There’s a popular adage about perennial gardens: “The first year they sleep, the second year they creep and the third year they leap!”. The thought is a new perennial garden takes 3 years to mature. The first year perennials put down roots, the second year they spread their foliage and the third year they leap into full growth. Perennials, by the way, are plants that persist year after year—they die back at the end of the growing season and grow back again in the spring. Annuals, on the other hand, last only one season.
The sleep-creep-leap analogy is a good reminder of the ways of Mother Nature. She can’t be rushed. The growing cycle is reassuringly predictable. These thoughts were running through my mind as I strolled around our garden recently.
Our front garden is ornamental consisting primarily of shrubs and perennial flowers under a canopy of mature trees. As with most gardens, it is ever-evolving. The main section, however, is about to leap into year 3. It’s come a long way from when we first saw this property in the spring of 2018.
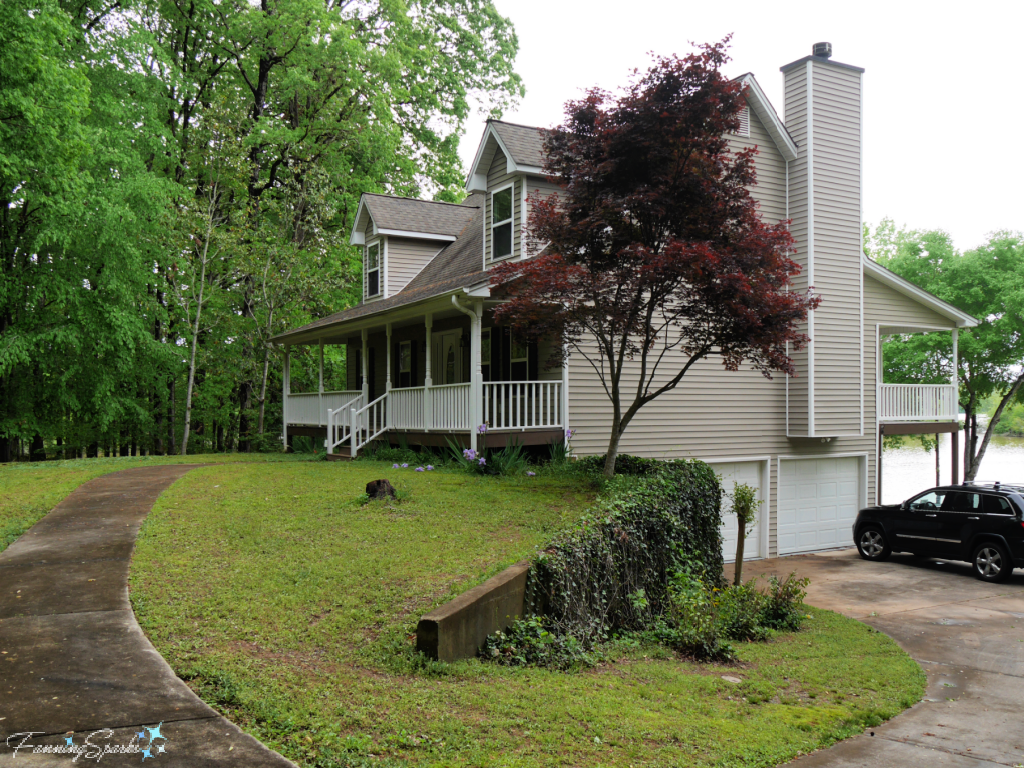
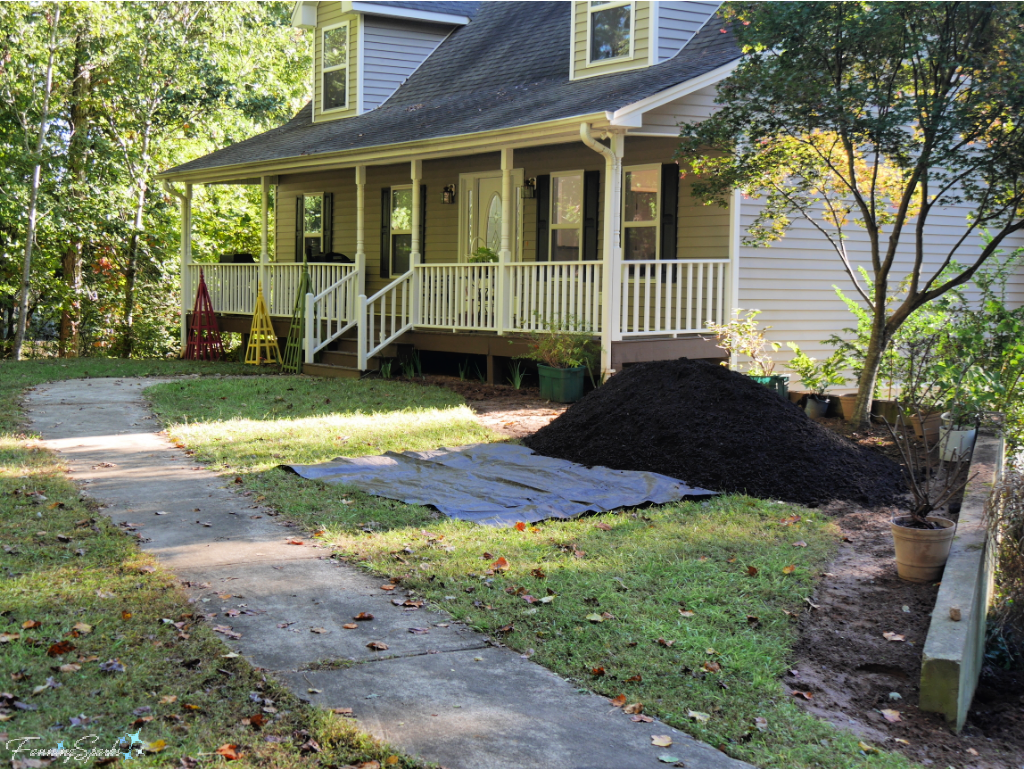
We moved in the midst of a Georgia summer so all gardening was on hold for several months. The delay worked to our advantage giving us time to assess the characteristics of the site. This section of the yard faces south and receives ample sun with a canopy of tall, mature trees providing some shade. Water drainage is good but the soil is heavy clay. I came to appreciate the gently, curved concrete walkway as well as the concrete retaining wall along the driveway. And I quickly fell in love with the beautiful Japanese maple. We started working on the new garden in late October 2018. A truck-load of amended garden soil can be seen in the photo below.
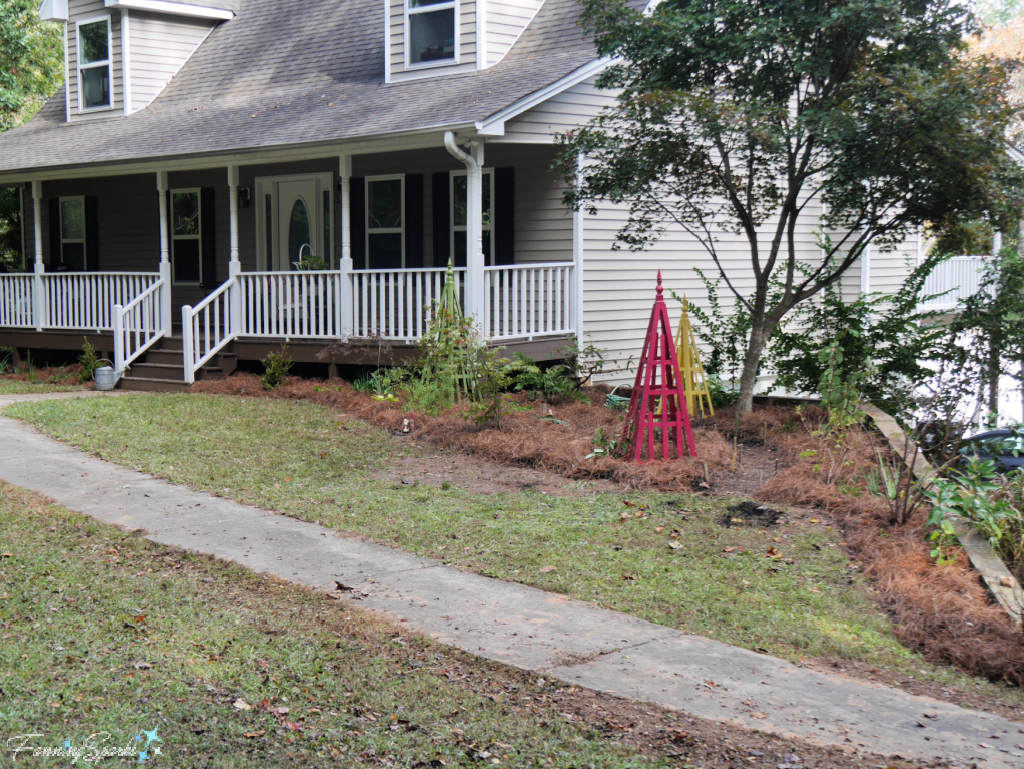
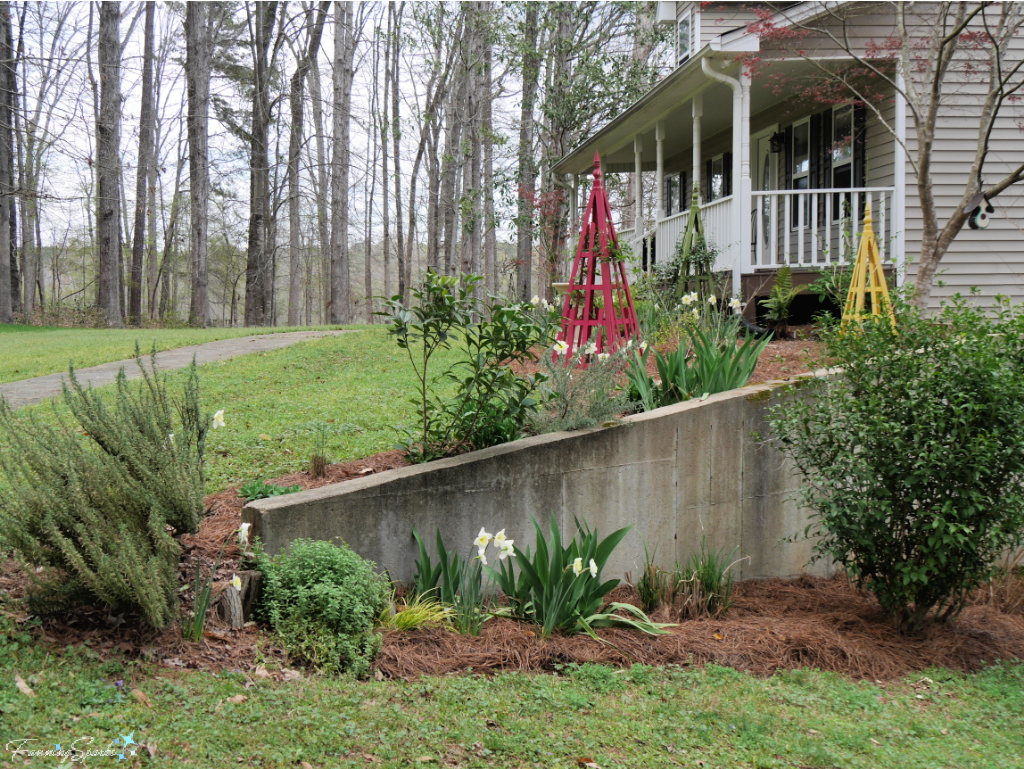
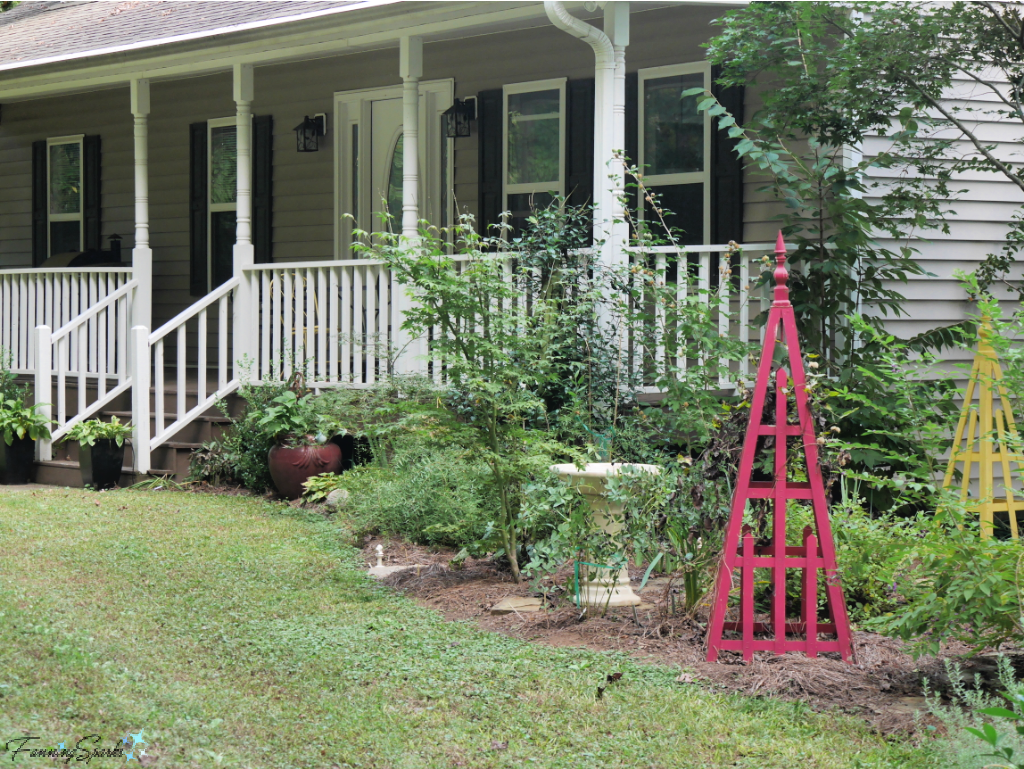
A few weeks (and lots of hard work) later, a new ornamental flower garden emerged. Several small trees, shrubs, and perennial plants were settled into their new home. A set of colorful pyramid trellises were added to support climbing plants and add visual interest (see post DIY Pyramid Trellis Tutorial). A layer of pine straw, commonly used as mulch in the Southeast, was added. Stepping stone paths were laid out. The below photo shows the new garden as it looked in early November 2019, at the beginning of year 1—the sleeping stage.
Fast forward 1½ years to this past spring as the garden enters the creeping stage. I love spring in the US Southeast! It’s a full-on extravaganza of blooming plants and gorgeous greenery. The daffodils (Narcissus ‘Ice Follies’) started the show in early March. This coming season, I’m hoping for an even earlier start with late-blooming camellias (see my previous post Camellia Road Trip). Pictured below is the garden in mid-March of this year.
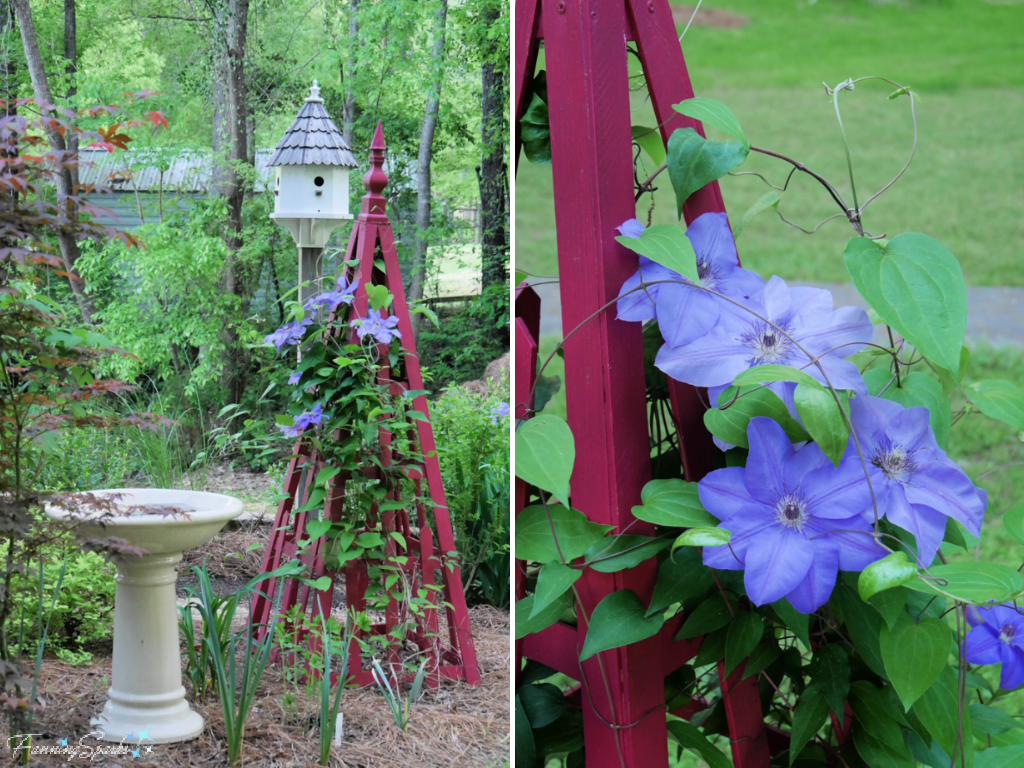
About two weeks later, the Japanese maples had leafed out and the clematis (Clematis ‘Ramona Blue’) hit its stride.
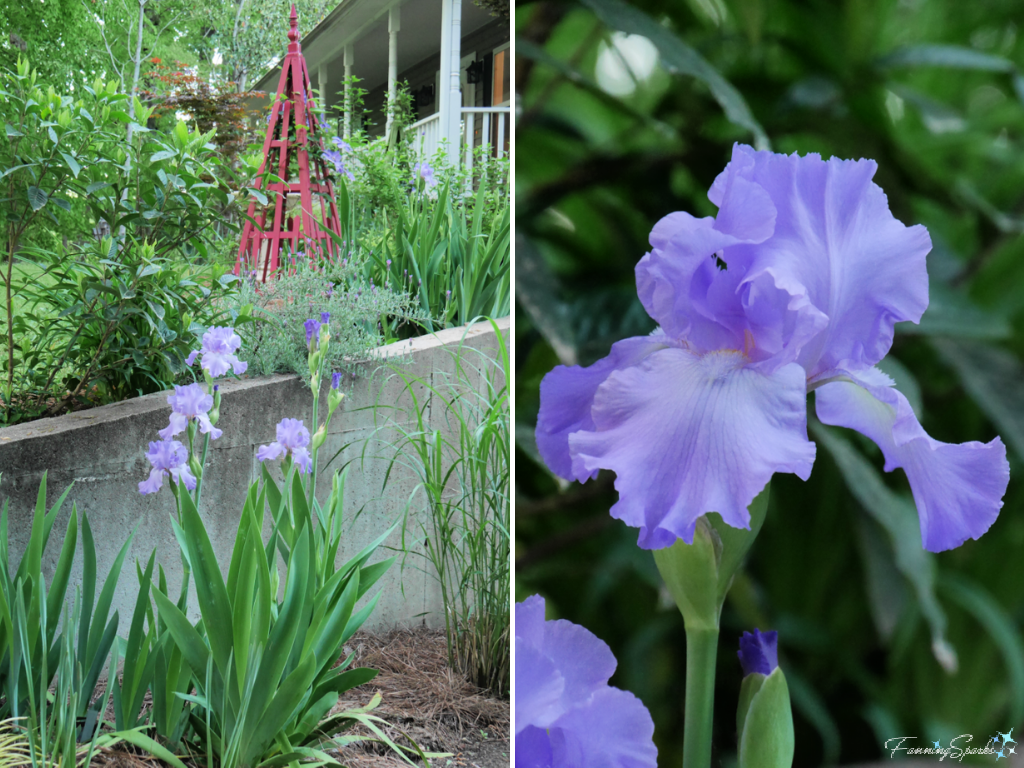
 This was also peak season for the spectacular bearded irises.
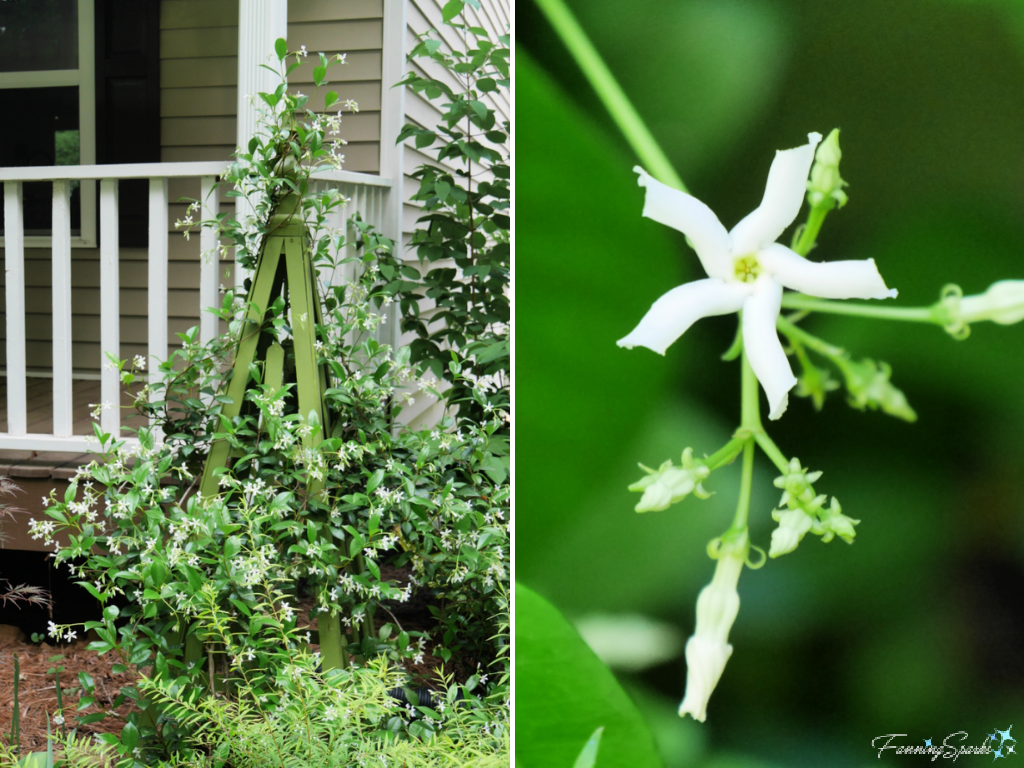
Two more weeks, and the air was heavily scented with the aroma of Star Jasmine (Trachelospermum jasminoides).
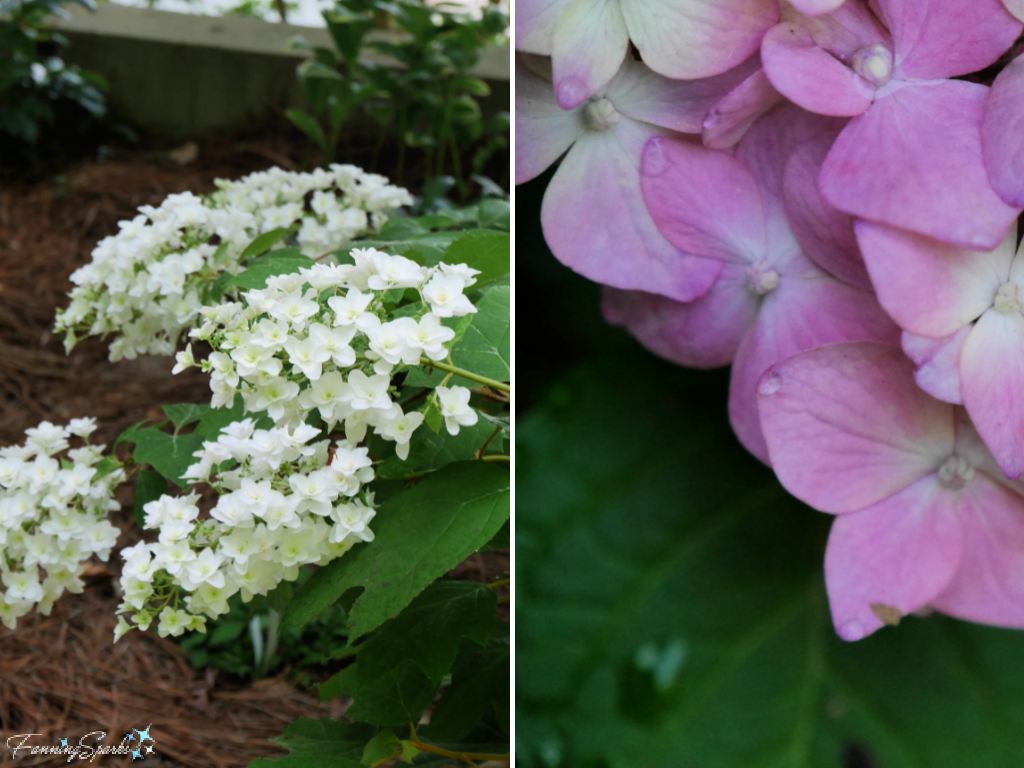
 A couple more weeks and several of the hydrangeas bloomed for the first time. Pictured are a Oakleaf Hydrangea (Hydrangea quercifola ‘Snowflake’) and a Big Leaf Hydrangea ‘Endless Summer’ (Hydrangea macrophylla ‘Endless Summer’).
 The floral show was outstanding but flowers don’t last long. The trick is to stretch it out by selecting plants with different blooming times. Another option is to include a variety of foliage with different plant forms, leaf shapes, patterns and colors.
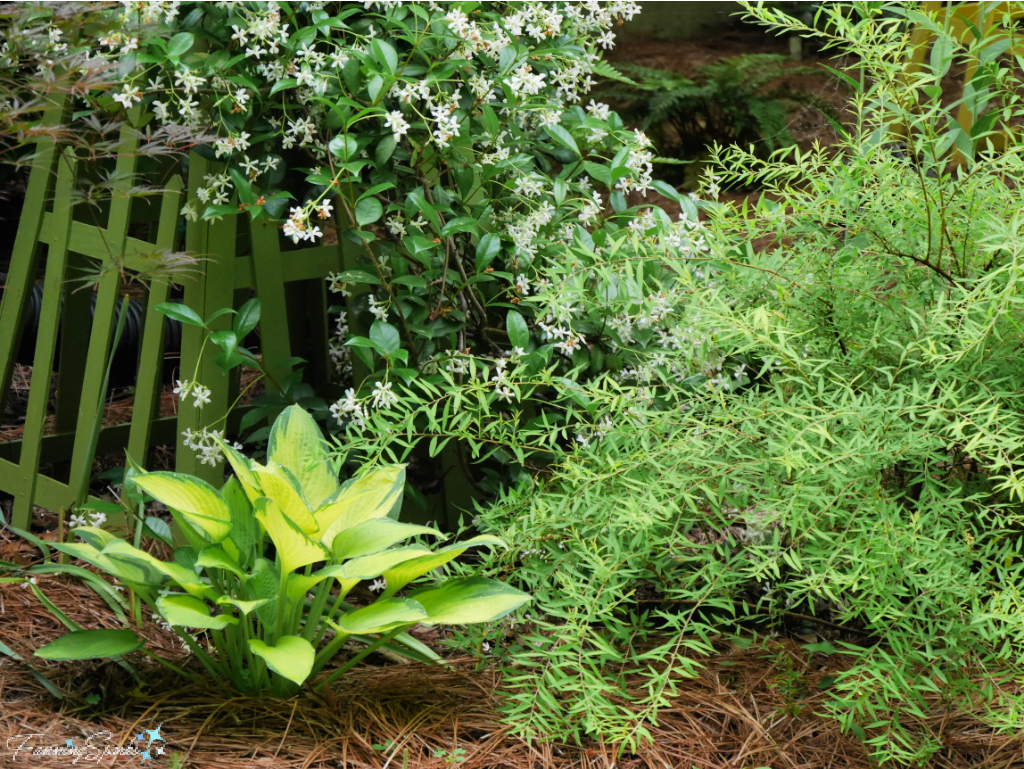
The challenge is to add just the right amount of variety… too much variation appears jumbled and haphazard while too little variety can be bland and uninteresting. I’ve found layering and repetition are key to adding variety effectively. By visualizing the garden as multiple layers, both on the vertical and horizontal planes, there are more opportunities to include a variety of plantings. Hardscapes and garden structures can also contribute to layering. Pictured here, is a variegated hosta (Hosta ‘Paul’s Glory’) in the foreground, Bridal Wreath Spirea (Spiraea thunbergii ‘Ogon’) to the right and Star Jasmine (Trachelospermum jasminoides) growing on the pyramid trellis in the background.
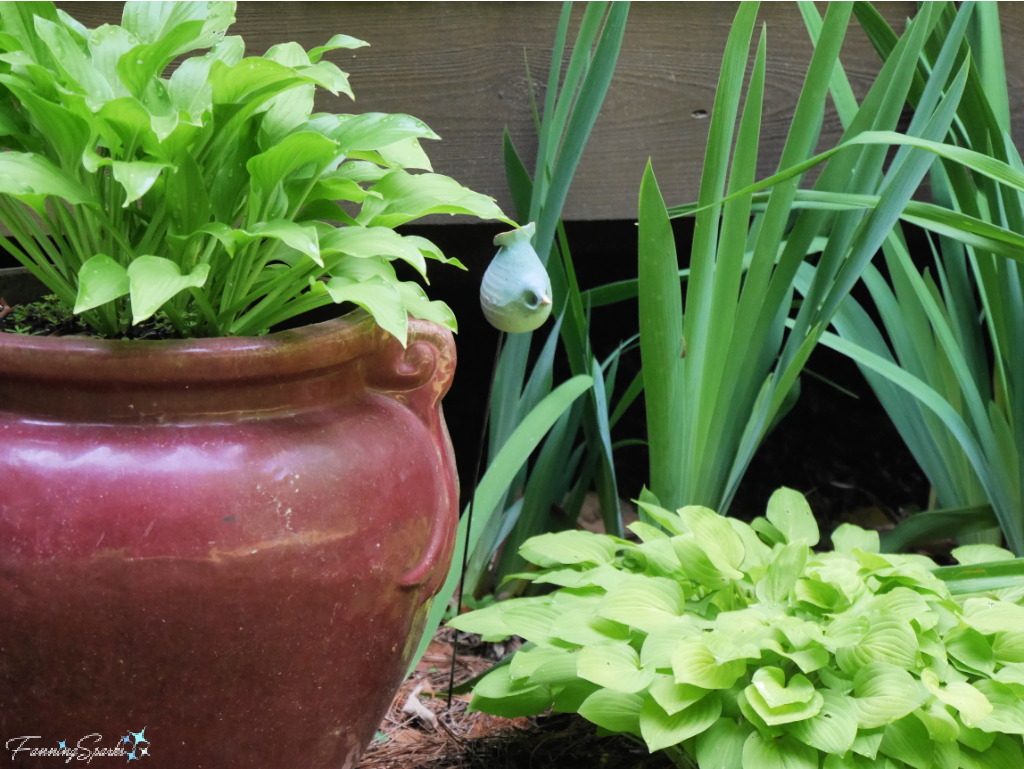
 Another way to add interest and variety is to strategically place large, potted plants in the flower beds. I first noticed this technique during a Garden Tour (see the post Spring Into a Garden Tour). The hosta planted in this large, burgundy-colored, ceramic pot provided lush, green foliage the entire season.
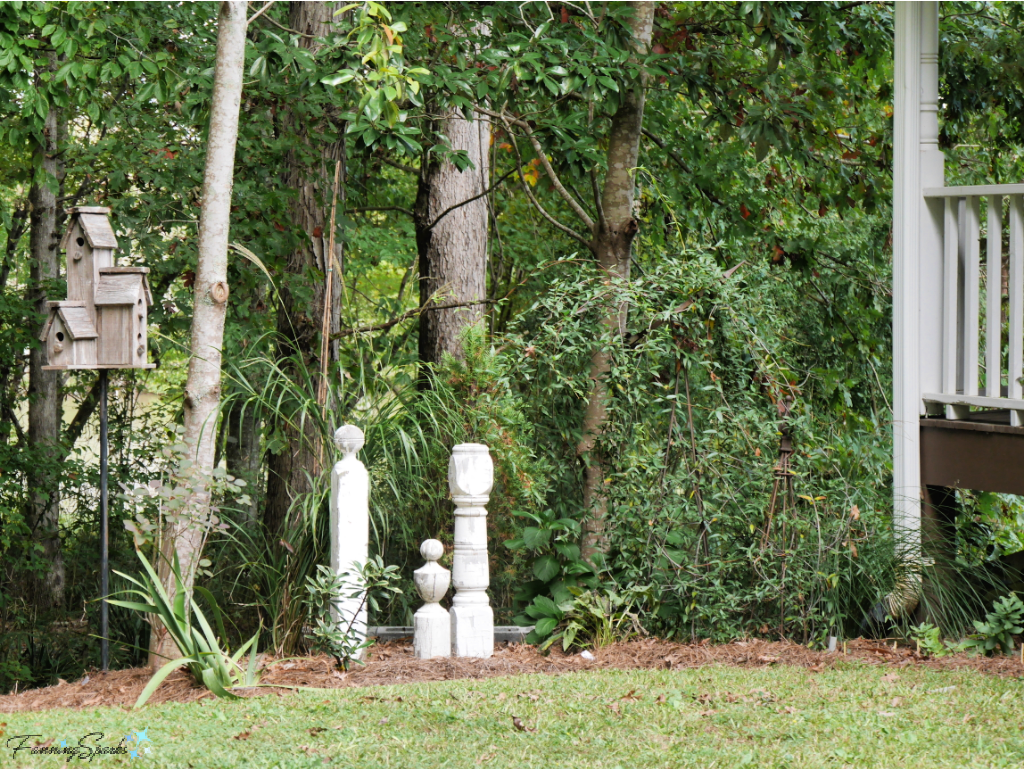
 It’s fun to incorporate interesting elements into the garden. In the below section, for instance, I created a focal point with 3 rustic, turned-wood posts. The idea is to draw the eye across the garden to the far left side. I love to include salvaged, paint-chipped porch posts, balusters and newel posts in the garden. Admittedly, I’ve gathered quite a collection over the years and more than one mover has questioned why I would bother to move old wooden posts from one home to another!
 Strolling around the garden, especially in the early morning, is something I look forward to every day.
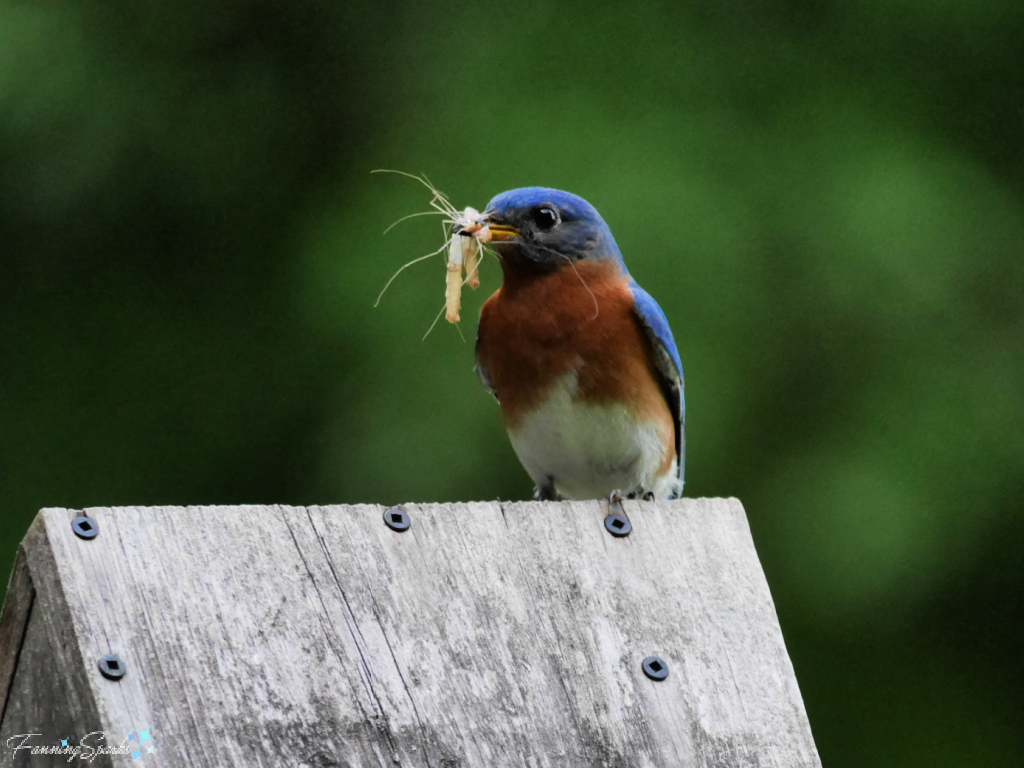
I’m not the only one drawn to the garden. Eastern Bluebirds (Sialia sialis) started visiting in early spring. We have a handful of birdhouses (see previous post – DIY Bluebird-Approved Birdhouse Tutorial) around our property and the bluebirds were busy nesting and feeding.
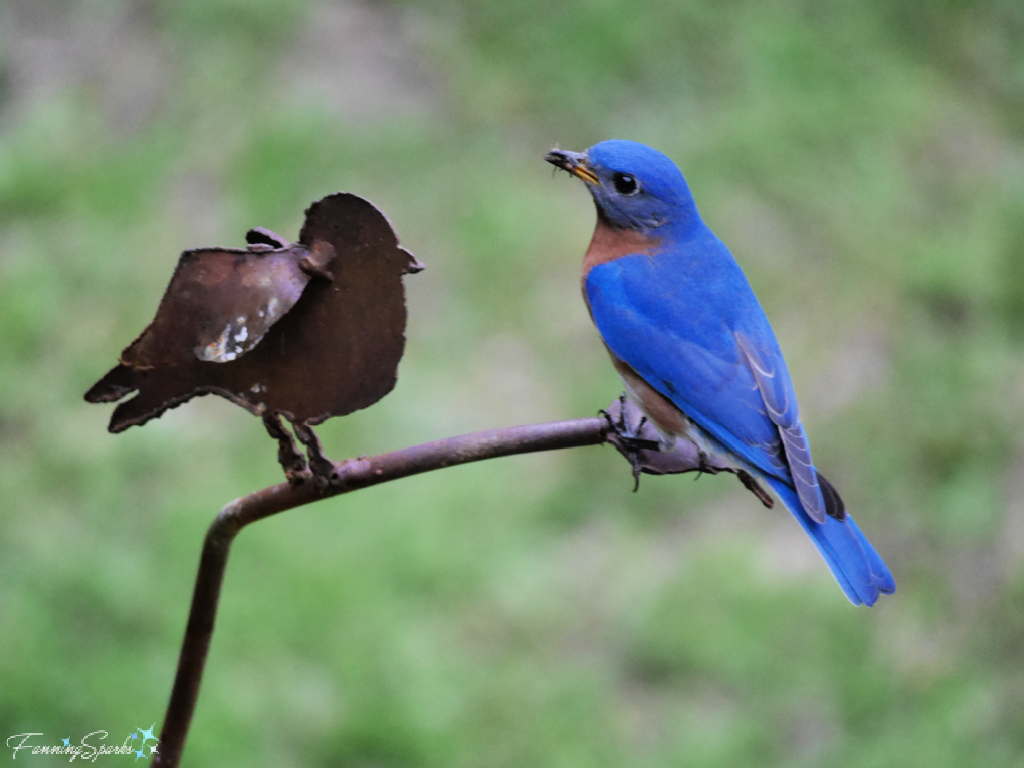
 Here’s a beautiful male Eastern Bluebird sharing a perch with the metal bird on our bird bath.
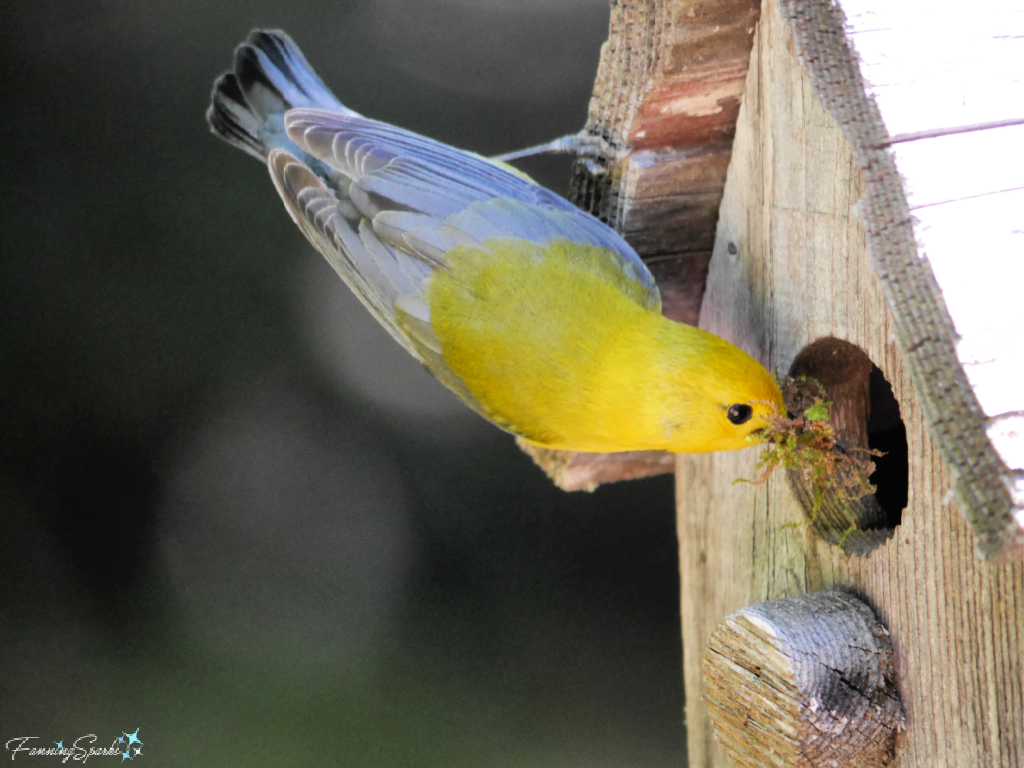
 Meanwhile, a charming Prothonotary Warbler (Protonotaria citrea) built a nest in this rustic, condo-style birdhouse.
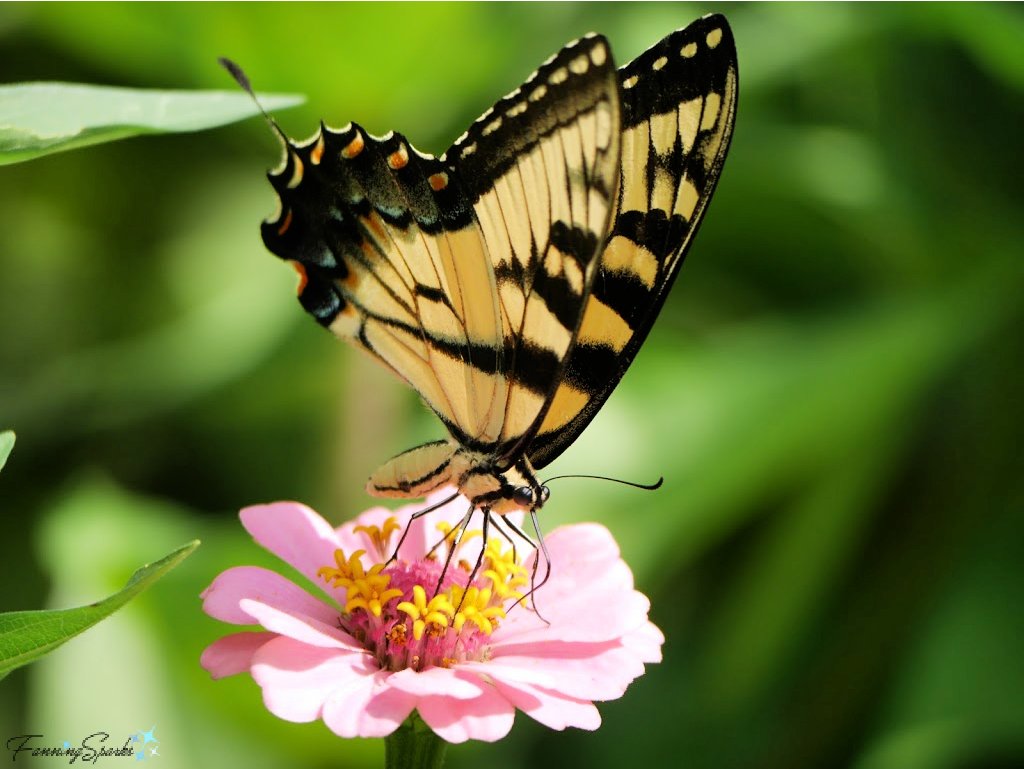
 Later in the summer, butterflies became frequent visitors (see post Chasing Butterflies). Here’s an Eastern Tiger Swallowtail (Papilio glaucus) enjoying a zinnia feast.
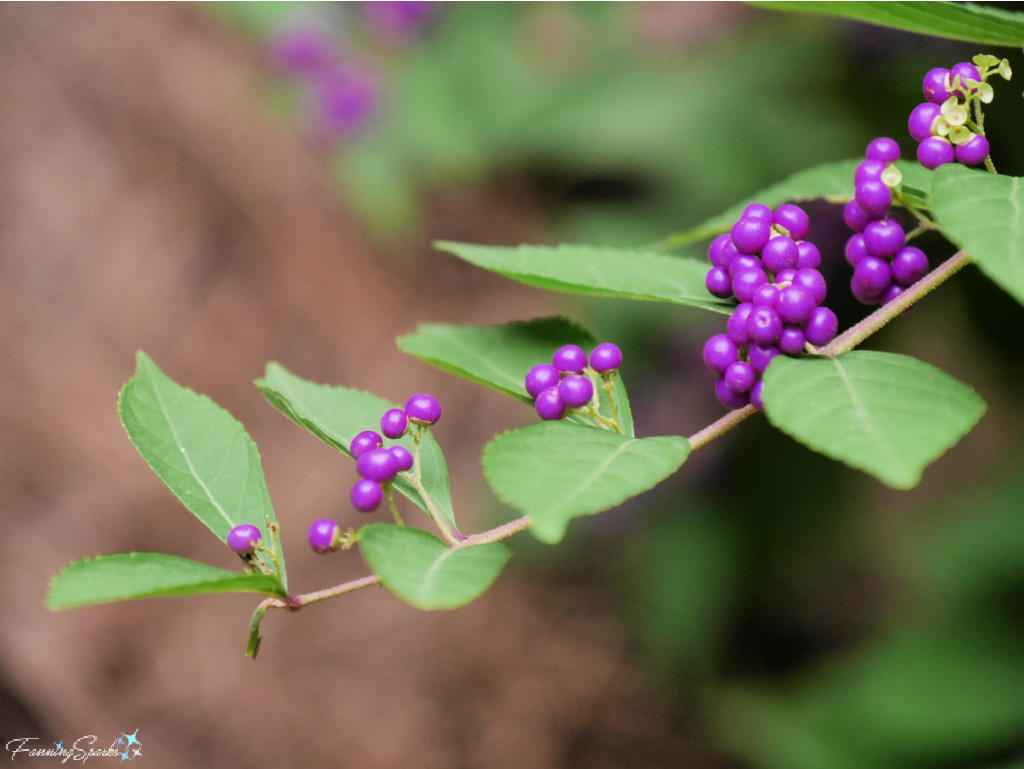
 It’s now the beginning of November and the garden has slowed down. But there are still a few highlights to enjoy while I continue to tweak and refine. The Beautyberry (Callicarpa rubella), for instance, adds a jolt of unexpected color.
 There’s nothing like before and after photos to illustrate progress. Our front garden has undergone quite a transformation in the first 2 years. I’m eager to see it leap into Year 3—something tells me I’d better get my pruning shears sharpened!
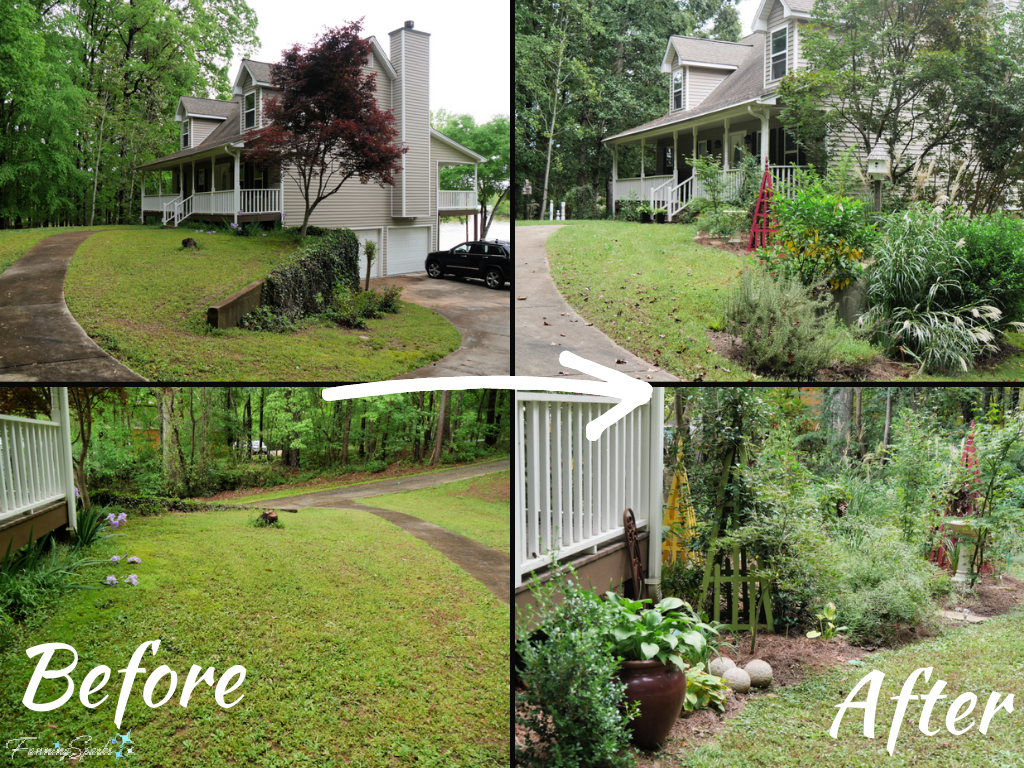
More Info
The colorful pyramid trellises featured in our front garden were made from lath strips using simple tools. I shared step-by-step instructions in the post DIY Pyramid Trellis Tutorial.
Step-by-step instructions for the birdhouse mentioned in this post can be found in DIY Bluebird-Approved Birdhouse Tutorial.
Garden tours are a great opportunity to admire other people’s gardens and to get ideas for your own. I’ve posted about a few garden tours including Spring Into a Garden Tour, A Virtual Stroll in Ticehurst and Charleston’s Glorious Window Boxes.
I’ve also had the pleasure of visiting several public display gardens. Check out A Virtual Visit to Lisse, Camellia Road Trip and Chasing Butterflies.
The posts A Before Tour of Our New Casual Lake House and Zinnias Rock! And More Cutting Garden Tips include more info and photos about our house and gardens.
For reference, I garden in Georgia in the southeast US, in a plant hardiness zone of 8A.
Today’s Takeaways
1. Perennial gardens sleep in the first year, creep in the second year and leap in the third year.
2. Consider building (or refining) your own perennial flower garden.
3. Take comfort in these words of encouragement from New Hampshire’s Bedrock Gardens: “In these trying times, we can agree that the power of gardens is all the more important and relevant. From the psychological benefits of connecting with the natural world, to the health benefits that stem from direct contact with a rich soil microbiome, we all understand that gardens are places of healing and wellness. It is our hope that gardens will continue to provide moments of joy and opportunities for reflection.”


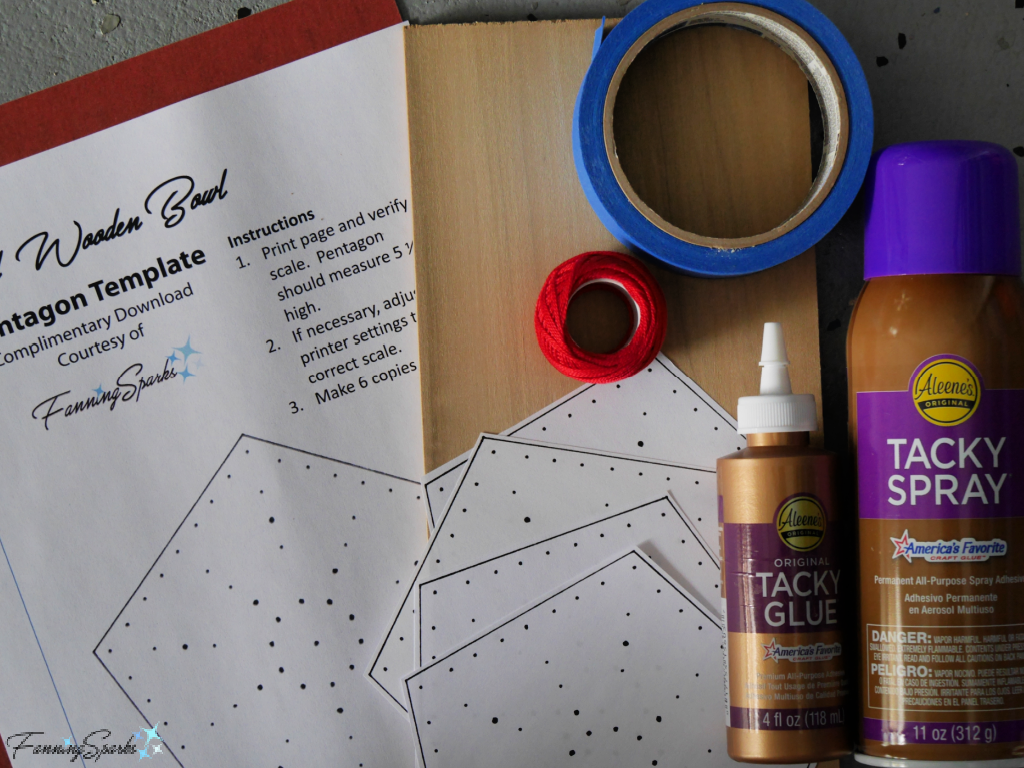
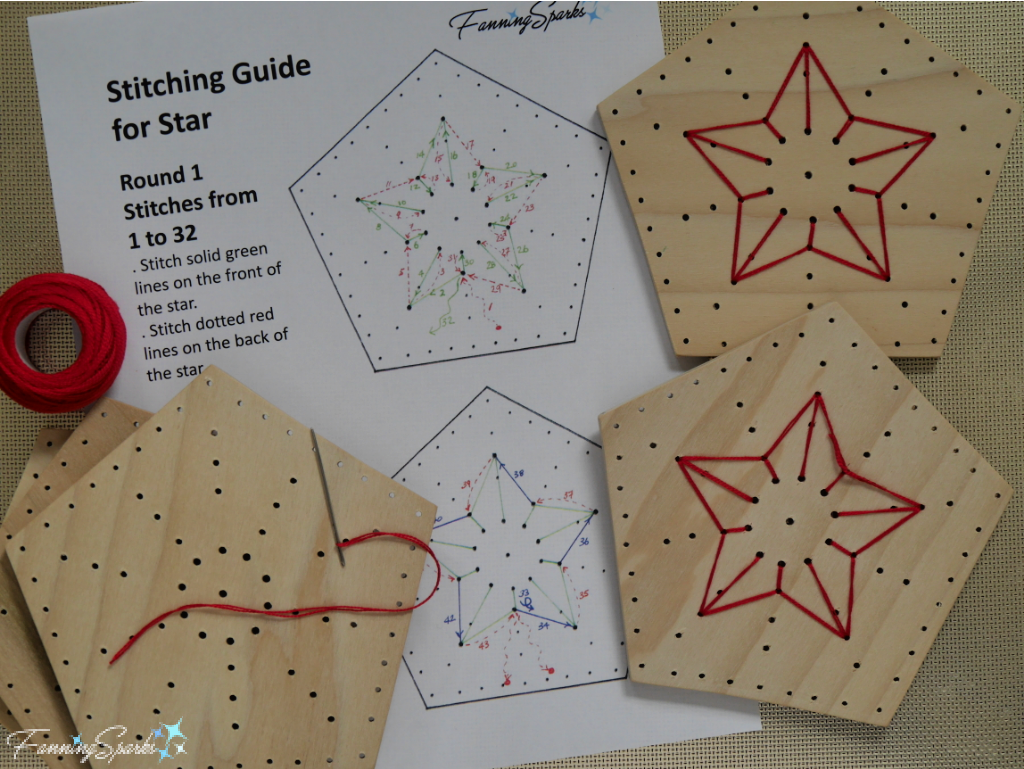
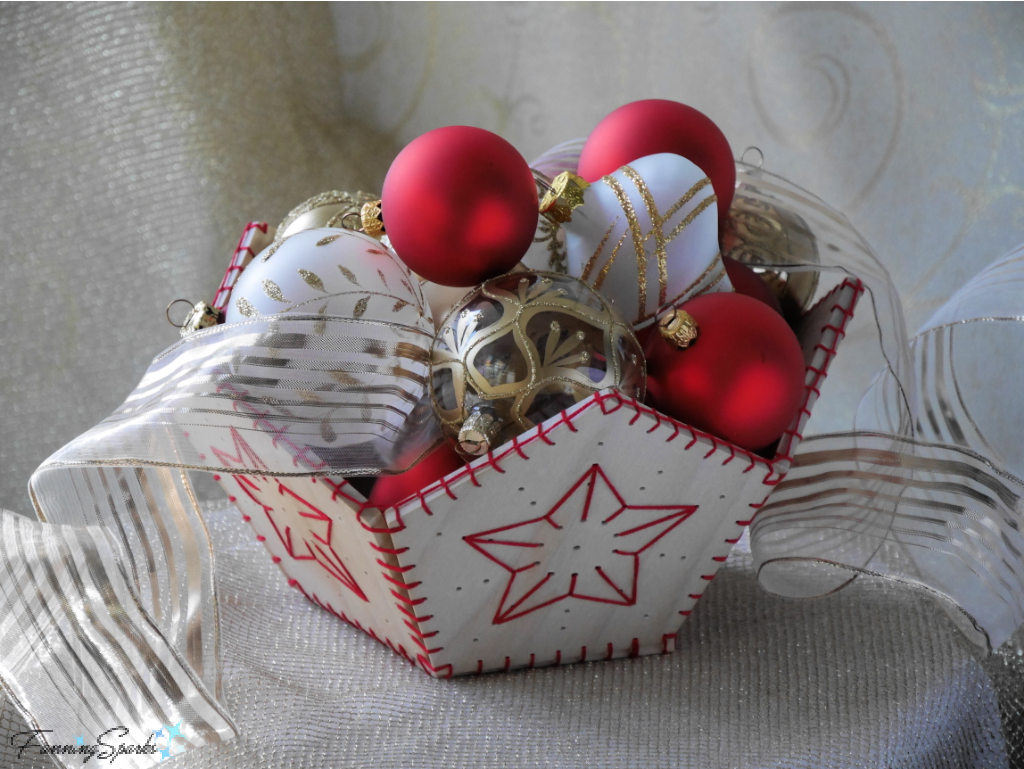
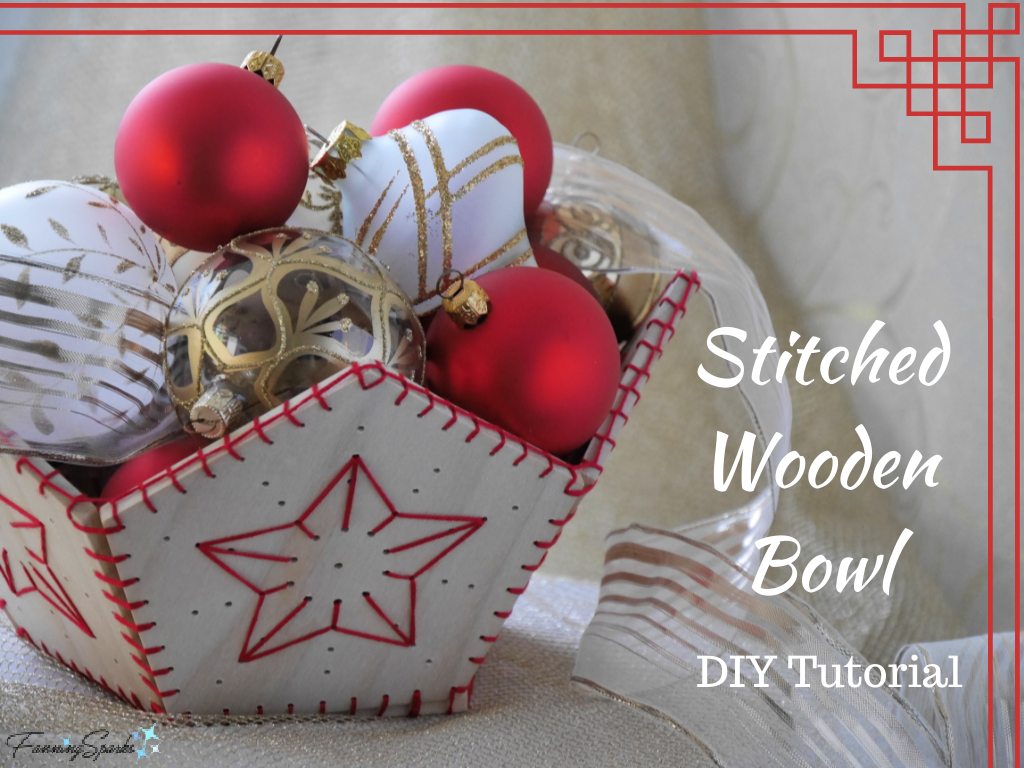
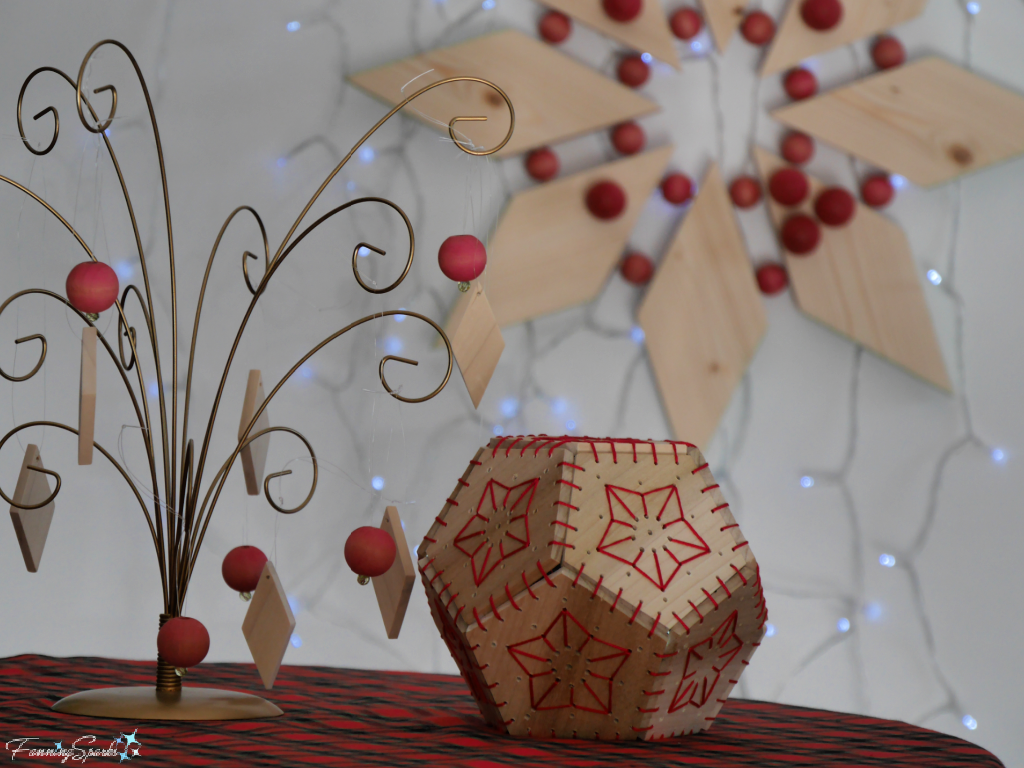

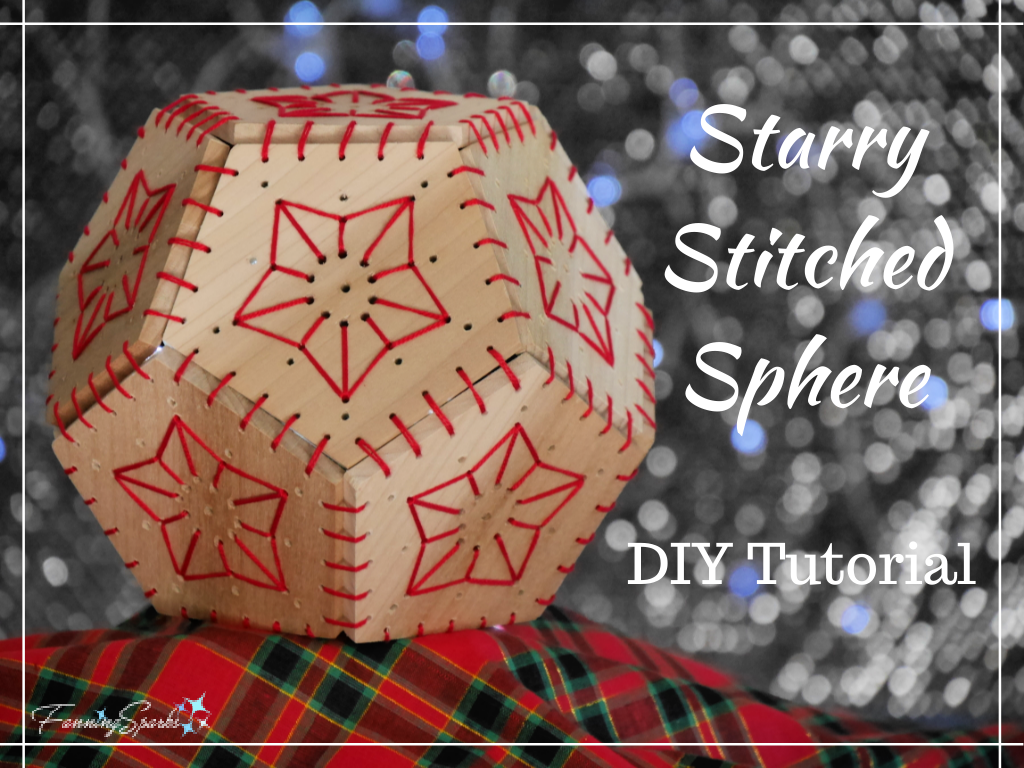
 In today’s post, I’d like to share step-by-step instructions so you can make your own Starry Stitched Sphere. This project requires only a few supplies—basically wood and thread. The sphere is designed to be made from ¼” x 3½” wood and measures just over 6″ in diameter. Basic woodworking and hand stitching is involved.
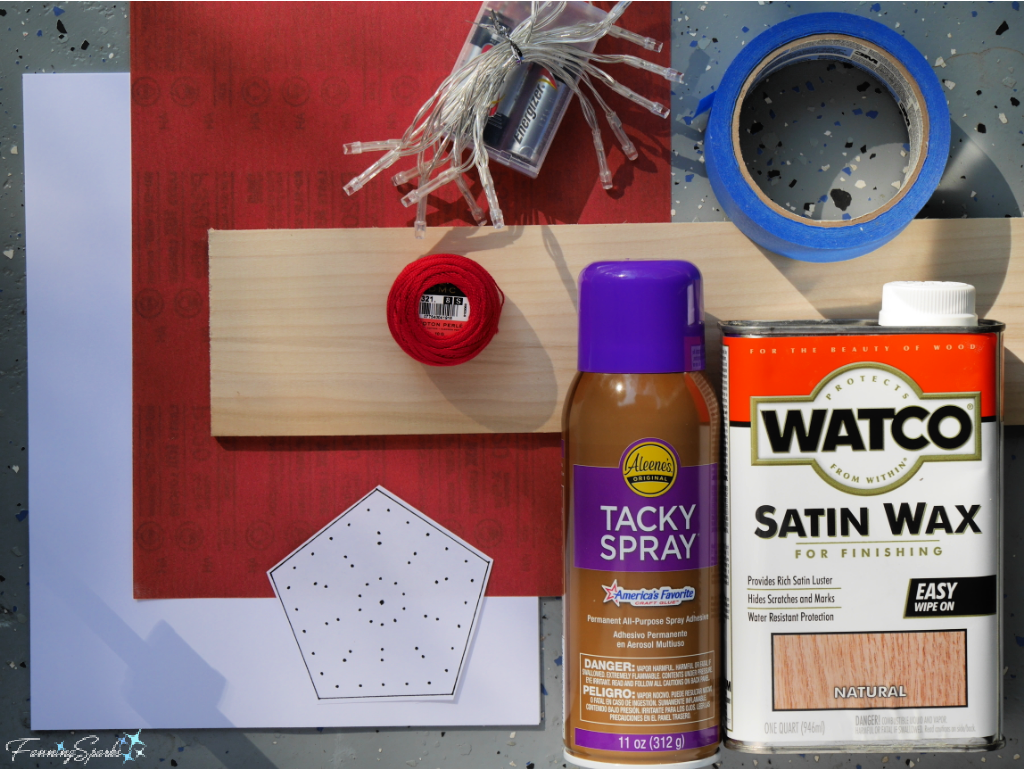
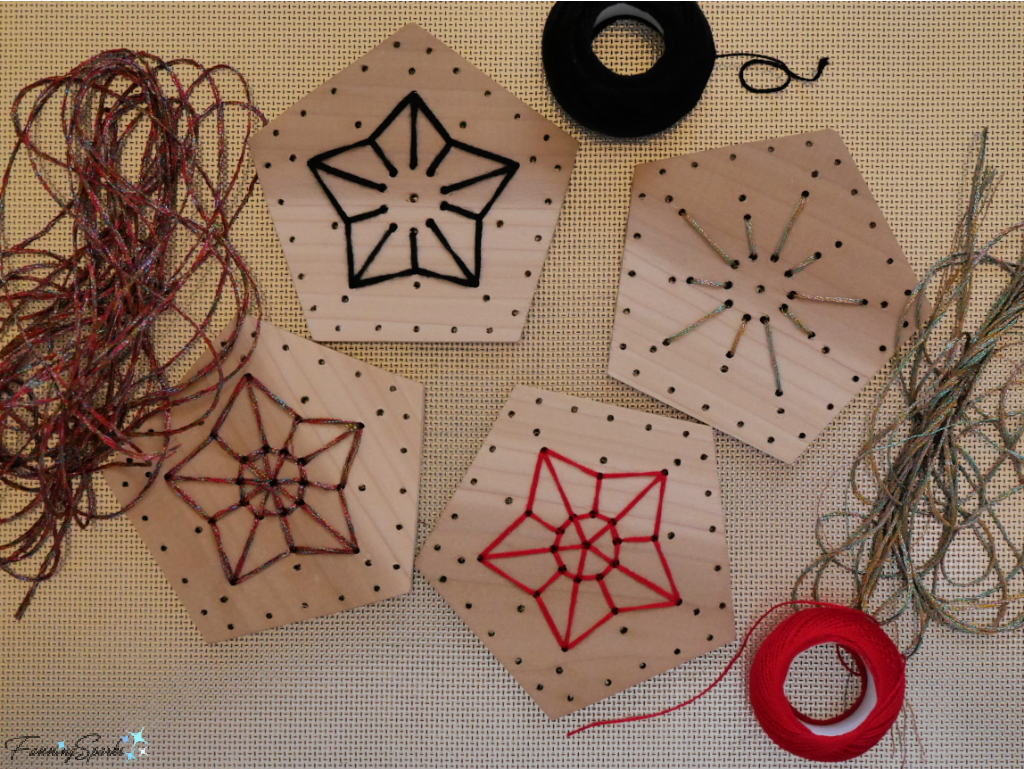 . LED Lights (optional): Battery-operated LED lights can easily be inserted into the Starry Stitched Sphere. If you decide to add lights, you’ll want to maximize the amount of light that can shine through the drilled holes. You may want to drill bigger holes and/or minimize the amount of stitching on the stars.
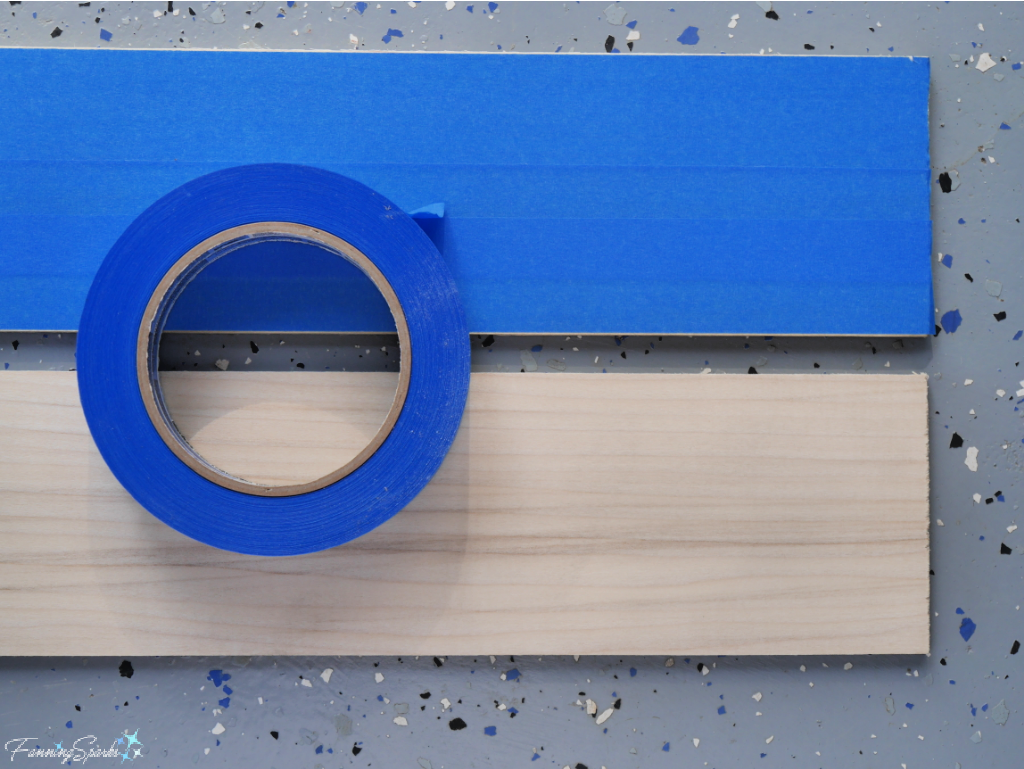
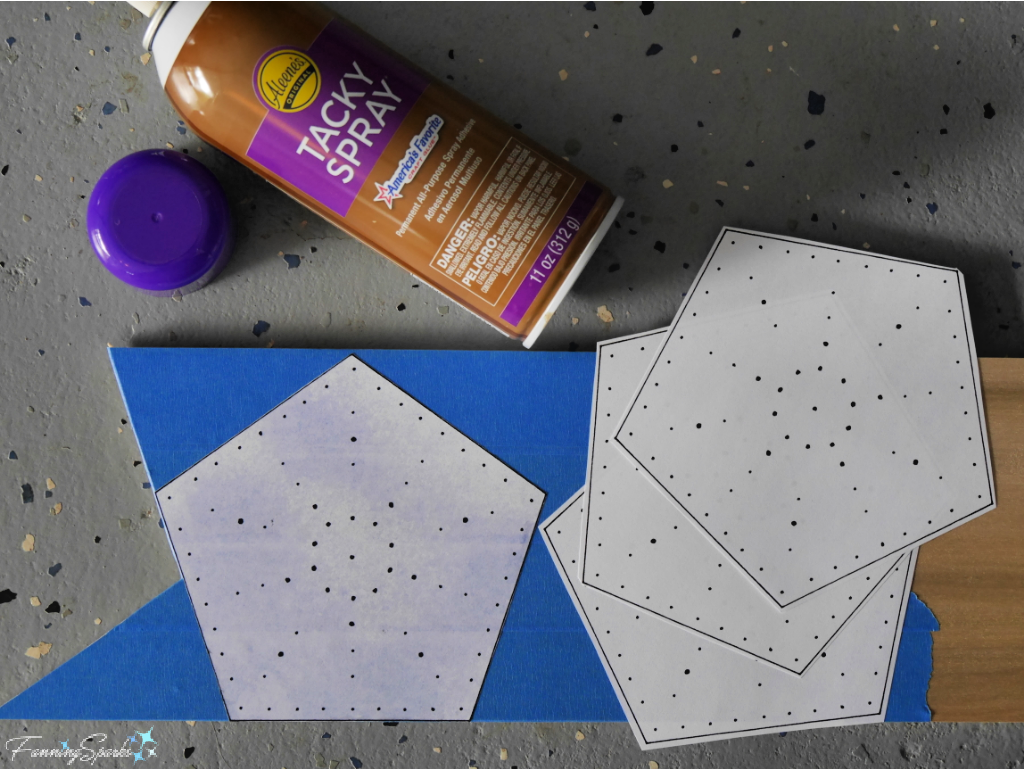
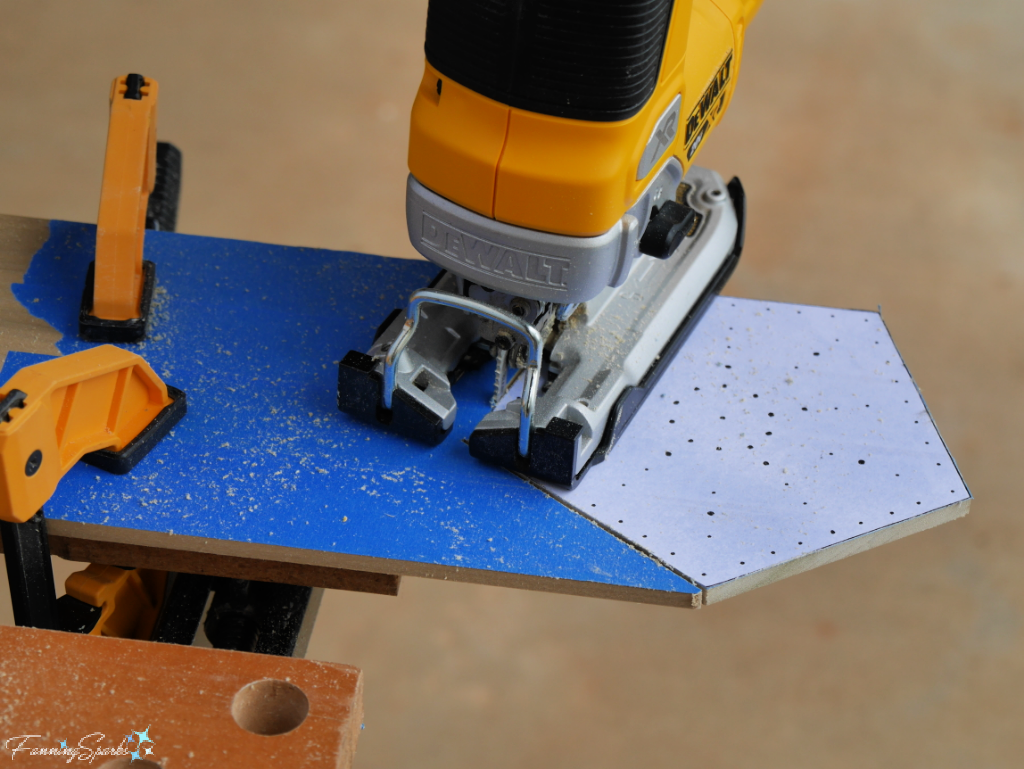
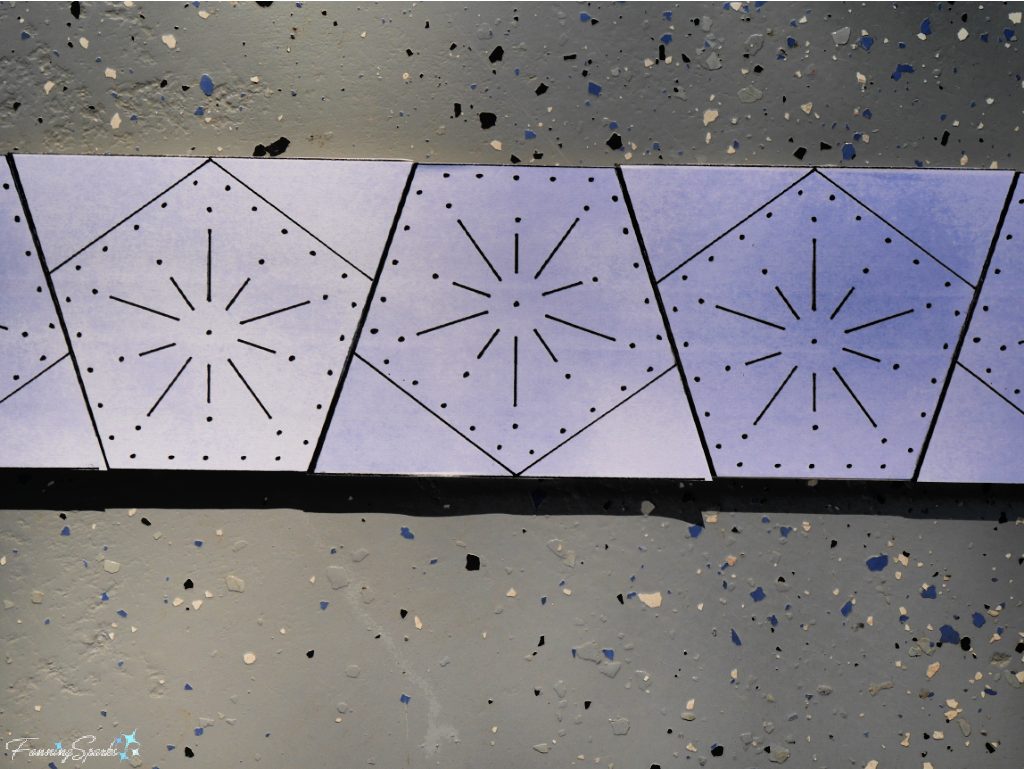 Step 3. Saw Wood Pentagons Clamp wood to sturdy surface. Use the jigsaw to cut out 11 pentagon-shaped pieces.
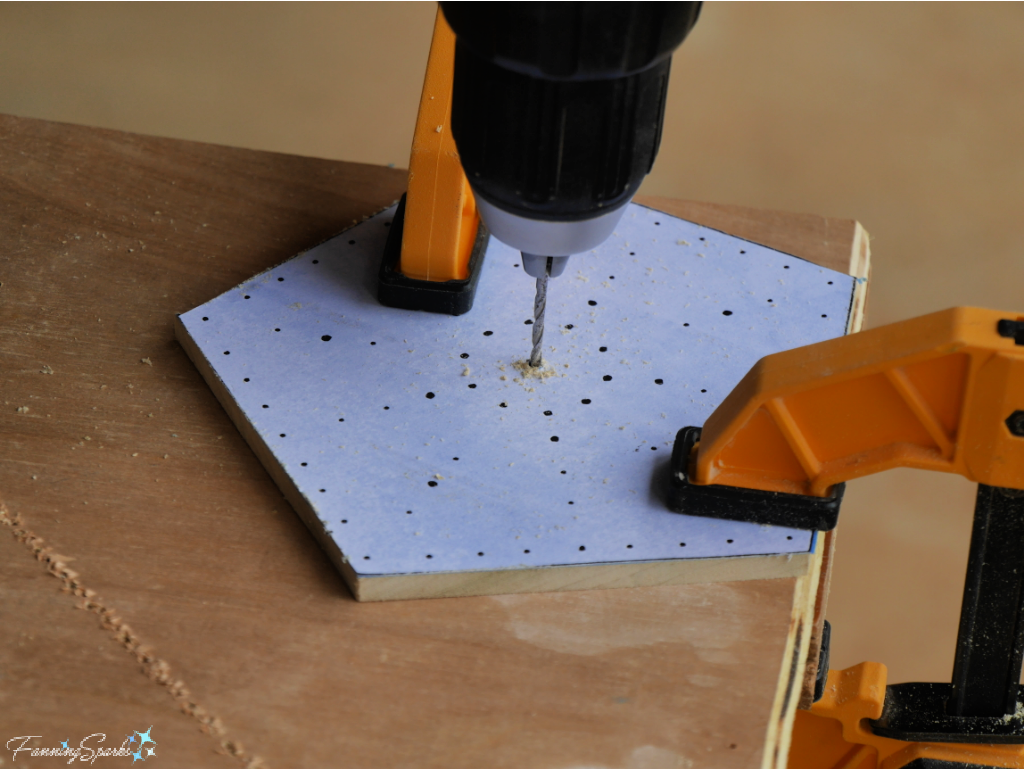
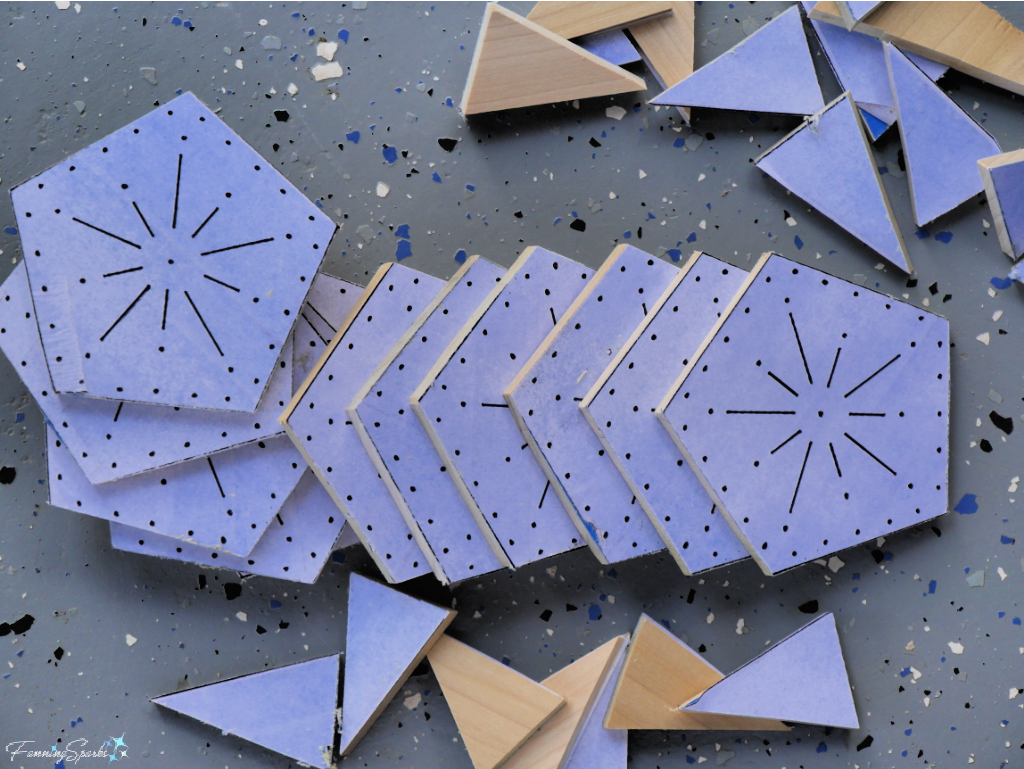 Step 4. Drill Wood Pentagons Clamp a pentagon on top of scrap wood to prevent tear out at back. Drill all outer edge holes with a 5/64” drill bit. Drill center hole and inside ring with 7/64” drill bit. Drill all other holes with 3/32” drill bit. Repeat for remaining 10 pentagons.
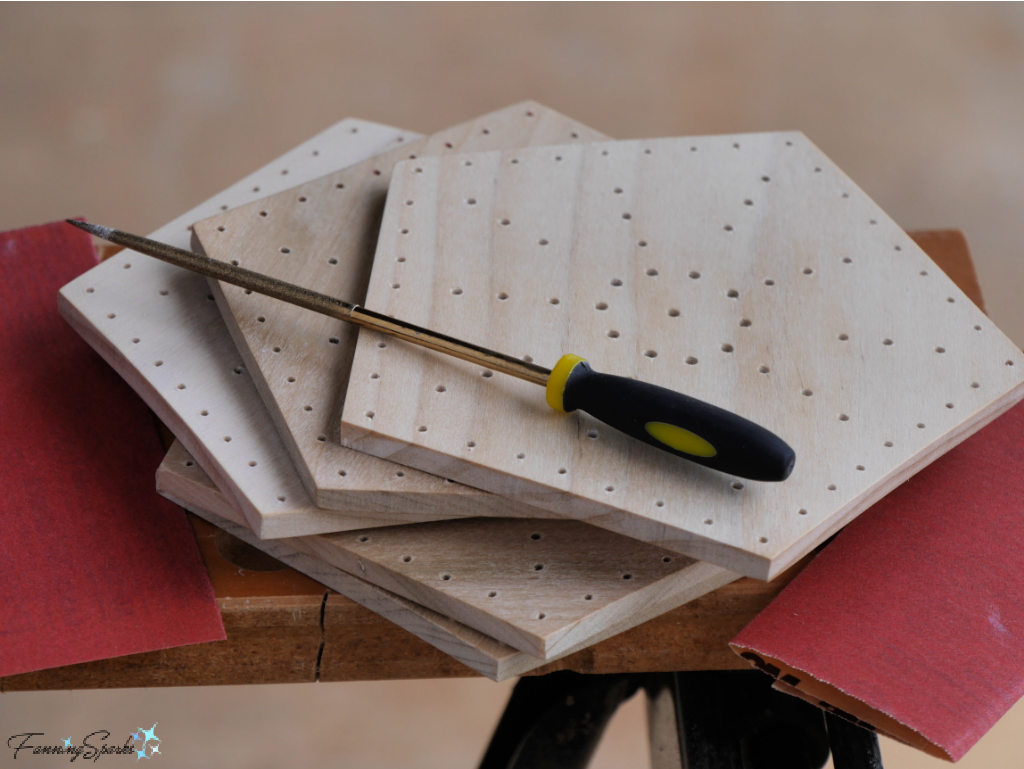
 Step 5. Sand Wood Pentagons Sand edges and drilled holes. This is an important step since any roughness, especially along the edges of the holes, will snag the thread during stitching. A round tapered file is critical for this step.
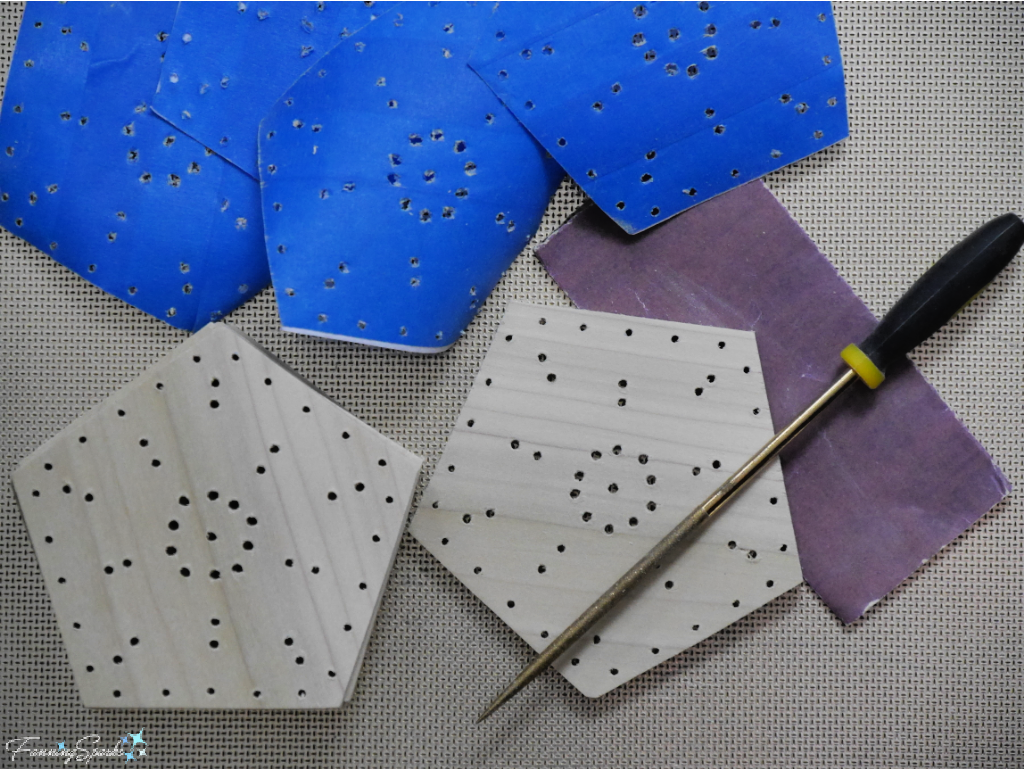 Step 6. Finish Pentagons Follow the manufacturer’s instructions for applying the wax. I used Watco Satin Wax for Finishing in Natural. Apply a generous coating to the front and edges of the pentagons. Let it soak in for about 15 minutes and reapply to any areas that dry out. Then wipe off the excess with lint-free rags. Buff and let dry.
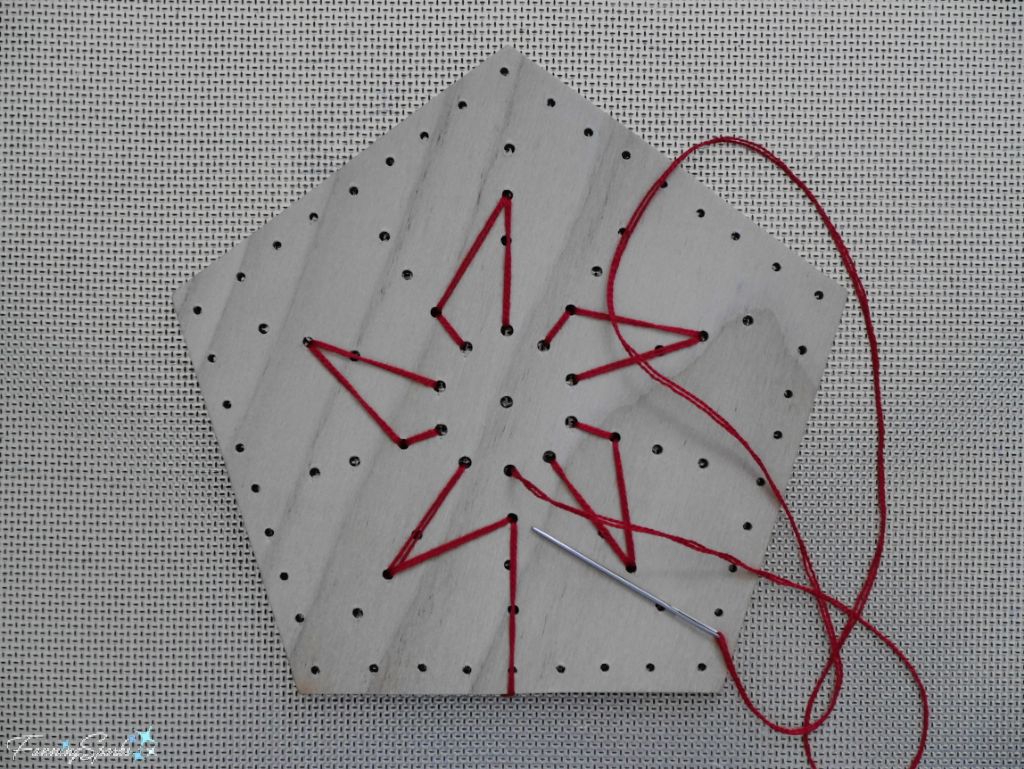
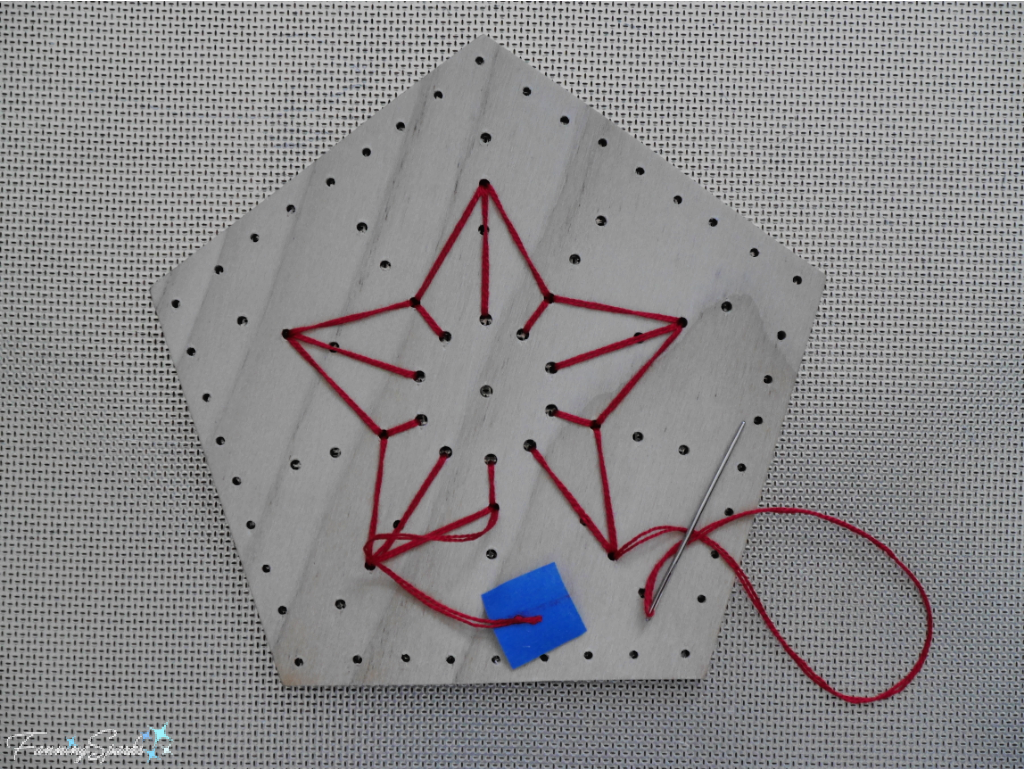
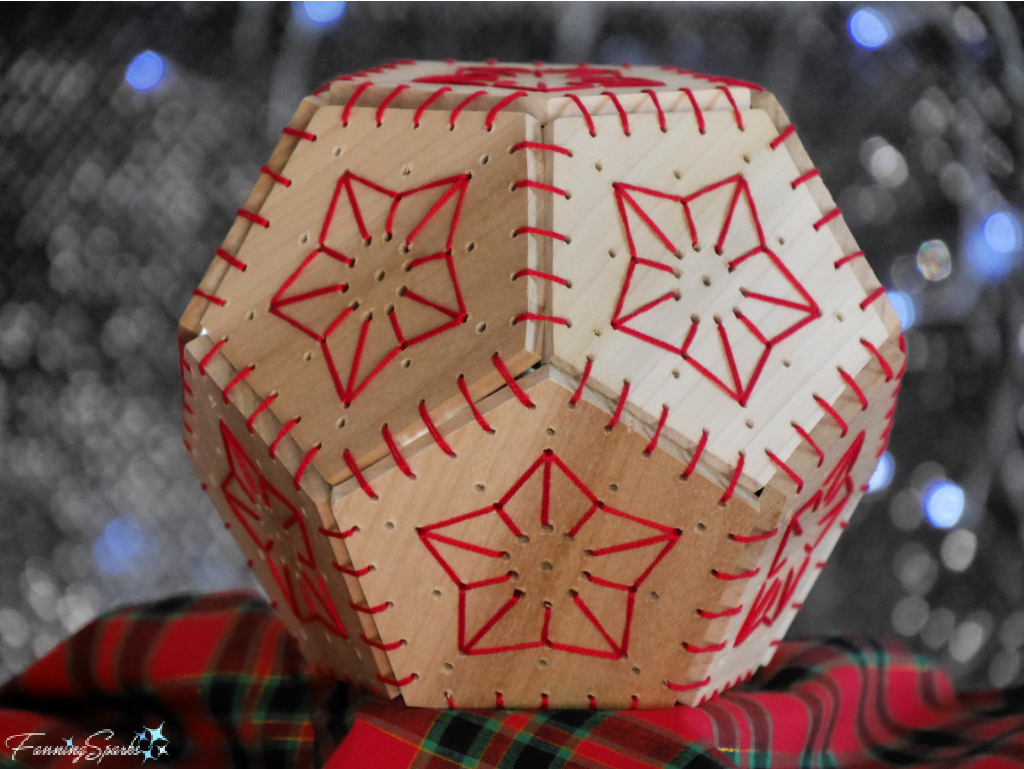
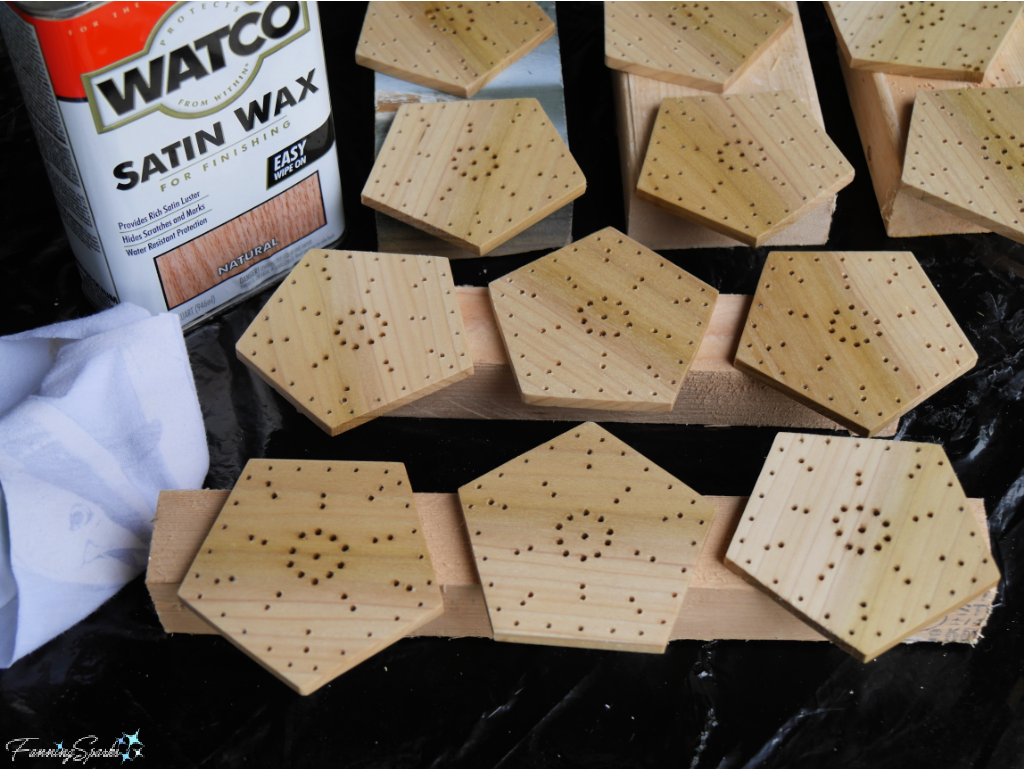 Step 7. Embroider Stars As noted in the Supplies Needed section above, there are a number of options for the star embellishments. You may wish to try stitching a few different configurations after your wooden pentagons are dried.
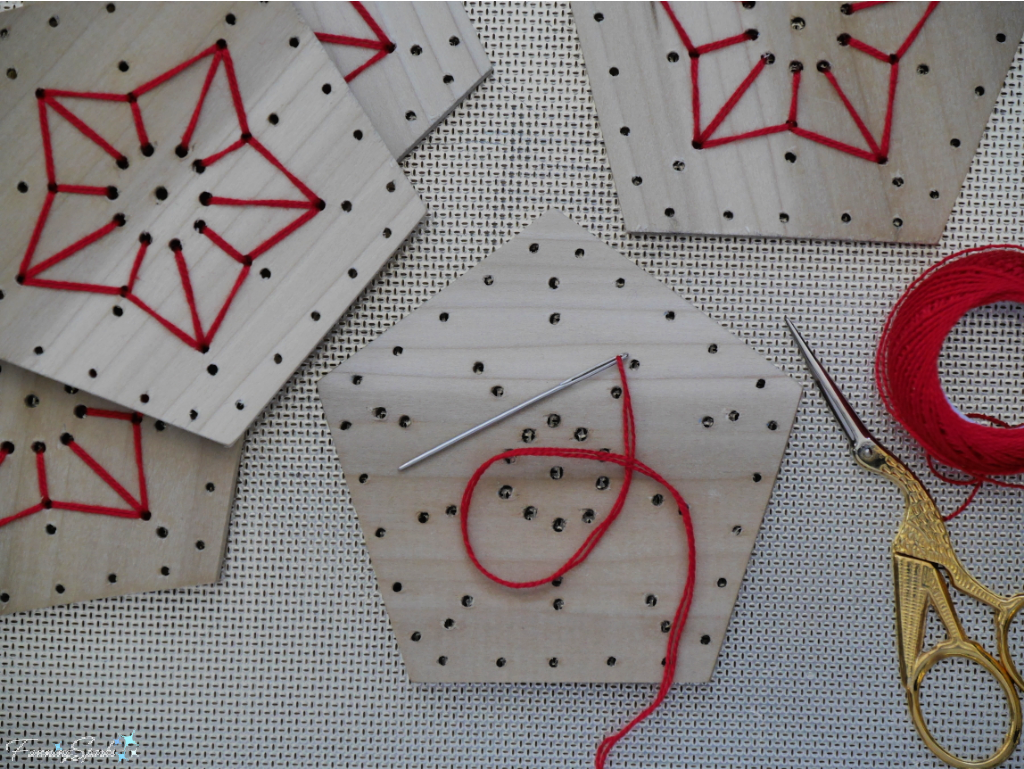 Step 8. Assemble Ring of Pentagons Start by connecting a row of 5 pentagons.
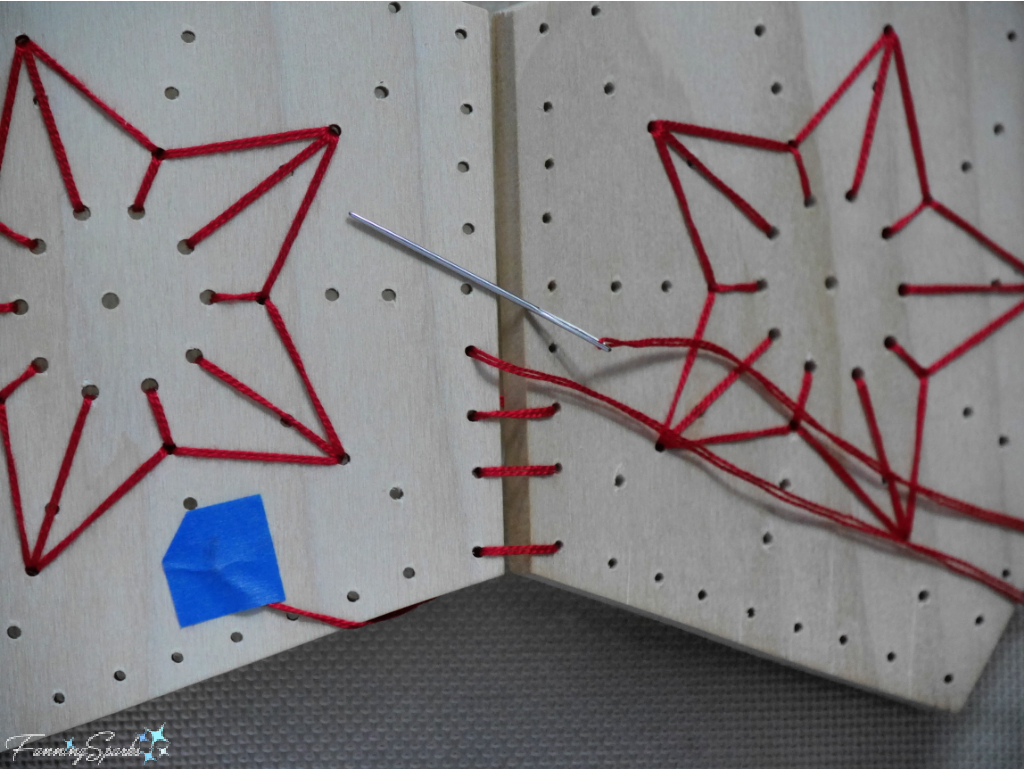
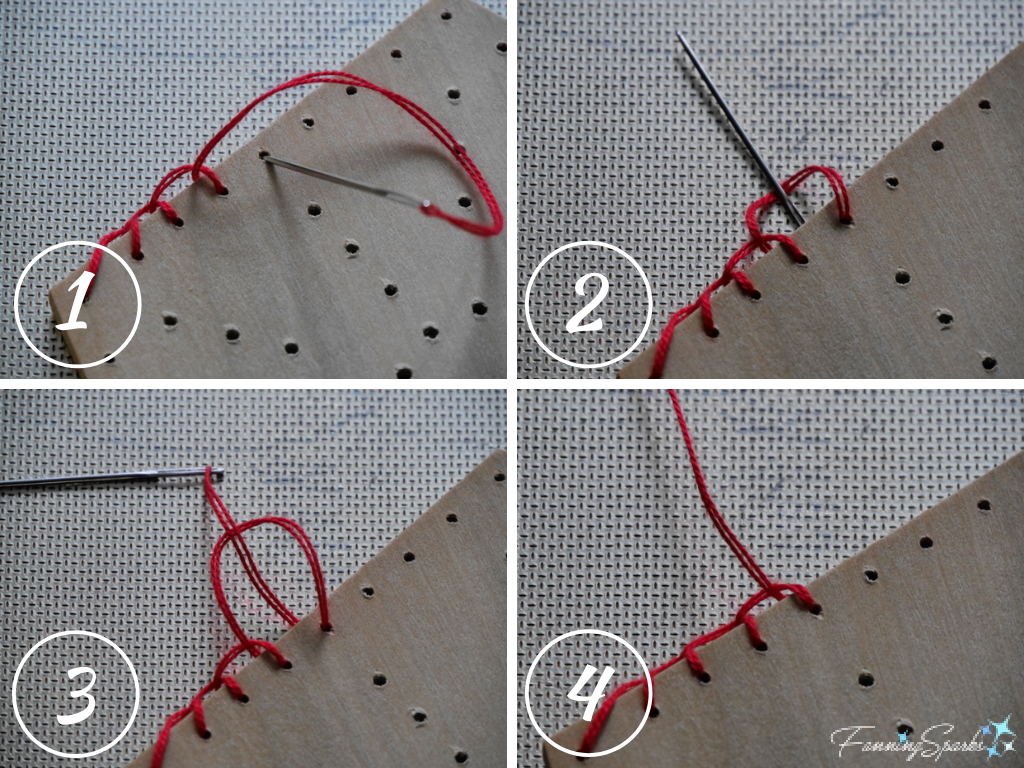
 Step 8b. Thread the needle with a 20” length of pearl cotton thread. This step is sewn with a single thread. Hold the 2 pentagons at an angle. Bring the needle up from the back through the first hole in the first pentagon. Pull the thread out through to the front leaving about a 1 ½-2 ½“ tail at the back.
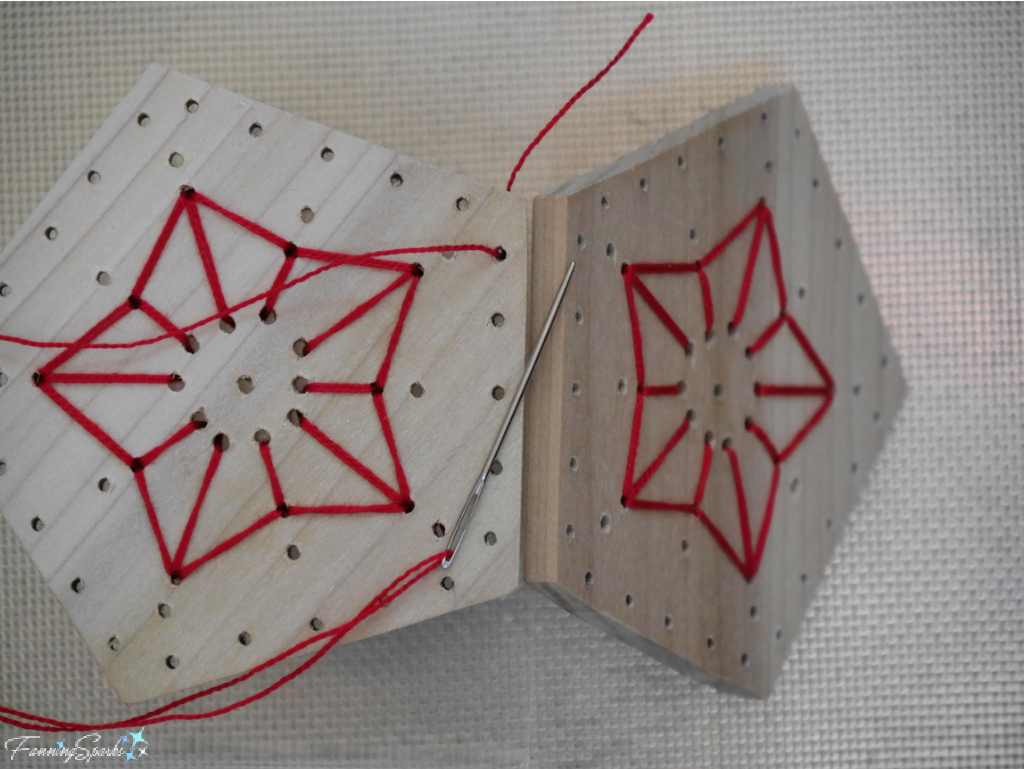 Step 8c. Push the needle down, from the front, through the matching first hole in the second pentagon. Pull the thread out through to the back. Pull the needle back through the first hole, from the back to the front, in the first pentagon. Push the needle down, from the front to the back, in the first hole of the second pentagon. This will result in 2 visible stitches on the front face (as shown below). Holding the 2 pentagons at an angle, pull the thread snuggly.
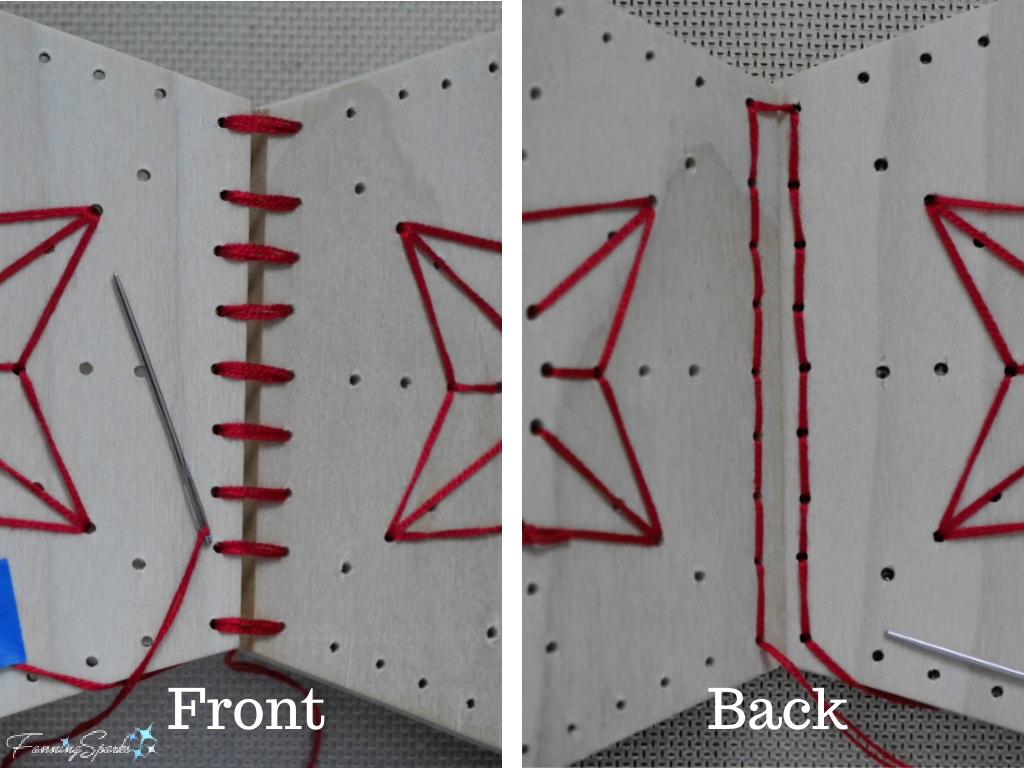
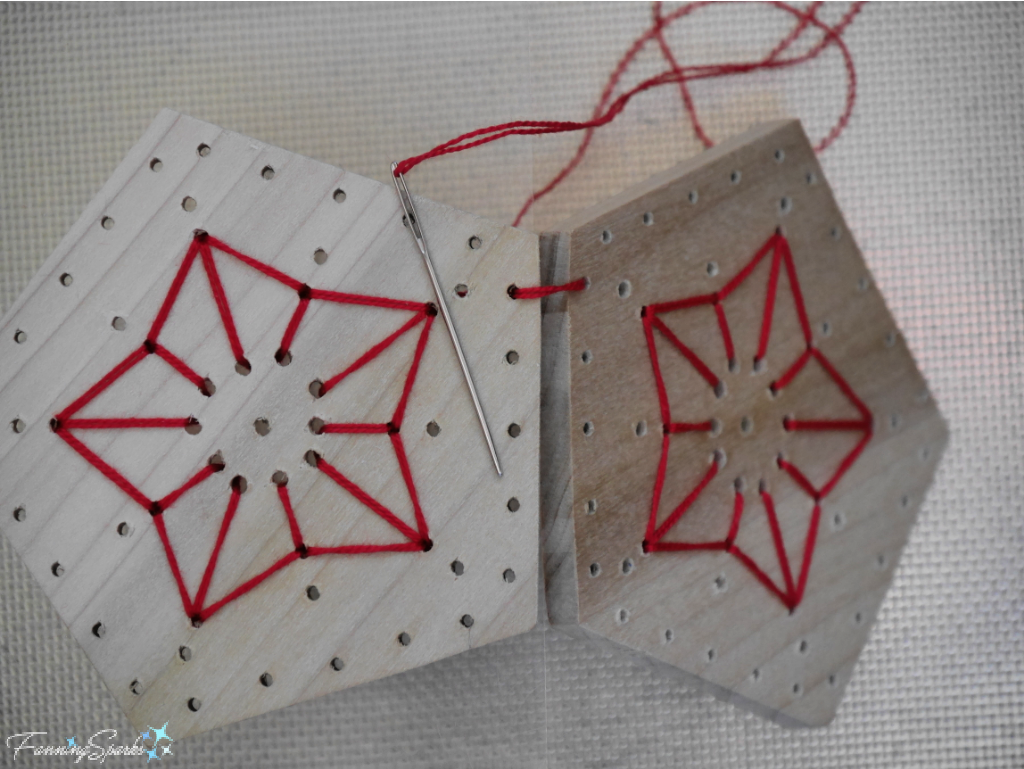 Step 8d. Follow the process described in Step 8c in the remaining 4 holes. The front should look like this.
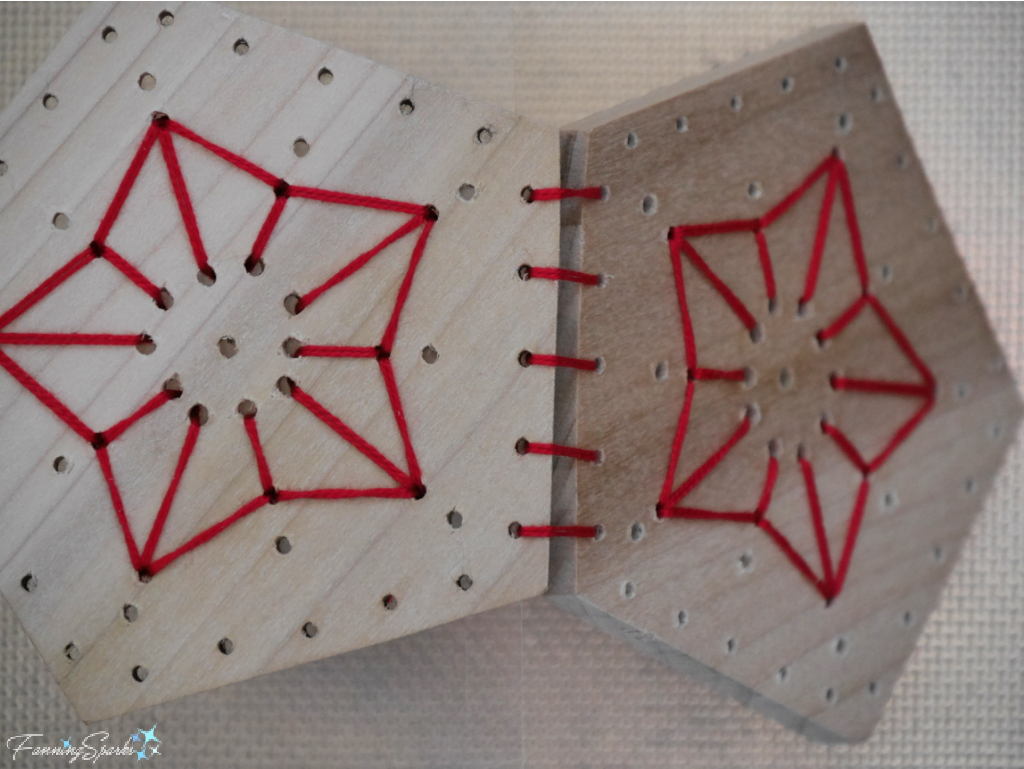 Step 8e. At the end, pull the thread to the back and tie the thread ends in a double knot. The back should look like this.
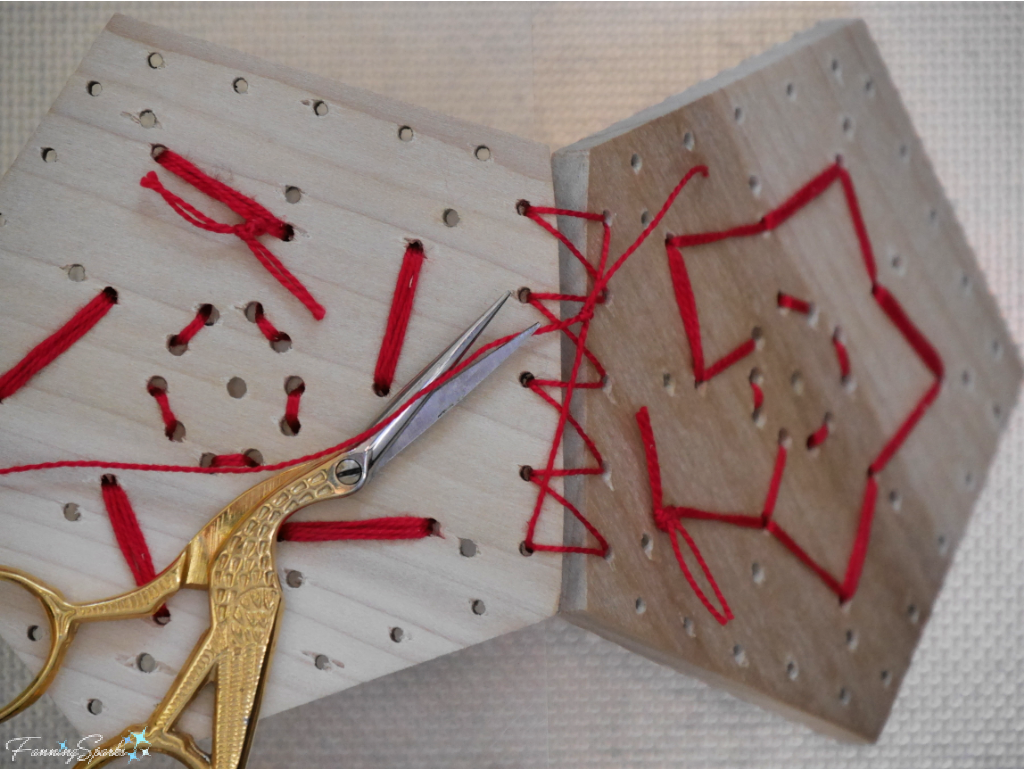 Step 8f. Continue to connect pentagons in this same way until a row of 5 is completed.
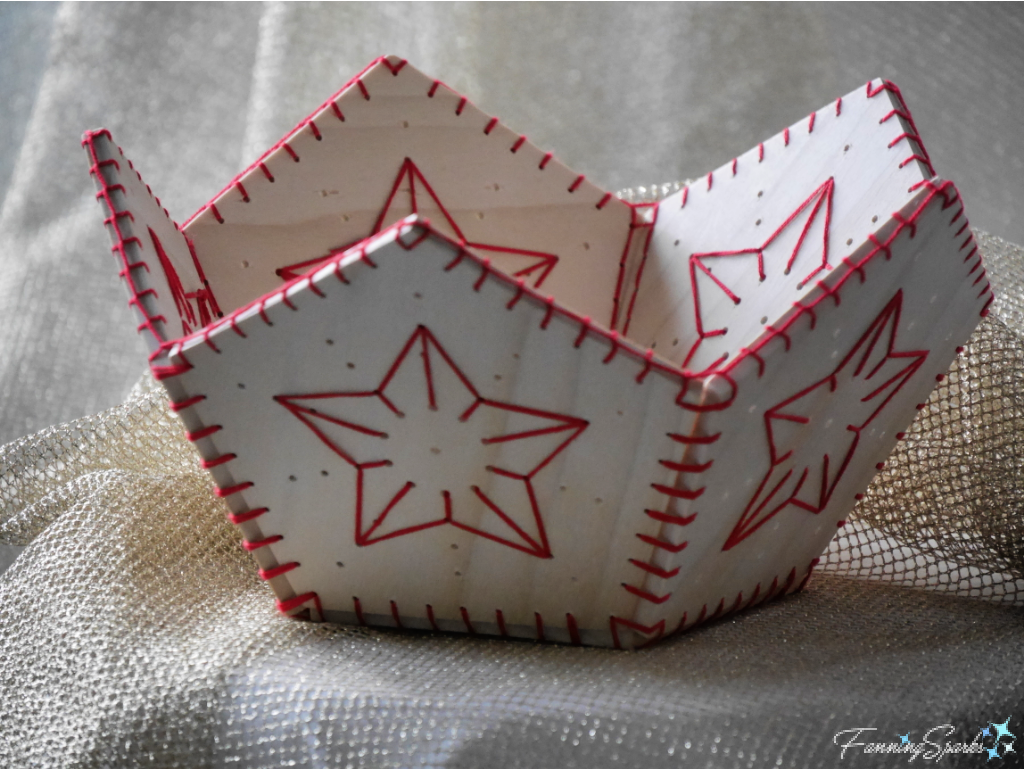
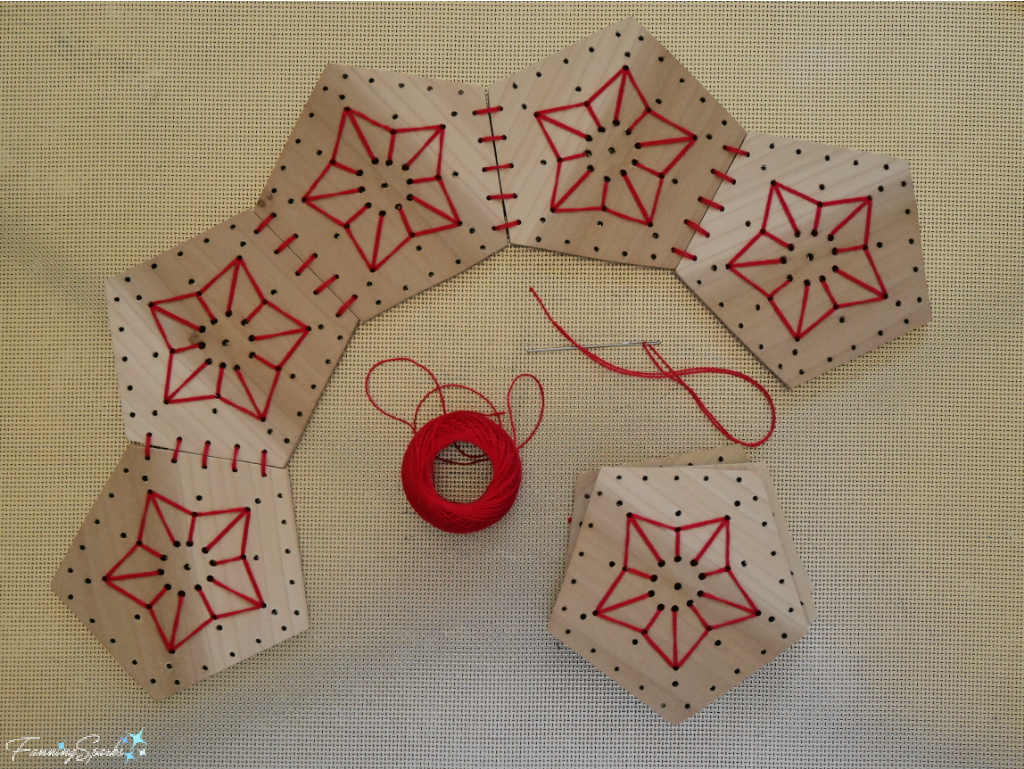 Step 8g. Pull the first and last pentagon of the row together to form a ring. If it’s too difficult to form a ring, one or more of the connections may be too tight. Adjust accordingly. Align the edges of the first and last pentagon. Connect in the same way as above in Steps 8b-8e.
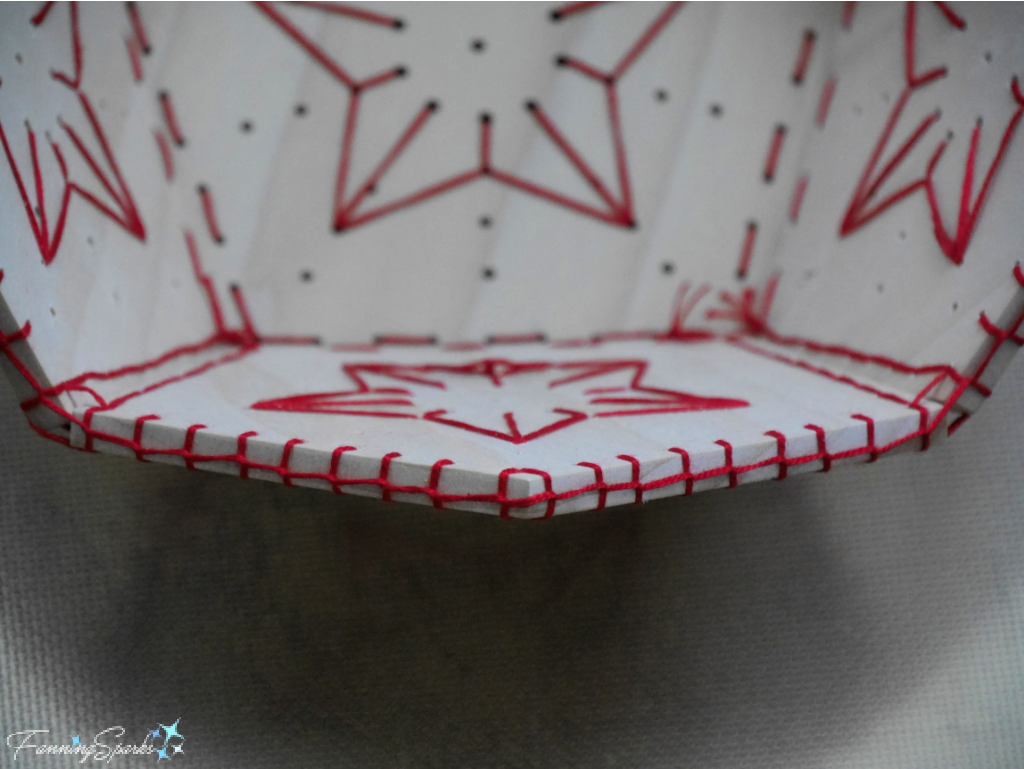
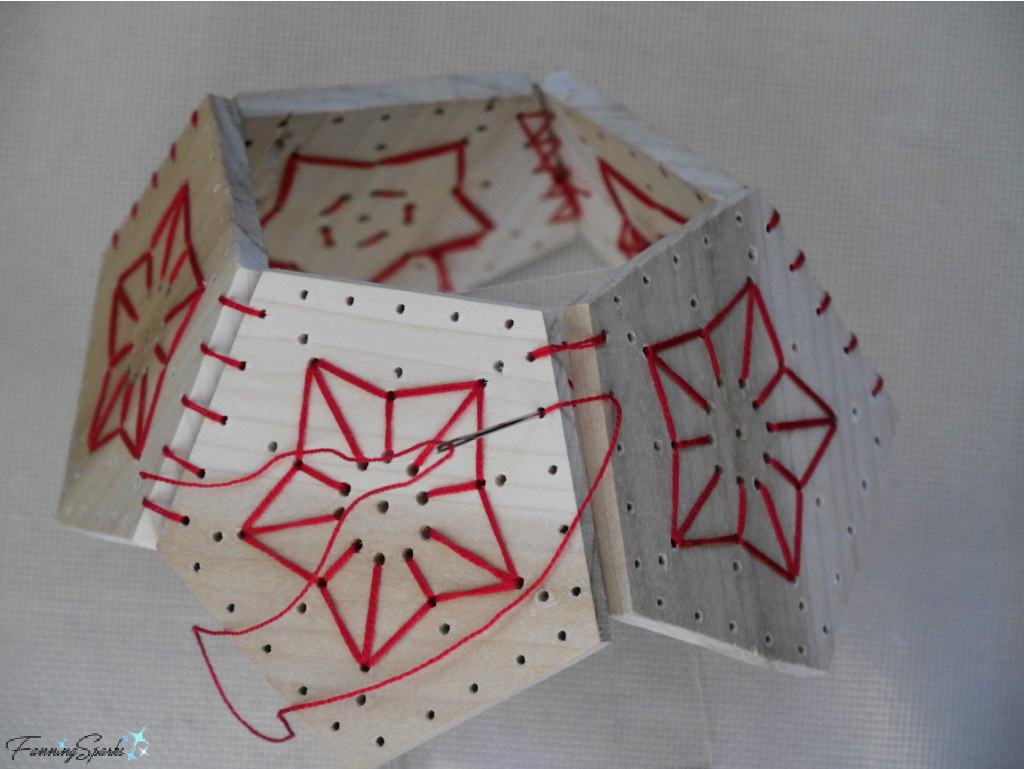 Step 9. Finish Bottom Edge The bottom edge is finished with a blanket stitch. Thread the needle with a 60” length of pearl cotton. This step is sewn with a single thread. Select a hole to the right of a connection as the starting point. Begin at back leaving a 3” tail. Pull tail up to top edge and tack down with painter’s tape.
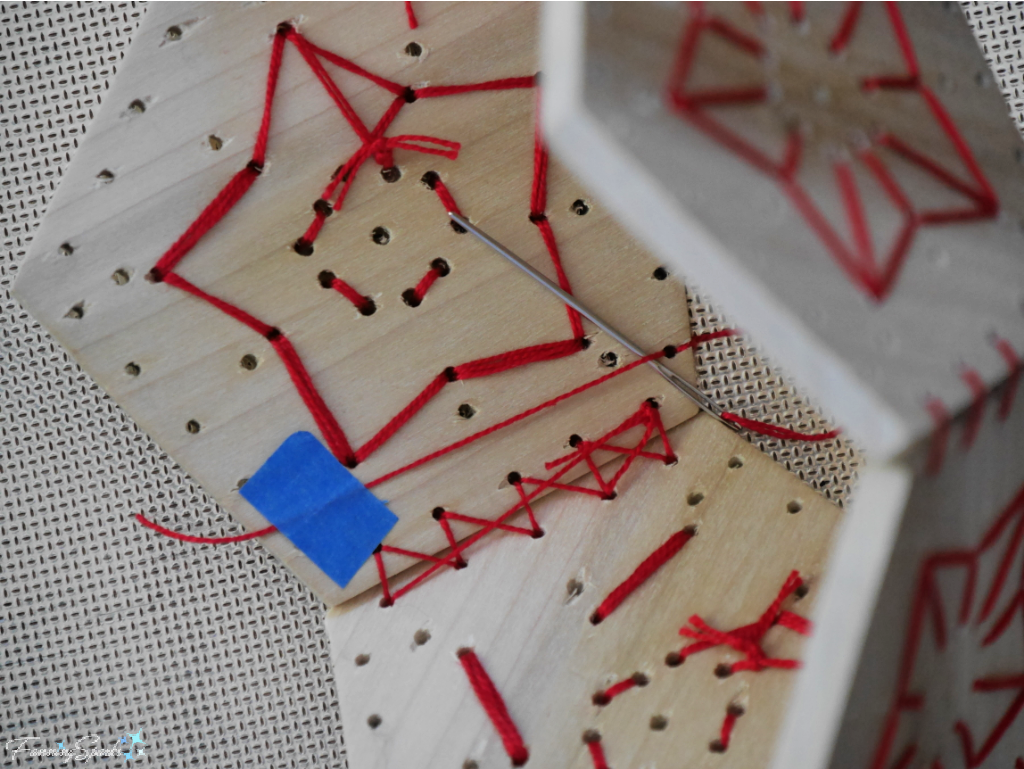 Step 9b. Continue around the entire bottom edge in the same way. Bring the needle through the hole from the back to the front. Wrap the thread neatly around the bottom edge. Bring the needle through the same hole from the back to the front again. Wrap the second line of thread neatly around the bottom edge beside the first line. Keeping the needle at the back, pass it under the previous horizontal stitch (stitching from left to right) and into the back of the next hole. Do not be concerned if the thread “cuts the corner” at the connections since this will not be visible.
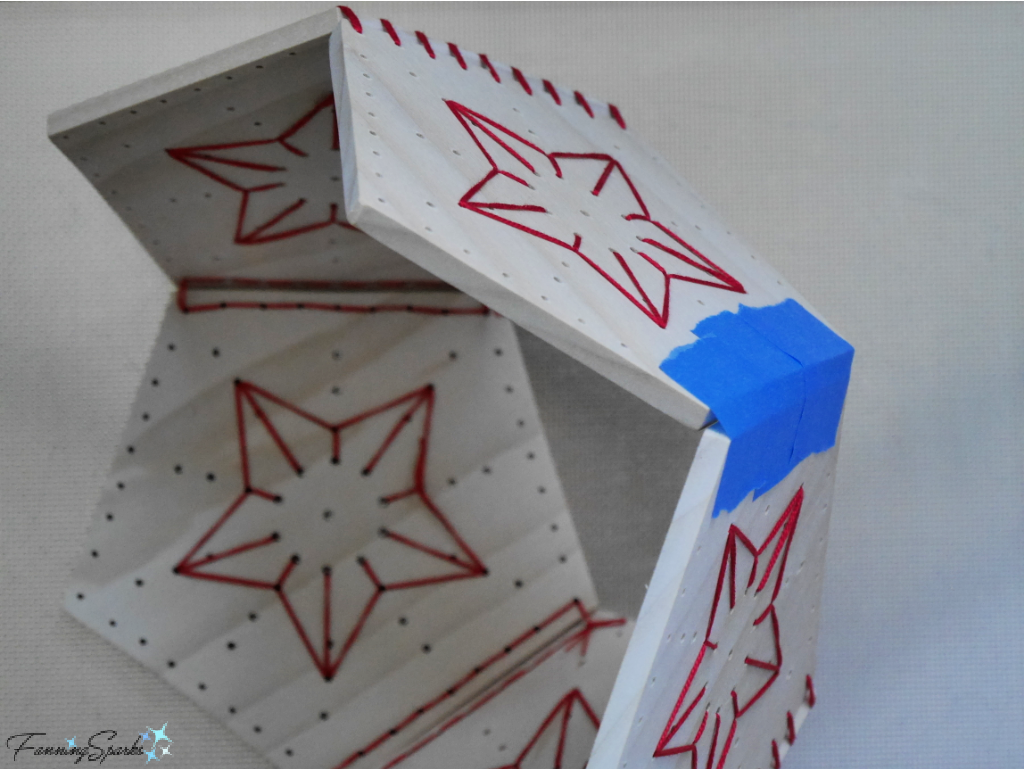
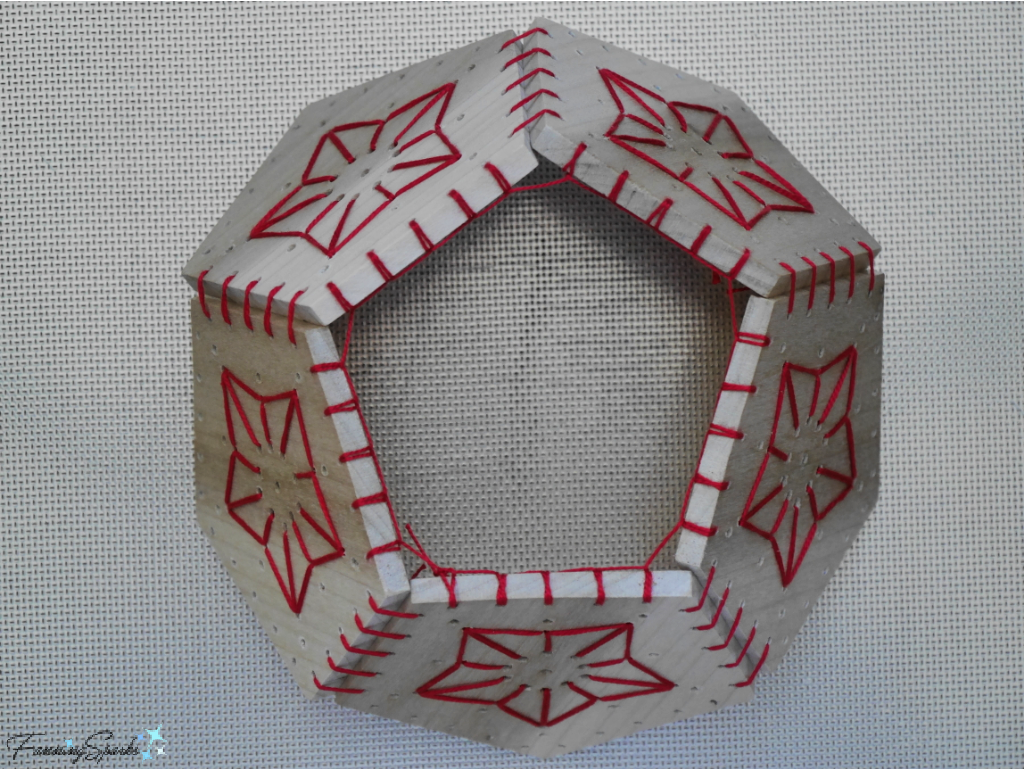 Step 10. Assemble Sphere Build up the sphere by connecting the remaining pentagons one at a time. The top will be the most visible so you may want to set aside your best pentagon for this position. The top will be added last. Work around the sphere building a second ring. Use the process described in Steps 8b-8e, to connect the pentagons. Stitch all connecting sides of a pentagon before attaching another one.
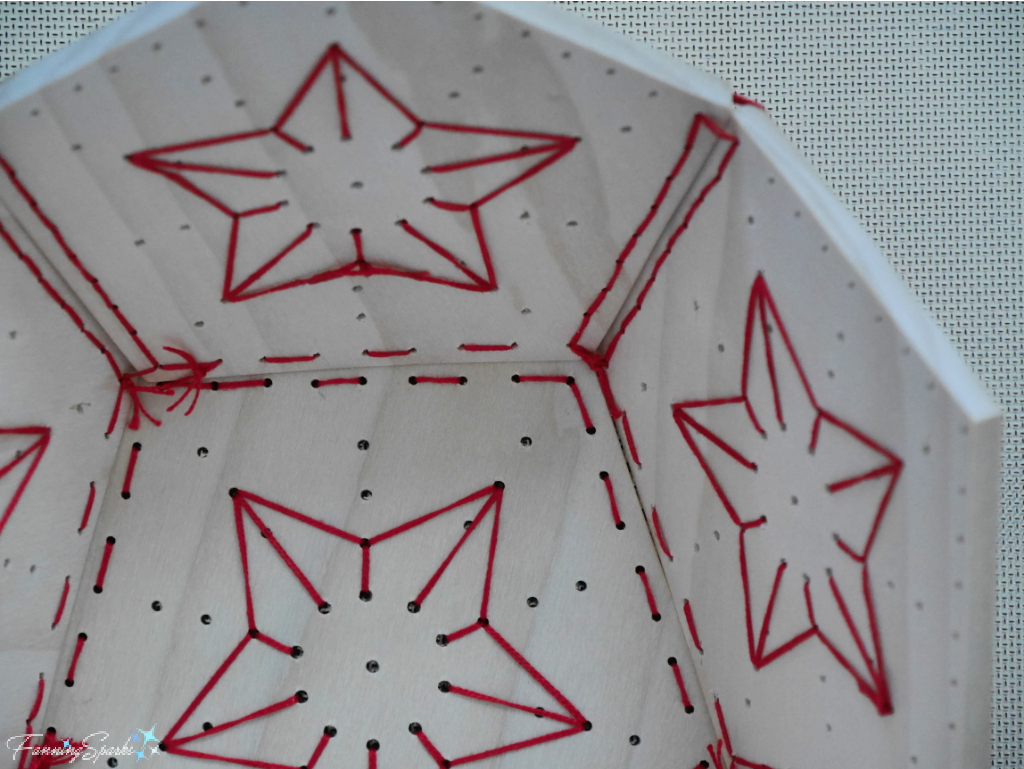
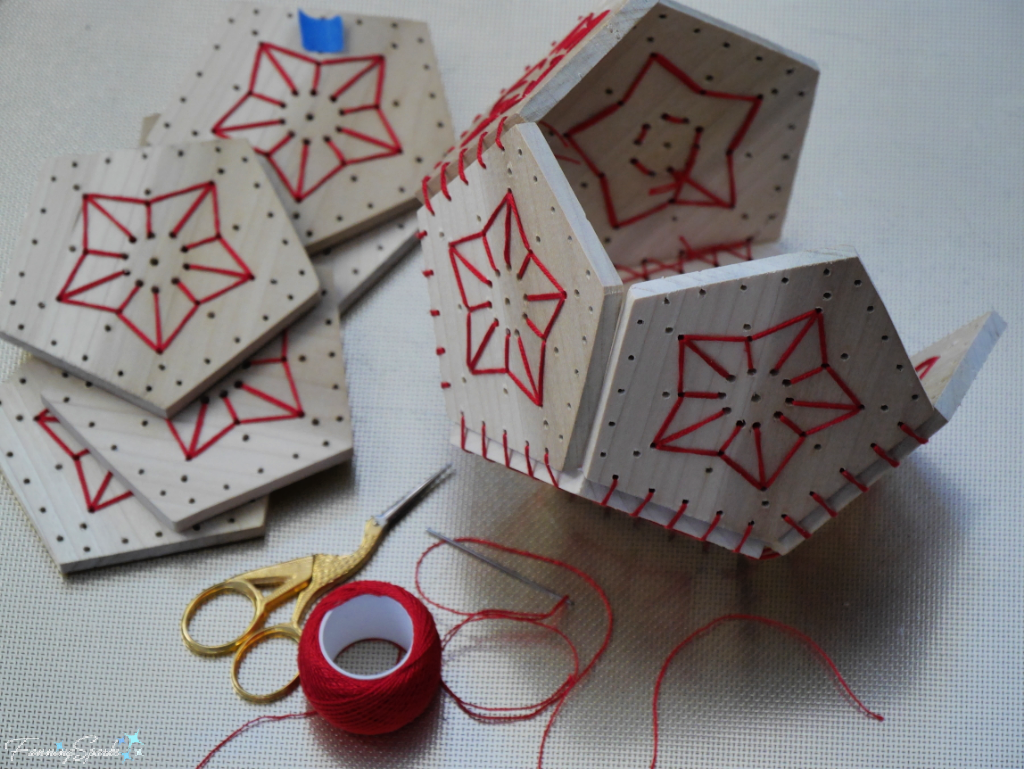 Step 11. Connect Top Place the final pentagon on the top of the sphere aligning all edges. Thread the needle with an 84” length of pearl cotton thread. This step is sewn with a single thread. Select a hole to the right of a connection as the starting point. Begin at the back leaving a 4-6” tail. Pull the thread tail down to the bottom edge and tack it down with painter’s tape. Stitch around all 5 sides of the pentagon before tying off. Follow a process similar to that described in Steps 8b-8e. It is a little tricky to sew this last section since you have to insert your hand inside the sphere. Take your time. Pull out and smooth the full length of the thread as you stitch to prevent knotting. Don’t worry about tightening the knotted tails—a loose knot is fine.
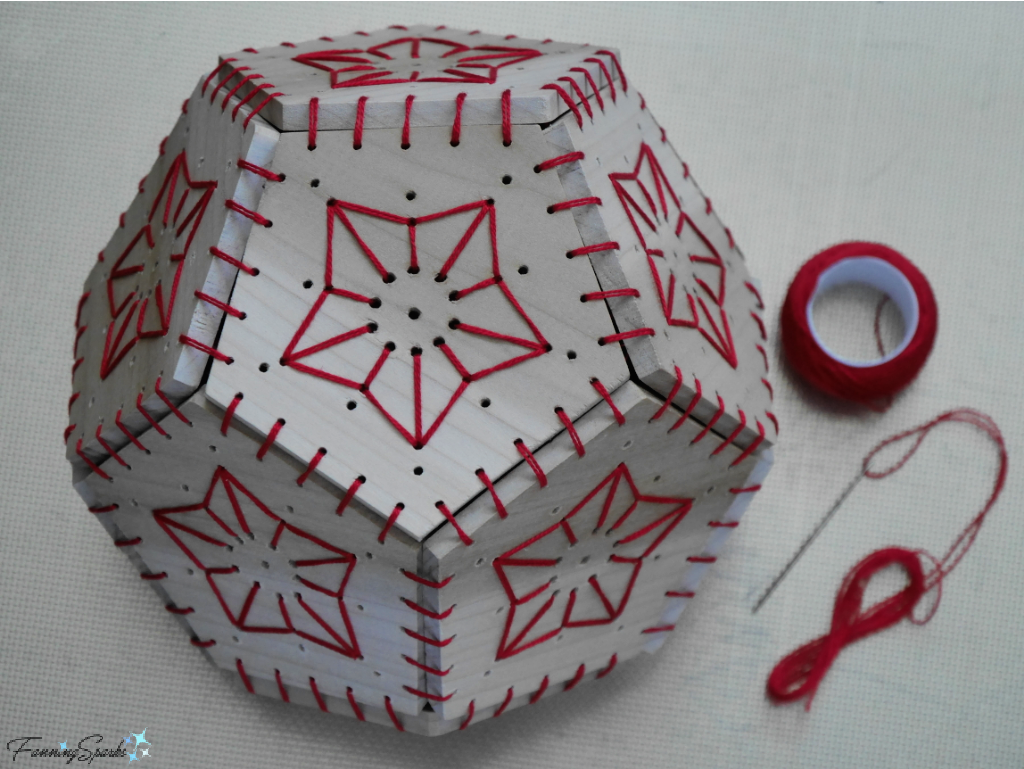 Step 12. Insert Lights (Optional) If desired, slip a set of battery-operated LED lights inside the sphere.