
In my previous post, Falling Leaves and Floating Boats, I introduced these small, floating boats and promised to share the instructions for making them. I’ve had the opportunity to test these little boats in a few different settings since that post. They handled the swift current of a small stream without any mishaps.
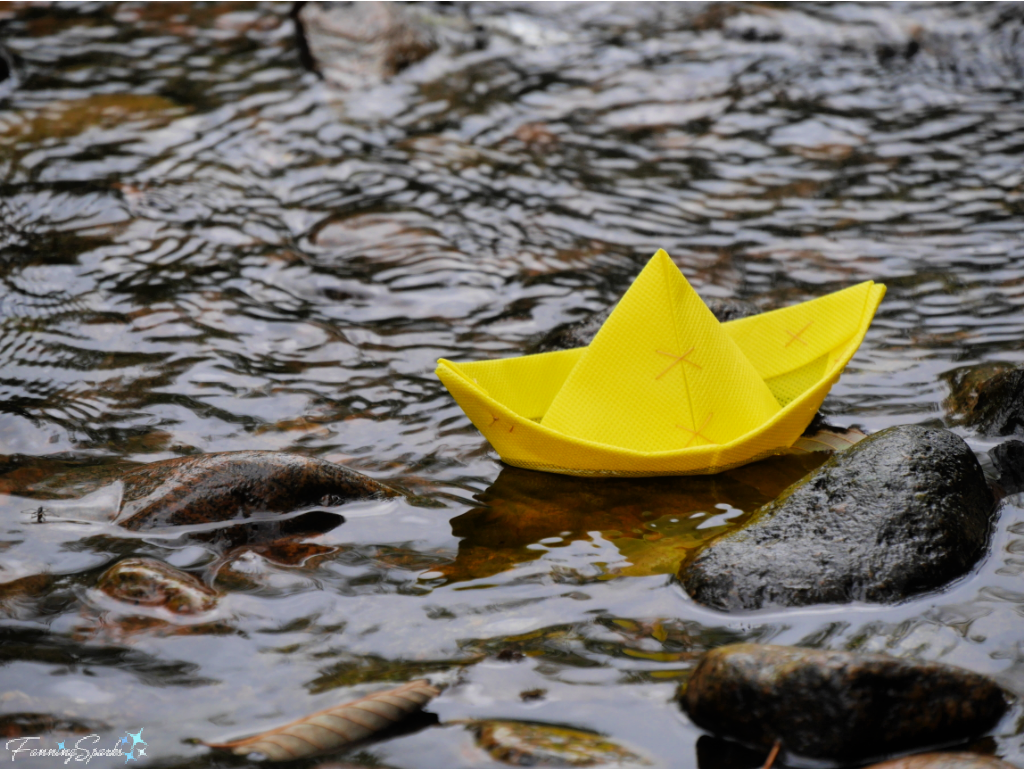
This little creek would have been a great place to stage a race or host a regatta.
I also tried the boats in the gentle surf at the beach.
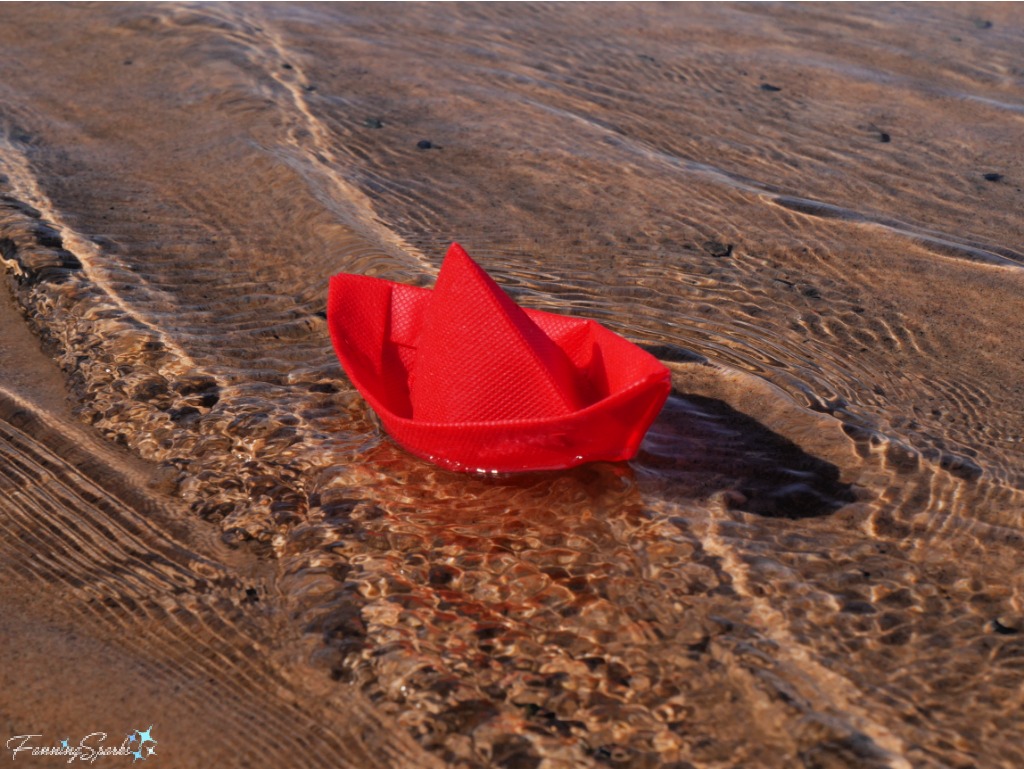
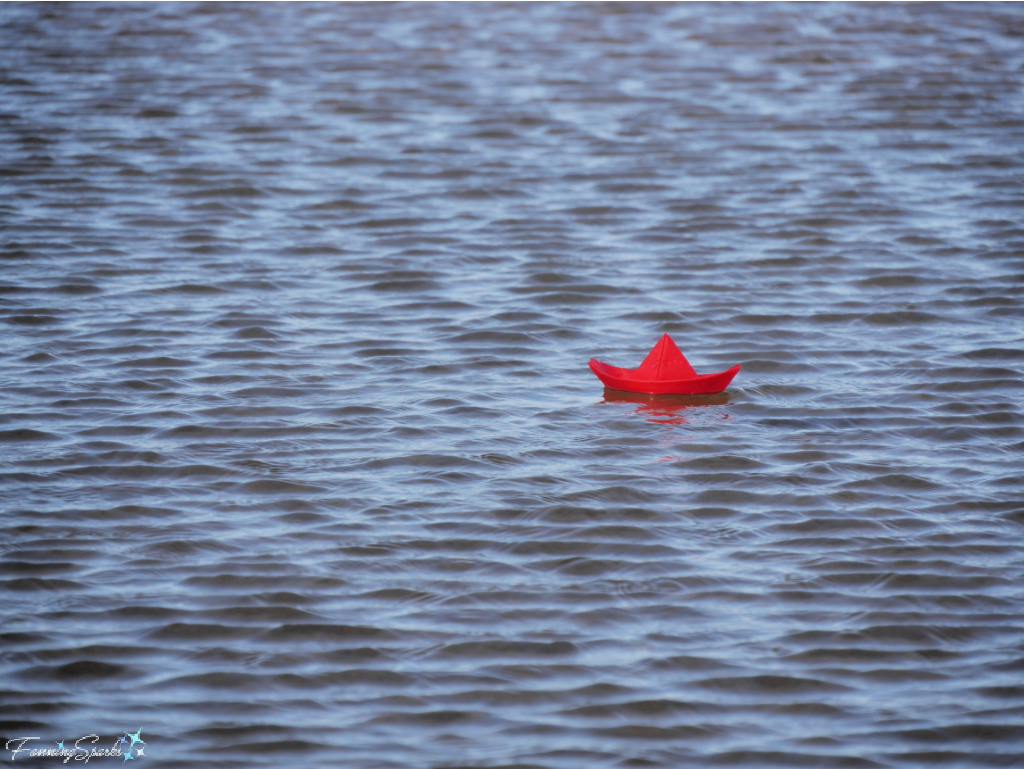
I’m happy to report the boats fared well in all these settings. But be forewarned, these boats are light and swift and could be heading out to sea before you know it. Ask me how I know!
These folded boats are easy to make. They are simply an upscaled version of the boats children fold from paper. But there are a few things I learned from trial and error that are worth calling out.
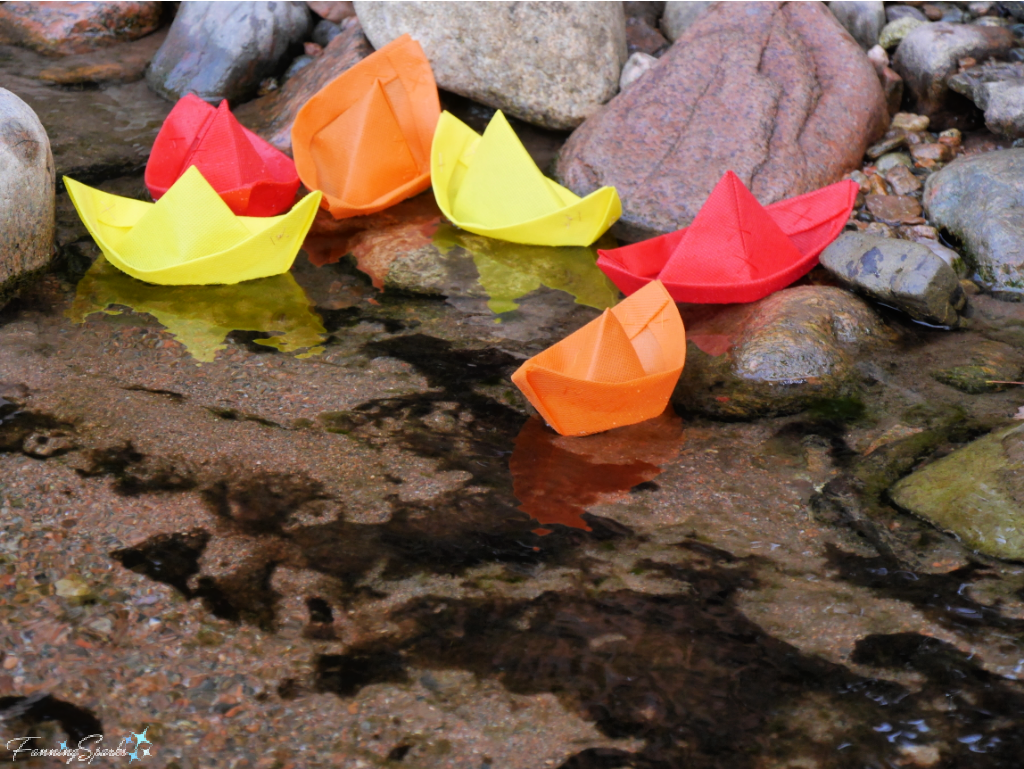
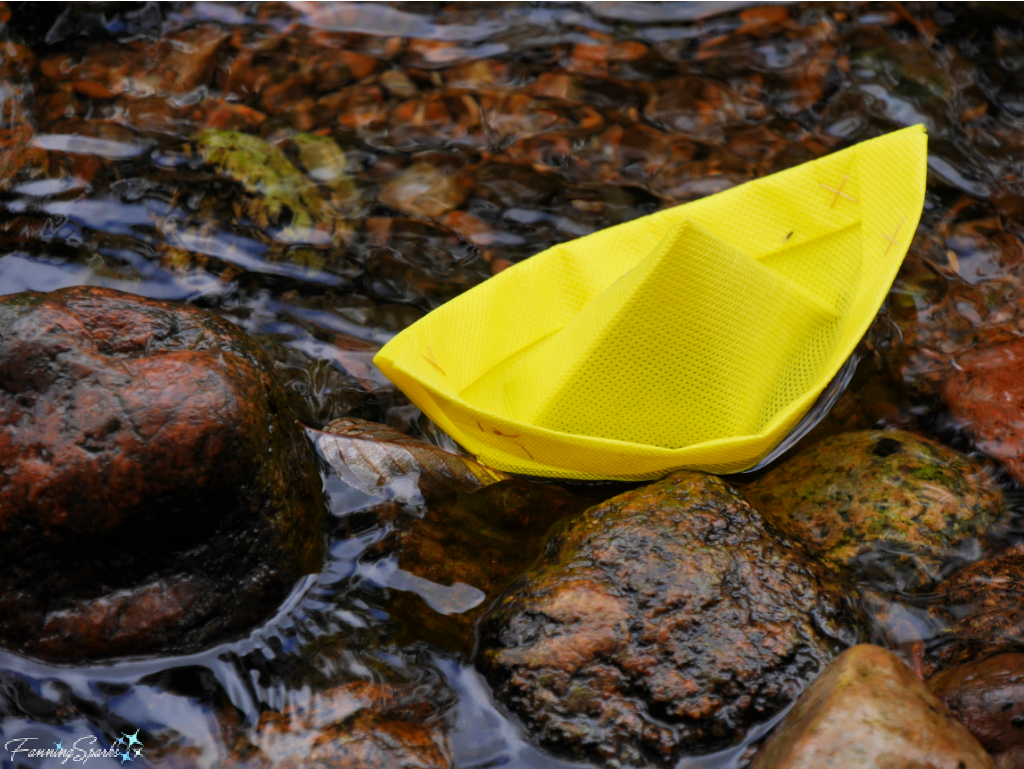
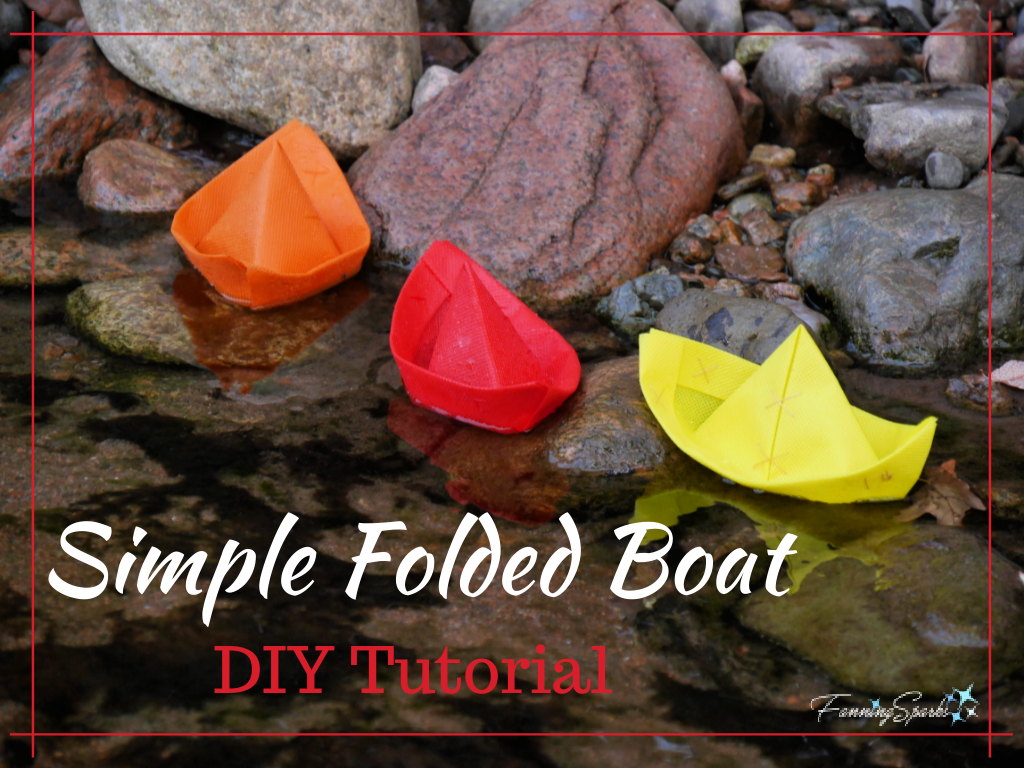
First is the material used to make them. Traditionally, these boats are folded from paper. Paper boats float beautifully—the first time. But they get waterlogged quickly. I tried several other materials including clear vinyl, adhesive vinyl, lightweight coated nylon and marine vinyl. The material that performed the best, though, is a polypropylene fabric called Oly*Fun™. This fabric repels water and floats perfectly. Oly*Fun™ is readily available from fabric and hobby stores. I purchased mine from Hobby Lobby. It is sold in sheets or by the yard and comes in a variety of deep, rich colors.
After trying a few different configurations, I found the ideal size and proportions to be a 7” x 10” rectangle of fabric. The finished boat is about 7” long by 3” wide by 2 ¾” high.
Fabric doesn’t hold folds as well as paper but I discovered that tacking down the folds solved that problem. I used matching thread to make a few simple stitches at pivotal spots. This served to hold the folds, keep the fabric in place and maintain the shape of the boat. I suspect you could use glue to accomplish the same thing.
These 3 key learnings are incorporated into the Simple Folded Boat Tutorial instructions that follow.
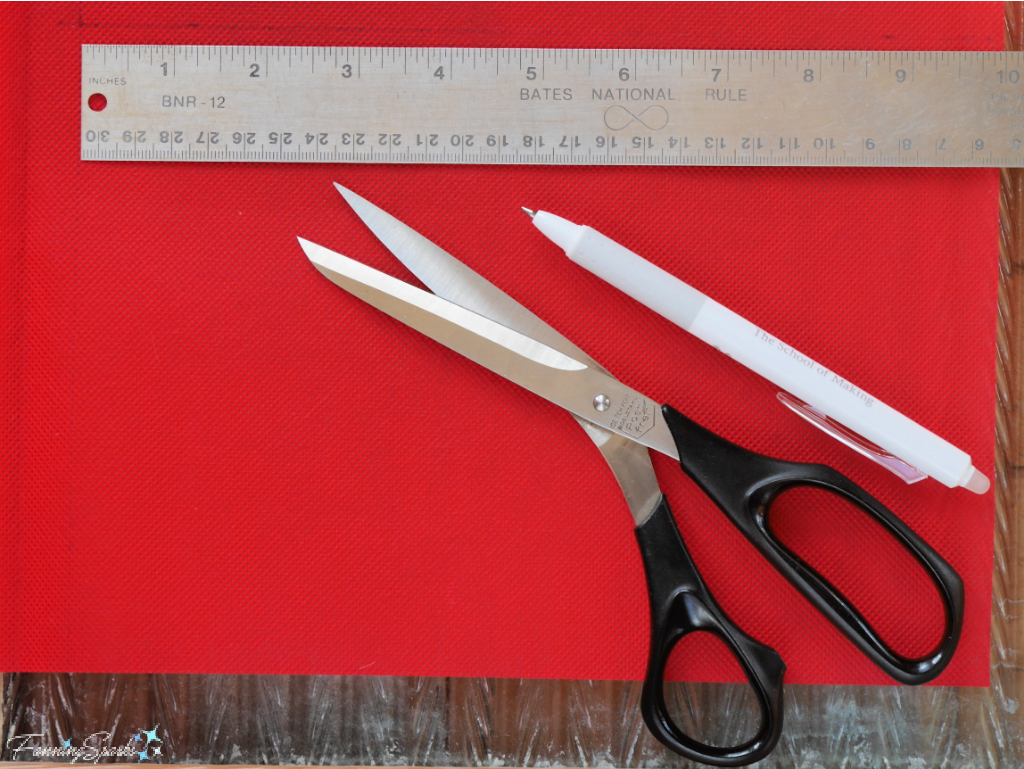
Supplies Needed
The following supplies are needed to make 1 simple, folded boat:
. Fabric: 1 – 7” x 10” rectangle of Oly*Fun™ which is a 100% polypropylene fabric made by Fairfield
. Thread: Matching thread. Alternatively, waterproof glue could be used.
Tools Needed
. Scissors
. Ruler
. Pencil/Marker
. Binder Clips: 2 small ¾” clips
. Sewing Needle
Instructions for Simple Folded Boats
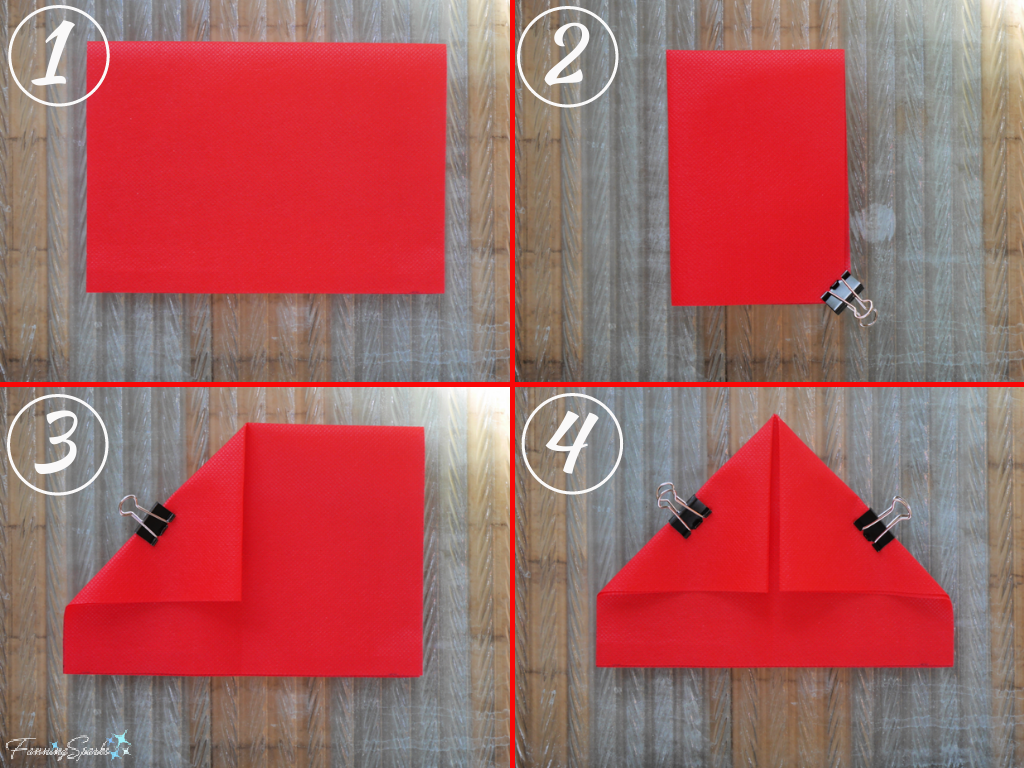
Step 1-4 Fold Peak Place fabric rectangle on working surface with 7” edge along bottom.
Step 1: Fold in half bringing top edge down to match bottom edge.
Step 2: Fold in half, again, bringing left edge over to match right edge. Use binder clip to hold in place while pressing firmly to crease the fabric. Once creased, remove the clips and unfold. This crease serves to mark the center line.
Step 3: Bring top left corner down to align with the center crease. Hold in place with a binder clip.
Step 4: Repeat on right side bringing top right corner down to align with the center crease.
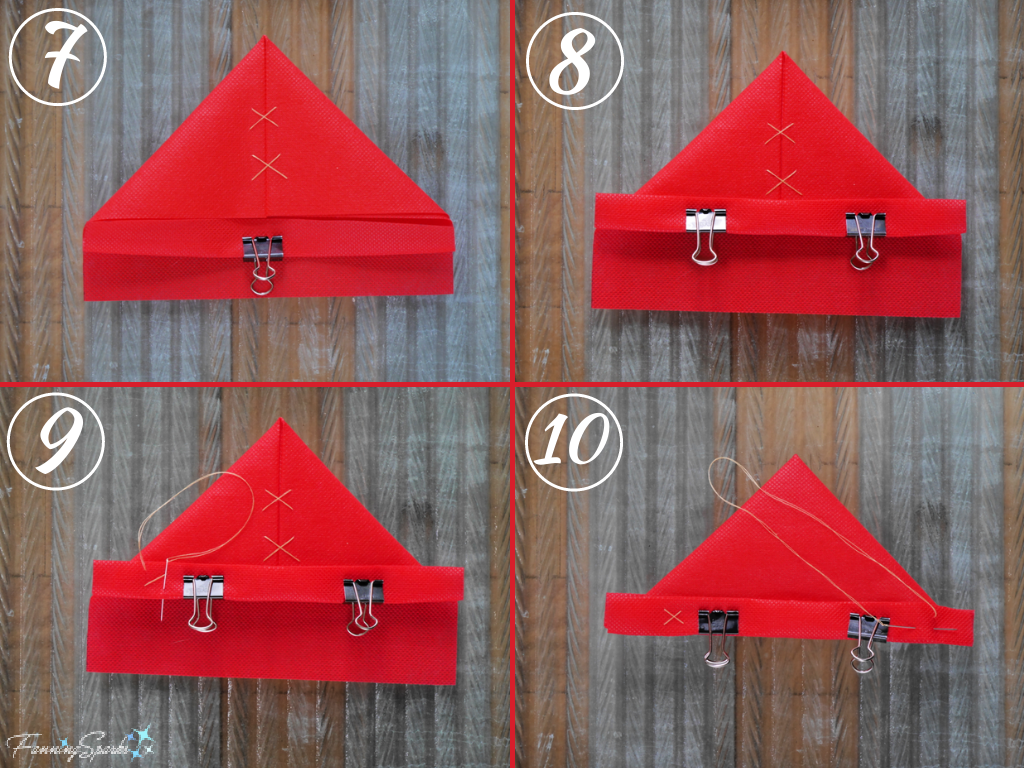
Steps 5-6 Stitch Peak Tack down folds with hand-sewn stitches. I used contrasting thread for clarity in this tutorial but I recommend using matching thread. I found cross-stitches worked well and looked nice. Alternatively, you could use glue to secure the folds.
Step 5: Carefully stitch through all layers EXCEPT the back layer. Otherwise, the boat cannot open. Insert fingers inside peak to hold fabric in place while stitching. Knot ends and hide inside folds.
Step 6: Make a second cross-stitch. Remove binder clips.

Steps 7-10 Fold and Stitch Sides
Step 7: Bring bottom edge up to match bottom edge of peak.
Step 8: Fold again, bringing folded bottom edge up by the same amount as previous fold.
Step 9: Tack folds with a cross-stitch about ¾“ from the left edge. Carefully stitch through all layers EXCEPT the back layer. Repeat on right side.
Step 10: Turn over boat so back side is facing up. Repeat steps 7-9.
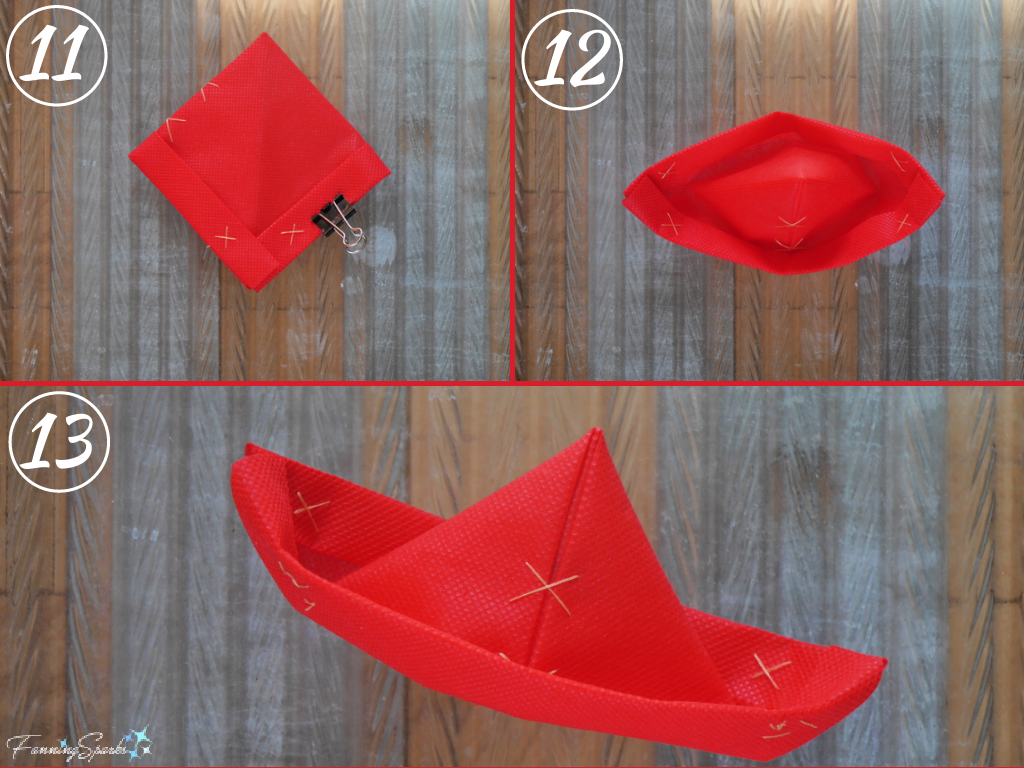
Steps 11-13 Open Boat
Step 11: Position boat on working surface with front facing up. Refold boat forming a diamond shape with the center front positioned along the top left. All the ends of the sides will be at the bottom point. Starting with the ends sitting on top, neatly tuck the right ends inside the folds of the left tip. Flip over the boat and repeat with the back set of ends.
Step 12: Lift up the boat holding a set of folded, tucked ends in each hand. Pull hands apart to open up boat. Flip up sides and open peak fully.
Step 13: It’s that simple! Your new Simple, Folded Boat is ready for action.
Find some water and let the fun begin!
More Info
Please share this image or pin for future reference.
Check out my previous post, Falling Leaves and Floating Boats, for fun photos of these boats in an autumn setting.
You can learn more about Oly*Fun™ fabric on the Fairfield website.
These Simple Folded Boats are suited to shallow waters while the Toy Sailboats I featured in the previous post, Sunrise Breakfast Picnic, are better suited to water that is at least 1½ feet deep. Check out a A Landlubber’s Toy Sailboat – DIY Tutorial for instructions.
Today’s Takeaways
1. Consider making simple, folded boats to share with children or enjoy yourself.
2. Enjoy spending time by a stream, lake, ocean or other natural body of water.
3. Find joy in the simple pleasure of floating a boat.


Comments are closed.