
You know that special feeling you get when you finally see the results of the project you’re making? Especially if it’s a project you’ve been working on for a long time? And you didn’t really know if it would turn out how you imagined? There’s such a sense of accomplishment! Ahhh… the sweet joy of making!
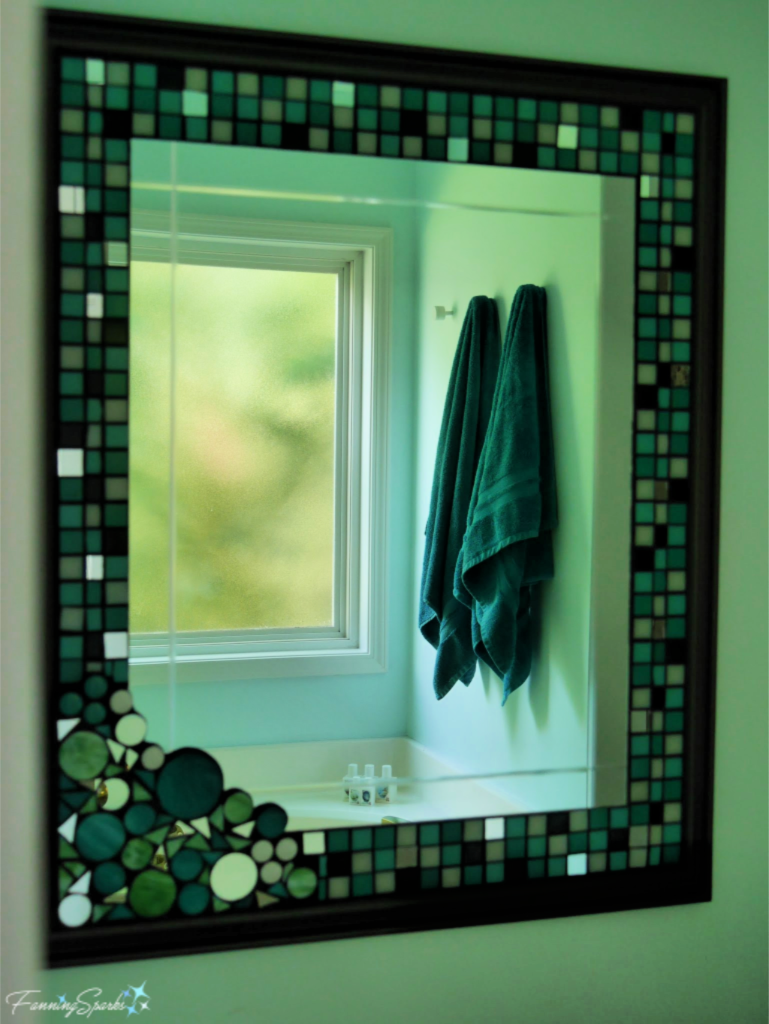
That’s how I felt recently when my mosaic project was finally done! We now have two framed mosaic mirrors hanging in our master bathroom. Here they are in all their glory. I’m so pleased with how they turned out.
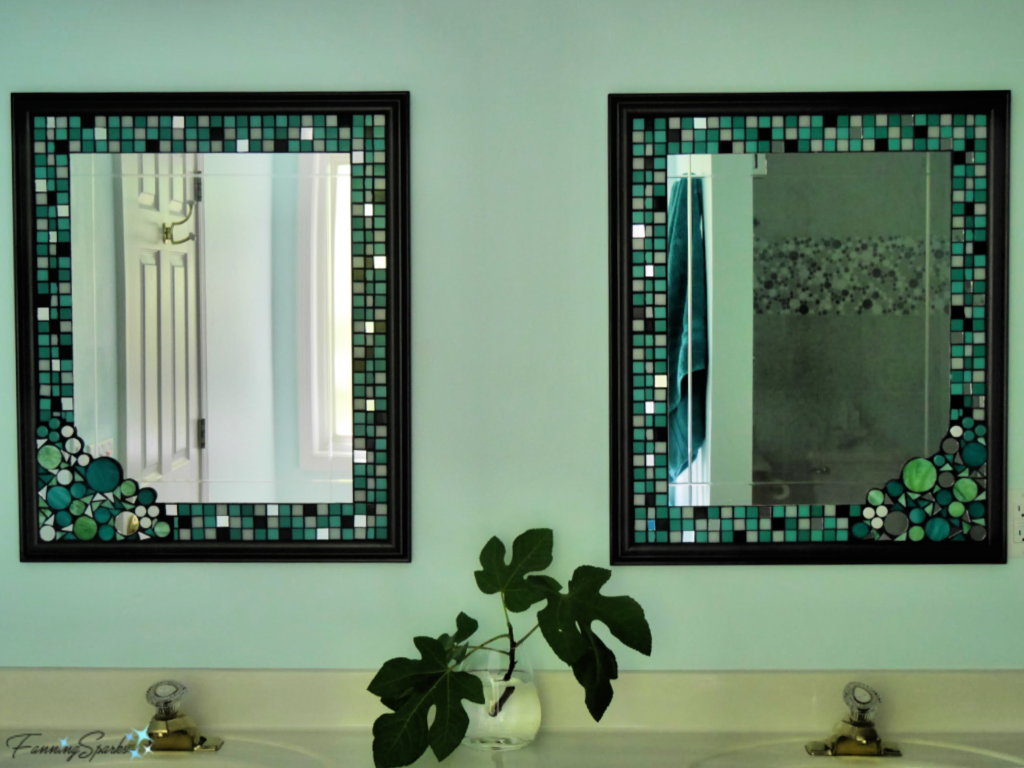
This was quite an undertaking. It all started with a frameless mirror from Ikea (see More Info below). I used wood molding and 5mm thin plywood to build custom frames. The frames are about 27” x 32” allowing for a 2 ½” border around the mirror. I used several coats of primer and paint to ensure the backing was sealed. Then the mosaic fun began!
Before moving into our new house (see A Before Tour of Our New Casual Lake House ), we had the shower in the Master Bathroom rebuilt. We selected new tile including an accent section of circular tiles in shades of grey and white. You can see it reflected in the mirror below.
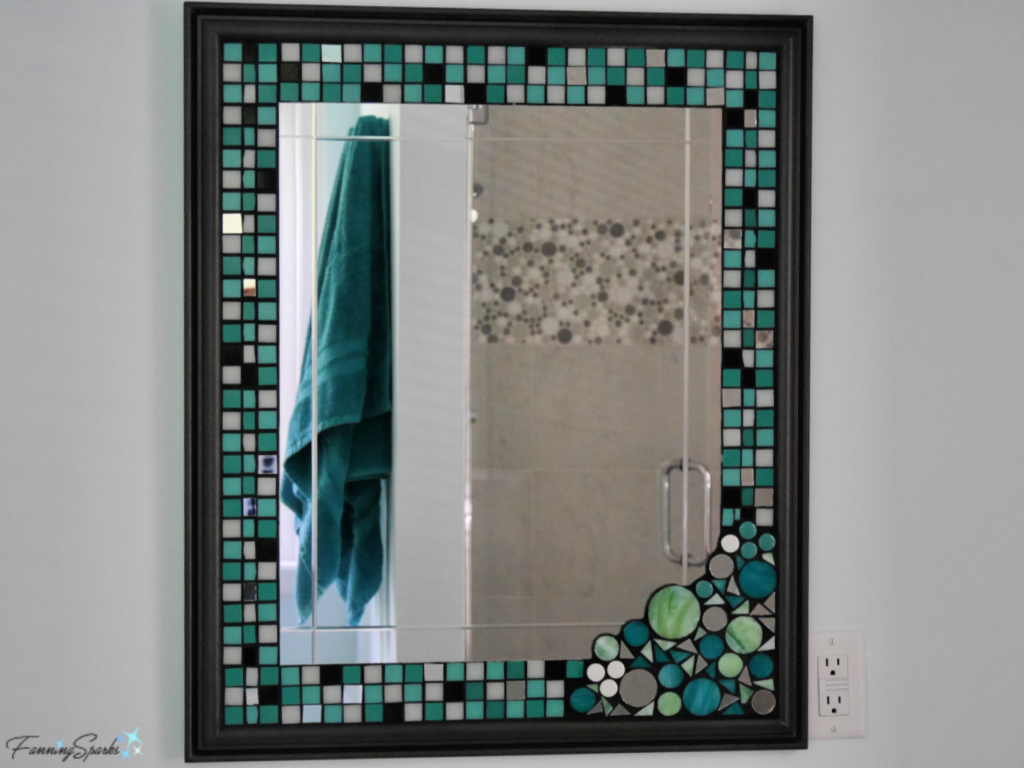
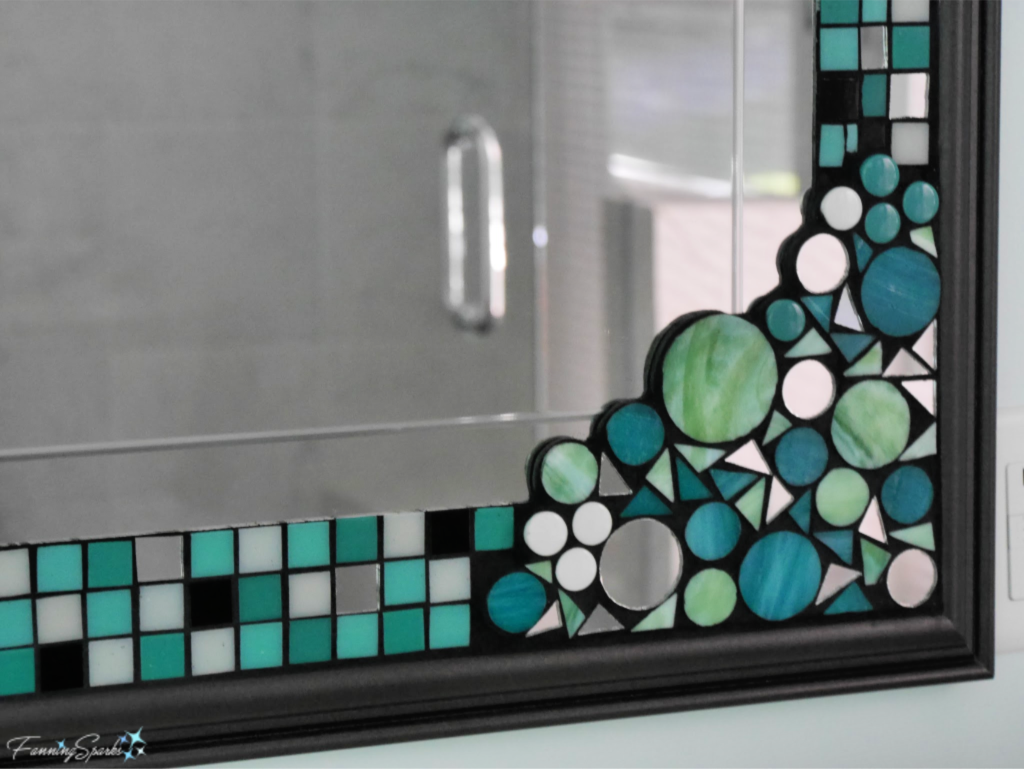
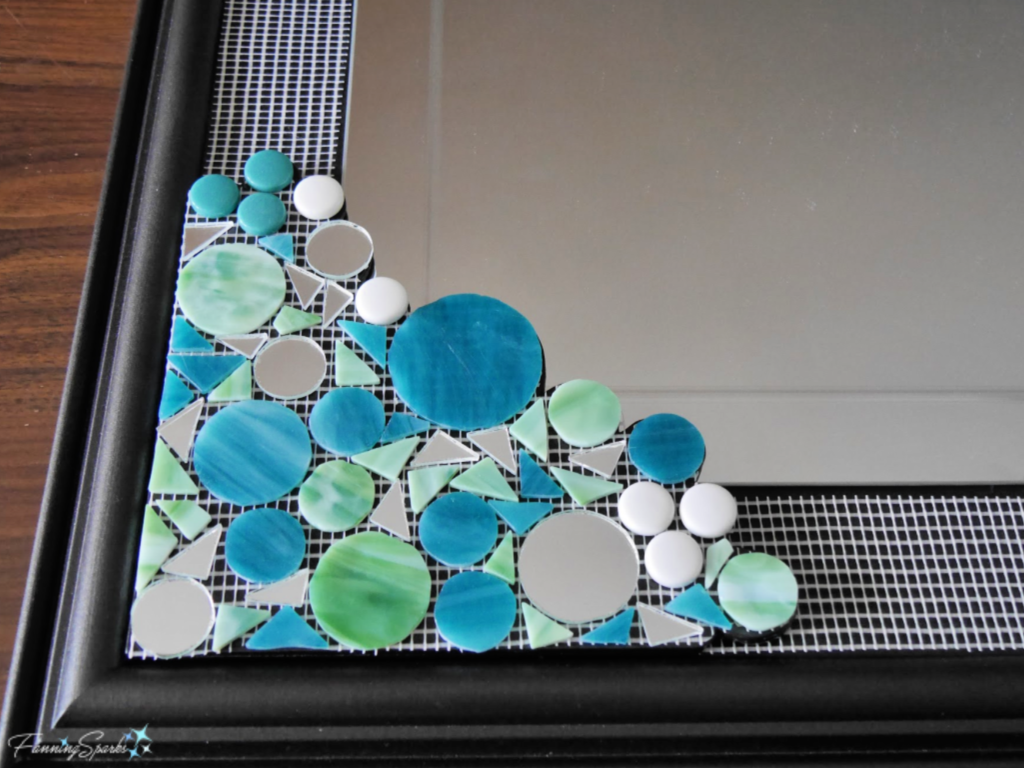
The circular shapes remind me of bubbles which seemed appropriate for a bathroom. I decided to incorporate the circular pattern into the mirror design. The idea was to add colorful bubbles as a focal point. I’d had good success with a multi-layered design in a previous project and decided to try it again. The layering is achieved with an extra piece of backing cut to shape and glued onto the frame.
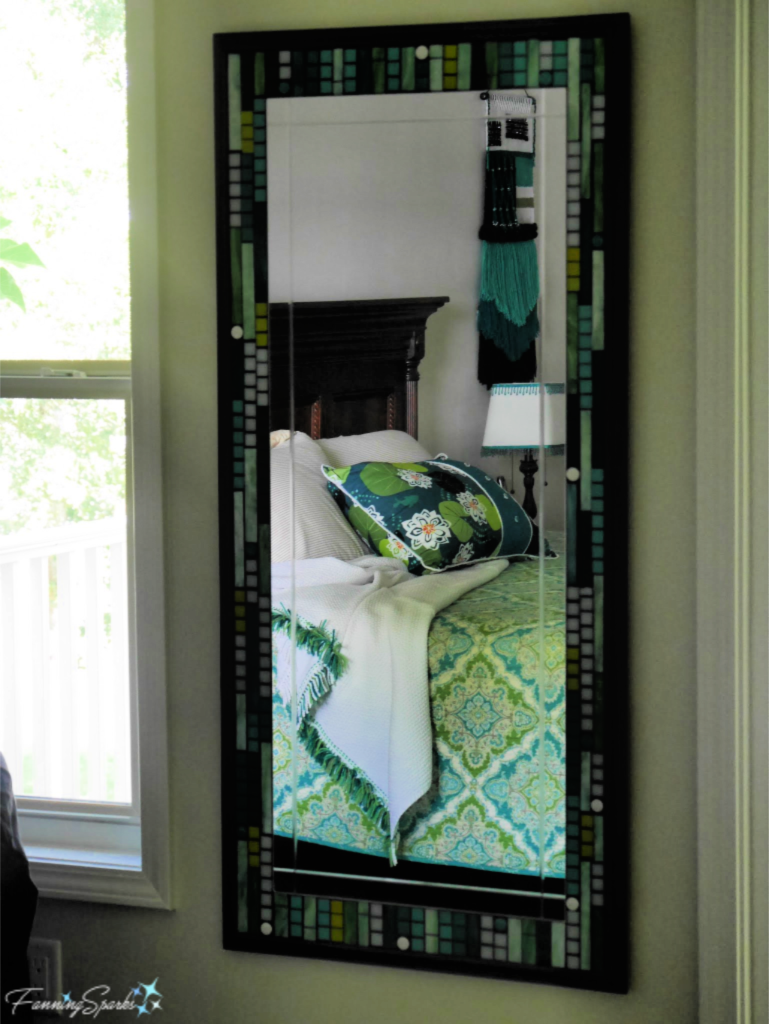
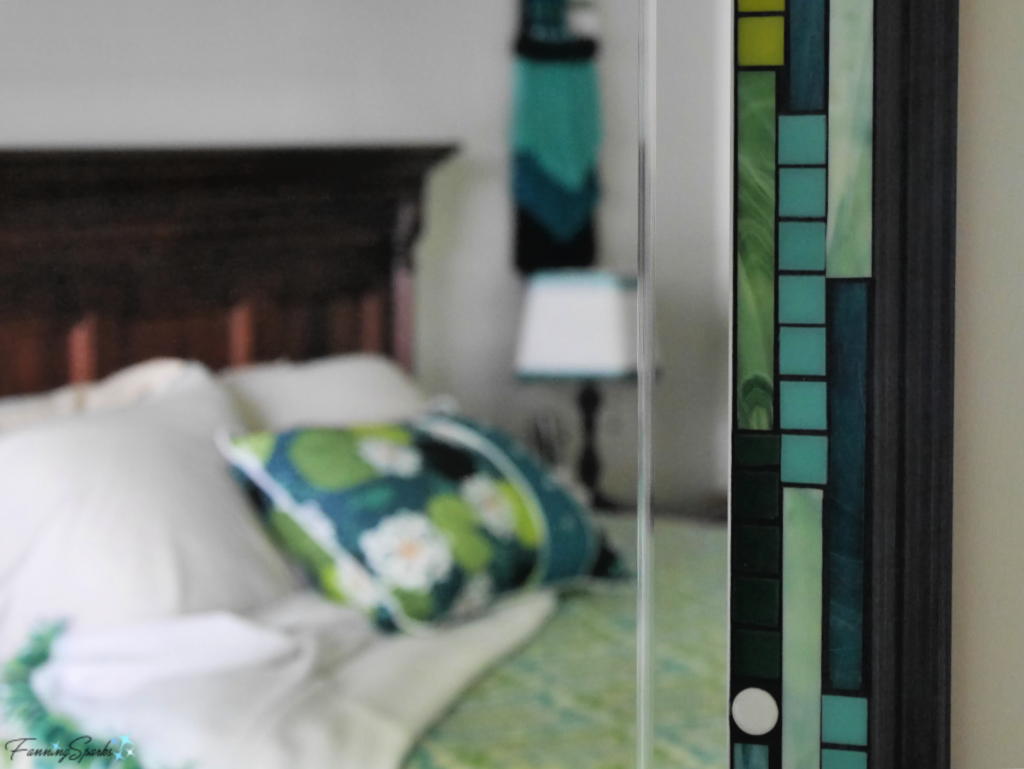
I’d already made a full length mosaic mirror frame for the Master Bedroom and was really pleased with the results.
And here’s a closer look at the mosaic border. It’s a combination of ¾” glass tiles, ¾” glass penny rounds and custom-cut stained glass.
I decided to merge all these ideas into a single design for the Master Bathroom mirrors. We needed two mirrors so the design was mirrored but not replicated. Both mirrors have a bottom corner of “bubbles” one is on the left …
…and the other is on the right.
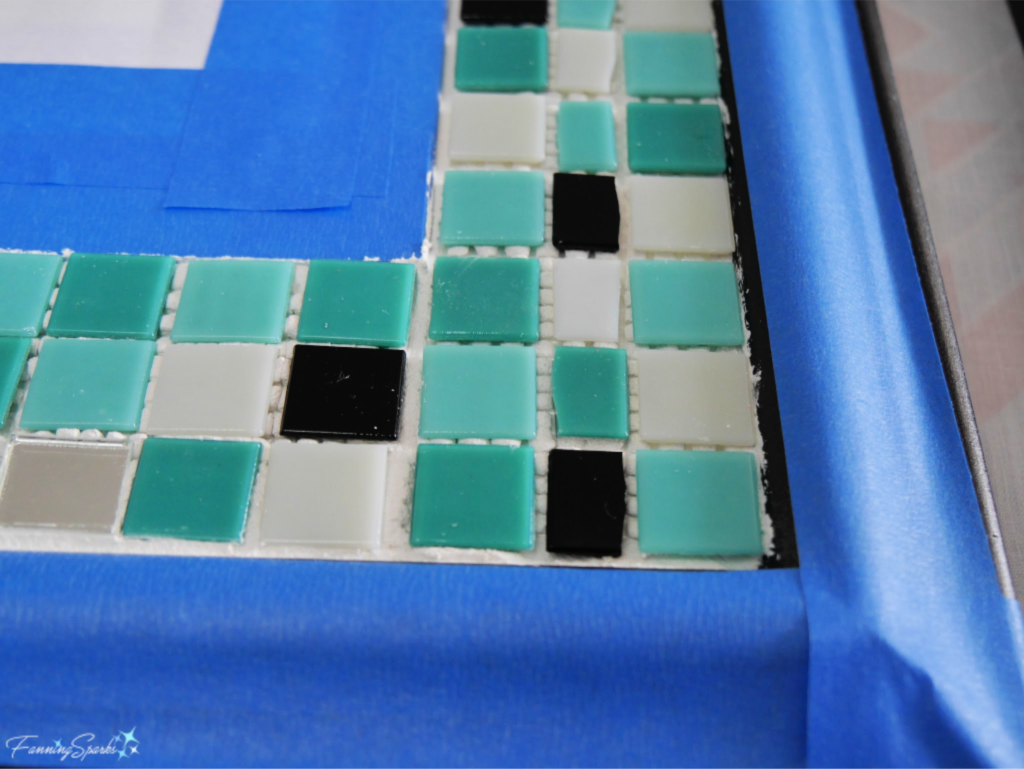
Now that you’ve seen the results, let’s take a look at the process for making these mosaic mirrors. I should point out that I’m not a mosaic expert‒I’m still learning and I rely heavily on the expertise and advice available online (see More Info below). After the idea of the bubble corners started to gel, I laid out a few variations of tesserae (ie the small pieces used in mosaic work) to see how they looked.
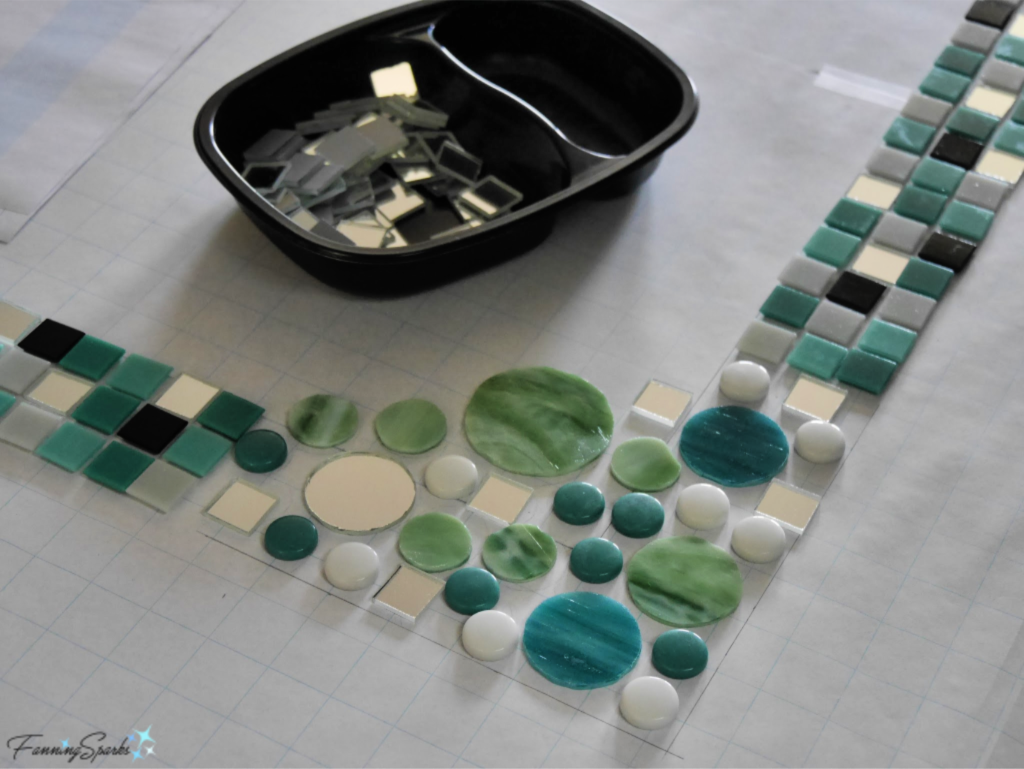
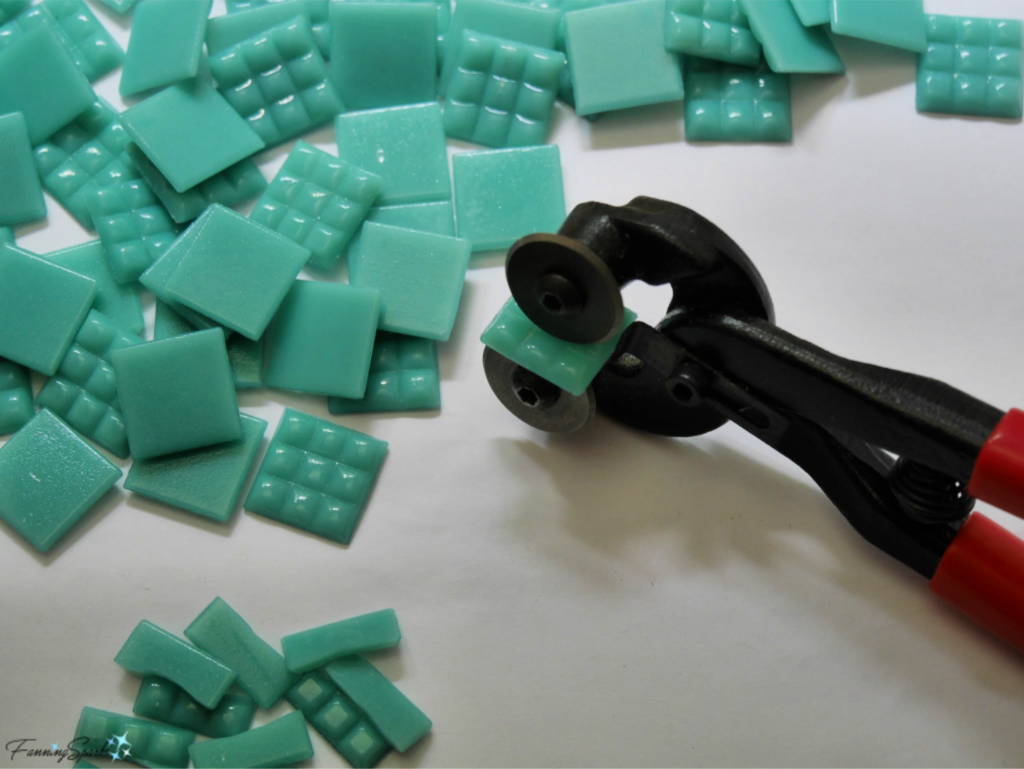
A little experimentation also helped to determine the composition of the border. With the exception of the mirror tiles, the borders are made of ¾” x ¾” vitreous glass tiles (see More Info below). I chose 4 colors from the Kaleidoscope Color Grove line: Smoke, Night, Rochester and Alpine Blue. I love using these tiles‒the colors are vibrant and they’re easy to cut.
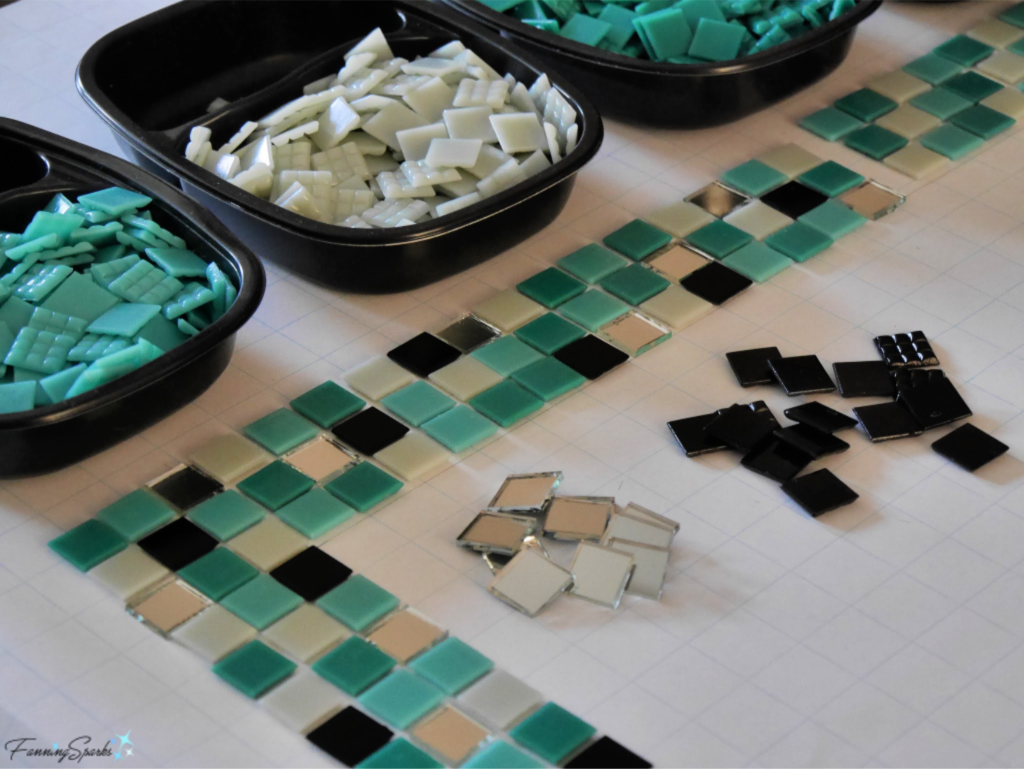 Here’s a closeup showing the bottom of the tiles‒they are formed into 9 quadrants for good adherence but that also makes them easy to cut with a pair of tile nippers.
The mirror tiles are cut from a sheet of mirror glass. First I measured and marked lines to cut a ¾” strip of glass. Then a glass cutter was used to score a line in the glass.
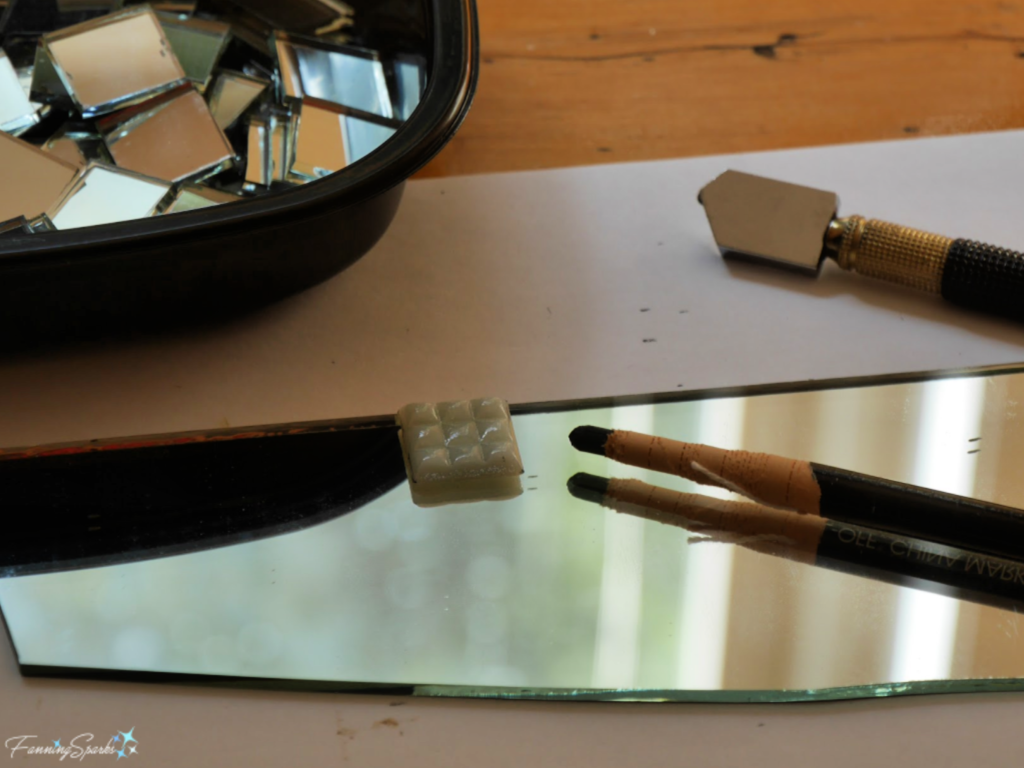
After scoring the glass, running pliers were used to run the score and separate the glass pieces. The running pliers have a slightly curved jaw which ensures equal pressure is applied on both sides of the score line. The trick is to align the pliers with the score line and squeeze firmly.

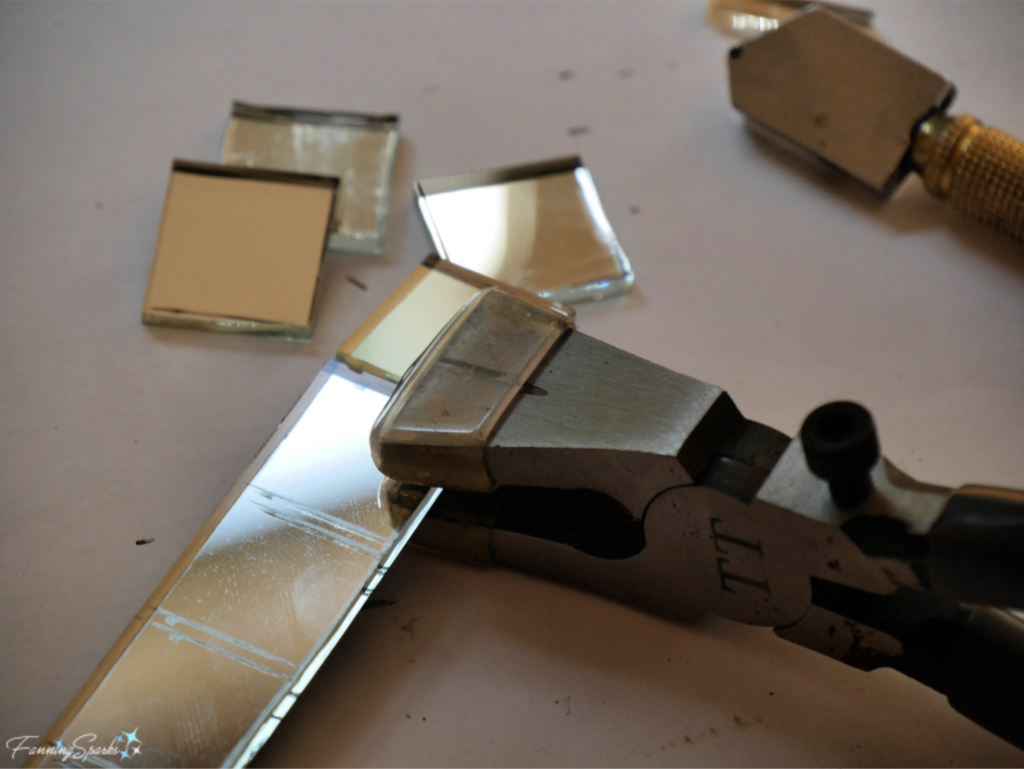
Turning that strip of glass, into tiles is a simple matter of scoring and breaking into ¾” squares‒over and over again.
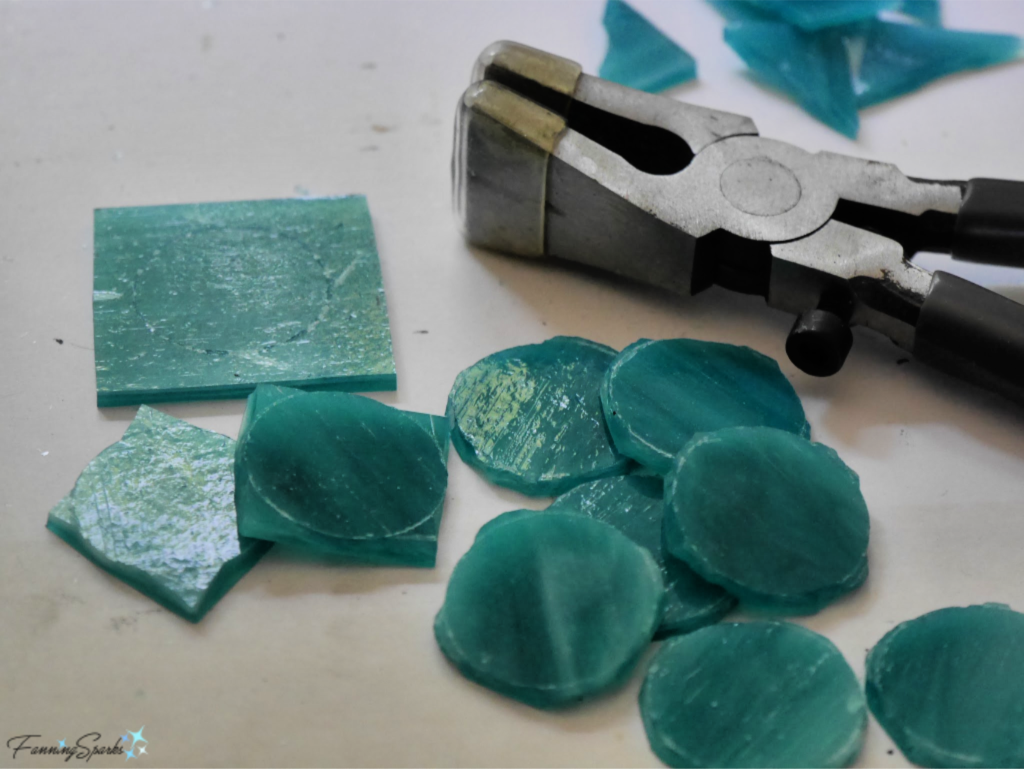
The round circles for the bubble corners required a little more work. I purchased a handy circle cutter called an Easy-Cut (see More Info below). I really like this cutter. But if you’re thinking of buying one, don’t expect the circles to simply fall out of the cutter.
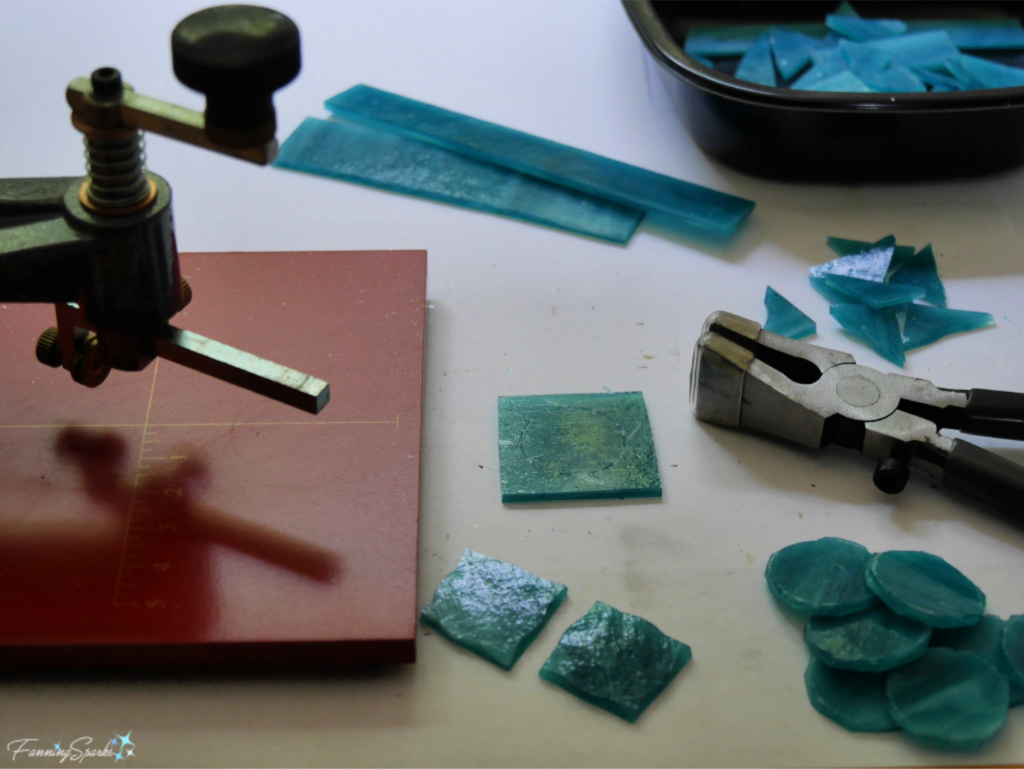
The cutter does a beautiful job of creating a perfect round score but you’ll have to extend that score to all the edges to actually break out the circle. And you’ll surely want an electric grinder (see More Info below) to smooth and finish those edges.
Once the design was finalized and the glass pieces were cut, it was time to start putting it together. This is where I would highly recommend a self-adhesive fiberglass mesh such as QuikStik Mosaic Mesh™ (see More Info below). This is the first time I tried this product but I swear I’ll never again take on a project like this without it. The reason is simple, it cuts the time required for this step in half. Seriously! Without this mesh I had to pick up every single tessera and glue it into place on the final piece… one tessera at a time. Usually this meant synchronizing two versions of the layout… one for planning and one for gluing. It was tedious, to say the least. With QuikStik, I cut the mesh to fit my backing and then positioned my tesserae. I could adjust until I was happy with the design and then I moved on to the next step. There’s no need to manage a second version of the design and no need to pick up and glue every single tessera individually.
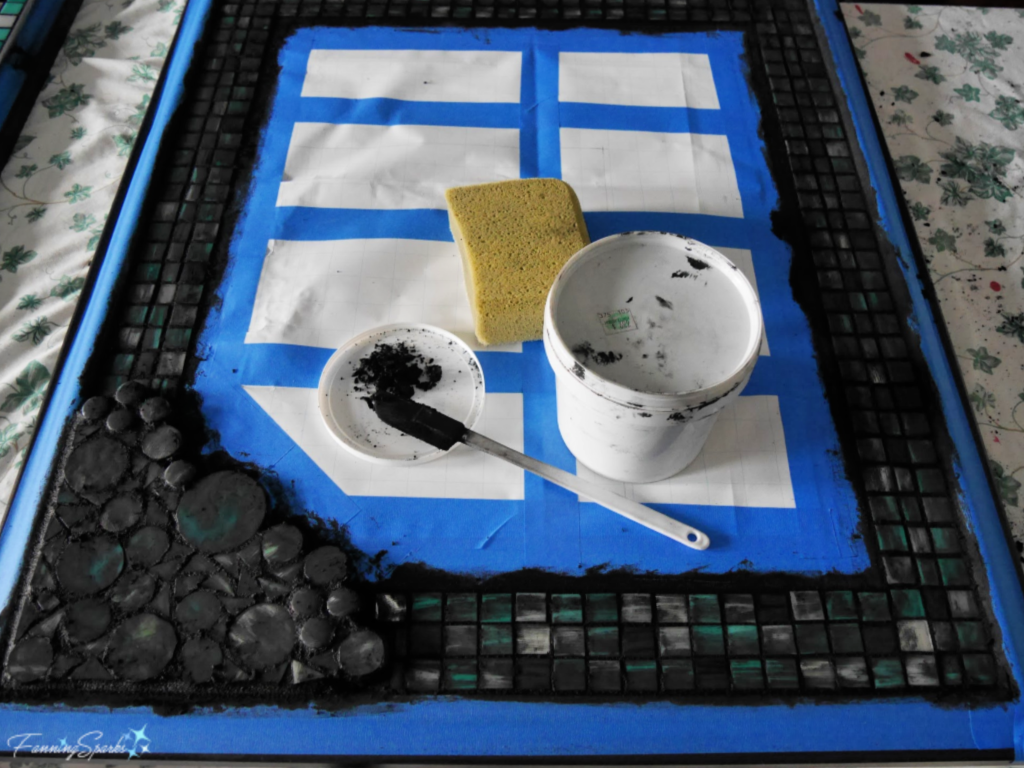
After all the tesserae were in place, I carefully lifted the mesh out of the frame and set it to the side. I taped the edges of the frame and covered the mirrors with paper to protect them. Then I prepared and applied a thin layer of thinset mortar to the border and the bubble corner.
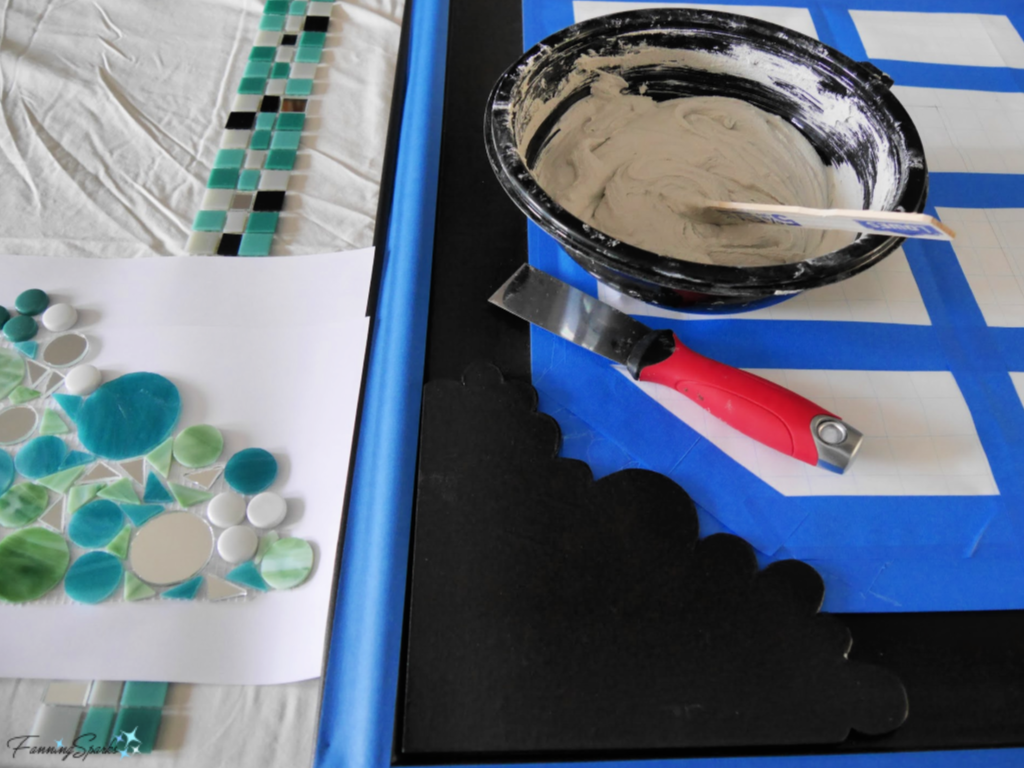
I carefully lifted the mesh back into place to permanently attach the tiles. Here’s how the tesserae and mesh look sitting in the thinset.
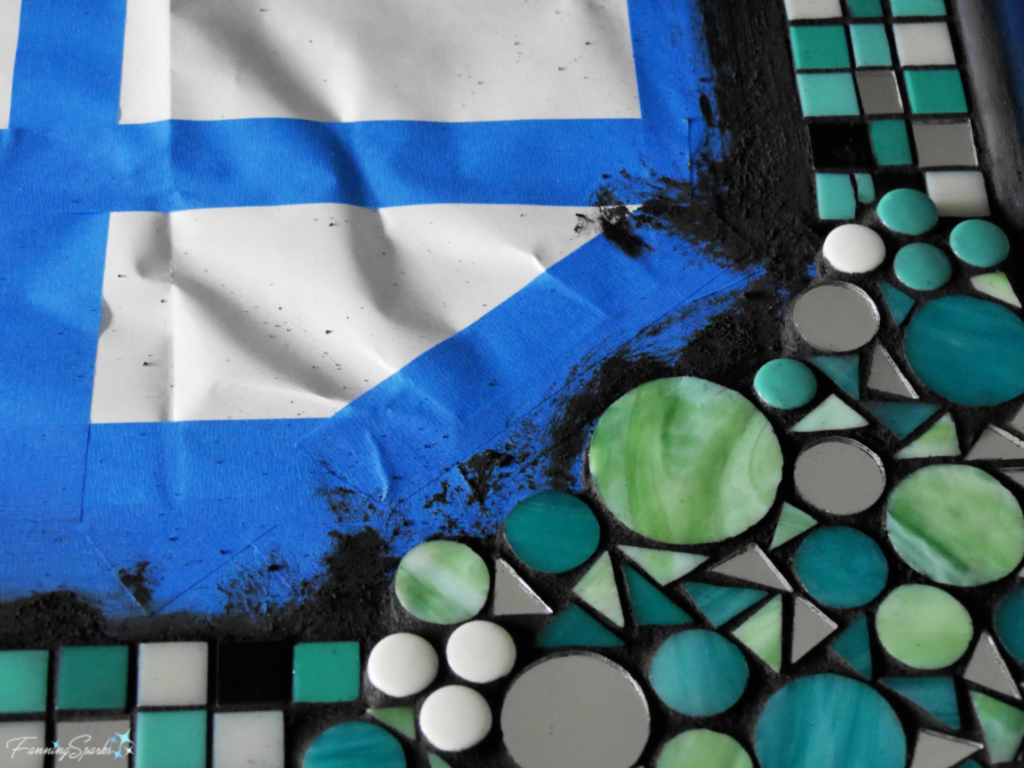
After waiting 24 hours for the thinset to harden, I was able to apply the grout. Here’s my frame covered in black grout.
Next I removed the excess grout and, after letting it sit for 20-30 minutes, I removed the haziness. Finally it started to look like the desired result.
The final steps were to let the grout cure and then to seal the piece with a tile and grout sealer. I hope you’ve enjoyed this glimpse into the making of a mosaic mirror. I’ve already started my next project and can’t wait to see how it turns out.
Aug 21, 2019 Update: Please Note: Ordinary glass mirror stock will oxidize and blacken if the silver backing comes into contact with ordinary adhesives. To prevent that from happening, I used special mirror adhesive to adhere the mirror to the frame. The mirror tiles in the decorative border, however, were adhered with thinset so they may blacken over time. Alternatively, I could have used pre-made mirror tiles which have a special epoxy coating to protect the silver backing. Special thanks to Joe Moorman from Mosaic Art Supply for this clarification.
More Info
The frame-less mirror I used is from Ikea. It is the EIDSÅ Mirror in 18 ⅞” x 23 ⅝”.
The ¾” vitreous glass tiles are from the Kaleidoscope Color Grove line by Mosaic Tile Supplies (MTS). MTS is the manufacturer of Kaleidoscope®, Prism® and Illuminati® Glass Mosaic Tile Brands, and more. You’ll want to optimize your order since shipping costs are pricey.
The glass circle cutter is Easy-Cut from Diamond Tech International. It cuts ½” to 5” diameter circles.
The self-adhesive fiberglass mesh I used is QuikStik Mosaic Mesh™ from Skeew. Lou Ann Weeks, who is the co-founder of Skeew, has been a mosaic artist for nearly 20 years. She has published a wealth of helpful information about making mosaics which you can access on her website under How To > Make Mosaics > Articles.
The electric grinder I use is a Gryphette Diamond Grinder from Gryphon Corporation.
There’s another online source of supplies and helpful reference material I’d highly recommend. It is Mosaic Art Supply. I’ve always had a good experience purchasing from them plus their online reference info found under Learn to Mosaic is clear, practical and reliable. I’ve consulted it numerous times and have always found good advice.
Today’s Takeaways
1. Experience the joy of making.
2. Consider trying mosaics‒they offer a vast variety of styles, materials and uses.
3. Imagine how you can customize and personalize a mosaic project for your own home.


2 Comments
@Cat – Thanks! It takes practice, as I’m sure you know :-). I can’t wait to try glass fusing at your studio. In fact, I already have a project in mind.
You make it sound so easy! Looks beautiful! 🤗 Next time you are up this way, and now that you have glass cutting skills, come by to try glass fusing! 😻