
Cordmaking is the ideal portable handicraft. It’s straightforward to learn, easy to start and stop, conveniently compact and lightweight, and doesn’t require much concentration. It’s well-suited to occupy your hands while on a long car trip, watching TV or attending a Zoom call. The repetitive motions can be very relaxing and soothing… even meditative. Cordmaking is a simple process—you manipulate fiber strands into a knotted cord.
There are many techniques for making cord, such as braiding and twisting, but the method I’d like to share is using a lucet. A lucet is a simple tool that resembles a two-pronged fork. It’s surprisingly simple to make and use. I’ll show you how in today’s tutorial.
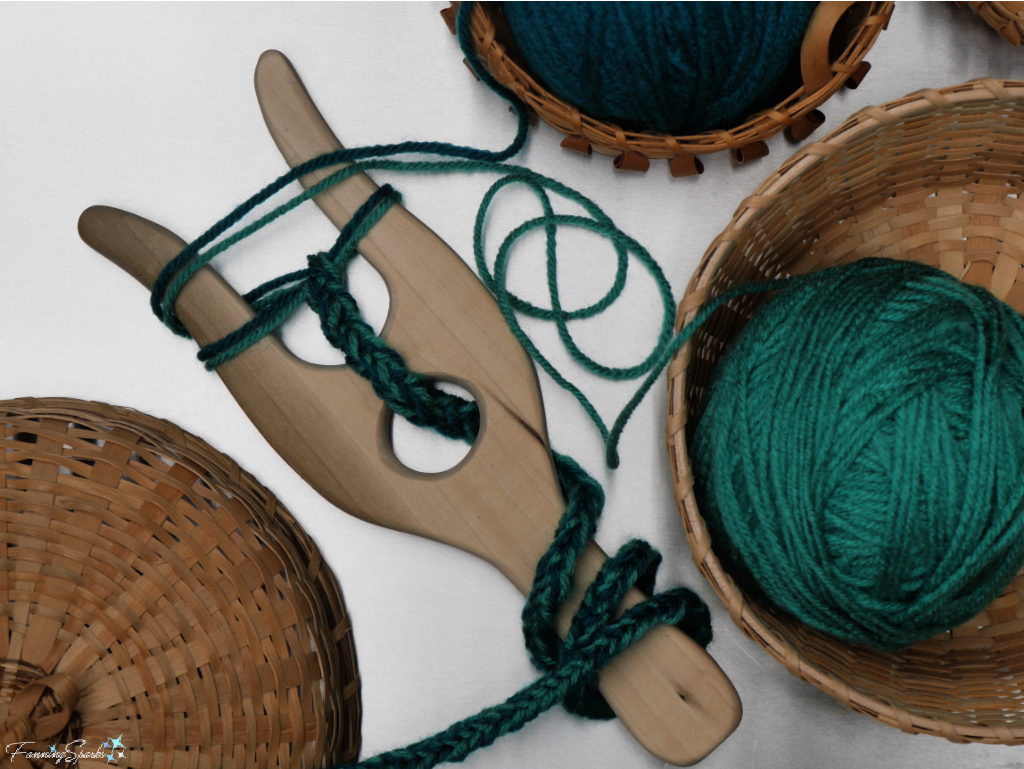
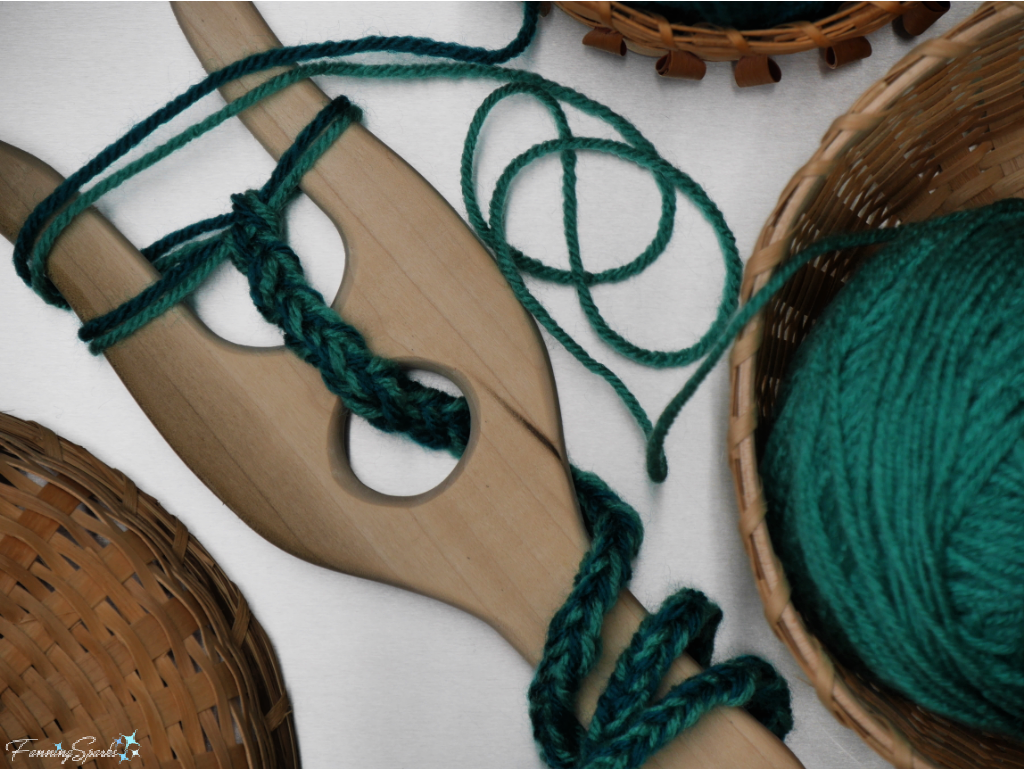 A lucet makes a strong, square woven cord. One advantage of luceted cord is it doesn’t unravel when cut. Another advantage of this method is that it’s not necessary to pre-cut the cording material. If using yarn, for instance, you work directly from the ball of yarn and continue until the desired length is reached.
Lucet cordmaking has a long history. It is believed to date back to the time of the Vikings (800-1050 AD). The original lucet, or “tvinningsben” (said to mean “twisting string” in Scandinavian), was fashioned from bone or horn and used to make strong cord or rope from wool, flax or leather. An archaeological find of braided cord remnants, retrieved from a woman’s burial site in Gotland, Sweden, are believed to have been made with a lucet.
We won’t be making a tvinningsben out of bone in today’s tutorial but I will be showing you how to make a lucet out of wood.
Supplies Needed
Very few supplies are needed to make the lucet:
. Template Download DIY Lucet – Complimentary Download to print the template for the lucet
. Wood Piece of ½” pine or poplar slightly larger than 3 ½” x 9”
. Paper for printing template
. Sandpaper in fine and extra fine grits I used 220 and 400 grit.
Tools and Equipment Needed
The following tools and equipment will be needed:
. Printer for printing template
. Scissors
. Pencil
. Jigsaw
. Drill
. Wood carving knife or similar tool to round off edges
Instructions to Make Lucet
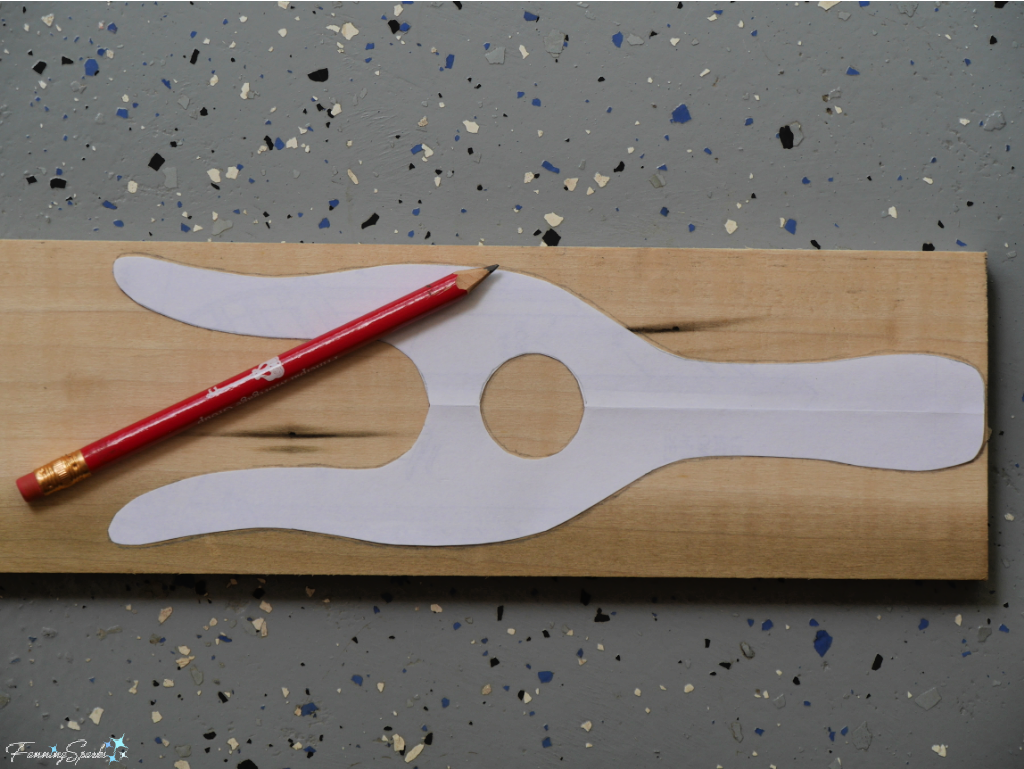
Step 1 Prepare Template Download the DIY Lucet – Complimentary Download to print the template for the lucet. Take care to ensure the scale is accurate on your printed version. See specifics in the download document. Trim template with scissors.
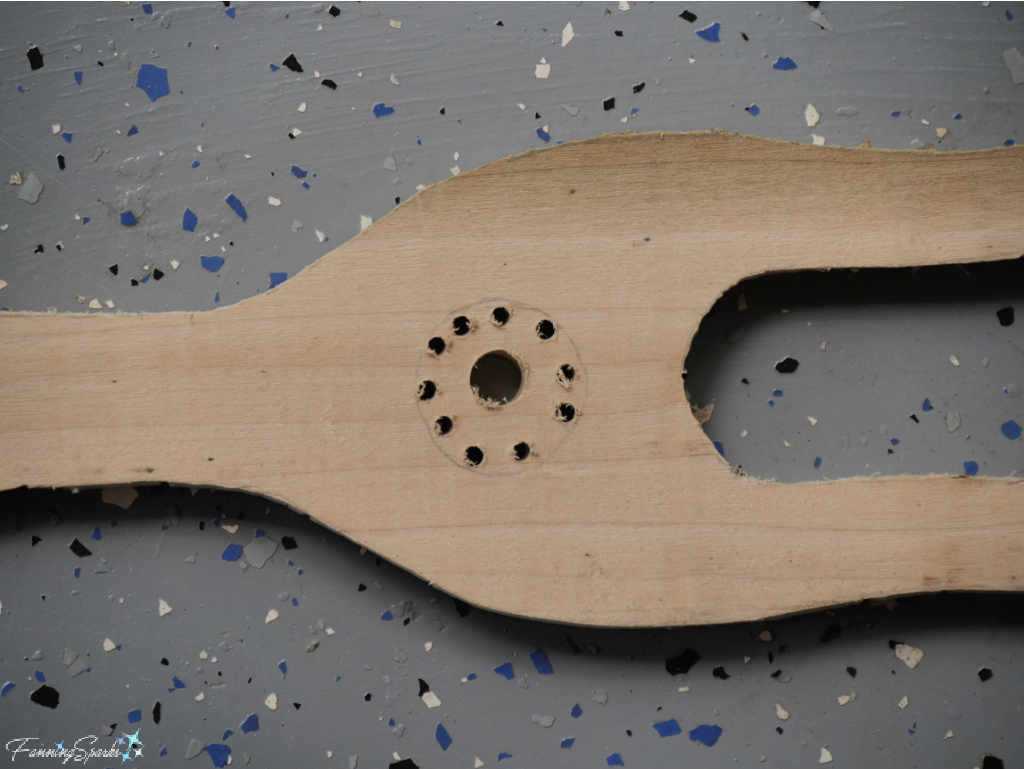
Step 2 Cut and Drill Wood Trace template on wood.
 Use jigsaw to cut along marked lines.
TIP: Make a series of relief cuts, just up to the cutting line, to make it easier to cut the inside curve.
 TIP: Use the drill to bore a series of holes in the center hole to make it easier to cut with the jigsaw.
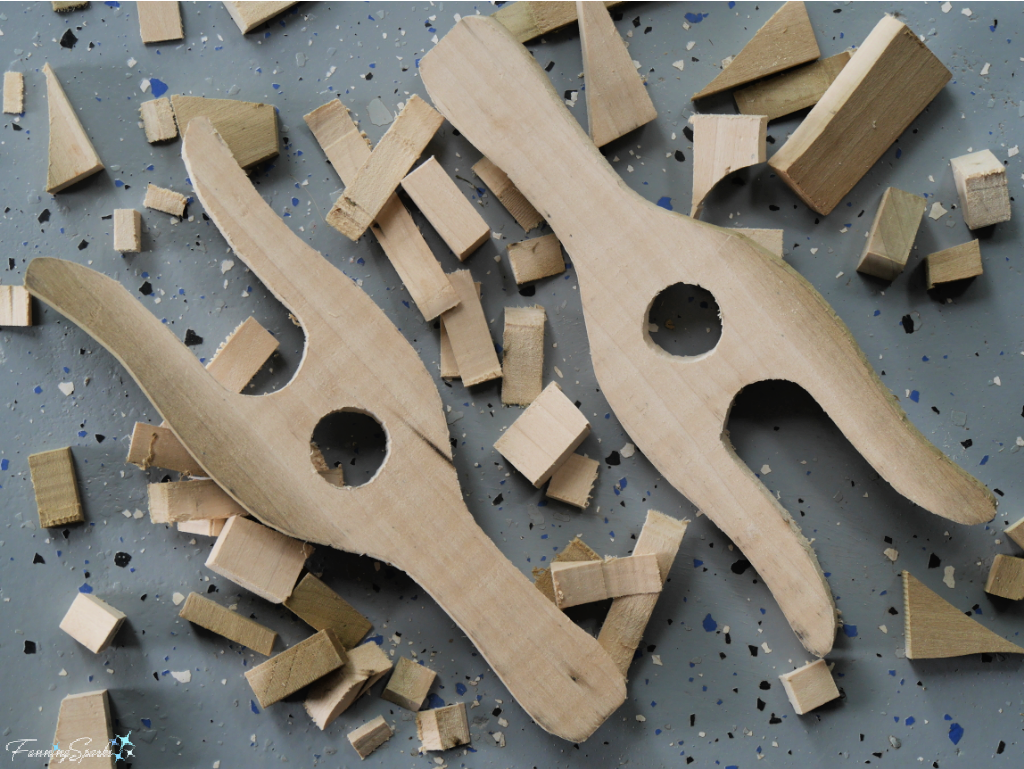
 I made two lucets. Here’s how they looked at this stage.
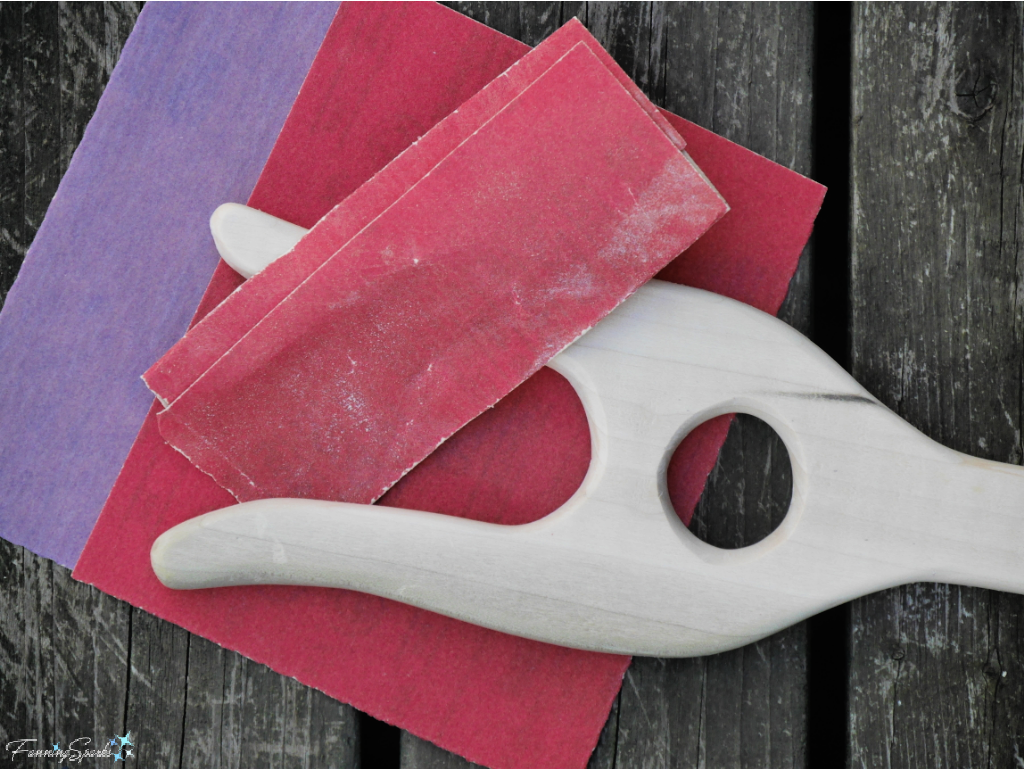
 Step 3 Finish and Sand Use a wood carving knife to round the edges of the lucet.
 Sand smooth with fine and extra fine grits sandpaper. This is an important step since any roughness, especially along the prongs, can snag your cording material.
 Instructions to Use Lucet
These instructions are for a single turn, right handed technique. There are several variations on this technique including left-handed, no turning, multiple threads and decorative additions such as beads. In this technique, all the action takes place on the prong on the right side. You continually flip over the lucet—over and back—to alternate which prong is on the right side. I’ll refer to this prong as the working prong.
To help clarify the instructions, I marked the Left Prong (“L” and single band), Right Prong (“R” and double band), Front Face (“F” and single circle) and Back (“B”) on this lucet.
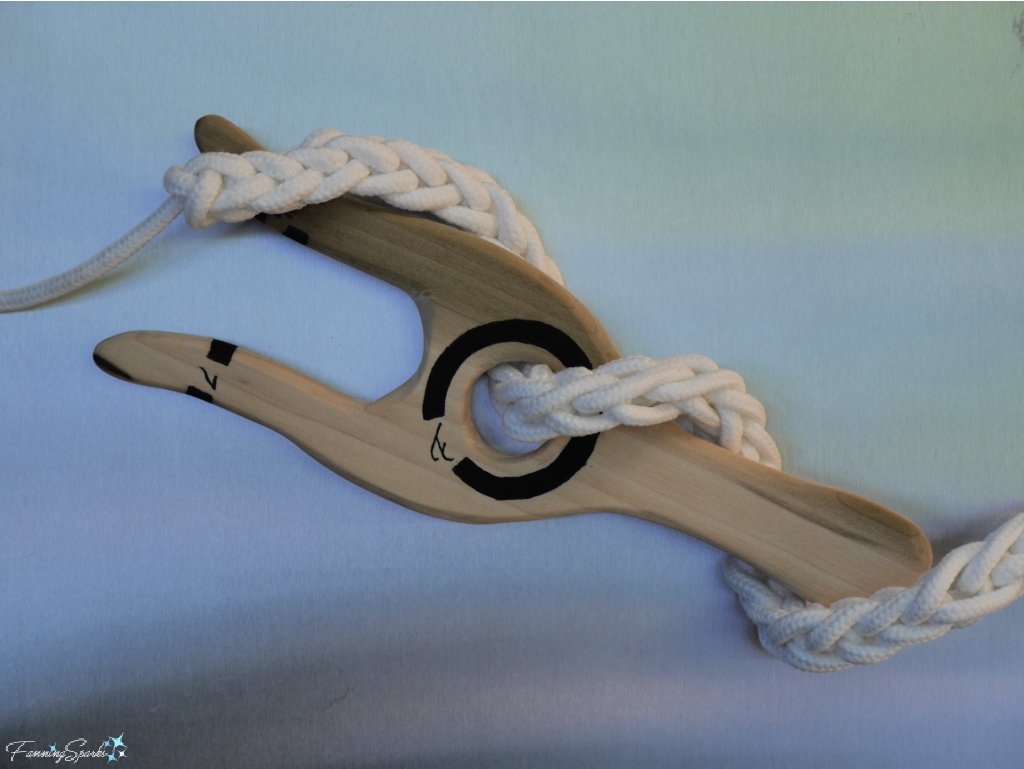 I used rope for this demonstration but you can use string, yarn, twine or other fiber strands. Results will vary from individual to individual and from one material to another but 1 foot of ¼” rope gave me 1 inch of luceted cord. Plan for approximately 1’ to 1”.
Tip: To determine how much cording material you’ll need for an actual project, make a test sample first. I found it easiest to mark my rope with a few stitches of brightly colored thread at the 6”, 18” and 30” points. I reserved the first 6” for the tail and corded past the 30” mark. By measuring my finished cord between the 6” thread marker and the 30” thread marker and dividing by 2, I was able to determine I used 12” of rope for every 1” of finished cord.
Please reference the photo below for these Lucet Cordmaking Instructions.
Step 1. Insert the rope through the hole toward the back leaving a 4-8” tail. Loosely wrap the rope in a figure eight around the prongs as shown in Figure #1. Hold the lucet and the tail in your left hand.
Step 2. Use the finger and thumb from your right hand to “pinch” the bottom loop on the working prong (ie right prong) and pull out slightly. See arrow in Figure #2.
Step 3. Slip the rope up and over the working prong, moving rope loop from the front to the back, as shown by the arrow in Figure #3.
Step 4. Gently slide the knot towards the center. Keep the working end of rope towards the left.
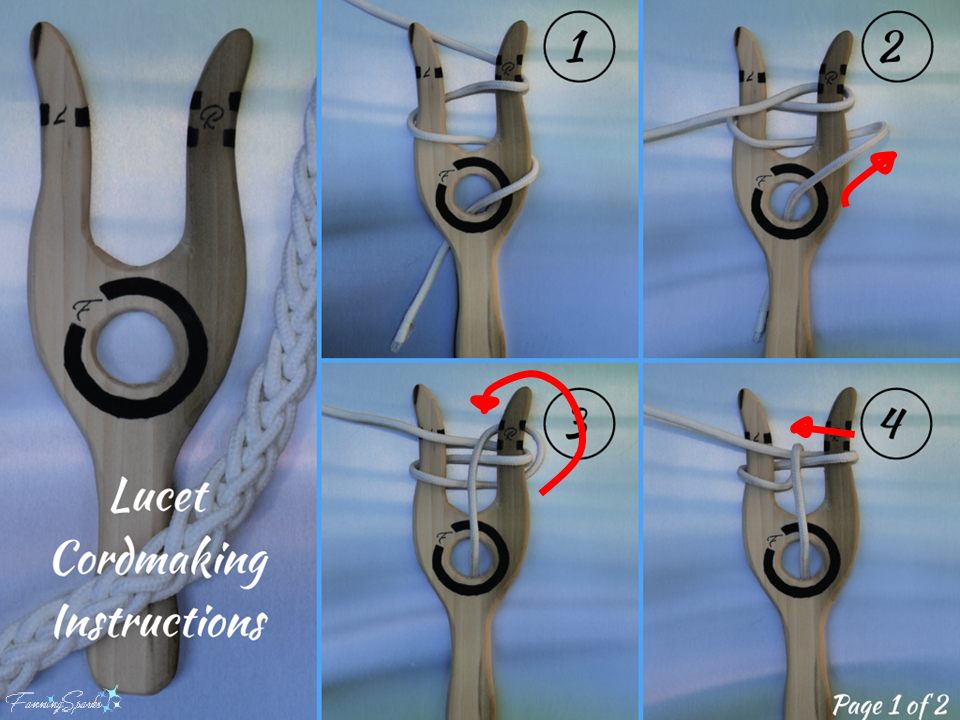
Step 5. Flip the lucet over by turning towards the left. See arrow in Figure #5. This should result in the rope being wrapped around the working prong above the first loop. Note the working prong is now the left prong positioned on the right side.
Step 6. As we did in Steps 2-4, use finger and thumb from right hand to pinch the bottom loop on the working prong, pull out slightly, slip the rope up and over the working prong, and gently slide the knot towards the center.
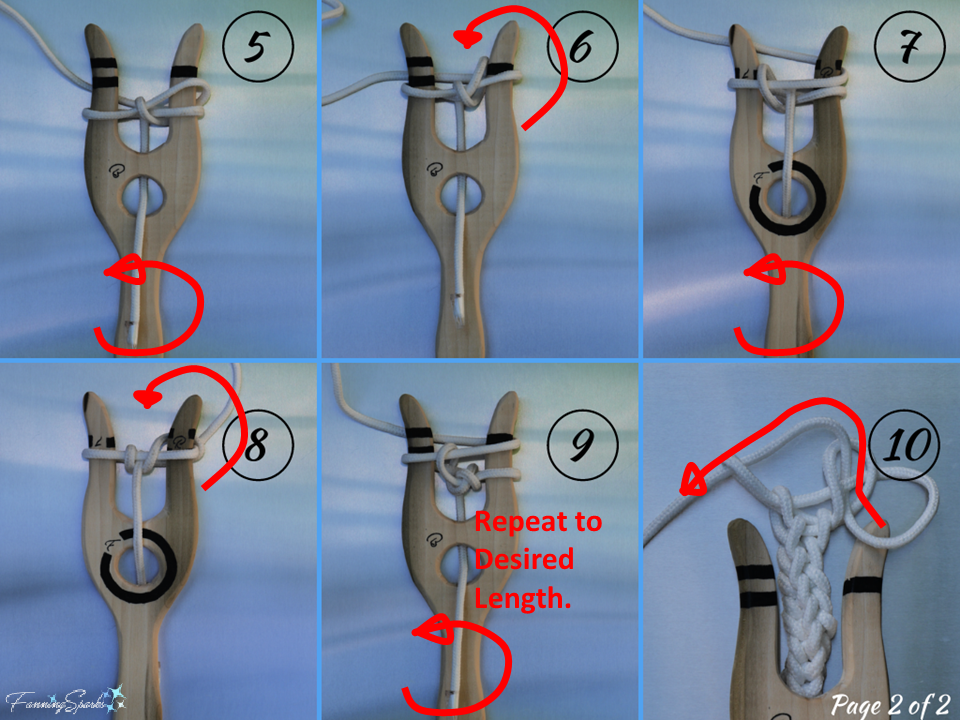
Steps 7-9. This is where the technique becomes repetitive. Flip, slip up and over. Flip, slip up and over. Flip, slip up and over. Adjust and fine-tune as you go to maintain a consistent tension. Keep the completed cord centered and flowing through the hole smoothly. Flip, slip up and over. Flip, slip up and over.
Step 10. When you reach the desired length, gently slip the loops off the lucet prongs and pull the end of the rope through the loops. Tighten.
 Once you get the hang of it, cordmaking goes surprisingly fast. I’ve been experimenting with different materials and tweaking my technique. Using a double strand of yarn, in two different colors, makes an interesting cord. And, of course, there’s the follow-on question of how to use all this lovely cord. But that’s a topic for another day!
More Info
You can download the lucet template here: DIY Lucet – Complimentary Download
Stitch Diva Studios features uncommon knit and crochet designs as well as lucet tutorials.
Stephen Willette is a maker of heirloom fiber art tools including lucets. He also offers video tutorials on how to use them.
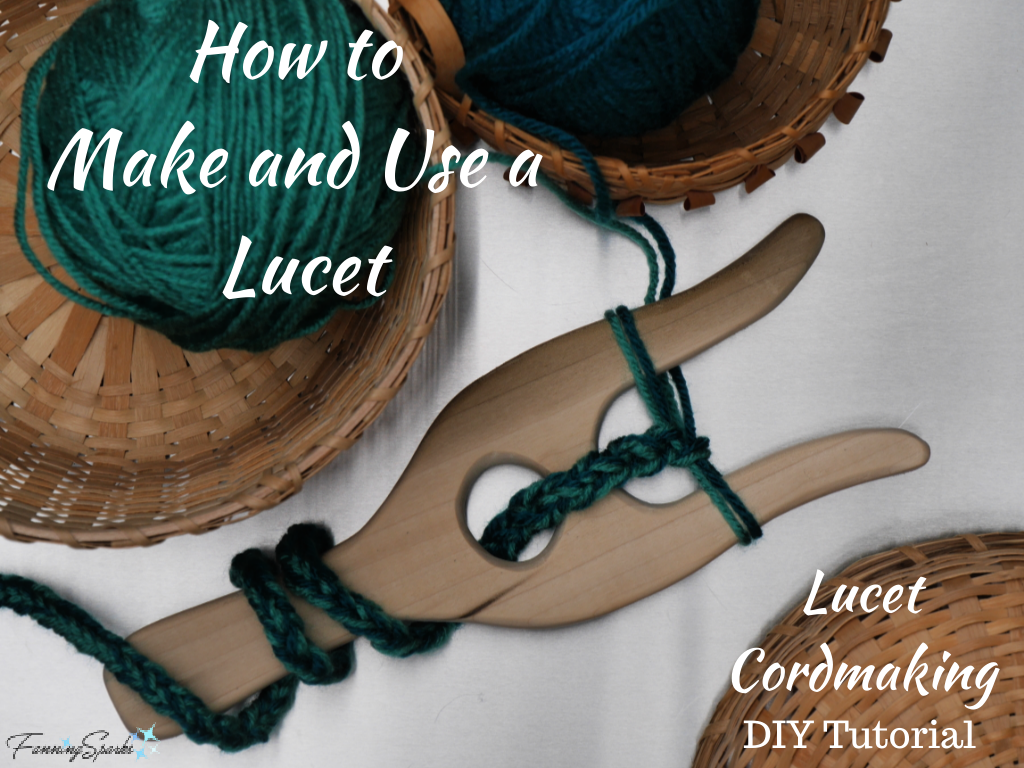
Please pin this image to share and save for future reference.
Today’s Takeaways
1. Cordmaking with a lucet is an unusual, old world handicraft.
2. Consider making your own wooden lucet.
3. The simple, repetitive movements of lucet cordmaking can be very relaxing.


Comments are closed.