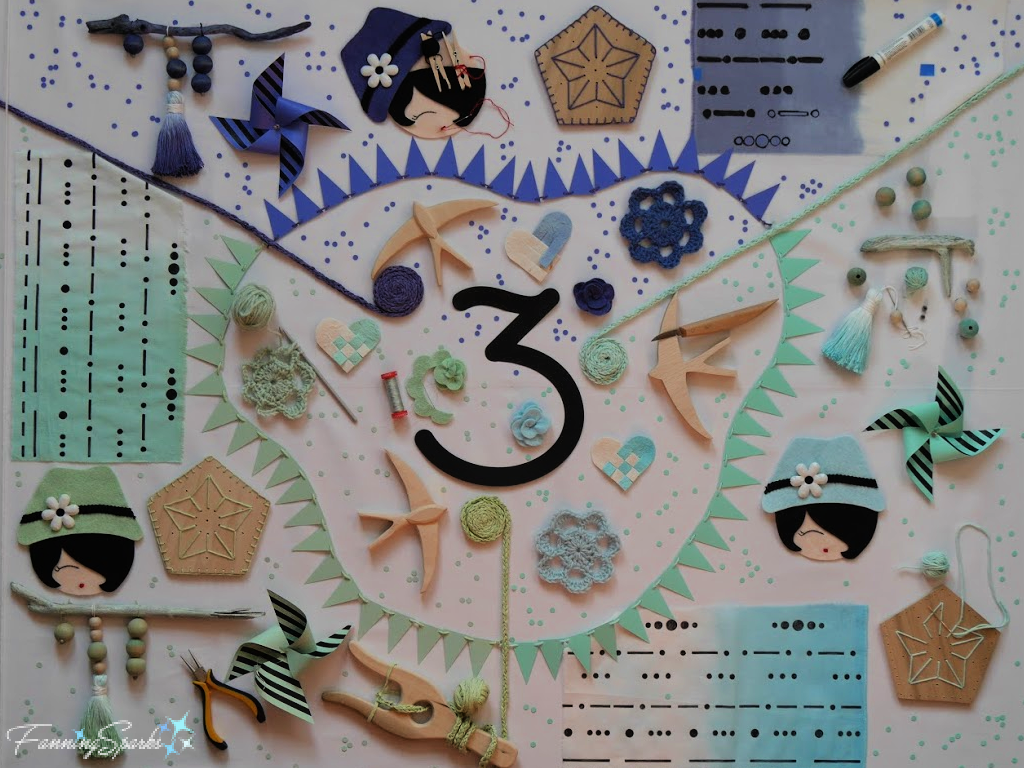
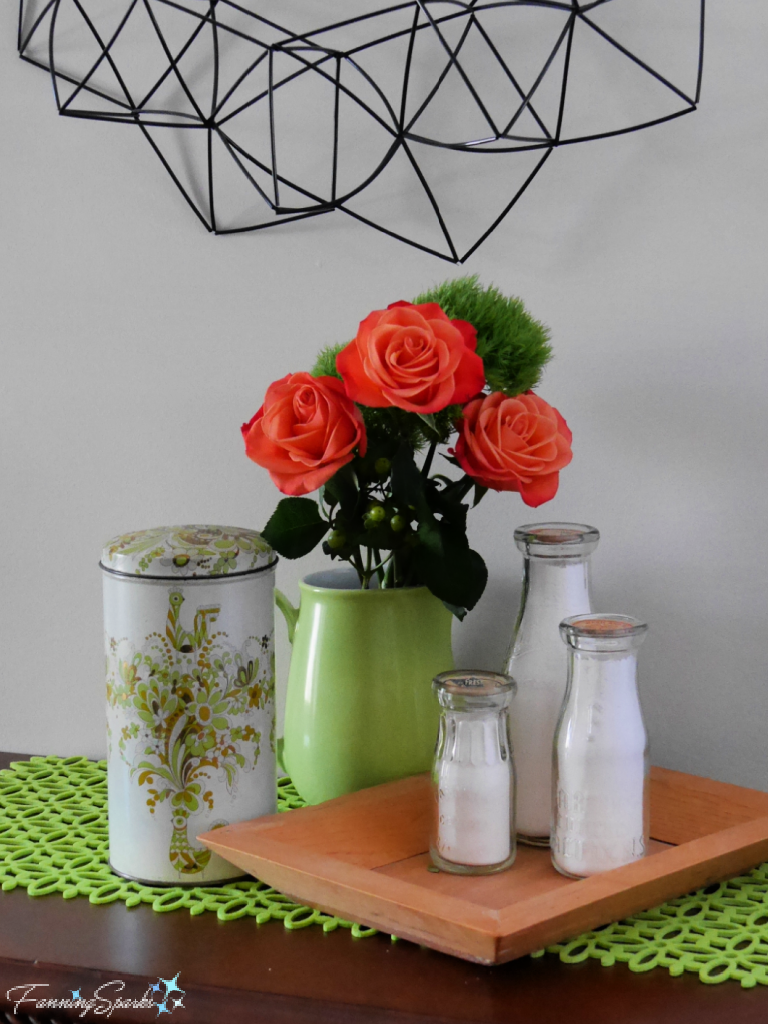
FanningSparks is celebrating a birthday this week—the blog turns 3! It’s the perfect time to stop and say Thank You! Thank you for following along with my blogging adventure. Thank you for taking the time to read the stories and look at the photos. Thank you for your words of encouragement, kind comments, generous likes and shares. I sincerely appreciate your support. To mark this special milestone, I created this elaborate flat lay featuring a variety of projects.
For today’s post, I’d like to take a step back and share some of the blog’s accomplishments from the last 3 years. There are 3 sections in this post: FanningSparks Blog, FanningSparks Social Media Platforms and FanningSparks Recognition and Feedback.
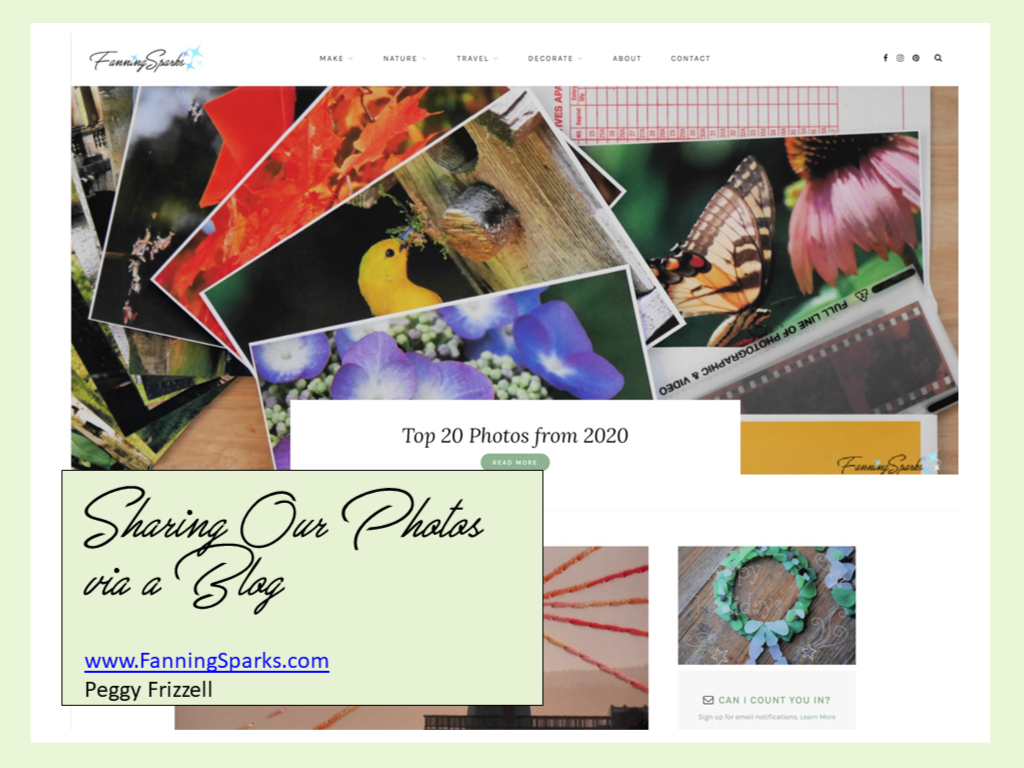
 Stories and photos are published on the blog, at www.FanningSparks.com, every Tuesday. This post marks the 159th time I’ve hit the publish button. Readers sometimes ask if I’m worried about running out of things to post about. Surprisingly, I’m not— I keep a running list of ideas that has far more topics than I could ever address. This endless list of things to see, to learn, to try and to share is what keeps me energized and the blog in motion.
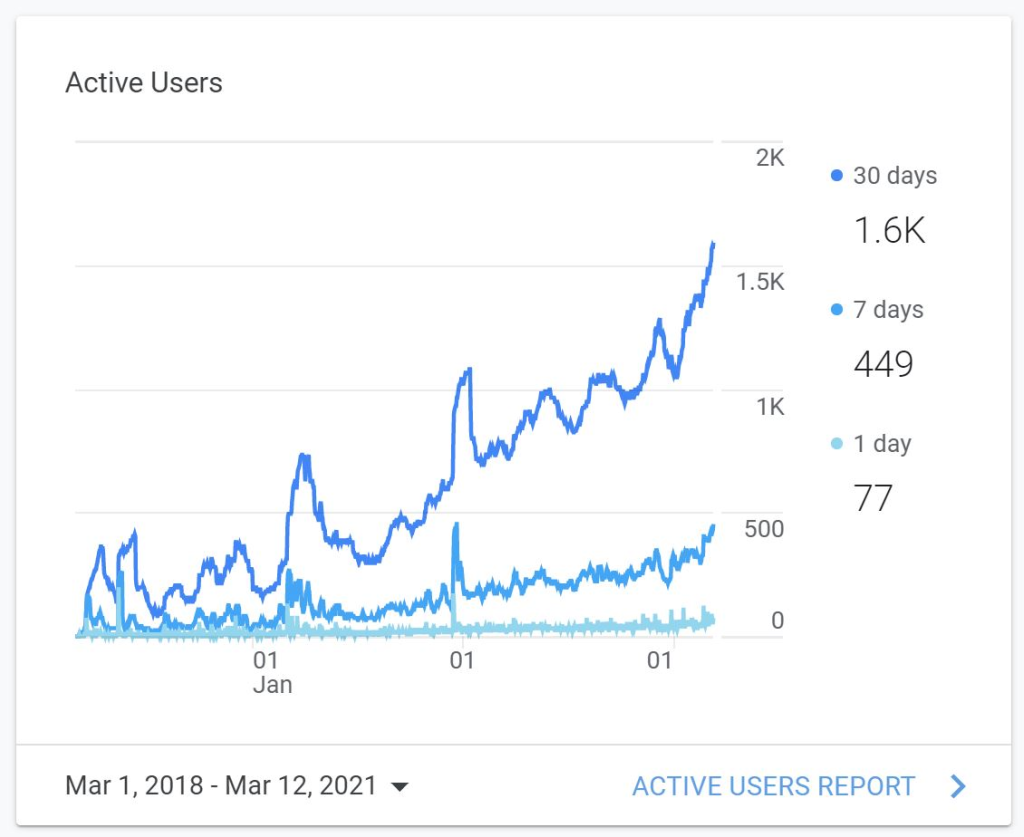
The blog’s audience continues to grow. Over 21,500 people have visited the blog since its launch and the growth trend is positive: Year 1 -> 3,000; Year 2 -> 6,000; Year 3 -> 12,000. Below is a trend chart from Google Analytics that shows the number of active users (ie visitors to FanningSparks) over the last 3 years. As indicated, the 3 trend lines represent the average number of visitors in 1 day (77 daily), 7 days (449 weekly) and 30 days (1,600 monthly).
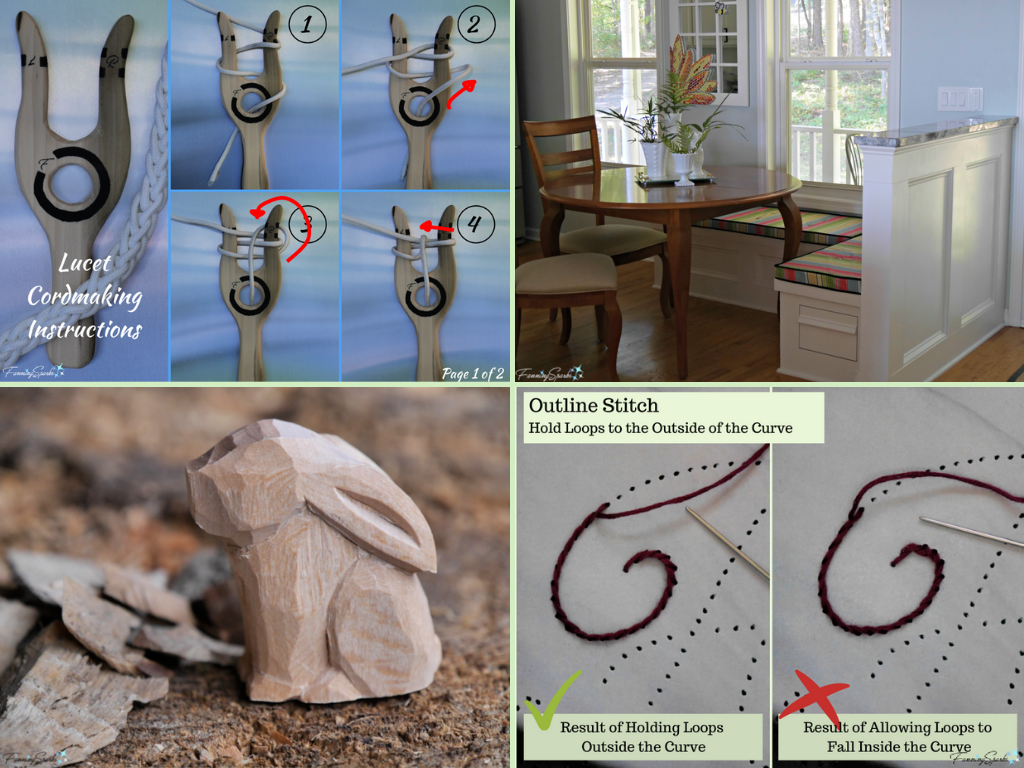
Google Analytics also calculates which posts are the most popular. Shown below are photos from the top 10 FanningSparks’ posts since the beginning of the blog. Long-time readers may recognize some of these from last year. The post titles are linked below the photo.
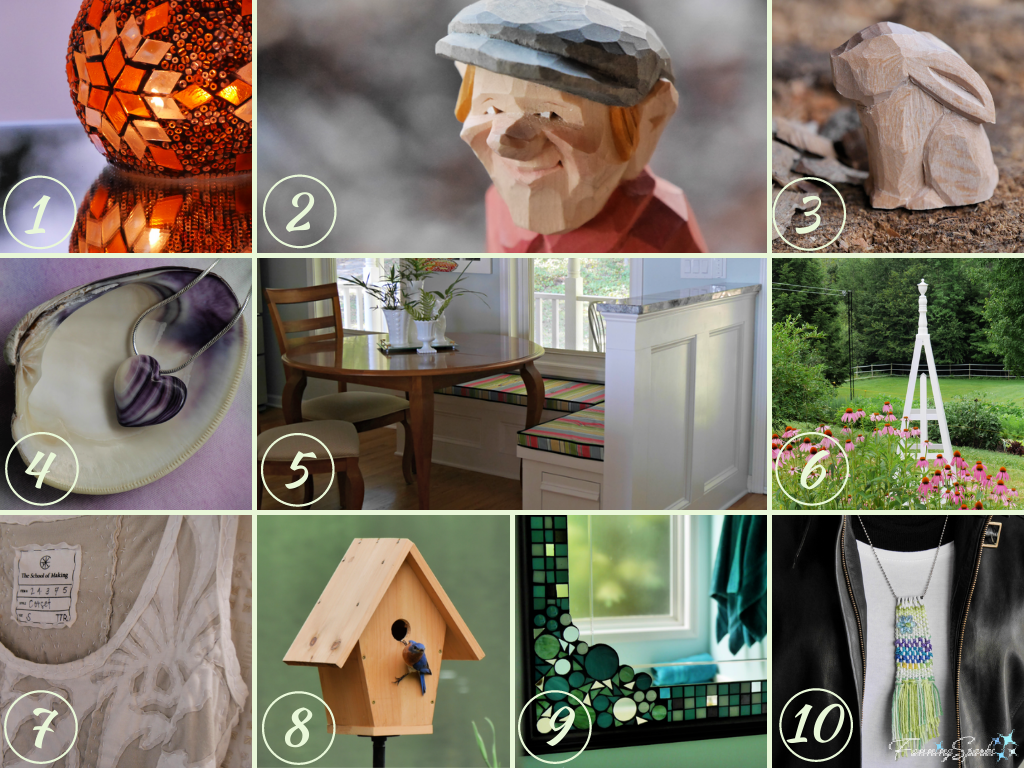 1. DIY Turkish Mosaic Candle Holder Tutorial
2. Flat-Plane Carving with Harley
3. Getting Started with Woodcarving
4. Artisan Transforms Quahog Shells
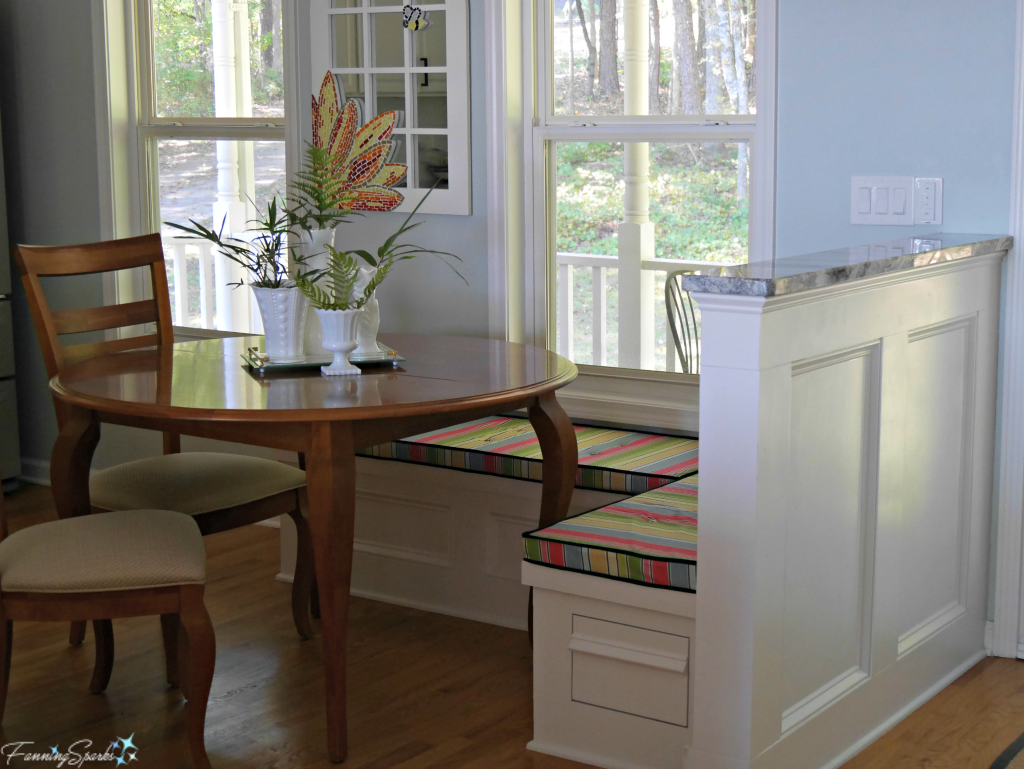
5. Our Pony Wall and Banquette Combo
6. DIY Pyramid Trellis Tutorial
7. A School for Makers
8. DIY Bluebird-Approved Birdhouse Tutorial
9. Pair of Mosaic Mirrors Completed
10. DIY Woven Statement Necklace Tutorial
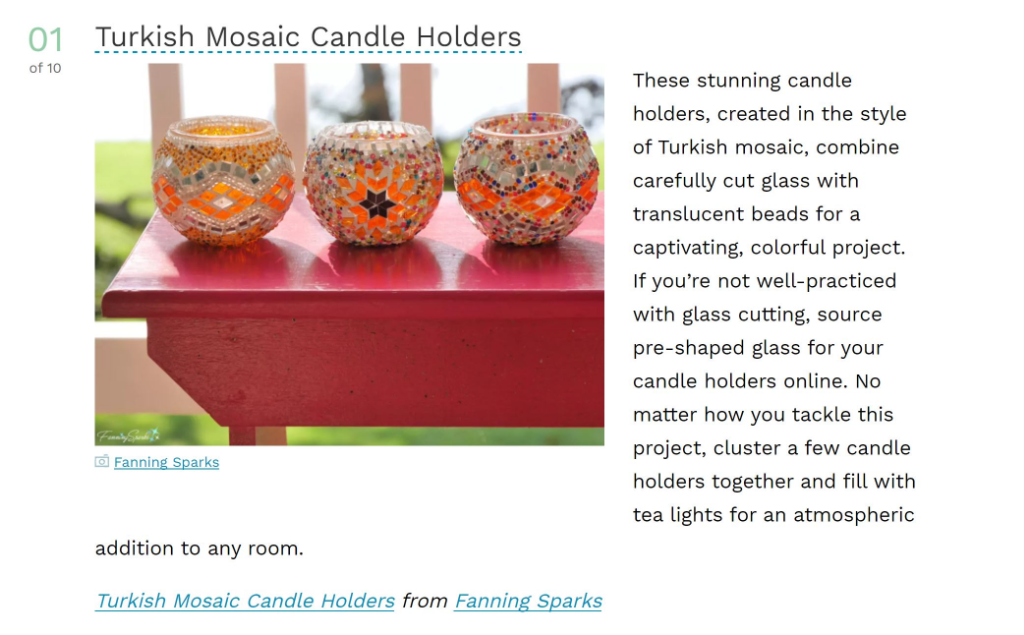
Interestingly, the DIY tutorial post for a Turkish Mosaic Candle Holder shot to the top after being picked up by a couple of aggregator blogs. When The Spruce Crafts blog mentioned FanningSparks in their April 20, 2020 post 10 Mosaic Ideas to Try at Home, I noticed an immediate increase in the number of viewers. Here’s the coverage from that post.
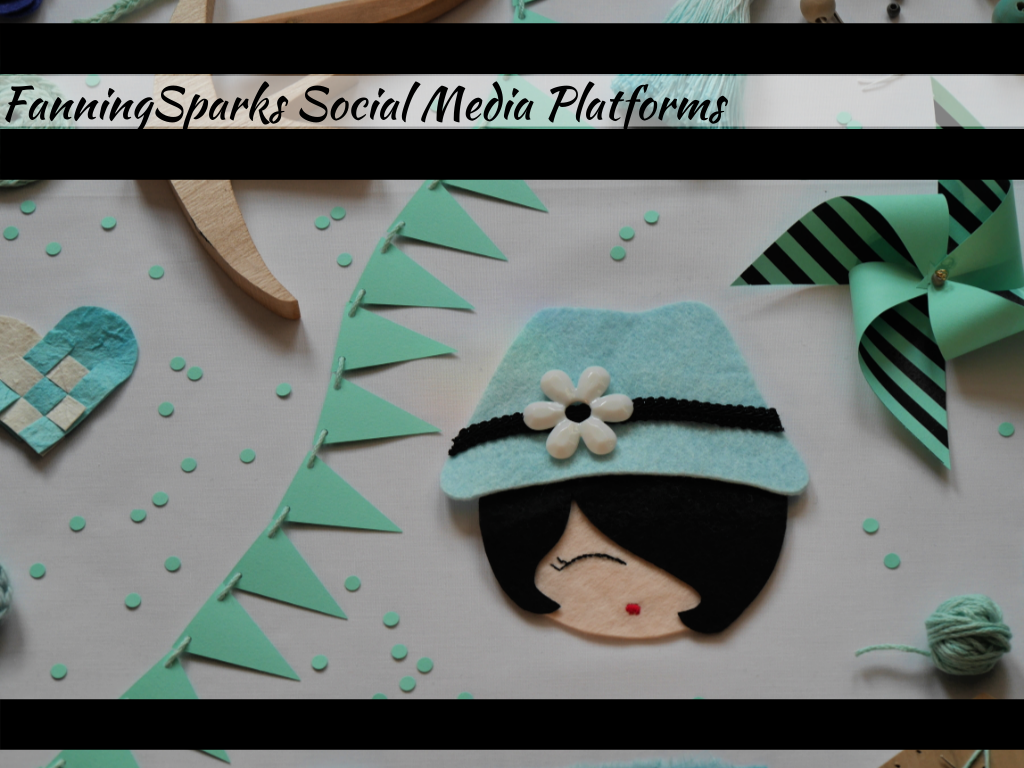 The FanningSparks presence on Instagram, Facebook, Pinterest and Bloglovin’ continues to be well received. Surprisingly, Pinterest is the channel with the most action. I’ve created over 3,600 pins (ie saved photos) and I’m thrilled to have 268 people following my Pinterest boards. It took a while to create this momentum but the amount of exposure Pinterest now provides to the FanningSparks blog is astonishing! In the last 90 days, Pinterest has shared FanningSparks’ pins over 1 Million times showing them to over 872,000 Pinterest visitors. This has resulted in over 27,000 engagements (meaning clicks, saves or shares)—27,000 engagements in only 90 days! Amazing! This represents twice as many Pinterest engagements as last year.
Here are the most popular FanningSparks’ pins from the last 90 days. There’s a noticeable correlation to the top posts especially for the DIY tutorials. The posts that originated these pins are linked below the photos.
1. Lucet Cordmaking – DIY Tutorial
2. Our Pony Wall and Banquette Combo
3. Getting Started with Woodcarving
4. Hello Marvelous Photo Embroidery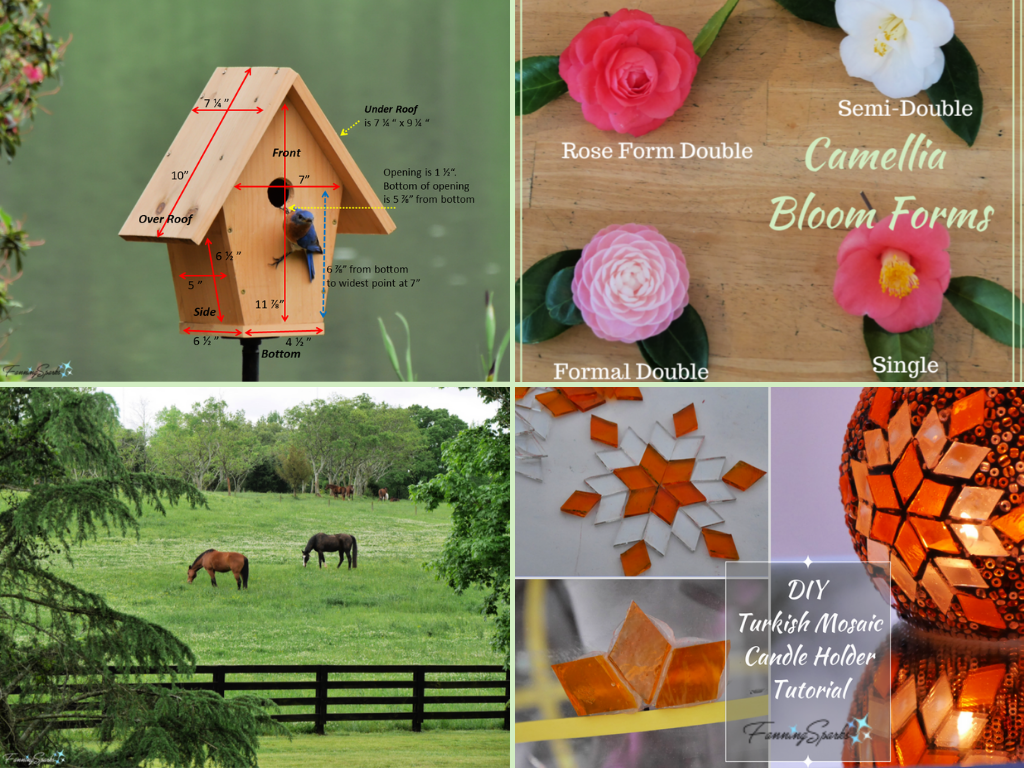
5. DIY Bluebird-Approved Birdhouse Tutorial
6. Camellia Road Trip
7. Spring Into a Garden Tour
8. DIY Turkish Mosaic Candle Holder Tutorial
There are a number of ways to follow along with FanningSparks: Instagram, Facebook, Bloglovin’ and email subscription. I announce my weekly posts via each platform so readers can stay up to date via their preferred channel. Each platform has a healthy number of followers. Instagram → 123 followers. Facebook → 62 followers. Bloglovin’ → 85 followers. Email Subscription → 56 followers.
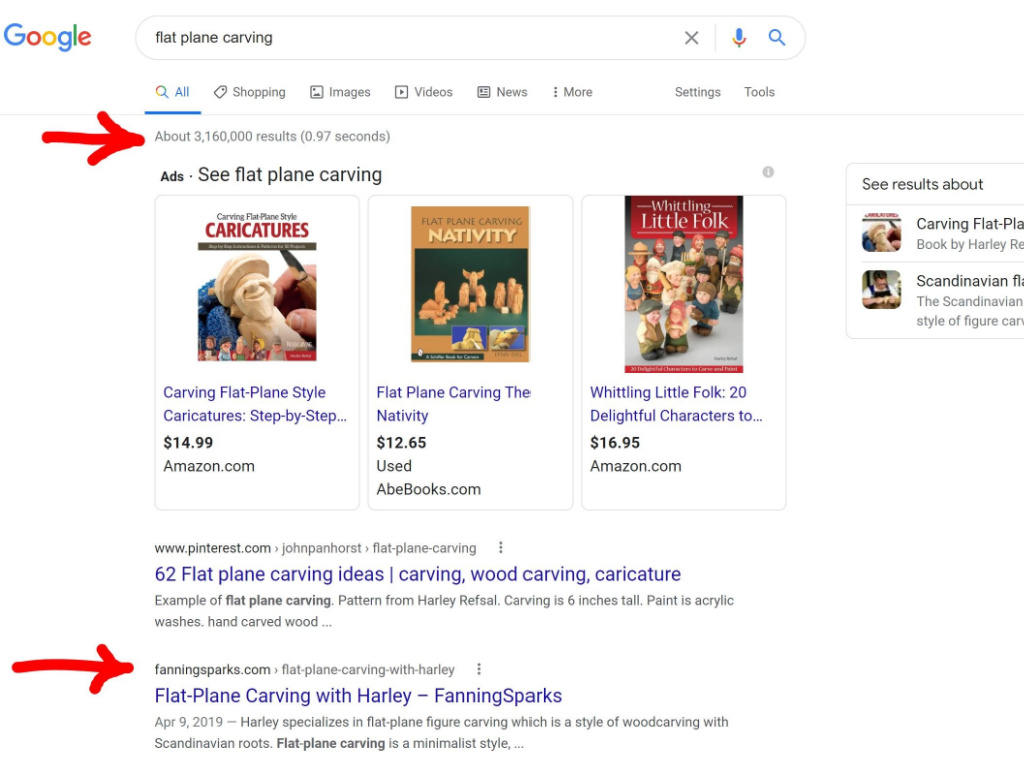
Some visitors find their way to FanningSparks via a general web search. Google’s Search Console explains which queries (ie terms in the search box) were used. For instance, the top performing queries in Feb 2021 were:
. “flat plane carving”
. “flat plane carving knife”
. “what is flat plane carving”.
While the top growing queries compared to the previous month were:
. “DIY Turkish lamp”
. “Quahog shell”
. “Scandinavian flat plane carving”.
It’s amazing to me to see results like those shown below—second hit of 3,160,000 results! You may notice Harley Refsal, the flat-plane carving expert I rave about in my post, is featured prominently on this page.
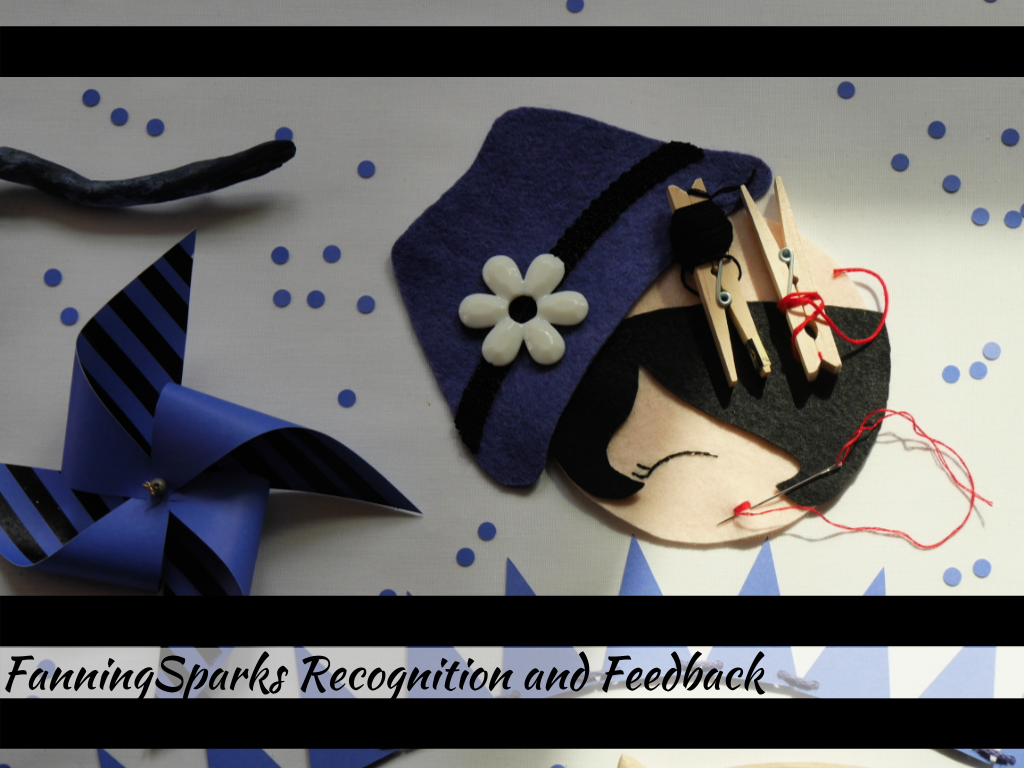 Statistics and analytics are all well and good but hearing from readers directly is better. FanningSparks got some great exposure this last year.
In Aug 2020, FanningSparks made an appearance in the Neighbor Spotlight in our Homeowners Association e-Newsletter. It was an honor to be featured in this neighborhood publication. (Thanks again Mary!)
More recently, I had the privilege to share the FanningSparks story with the Osher Lifelong Learning Institute (OLLI) Picture This! special interest group. I joined this local photography club just before the 2020 lockdown and we’ve been meeting virtually every month. Fellow members wanted to know how a blog could be used to gain exposure for one’s photography. My presentation was well received. (Thanks again Gary!)
Early last year, I received a request for citation from Atlanta-based ceramic artist Keok Lim. I had the pleasure of seeing her work at the Georgia Pottery Invitational Perspectives shows and posted about it on the blog. I’m thrilled these posts are now quoted on Keok Lim Ceramics’ website Press page. (Thank you Keok!).

It’s always a pleasure to hear from an artist I mention on the blog. Jeffrey Waller, a local intarsia artist I featured in the post Intarsia: Mosaic of Wood, sent me a delightful email. He said it warms his heart to know that something he has created from an idea in his mind “brings a smile, joy, excitement, and sheer amazement to the viewers. I thank you again for your wonderful words and exposure of and about this little ole country boy here in Georgia.” (Thank you Jeffrey!)
Knowing others are making the projects I share on the blog makes all the effort worthwhile. I’m so appreciative of a regular follower who let me know she’d followed my Fern & Flower Press tutorial to make one for her daughter as a Christmas gift. She sent a photo with this note “Thank you for the inspiration (and directions) for the most popular Xmas gift this year.” (Thank you Robin!)

Thanks again for your support and encouragement of FanningSparks!
Cheers,


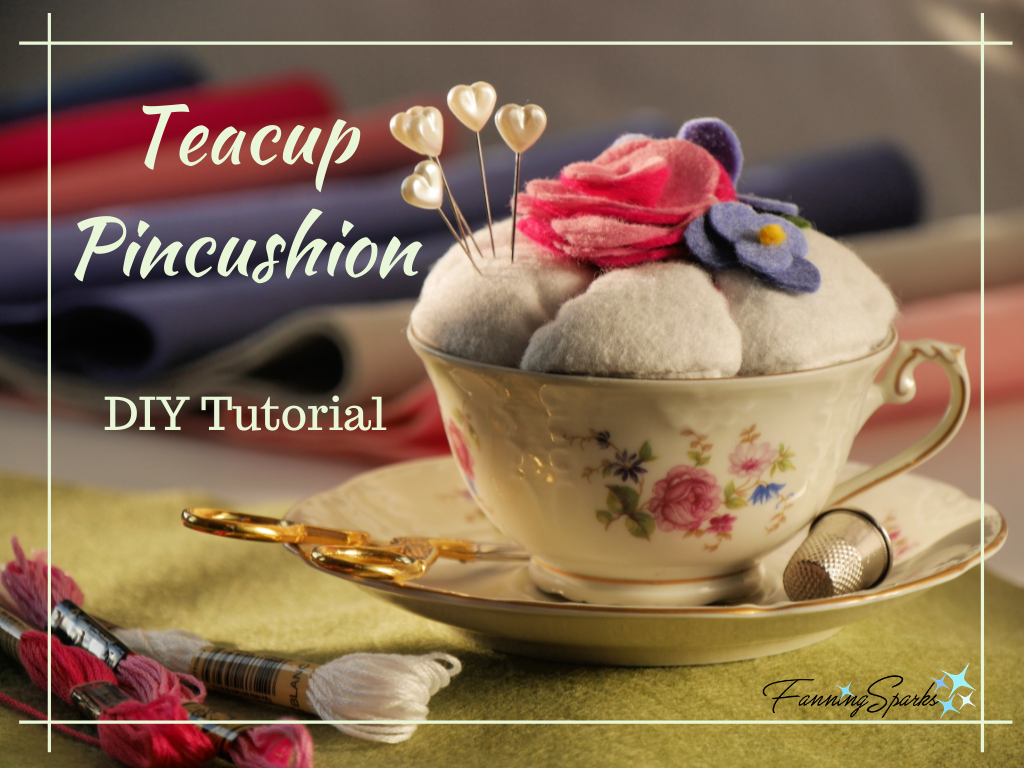
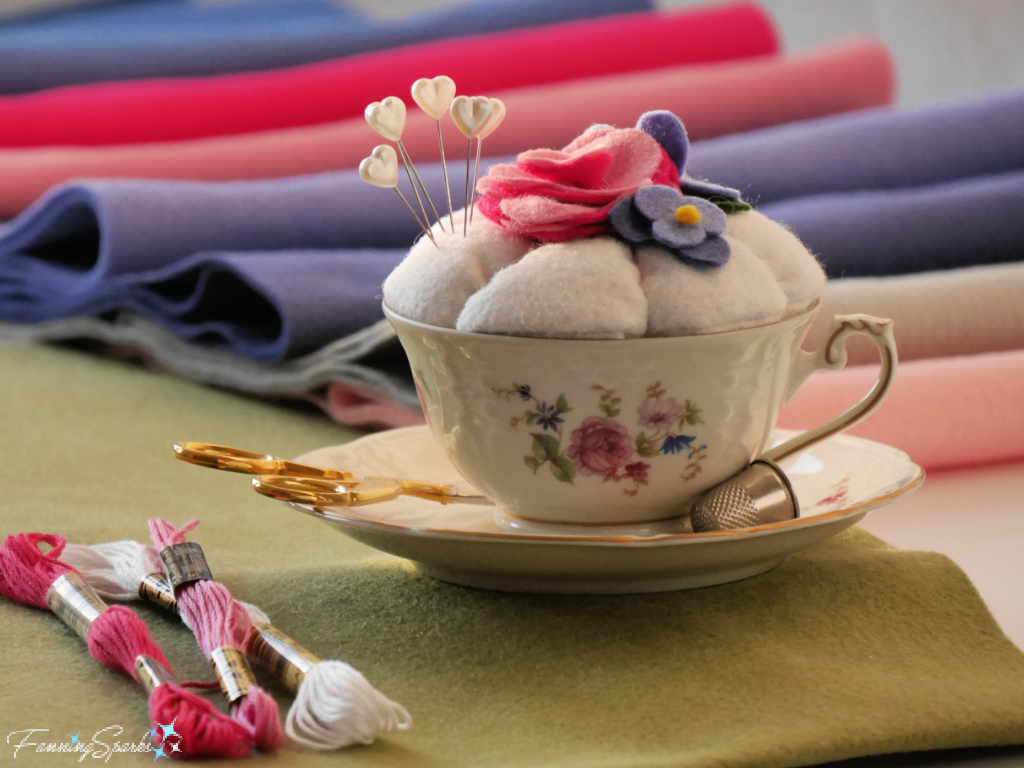 In today’s post, I share step-by-step instructions to make your own teacup pincushion. The approach and technique used are similar to those from my last DIY tutorial post,
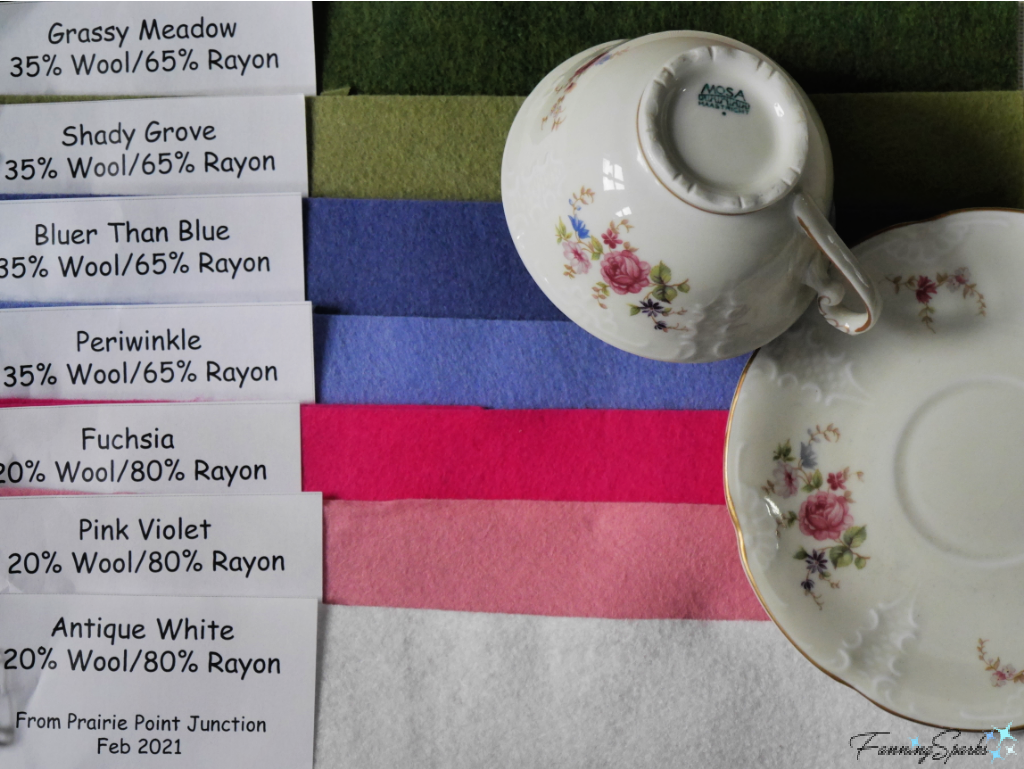
  Colorful felt flowers are the key to this project but buying felt in the desired colors can be a little tricky. The best way, of course, is to shop in person where you can hold the teacup up against the felt. But that’s not possible when shopping online. I’ve found using a photo of the item I’m trying to match is a good way to select colors online. Shoot the photo against a white background in bright, clear, natural light. Then view your photo beside the vendor’s colors. It’s helpful to take snippets of the color samples and drop them directly onto your photo. This method isn’t foolproof but the side-by-side comparison is a good indicator of which colors will work best. And it’s much better than holding a teacup up to your computer monitor! The below photo shows a few color samples from Prairie Point Junction’s wool blend felt (see More Info below).
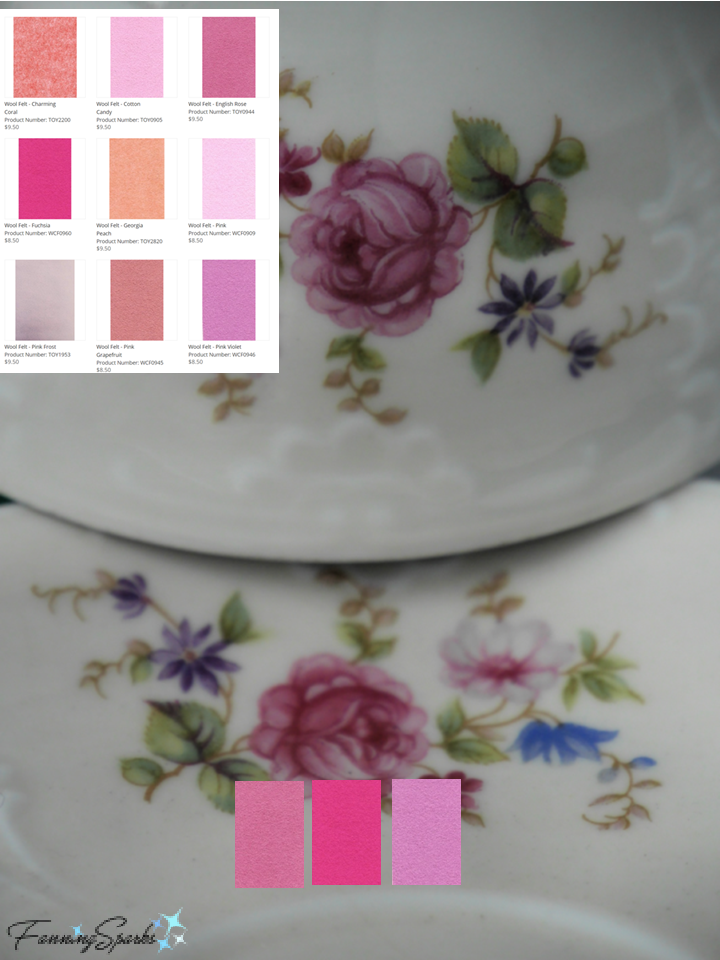
 Supplies Needed
 Gently turn the felt circle inside out through the slit. Push out seam by running finger along the inside of the seam. Press. Stuff pincushion pad with polyester fiberfill or other material. Ensure outside edge is stuffed evenly. Take care not to overstuff—the seams should not be strained. Use matching thread and whipstitch (or stitch of your choice) to close the back slit.
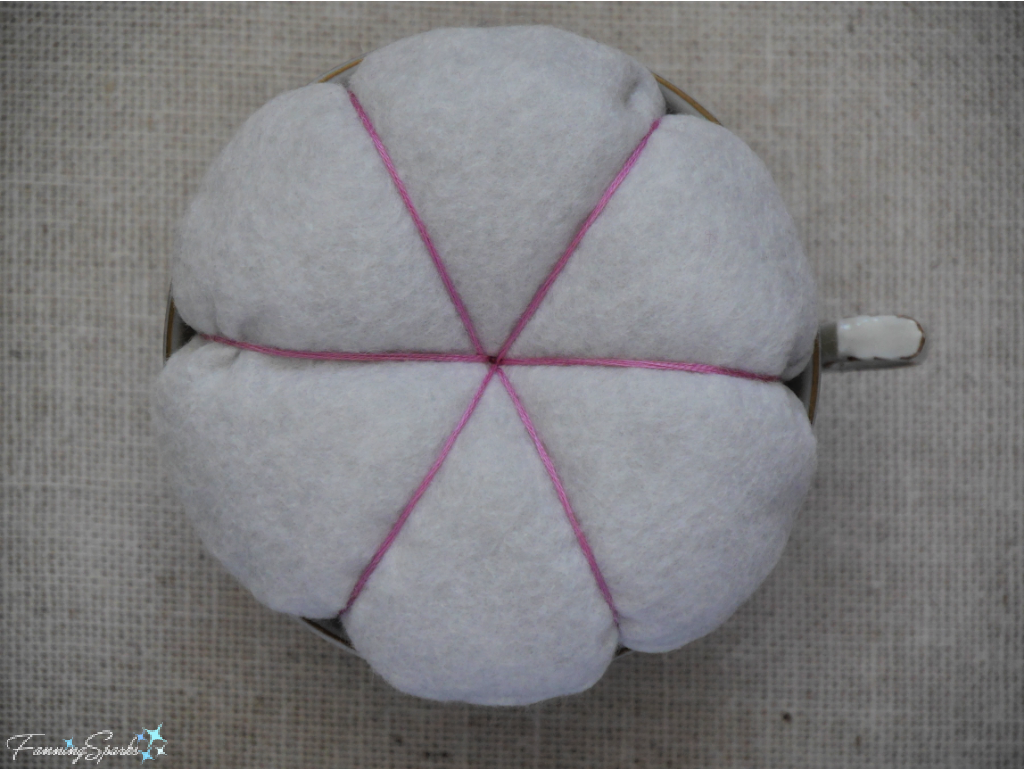
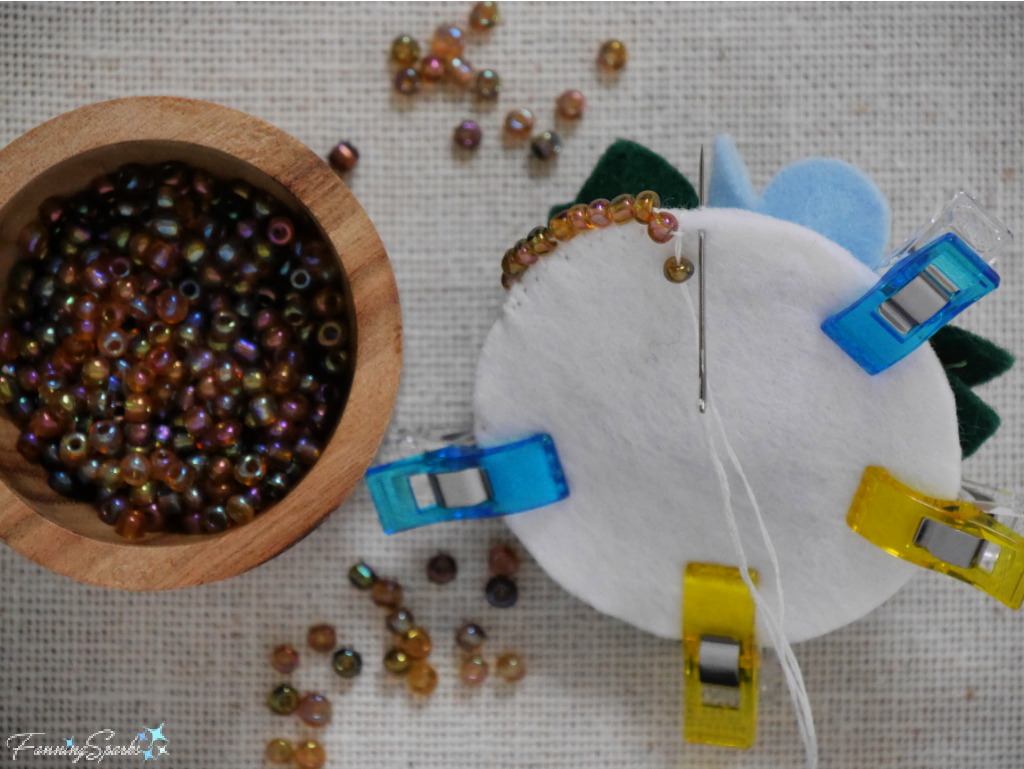
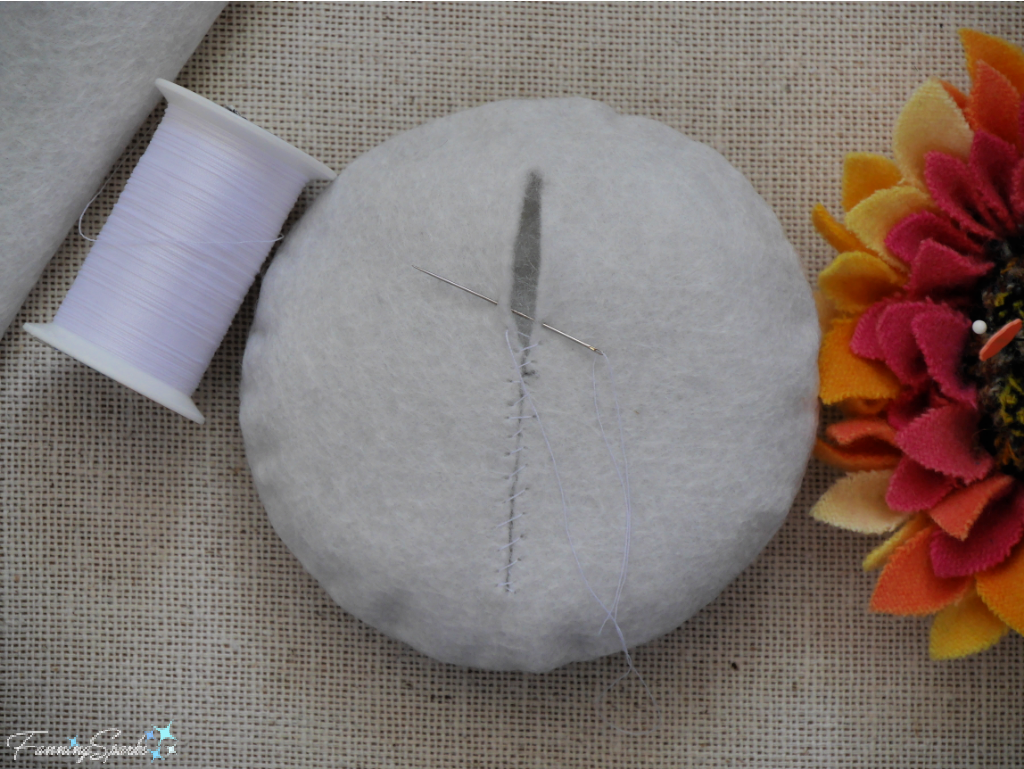 Choose embroidery floss to divide the pincushion pad into petals—the color can match or contrast as you wish. Wrap the 6-strand floss around the pincushion pad 3 times to measure the length needed. Mine was 32” long. Cut and thread the floss onto a long embroidery needle. Insert a pin near the center point on the bottom and wrap the floss tail around this pin to anchor it. Insert the needle at the center point on the bottom of the pad, pull it up through the pad and exit at the center point on the top. Wrap the floss around the outside of the pad and return the needle to the center point on the bottom.
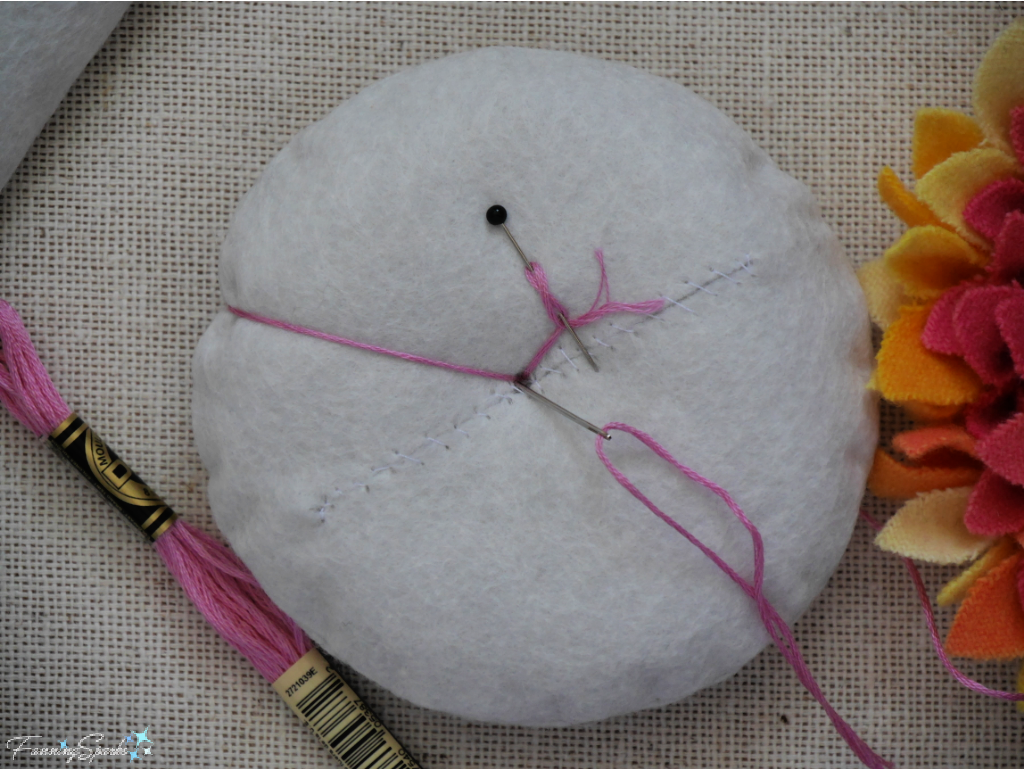

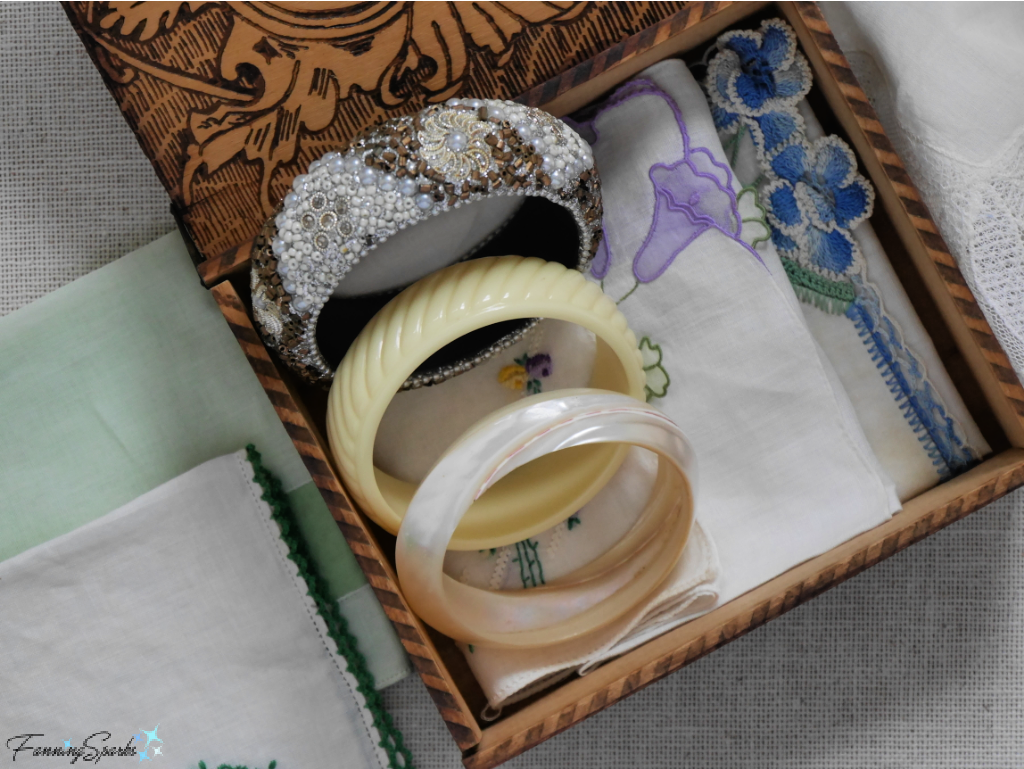 One in particular, a chunky, bejeweled costume jewelry bangle, caught my imagination. With the help of a little felt flower-making research, some colorful felt and a few accents, a pretty little keepsake box emerged. It was a fun process with lots of opportunity to get creative. Today’s post includes detailed step-by-step instructions for transforming any bangle bracelet into a keepsake or trinket box.
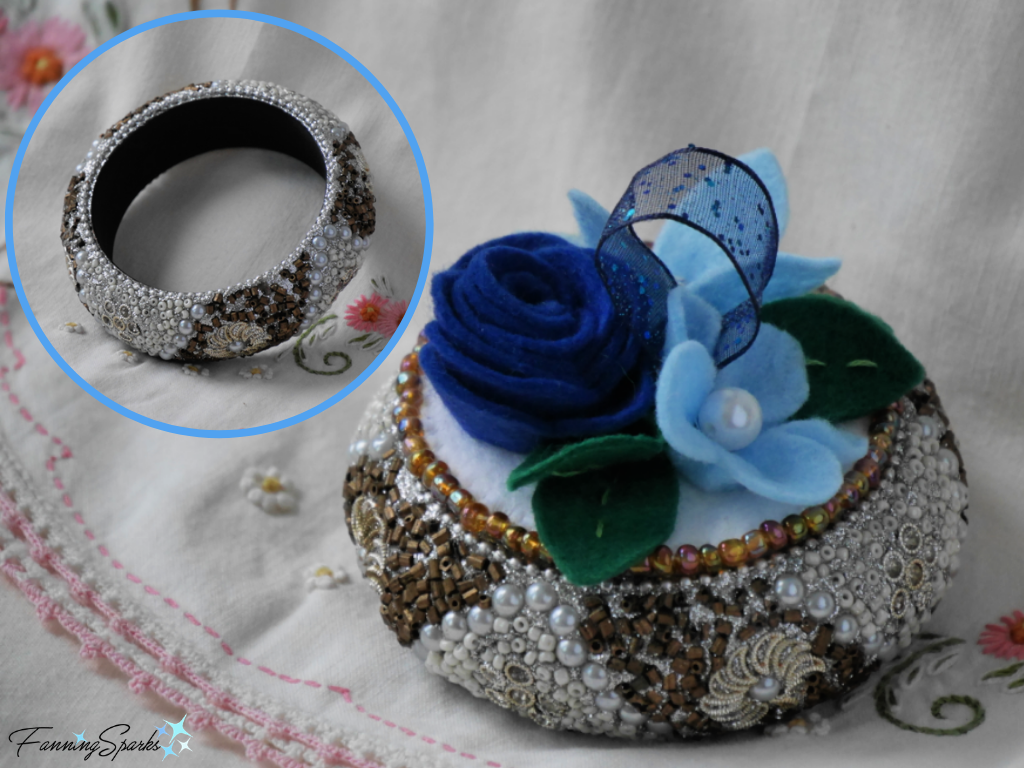
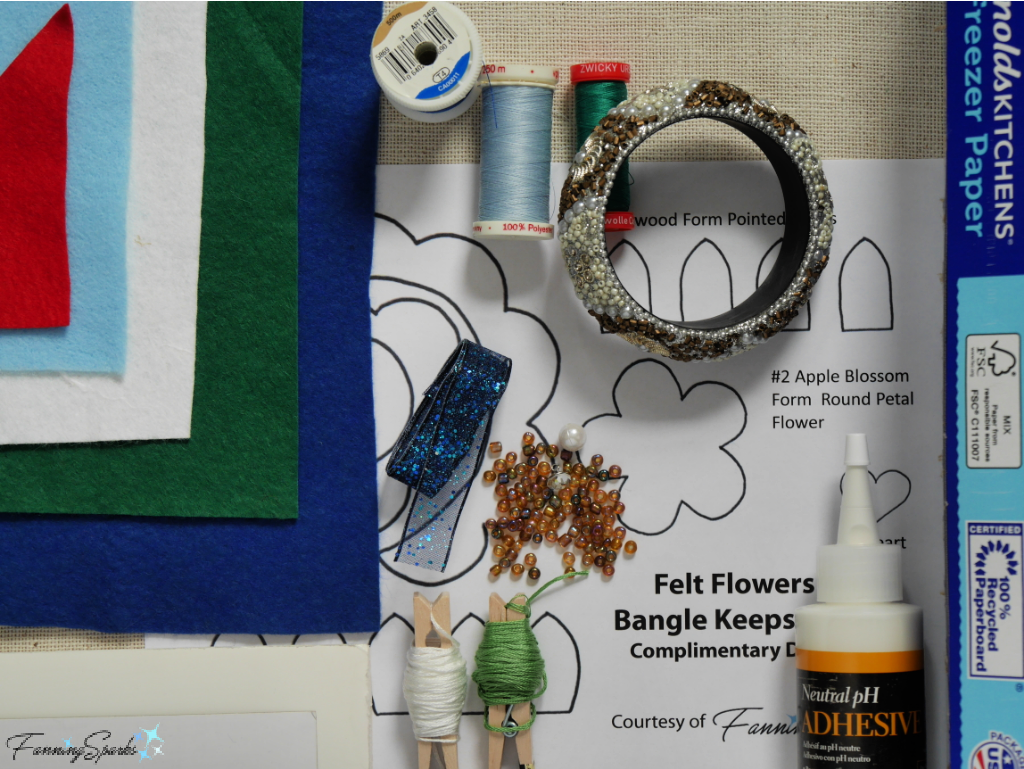 Equipment and Tools Needed
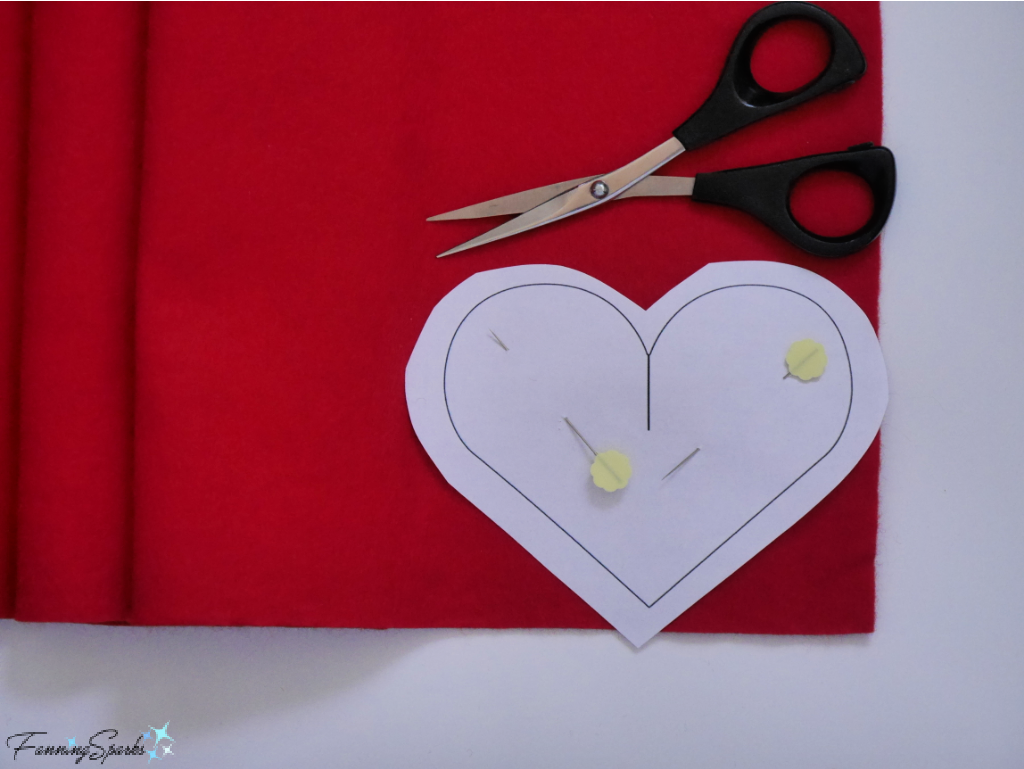
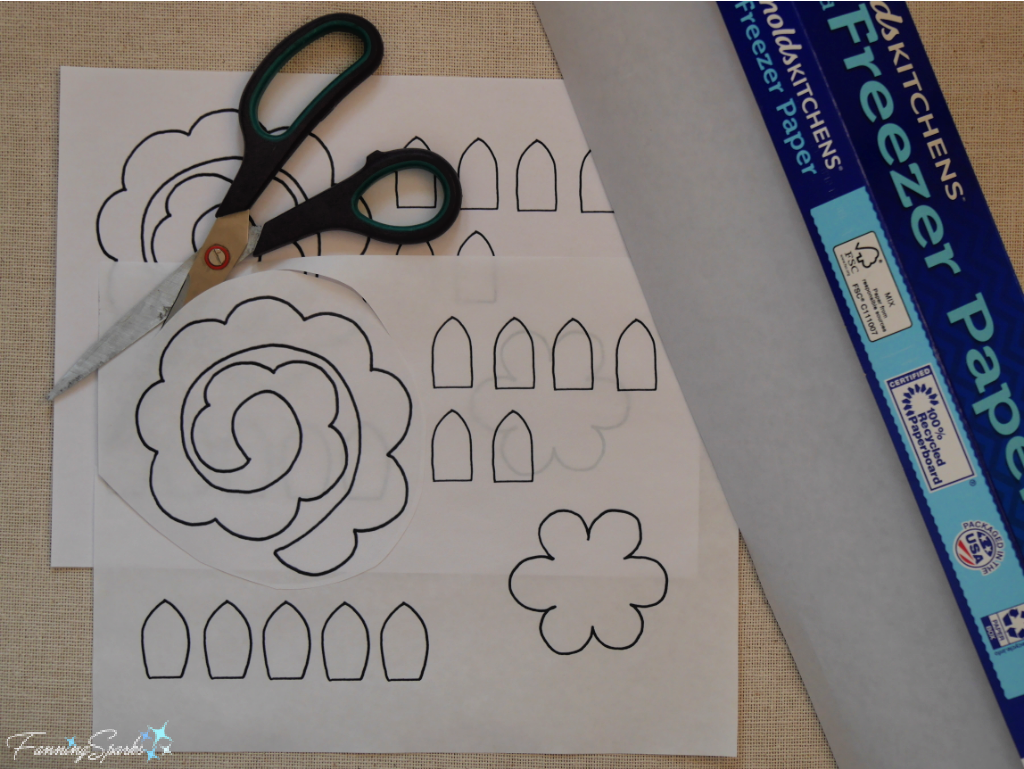 B. Next comes the best part, place your felt on your ironing surface and lay the freezer paper pattern on top of the felt with the shiny side down. Use your iron to press the freezer paper pattern into place—a few seconds is all that’s needed. Take care to use the heat setting appropriate for your felt. The amazing thing is the iron melts the plastic just enough to make the paper stick to the felt while you cut out your piece.
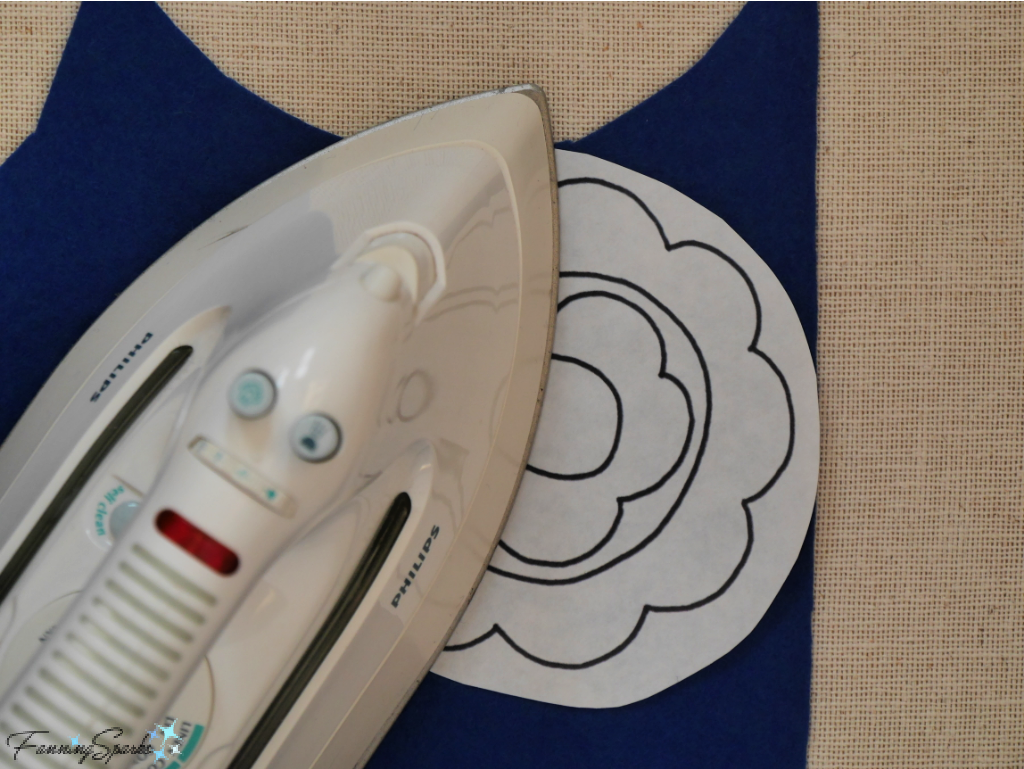 C. Cut out the pattern piece (freezer paper and felt) using sharp, short-bladed scissors for precision. Then simply pull the freezer paper off the felt. Surprisingly, it comes off very easily and no residue is left behind. Pattern pieces can be reused so take care when removing them from the felt.
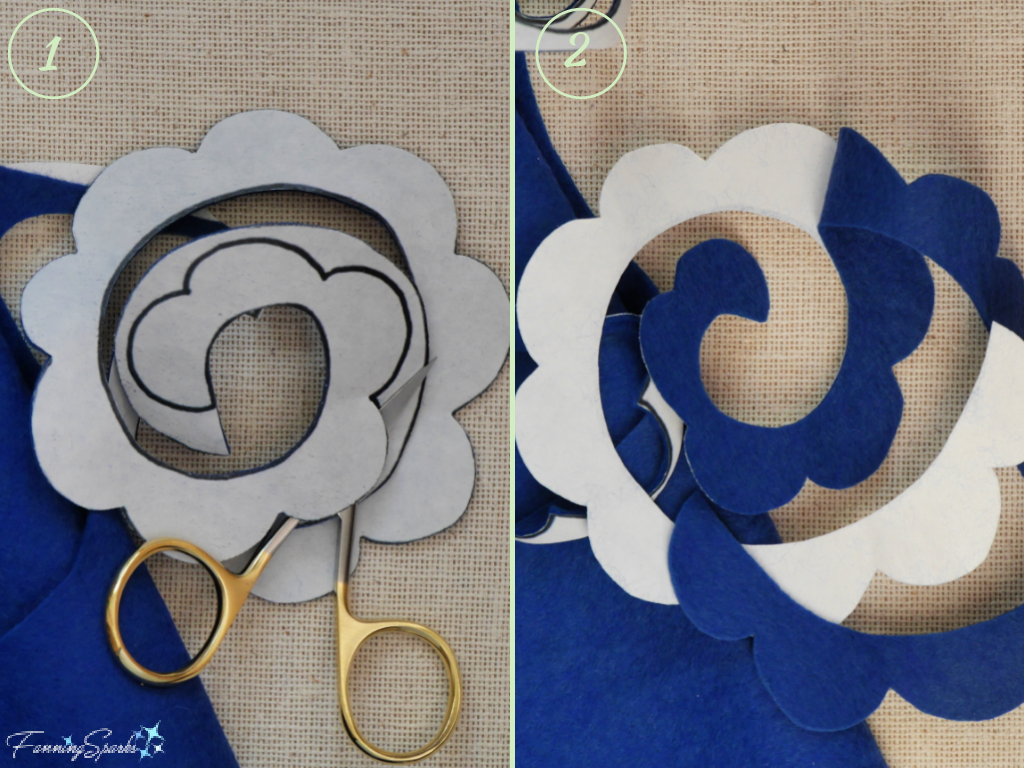
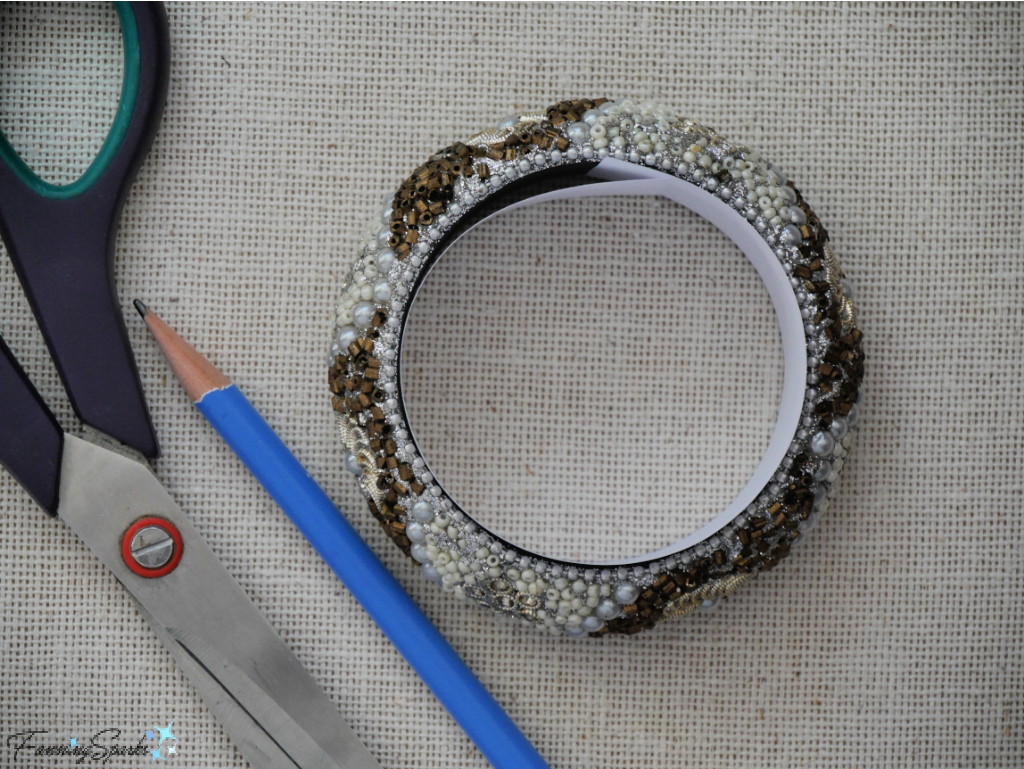 Measure the height of the inside of the bangle using a ruler. Add ¼“ for the seam allowance. This will be the height of the liner wall. Cut a rectangle of white felt with the length and width calculated.
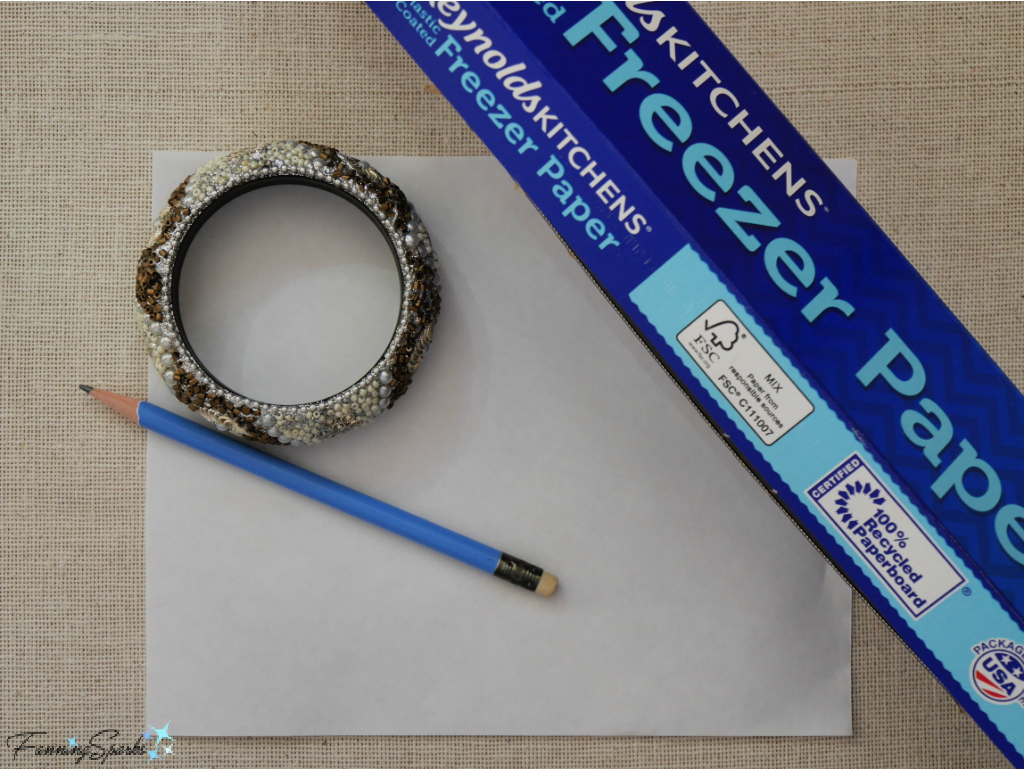 Cut out the circle leaving a small border outside the cutting line. Follow Steps B-C of the Freezer Paper Technique as described above to adhere and cut out a white felt circle. Reuse the freezer paper pattern to cut 3 more white felt circles.
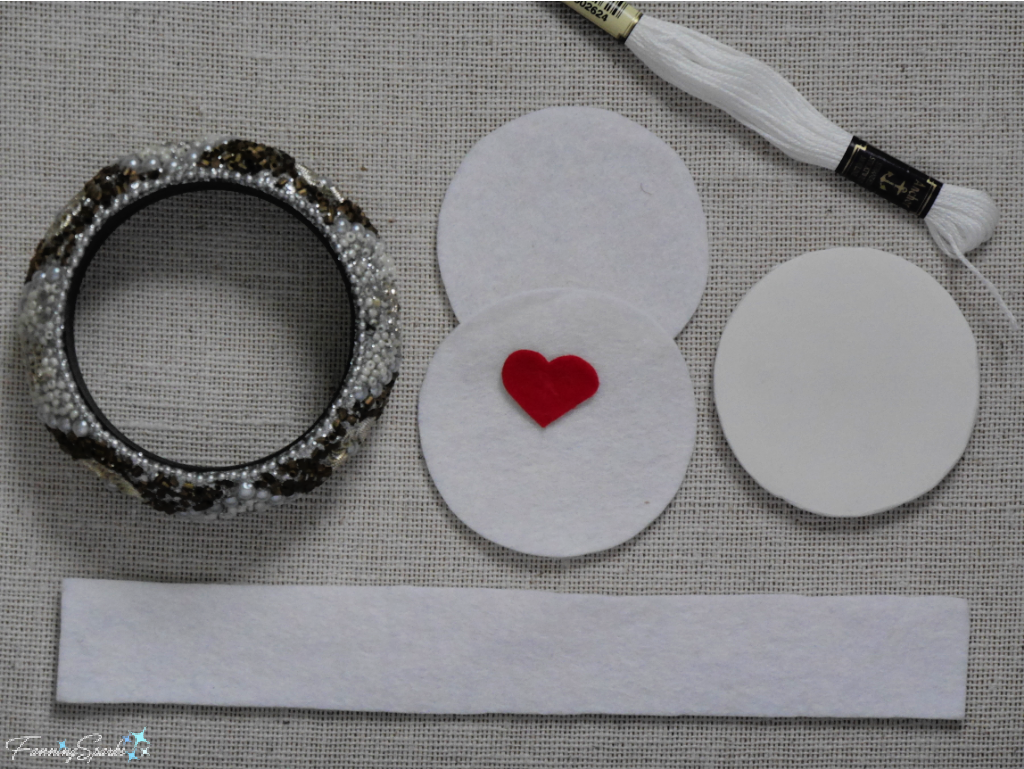 Start by sewing one long edge of the felt rectangle, which will become the liner wall, to one of the felt circles. Use 2-strands of matching embroidery floss with a blanket stitch. Start and finish ½“ from the ends of the rectangle.
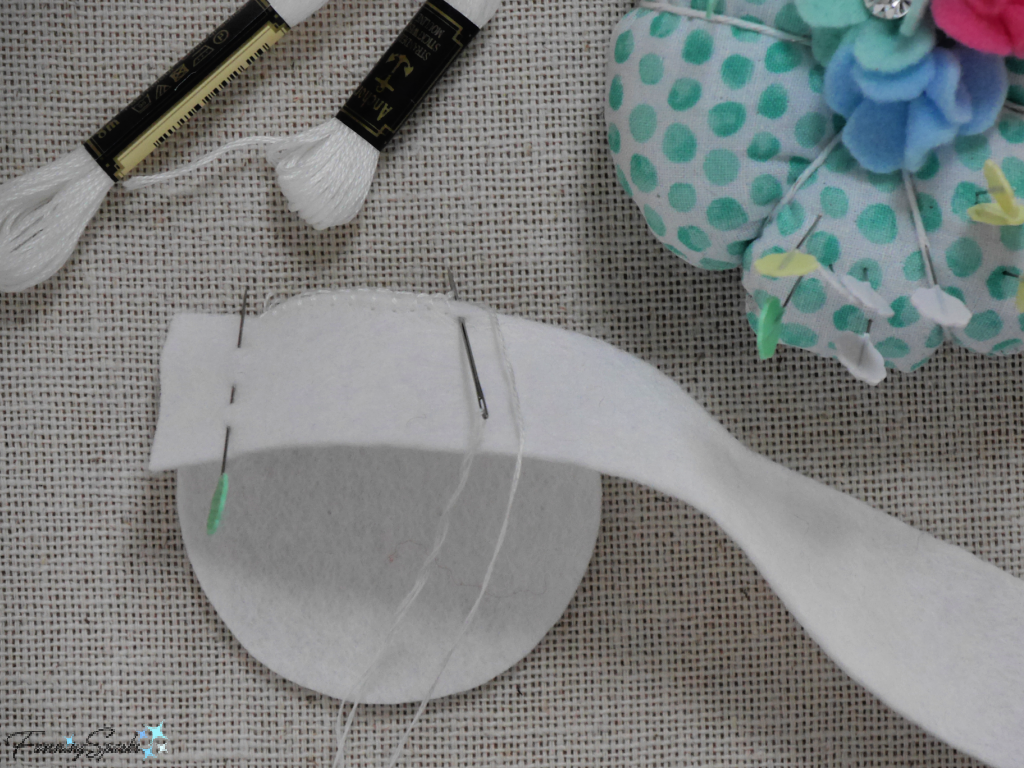 Hold the short ends of the rectangle together ensuring the remaining unsewn bottom edges are aligned and fit snuggly against the bottom circle. Trim the short ends if necessary. Pin and stitch the short ends with a blanket stitch. Finish stitching the long edge of the felt rectangle to the bottom circle.
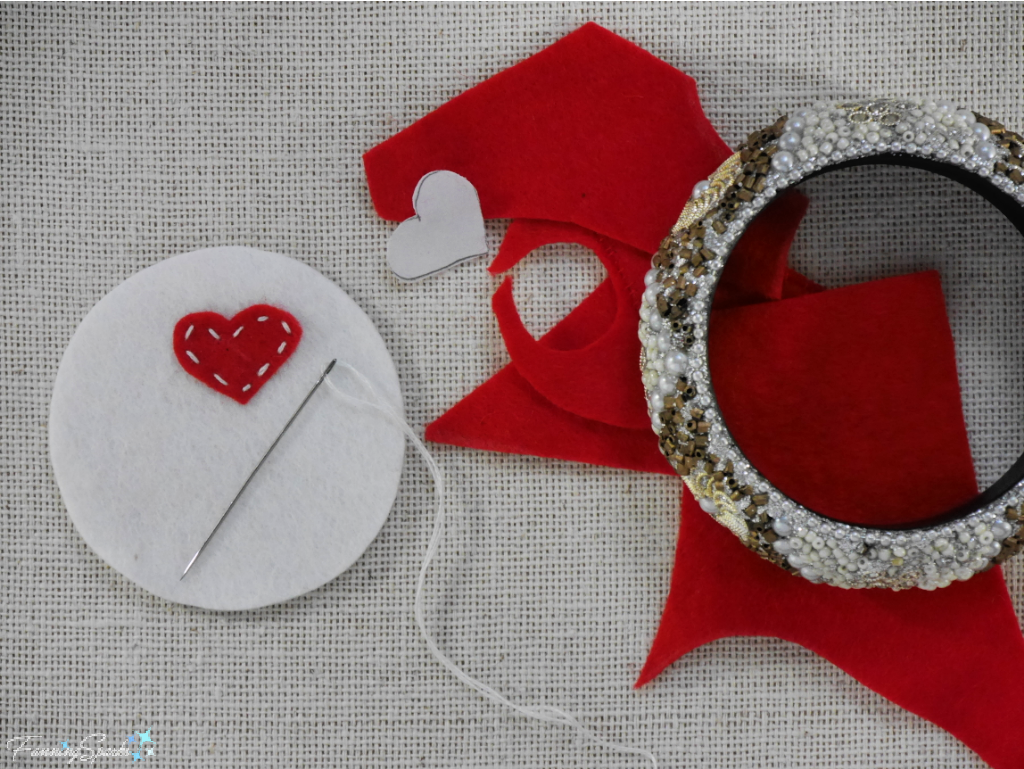 Glue this felt circle to the top of the foam board circle. Insert embellished bottom into the liner. If desired, glue felt liner walls to the inside edge of bangle.
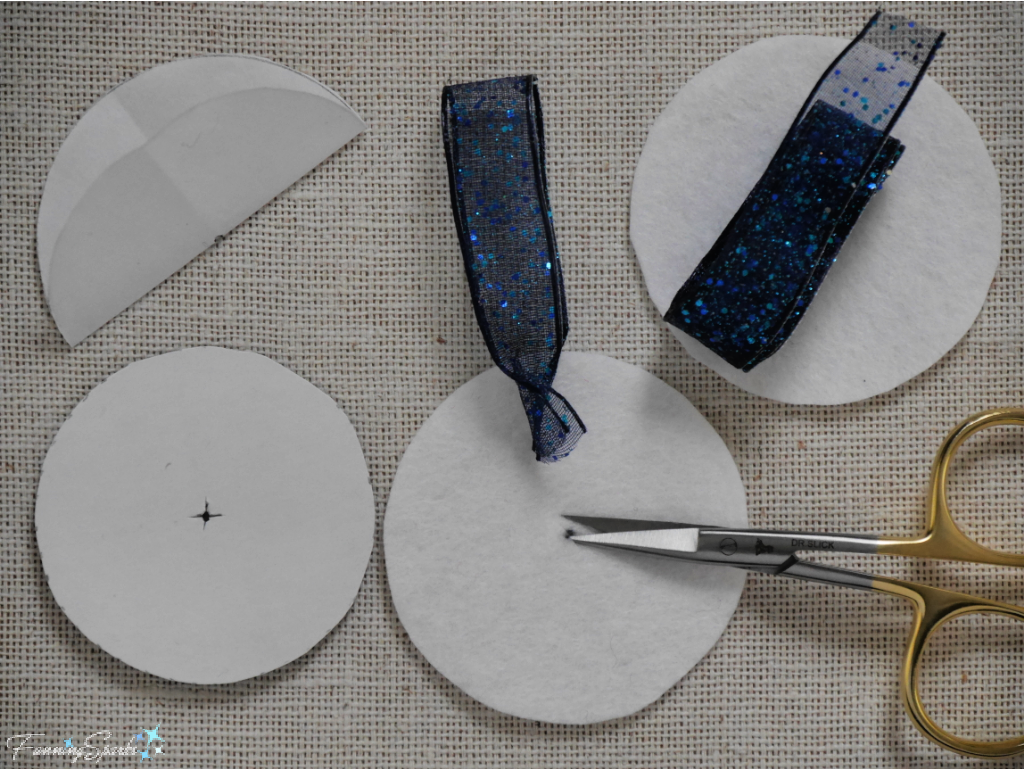 Hold ribbon by loop and gently pull the ends of the ribbon through the hole in the felt circle and then the hole in the cardboard. Push cardboard and felt circle together. Securely fasten the ends of the ribbon together. You can twist the ends if the ribbon is wired. Knot or stitch if the ribbon is unwired. Keep ends as flat as possible under the cardboard. You may wish to glue or tape the ends in place.
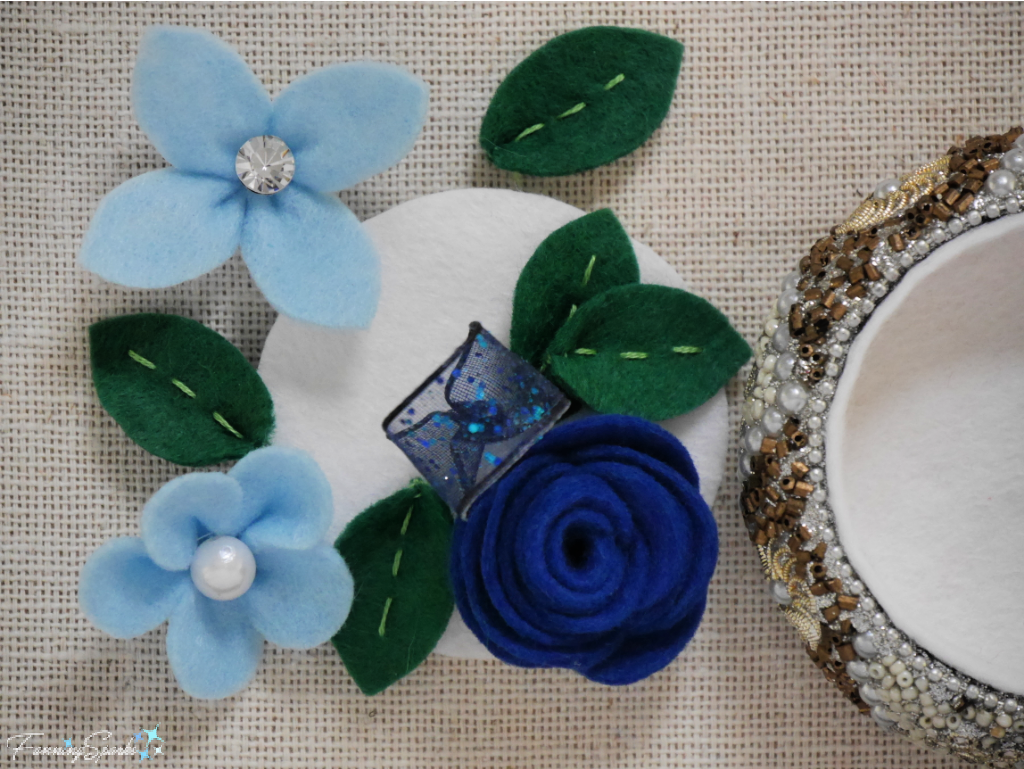
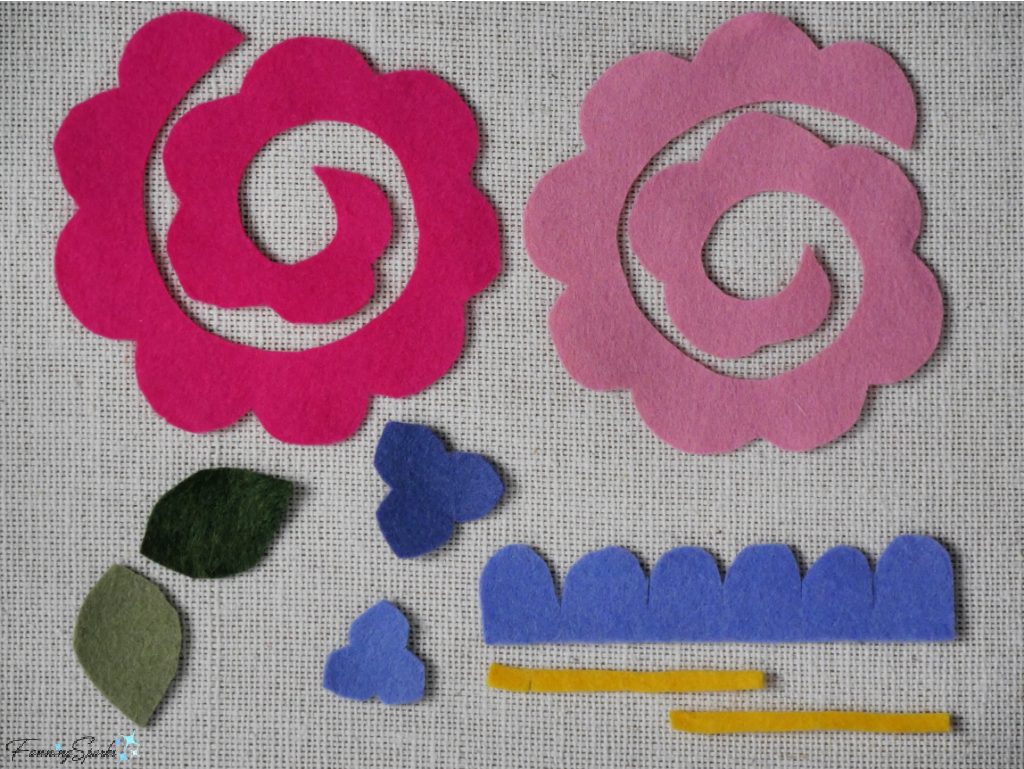
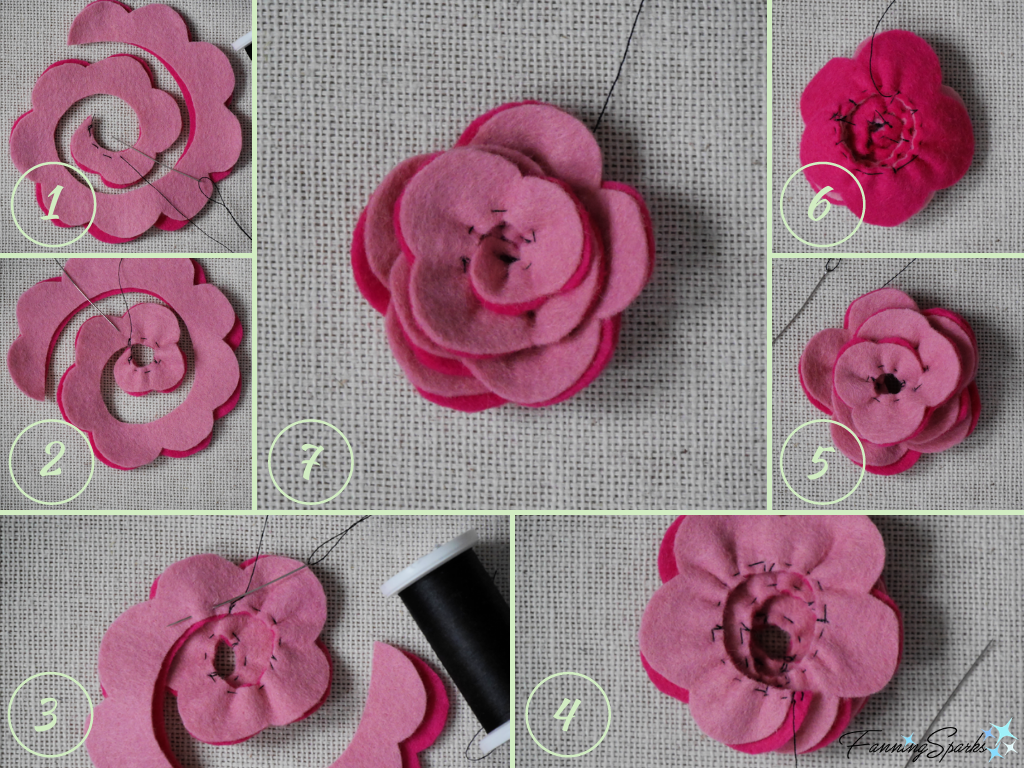
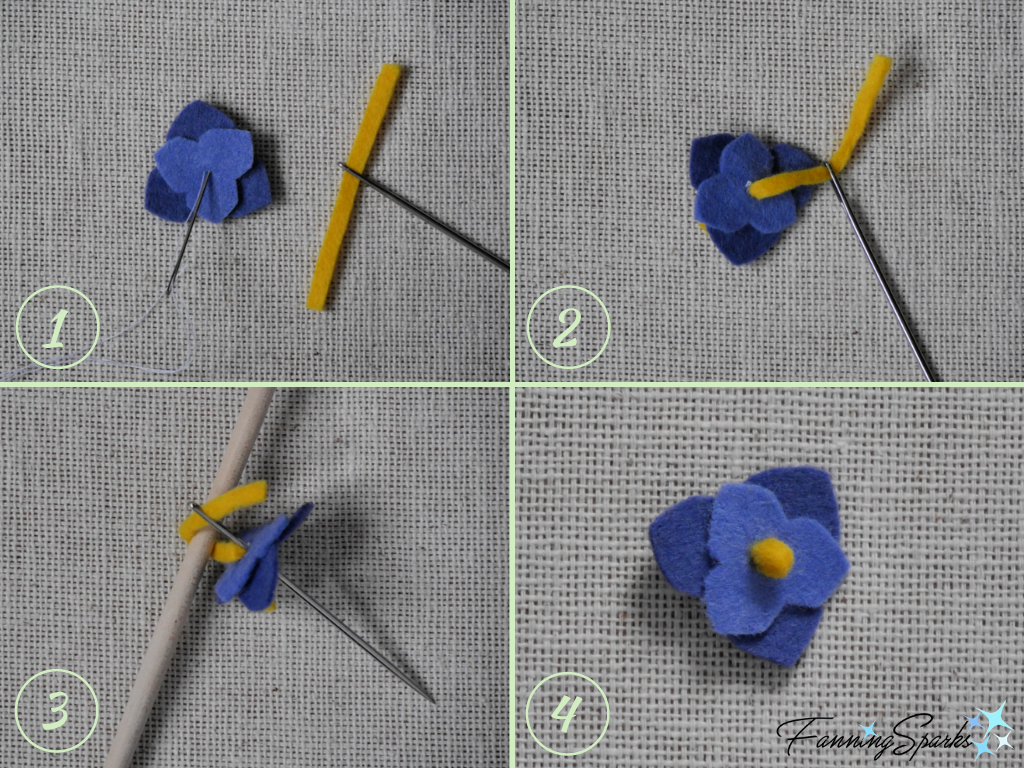
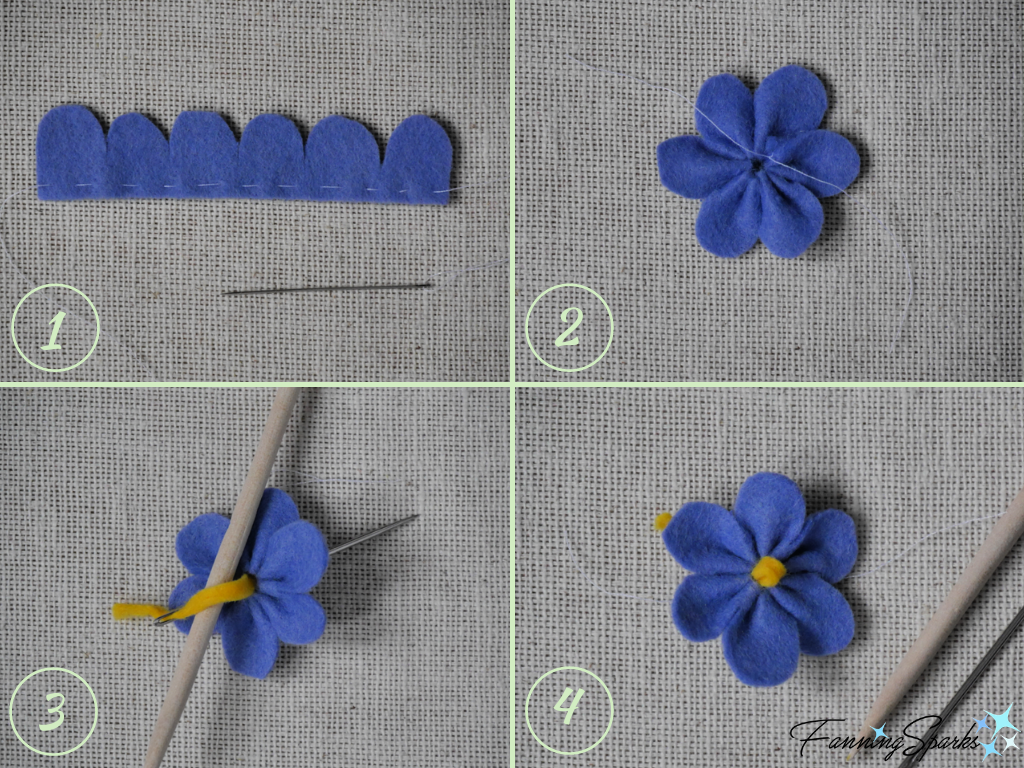
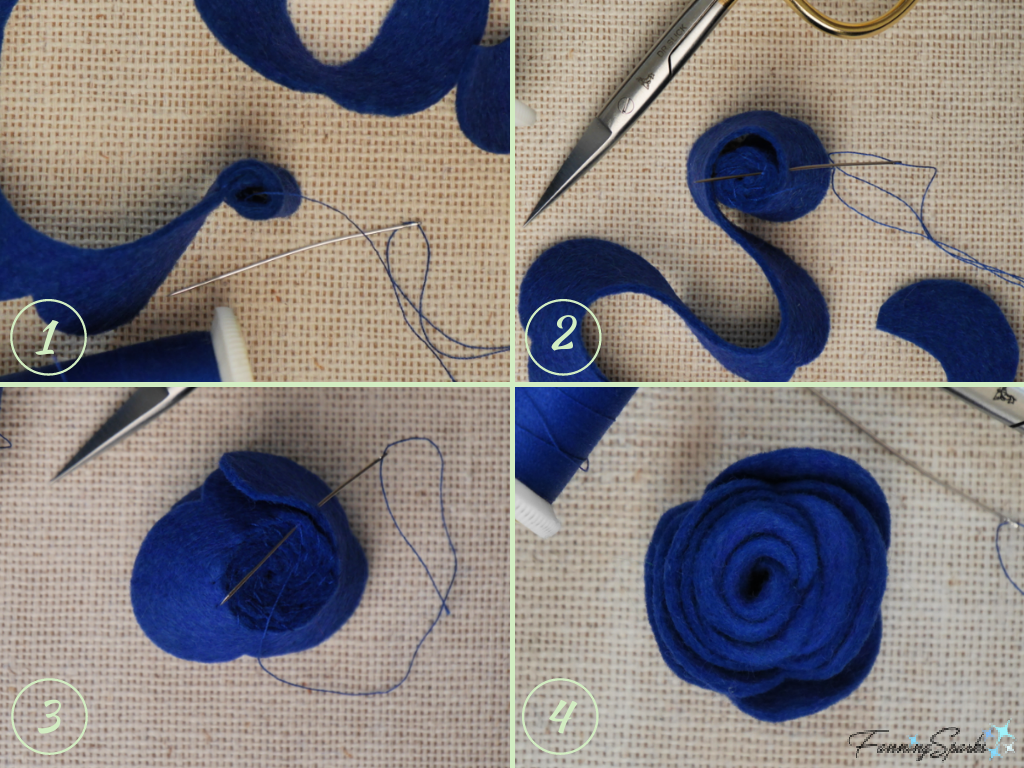 Make Apple Blossom Form Round Petal Flower
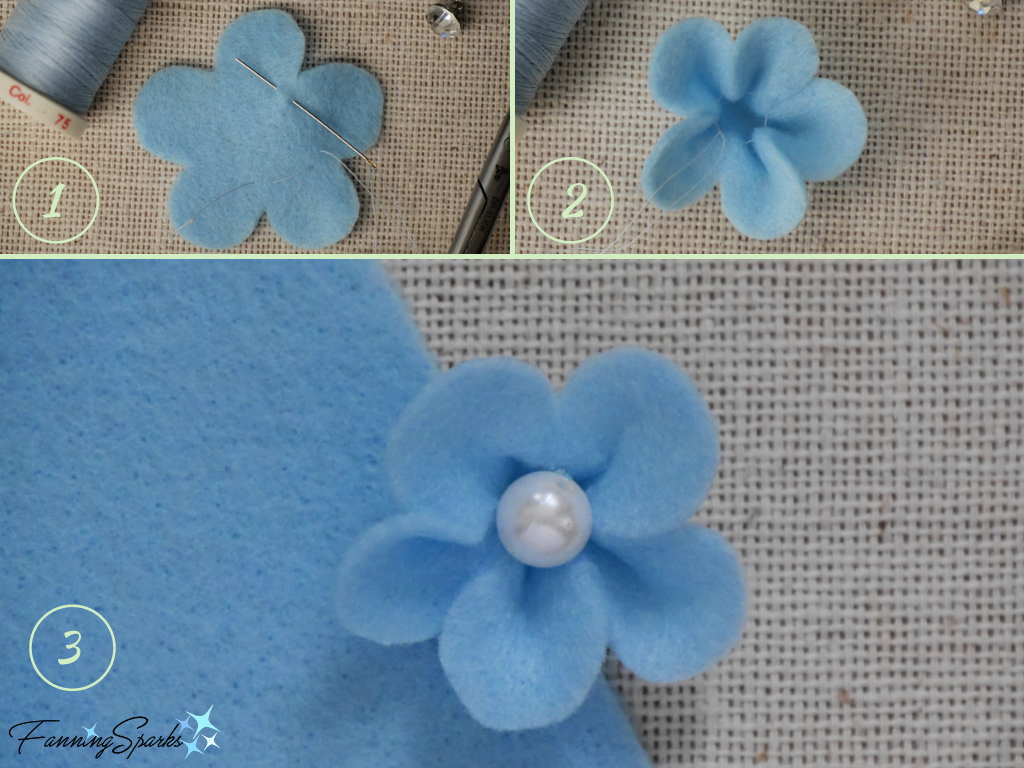 Make Dogwood Form Pointed Petals Flower
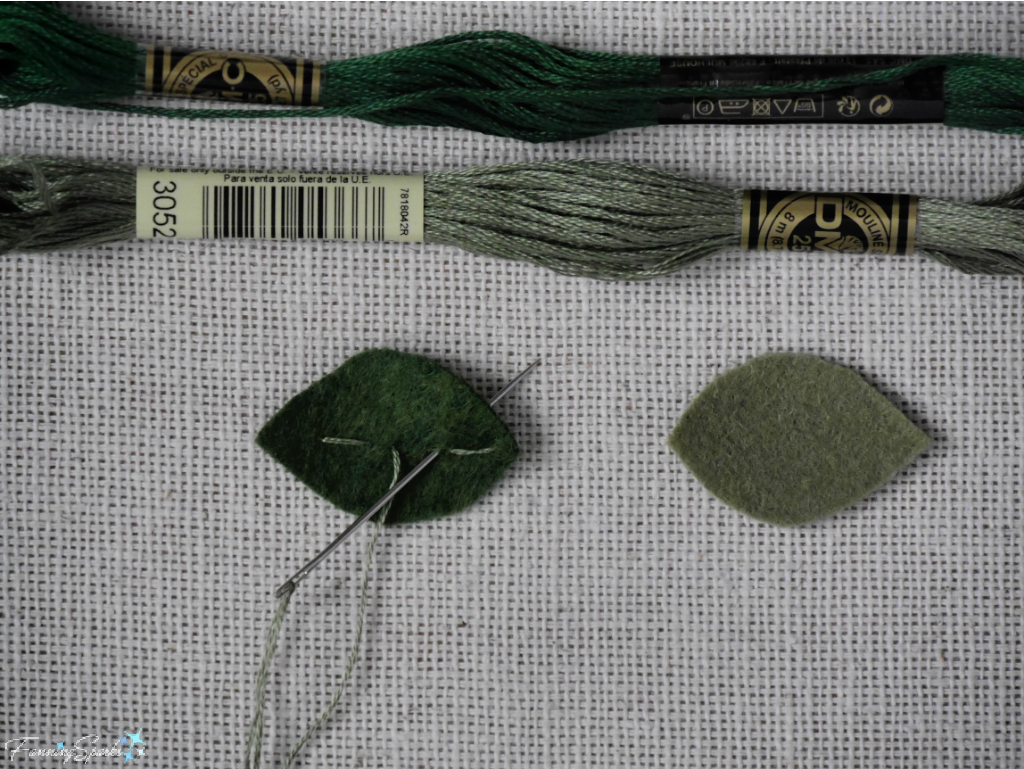
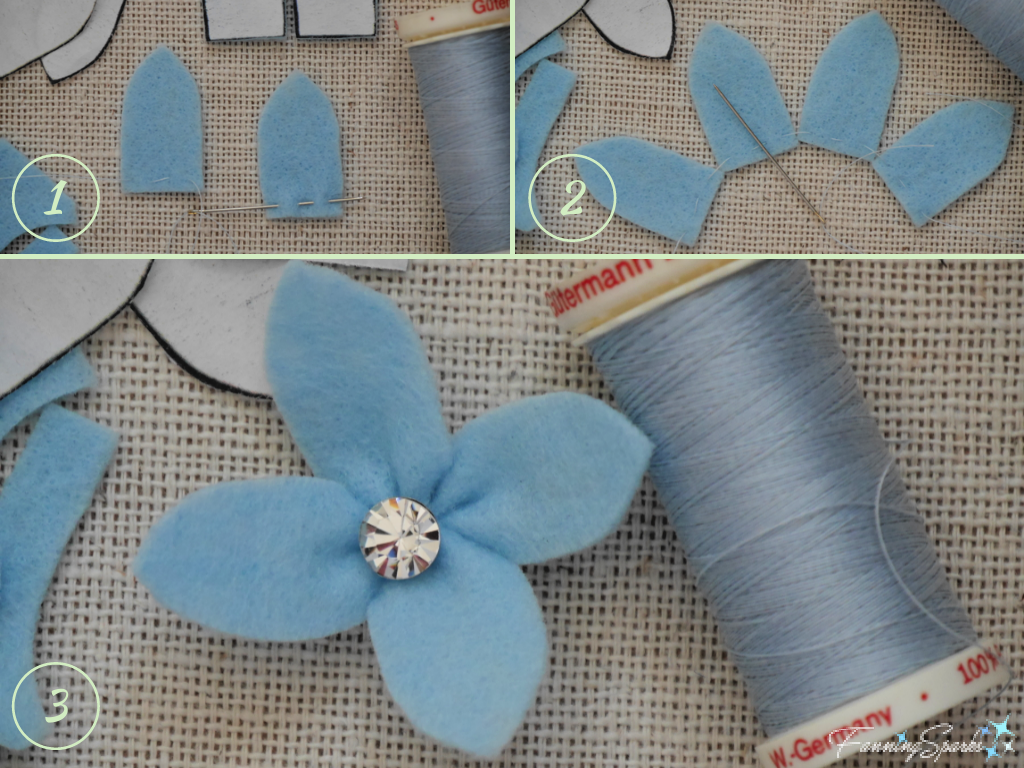 Make the Leaves
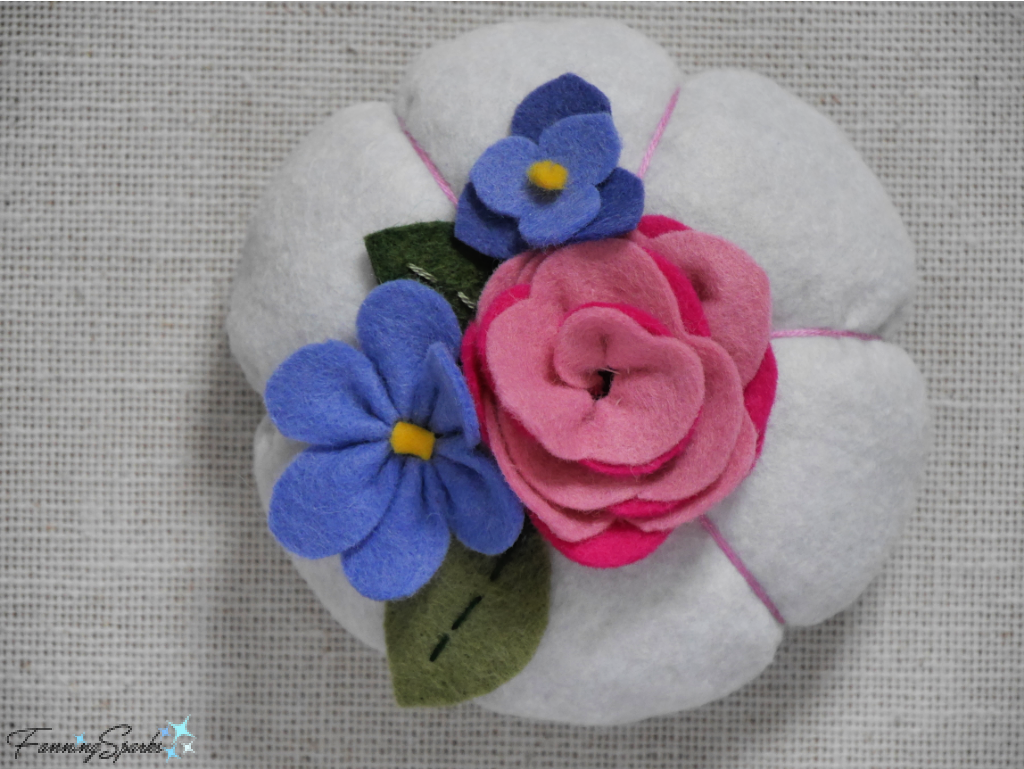
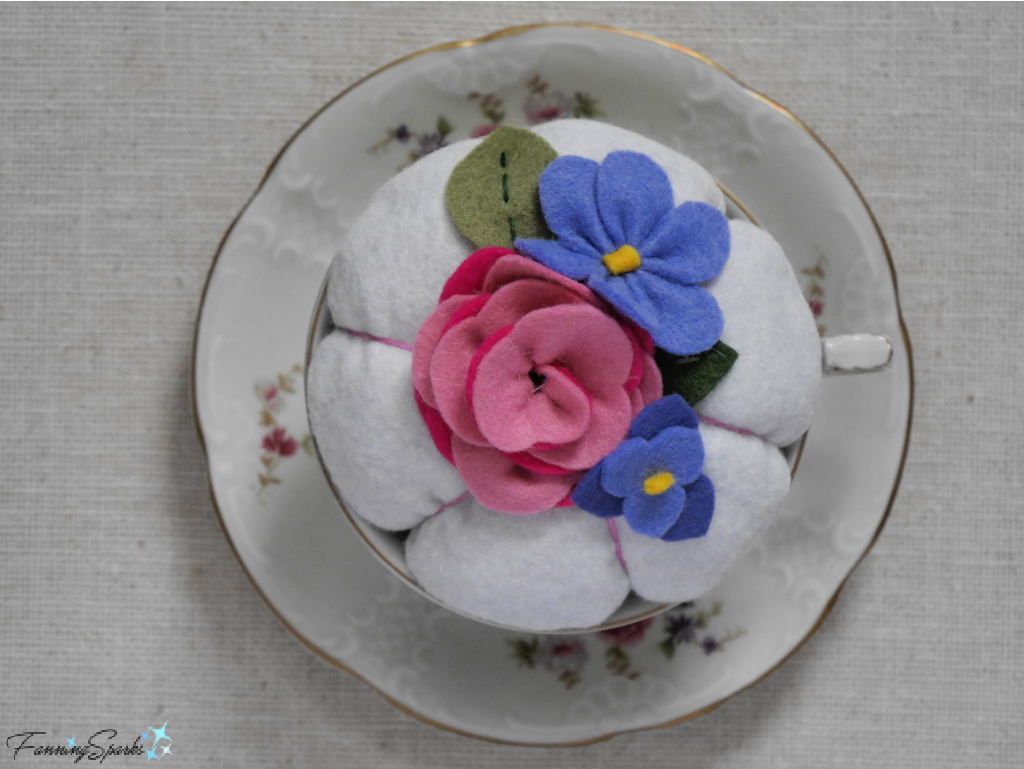
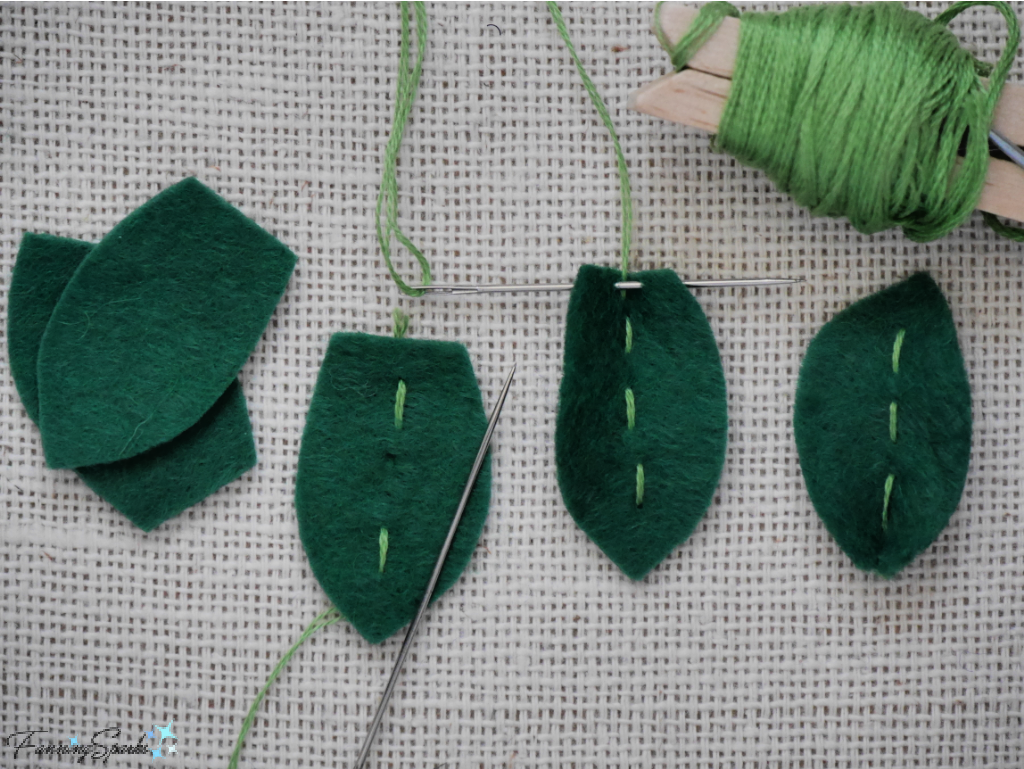 Step 6 Embellish Lid Now comes the fun part—embellishing the felt lid! Position the flowers and leaves in a pleasing arrangement.
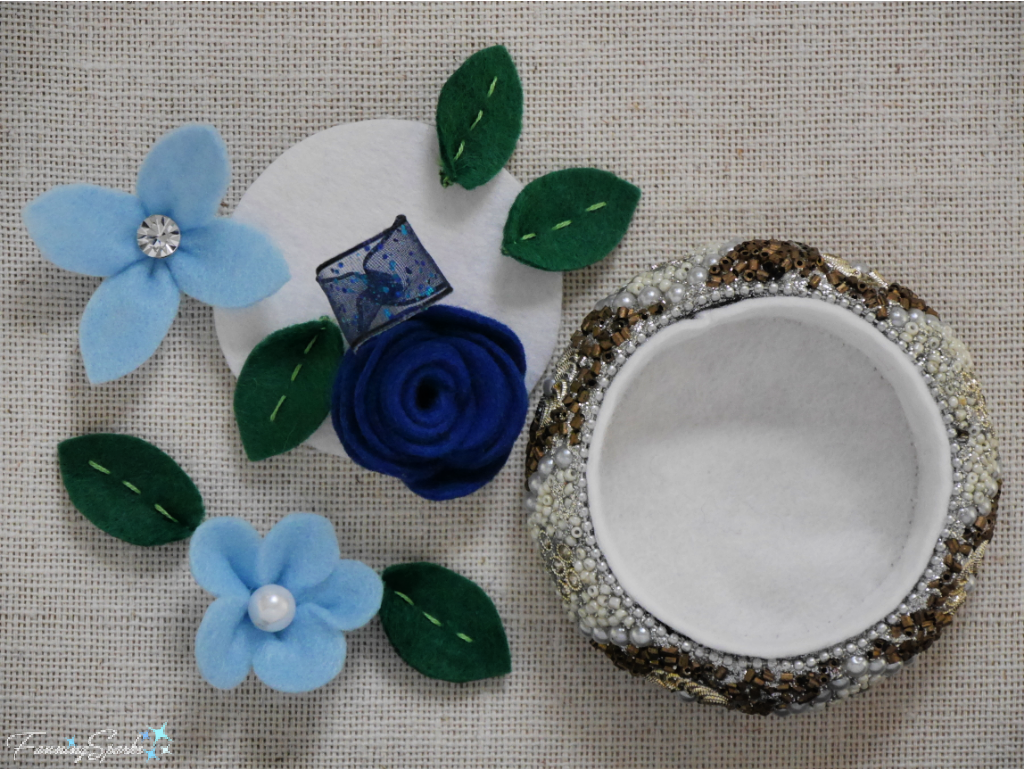
 Voilà! Your new keepsake box is done!
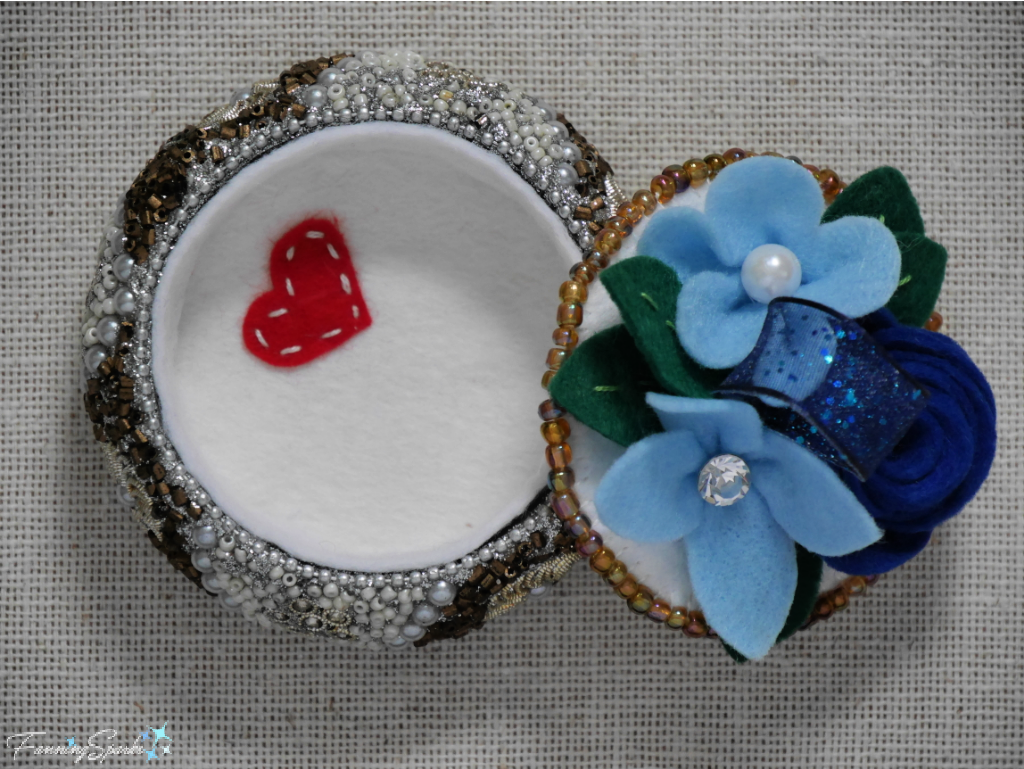 Now it’s time to put your new creation to work—mine holds a pretty little vintage button collection.
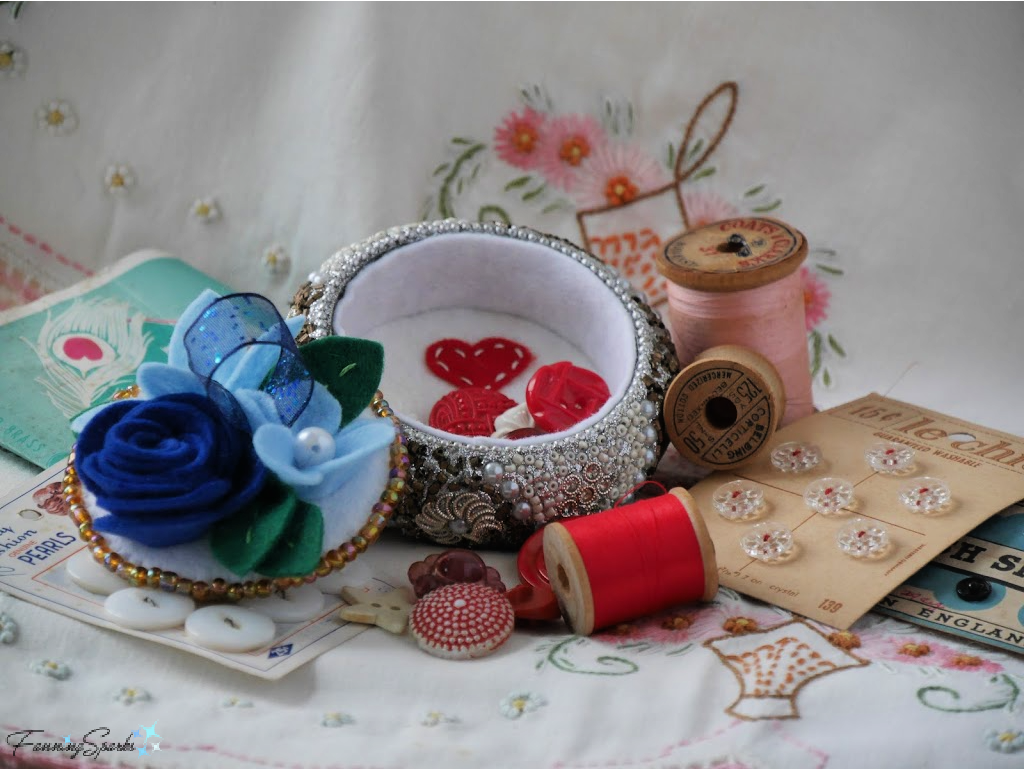


 Another item that seems to have grown into a collection is vintage textiles. I have a few displayed on a ladder in the hallway to my studio. The top piece, taking pride of place, is a tablecloth hand-embroidered by my Mom. It’s a beautiful piece! The other pieces were collected from near (US Southeast) and far (Japan and Germany).
 Sometimes a vintage or thrift store find can be repurposed for an entirely new role. I shared an example in the post
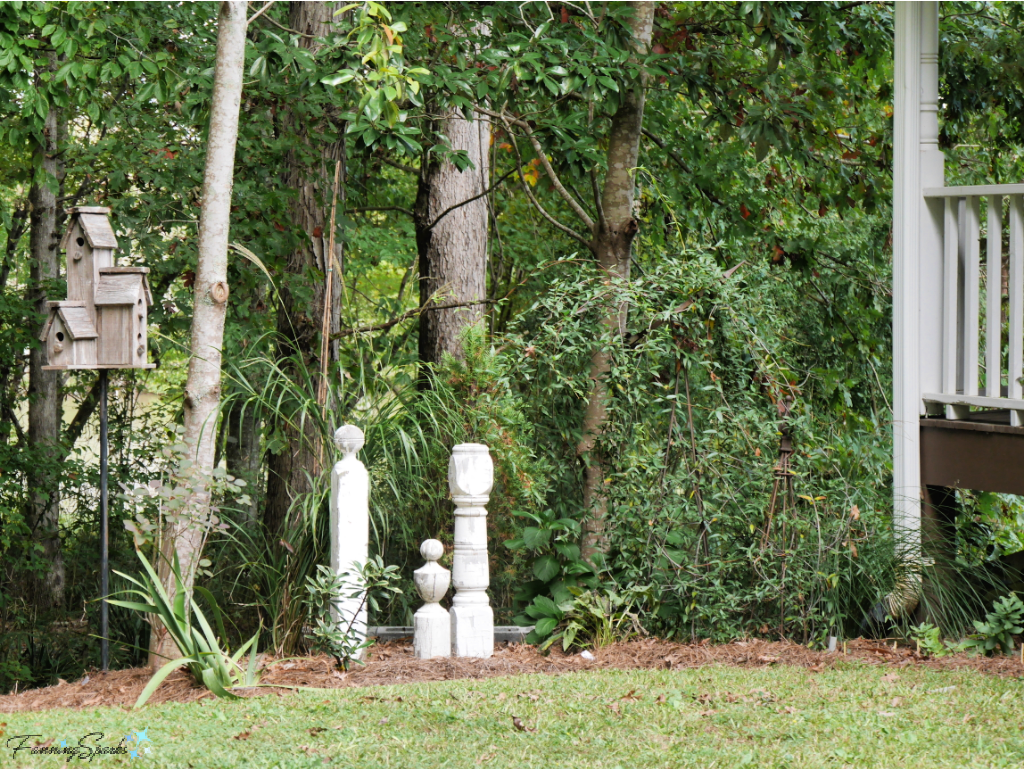
 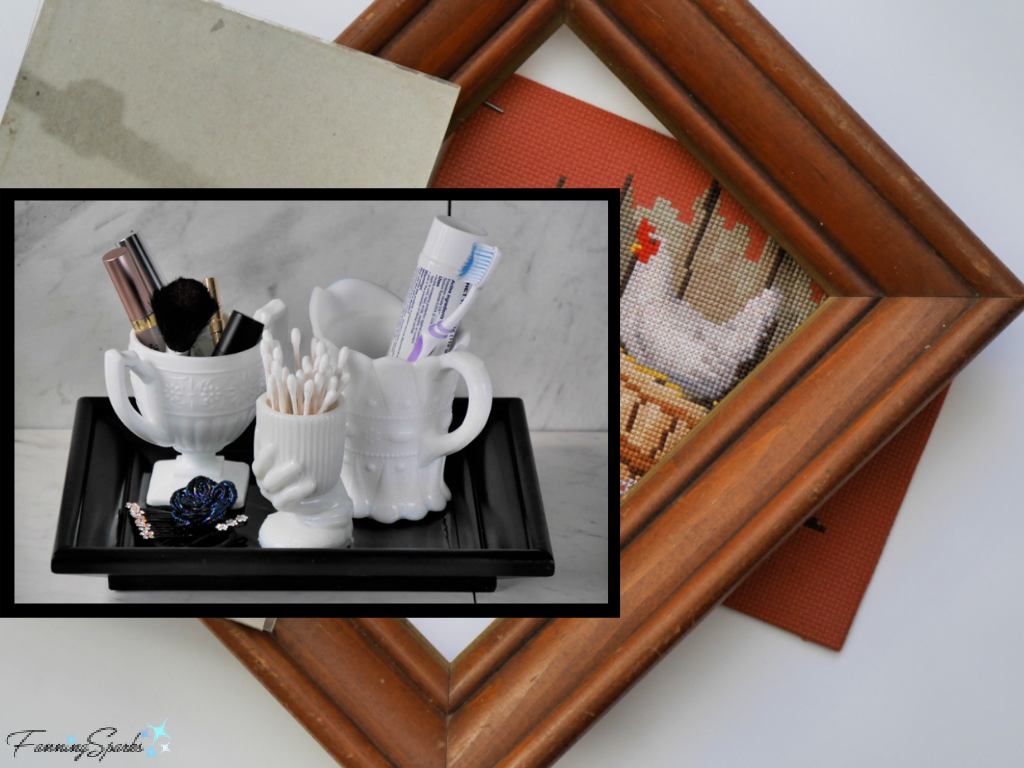 But vintage finds need not be limited to the inside of the home. We have a small collection of vintage white French enamelware which we collected while living in Germany. It’s displayed on our porch and reminds us of our time in Europe. Here’s one of those pieces playing an unexpected role as a wren’s nest.
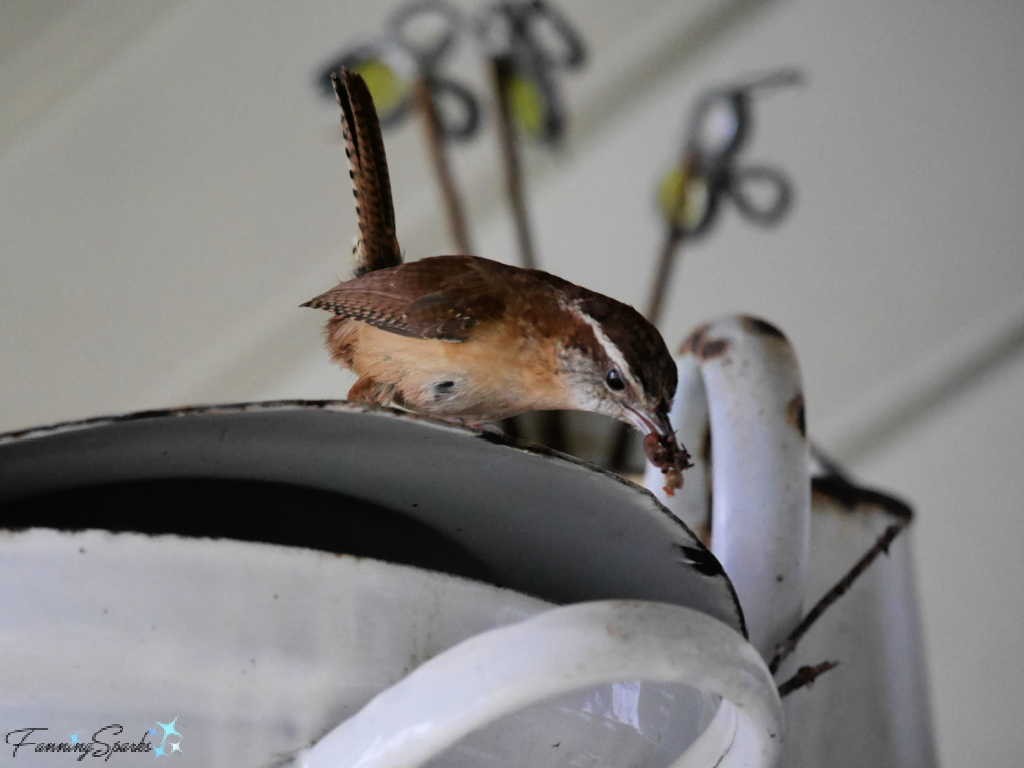
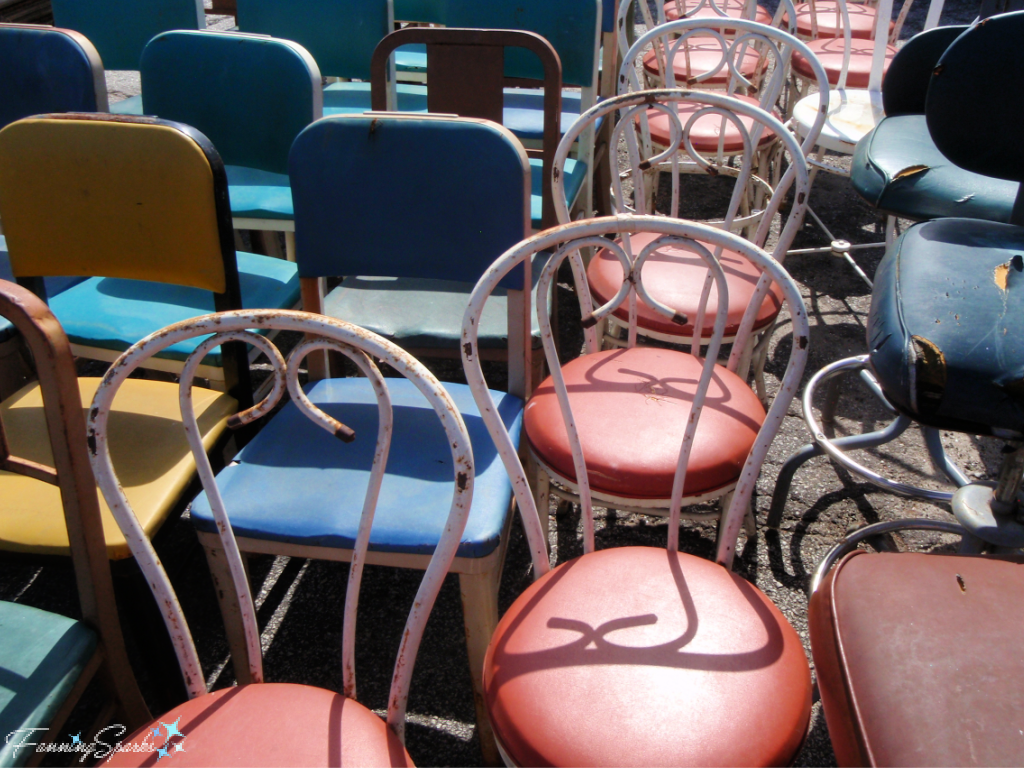
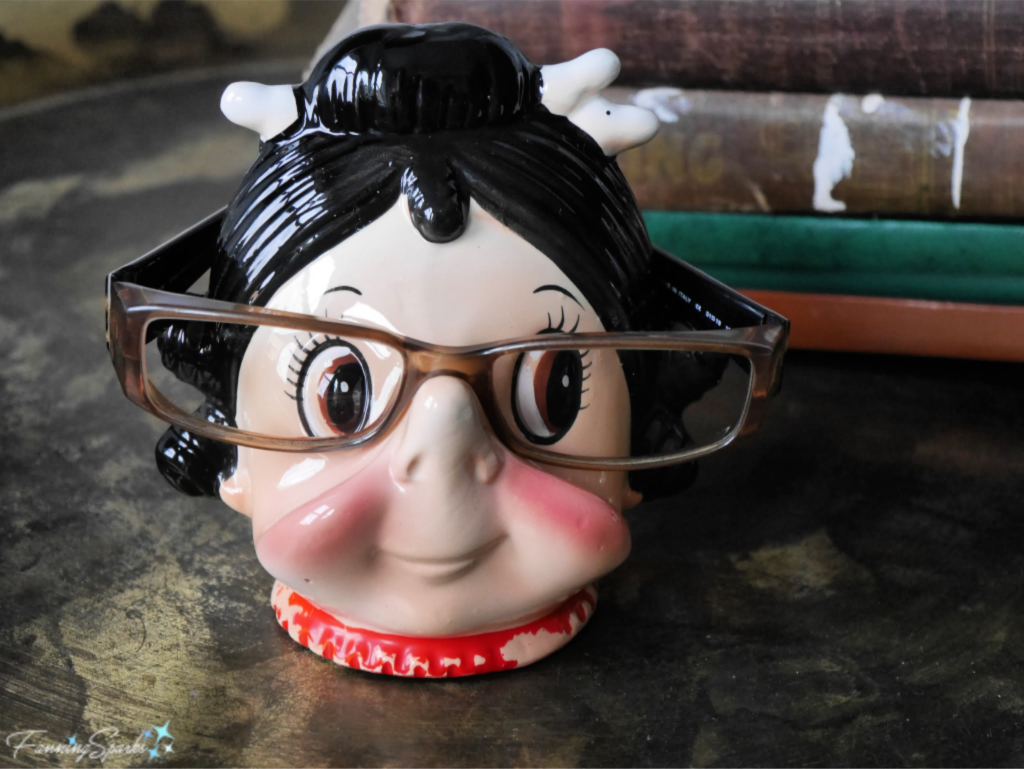
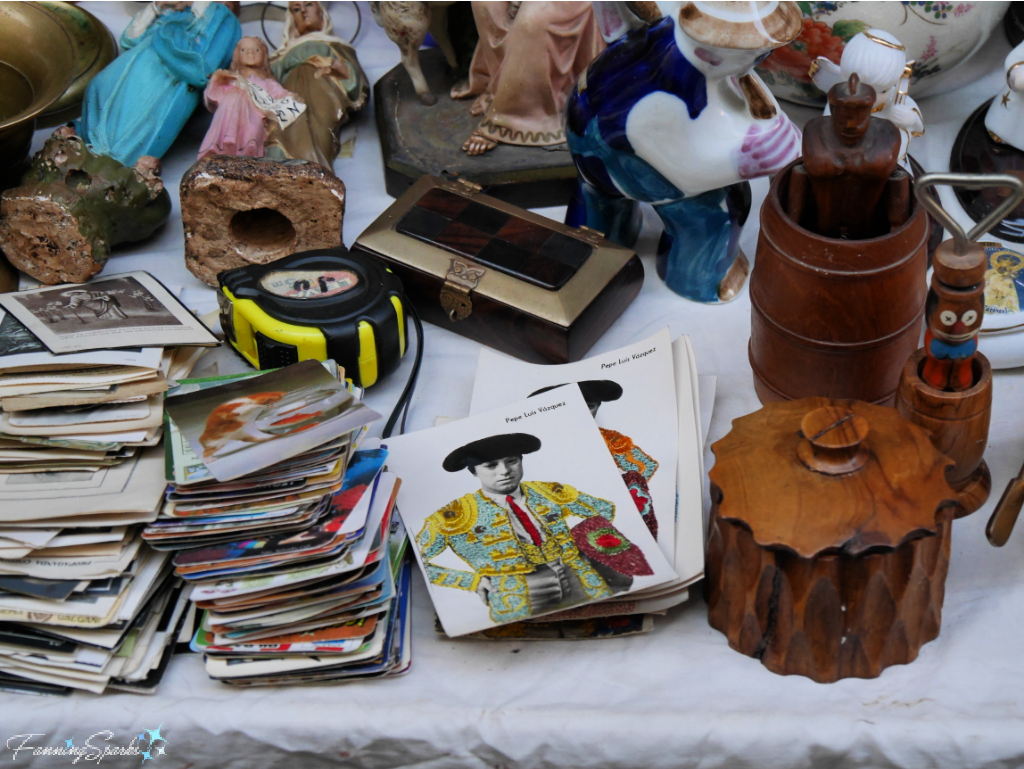
 In the same way vintage finds add interest and uniqueness to our home, they can add personality and punch to photos. I’m always on the lookout for vintage or thrift store finds to serve as photo props. The little porcelain figurine of a young girl holding the number 2 was a timely vintage find for the post
  Here’s another example of a thrift store find that needed a little attention. The wicker picnic basket was in good condition but the top covers were missing. The updated basket, complete with new covers, starred in the post
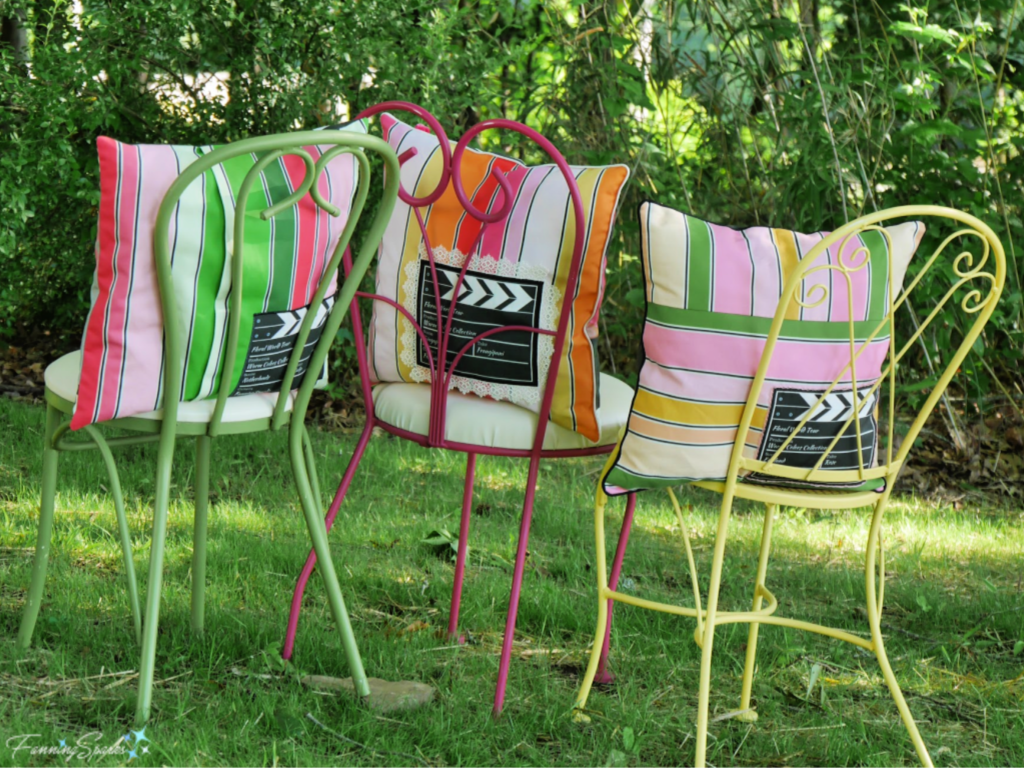
  Vintage pieces are often time-worn but I think that can add to their appeal. This vintage croquet set, which played a key role in the post
 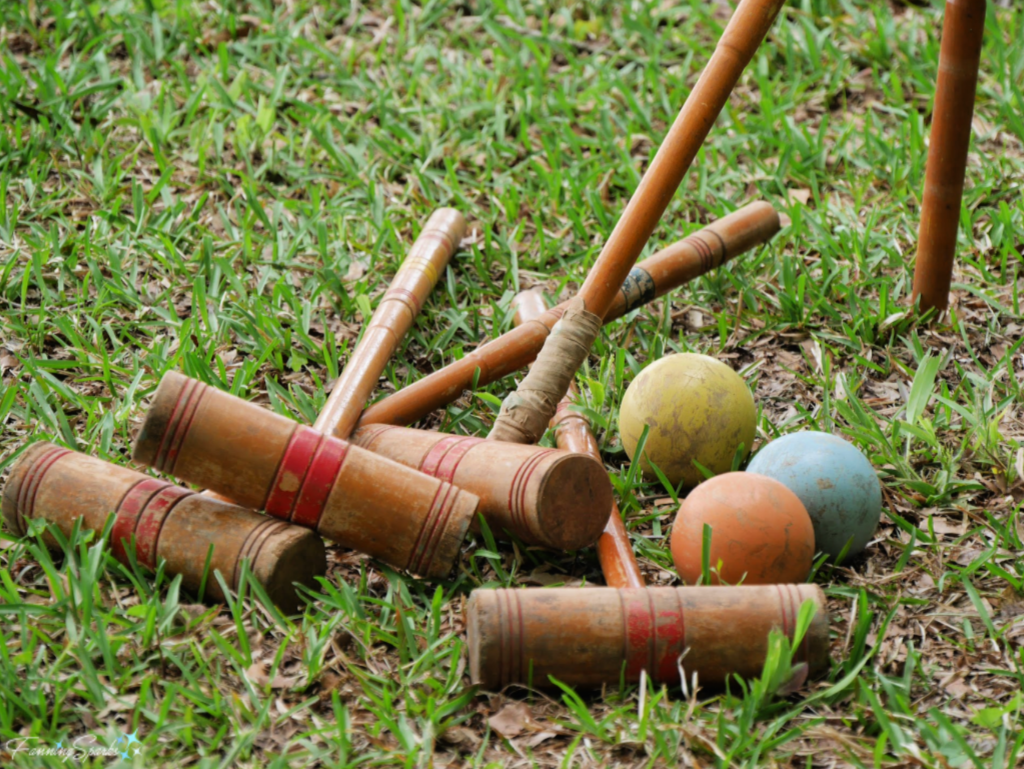 There’s one more reason I like to explore vintage shops—to scout for inspiration. I love to find handmade items from the past. It’s interesting to see what people made—to see what materials and techniques they used. These vintage finds can serve as thought-starters for new projects. The wooden trivet, shown top right in the photo below, inspired the Christmas wreath I shared in the post
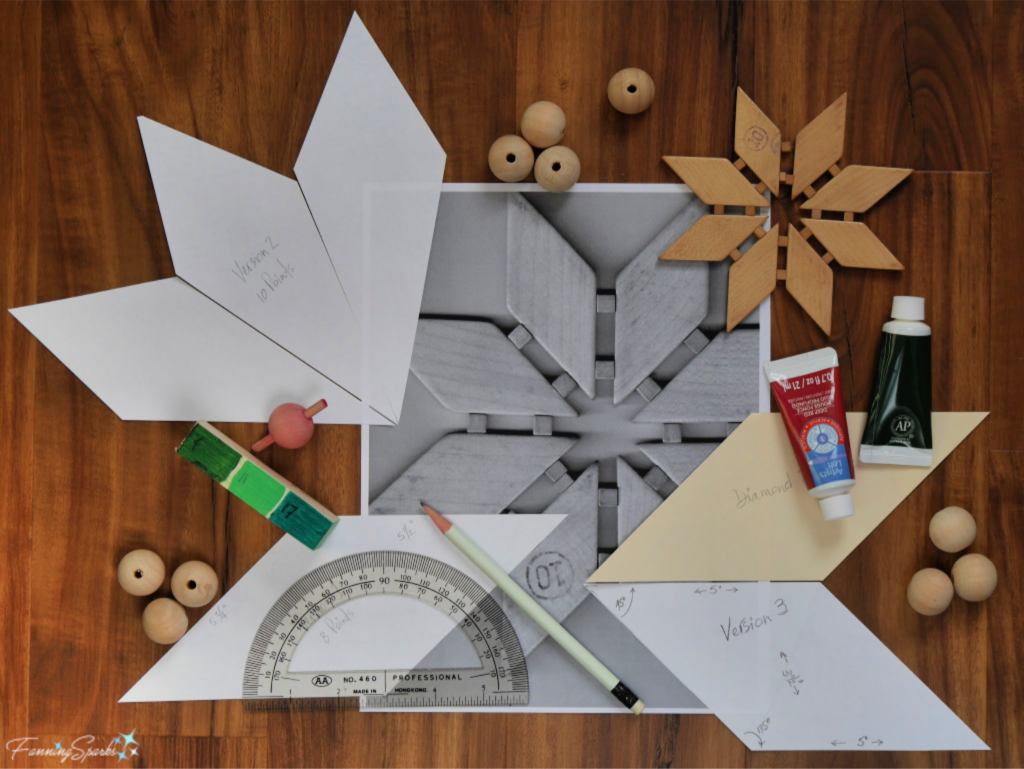
 This postcard featuring Rafael Ortega, a famous Spanish bullfighter, is elaborately enhanced with embroidery.
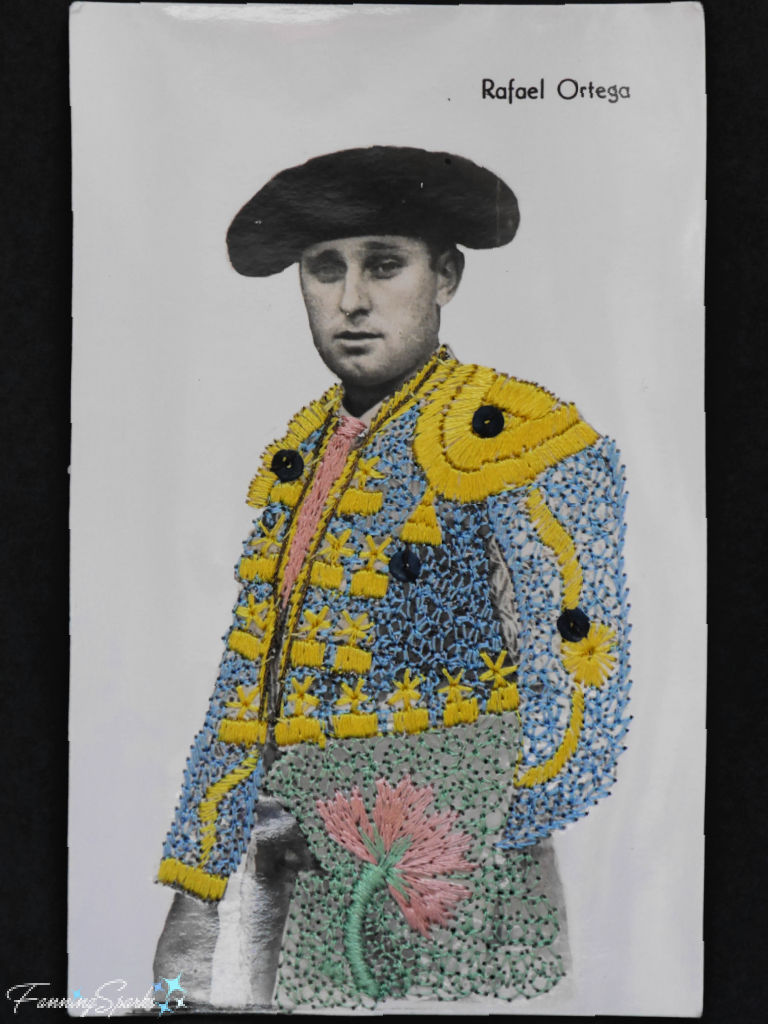 Vintage postcards are fun to collect. They’re small and easy to transport and store. Yet they can be quite fascinating as can be seen in this set of 3 vintage postcards from an antique market in Tongeren, Belgium.
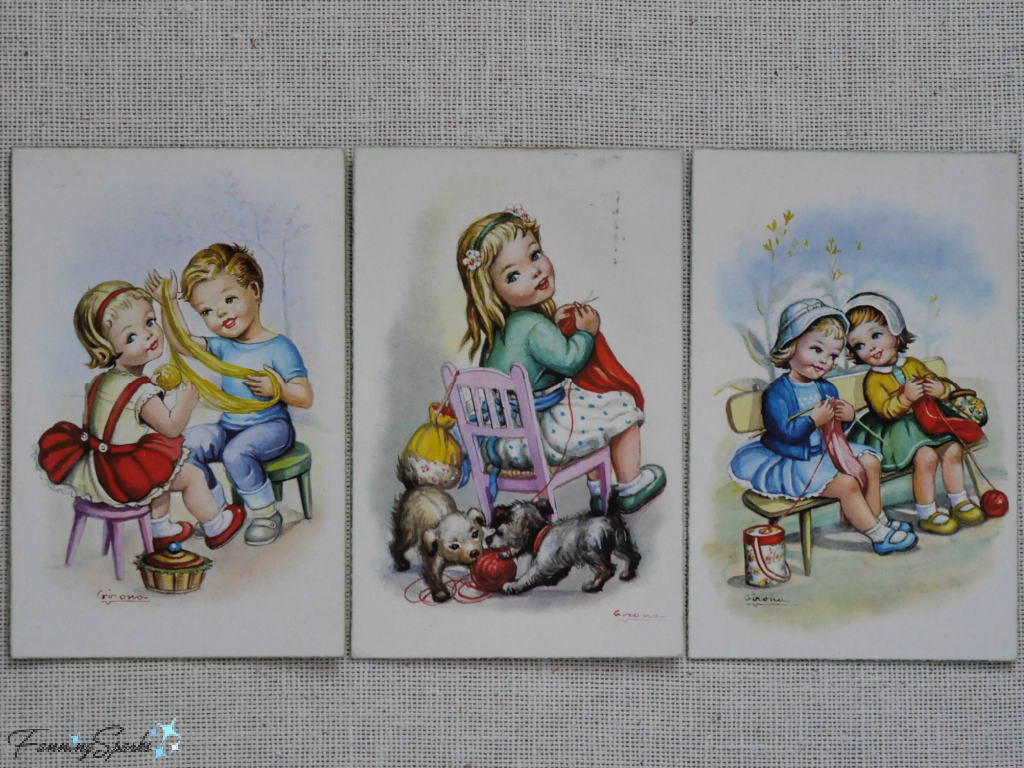 The illustrations are signed by “Girona”. The postcards were printed in Spain. They are incredibly cutesy but special and unique. Here’s a closer look at the little girl and boy winding yarn.
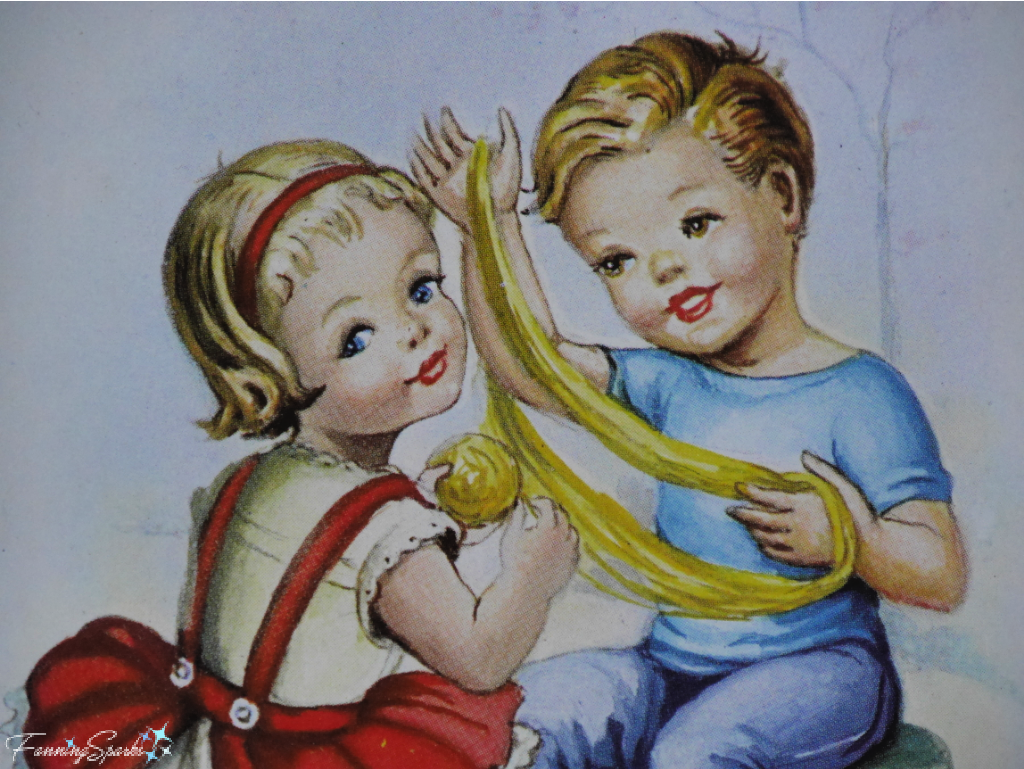 An interesting detail that I didn’t notice before is the girls are knitting with extra-long straight needles positioned under their arms—that’s the way my mother knits too. It’s just another reason to treasure these vintage finds!

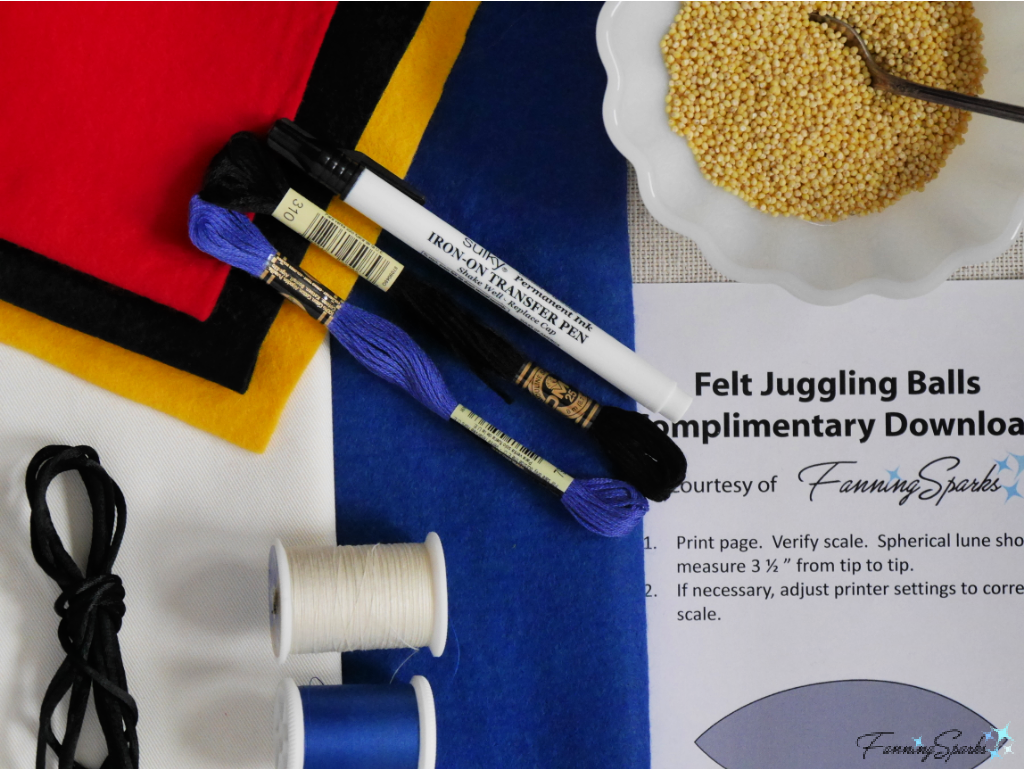
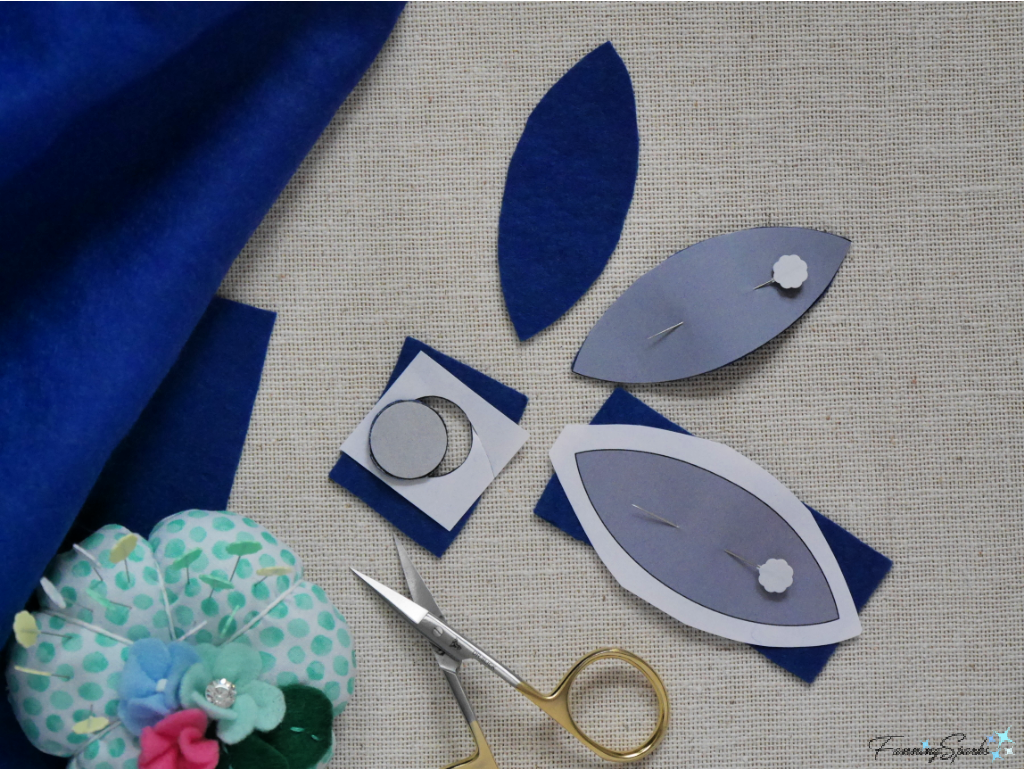 Cut 6 lunar panels and 2 end circles for EACH ball. Use a fabric marker or chalk to clearly mark the wrong sides of the cut pieces.
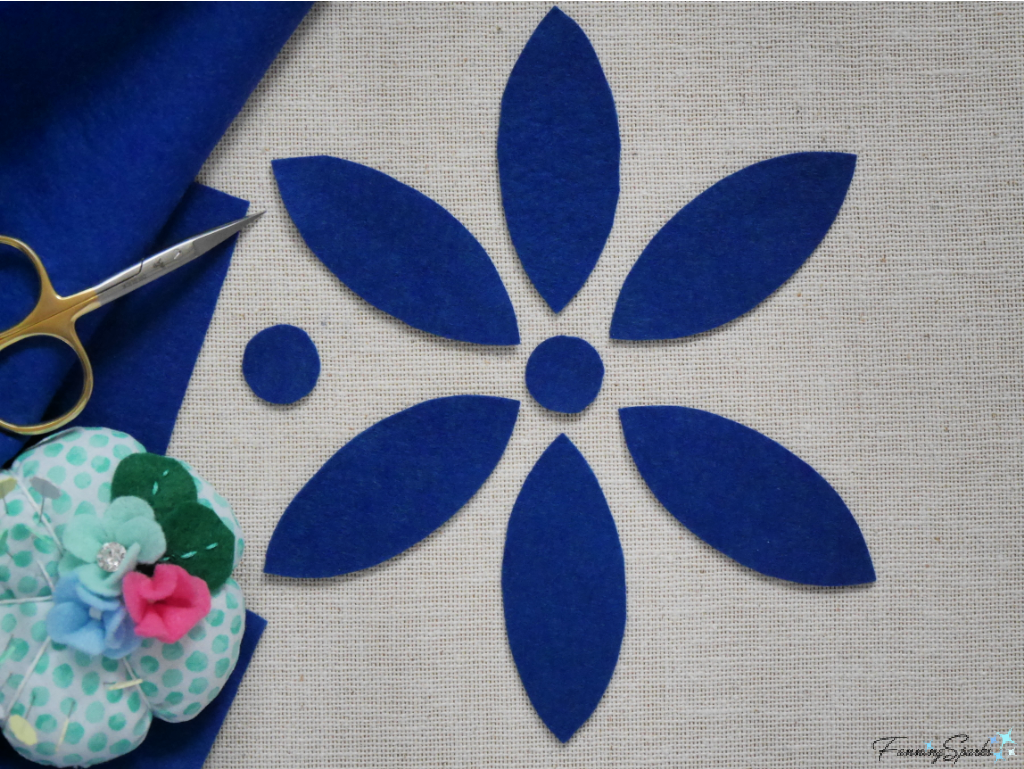 Step 3 Sew Juggling Ball Align a pair of matching lunar panels with RIGHT sides together. Pin. Check that the two pieces are identical especially at the tips. Sew only one side of the lunar panels. Use a single strand of matching sewing thread and a whipstitch/ overcast stitch (or your stitch of choice). Note: I’m using white (instead of blue) thread for visibility in the photo below. Take your time to firmly secure the lunar panels with small, strong, even stitches, spaced close together, catching both edges in each stitch.
 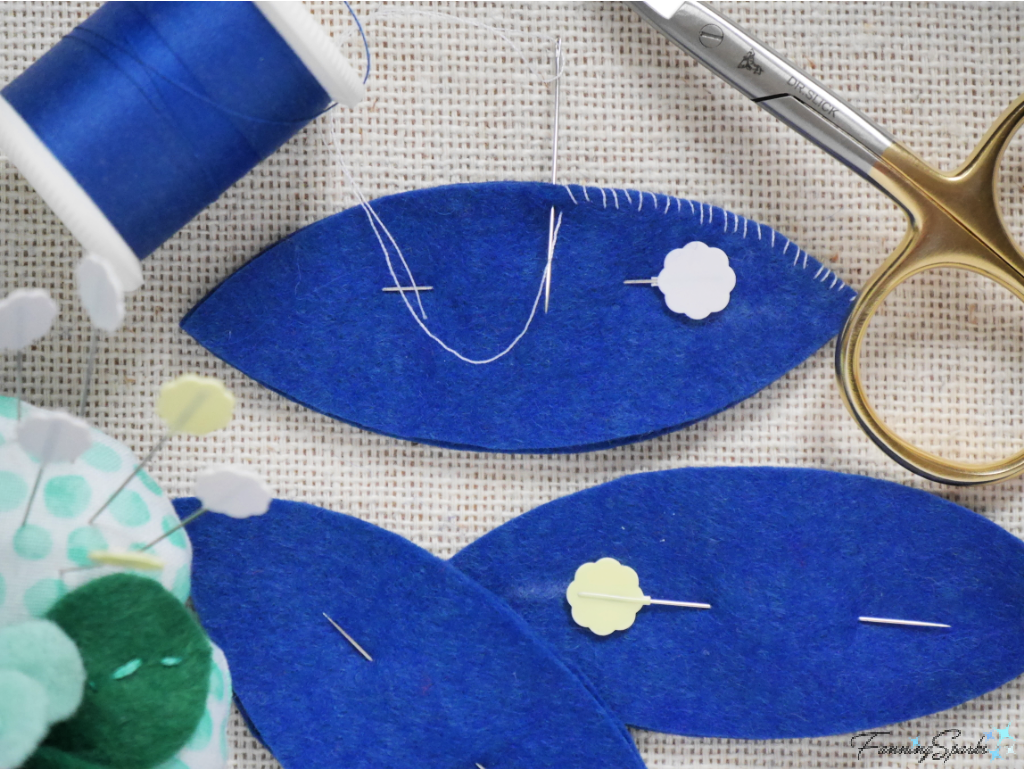 Repeat this process with the other 2 sets of lunar panels. You should have 3 pairs of lunar panels stitched together along one side. Prepare to sew 2 sets of lunar panels together by tucking one set of panels inside the other. Ensure the RIGHT sides are facing. Once again, take care to align the tips. Connect the final set of lunar panels in this same manner.
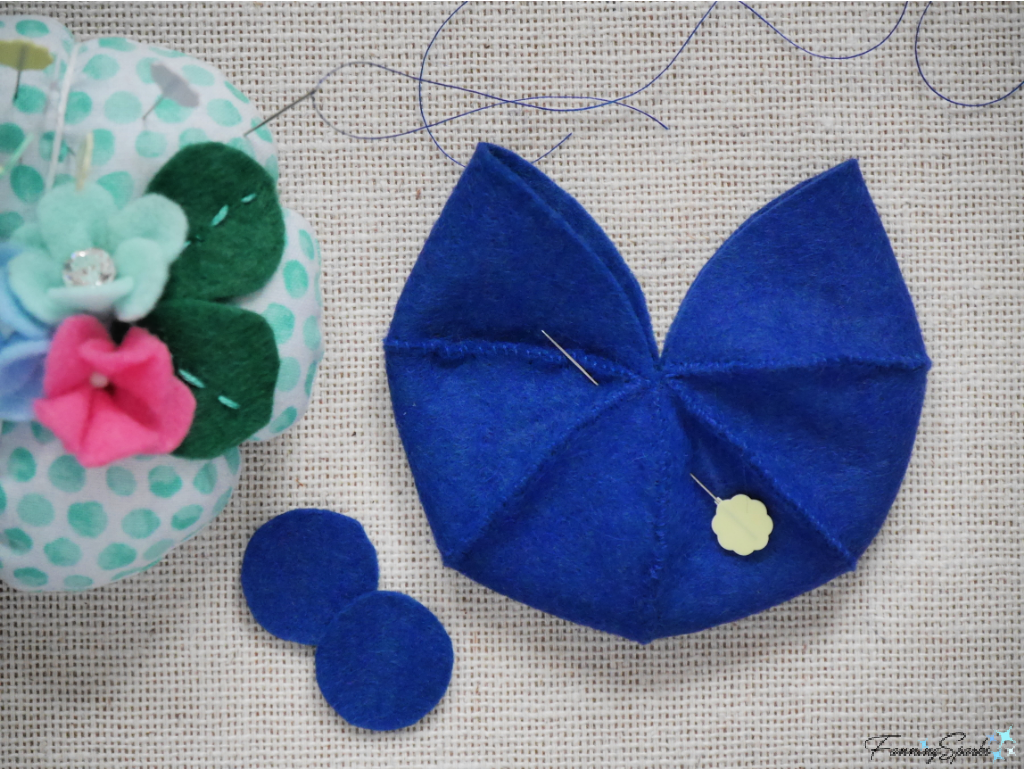 Sew the final seam connecting the first and sixth lunar panel sides. Stop sewing about 1” before the tip leaving a small opening for turning and filling. At this point, you may want to sew the other 2 balls together. Follow the same process, as outlined in this step, for each set of 6 lunar panels.
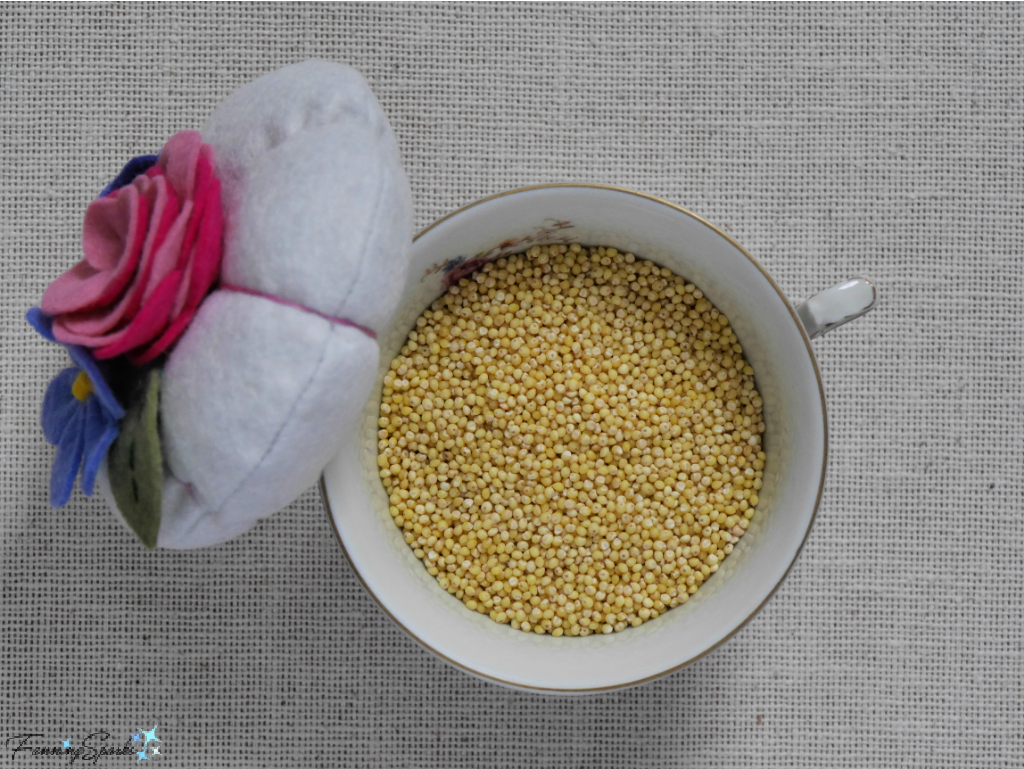
 Step 4 Fill Juggling Ball Gradually turn the ball right side out. Take care not to stretch the felt at the opening. Insert finger into the turned ball. Run finger along each seam, firmly pressing it smooth and flat. Working over a container or bowl, insert a small funnel into the unsewn opening in the ball. Use a spoon to slowly scoop the millet into the funnel. Carefully tamp down the millet so it runs into the ball. Remove funnel. Spoon small amounts of millet directly into the ball. Use the spoon handle to gently pack the millet into the ball.
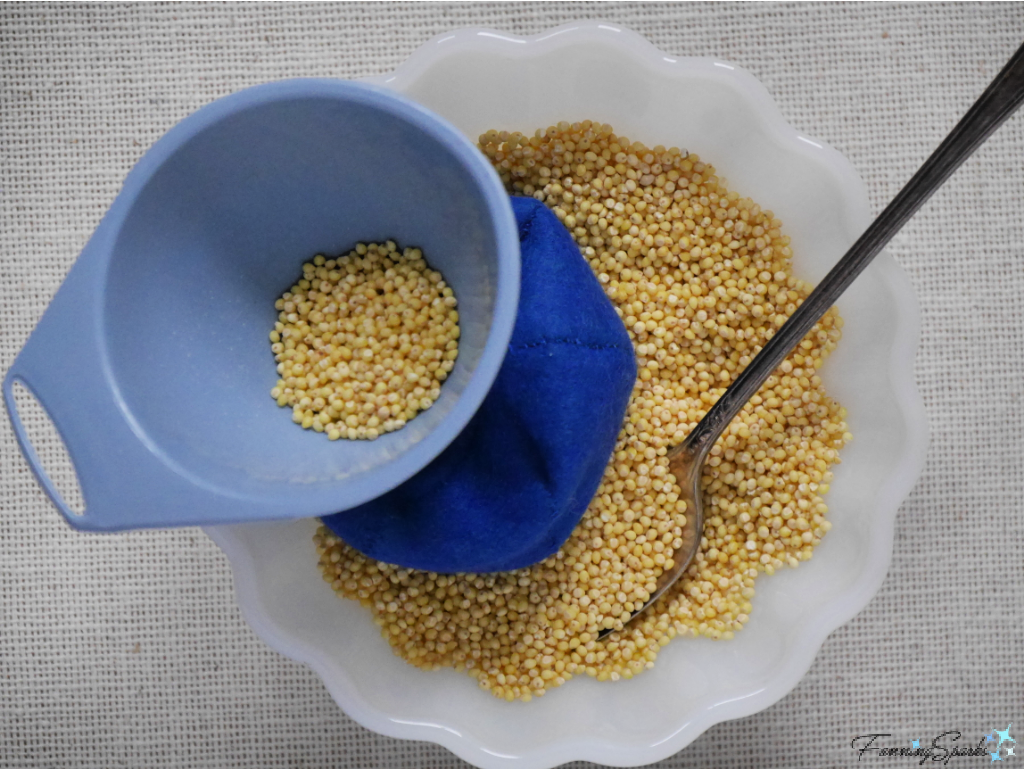 Fill the ball as full as possible while ensuring you can still grasp the edges of the opening. Pin the opening. Sew the opening closed with a whipstitch/ overcast stitch. Repeat on the other 2 juggling balls.
 Step 6 Cut Pouch Parts Cut TWO 10” x 6 ½ “ rectangles from fabric.
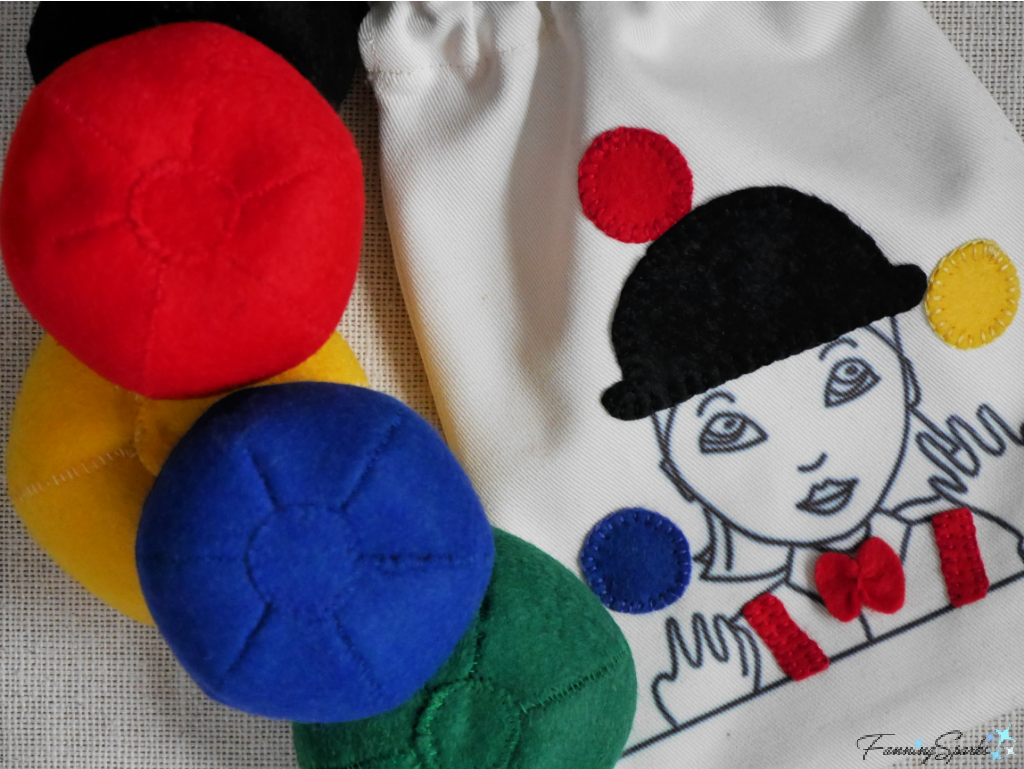
 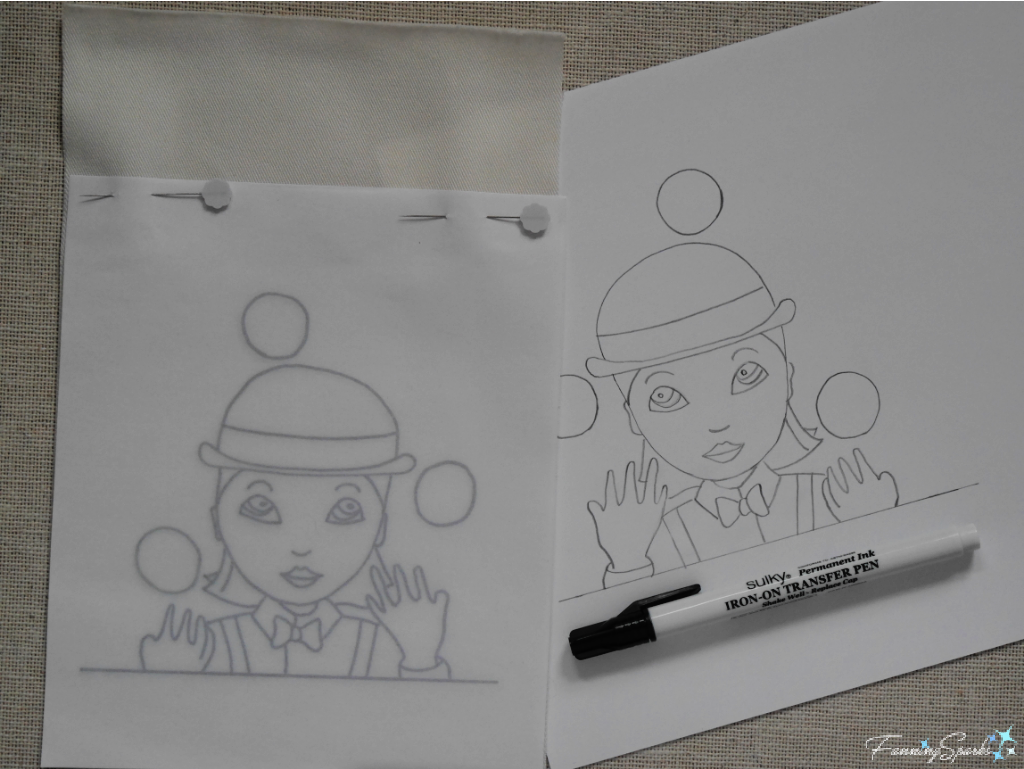 I chose to add a few felt appliques for a little color and punch on my emoji juggler. I simply cut these pieces, a hat, 3 balls, bowtie and suspenders, from small pieces of felt. Then I hand-stitched them into place with a blanket stitch using 2-strands of matching embroidery floss. Alternatively, you could use fabric glue to attach felt pieces.
 Step 8 Sew Pouch Note: Take care not to touch the transferred design with a hot iron as you construct the pouch.
 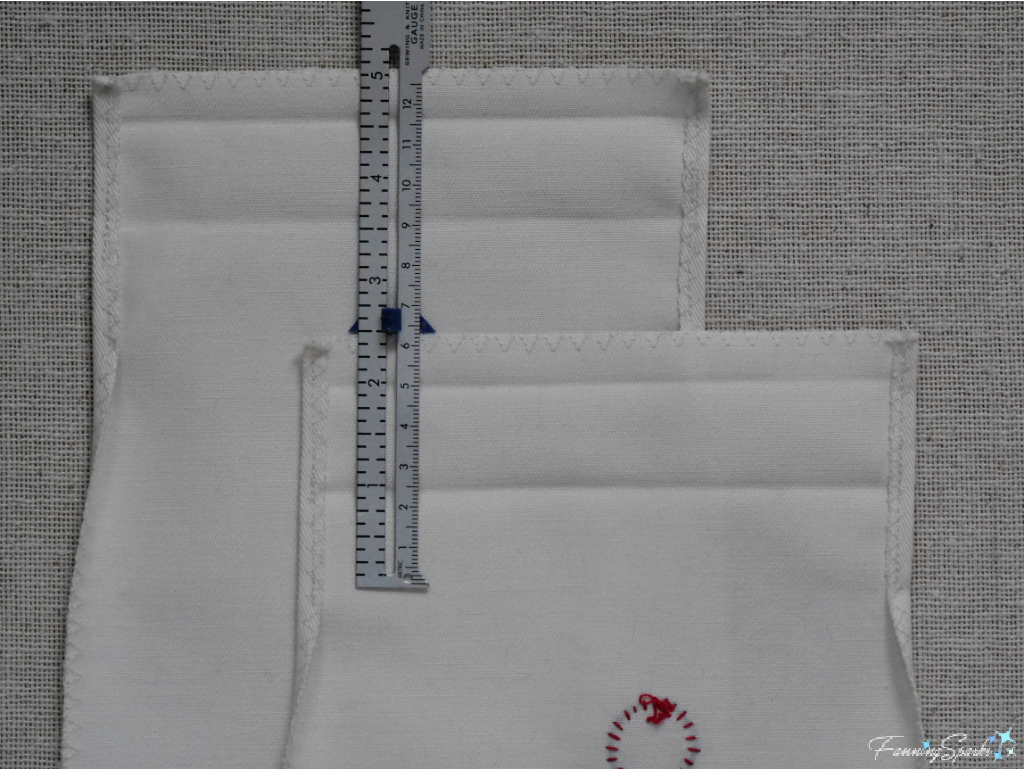 Pin folds. Make a tiny snip into the seam allowances on the sides just below the folded edge. Sew across the top edge of the front pouch panel. Sew a second seam along the folded edge. Repeat with back pouch panel.
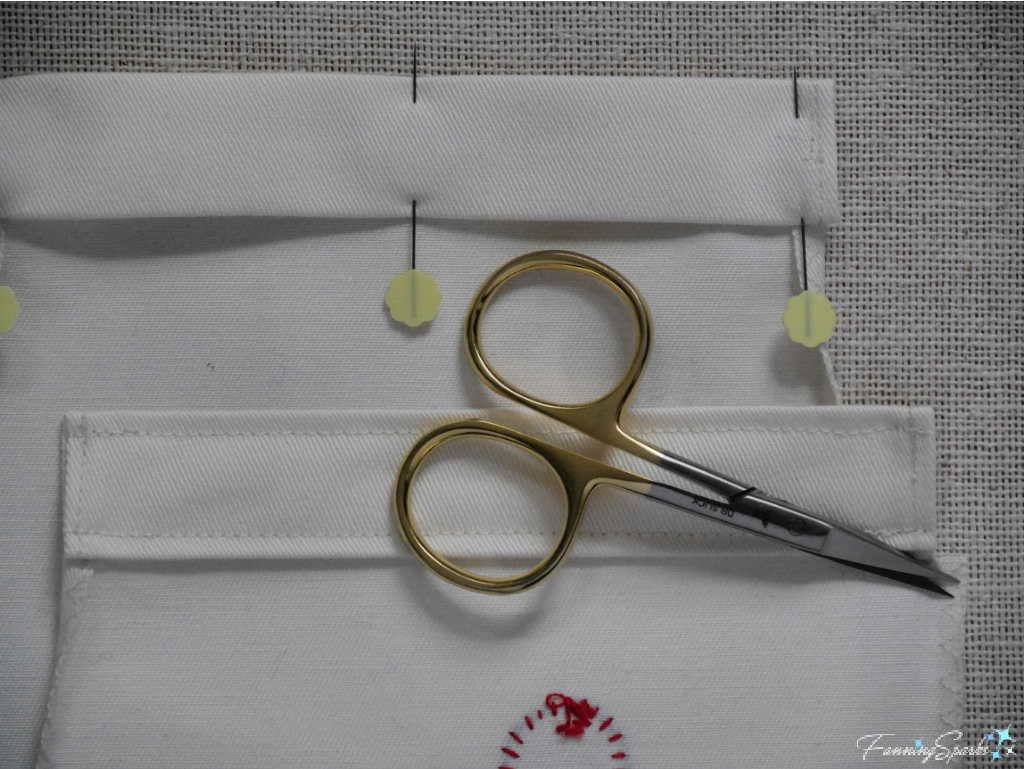 Prepare to sew front and back pouch panels together. Place the pouch panels on your working surface with the right sides together. Align edges and pin. Stitch ¼” seam along the sides and bottom—beginning and ending at the folded edge. Turn the pouch right side out. Push out the seams and corners. Press edges.
  There are a number of free online resources that will teach you how to juggle. I suggest checking out the videos on the International Jugglers Association website (see More Info) or on YouTube. Look for a 3-Ball Cascade—this seems to be the easiest technique for beginners to learn. Here are a few tips I gleaned by comparing several resources:
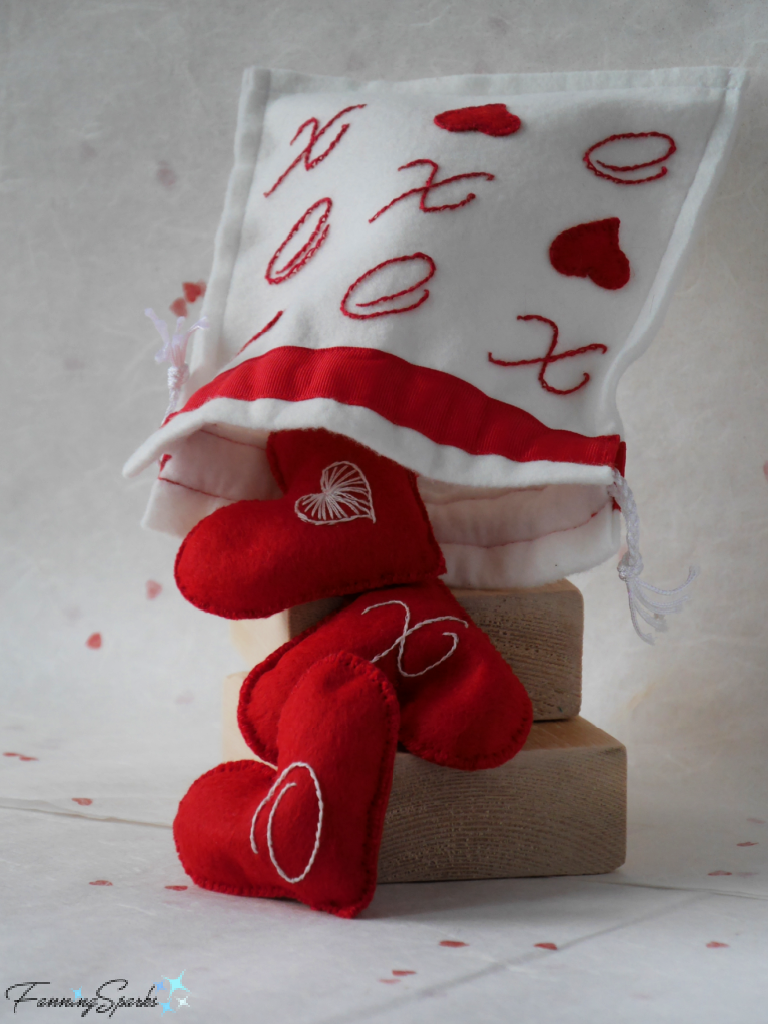
 Step 3 Sew Heart Slit Fold a felt heart vertically along the cut slit with right sides together. Use a whipstitch/overcast stitch to sew the two sides of the slit together with tiny, tight stitches. The sewn slit adds shape and dimension to the heart. Repeat on the other five felt hearts.
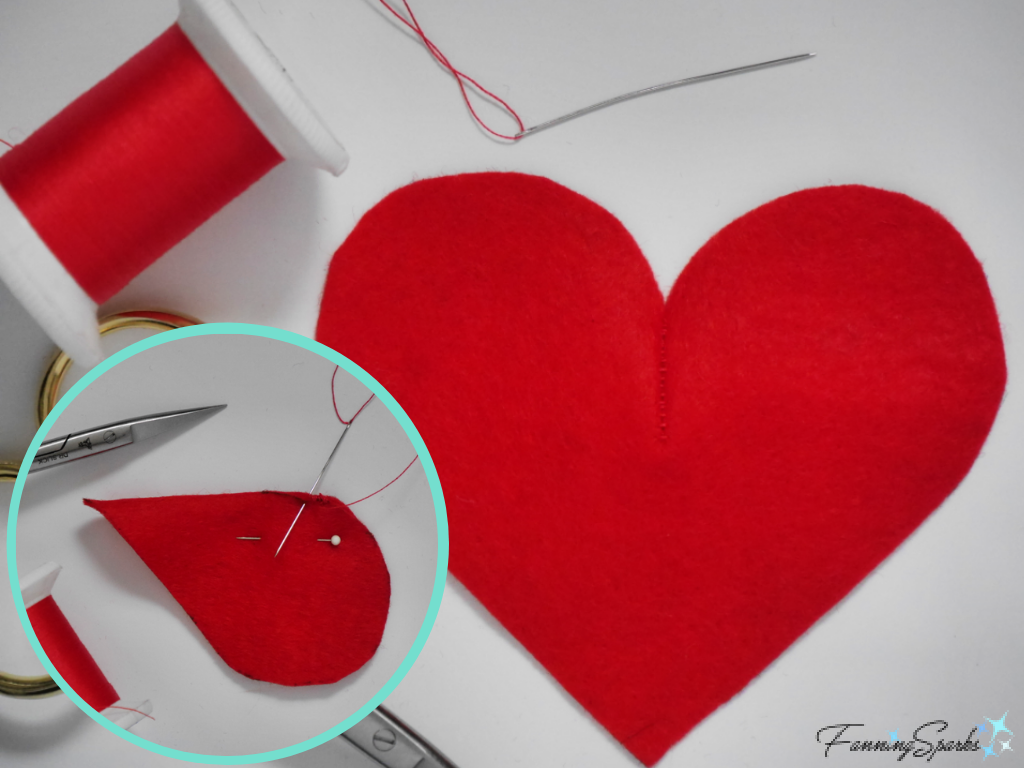 Step 4 Embroider Heart Lay a piece of tissue or parchment paper over one of the heart design patterns. Trace the outline of the heart as well as the inside design (X, O and heart). Trim the outside edge of the tissue paper heart. Align the tissue paper heart with a felt heart and pin in place. Use an outline/stem stitch (or your stitch of choice) to embroider the design onto the felt heart with 2 strands of white embroidery floss. If you’re new to embroidery or need a refresher, check out the More Info section at the end of the post. Stitch through the tissue paper. After stitching is completed, carefully tear away the tissue paper. Repeat on the other five felt hearts embroidering 2 X’s, 2 O’s, and 2 hearts.
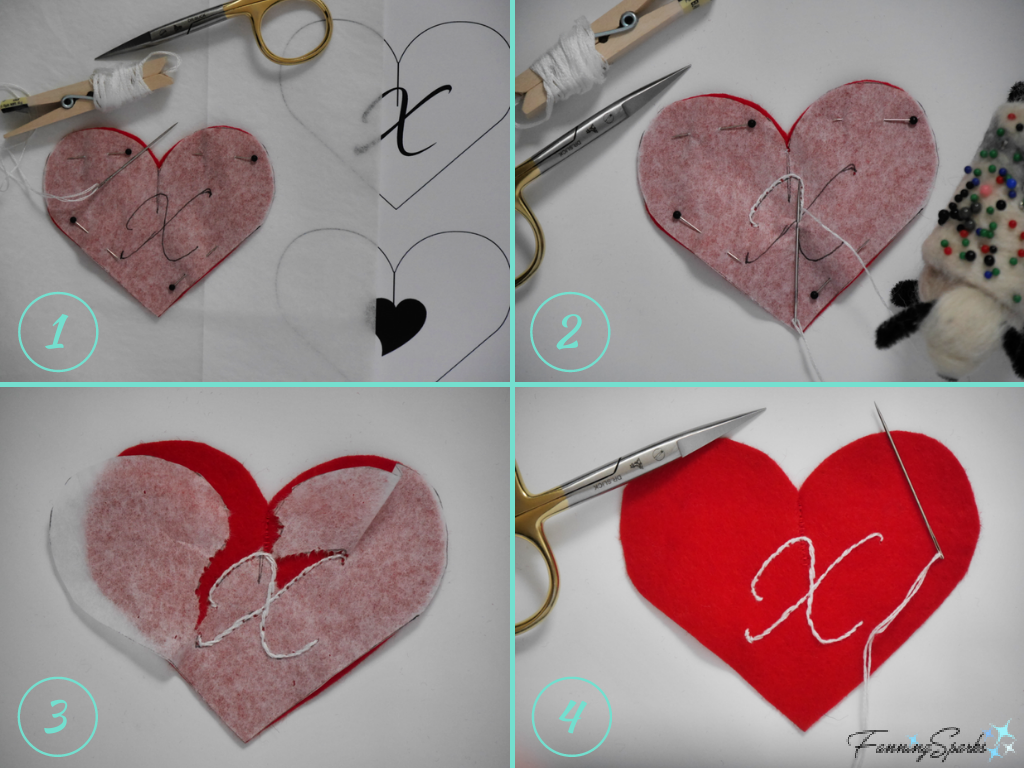 Step 5 Sew Hearts Together Align a pair of matching hearts with WRONG sides together. Pin. Use a single strand of matching sewing thread. (Note: I’m using white thread for visibility in the photo below.) Use a whipstitch/ overcast stitch (or your stitch of choice) to sew the hearts together. Leave a small 1” opening along one of the long sides. Take your time to firmly secure the hearts with small, strong even stitches, spaced close together, catching both edges in each stitch. You don’t want the filling to come out when the juggling begins!
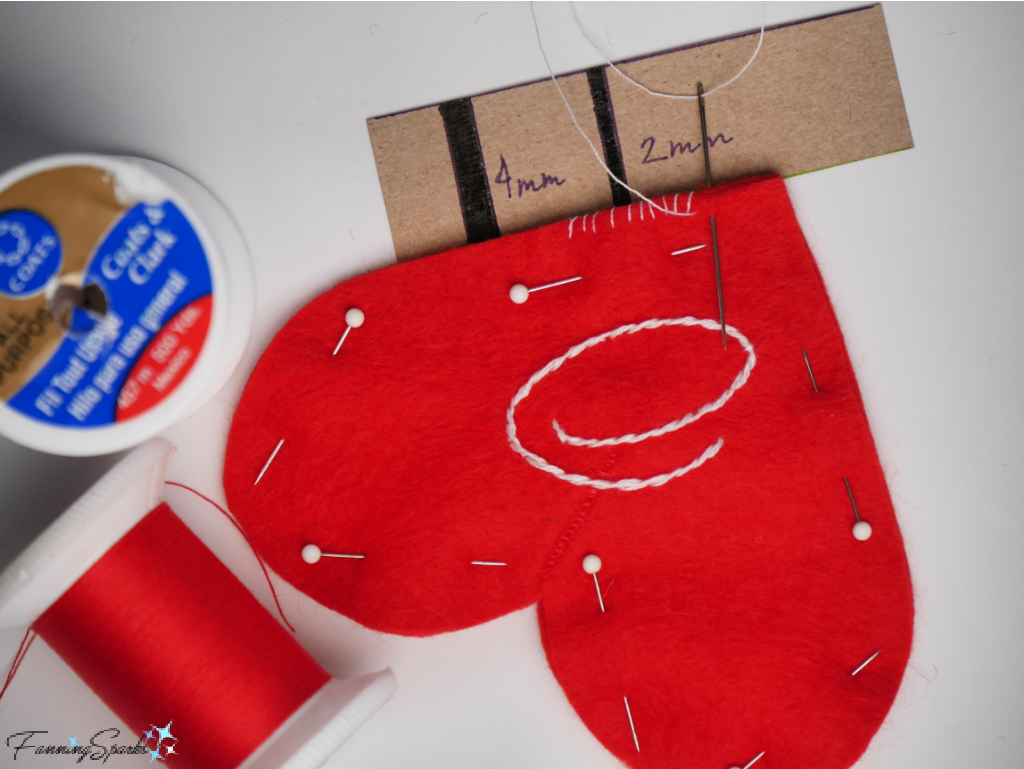 Step 6 Fill Heart Working over a container or bowl, insert a small funnel into the unsewn opening in the heart. Use a spoon to slowly scoop the millet into the funnel. Carefully tamp down the millet so it runs into the heart. Remove funnel. Spoon small amounts of millet directly into the heart. Use the spoon handle, or a thin stick such as a chopstick, to gently push the millet into all the sections of the heart.
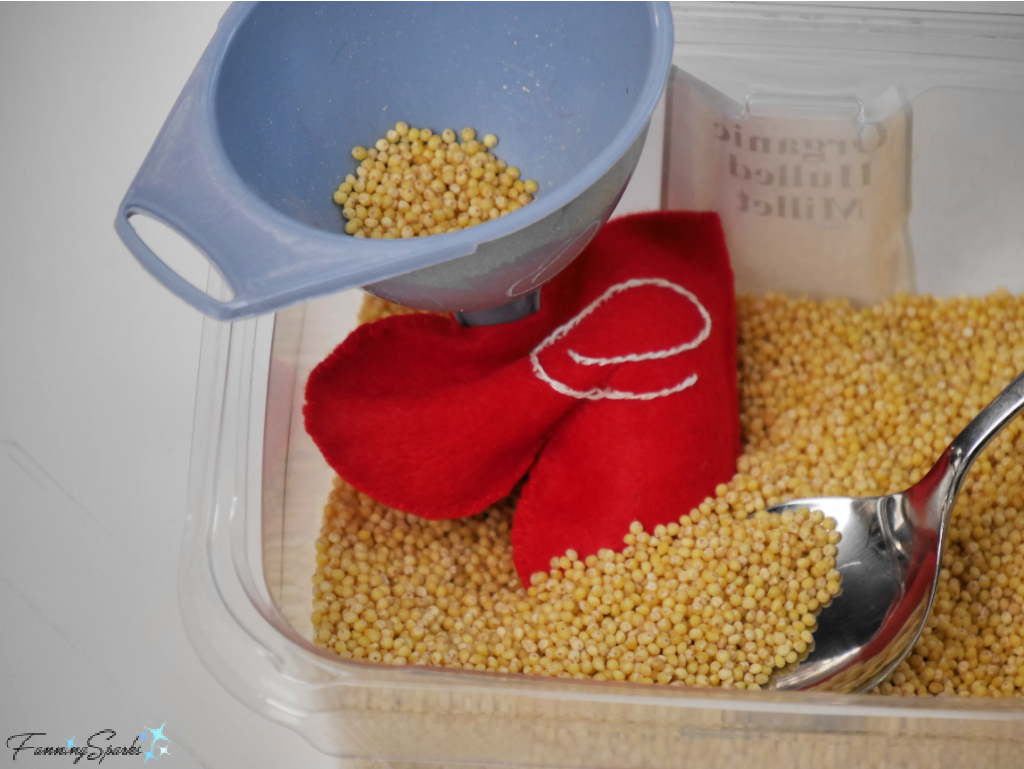 Fill the heart as full as possible while ensuring you can still grasp the edges of the opening. Pin the opening. Sew the opening closed with a whipstitch/ overcast stitch. Repeat on 2 remaining hearts.
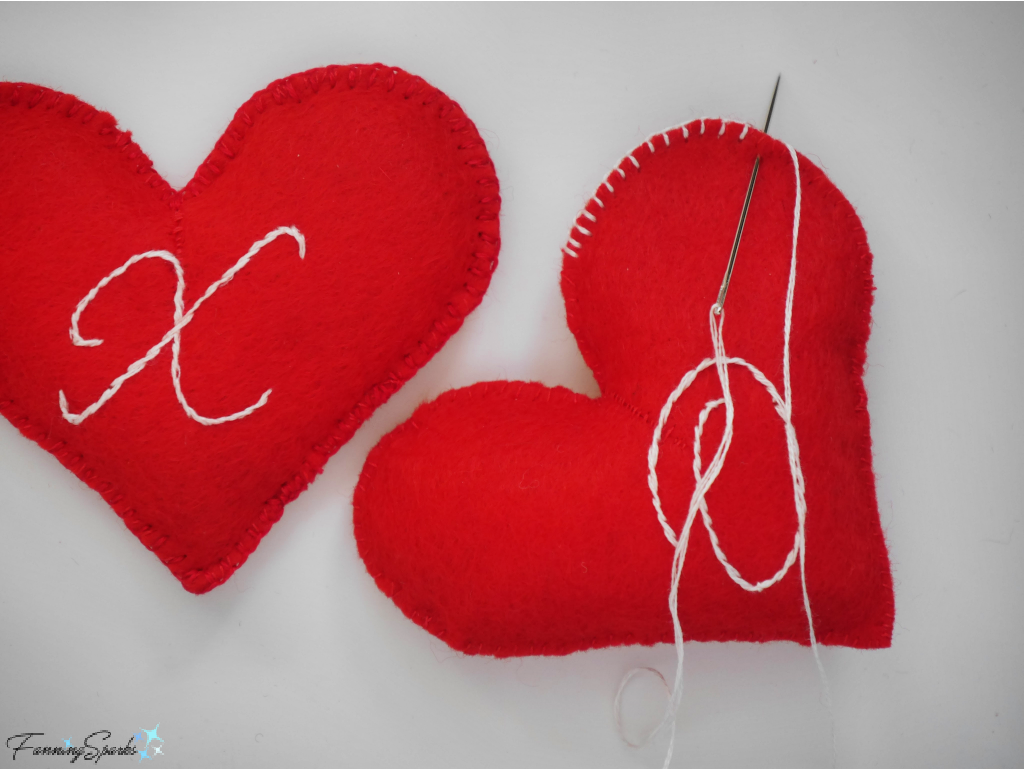 Step 8 Cut Pouch Parts Cut TWO 10” x 6 ½ “ rectangles from white felt. Cut TWO 7 ½“ lengths of 1” red grosgrain ribbon. Cut THREE small applique hearts from red felt using the method described above in Step 2.
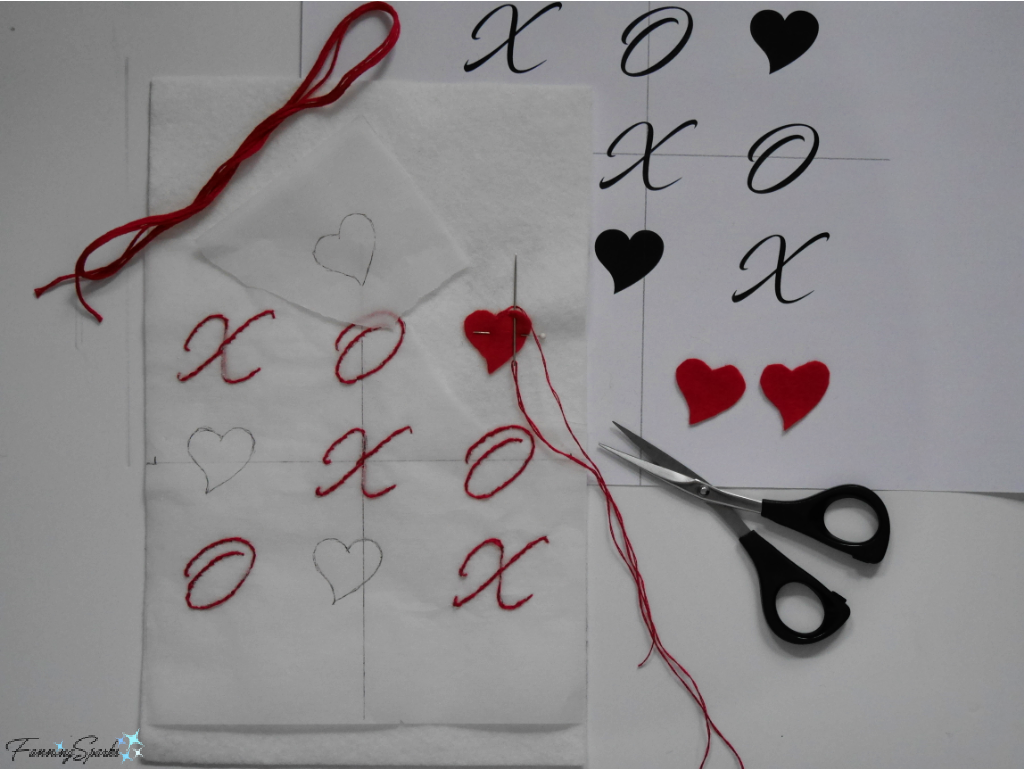 Repeat for the remaining 2 small hearts. After stitching is completed, carefully tear away the remaining tissue paper. It’s best to press down on the embroidery stitches with the fingers of one hand while tearing the tissue paper with the other hand.
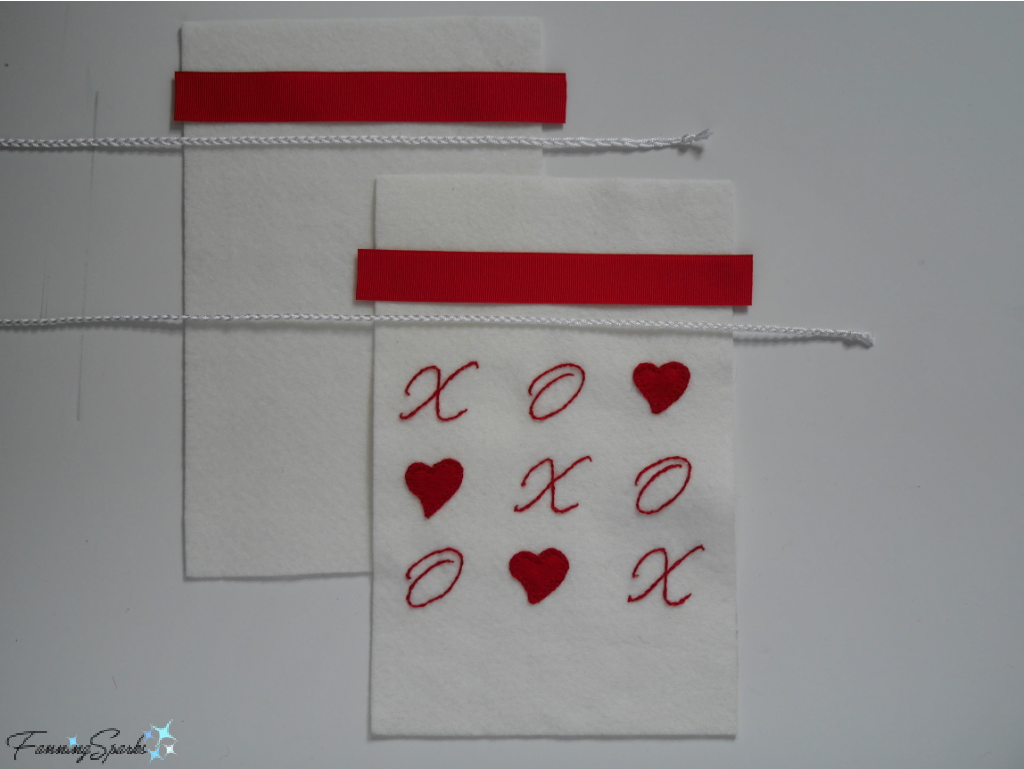 Start by making the casing. Place front pouch panel on working surface with the wrong side facing up. Fold down 1½“ from the top edge. Press. Unfold top edge. Place front pouch panel on working surface with right side facing up. Measure down ½” from pressed fold edge and align top edge of grosgrain ribbon with this line—top edge of ribbon is 2” from top edge of panel. Pin ribbon in place. Ends of ribbon should extend over side edges by ½“. Fold ribbon ends to the back side of the panel. Pin and stitch ribbon ends at the side edges of the front pouch panel. Repeat with back pouch panel.
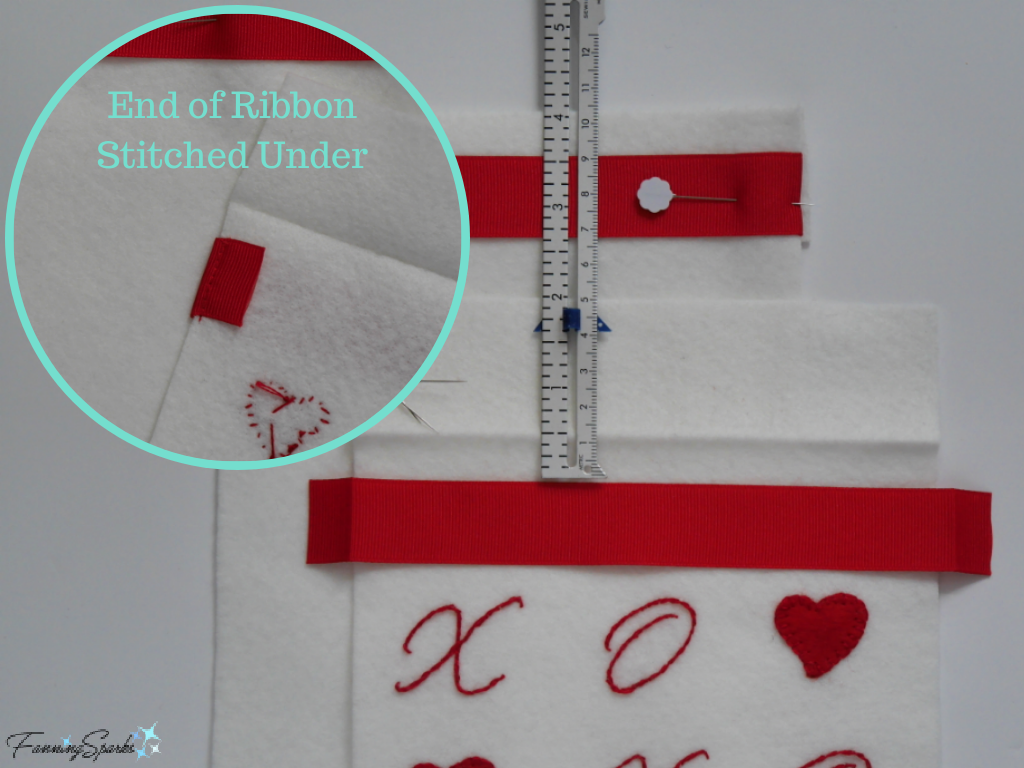 Place front pouch panel on working surface with the right side facing up. Refold the top edge to the back at the pressed fold which is 1½” from top edge. Ensure ribbon is placed straight and level at ½” from folded edge. Pin ribbon in place. Stitch across the panel along the top and bottom edges of the ribbon. Repeat with back pouch panel.
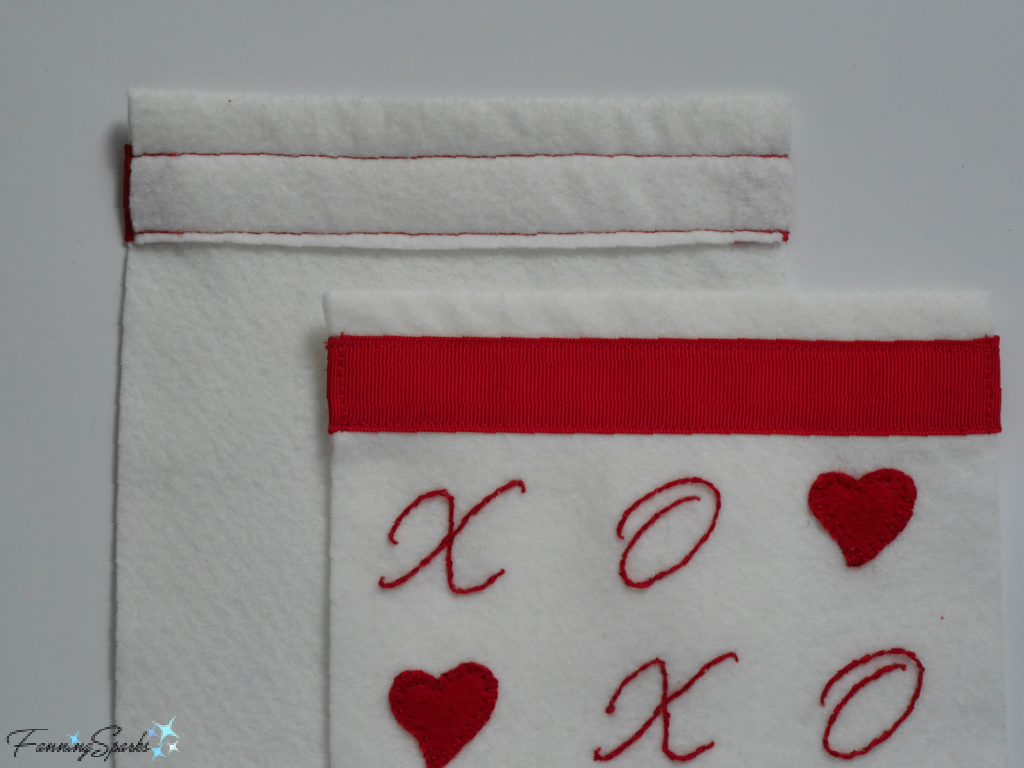 Prepare to sew front and back pouch panels together. Place back pouch panel on working surface with wrong side facing up. Place front pouch panel on back panel with right side facing up. The two panels should match and the ribbon ends should align. Pin in place. Stitch ¼” seam along the sides and bottom—beginning and ending at the bottom edge of the ribbon.
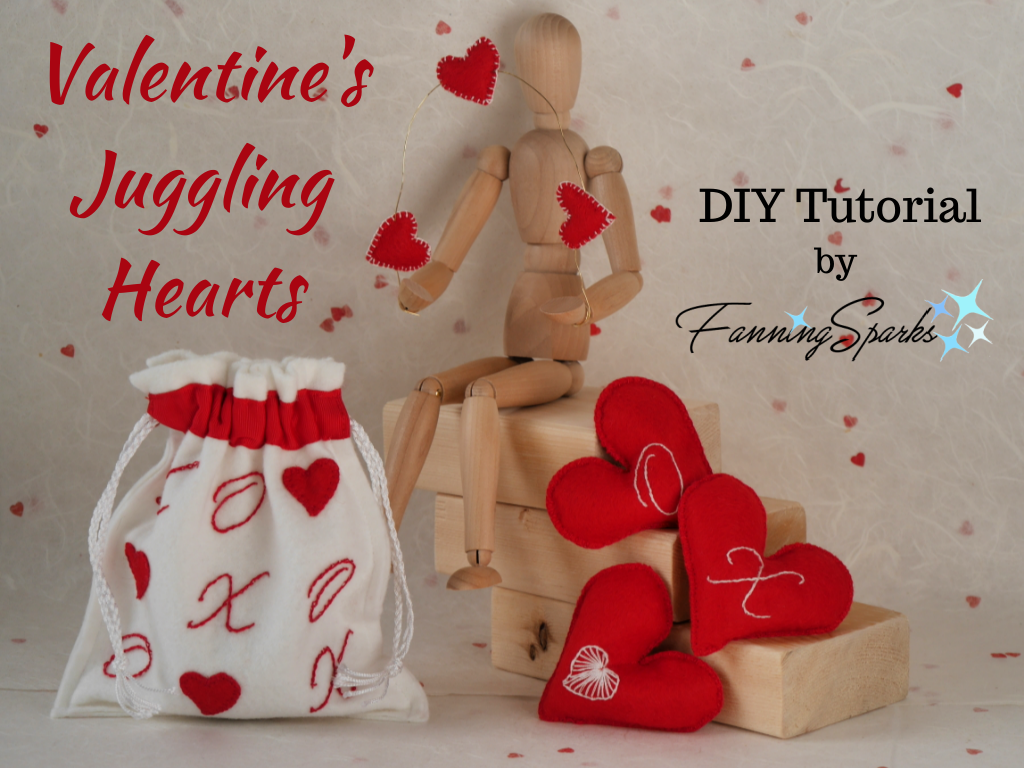
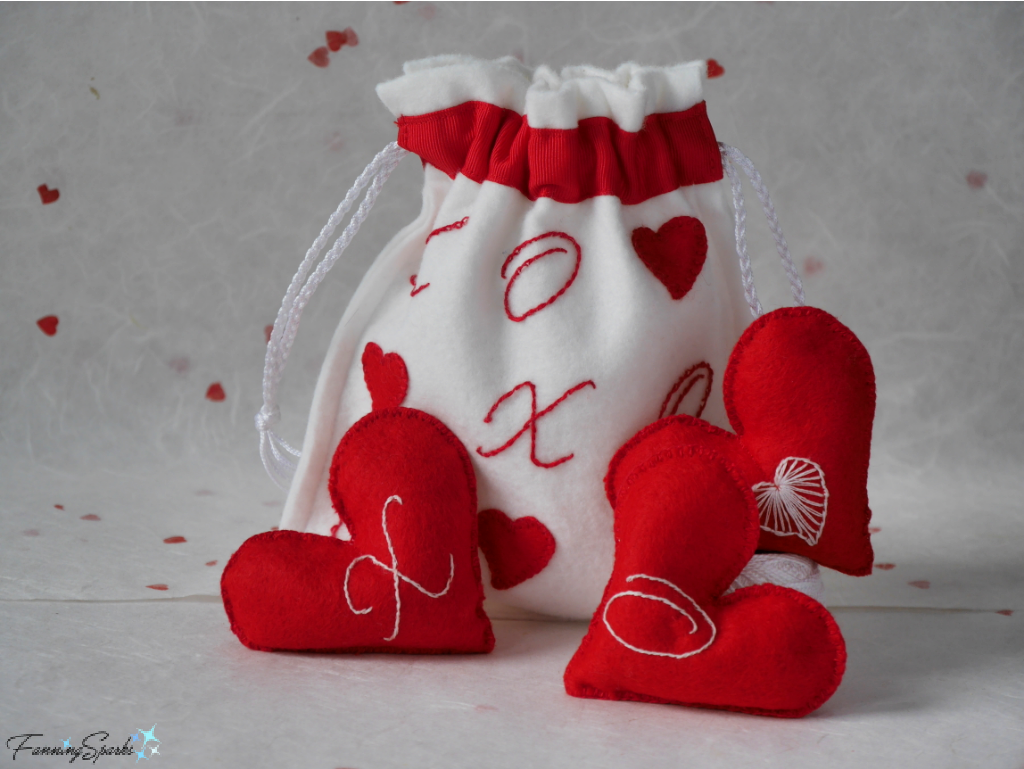
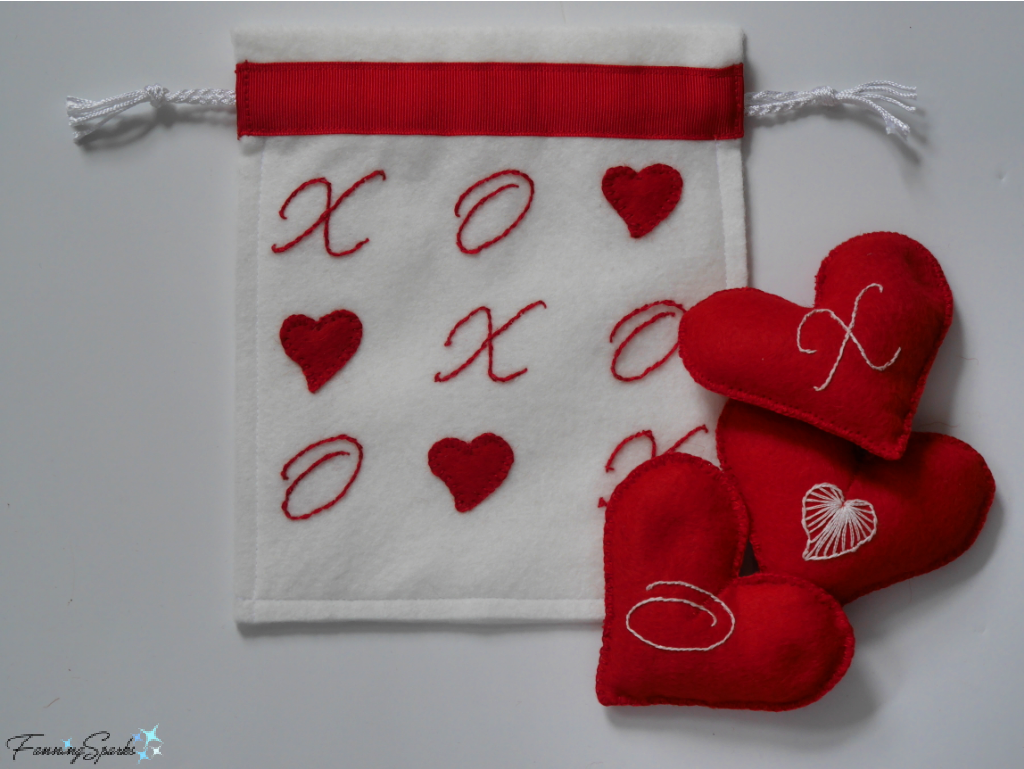 Your Valentine’s Juggling Hearts are ready to share with a fun-loving person in your life. Happy Valentine’s Day!