Some time ago, I had the pleasure of visiting Kingsbrae Garden in beautiful St. Andrews by-the-Sea, New Brunswick. Kingsbrae Garden (see More Info below) is 27 acres of award-winning art and natural beauty. While admiring the sculpture sprinkled throughout the garden, an unusual planter caught my eye. The pyramid-shaped tower was planted with strawberries. It seemed like the perfect combination of practical purpose and visual interest. I took a few photos and filed the idea away for future reference.
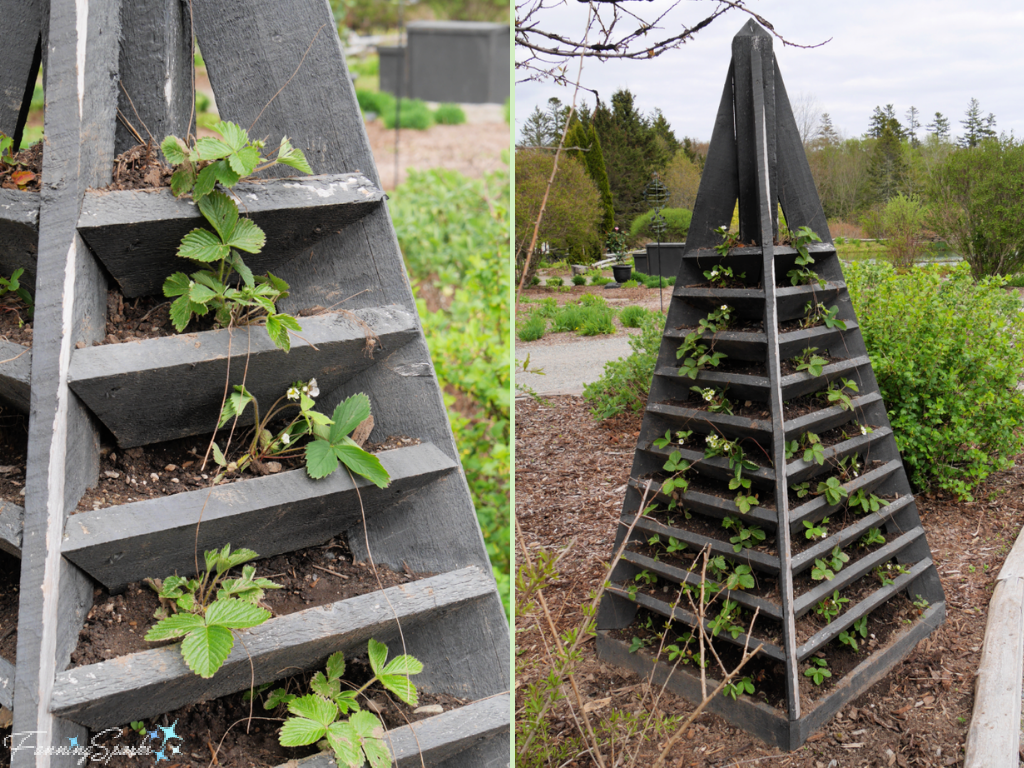
Meanwhile, back home in Georgia, we decided to try growing our own berries. We added a new garden bed and planted several fruit plants including blackberries, raspberries, blueberries and strawberries. That was last spring. This spring, when the strawberries were threatening to take over the entire bed, I remembered the Kingsbrae Garden strawberry tower.
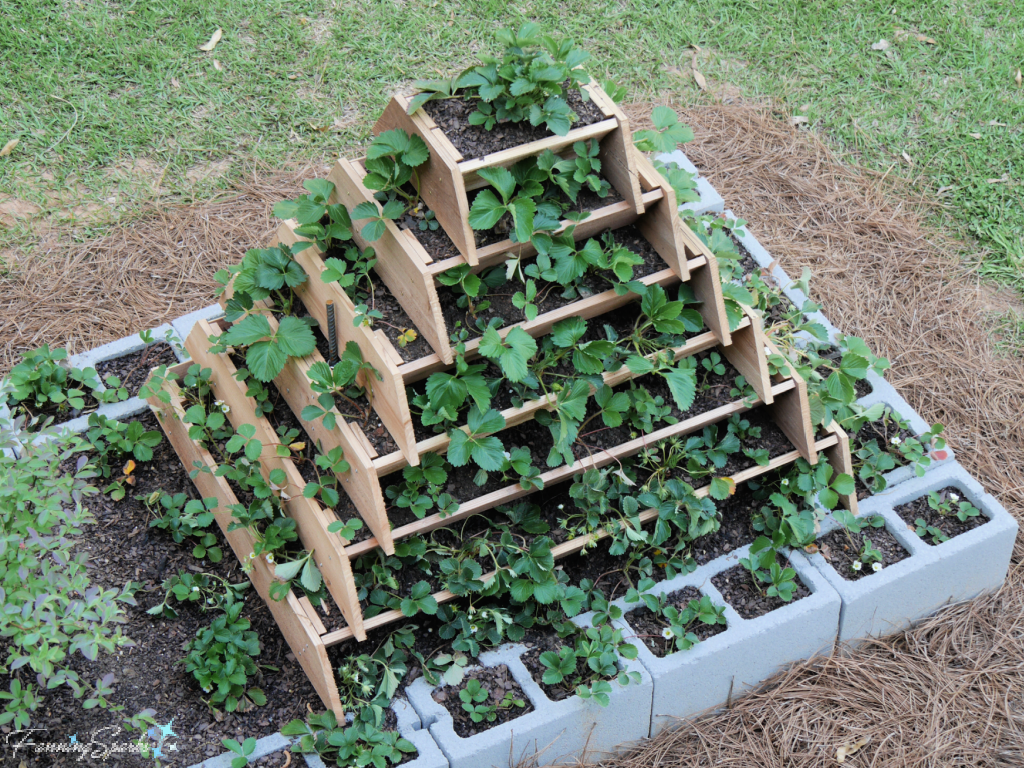
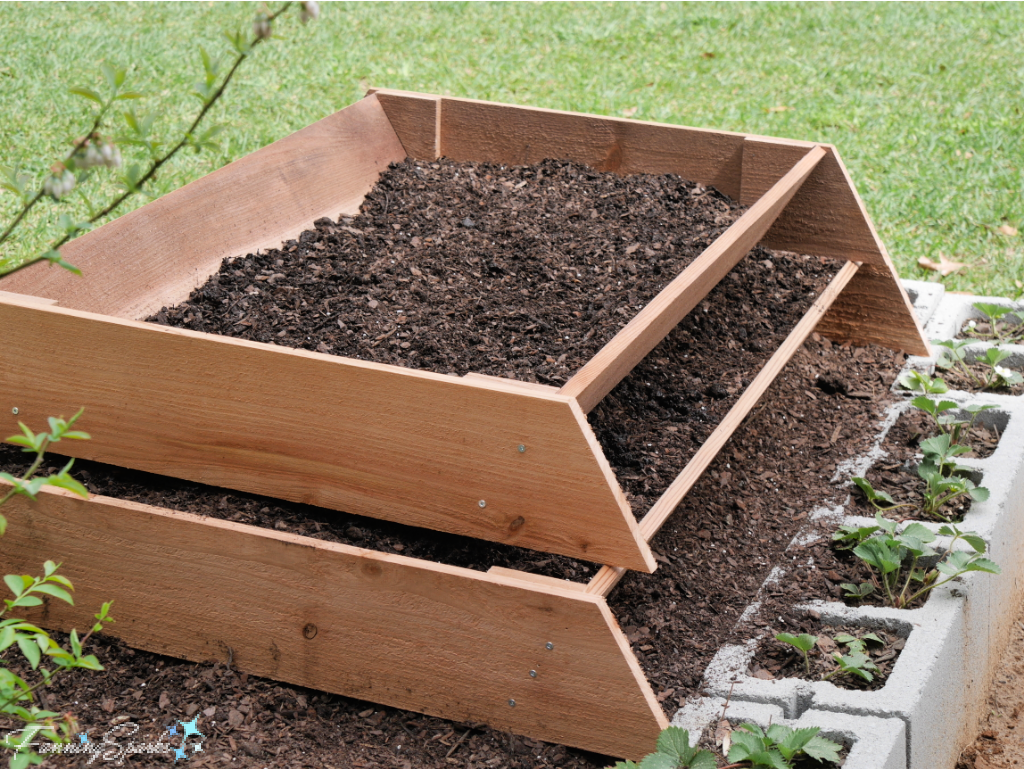
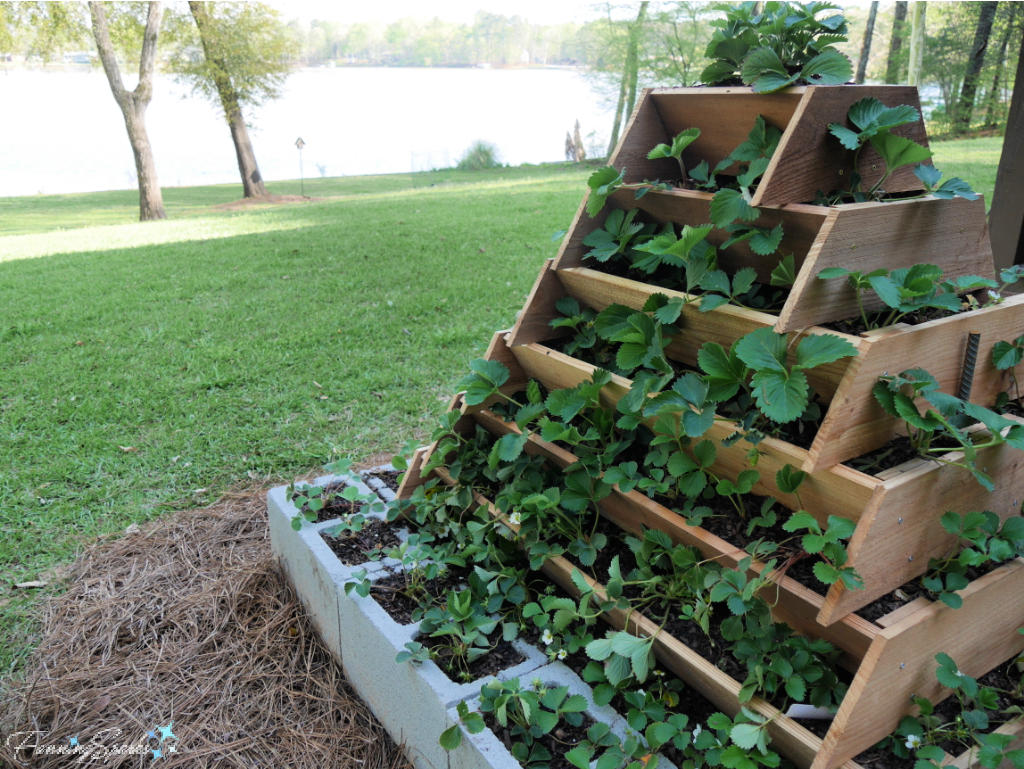
After looking for plans online and not finding any to my liking, I decided to incorporate the best aspects of the various options and design my own. I started with a few sketches, kluged together a paper prototype and researched the materials available. Cedar fence pickets, in 6 foot lengths of 1” x 6”, seemed like a good option because of their convenient size and availability at the local home improvement store. Plus cedar is reported to be a good, long-lasting alternative to treated lumber. Eventually my plan came together and my new Strawberry Tower Planter was in place. Here’s how it looked a few days after transplanting the strawberry plants.

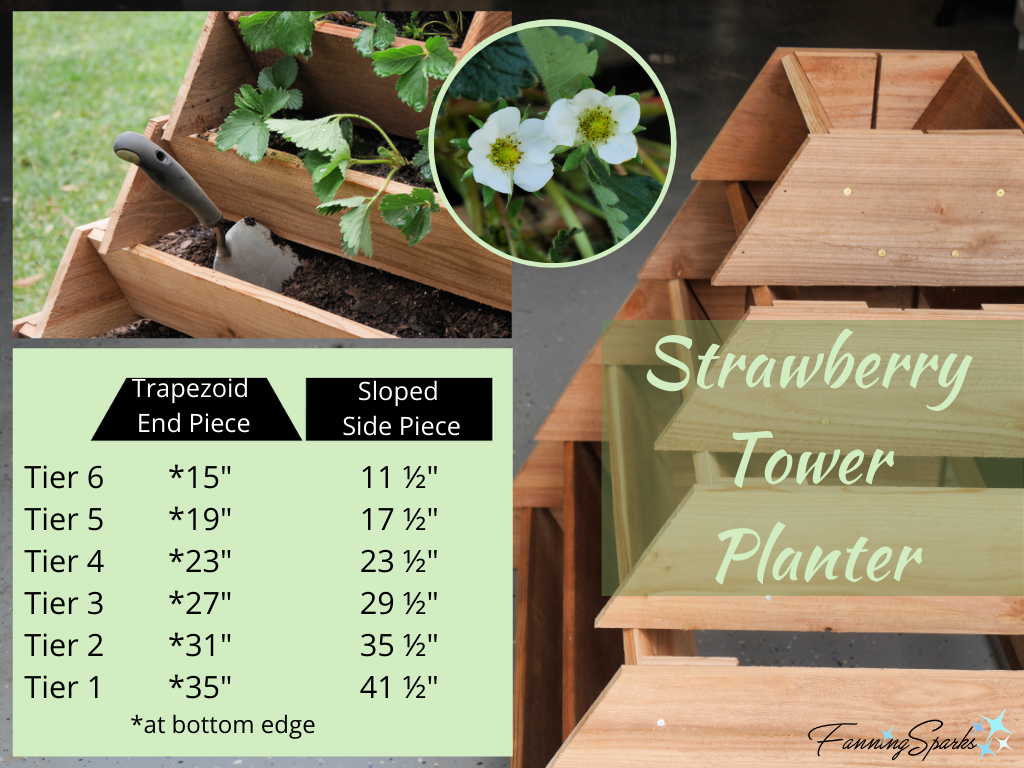
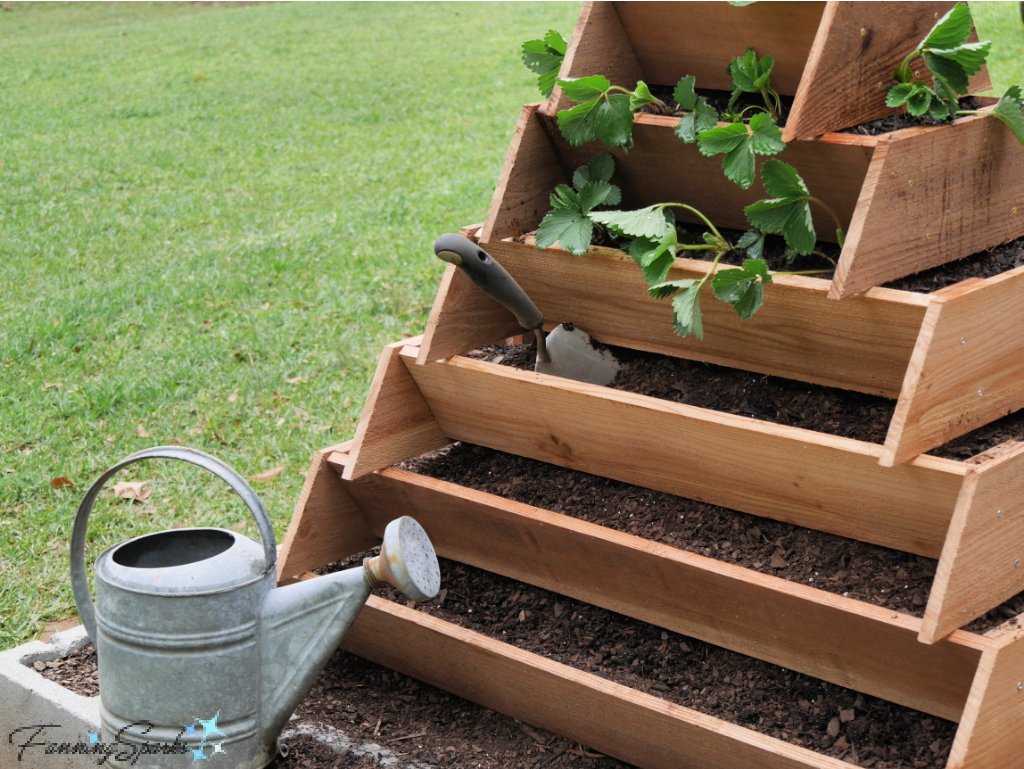
This Strawberry Tower Planter has 6 tiers, each made of a rectangular frame. The rectangular frames have trapezoid shaped ends and long sloped sides. The sides form a series of troughs of sorts. The rectangular frames are staggered in size such that each one can sit neatly on the one below. The structure can sit directly on the ground or on concrete blocks as shown. My overall structure, including the concrete blocks around the base, measures 47” wide x 63” long x 41” tall. The planter provides approximately 13½ square feet of growing surface.
I consider this to be a beginner woodworking project. No special tools, only a jigsaw and a drill, are needed. The construction could be a little tricky but I’ve provided detailed step-by-step instructions in the tutorial that follows. Why not give it a try? It’s the perfect opportunity to start your own strawberry “patch” and just think—strawberries! Sweet, juicy strawberries fresh from your own garden!
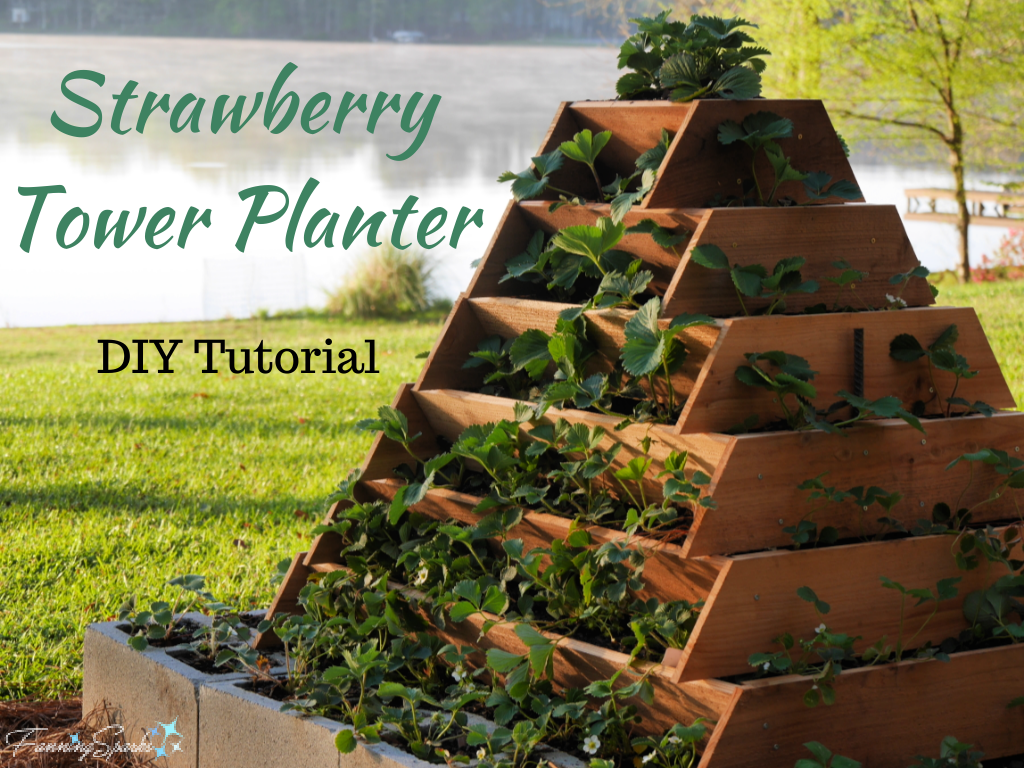
Strawberry Tower Planter DIY Tutorial
I’ve adopted a few terms to make the instructions as clear as possible—they are illustrated in the graphic below. I’ll refer to the end support pieces as the “Trapezoid End Pieces” and the long slanted sides as the “Sloped Side Pieces”. Please note the orientation of the Trapezoid End Pieces—the long edge is at the bottom with 60⁰ angles at each end. The sizes of the Trapezoid End Pieces and the Sloped Side Pieces for each of the 6 tiers are also shown.
Supplies Needed
. Template: Download the Strawberry Tower Planter – Complimentary Download to print the templates.
. Paper to print the templates.
. Cedar Dog Ear Fence Pickets: TWELVE 1” x 6” x 6’ (actual size is 19/32” x 5½” x 6’). I recommend buying 12 pickets, which strictly speaking is 2 more than needed, to allow for working around flaws. As noted earlier, I selected cedar fence pickets because they are a convenient size, are readily available at the local home improvement store, and offer a great alternative to treated lumber.
. Painter’s Tape
. Screws: 64 #6 1 ¼“ wood screws
. Nails: 80 1″ nails
. Screw Eyes: TWO 1” long with eye slightly larger than ½”
. Rebar: TWO ½” x 4’ pieces
Please Note: The completed Strawberry Tower Planter is quite stable when filled with soil but it is not designed as a play structure. You may wish to install additional screw eyes and insert additional rebar for increased stability.
. Soil and Strawberry Plants (of your choice).
Equipment and Tools Needed
. Printer
. Tape Measure
. Jigsaw (or saw of your choice)
. Clamps
. Hammer
. Pencil
. Drill with 3/32“ bit and 3/16“ bit
. Screwdriver
. Level
. Sledge Hammer (or heavy hammer of your choice)
. Shovel and Equipment (of your choice) to add Soil to the planter and to plant the Strawberry Plants.
Step 1. Print Templates Download the Strawberry Tower Planter – Complimentary Download to print the templates. Take care to ensure the scale is accurate on your printed version. See specifics in the download document.
Step 2. Cut Straight Parts Cut parts from the cedar fence pickets. Please note fence pickets are rough lumber and will likely have warping, knots or other flaws that you’ll want to work around. I found it easiest to start by cutting the longest parts from the best fence pickets and then working my way down to the shortest parts.
Use jigsaw (or saw of your choice) to cut off the dog ear tips from the fence pickets. Then cut the following:
… For the TWELVE Trapezoid End Pieces, cut: TWO 15”, TWO 19”, TWO 23”, TWO 27”, TWO 31”, TWO 35”.
… Cut TWELVE Sloped Side Pieces: TWO 11½“, TWO 17½“, TWO 23½“, TWO 29½“, TWO 35½“, TWO 41½“.
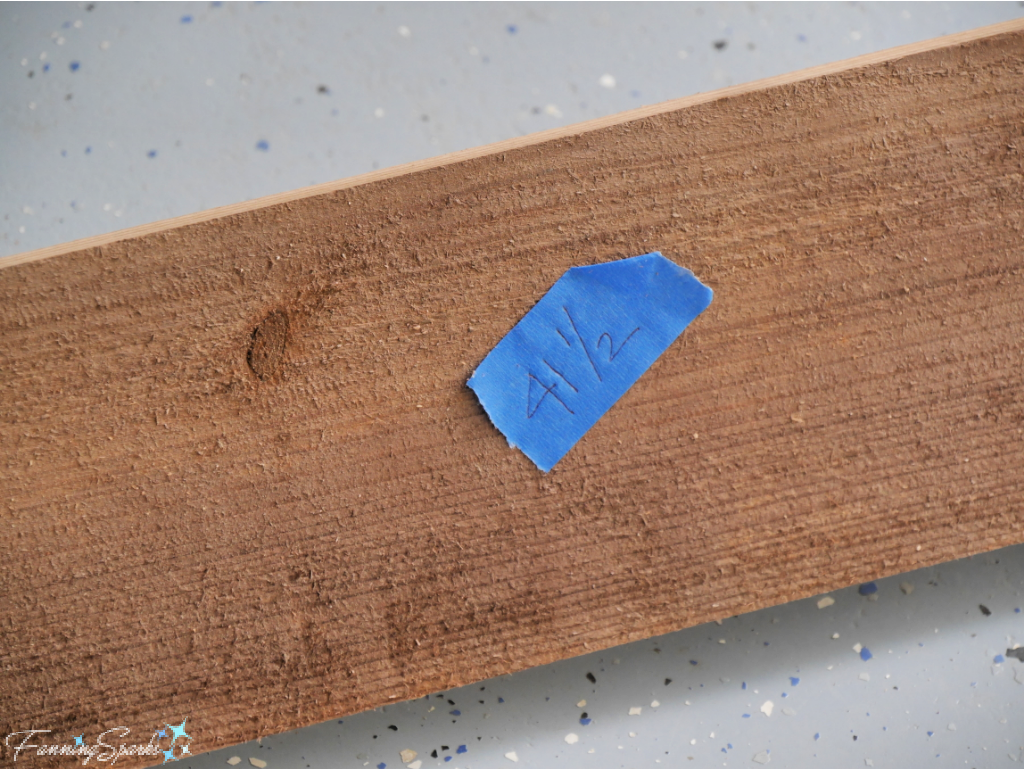
♦ TIP: Use painter’s tape to label each part with the cut length.
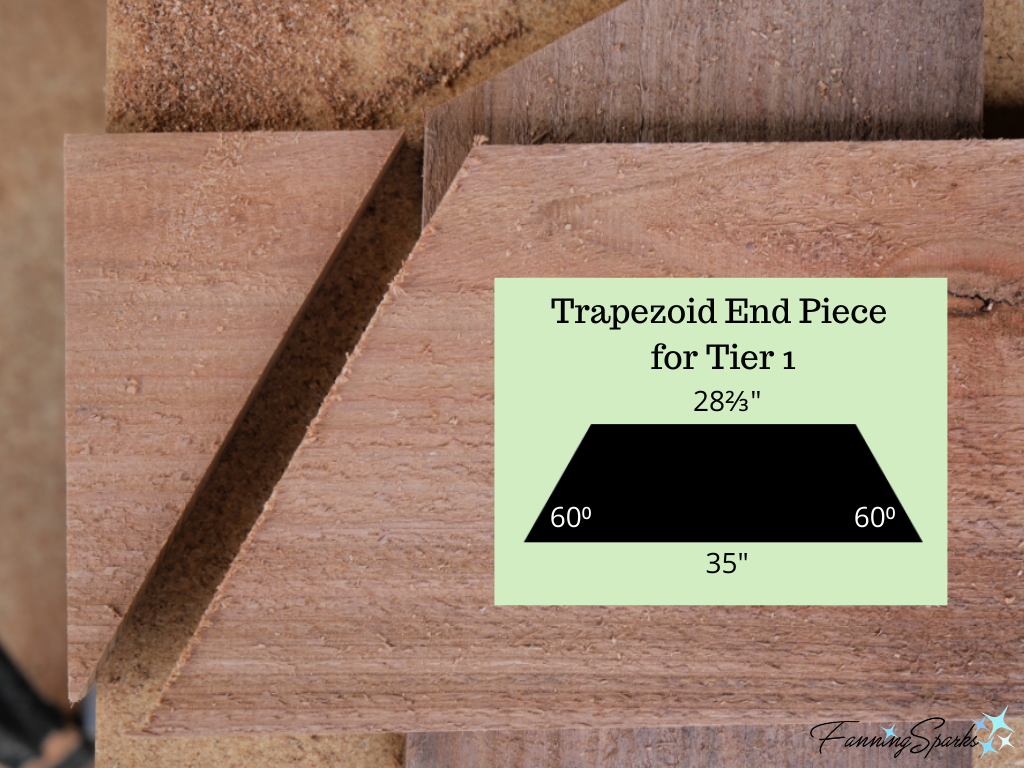
Step 3 Cut Angled Ends Use Template A to mark 60⁰ angles on both ends of all Trapezoid End Pieces. Ensure the angles are placed so only the top edge of the Trapezoid End Piece is trimmed. The top edge will become 6⅓” shorter than the bottom edge. Use jigsaw (or saw of your choice) to cut the angled ends.
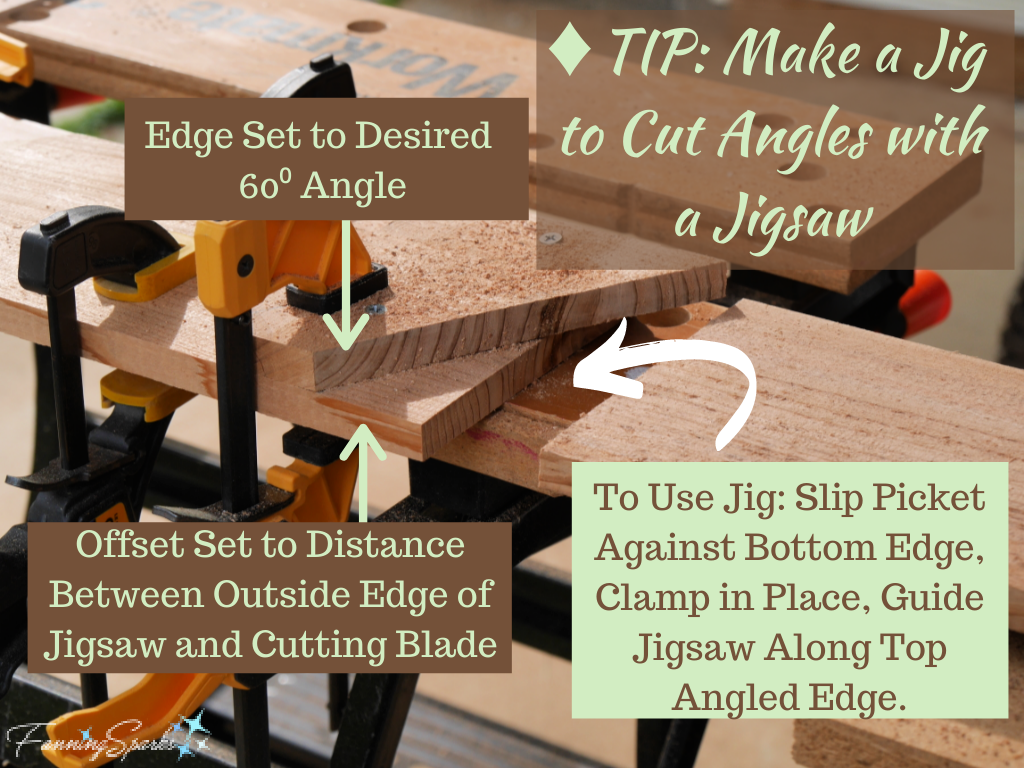
♦ TIP: Since my jigsaw cannot be set for angled cuts, I created a jig to help me cut all the angles consistently. The trick to making this jig is to allow for the distance between the jigsaw’s edge and the jigsaw’s cutting blade. To use the jig, I simply slid each fence picket under the jig and guided the jigsaw along the precut angled edge.
Set aside the angled corners you remove from the Trapezoid End Pieces.
Step 4. Add Supports The triangular pieces, cut from the Trapezoid End Pieces in the previous step, will be nailed to the Trapezoid End Pieces and used as supports for the Sloped Side Pieces. Use Template B to determine where the supports should be placed. Align the template with the bottom edge and angled edge of a Trapezoid End Piece. Then mark along the third side. Flip over Template B and mark the other end of the Trapezoid End Piece.
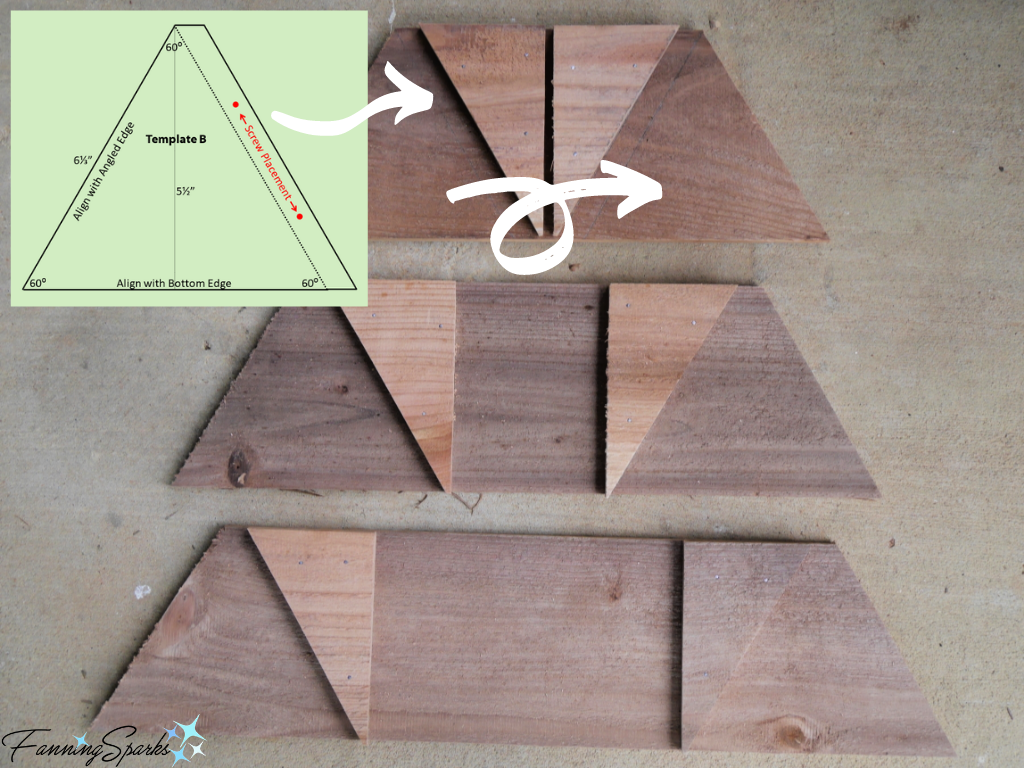
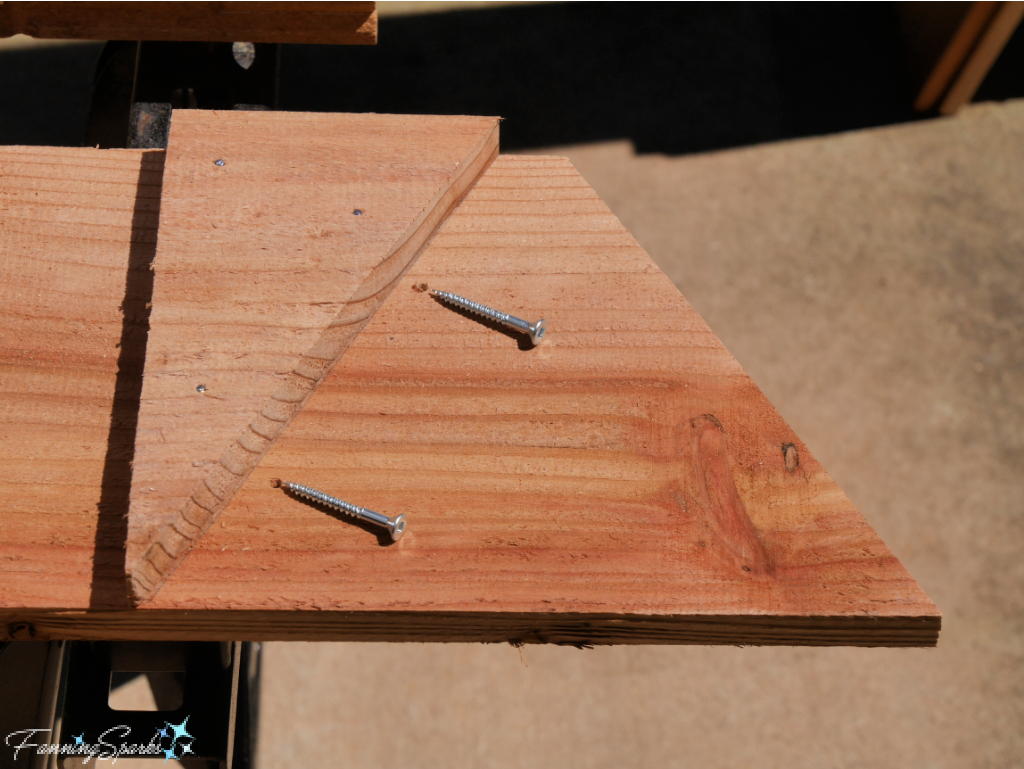
Place the triangular support piece on top of the Trapezoid End Piece with the point at the bottom and the angled edge aligned with the marks (as shown in photo above). Nail in place. Repeat at other end of Trapezoid End Piece. Repeat for all Trapezoid End Pieces.
Step 5. Construct Tiers The Strawberry Tower Planter has 6 tiers each made of a rectangular frame with trapezoid-shaped ends and long sloped sides. Every tier is made in the same way but to different dimensions. The below photo shows how the Tower Planter will look after the tiers are constructed and stacked.

Begin with Tier 6 which is the smallest rectangular frame. Select the TWO 15” Trapezoid End Pieces and the TWO 11 ½“ Sloped Side Pieces. The Sloped Sides will be screwed into the Trapezoid End Pieces. Position one of the 15” Trapezoid End Pieces on your work surface with the supports facing up. Use Template B to determine where the screws should be placed. Position Template B in the same way as in Step 4 (ie aligned with the bottom and angled edges). Mark the locations for the two screws on the Trapezoid End Piece. Flip over Template B and mark the other end of the Trapezoid End Piece. Drill pilot holes with 3/32” bit at the 4 spots as marked.
Repeat these steps, marking and drilling 4 holes, in the second 15” Trapezoid End Piece.
Select one of the 11½” Sloped Side Pieces. Hold it vertically at a 90⁰ angle. It can be helpful to prop and/or clamp the piece against a work bench or other vertical surface. Select one of the 15” Trapezoid End Pieces and hold it over the standing Sloped Side Piece with the bottom edge closest to you. Push the Sloped Side Piece snuggly against the angled support under the Trapezoid End Piece. Align the top edge of the Trapezoid End Piece with the top edge of the Sloped Side Piece. Hold firmly with one hand while drilling through one of the pilot holes to extend it into the end grain of Sloped Side Piece. Screw the two pieces together with a #6 1¼” wood screw. Repeat for the other pilot hole and screw.
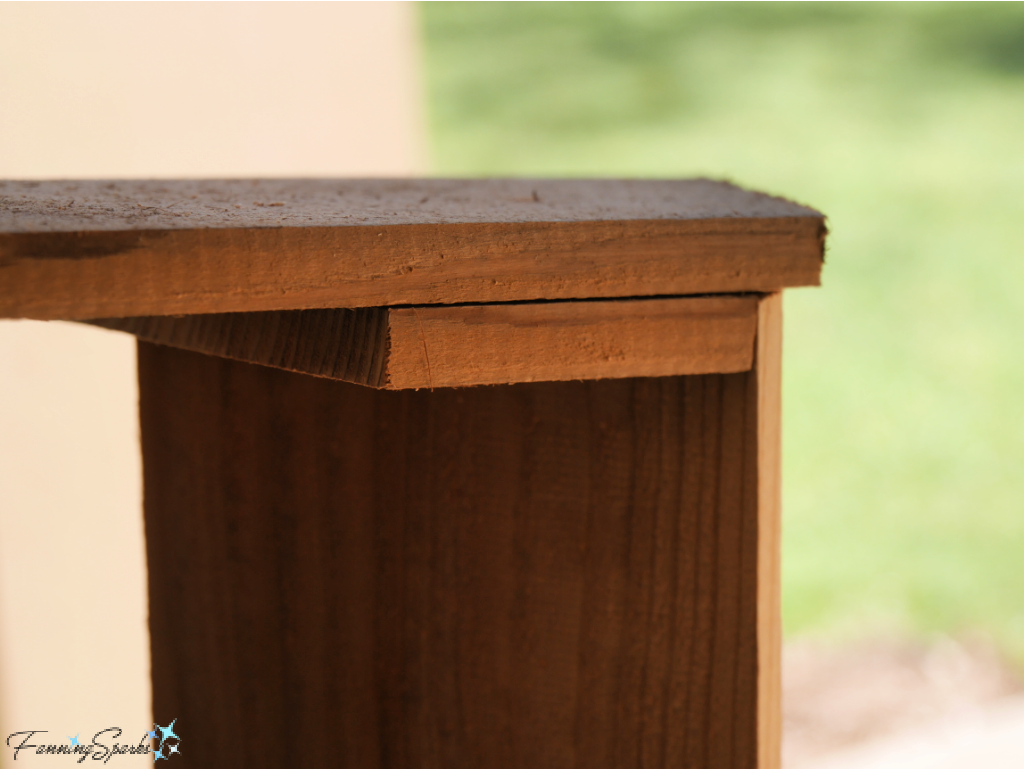
Insert the second 11½” Sloped Side Piece vertically under the Trapezoid End Piece. Repeat the process of aligning the parts, extending the pilot holes and screwing the pieces together. With one end attached, the rectangular frame should look like this.
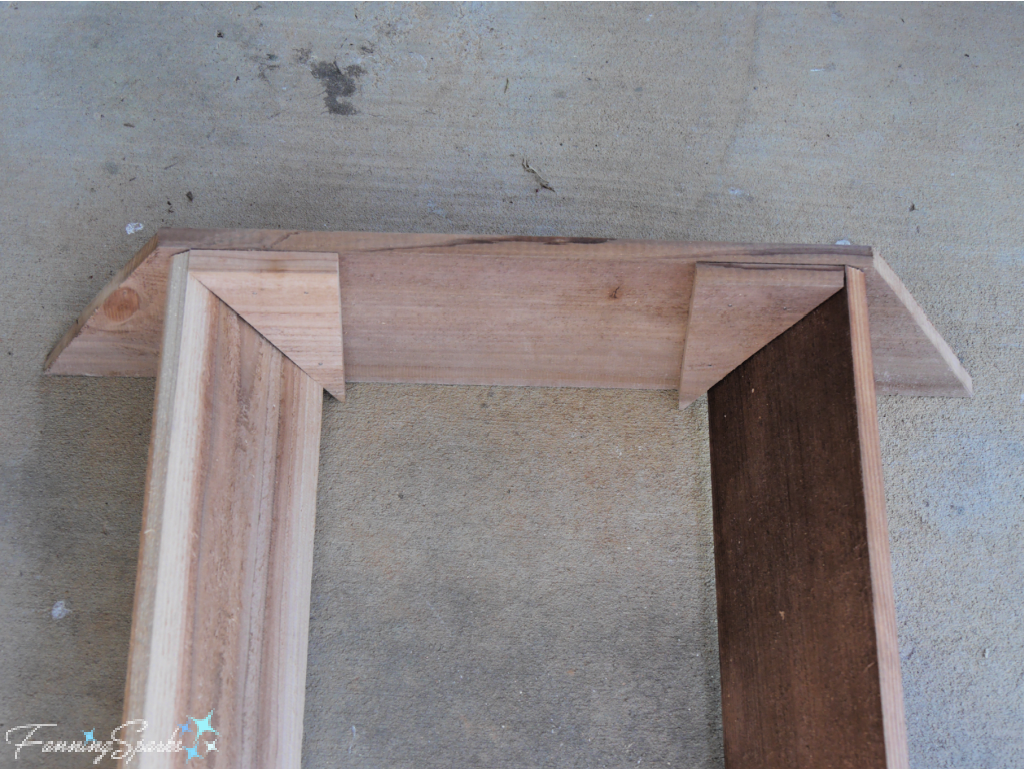
Flip the frame over so the attached Trapezoid End Piece is sitting on the work surface. Place the second 15” Trapezoid End Piece on top of the structure. Repeat the process for this end.
Repeat for each tier. For good measure, you may wish to add a third screw on the larger tiers.
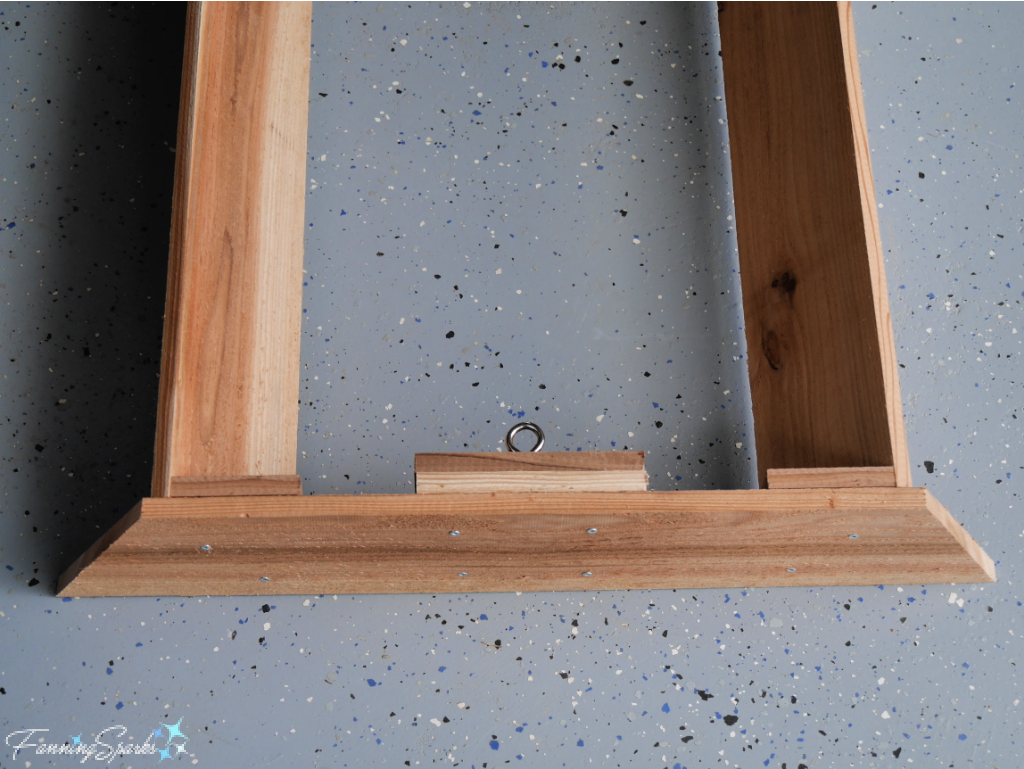
Step 6 – Add Screw Eyes To add stability to the structure, a set of screw eyes will be added to Tier 3 and a piece of 4’ rebar will be slipped into these screw eyes when the planter is set up.
Cut FOUR 6” pieces from the cedar fence picket scraps. Select two of the 6” pieces. Lay one on top of the other and align the edges. Attach the two pieces with nails. Repeat with the two remaining 6″ pieces.
Place Tier 3 on your work surface. Find and mark the center on the inside face of the Trapezoid End Piece. Align the double-layered support with the center mark of the Trapezoid End Piece. On the outside face of the Trapezoid End Piece, drill 4 pilot holes and then screw the parts together. Repeat on the other Trapezoid End Piece.
To insert the screw eye on the inside face, measure and mark about 1” down from the top edge at the center of the Trapezoid End Piece. Drill pilot hole with 3/16” bit. Screw in screw eye. Repeat at other end with the second screw eye. It should look like this.
Step 7 Setup the Planter After the 6 tiers are constructed, it’s time to setup the Strawberry Tower Planter in your garden. It can be set directly on the ground or on a built-up bed. I chose to place mine on a raised bed which I’d built from concrete blocks. In either case, prepare the foundation appropriately and ensure the surface is level.
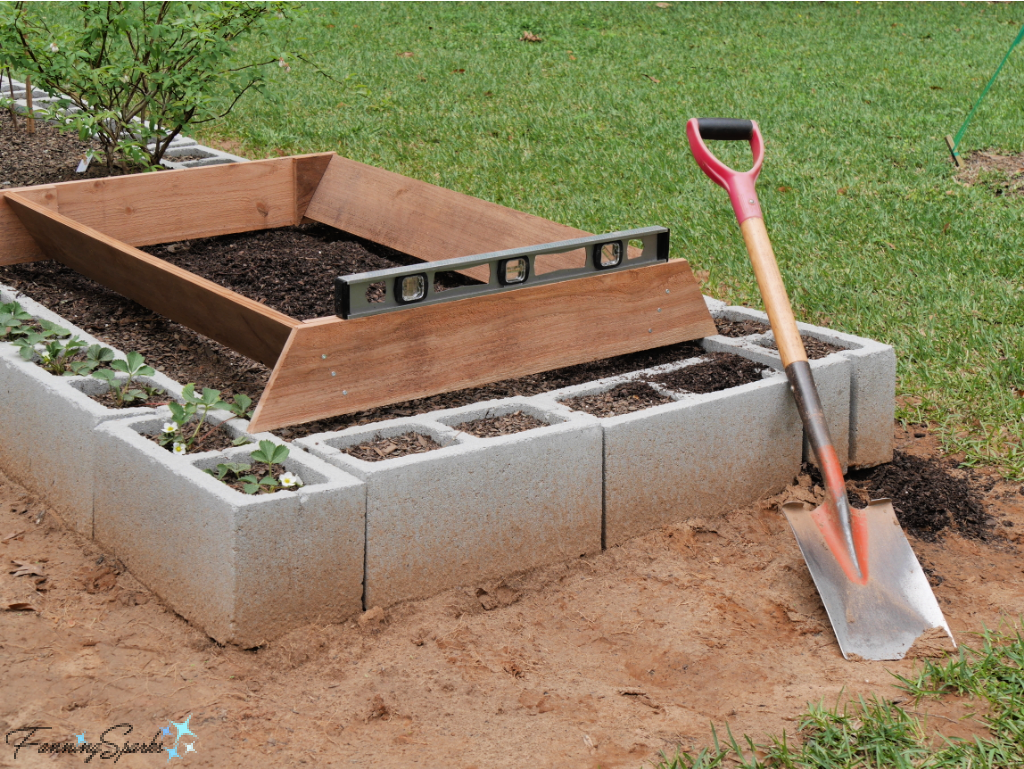
Put Tier 1, the largest one, in place and fill with soil. There’s no shortage of online advice about what type of soil is best for raised beds. I chose to use amended soil, called “Morgan Mix”, which we purchase from our local garden center in bulk (Thank you Morgan Outdoors!). It’s the same soil we used last year to get the strawberries established and we’re very pleased with the results. After filling your first tier, place the second tier on top centering it carefully. Fill Tier 2 with soil.
Place Tier 3, the one with the screw eyes, on top of Tier 2 and center it carefully. Partially fill this tier with soil. Insert the 4’ pieces of rebar through the screw eyes.
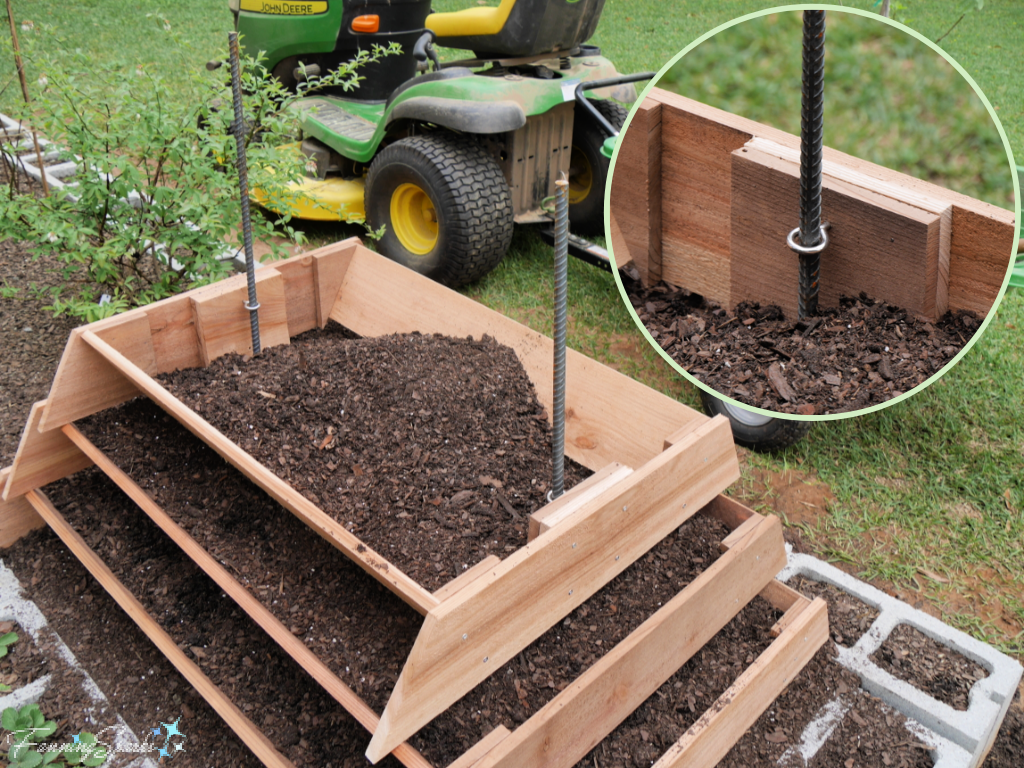
Use a sledge hammer (or heavy hammer of your choice) to pound the rebar into the ground. Finish adding soil to Tier 3. Then add and fill the other three tiers.

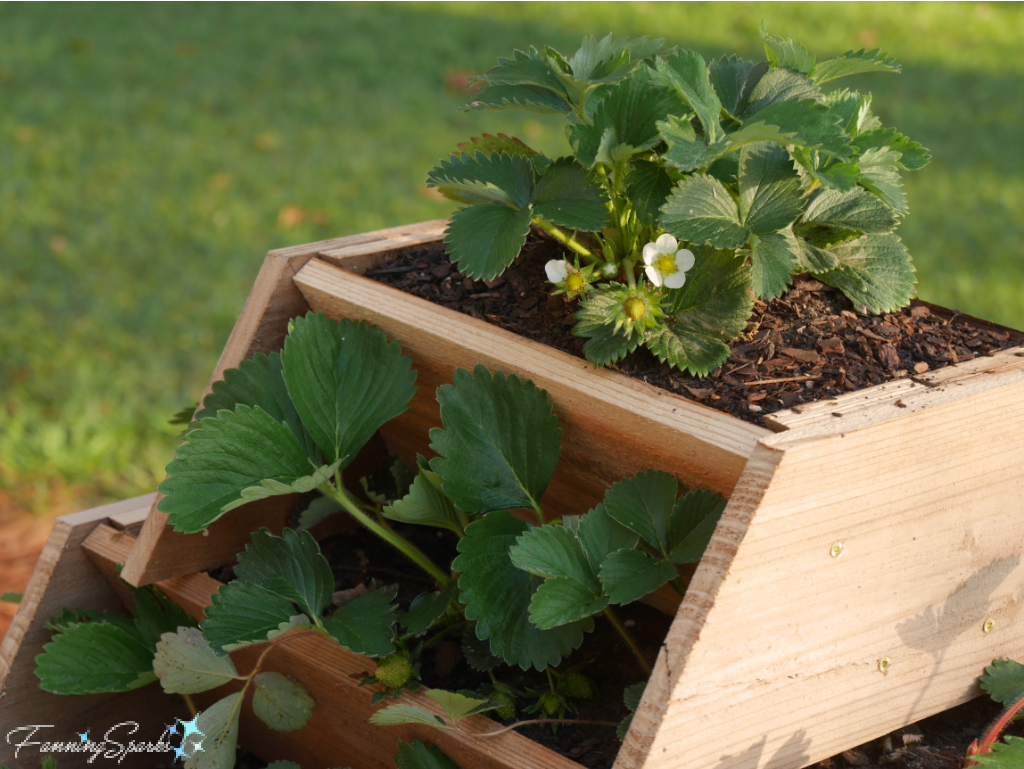
Step 8 Plant Strawberries Now, it’s time to plant your strawberries! Start at the top and carefully set strawberry plants into the soil. Be sure to plant on all four sides of each tier. Take care to plant your strawberries at the correct depth—see More Info for a suggested online reference on this point.
And there you have it! An attractive new structure in your garden…
… ready to house and nurture your very own strawberry crop!
More Info
You can download the Strawberry Tower Planter – Complimentary Download to print the templates.
Please share this image or pin for future reference.
To get specifics on how to plant your strawberries or to learn more about growing strawberries, check out the Bonnie Plants > Growing Strawberries resource. Our strawberry plants, including a Quinalt, Allstar and Ozark Beauty variety, are all from Bonnie Plants.
Check out the Kingsbrae Garden website to learn more about these beautiful gardens in St. Andrews by-the-Sea, New Brunswick, Canada.
If you’re located near Madison, Georgia, USA you may want to check out Morgan Outdoors. We’ve been very pleased with their products and service.
You may also like these FanningSparks’ DIY projects for your garden and yard:
. Pyramid Trellis
. Bluebird-Approved Birdhouse
. AirBee-n-Bee House
. Zinnias Rock! And More Cutting Garden Tips.
Today’s Takeaways
1. Botanical and display gardens are a great source of inspiration.
2. A Strawberry Tower Planter can be made with inexpensive materials, common tools and basic woodworking skills.
3. Consider making a Strawberry Tower Planter for your own garden.


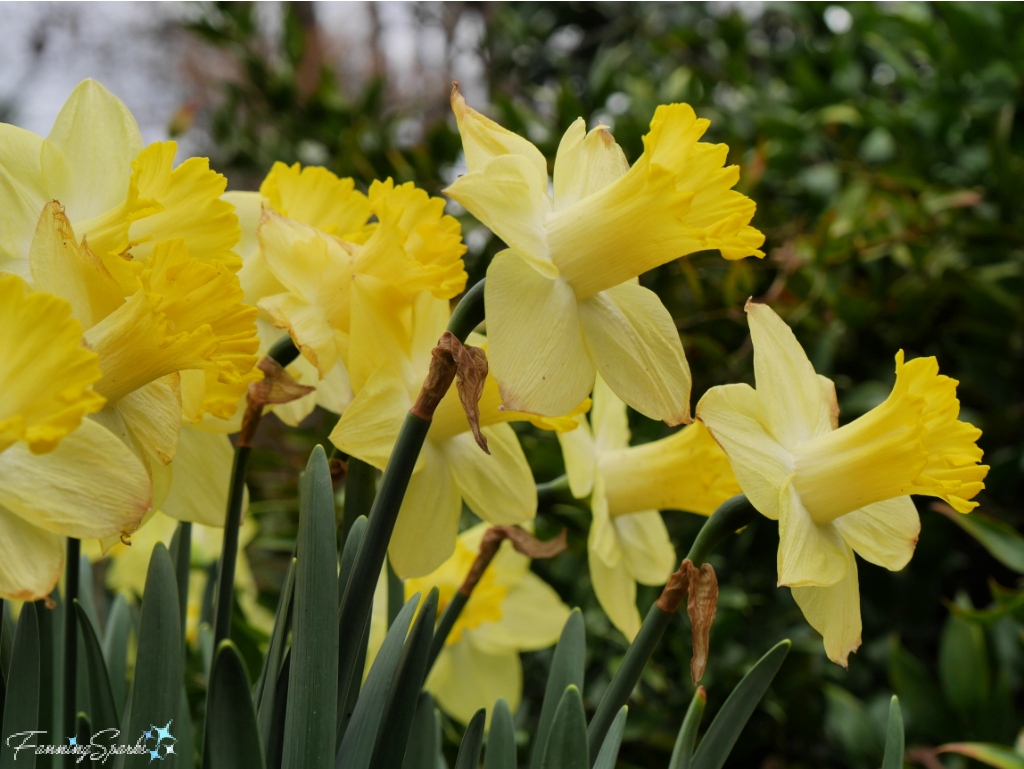
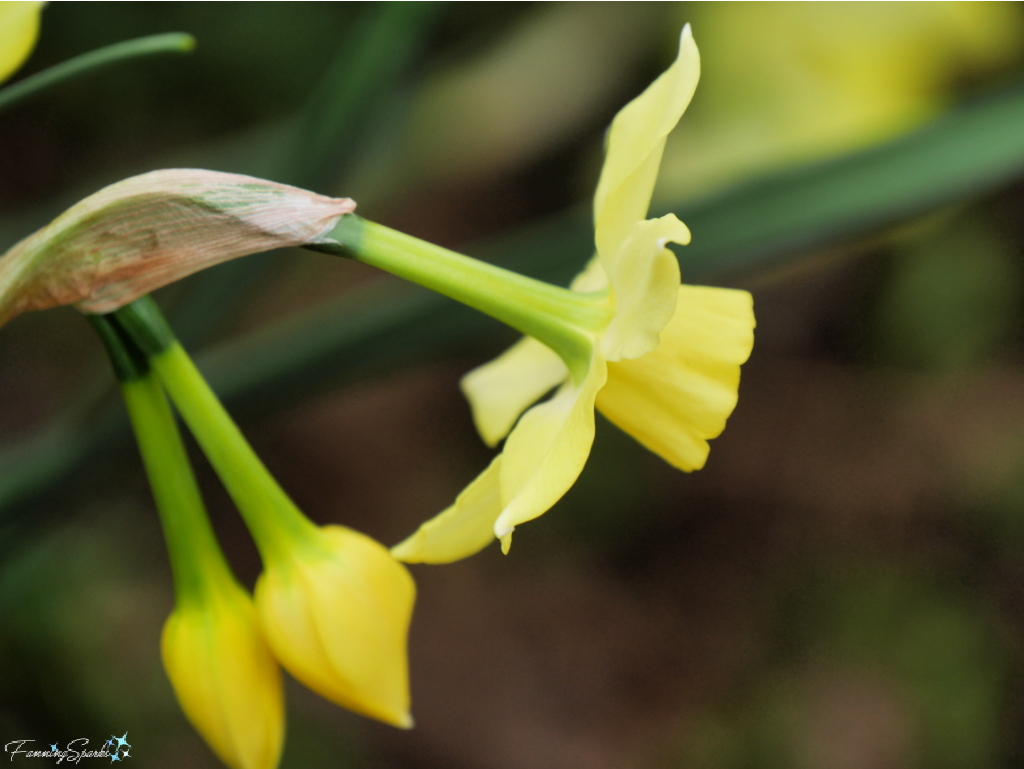


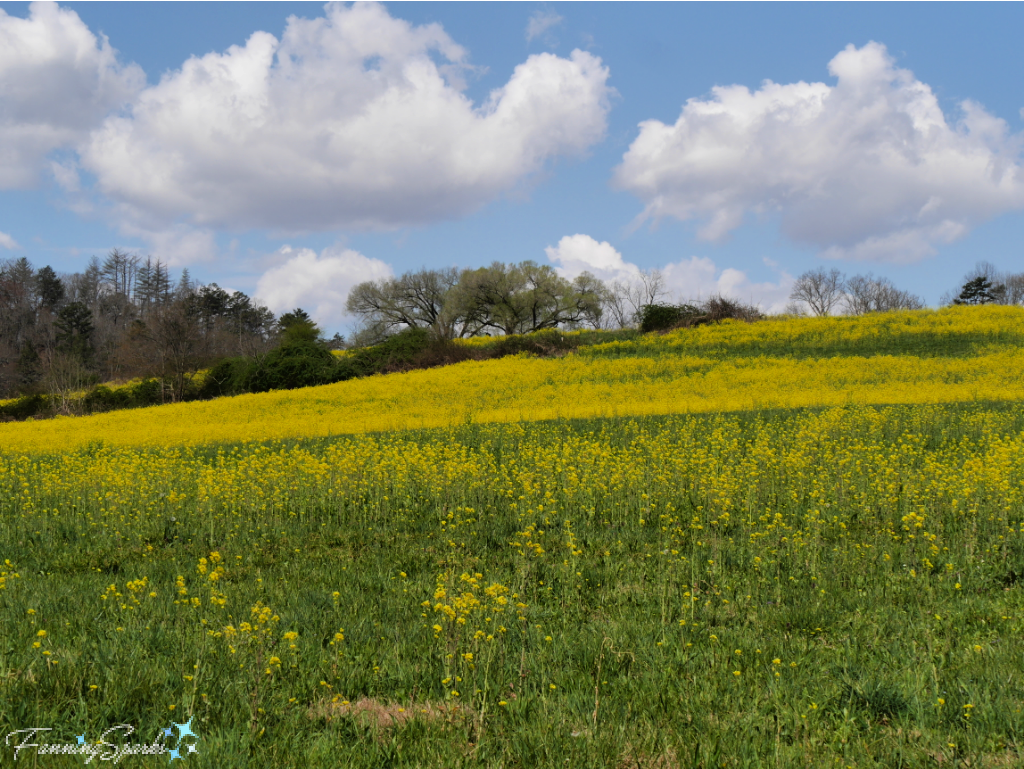
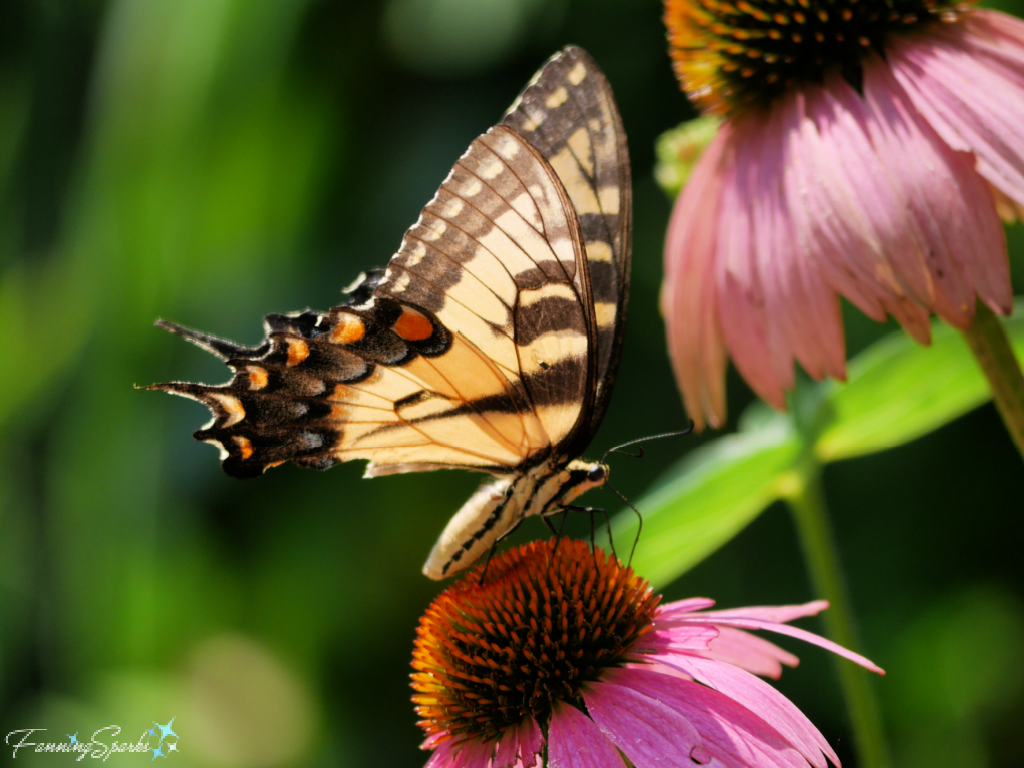
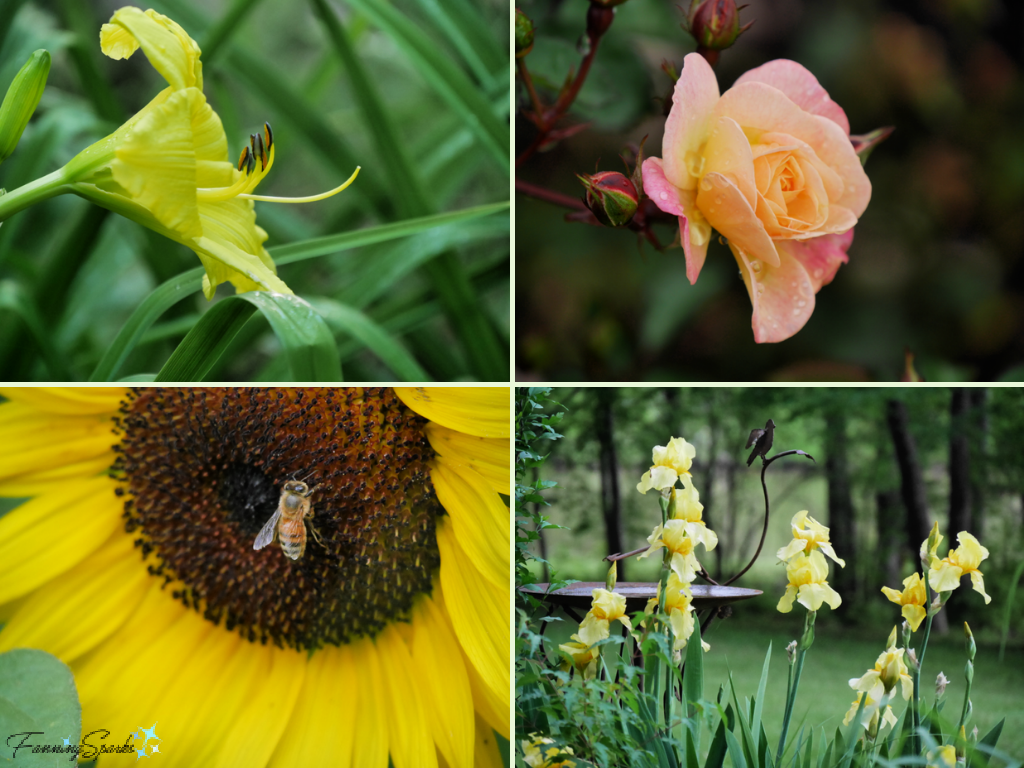 In the fall, yellow joins red to mark the turn of the season as the leaves turn.
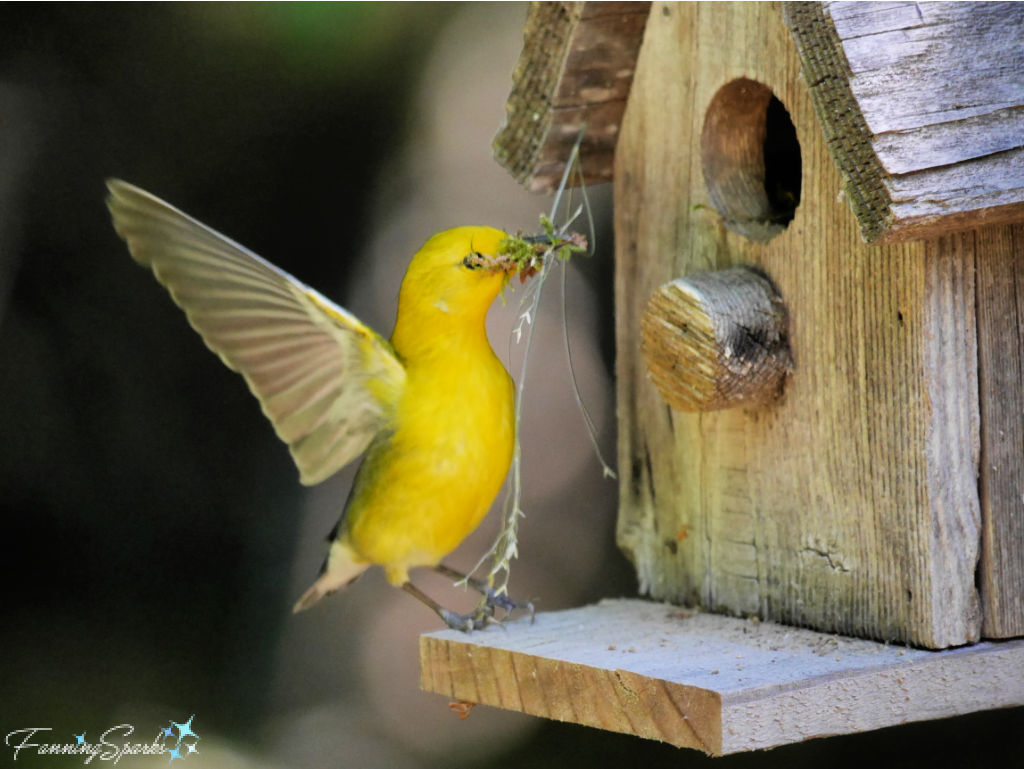
 But yellow isn’t only for flowers and plants. Mother Nature also uses yellow, although sparingly, on wildlife. Here are two examples of beautiful yellow birds—the American Goldfinch (Spinus tristis) and the Prothonotary Warbler (Protonotaria citrea).
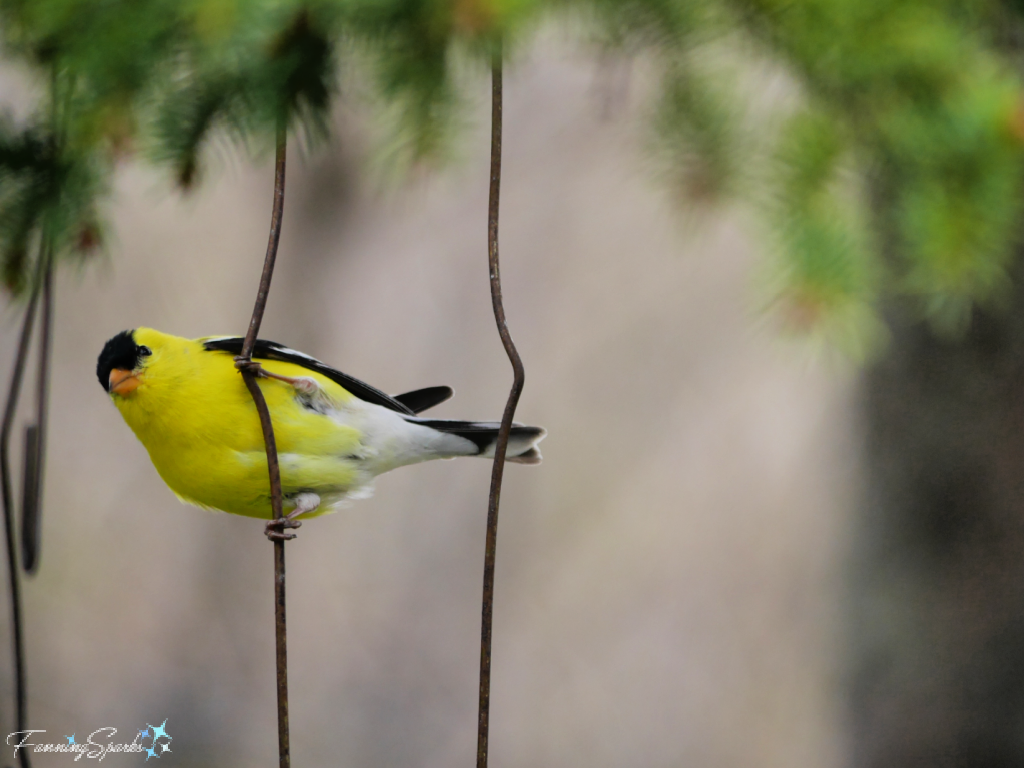

 A post about a specific color would not be complete without addressing the meaning of that color. According to Jacob Olesen, a world-renowned color expert who authors the website Color Meanings, “Colors play an exceptionally prominent role in our lives. They influence our thinking, inspire our decision-making, and impact our moods.” He describes yellow as “the color of happiness and optimism. Yellow is a cheerful and energetic color that brings fun and joy to the world. It makes learning easier as it affects the logical part of the brain, stimulating mentality and perception. It inspires thought and curiosity and boosts enthusiasm and confidence.”
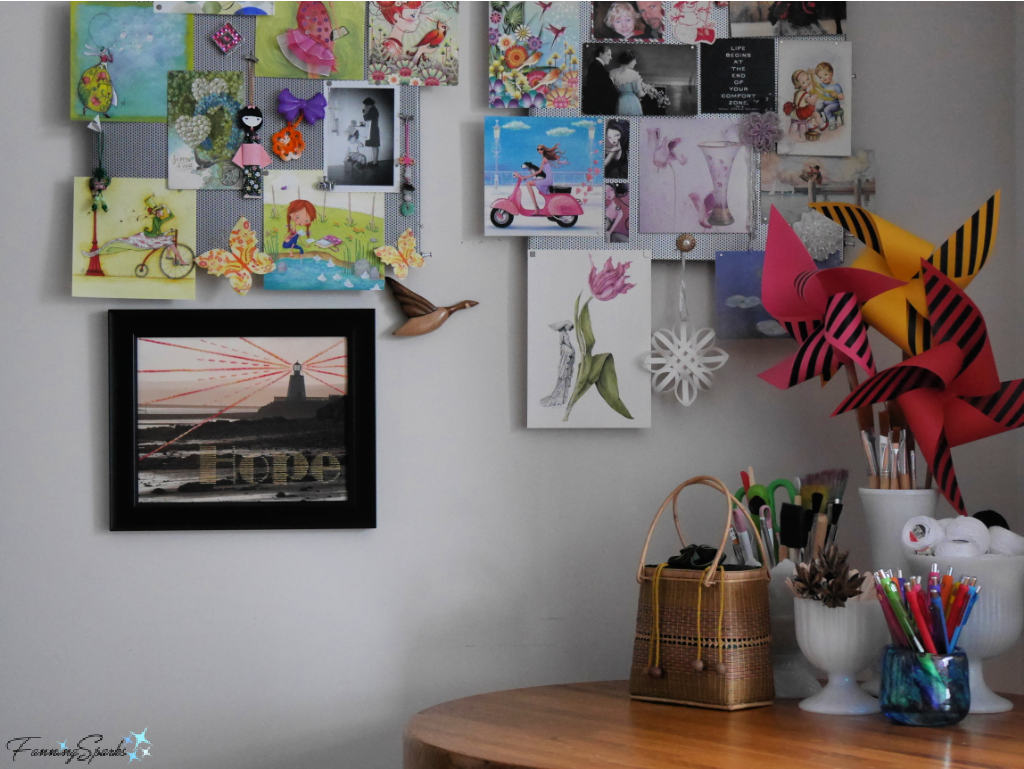
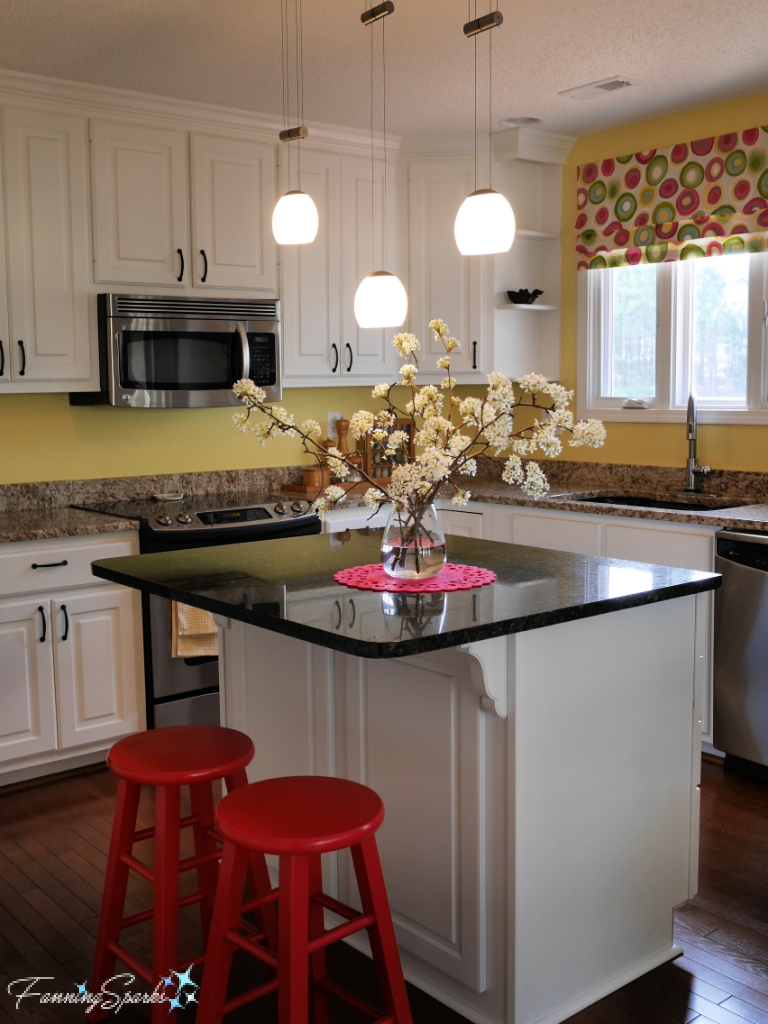 Nowadays, I use yellow a little more carefully. Yellow, along with magenta and moss green, are the foundation of my outdoor décor. Here’s the color scheme on our curvy café chairs.
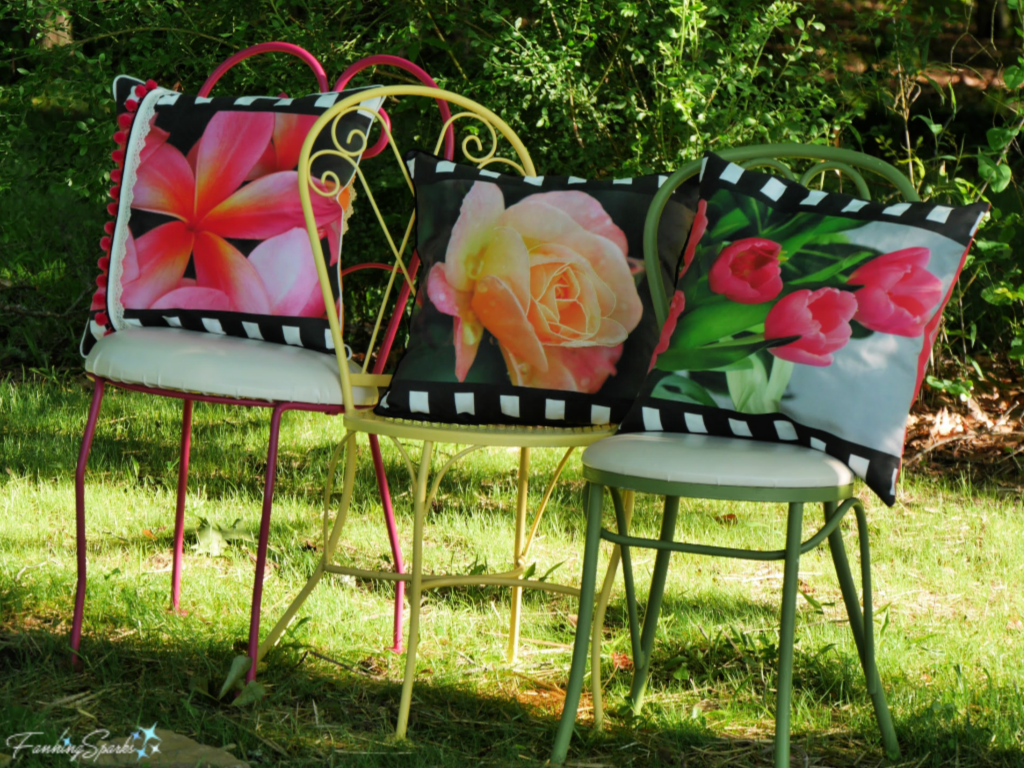 The color scheme is repeated in the pyramid trellises I made for our flower garden. There are, by the way, step-by-step instructions to make these tuteurs here on the blog at
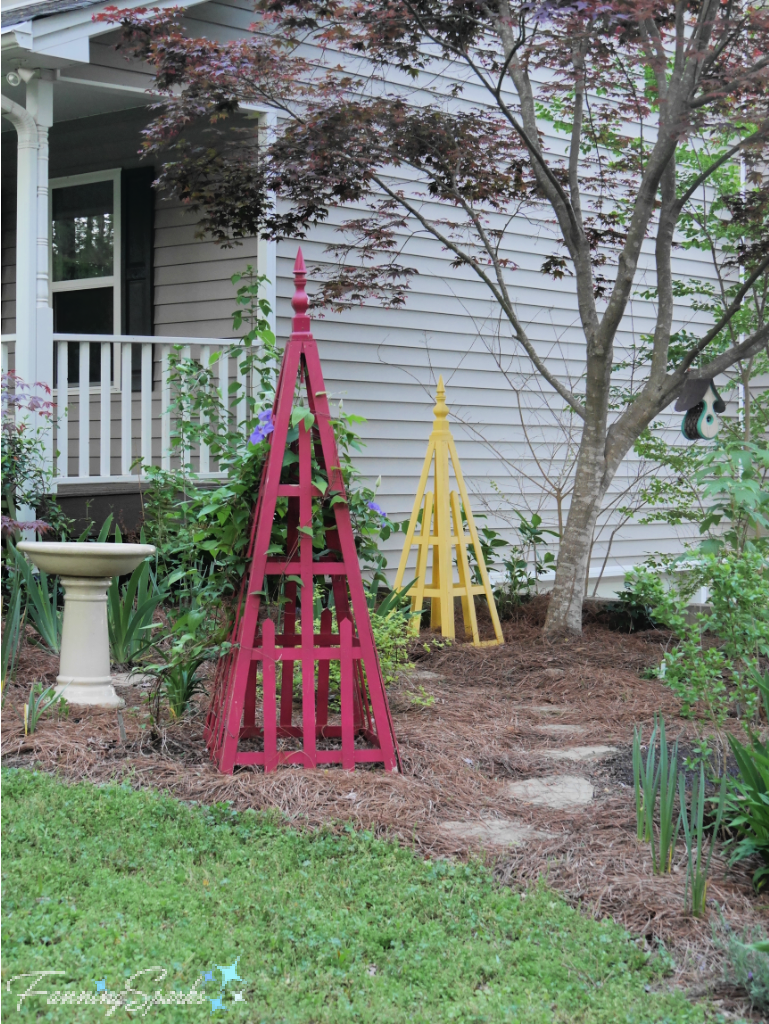


 Stories and photos are published on the blog, at www.FanningSparks.com, every Tuesday. This post marks the 159th time I’ve hit the publish button. Readers sometimes ask if I’m worried about running out of things to post about. Surprisingly, I’m not— I keep a running list of ideas that has far more topics than I could ever address. This endless list of things to see, to learn, to try and to share is what keeps me energized and the blog in motion.
 1.
1. 
 The FanningSparks presence on
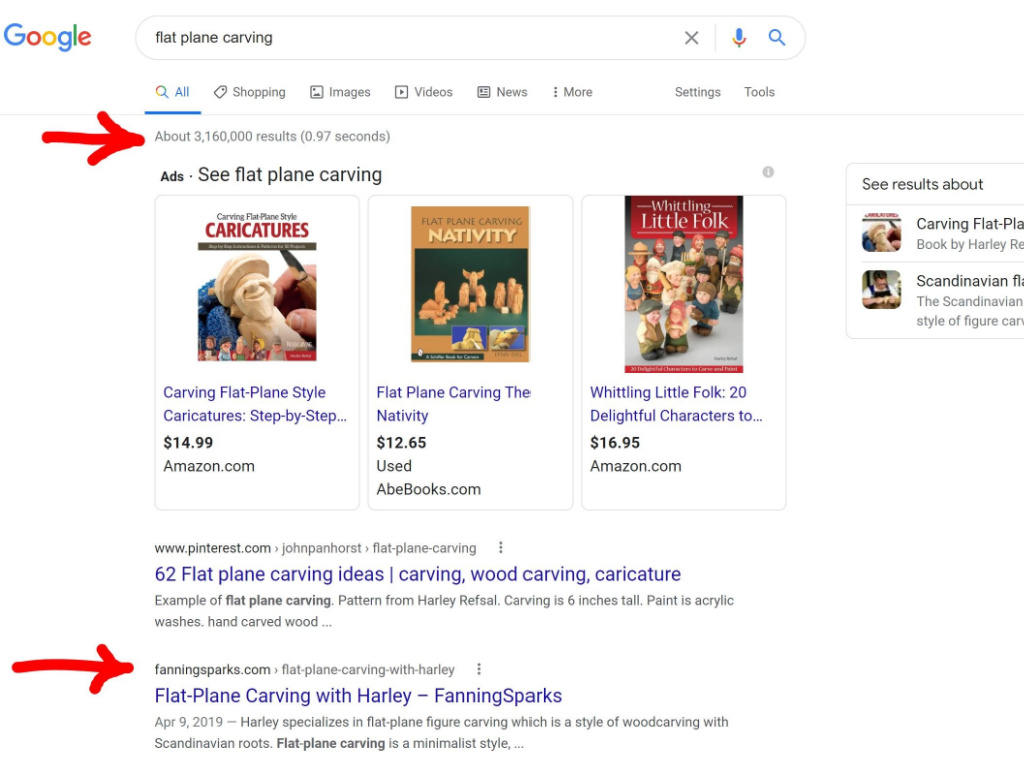
 Statistics and analytics are all well and good but hearing from readers directly is better. FanningSparks got some great exposure this last year.


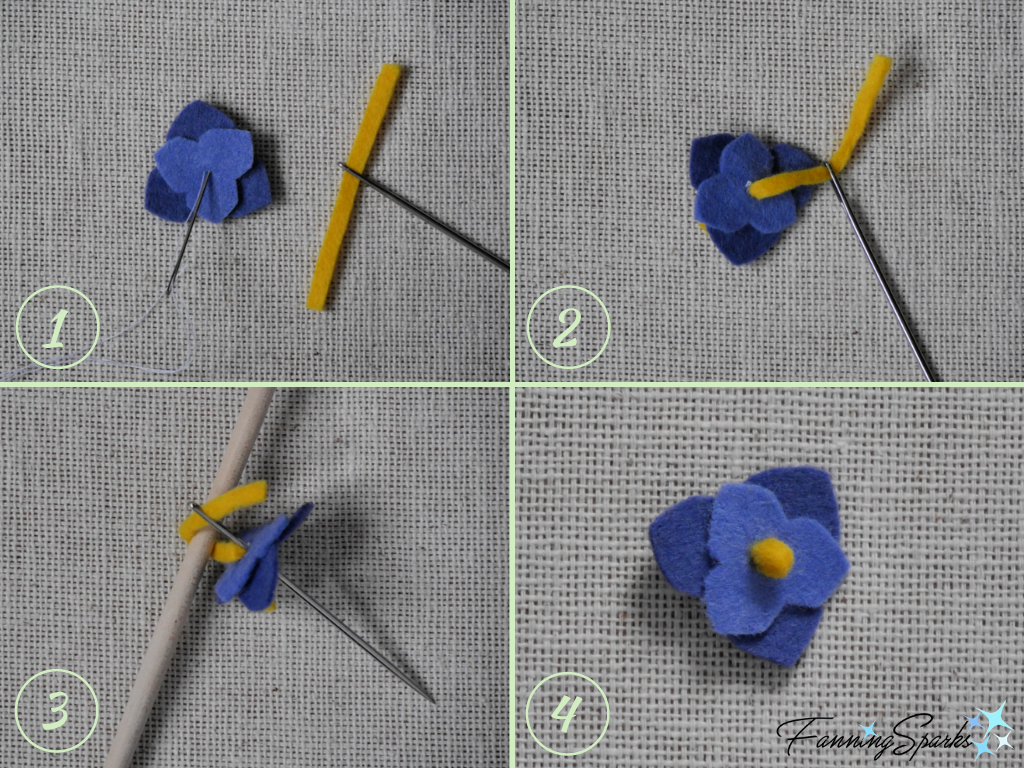
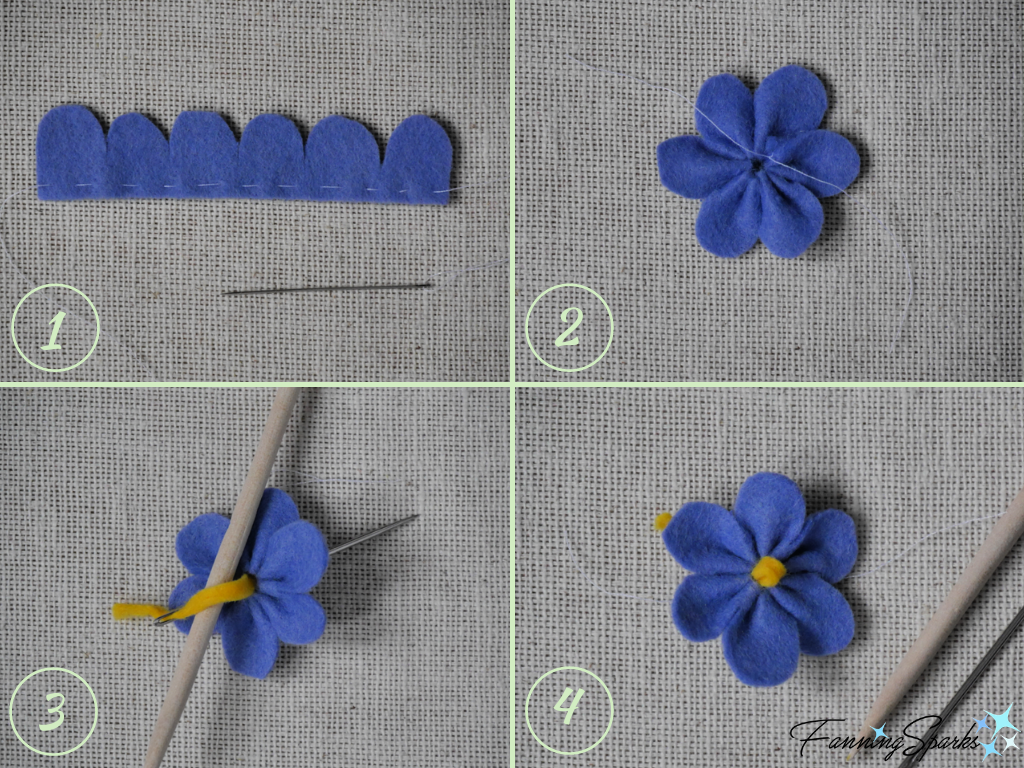
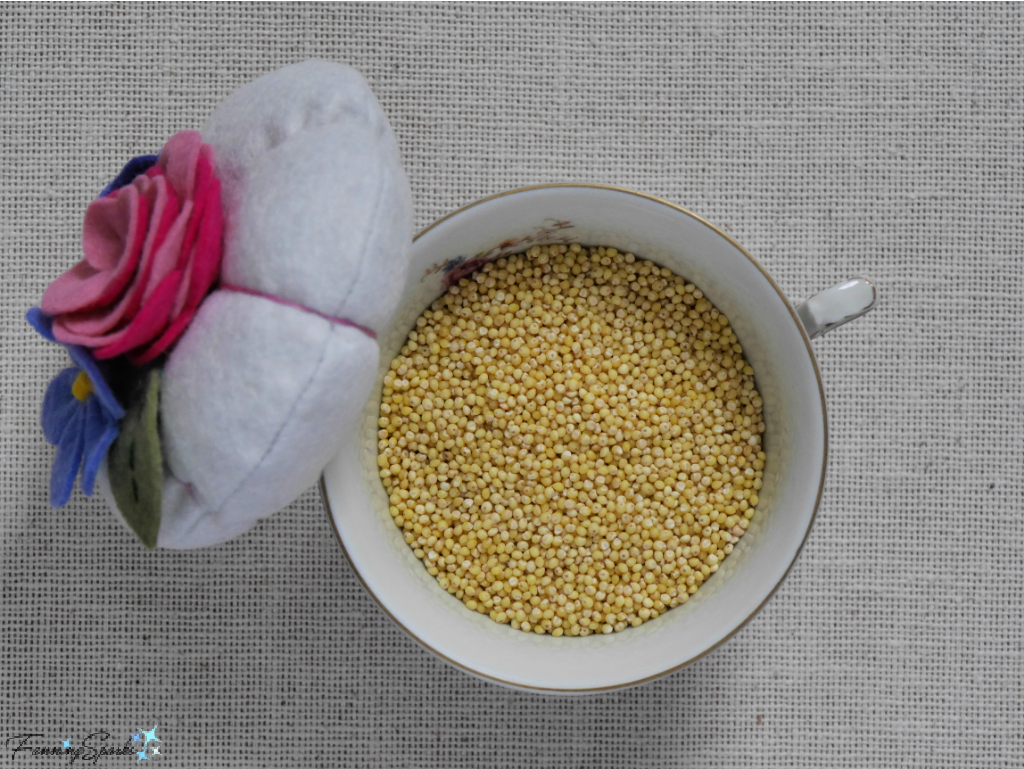
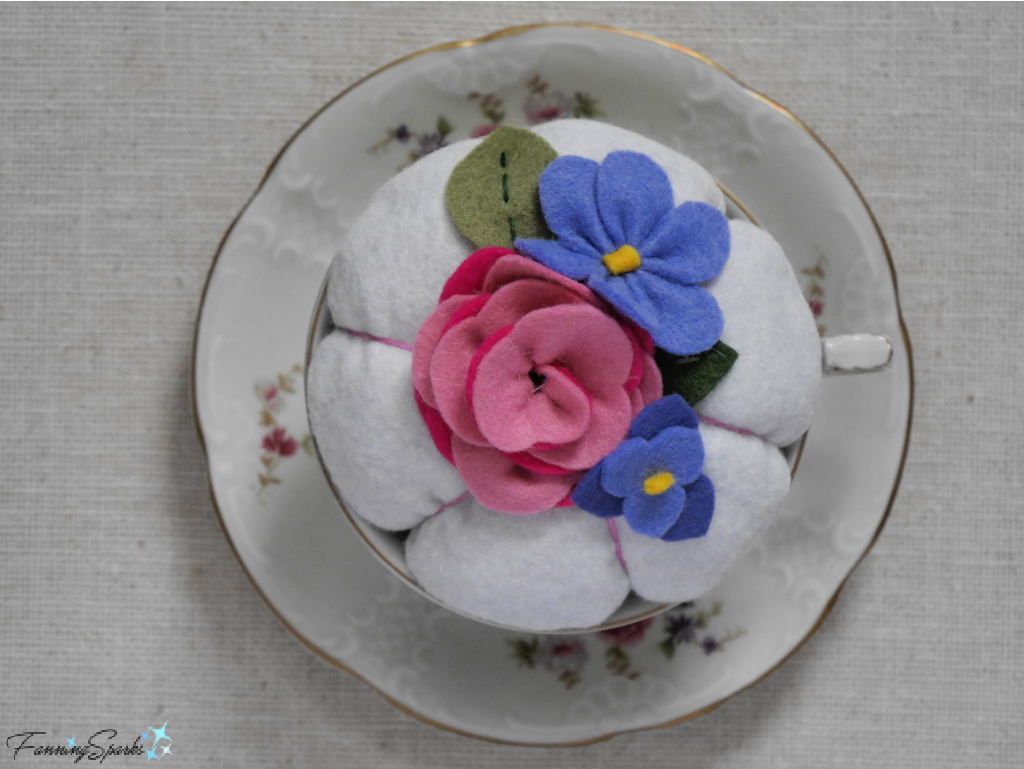
 In today’s post, I share step-by-step instructions to make your own teacup pincushion. The approach and technique used are similar to those from my last DIY tutorial post,
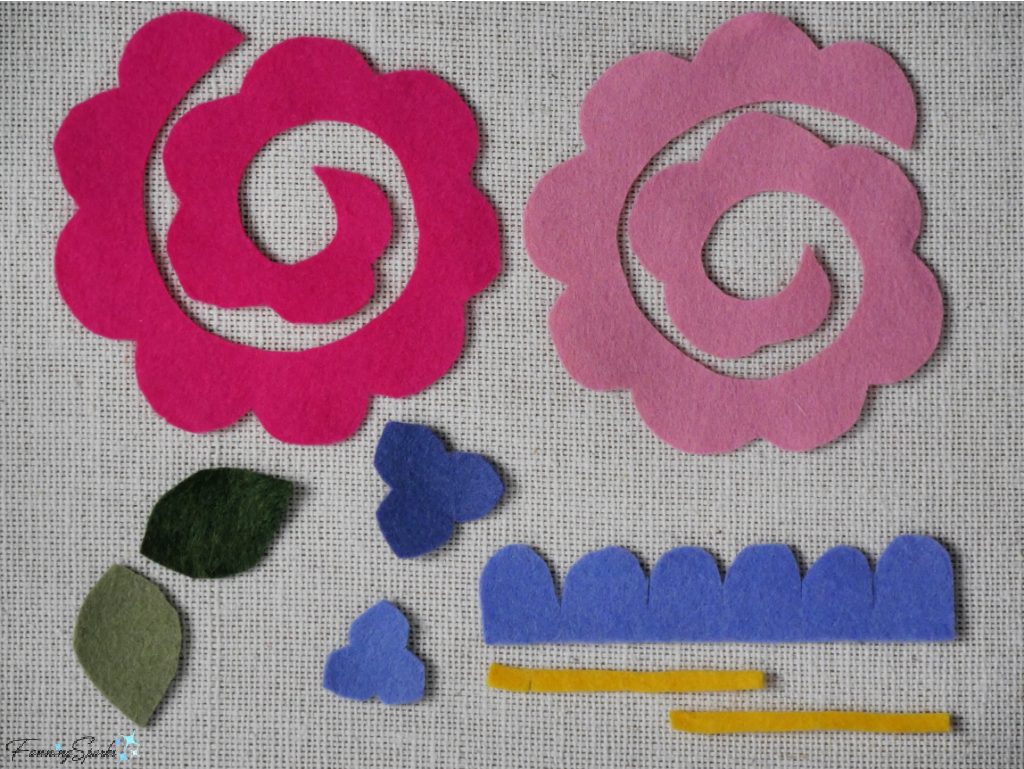
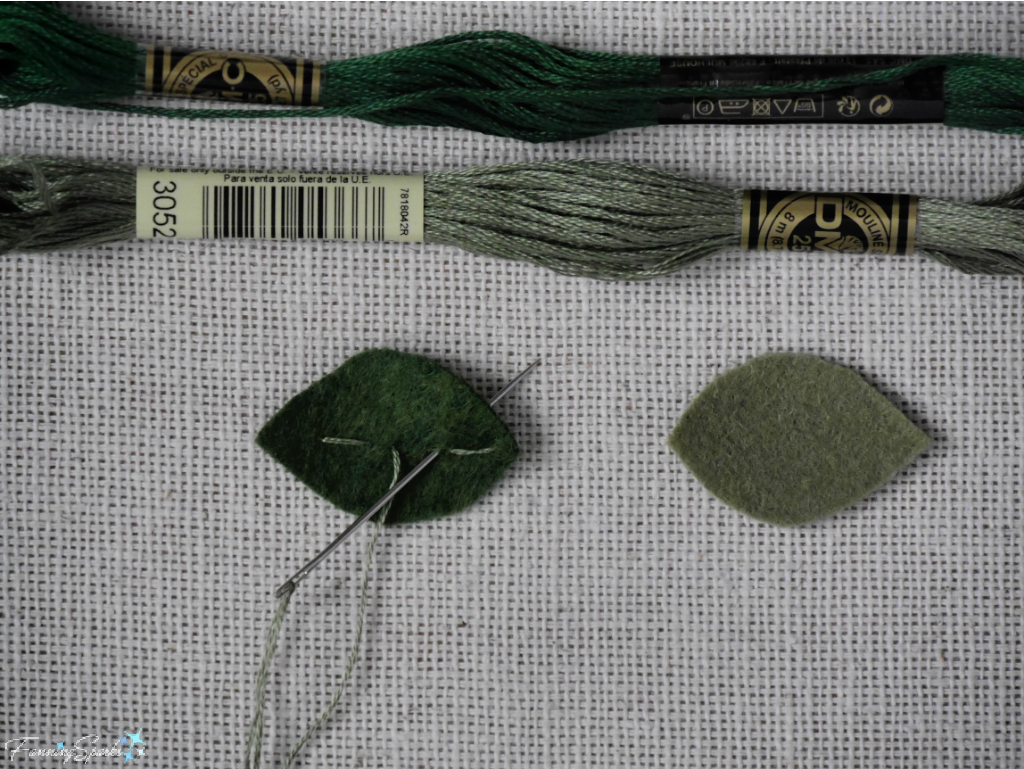
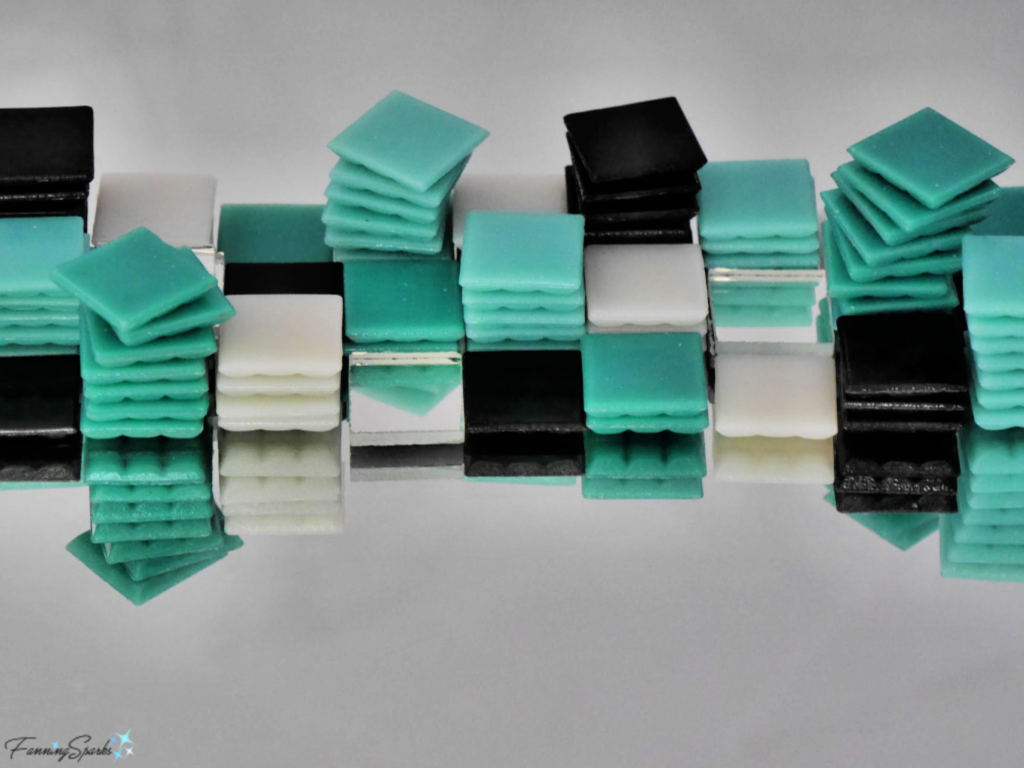
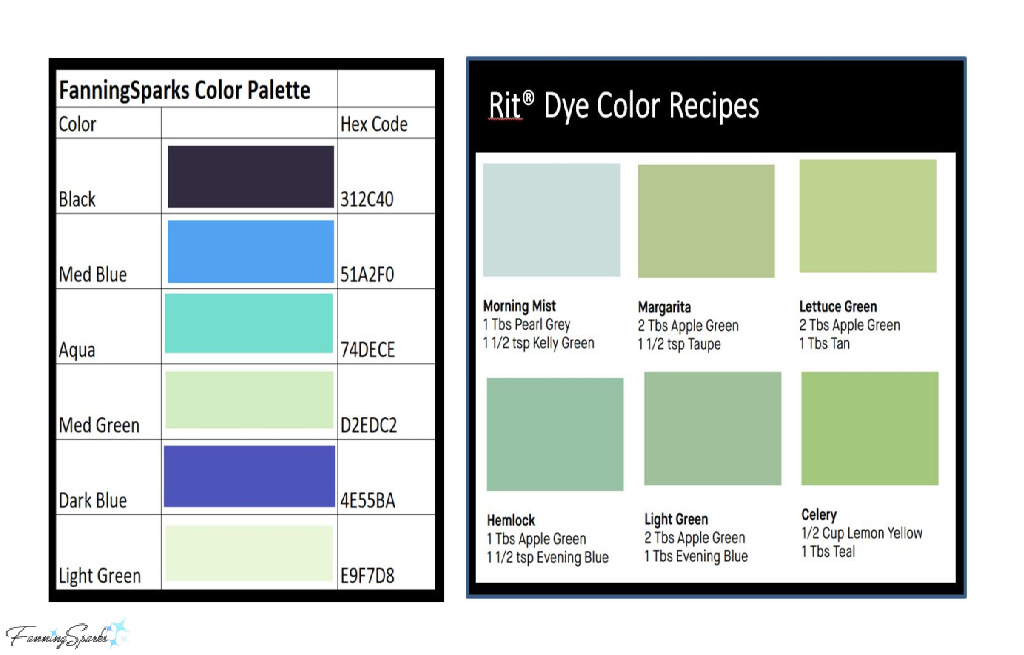
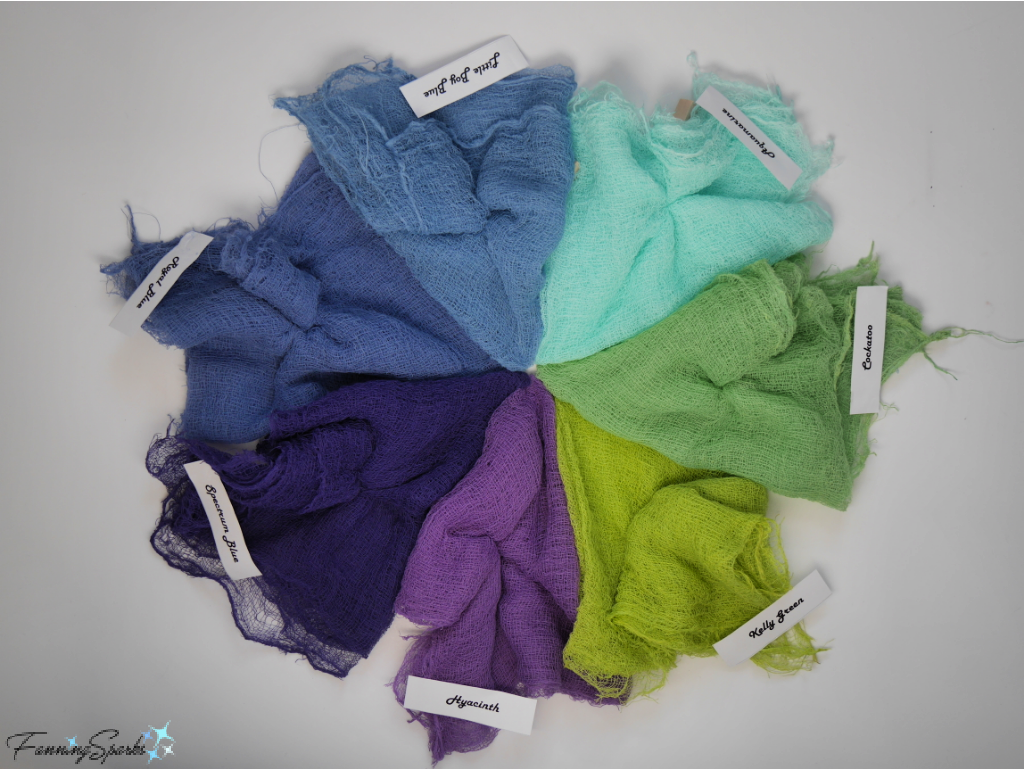
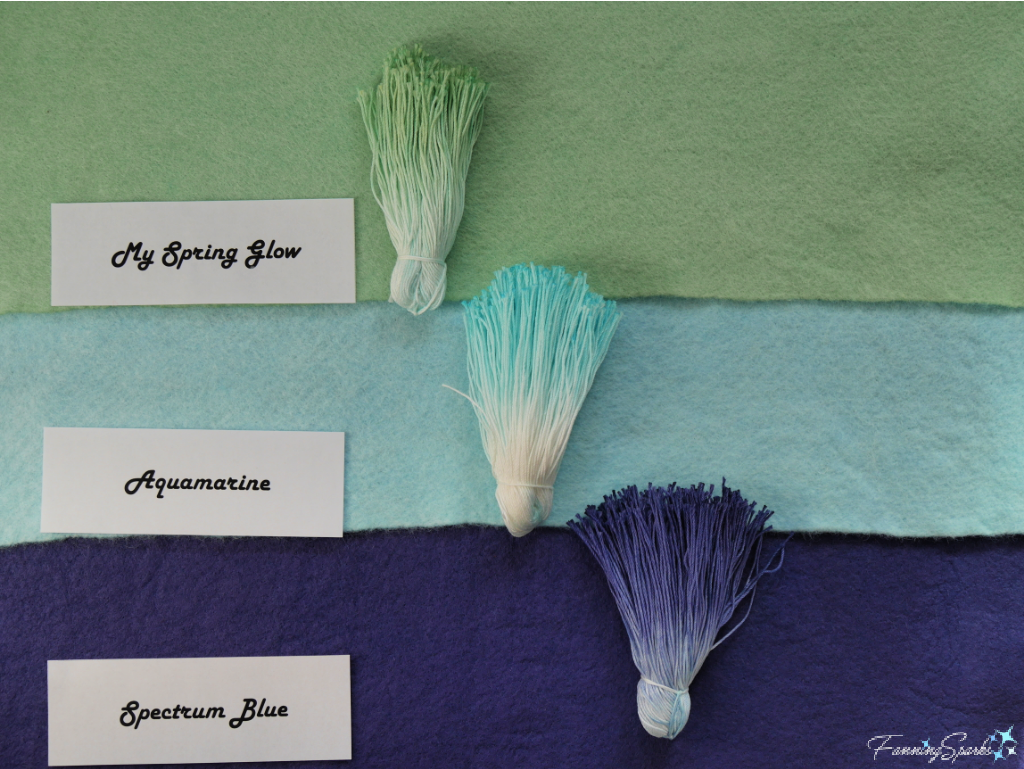
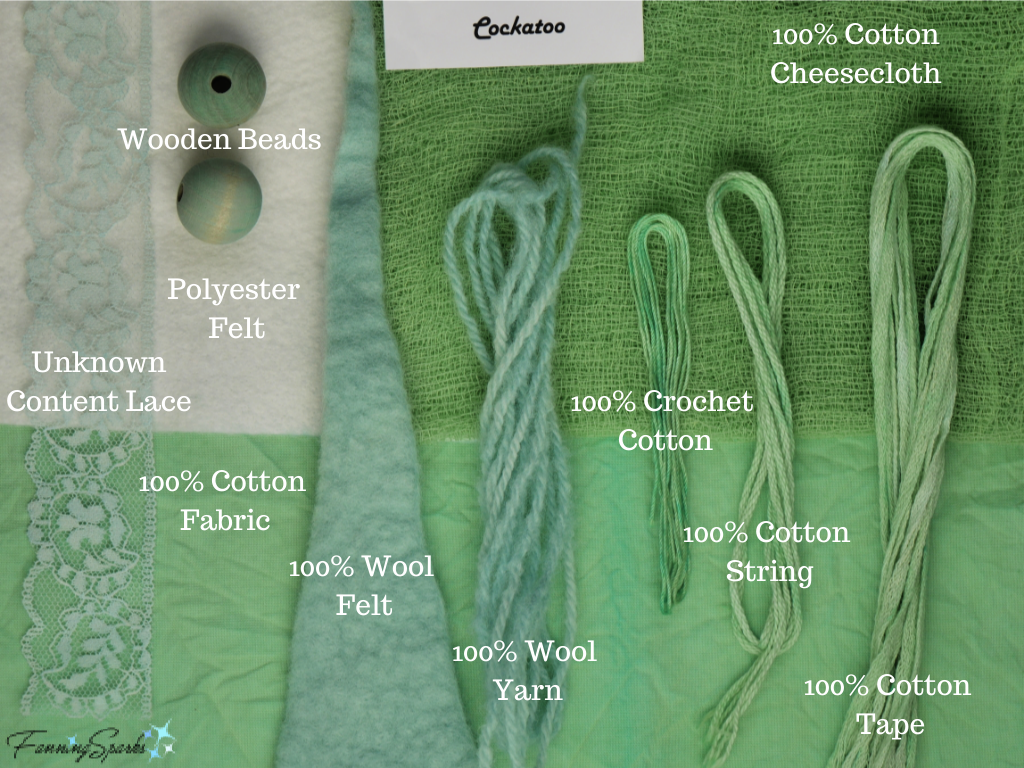
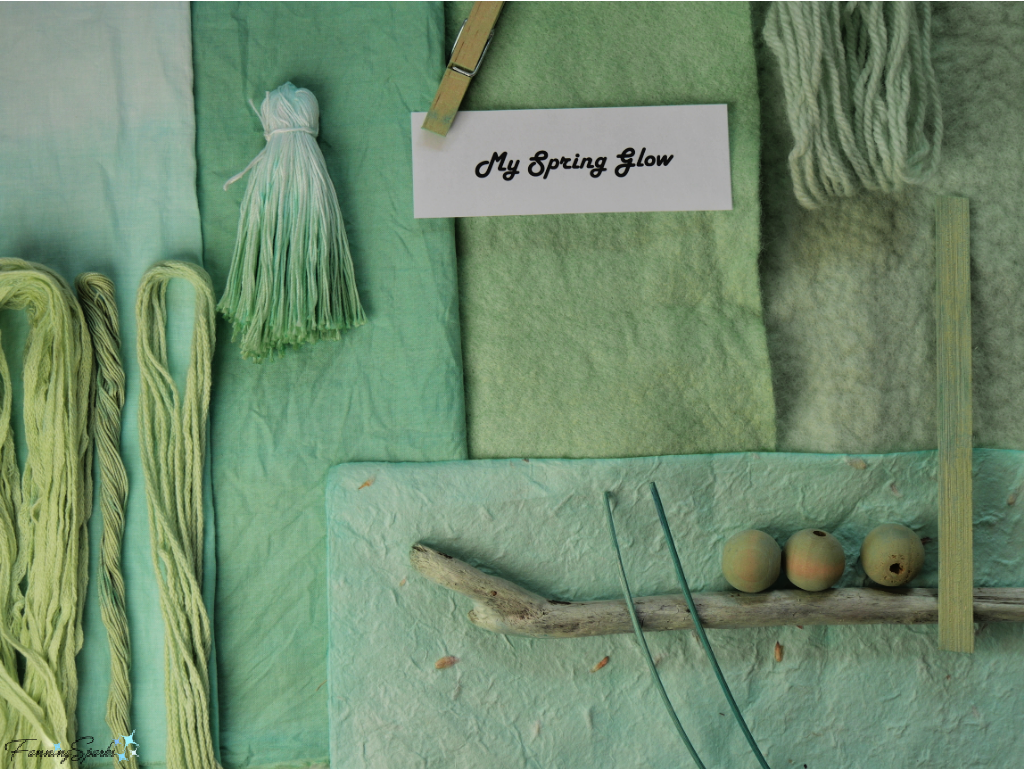
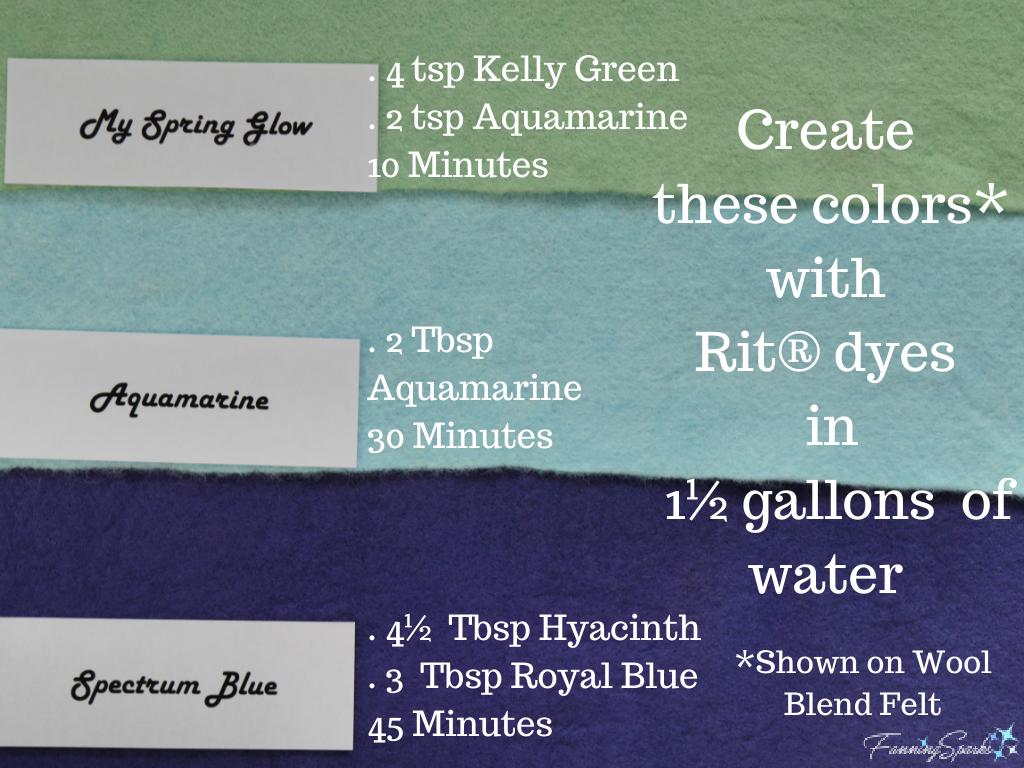
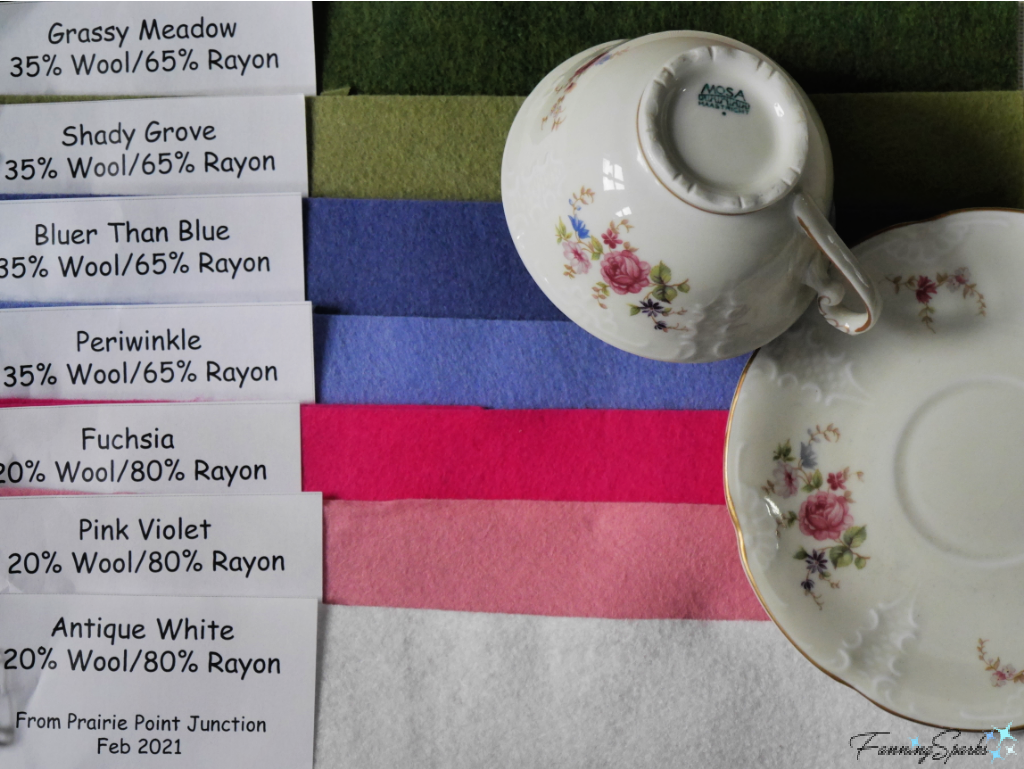
  Colorful felt flowers are the key to this project but buying felt in the desired colors can be a little tricky. The best way, of course, is to shop in person where you can hold the teacup up against the felt. But that’s not possible when shopping online. I’ve found using a photo of the item I’m trying to match is a good way to select colors online. Shoot the photo against a white background in bright, clear, natural light. Then view your photo beside the vendor’s colors. It’s helpful to take snippets of the color samples and drop them directly onto your photo. This method isn’t foolproof but the side-by-side comparison is a good indicator of which colors will work best. And it’s much better than holding a teacup up to your computer monitor! The below photo shows a few color samples from Prairie Point Junction’s wool blend felt (see More Info below).
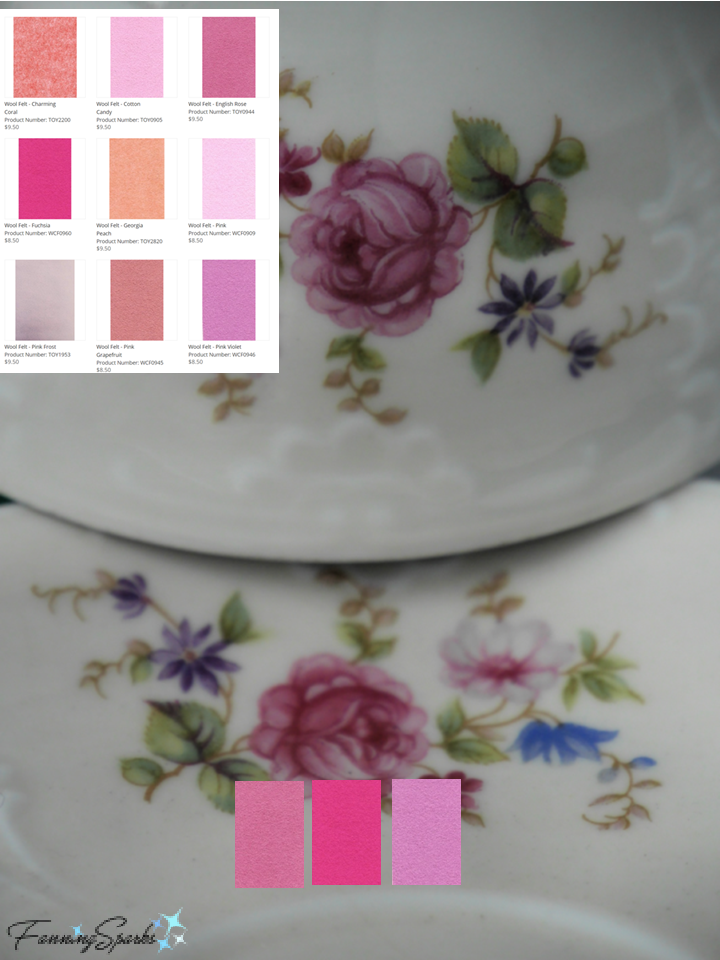
 Supplies Needed
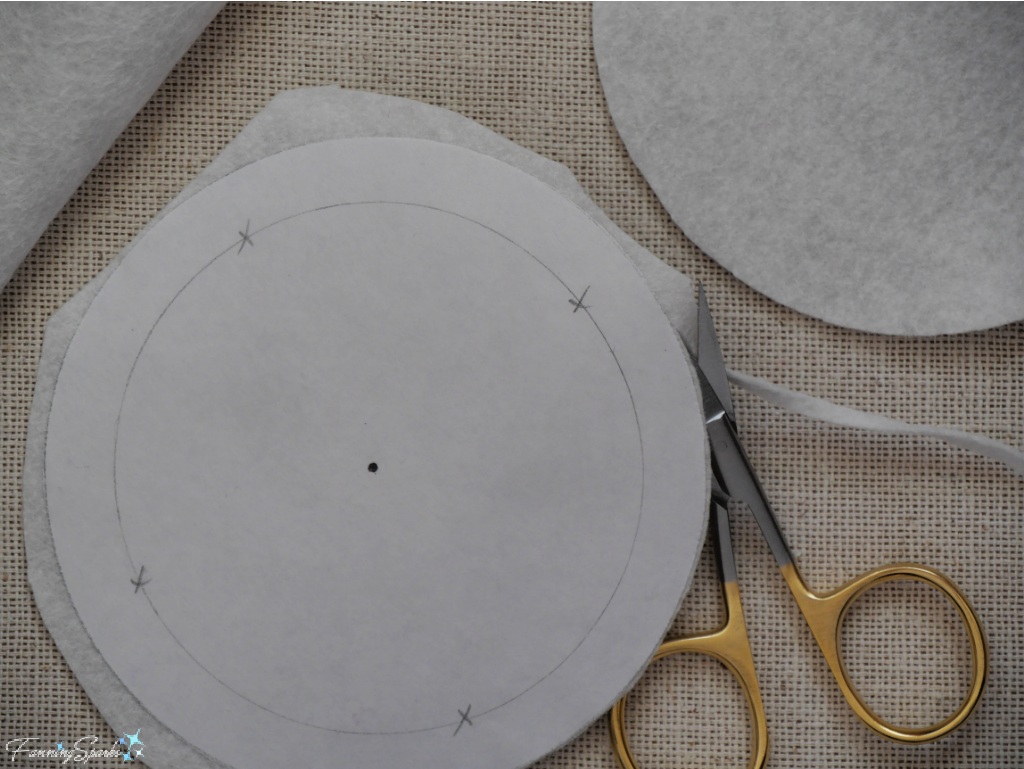
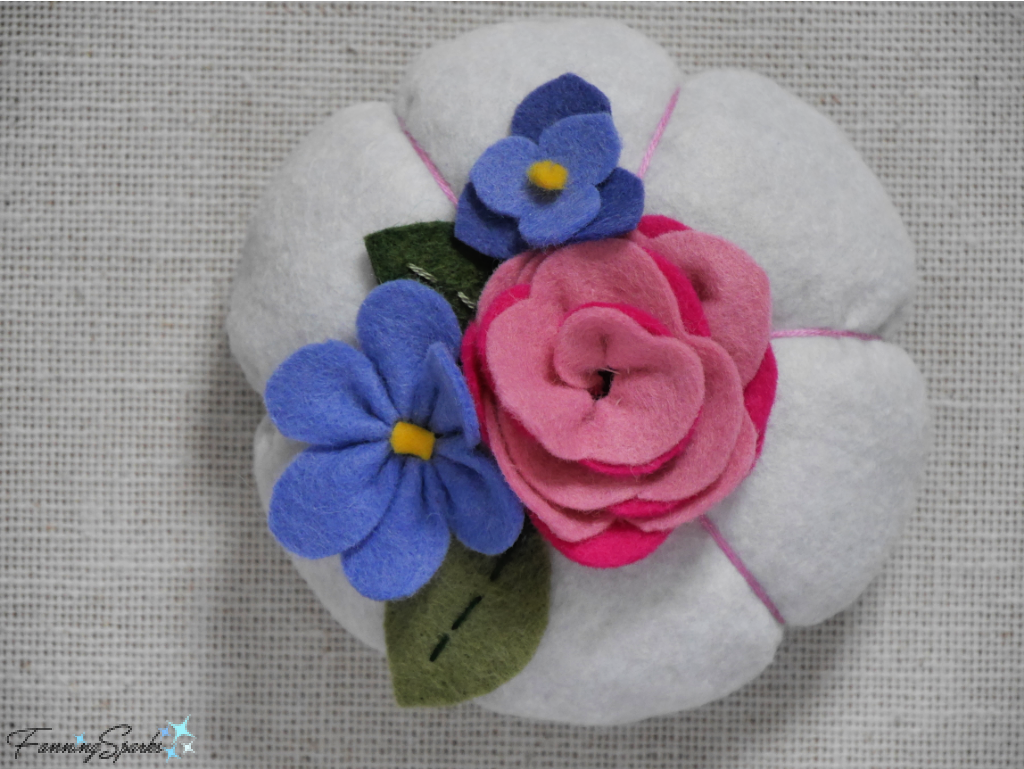
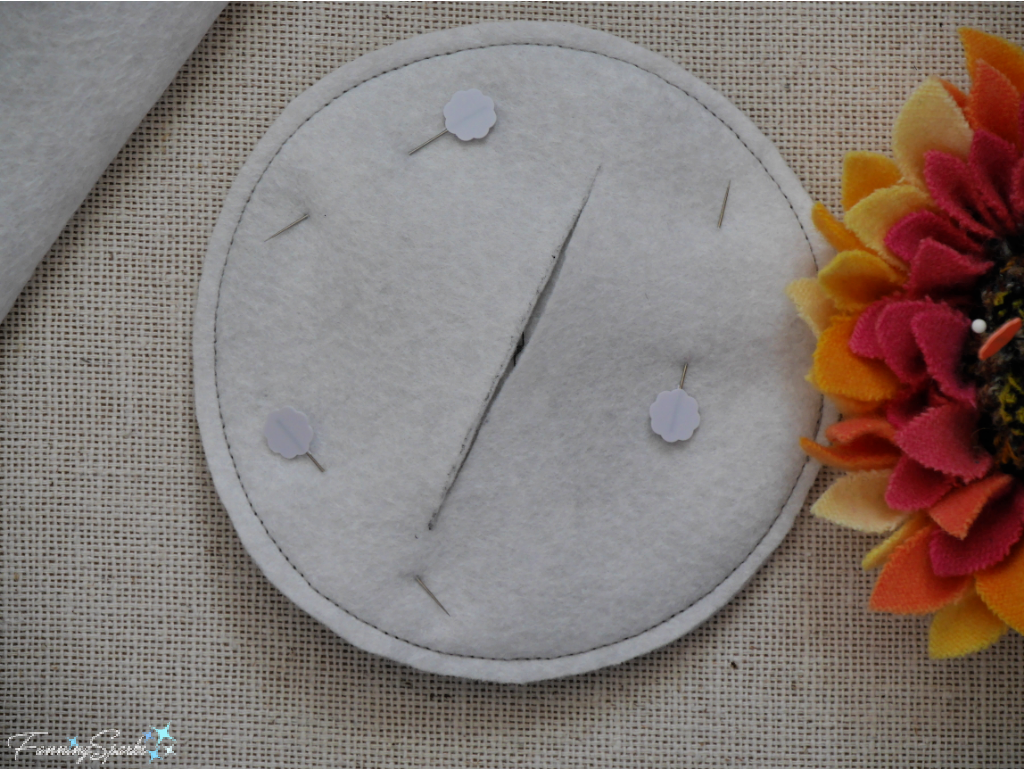 Gently turn the felt circle inside out through the slit. Push out seam by running finger along the inside of the seam. Press. Stuff pincushion pad with polyester fiberfill or other material. Ensure outside edge is stuffed evenly. Take care not to overstuff—the seams should not be strained. Use matching thread and whipstitch (or stitch of your choice) to close the back slit.
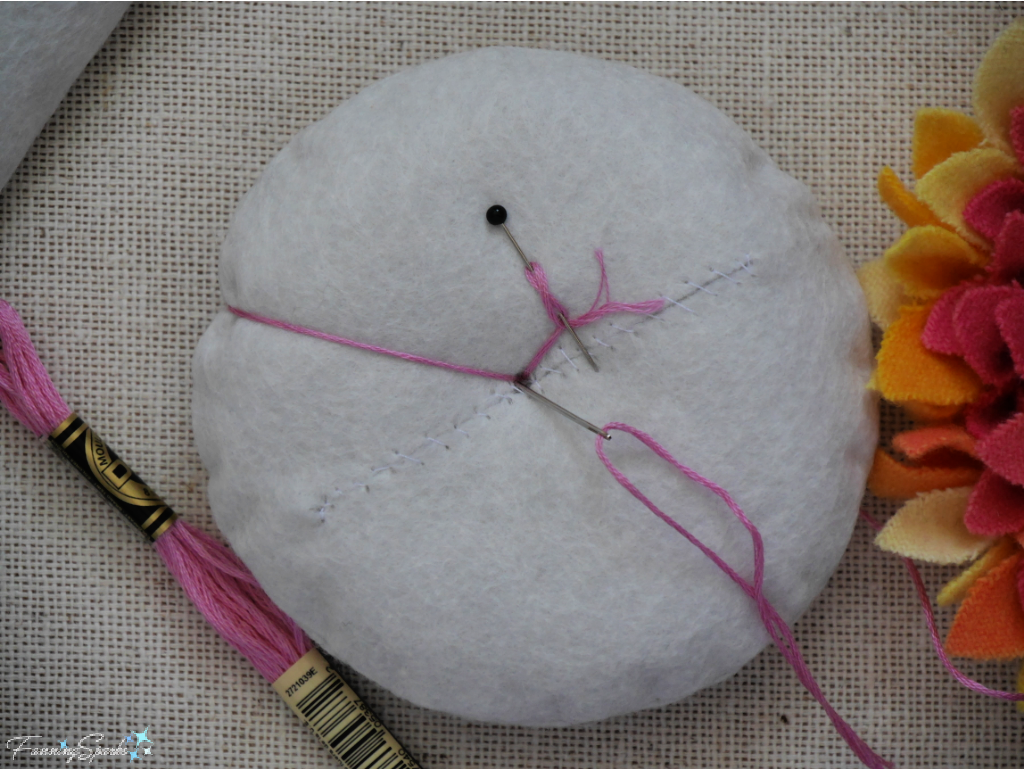
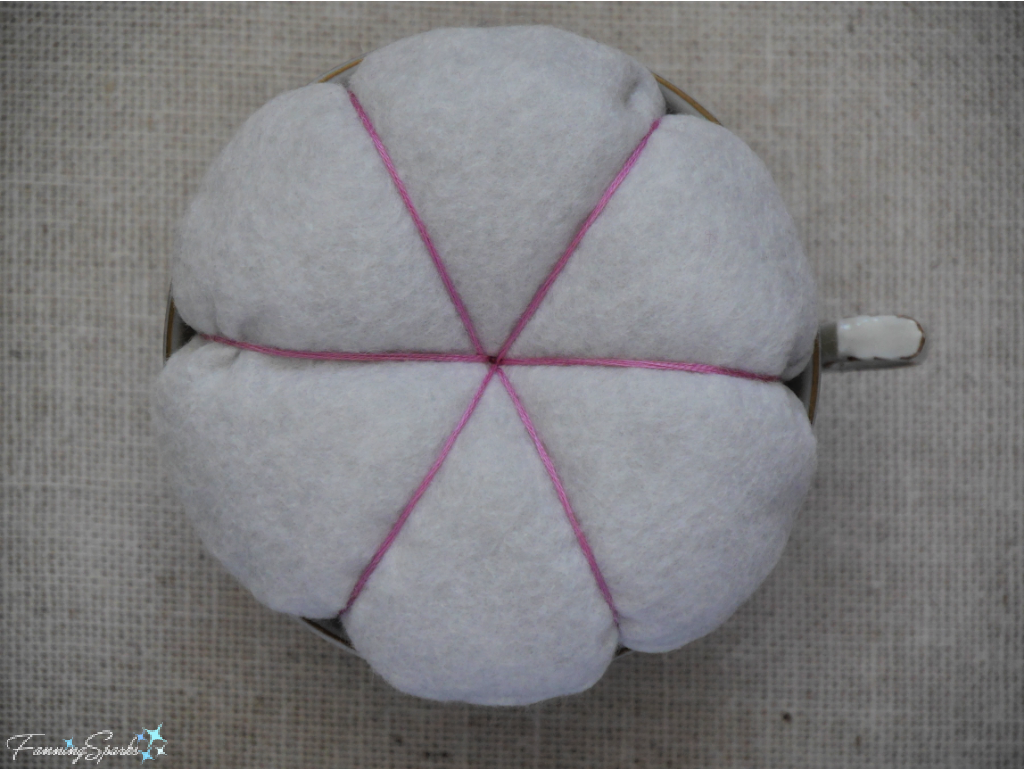
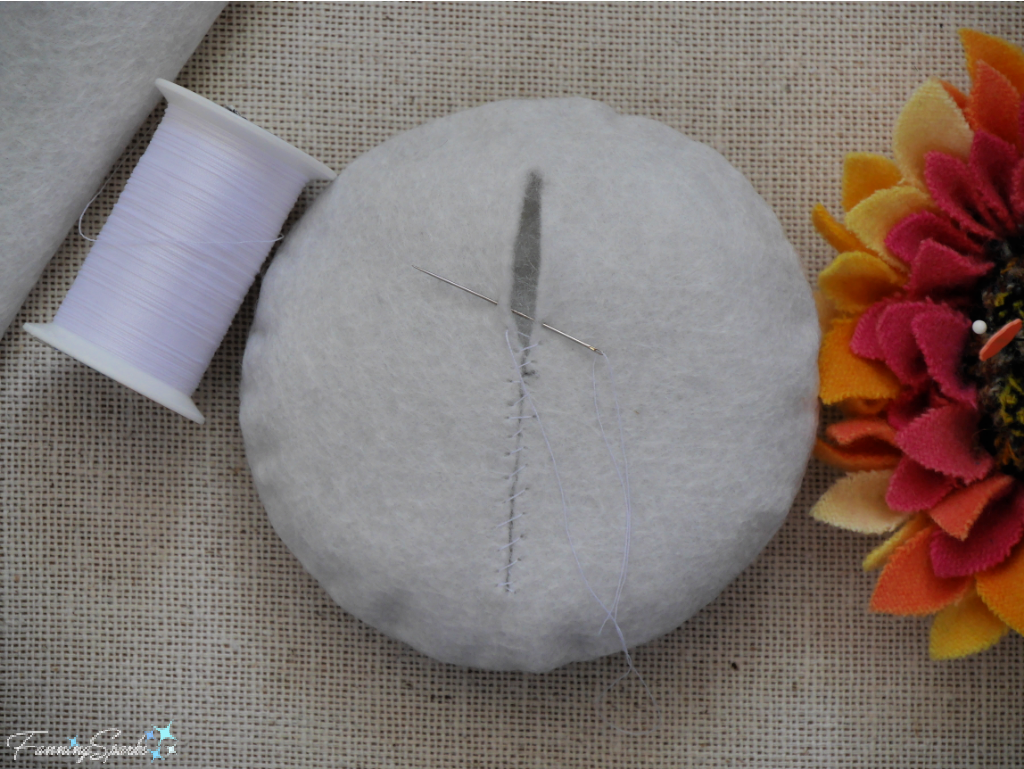 Choose embroidery floss to divide the pincushion pad into petals—the color can match or contrast as you wish. Wrap the 6-strand floss around the pincushion pad 3 times to measure the length needed. Mine was 32” long. Cut and thread the floss onto a long embroidery needle. Insert a pin near the center point on the bottom and wrap the floss tail around this pin to anchor it. Insert the needle at the center point on the bottom of the pad, pull it up through the pad and exit at the center point on the top. Wrap the floss around the outside of the pad and return the needle to the center point on the bottom.