Author

Peg

Browsing

A pretty bowl filled with beautiful ornaments can add a nice decorative touch for the holidays.  It’s a simple way to showcase favorite glass balls on a side table or as a centerpiece.  Any pleasing bowl can be used but a stitched wooden bowl makes the display even more special.  I’d like to share how I put together my ornament bowl in today’s post.
You may recognize this technique from the Starry Stitched Sphere I shared in my last post.  The new stitched bowl is different enough that I’ve included step-by-step instructions.  The finished bowl is 10½” in diameter and 5¼“ high.  It is designed to be made from ¼” x 5½” wood.  Basic woodworking and hand stitching is involved.
Supplies Needed
The following supplies are needed to make the Stitched Wooden Bowl.
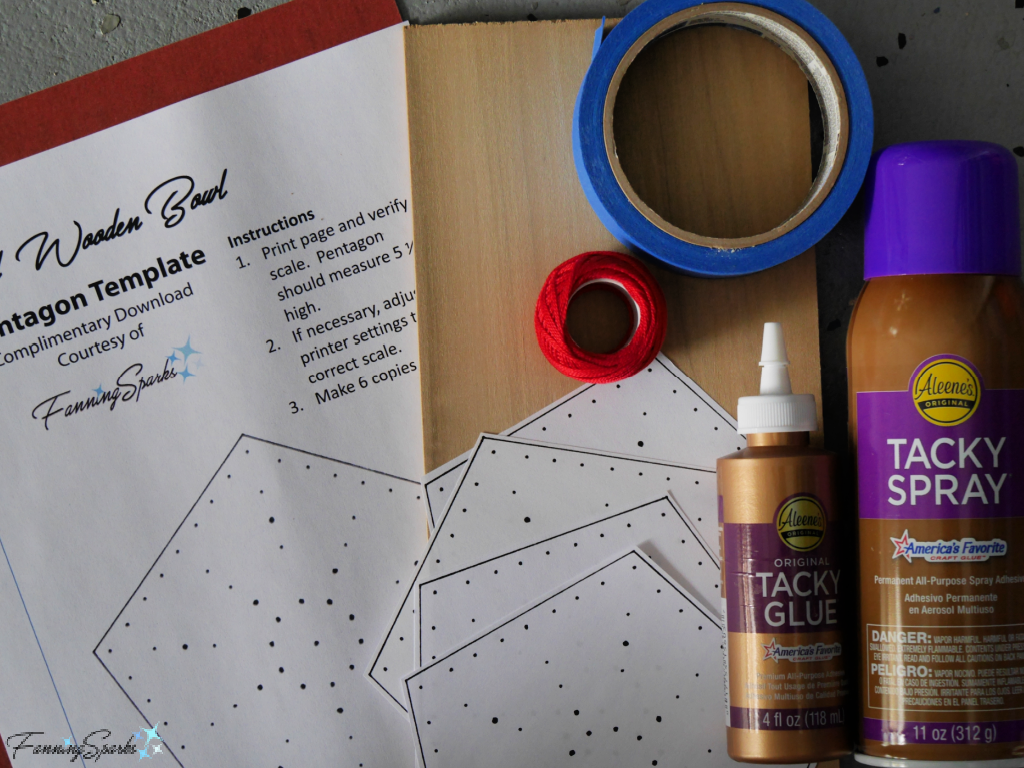
Supplies Needed for Stitched Wooden Bowl   @FanningSparks
Template and Guides:  Download Stitched Wooden Bowl – Complimentary Download  to print the pentagon template and stitching guides.
. Paper:  A few sheets of white paper for printing patterns and stitching guides.
. Wood Board: ¼“ x 5½” x 3 feet in light wood such as pine or poplar.
. Painter’s Tape
. Spray Adhesive:  I used Aleene’s Tacky Spray.
. Sandpaper:  In fine grit.
. Wood Finish: There are many options for finishing the wooden pentagons for this bowl.  If you plan to use it for food, be sure to use a food-safe finish.  Cutting Board Oil from Walrus Oil is made with coconut oil, beeswax, mineral oil and Vitamin E.  It is FDA Compliant and safe for food-contact surfaces.  If you do not plan to use the bowl for food, you could wax or stain the wood.  Or you could leave the wood unfinished.  I chose to wax the outside of the bowl and leave the inside unfinished.
. Thread: About 42 yards of Size 8 DMC Perle Cotton in your choice of color.
. Clear Glue: To finish thread ends.  I used Aleene’s Tacky Glue.
Tools and Equipment Needed
. Printer: To print template.
. Scissors
. Tape Measure or Ruler
. Jigsaw
. Clamps
. Drill with 3 bits including 7/64”, 5/64” and 3/32”.
. Tapered Round File:  To sand the drilled holes.  I used a diamond- and titanium-coated steel file designed for jewelry-making.
. Needle: A dull-pointed tapestry needle is ideal.
Step-by-Step Instructions
Step 1. Print Patterns
  Download the Stitched Wooden Bowl – Complimentary Download and print the template for the pentagons. Take care to ensure the scale is accurate on your printed version.  See specifics in the download document.  Print 6 copies.  Trim patterns with scissors.
Step 2. Adhere Patterns  Cover wood board with painter’s tape.  The tape makes it easier to remove the patterns from the wood later.
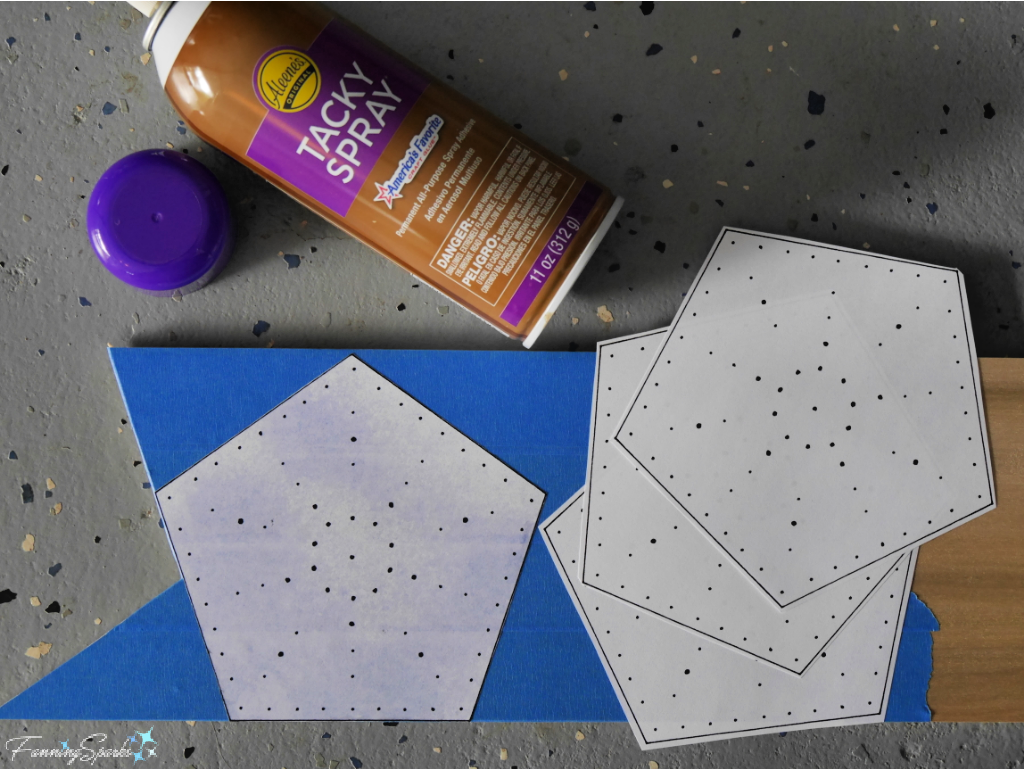
Adhere Pattern to Wood for Stitched Wooden Bowl   @FanningSparks
Spray the back of a paper pattern with adhesive.  Position carefully on board, over the painter’s tape, aligning bottom of pentagon with bottom edge of board.  Smooth and press down.  Repeat for the second pentagon aligning its bottom with the top edge of the board.  Repeat for the remaining 4 pentagons alternating placement to reduce the number of cuts and minimize the amount of scrap.
Step 3. Saw Wood Pentagons   Clamp wood to sturdy surface.  Use the jigsaw to cut out the 6 pentagon-shaped pieces.  Cut as precisely as possible.
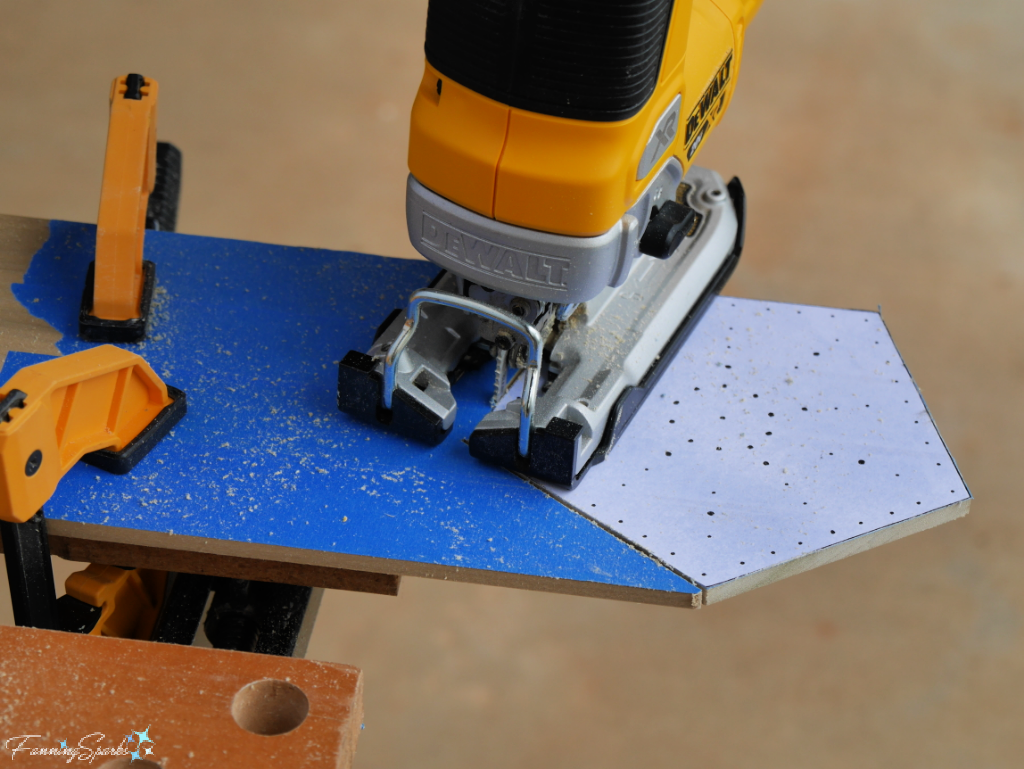
Cut Wooden Pentagons for Stitched Wooden Bowl   @FanningSparks
Step 4. Drill Wood Pentagons  Clamp a pentagon on top of scrap wood to prevent tear out at the back.  Drill all outer edge holes with a 5/64” drill bit.  Drill center hole and all heavily-marked, large holes with a 7/64” drill bit.  Drill all other holes with a 3/32” drill bit.  Repeat for remaining 5 pentagons.
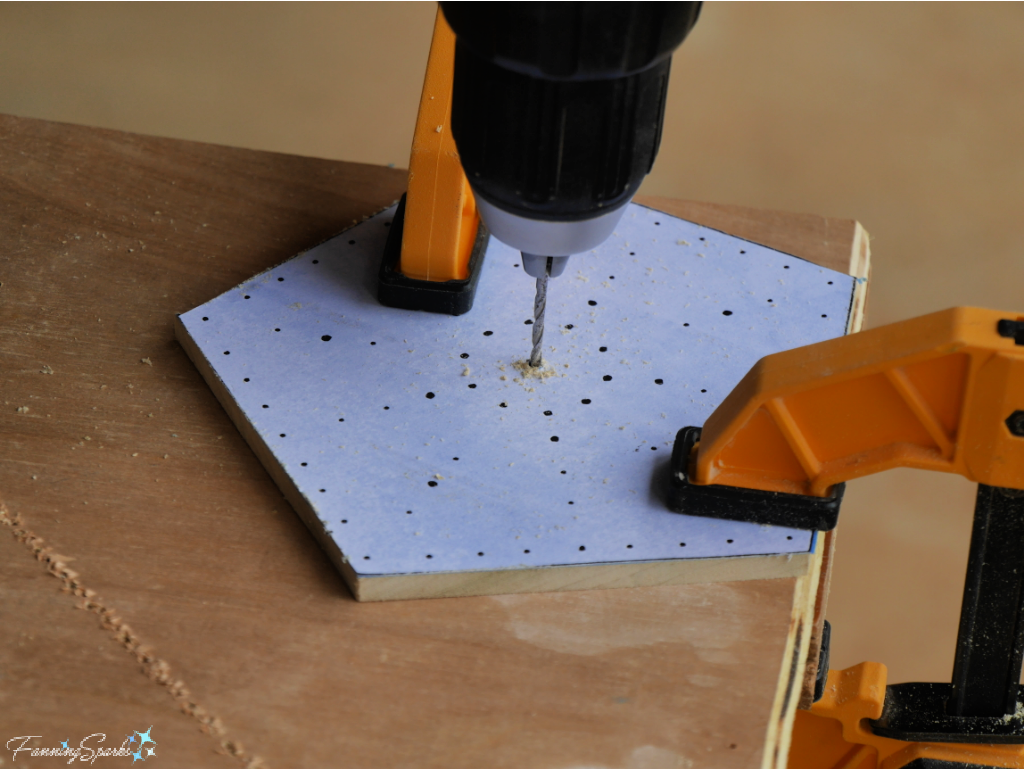
Drill Wooden Pentagons for Stitched Wooden Bowl   @FanningSparks
Step 5. Sand Wood Pentagons  Sand edges and drilled holes. This is an important step because any roughness, especially along the edges of the holes, will snag the thread during stitching.  A round tapered file is critical for this step.
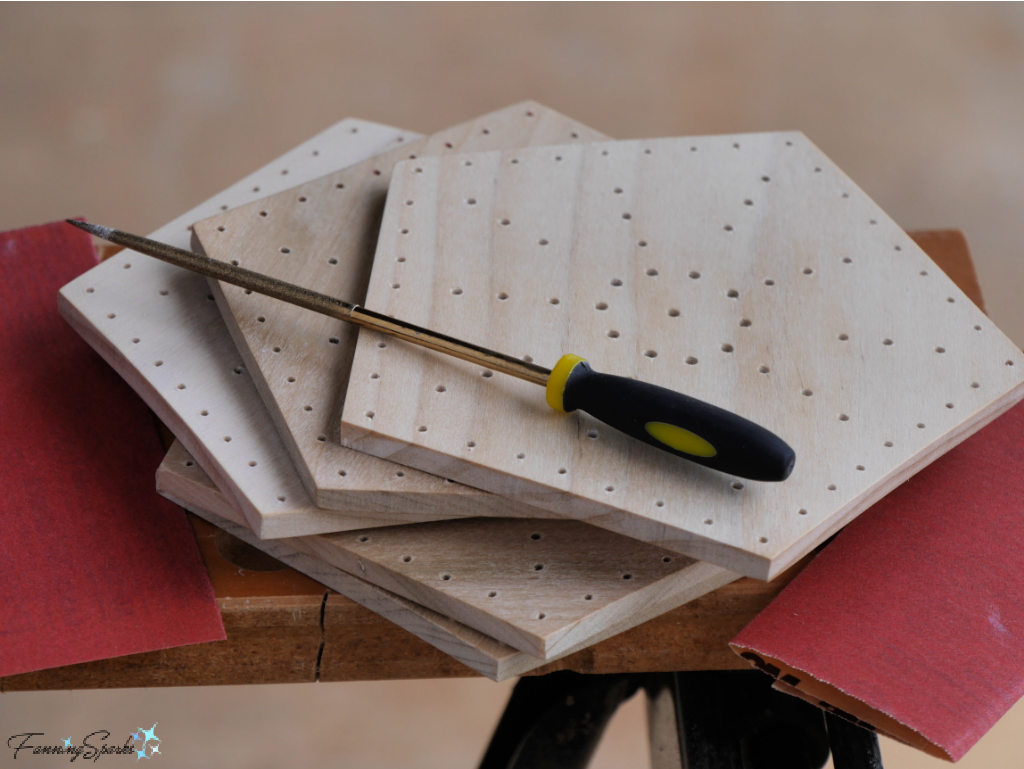
Sand Wooden Pentagons for Stitched Wooden Bowl   @FanningSparks
Step 6. Finish Wood Pentagons  As noted in the Supplies Needed section above, there are many options for finishing the wooden pentagons for this bowl.  If you plan to use the bowl for food, be sure to use a food-safe finish such as Cutting Board Oil from Walrus Oil.  Follow the manufacturer’s instructions for your chosen finish.
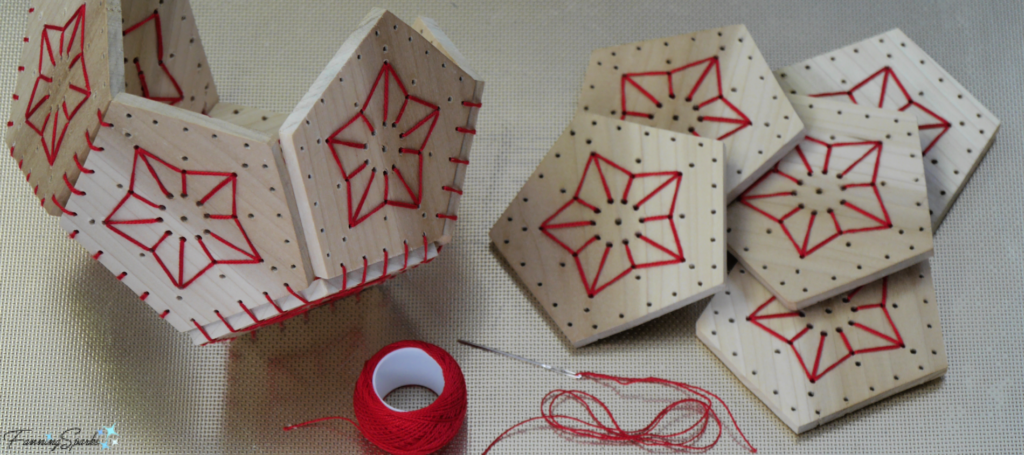
Step 7. Stitch Stars   Download the Stitched Wooden Bowl – Complimentary Download and print the Stitching Guides.  Be sure to print in color because it is color-coded.  The stitched stars are designed to look the same on the inside and the outside of the bowl with no missing or double stitches.  Pictured below are two finished pentagons; the pentagon at the top right shows the finished front and the one at the bottom right shows the finished back.
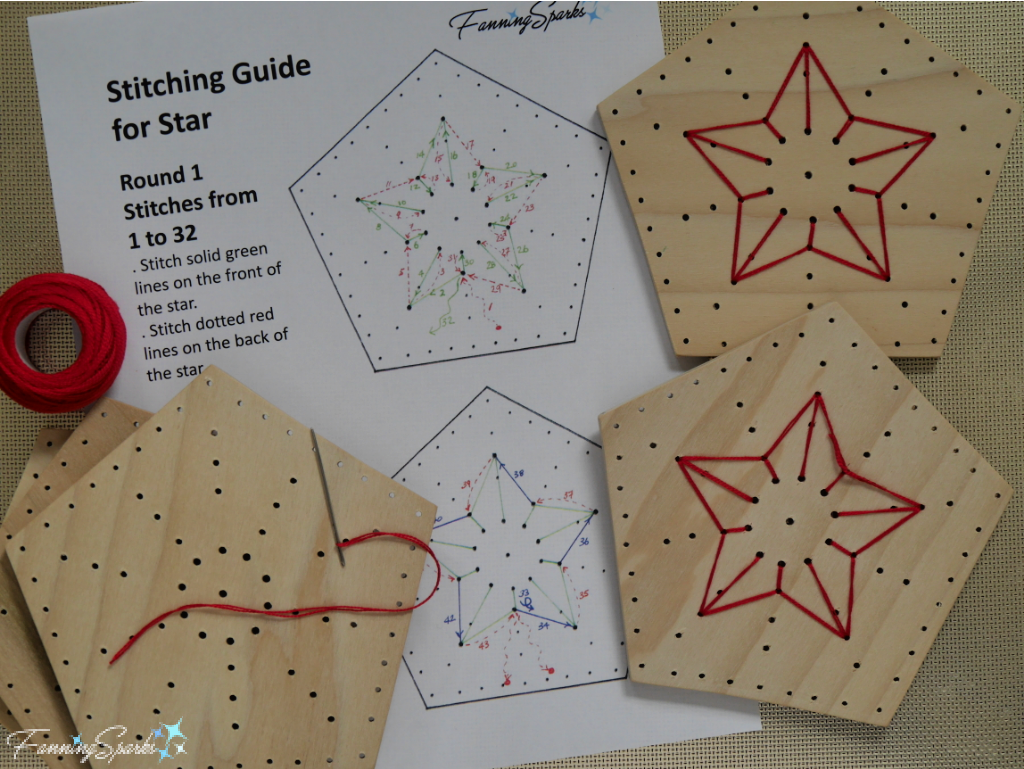
Front and Back of Stitched Stars for Stitched Wooden Bowl   @FanningSparks
The Stitching Guide for Stars illustrates the stitch pattern.  Stitch around the star twice; the first round is stitched clockwise and the second round is stitched counter-clockwise.  The Stitching Guide for Stars is coded to indicate the placement of each stitch.  In Round 1, solid green lines are to be stitched on the front of the star and dotted red lines are to be stitched on the back of the star.  Follow the numbers, from 1 to 32, to stitch in the intended sequence.  Reverse direction at Stitch 33 for Round 2.  Work counter-clockwise from Stitch 34 to 43.  In Round 2, solid purple lines are to be stitched on the front of the star and dotted orange lines are to be stitched on the back of the star.
Each star requires about 9 feet of pearl cotton thread.  The stars are stitched with a double thread so pull thread ends even and knot.  Begin at Stitch Number 1 with a 3-4” tail at the back of the wooden pentagon.  Pull tail up around edge to the front and tack down with painter’s tape.  Pictured below is the star at the end of Round 1.
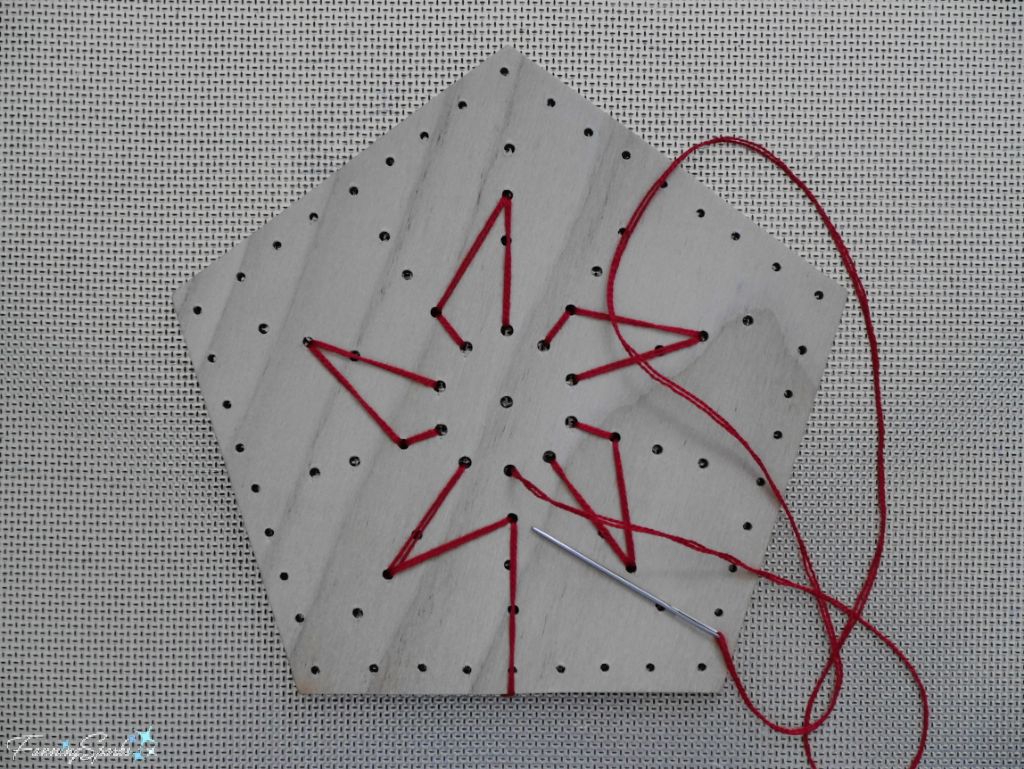
Star Stitching After Round 1 for Stitched Wooden Bowl   @FanningSparks
Finish at Stitch Number 43 with both thread ends at the back of the wooden pentagon.  Pictured below is the star at the end of Round 2.
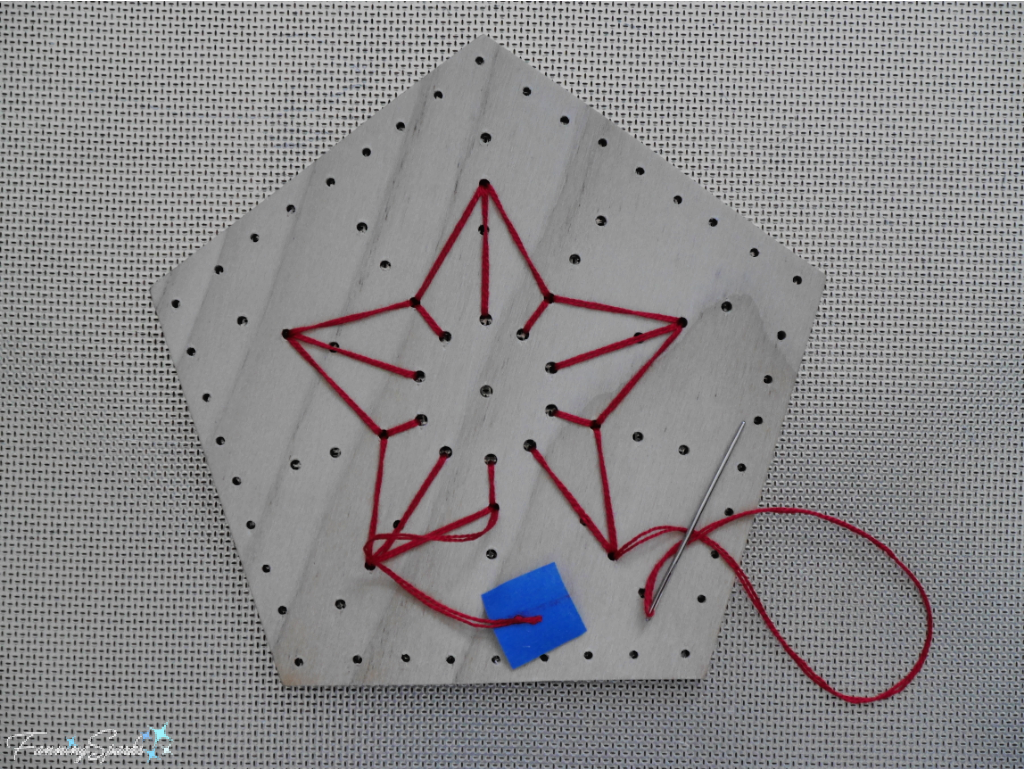
Star Stitching After Round 2 for Stitched Wooden Bowl   @FanningSparks
Knot the thread ends as close to a drilled hole as possible.  Use a firm double knot. Trim thread with scissors leaving short ends.  Use a dab of clear glue to hide the ends and prevent them from unravelling.  Small strips of cardboard can be used to keep the glue off the wood but take care to remove them before the glue dries completely.
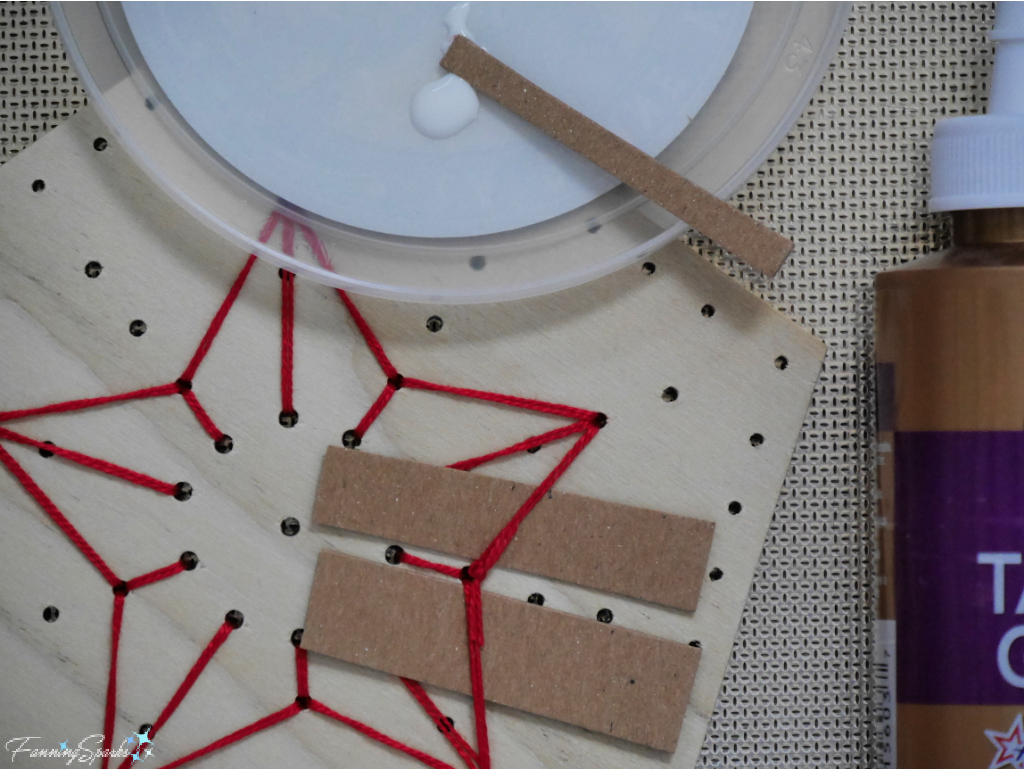
Glue Thread Ends for Stitched Wooden Bowl   @FanningSparks
Repeat on the remaining 5 pentagons.
Step 8. Assemble Ring of Pentagons   Start by connecting a row of 5 pentagons.  The Stitching Guide for Connections illustrates the stitch pattern.  The Stitching Guide is coded to indicate the placement of each stitch.  Solid green lines are to be stitched on the front of the pentagons and dotted red lines are to be stitched on the back of the pentagons.
Each connection between pentagon sides requires about 5 ½ feet of pearl cotton thread.  Double the thread and tie a knot.  Select 2 pentagons and align 2 sides.  Hold the pentagon sides together at an angle (as shown in the photo below).  If the pentagons are held flat while stitching, the connection will likely be too tight and it won’t be possible to bend the pentagons into a ring.  Begin at Stitch Number 1 with a 3-4” tail at the back of the wooden pentagon.  Pull tail up around edge to the front and tack down with painter’s tape.  Pictured below is the front view of the connection in progress.
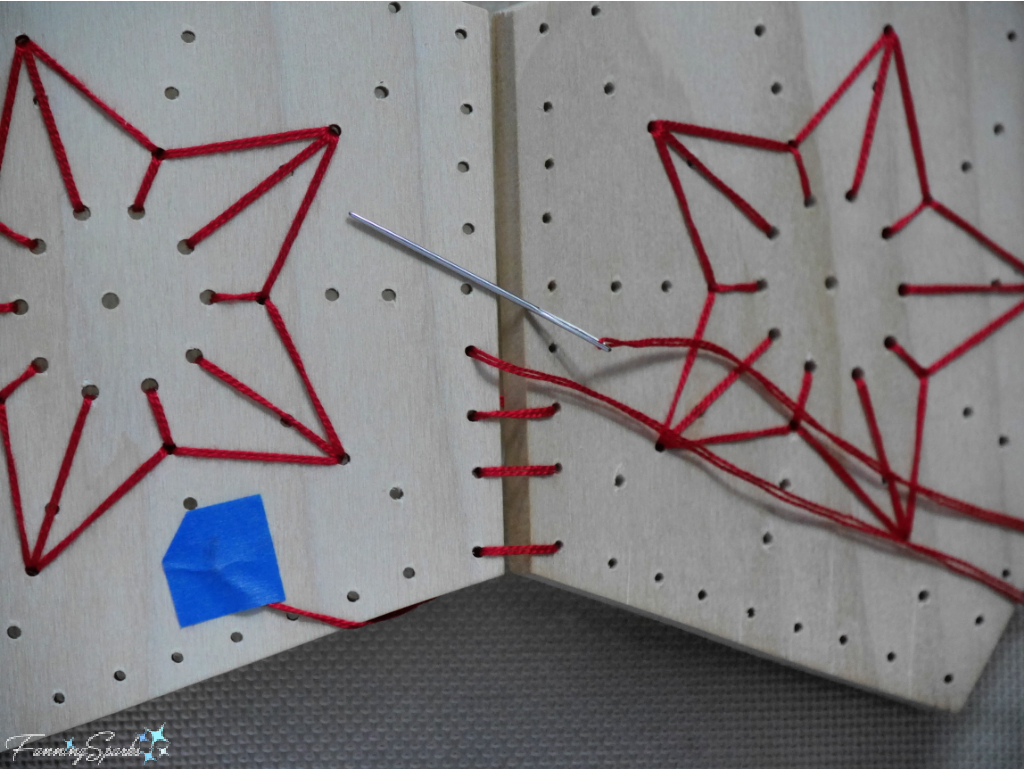
Pentagon Connections Started for Stitched Wooden Bowl   @FanningSparks
After working from the bottom up to the top, take the final stitch, Stitch Number 19, at the top and then repeat the entire sequence working back down to the bottom.  This pass is done in the same way as Stitches 1-19.  Make the stitches on the front of the pentagons in the exact same places.  But make the stitches on the back of the pentagons on the opposite sides filling in the gaps.  Pictured below are the front and back views of a connection.
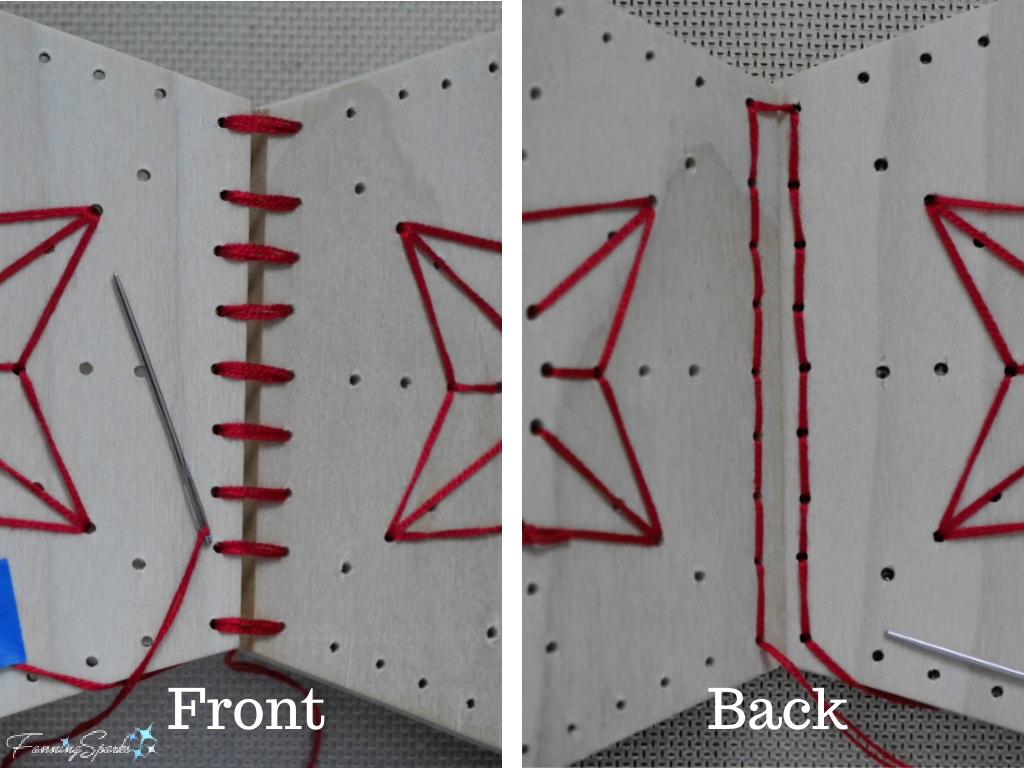
Pentagons Connected from Front and Back for Stitched Wooden Bowl   @FanningSparks
Knot the thread ends as close to a drilled hole as possible.  Use a firm double knot. Trim thread with scissors leaving short ends.
Continue to connect pentagons in this same way until a row of 5 is completed.
Pull the first and last pentagon of the row together to form a ring.  If it’s too difficult to form a ring, one or more of the connections may need to be adjusted.  Align the edges of the first and last pentagon.  Use painter’s tape to hold ring in place.
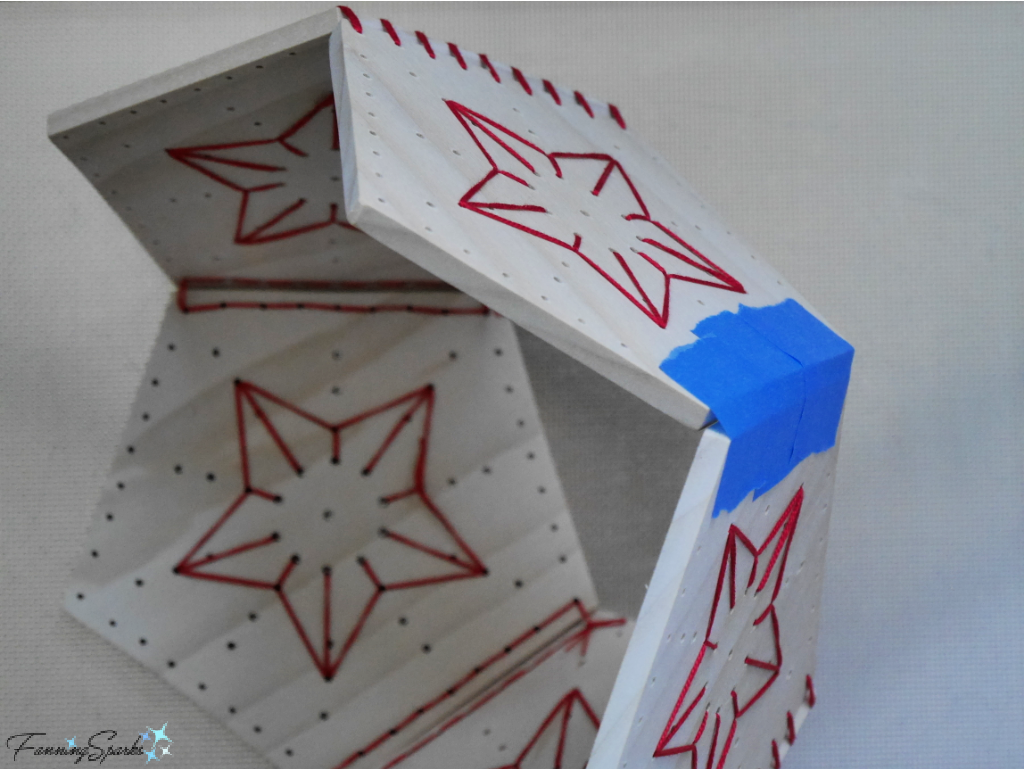
Tape Ring of Pentagons for Stitched Wooden Bowl   @FanningSparks
Stitch these 2 pentagons together in the same way as the other side connections.
Step 9. Connect Bottom  Place the final pentagon on the bottom of the ring aligning all edges.  Thread the needle with about 14 feet of pearl cotton thread.  Double the thread and tie a knot.  Follow the stitch pattern illustrated in the Stitching Guide for Connections.  Select a hole to the right of a connection as the starting point.  Begin at the back leaving a 4-6” tail.  Pull the thread tail up to the top edge and tack it down with painter’s tape.  Pull out and smooth the full length of the thread as you stitch to prevent knotting.  Stitch around all 5 sides of the bottom pentagon before tying off.   Knot the thread ends as close to a drilled hole as possible.  Use a firm double knot. Trim thread with scissors leaving short ends.  Pictured below is the inside of the bowl showing the side and bottom connections.
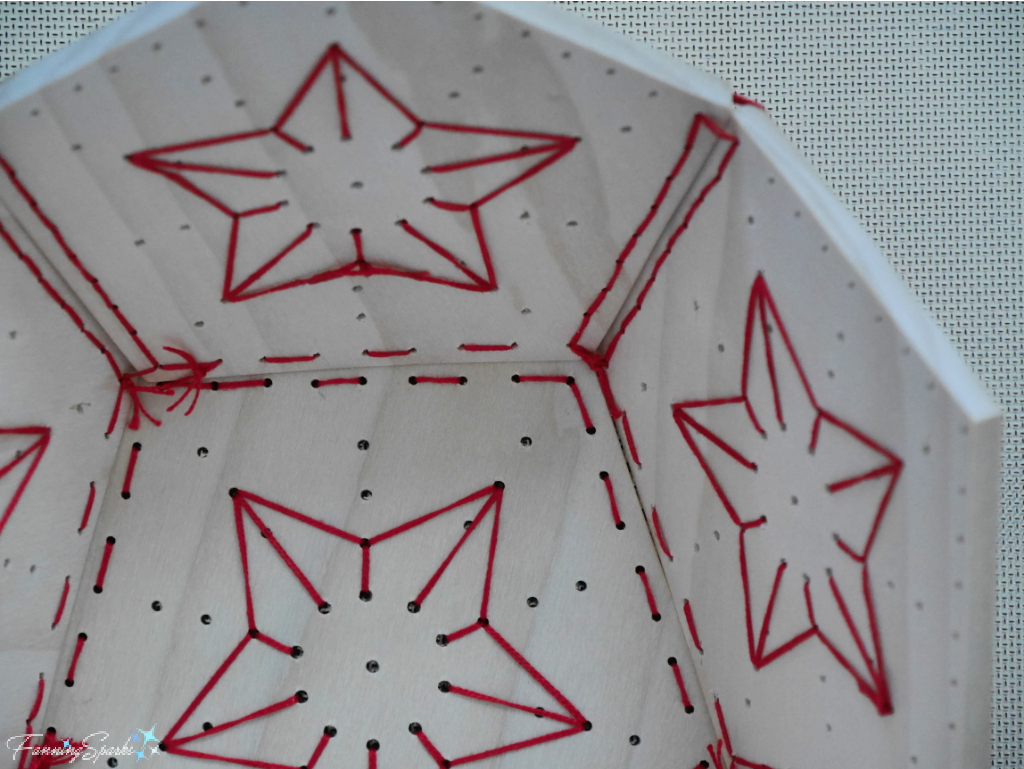
Side and Bottom Connections Finished for Stitched Wooden Bowl   @FanningSparks
Step 10. Finish Top Edge  The top edge is finished with a basic blanket stitch.  Thread the needle with about 20 feet of pearl cotton thread.  Double the thread and tie a knot.  Select a hole to the right of a connection as the starting point.  Begin at the back leaving a 3-4” tail.  Pull the thread tail down towards the bottom and tack it down with painter’s tape.  Follow the steps in the photo below.  Push the needle from the front to the back while passing over the thread at the back to form a loop.  Gently pull the loop to the center top of the wooden edge.
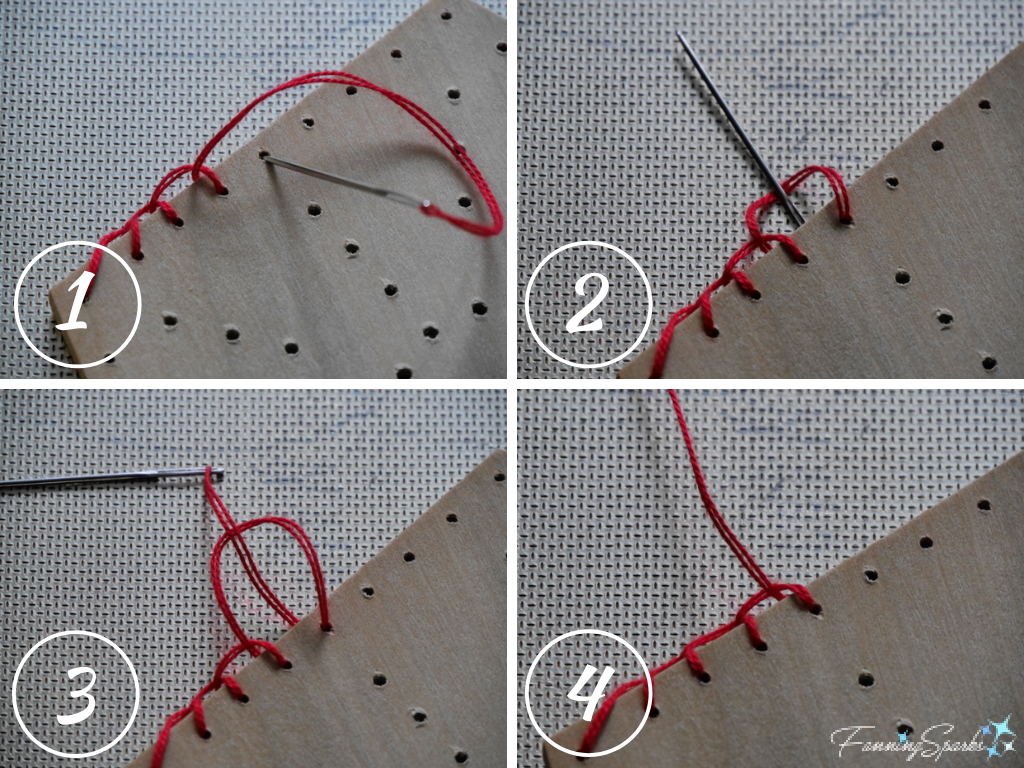
Blanket Stitch Edging Steps for Stitched Wooden Bowl   @FanningSparks
Pull out and smooth the full length of the thread as you stitch to prevent knotting.  Take 2 stitches in the hole at the peak of each pentagon.  Stitch around the entire top edge before tying off.  Knot the thread ends as close to a drilled hole as possible.  Use a firm double knot. Tuck ends into previous stitching and trim.  Pictured below is the finished top edge.
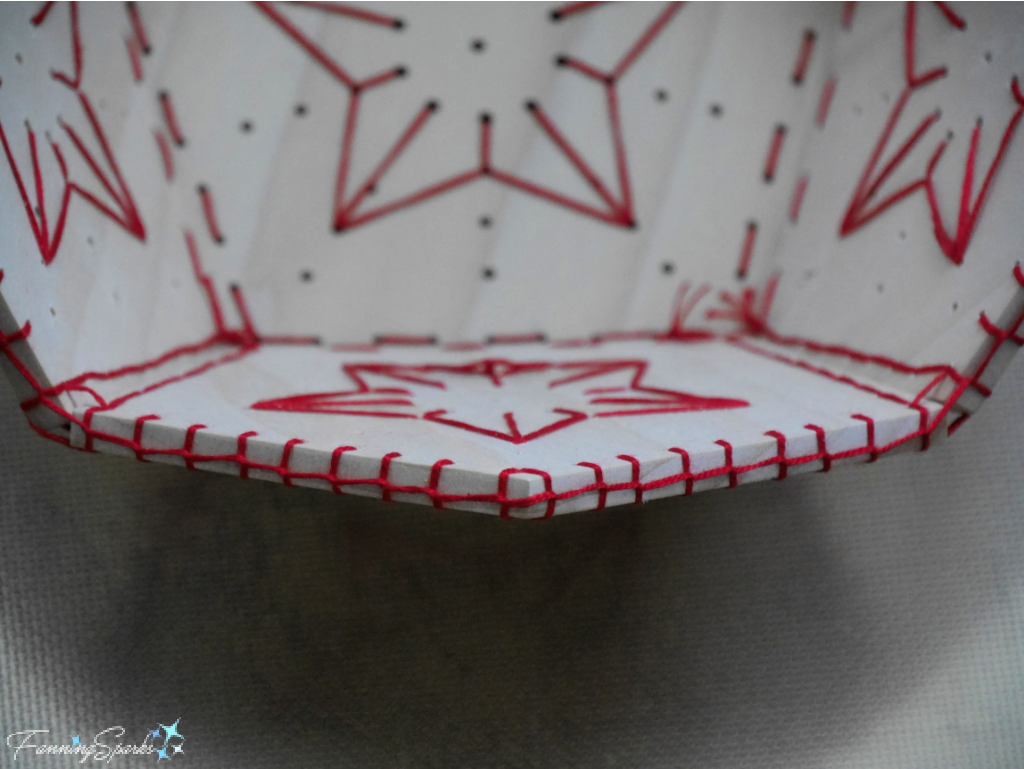
Blanket Stitch Edging Steps for Stitched Wooden Bowl   @FanningSparks
Step 11.  Display  Your pretty Stitched Wooden Bowl is ready!
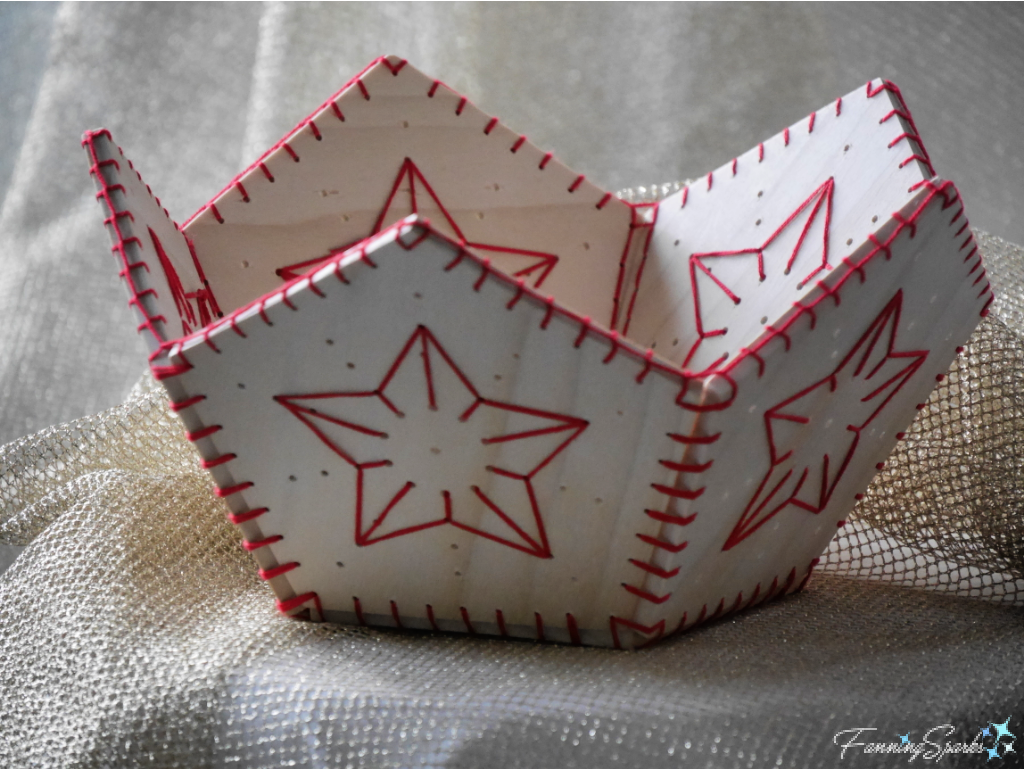
Finished Stitched Wooden Bowl  @FanningSparks
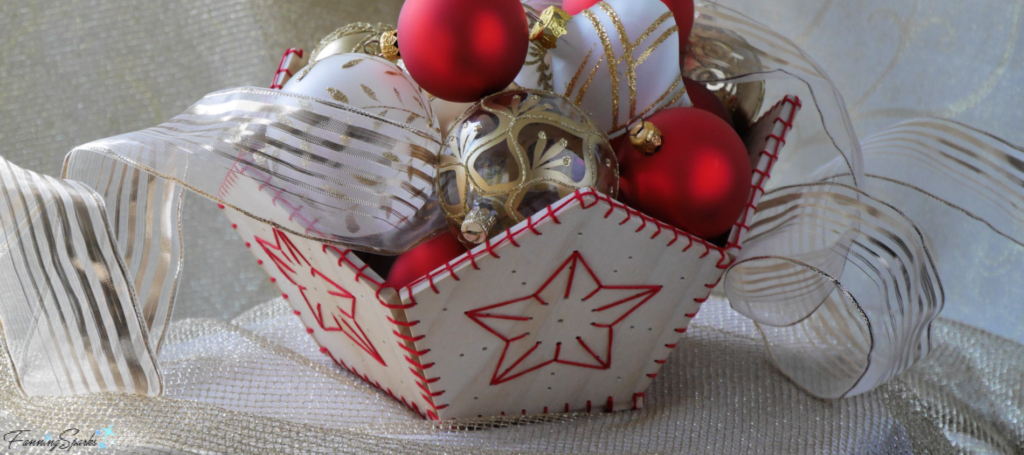
Have fun filling your bowl with pretty glass balls and ornaments.  You may want to hide a small, upside-down dish or container inside the bowl to add height and reduce the number of ornaments needed.  Consider curling a generous stretch of glittering ribbon through and around the bowl.  Place the ornaments in a pleasing arrangement and you’re all set!

Stitched Wooden Bowl with Ornaments @FanningSparks

More Info

You can download the  Stitched Wooden Bowl – Complimentary Download to print the pentagon template and the stitching guides.
Please share this image or pin for future reference.
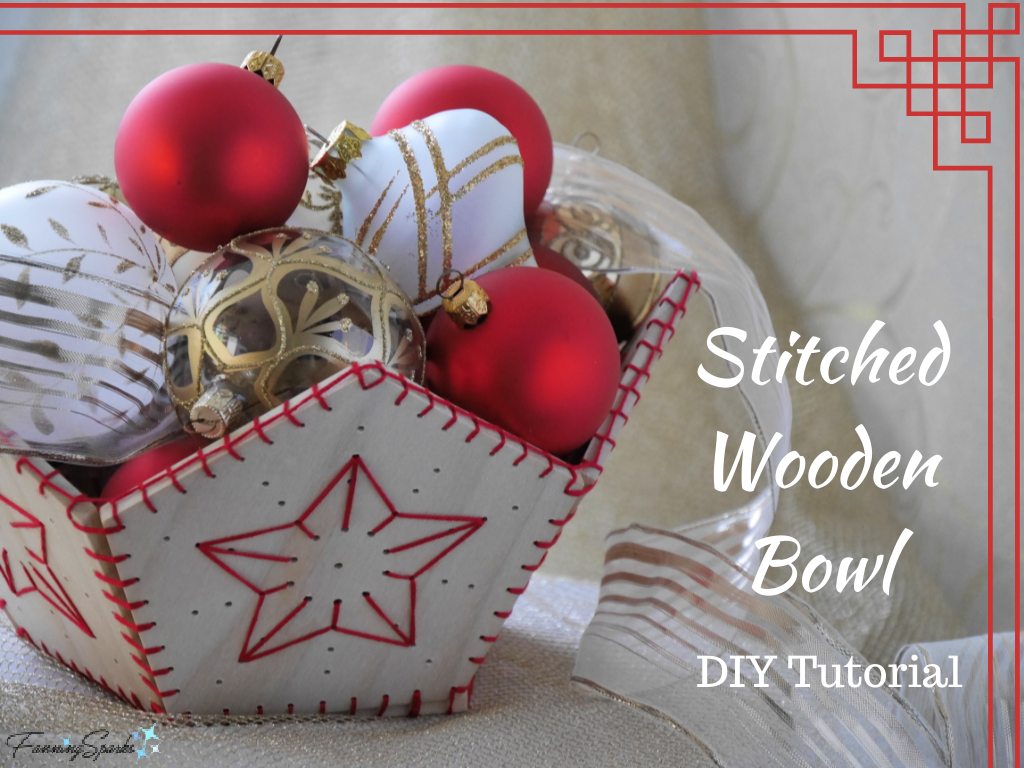
Stitched Wooden Bowl DIY Tutorial   @FanningSparks
You may also like the Starry Stitched Sphere and the Diamonds and Beads Wooden Wreath shown in the below photo.  Step-by-step instructions are provided for both projects.
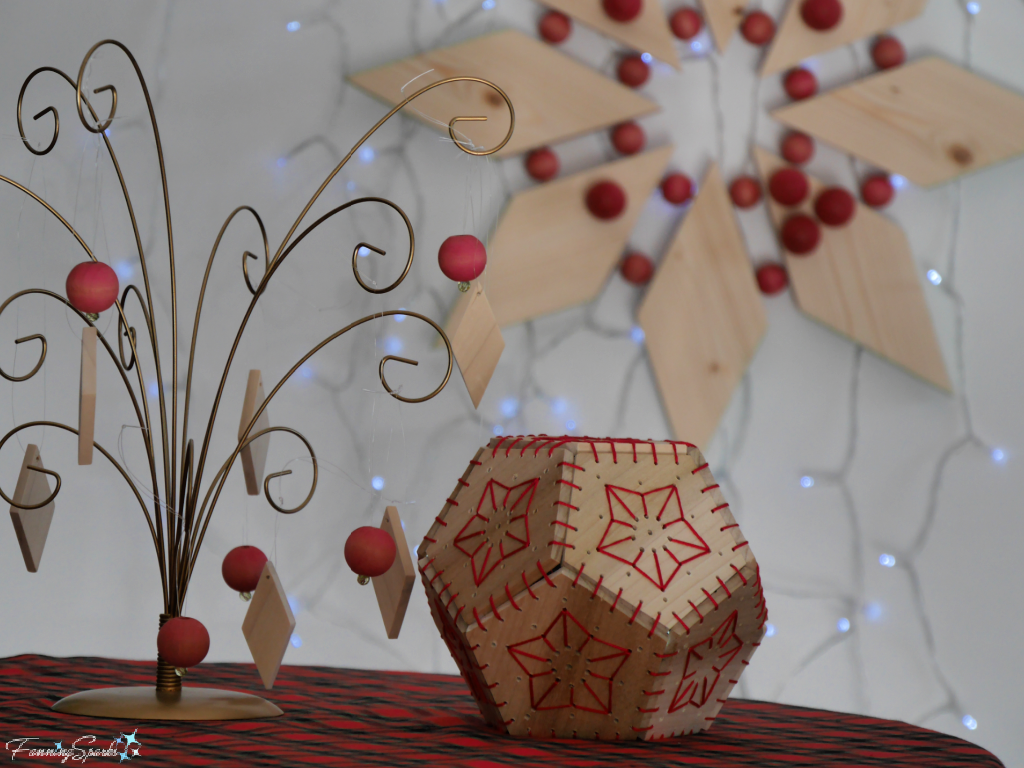
Starry Stitched Sphere with Wood Wreath @FanningSparks

Today’s Takeaways

1. A pretty bowl filled with beautiful ornaments can add a nice decorative touch for the holidays.
2. Consider stitching together wooden shapes for an unexpected accent.
3. Mix contrasting textures, from materials such as wood, fiber and glass, to create a striking arrangement.
Peg - FanningSparks Author

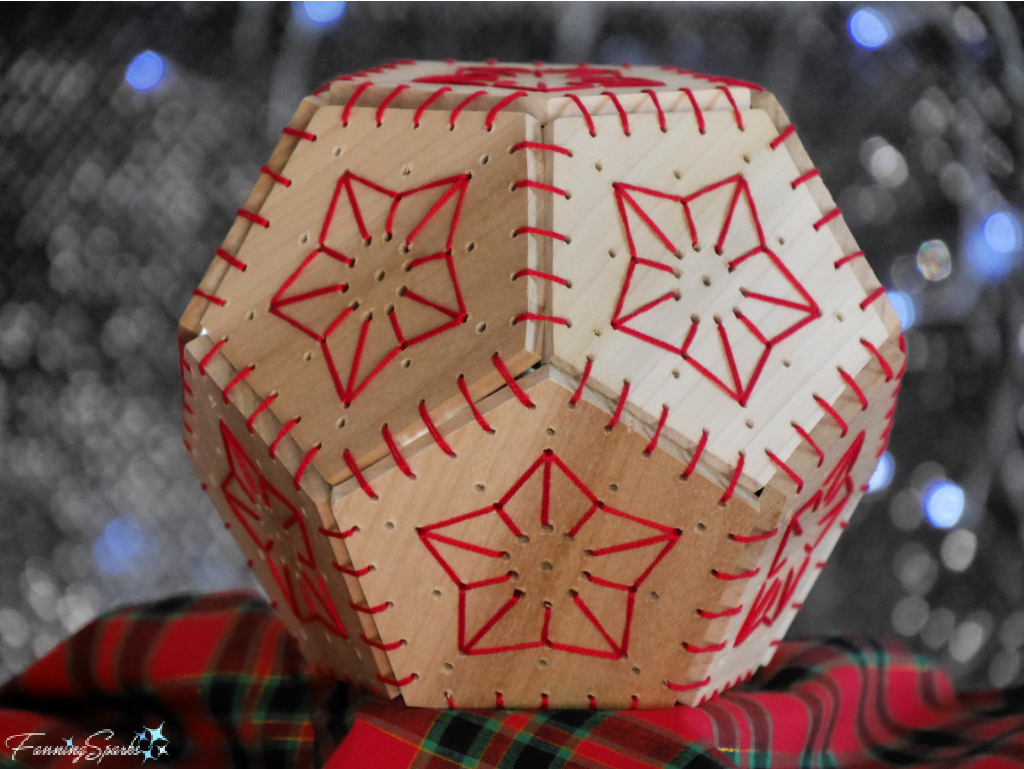
Decorating for the holidays gives us a chance to bring cherished treasures out of storage and enjoy them in our homes.  It’s also a great opportunity to get creative and make something new.  Adding one or two new items into the mix keeps things interesting.  This year, I decided to try something a little unexpected—stitching wood!  I love the warm and cozy feeling of natural wood.  Highlighted with the red and green of the season, it’s perfect for the holidays.   I dusted off my geometry skills and designed a decorative dodecahedron.  The 12-sided sphere is made of wooden pentagons stitched together with pearl cotton thread.  Each pentagon shape is embellished with a bright and cheery red star.  Here’s how my Starry Stitched Sphere turned out!
Finished Starry Stitched Sphere   @FanningSparksIn today’s post, I’d like to share step-by-step instructions so you can make your own Starry Stitched Sphere.  This project requires only a few supplies—basically wood and thread.  The sphere is designed to be made from ¼” x 3½” wood and measures just over 6″ in diameter.  Basic woodworking and hand stitching is involved.
Supplies Needed
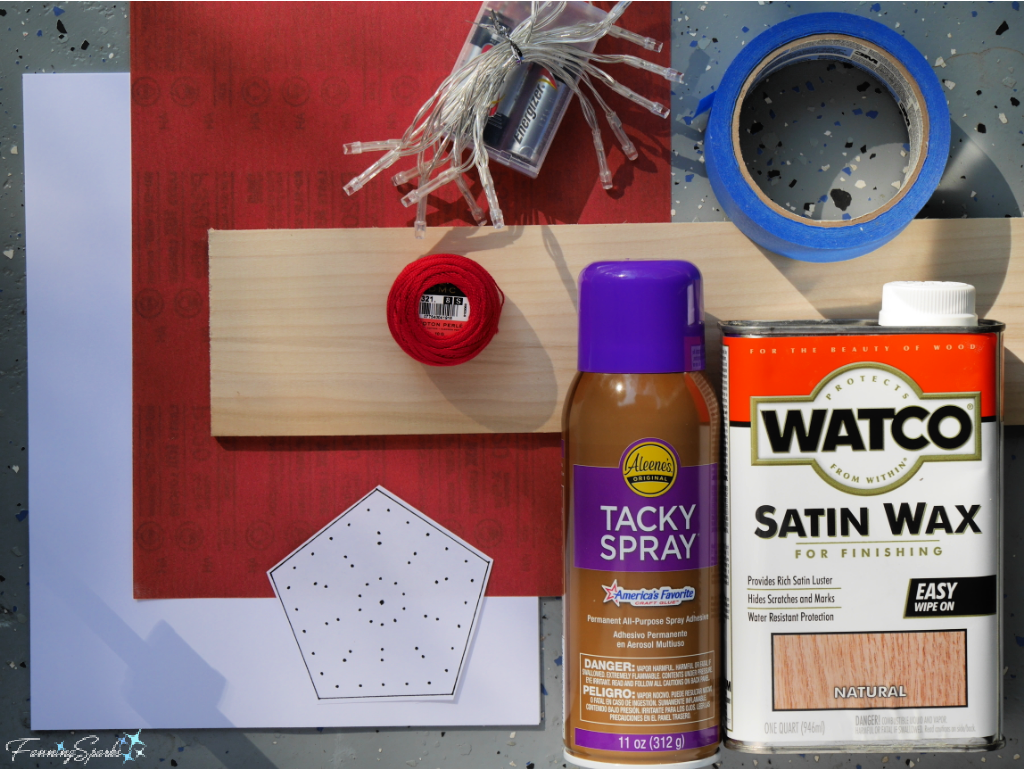
The pictured supplies, described below, are needed to make this project.
Supplies Needed for Starry Stitched Sphere @FanningSparks
.Template:  Download Starry Stitched Sphere Pentagon Template – Complimentary Download to print the template for the pentagons.
. Paper:  A few sheets of white paper for printing template.
. Wood Board: ¼“ x 3½” x 4 feet in light wood such as pine or poplar.
. Painter’s Tape
. Spray Adhesive:  I used Aleene’s Tacky Spray.
. Sandpaper:  In fine grit.
. Finishing Wax: I used WATCO Satin Wax for Finishing in Natural color.  Alternatively, you could choose to stain the wood or leave it unfinished.
. Thread for Assembly:  About 18 yards of DMC Perle Cotton.  I used red in size 8.
. Thread for Star Embellishments:  About 25 yards of DMC Perle Cotton.  I used the same thread for assembly and embellishment–red in size 8.
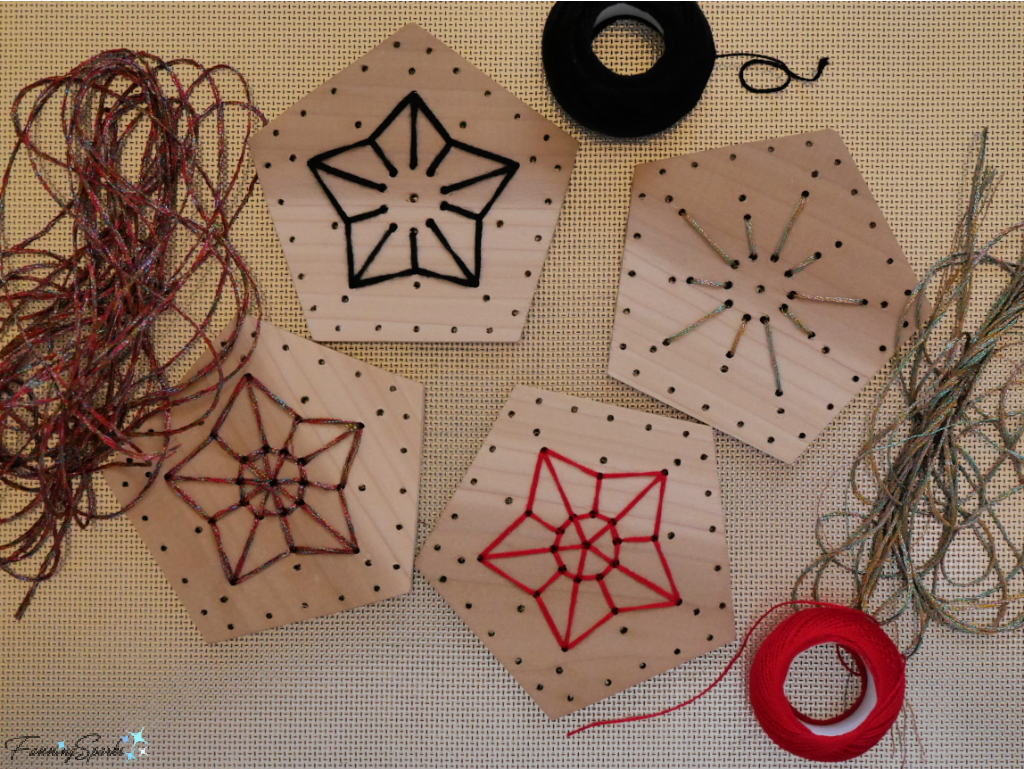
There are a number of options for the star embellishments.  They can be stitched in the same thread as that used to connect the pentagons.  Or the stars can be stitched with a decorative thread such as metallic embroidery floss.  The stars can be stitched as 5 straight spokes, fully filled in, or something in between.  Here are some options to consider.
Star Embellishment Options   @FanningSparks. LED Lights (optional): Battery-operated LED lights can easily be inserted into the Starry Stitched Sphere.  If you decide to add lights, you’ll want to maximize the amount of light that can shine through the drilled holes.  You may want to drill bigger holes and/or minimize the amount of stitching on the stars.
Tools and Equipment Needed
. Printer: To print template.
. Scissors
. Tape Measure or Ruler
. Jigsaw
. Clamps
. Drill with 3 bits including 7/64”, 5/64” and 3/32”.
. Tapered Round File:  To sand the drilled holes.  I used a diamond- and titanium-coated steel file designed for jewelry-making.
. Rags: Lint-free rags such as an old t-shirt.
. Gloves
. Needle: A dull-pointed tapestry needle is ideal.
Step-by-Step Instructions
Step 1. Print Patterns   Download the Starry Stitched Sphere Pentagon Template – Complimentary Download and print the template for the pentagons. Take care to ensure the scale is accurate on your printed version.  See specifics in the download document.  Print 11 copies.  Trim patterns with scissors.
Step 2. Adhere Patterns  Cover wood board with painter’s tape.  This tape makes it easier to remove the patterns from the wood.
Apply Painter’s Tape to Wood   @FanningSparks
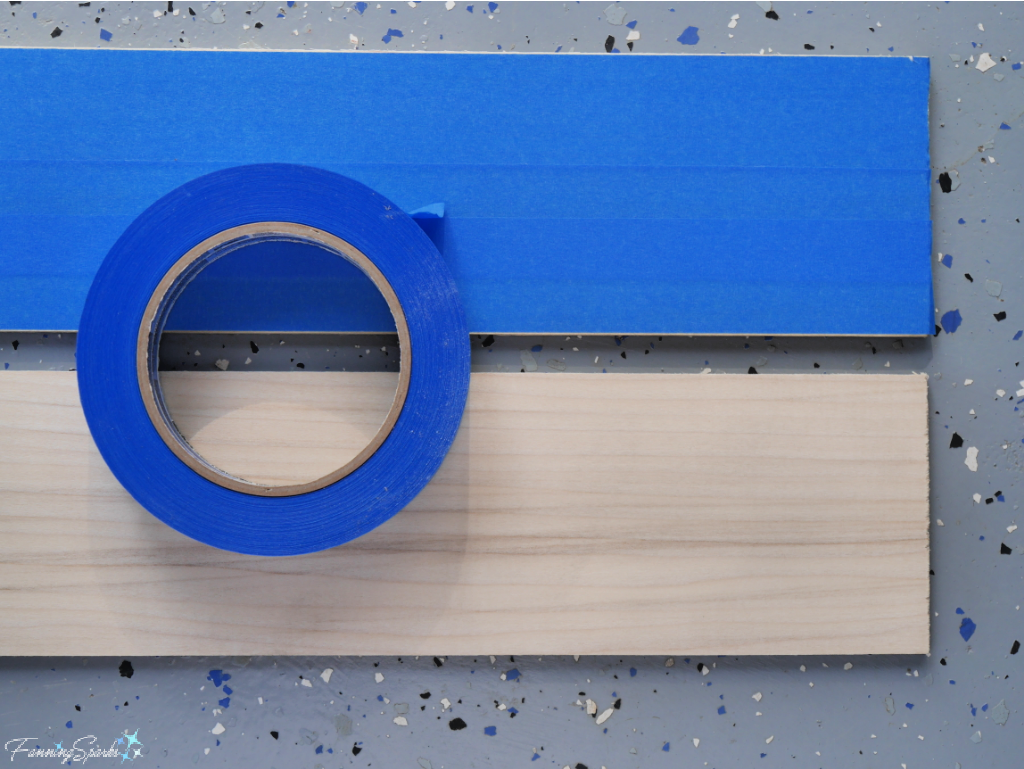
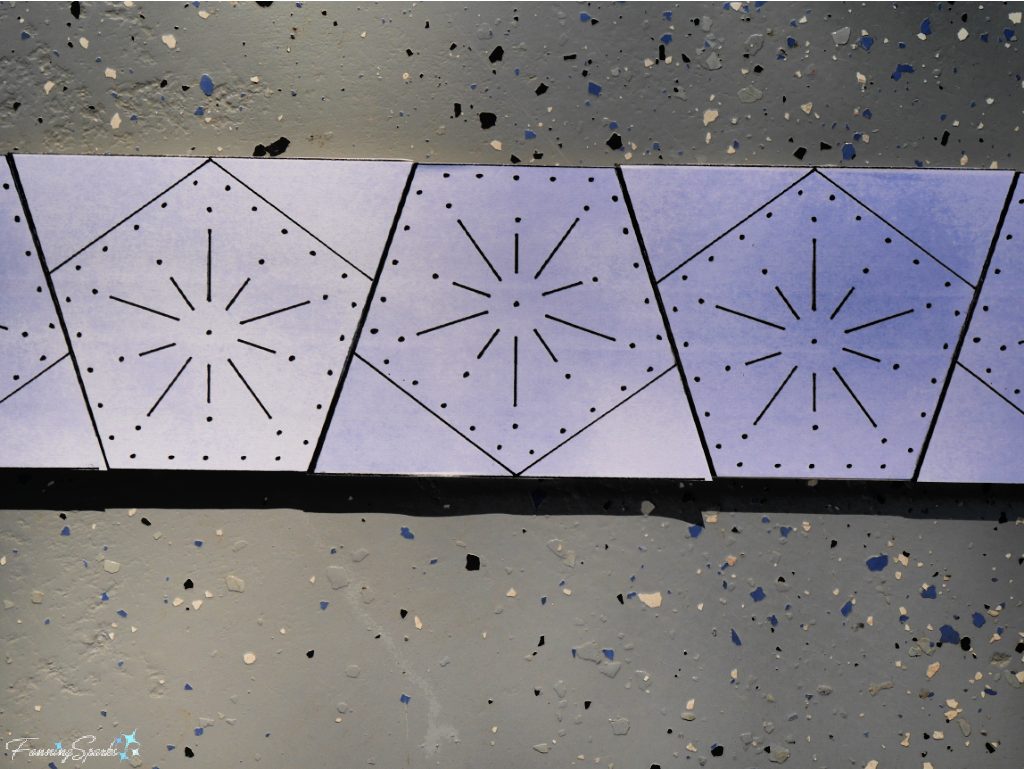
Spray back of one paper pattern with adhesive.  Position carefully on board (on top of painters tape) aligning bottom of pentagon with bottom edge of board.  Smooth and press down.  Repeat for remaining 10 pentagons.  Arrange as shown to minimize cuts and reduce scrap.
Note: You may notice the pattern shown differs slightly from the version provided in the download.  The download is a more accurate version.
Glue Paper Patterns to Wood   @FanningSparksStep 3. Saw Wood Pentagons   Clamp wood to sturdy surface.  Use the jigsaw to cut out 11 pentagon-shaped pieces.
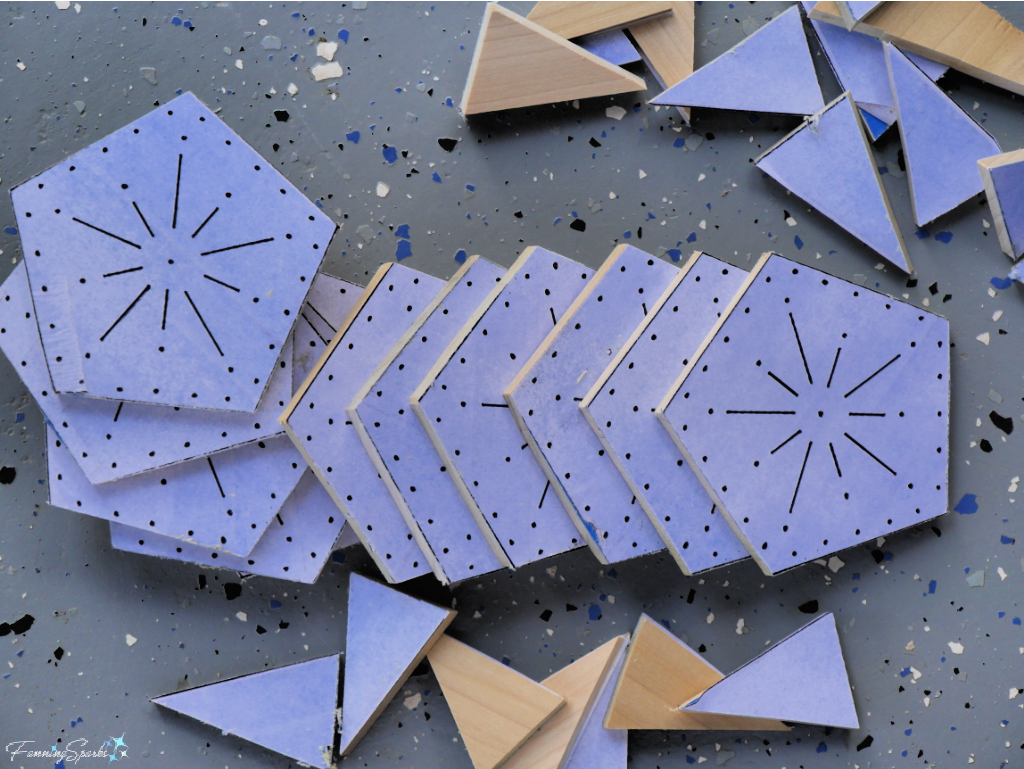
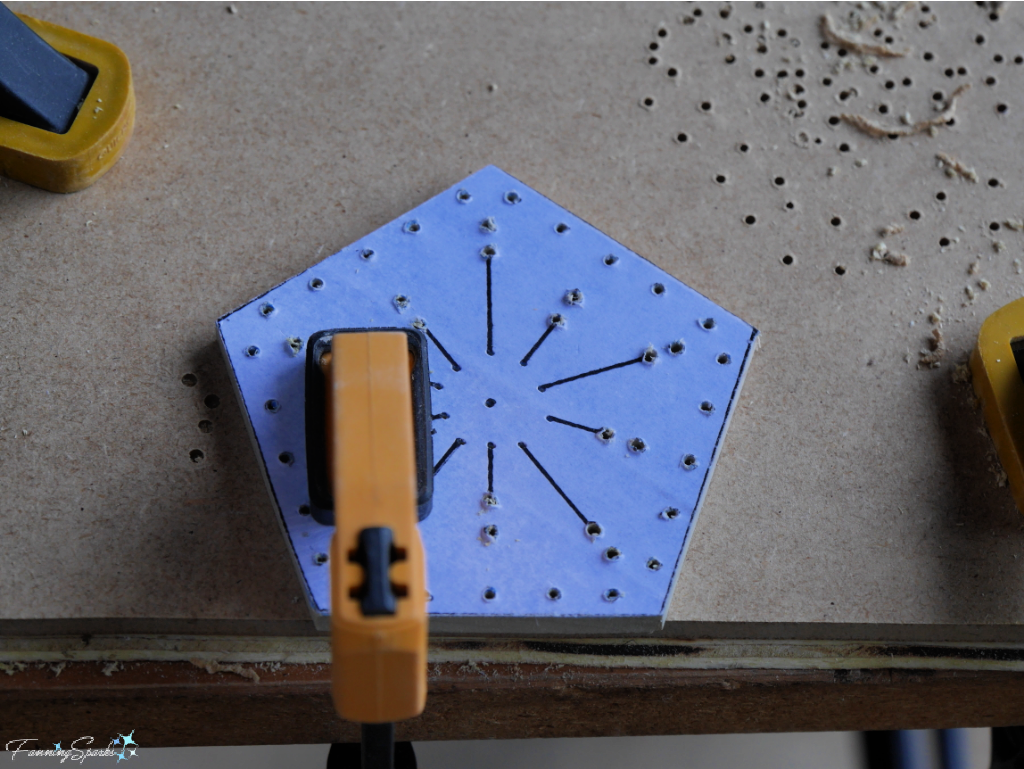
Cut 11 Pentagons from Wood   @FanningSparksStep 4. Drill Wood Pentagons  Clamp a pentagon on top of scrap wood to prevent tear out at back.  Drill all outer edge holes with a 5/64” drill bit.  Drill center hole and inside ring with 7/64” drill bit.  Drill all other holes with 3/32” drill bit.  Repeat for remaining 10 pentagons.
Drill Holes in Pentagons   @FanningSparksStep 5. Sand Wood Pentagons  Sand edges and drilled holes. This is an important step since any roughness, especially along the edges of the holes, will snag the thread during stitching.  A round tapered file is critical for this step.
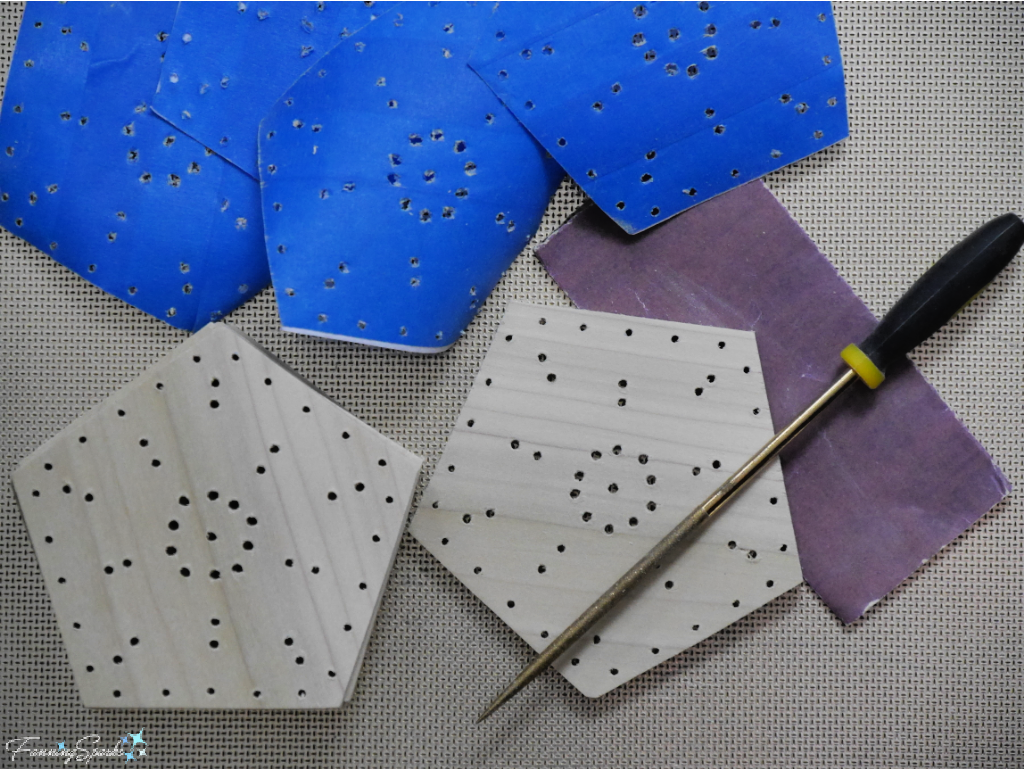
Sand Pentagon Edges and Holes   @FanningSparksStep 6. Finish Pentagons  Follow the manufacturer’s instructions for applying the wax.  I used Watco Satin Wax for Finishing in Natural.  Apply a generous coating to the front and edges of the pentagons.  Let it soak in for about 15 minutes and reapply to any areas that dry out.  Then wipe off the excess with lint-free rags.  Buff and let dry.
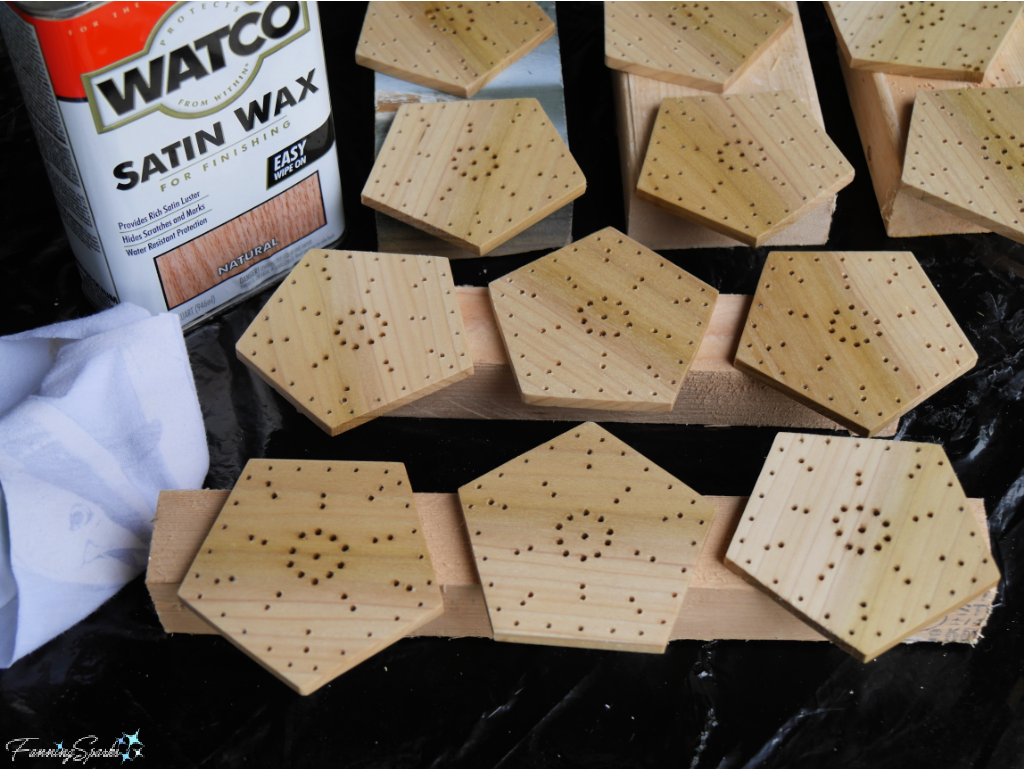
Please note: this product has a very strong odor so be sure to use it in a well ventilated area and allow plenty of time for the wax to dry and the smell to dissipate.  I waited 4 days.
Finish Wooden Pentagons with Wax   @FanningSparksStep 7. Embroider Stars   As noted in the Supplies Needed section above, there are a number of options for the star embellishments.  You may wish to try stitching a few different configurations after your wooden pentagons are dried.
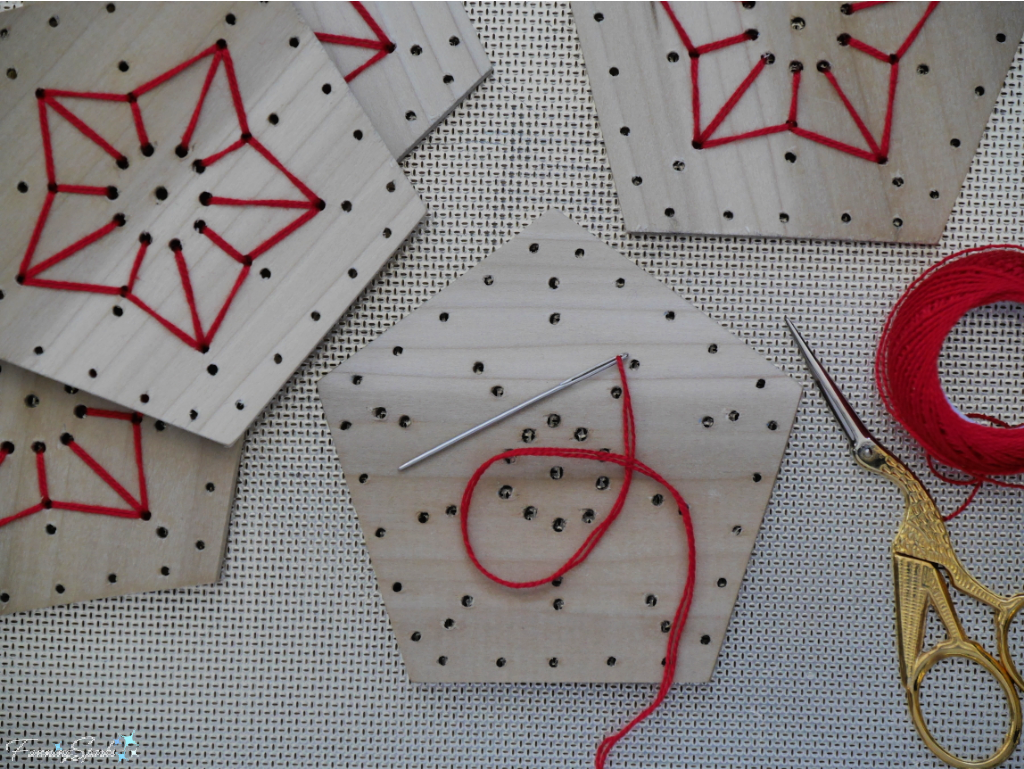
The design shown requires about 72” of pearl cotton thread for each star.  The stars are stitched with a double thread so pull thread ends even and knot.  Begin at the back of a wooden pentagon leaving a 1 ½ -2 ½ ” tail.  Simply lace needle in and out of holes to stitch around the star.  Knot tails at back to secure.  The back will not show so there’s no need to worry about how it looks.  Repeat on the remaining 10 pentagons.
Stitch Stars on Wooden Pentagons   @FanningSparksStep 8. Assemble Ring of Pentagons   Start by connecting a row of 5 pentagons.
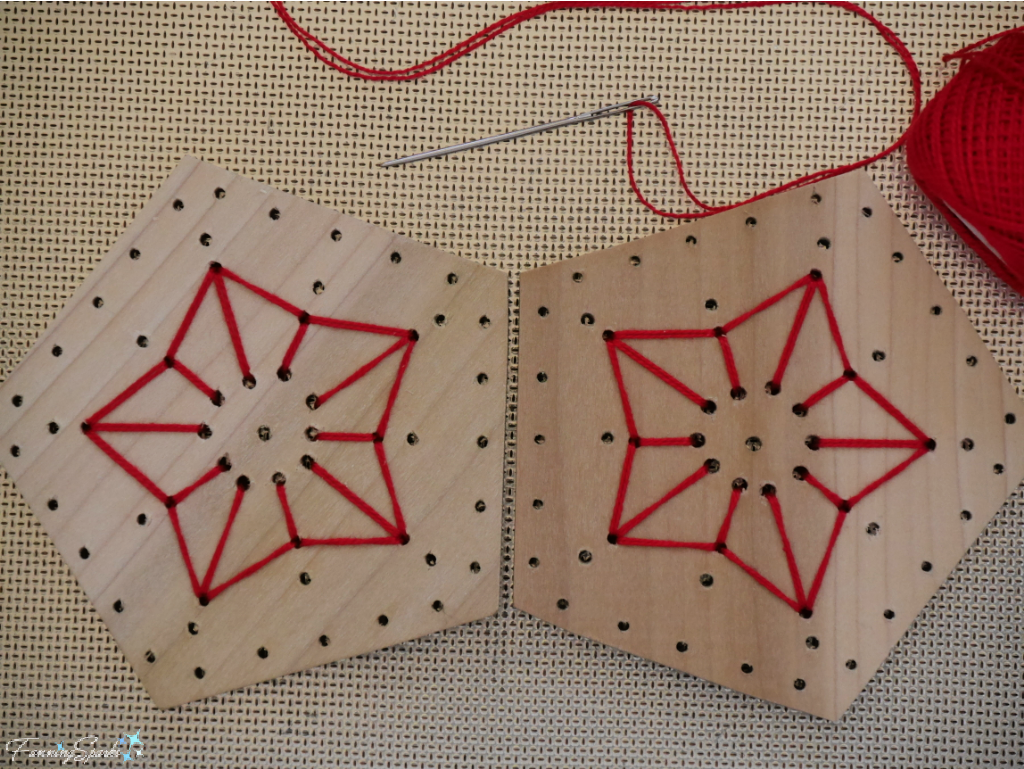
Step 8a. Select 2 pentagons.  Choose 2 sides that are precisely the same width with the holes well aligned.
Align Sides of Two Pentagons   @FanningSparksStep 8b. Thread the needle with a 20” length of pearl cotton thread.  This step is sewn with a single thread.  Hold the 2 pentagons at an angle.  Bring the needle up from the back through the first hole in the first pentagon.  Pull the thread out through to the front leaving about a 1 ½-2 ½“ tail at the back.
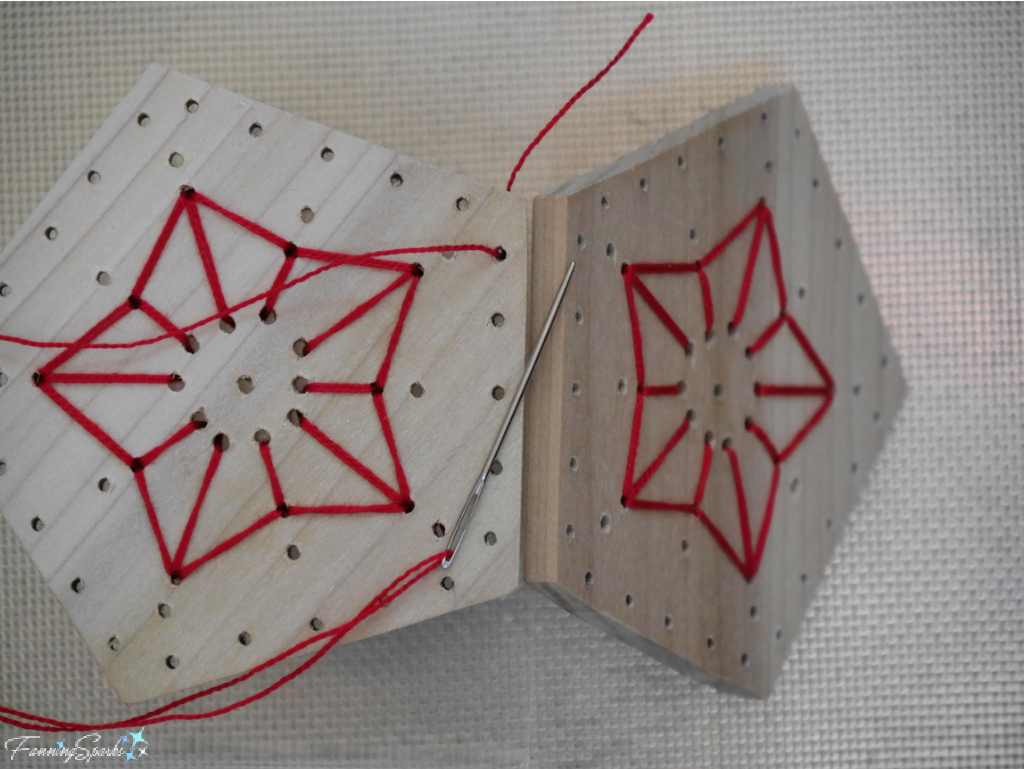
Begin First Stitch to Connect Pentagons   @FanningSparksStep 8c. Push the needle down, from the front, through the matching first hole in the second pentagon.  Pull the thread out through to the back.  Pull the needle back through the first hole, from the back to the front, in the first pentagon.  Push the needle down, from the front to the back, in the first hole of the second pentagon.  This will result in 2 visible stitches on the front face (as shown below).  Holding the 2 pentagons at an angle, pull the thread snuggly.
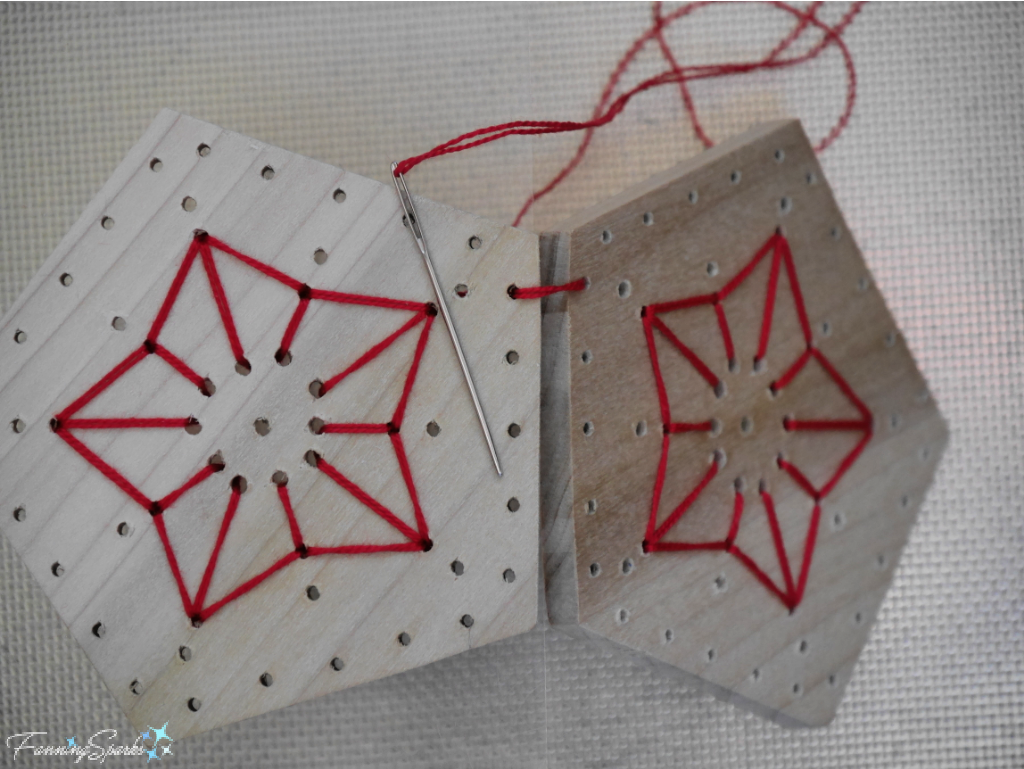
First Stitch to Connect Pentagons   @FanningSparksStep 8d.  Follow the process described in Step 8c in the remaining 4 holes.  The front should look like this.
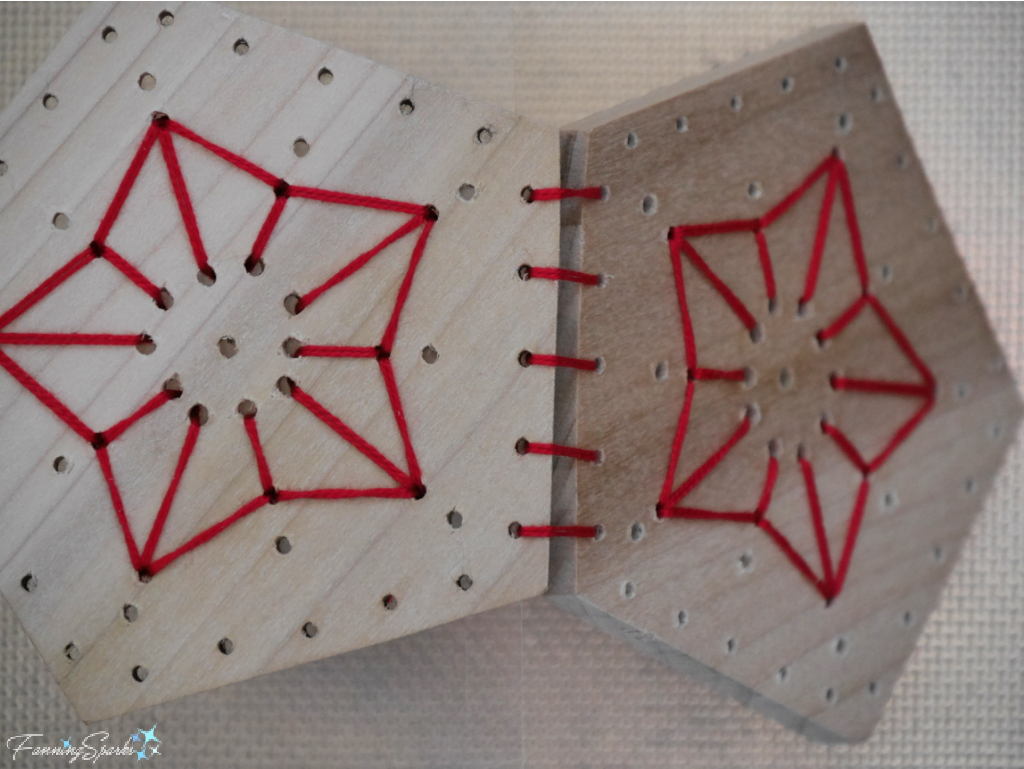
First Stitch to Connect Pentagons   @FanningSparksStep 8e.  At the end, pull the thread to the back and tie the thread ends in a double knot.  The back should look like this.
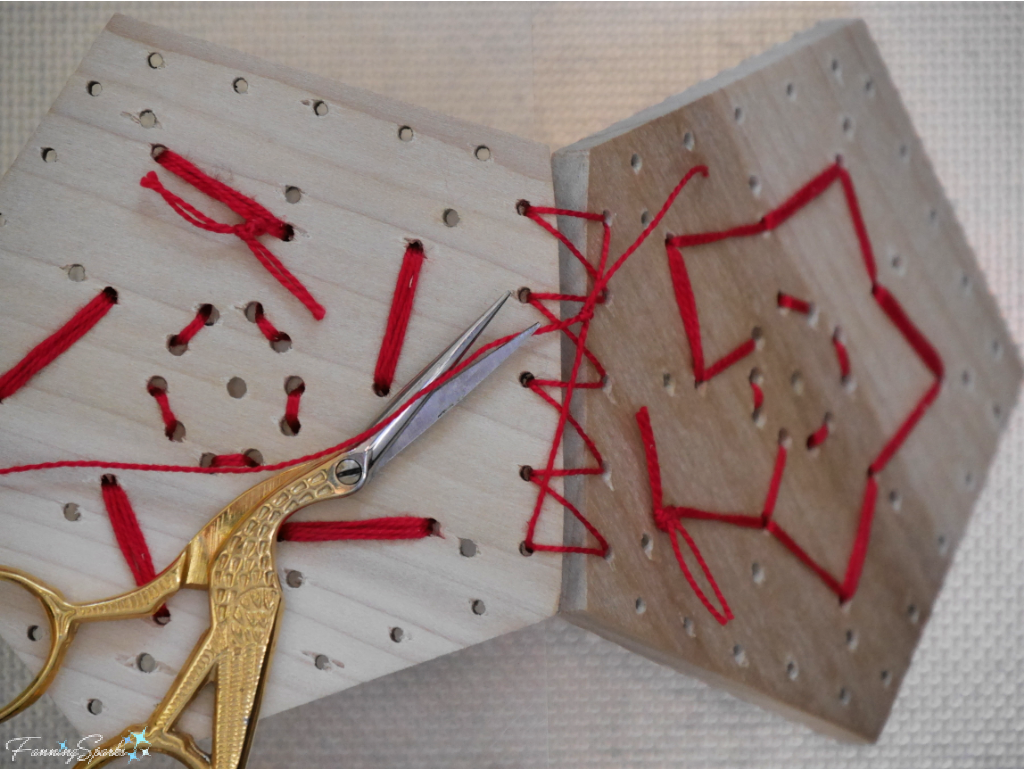
Knot Thread Tails to Secure   @FanningSparksStep 8f.  Continue to connect pentagons in this same way until a row of 5 is completed.
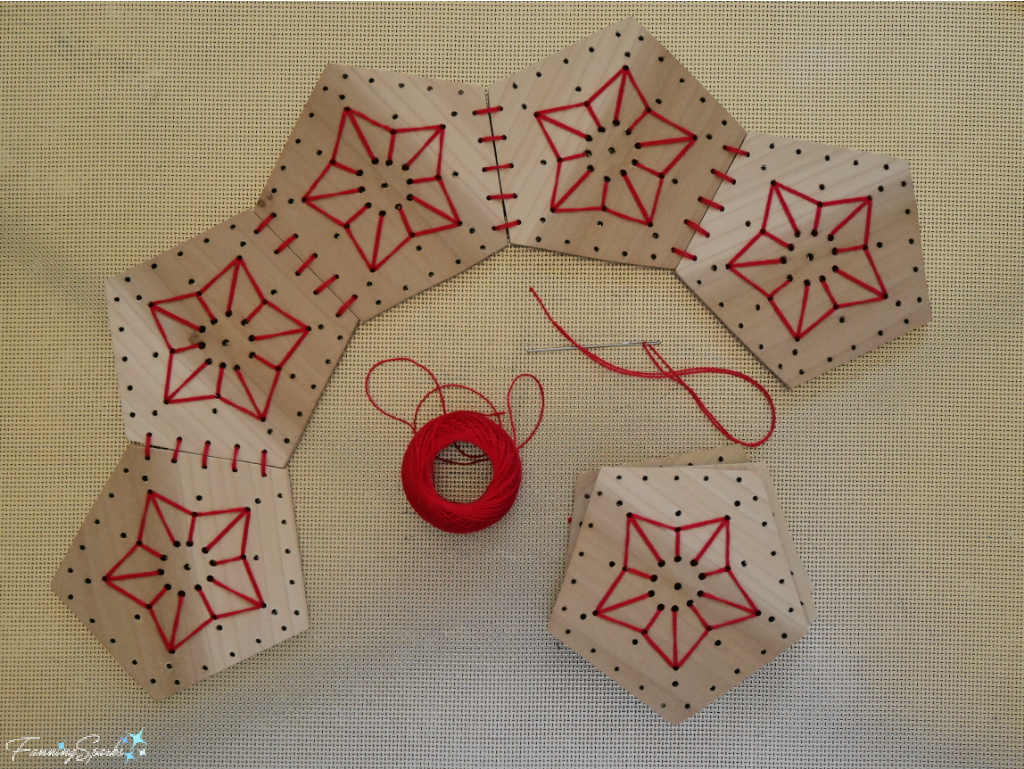
Row of 5 Connected Pentagons   @FanningSparksStep 8g. Pull the first and last pentagon of the row together to form a ring.  If it’s too difficult to form a ring, one or more of the connections may be too tight.  Adjust accordingly.  Align the edges of the first and last pentagon.  Connect in the same way as above in Steps 8b-8e.
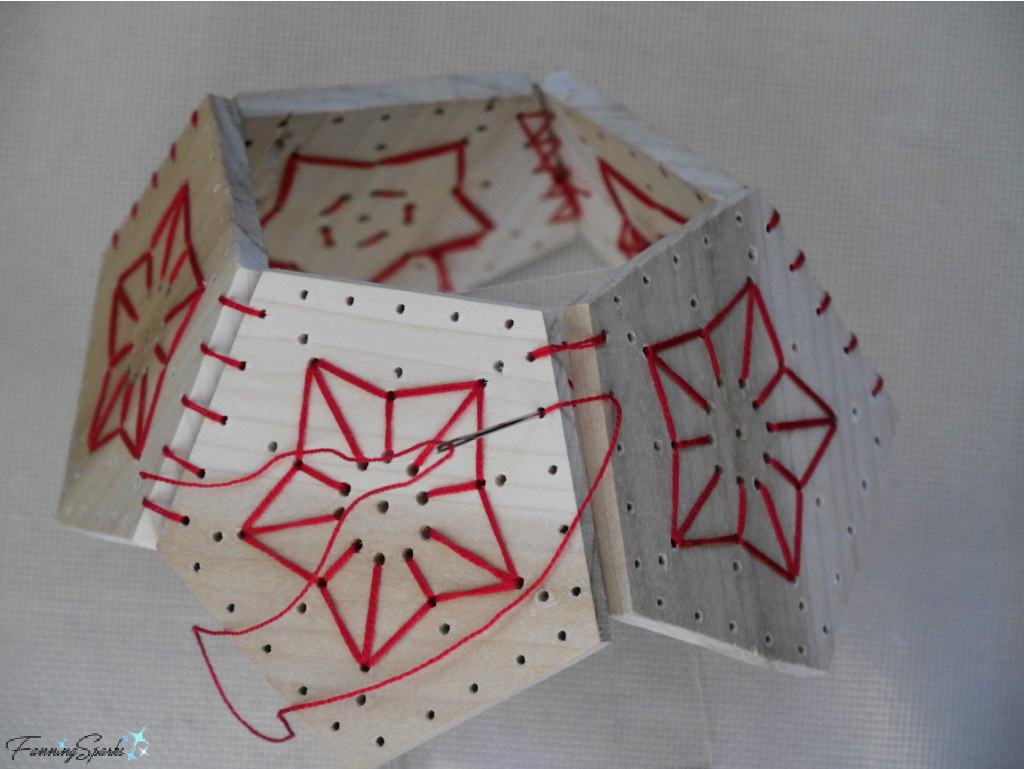
Connect Ring of Pentagons   @FanningSparksStep 9. Finish Bottom Edge  The bottom edge is finished with a blanket stitch.  Thread the needle with a 60” length of pearl cotton.  This step is sewn with a single thread.  Select a hole to the right of a connection as the starting point.  Begin at back leaving a 3” tail.  Pull tail up to top edge and tack down with painter’s tape.
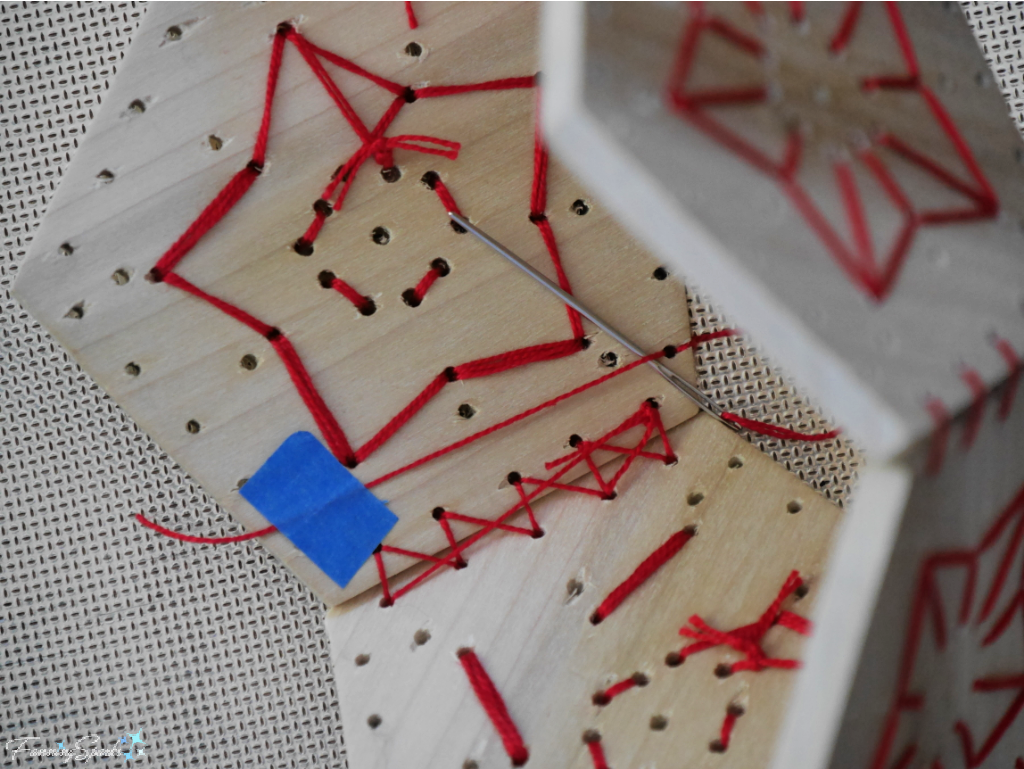
TIP: Sewing with 60” of thread can be tricky.  Work slowly and smooth out the thread as you go to prevent knotting.
Step 9a. To start the stitching, bring the needle through the hole from the back to the front.  Wrap the thread neatly around the bottom edge.  Bring the needle through the same hole from the back to the front again.  Wrap the second line of thread neatly around the bottom edge beside the first line.  Keeping the needle at the back, pass it under the tacked-down thread tail (stitching from left to right) and into the back of the next hole.
Begin Stitching Bottom Edge   @FanningSparksStep 9b. Continue around the entire bottom edge in the same way.  Bring the needle through the hole from the back to the front.  Wrap the thread neatly around the bottom edge.  Bring the needle through the same hole from the back to the front again.  Wrap the second line of thread neatly around the bottom edge beside the first line.  Keeping the needle at the back, pass it under the previous horizontal stitch (stitching from left to right) and into the back of the next hole.   Do not be concerned if the thread “cuts the corner” at the connections since this will not be visible.
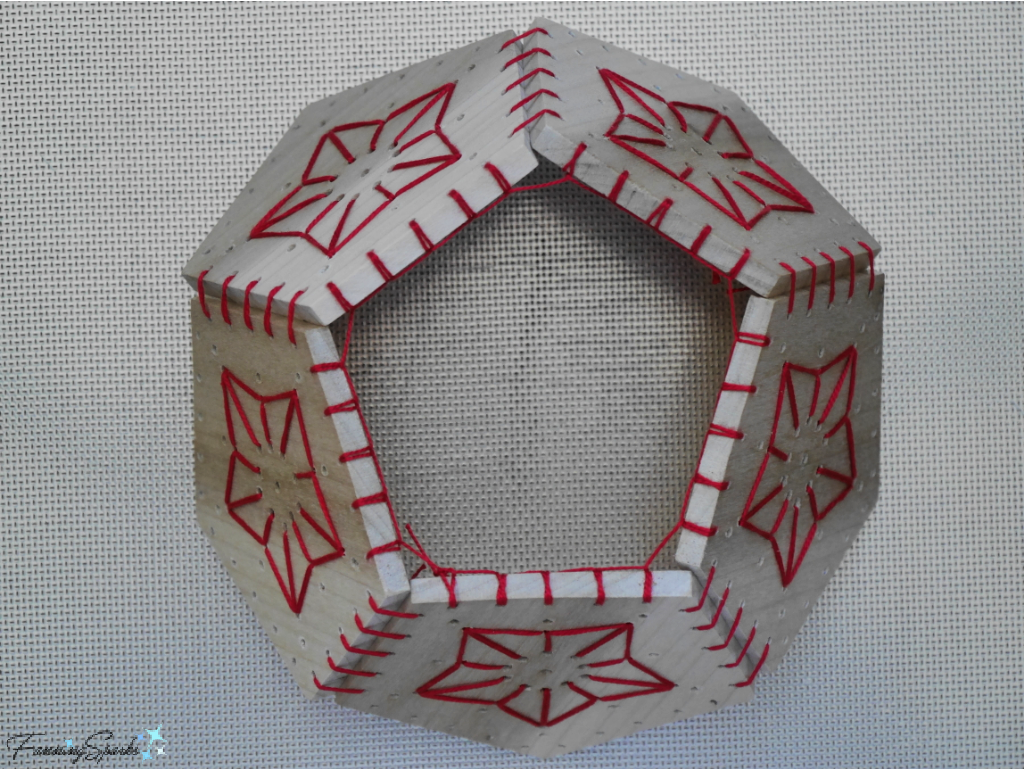
Finished Bottom Edge   @FanningSparksStep 10. Assemble Sphere   Build up the sphere by connecting the remaining pentagons one at a time.  The top will be the most visible so you may want to set aside your best pentagon for this position.  The top will be added last.  Work around the sphere building a second ring.  Use the process described in Steps 8b-8e, to connect the pentagons.  Stitch all connecting sides of a pentagon before attaching another one.
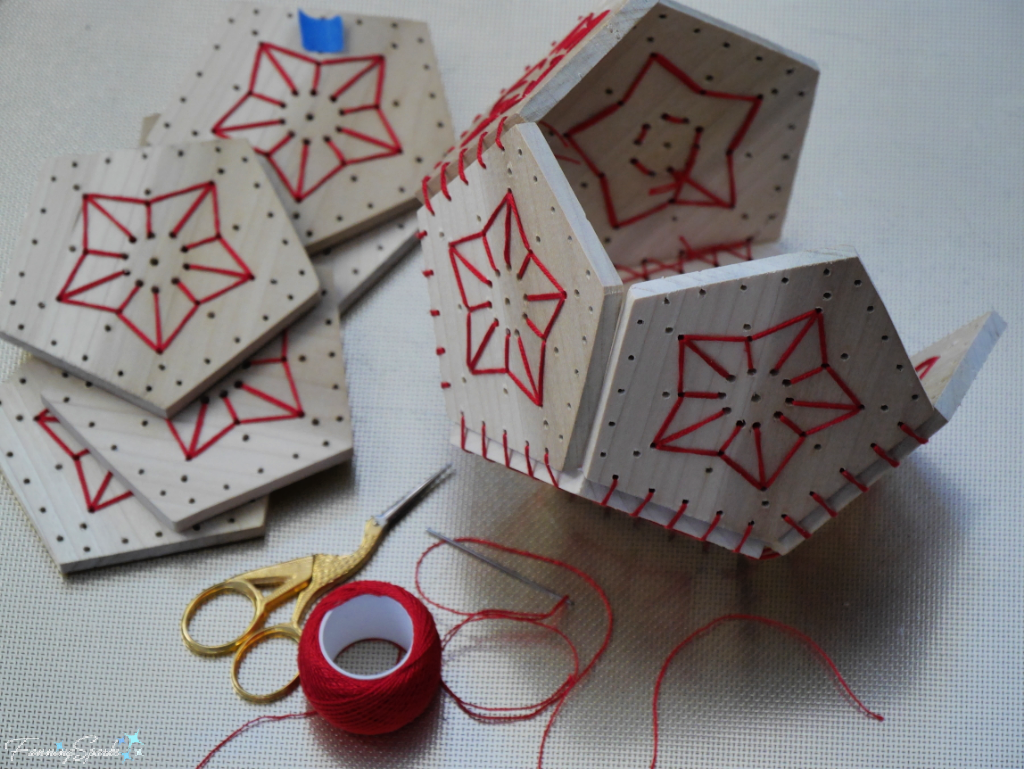
Build Up Sphere One Pentagon at a Time   @FanningSparksStep 11. Connect Top  Place the final pentagon on the top of the sphere aligning all edges.  Thread the needle with an 84” length of pearl cotton thread.  This step is sewn with a single thread.  Select a hole to the right of a connection as the starting point.  Begin at the back leaving a 4-6” tail.  Pull the thread tail down to the bottom edge and tack it down with painter’s tape.  Stitch around all 5 sides of the pentagon before tying off.  Follow a process similar to that described in Steps 8b-8e.  It is a little tricky to sew this last section since you have to insert your hand inside the sphere.  Take your time.  Pull out and smooth the full length of the thread as you stitch to prevent knotting.  Don’t worry about tightening the knotted tails—a loose knot is fine.
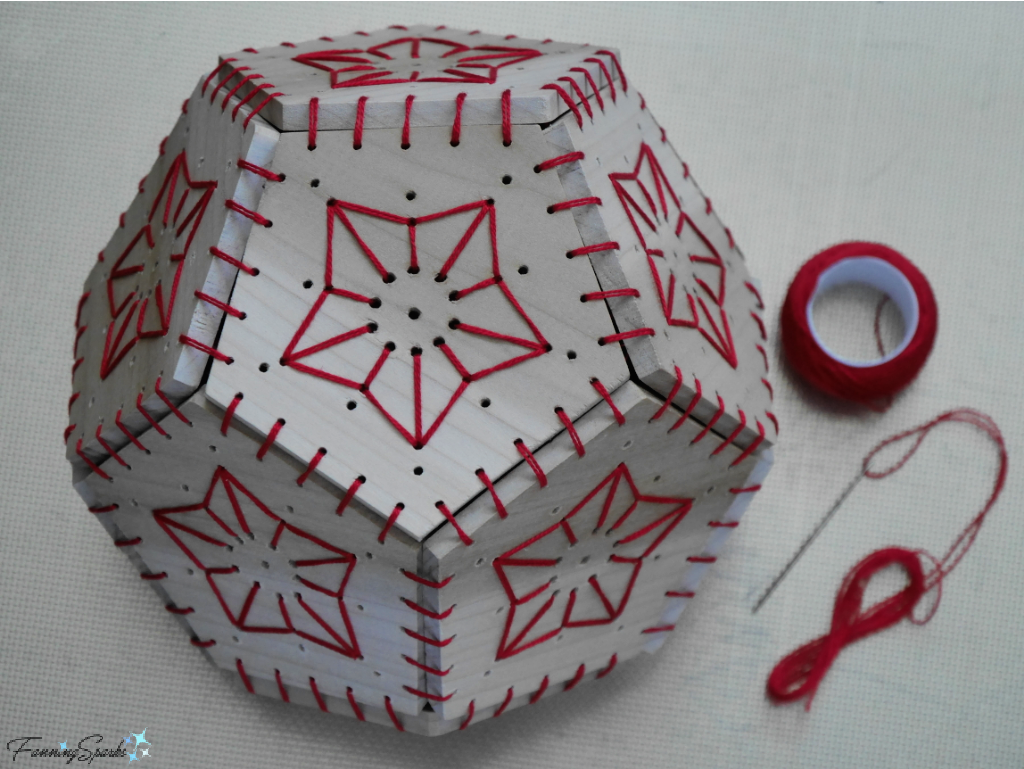
Finished Top of Pentagon   @FanningSparksStep 12. Insert Lights (Optional)  If desired, slip a set of battery-operated LED lights inside the sphere.
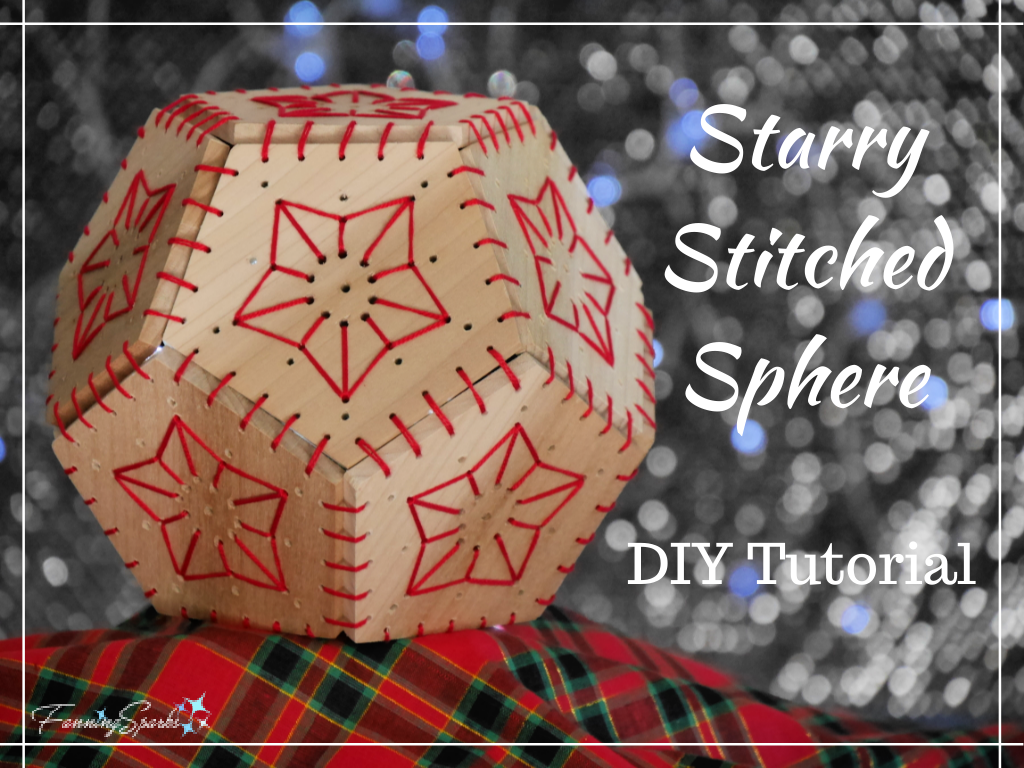

There you have it—your new Starry Stitched Sphere is ready to display!
Starry Stitched Sphere - DIY Tutorial pin   @FanningSparks
This Starry Stitched Sphere is the perfect companion for the Diamonds and Beads Wooden Wreath I made last year.  See the DIY Tutorial here.  Starry Stitched Sphere with Wood Wreath   @FanningSparks

More Info

You can download the Starry Stitched Sphere Pentagon Template – Complimentary Download to print the template for the pentagons.
You may also like the Diamonds and Beads Wooden Wreath which has a similar style.  Check out the Diamonds and Beads Wooden Wreath – DIY Tutorial for step-by-step instructions.

Today’s Takeaways

1. Holiday decorating provides an opportunity to get creative and make something new.
2. Natural wood can add warmth and coziness.
3. Consider mixing materials and techniques in unexpected ways.
Peg - FanningSparks Author

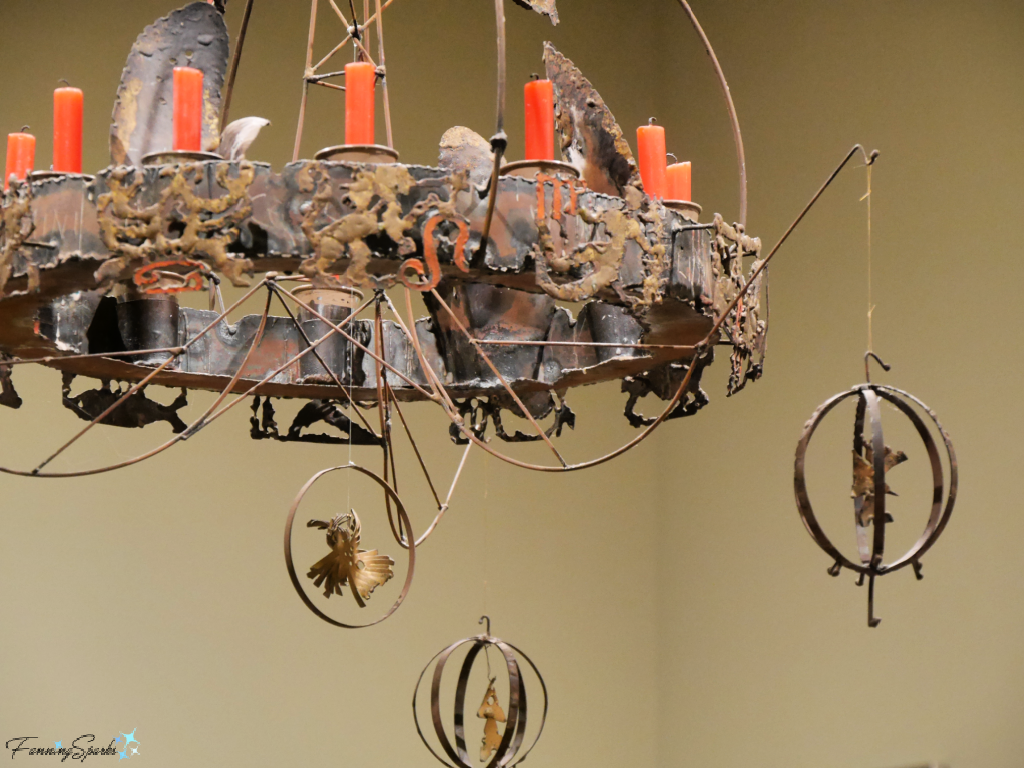
An interesting exhibition, “Elements: Expressions in Wood, Metal and Stone”, was recently hosted by the Steffen Thomas Museum of Art. The art museum, a small, lesser-known venue in the town of Buckhead Georgia, is dedicated to preserving the works of Steffen Thomas (1906-1990).  The art museum’s website describes the artist this way: “Not happy unless he was making something, his vast output and ceaseless experimentation with every available medium are his work’s most characteristic aspects.”  The Elements exhibition aimed to “honor the legacy of Steffen’s three-dimensional work by displaying selections from our permanent collection alongside contemporary regional sculptors working in wood, metal and stone”.   The below Zodiac Chandelier (ca. 1965), made by Thomas from welded copper, is one of the many works on display.
Zodiac Chandelier by Steffen Thomas   @FanningSparks
The Zodiac Chandelier was originally a focal point in the Thomas family’s living room.   It hung above the huge dining table which can be seen in the Steffen Thomas Family Room Gallery at the museum.
Steffen Thomas Family Room Gallery   @FanningSparks
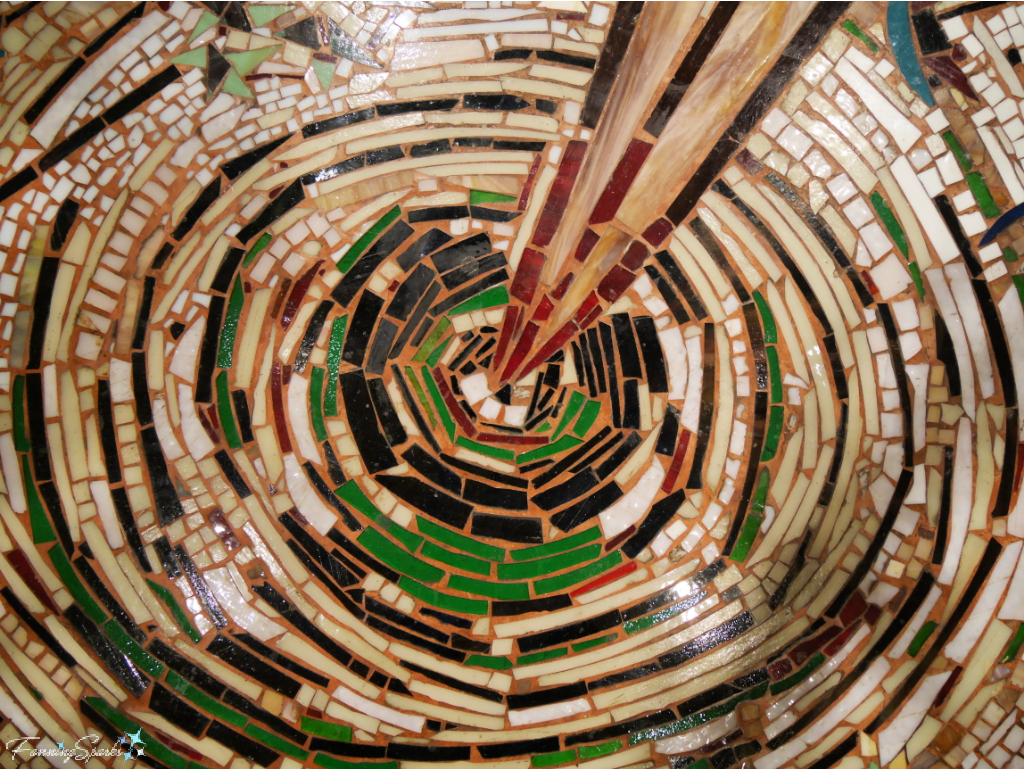
The table and the matching benches are covered in gorgeous Venetian glass mosaic artworks by Thomas.  Being a big fan of mosaics, I was thrilled to see a number of Thomas’ mosaic pieces at the museum.  Here’s a closer look at the Break Through into Outer Space mosaic artwork on the dining table.
Break Through Into Outer Space Details by Steffen Thomas   @FanningSparks
The variety and originality of Thomas’ work is striking.  It would take several hours to fully appreciate all the pieces on display but the work I’d come to see was part of the Elements exhibition.  Jeffrey Waller’s intarsia art was highlighted in a local newspaper article and I was eager to see it in person.  Shown below is Waller’s artwork called Southern Girl.
Southern Girl Intarsia by Jeffrey Waller   @FanningSparks
At first glance, Southern Girl appears to be a beautiful two-dimensional painting.  But as the charming subject draws in the viewer for a closer look, the surprise is revealed.  This artwork is made of wood!  I was vaguely familiar with intarsia and knew it was made with pieces of wood but I wasn’t expecting this!  Waller’s work takes intarsia to a whole new level.  Waller describes intarsia as “a picture mosaic in wood”.   Dozens of separate wooden pieces fit together perfectly to create the overall picture.  Here’s a closer look at Southern Girl.
Southern Girl Detail Intarsia by Jeffrey Waller   @FanningSparks
Intarsia pieces, I’ve learned, are typically cut from a variety of wood species with a scroll saw.  Variation in wood color and grain are typically used to “paint” the picture.  Sometimes, as appears to be the case in this work, color is added judiciously.  The pieces may be textured by carving and imprinting.  Pieces are typically contoured with careful sanding.  Each piece is finished and prepared for assembly.  Then the finished pieces are reassembled into the final work, like a jigsaw puzzle, and adhered to a backing.  This closeup from Waller’s work Tranquility illustrates the point.
Tranquility Detail Intarsia by Jeffrey Waller   @FanningSparks
It strikes me that this process is quite similar to making glass mosaics with a few notable exceptions.  Grout lines are a strong characteristic of glass mosaics—the lines are a fundamental element of the design with the grout filling the gaps between the tesserae.  There are no grout lines in intarsia—meaning the pieces have to be cut more precisely.  Anyone who has worked with wood can appreciate the challenge of getting those pieces to fit perfectly. This is the full view of Waller’s Tranquility.  Beautiful!
Tranquility Intarsia by Jeffrey Waller   @FanningSparks
Another major difference between glass mosaic and intarsia is dimension.  Glass mosaic is typically 2 dimensional—it’s not unheard of to incorporate a third dimension but it’s difficult to accomplish and rarely seen.  Intarsia, on the other hand, is 3 dimensional.  Wood is easier to layer and contour than glass.  The result is a work of art that comes alive with depth and dimension.  Take Waller’s stunning artwork “Journey Forward” for example.
Journey Forward Intarsia by Jeffrey Waller   @FanningSparks
His masterful use of wood tones and grain lines is more visible closeup.
Journey Forward Detail Intarsia by Jeffrey Waller   @FanningSparks
The magic of the third dimension becomes even more apparent when viewed at an angle.
Journey Forward Detail Intarsia by Jeffrey Waller   @FanningSparks
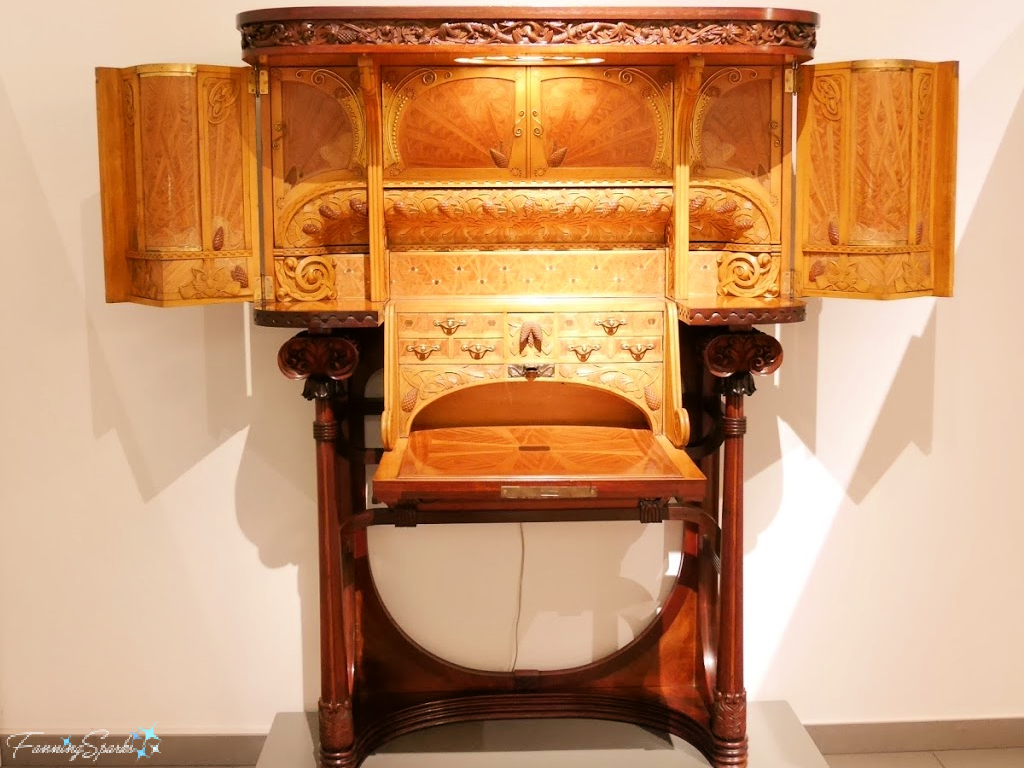
There is another wood working technique often discussed alongside intarsia.  In “marquetry”, the artist cuts the pieces of the design from differently-colored thin wood (ie veneer) then arranges and glues the pieces into intricate designs.  It is a 2-dimensional form.   Marquetry was popular during the Art Nouveau movement and often used in furniture making.  The below desk, labelled as a “Coffer-Writing Desk” is displayed at the Museum of Modernism in Barcelona. This jaw-dropping masterpiece is the work of Joan Busquets i Jané.
Coffer-Writing Desk by Joan Busquets i Jané   @FanningSparks
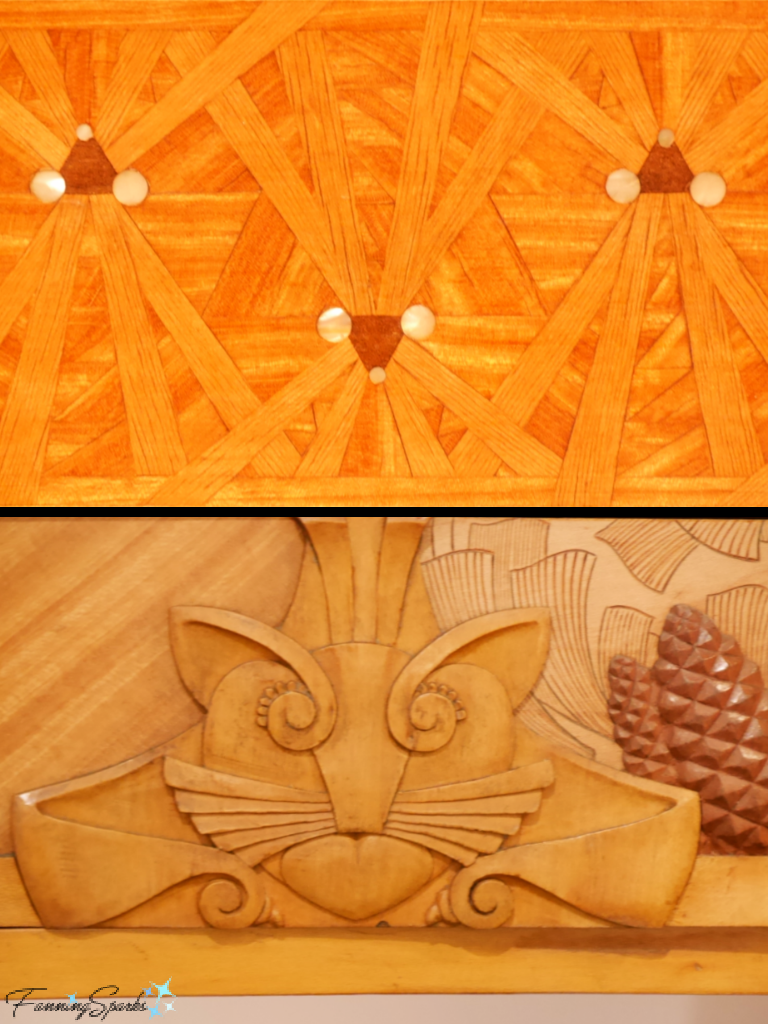
Several different woodworking techniques were used to create this astounding piece.  A couple of details are shown below.  The top section shows a beautiful marquetry panel made of several woods.  The clever cat, in the bottom section, appears to be a relief carving.  In relief carving, chisels are used to carve out wood from a flat surface creating depth and giving the carved objects dimension.
Coffer-Writing Desk Details by Joan Busquets i Jané   @FanningSparks
I’ve dabbled in woodworking for some time but I didn’t appreciate the creative possibilities until I tried woodcarving (see my posts Getting Started with Woodcarving and Flat-Plan Carving with Harley).  Intarsia, the art of making mosaics from wood, opens up a whole new creative outlet!

More Info

You can learn more about the Steffen Thomas Museum of Art, in Buckhead Georgia, on their website.  Note the museum is following strict COVID-19 safety measures and guests are asked to schedule an appointment to visit.  I had the pleasure of a private viewing during my recent visit.
Check out Jeffrey Waller’s website or Instagram account for more information about this talented artist.  The Augusta Chronicle article, “Wanting to separate his style, Eatonton artist uses centuries-old woodwork technique”, is an interesting read.
Intarsia has been practiced from before the 7th century CE.  The 1903 book, Handbooks for the Designer and Craftsman – Intarsia and Marquetry, by Jackson F. Hamilton provides a comprehensive history and overview.  The book is available in its entirety on the Internet Archive here.  The Internet Archive is a non-profit library of millions of free books, movies, software, music, websites, and more.
Despite its long history, I wasn’t able to find a great deal of information about intarsia online.  I did learn that Judy Gale Roberts, a Tennessee-based artist, is highly regarded as an intarsia expert.  She has been creating intarsia art for over 45 years, sells patterns for intarsia projects, has authored 14 books and teaches workshops.  Check out her website at Intarsia.com.
I learned about woodcarving at the John C Campbell Folk School.  Check out my posts Carving in BrasstownGetting Started with Woodcarving and Flat-Plan Carving with Harley.
It’s no secret I have a passion for mosaics.  Check out the posts Learning from the Ancient Masters and Gaudi’s Trencadis Mosaics to learn more about mosaics.  I’ve shared my mosaic projects in the posts Pair of Mosaic Mirrors Completed, My Mandala-Inspired Oval Design  and Serving Up My OOAK Mosaic Tray.  Plus I shared full step-by-step instructions for making your own mosaic project in the post DIY Turkish Mosaic Candle Holder Tutorial.

Today’s Takeaways

1. Small, lesser-known, local museums may provide safe and interesting excursions.
2. Intarsia is the art of making mosaics from wood.
3. Consider the creative possibilities of combining techniques and materials in innovative ways.
Peg - FanningSparks Author

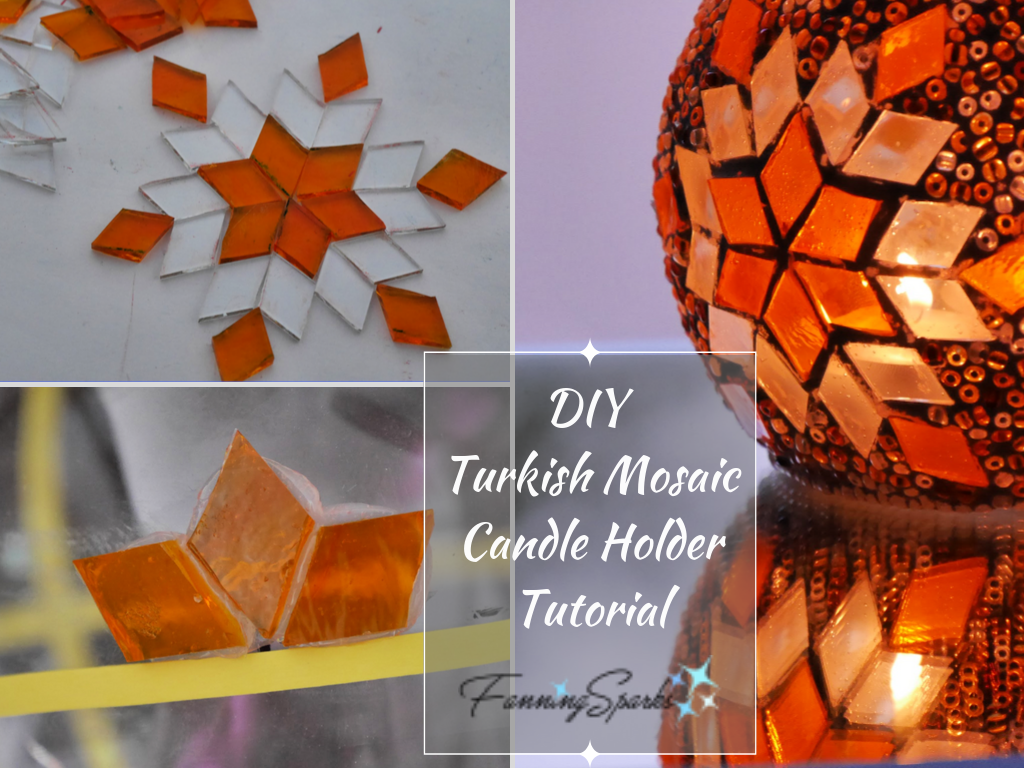
Judging from the recent activity on my Pinterest pins, crafting and making for the holidays is in full swing.  My Turkish Mosaic Candle Holder, for instance, is getting considerable attention.  It’s my most popular DIY tutorial having been featured on at least 3 other blogs and been viewed, pinned or shared over 660 times in just the last 90 days.  The candle holder has a pretty 6-point star design that glitters and shines with candlelight.  It is a great DIY project—quite doable with the step-by-step instructions.  Plus it’s perfect for the holidays either to give as a gift or to decorate your own home!
DIY Turkish Mosaic Candle Holder Tutorial pin. @FanningSparks
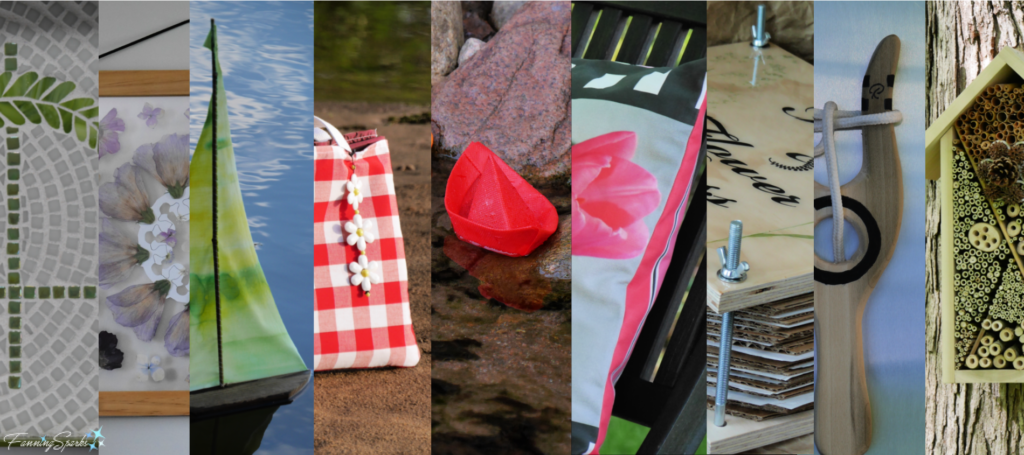
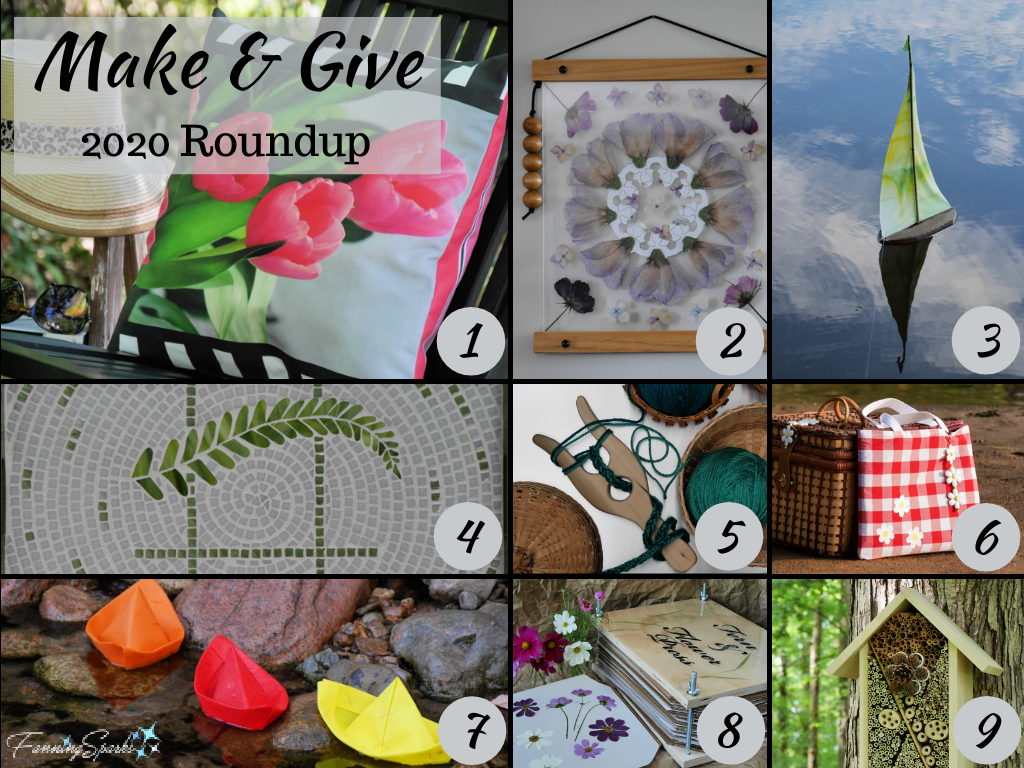
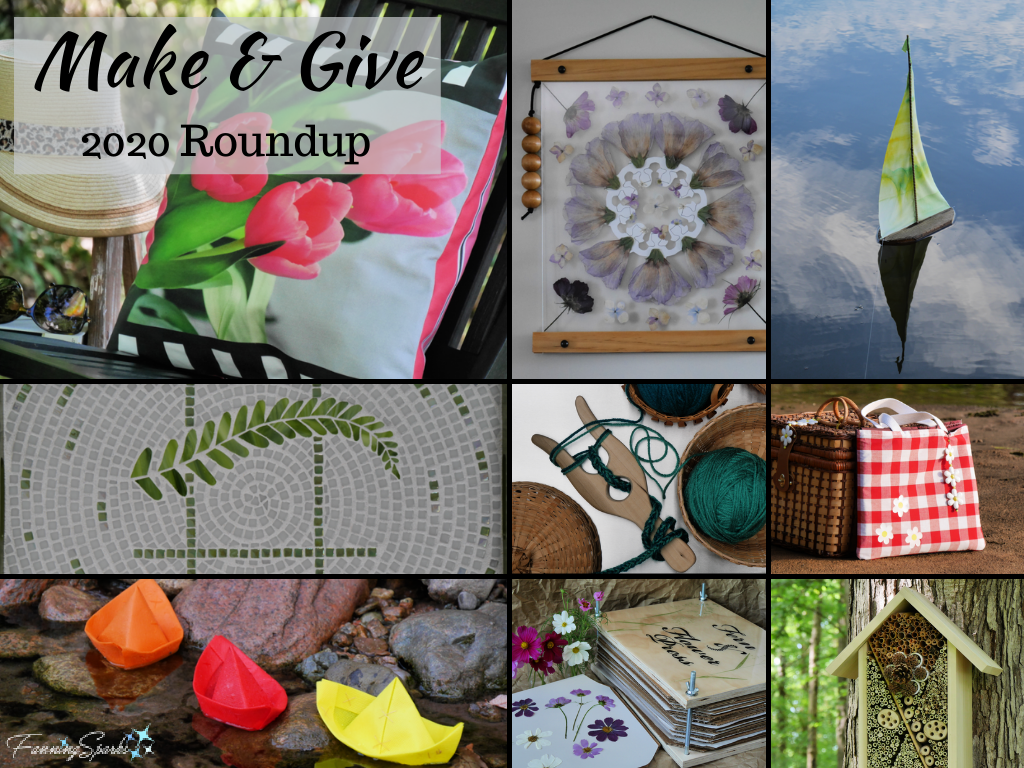
As much as I like the Turkish Mosaic Candle Holder, several of the other DIY projects I’ve shared are equally noteworthy.  Today’s post includes a roundup of Make & Give suggestions from the last year.  Every item is unique and special.  All have been featured in a blog post here on FanningSparks.  Here’s the Make & Give Roundup for 2020.
Make & Give 2020 Roundup   @FanningSparks
1. Basic Pillow
2. Pressed Flower Girls Wall Art
3. Landlubber’s Toy Sailboat
4. One of a Kind (OOAK) Mosaic Tray
5. Lucet Cordmaking
6. Ultimate Picnic Blanket
7. Simple Folded Boat
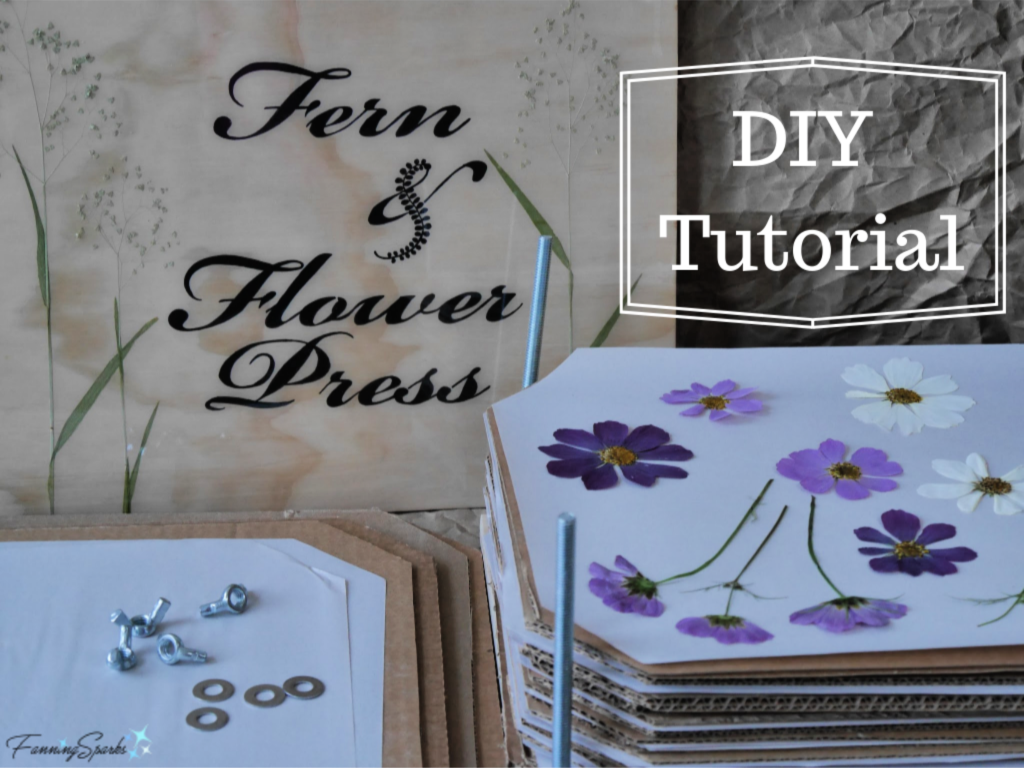
8. Fern & Flower Press
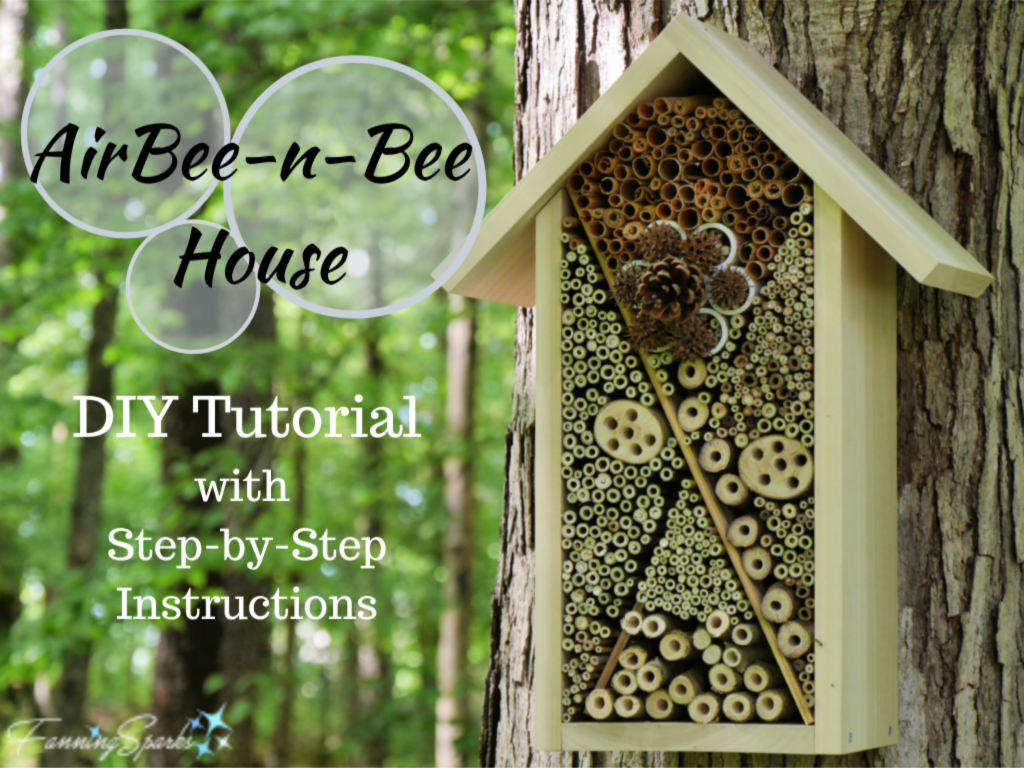
9. AirBee-n-Bee House

1. Basic Pillow
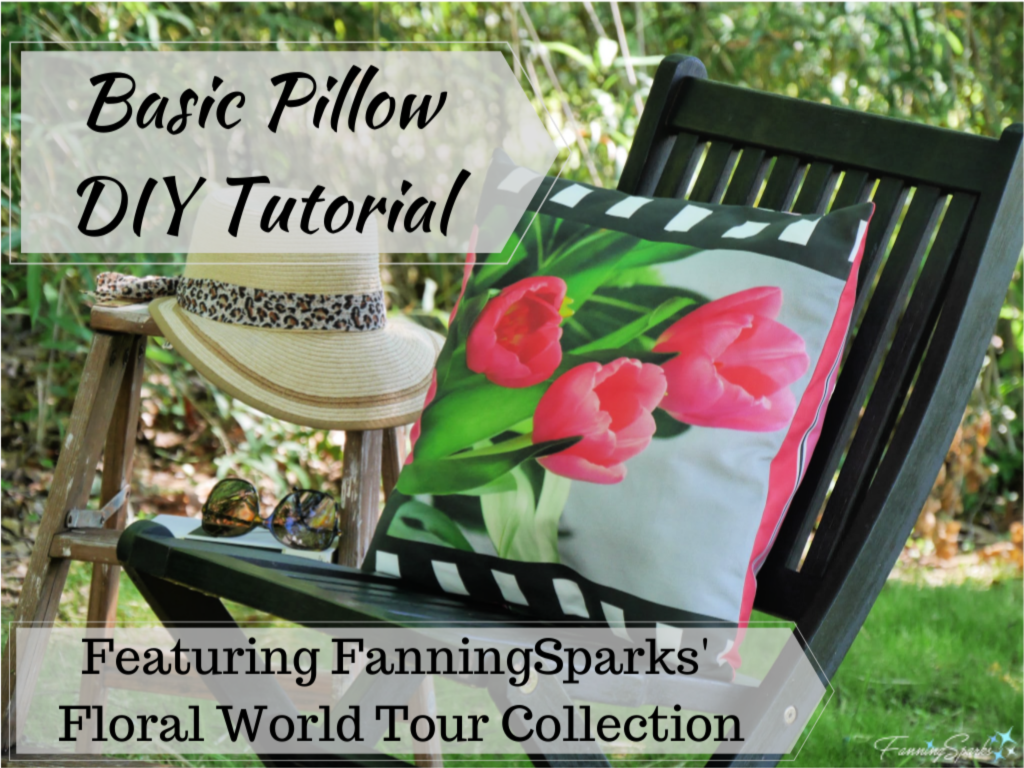
This Basic Pillow is perfect for the beginner sewer.  It’s designed to be made with custom fabric from the FanningSparks shop on Spoonflower.  There are two collections of designs—the Floral World Tour – Warm Colors Collection featuring 3 colorful flower designs and Bring In the Outdoors – Fern Collection featuring 3 lush fern designs.  Custom-matched striped fabric is also available for the pillow backs.  That being said, any fabric can be used to make this simple 18” x 18” pillow cover.  It is the perfect opportunity to use a fabric with special significance.  Check out my previous post, DIY Personalized Fabric-Covered Journal Tutorial Part 1, for ideas about selecting fabric to match your recipient’s passion.
Basic Pillow DIY Tutorial Featuring FanningSparks’ Floral World Tour Collection @FanningSparks
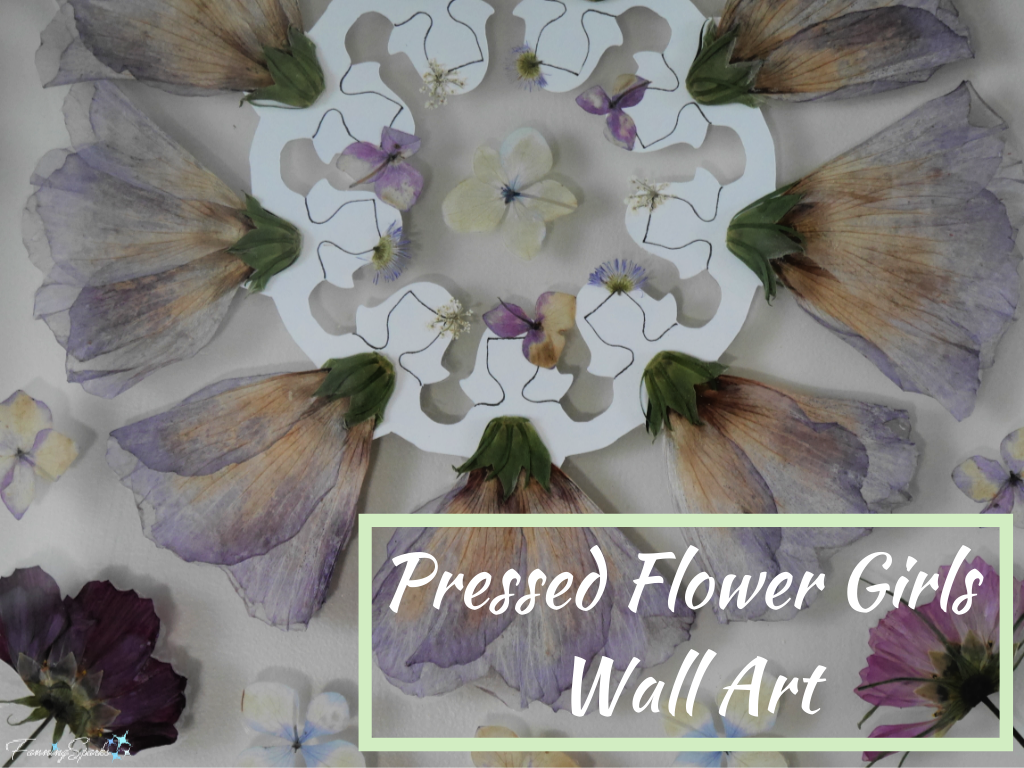
2. Pressed Flower Girls Wall Art
This wall art showcases pressed Rose of Sharon blooms.  It’s a fun collage of dried flowers and paper cutout dolls mounted in a frameless holder of acrylic sheets and wooden bars.  It could easily be customized with a name or meaningful quote.  I didn’t provide a full step-by-step tutorial but the post clearly explains the process I followed.  This project goes hand-in-hand with the Fern & Flower Press listed below at number 8.  The only difficultly is settling on a pleasing arrangement of the design elements.
Pressed Flower Girls Wall Art   @FanningSparks
3. Landlubber’s Toy Sailboat
The Landlubber’s Toy Sailboat started as a photo prop but it promises hours of fun for children and the young-at-heart.  It does an amazing job of floating in still waters and gentle breezes.  Simple materials are used.  The sails can easily be customized with unique fabric.  A name, number or design motif could also be added.  Basic wood working and fabric stitching are involved.
A Landlubber's Toy Sailboat - DIY Tutorial @FanningSparks
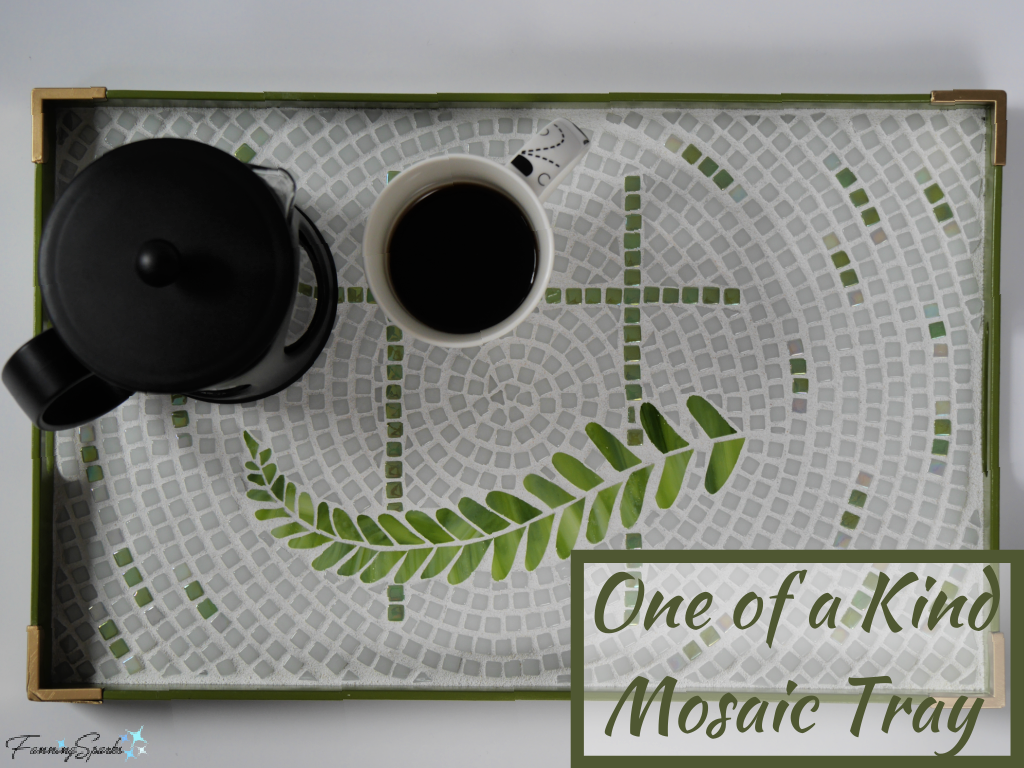
4. One of a Kind (OOAK) Mosaic Tray
This One of a Kind (OOAK) Mosaic Tray is as functional as it is pretty.  The glass tile and stained glass mosaic is seated in a thrifted serving tray.  The mosaic design combines a charming fern motif with a playful tic-tac-toe grid.  The background is laid in a spiral pattern.  The design could easily be customized to reflect the interests of the recipient.  This project may be a little ambitious for a first mosaic project but is ideal for someone with a little mosaic experience.  My post includes a description of the process along with helpful tips but does not provide detailed step-by-step instructions.
One of a Kind Mosaic Tray   @FanningSparks
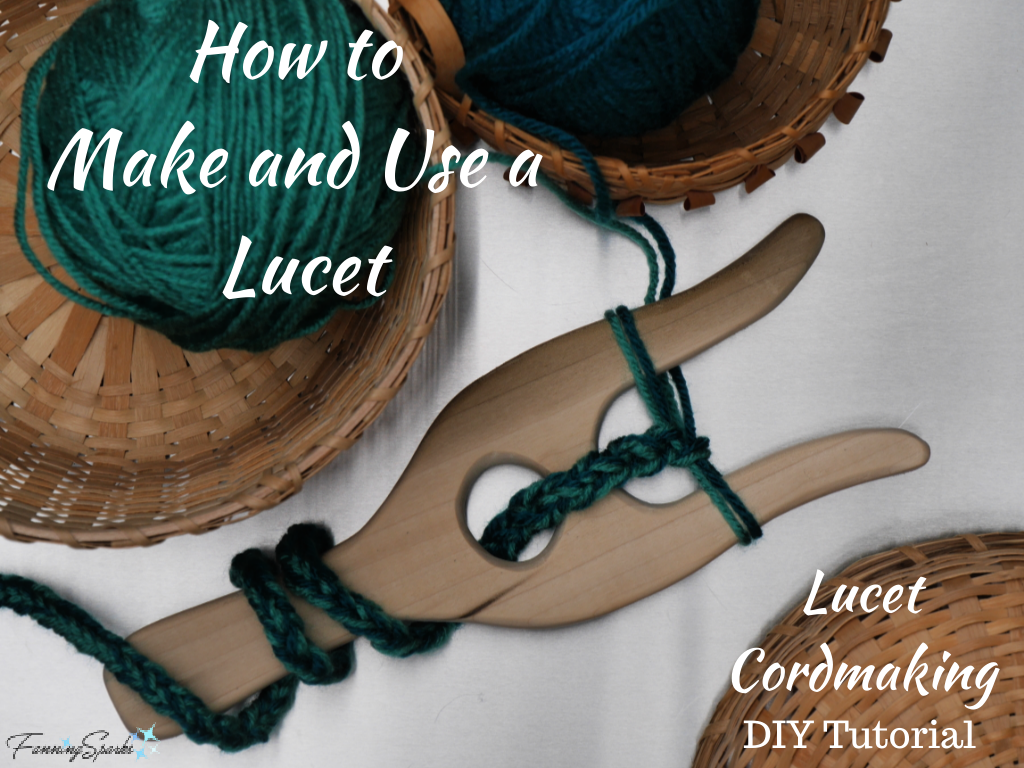
5. Lucet Cordmaking
A lucet is a simple tool that resembles a two-pronged fork. It is used to make a knotted cord by manipulating fiber strands around the prongs.  My full step-by-step tutorial explains how to make a wooden lucet and use it to make cord.  The lucet requires only a few supplies and basic woodworking skills.  Cordmaking may require a little patience but the repetitive movements quickly become relaxing and soothing.  Cord can be made in a variety of fibers, such as yarn, string and floss, in an endless array of colors.
How to Make and Use a Lucet @FanningSparks
6. Ultimate Picnic Blanket
This picnic blanket has several features earning it the “ultimate” title.  It provides a protected place to sit keeping moisture, bugs and pokey things at bay.  Plus it’s durable, easy care and machine washable.  Fabric and sewing notions are needed.  It requires basic sewing skills.  The red-and-white gingham check and daisy motif could easily be replaced with different design choices.
The Ultimate Picnic Blanket DIY Tutorial Pin @FanningSparks
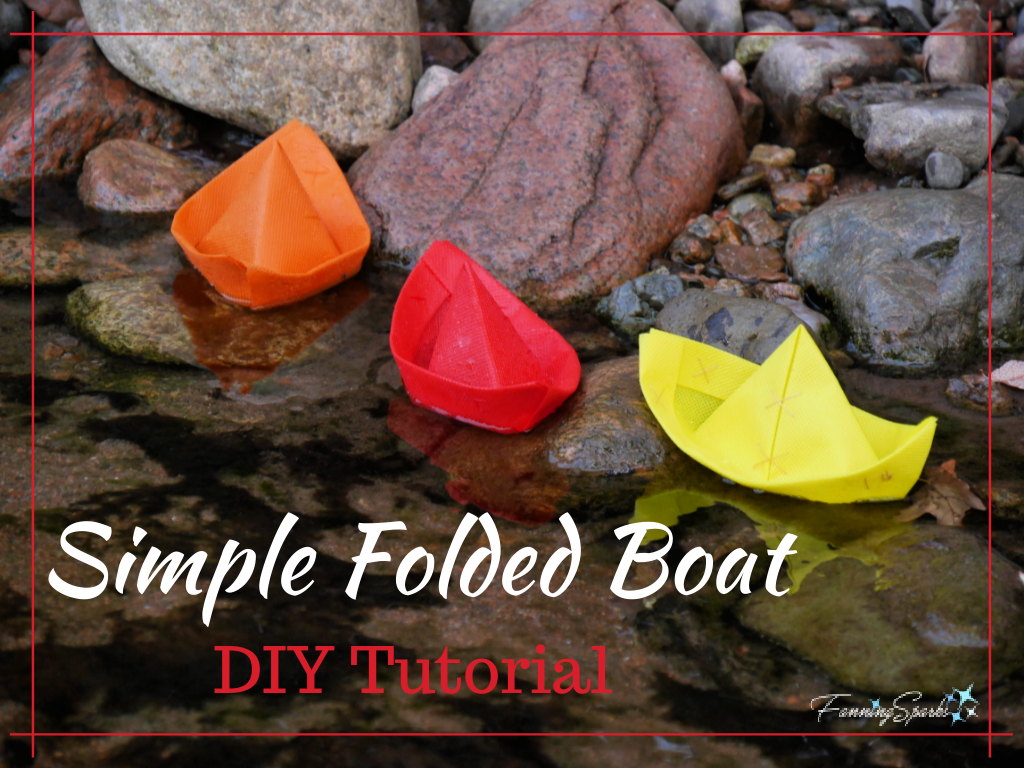
7. Simple Folded Boat
The Simple Folded Boat is another great project for children and the young-at-heart.  It would be perfect packaged as a kit with plans to make it together.  It doesn’t get much easier than this project.  The fabric for this project is available in a rainbow of colors and could easily be personalized with a name, number or design motif.
Simple Folded Boat DIY Tutorial pin @FanningSparks
8. Fern & Flower Press
The Fern & Flower Press can be used to preserve flowers, ferns, leaves, grasses and other plant materials.  It’s straightforward and simple to construct.  It is a generously-sized press specifically designed for large plant elements like fern fronds.  It would be easy, however, to adjust the size to make it smaller.  The cover design could easily be customized.  Basic woodworking materials and skills are required.
Fern & Flower Press DIY Tutorial @FanningSparks
9. AirBee-n-Bee House
The AirBee-n-Bee House is an attractive insect hotel designed for a backyard or garden.  It is targeted to tunnel-nesting native bees such as Mason Bees and Leaf-Cutting Bees.  It features natural materials such as reeds and branches.  Basic woodworking materials and skills are required.  The nesting materials can be arranged as desired.
AirBee-n-Bee House DIY Tutorial @FanningSparks
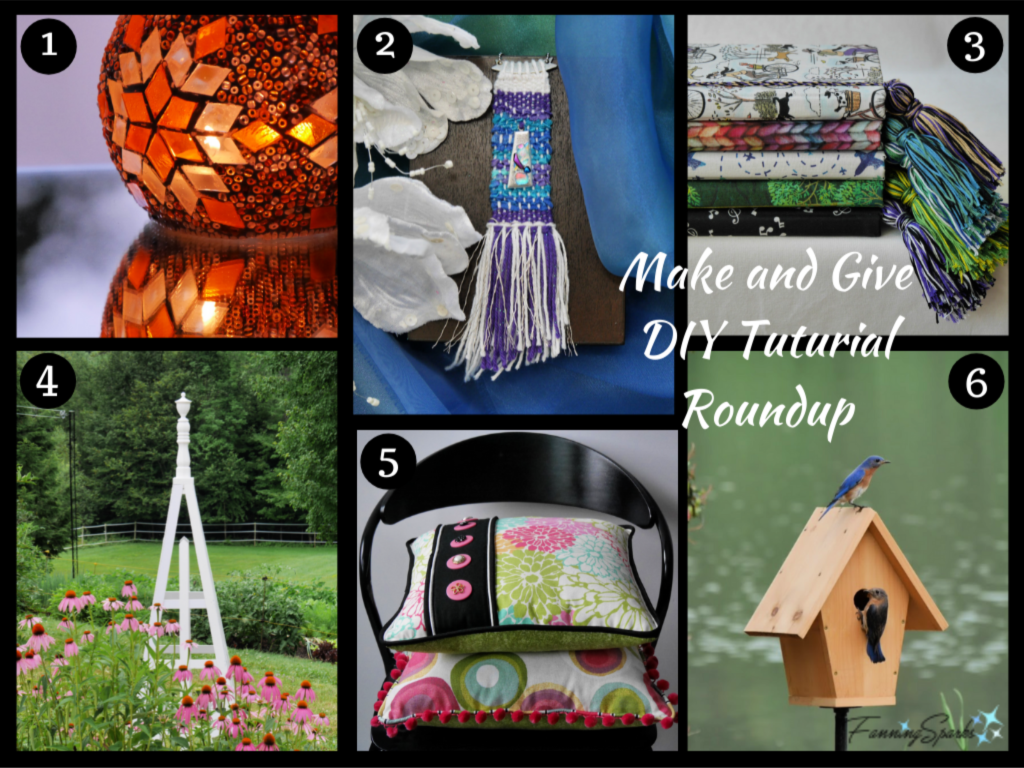
For a few additional options, consider these Make & Give projects from the 2019 roundup.
Make and Give DIY Tutorial Roundup @FanningSparks
1. Turkish Mosaic Candle Holder
2. Woven Statement Necklace
3. Personalized Fabric-Covered Journal
4. Pyramid Trellis
5. Bespoke Pillows
6. Bluebird-Approved Birdhouse

More Info

Don’t miss last year’s Make & Give Roundup.
Please share this image or pin for later reference.
Make & Give 2020 Roundup   @FanningSparks

Today’s Takeaways

1. Hand-crafted items are unique and special.
2. Tailoring a hand-crafted gift for the recipient sends a message of love and caring.
3. Consider making and giving gifts this holiday season.
Peg - FanningSparks Author

There’s a popular adage about perennial gardens: “The first year they sleep, the second year they creep and the third year they leap!”.   The thought is a new perennial garden takes 3 years to mature.  The first year perennials put down roots, the second year they spread their foliage and the third year they leap into full growth.  Perennials, by the way, are plants that persist year after year—they die back at the end of the growing season and grow back again in the spring.  Annuals, on the other hand, last only one season.
The sleep-creep-leap analogy is a good reminder of the ways of Mother Nature.  She can’t be rushed.  The growing cycle is reassuringly predictable.  These thoughts were running through my mind as I strolled around our garden recently.
Our front garden is ornamental consisting primarily of shrubs and perennial flowers under a canopy of mature trees.  As with most gardens, it is ever-evolving.  The main section, however, is about to leap into year 3.  It’s come a long way from when we first saw this property in the spring of 2018. 
First Viewing of House and Yard Apr 2018   @FanningSparks
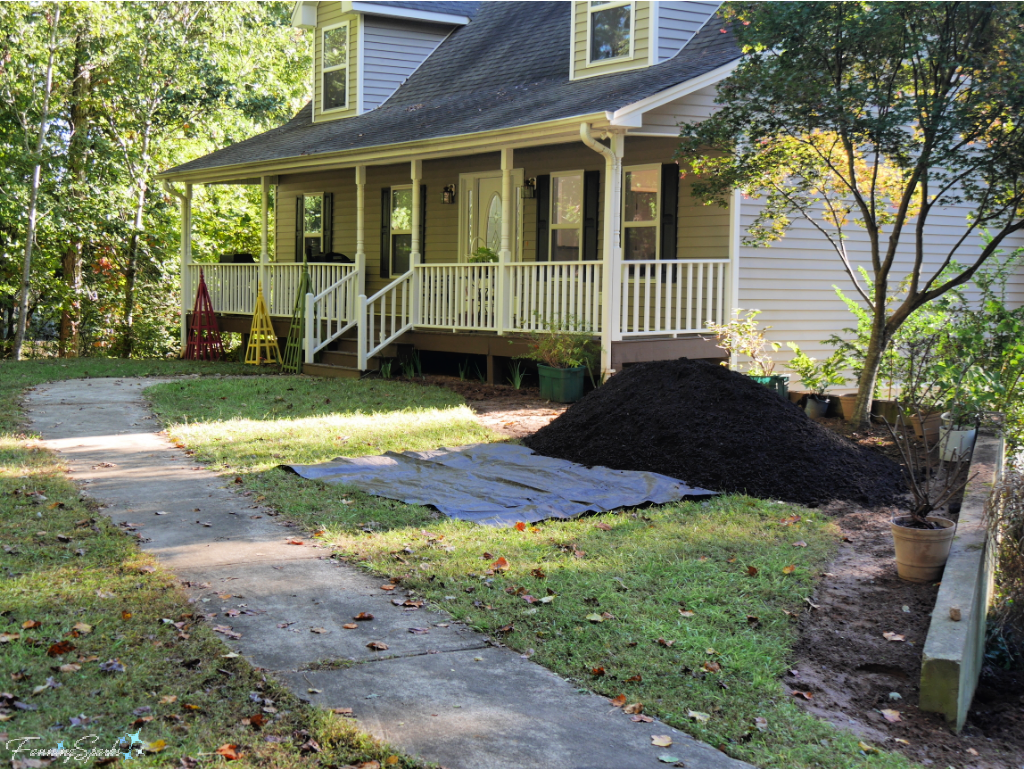
We moved in the midst of a Georgia summer so all gardening was on hold for several months.  The delay worked to our advantage giving us time to assess the characteristics of the site.  This section of the yard faces south and receives ample sun with a canopy of tall, mature trees providing some shade.  Water drainage is good but the soil is heavy clay.  I came to appreciate the gently, curved concrete walkway as well as the concrete retaining wall along the driveway.  And I quickly fell in love with the beautiful Japanese maple.  We started working on the new garden in late October 2018.  A truck-load of amended garden soil can be seen in the photo below.
Load of Garden Soil on Front Lawn   @FanningSparks
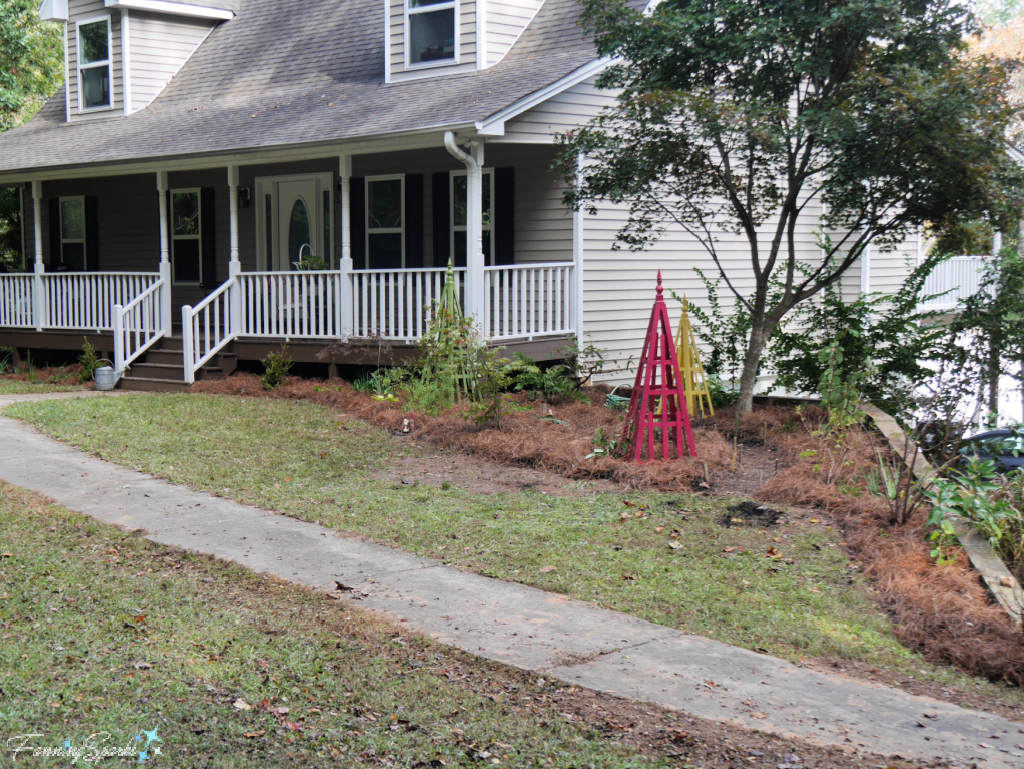
A few weeks (and lots of hard work) later, a new ornamental flower garden emerged.  Several small trees, shrubs, and perennial plants were settled into their new home.  A set of colorful pyramid trellises  were added to support climbing plants and add visual interest (see post DIY Pyramid Trellis Tutorial).  A layer of pine straw, commonly used as mulch in the Southeast, was added.  Stepping stone paths were laid out.  The below photo shows the new garden as it looked in early November 2019, at the beginning of year 1—the sleeping stage.
New Garden from Right Nov 2018   @FanningSparks
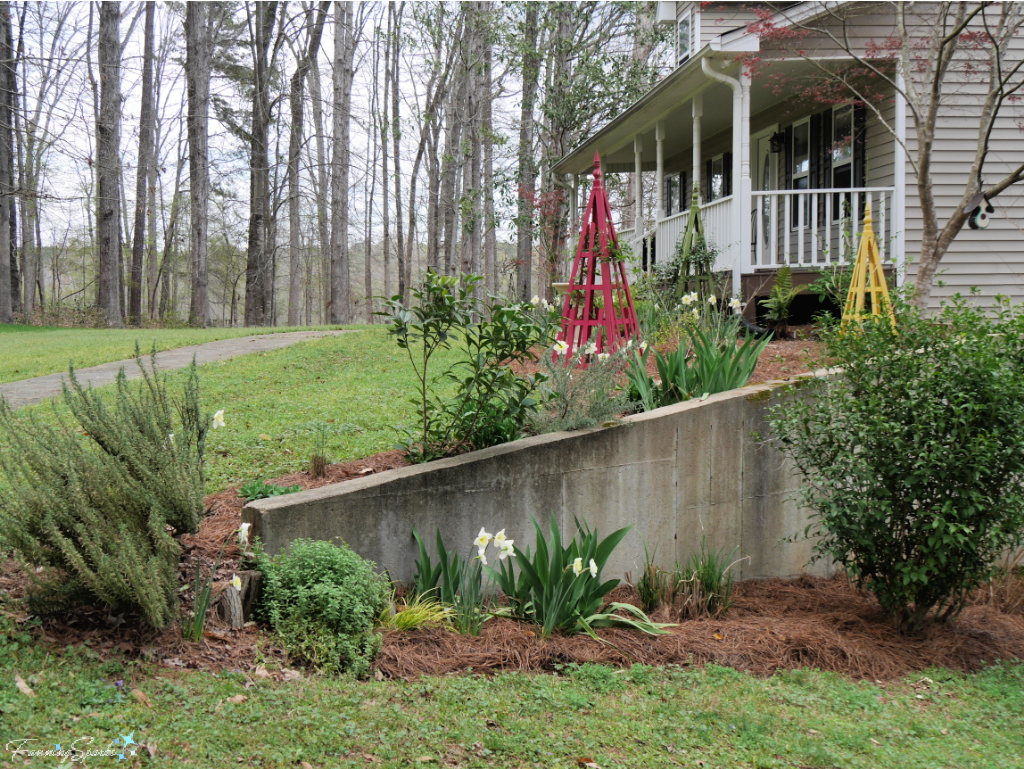
Fast forward 1½ years to this past spring as the garden enters the creeping stage.  I love spring in the US Southeast!  It’s a full-on extravaganza of blooming plants and gorgeous greenery.  The daffodils (Narcissus ‘Ice Follies’) started the show in early March.  This coming season, I’m hoping for an even earlier start with late-blooming camellias (see my previous post Camellia Road Trip).  Pictured below is the garden in mid-March of this year.
Our Front Garden in Second Spring @FanningSparks
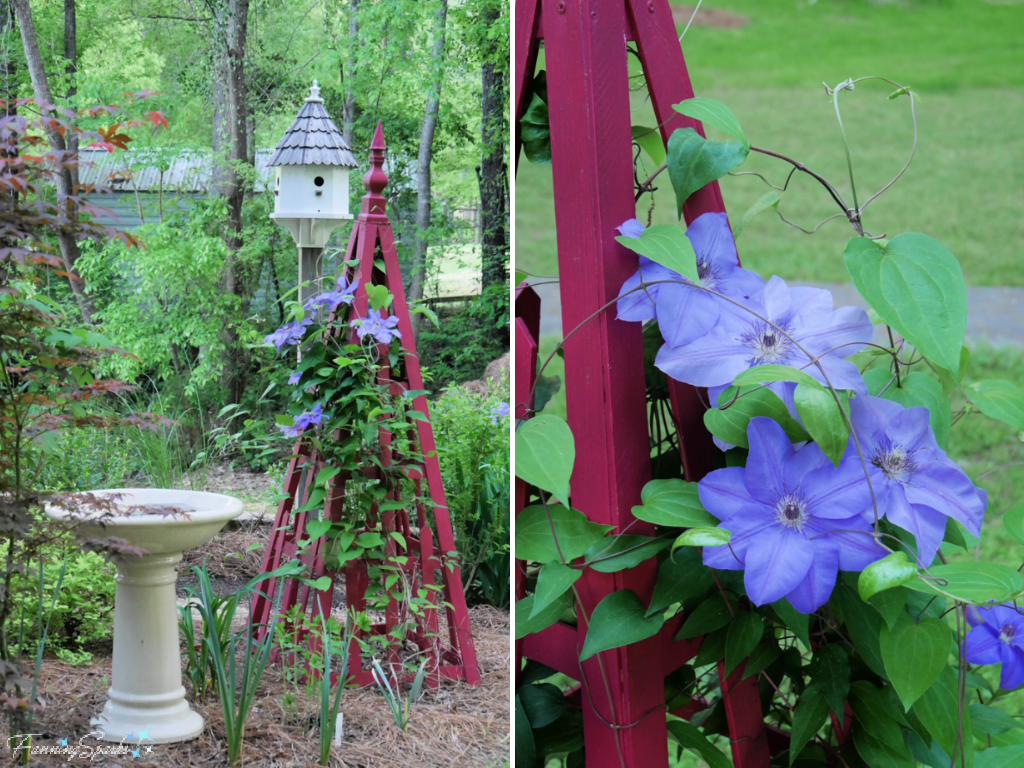
About two weeks later, the Japanese maples had leafed out and the clematis (Clematis ‘Ramona Blue’) hit its stride.
Clematis Ramona Blue in Bloom   @FanningSparksThis was also peak season for the spectacular bearded irises.
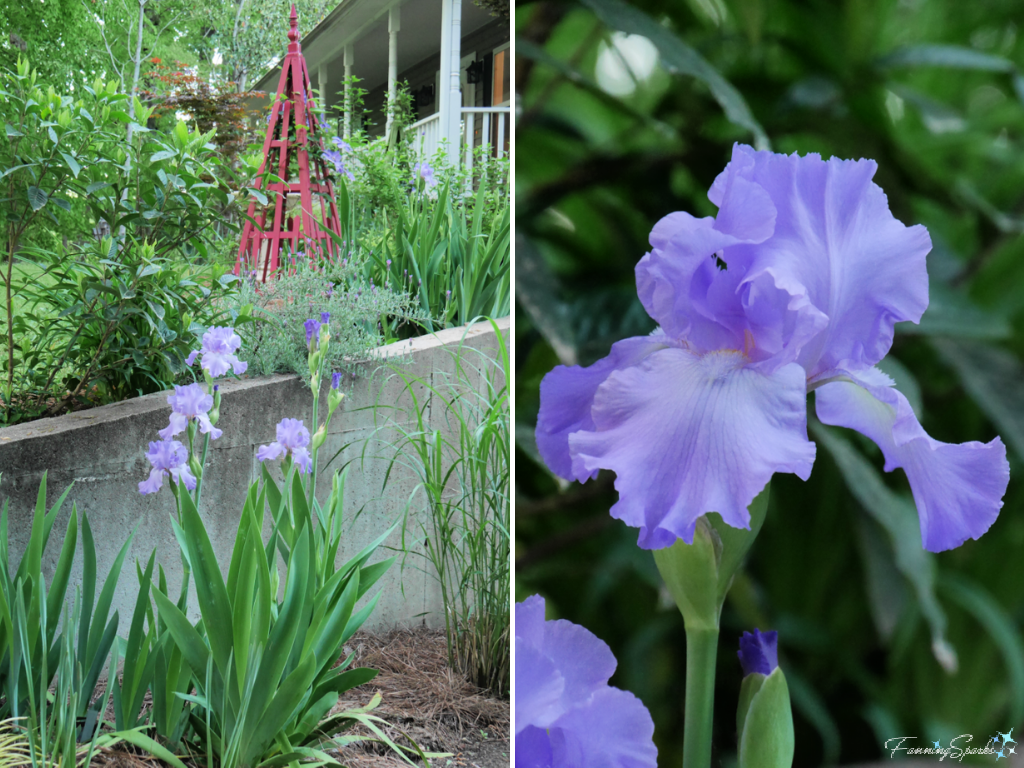
Purple Bearded Irises in Bloom   @FanningSparks
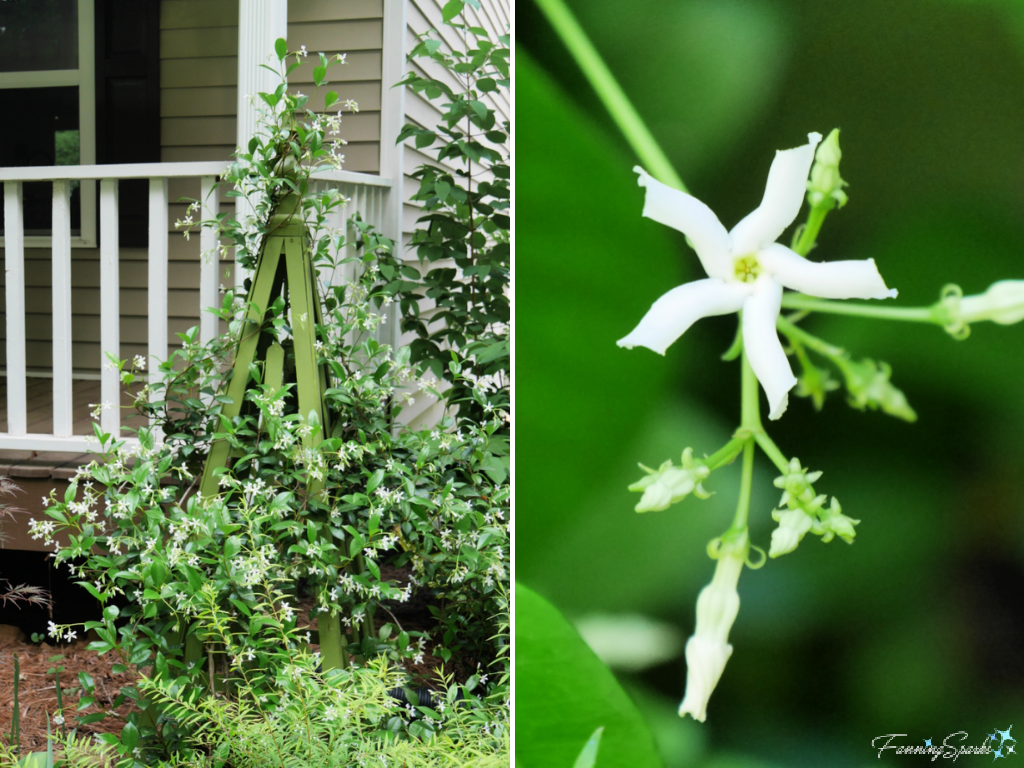
Two more weeks, and the air was heavily scented with the aroma of Star Jasmine (Trachelospermum jasminoides).
Star Jasmine in Bloom   @FanningSparksA couple more weeks and several of the hydrangeas bloomed for the first time.  Pictured are a Oakleaf Hydrangea (Hydrangea quercifola ‘Snowflake’) and a Big Leaf Hydrangea ‘Endless Summer’ (Hydrangea macrophylla ‘Endless Summer’).
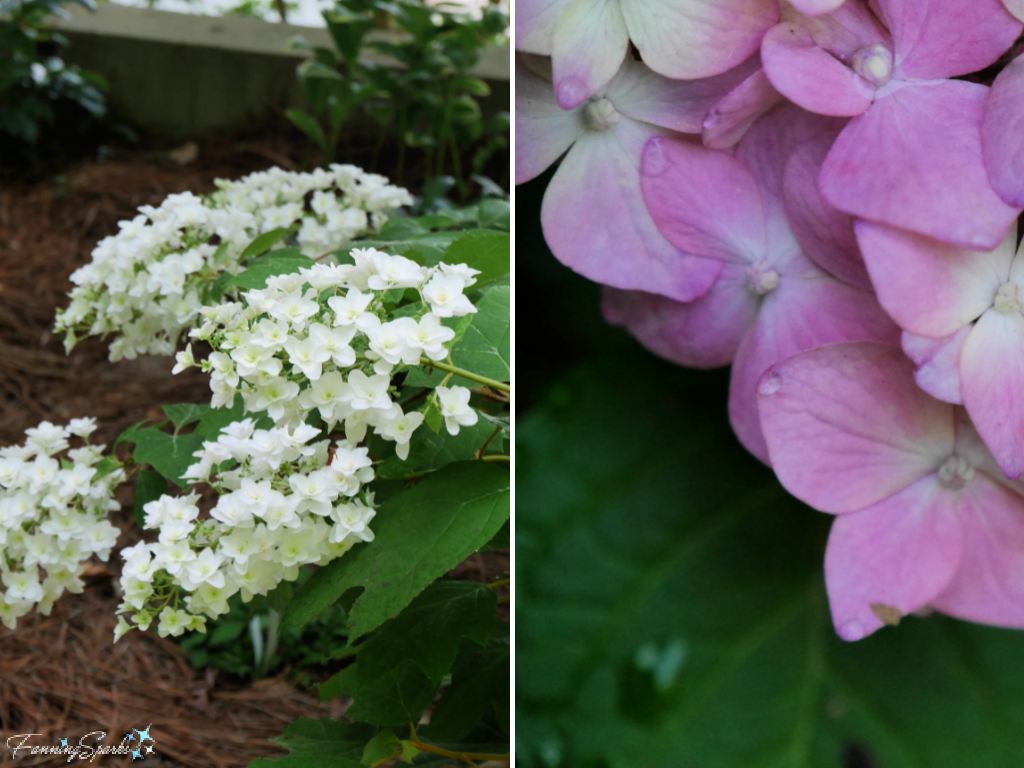
Hydrangeas in Bloom   @FanningSparksThe floral show was outstanding but flowers don’t last long.  The trick is to stretch it out by selecting plants with different blooming times.  Another option is to include a variety of foliage with different plant forms, leaf shapes, patterns and colors.
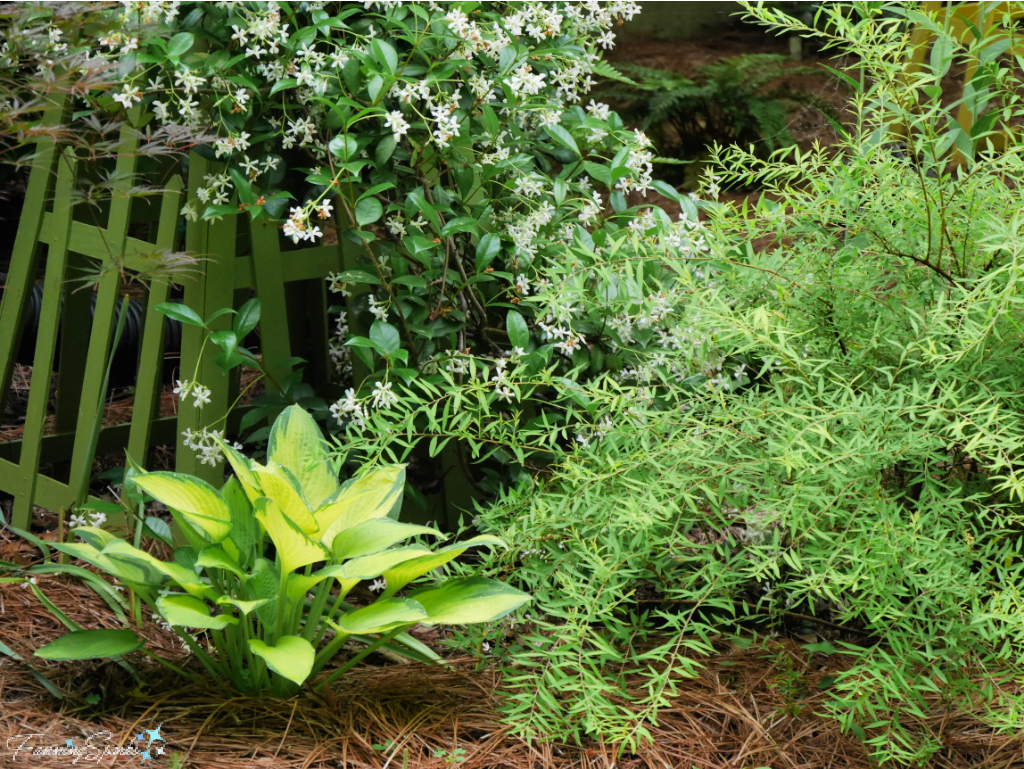
The challenge is to add just the right amount of variety… too much variation appears jumbled and haphazard while too little variety can be bland and uninteresting.  I’ve found layering and repetition are key to adding variety effectively.  By visualizing the garden as multiple layers, both on the vertical and horizontal planes, there are more opportunities to include a variety of plantings.  Hardscapes and garden structures can also contribute to layering.  Pictured here, is a variegated hosta (Hosta ‘Paul’s Glory’) in the foreground, Bridal Wreath Spirea (Spiraea thunbergii ‘Ogon’) to the right and Star Jasmine (Trachelospermum jasminoides) growing on the pyramid trellis in the background.
Variety of Foliage with Hosta, Spirea and Jasmine   @FanningSparksAnother way to add interest and variety is to strategically place large, potted plants in the flower beds.  I first noticed this technique during a Garden Tour (see the post Spring Into a Garden Tour).  The hosta planted in this large, burgundy-colored, ceramic pot provided lush, green foliage the entire season.
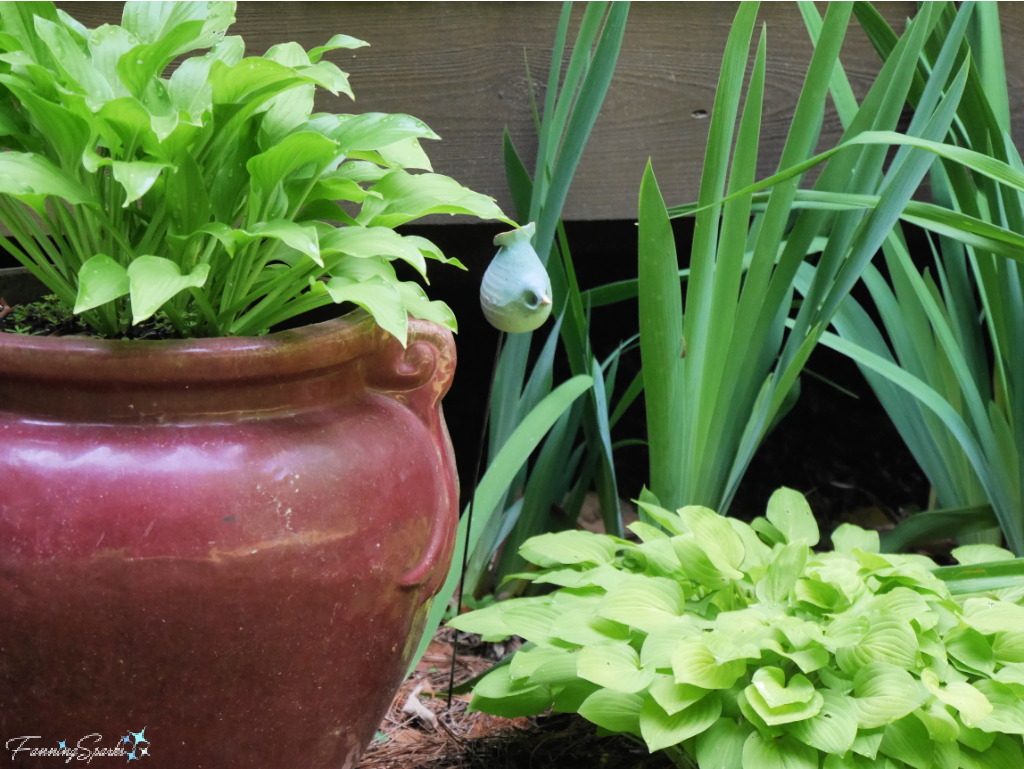
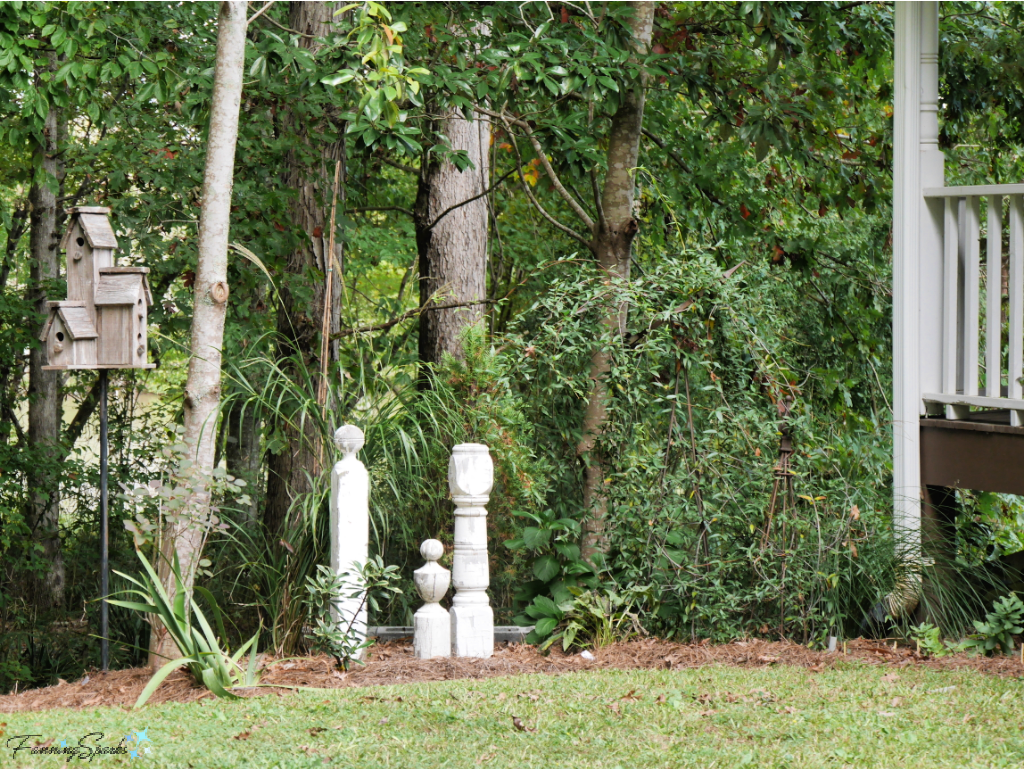
Burgundy Ceramic Pot with Hosta   @FanningSparksIt’s fun to incorporate interesting elements into the garden.  In the below section, for instance, I created a focal point with 3 rustic, turned-wood posts.  The idea is to draw the eye across the garden to the far left side.  I love to include salvaged, paint-chipped porch posts, balusters and newel posts in the garden.  Admittedly, I’ve gathered quite a collection over the years and more than one mover has questioned why I would bother to move old wooden posts from one home to another!
Old Wooden Posts in Flower Bed   @FanningSparksStrolling around the garden, especially in the early morning, is something I look forward to every day.
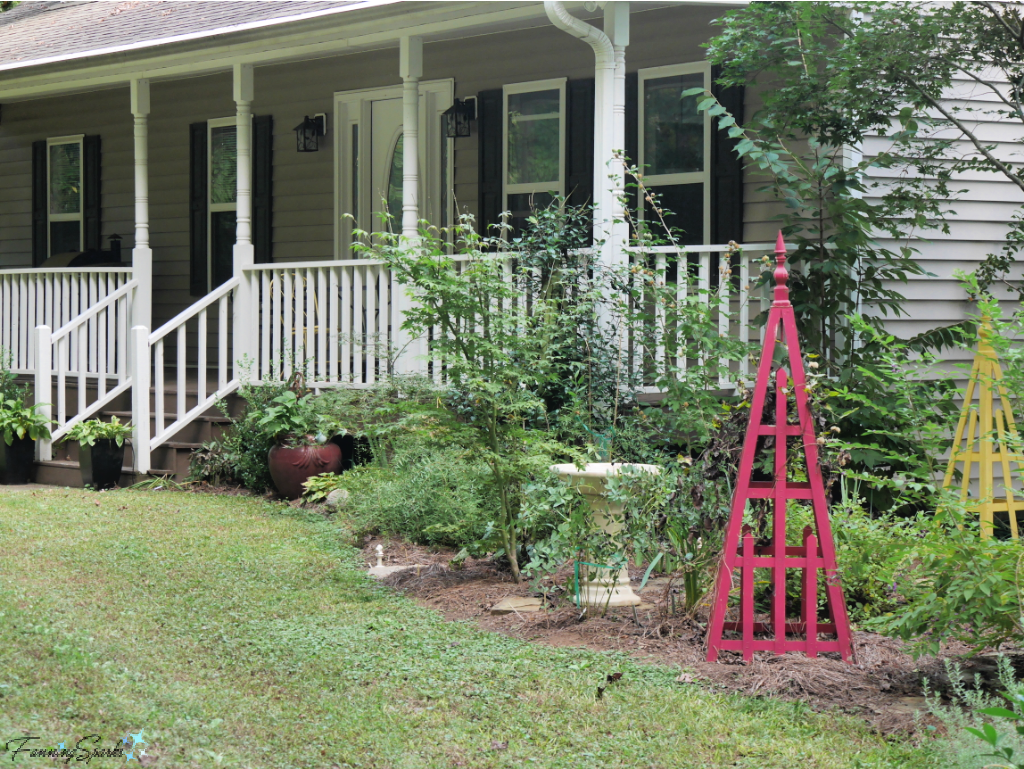
Our Front Garden at End of Year 2   @FanningSparks
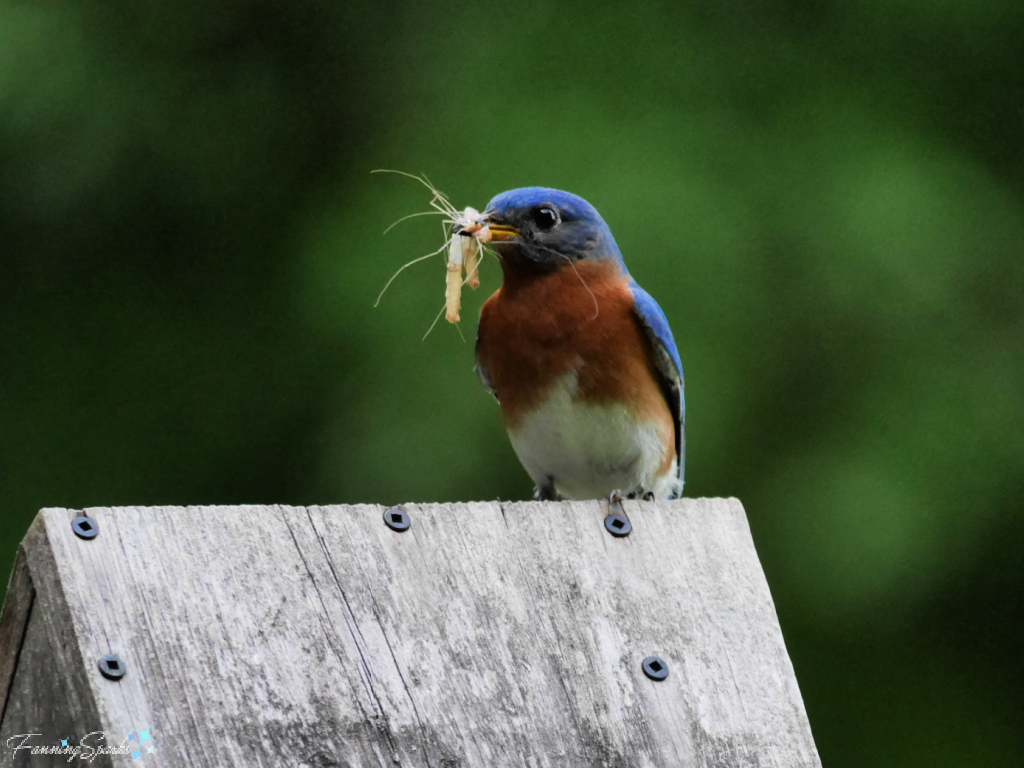
I’m not the only one drawn to the garden.  Eastern Bluebirds (Sialia sialis) started visiting in early spring.  We have a handful of birdhouses (see previous post – DIY Bluebird-Approved Birdhouse Tutorial) around our property and the bluebirds were busy nesting and feeding.
Eastern Bluebird with Bugs   @FanningSparksHere’s a beautiful male Eastern Bluebird sharing a perch with the metal bird on our bird bath.
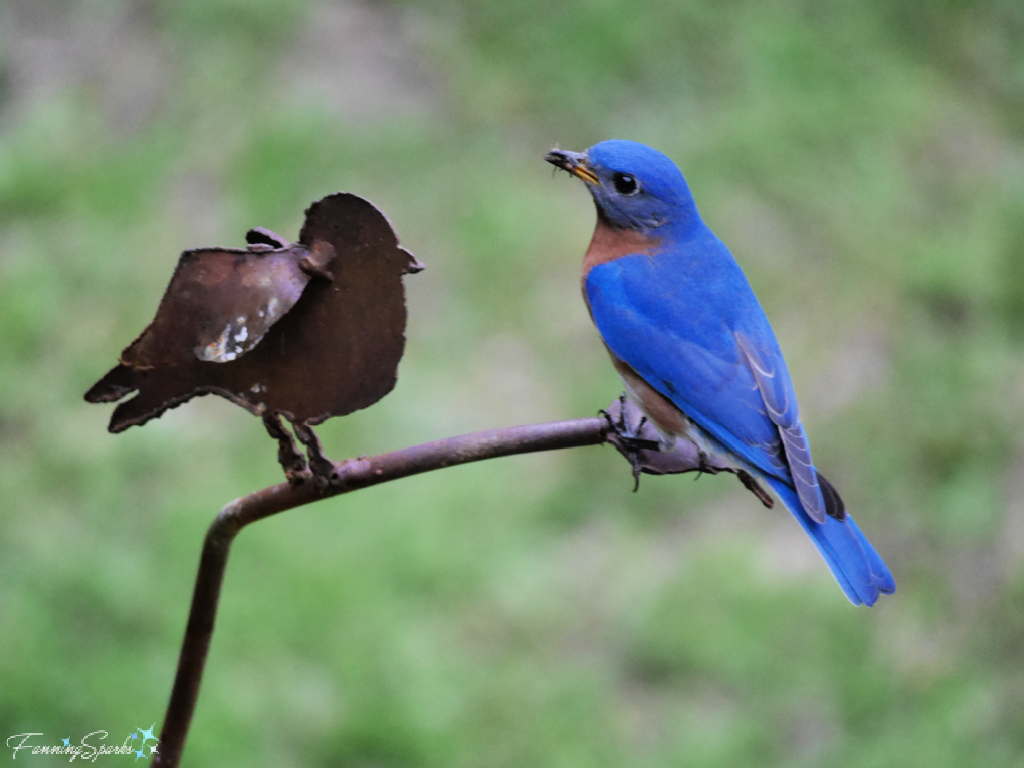
Eastern Bluebird Sitting Beside Metal Bird   @FanningSparks Meanwhile, a charming Prothonotary Warbler (Protonotaria citrea) built a nest in this rustic, condo-style birdhouse.
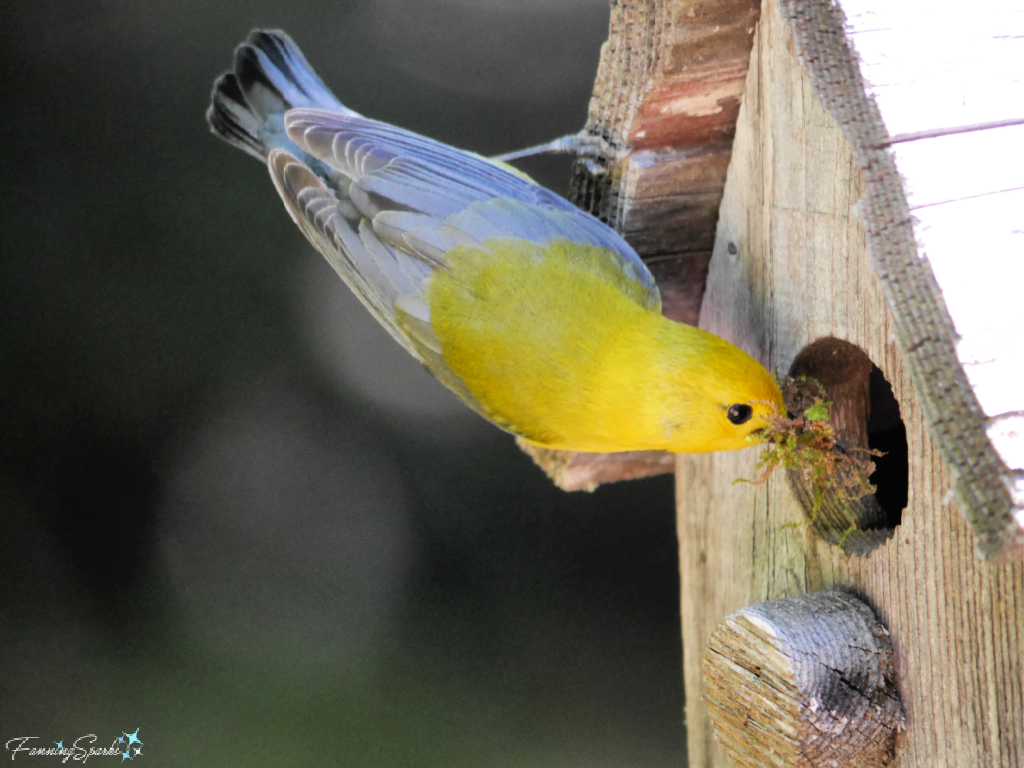
Warbler Building Nest in Birdhouse   @FanningSparksLater in the summer, butterflies became frequent visitors (see post Chasing Butterflies).  Here’s an Eastern Tiger Swallowtail (Papilio glaucus) enjoying a zinnia feast.
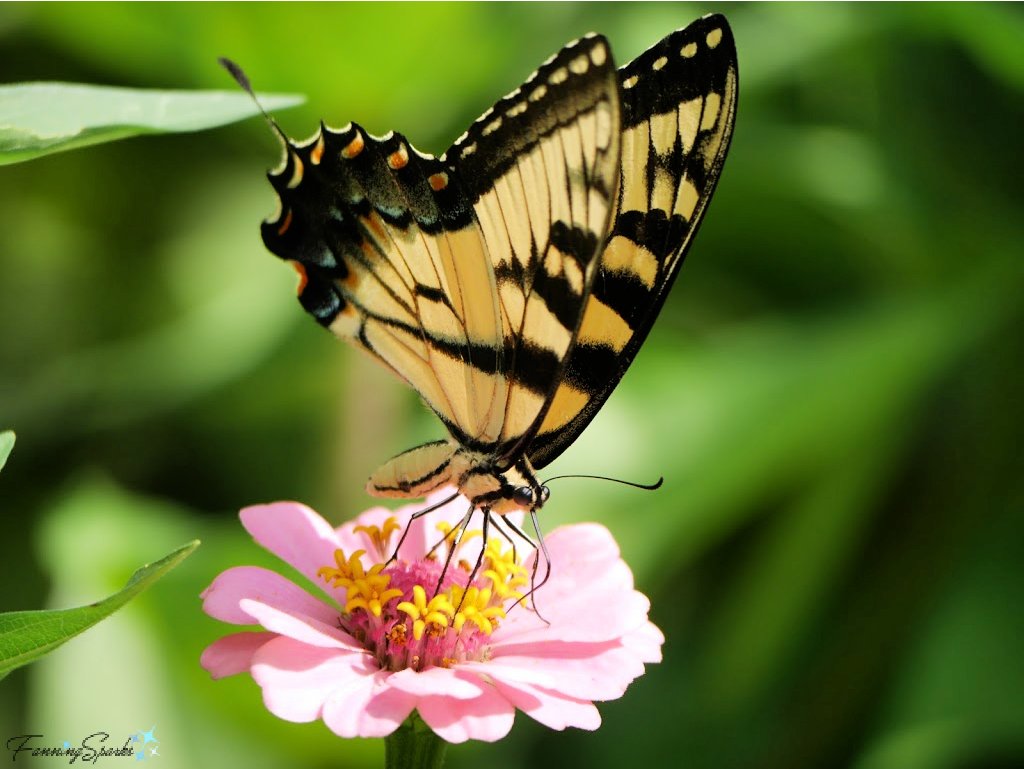
Eastern Tiger Swallowtail on Zinnia   @FanningSparksIt’s now the beginning of November and the garden has slowed down.  But there are still a few highlights to enjoy while I continue to tweak and refine.  The Beautyberry (Callicarpa rubella), for instance, adds a jolt of unexpected color.
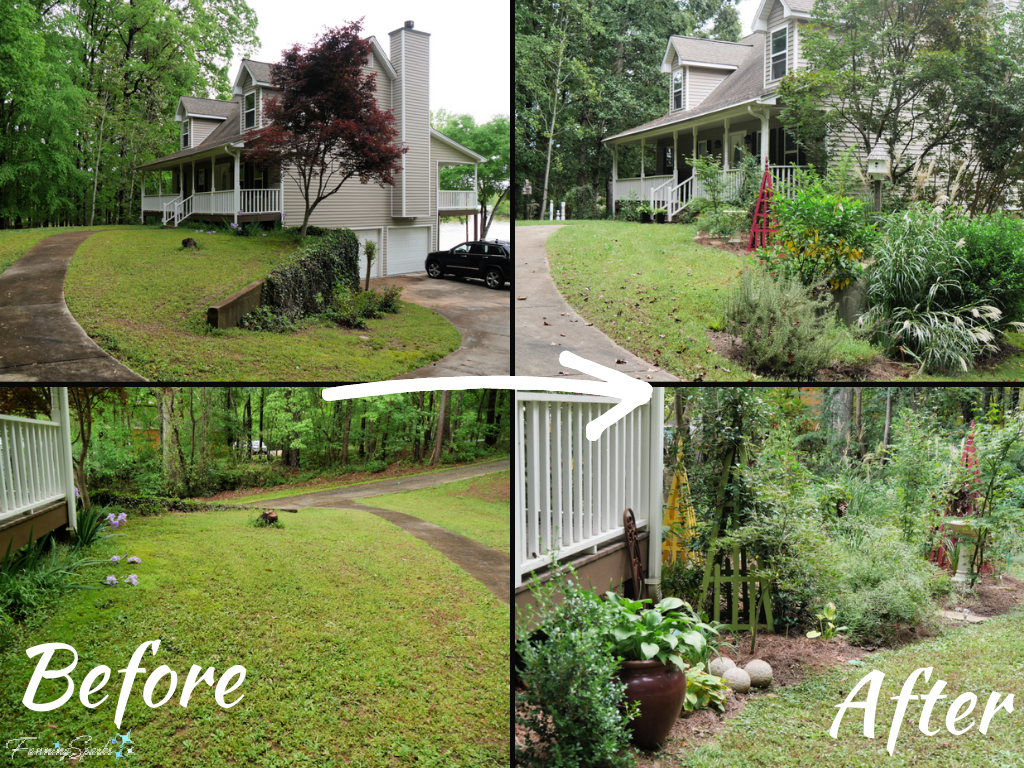
Beautyberry Branch   @FanningSparksThere’s nothing like before and after photos to illustrate progress.  Our front garden has undergone quite a transformation in the first 2 years.  I’m eager to see it leap into Year 3—something tells me I’d better get my pruning shears sharpened!Before and After of Our Front Garden   @FanningSparks
More Info

The colorful pyramid trellises featured in our front garden were made from lath strips using simple tools.  I shared step-by-step instructions in the post DIY Pyramid Trellis Tutorial.
Step-by-step instructions for the birdhouse mentioned in this post can be found in DIY Bluebird-Approved Birdhouse Tutorial.
Garden tours are a great opportunity to admire other people’s gardens and to get ideas for your own.  I’ve posted about a few garden tours including Spring Into a Garden Tour,  A Virtual Stroll in Ticehurst and Charleston’s Glorious Window Boxes.
I’ve also had the pleasure of visiting several public display gardens.  Check out A Virtual Visit to Lisse, Camellia Road Trip and  Chasing Butterflies.
The posts A Before Tour of Our New Casual Lake House  and Zinnias Rock! And More Cutting Garden Tips include more info and photos about our house and gardens.
For reference, I garden in Georgia in the southeast US, in a plant hardiness zone of 8A.

Today’s Takeaways

1. Perennial gardens sleep in the first year, creep in the second year and leap in the third year.
2. Consider building (or refining) your own perennial flower garden.
3. Take comfort in these words of encouragement from New Hampshire’s Bedrock Gardens: “In these trying times, we can agree that the power of gardens is all the more important and relevant. From the psychological benefits of connecting with the natural world, to the health benefits that stem from direct contact with a rich soil microbiome, we all understand that gardens are places of healing and wellness. It is our hope that gardens will continue to provide moments of joy and opportunities for reflection.
Peg - FanningSparks Author

When you grow up in a province with 13,300 km of stunning seacoast (as I did), it’s easy to take the ocean and its associated characteristics for granted.  Take the lighthouse, for example.  There are about 175 lighthouses in the province of Nova Scotia.  The Lighthouse Route, along the province’s South Shore, has been touted as a scenic drive as long as I can remember.  Peggy’s Cove Lighthouse, an iconic Canadian image, is a must-see attraction for visitors.
Peggy’s Point Lighthouse at First Light, Nova Scotia   @FanningSparks
But, I can’t honestly say I’ve given much thought to lighthouses and the important role they play.  That is… until recently.  During a visit to Nova Scotia’s neighboring province of Prince Edward Island (PEI or simply “the Island”), my husband and I set out on a short lighthouse tour.  PEI, we discovered, boasts the highest concentration of lighthouses in North America.  There are 63 lighthouses and range lights, averaging one for every 34 square miles, along the deeply-indented coastline of Canada’s smallest province.  I walked away with a whole new appreciation for these historical structures.  One of the lighthouses we visited is the Panmure Head Lighthouse on Panmure Island.
Panmure Head Lighthouse Viewed From Causeway, PEI   @FanningSparks
It’s common knowledge lighthouses emit beams of light to warn mariners of hazards and aid them in navigating safely.  Lighthouses are typically built as towers to hold the guiding lights as high as possible.  In the below photo of the Felgueiras Lighthouse in Porto Portugal, the rocky shores, thick fog and crashing waves bring the purpose of the lighthouse to life.
Felgueiras Lighthouse in Porto Portugal@FanningSparks
What may not be as well-known is that every lighthouse is identified by its own unique markings and flash patterns.  As explained by the Britannica website: “Most lighthouses rhythmically flash or eclipse their lights to provide an identification signal. The particular pattern of flashes or eclipses is known as the character of the light, and the interval at which it repeats itself is called the period. The number of different characters that can be used is restricted by international agreement through the International Association of Lighthouse Authorities.”  This critical information is distributed to mariners by the relevant national authorities.  In Canada, the Canadian Coast Guard publishes Notices to Mariners (NOTMAR).  Here is the relevant section about the lighthouse on Panmure Island.
Screengrab of Panmure Head Lighthouse from Canadian Coast Guard NOTMAR
The 3 data points under Light Characteristics are Rhythm, Colour and Period.  The Light Characteristics of the Panmure Head Lighthouse are:
. Rhythm is “Fl” for flashing which is defined as “a light in which the flash is clearly shorter than the duration of darkness (eclipse) and in which the flashes of light are all of equal duration”.
. Colour is “W” for white.
. Period is “4s” for 4 seconds.  The period is defined as “the time taken to complete one rhythm cycle”.
More simply, as stated in the Panmure Island Lighthouse visitor brochure, “Panmure Island has a white flash, with a flash of 4 seconds followed by an eclipse of 4 seconds.
The NOTMAR also includes a brief description for each entry. The below photo illustrates the “White octagonal tower with red top” of the Panmure Head Lighthouse.
Red Roof of Panmure Head Lighthouse, PEI   Panmure@FanningSparks
During tourist season, it’s possible to enter the Panmure Island lighthouse and climb up the stairs to the top.  There’s a lovely view of the Northumberland Strait waters, beach and causeway from there…
View from Top of Panmure Head Lighthouse, PEI   @FanningSparks
…as well as a closeup look at the light in the Lantern Room.  This light, from 2010, works with a photo sensor to activate the light at night or during conditions of fog or low light.  The flashing light can be seen for 9 nautical miles.
Light in Panmure Head Lighthouse, PEI   @FanningSparks
Interestingly, the previous light, a 4th Order Fresnel beehive lens was visible for an even greater range at 19 nautical miles.  It is on display on the second floor of the lighthouse.
4th Order Fresnel Beehive Lens   @FanningSparks
The Fresnel lens is noteworthy for its history.  Nearly 200 hundred years ago, in 1822, a French physicist named Augustin-Jean Fresnel revolutionized lighthouse illumination with the invention of this lens.  He innovatively encircled the light source with glass prisms preventing the light from scattering.  The prisms collect and redirect the light producing a significantly stronger beam of light.
The Panmure Island Lighthouse, built in 1853, has a heavy timber frame built with construction techniques typical of shipbuilding.  It is considered a “first-generation” or colonial lighthouse.  But it is not the oldest lighthouse on the Island—that honor goes to the Point Prim Lighthouse.
Point Prim Lighthouse, PEI   @FanningSparks
The Point Prim Lighthouse has been in service since 1845.  It is one of a few round, brick lighthouses in Canada.  Note the brick has since been covered with wooden shingles which are visible in the below photos.
Top of Point Prim Lighthouse,PEI   @FanningSparks
It stands 18.6 meters above the ground—surprisingly the exact same height as the Panmure Island lighthouse.  The Point Prim flash pattern is “Flash 0.2s; eclipse 4.8s.  Operates at night only.
Point Prim Lighthouse with Lobster Traps, PEI   @FanningSparks
Arguably, the most photographed lighthouse on the Island is the one at Brighton Beach.  Located in Charlottetown, at the west end of the ever-popular Victoria Park Boardwalk, it is perfectly positioned for dramatic sunset scenes.  To be accurate about it, the Brighton Beach structure is actually a Front Range Light not a lighthouse.
Brighton Beach Front Range Light in Charlottetown, PEI   @FanningSparks
The distinction between lighthouses and range lights was new to me.  Range lights are a pair of light beacons positioned near one another.  The two light structures are carefully constructed so one range light is in front of and below the other.  At night, mariners visually align the front and rear range lights to provide a bearing and navigate safely.  During the day when the lights are not clearly visible, the range lights may be equipped with large painted flags, called daymarks or dayboards, to be aligned in the same fashion as the nighttime lights.
A fun fact I learned from the Lighthouse Friends website (see More Info below) is the “Brighton Beach Range Lights did not escape the notice of Lucy Maude Montgomery, Prince Edward Island’s most famous author, when she vacationed at the Brighton Shore in 1923. Montgomery wrote the following to her pen pal George McMillan in a letter dated September 3, 1924. “My first week was spent with an old college chum in her summer bungalow on the south side, built just where the North River empties into Hillsborough Bay. It was situated between two range lights that burned enchantingly through the twilights, pearl white against the ethereal skies. Down the harbor there were more rangelights and far out, seemingly in mid-harbor, shone the far away lighthouse on Point Prim — a beacon in ‘fairylands forlorn’.
We visited another Range Light on the Island; the Leards Front Range Light is located in the charming village of Victoria-by-the-Sea.
Leards Front Range Light in Victoria, PEI   @FanningSparks
In addition to visual aids, some lighthouses also provide aural aids to mariners.  Examples of sound producing aids include bell buoys, whistle buoys and fog horns.  The East Point Lighthouse, shown below, provides some insight into the historical use of fog horns.  The building shown to the right of the lighthouse was originally a Fog Alarm Building.  It is one of the few intact fog alarm buildings on PEI and currently serves as a gift shop and café.
East Point Lighthouse and Fog Alarm Building, PEI  @FanningSparks
In the same way that lighthouses have distinct flashing pattern, fog alarms have a distinct pattern of blasts.  The East Point Fog Alarm characteristic consisted of a 6-second blast every 54 seconds.  The below fog horns were removed from the original 1908 fog alarm building.
Fog Horns from East Point Light Station, PEI   @FanningSparks
Not surprisingly, fog horns like these are no longer used.  Advances in technology, especially the wide-spread adoption of GPS and depth-finding equipment on board marine vessels, have diminished the role of the lighthouse.  But for many, lighthouses will always represent strength, guidance, hope and safe harbor.
I’ll wrap up with one final shot—this splendid sunset scene of the St Andrews (North Point) lighthouse from St Andrews, New Brunswick.
Sunset with St Andrew North Point Lighthouse in St Andrew, New Brunswick   @FanningSparks

More Info

Learn more about Peggy’s Cove, Nova Scotia in my previous post, First Light at Peggy’s Cove.
The Prince Edward Island Lighthouse Society (PEILS) is a non-profit group formed to aid in the preservation of PEI lighthouses.  Check out the PEILS website for a directory of lighthouses on the Island including an interactive map, photos, descriptions and histories.
The International Association of Marine Aids to Navigation and Lighthouse Authorities (IALA), previously known as International Association of Lighthouse Authorities, is an intergovernmental organization founded in 1957 to collect and provide nautical expertise and advice. You can learn more on the IALA website.
The Canadian Coast Guard Notices to Mariners – NOTMAR can be found here.  Select the “Atlantic Coast” tab to find the list for PEI.  The United States Coast Guard publishes similar information—the US Atlantic Coast Light List can be accessed from here.
The Lighthouse Friends website is packed with information about the lighthouses of the USA and Canada.  The author, Kraig Anderson, reports he has visited all the lighthouses in the US and nearly all in Canada.

Today’s Takeaways

1. Lighthouses have a fascinating story to tell.
2. Find comfort in the good vibes associated with lighthouses: strength, guidance, hope and safe harbor.
3. Consider visiting a nearby lighthouse to enjoy some socially-distanced, time outdoors.
Peg - FanningSparks Author