Sometimes the best home improvement projects aren’t planned—they’re spontaneous. There’s no poring over Pinterest, no mood board, no supplies list, no work plan. Instead it starts with one small change which somehow morphs into something significant. At least, that’s what happened in our workshop last week!
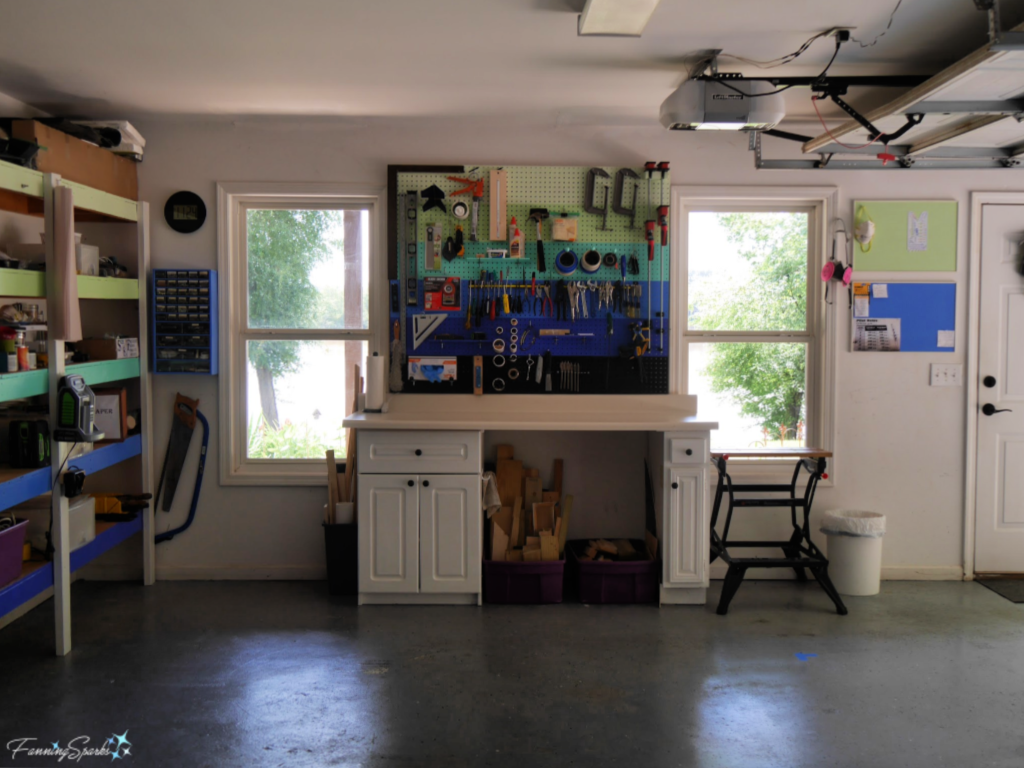
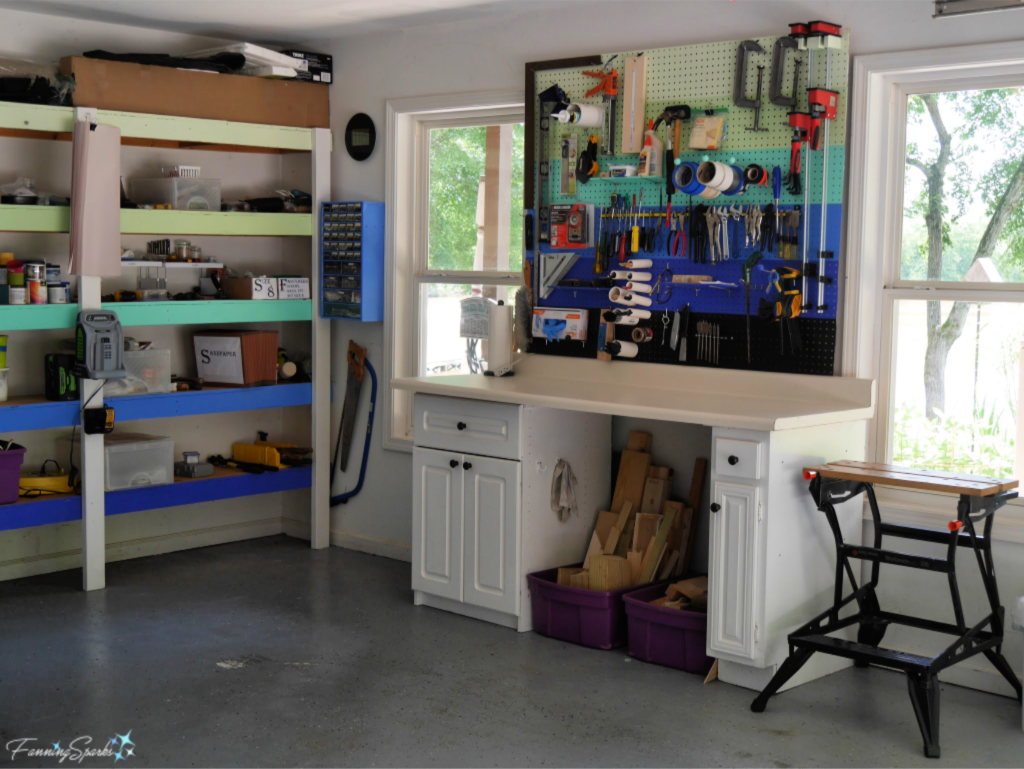
It may be overly generous to call it a “workshop”; the area I use for woodworking and other such projects is actually the side wall of our garage. It’s only about 3.5’ wide with a 2′ x 6’ workbench squeezed in. I have to park my car outside the garage to actually use the space. There’s a covered patio just outside which is perfect for dusty activities like sawing and sanding. Here’s how our workshop looks today.
 But it wasn’t always like this! Before last week, only a few tools like the jigsaw and drill were stored in the cabinet under the workbench. Many of the tools and supplies I used most frequently were stored on shelves on the opposite side of the garage. So every time I needed a hammer or a piece of sandpaper I had to walk around our second vehicle. I’m not complaining—I love having a dedicated workshop area and I really didn’t mind maneuvering around the vehicles. That being said, it wasn’t the most efficient setup and space was tight.
When we first moved to this house and discovered there was nowhere to put our large, 6 ‘ wooden cabinet, we shoved it into the corner of our garage. It was along the same wall as the workbench and covered the window on the left. Last week, it struck me the cabinet was sucking up a lot of valuable real estate. We made space in the basement and moved the cabinet there. This change freed up a lot of space actually doubling the working area. Plus it doubled the amount of light because the cabinet was no longer blocking the window. So it began! We re-positioned the workbench, hung a pegboard, cleaned, painted, organized, moved things around and gussied up the workshop. I don’t have a before photo but I assure you it didn’t look like this!
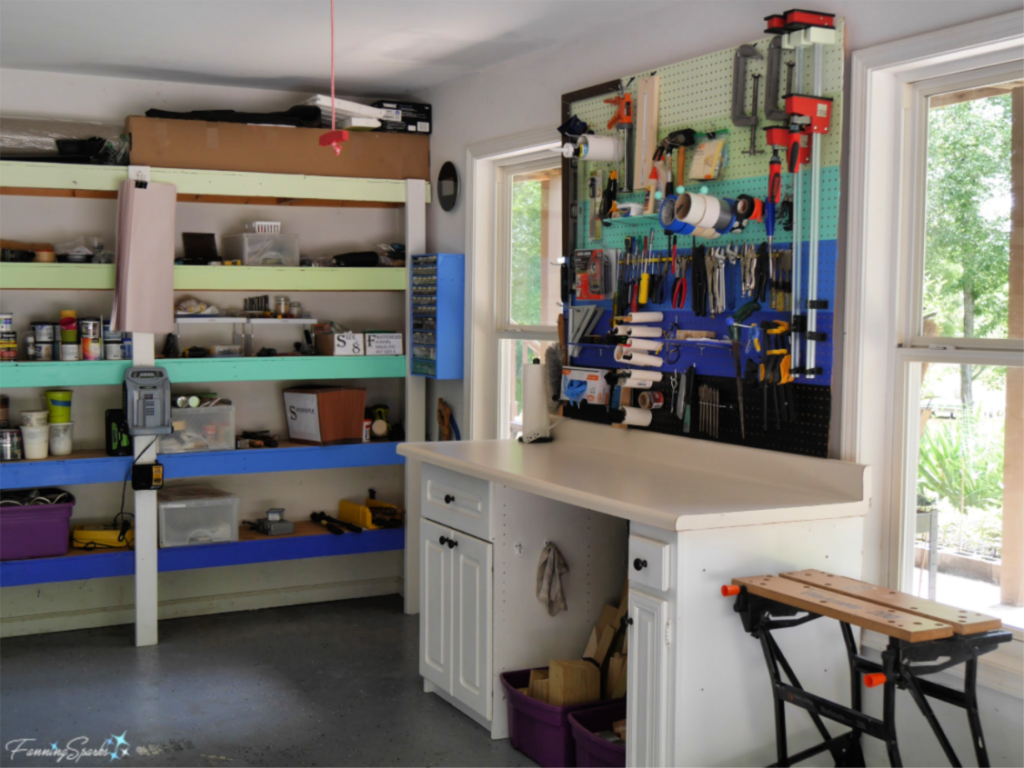 Hanging a pegboard and reorganizing isn’t ground breaking but I’m amazed at the improvement. Now my frequently used tools and supplies are within easy reach. It’s so much more efficient to simply reach for a tool than to interrupt my work flow to go fetch it. It’s also easier to keep my work surface cleared. Plus it’s so pleasant to spend time in this pretty workspace. I learned a few things along the way that I thought might be worth sharing. Here are my top 10 tips from our gussied up workshop.
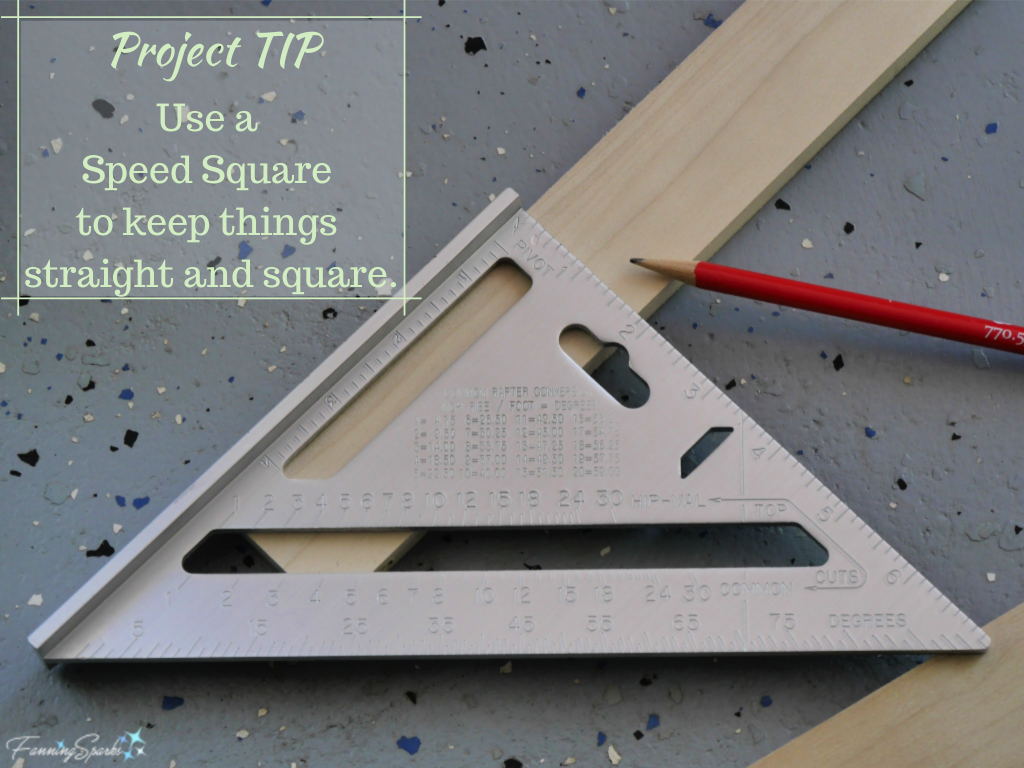
Tip 1. Just do it. My first and biggest tip is simply this: If your workshop or workspace needs a little attention, stop all projects and just get it done!
Tip 2. Install and maximize a pegboard.
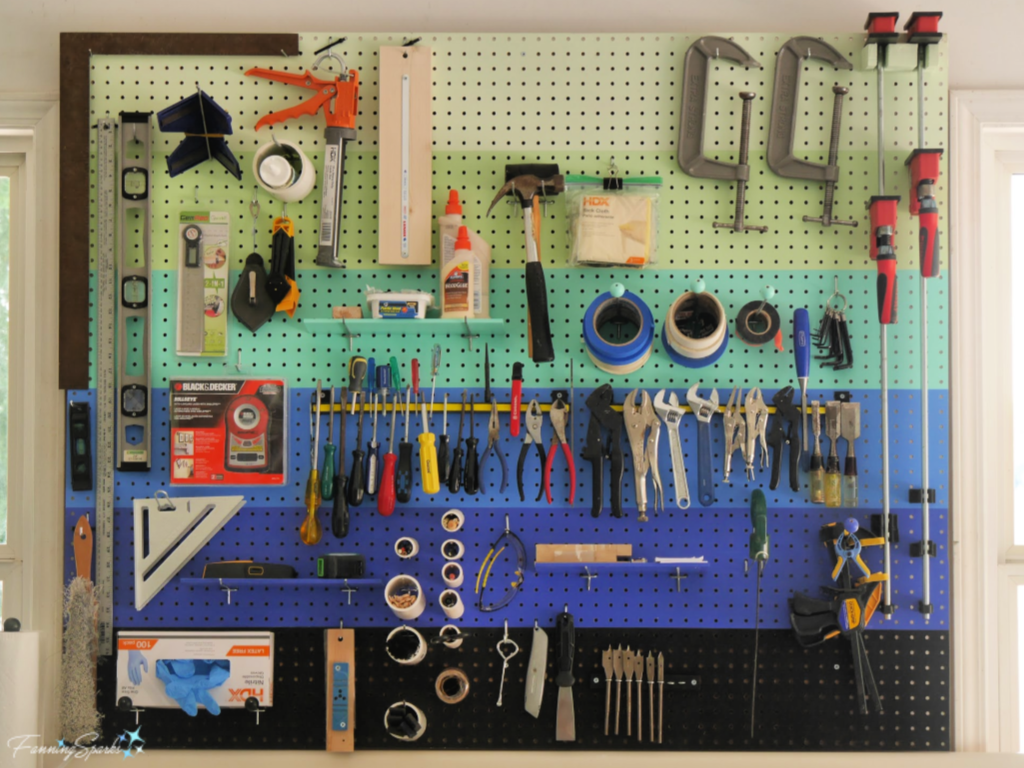 These steps should help maximize your pegboard space:
a. Clear and mark a space on the floor the size of your new pegboard.
b. Pick out the tools and supplies you use most frequently.
c. Sort the tools and supplies into logical groupings eg measuring, finishing, clamping and so on.
d. Arrange items in an efficient layout making the best use of all available space.
e. Transfer items to the pegboard.
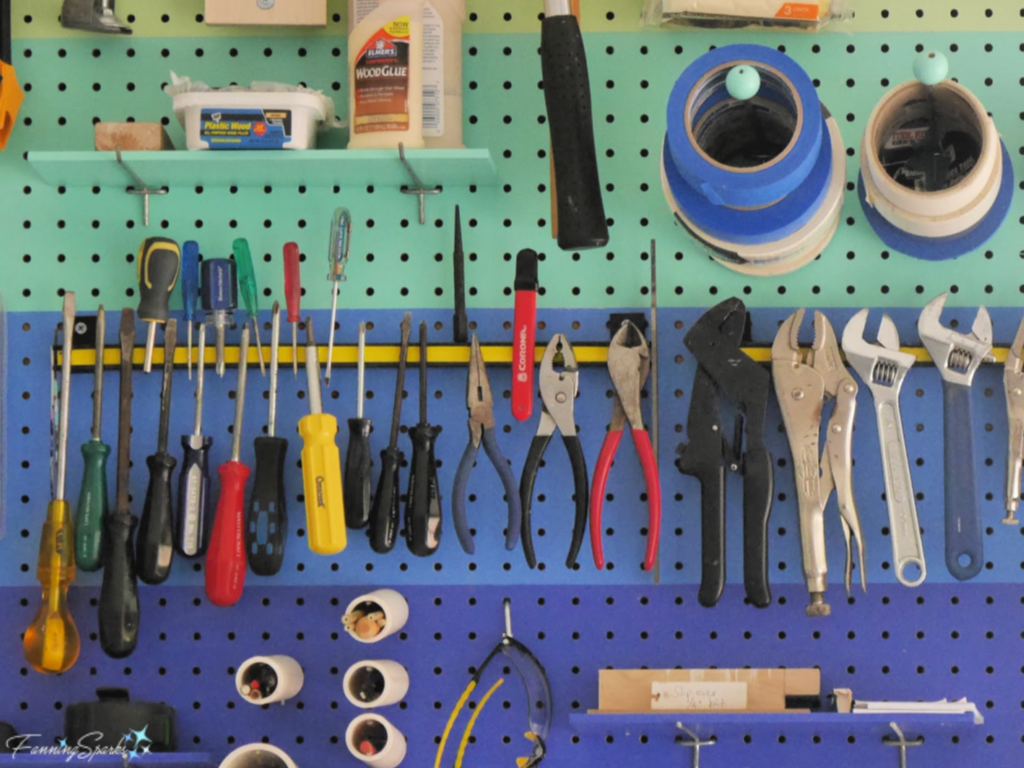
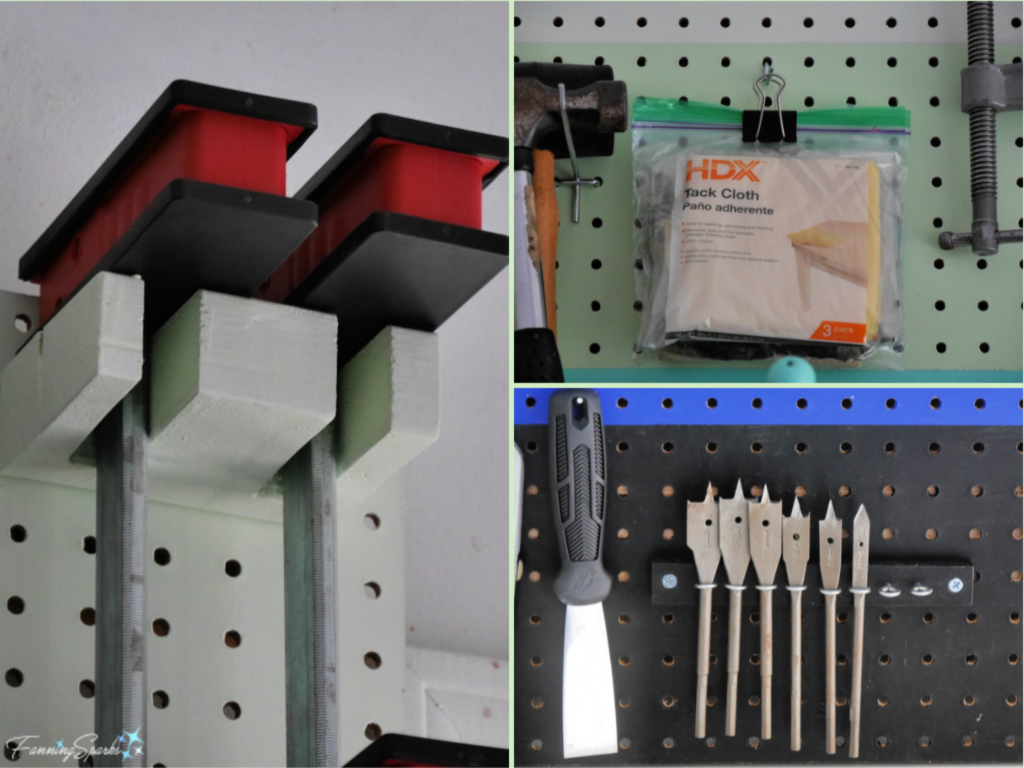
 Tip 3. Magnetic tool bars are great. We already had 2 magnetic tool storage bars so I moved then to the center of the pegboard and secured them to a supporting brace. I really like these bars because the magnets are strong and they hold a lot of items in a small space. The magnetic tool bars, with their bright yellow strips, are shown below.
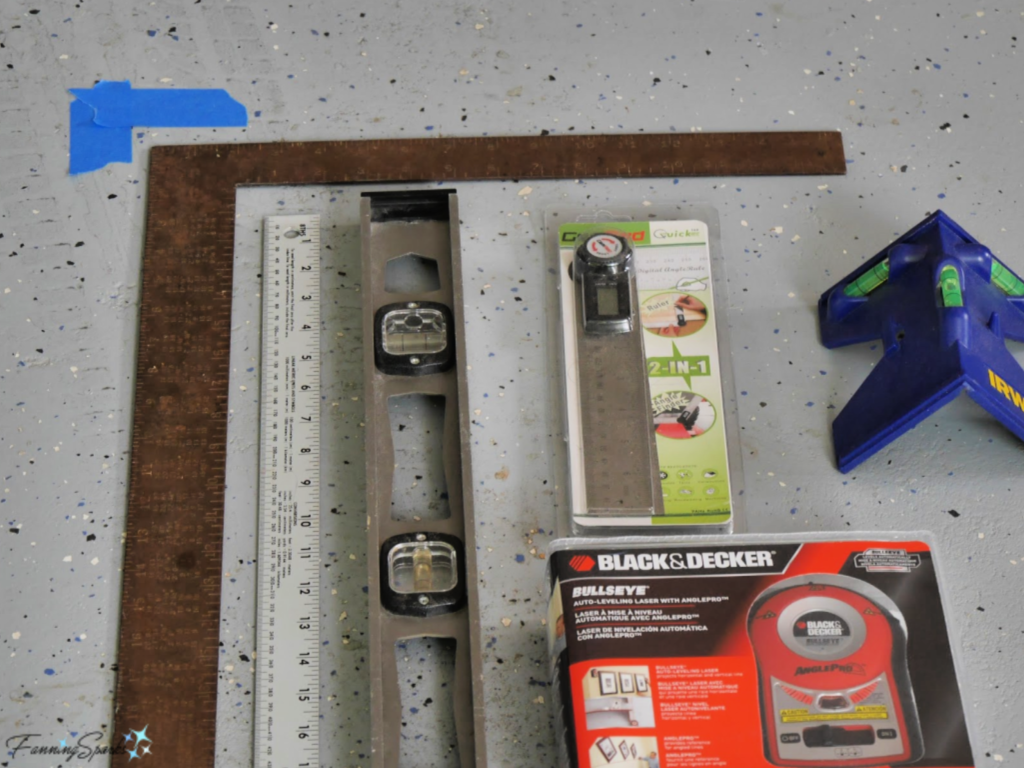
 Tip 4. Select good pegboard hooks. There are lots of different formats and sizes of pegboard hooks and hangers on the market. I simply repurposed hooks we already had. Some of the hooks were duds and fell out every time I removed the item I’d hung. Other hooks, like the one highlighted below, stayed in place and worked much better.
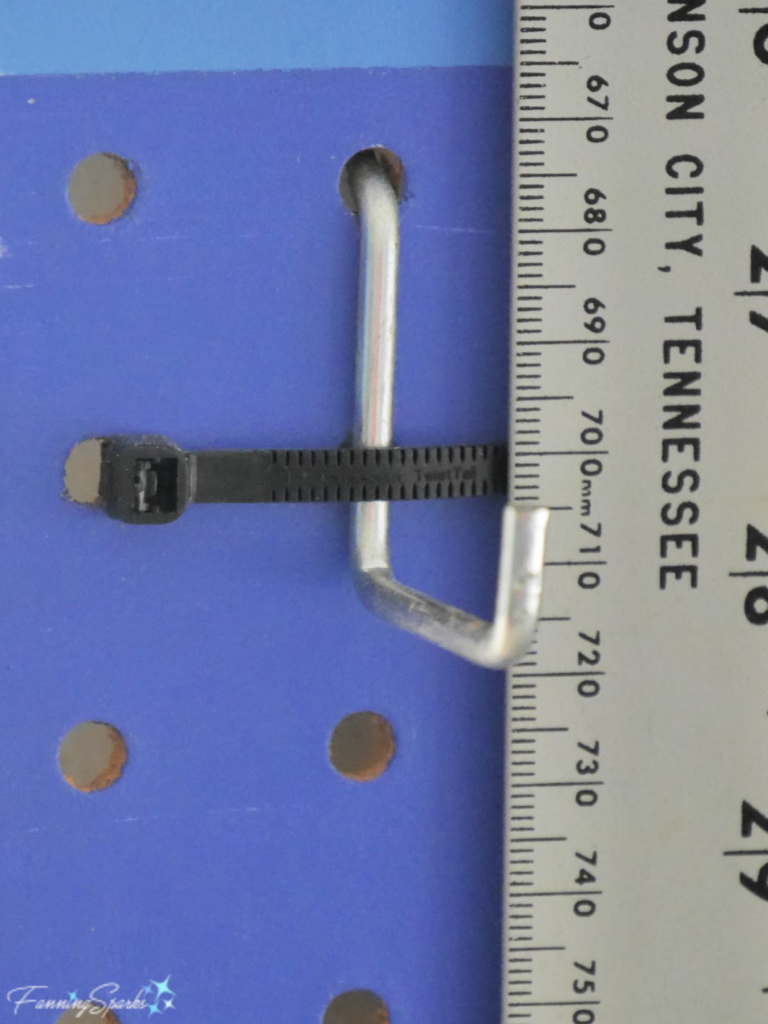
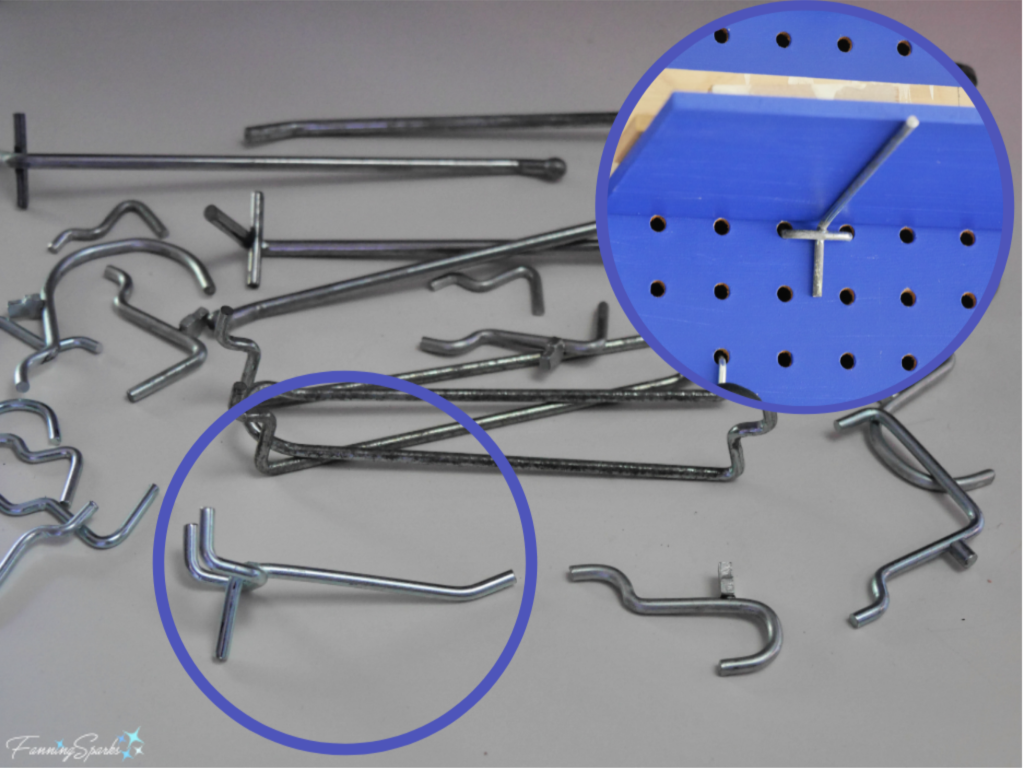 Tip 5. Lock in pegboard hooks. As mentioned, some pegboard hooks won’t stay in place. A simple fix is to secure them with a cable tie. This isn’t a perfect solution, though, because it only works along the edges where you can get your hand behind the pegboard. A quick online check suggests that “peg locks” are the latest solution to this problem. If you’re buying new hooks, consider including peg locks.
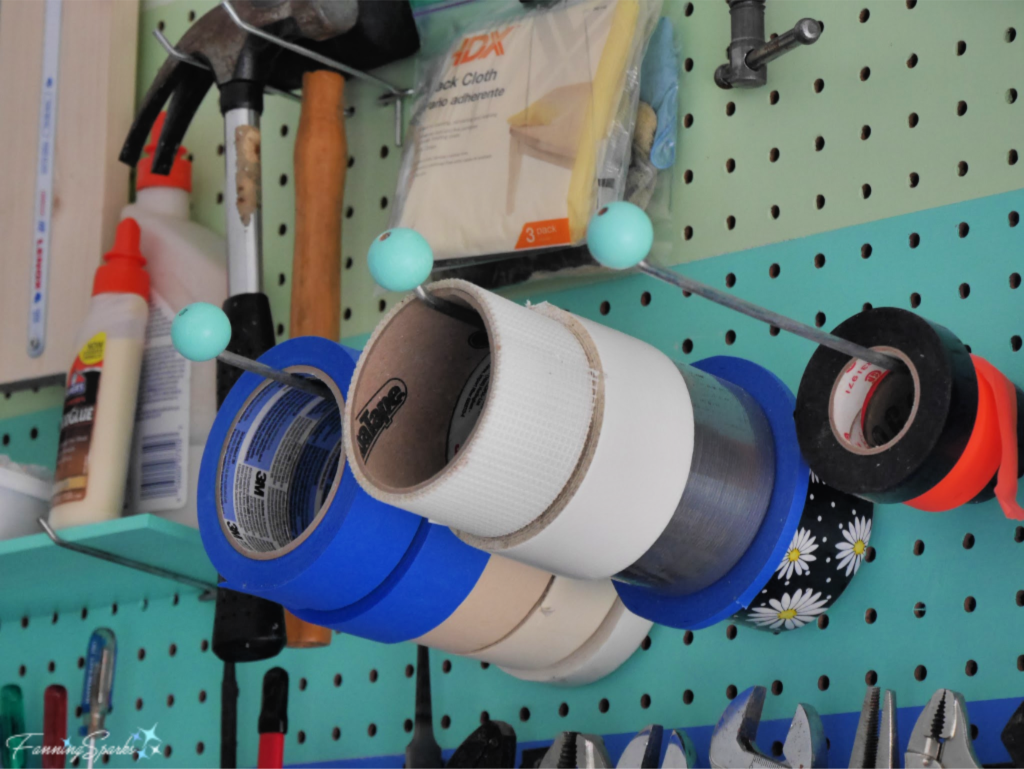
Tip 6. Cover protruding pegboard hooks. Slip small wooden beads onto the end of any protruding pegboard hangers to prevent poking or scratching when you’re reaching around them. I used 25mm (1”) wood beads with 5mm holes and painted them to match the pegboard stripes.
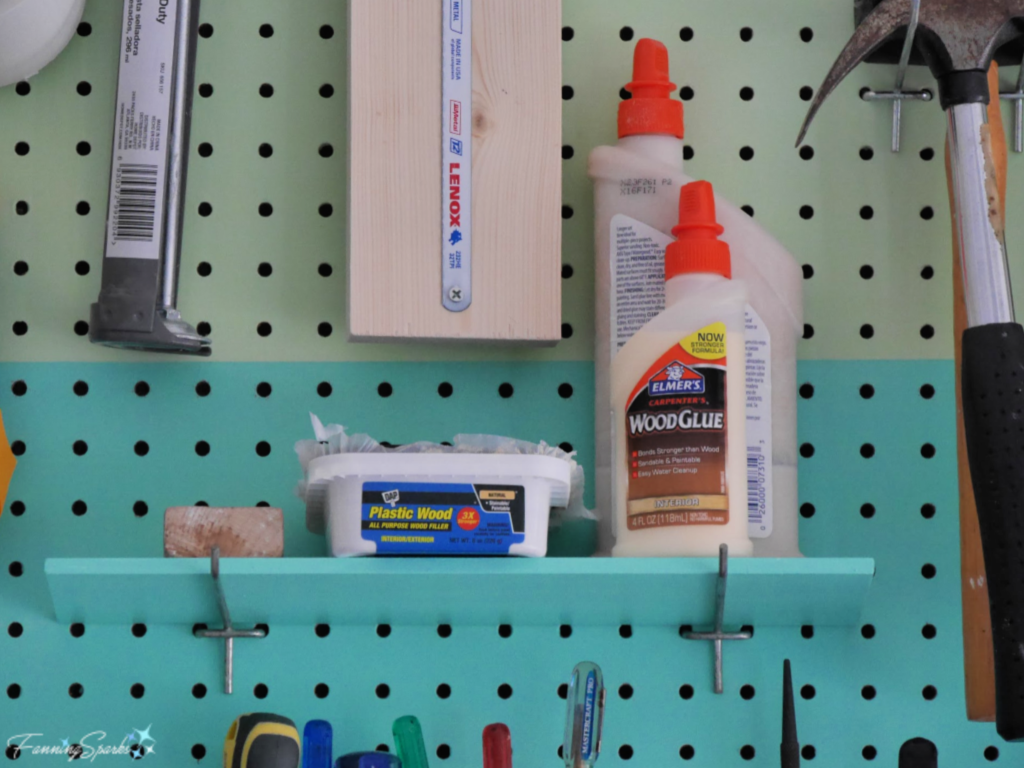
 Tip 7. Make small shelves. Some tools and supplies don’t lend themselves to being hung. My sanding block, wood filler and wood glue are examples. It’s easy to create a small shelf using 2 matching pegboard hooks and a small rectangular piece of wood or MDF. I simply laid my shelves across the hooks but you could easily secure them with cable staples.
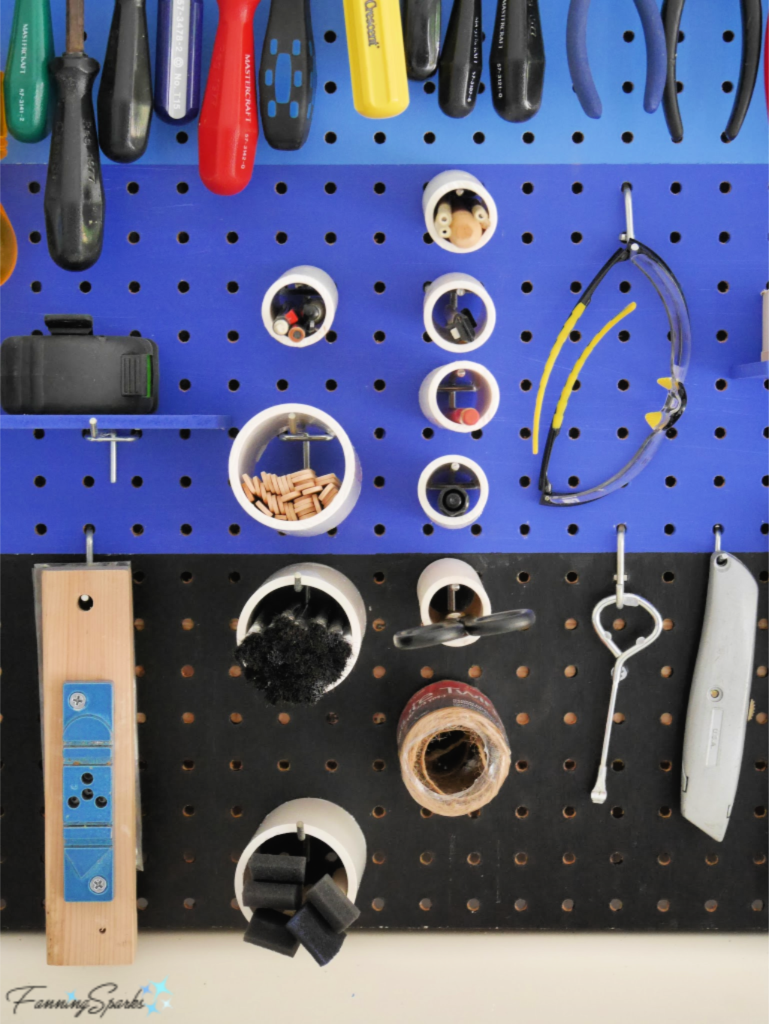
 Tip 8. Hang sections of PVC pipe. Simply cut pieces of PVC pipe and slip them over a pegboard hook. These tubes are perfect for long narrow items like pencils, scissors, craft sticks and small foam paint brushes.
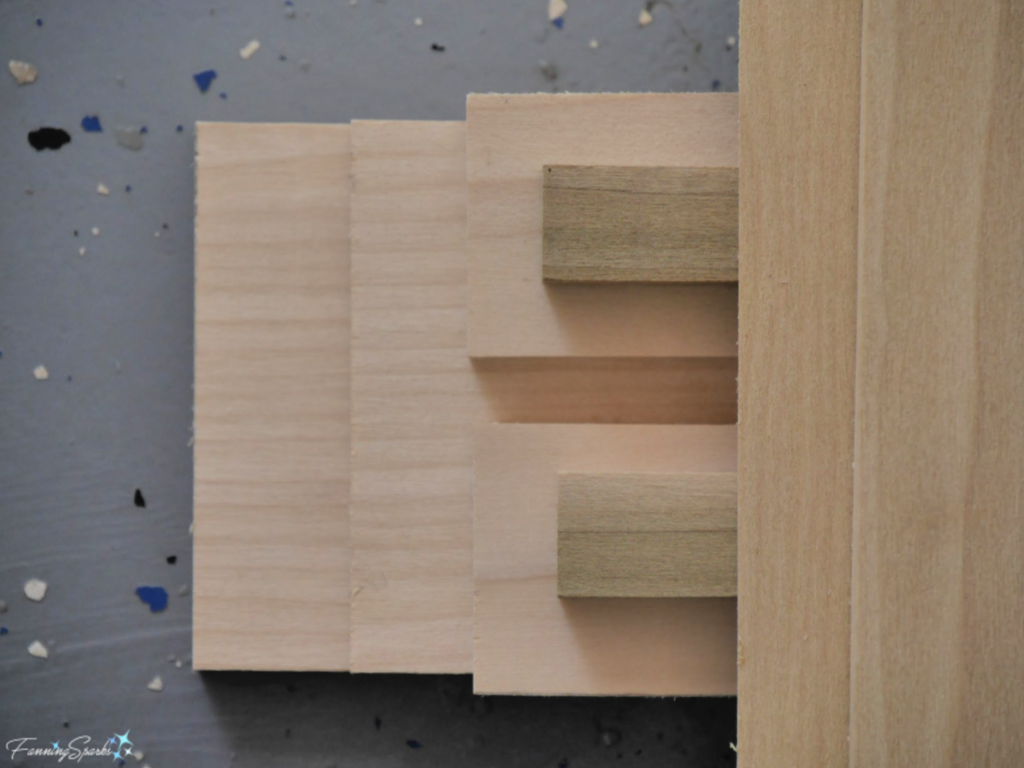
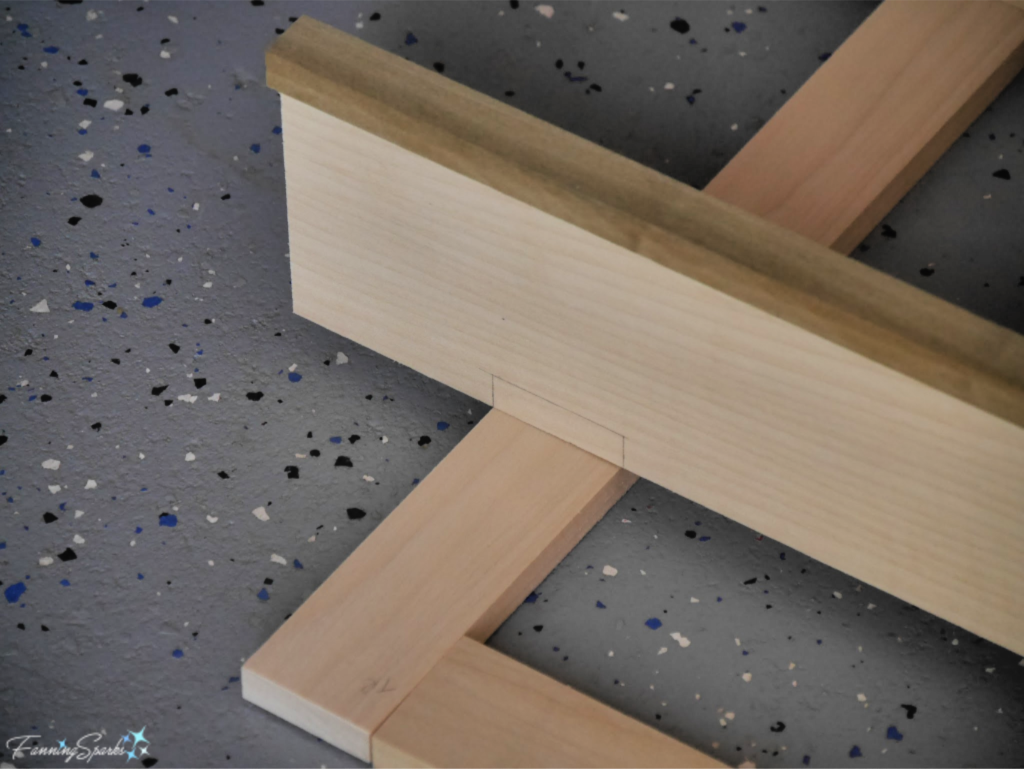
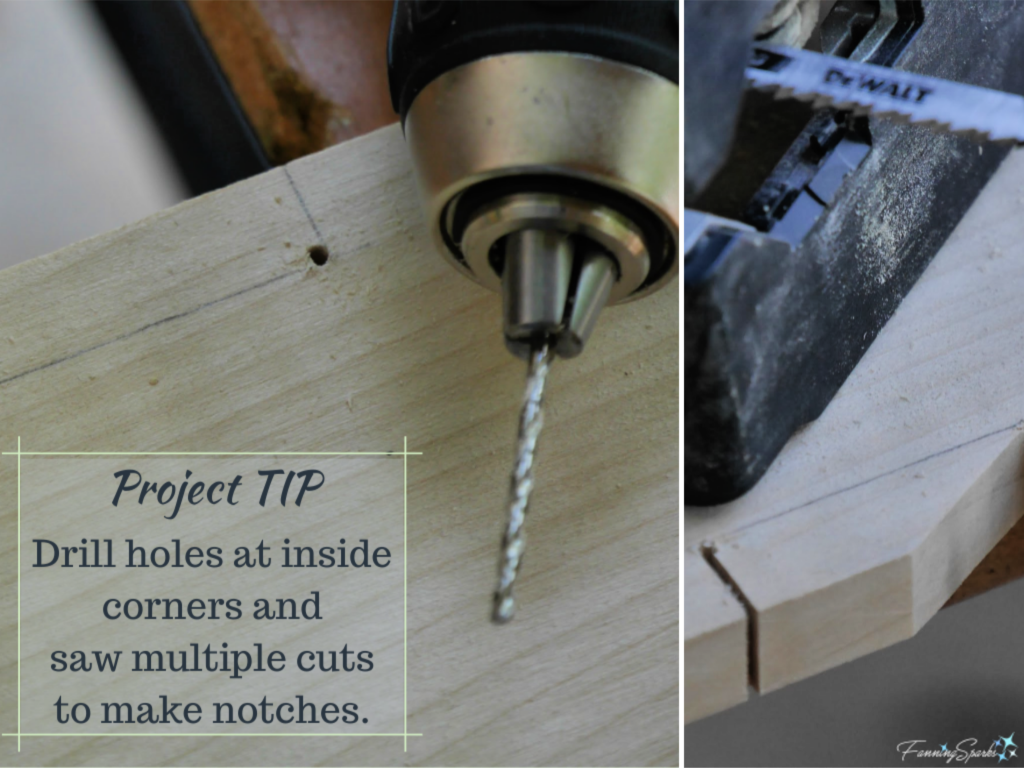
Tip 9. Make custom holders. Some items may need tailored holders. It could be as simple as a plastic, zip lock bag on a binder clip for your tack clothes. Or it could take a little effort to make such as a notched, wooden block for parallel clamps. A third example is a wooden block with a series of screw eyes to hold spade drill bits.
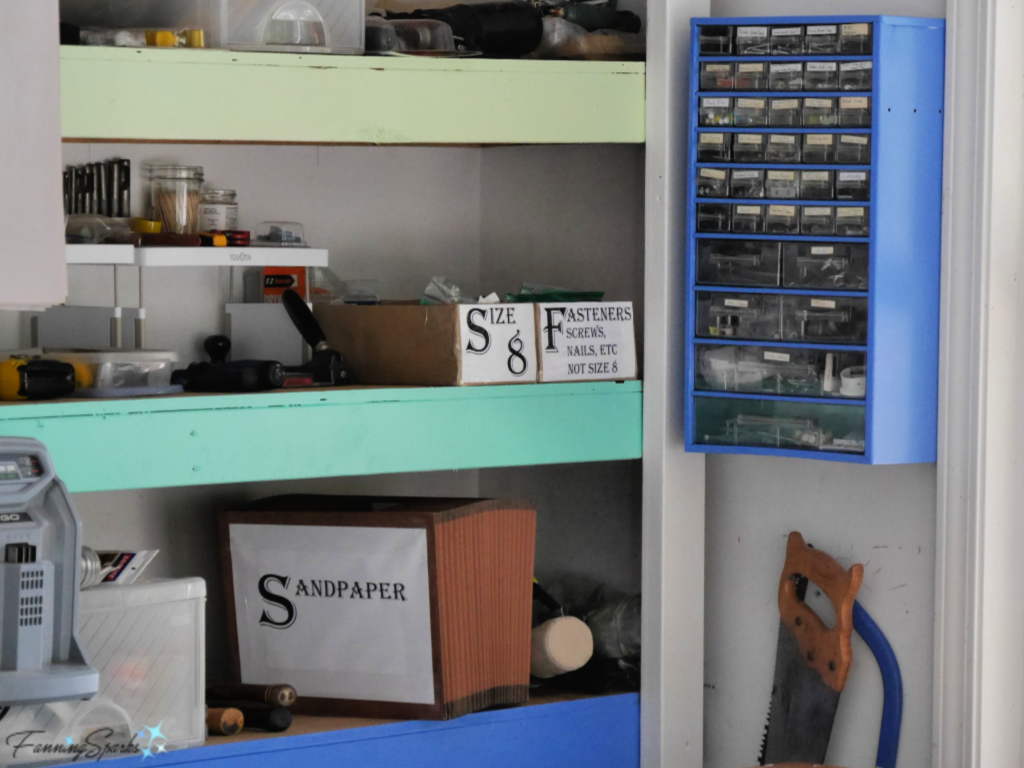
 Tip 10. Add labels. Take a few minutes to label items that aren’t obvious. For instance, I like to store sandpaper in an accordion file sorted by grit. Labels make that clear. Another tip that might be helpful relates to fasteners. Whenever possible, I use size 8 fasteners. This has allowed me to build up a good inventory of size 8 screws, for wood and metal, in various lengths. Labels remind me of what goes where.
 Bonus Tip. Paint with bright, cheerful colors. We re-purposed the pegboard from another location. As I was hanging it, I realized it was rather scuffed up and could use a fresh coat of white paint. But, hey, if I’m going to paint it anyway why stick with boring white? That’s when the 6-colored stripes emerged and things got a whole lot more interesting. Very little paint was needed—I just used leftover sample paint which I already had on hand. Although I didn’t set out to paint the pegboard, the faces of the built-in shelves and even my cork bulletin boards, I’m really glad I did.
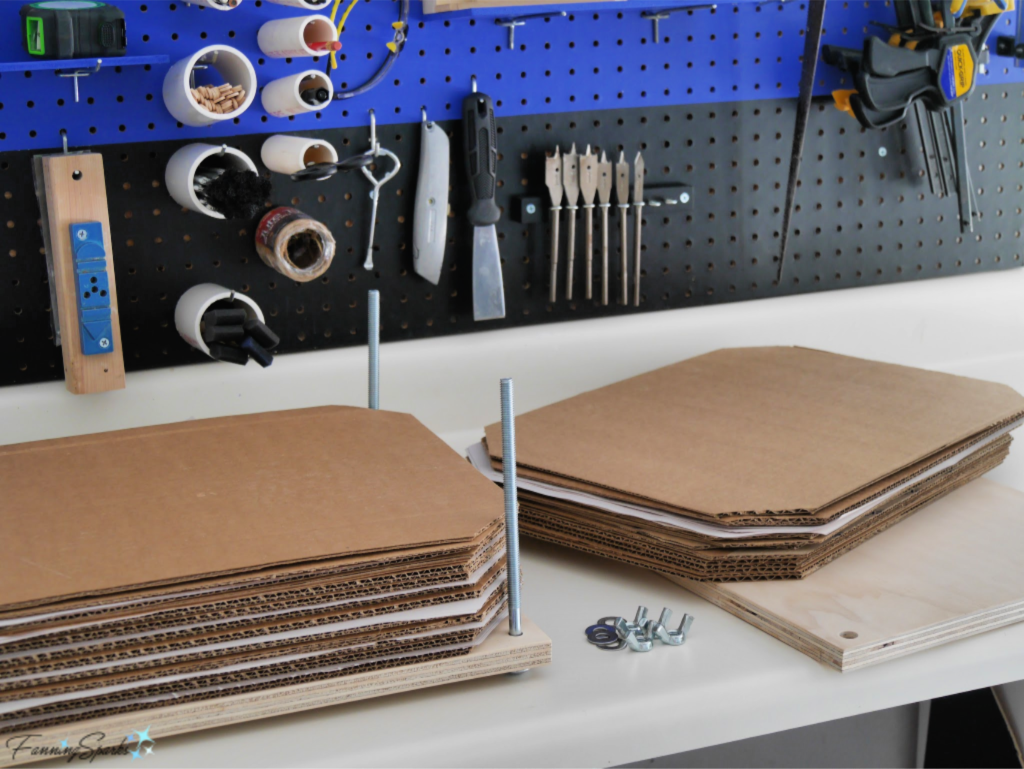
 It’s back to project work in our new gussied up workshop! Here’s a sneak preview of one that’s under way.
More Info
For more organizing and storage ideas, check out The Ultimate Maker’s Cabinet for craft supplies and projects.
You might also find the post Glide It On and 14 More Painting Tips helpful.
Today’s Takeaways
1. Spontaneous projects can be surprisingly effective.
2. Simple changes, like a well-organized pegboard, can have a big impact.
3. If your workshop or workspace needs a little attention, consider stopping all projects to just get it done!


 And how could I ever forget the Wisteria lamp? This masterpiece of leaded-glass art by Clara Driscoll is on display at the Morse Museum in Winter Park, Florida. More Art Nouveau stained glass gorgeousness can be seen in my post

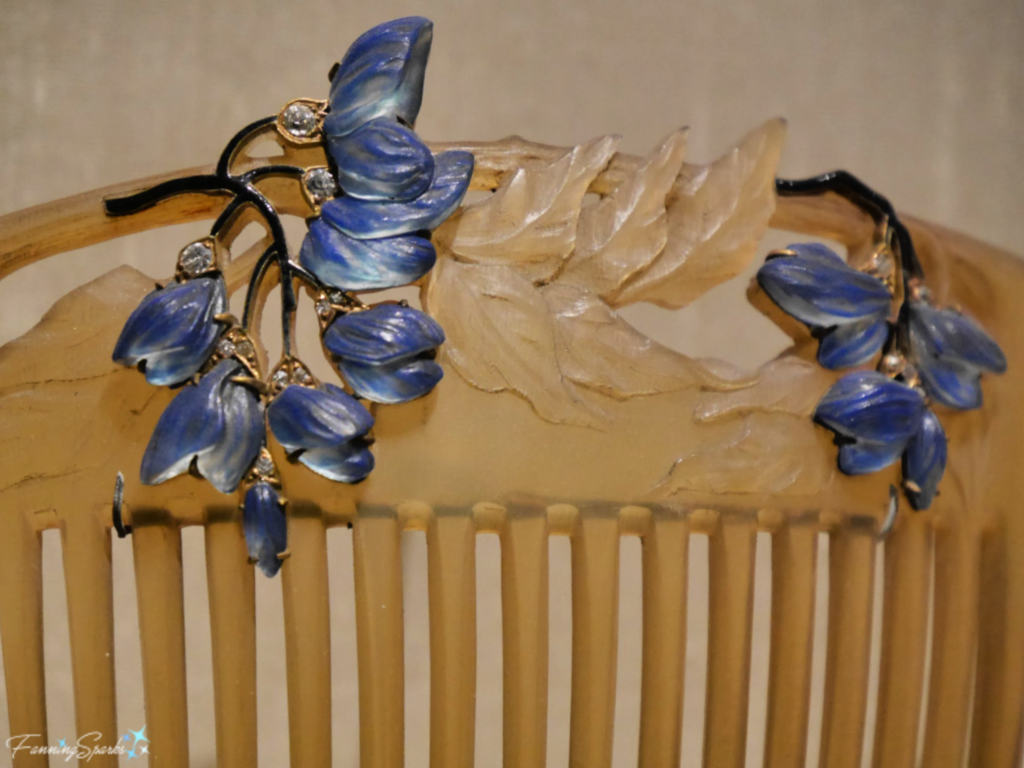
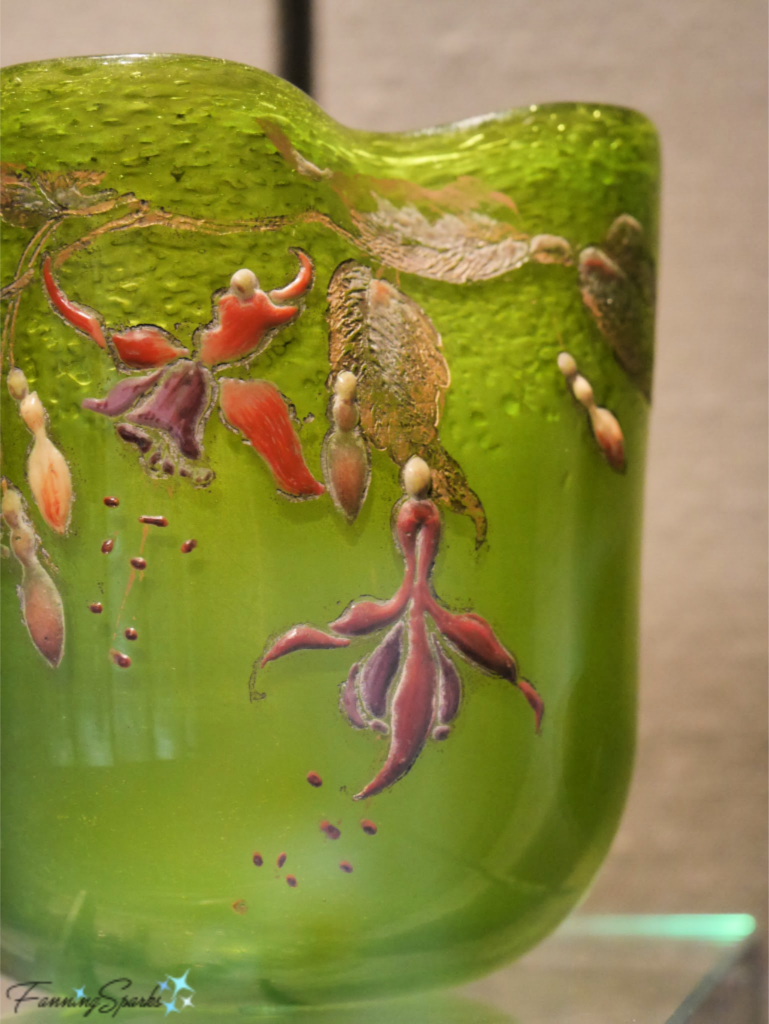
 Throughout the book, Verneuil suggests a range of interpretations for the Fuchsia including: 1. Napkin Ring 2. Decorative Vase 3. Stencil Border.
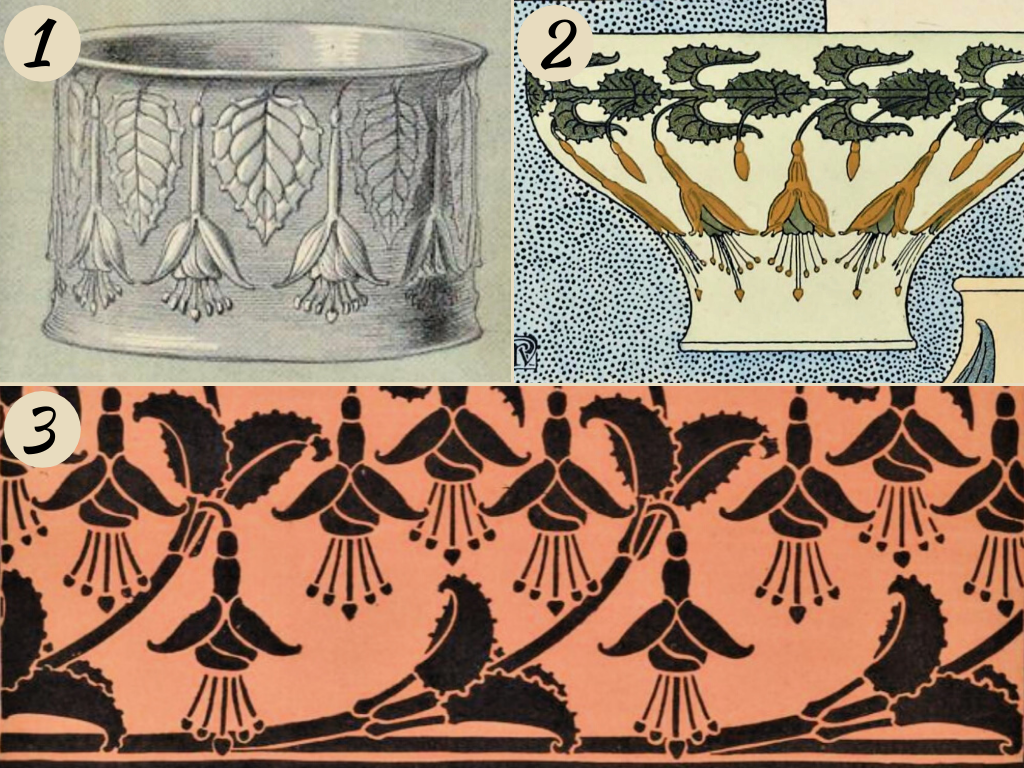
 Verneuil suggests several interpretations of the Water Lily including: 1 Tiles 2 – Marquetry and 3 – Wallpaper Border.
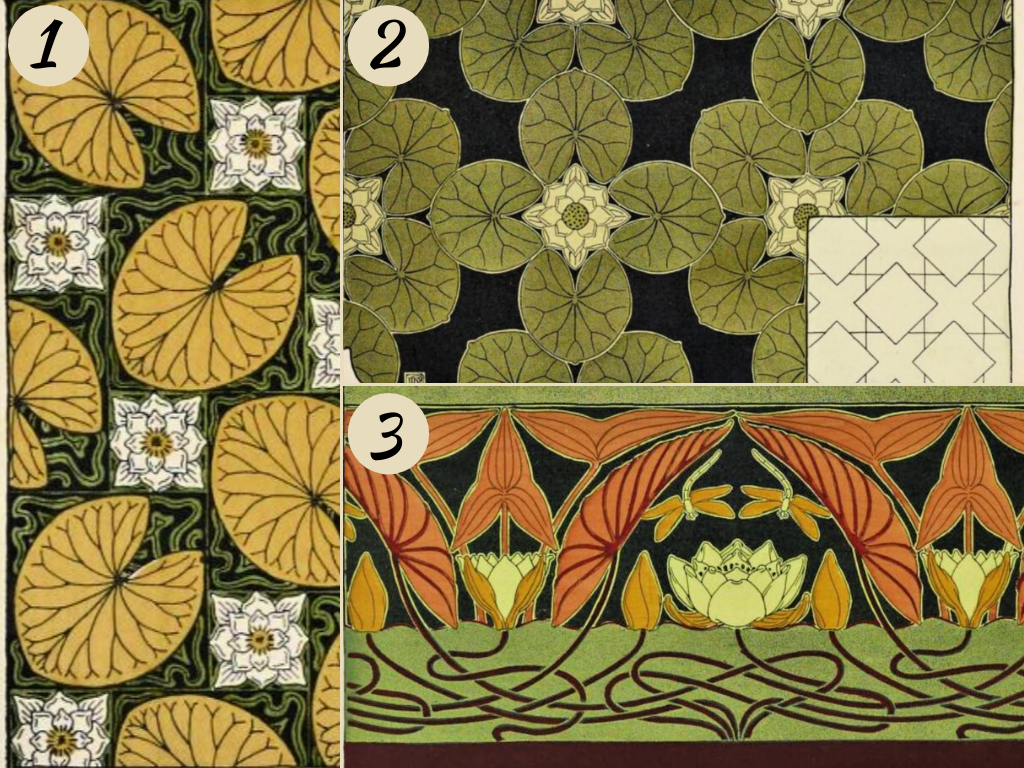

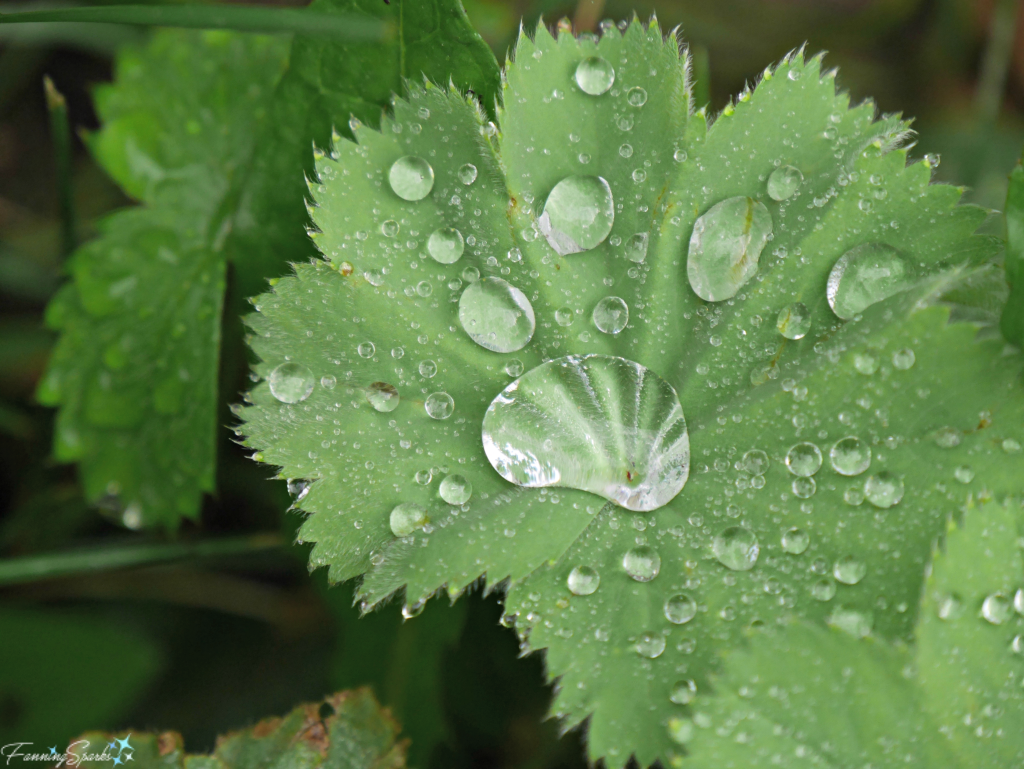
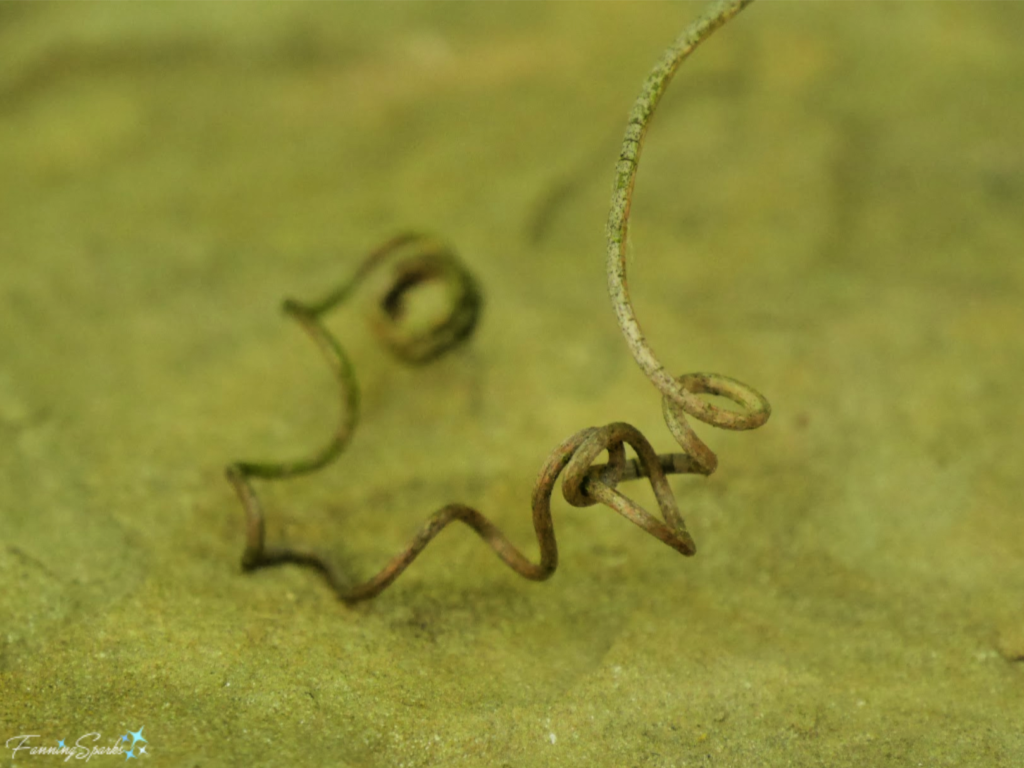
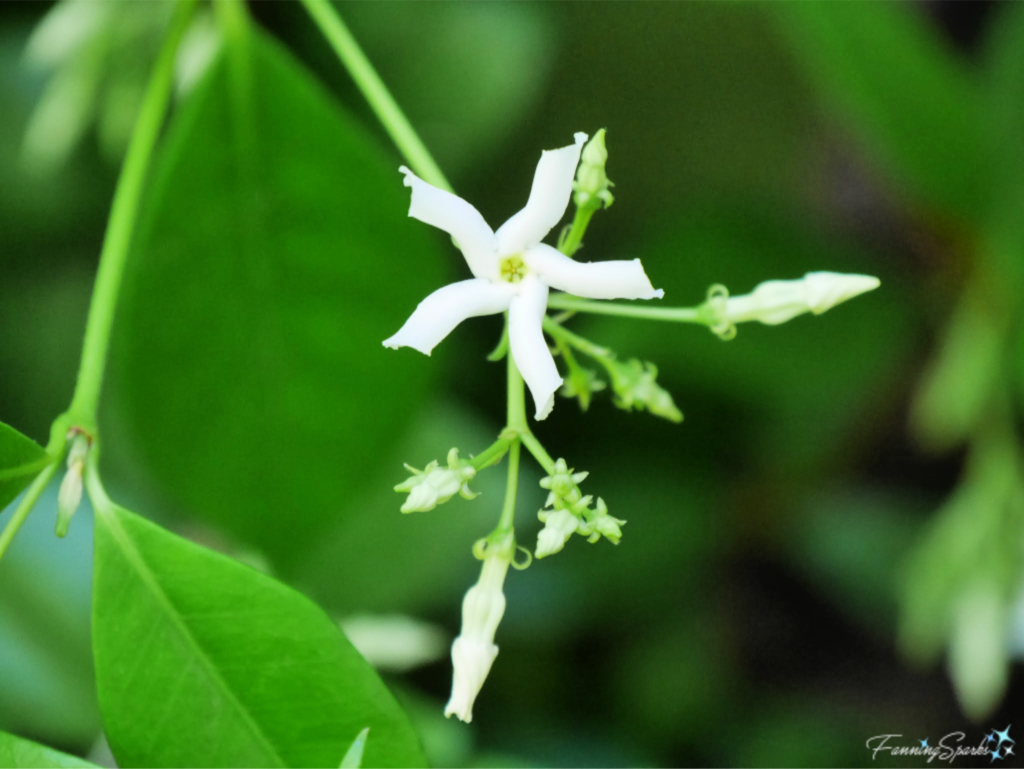
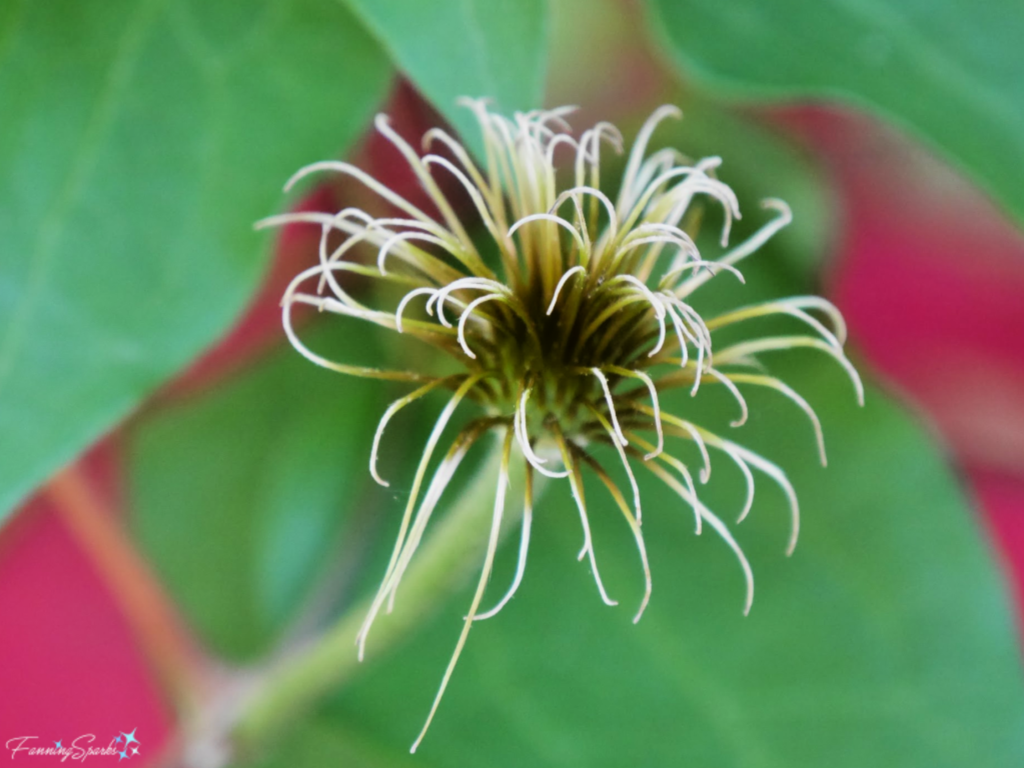
 Organic forms are rounded, irregular, free-flowing and curvy. They are most evident in nature. They often make patterns but rarely with mathematical precision. When I set out to photograph examples of natural forms I quickly became overwhelmed. There is an endless variety and every subject has multiple forms. I decided to narrow my focus to the plant world and pick out familiar forms.

 A similar free-flowing form is illustrated by the fractal branching of this gorgeous Southern Live Oak (Quercus virginiana).
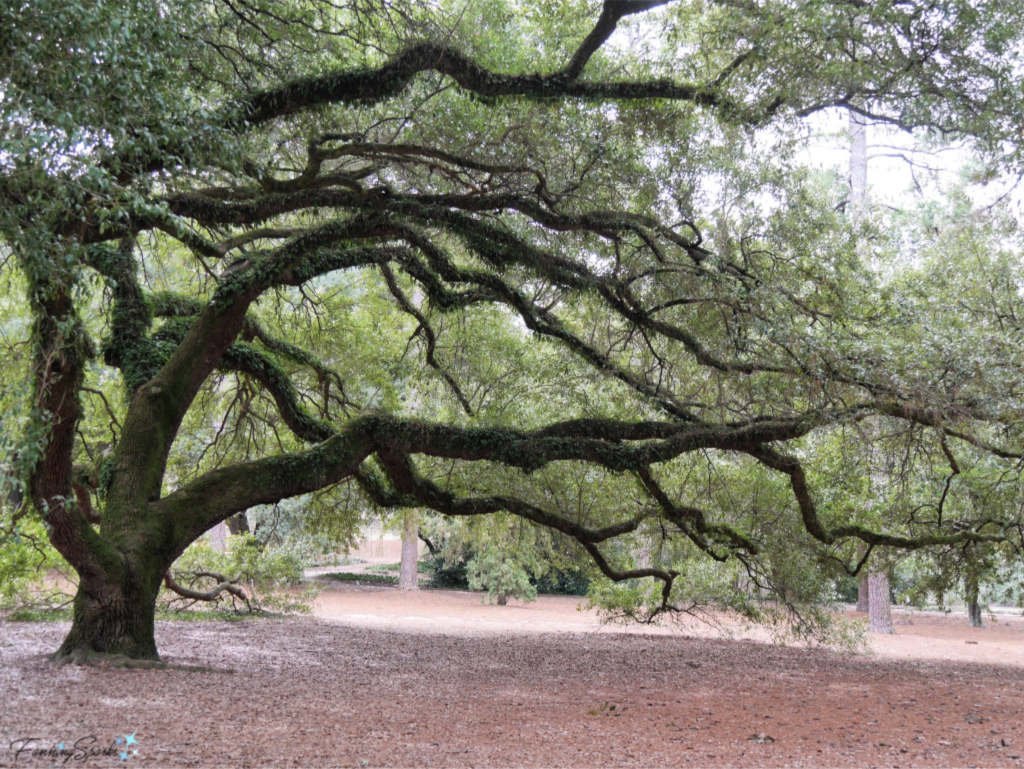
 In the spring, the Japanese Maple tree bears these uniquely-formed winged seeds called samaras or keys.
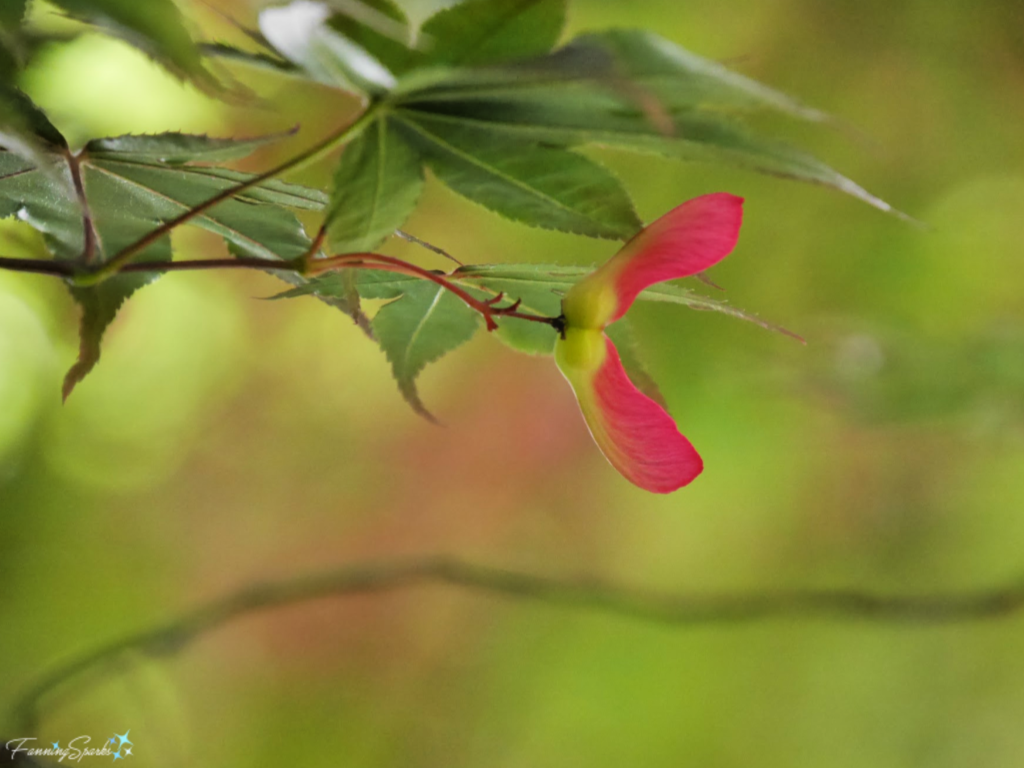


 Studying nature’s forms is not a new idea. The work of German biologist Ernst Haeckel is particularly noteworthy. Back in 1904, he published Kunstformen der Natur (Art Forms in Nature). The book, a collection of 100 prints of various organisms, is “considered the most beautiful visualization of nature ever made by a scientist”. While Haeckel’s purpose was scientific research and documentation, his work has been tremendously influential on many of the 20th Century artistic movements especially the Art Nouveau movement. Here’s an example from Haeckel’s Art Forms of Nature illustrating Siphonophorae and Discomedusae which are classes of marine organisms commonly known as jellyfish.
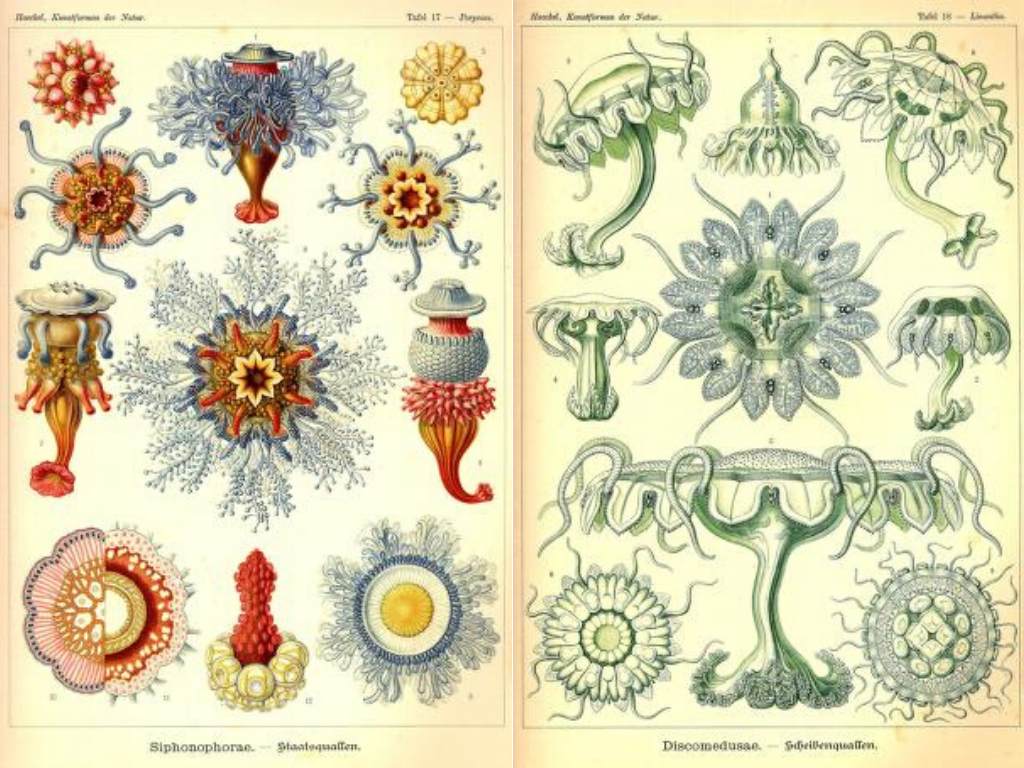


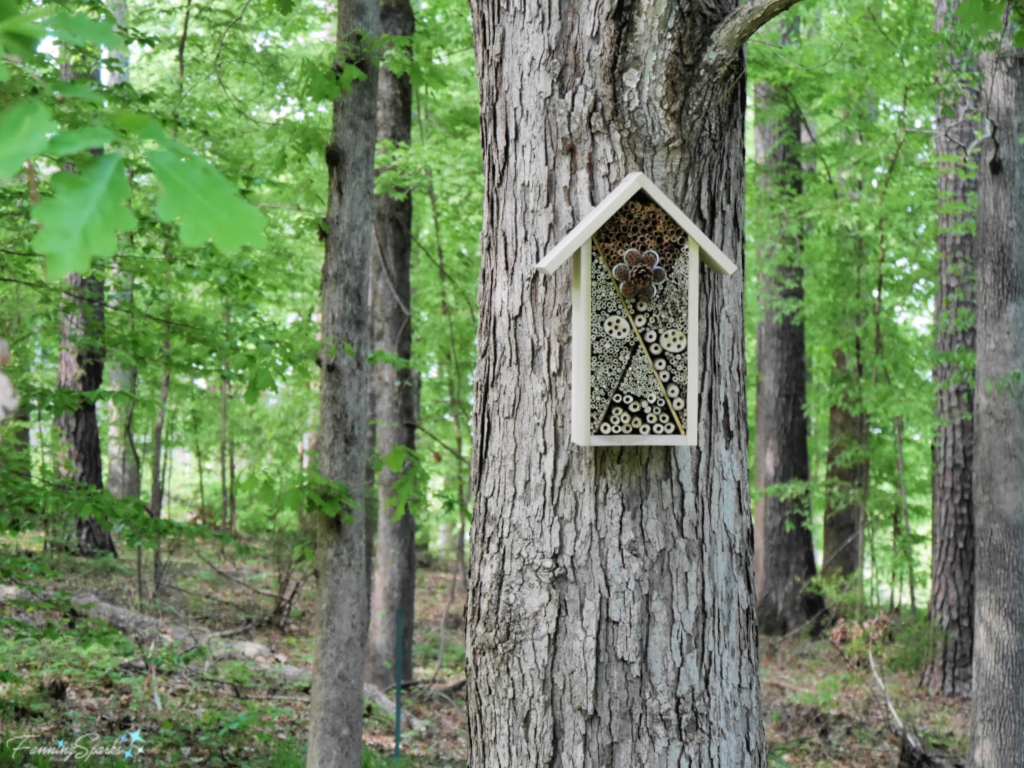
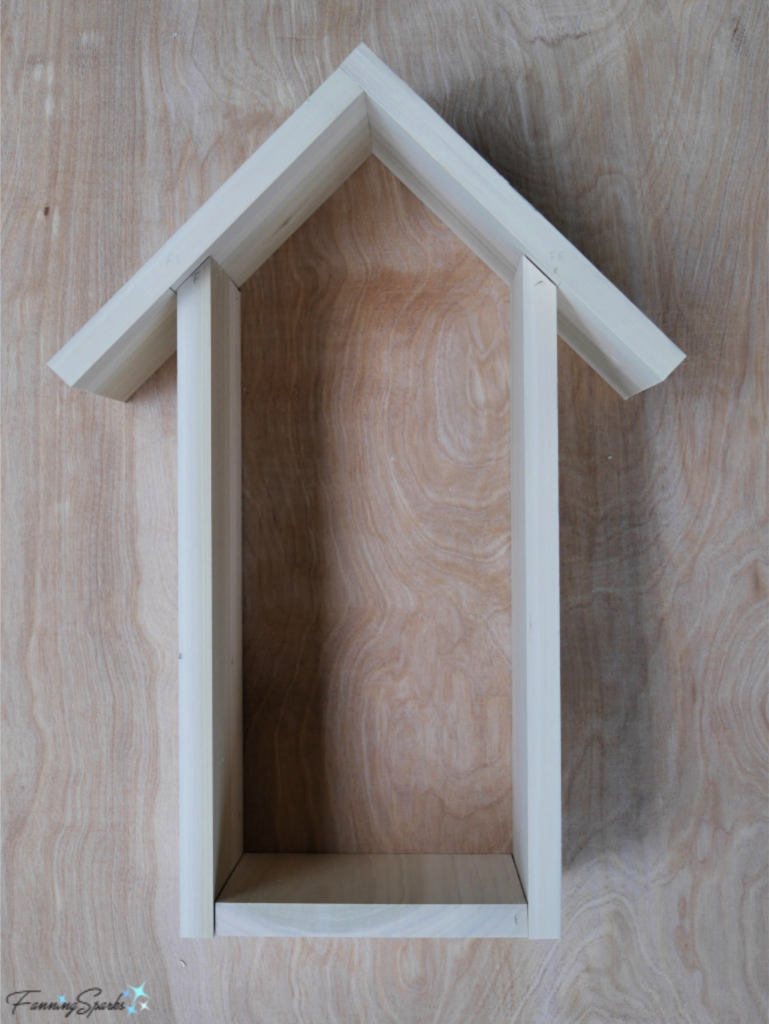
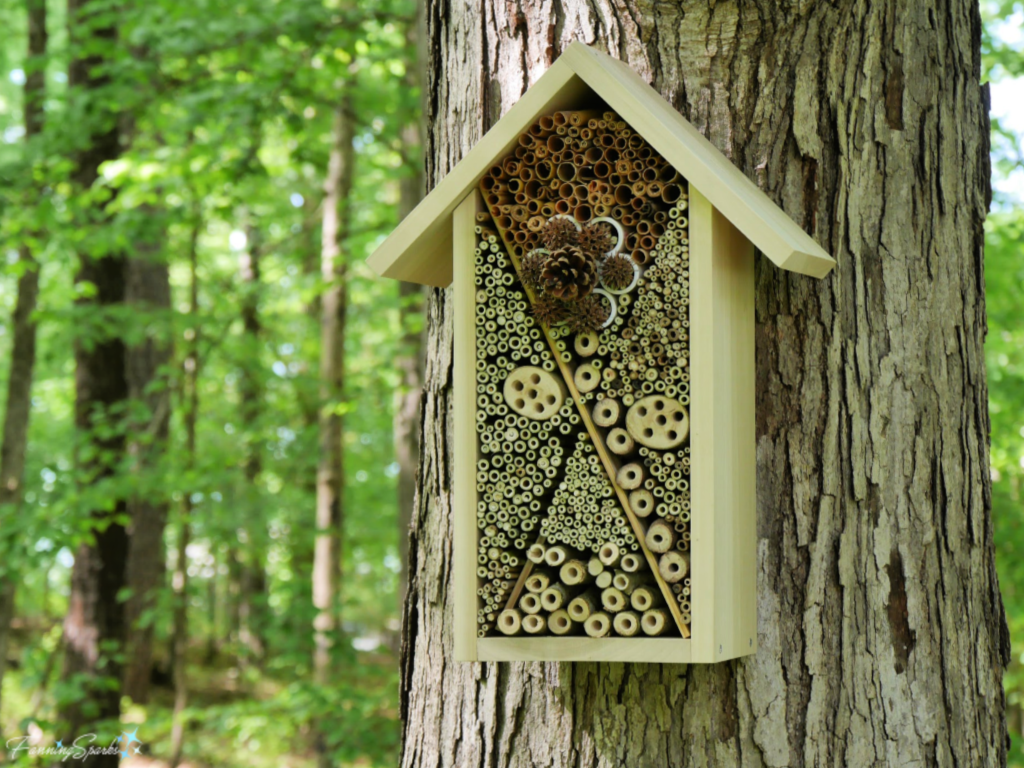 This post provides easy, step-by-step instructions to make your own AirBee-n-Bee House. There are two components to this project: a wood frame in the shape of a house and nesting materials that fill the frame. We’ll start by building the wooden House Frame.
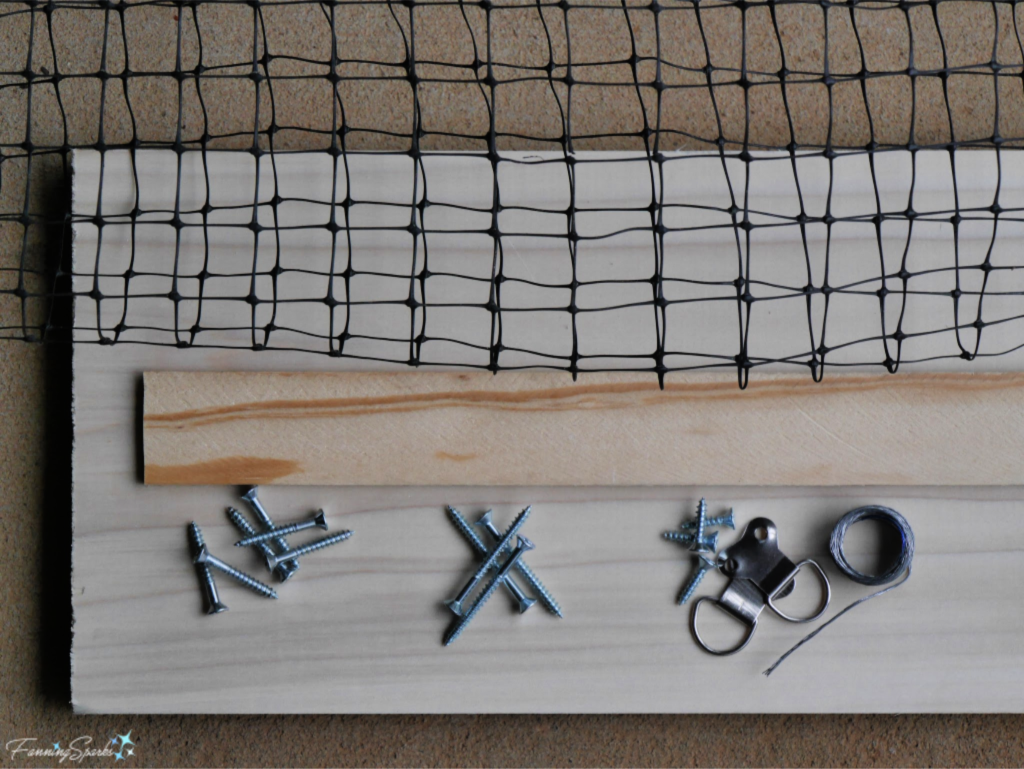 Tools Needed
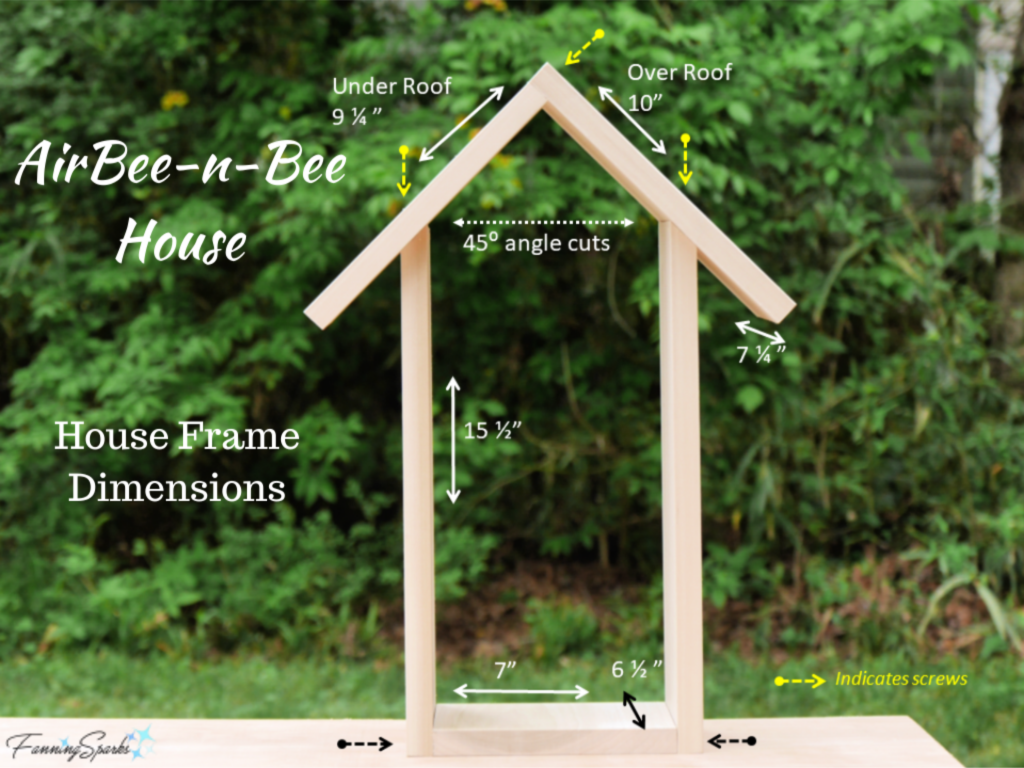
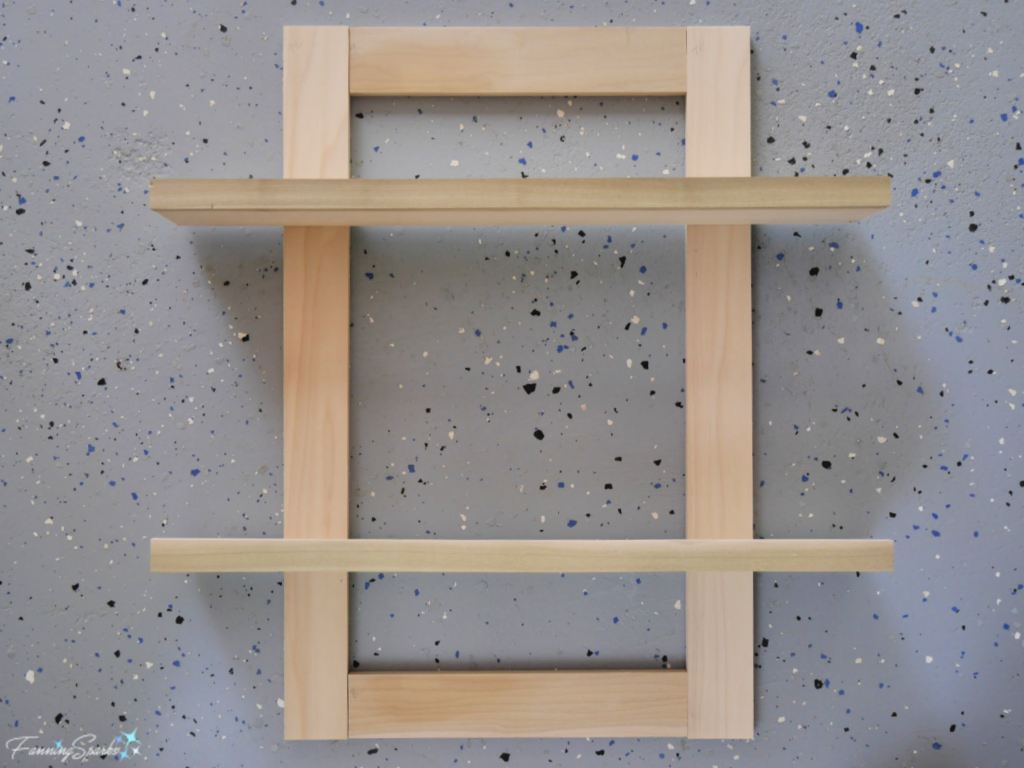
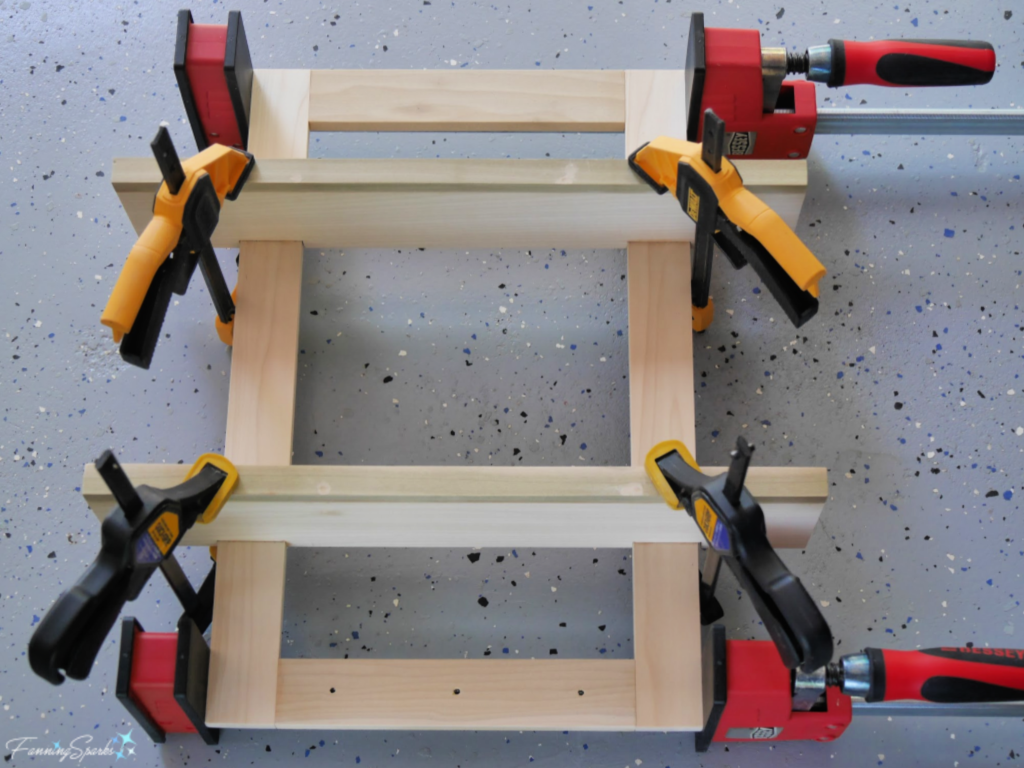
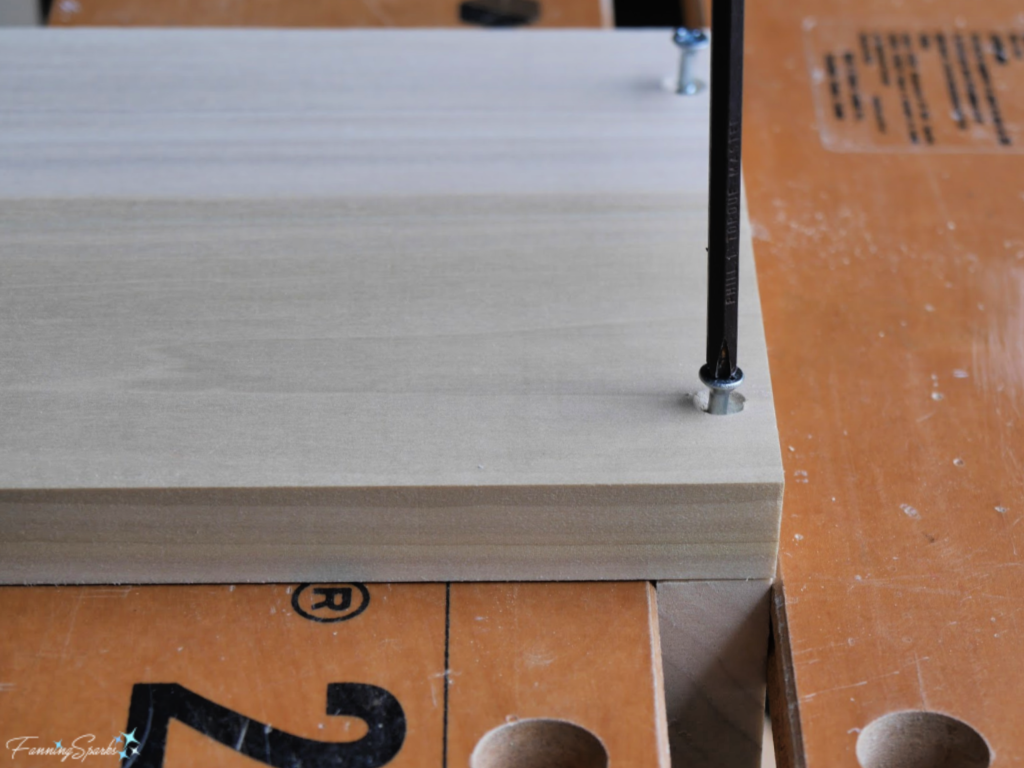 Step 4 Attach Other Side to Bottom Repeat Step 3 to attach other Side to Bottom. This will result in a U-shaped piece.
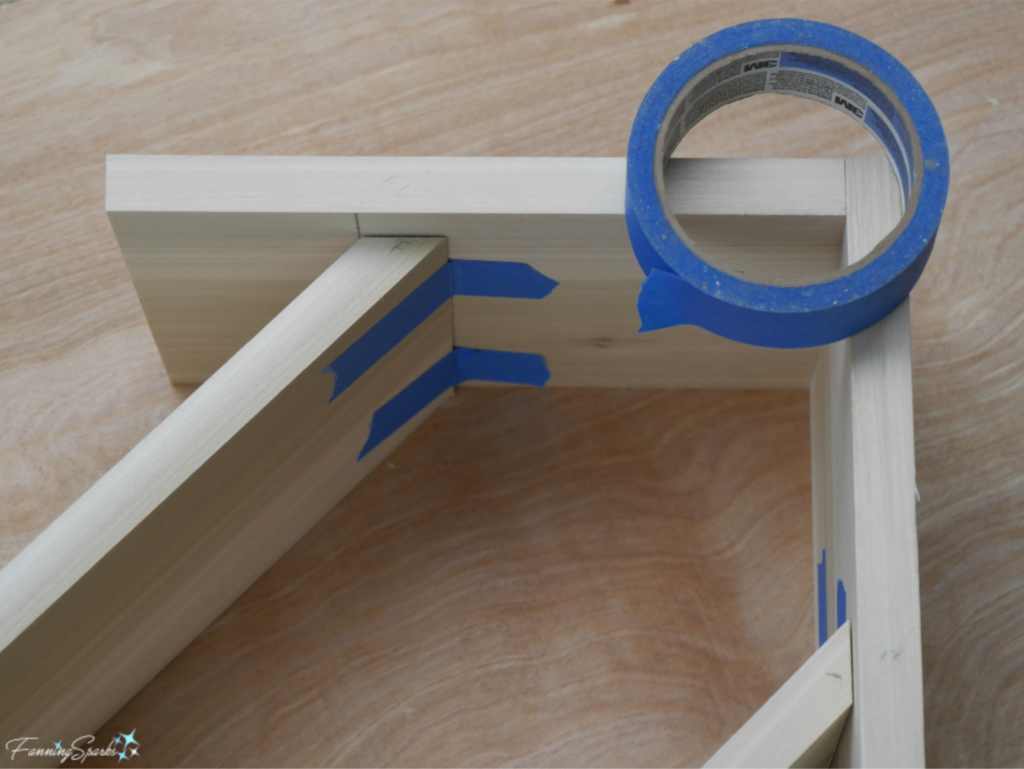 Step 7 Insert Cross Pieces Use four pieces of wood slat to create 2 X’s inside the House Frame. Cut a piece of wood slat to 16 ¼”. Slide into frame to ensure a snug fit. Adjust if necessary. Repeat with 3 more pieces. These pieces fit snugly but are not attached. They will serve to hold the nesting materials in place.
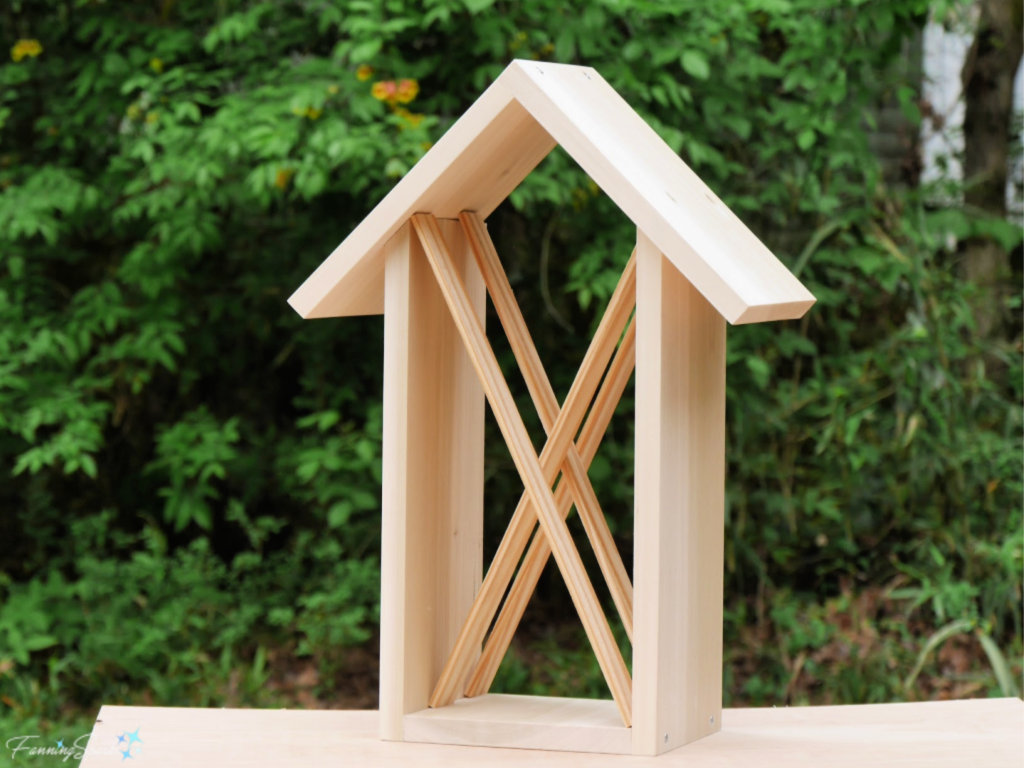
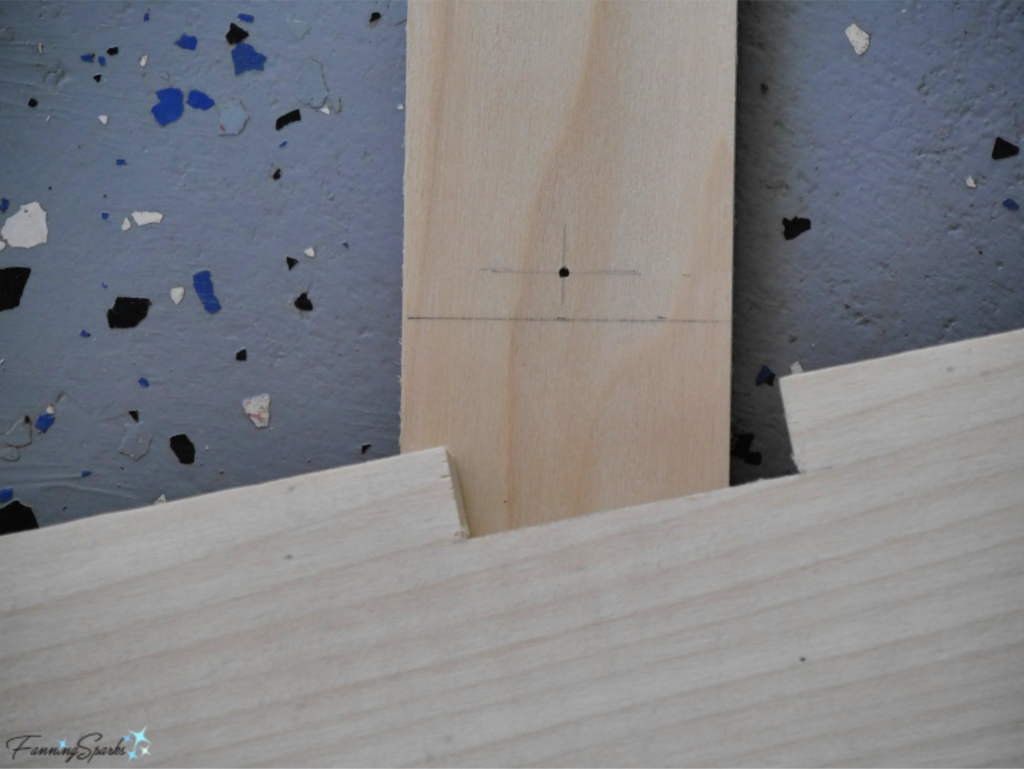
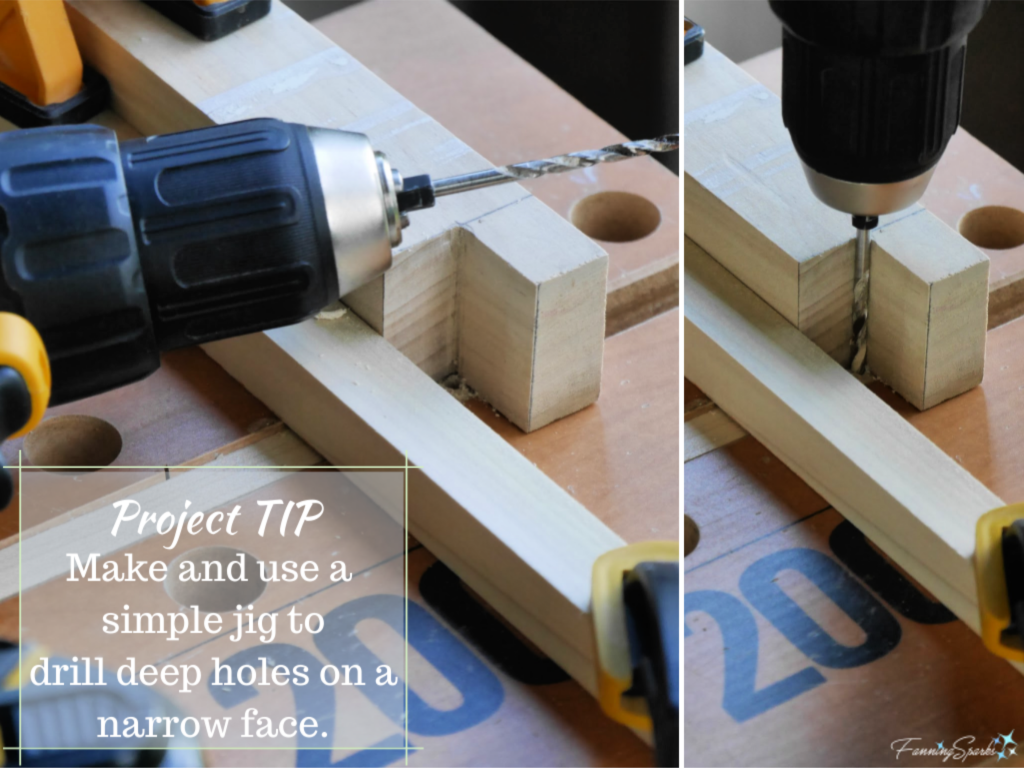
 Drilled Tree Branches: Gather small fallen or pruned tree branches and cut to 6 ½” lengths. Drill 5/16” holes into the ends.
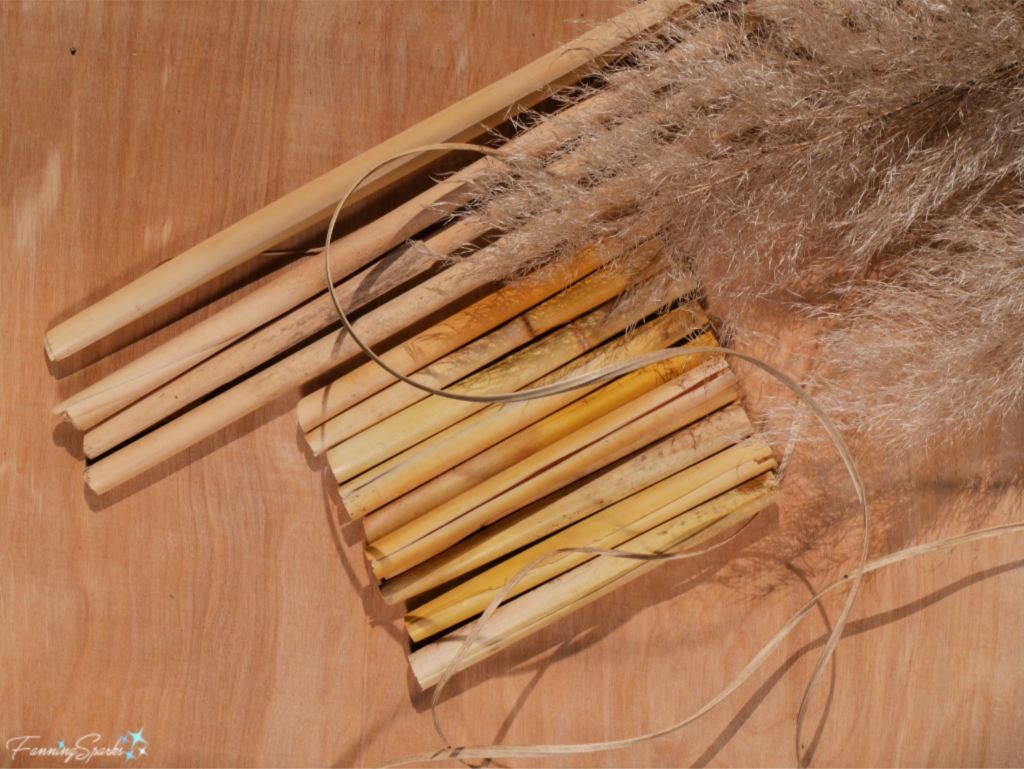
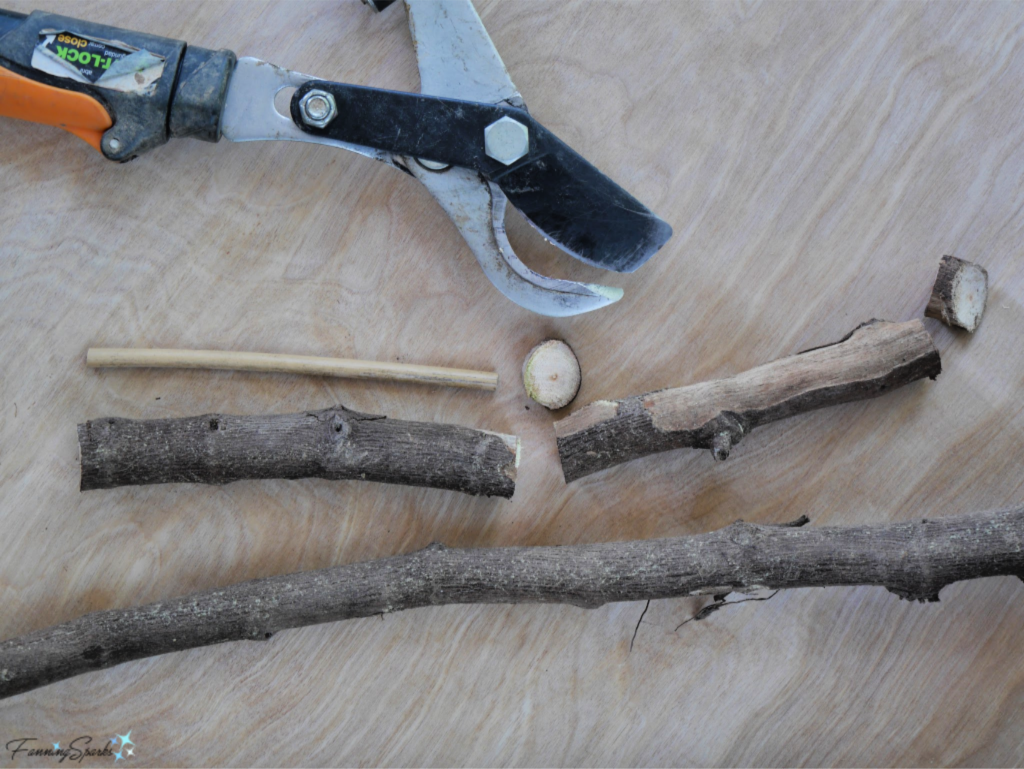 Filler: I cut bamboo from our yard and trimmed it into 6 ½” lengths to use as filler. A few of the tubes might be big enough for the bees to nest inside but most will serve as filler and create natural cavities and hollows.
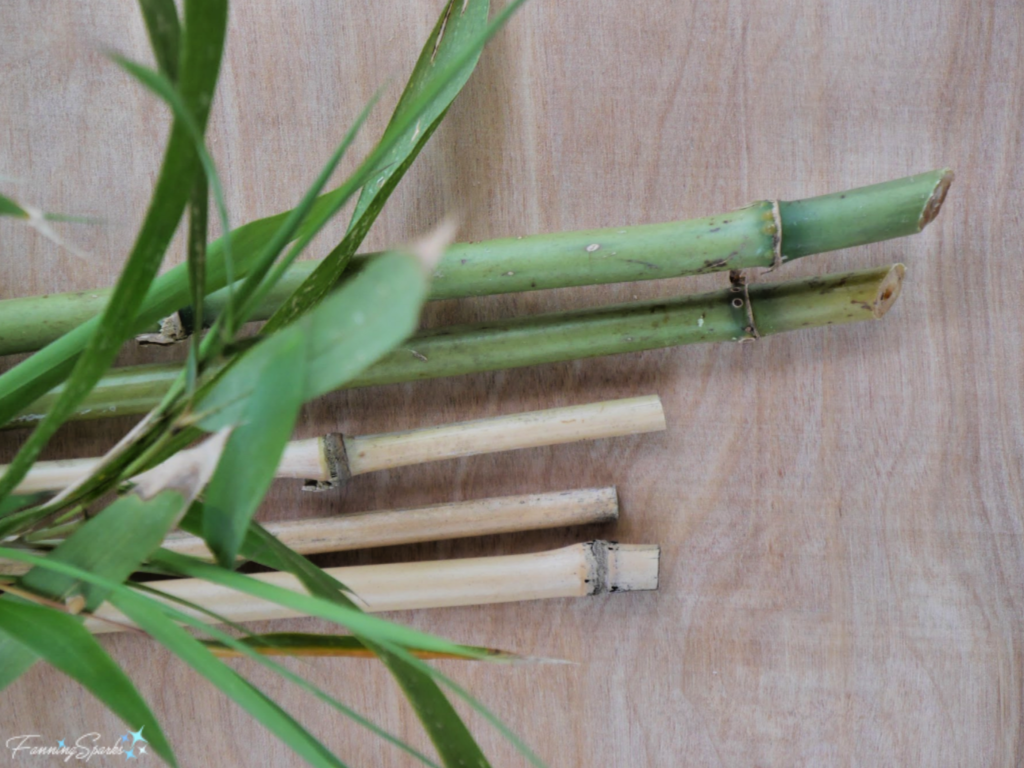 Decorative Elements (optional): We have a substantial stack of scrap PVC pipe, so I used some to create a decorative flower shape. It is merely cosmetic and definitely optional. I cut 7 pieces of 1” PVC pipe to 6 ½” lengths and wrapped a strand of thin wire around the bundle to hold it together.
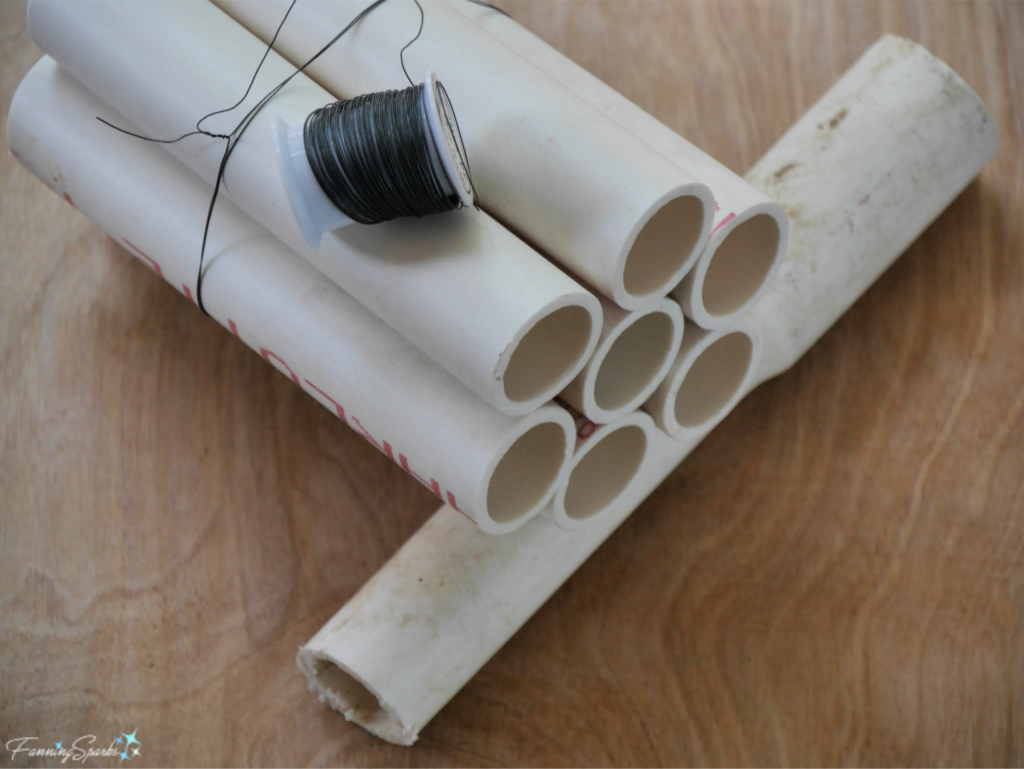 There are thousands of pesky sweetgum fruits (ie the spiny seed pods pictured below) and pine cones lying around our property so it’s nice to finally find a use for a few of them. I used them as decorative elements. It’s easier to position and secure the sweetgum fruit if it is attached to a stick. Drill a small hole into the end of a 6 ½” piece of bamboo. Then thread a piece of thin wire through the bamboo, attach it to the stem of a sweetgum fruit on one end and anchor it through the drilled holes on the other end. Pine cones can be wired in a similar way.
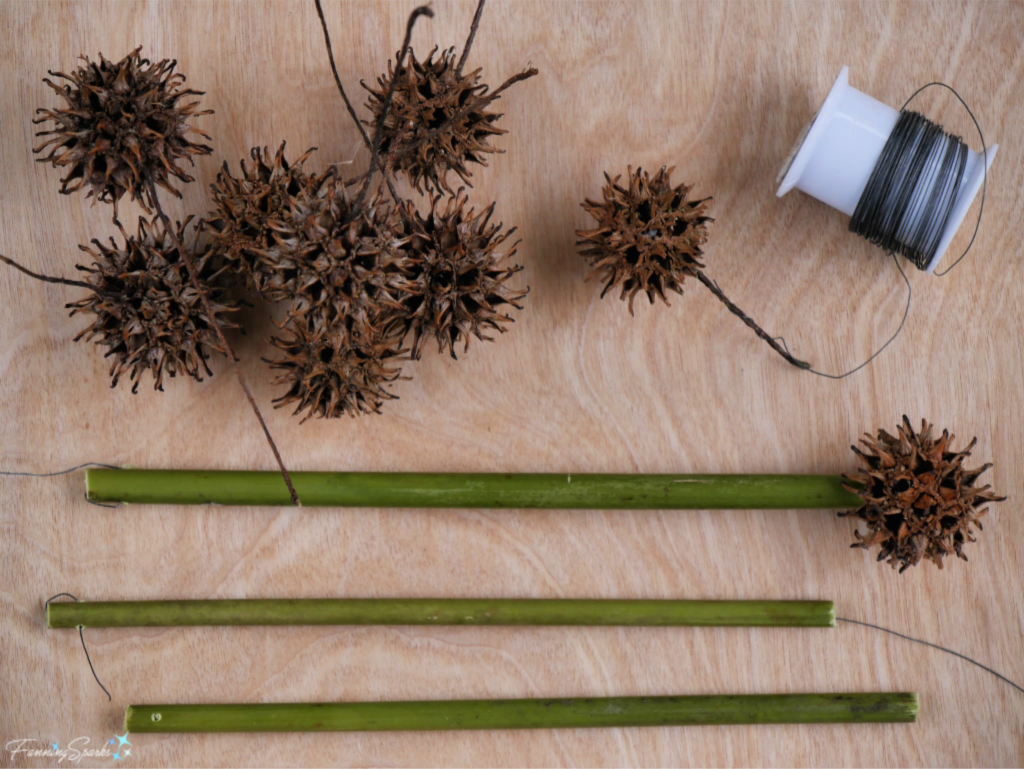 Step 9 Place Nesting Materials in House Frame Fill the House Frame with the nesting materials. Simply lay hollow reeds, bamboo stems and drilled tree branches around the Cross Pieces. Ensure the final placement is snug and tight so pieces will stay in place. As noted above, you can position the materials in any way you like to create patterns and designs.
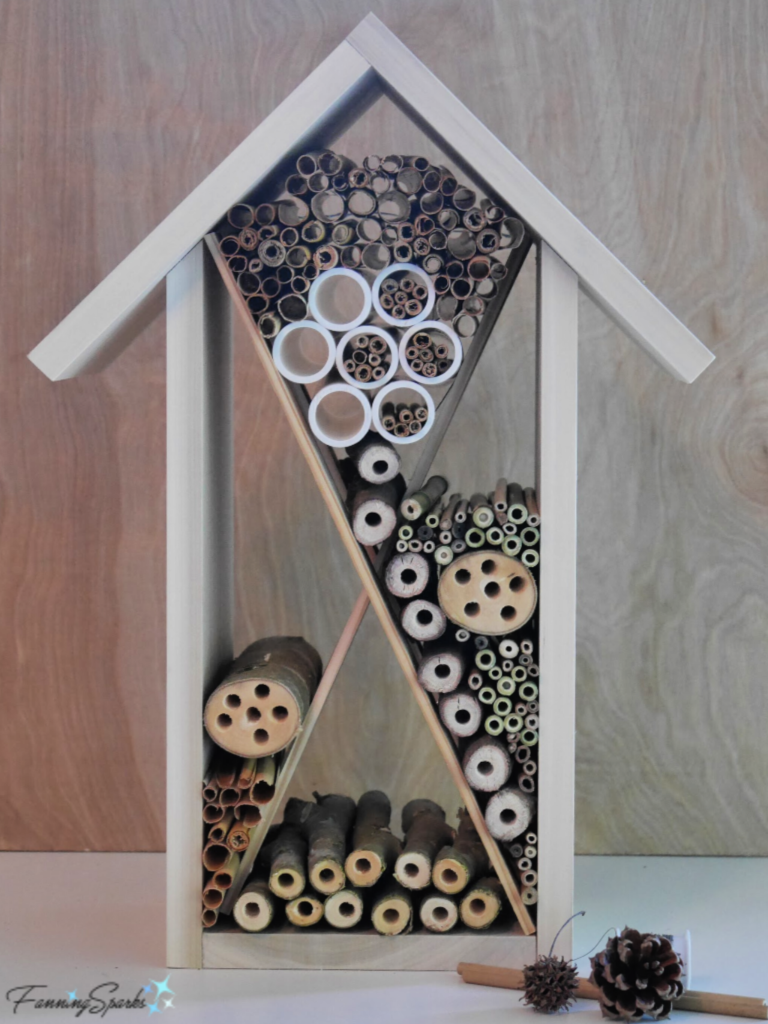

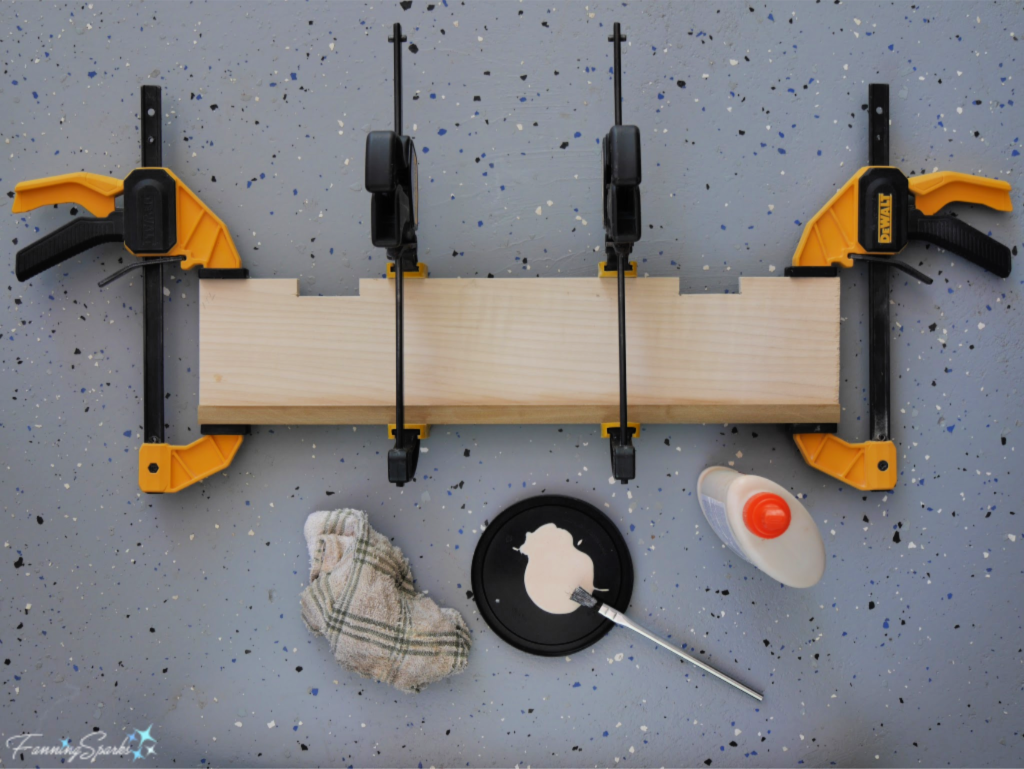
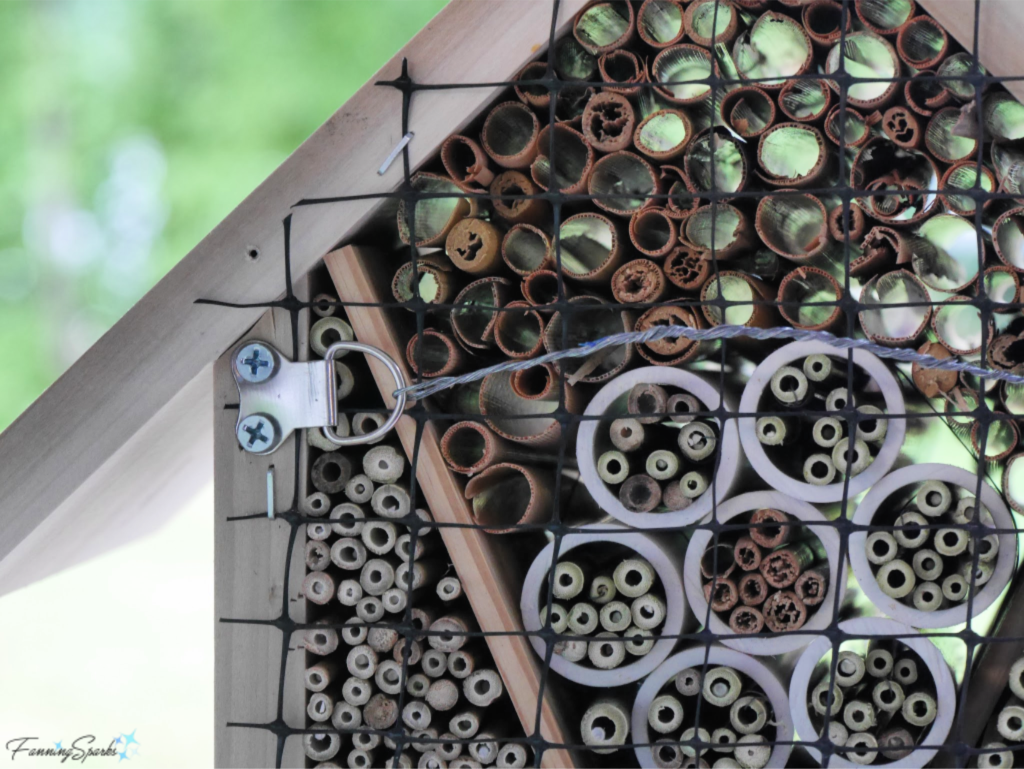 I deliberately didn’t paint or finish the wood to avoid exposing the bees to harsh materials. Plus I prefer to let it weather naturally. When it comes time to clean the bee house—it’s recommended to do so annually—you can replace the old tubes and reeds with fresh ones. The Xerces Society provides clear instructions on proper nest maintenance (see More Info below).