In last week’s post, I shared a DIY tutorial for a simple wall shelf. The wooden, two-shelf unit fits perfectly above the toilet in our Half Bathroom. I mentioned I had a project do-over and a few missteps but didn’t elaborate. This week, I come clean on that do-over and share a helpful decorating lesson I learned along the way.
You may recall from last week’s post that I was inspired by a simple wall shelf I’d spotted at an Airbnb.
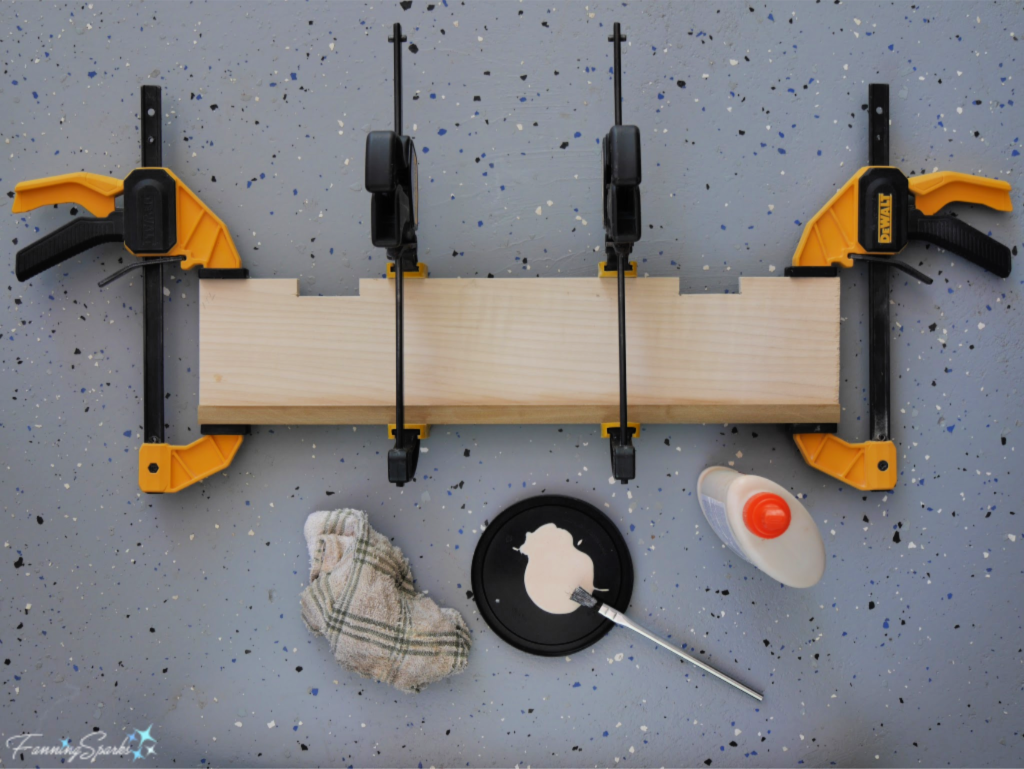
In fact, the first shelf I built looked almost identical to the Airbnb version. That’s the one I had to do-over. I’m really happy with the second version but the first one was a disappointment. Here’s what happened.
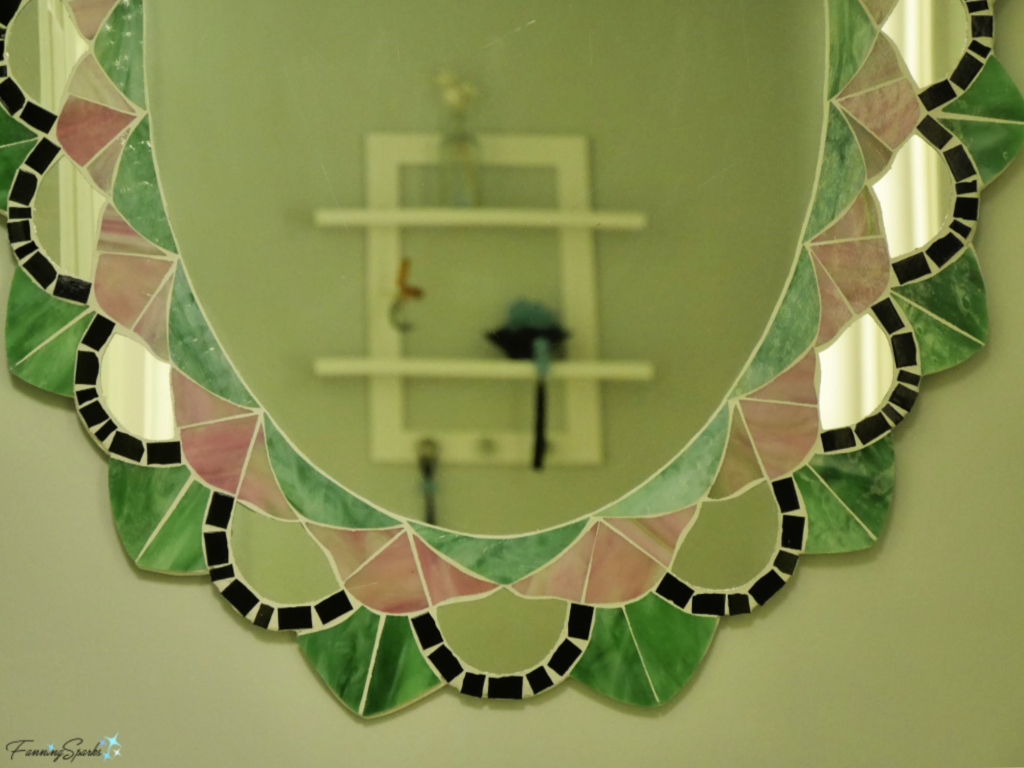
Some time ago I made a mosaic mirror for our Half Bathroom. The mirror, which I shared in the post My Mandala-Inspired Oval Design, looks so nice over the pedestal sink. It makes me smile every time I see it.

Not much has happened in this small room since then. We still need to upgrade the faucet and replace the towel ring and other hardware. The walls are still bare. It’s rather disappointing to have this lovely mirror reflect a boring, blank wall. Eventually, sparks ignited and I got inspired to replicate the wall shelf from the Airbnb for the wall above the toilet. I took some time to figure out size and placement. I readily admit I got more excited about styling and decorating the shelf than the shelf itself. I was visualizing framed photos, handmade clay pieces and dried flower bouquets. I rushed off to build a wall shelf tailored to these plans.
Then the big day came to hang my new wall shelf. But something was off! The shelf didn’t look quite right—it fit the space just fine and it was exactly as designed—but it was lackluster. I couldn’t put my finger on what was wrong but I never hung the shelf.
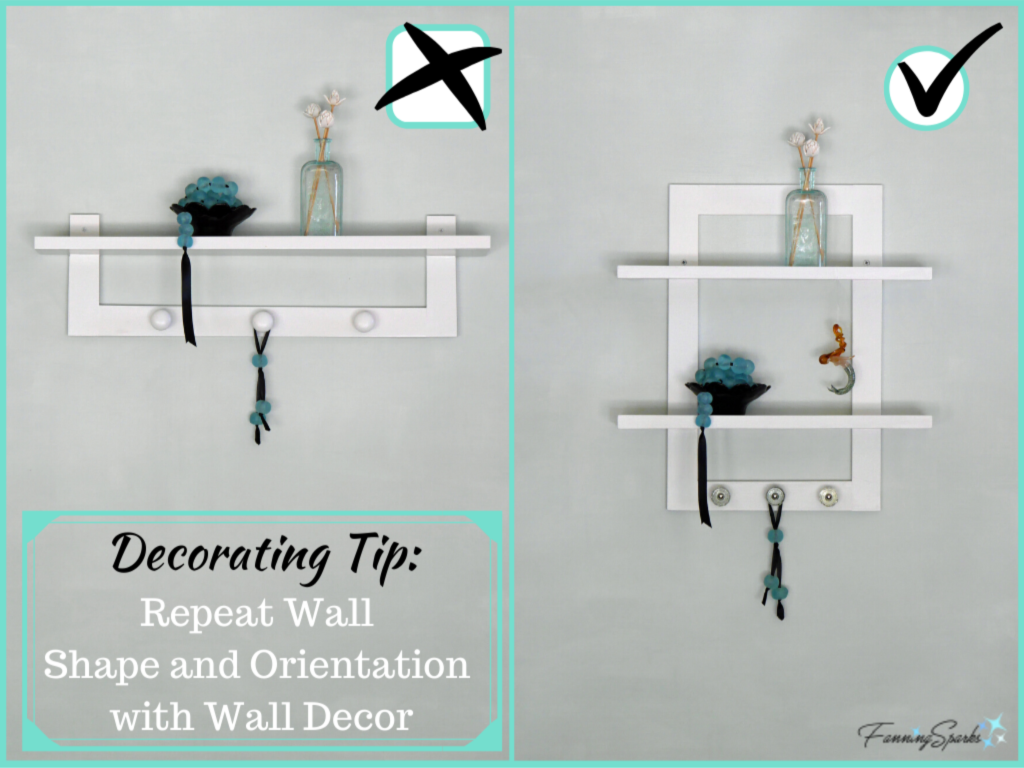
Time went on. The wall shelf just sat there. The answer came to me when I was reading a home decorating blog post about hanging art on a wall (see More Info below). The author, Diane Henkler, explained How to Hang Art on a Wall the Way an Interior Designer Does [by] Relating Shape to Wall Space. … When you hang something on a wall … the single item or the grouping of objects should be arranged in the same shape and orientation as the wall space you are trying to fill.”
In other words, your wall decor should mirror the shape of your wall. A square wall space should have square-shaped wall art. It could be a single item such as a painting or a weaving or it could be a grouping of items such as a gallery of photos. The overall shape of the wall art should be square, in proportion to the wall space, although the pieces don’t actually have to be square. A round mirror, for instance, could work well in a square wall space. Or if the wall space is rectangular, the wall décor should be rectangular. The orientation of the rectangular space should also be taken into consideration. Wall décor on a vertical rectangle of wall space should be hung in portrait orientation. Wall décor on a horizontal rectangle of wall space should be in landscape orientation. And so on.
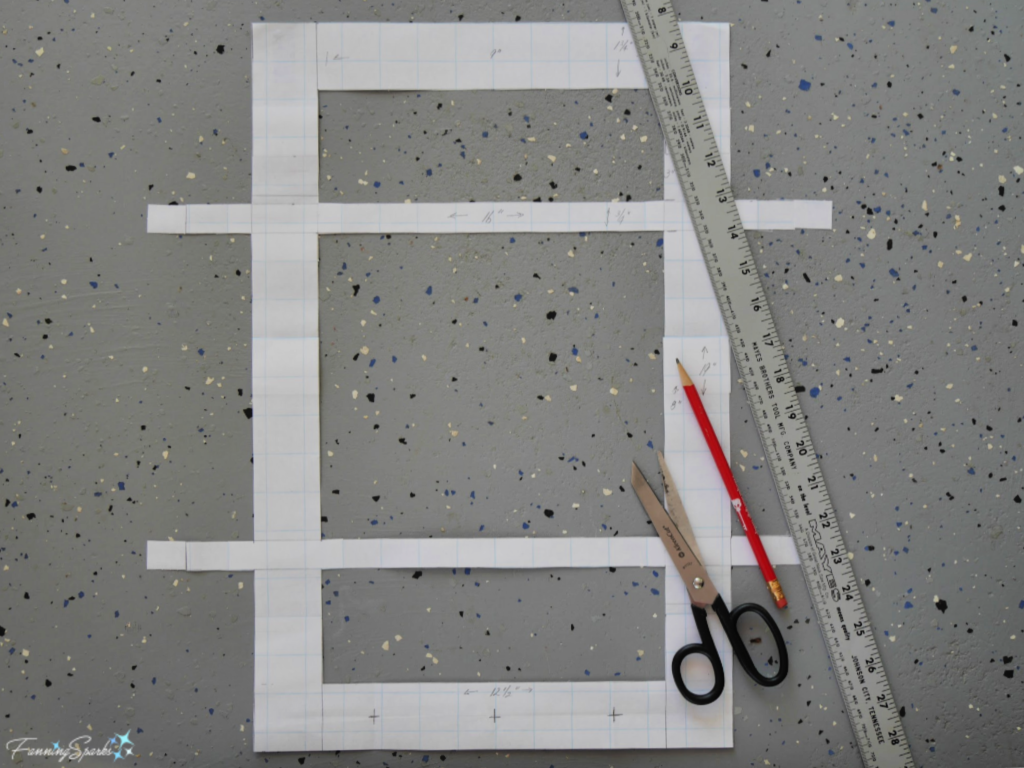
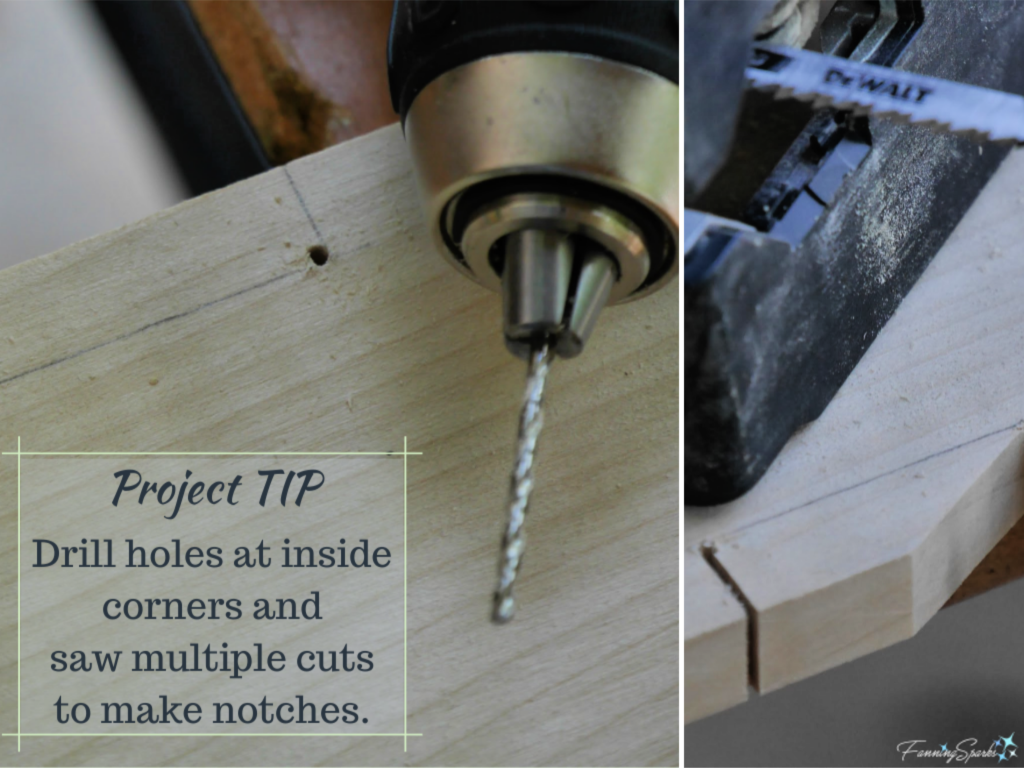
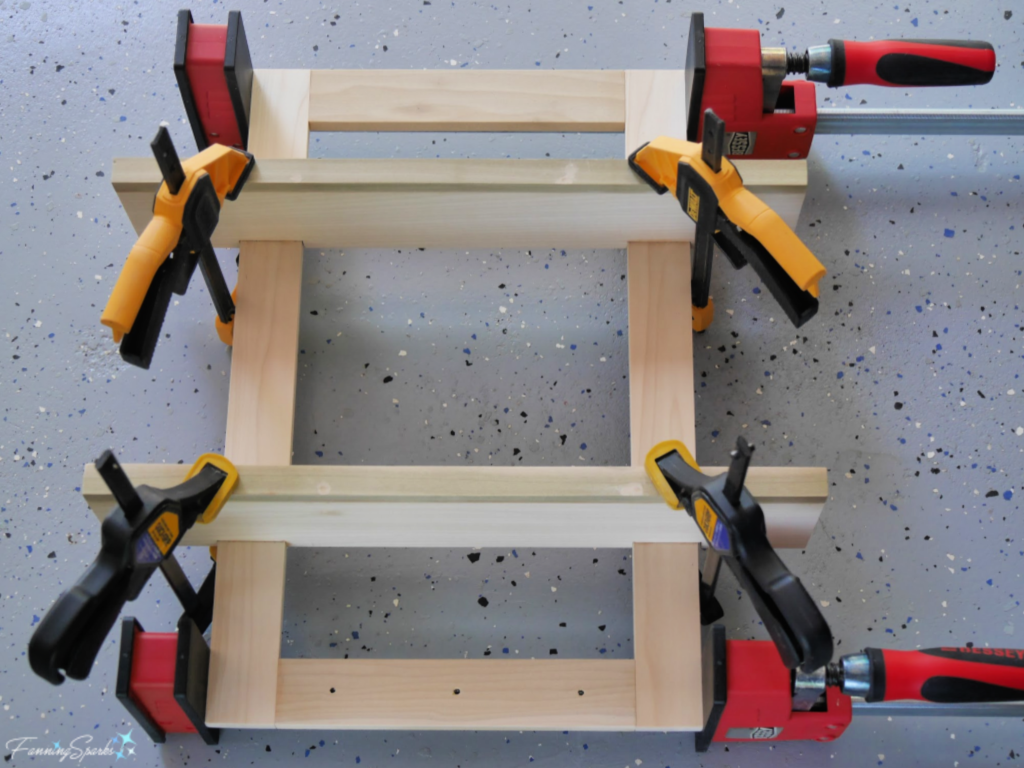
Ah Ha! That was the problem with my bathroom wall shelf: the wall space is an obvious vertical rectangle but my wall shelf was an obvious horizontal rectangle. It was back to the drawing board! This time I forced myself to pay more attention to the wall shelf itself. I carefully designed it to mirror the vertical rectangle of the wall space. I added a second shelf. Then I filled in the top of the frame to emphasize the vertical rectangle. I made a paper template to better visualize the results.
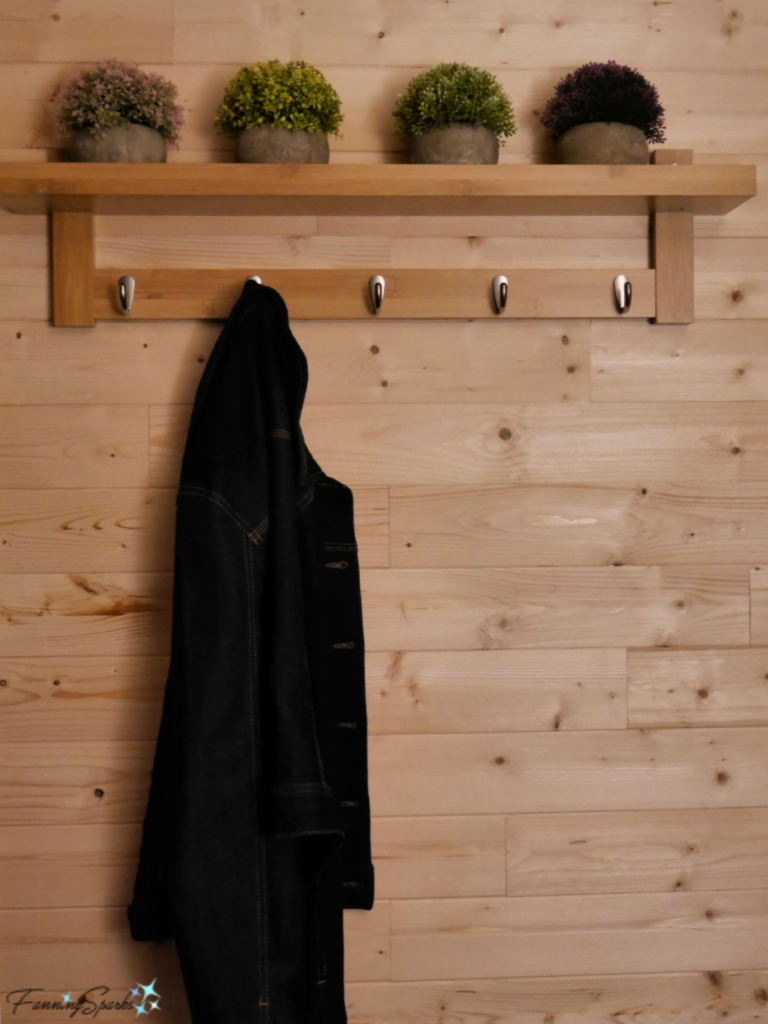
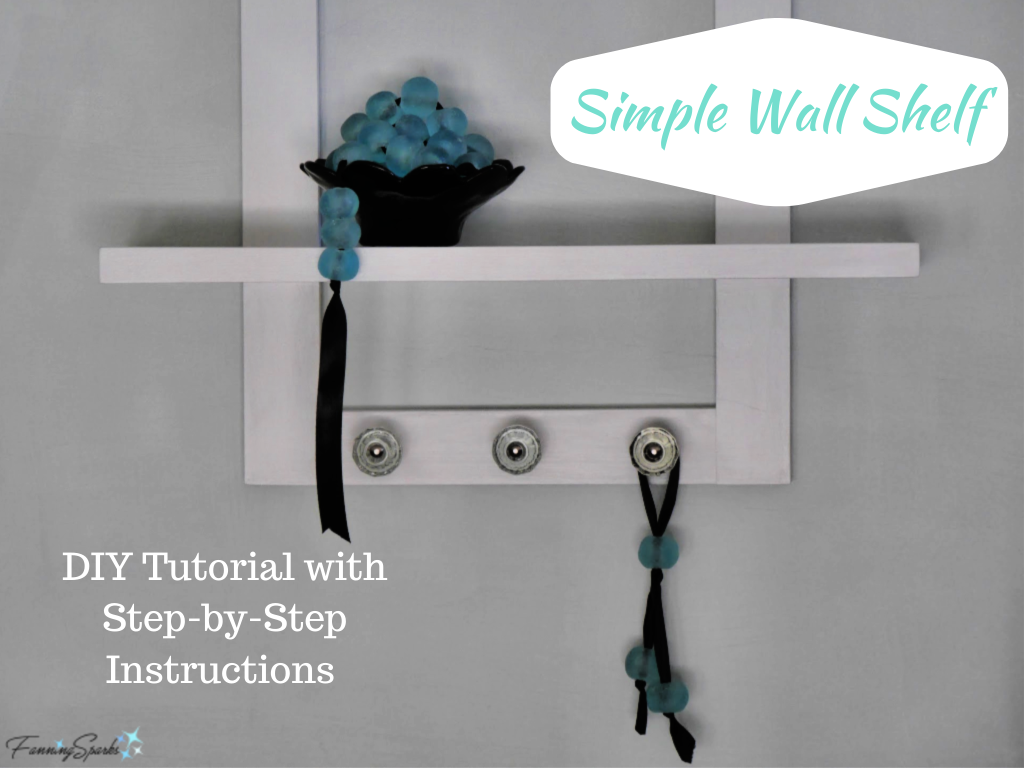
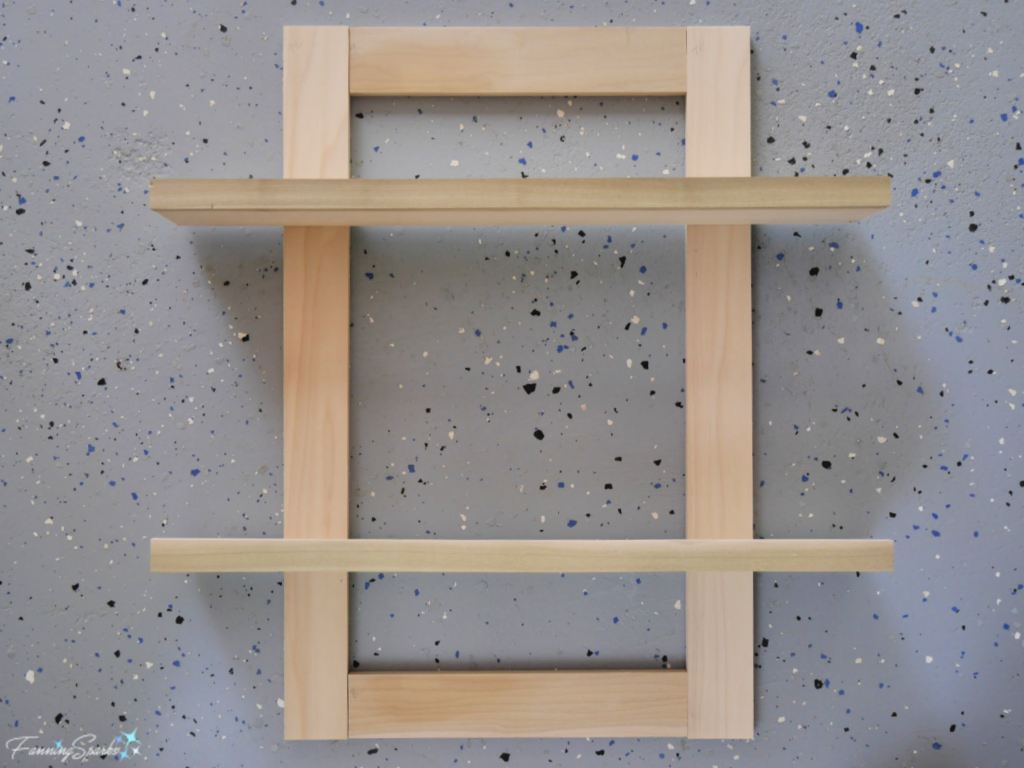
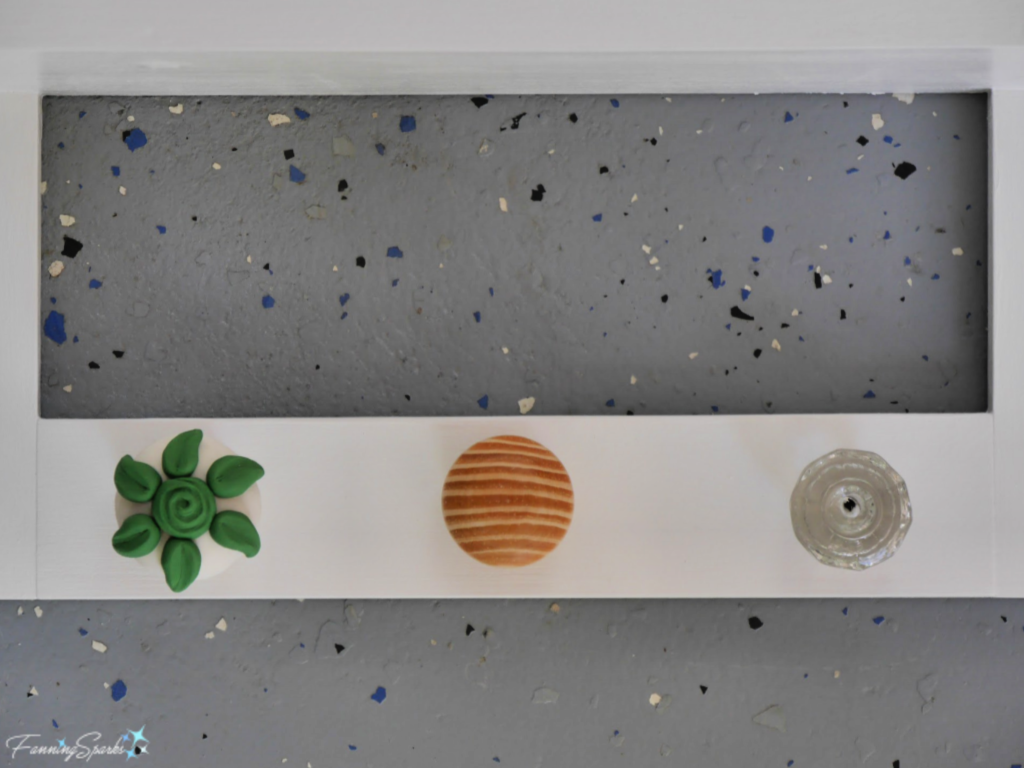
With this reassurance, I set off to build version 2 of the wall shelf. Things came together quickly as I’d already figured out the construction process. All the details were captured in last week’s DIY Tutorial. Here’s another look at the new wall shelf. Much better!
I staged the below side by side comparison to help me see the difference. It’s amazing how shifting to the same vertical orientation as the wall space improves the arrangement. I may have taken the long way to get here but this is a decorating lesson I won’t forget!
The best part of all is seeing the finished wall shelf with my treasured items reflected in my beautiful mosaic mirror. Oh so pretty!
More Info
In My Own Style, by blogger Diane Henkler, is where I found the post Hang Art on a Wall the Way a Designer Does. I’ve been following Diane’s blog for years. She shares lots of great budget-minded decorating ideas. Thank you, Diane!
You can learn more about the mosaic mirror I created for the Half Bathroom in the post My Mandala-Inspired Oval Design. I also created mosaic mirrors for our Master Bathroom which you can see in the post Pair of Mosaic Mirrors Completed.
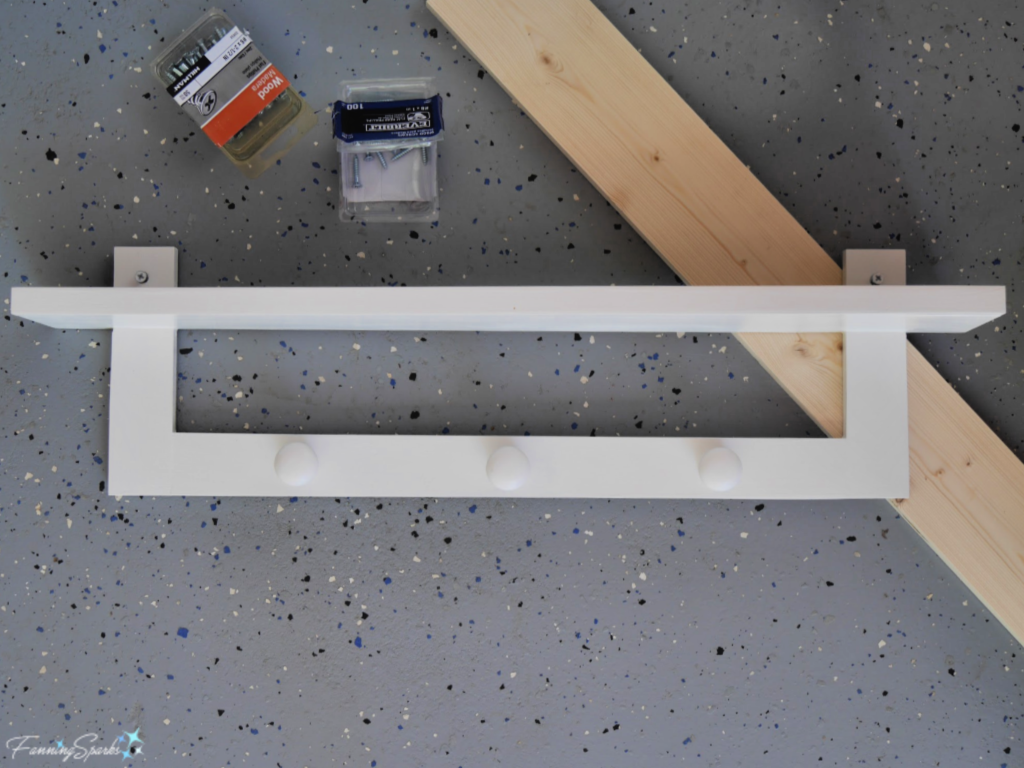
There’s a full tutorial with step-by-step instructions to make this Simple Wall Shelf in this post.
Today’s Takeaways
1. Don’t underestimate the value of trial and error.
2. There are a multitude of resources available to guide you in decorating your home and surroundings.
3. Consider making your own one-of-a-kind home decor items tailored specifically to your space.


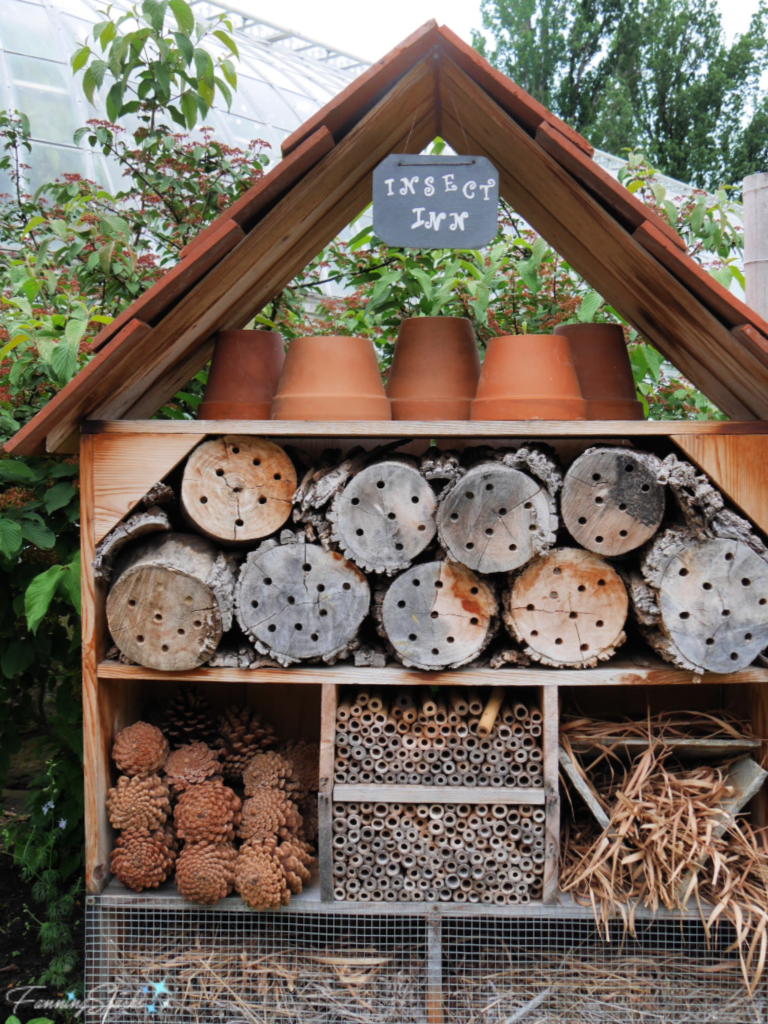
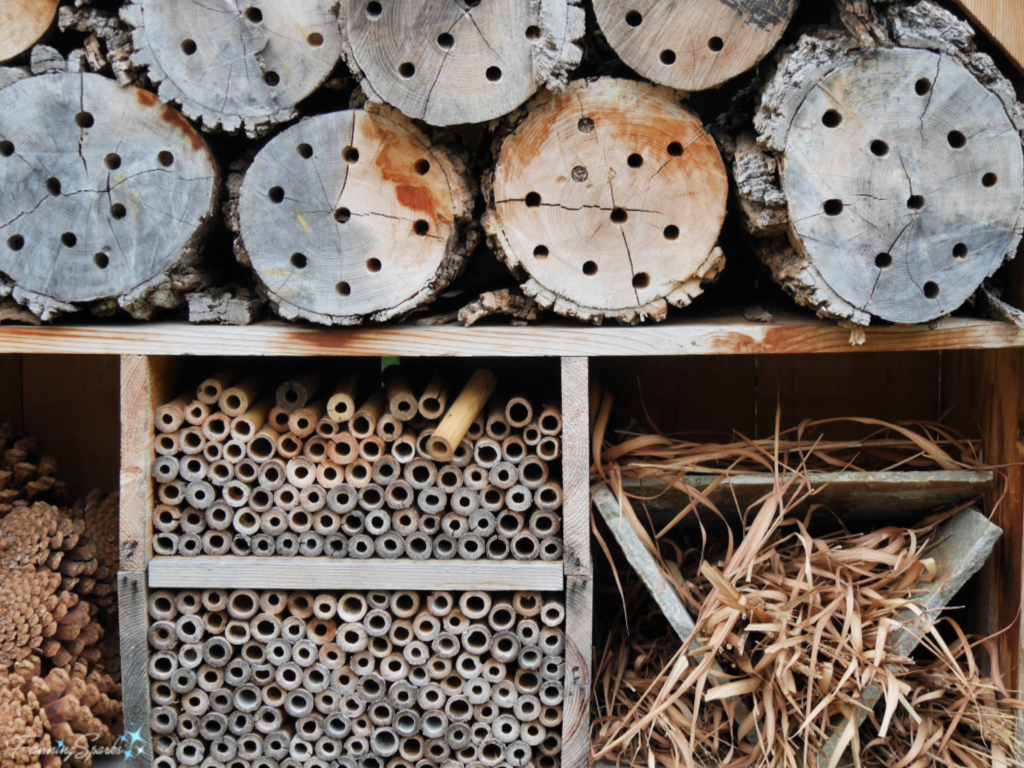
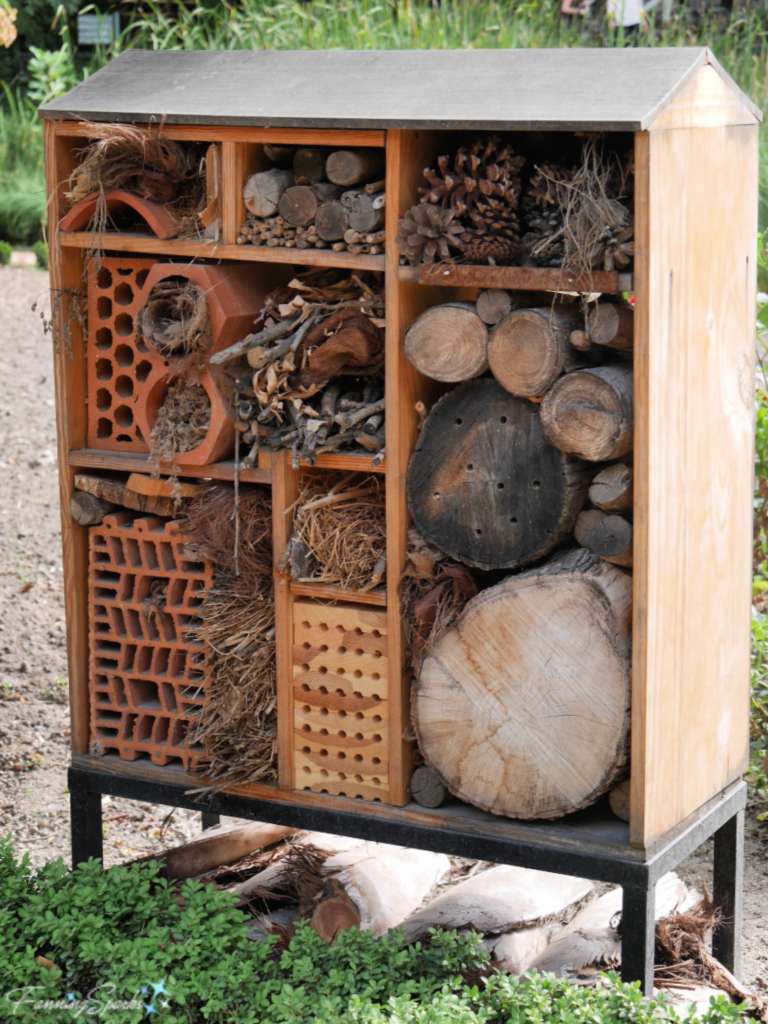
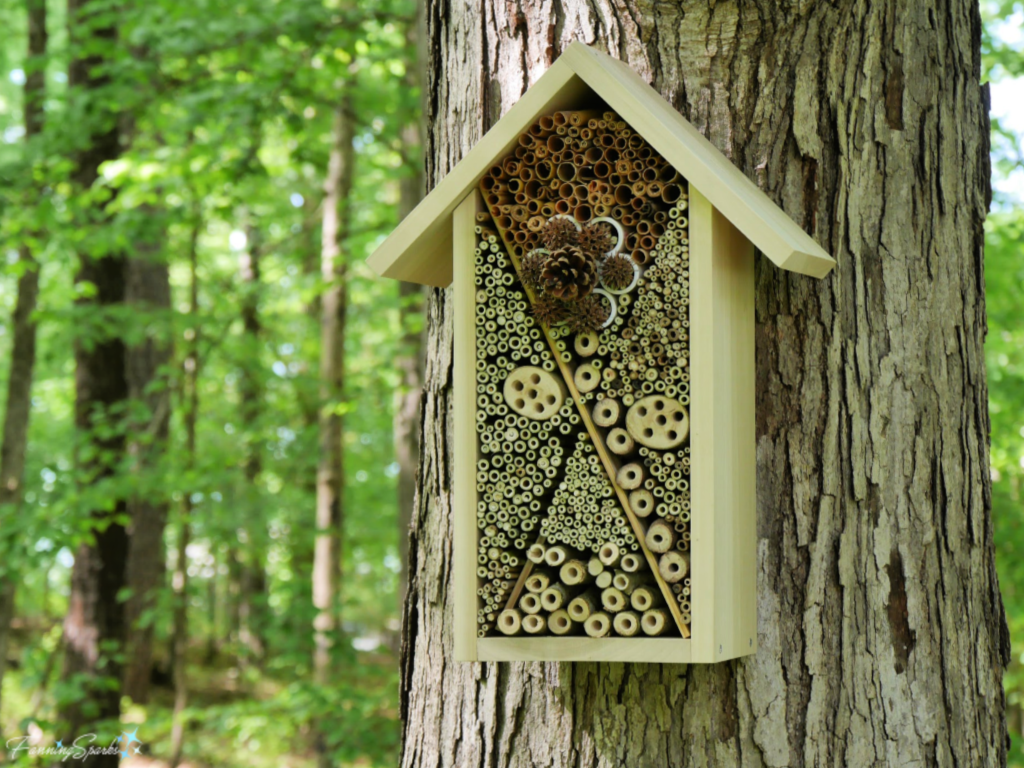 This post provides easy, step-by-step instructions to make your own AirBee-n-Bee House. There are two components to this project: a wood frame in the shape of a house and nesting materials that fill the frame. We’ll start by building the wooden House Frame.
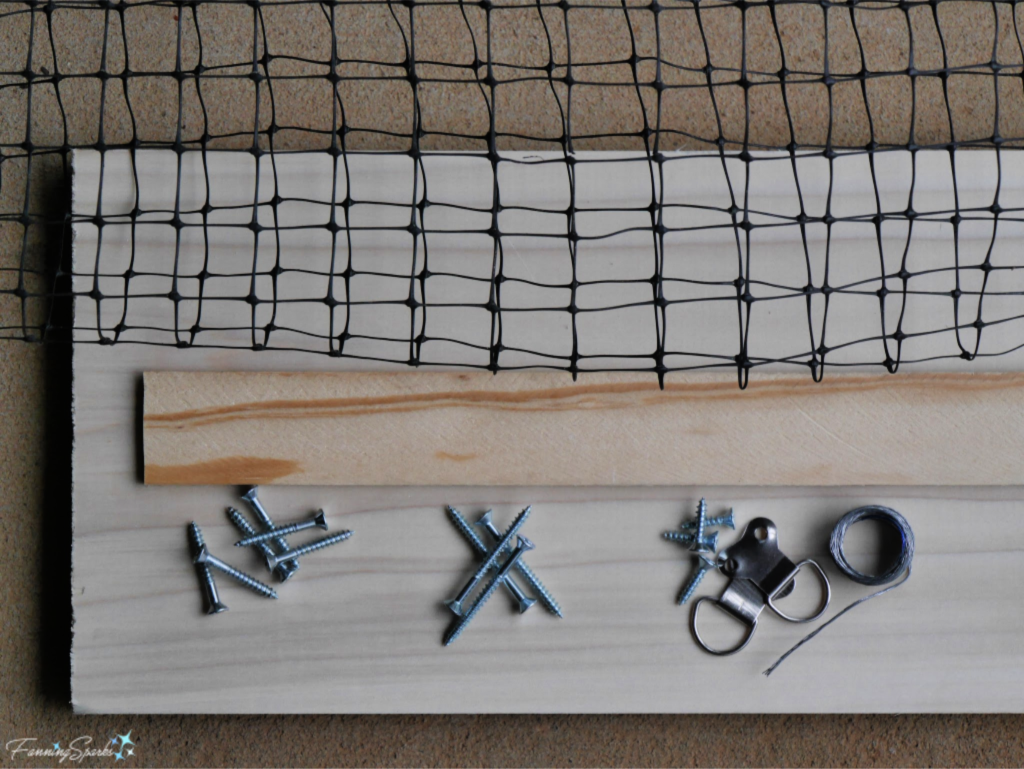 Tools Needed
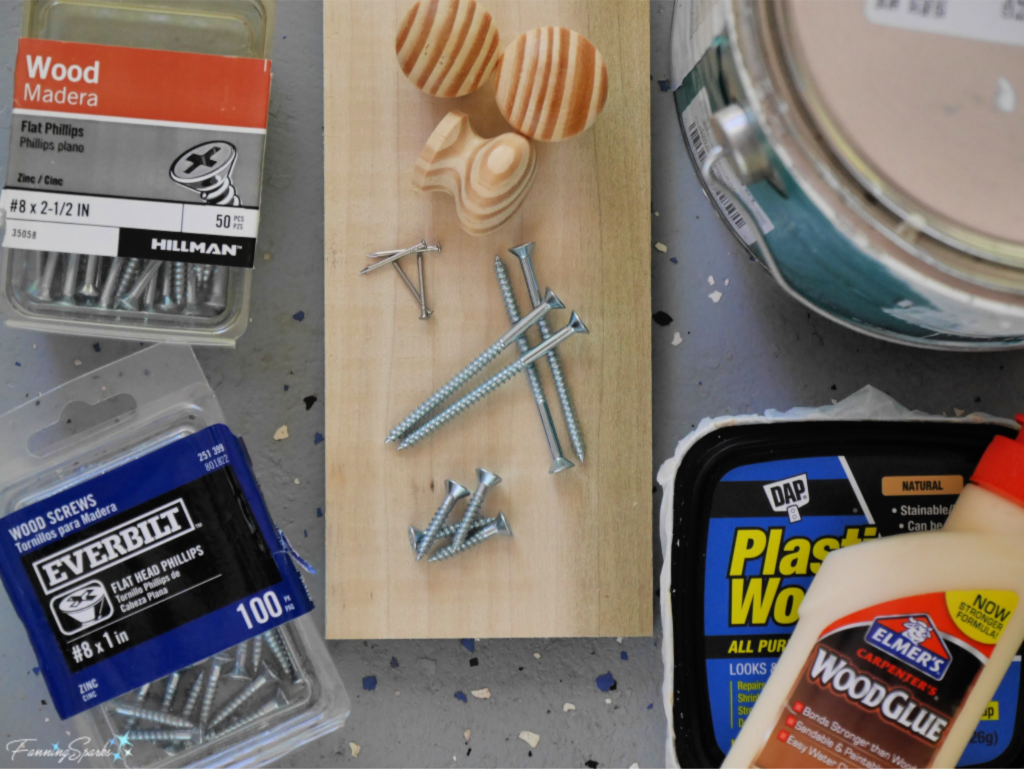
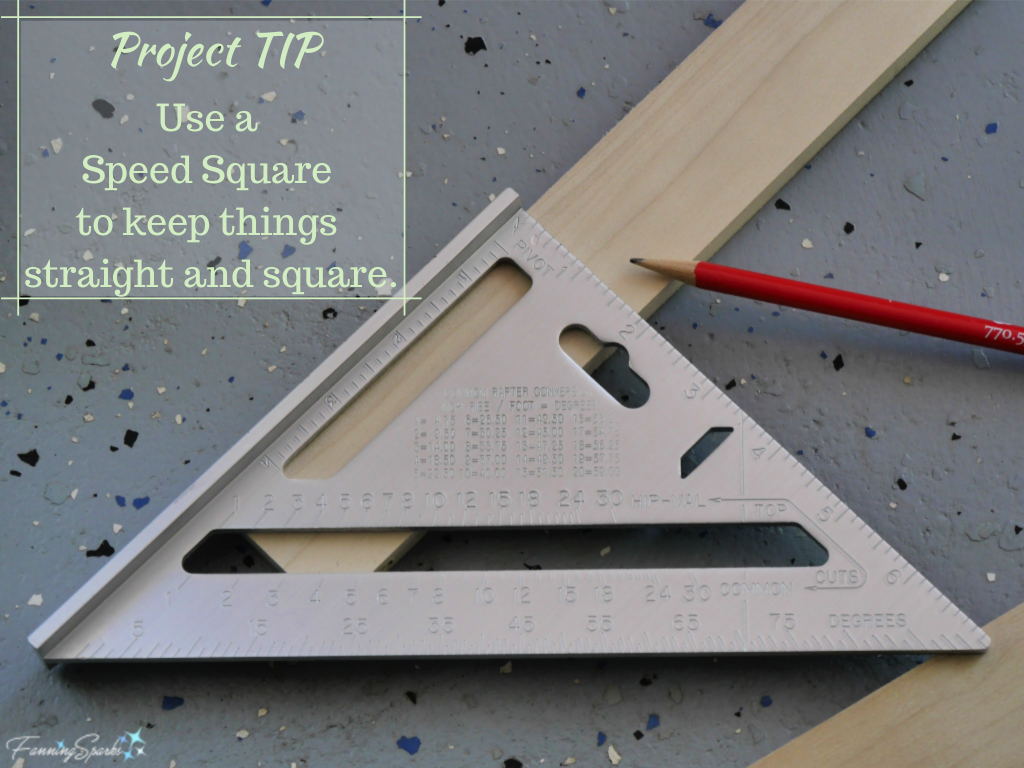
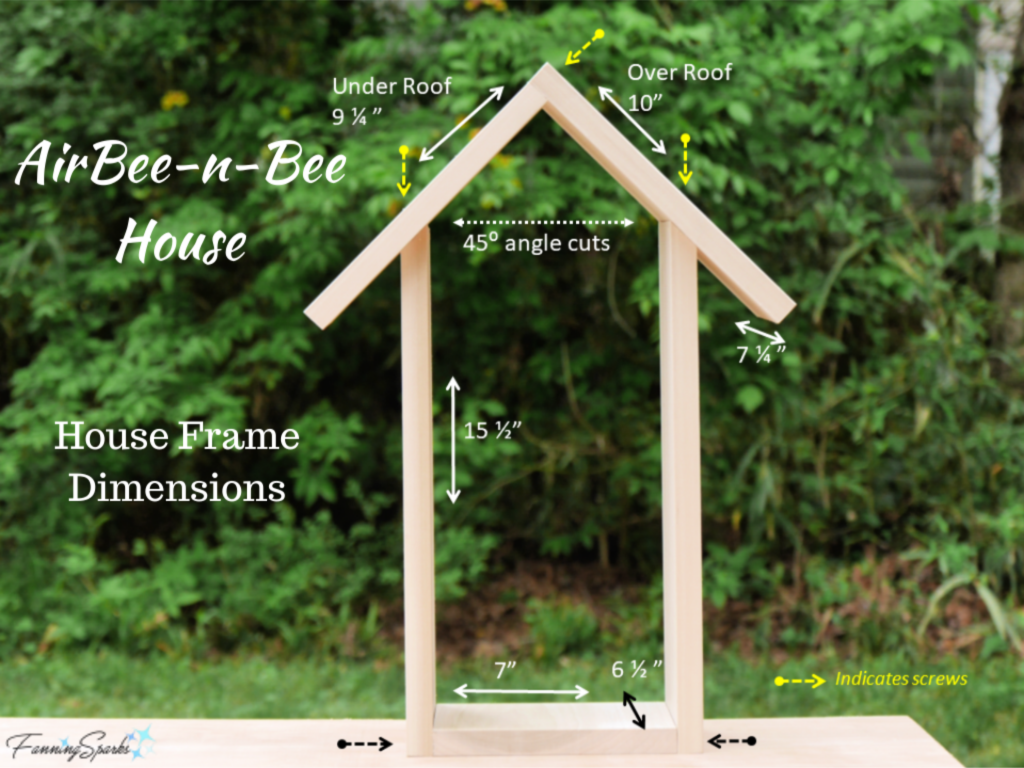
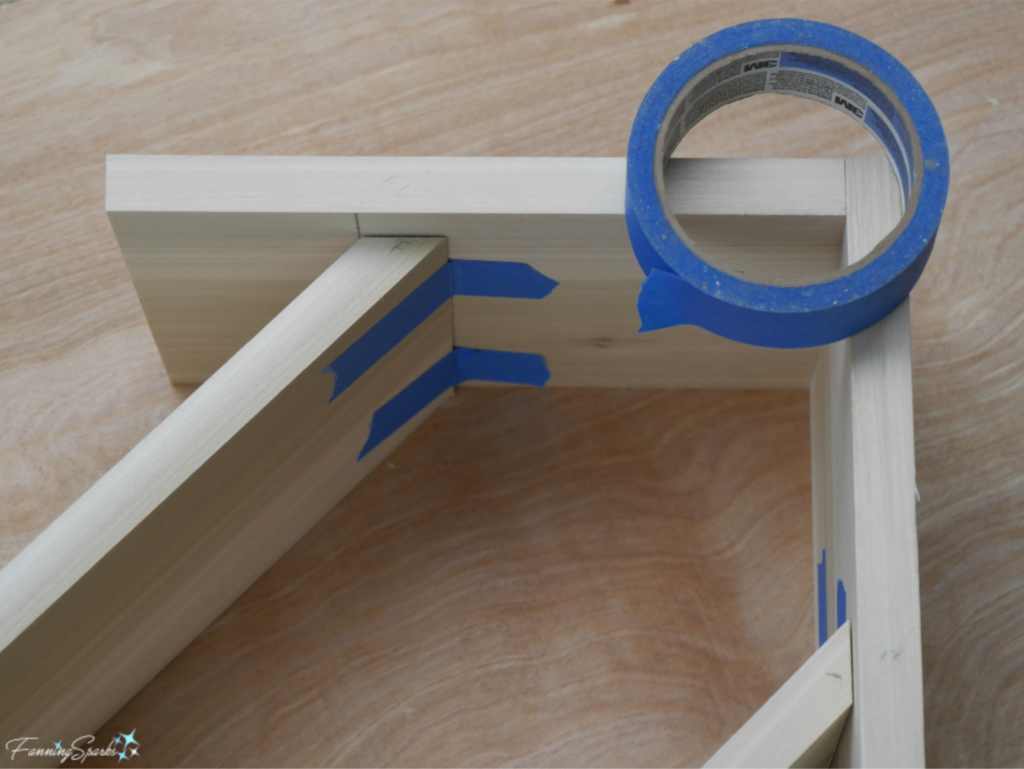
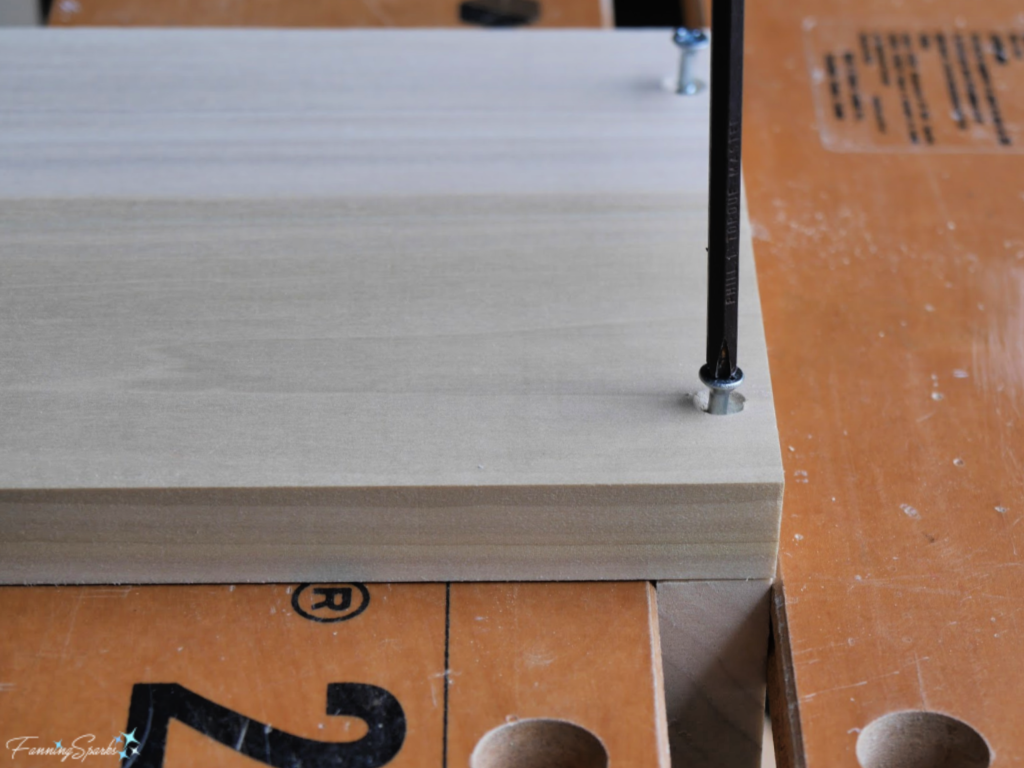 Step 4 Attach Other Side to Bottom Repeat Step 3 to attach other Side to Bottom. This will result in a U-shaped piece.
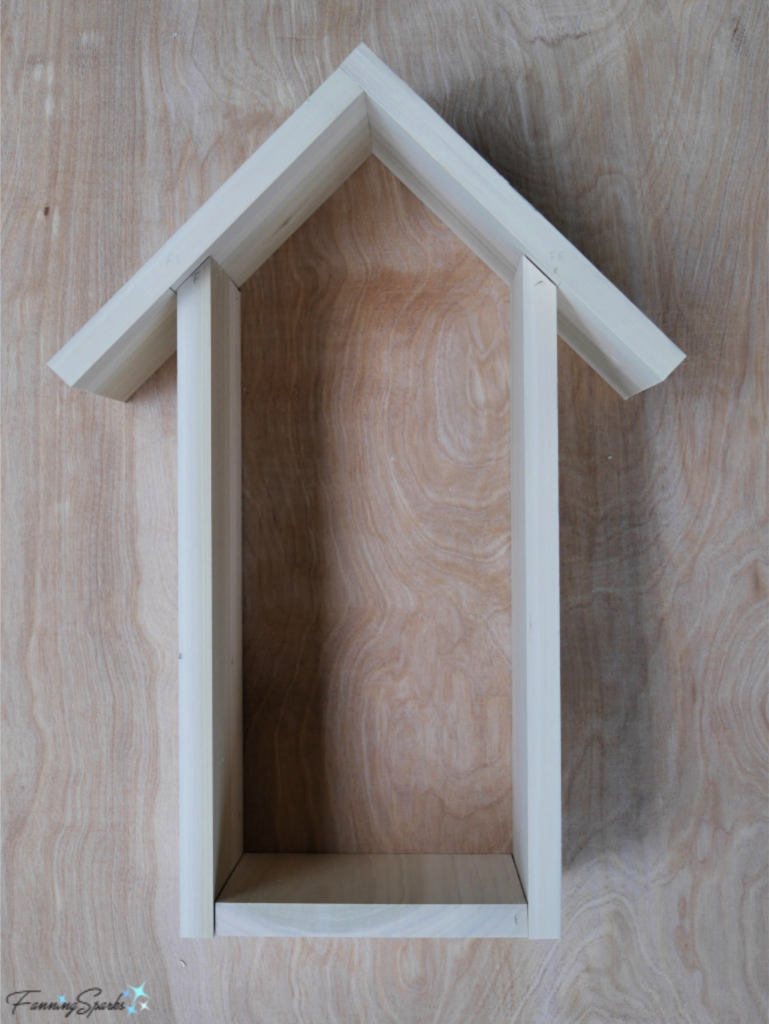
 Step 7 Insert Cross Pieces Use four pieces of wood slat to create 2 X’s inside the House Frame. Cut a piece of wood slat to 16 ¼”. Slide into frame to ensure a snug fit. Adjust if necessary. Repeat with 3 more pieces. These pieces fit snugly but are not attached. They will serve to hold the nesting materials in place.
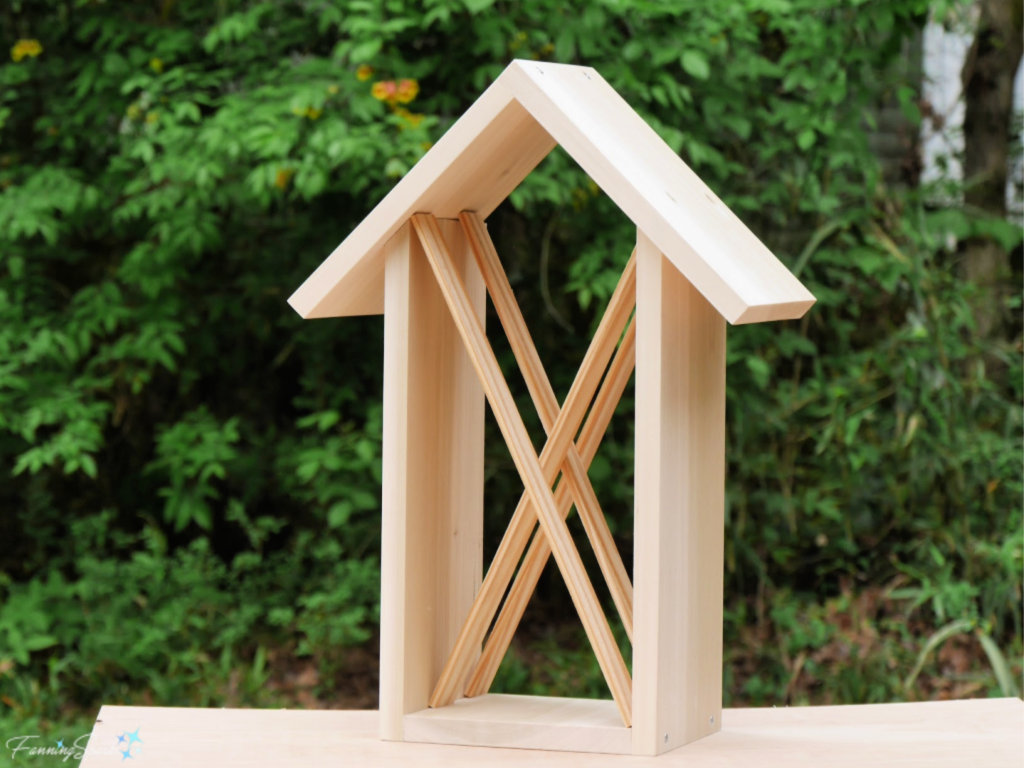
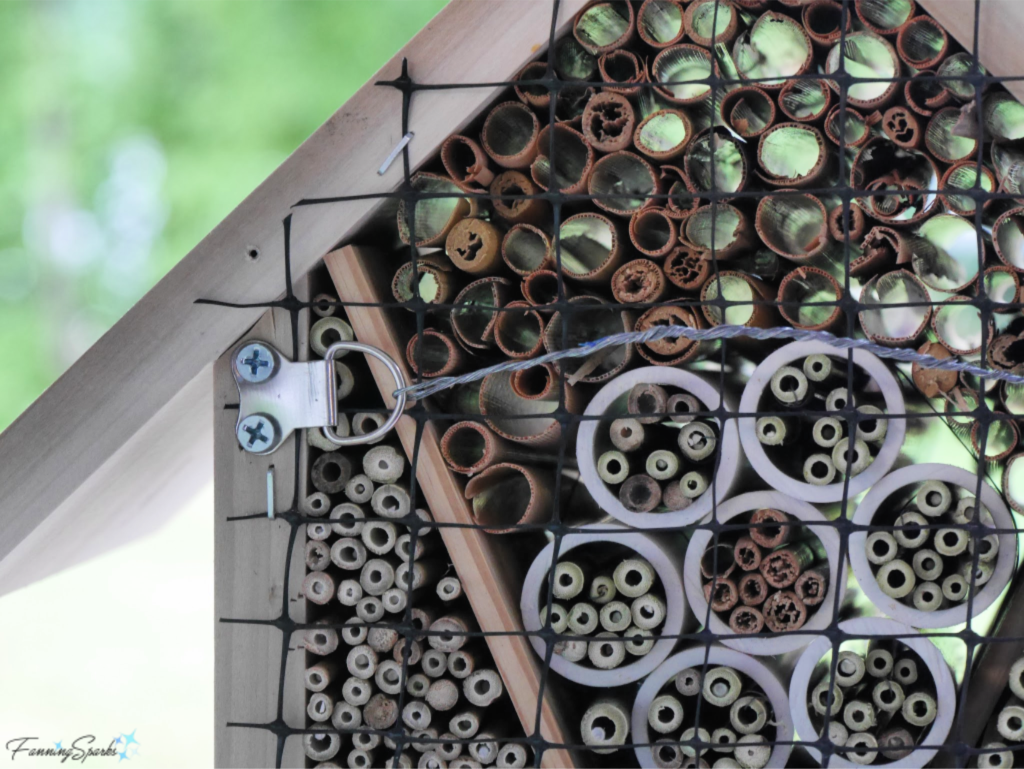
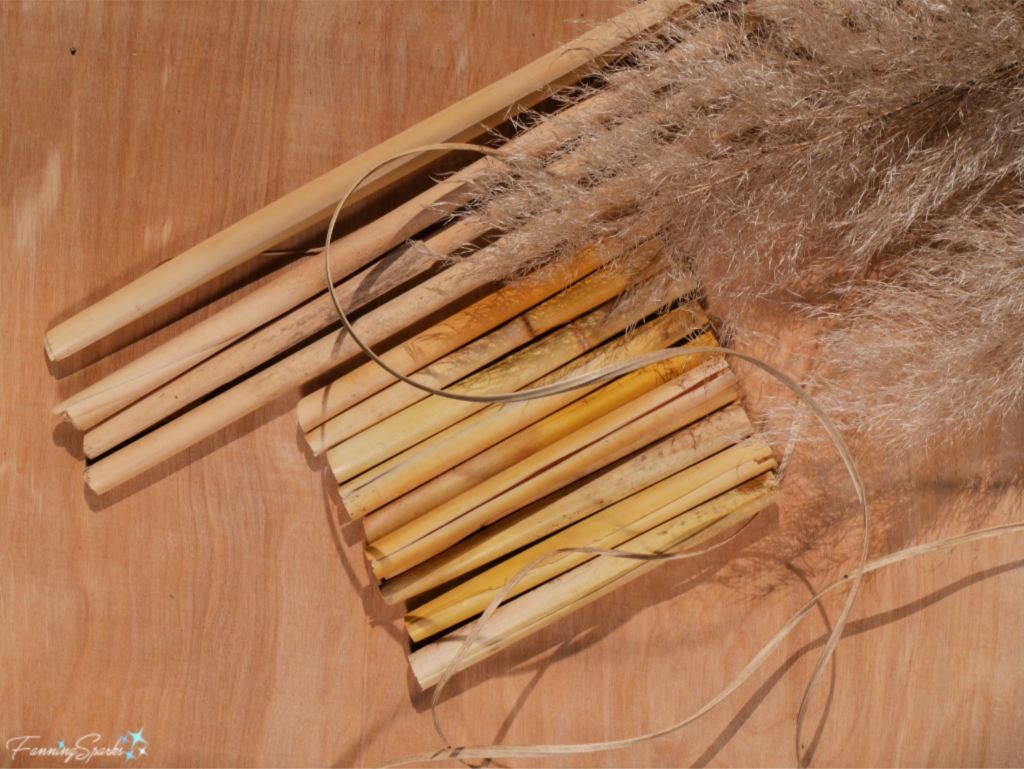 Drilled Tree Branches: Gather small fallen or pruned tree branches and cut to 6 ½” lengths. Drill 5/16” holes into the ends.
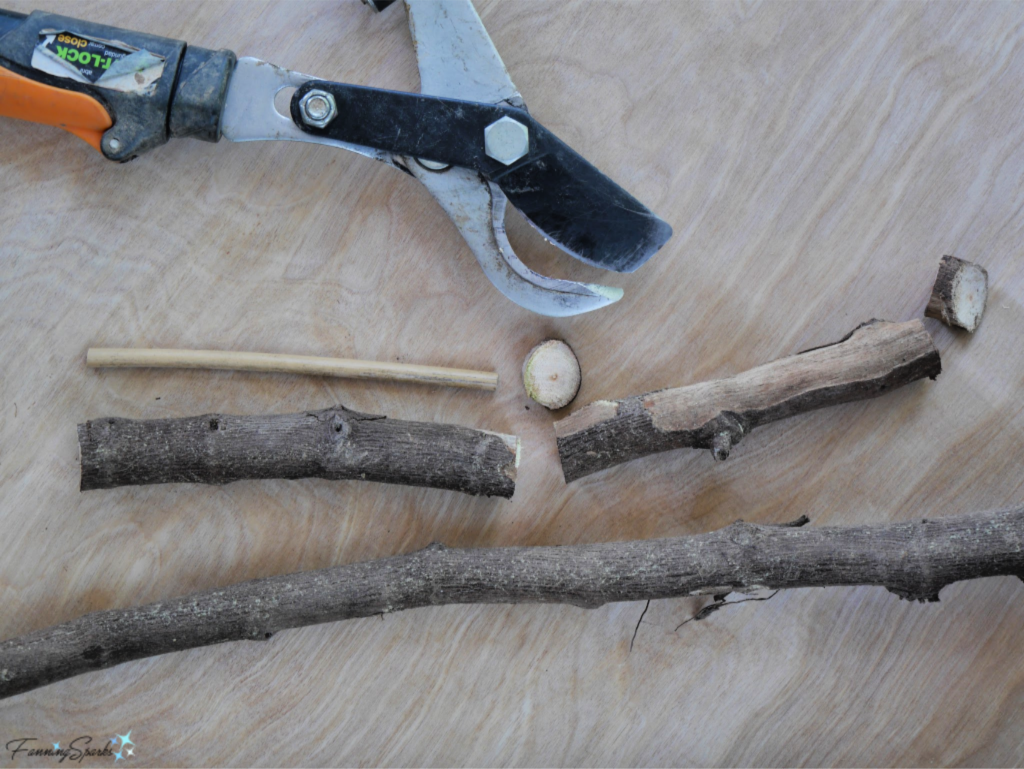 Filler: I cut bamboo from our yard and trimmed it into 6 ½” lengths to use as filler. A few of the tubes might be big enough for the bees to nest inside but most will serve as filler and create natural cavities and hollows.
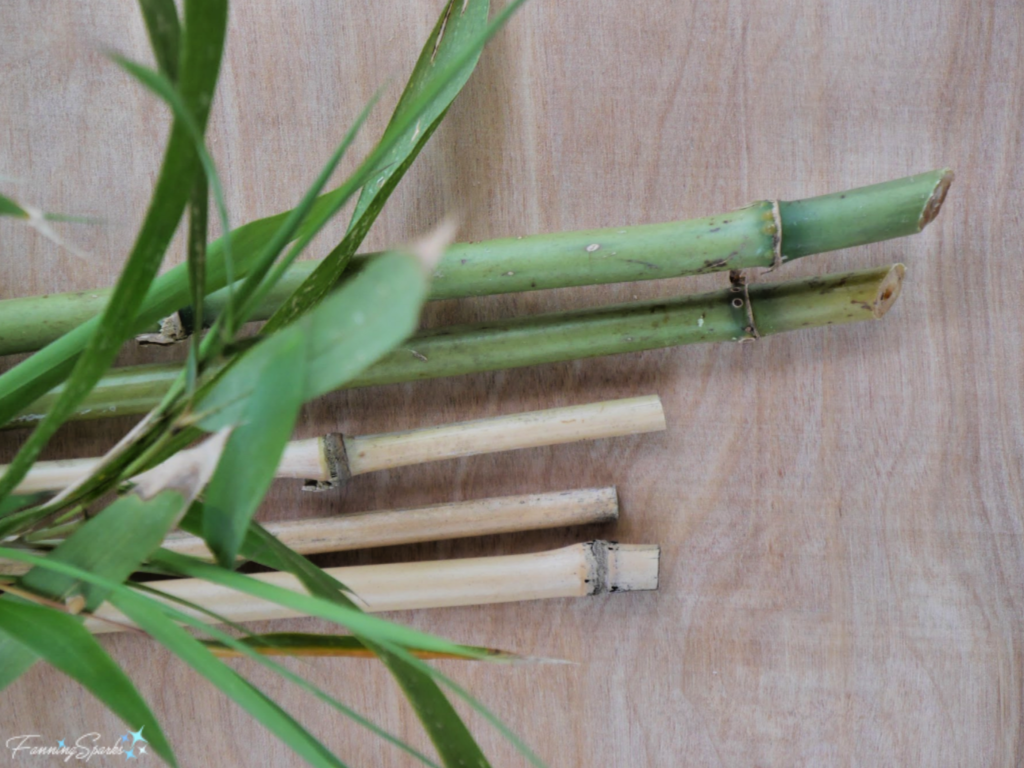 Decorative Elements (optional): We have a substantial stack of scrap PVC pipe, so I used some to create a decorative flower shape. It is merely cosmetic and definitely optional. I cut 7 pieces of 1” PVC pipe to 6 ½” lengths and wrapped a strand of thin wire around the bundle to hold it together.
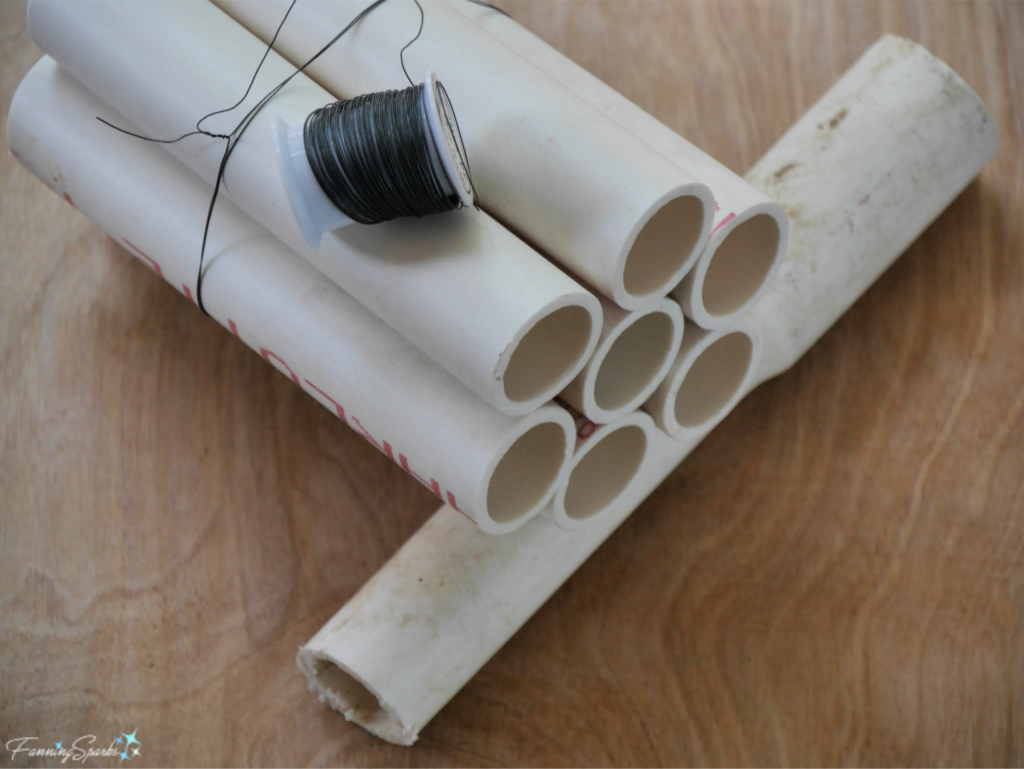 There are thousands of pesky sweetgum fruits (ie the spiny seed pods pictured below) and pine cones lying around our property so it’s nice to finally find a use for a few of them. I used them as decorative elements. It’s easier to position and secure the sweetgum fruit if it is attached to a stick. Drill a small hole into the end of a 6 ½” piece of bamboo. Then thread a piece of thin wire through the bamboo, attach it to the stem of a sweetgum fruit on one end and anchor it through the drilled holes on the other end. Pine cones can be wired in a similar way.
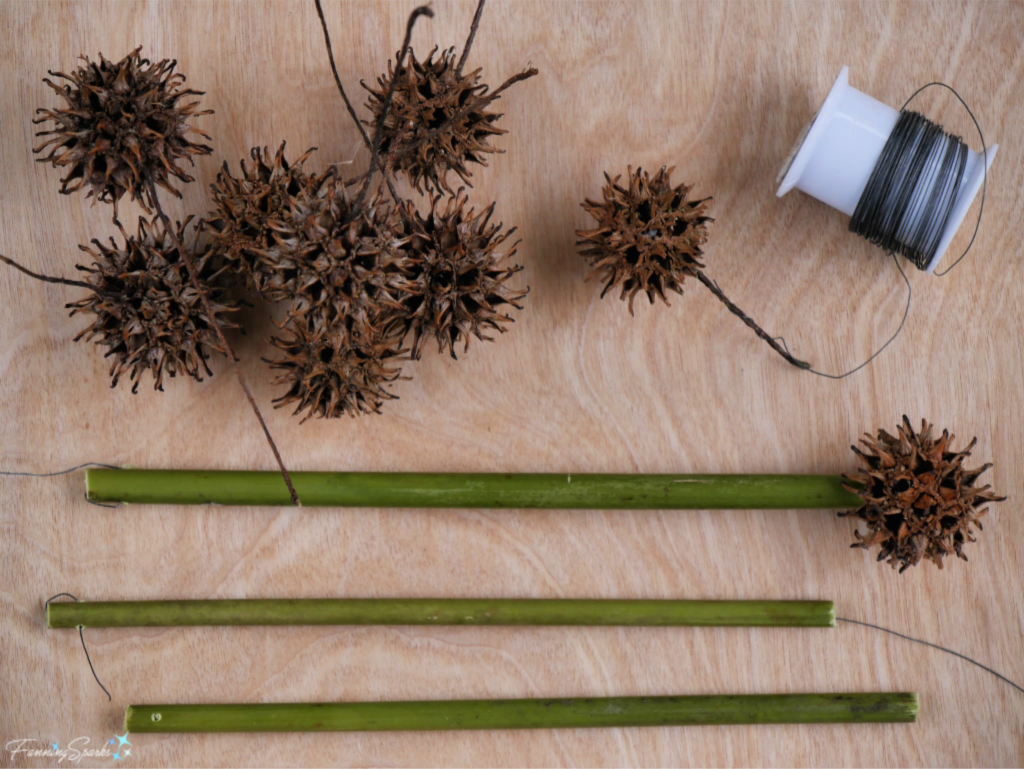 Step 9 Place Nesting Materials in House Frame Fill the House Frame with the nesting materials. Simply lay hollow reeds, bamboo stems and drilled tree branches around the Cross Pieces. Ensure the final placement is snug and tight so pieces will stay in place. As noted above, you can position the materials in any way you like to create patterns and designs.
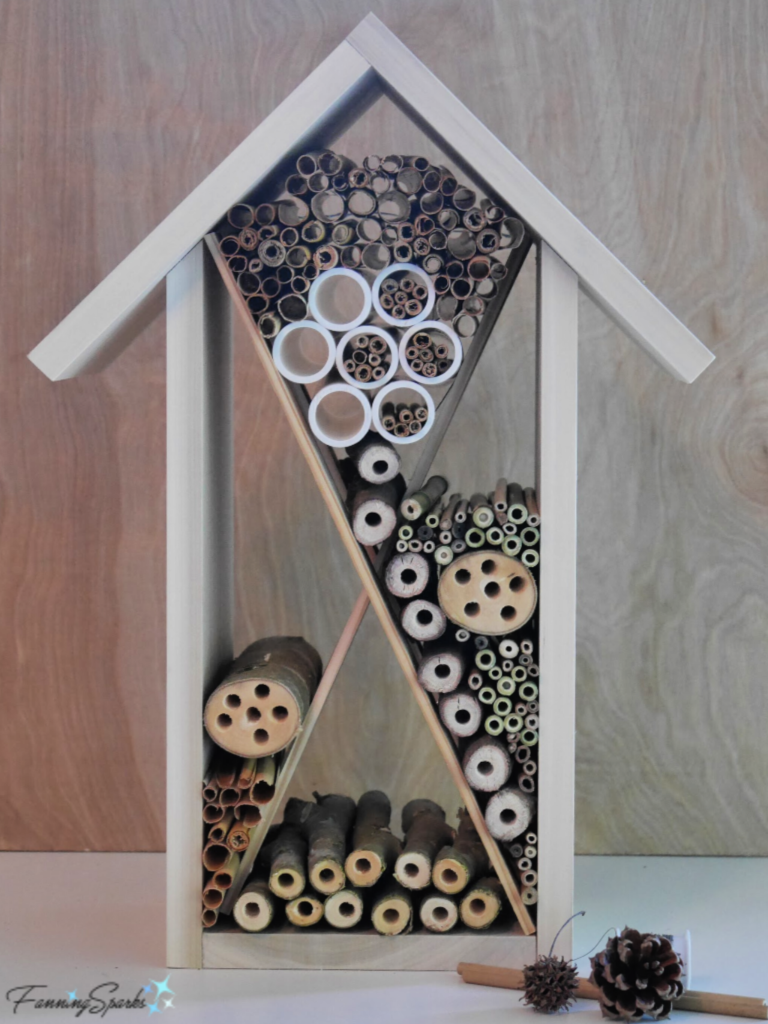

 I deliberately didn’t paint or finish the wood to avoid exposing the bees to harsh materials. Plus I prefer to let it weather naturally. When it comes time to clean the bee house—it’s recommended to do so annually—you can replace the old tubes and reeds with fresh ones. The Xerces Society provides clear instructions on proper nest maintenance (see More Info below).
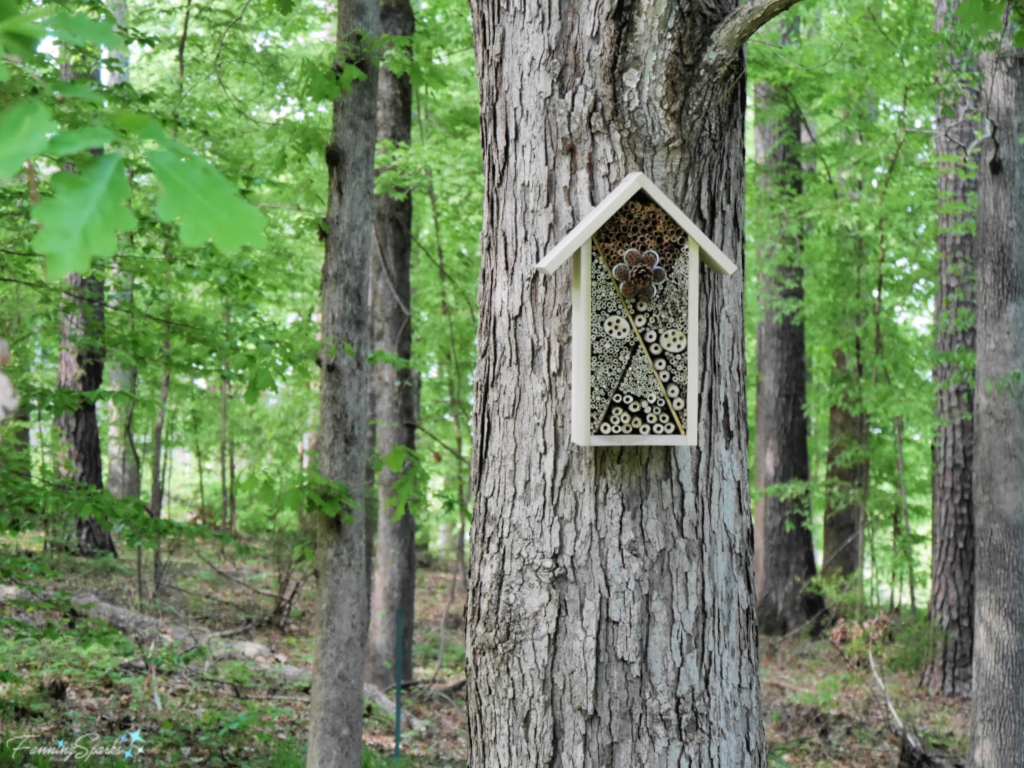


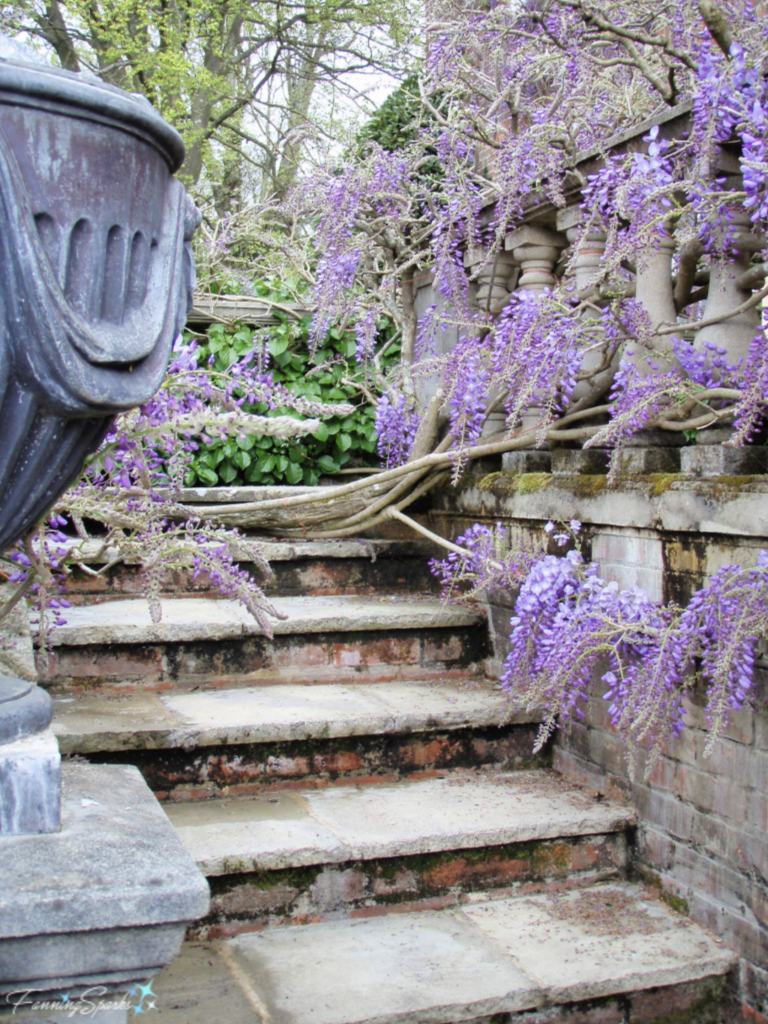


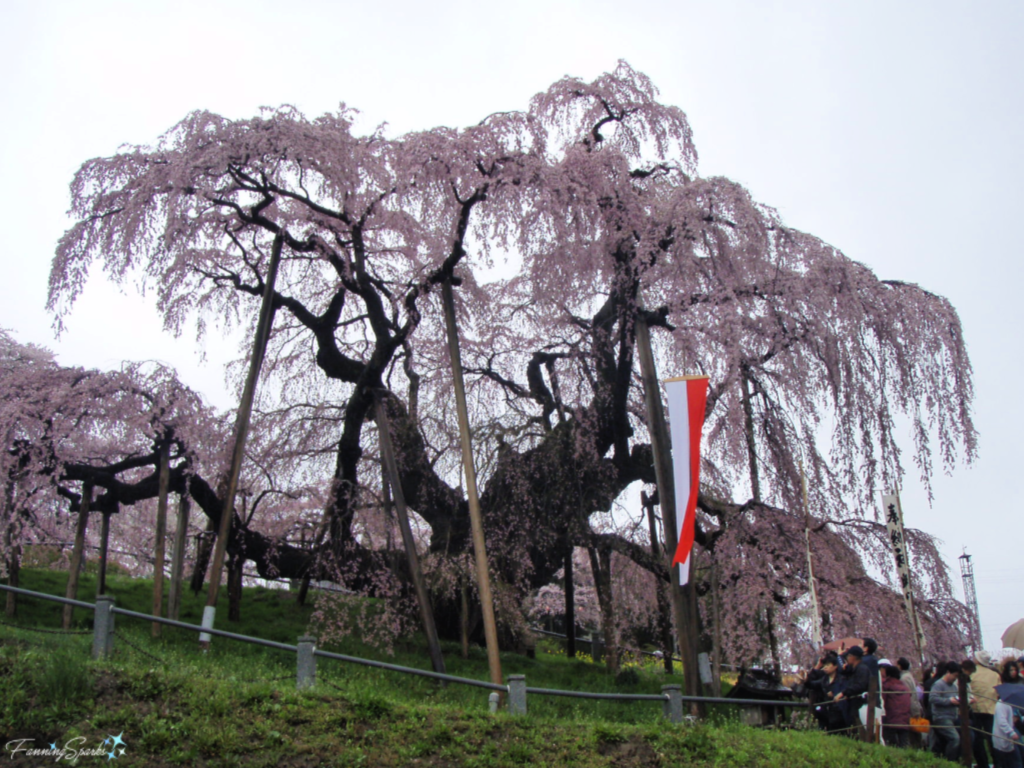
 The ancient stone walls provide a striking contrast for the delicate flowers.
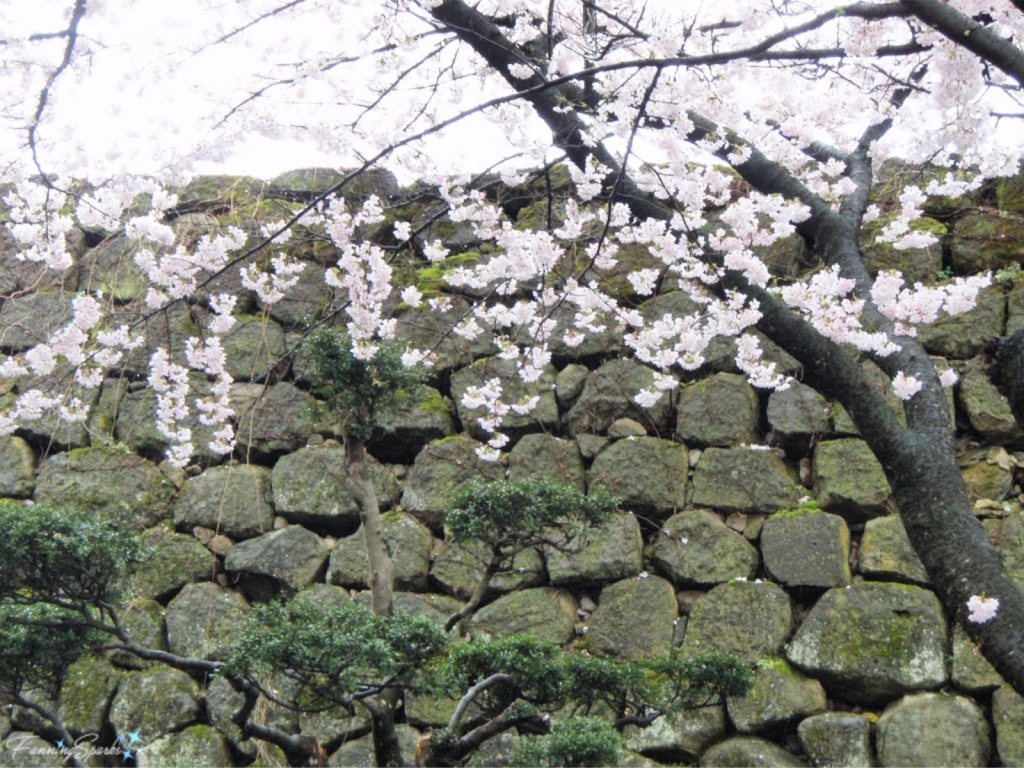
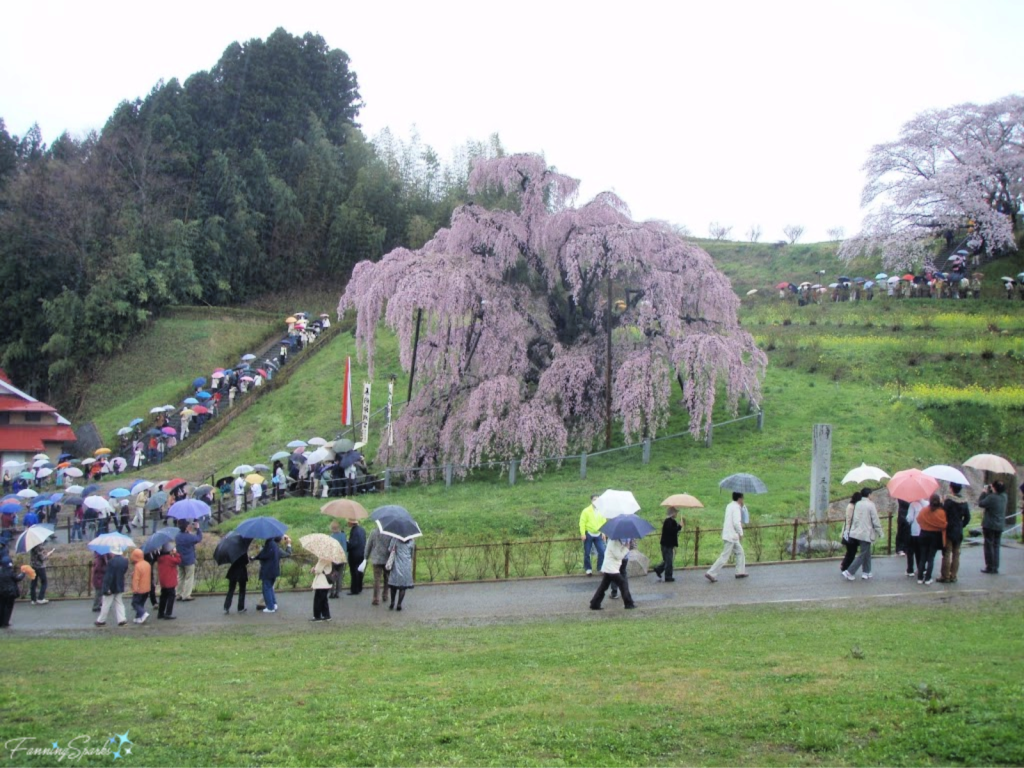
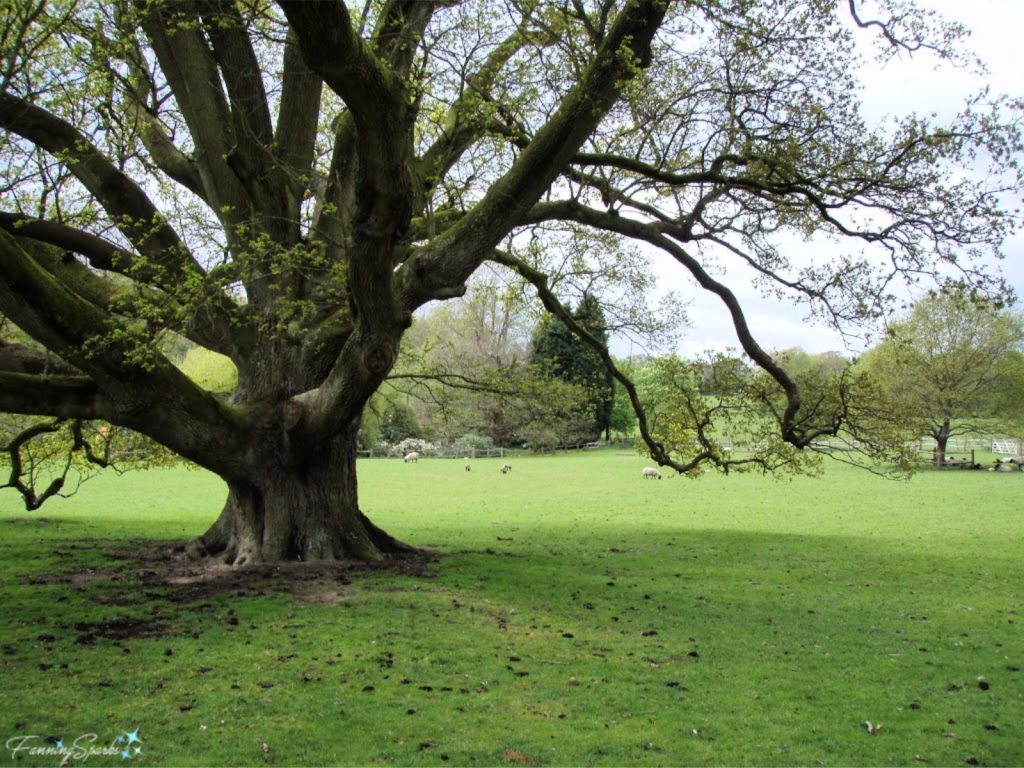
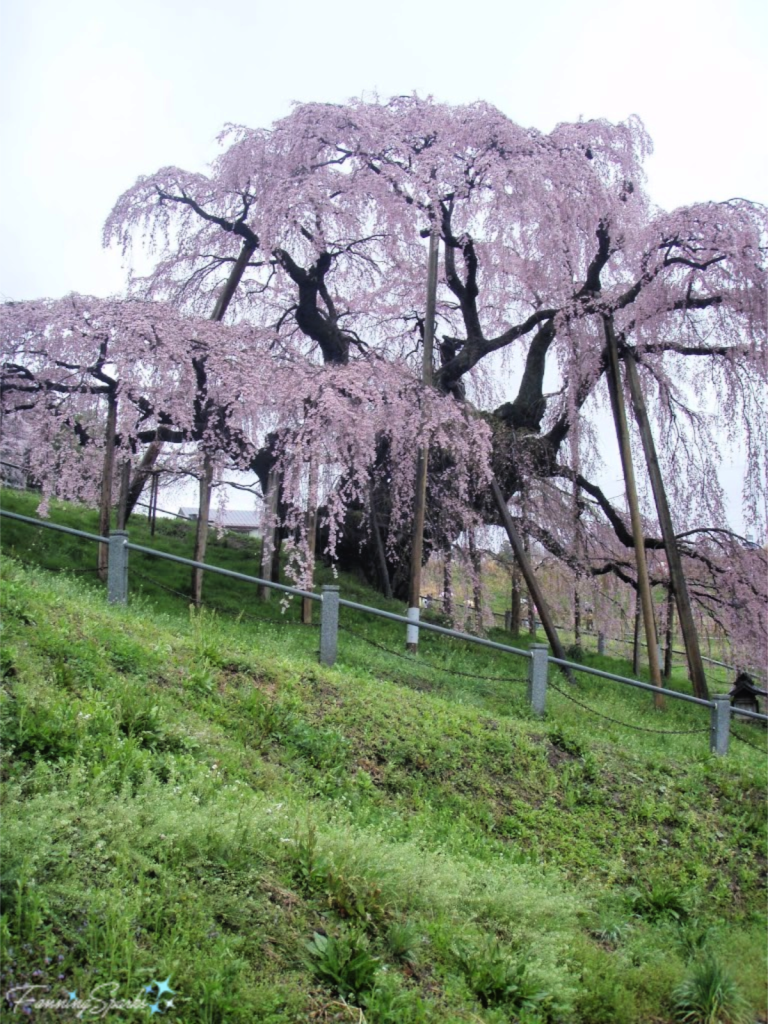 Understandably, we were not the only people who wanted to view this ancient wonder. In the below photo you can see visitors politely queuing up for their turn to get closer to the tree.