One of the pleasures of lake living is observing the abundant wildlife. Whether it’s fish, mammals or birds, it’s always entertaining. Recently, I’ve been watching the regal osprey.
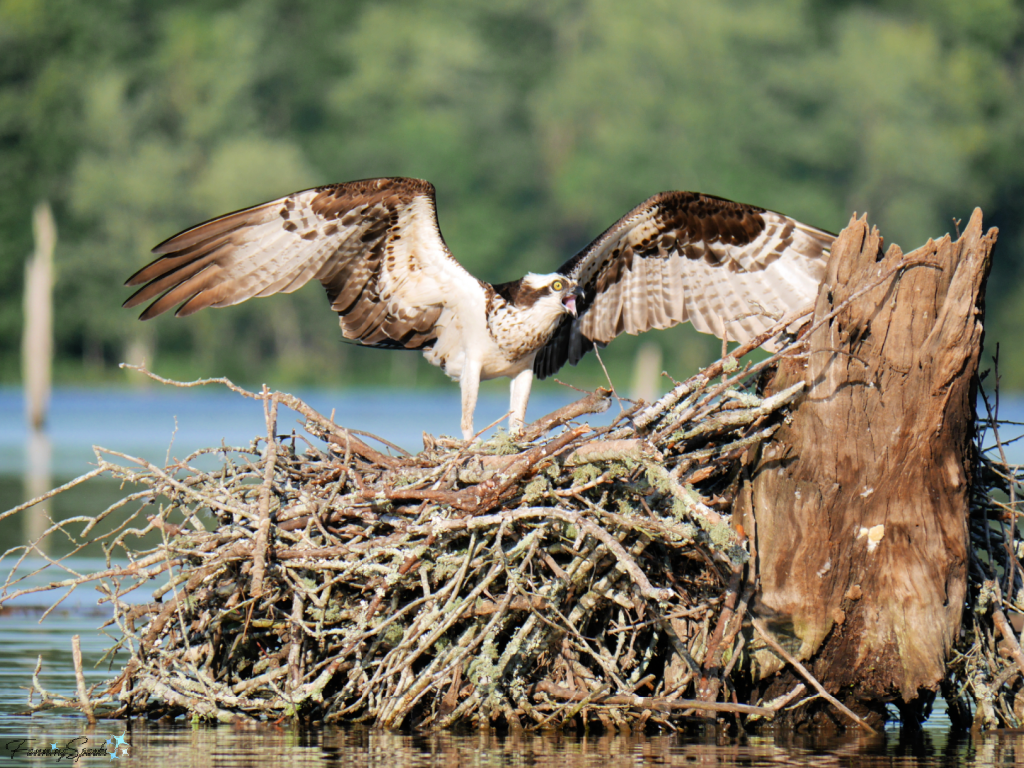
We live on Lake Oconee which is a reservoir created by Georgia Power when they dammed the Oconee River. As a result, there are a significant number of tree stumps in the shallow areas of the lake. There’s a shallow section, which my husband likes to call “Stumptown”, just a short kayak paddle away from our dock. While Stumptown isn’t safe for boaters, it’s perfect for birds. There’s an osprey nest that’s low to the water and very easy to see. Osprey build their nests on tree trunks and platforms using surprisingly large sticks.
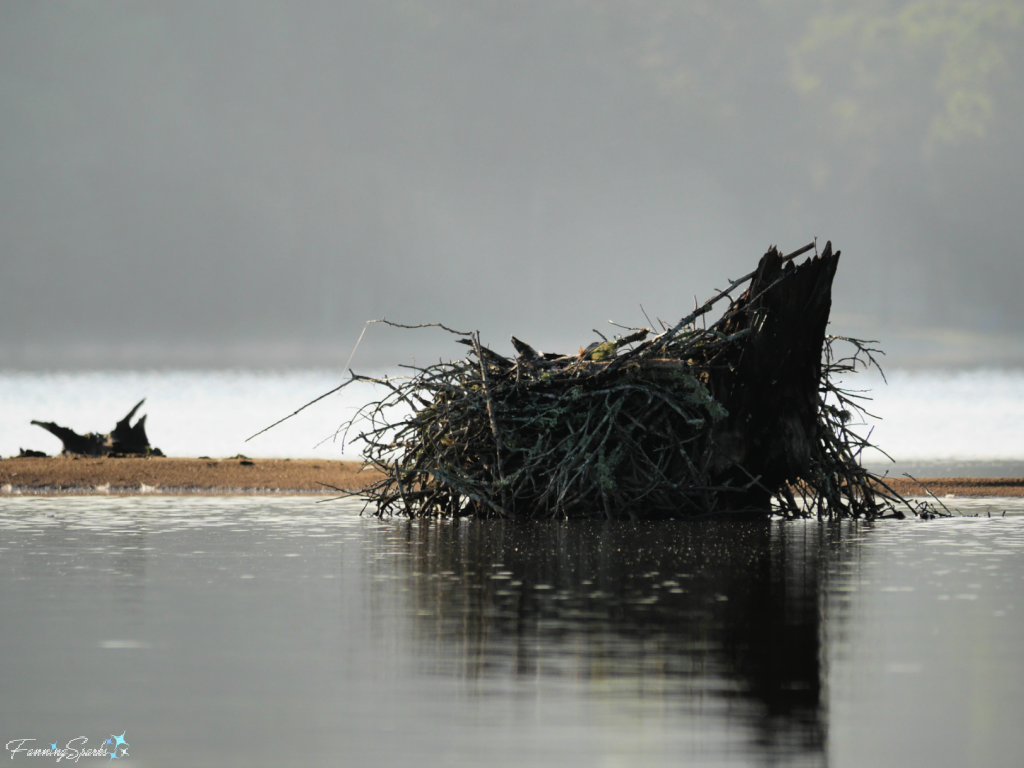
During my first visit to the nest, I saw this majestic adult osprey perched on the edge.
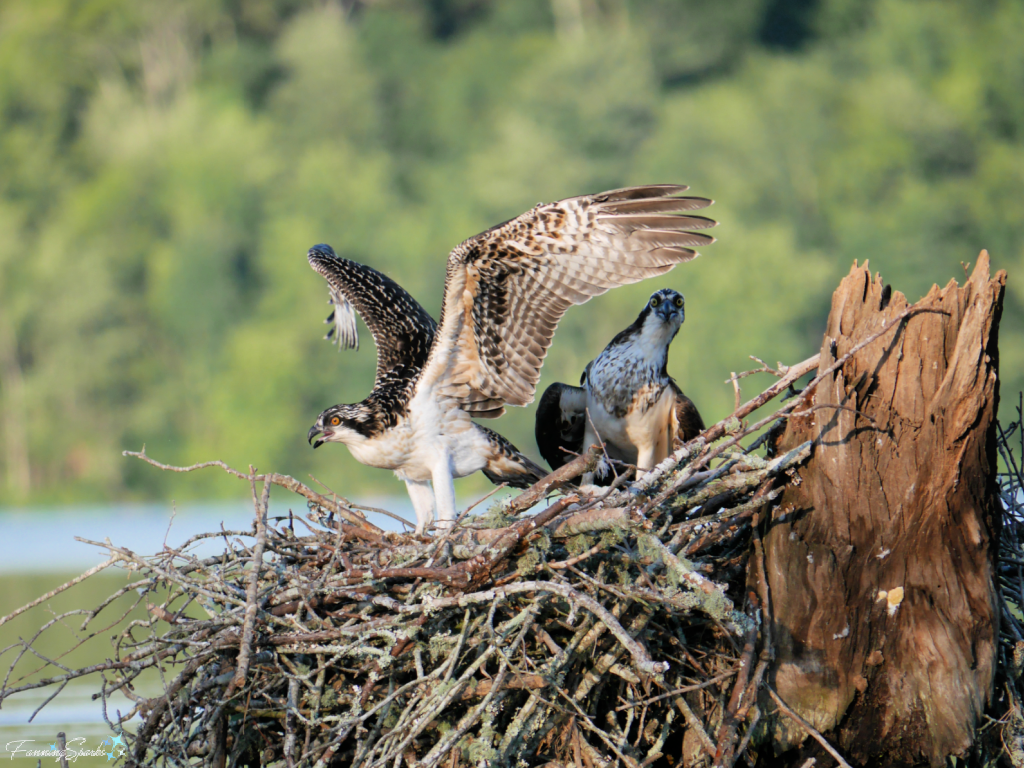
 But then I got curious and decided to go back for a closer look the next day. There were two osprey!
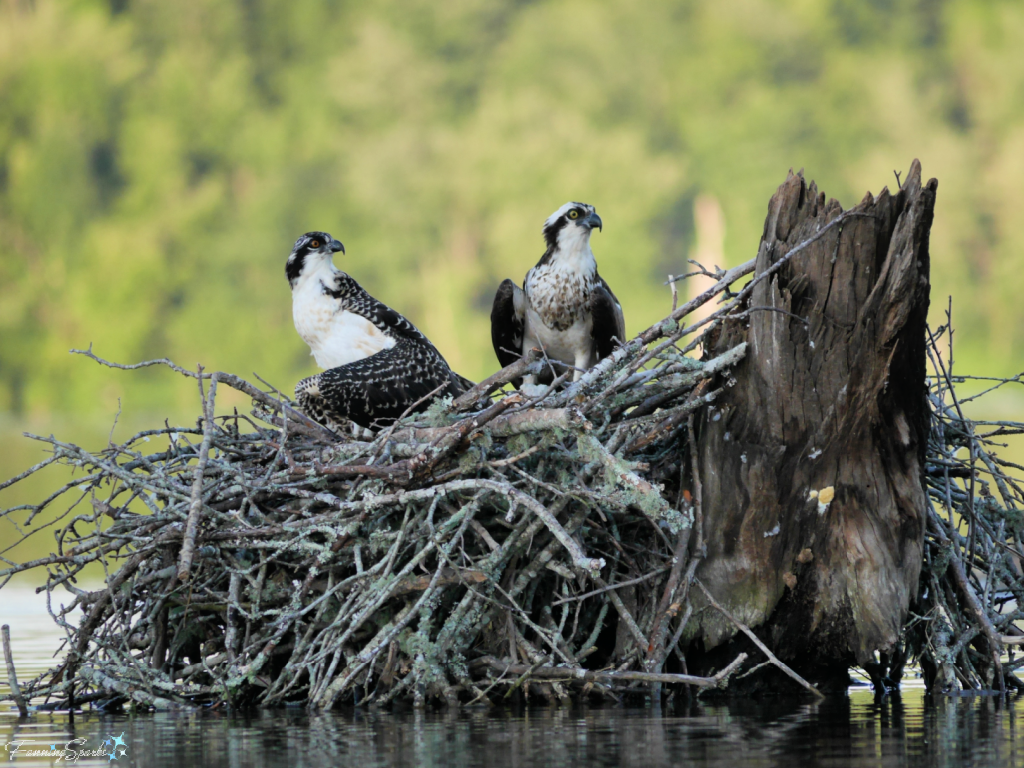
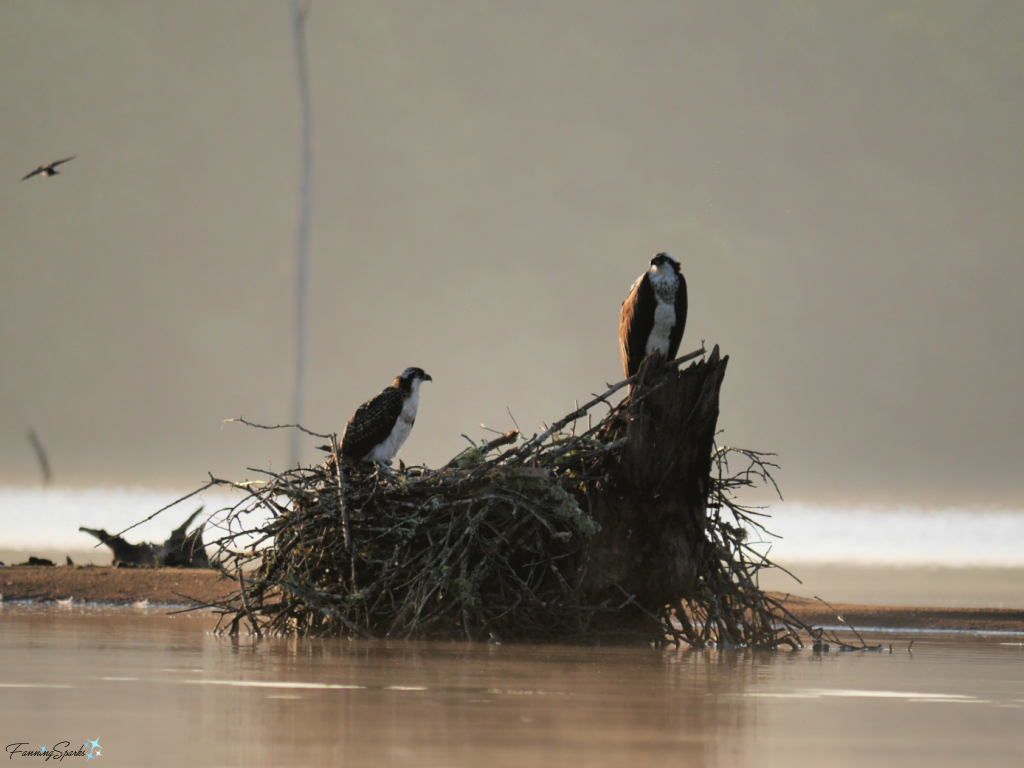 I’ve been back several times and have taken hundreds of photos of these two birds. One is an adult and the other is a juvenile. I assume the adult is female since they typically guard their young during the nestling period. Here’s one of my favorite shots of the mother (on right) and her chick (on left).
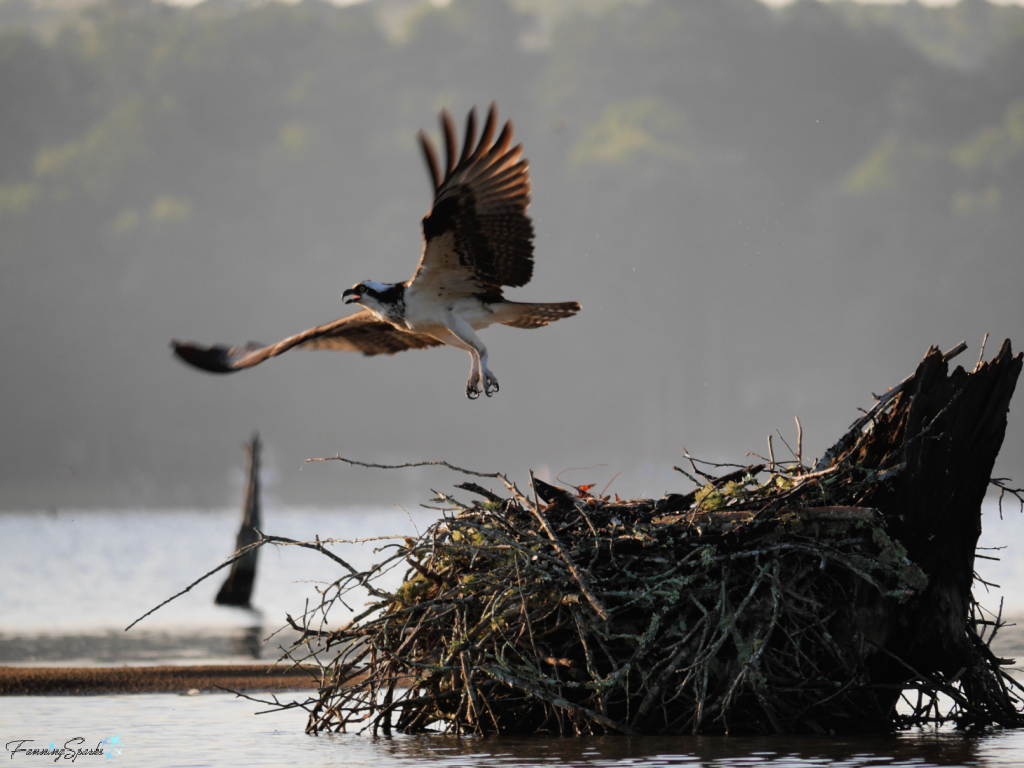
I’ve been checking the nest in the mornings and evenings. Every day, there’s something new to observe. And, of course, that means there’s something new to photograph. But it’s not easy to get good photos of osprey… or most birds for that matter. They rarely sit still and move quickly. Plus they simply fly away when they feel threatened. Here’s the female osprey taking off—she’s awe-inspiring in flight!
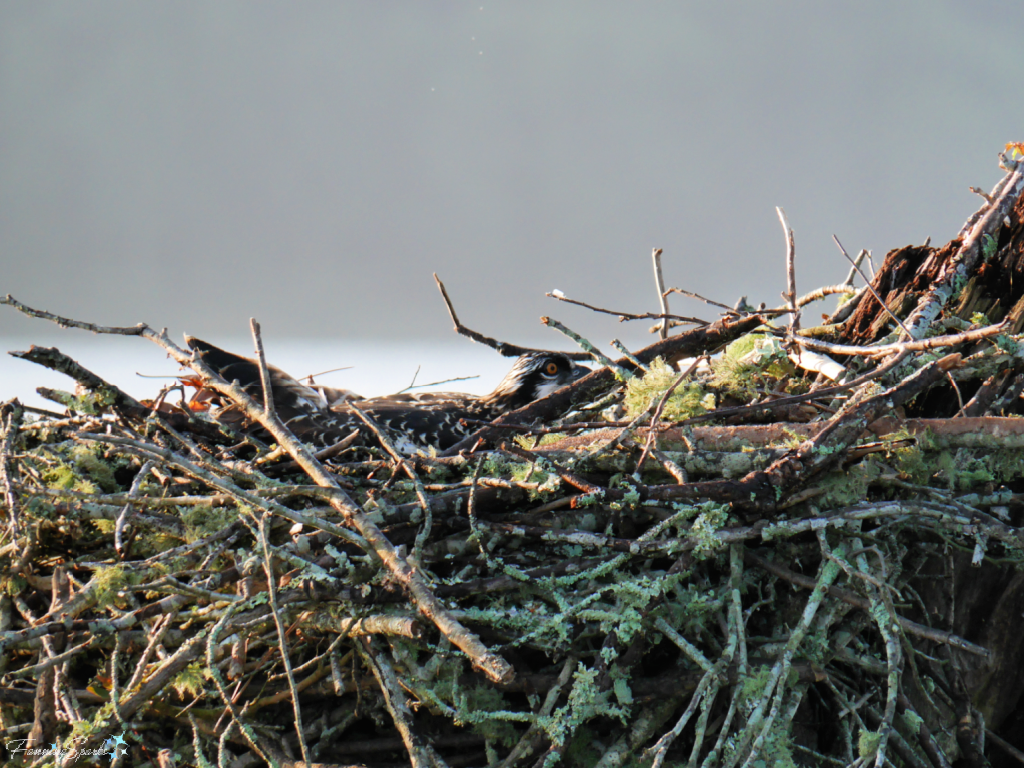
 The juvenile osprey can’t fly yet so it hides in the nest. It blends in perfectly but its red eye is just visible (at center).
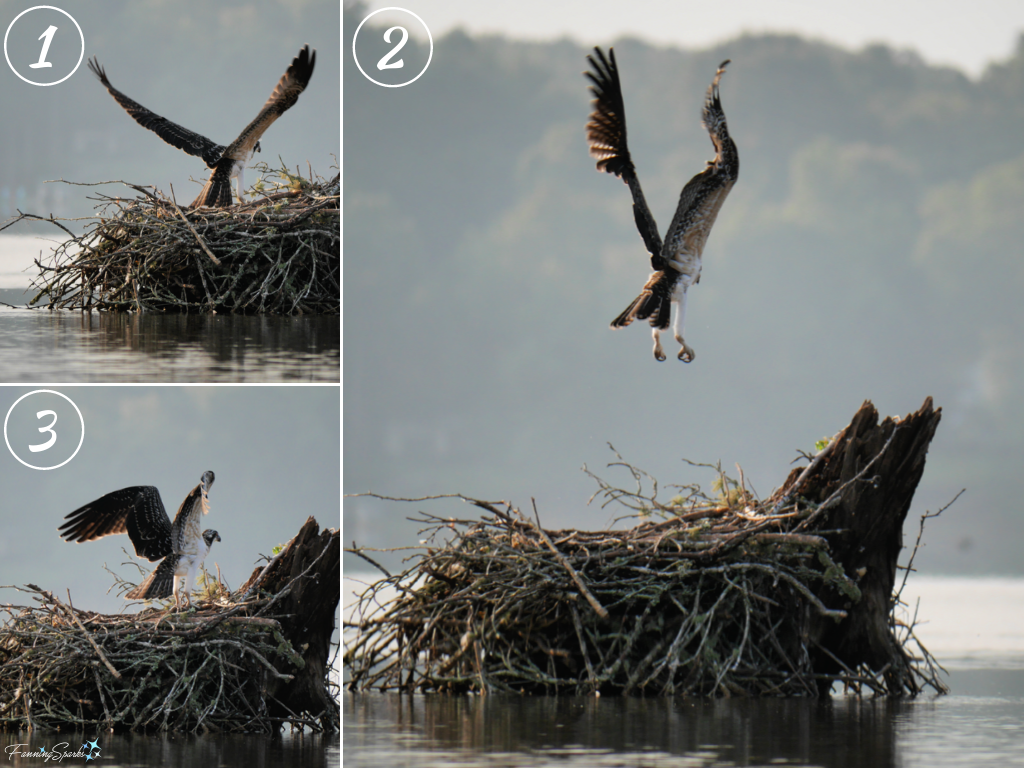
 If I wait long enough, the juvenile osprey will come out of hiding. It seems to be impatient to fly and appears to be practicing. Several times, it has taken a few powerful, hops while frantically flapping its wings. On my most recent visit, it actually achieved liftoff! But it was a very short flight! These 3 photos were taken back-to-back over 10 seconds. It was awesome to watch!
 Osprey (Pandion haliaetus) are fish-eating birds of prey. They are raptors similar to eagles, vultures and other hawks. The osprey has an astonishing ability to high dive into water to catch fish. The Royal Society for the Protection of Birds describes it this way: “The osprey…will fly above the water’s surface to locate fish, sometimes gliding and soaring up to 70 metres [approx. 230 feet or 20 building stories] high. The exact catching technique varies with the type of fish, but they all involve a nearly vertical plunge dive with wings half-folded and feet thrown forward at [the] last moment. The fish are caught in talons after a dive to a maximum depth of 1m [approx. 3 feet]. The fish is held head first, like a torpedo, when carried to a perch or to the nest.” I’ve had the pleasure of watching the osprey’s aerial dive from a distance but it happens in a split-second and actually capturing it on camera seems pretty unlikely. But that doesn’t mean I won’t continue to try.
I’ve been researching techniques for photographing wild birds. Predictably, most experts start by emphasizing the importance of good camera gear and effective camera settings. But I’m more interested in the practices I can follow to increase my chances of an outstanding shot. Here are some helpful tips for wild bird photography.
1. Practice. Install bird feeders, birdbaths and/or birdhouses encouraging wild birds to spend time nearby and increase your opportunities to practice. Check out my DIY Bluebird-Approved Birdhouse Tutorial for a design that has worked well for me. One expert suggested practicing on birds that are accustomed to being around people such as geese and duck.
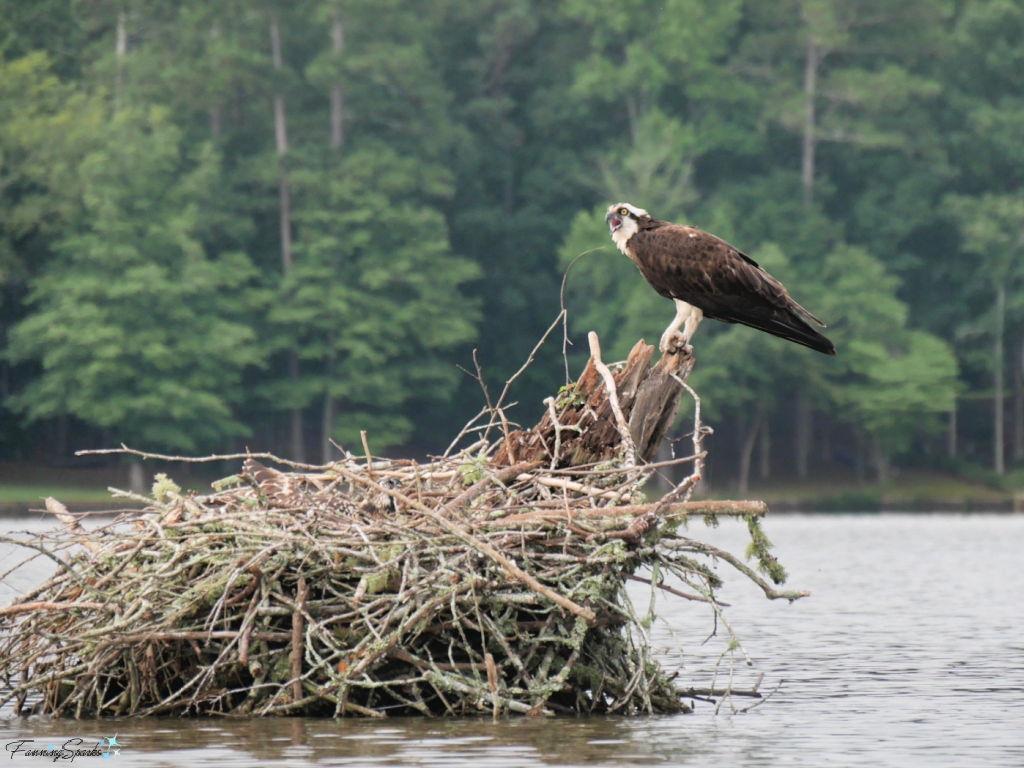
2. Focus On the Eye. Focus the camera on the bird’s eye and strive for catch lights, or highlights, in the bird’s eyes. In the below example, the morning sunlight highlights the osprey’s eye and brings the photo to life.
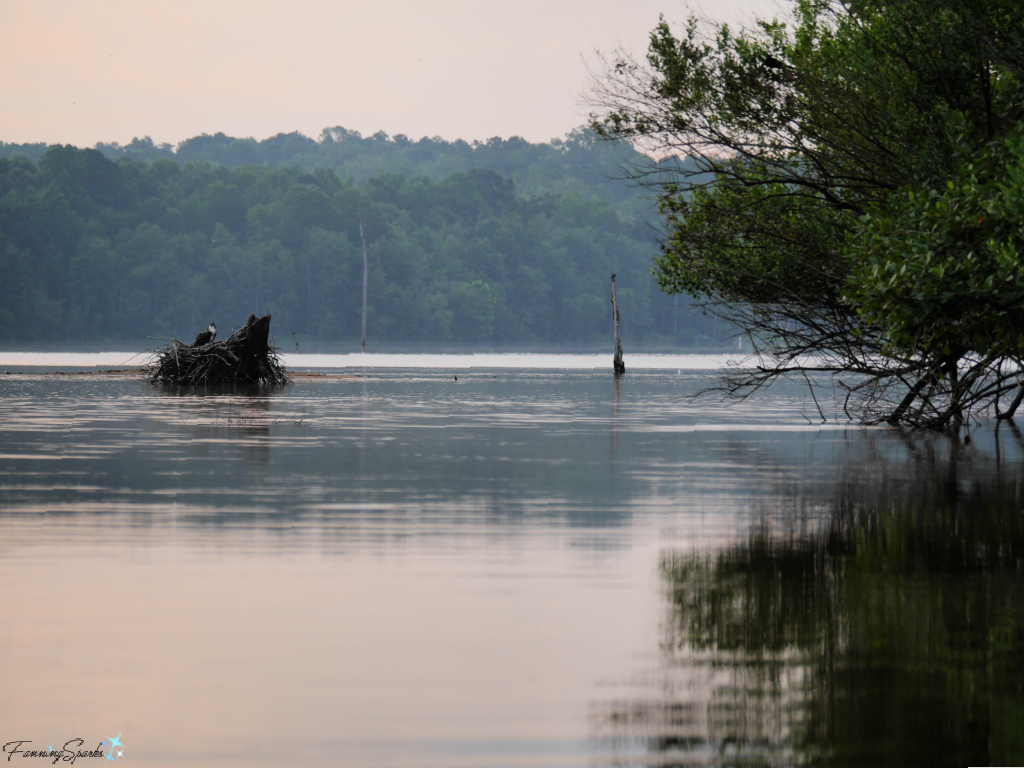
 3. Be Stealthy. Obviously, avoid scaring away the bird to be photographed. Approach carefully. Be quiet. Set the camera to silent mode. Step lightly. Move slowly. Make no sudden movements. Hide out of sight. Blend in. It’s impossible to hide my bright green, 10-ft kayak from a sharp-eyed osprey. But I’ve found that the osprey will calm down and resume normal activity when I wait patiently snuggled into the shrubs along the shoreline (shown at right below).
4. Take a “Safe Shot”. The idea is to take a photo when the bird is first spotted— before starting to approach it. It may not be the best shot but at least it will record the sighting if the bird is scared off.
5. Get Close But Not Too Close. Get close to the bird but keep a respectful distance. If the bird fills the viewfinder, you are probably too close.
6. Avoid Eye Contact. Don’t stare at the bird directly and don’t make eye contact. That doesn’t mean the bird won’t stare at you! I love the below shot because it’s so obvious the adult osprey is watching me. It’s as if she’s saying “I see you!”.
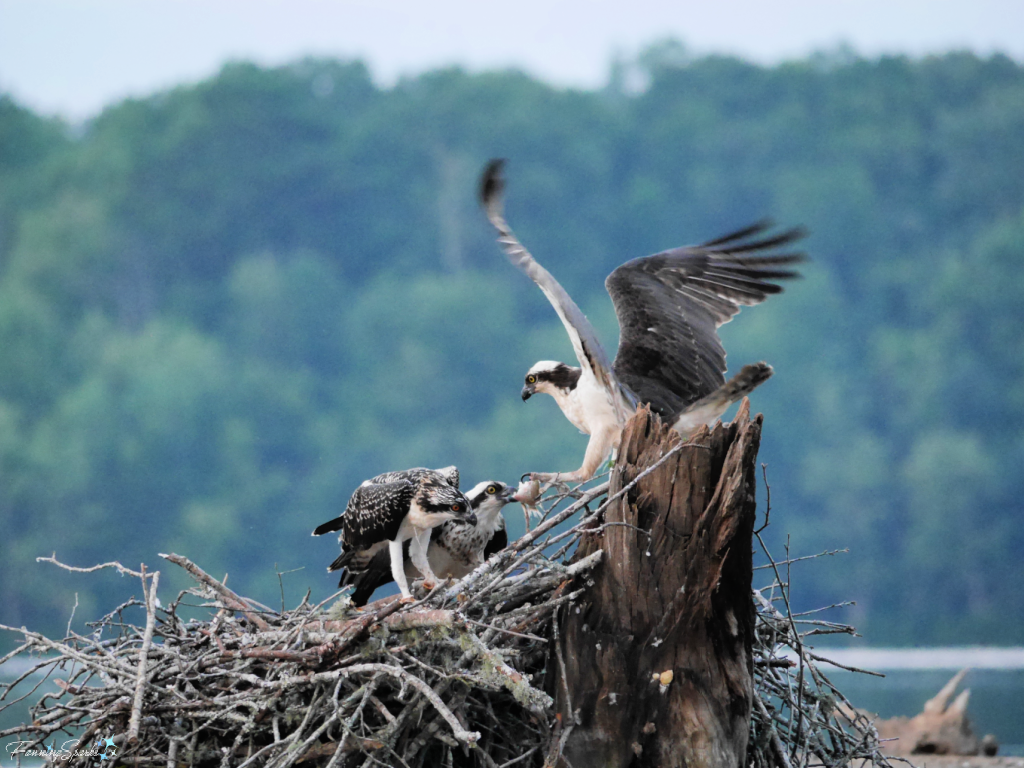
 7. Research. Learn about the grooming, nesting, feeding, parenting and mating habits of the birds to be photographed. I’d visited the osprey nest several times and spotted only one adult and one juvenile osprey. I was completely unprepared when a third bird flew in and out of the scene. Luckily, I was able to wait long enough for the third osprey to come back. Turns out, it was delivering a fish and I caught the below amazing shot. After the fact, I learned that the male osprey is the major provider of fish for the female and young until the chicks are larger.
 8. Be Curious. Visit the target location frequently and observe the birds over time. This practice will prepare you for the stages and special events in the bird’s natural cycles such as courting, nest building and raising young. Study their routines. How do they hunt/gather food? How do they feed it to their young? At what time? From where? What sounds do they make? What are their calls and songs? Osprey, for instance, have high-pitched whistling voices. Their calls, which are like a succession of chirps, will evolve into an intense squeal if they feel threatened. Become familiar with possible sites to identify the best vantage points and lighting conditions.
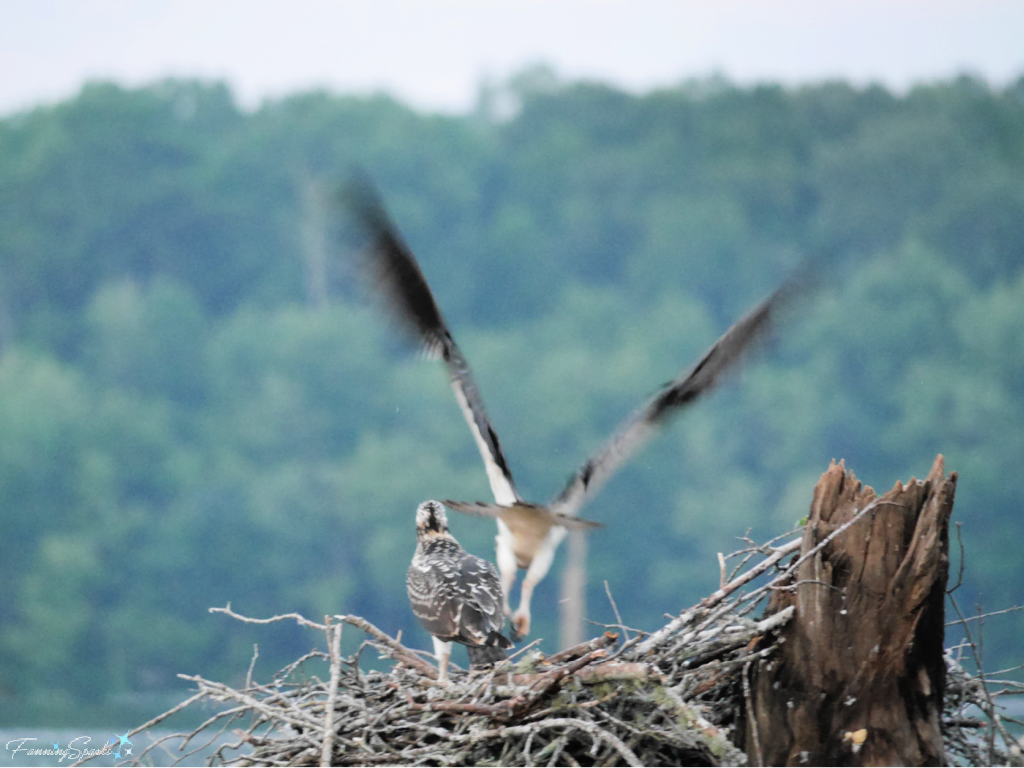
9. Choose Background. Position yourself so the background in the photos will be clear and uncluttered. Here’s an example of how a poor background can spoil an otherwise great shot.
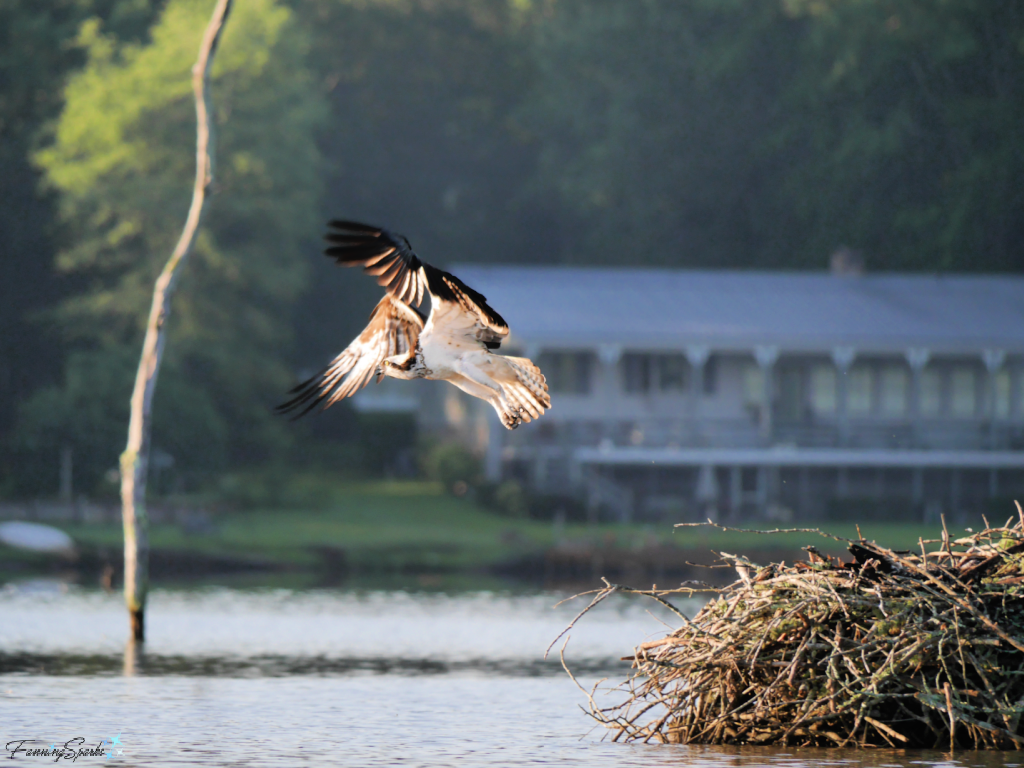
10 Choose Lighting. I’ve raved about the beauty of the natural light during early morning and late evening several times on the blog. It’s equally true for photos of birds. I think the early morning light in the above photo is perfect—which makes it even more disappointing to have that house spoiling the background.
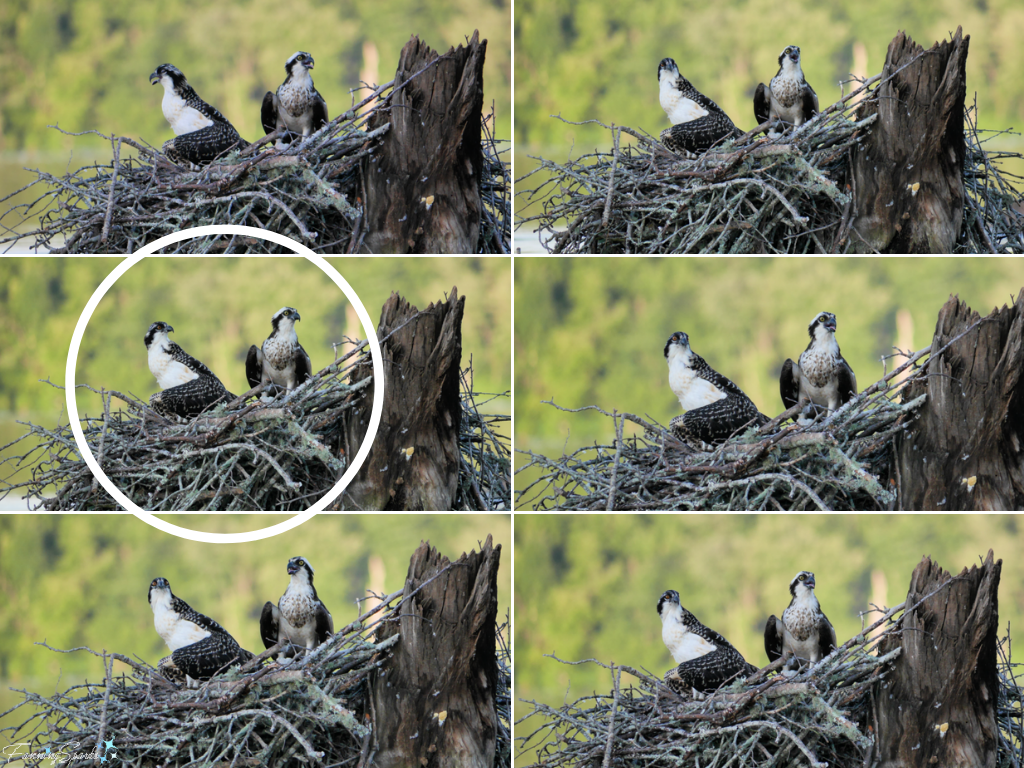
11. Take Lots of Shots. Take a variety of shots including portraits, surroundings, details and action shots. Take multiple iterations of each. Obviously, you can’t tell a bird to hold a pose or to look in a certain direction so you have to wait for it happen. Action shots are even more difficult because birds move so quickly. Think ahead to anticipate the action (eg take off, landing, dive) before it happens. The below collage illustrates why it’s important to take multiple shots. These six images were taken over a one-minute period. Notice the movement of the bird’s heads—it was nonstop. The third image, where they are both looking to the right, is the one I selected.
 12. Be Ready and Alert. As difficult as it is to hold a camera steady with a finger on the shutter button for long periods of time, it’s necessary to catch the great shots. Of course, a tripod would make it much easier. I’m not geared up to use a tripod on my kayak, so I handhold my camera and lens. Holding it steady for 15 minutes at a time can be challenging! Staying focused and ready to shoot during that entire time can be even more challenging. But it’s worth the effort. It’s probably just a coincidence but it seems that every time I release my hands or look away, the birds change things up and I miss the shot! Here’s an example.
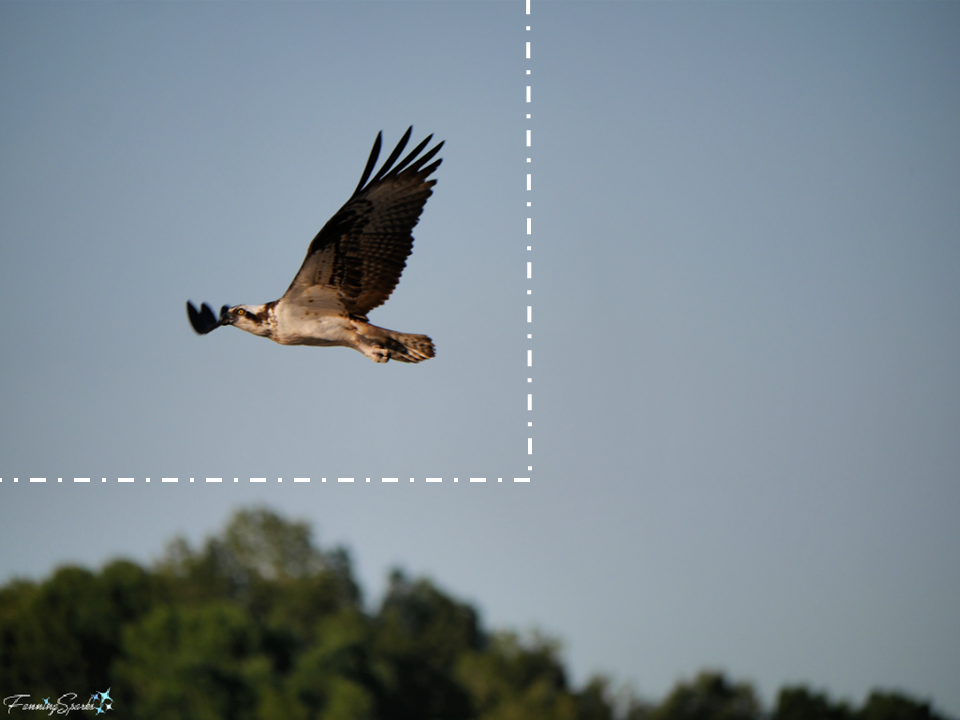
 13. Compose the Shot. It’s easy to forget about good photo composition when scrambling to capture a shot. But all the rules about balance, unity, entrance and exit, lines, framing, breathing space, light, shade and so on still apply. It’s always better to leave room in the frame when a subject is looking off or moving towards to the side of the picture. So if a bird is flying into the frame from the right, compose the image so the bird is slightly to the right of center freeing up the majority of the left side for them to “fly into”. Here’s an example of how not to do it—notice how it looks like the osprey is about to fly off the image. The composition would have been better if it were framed along the white lines.
 14. Be Patient. If there’s one thing I’ve learned about photographing wild birds, it’s patience. I’ve spent hours watching the osprey. Ironically, you often have to wait a long time to get a great shot but when it appears, you need to act in a split-second.
15. Seek Inspiration. It’s always a good idea to reference the work of professionals and award winners. Check out highly respected photography contests like the Audubon Photography Awards and the Bird Photographer of the Year (see More Info).
More Info
You might also like my post, Top 19 Photos from 2019, which included several of my favorite photos of wild birds.
The birdhouse featured in my DIY Bluebird-Approved Birdhouse Tutorial has provided many opportunities to photograph bluebirds and other small birds.
You can learn more about the amazing osprey on the following websites:
. Osprey on All About Birds
. Osprey on National Audubon Society
. Pandion haliaetus on iNaturalist.org
. Osprey on The Royal Society for the Protection of Birds
The 2020 Audubon Photography Awards were announced recently. Check out the top 100 photographs. The 2020 finalists for the Bird Photographer of Year are also worth checking out.
Today’s Takeaways
In addition to having good camera gear and knowing how to use it, successful wild bird photography is all about:
1. Curiosity,
2. Preparation and
3. Patience.


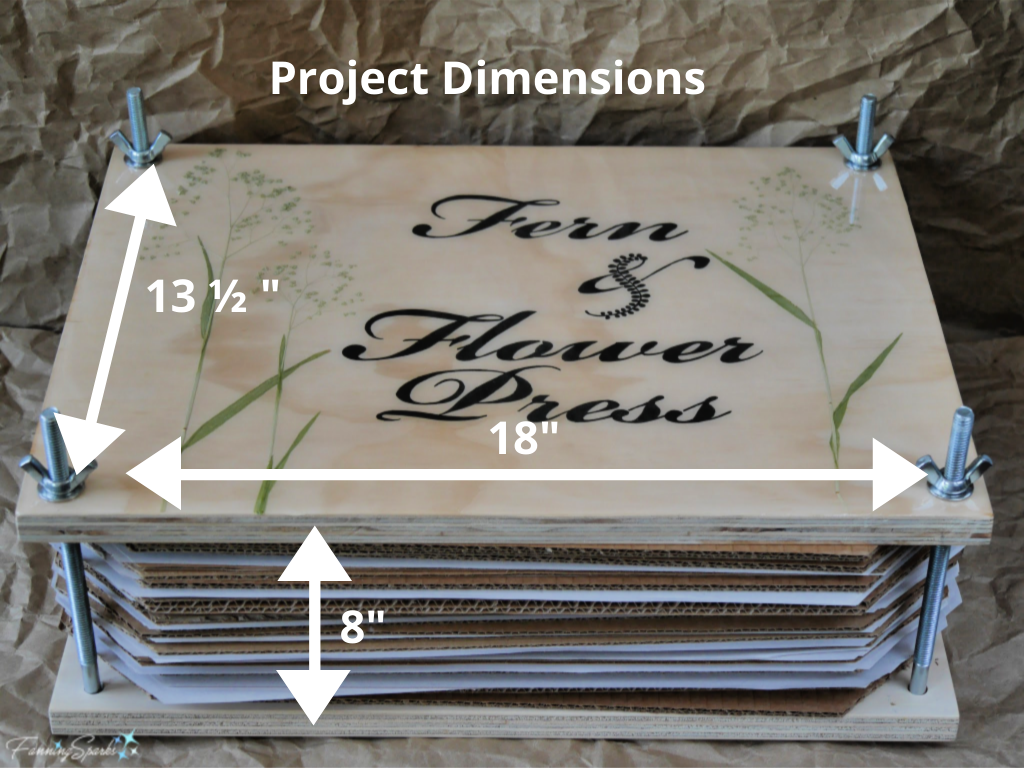
 The below graphic illustrates the parts and measurements for the landlubber’s toy sailboat. Essentially, it’s a piece of flat wood (aka Hull) with a vertical stick (aka Mast) and some pieces of fabric (aka Mainsail and Jib). The trick is to get it to float and stay upright. That’s where determination and perseverance came into play. It took lots of trial and error and several test runs to get to a solution that works. Now that I’ve figured it out, I’m happy to share the details with you!
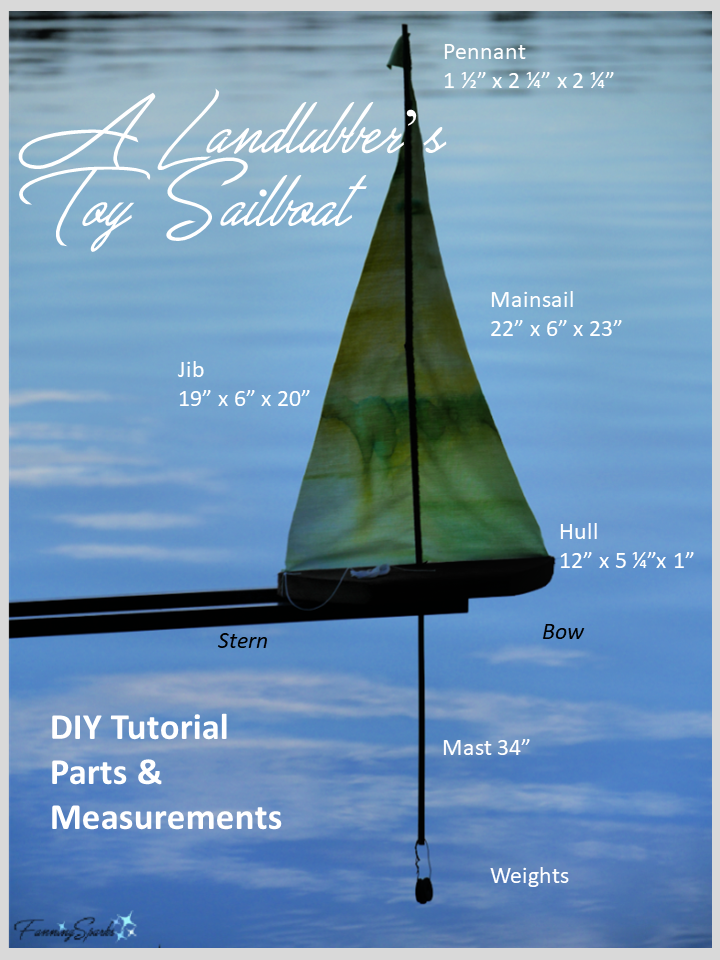
 . Weathered Wood 12” x 5 ¼” x 1” (actual dimensions)
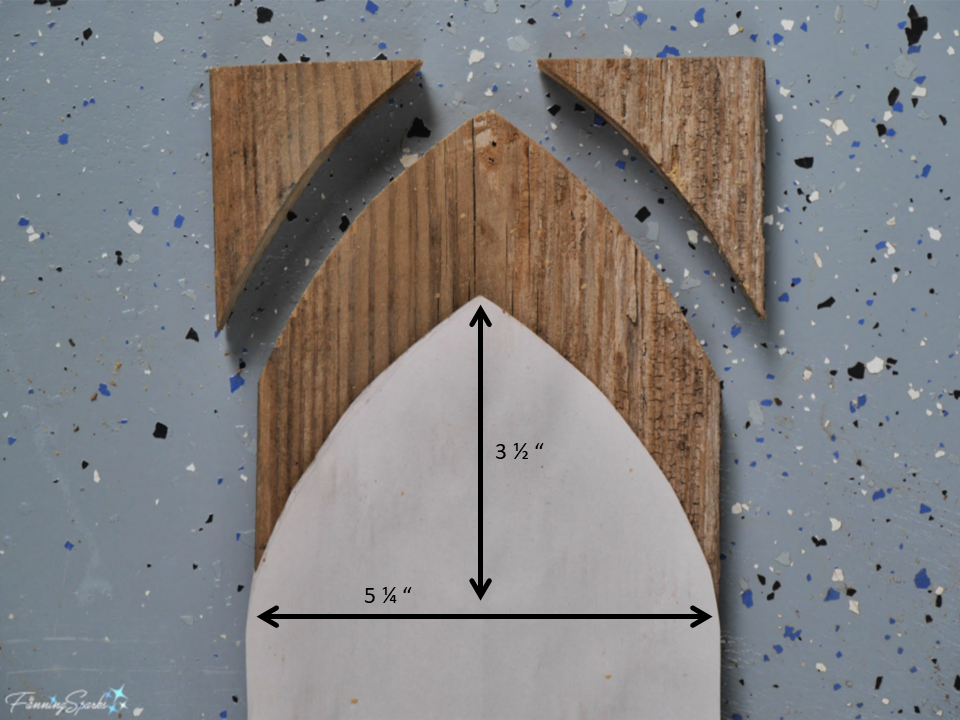 Step 2 – Drill Hull Using the ⅟₁₆” bit, drill 3 holes for thread and string as illustrated with black arrows on the below photo:
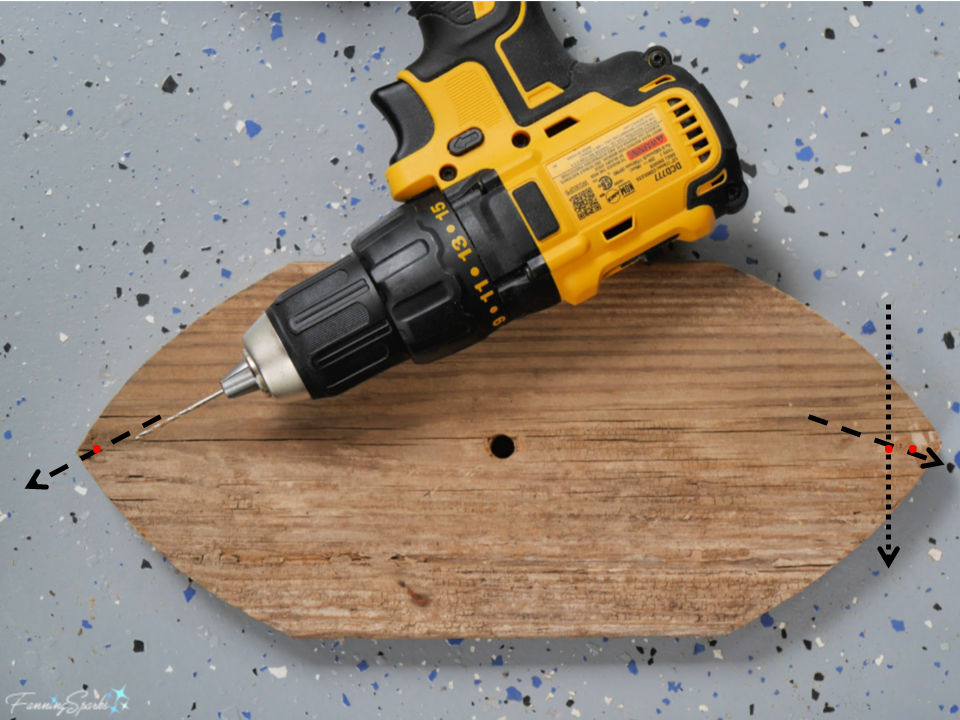 Step 3 – Cut Mast Cut a 34” section of ⅜” bamboo (or dowel) to make the Mast. Measure up 12” from the bottom of the Mast and drill with the ⅟₁₆” bit through the center of the bamboo rod at this point. Drill through the bamboo rod at each end of the Mast.
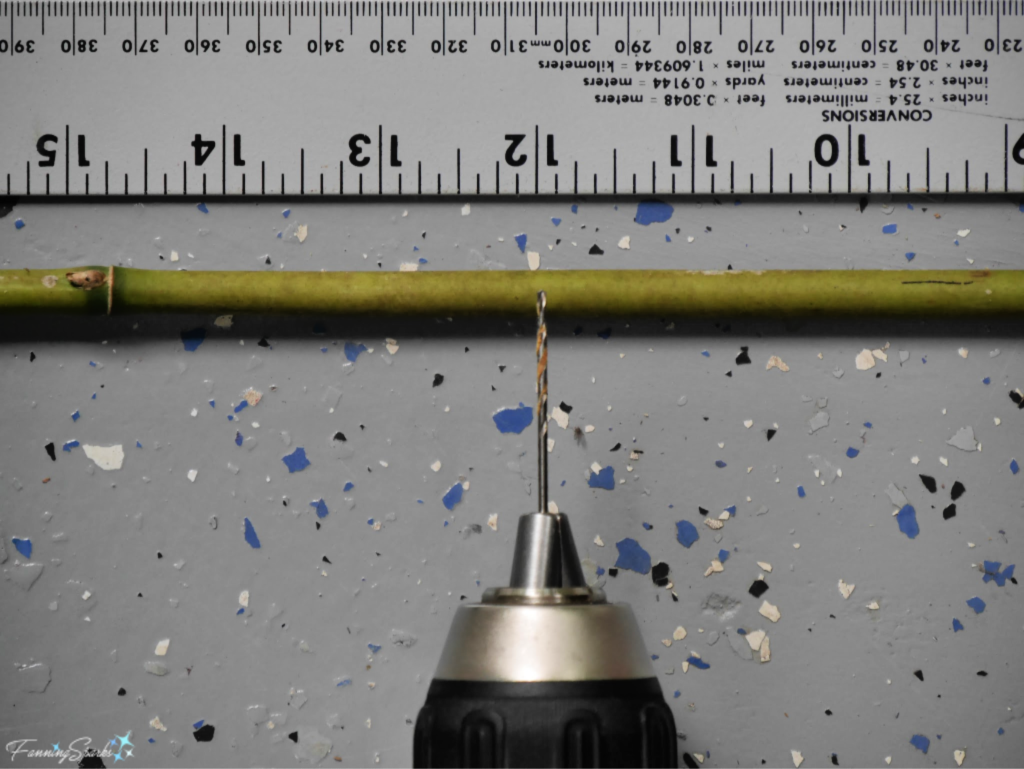 Step 4 – Cut Sails Cut the sails from the fabric. You will need 3 triangles of fabric:
 Step 5 – Sew Sails Lay the Jib on the Mainsail aligning the right angle corners and the long straight edges (Mainsail 22” and Jib 19”). Sew a small ¼” seam. Alternatively, you could use waterproof glue.
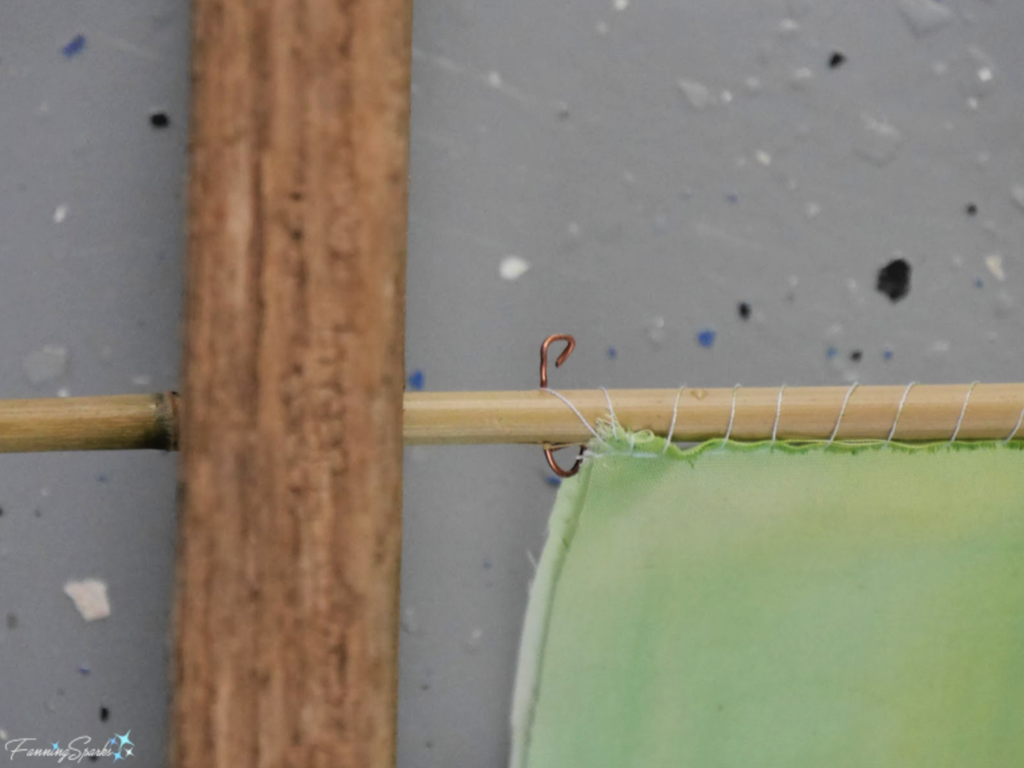
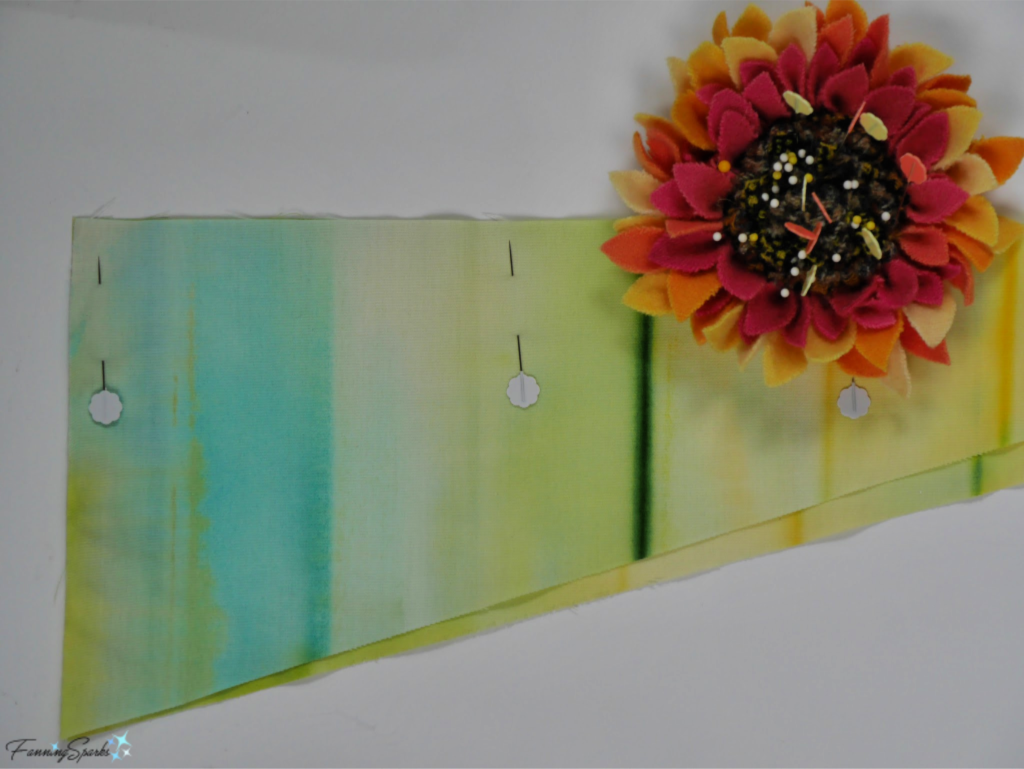 Step 6 – Attach Sails Cut about 1 ½” of wire. Bend loop into one end. Insert wire through the middle hole in Mast (at 12” mark). Bend loop in other end of wire to keep it snuggly in place. Sew the sails to the mast. Start by stitching thread through the bottom of the sails and the wire. Stitch by looping thread around Mast and through seam on sails. At the top of the Mast, insert needle and thread through hole in Mast to secure top of Mainsail. Take a few last stitches through the fabric to finish securely. Alternatively, you could use waterproof glue to attach the sails to the Mast.
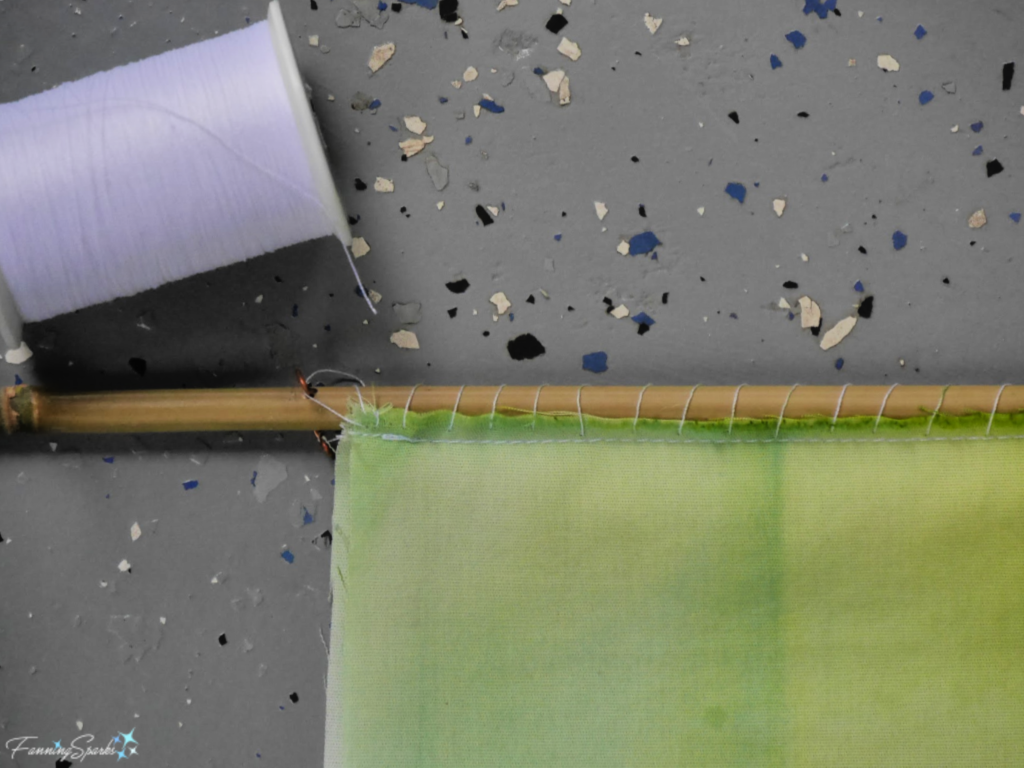 Step 7 – Attach Pennant Sew Pennant to top of Mast. Start at the top of the Mast, take a few stitches through the fabric to start securely. Insert needle and thread through hole in Mast to secure Pennant. Use running stitch to bring thread down to bottom of the Pennant. Wrap thread around Mast. Take a few last stitches through the fabric to finish securely. Alternatively, you could use waterproof glue to attach the Pennant to the Mast.
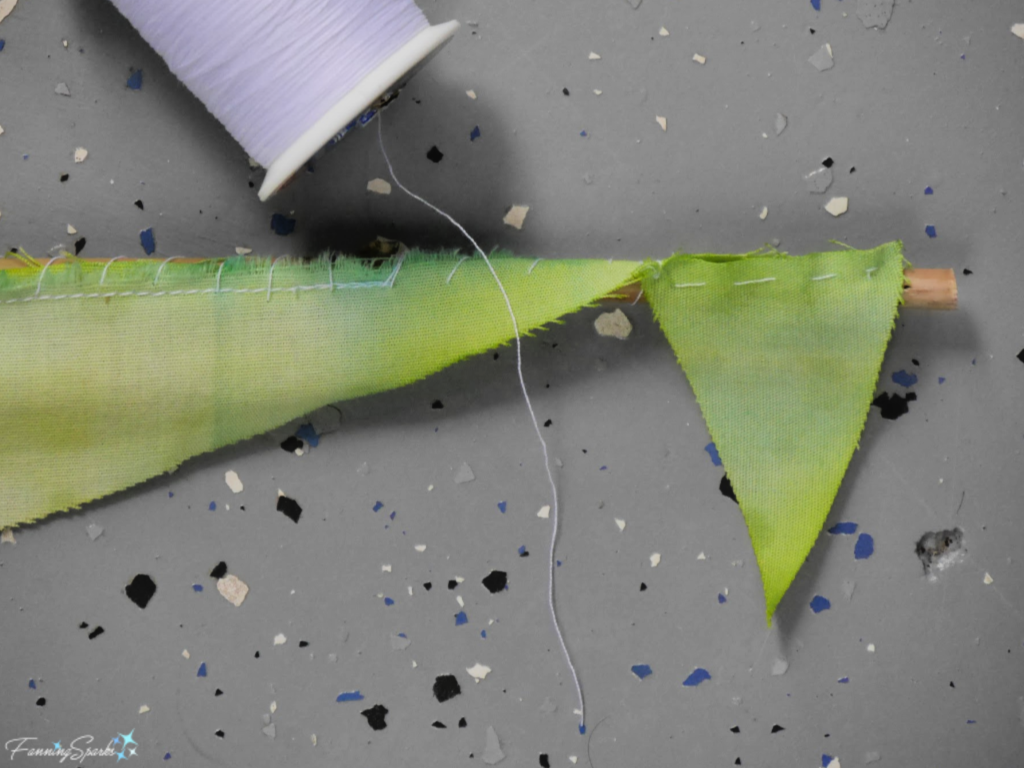
 Step 9 – Attach Sails to Hull Attach front and back corners of sails to Hull with thread. Start with the Mainsail and the bow of the Hull.
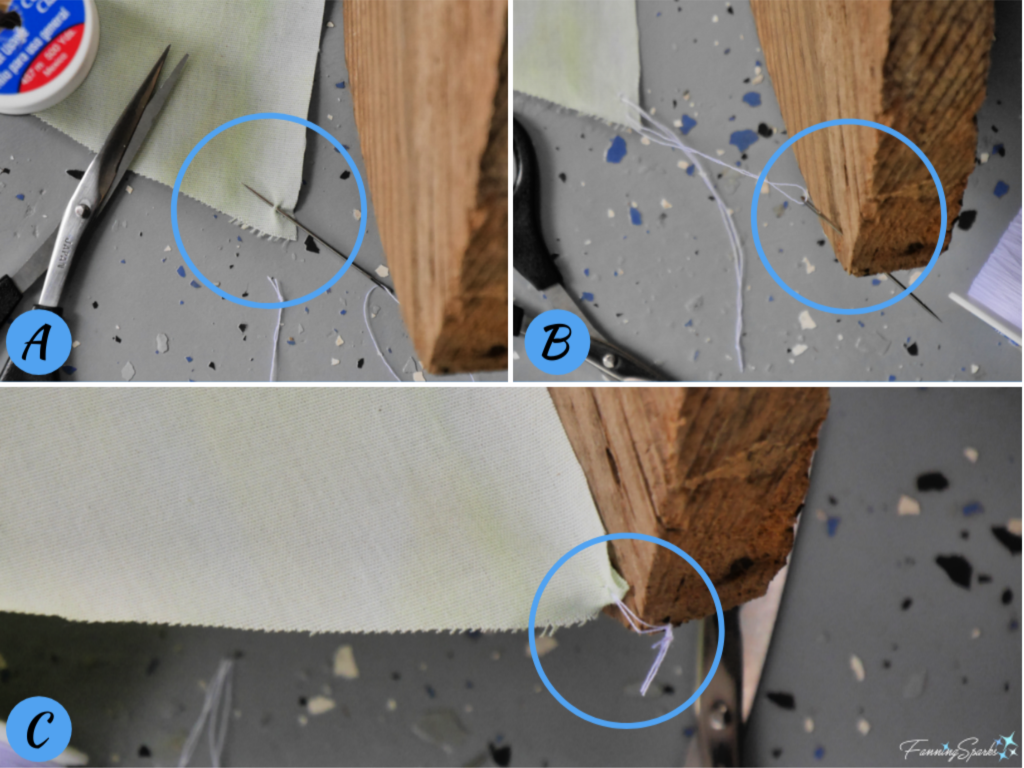 Step 10 – Attach Weights to Mast Cut about 6” of wire, put 4-6 1”washers (or nuts) on wire, thread wire through bottom hole of the Mast. This weight forms a keel, of sorts, and serves to keep the sailboat upright.
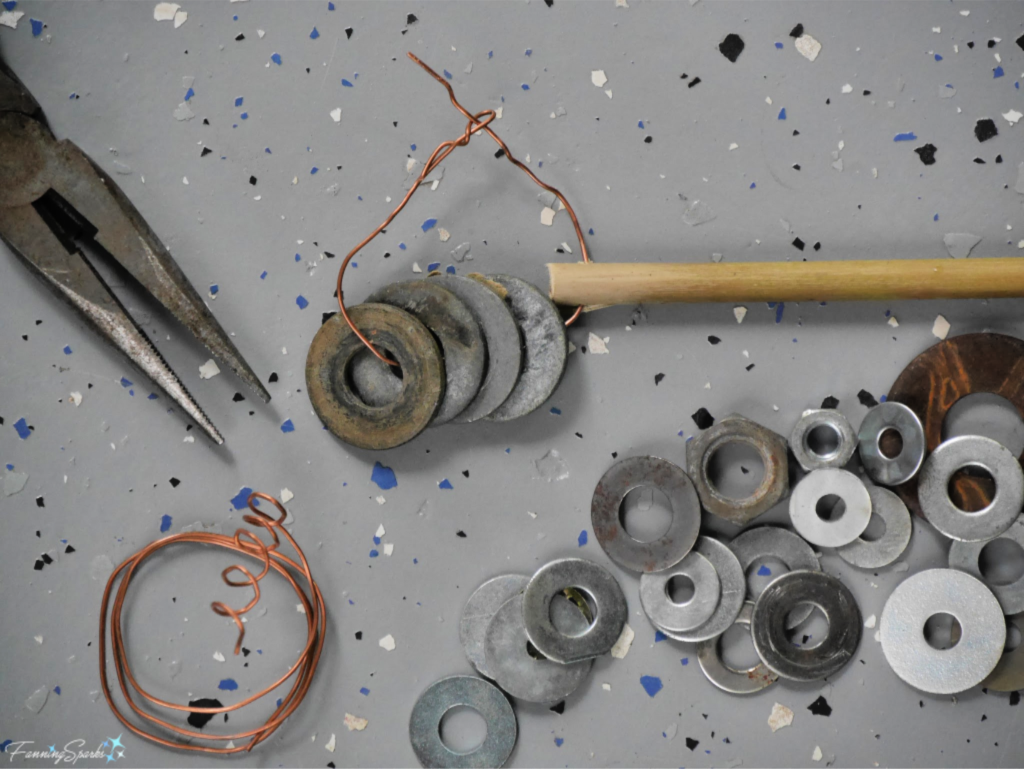 Step 11 – Attach String Cut a piece of string about 6 feet long. Use needle to thread the string through the hole at the stern of the Hull. Knot to attach securely. You’ll need this string to keep the sailboat from floating off into the sunset!
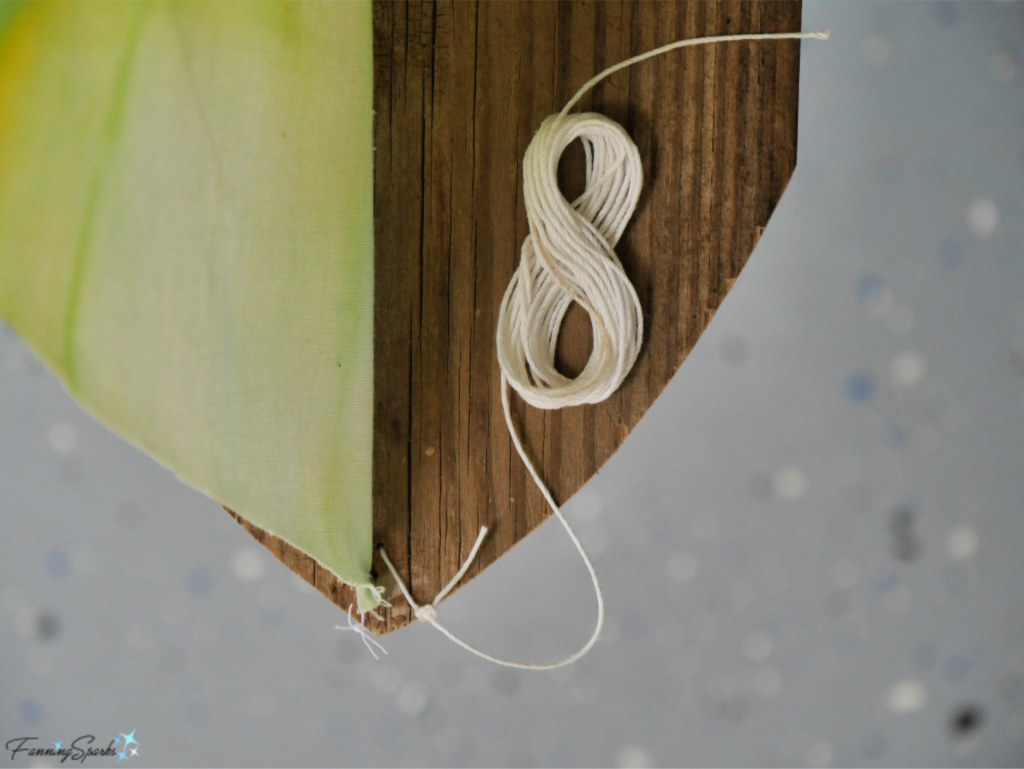 Step 12 Test Run It’s time to give your sailboat a try. This sailboat needs about 1 ½ feet of water to stand upright. Gently set it in water to ensure it floats and stays upright. Adjust if necessary; for example by centering or adding washers to the weights.
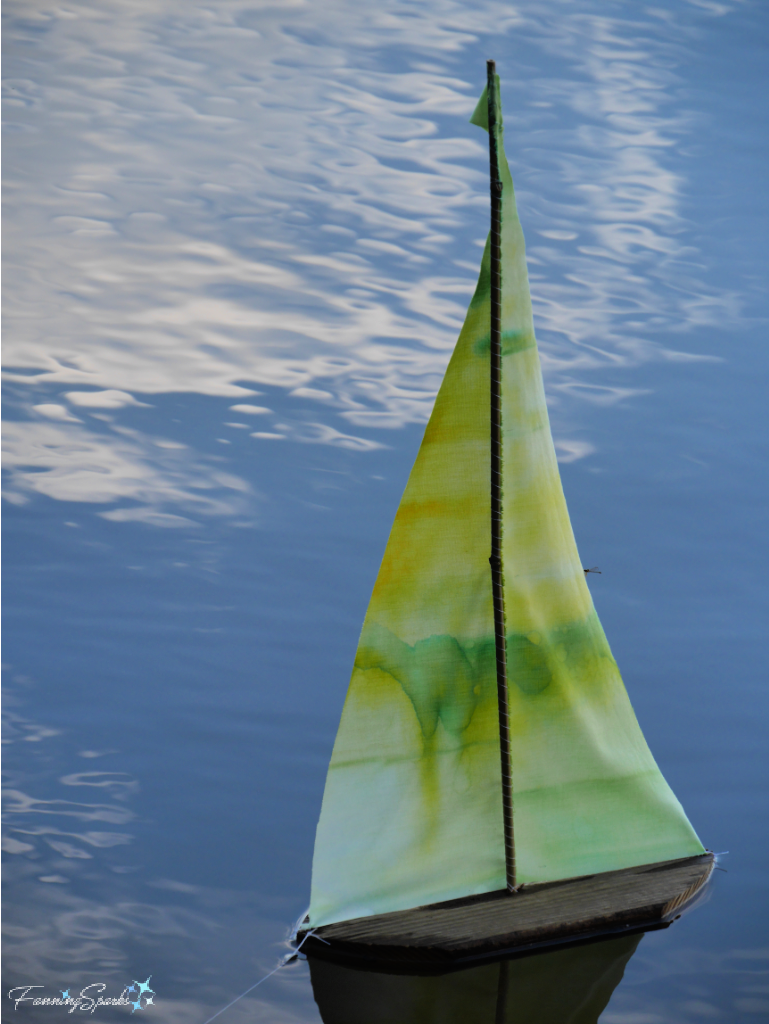 UPDATE July 6, 2021: Shown below is my latest iteration of this sailboat. This time I made the sails with a polypropylene fabric called Oly*Fun™. This fabric repels water so the sails stay dry and the sailboat stays balanced.
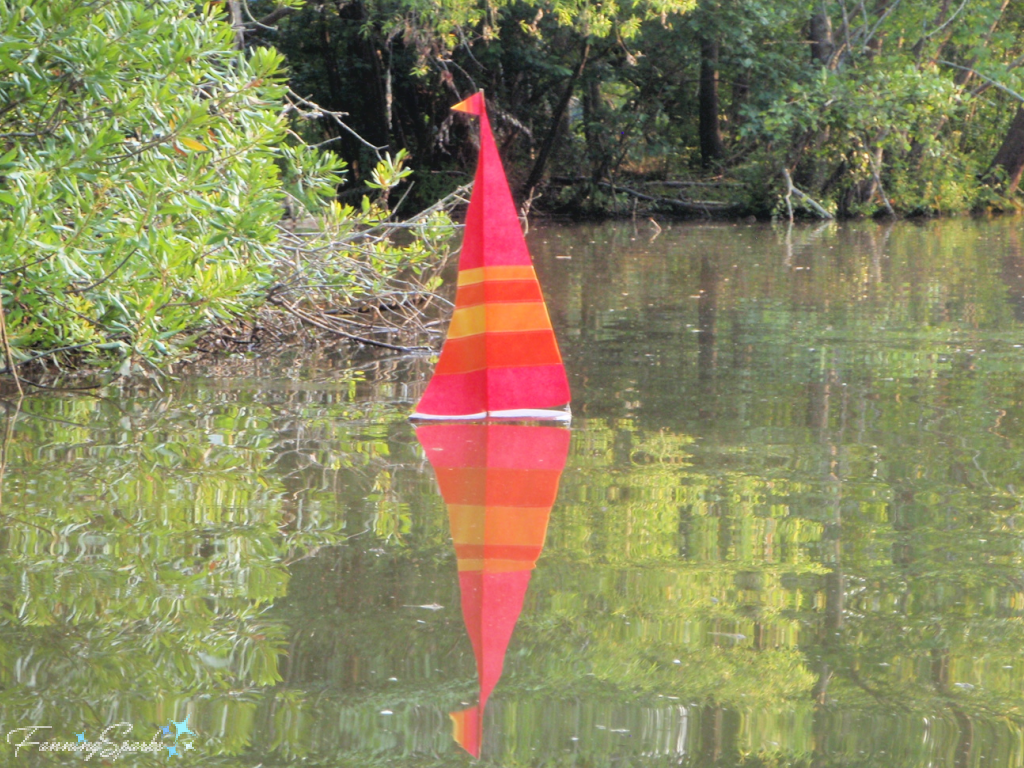
 You can learn to build a tiny toy sailboat with a cork, craft foam and a toothpick in the hands-on science activity in this
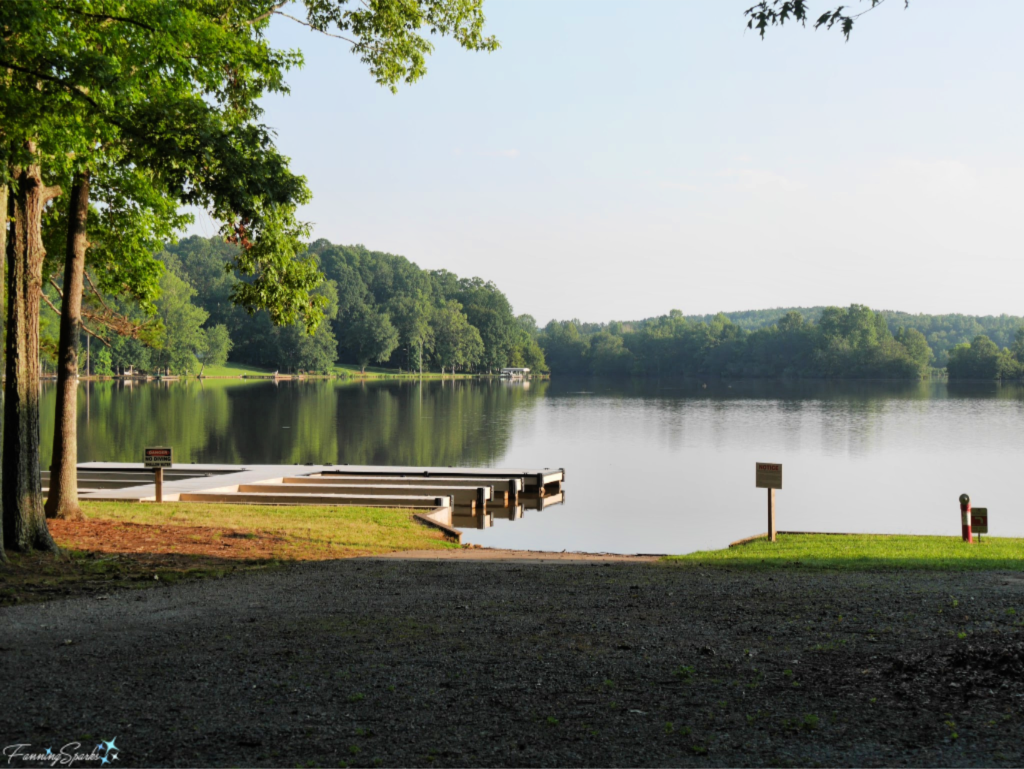
 The end of the dock provided the perfect spot to enjoy the show and await sunrise.
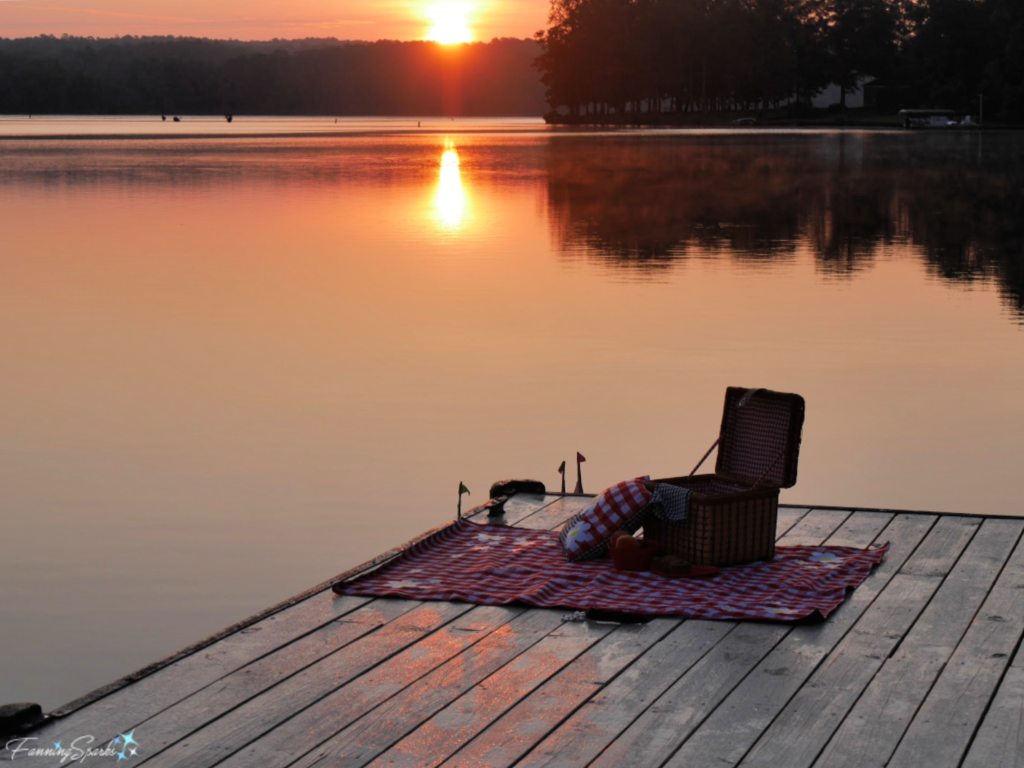 With such an early start, everything had to be prepared and packed the night before. Luckily, a breakfast picnic doesn’t require much food and the menu was super simple.
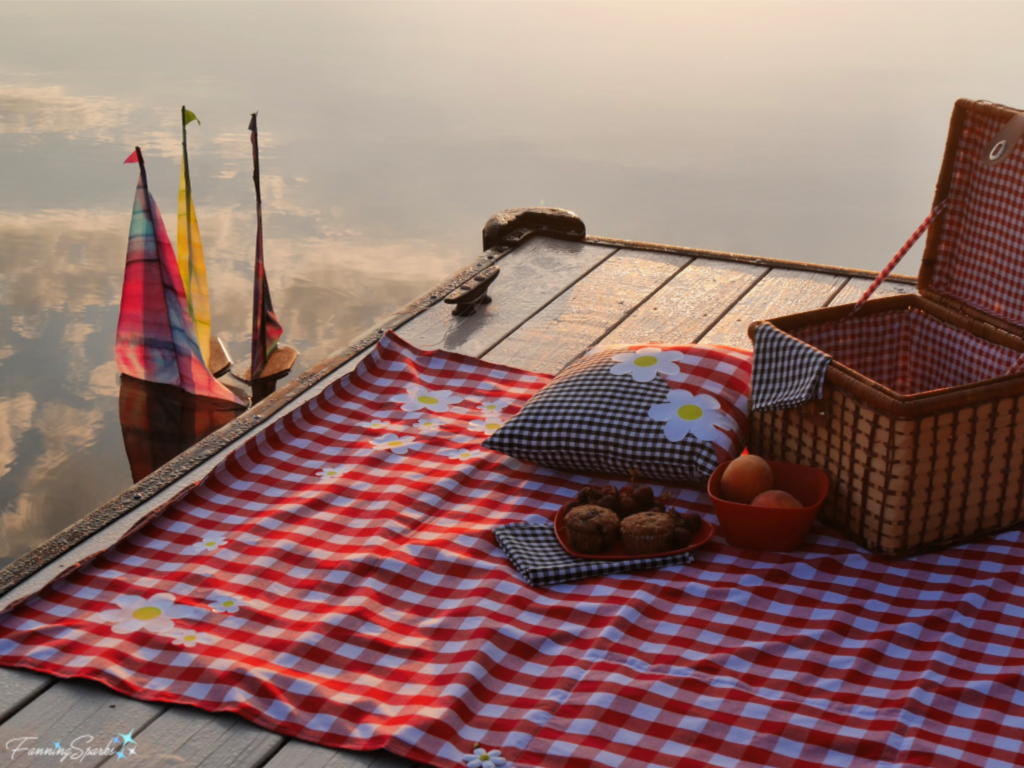 My breakfast picnic consisted of blueberry muffins and fresh fruit. It would have been perfect if I hadn’t forgotten the coffee. My to-go coffee mug was ready but, in the rush to reach the boat launch for first light, I left it sitting on the kitchen counter. With or without coffee, this simple meal was tasty and hassle-free.
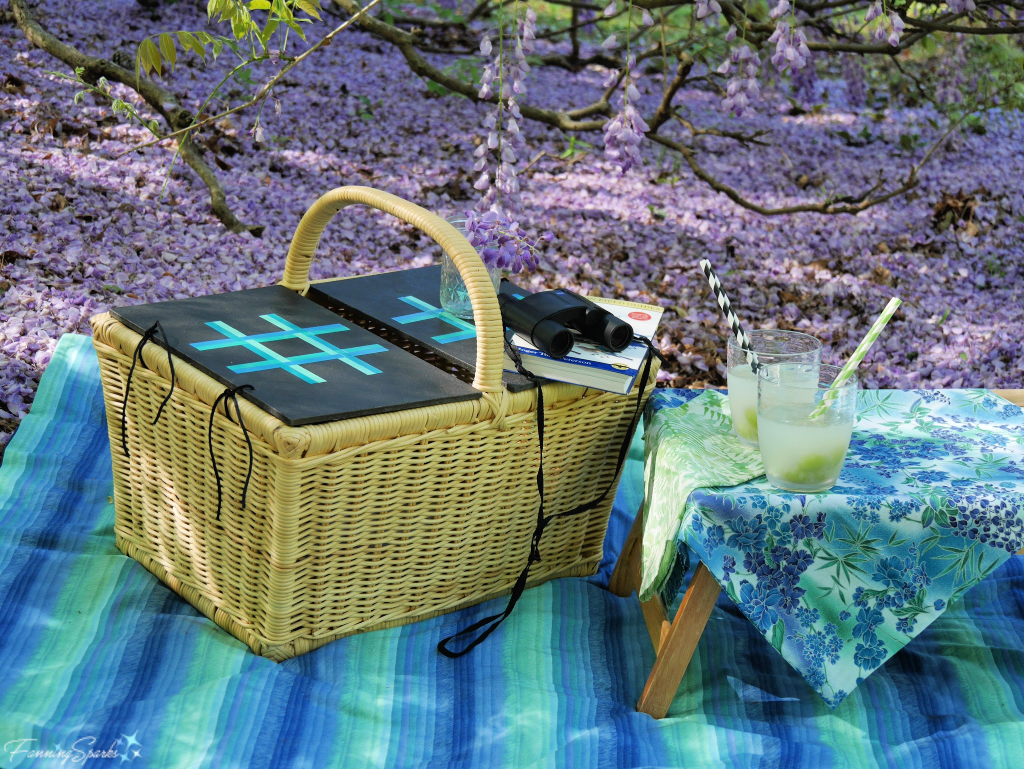
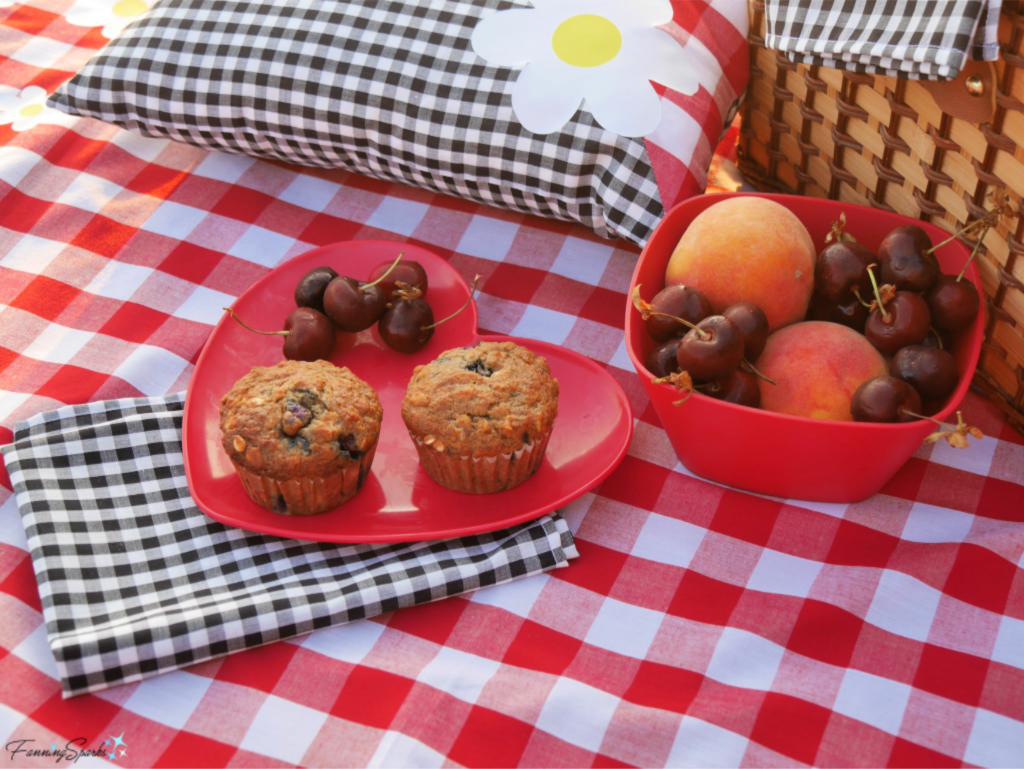 Aside from the picnic blanket, everything fit inside the picnic hamper. This was my first time using this new picnic blanket and I’m really pleased with the results. The waterproof backing kept the blanket dry despite the heavy dew on the dock—just as intended.
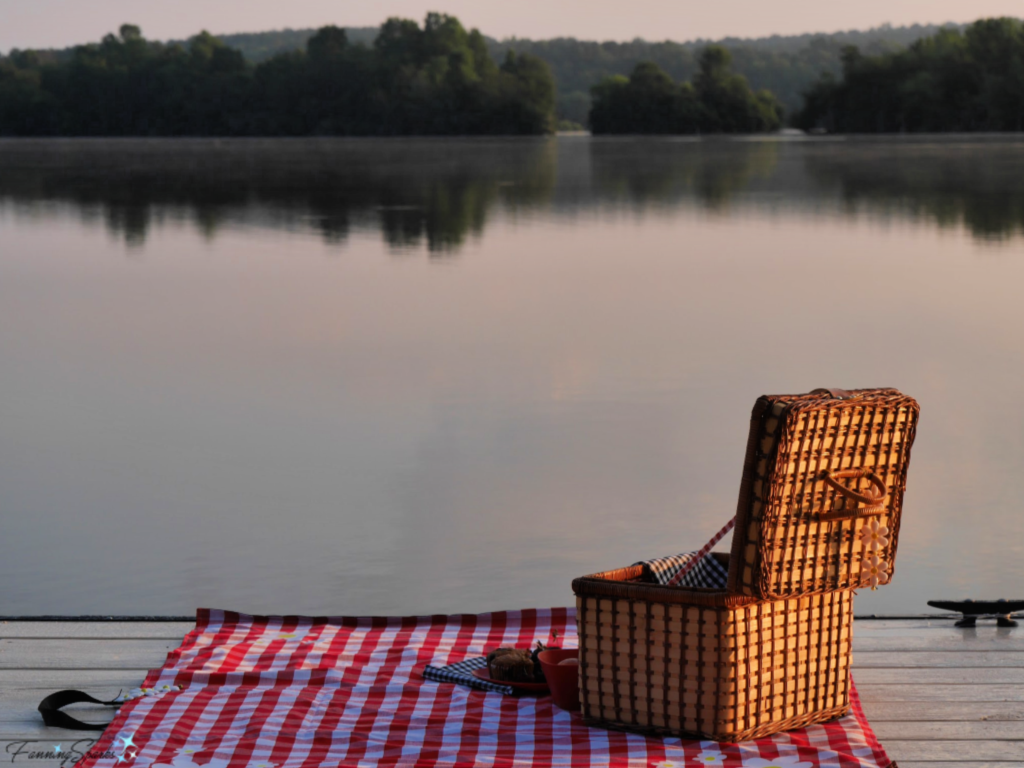 This picnic blanket is a project from last summer. At the time, my research showed that while there are dozens of online tutorials for making a picnic blanket none had all the features I wanted. So I designed, what I consider to be, the ultimate picnic blanket. It’s a generous size, machine washable, waterproof but not slippery, easy to transport, and has a pretty, eye-catching design. I’ll share the step-by-step instructions in an upcoming post. There’s even a built-in pocket that turns into a compact carrying case.
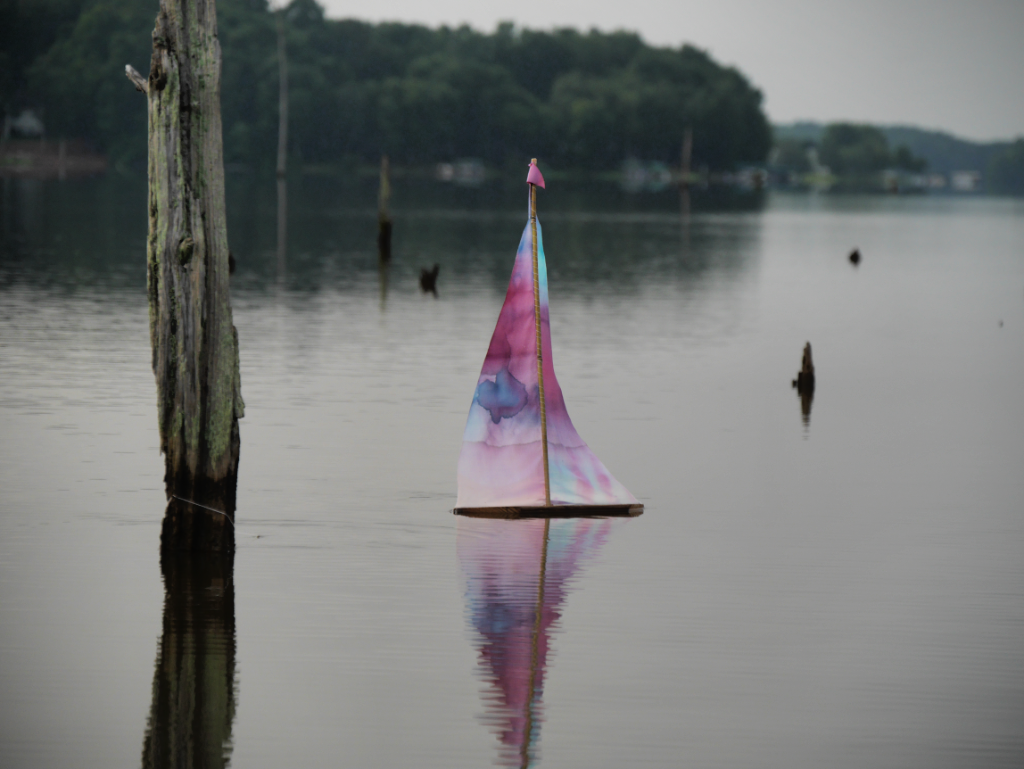
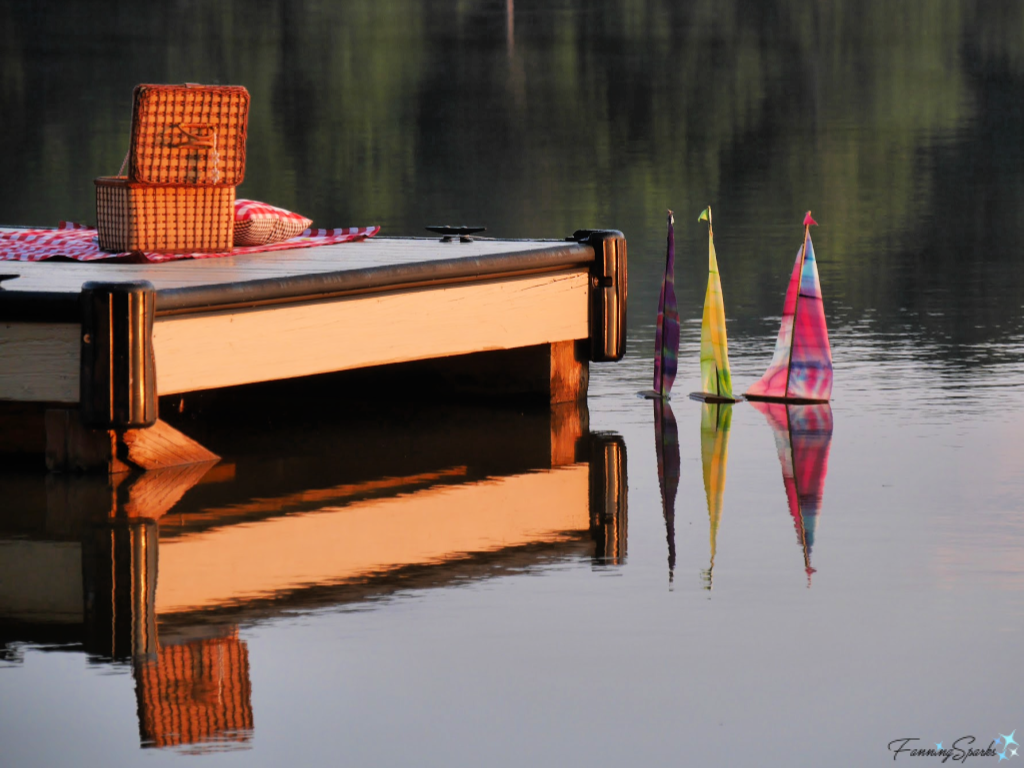
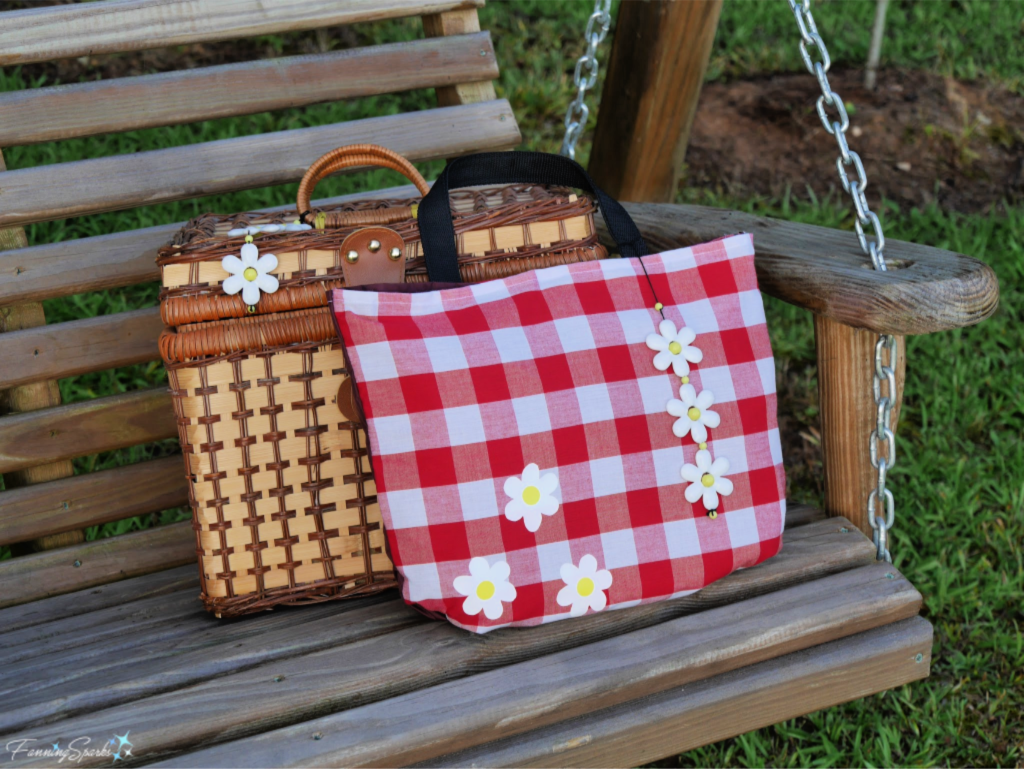 As I was planning for the breakfast picnic, it occurred to me it might be fun to include a small boat. I readily admit I got a little carried away. Instead of a small boat, a small fleet of sailboats, complete with colorful fabric sails, emerged. Thankfully, the sailboats actually floated! Here’s the photographic evidence—3 pretty sailboats floating in the diffused light of the magic hour.
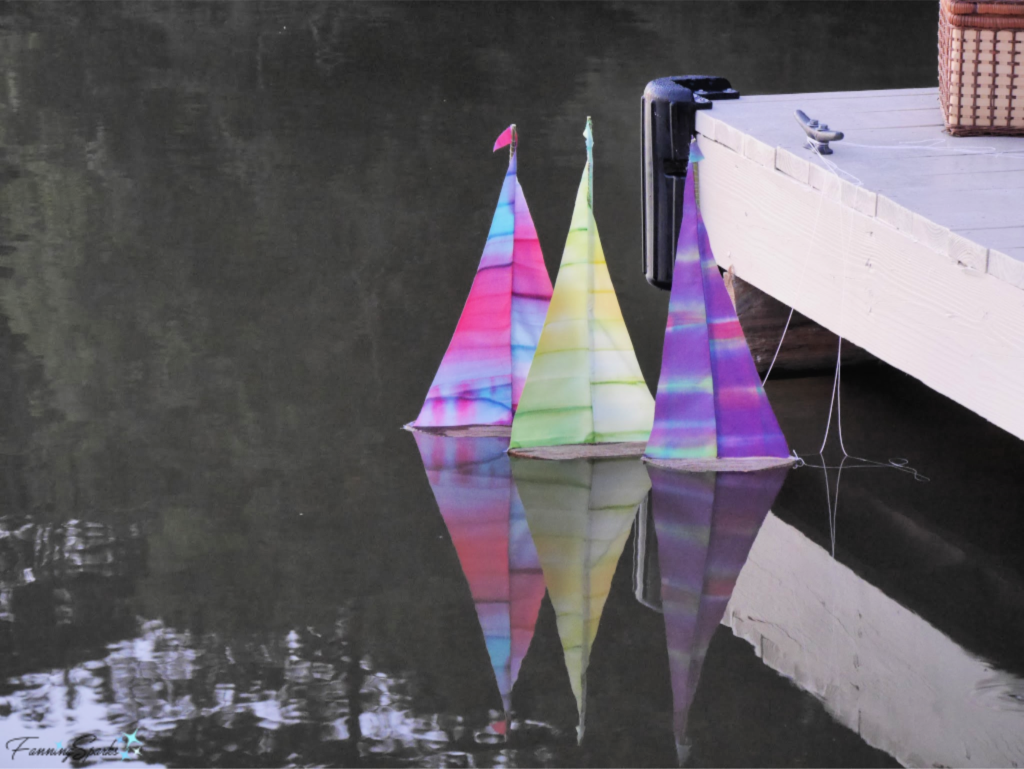 By the way, the term “magic hour” is used by photographers to describe the natural light around sunrise and sunset. The morning sequence is magic hour > sunrise > golden hour. It’s the opposite at sunset. Typically, the light during these hours is softly diffused producing the warm, rich colors that photographers love. I also raved about the beauty of this natural light in the post
 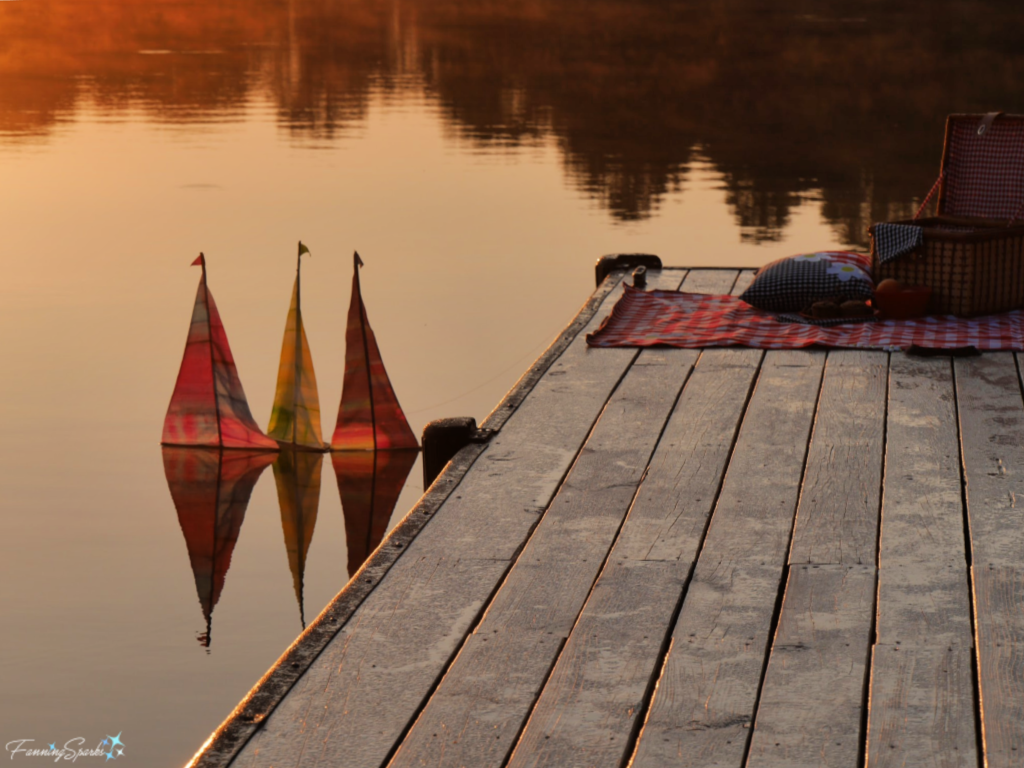 Here’s another example of the little fleet caught in the golden hour.
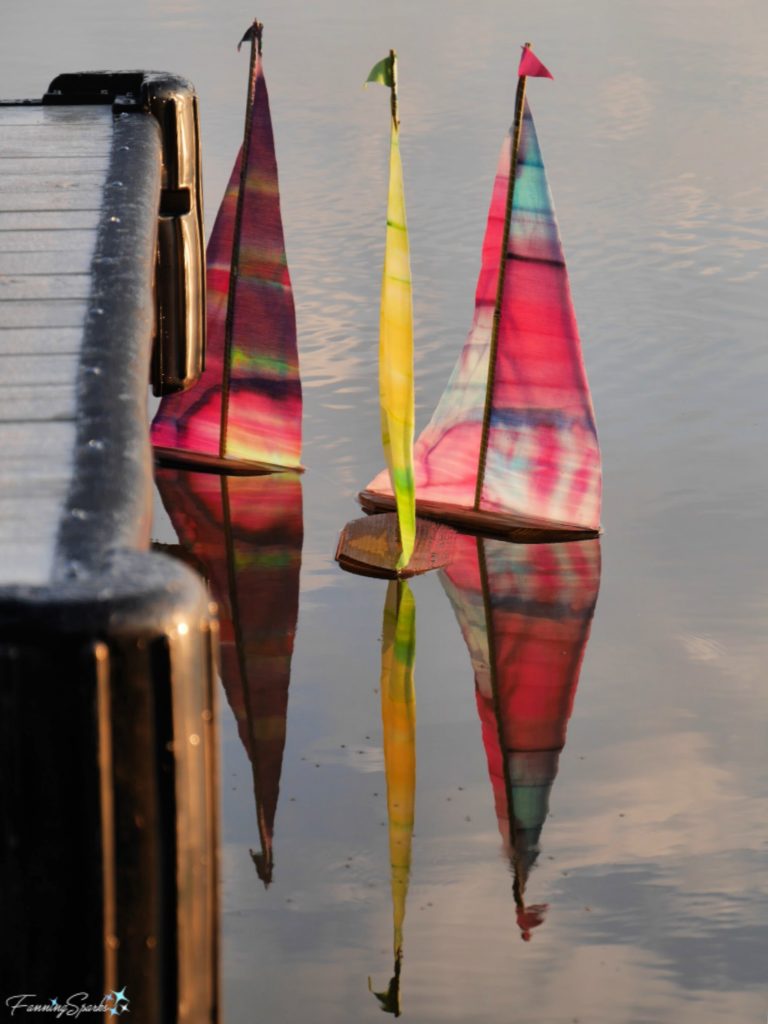

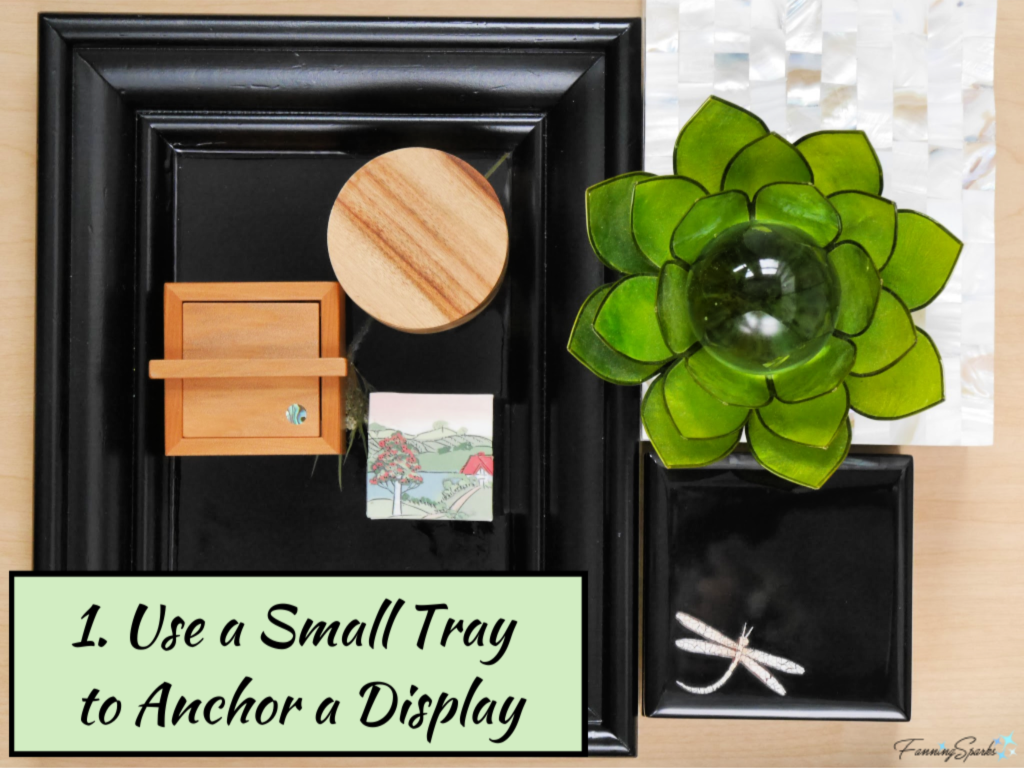
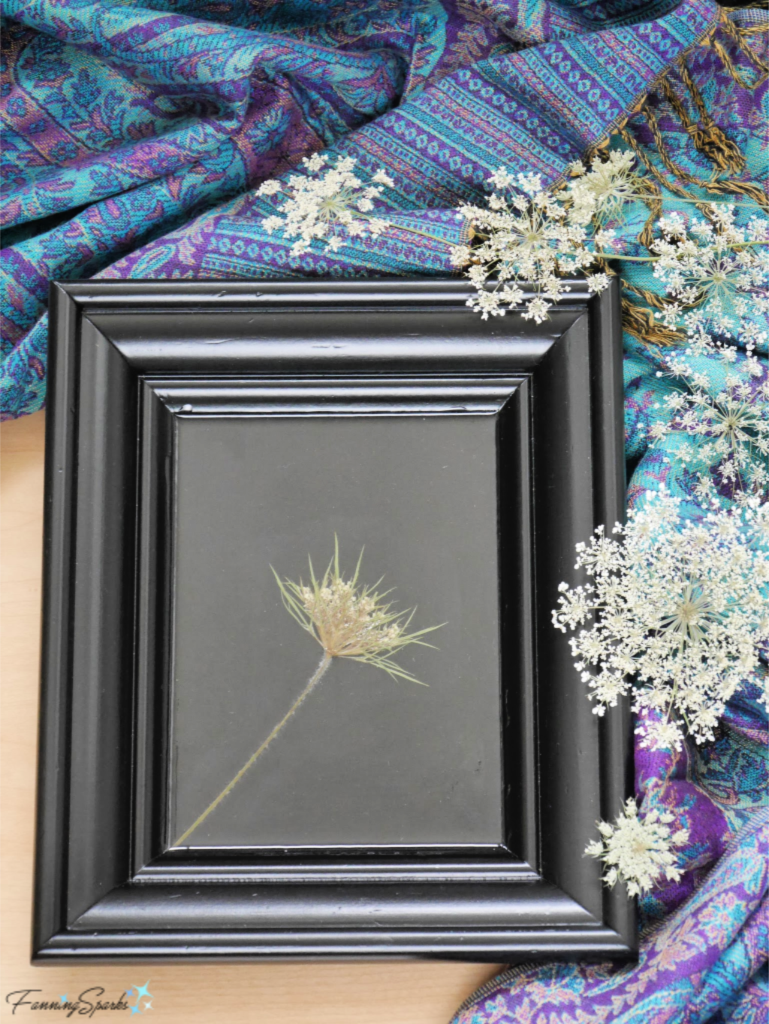
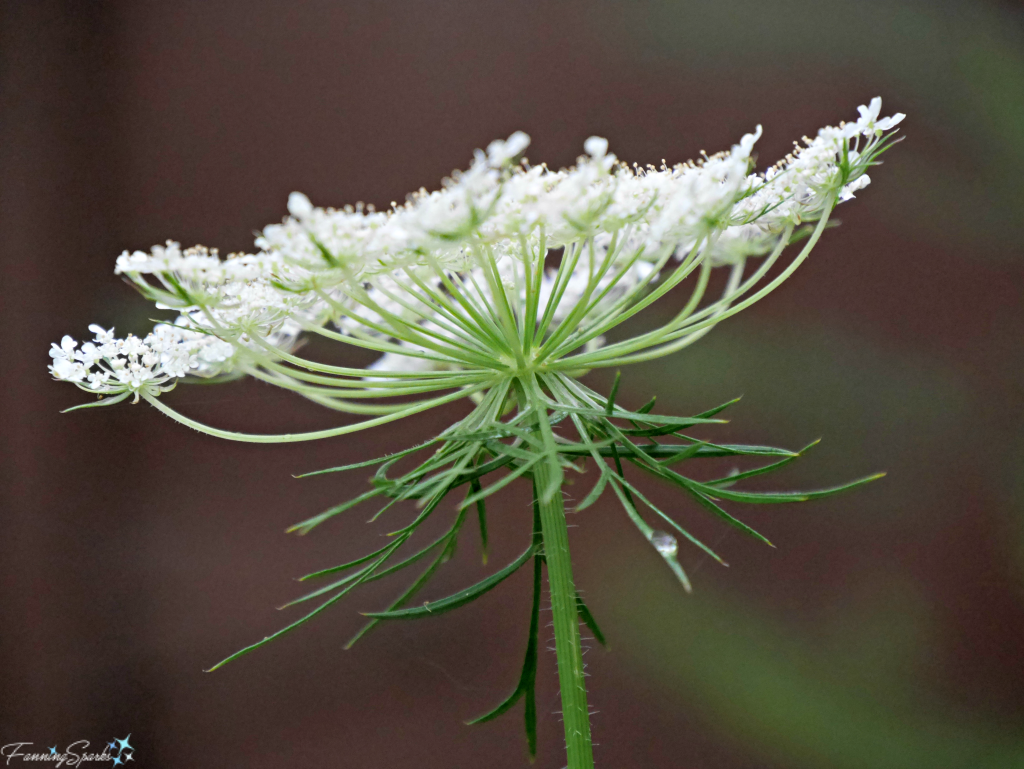 The partially open blossom of Queen Anne’s Lace (shown below) is strikingly simple against the black background. I used Mod Podge matte finish to glue the pressed wildflower in place and to seal the surface.
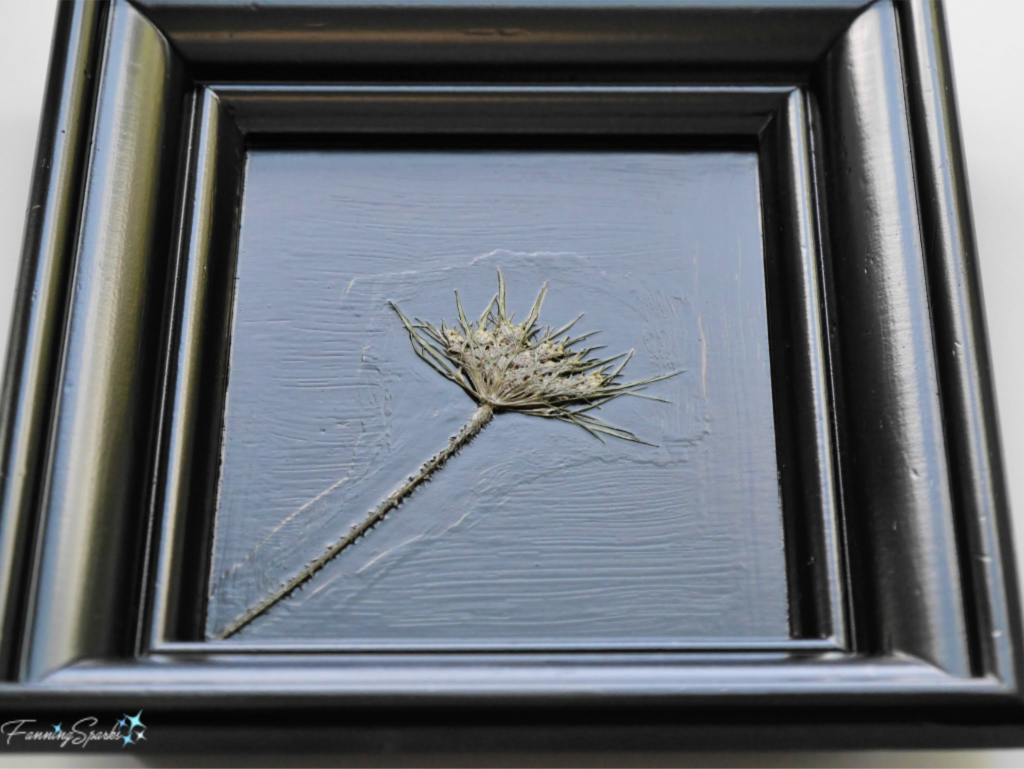

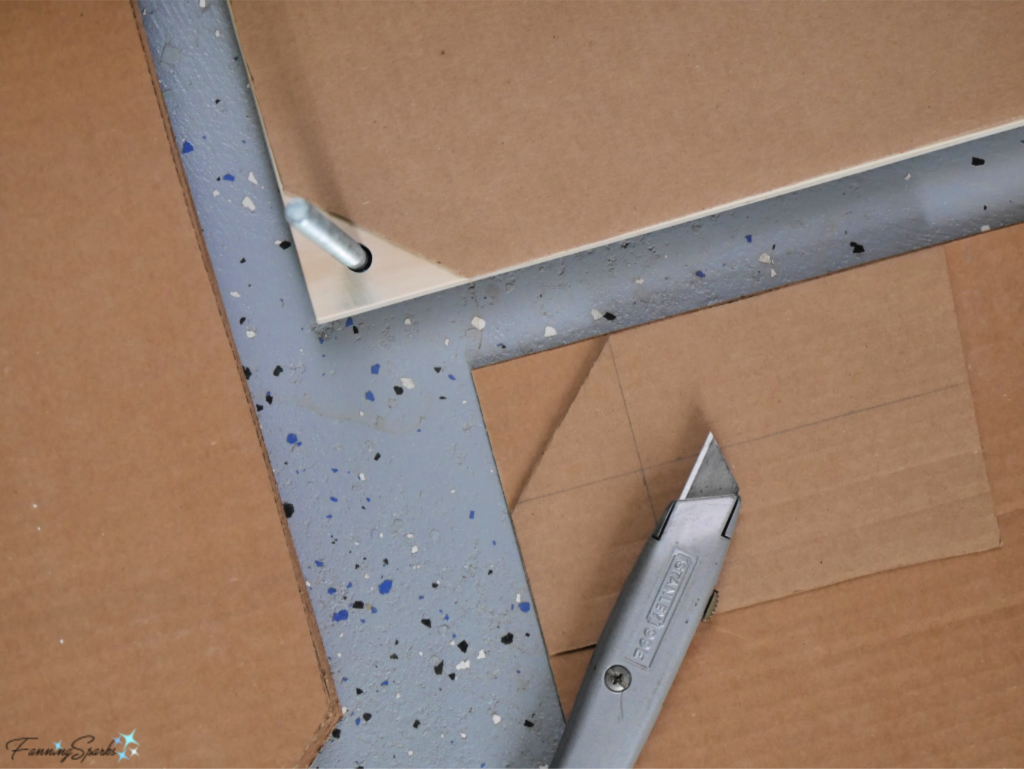 Use one of the cardboard sheets to cut a piece of packing paper to the same size. I found it easiest to use scissors and cut multiple sheets of paper at once. Repeat to make 72 sheets of paper.
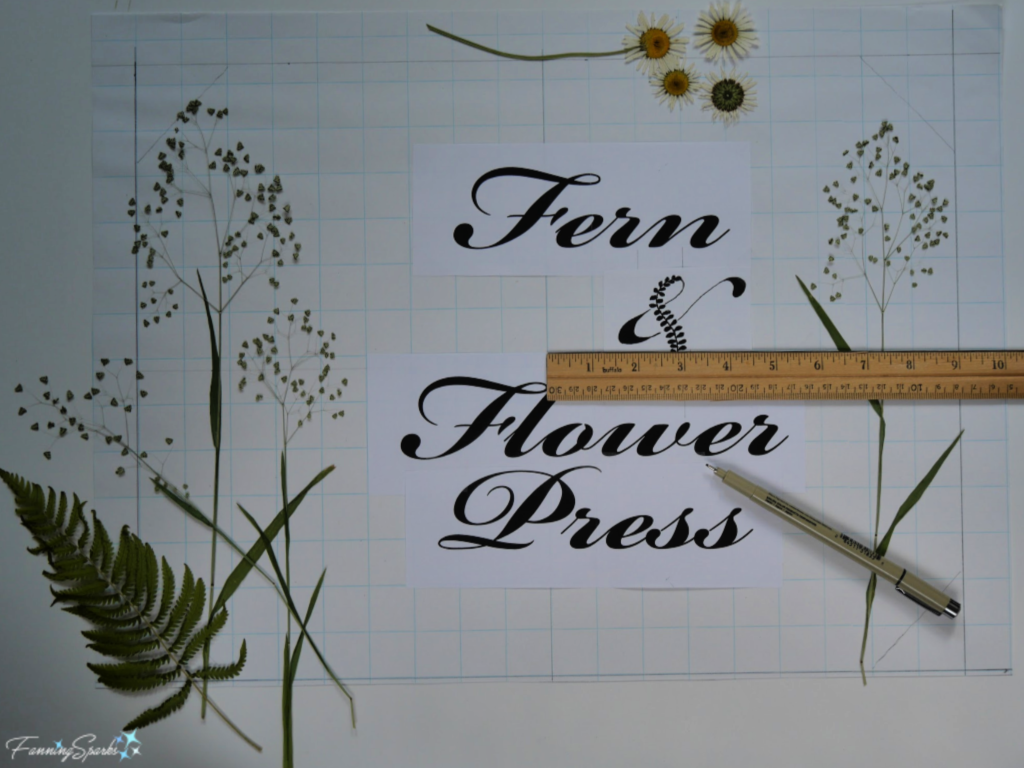 Step 6 – Trace and Color Title on Top Cover Tape your final design to the Top Cover. Use a ball stylus tool or dull pencil to trace the letters pressing down to indent the surface of the wood. Check to ensure indentation is visible.
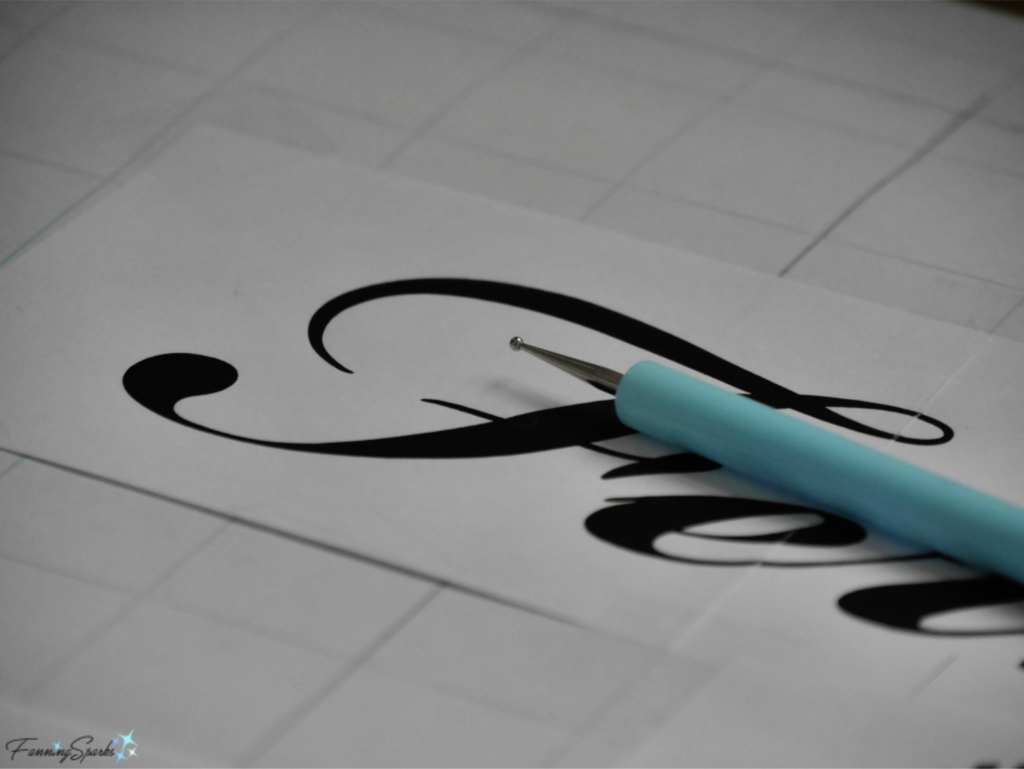 Use 08 black marker to trace along the indentations. Fill in letters with brush tip black marker.
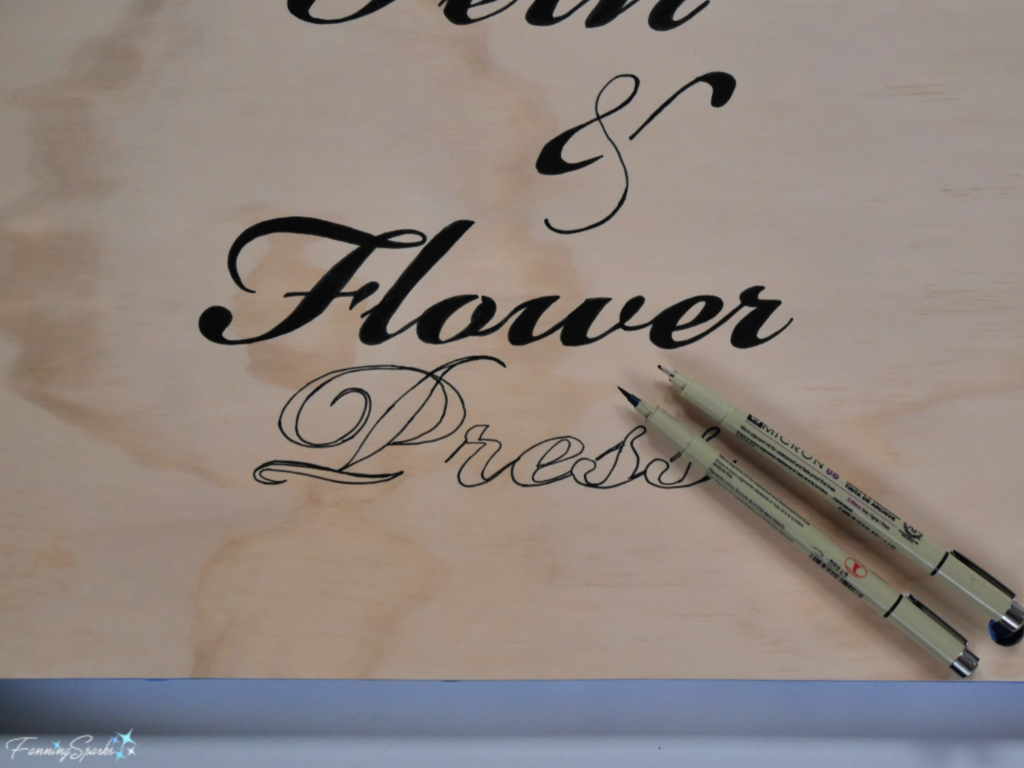 Step 7 – Seal with Mod Podge Use small paint brush to apply a thin coat of Mod Podge matte finish over the entire surface of the Top Cover. Start with the lettering. Then apply Mod Podge to the areas where the dried materials will be positioned. Carefully, place the dried materials on the Mod Podge pressing down to attach all stems, leaves, seeds, etc to the surface of the wood.
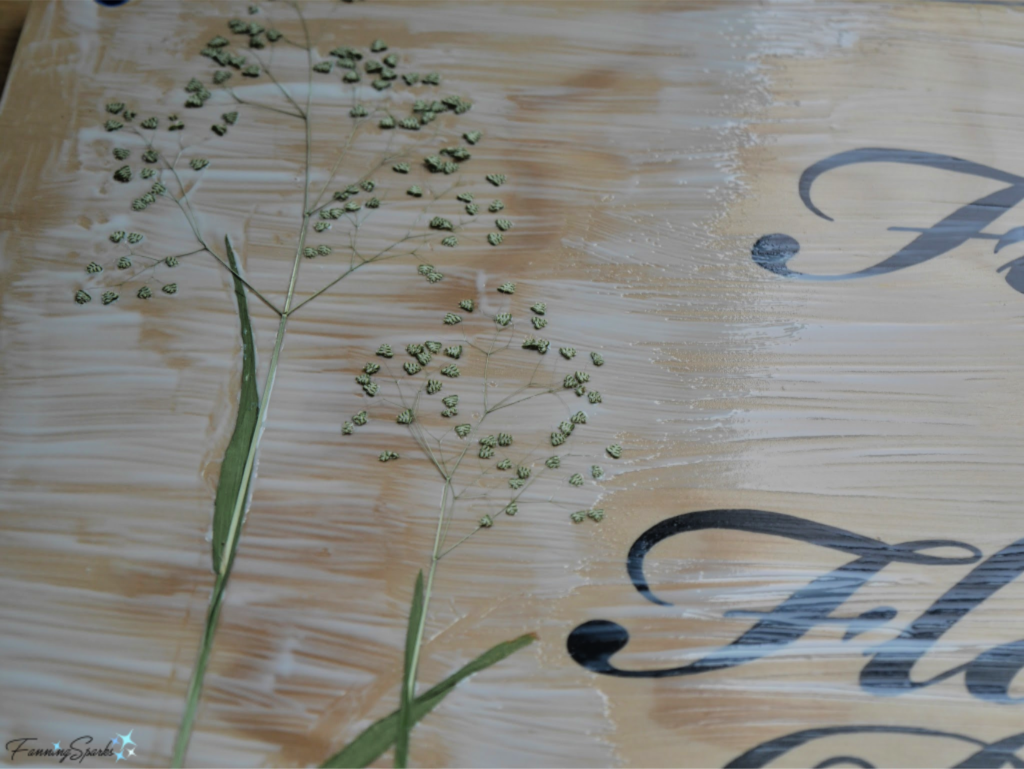 After placing everything as desired, prepare to apply a top coat of Mod Podge. The top coat can be thinned out with a little water if desired. The objective is to seal all the natural materials under the Mod Podge so everything stays in place when the resin coat is applied. Sealing also reduces the number of air bubbles in the next step.
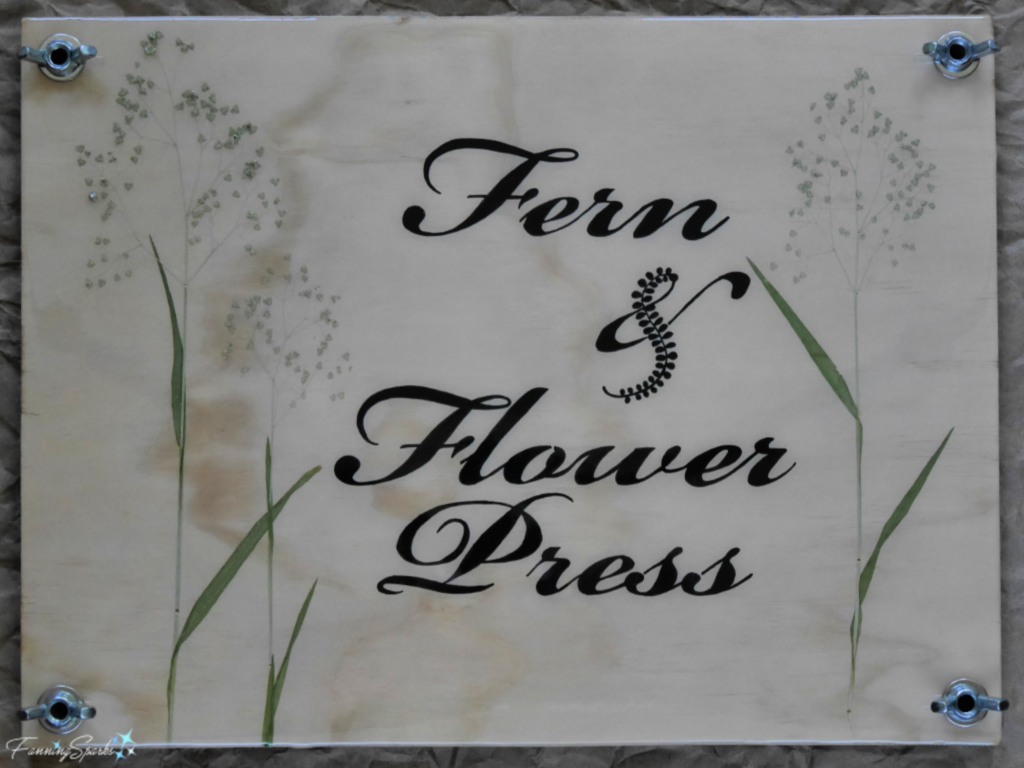 Your new Fern & Flower Press is ready to use! Begin by gathering leaves, fronds, flowers, grasses, seed heads and any other plant materials you wish to dry and press. It’s best to cut plant materials early in the day as soon as they are dry. Avoid thick or dense elements such as roses or peonies. Work quickly to minimize drooping and wilting.
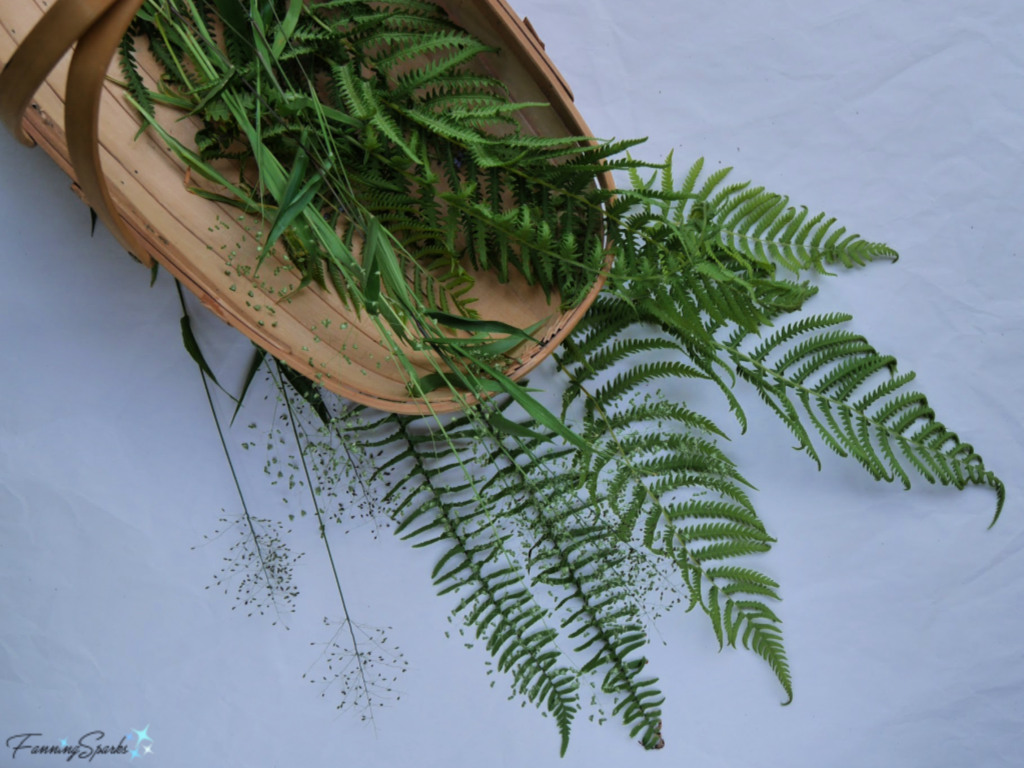 Separate and trim the materials to be pressed.
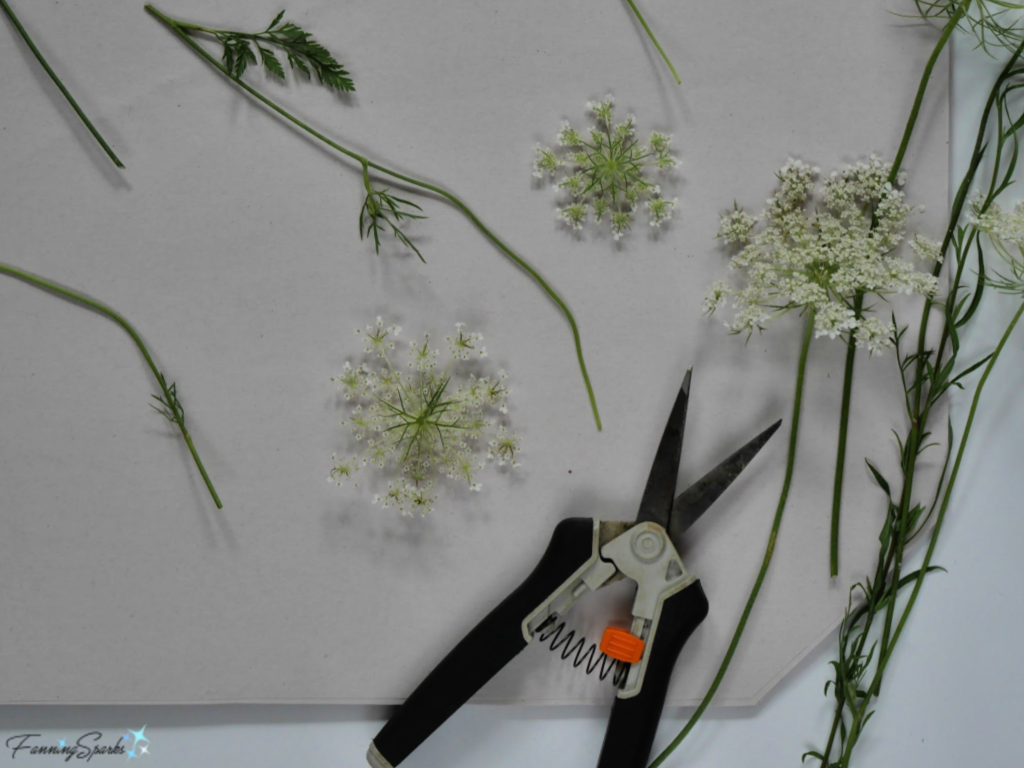 To place plant materials in the press, layer the components as follows:
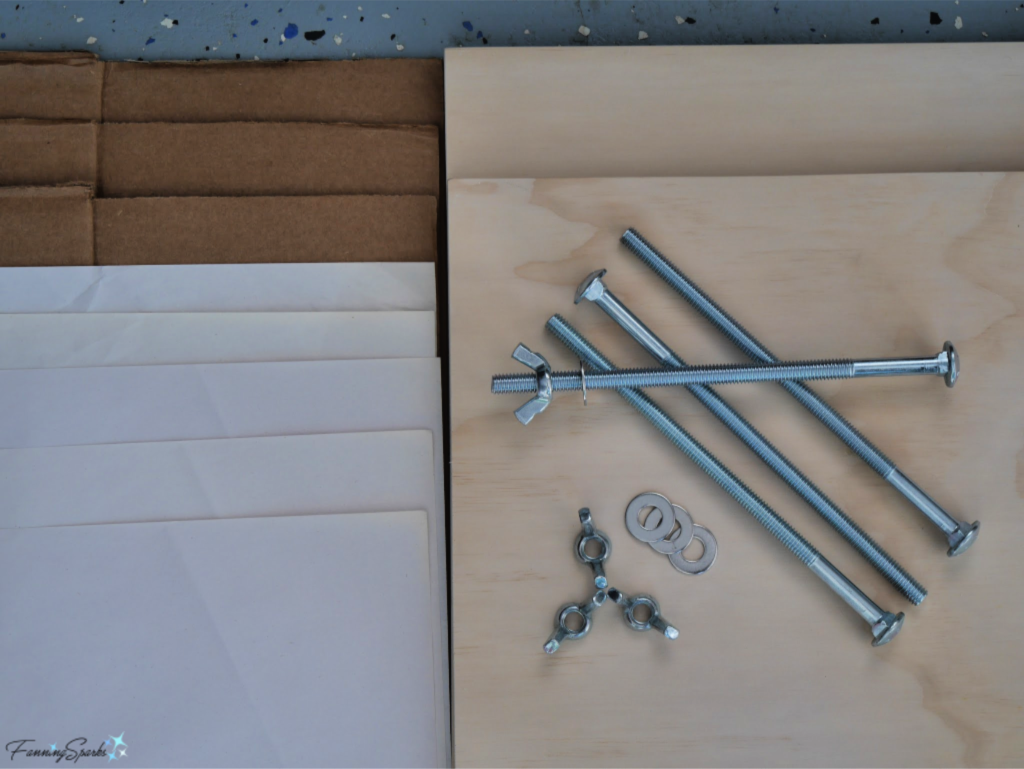
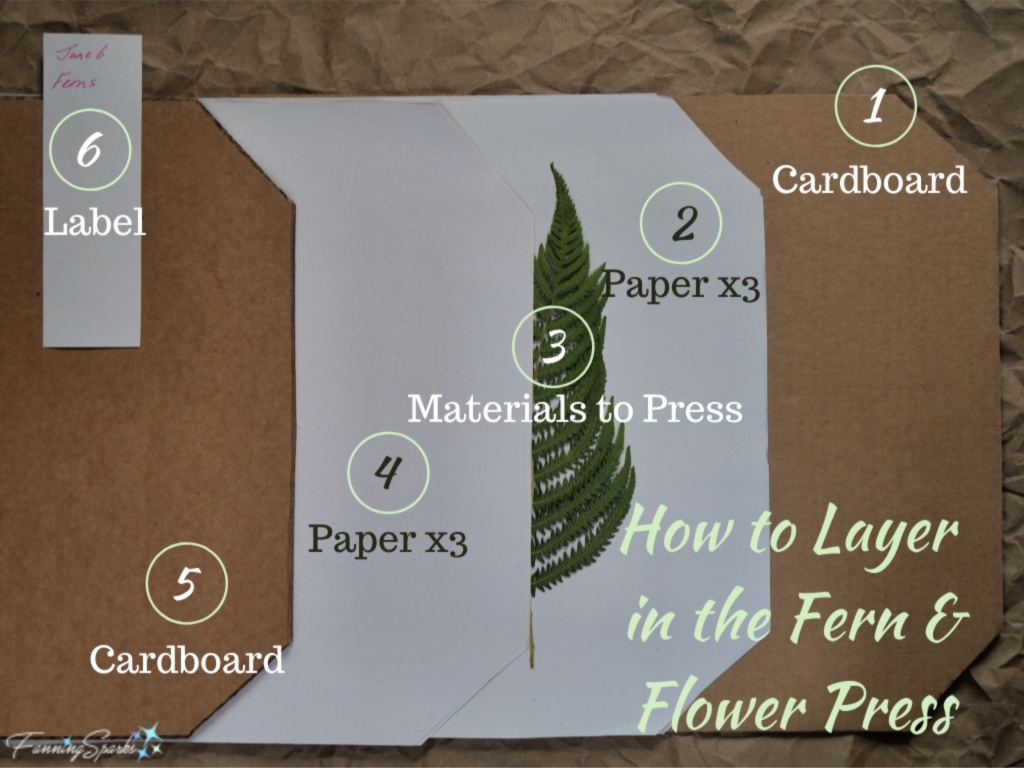 Insert the carriage bolts into the Bottom Cover. Continue to build layers stacking them on the bottom of the press. When all layers are ready, slip the Top Cover onto the carriage bolts, slide on flat washers and tighten with the wingnuts. Ensure all 4 wingnuts are tightened equally.
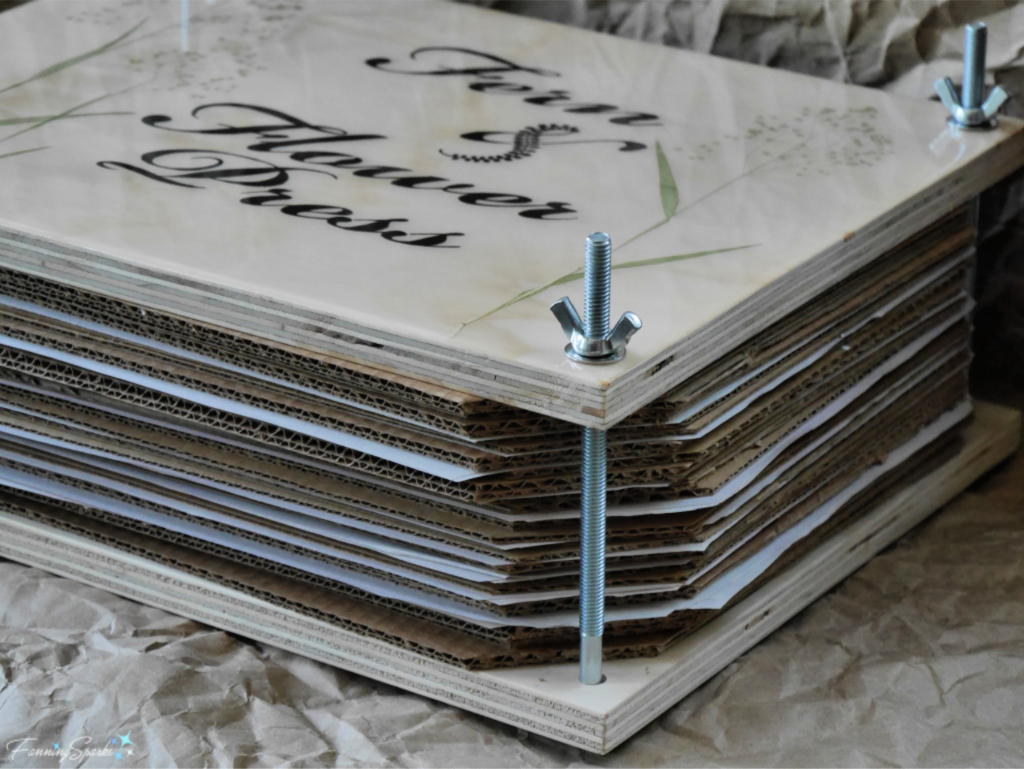 Now it’s time to let the press do the work. Drying times will vary but most plant materials are ready in about 2 weeks. You may need to re-tighten the wingnuts as the materials dry. While you’re waiting, start planning how you’ll use your beautifully pressed plant materials!
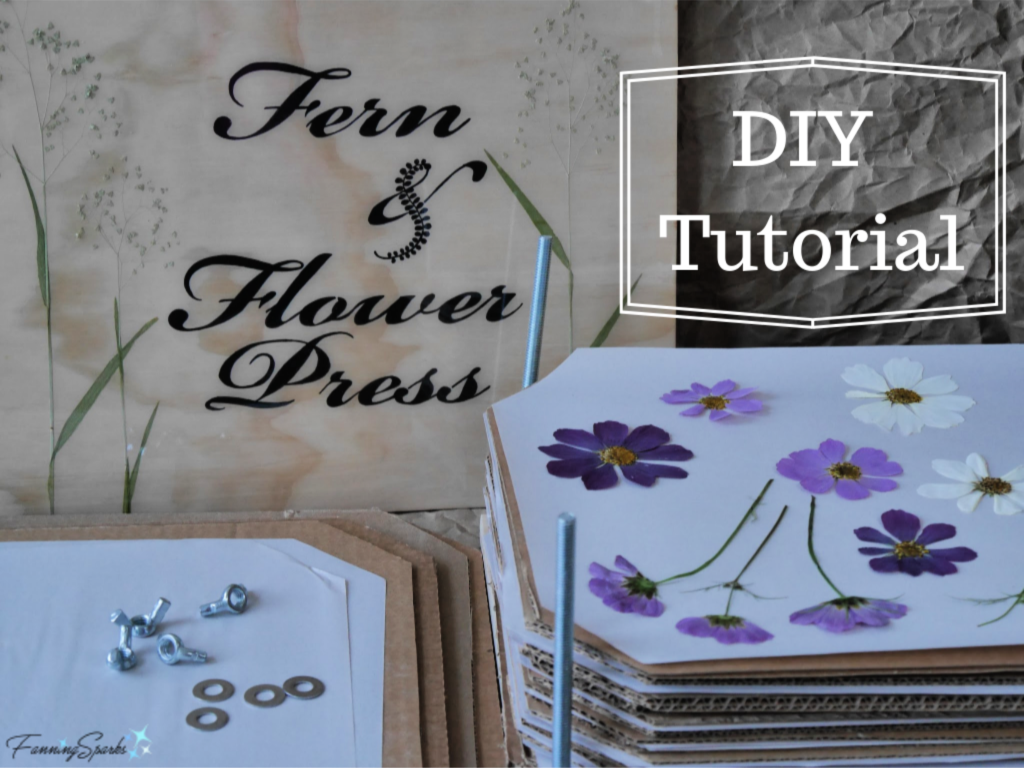 You can learn more about epoxy resin on the
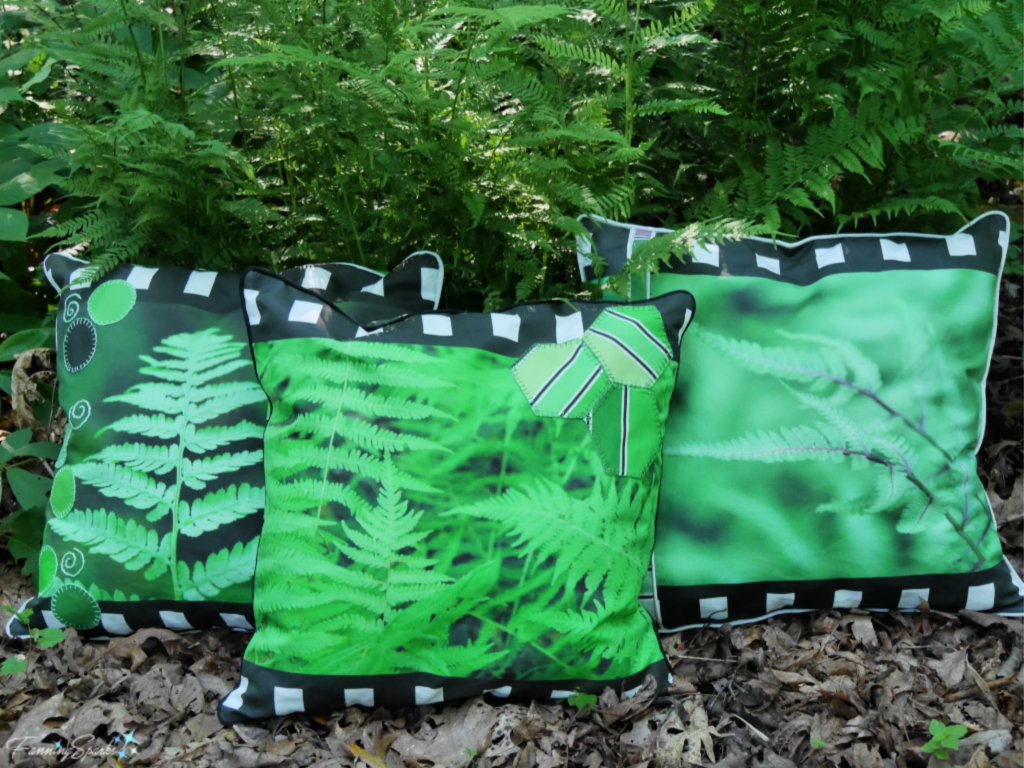

 Here’s how it turned out.
 For the back of the Southern Lady Fern pillow, I added a little twist with a diagonal section of the striped fabric.
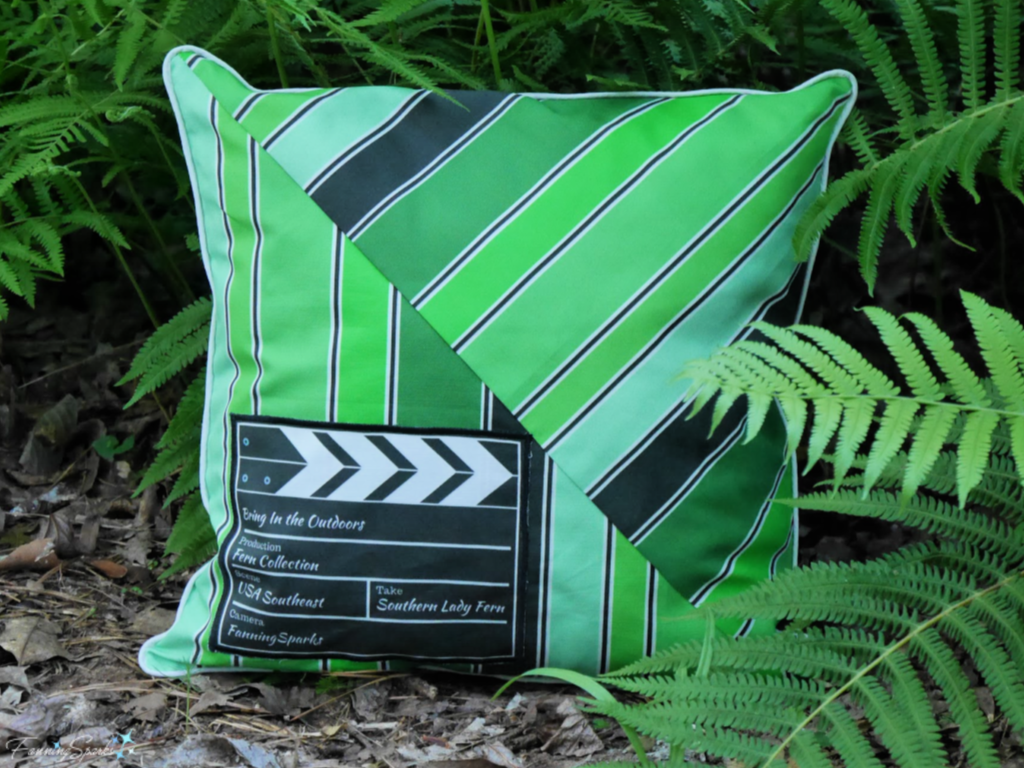 The Japanese Painted Fern (Athyrium niponicum ‘Pictum’) is considered one of the most beautiful ferns for the home shade garden thanks to its dramatic foliage and unique burgundy and silver coloring. Here’s how it looks on the pillow front design.
 I added a narrow strip of the striped fabric on the pillow front to accent the various colors in this design. Here is the finished front of my Japanese Painted Fern pillow.
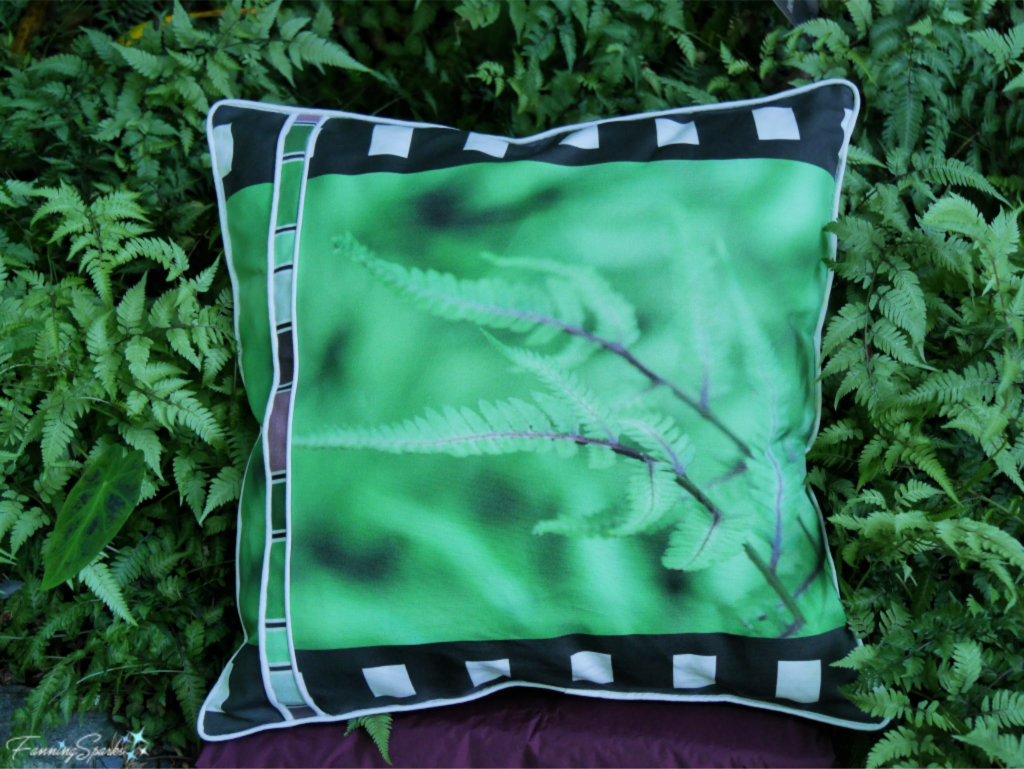 Here is the back of my Japanese Painted Fern pillow. I love this combination of greens and burgundies.
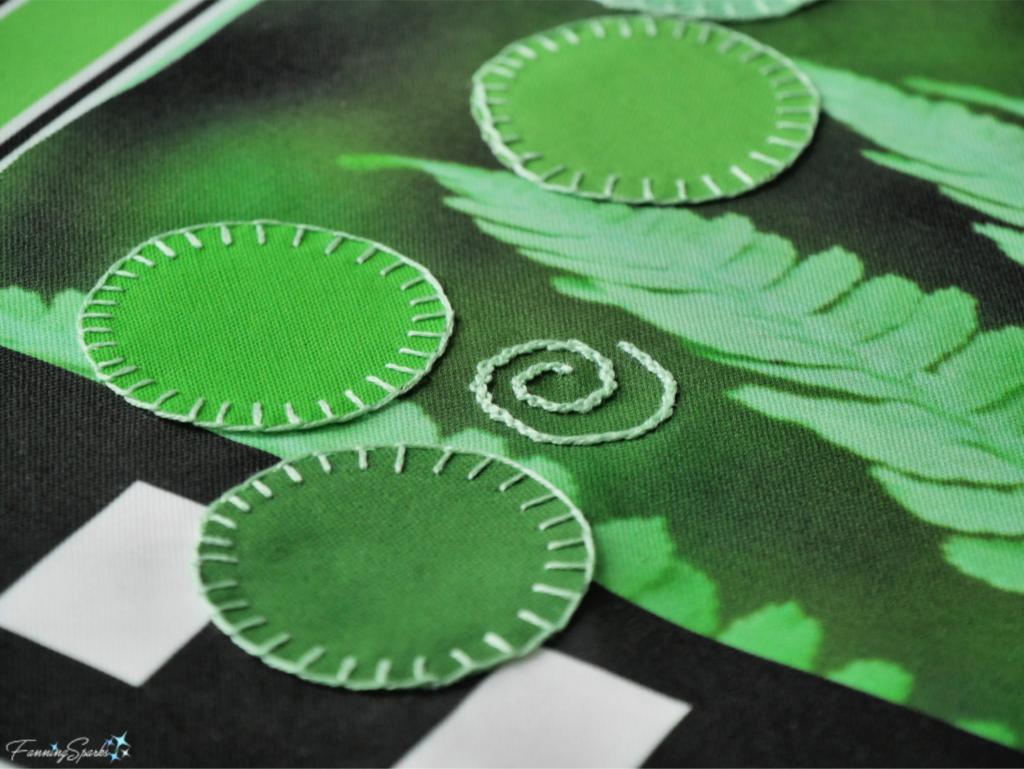
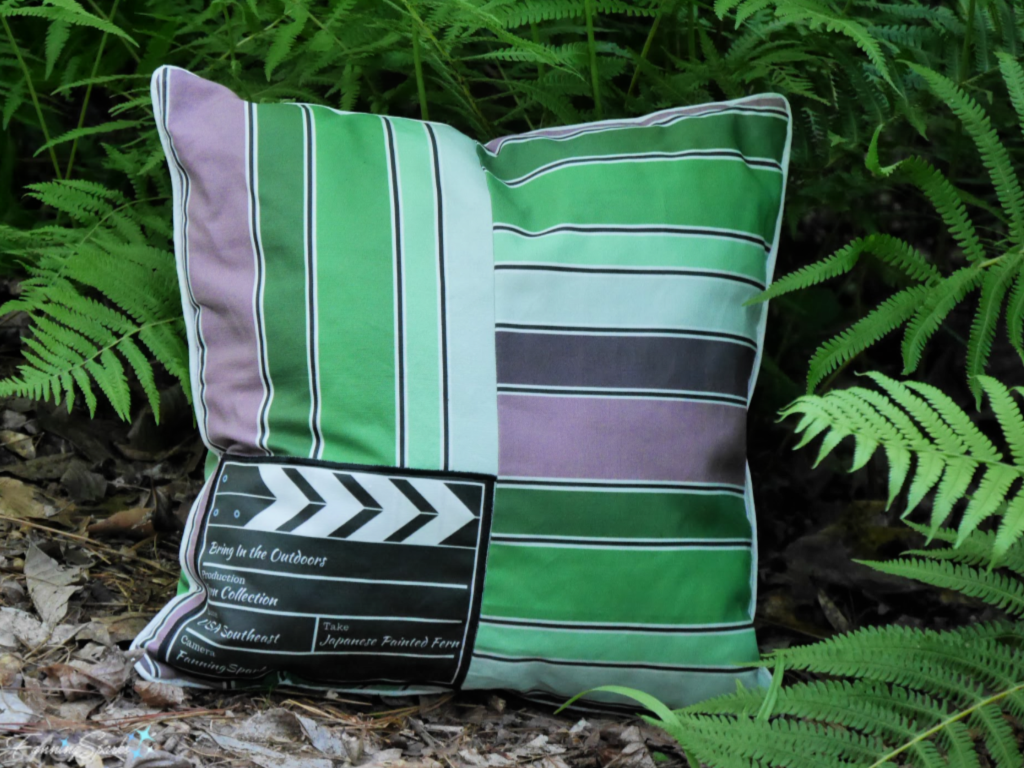 The third pillow in the collection is the New York Fern (Thelypteris noveboracensis). This is the pillow front design.
 To add a little unexpected contrast, I appliqued hexagon shapes from the striped fabric on the pillow front.
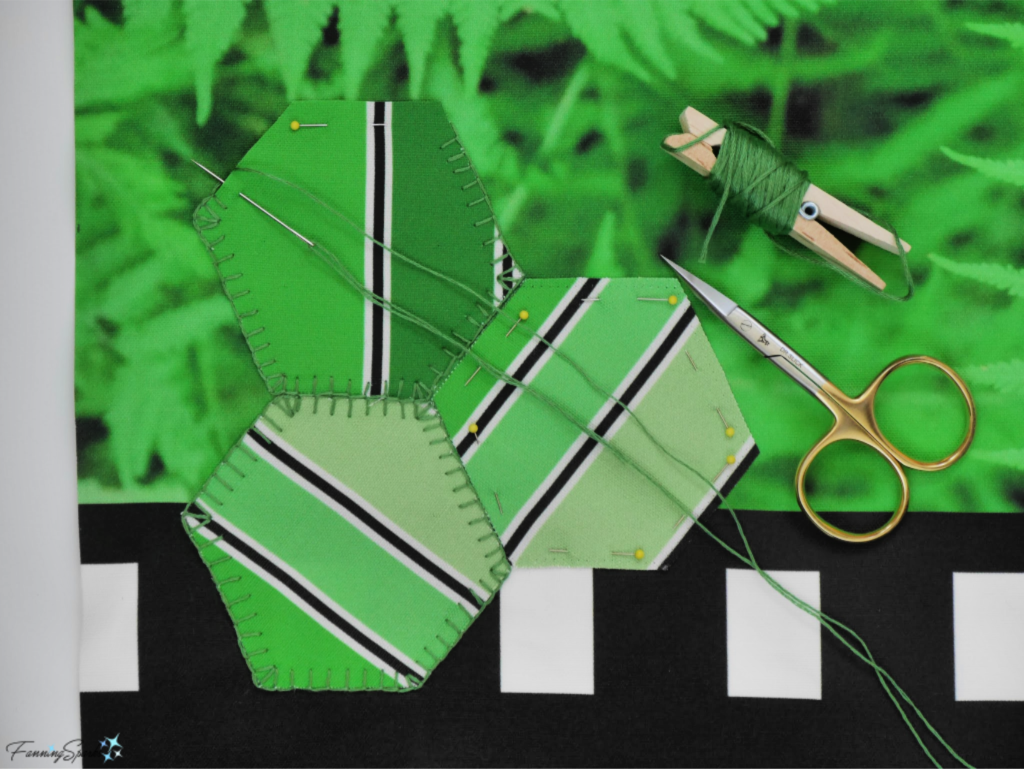 Here’s how the finished hexagons look on the front of the New York Fern pillow.
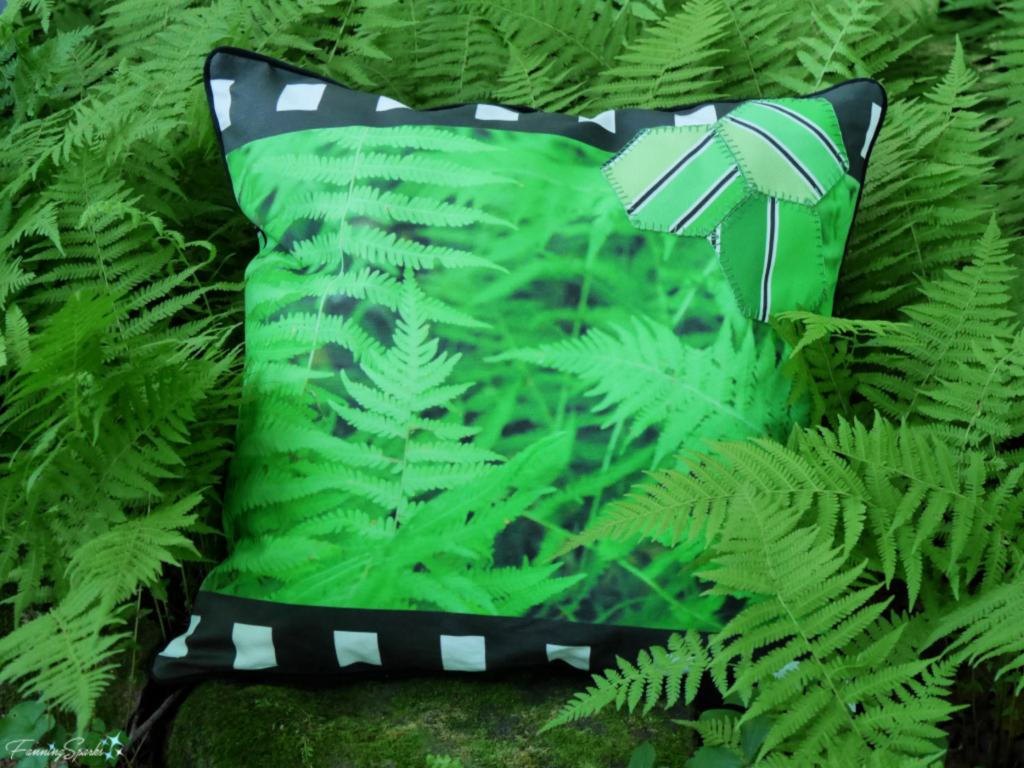 The hexagon shapes are repeated on the pillow back.
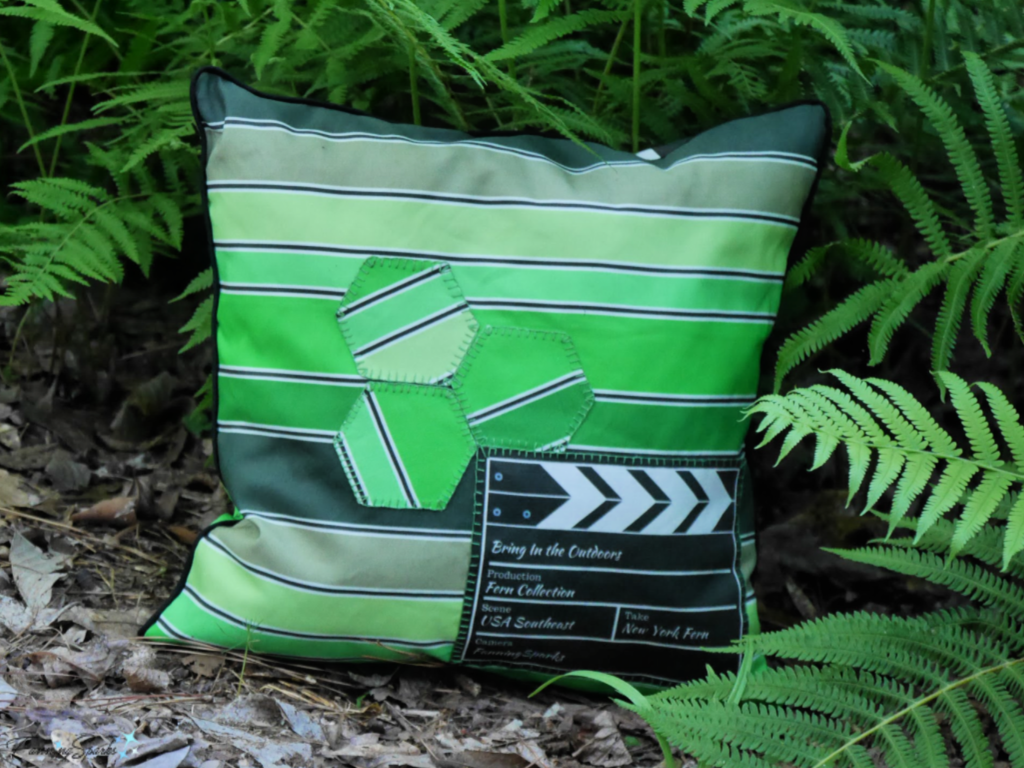 Last summer, I attended a class on Ferns and Fern Allies at the State Botanical Garden of Georgia (see
  I’m on the lookout for new and interesting ways to incorporate ferns into my home and surroundings. My favorite ideas are pinned on a Pinterest board,