
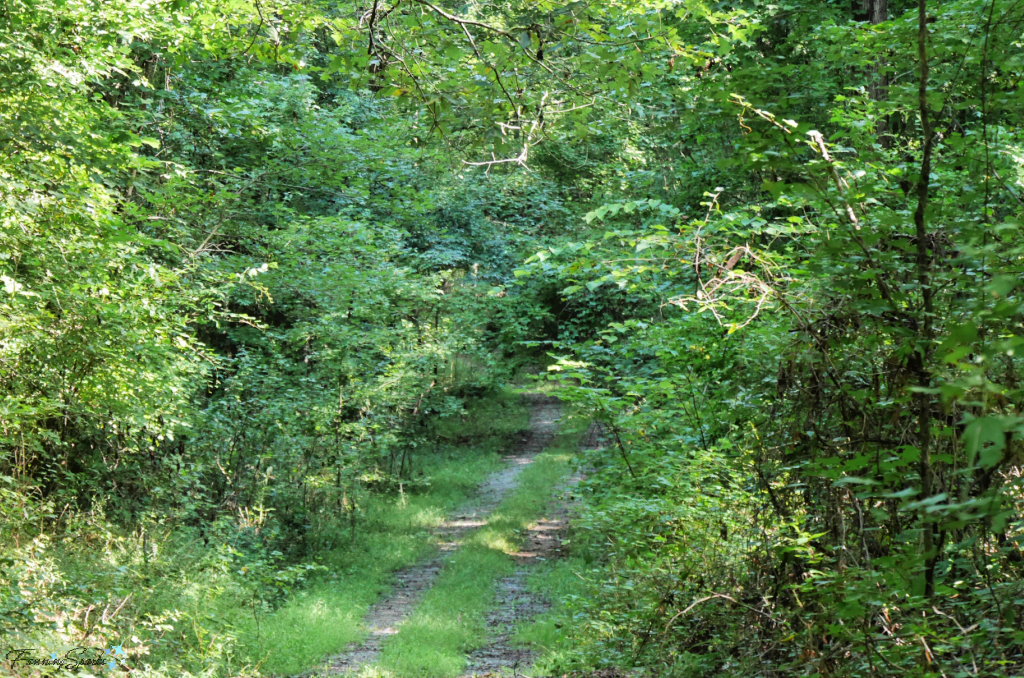
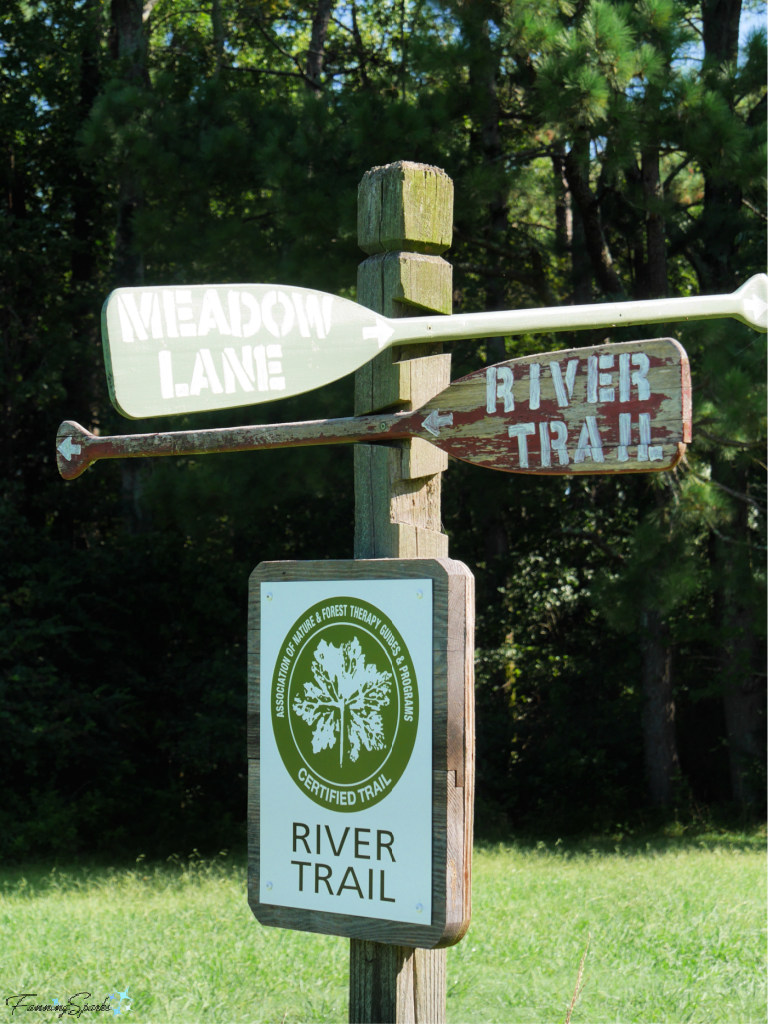
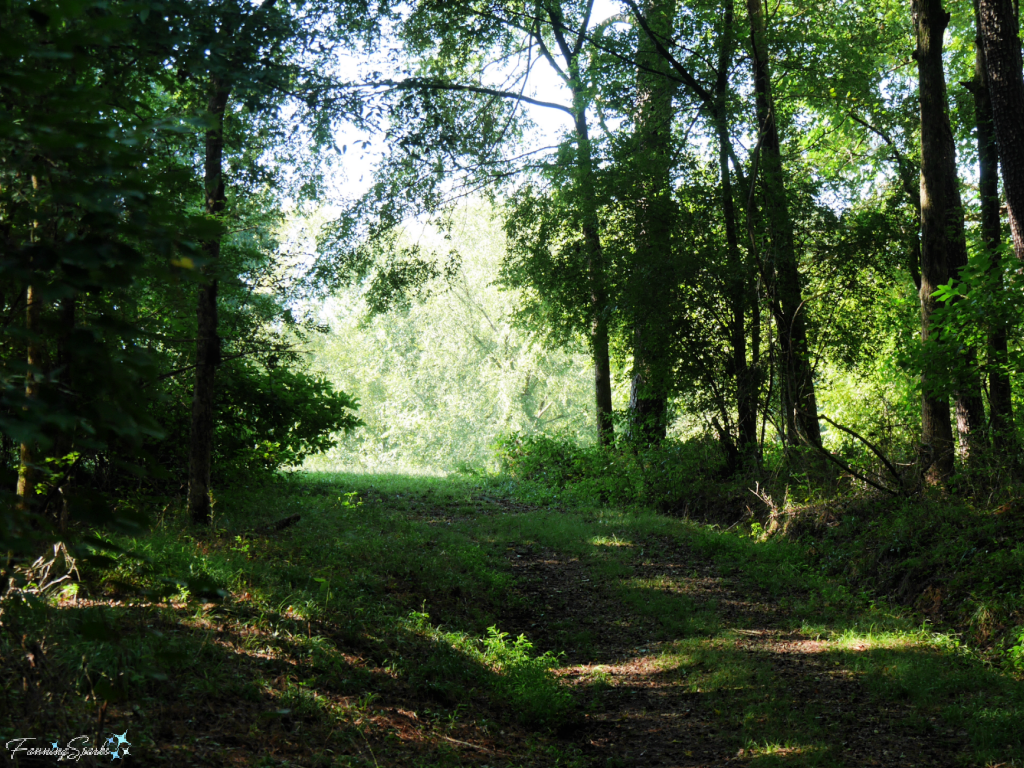
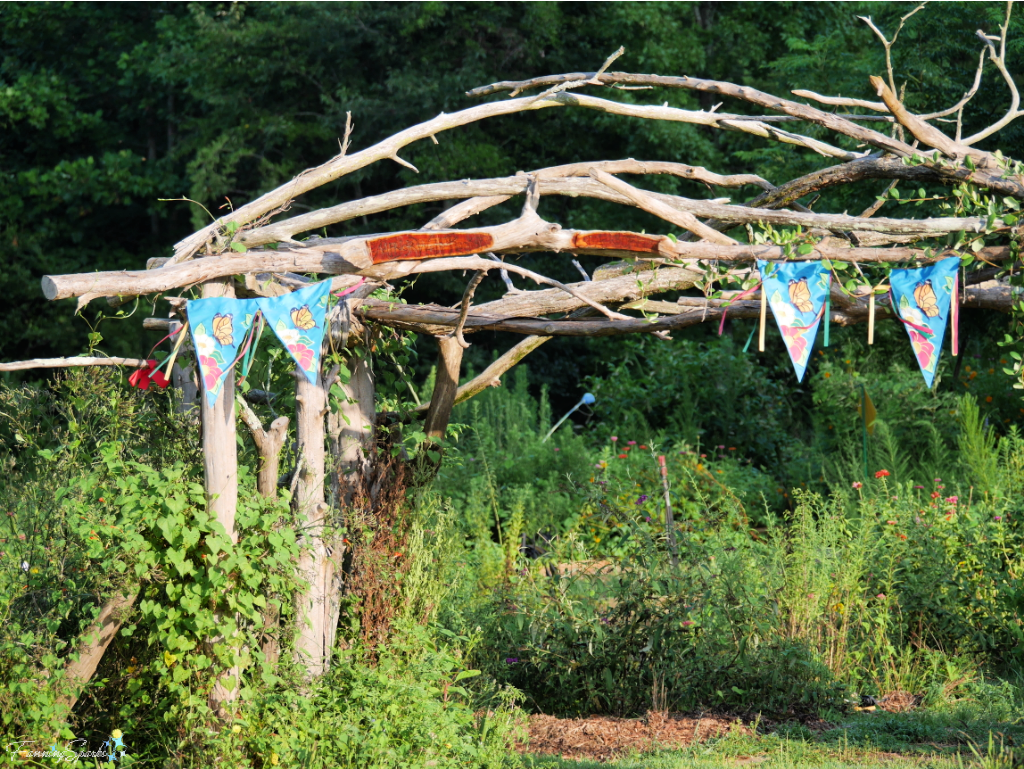
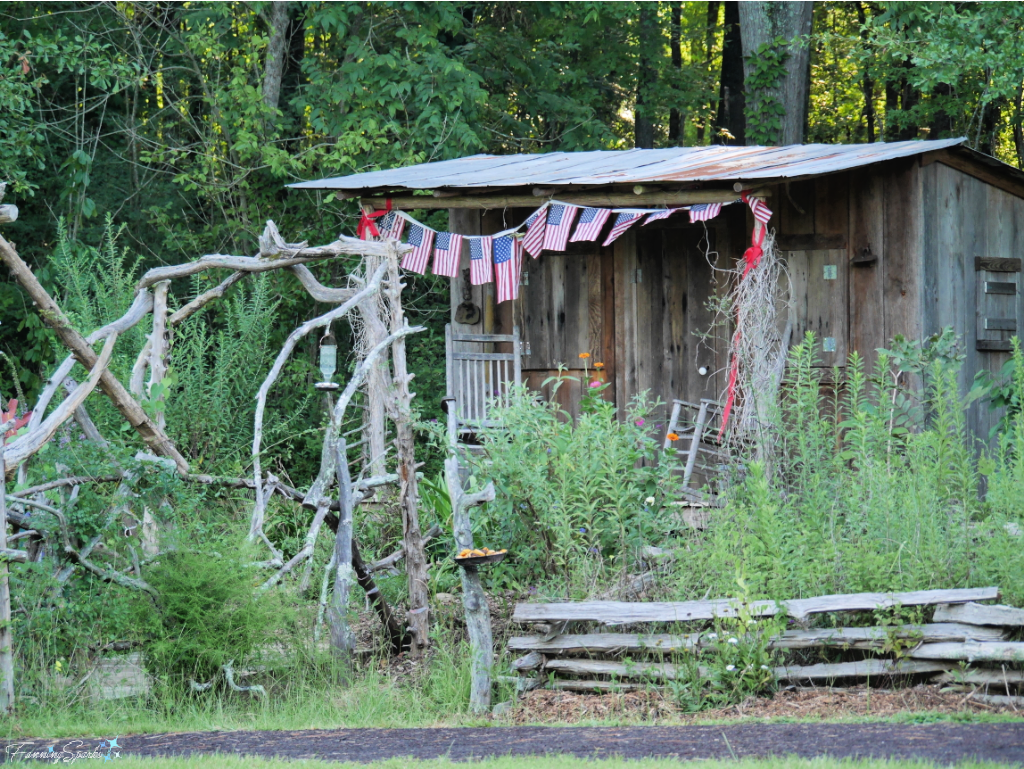
On a sultry Georgia morning, I found myself strolling along a quiet forest trail. A variety of mature trees provided relief from the bright sun. The abundant greenery was highlighted by dappled shade. The air was fresh, clear and rich with earthy aromas. Birds and insects provided background music. This beautiful place was the River Trail Certified Forest Therapy Trail at Hundred Acre Farm in Madison Georgia. This is the second local destination I’ve found for what I’ve come to call “safe excursions”. There was little need to worry about face masks and social/physical distancing along this secluded trail.
The River Trail is a short walk designed to be taken slowly. It’s not a hike—more of a stroll or an amble. The folks at the Hundred Acre Farm provide a small brochure containing guided activities or “invitations” to dawdle. As the guide brochure explains it: “Forest Therapy is a research-based framework for supporting healing and wellness through immersion in forests and other natural environments. In Japan it is called “shinrin yoku,” which translates to “forest bathing.” Studies have demonstrated a wide array of health benefits, especially in the cardiovascular and immune systems, and for stabilizing and improving mood and cognition.”
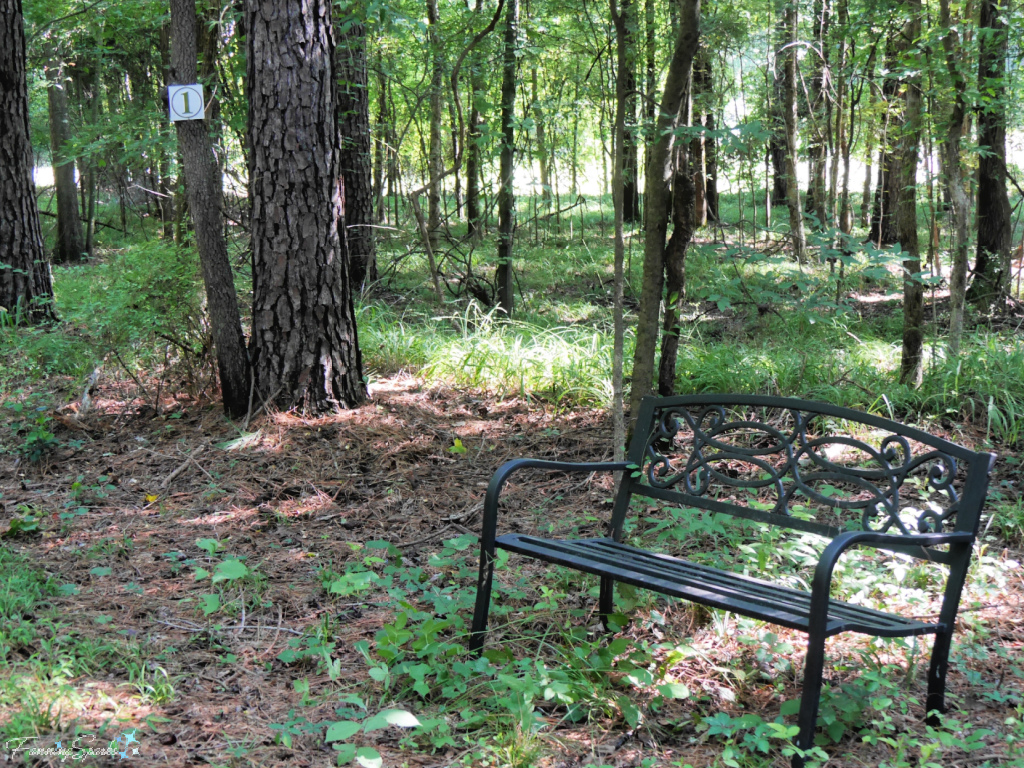
I’ve been intrigued by forest bathing for some time. In her 2017 book, The Nature Fix Why Nature Makes Us Happier, Healthier and More Creative, author Florence Williams describes her experience with guided shinrin-yoku in Chichibu-Tama-Kai National Park in Japan. She explains “The idea with shinrin yoku, … based on ancient Shinto and Buddhist practices, is to let nature into your body through all five senses…”. The first invitation in the River Trail guide brochure starts by asking “Stand still for a moment – what are you noticing? Hearing? Smelling? Seeing?” A convenient bench, positioned at Sign 1, invites you to linger and ask yourself those same questions while seated.
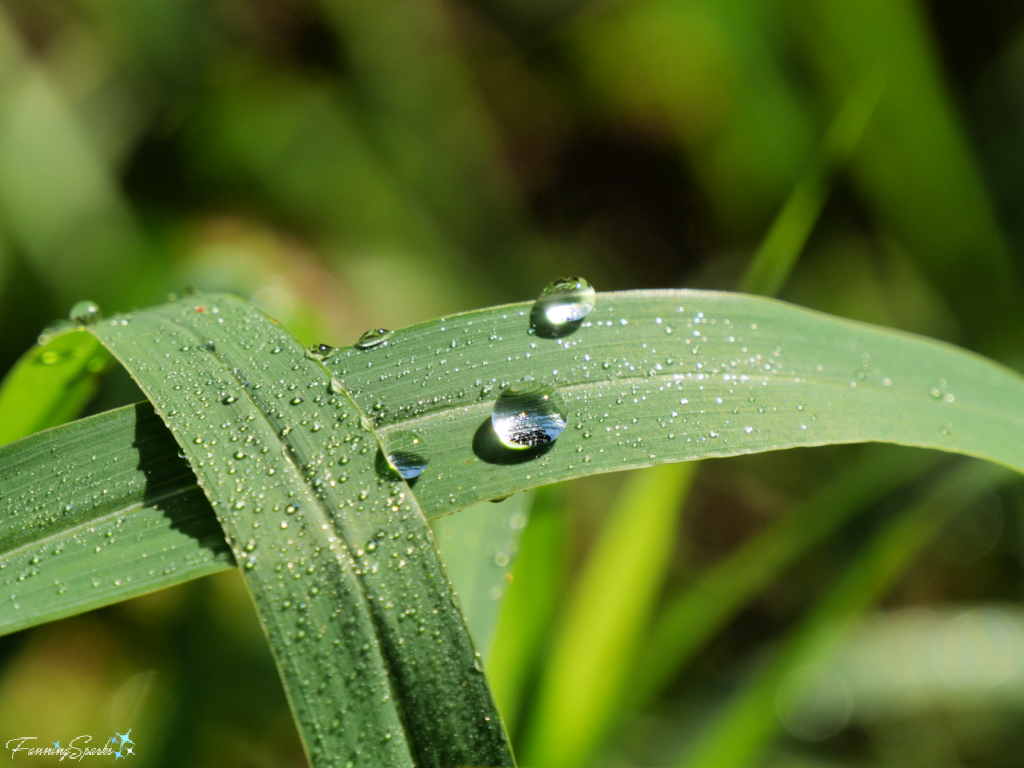
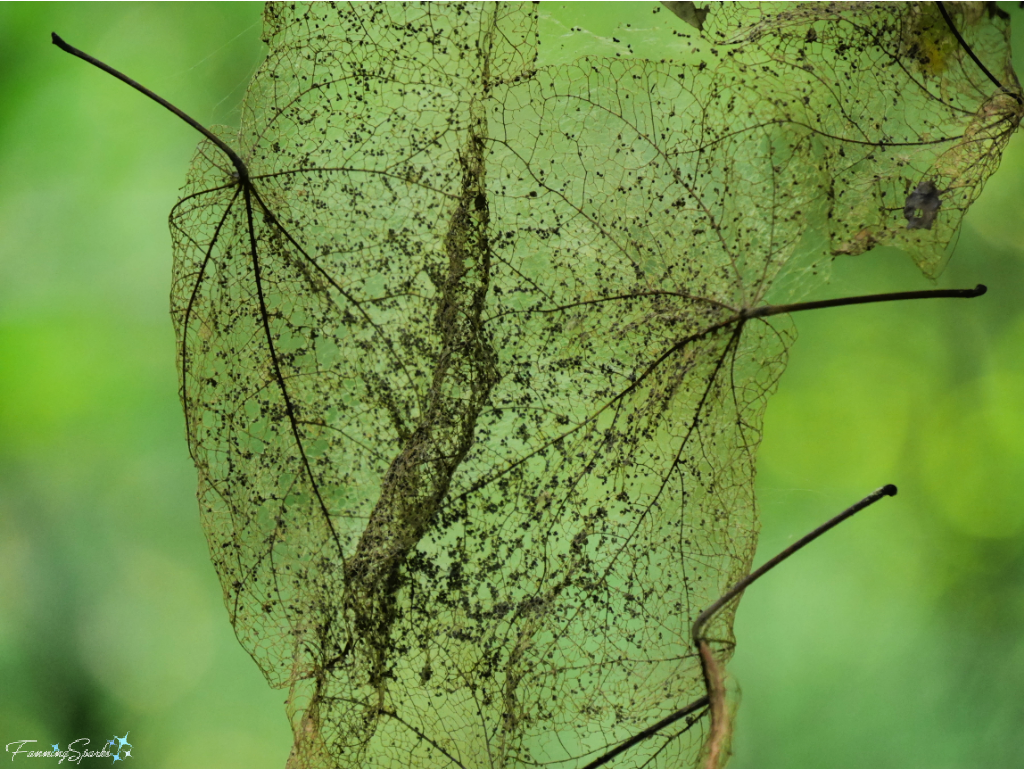
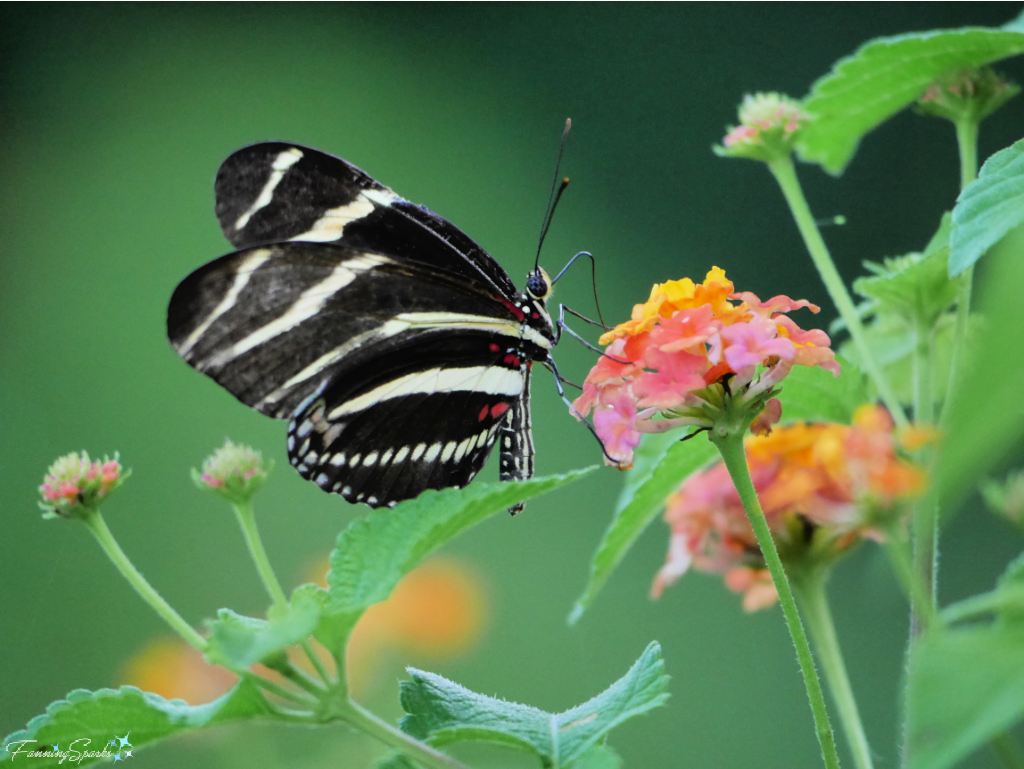
The guide brochure also invites you to “Walk slowly. Look for tiny things – flowers, leaves, pebbles – whatever is tiny.” Of course, the shutterbug in me is always looking for tiny things! Here are a few of the beautiful small things I captured along the River Trail.
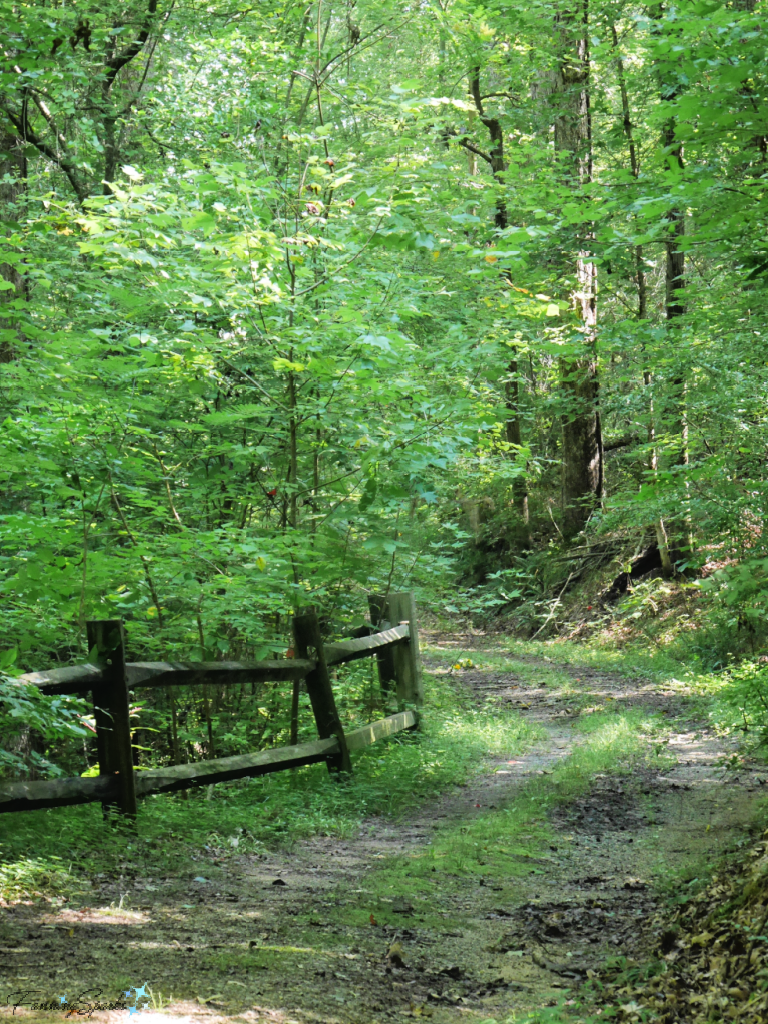
At one point, the trail turns to the right and a split-rail fence protects you from a rather steep bank with a pretty, little stream running below.
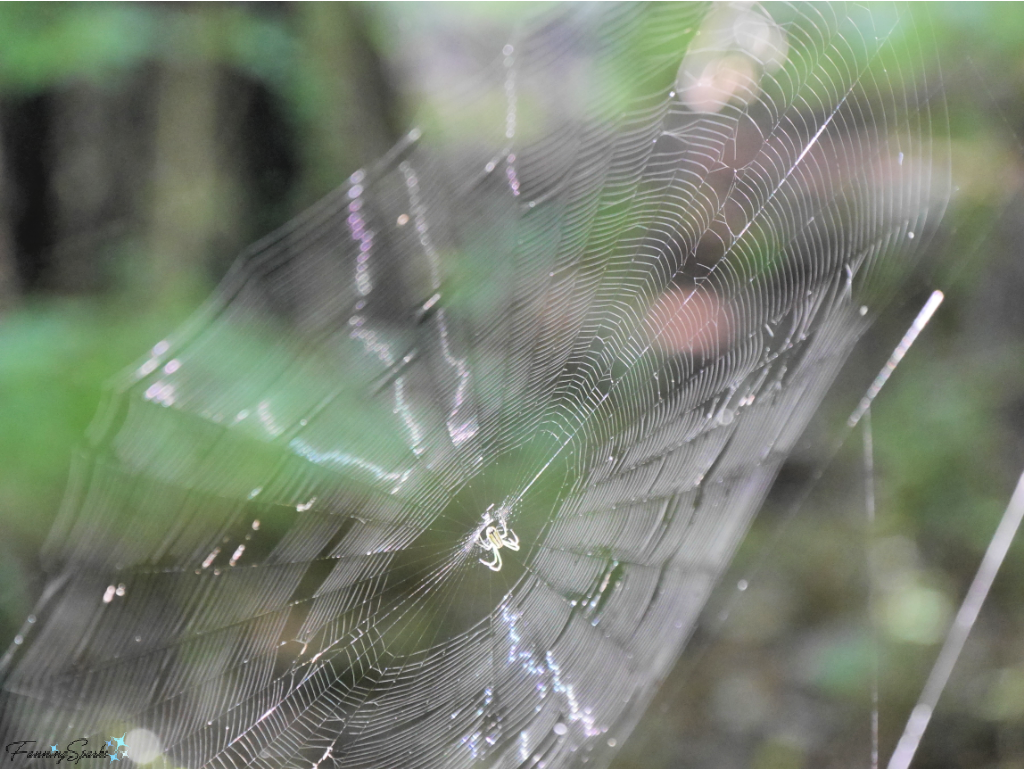
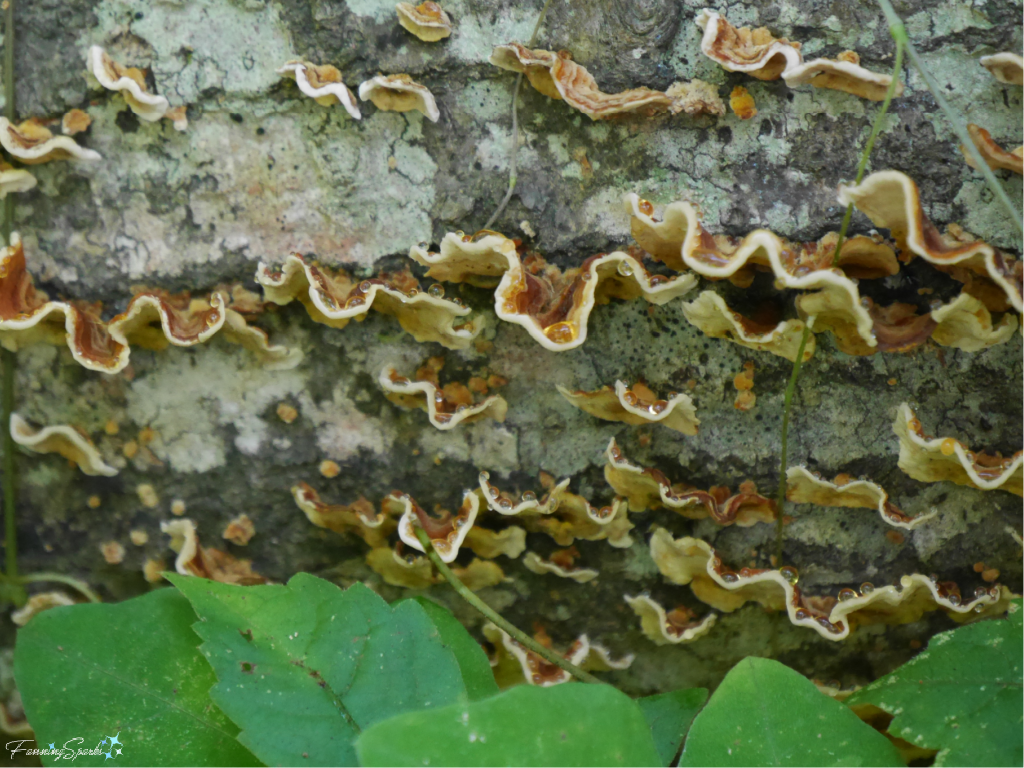
The guide brochure encourages you to “Allow your eyes to wander over the landscape along and beside the trail. Notice what is drawing your eye.” A fallen tree covered in fungi caught my eye. I consulted iNaturalist, after the fact, and discovered this is False Turkey-Tail (Stereum ostrea). It’s surprisingly photogenic!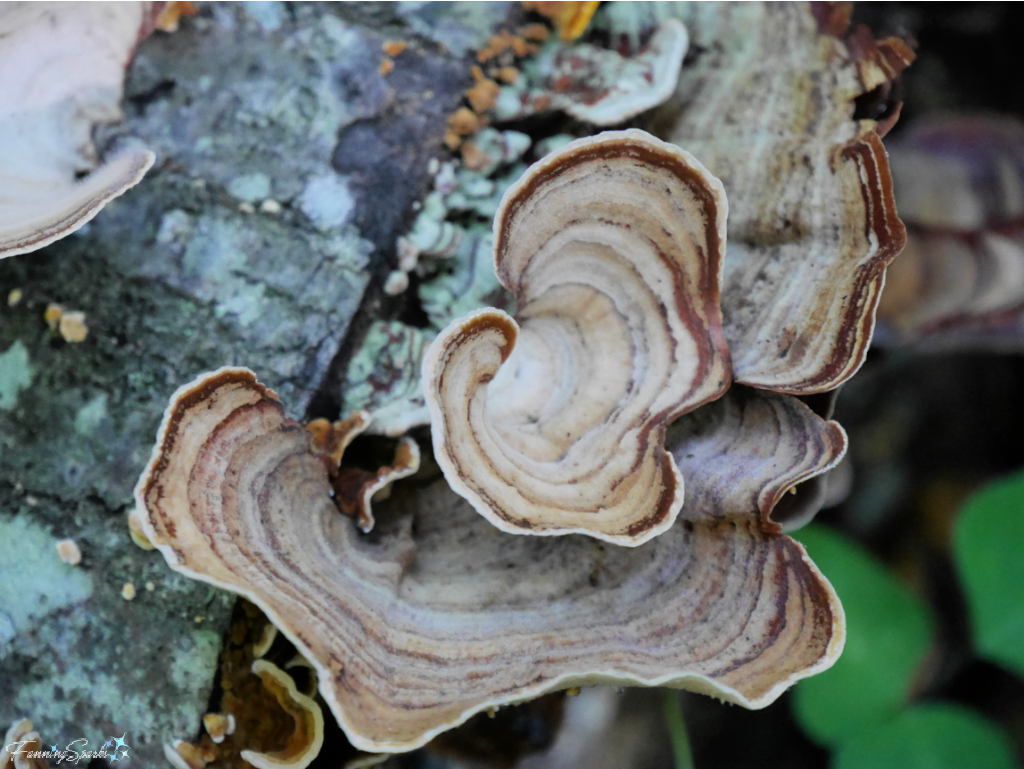
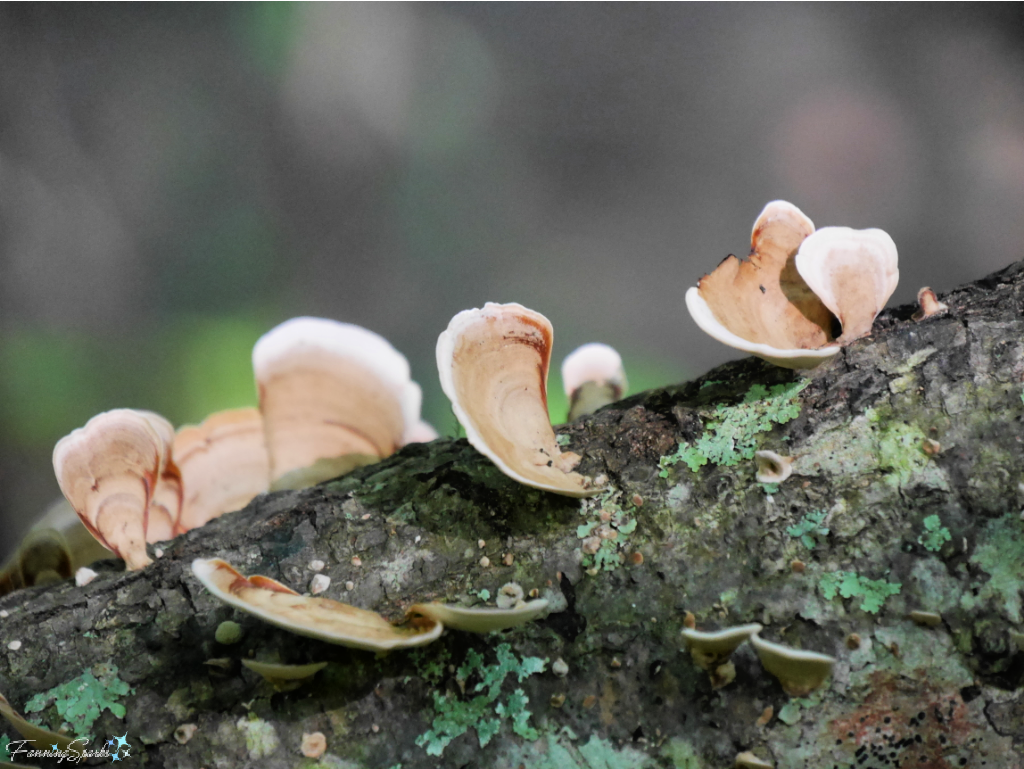
This fungi, on the same tree, is Crowded Parchment (Stereum complicatum).
The trail continues down to a wetland meadow which you can cross to see the Apalachee River at Lake Oconee. Then it circles back around and returns to the trailhead. The 8 invitations in the guide brochure were crafted by a ANFT-certified forest therapy guide. The Association of Nature and Forest Therapy Guides and Programs (ANFT) is, according to their website, “the most experienced global leader in guide training, and promoting the development and practice of Forest Therapy”. Their mission is “Nurture heart-centered relationships between all peoples and the More-Than-Human world of nature.” The River Trail is the first certified Forest Therapy Trail in the United States.
One of the 3 major strands supporting the ANFT approach to forest therapy is Japanese Shinrin-yoku. This brings me full circle to the practice of forest bathing developed in Japan and mentioned by Florence Williams in her book.
To understand the science behind forest bathing, Williams consulted several experts starting with Yoshifumi Miyazaki. Miyazaki is an expert on the topic having researched, taught and written about the subject for over 30 years. He is a Research Fellow and Grand Fellow, at Chiba University’s Centre for Environment, Health, and Field Sciences in Japan. In fact, Miyazaki coined the term “Forest Therapy” in 2003, when as he reports it, Americans found the Japanese term “shinrin-yoku” too difficult to pronounce.
His research has shown many health benefits result from a deeper connection with nature and spending time surrounded by trees. These benefits include reduced stress, lower blood pressure, improved mood, and increased focus and energy.

Miyazaki calls out that humans evolved in nature and have spent 99.99% of the last 5 million years in nature compared to the mere 0.01% of time, since the Industrial Revolution, when humans started spending their time in the urban world. He maintains the human brain and body, which are made for nature, are being overworked by urbanization. His straightforward premise is that humans need the calming effect of nature to return them to a normal state. His research findings certainly support this hypothesis.
I can’t honestly claim to have realized all the benefits—reduced stress, lower blood pressure, improved mood, and increased focus and energy—from my stroll along the River Trail but it was deeply enjoyable. And whether you call it Shinrin-yoku, Forest Bathing, Forest Therapy or Deliberate Dawdling, I’m definitely looking forward to doing it again!
More Info
Many thanks to the folks at the Farmhouse Inn at Hundred Acre Farm in Madison, Georgia! You can learn more about this peaceful country retreat on the Farmhouse Inn website. Information about the River Trail can be found under Forest Therapy.
Check out the Association of Nature and Forest Therapy Guides and Programs on their website.
I also mentioned Florence Williams book, The Nature Fix Why Nature Makes Us Happier, Healthier and More Creative, in my previous post My Top 3 Nonfiction Reads from 2018.
You can learn more about Yoshifumi Miyazaki and the Center for Environment, Health and Field Sciences at Chiba University, Japan on their website. I enjoyed Miyazaki’s 2012 TEDxTokyo talk on Nature Therapy. His book, Shinrin Yoku The Japanese Art of Forest Bathing, is available on Amazon.
iNaturalist came through for me again. I couldn’t have identified the fungi without their help. Their web-based observation and identification tools, along with their mobile app, are excellent for identifying plants and wildlife. Check out my previous post Seek to Identify Wildlife with this Fun App. To learn more, access the iNaturalist website.
Today’s Takeaways
1. Consider the potential health benefits of strengthening your connection with nature.
2. Engage all your senses to get the most of your time in the forest.
3. Forest therapy calls for you to walk slowly, observe and savor.


 I tried drying and pressing some Rose of Sharon flowers in my new
 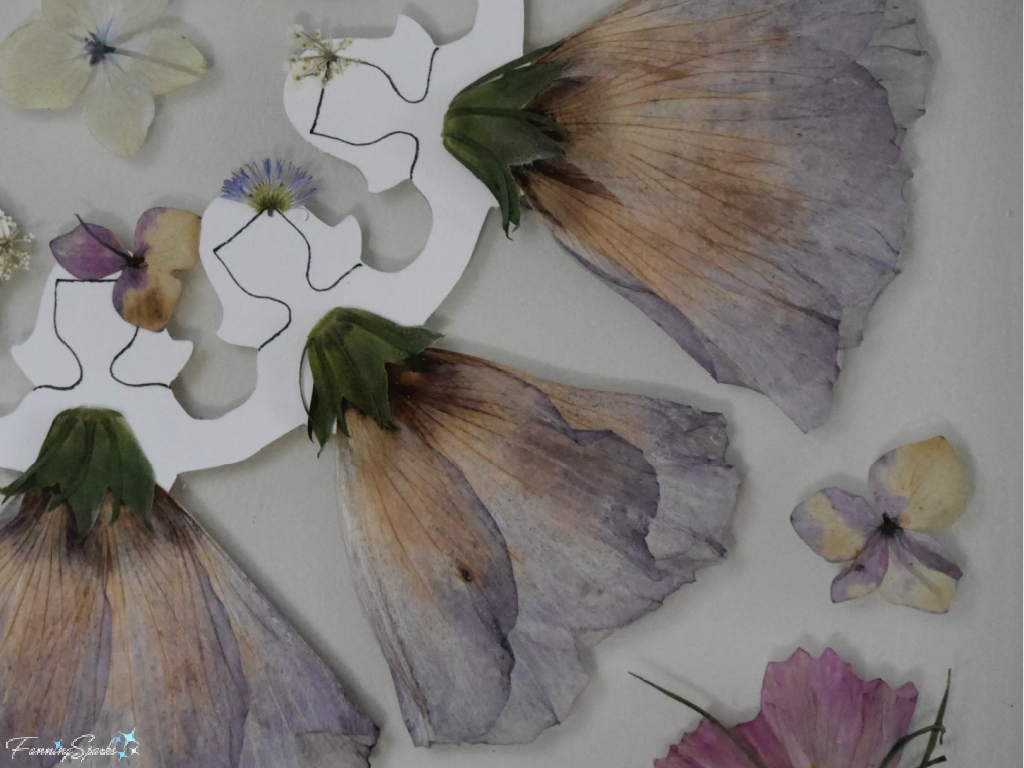 It’s best to cut the Rose of Sharon flowers when they are partially open and to remove the stamens before putting them in the flower press. Check out my previous post
 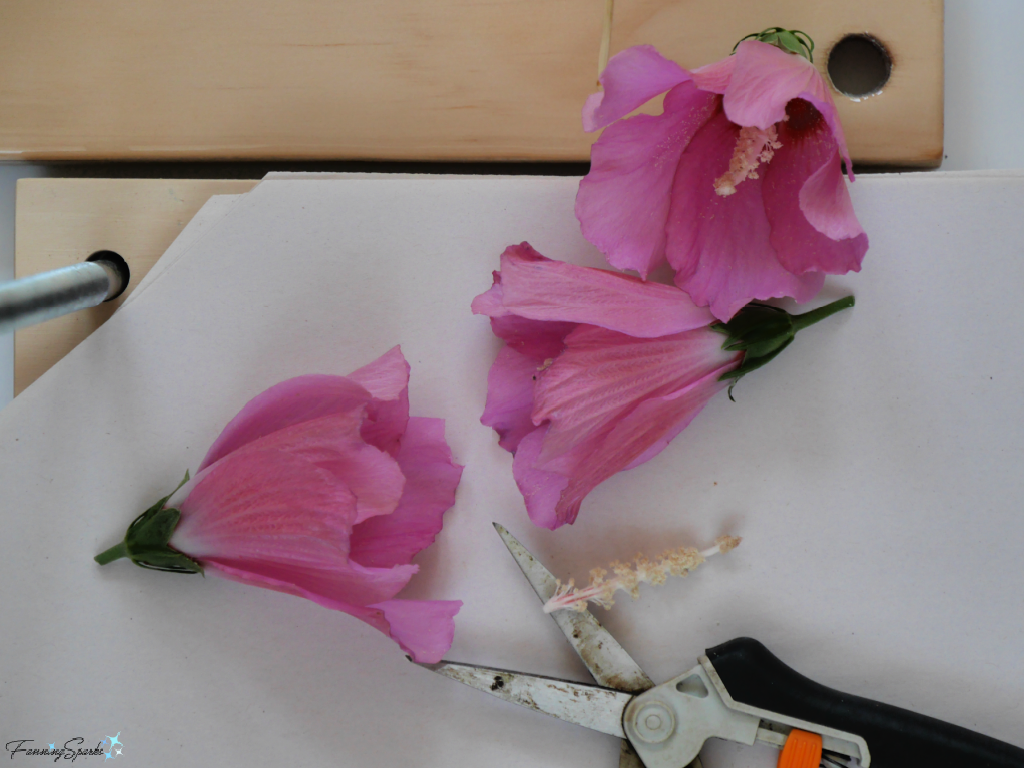 Cosmos and hydrangea also have thin, delicate flower petals which dry beautifully. The flowers pictured below took about 2 weeks to dry.
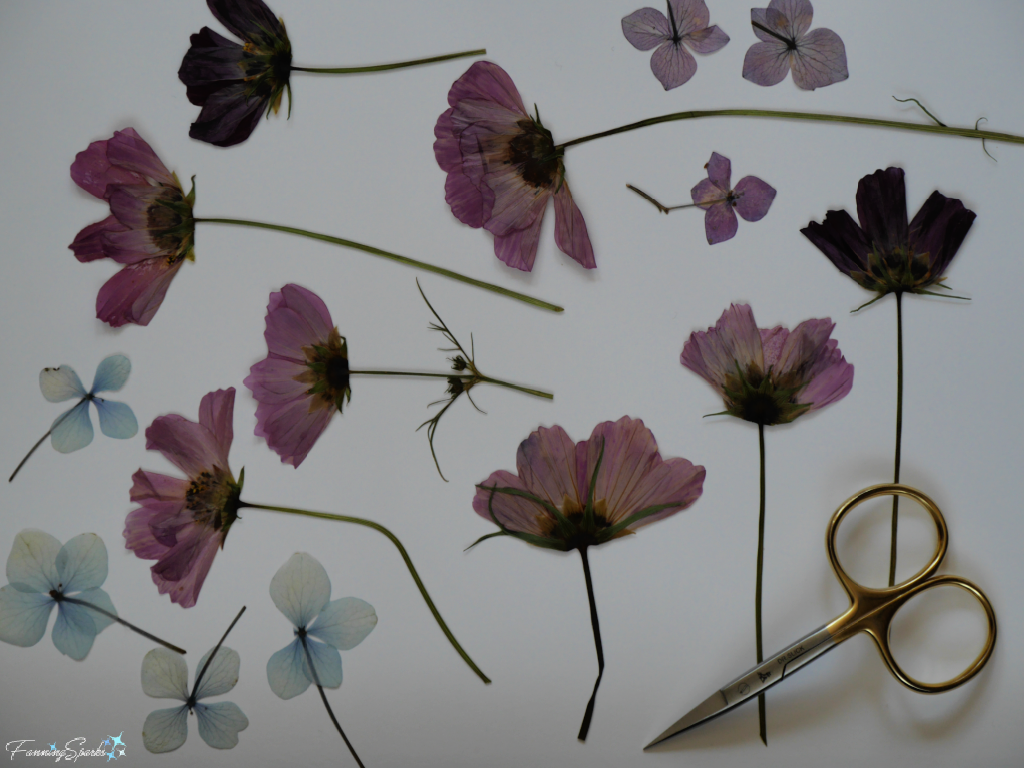

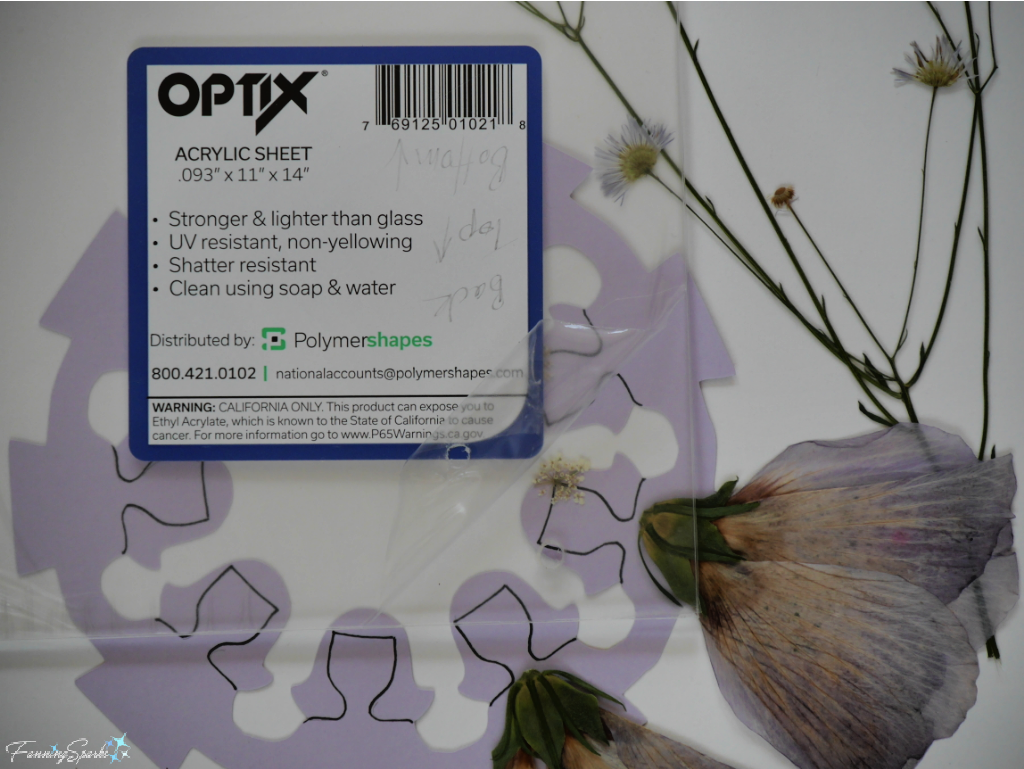
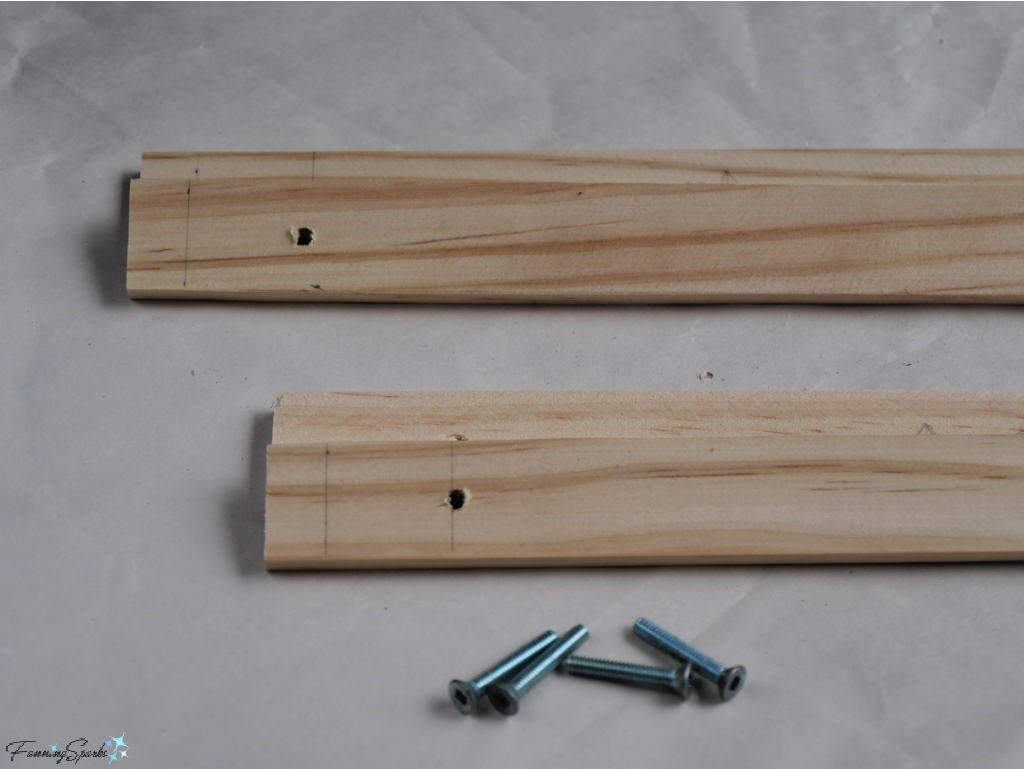 The trick to drilling acrylic, as I learned online, is to drill slowly and work in gradual increments. Starting with a 1/16″ bit and gradually working my way up to a 11/64″ bit resulted in neat and clean holes. Note the holes in the acrylic are slightly bigger than the holes in the wood so the screws can slip through without resistance.
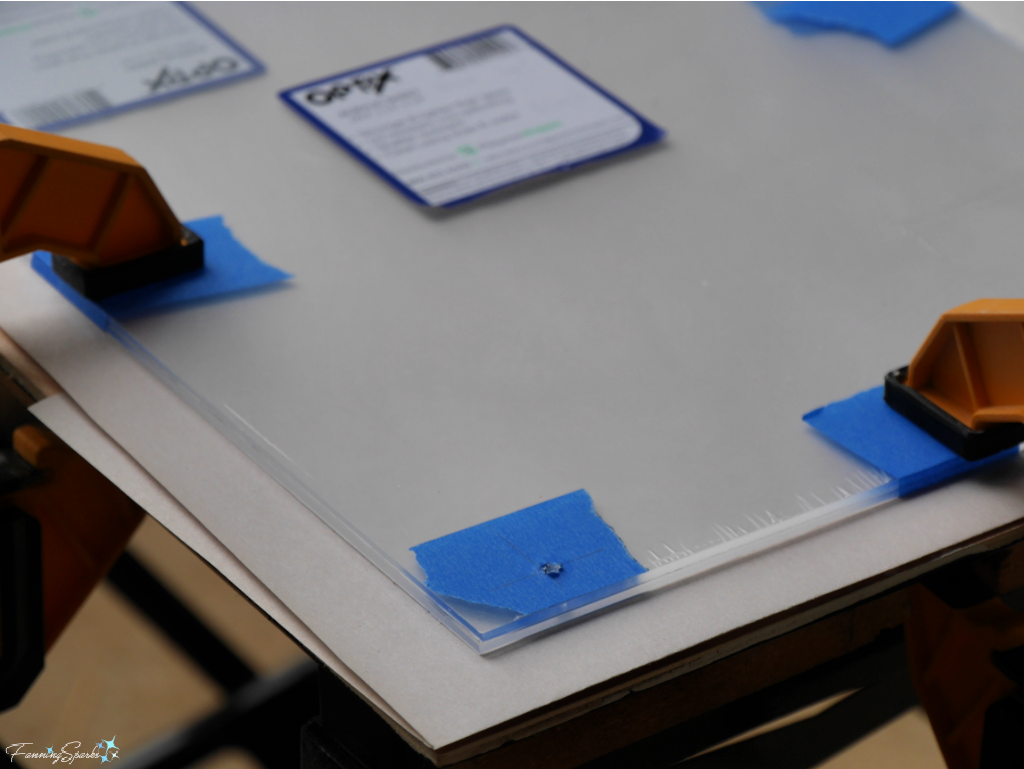 To finish the wooden bars, I sanded them smooth and then stained them with some General Finishes Gel Stain left over from another project. This product produces great results but does require a few steps and a little patience.
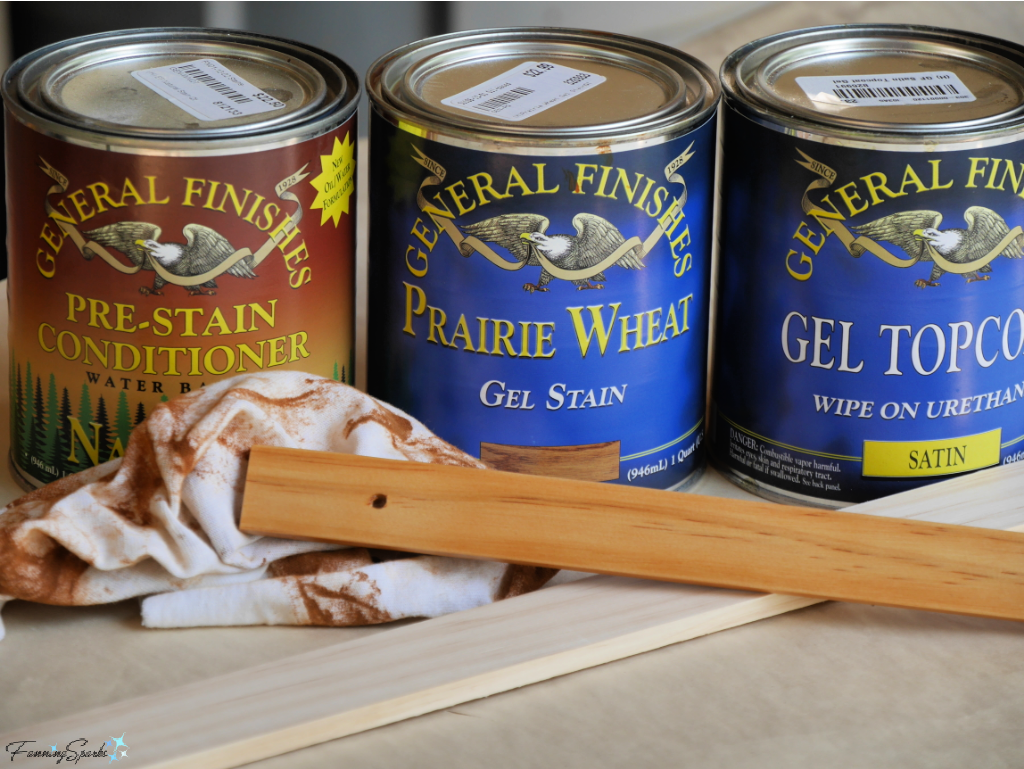
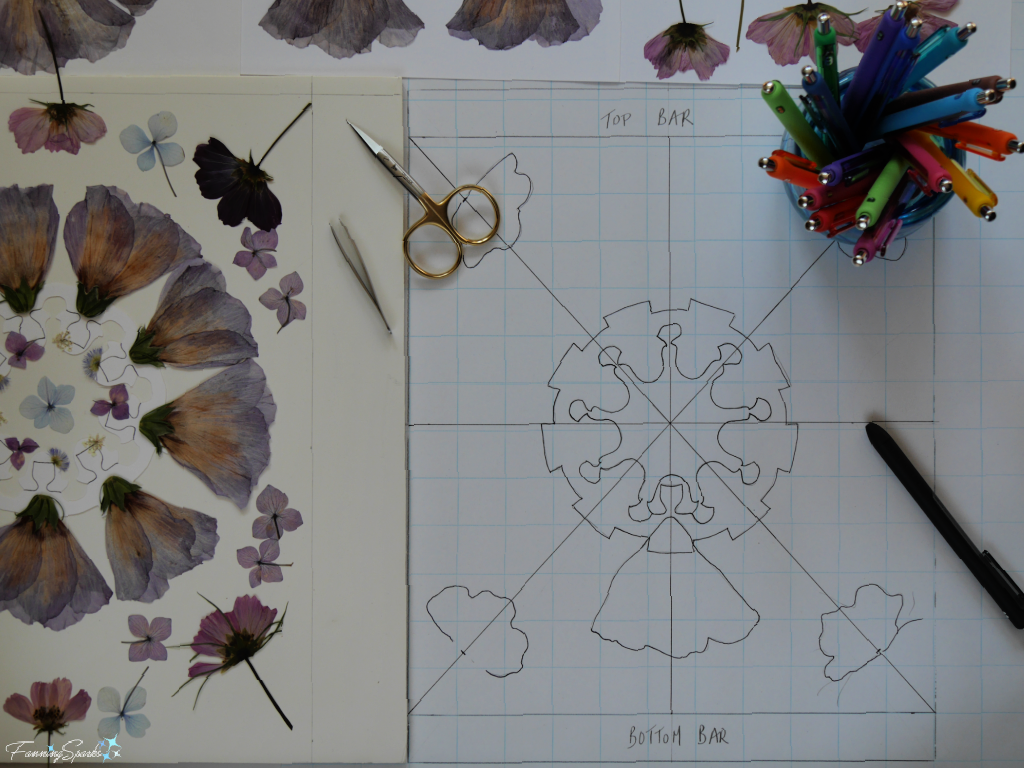 The next step was to glue the cut paper dolls and the dried flowers to the back sheet of acrylic. Using a small paintbrush, I carefully covered the back of each element with Matte Mod Podge. Tweezers were helpful for lifting and placing the tiny delicate pieces. After drying the piece overnight, I used wet cotton swabs to remove smudges and smears.
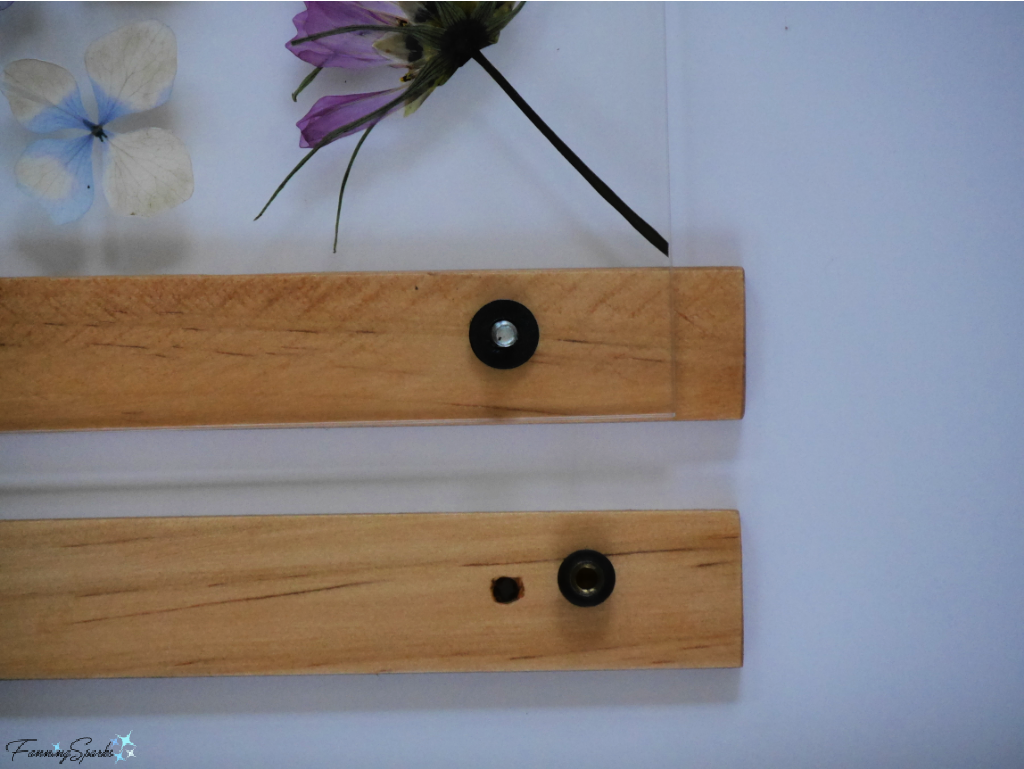
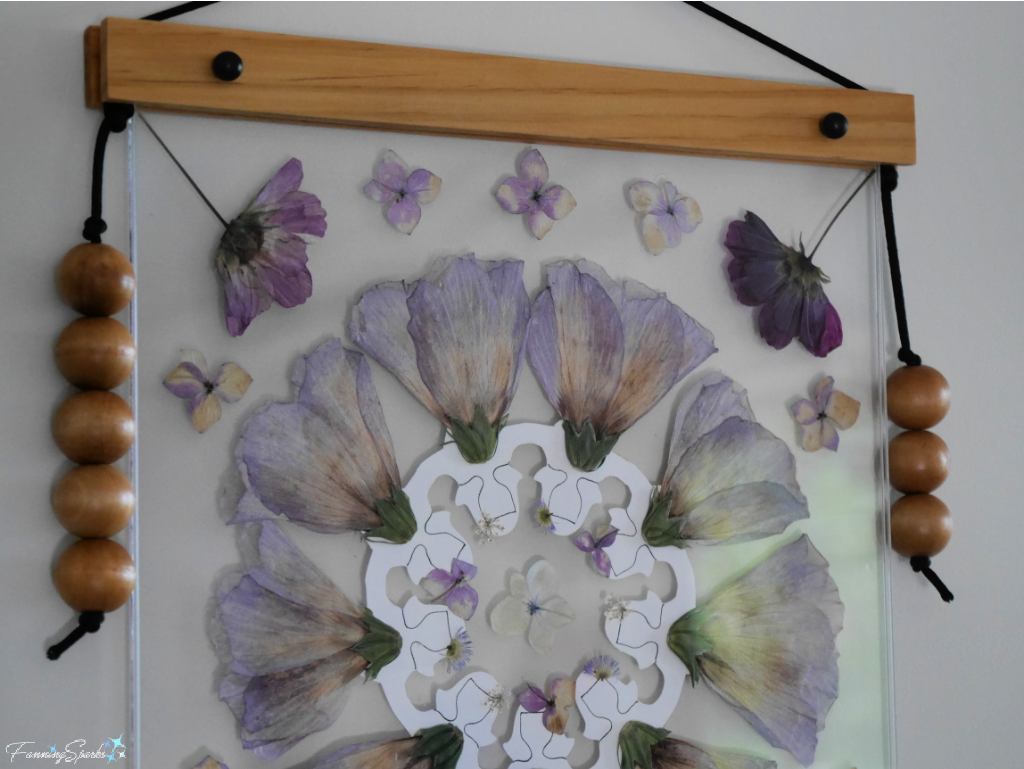 Here’s the completed piece. Now the lovely Rose of Sharon flowers can live on as pretty Pressed Flower Girls!
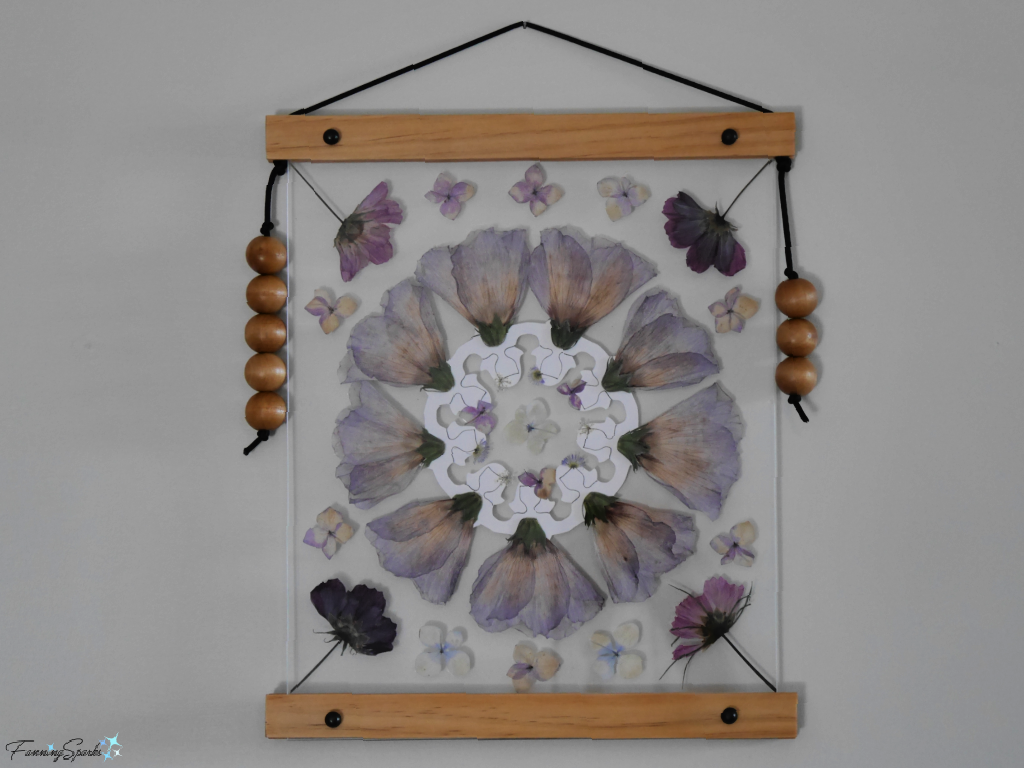

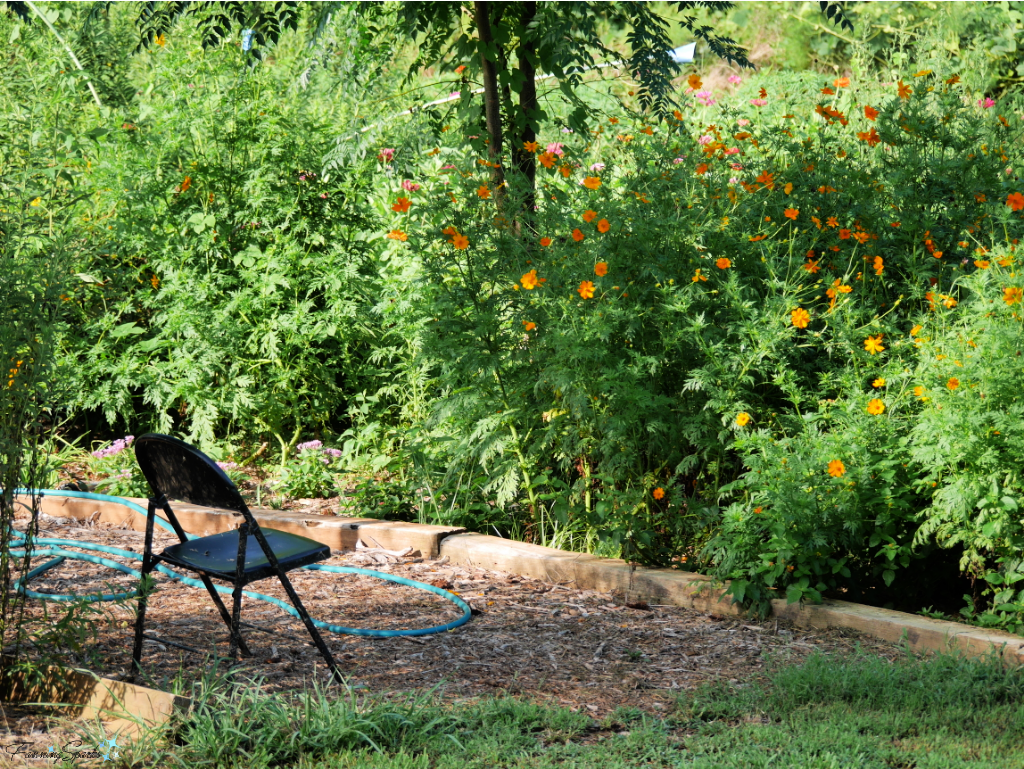
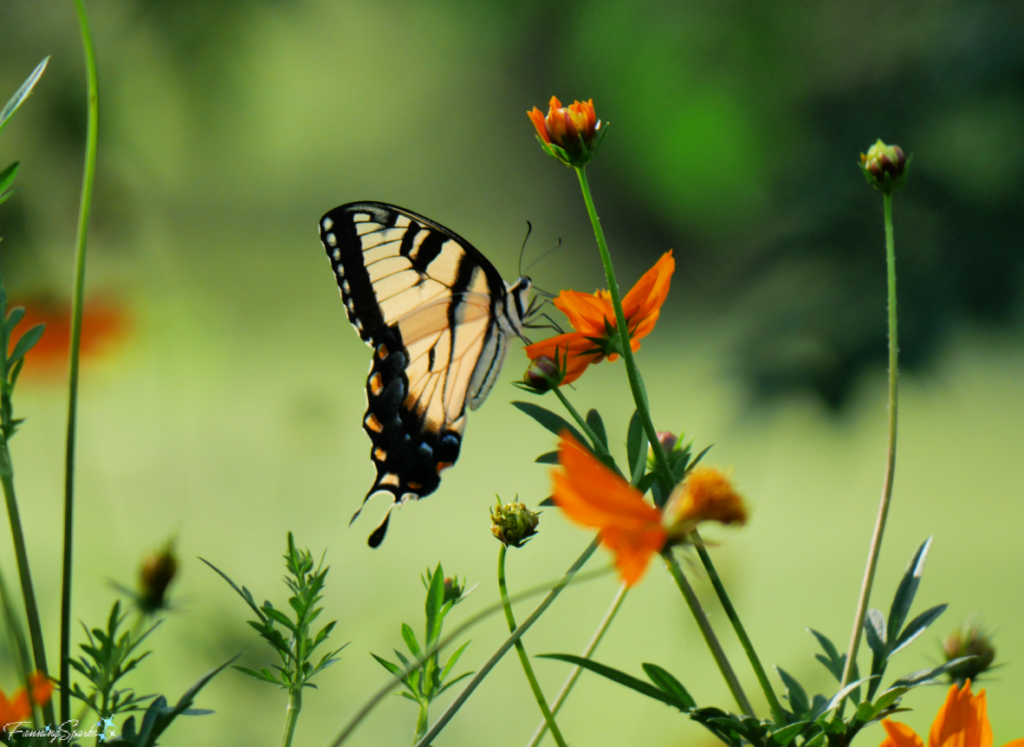
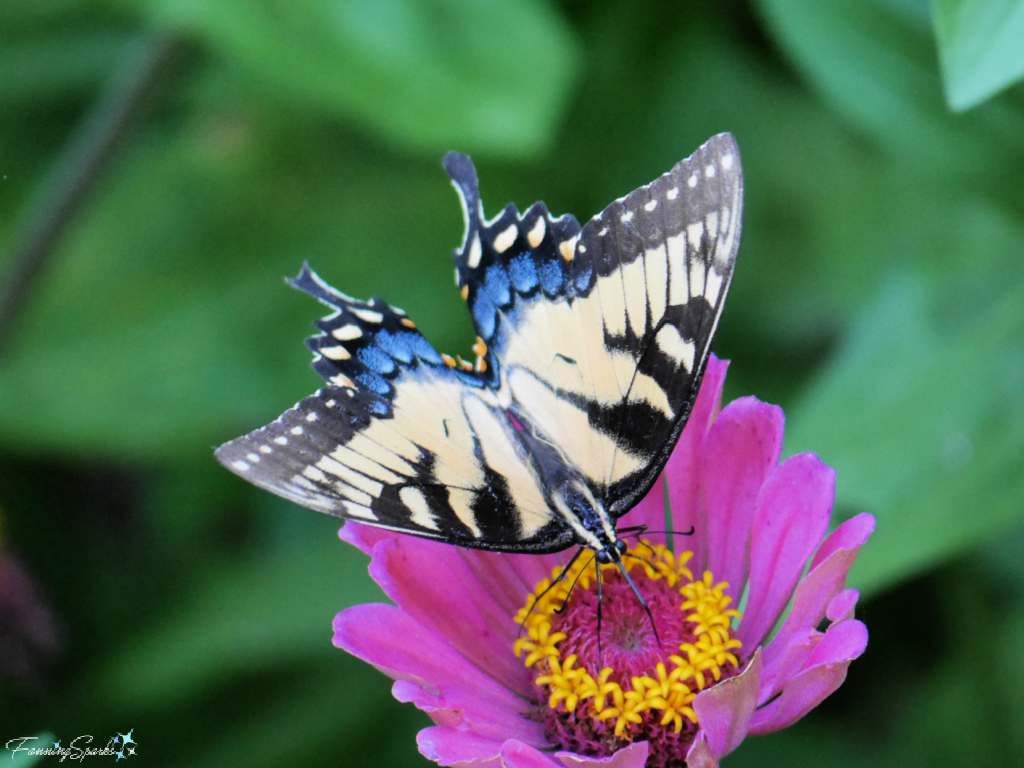
 The park was overflowing with summer flowers. Here’s another magnificent Eastern Tiger Swallowtail perched on a vibrant zinnia.
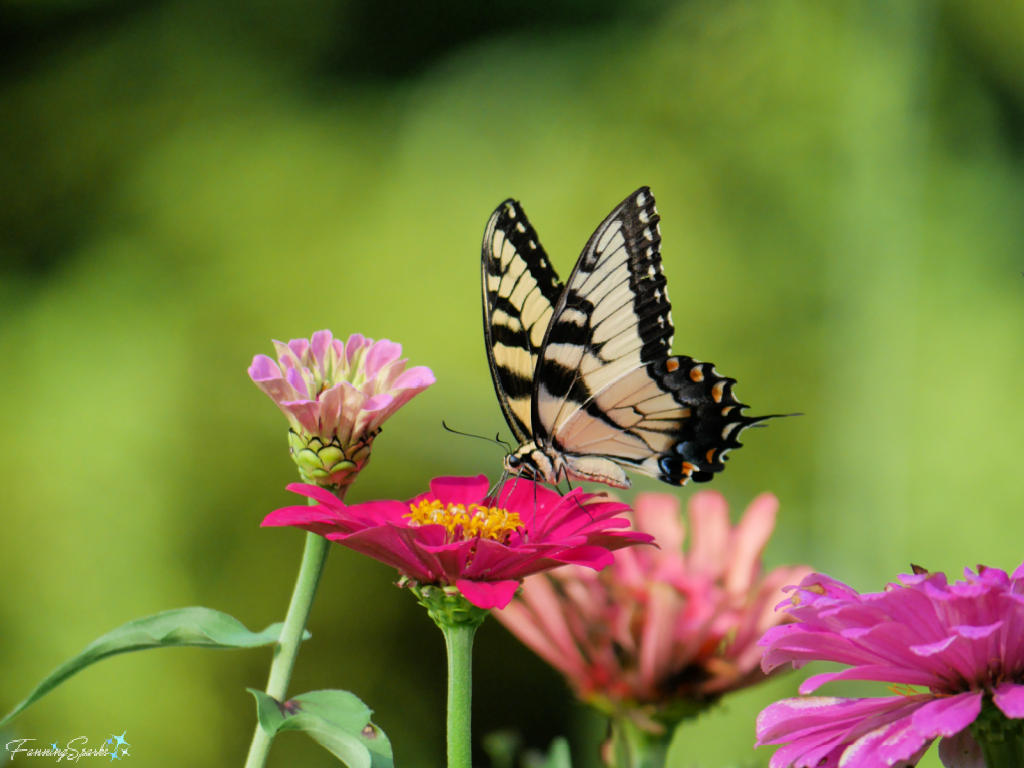 Speaking of zinnias, I shared my love for these flowers in a previous post called
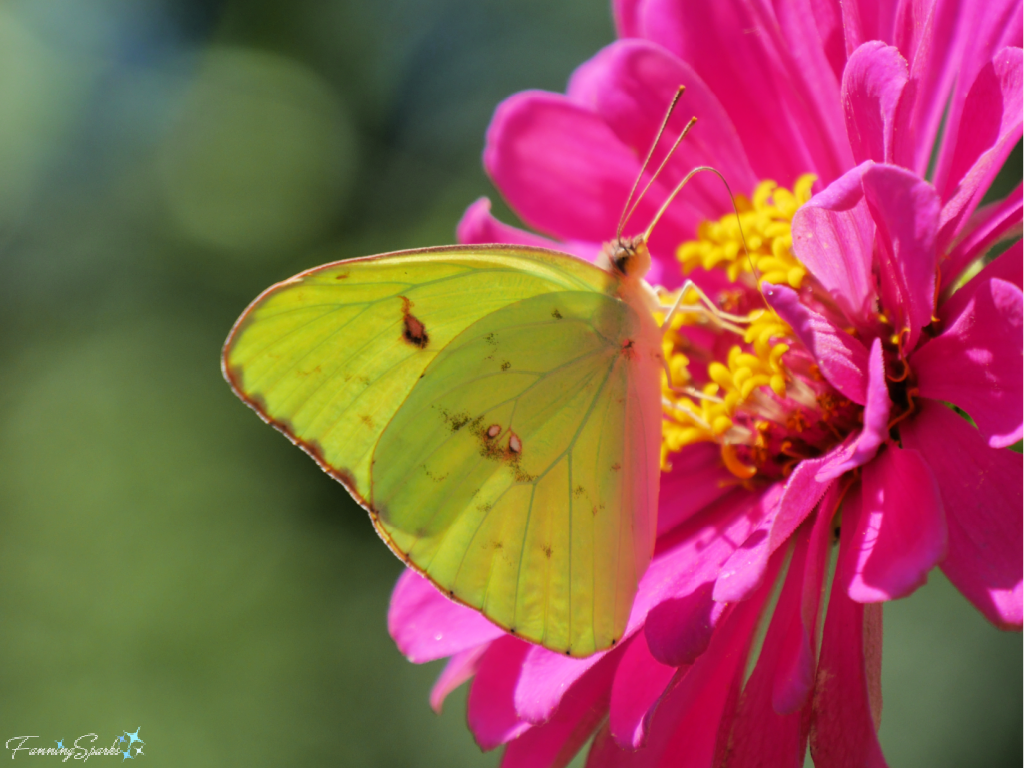 Here’s another species—it’s the striking Gulf Fritillary (Agraulis vanilla) with its orange-patterned wings.
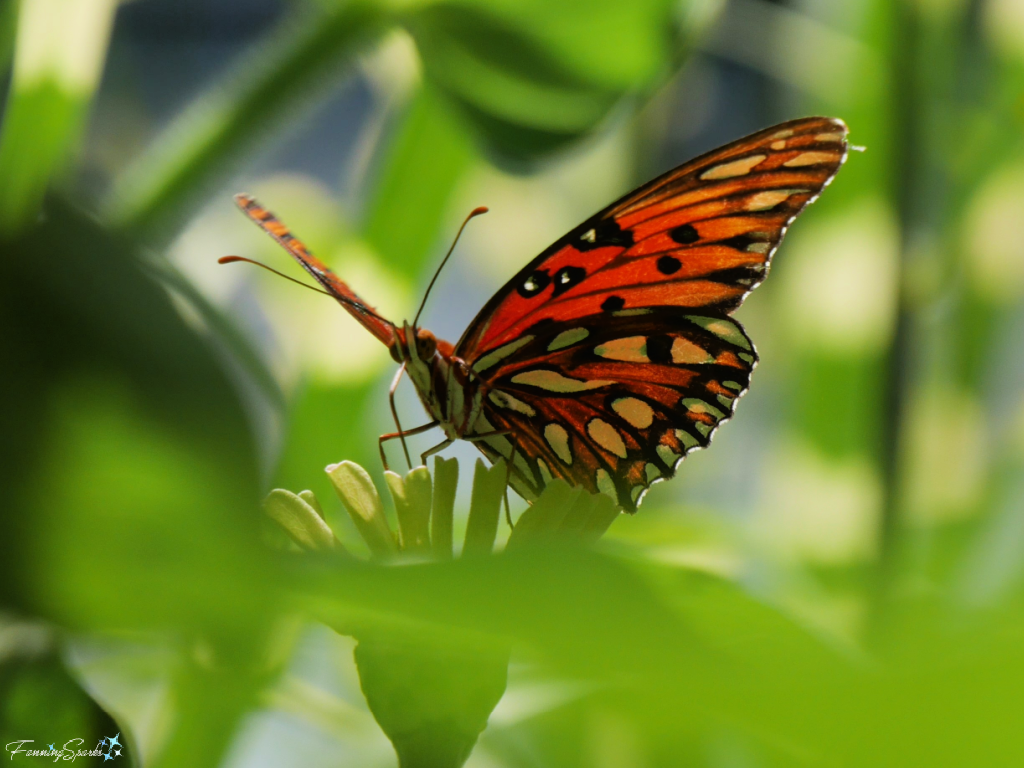 Here’s another shot of the Gulf Fritillary. It’s moved on to the ever popular purple coneflower.
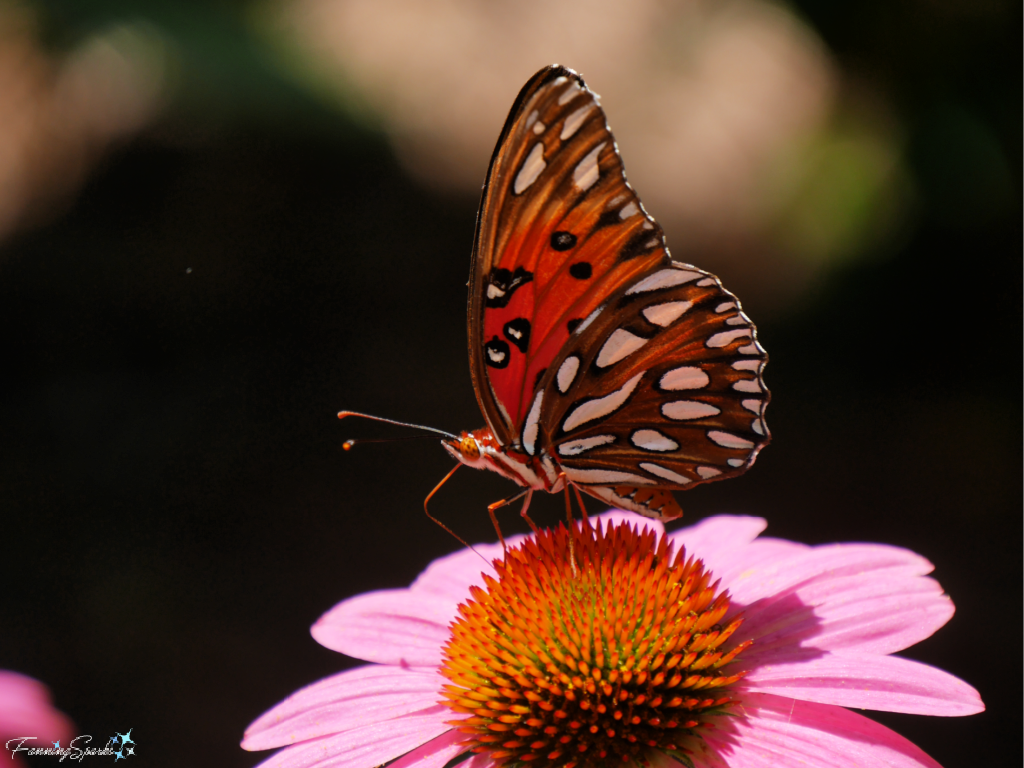

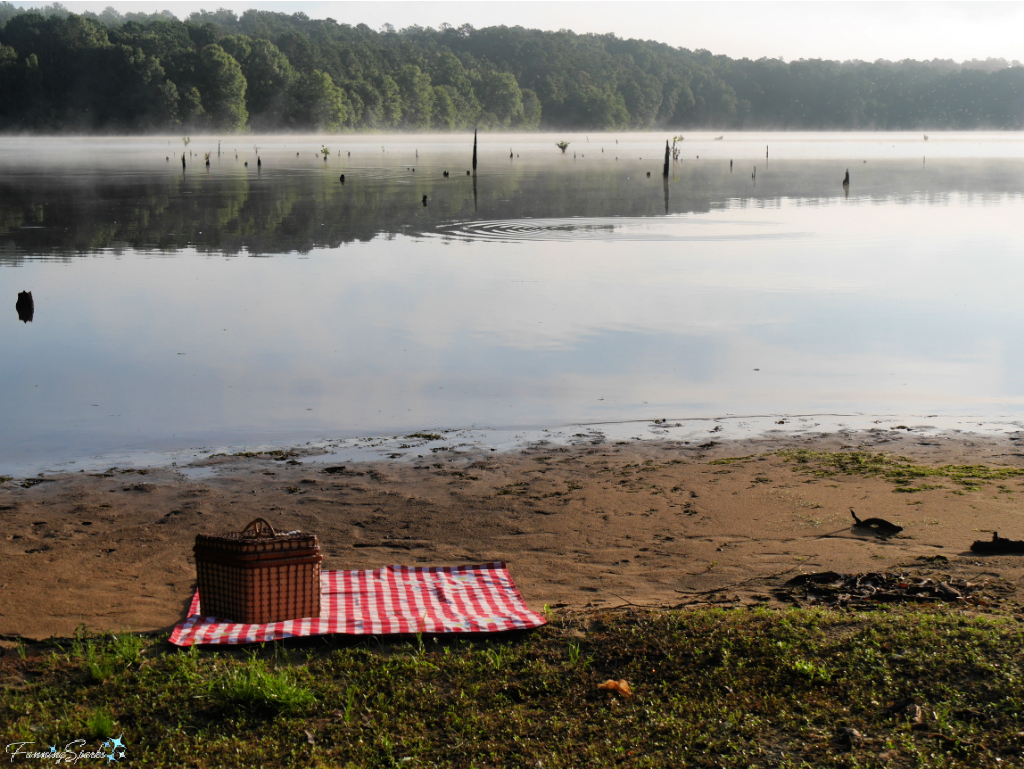
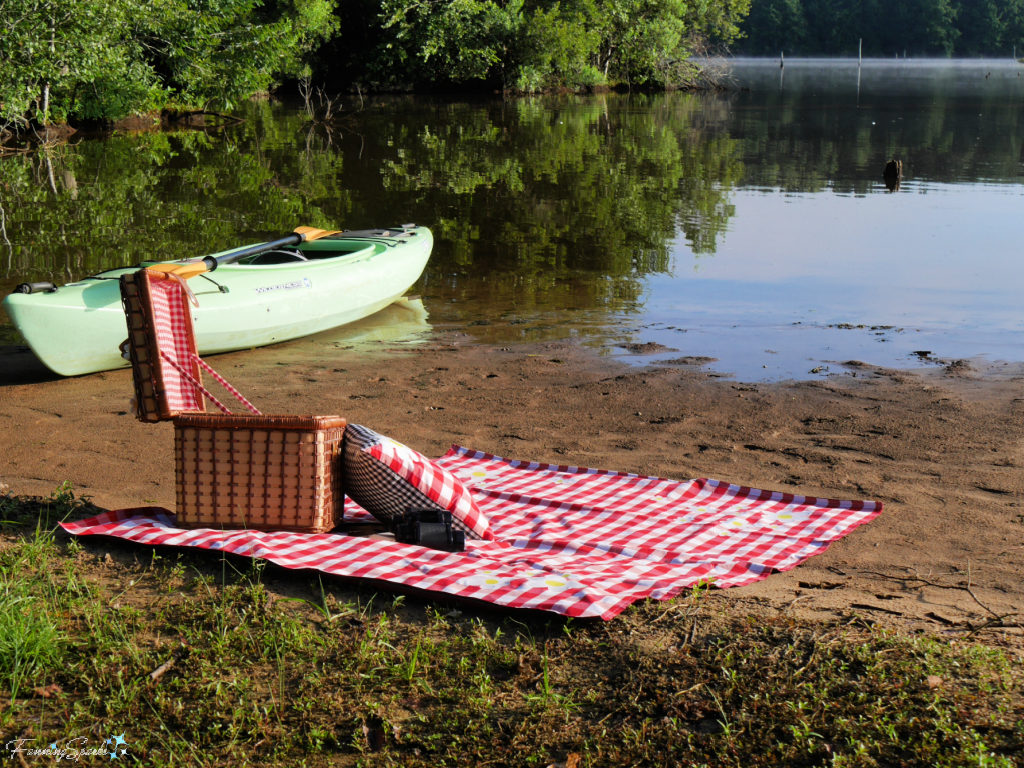
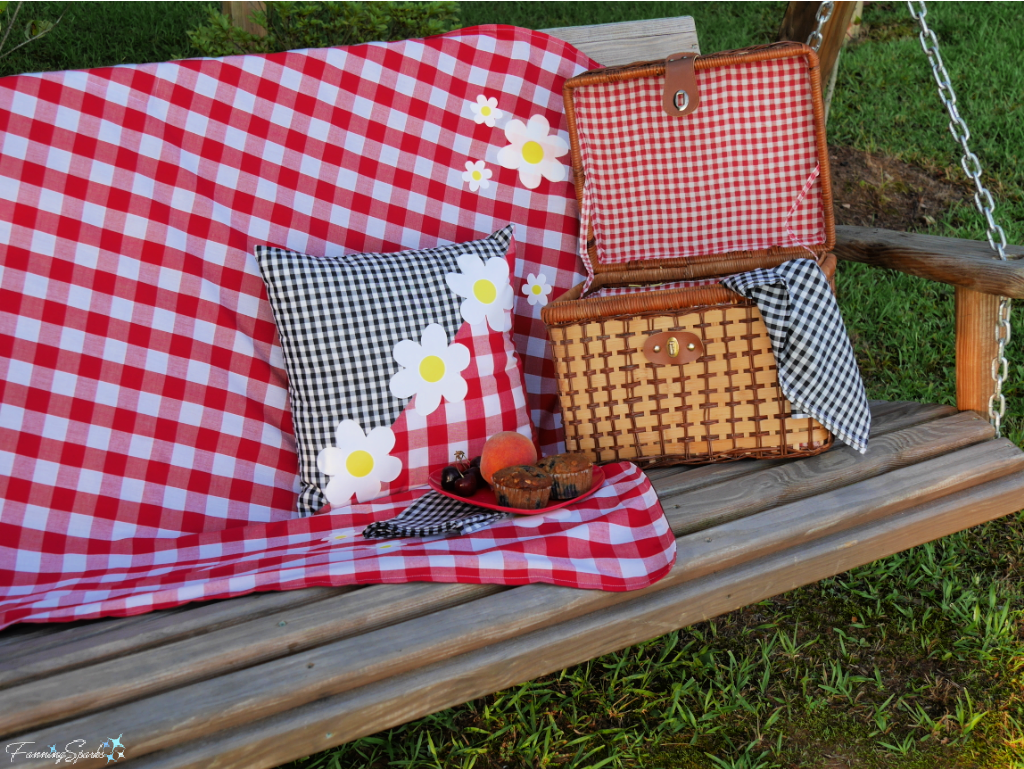
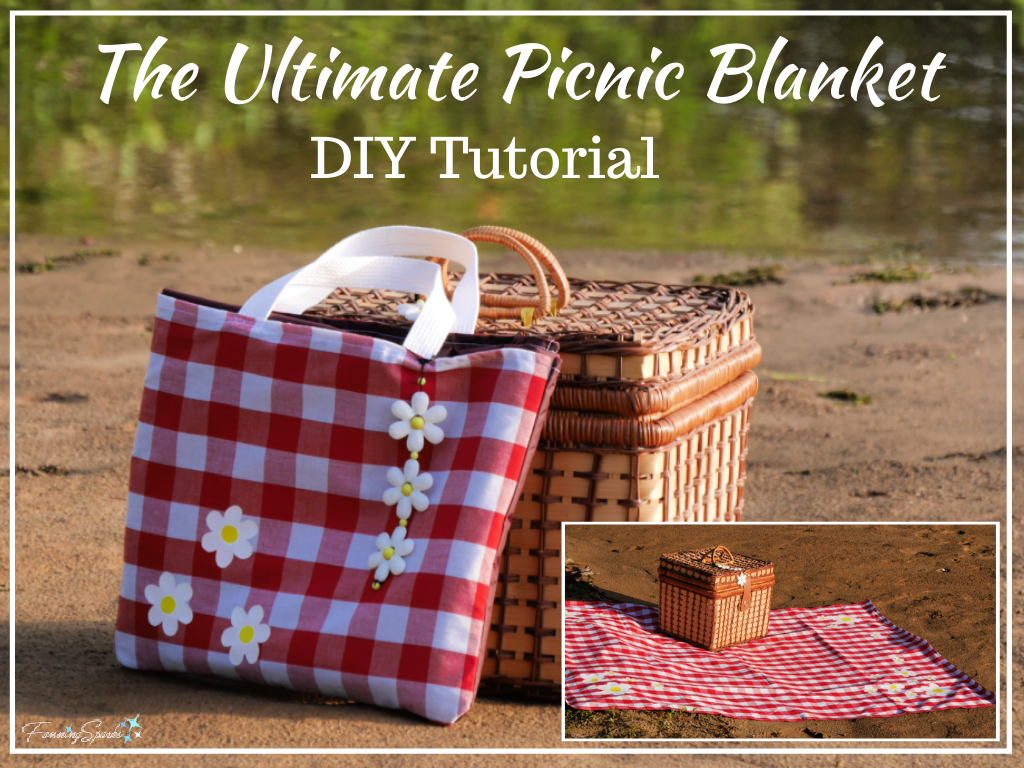
 I think the picnic blanket featured in today’s post delivers on all that. Plus it’s easy to make with the step-by-step instructions provided below. Why not give it a try?
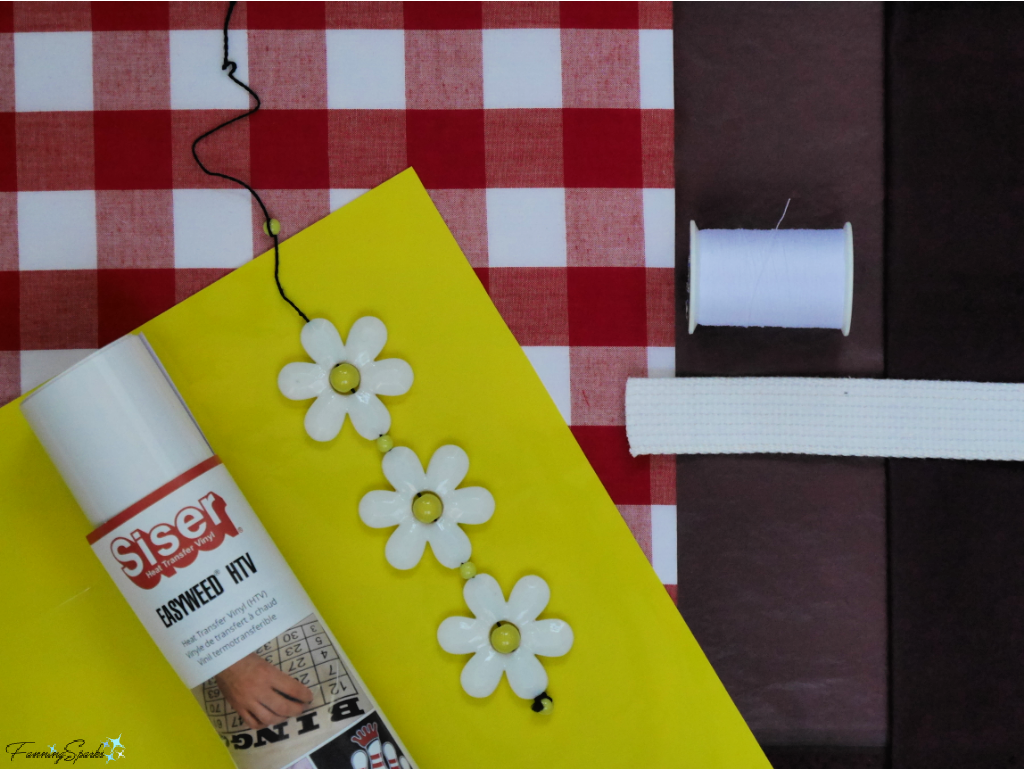 Tools and Equipment Needed
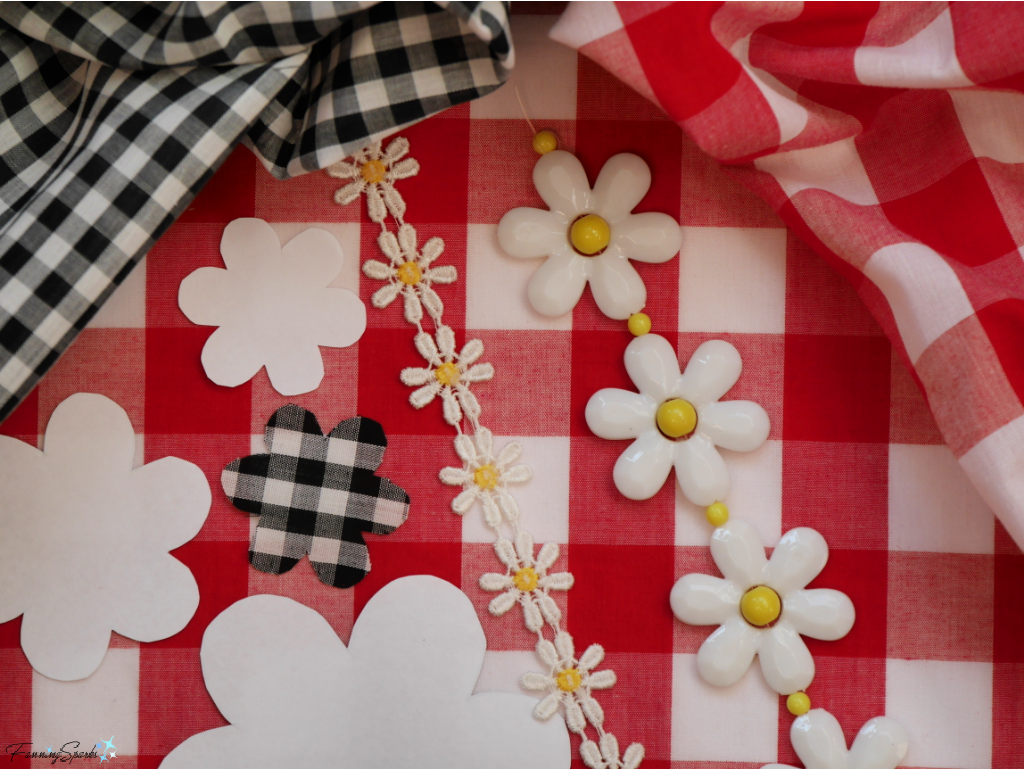 Step 2 Cut Fabric Cut the following 4 rectangles of fabric:
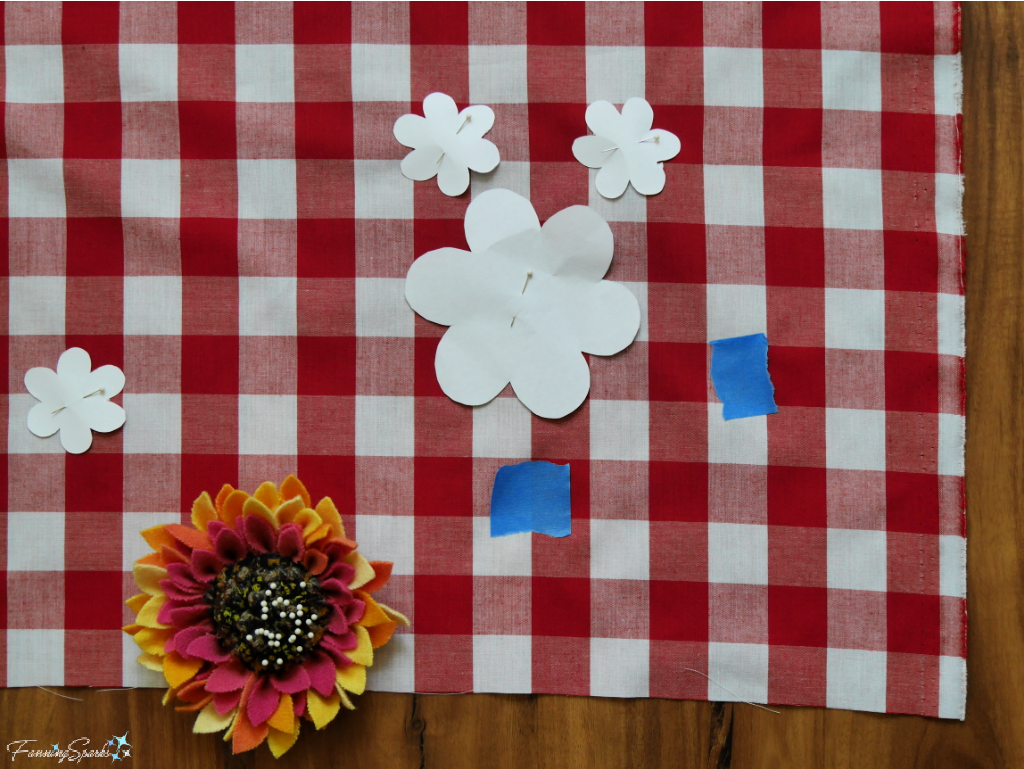 Step 4 Adhere Vinyl Daisies The daisy motif is made from heat transfer vinyl (HTV). HTV can be purchased in sheets or rolls. It can be cut with a cutting machine (such as a Cricut Explorer) or cut with scissors. HTV is an iron-on vinyl, which is available in a variety of brands and colors. Siser Classic Easyweed HTV brand seems to have the best reviews and, after working with it a few times, I would recommend it as well. If you’re not familiar with HTV, here’s a short explanation.
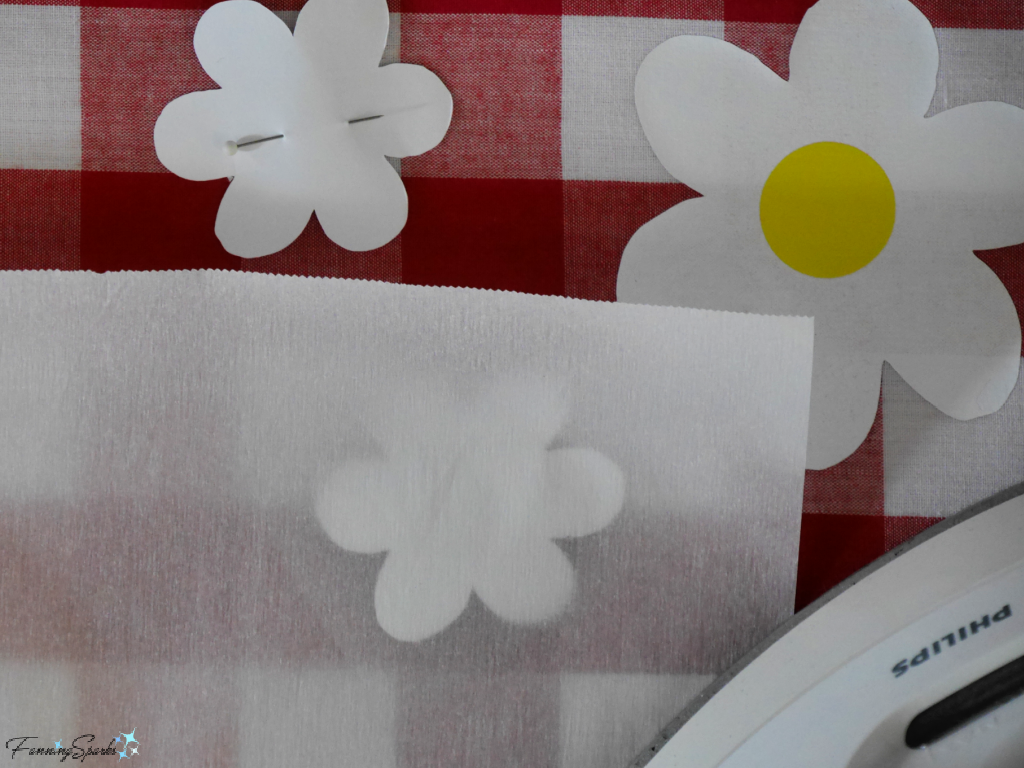 Step 4f) Repeat for all daisies.
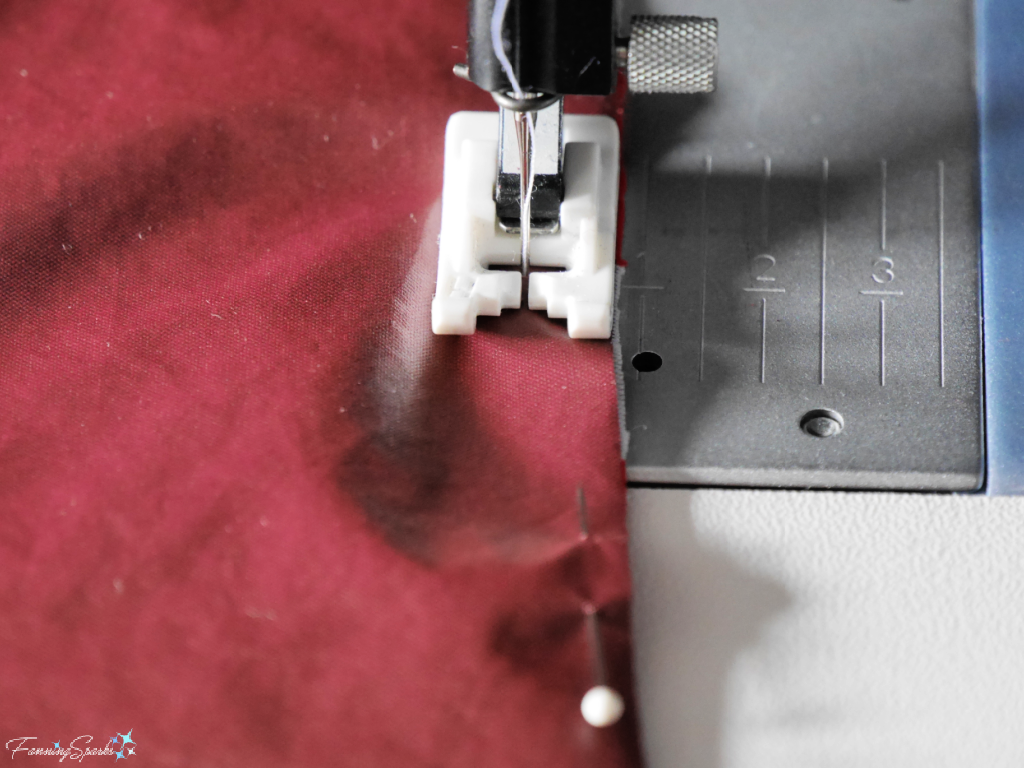 Step 6 Turn Right Side Out Pull the blanket through the opening to turn it right side out. Use seam turner to push out seams and corners. Press for a crisp finished seam taking care not to overheat the coated taffeta on the Blanket Backing. Sew the opening closed. Topstitch close to edge all around the Blanket skipping the two small openings left for the belting (from Step 5). Here’s how a finished corner looks.
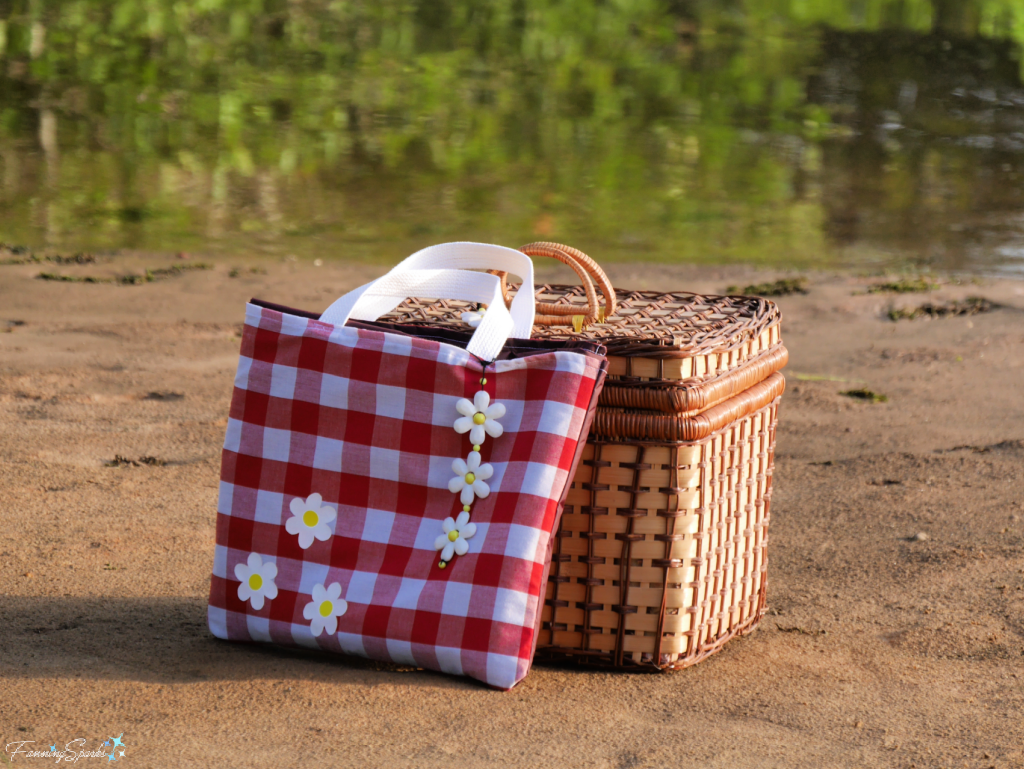
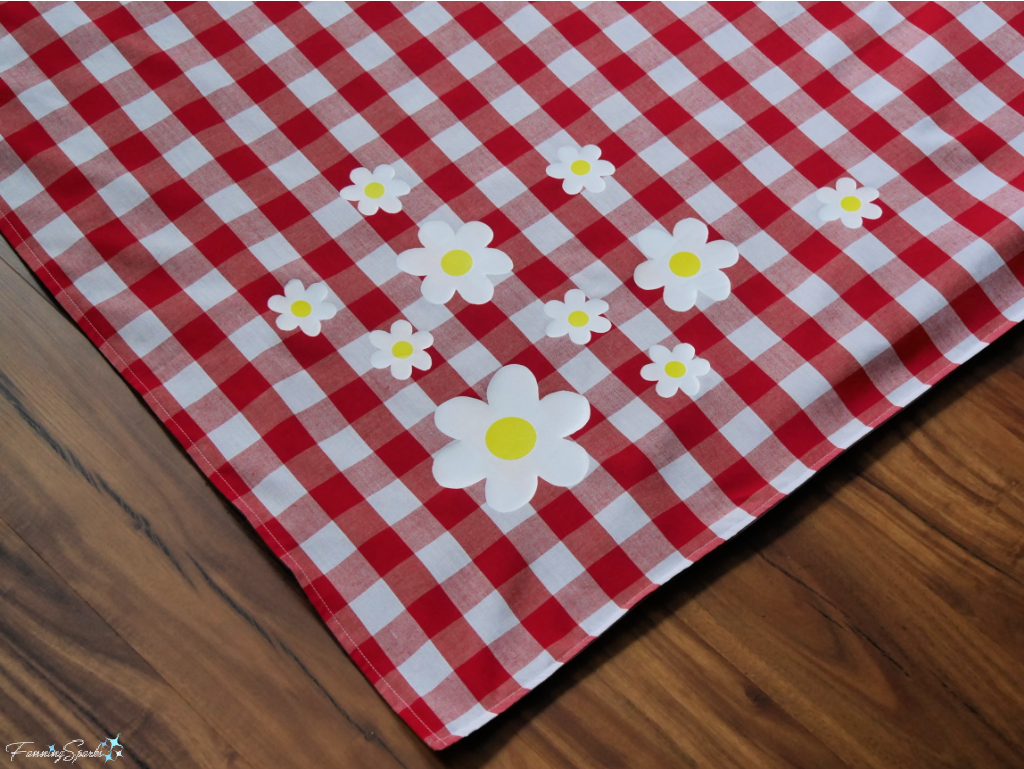 Step 7 Prepare Pocket Gather pieces for the Blanket Pocket including the decorative cotton fabric Pocket Front and the coated taffeta Pocket Backing. Cut 2 pieces of 1” belting each measuring 14”. Adhere HTV daisies to Pocket Front following method outlined above in Step 4. Use the zigzag stitch on the sewing machine to overcast the ends of the belting and prevent fraying.
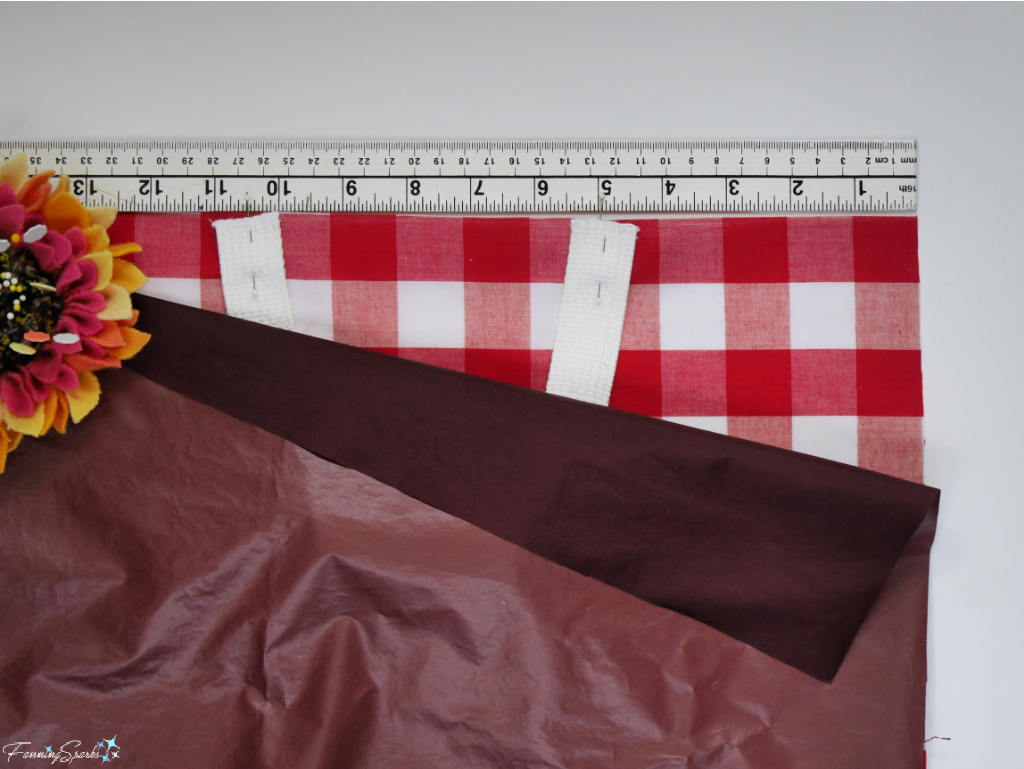 Sew all around the Pocket edges with a ¼“ seam allowance leaving a 4-6” opening along the bottom edge. Turn Pocket right side out. Use seam turner to push out seams and corners. Press for a crisp finished seam taking care not to overheat the coated taffeta on the Blanket Backing. Sew the opening closed. Topstitch close to edge all around the Pocket. Reinforce handle with a second row of stitching.
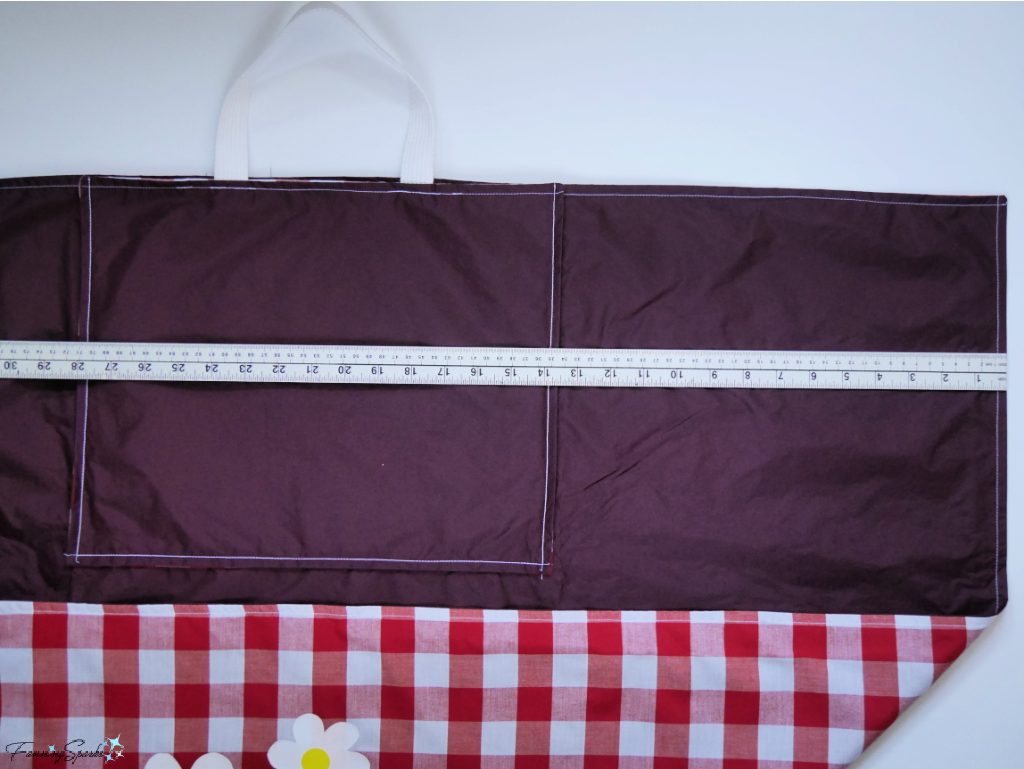 Sew around sides and bottom of Pocket leaving top edges open. Backstitch at top edges to reinforce.
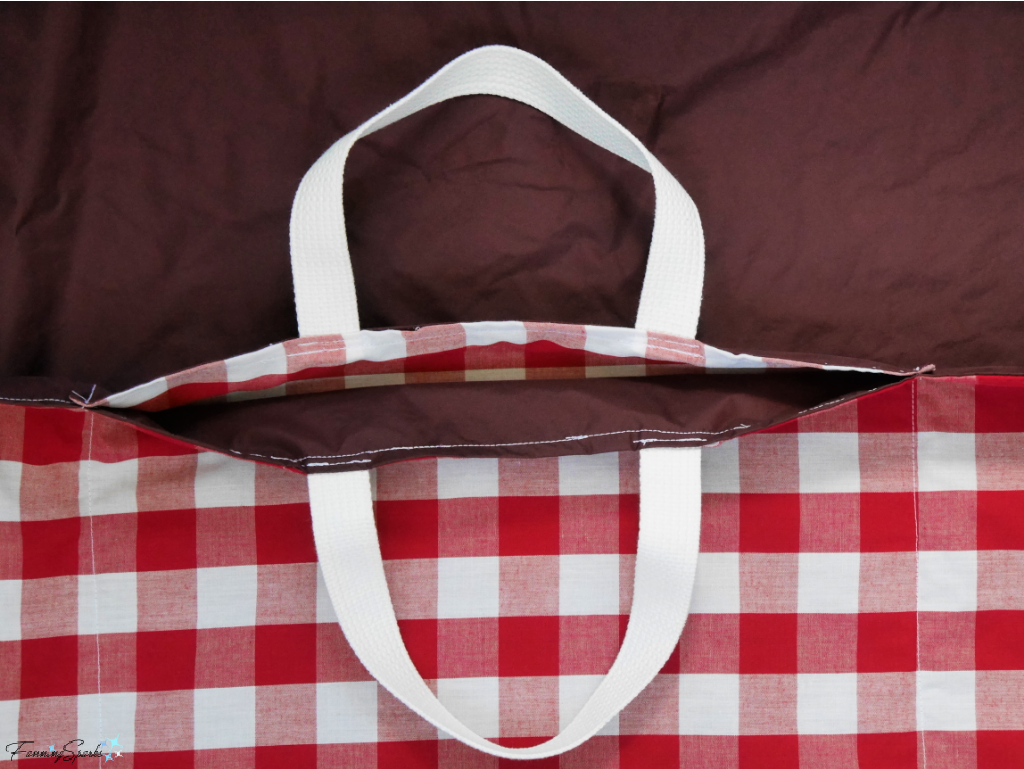 Step 11 Attach Trim Attach your trim of choice, beads, tassels, pompoms, ribbons, etc, with thread or string. It should be easy to remove before washing the Picnic Blanket. Simply tie a loop at the end of the string and then slip the trim through the loop and tighten.
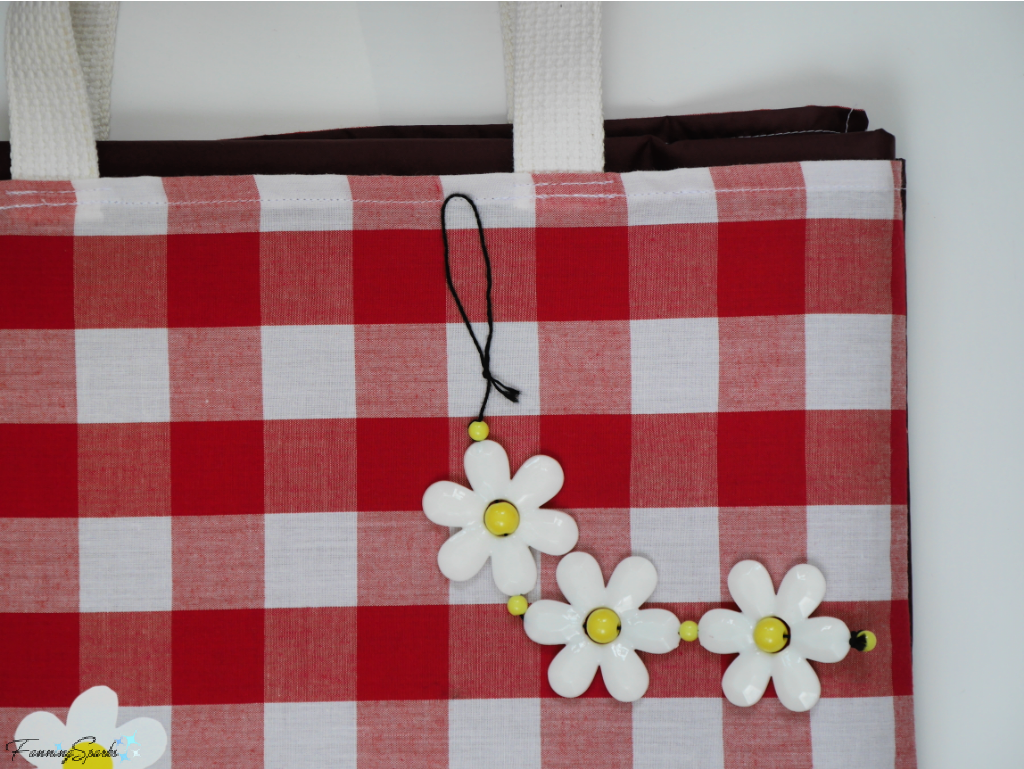 Your Ultimate Picnic Blanket is ready to use! To fold the Blanket for easy carrying to your next picnic:
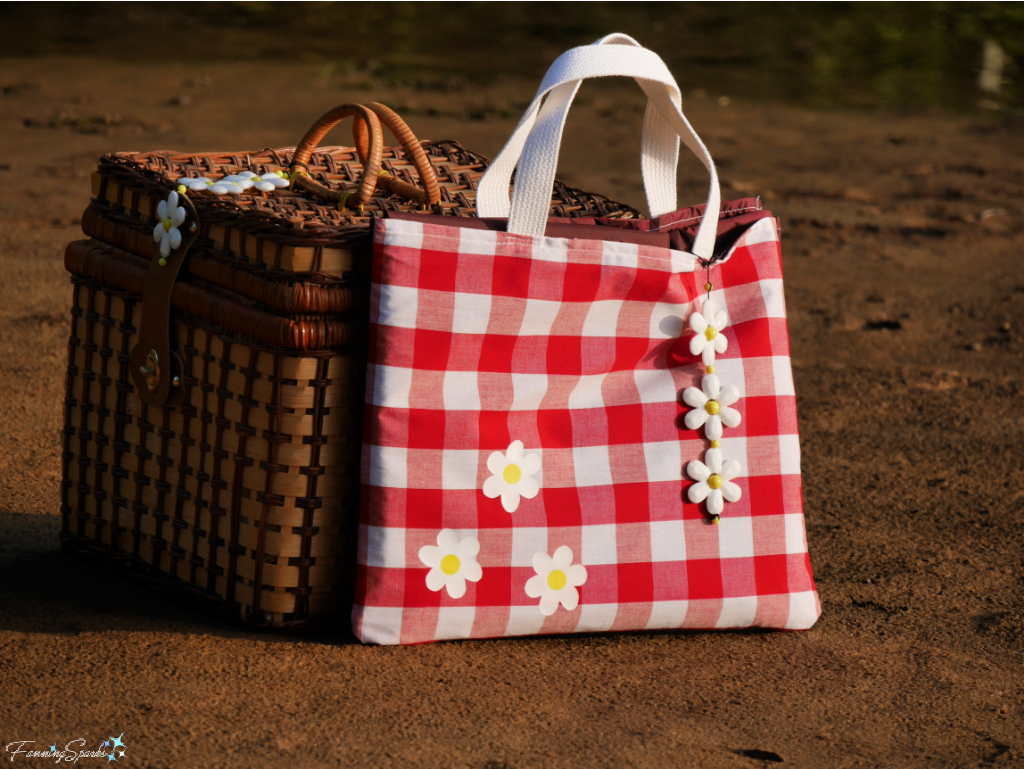

 But then I got curious and decided to go back for a closer look the next day. There were two osprey!
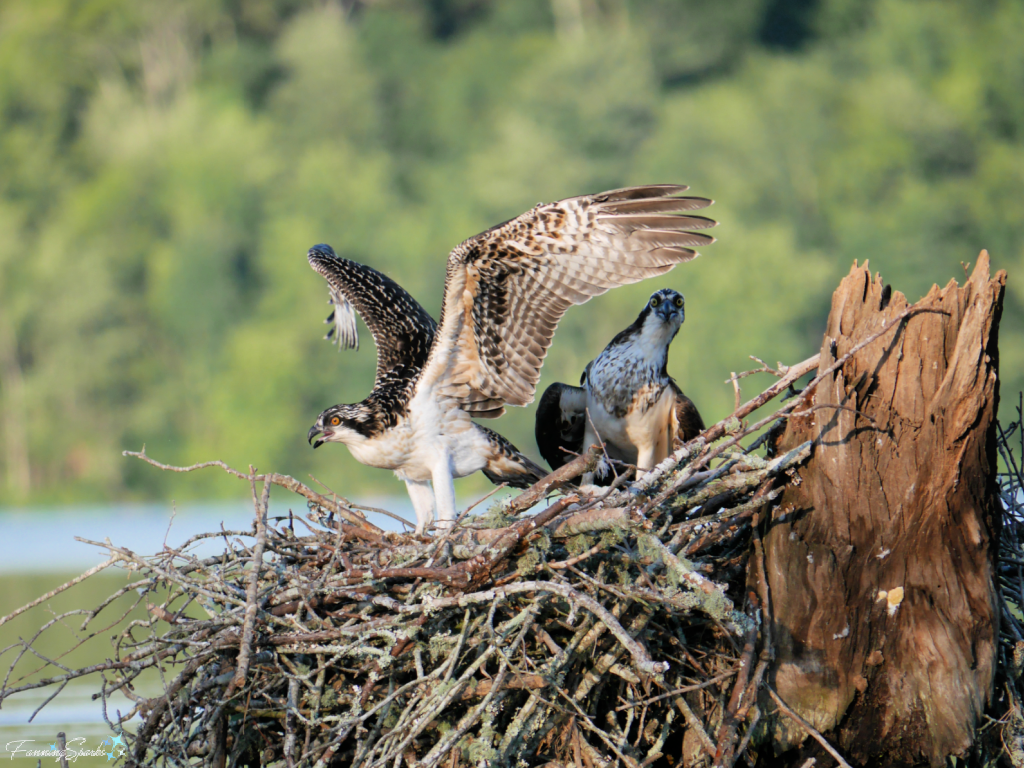
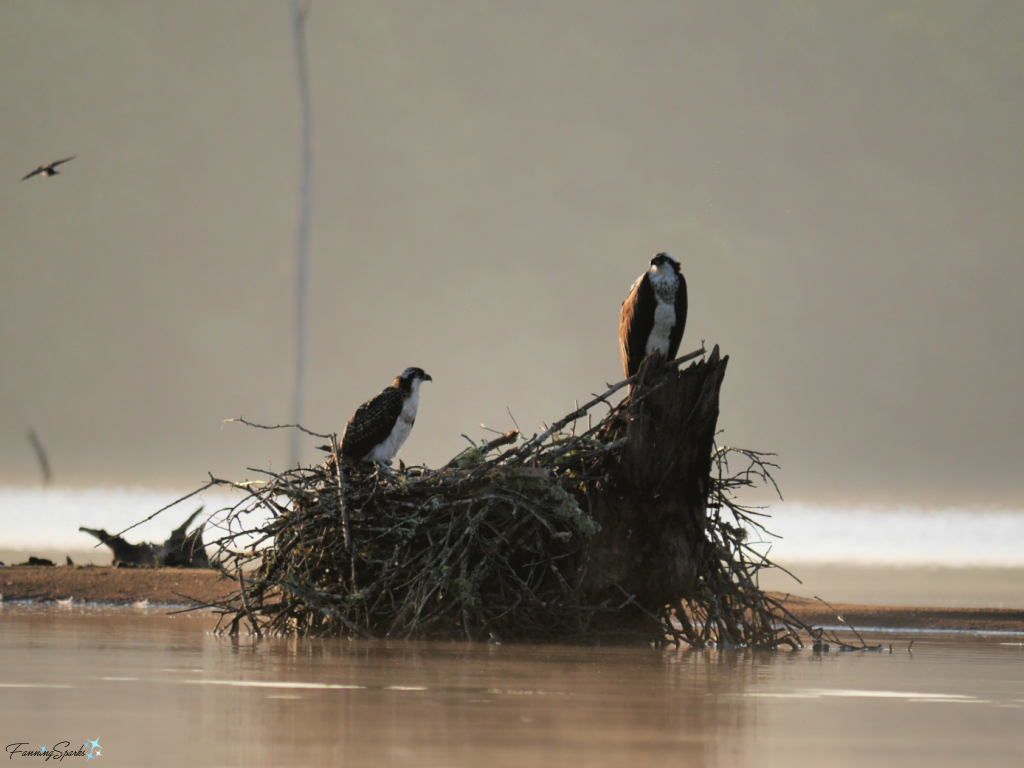 I’ve been back several times and have taken hundreds of photos of these two birds. One is an adult and the other is a juvenile. I assume the adult is female since they typically guard their young during the nestling period. Here’s one of my favorite shots of the mother (on right) and her chick (on left).
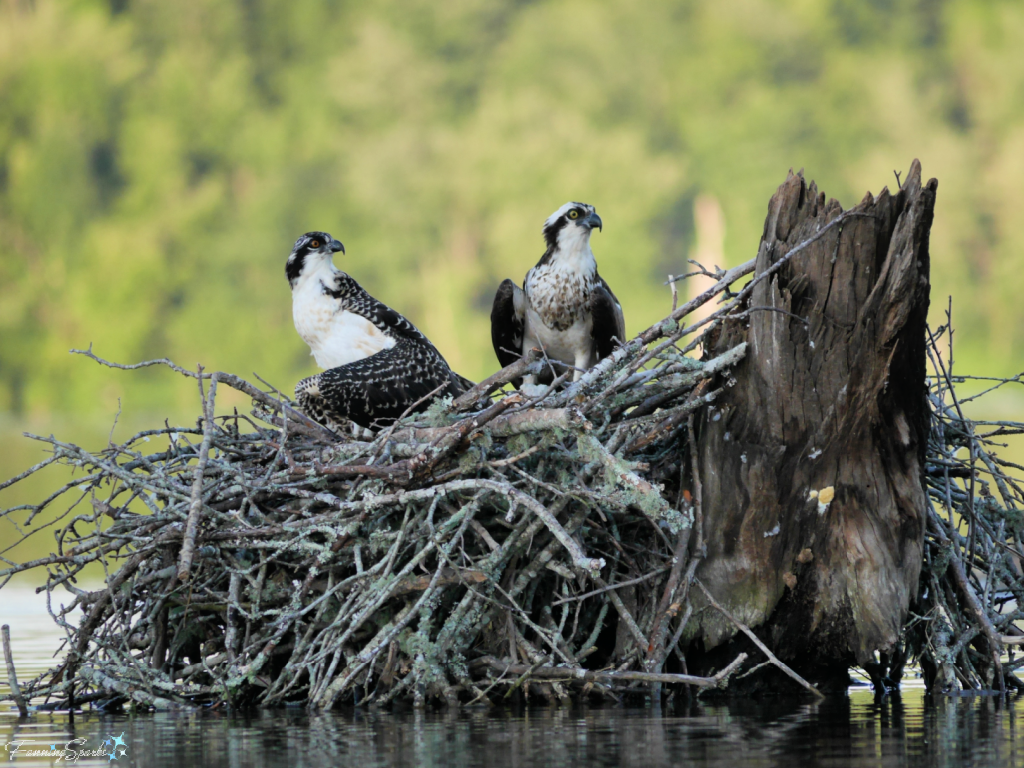
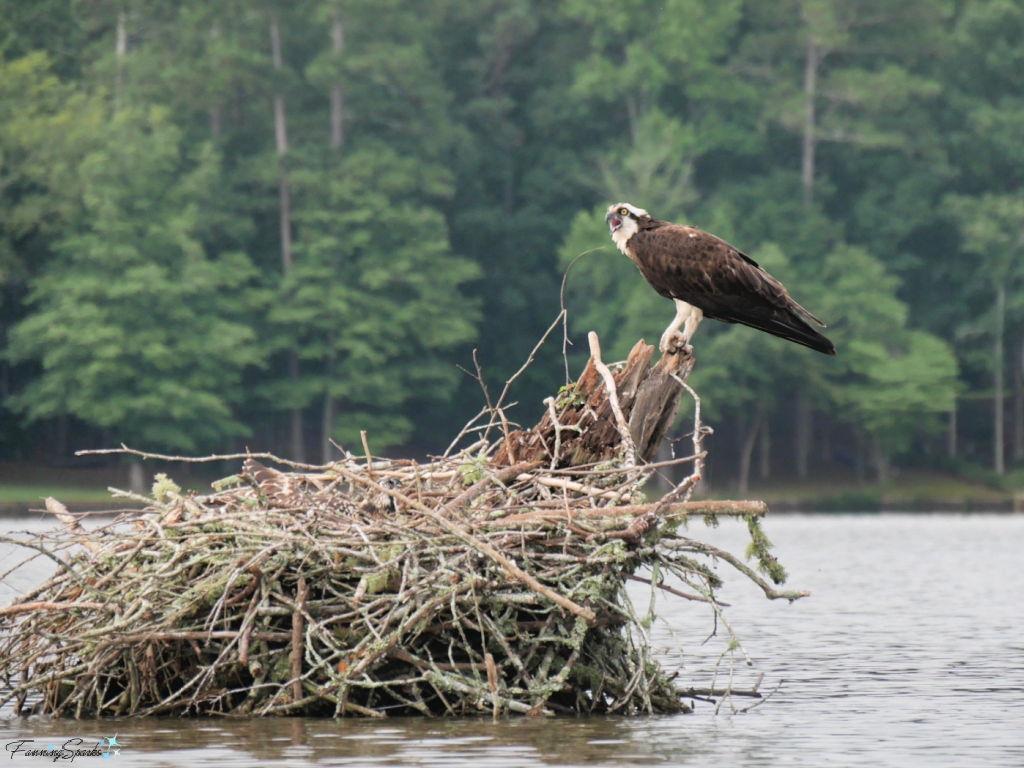
 The juvenile osprey can’t fly yet so it hides in the nest. It blends in perfectly but its red eye is just visible (at center).
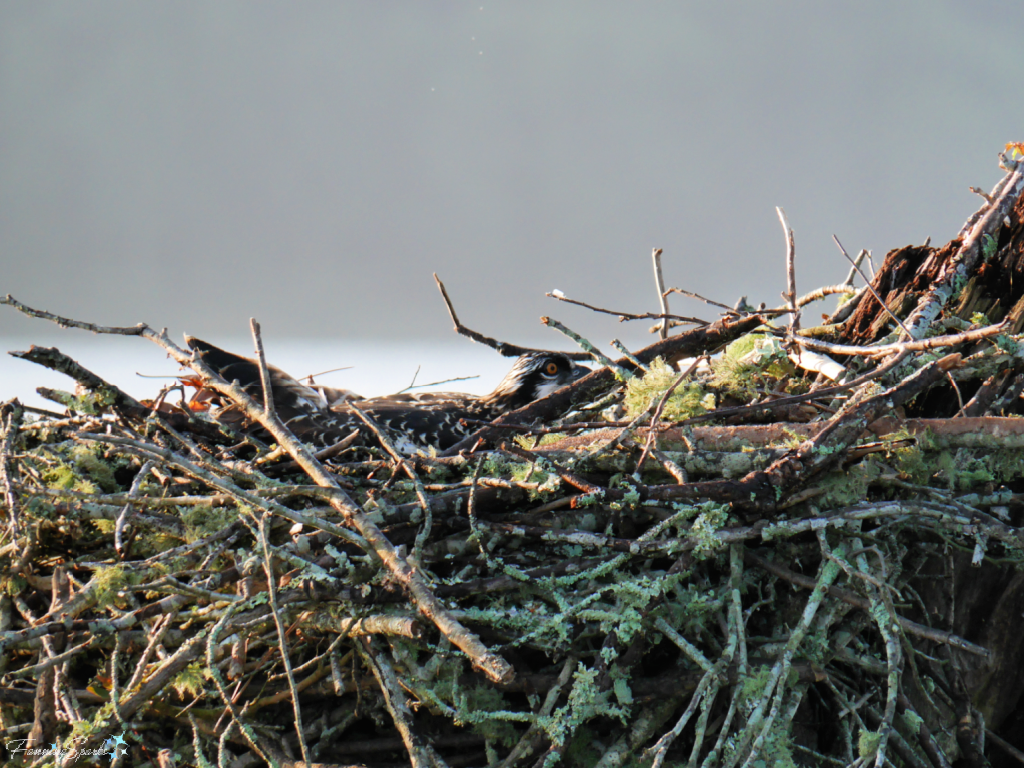 If I wait long enough, the juvenile osprey will come out of hiding. It seems to be impatient to fly and appears to be practicing. Several times, it has taken a few powerful, hops while frantically flapping its wings. On my most recent visit, it actually achieved liftoff! But it was a very short flight! These 3 photos were taken back-to-back over 10 seconds. It was awesome to watch!
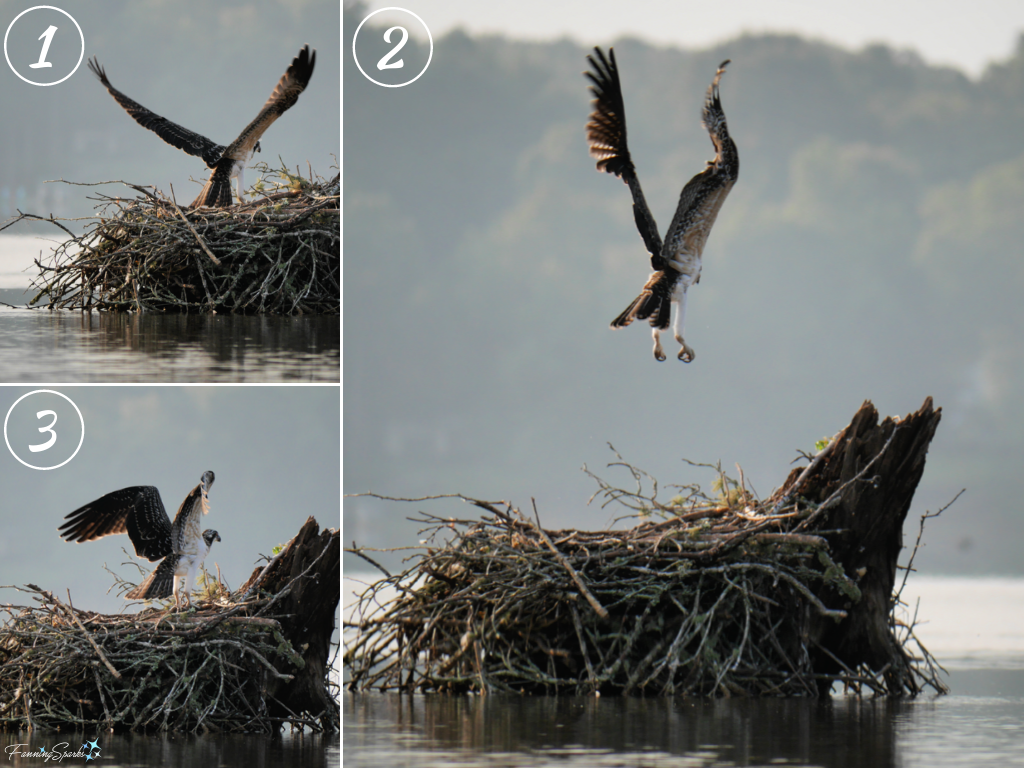 Osprey (Pandion haliaetus) are fish-eating birds of prey. They are raptors similar to eagles, vultures and other hawks. The osprey has an astonishing ability to high dive into water to catch fish. The Royal Society for the Protection of Birds describes it this way: “The osprey…will fly above the water’s surface to locate fish, sometimes gliding and soaring up to 70 metres [approx. 230 feet or 20 building stories] high. The exact catching technique varies with the type of fish, but they all involve a nearly vertical plunge dive with wings half-folded and feet thrown forward at [the] last moment. The fish are caught in talons after a dive to a maximum depth of 1m [approx. 3 feet]. The fish is held head first, like a torpedo, when carried to a perch or to the nest.” I’ve had the pleasure of watching the osprey’s aerial dive from a distance but it happens in a split-second and actually capturing it on camera seems pretty unlikely. But that doesn’t mean I won’t continue to try.
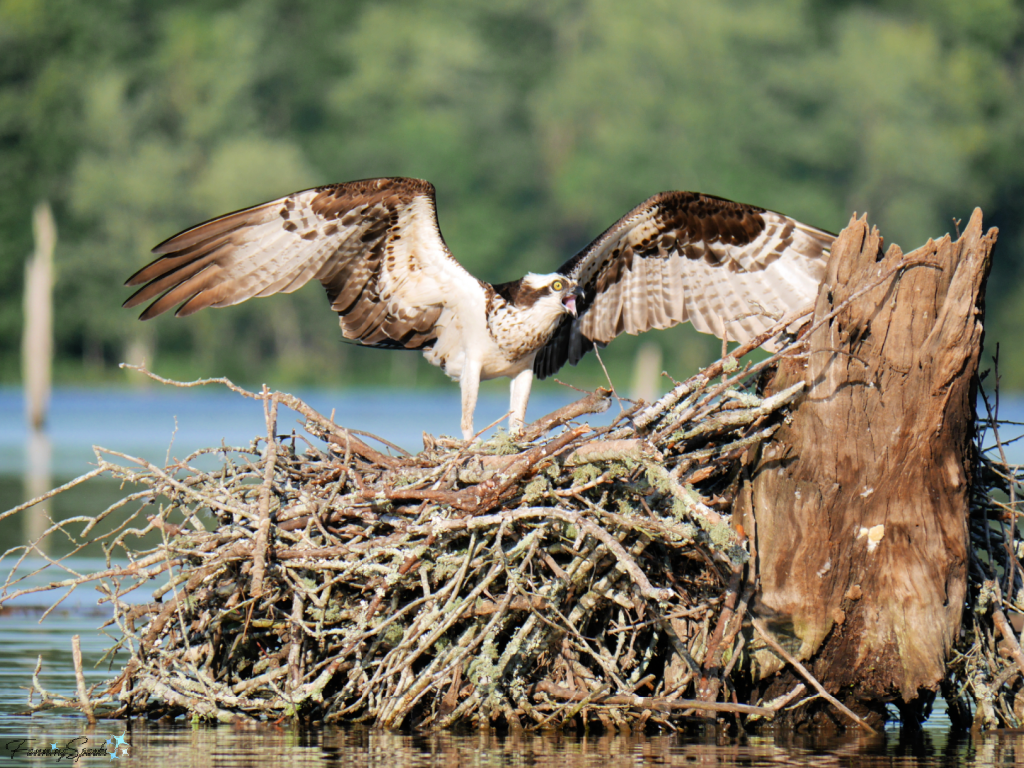 3. Be Stealthy. Obviously, avoid scaring away the bird to be photographed. Approach carefully. Be quiet. Set the camera to silent mode. Step lightly. Move slowly. Make no sudden movements. Hide out of sight. Blend in. It’s impossible to hide my bright green, 10-ft kayak from a sharp-eyed osprey. But I’ve found that the osprey will calm down and resume normal activity when I wait patiently snuggled into the shrubs along the shoreline (shown at right below).
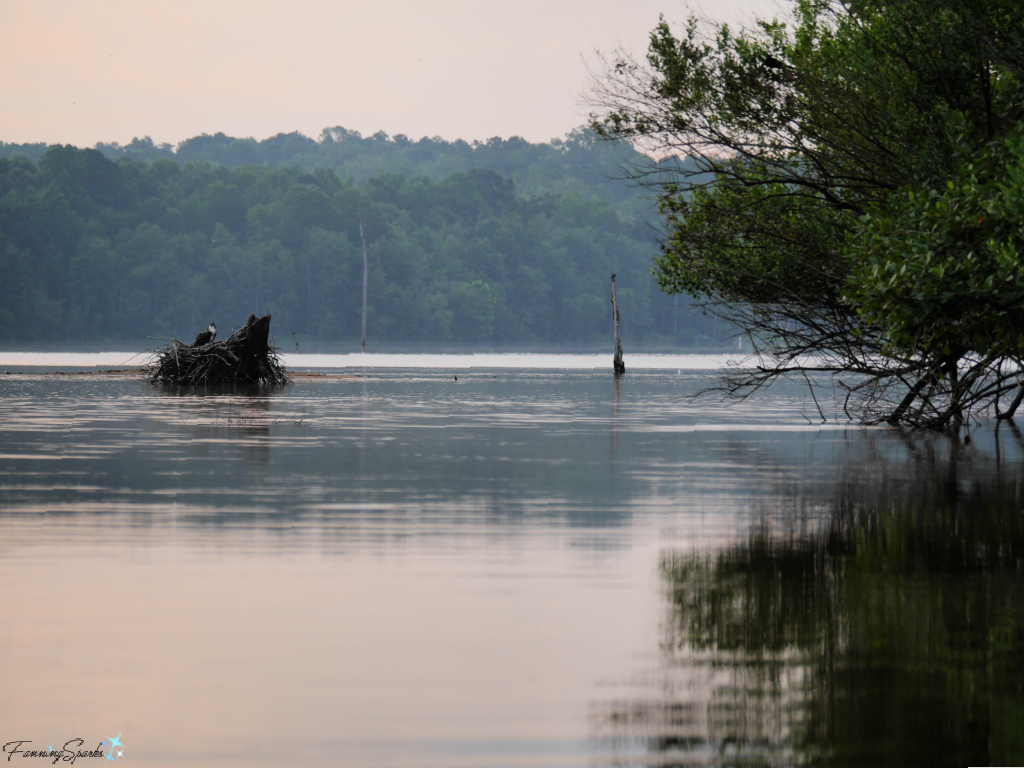
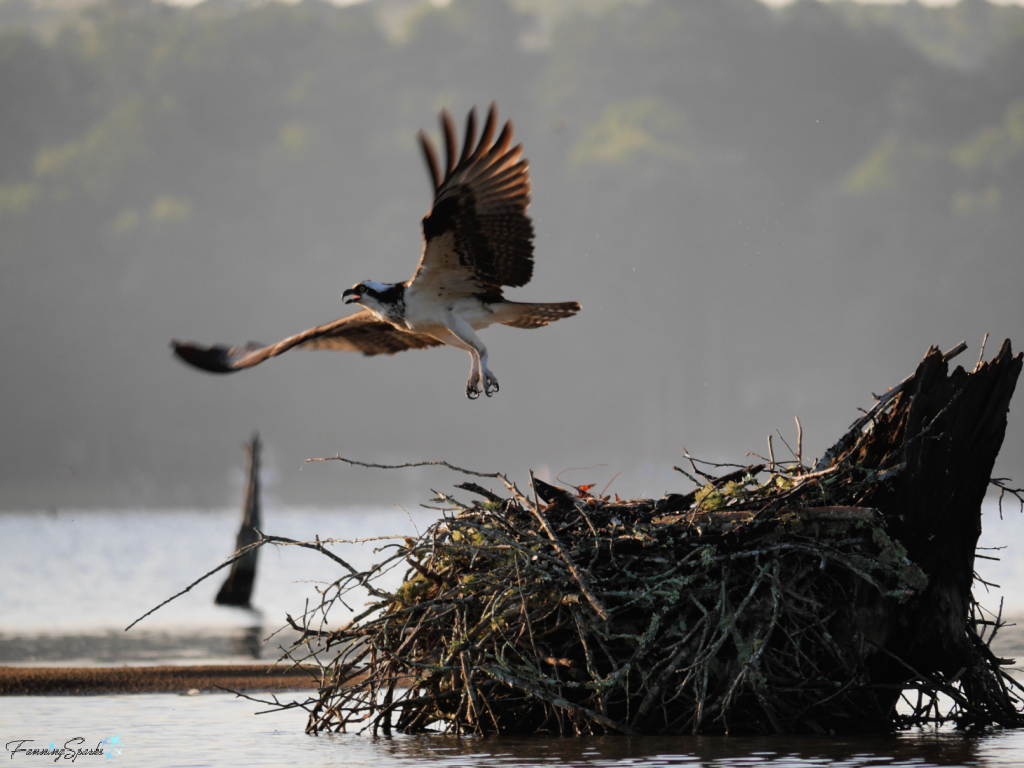
 7. Research. Learn about the grooming, nesting, feeding, parenting and mating habits of the birds to be photographed. I’d visited the osprey nest several times and spotted only one adult and one juvenile osprey. I was completely unprepared when a third bird flew in and out of the scene. Luckily, I was able to wait long enough for the third osprey to come back. Turns out, it was delivering a fish and I caught the below amazing shot. After the fact, I learned that the male osprey is the major provider of fish for the female and young until the chicks are larger.
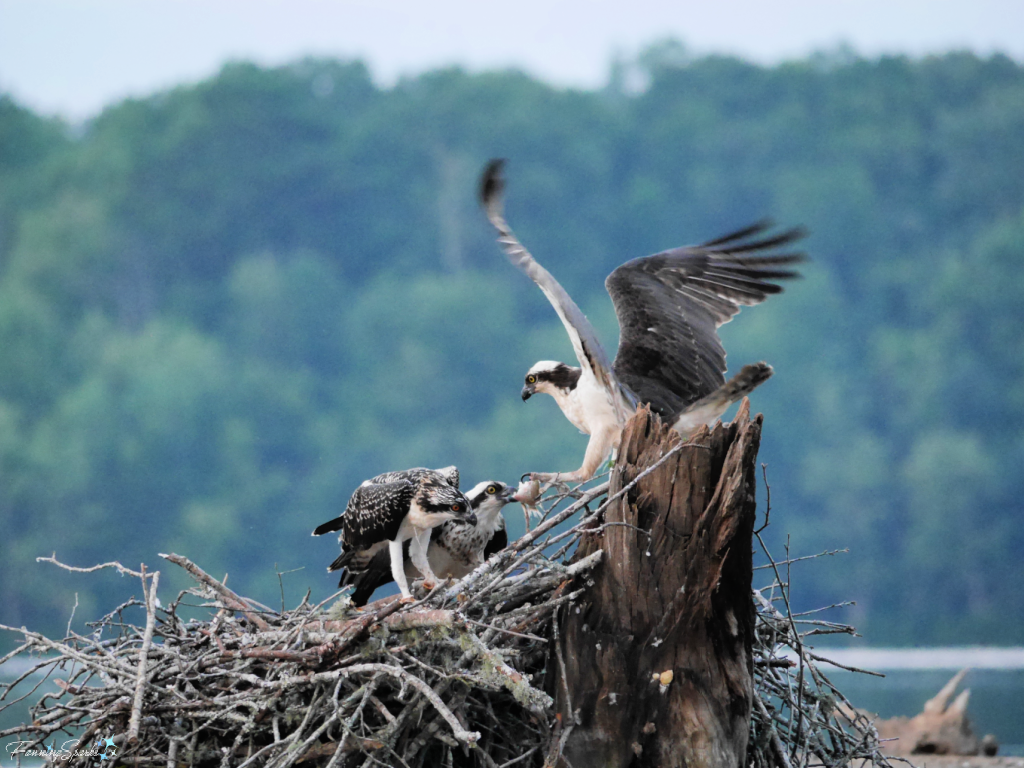 8. Be Curious. Visit the target location frequently and observe the birds over time. This practice will prepare you for the stages and special events in the bird’s natural cycles such as courting, nest building and raising young. Study their routines. How do they hunt/gather food? How do they feed it to their young? At what time? From where? What sounds do they make? What are their calls and songs? Osprey, for instance, have high-pitched whistling voices. Their calls, which are like a succession of chirps, will evolve into an intense squeal if they feel threatened. Become familiar with possible sites to identify the best vantage points and lighting conditions.
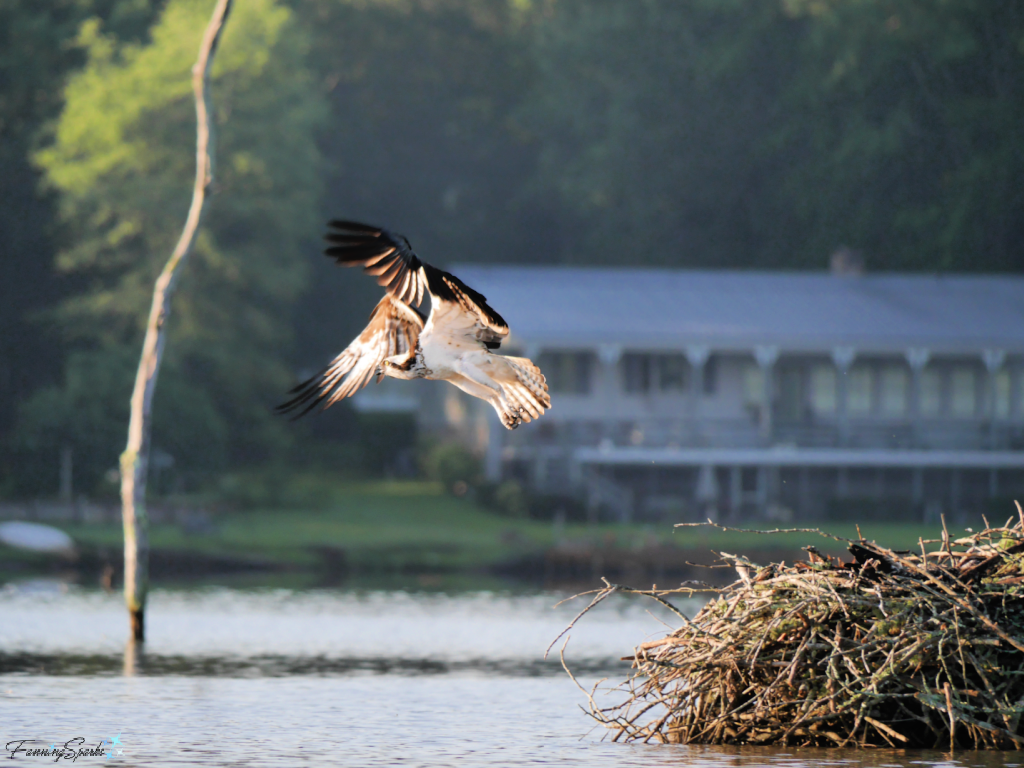
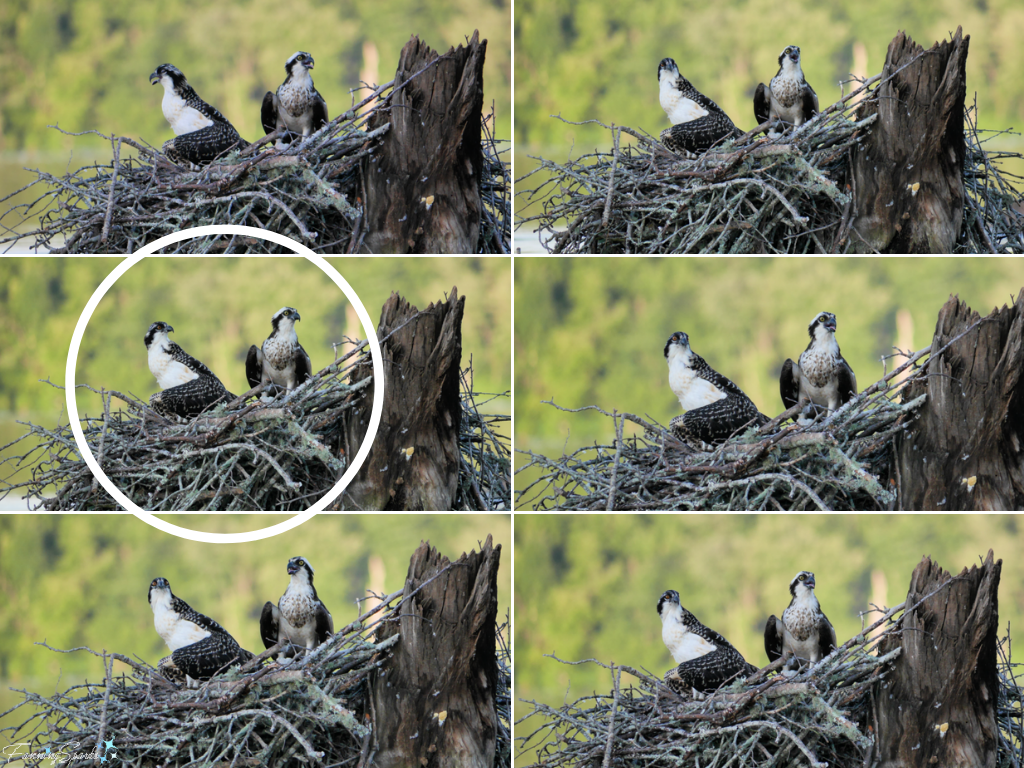 12. Be Ready and Alert. As difficult as it is to hold a camera steady with a finger on the shutter button for long periods of time, it’s necessary to catch the great shots. Of course, a tripod would make it much easier. I’m not geared up to use a tripod on my kayak, so I handhold my camera and lens. Holding it steady for 15 minutes at a time can be challenging! Staying focused and ready to shoot during that entire time can be even more challenging. But it’s worth the effort. It’s probably just a coincidence but it seems that every time I release my hands or look away, the birds change things up and I miss the shot! Here’s an example.
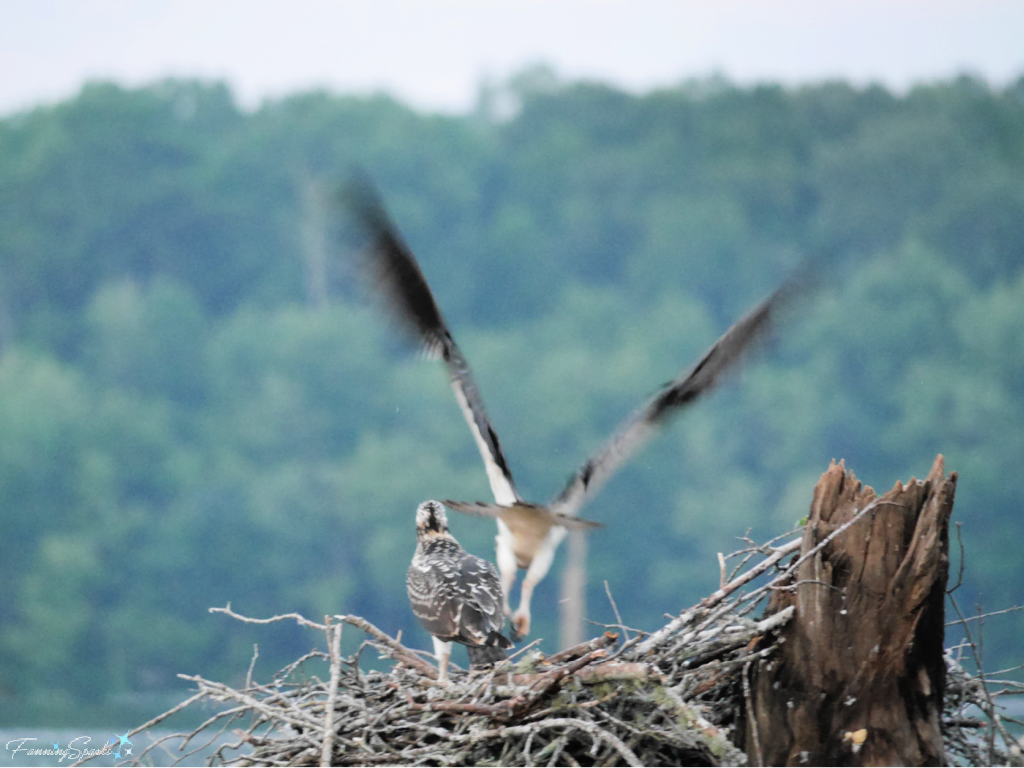 13. Compose the Shot. It’s easy to forget about good photo composition when scrambling to capture a shot. But all the rules about balance, unity, entrance and exit, lines, framing, breathing space, light, shade and so on still apply. It’s always better to leave room in the frame when a subject is looking off or moving towards to the side of the picture. So if a bird is flying into the frame from the right, compose the image so the bird is slightly to the right of center freeing up the majority of the left side for them to “fly into”. Here’s an example of how not to do it—notice how it looks like the osprey is about to fly off the image. The composition would have been better if it were framed along the white lines.
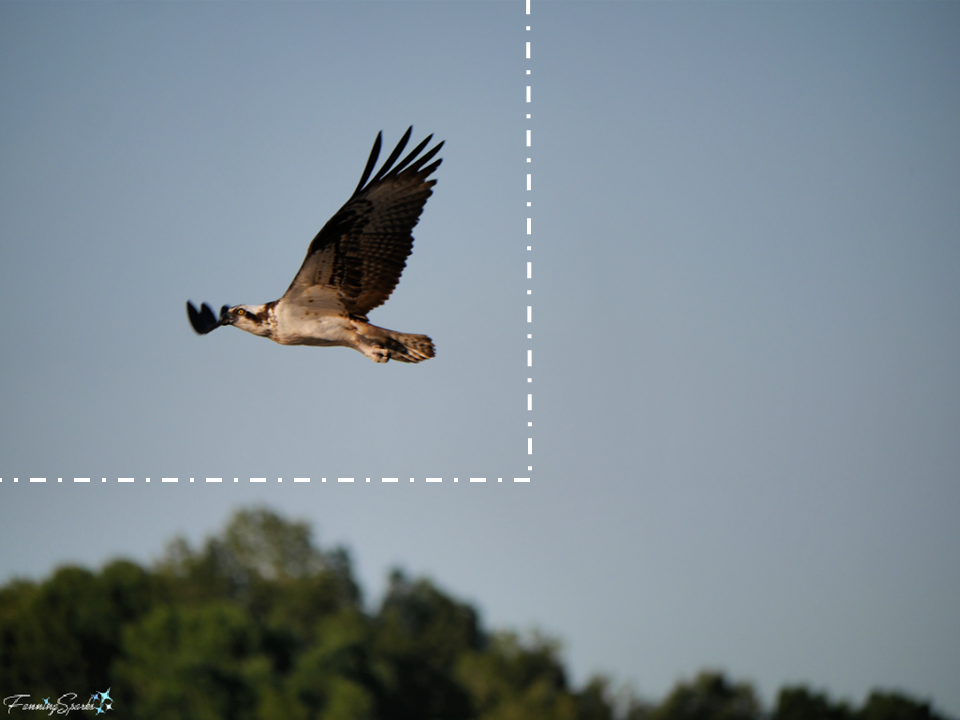 14. Be Patient. If there’s one thing I’ve learned about photographing wild birds, it’s patience. I’ve spent hours watching the osprey. Ironically, you often have to wait a long time to get a great shot but when it appears, you need to act in a split-second.
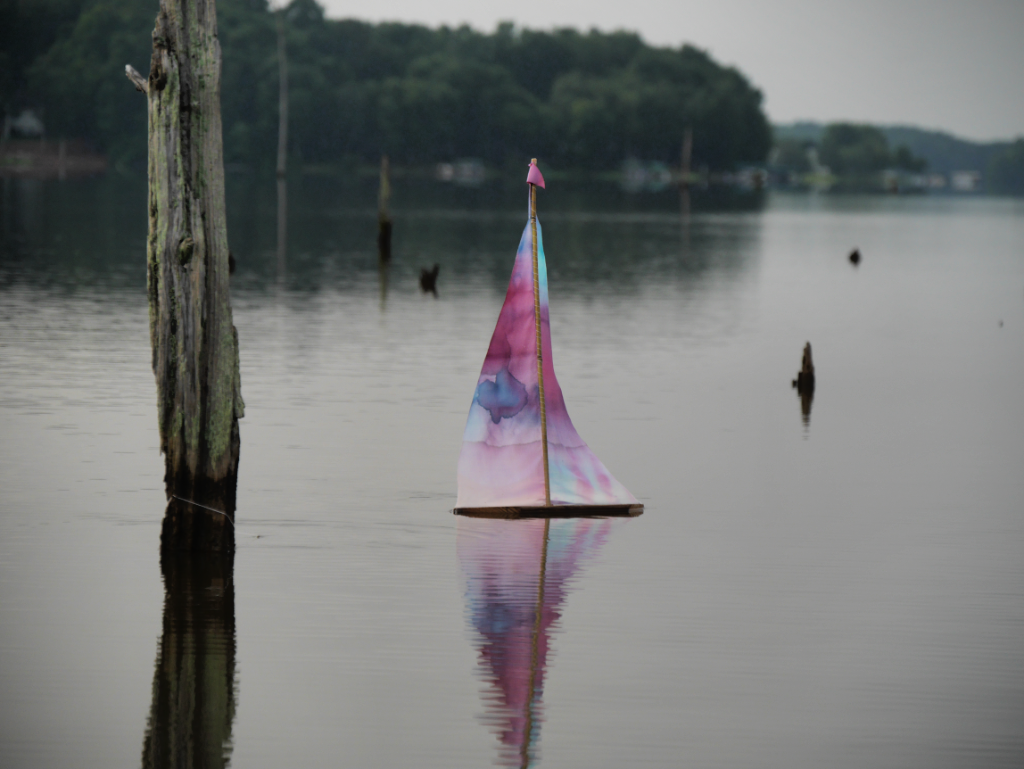 The below graphic illustrates the parts and measurements for the landlubber’s toy sailboat. Essentially, it’s a piece of flat wood (aka Hull) with a vertical stick (aka Mast) and some pieces of fabric (aka Mainsail and Jib). The trick is to get it to float and stay upright. That’s where determination and perseverance came into play. It took lots of trial and error and several test runs to get to a solution that works. Now that I’ve figured it out, I’m happy to share the details with you!
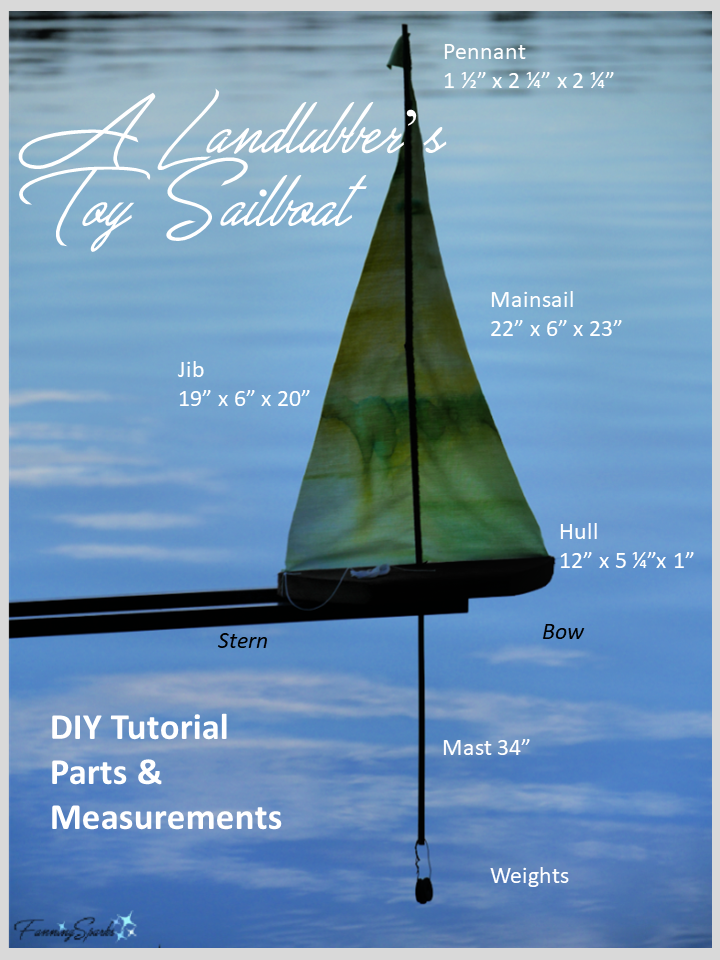
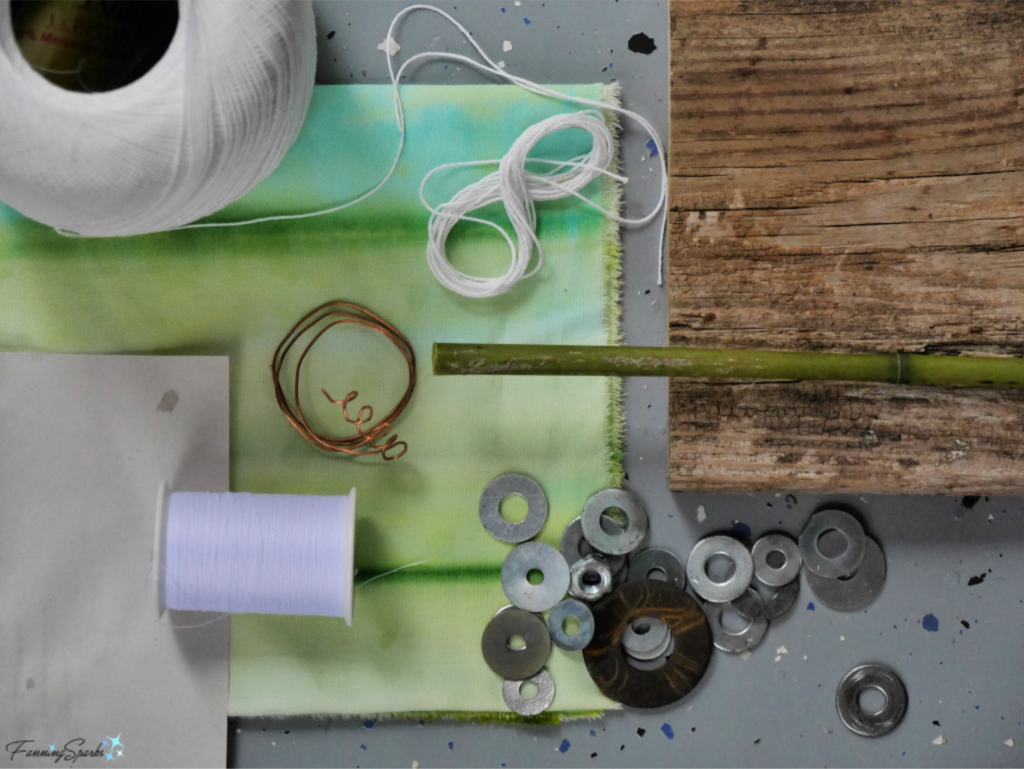 . Weathered Wood 12” x 5 ¼” x 1” (actual dimensions)
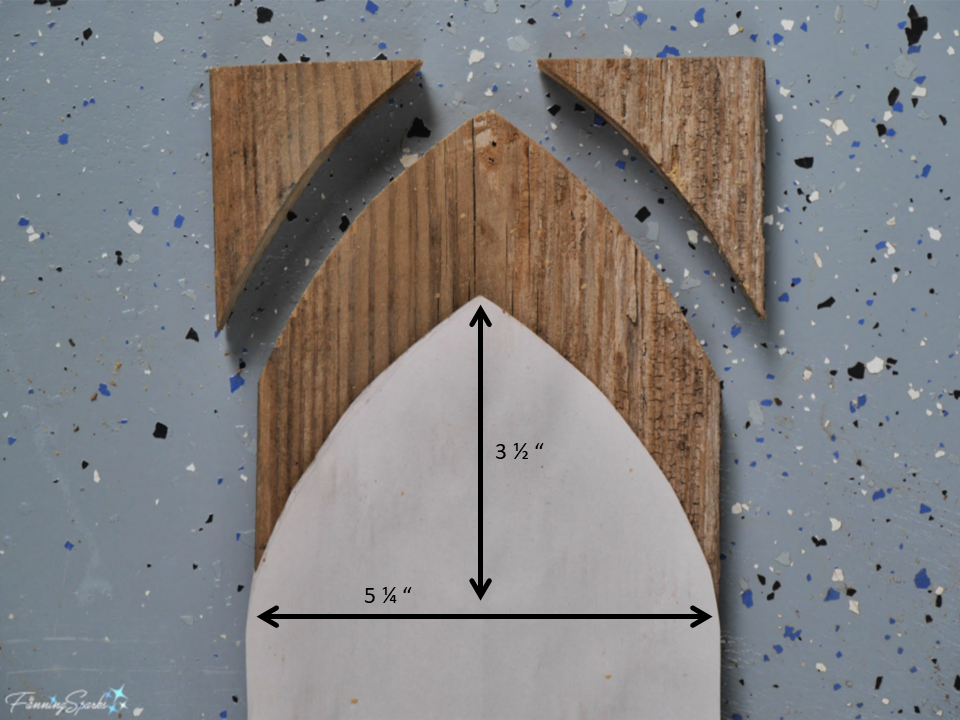 Step 2 – Drill Hull Using the ⅟₁₆” bit, drill 3 holes for thread and string as illustrated with black arrows on the below photo:
 Step 3 – Cut Mast Cut a 34” section of ⅜” bamboo (or dowel) to make the Mast. Measure up 12” from the bottom of the Mast and drill with the ⅟₁₆” bit through the center of the bamboo rod at this point. Drill through the bamboo rod at each end of the Mast.
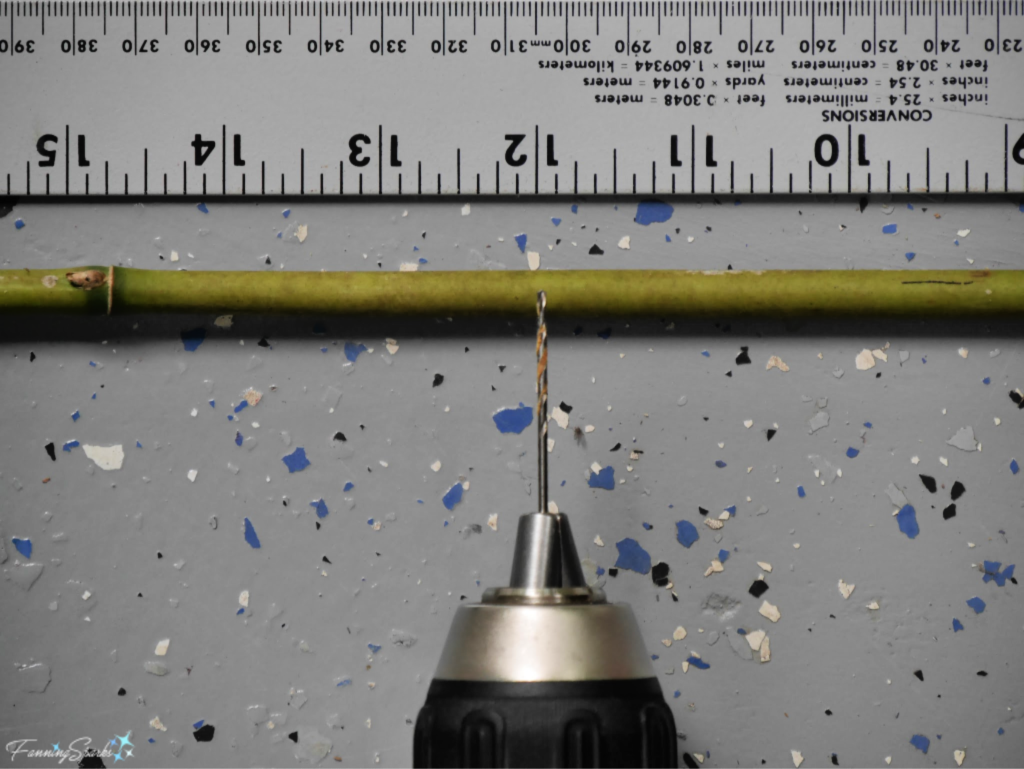 Step 4 – Cut Sails Cut the sails from the fabric. You will need 3 triangles of fabric:
 Step 5 – Sew Sails Lay the Jib on the Mainsail aligning the right angle corners and the long straight edges (Mainsail 22” and Jib 19”). Sew a small ¼” seam. Alternatively, you could use waterproof glue.
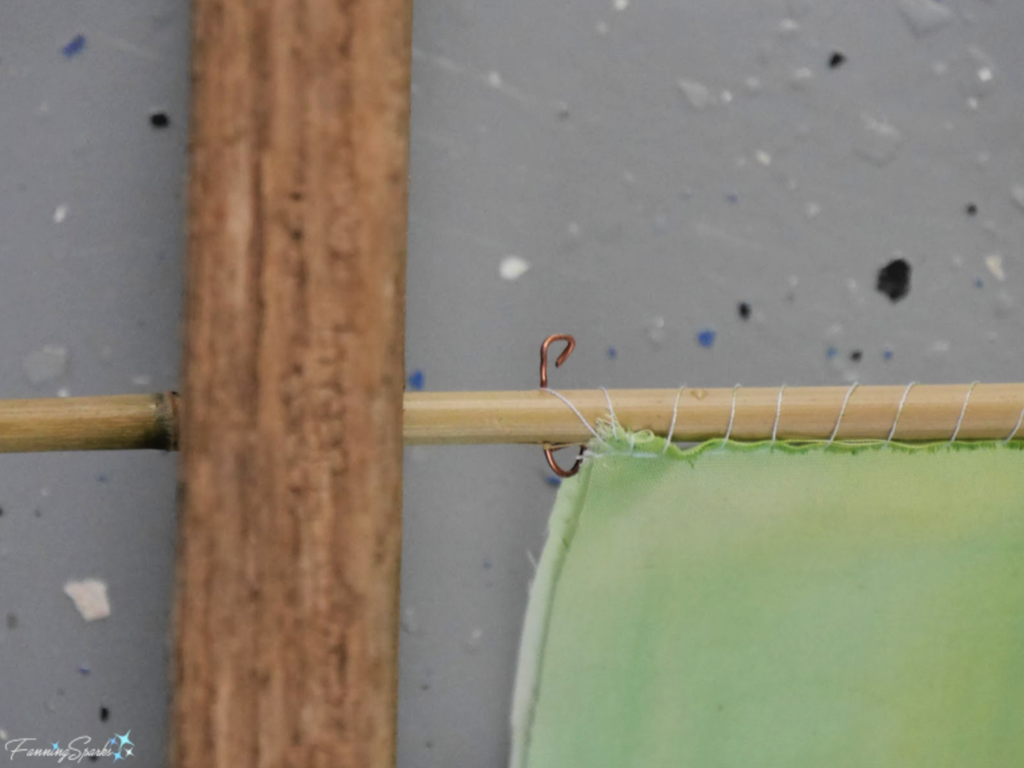
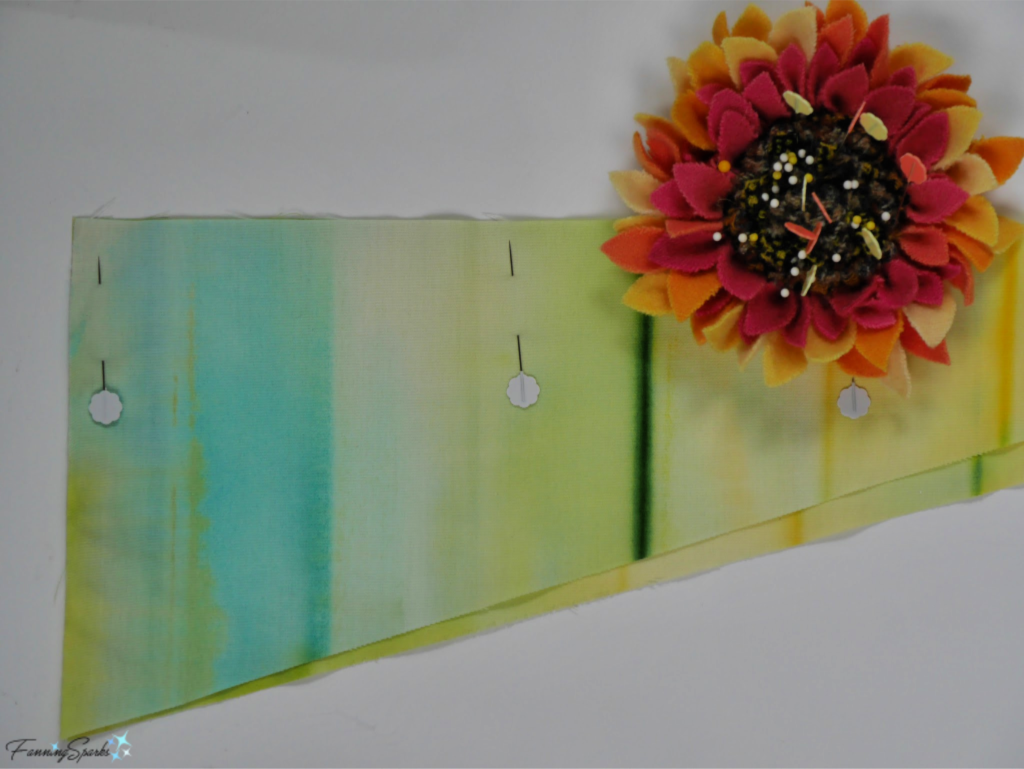 Step 6 – Attach Sails Cut about 1 ½” of wire. Bend loop into one end. Insert wire through the middle hole in Mast (at 12” mark). Bend loop in other end of wire to keep it snuggly in place. Sew the sails to the mast. Start by stitching thread through the bottom of the sails and the wire. Stitch by looping thread around Mast and through seam on sails. At the top of the Mast, insert needle and thread through hole in Mast to secure top of Mainsail. Take a few last stitches through the fabric to finish securely. Alternatively, you could use waterproof glue to attach the sails to the Mast.
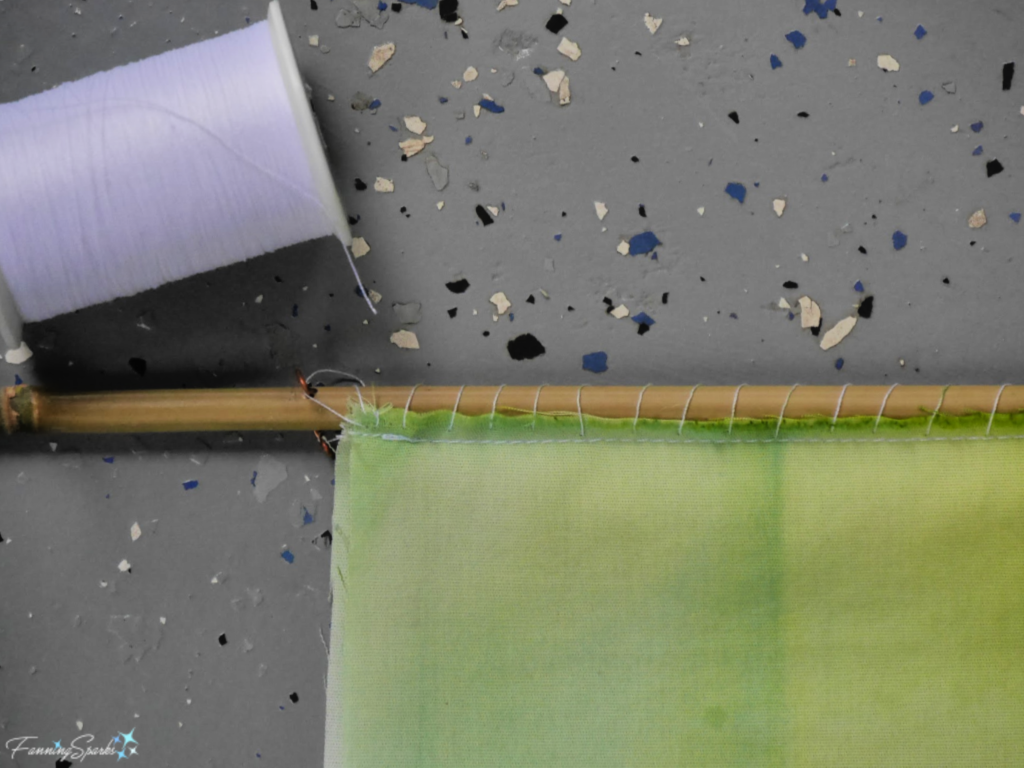 Step 7 – Attach Pennant Sew Pennant to top of Mast. Start at the top of the Mast, take a few stitches through the fabric to start securely. Insert needle and thread through hole in Mast to secure Pennant. Use running stitch to bring thread down to bottom of the Pennant. Wrap thread around Mast. Take a few last stitches through the fabric to finish securely. Alternatively, you could use waterproof glue to attach the Pennant to the Mast.
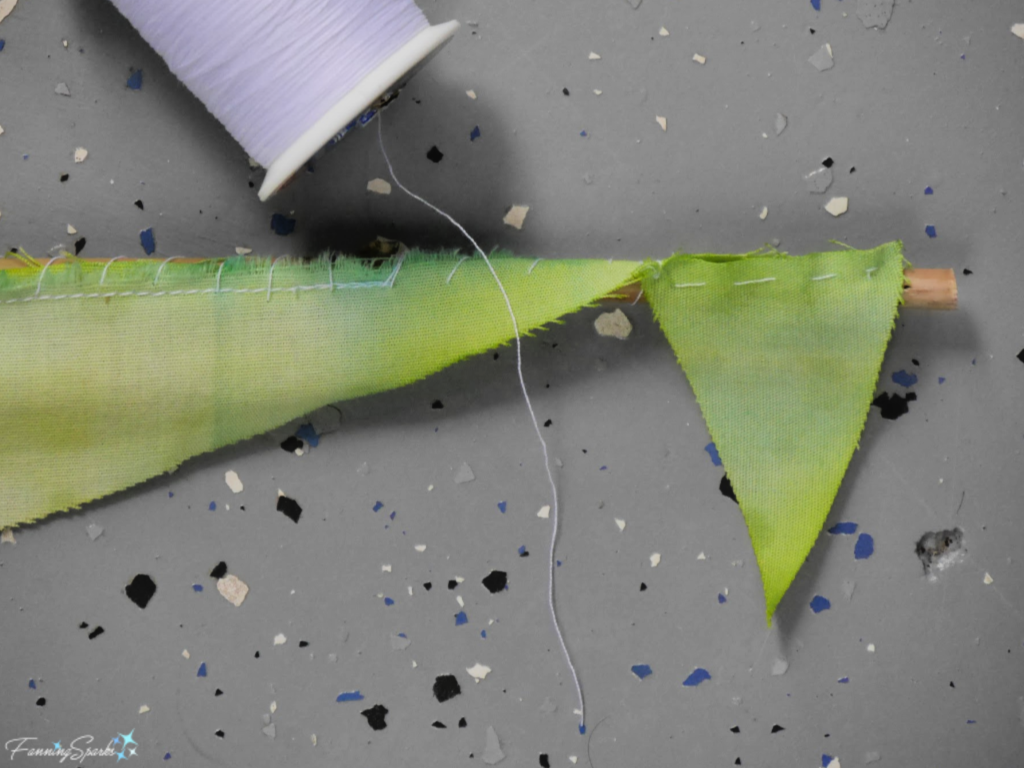
 Step 9 – Attach Sails to Hull Attach front and back corners of sails to Hull with thread. Start with the Mainsail and the bow of the Hull.
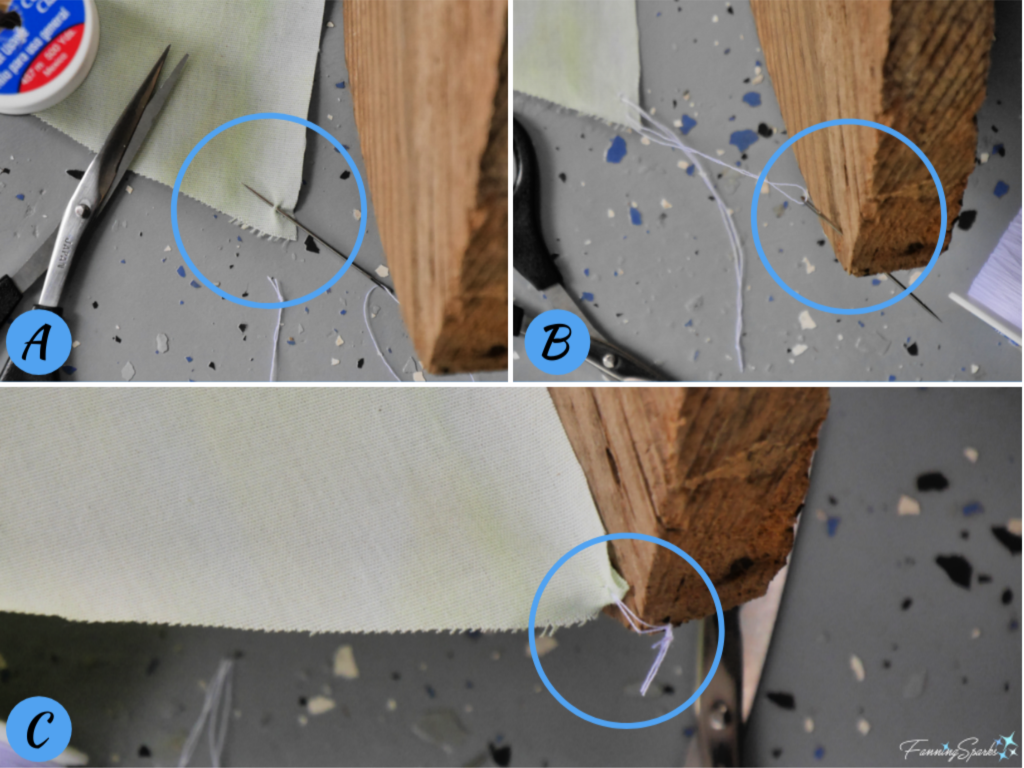 Step 10 – Attach Weights to Mast Cut about 6” of wire, put 4-6 1”washers (or nuts) on wire, thread wire through bottom hole of the Mast. This weight forms a keel, of sorts, and serves to keep the sailboat upright.
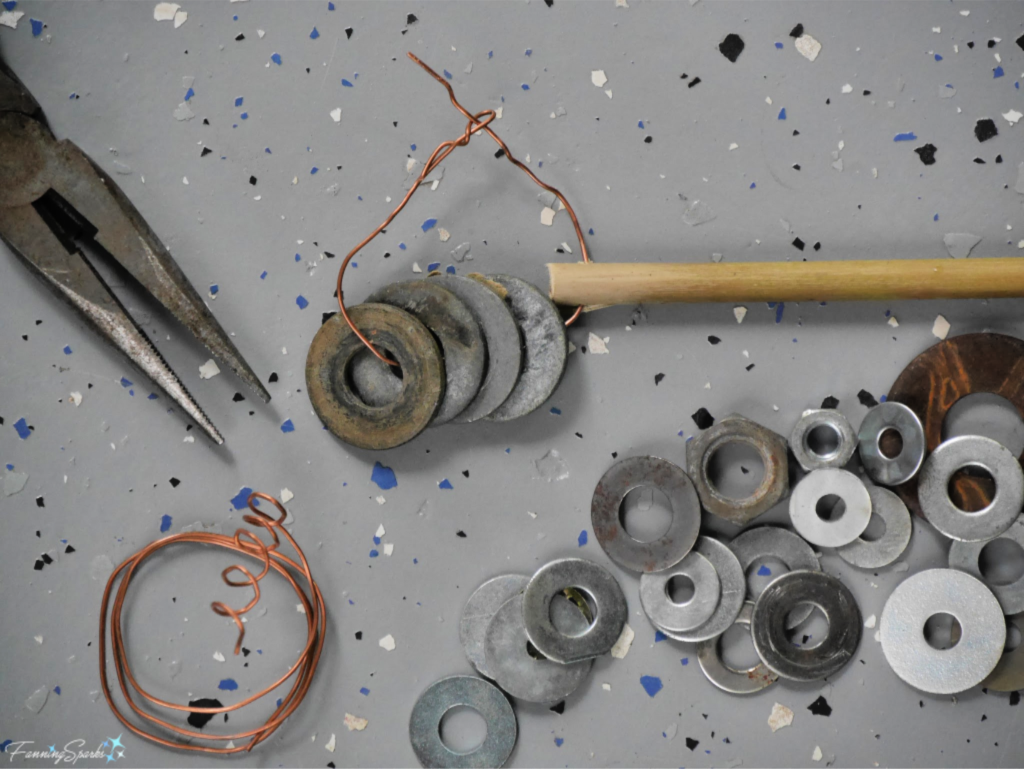 Step 11 – Attach String Cut a piece of string about 6 feet long. Use needle to thread the string through the hole at the stern of the Hull. Knot to attach securely. You’ll need this string to keep the sailboat from floating off into the sunset!
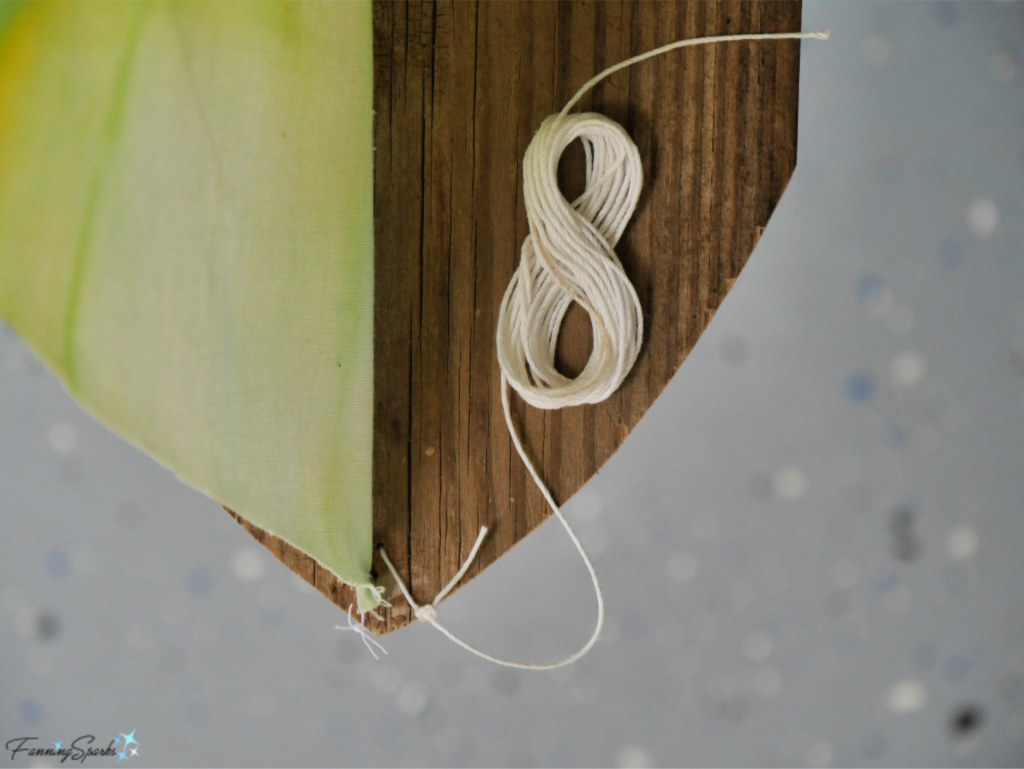 Step 12 Test Run It’s time to give your sailboat a try. This sailboat needs about 1 ½ feet of water to stand upright. Gently set it in water to ensure it floats and stays upright. Adjust if necessary; for example by centering or adding washers to the weights.
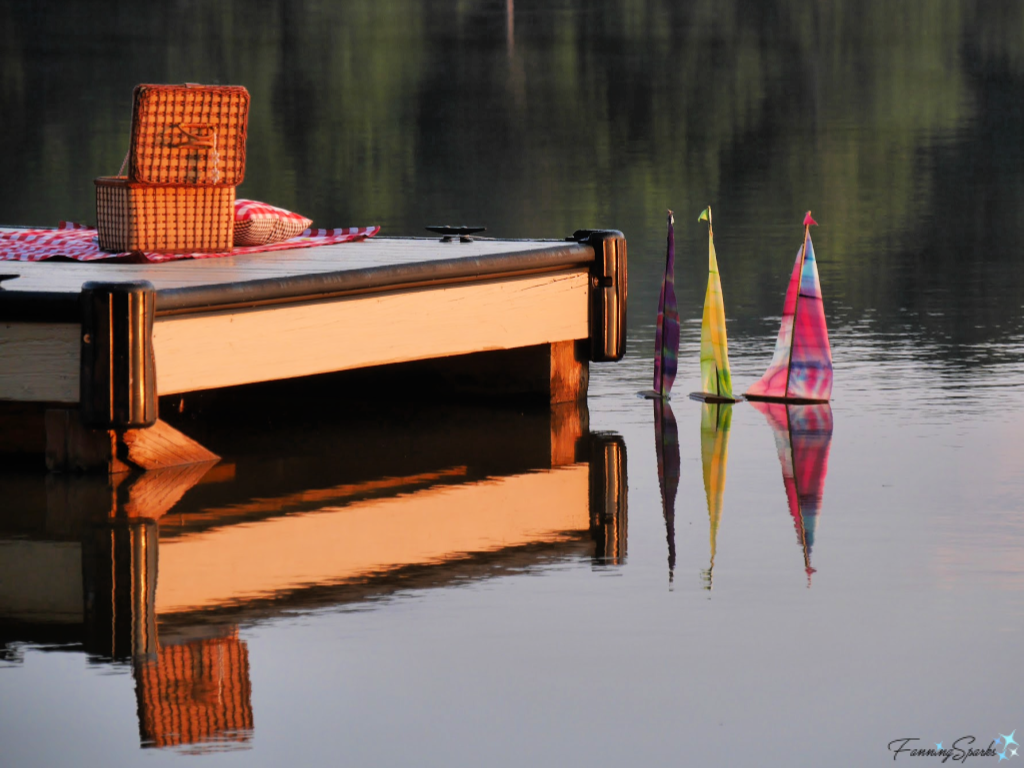
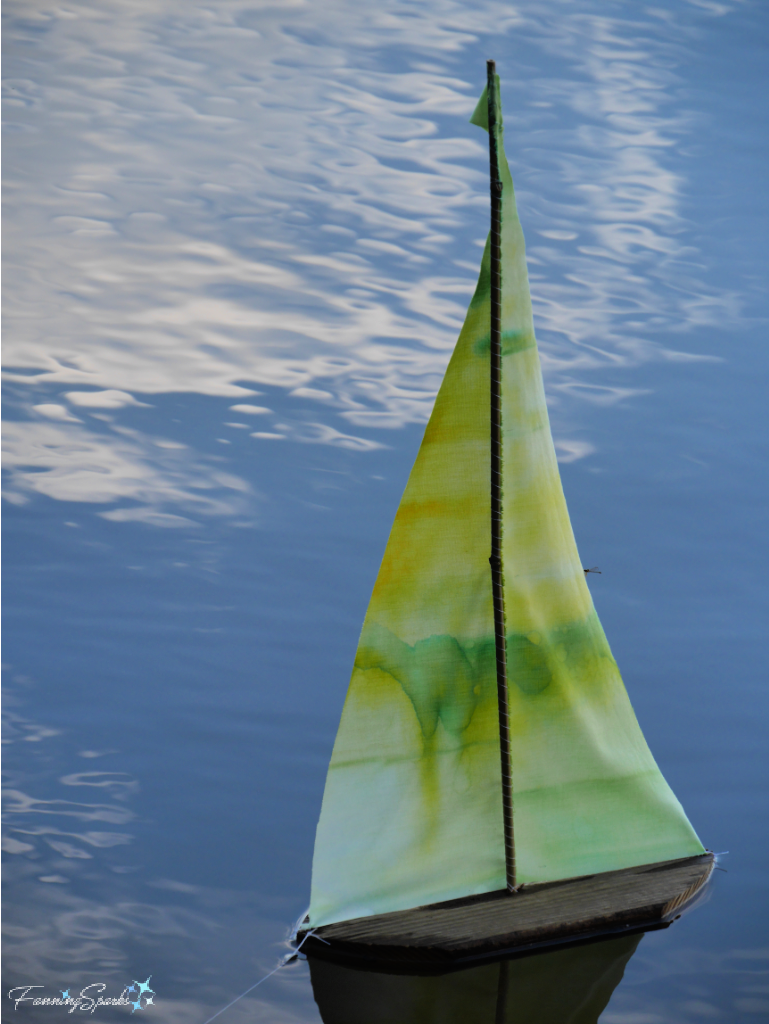 UPDATE July 6, 2021: Shown below is my latest iteration of this sailboat. This time I made the sails with a polypropylene fabric called Oly*Fun™. This fabric repels water so the sails stay dry and the sailboat stays balanced.
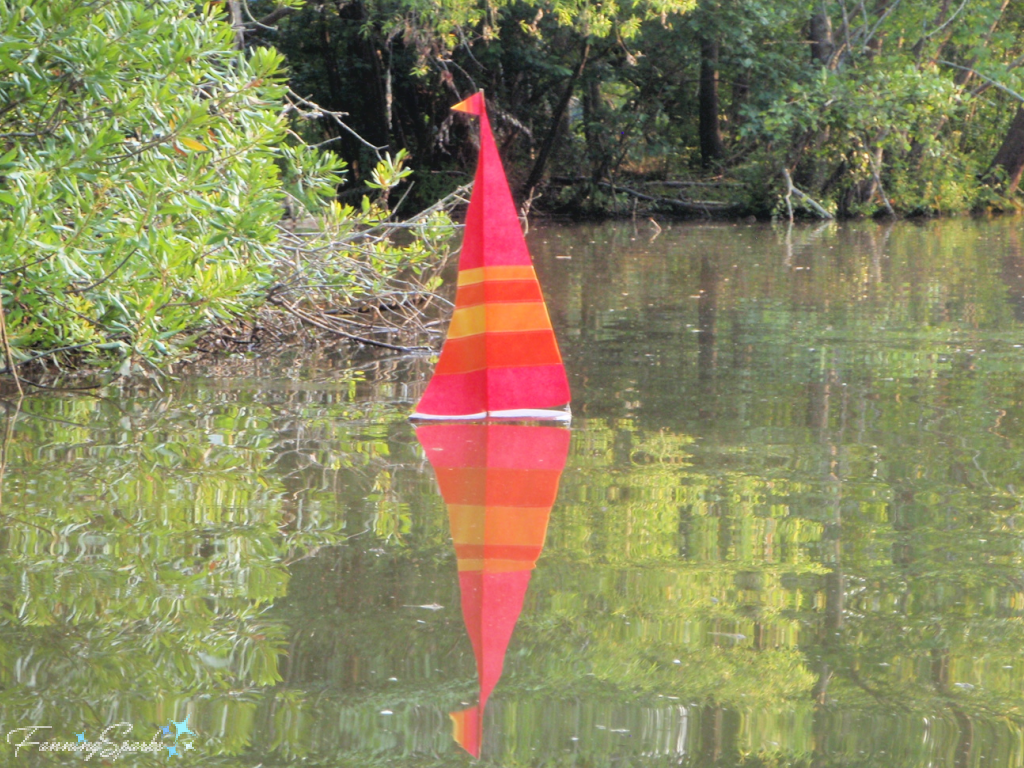
 You can learn to build a tiny toy sailboat with a cork, craft foam and a toothpick in the hands-on science activity in this