We’re celebrating a major milestone in FanningSparks’ world this week—the blog turns 4!  It’s another ring on the tree, another trip around the sun, another chapter in the book… it’s time to take a step back and assess our progress.  More importantly, it’s time to acknowledge those that make this endeavor possible—you, the readers!  Thank you so much for reading the blog, viewing the photos and sharing in the FanningSparks adventure.
Tree Rings on Oak Log   @FanningSparks
It’s always heartening to hear from readers directly.  Whether it’s in real life or virtual, your feedback, comments, shout-outs, and reactions are greatly appreciated.
A few months ago, I received an email from a work colleague—we’d worked together on a short consulting engagement.  We’ve lost touch but stay connected on LinkedIn.  It was a wonderful surprise to receive his email with the subject line: Glad I Looked You Up.  He went on to say “I stumbled across your name today on my contacts and on a lark, looked you up on LinkedIn. … pulling the thread a little, I found your website and am glad I did.  I just love it. … I see excellence in clay, wood, leatherwork, fiber arts, … design/decoration, gardening and so much more!  Then we add in a traveling spirit and an eye to capture the moments in photos.  Keep going and keep making the world beautiful.”  (Thank you Sean for your thoughtful email and kind words!)
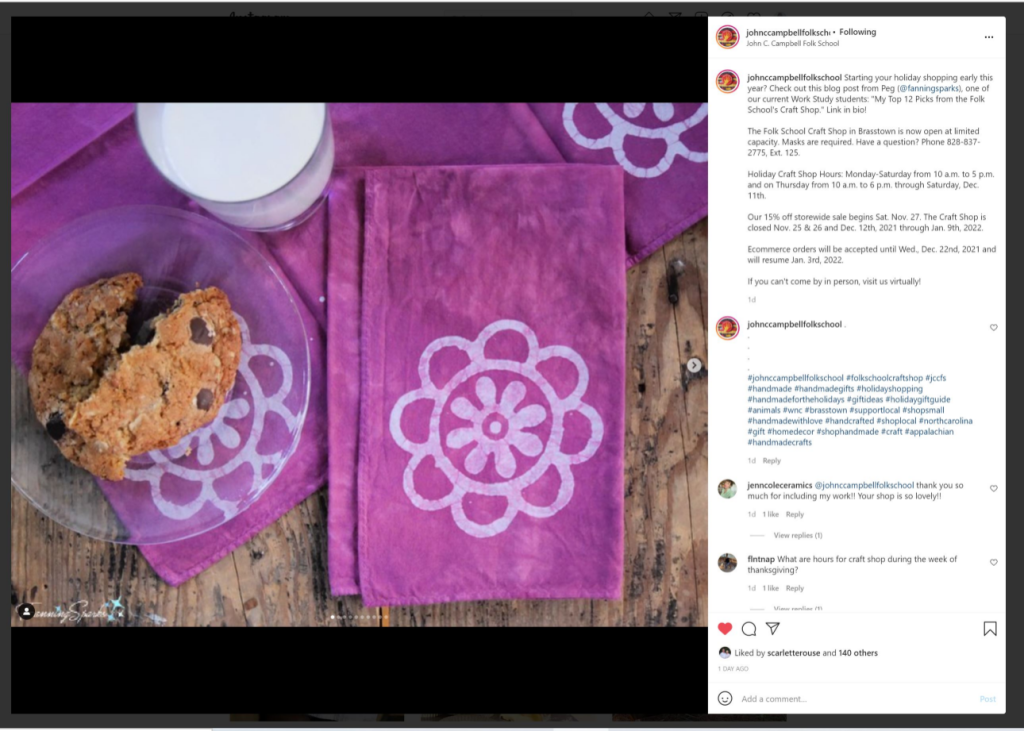
In October-November 2021, I had the opportunity to participate in a Work Study program at the John C Campbell Folk School.  As stated in their mission, the Folk School “transforms lives, bringing people together in a nurturing environment for experiences in learning and community life that spark self-discovery”.  I love this nurturing and supportive creative environment and enjoy sharing my Folk School experiences on the blog.  In turn, the Folk School often shares FanningSparks’ stories with their audience.  Here are two examples from the Folk School’s Instagram stories.  (Thank you Robert!)
Folk School Instagram Story Shout-Outs   @FanningSparks
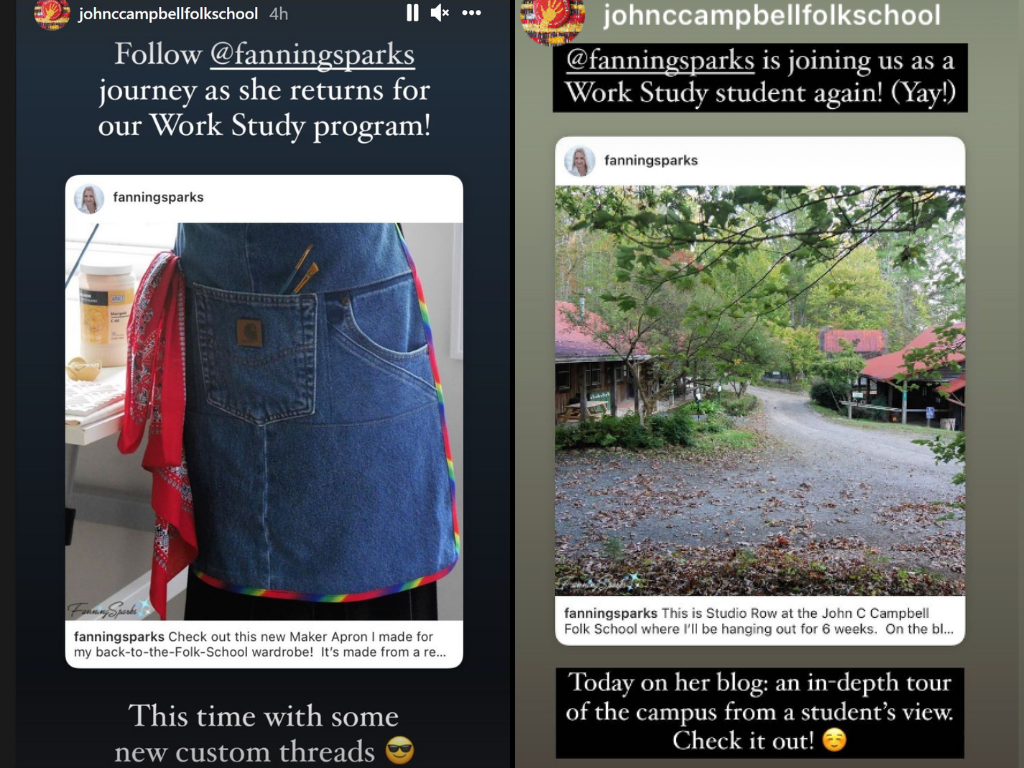
The FanningSparks blog post, My Top 12 Picks from the Folk School Craft Shop, got top billing on the Folk School social media channels.  There was a noticeable uptick in blog visitors that week!
Folk School Instagram Post Featuring FanningSparks Post   @FanningSparks
In addition to hearing from readers directly, data analytics provide a comprehensive view of the blog.  There are data points to consider for the FanningSparks blog, the associated social media platforms, and Google search.

FanningSparks Blog
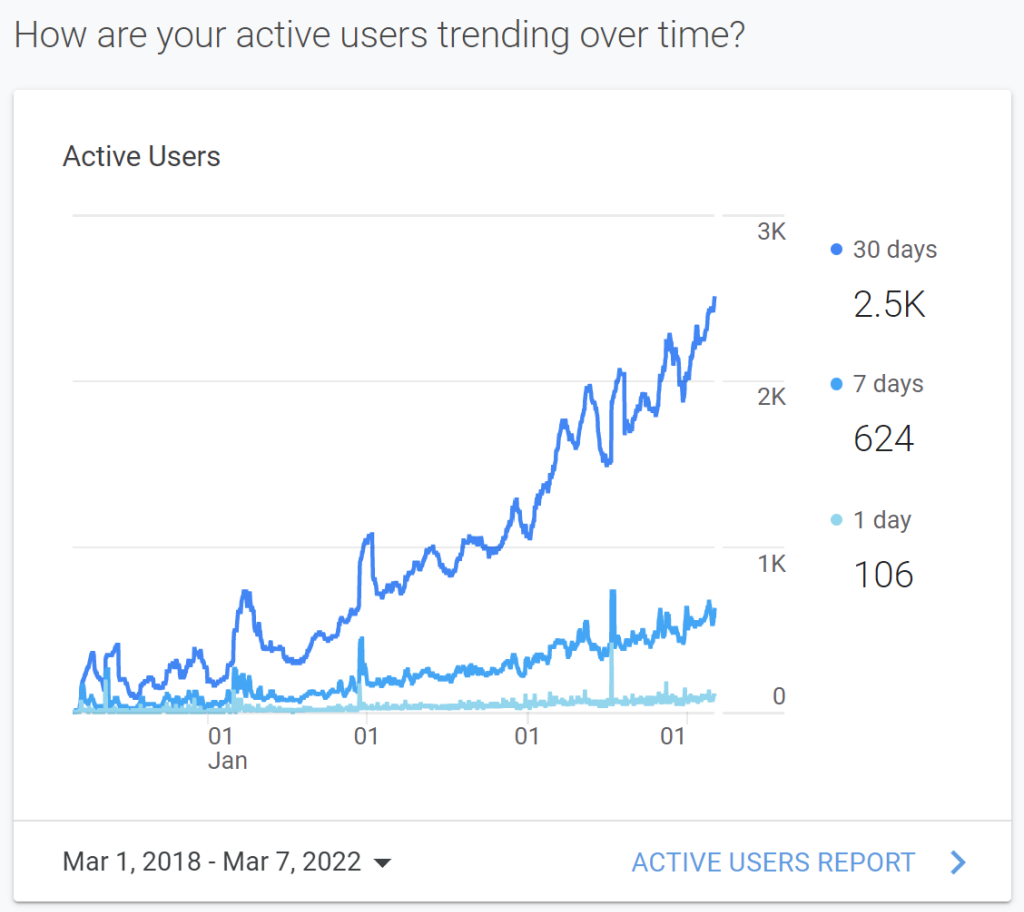
FanningSparks blog posts have been published every Tuesday since the blog was launched on March 20, 2018—this is the 211th blog post!  Google Analytics reports that over 44,550 people have visited the FanningSparks blog over the last 4 years.  It’s so gratifying to know the blog is being read!
The number of blog visitors continues to grow: Year 1 -> 3,000; Year 2 -> 6,000; Year 3 -> 12,000; Year 4 -> 23,000.  Below is a Google Analytics growth chart showing the number of active users (ie visitors to FanningSparks) over the last 4 years.  The 3 trend lines represent the average number of visitors in 1 day (106 daily), 7 days (624 weekly) and 30 days (2,500 monthly).
Google Analytics Growth Chart   @FanningSparks
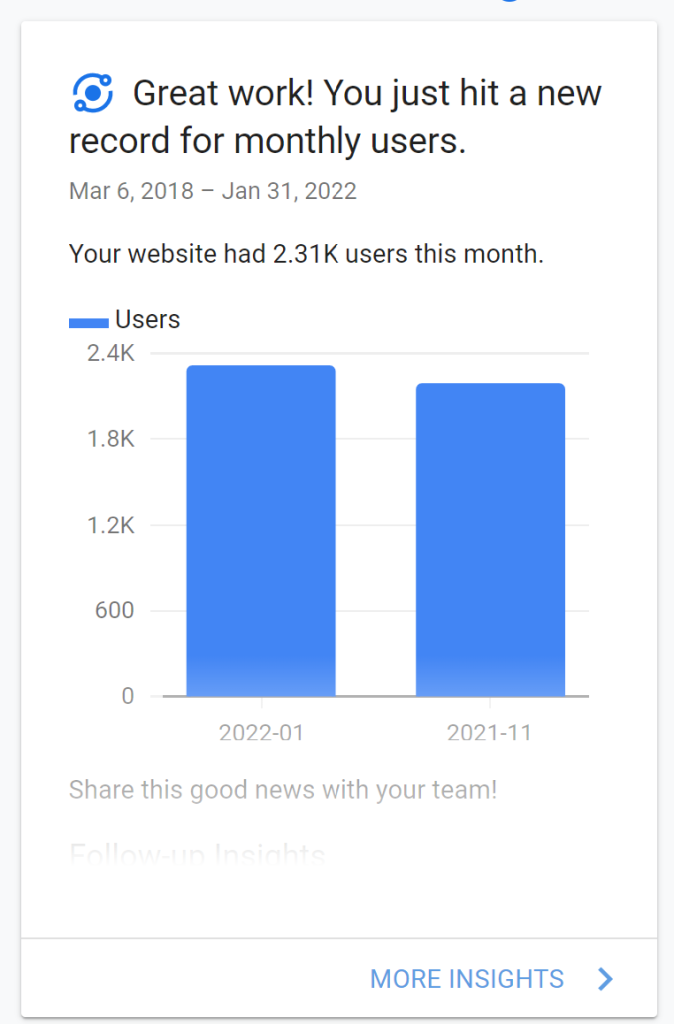
A few months ago, Google Analytics surprised me with this message:
Google Analytics Great Work Message   @FanningSparks
Google Analytics also calculates which posts are the most popular.  Shown below are photos from the Top 10 FanningSparks blog posts since the blog’s beginning.  Many of these blog posts were also amongst the most popular last year.  But two of them, Lucet Cordmaking – DIY Tutorial and Natural Dye Making are new to the Top 10 this year.  It’s interesting to note that tutorials and instructional posts continue to do well.  Links to the Top 10 posts are listed below the graphic should you wish to check them out.
Top 10 Posts To Date – as of March 2022   @FanningSparks
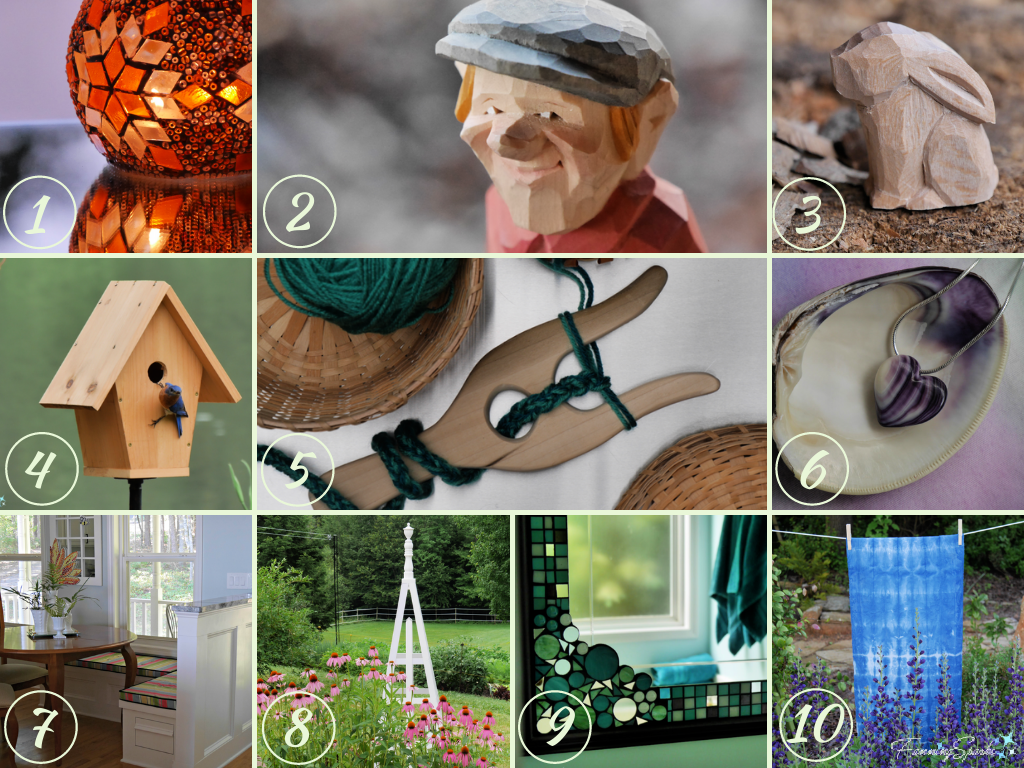
1. DIY Turkish Mosaic Candle Holder Tutorial
2. Flat Plane Carving with Harley
3. Getting Started with Woodcarving
4. DIY Bluebird-Approved Birdhouse Tutorial
5. Lucet Cordmaking – DIY Tutorial
6. Artisan Transforms Quahog Shells
7. Our Pony Wall and Banquette Combo
8. DIY Pyramid Trellis Tutorial
9. Pair of Mosaic Mirrors Completed
10. Natural Dye Making
Obviously, posts which have been available longer are likely to garner more visitors than recent posts.  For comparison, I pulled the top 5 posts from the past year.  Links to these posts are listed below the graphic for your convenience.
Top 5 Posts Past Year – as of March 2022   @FanningSparks   
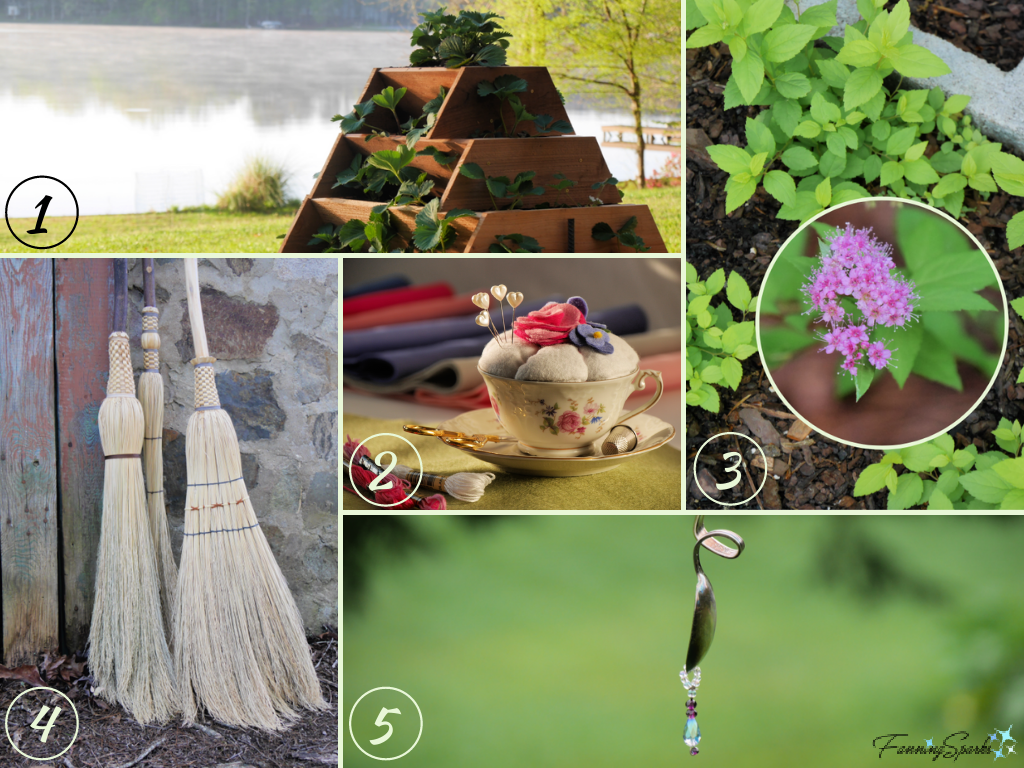
1. Strawberry Tower Planter – DIY Tutorial
2. Teacup Pincushion – DIY Tutorial
3. From One to Many: Propagating Flowering Shrubs
4. Swept Away by Broom Making
5. Old Silver Wind Chimes – DIY Tutorial

FanningSparks Social Media Platforms
The FanningSparks presence on Instagram, Facebook, Pinterest and Bloglovin’ continues to be well received.
FanningSparks Social Media Platforms   @FanningSparks
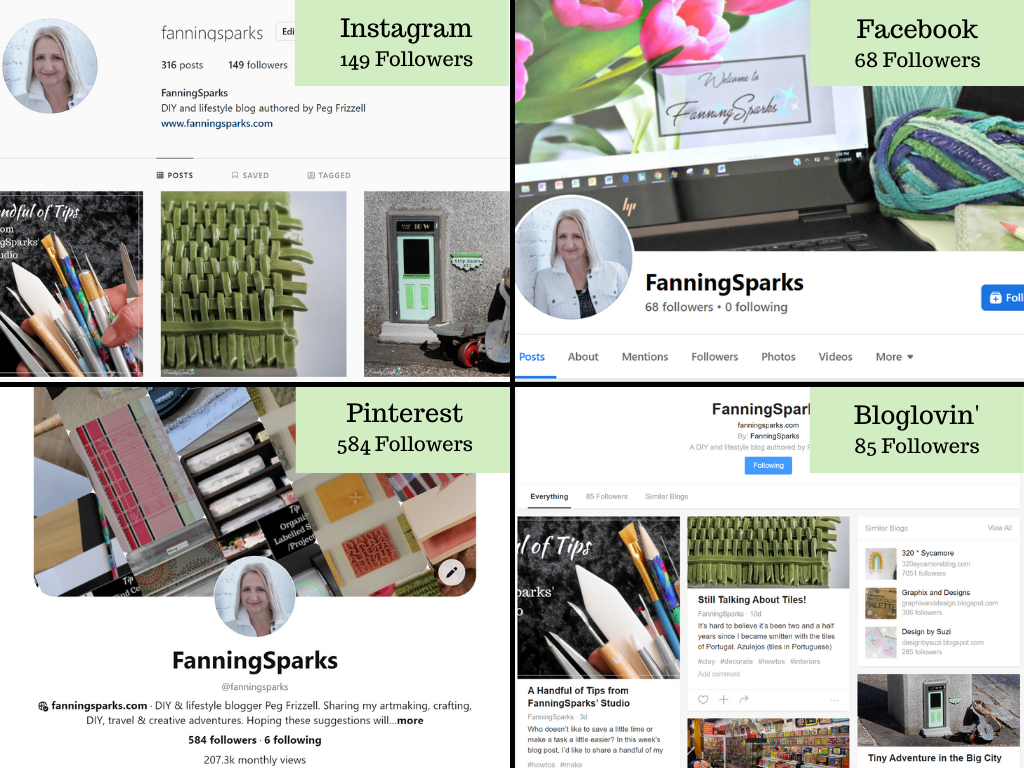
Pinterest continues to be the most active platform.  This is to be expected since Pinterest content lives on beyond the initial publication.  I’ve created over 5,000 pins and I’m thrilled to have 584 Pinterest followers (up from 268 at this time last year).  FanningSparks’ pins were shown over 600K times in the last 90 days resulting in 17,740 engagements.

FanningSparks on Google Search
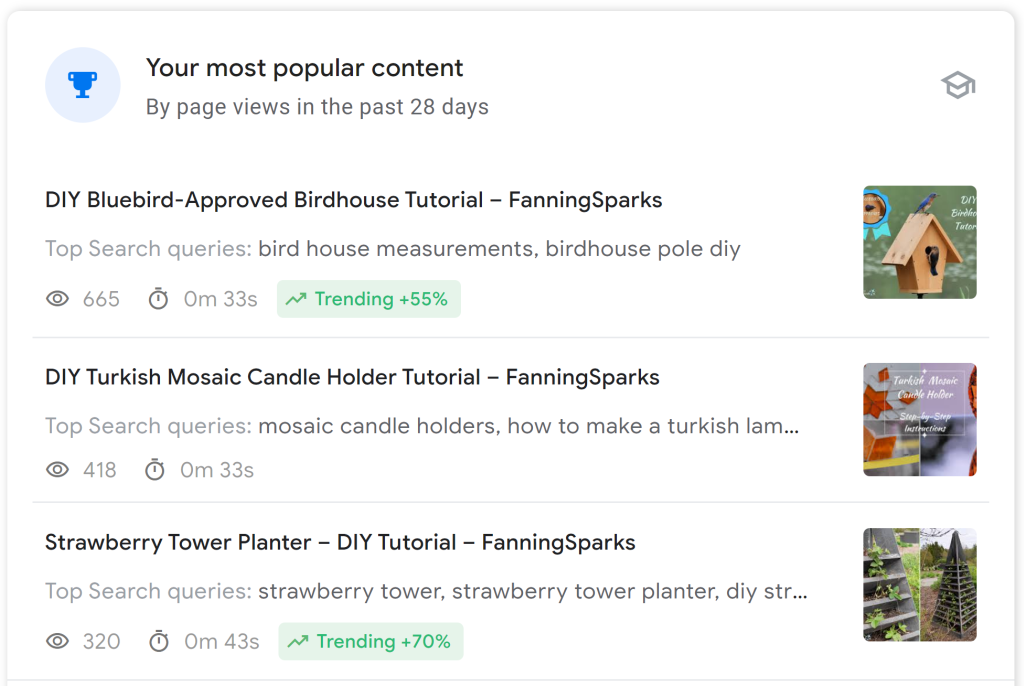
Google also provides helpful analytics about how visitors find FanningSparks via Google Search.  Based on the following report from the past 28 days, I’d say visitors to FanningSparks are getting ready for spring by building birdhouses and strawberry tower planters!
Google Search Most Popular Content   @FanningSparks
This concludes our behind-the-scenes peek into the FanningSparks blog.  It’s time to wrap up this celebration of four successful years and look forward to what lies ahead.  Please join me for another year of making, traveling and sharing!
Cheers,
Peg - FanningSparks Author

Who doesn’t like to save a little time or make a task a little easier?  In this week’s blog post, I’d like to share a handful of my best tips for makers.  Nothing earth shattering—just a few suggestions that may make your next project go a little smoother.

Tip #1 – Find Center by Folding Instead of Measuring
Instead of measuring an edge to calculate the center point, align a piece of paper with the edge and fold it in half.
Tip 1 Find Center by Folding Instead of Measuring   @FanningSparks
This approach lets you skip the measuring step—there’s no need to determine the length, calculate the midpoint and then find the correct point on the ruler or tape measure.  Simply align the straight edge of a piece of paper, make a small tick mark at the end, and fold the paper in half.  The fold is the center point.  This technique is especially helpful for short, precise, fractional measurements.  It’s also helpful on surfaces which aren’t flat such as this glass globe from my Turkish-style glass mosaic candle holder (see DIY Turkish Mosaic Candle Holder Tutorial).  This technique would not be helpful for parts longer than a foot or two.
Turkish Mosaic Candle Holder Tutorial - Marking Horizontal Center. @FanningSparks
To take it one step further, I also use a piece of paper to measure something that I need to match.  For instance, if part 1 and part 2 need to be the same length, I use a piece of paper to mark the size of part 1 and then transfer that mark to part 2.  It’s faster than determining the actual measurement and there’s less room for error.  I used this technique to create a string of beads for the top and bottom edges of the mosaic candle holder.
Turkish Mosaic Candle Holder Tutorial - Stringing Beads. @FanningSparks

Tip #2 – Fold Under Corner to Save Tape End
Instead of just letting the end of the tape stick to the roll, fold under a corner to save the end.
Tip 2 Fold Under Corner to Save Tape End   @FanningSparks
If you’ve ever spent more than a minute trying to find the end on a roll of tape, this is the trick for you!  Get in the habit of always folding under a small corner of the tape before letting the tape stick back on the roll.

Tip # 3 – Replace Ironing Board with Padded Surface
Replace your conventional ironing board with a padded surface for pressing.
Tip 3 Replace Ironing Board with Padded Surface   @FanningSparks |
Conventional ironing boards may be good for ironing shirts but they’re less than ideal for most pressing projects.  A more convenient surface can be made with a large piece of flat wood (such as plywood) padded with quilting and covered with plain cotton fabric.  I made mine from a 4-foot piece of laminate countertop.  The quilt batting and cotton fabric are stretched over the board, folded into place and held with safety pins.  My padded surface can be placed on a table when in use or leaned against a wall for storage.  The actual surface is much larger than a conventional ironing board so it’s easier to press large pieces of fabric and maneuver rulers and other tools.
Fold and Press Pillow Back for Basic Pillow Featuring FanningSparks’ Floral World Tour Collection @FanningSparks

Tip # 4 – Elevate Work Surface with Bed Risers
Use bed risers to safely and securely elevate your work surface.
Tip 4 Elevate Work Surface with Bed Risers   @FanningSparks
Different tasks can require different working heights.  For instance using a sewing machine is most comfortable at standard, table height but piecing together a mosaic is more comfortable on an elevated surface.  Bed risers, those sturdy plastic blocks typically used to add storage under a college dorm bed, are ideal for raising a work table by 5-6 inches.  They’re easy to slip under the table legs and sturdy enough that you can forget about them once in place.

Tip # 5 – Organize with Labelled Scrapbook/ Project Cases
Use plastic scrapbook/ project cases to organize your equipment and materials and label the contents for easy retrieval.
Tip 5 Organize with Labelled Scrapbook/ Project Cases   @FanningSparks 
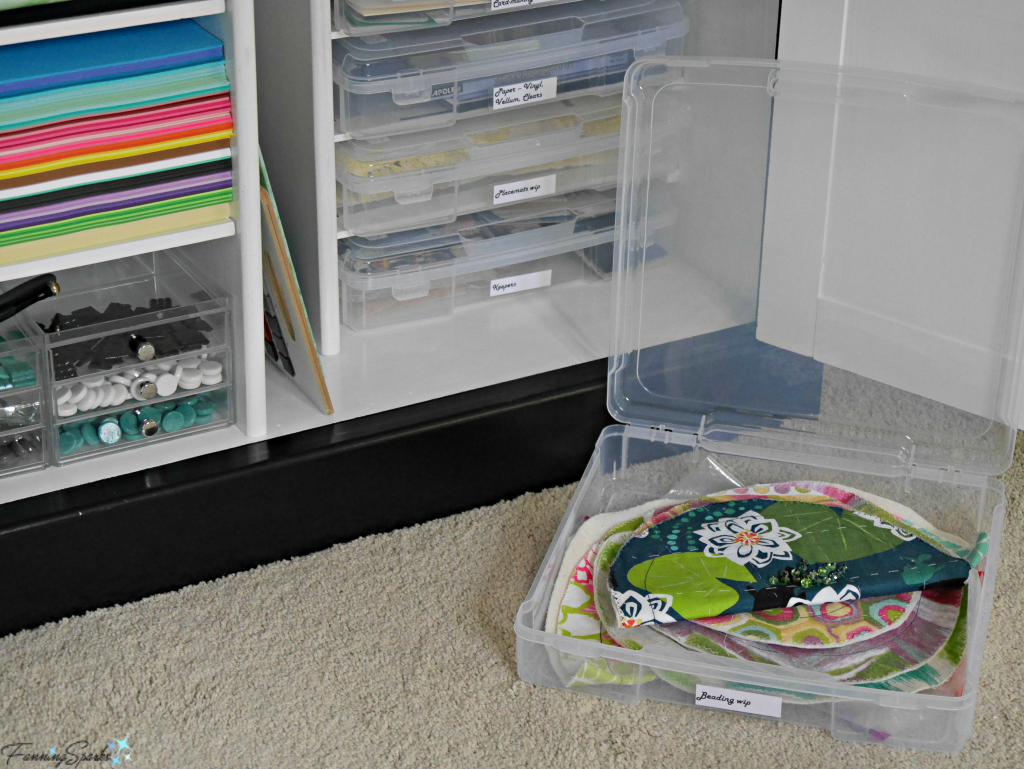
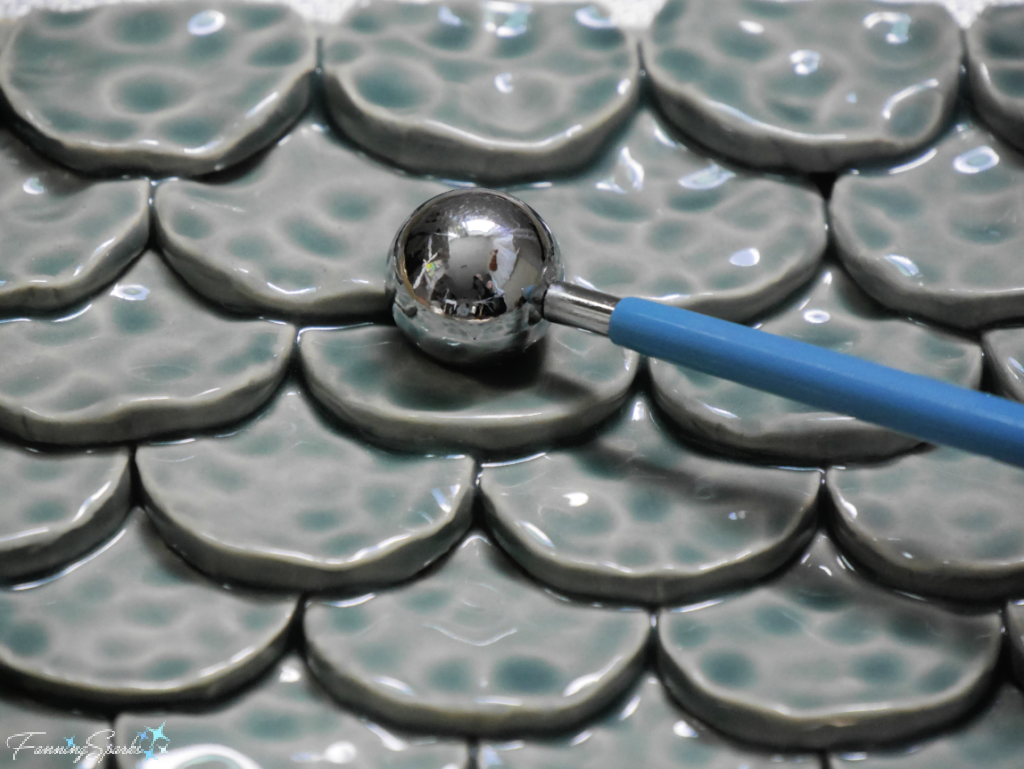
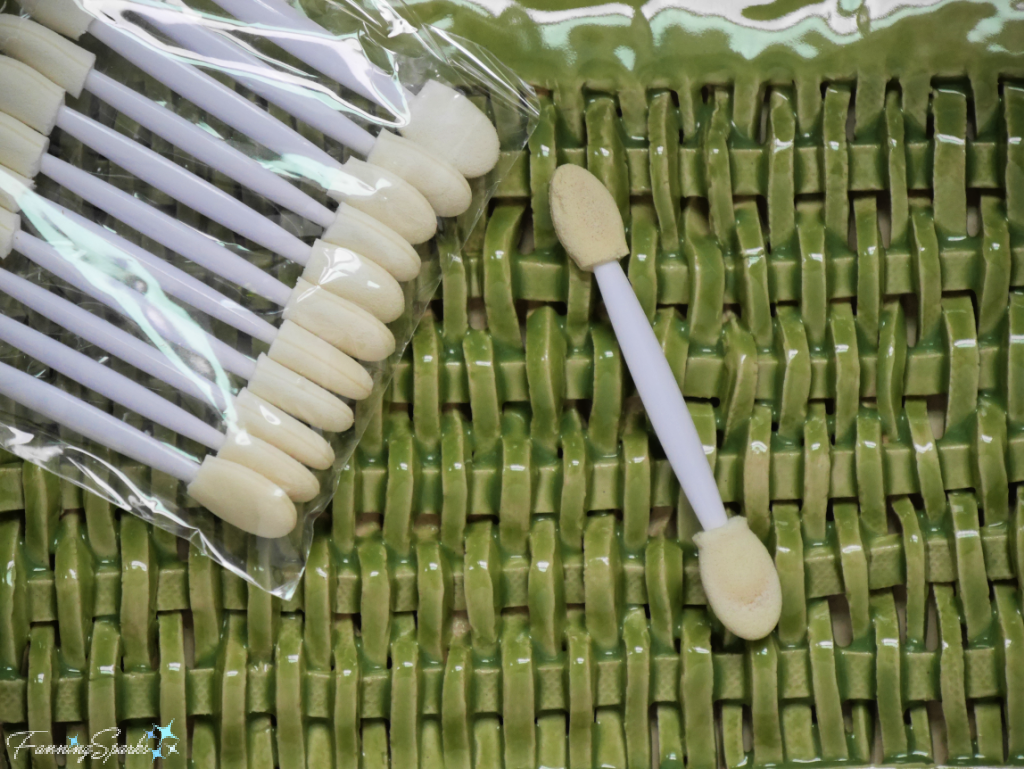
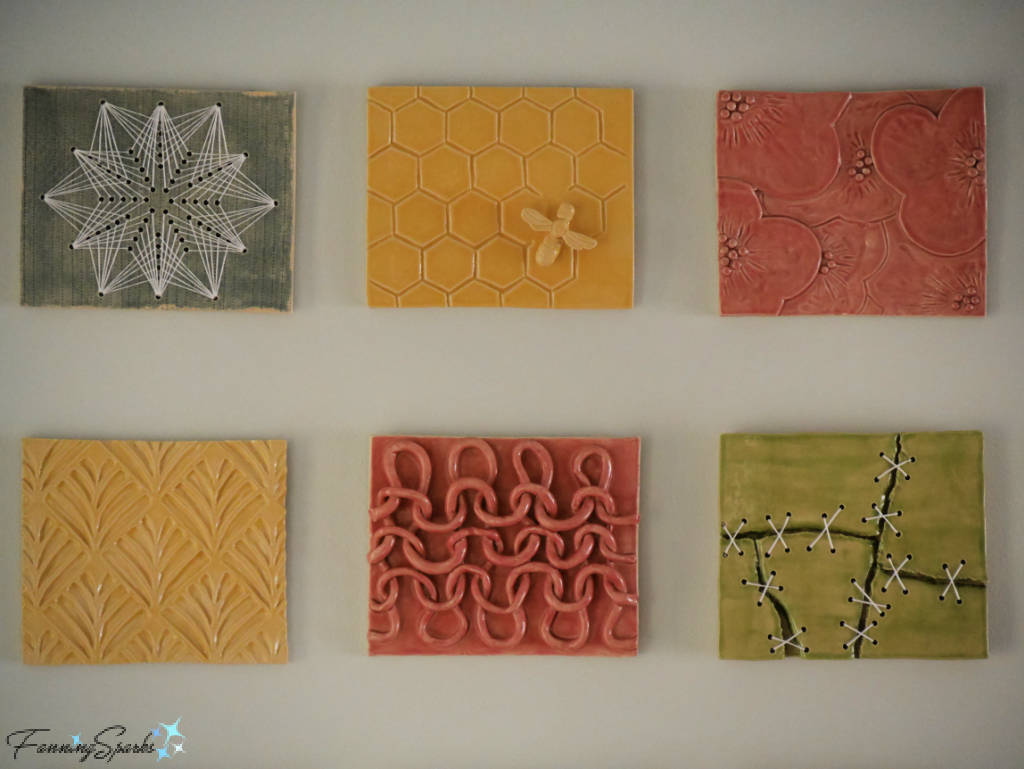
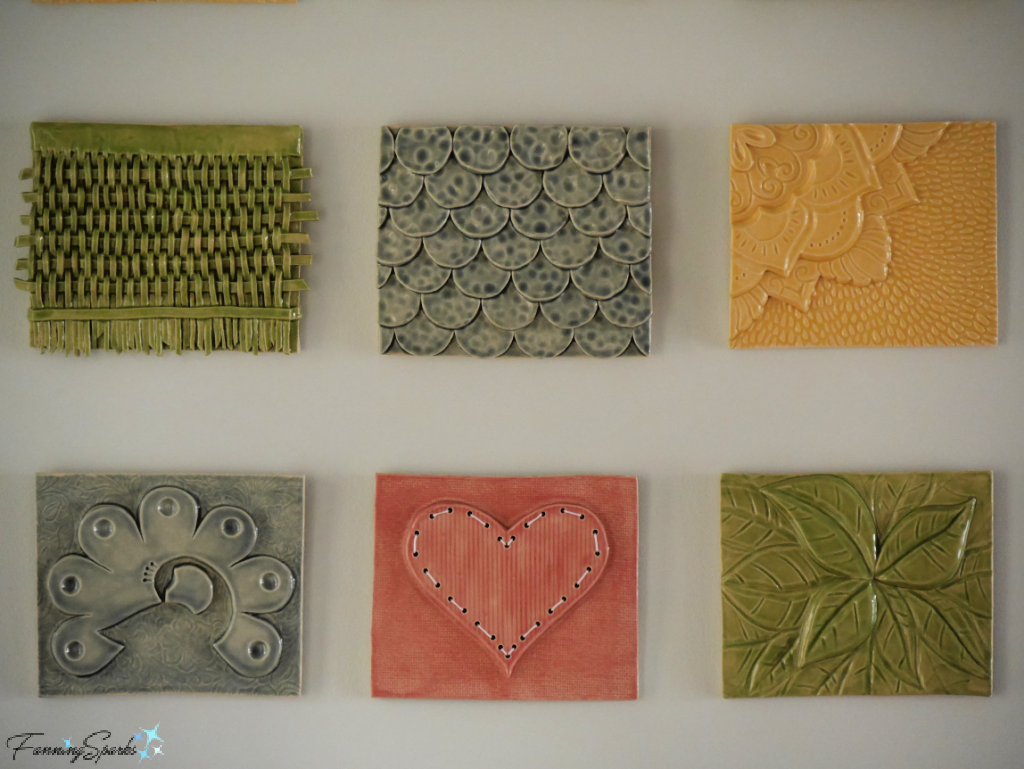
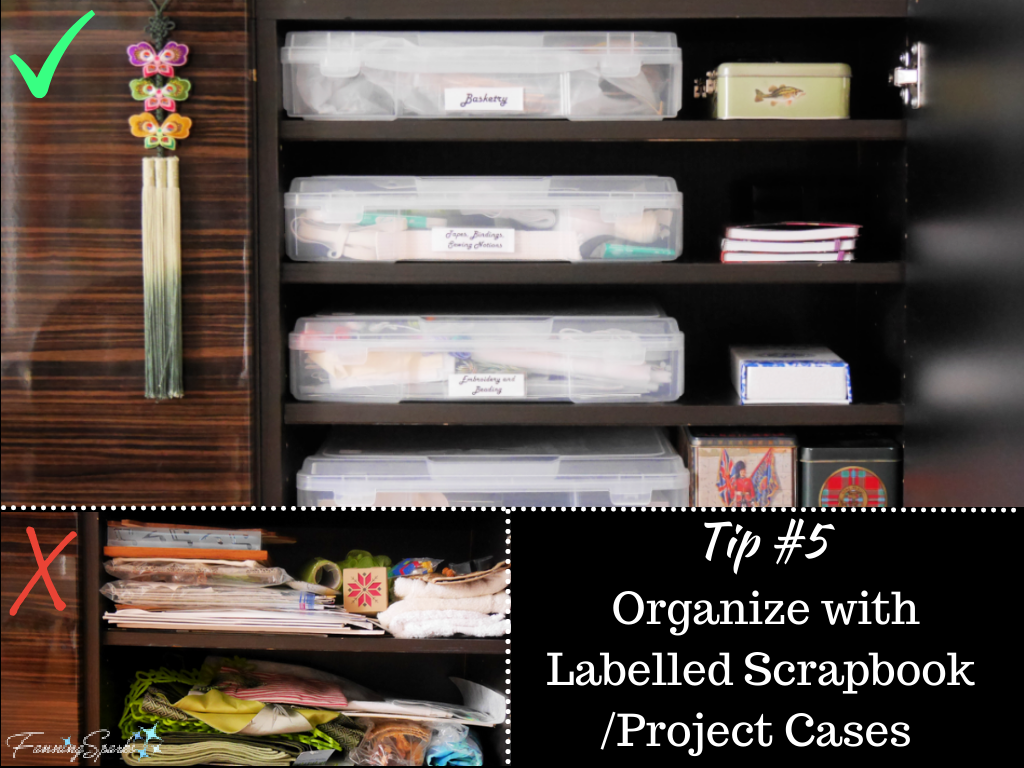
No set of tips for makers would be complete without some mention of organization and storage!  My favorite storage method for the myriad of projects, supplies and tools I have hoarded in my studio/ craft room is the 14” square plastic scrapbook/ project case.  These cases are specifically designed to hold 12”x12” scrapbook pages so they’re a generous size.  They’re big enough to hold most craft items but not so big that they become a bottomless pit.  Plus they’re transparent so you see what’s inside.  The cases stack neatly making them easy to store.  They’re available from most major craft stores like Michaels and Joann as well as from online suppliers like Amazon.
I mentioned these plastic trays in my previous blog post about The Ultimate Maker’s Cabinet when I used them instead of drawers in my storage cabinet.  They’ve worked out perfectly!
Plastic trays sit on lath shelves. Fabric covered backing peeks through. @FanningSparks
The lids open and close effortlessly and can easily be propped open when in use.
Plastic trays provide easy access to craft supplies and projects. @FanningSparks
The labels, purchased separately, are clear plastic with a slot for the printed tag.  Adhesive-covered backs make it easy to attach the labels to the storage cases.
So there you have it—a handful of tips from the FanningSparks’ studio!  I hope you’ll find them helpful.

More Info

Please pin this image to share or save for future reference.
A Handful of Tips from FanningSparks’ Studio pin   @FanningSparks
The following FanningSparks blog posts were mentioned in this post:
. DIY Turkish Mosaic Candle Holder Tutorial
. The Ultimate Maker’s Cabinet
You may also enjoy the previous blog post 10 Tips from our Gussied Up Workshop.

Today’s Takeaways

1. Be on the lookout for time-saving maker techniques.
2. Optimize equipment and tools for common tasks.
3. Consider ways to streamline and simplify processes.
Peg - FanningSparks Author

It’s hard to believe it’s been two and a half years since I became smitten with the tiles of Portugal.  Azulejos (tiles in Portuguese) are found in a multitude of patterns, colors and designs throughout Portugal especially in historic cities like Ovar and Aveiro.  I shared this amazing discovery in my previous blog post, Talk About Tiles!.
It’s equally hard to believe that I’ve been working on my own set of ceramic tiles for nearly as long.  This week, after two years in the making, I was finally able to hang my collection of handmade ceramic tiles in our home.
OOAK Ceramic Tile Collection in Entryway   @FanningSparks
In my own defense, I haven’t actually been working on the tiles non-stop—the project has progressed in fits and starts.  First the School Street Pottery Studio, where I do my clay work during open studio hours, was closed for an extended period due to the pandemic.  Then my project sat on hold while I travelled out of town.  Despite the delays, the project is finished and I’m thrilled with the results.
This is my first major clay project after attending a Hand Building Clay class at OCAF (Oconee Cultural Arts Foundation) (see More Info below).  In today’s post, I’d like to share this experience along with some tips and tricks I learned along the way.  This will also serve as a reference for my clay projects going forward.
Inspired by the beautiful azulejos of Portugal, my original plan was to experiment with pattern and texture.
Selection of Portuguese Tiles @FanningSparks
I arrived at the idea of making a set of ceramic tiles while exploring the possibilities of Decorating With Collections.  This is a rough sketch of the original idea.
Rough Sketch of Ceramic Tile Collection   @FanningSparks
Starting with the wall space where I intended to display the tiles, I determined a collection of 12 tiles sized 7⅛” wide x 6” high would work.  I used the slab roller at the Studio to roll out ⅜” thick slabs of B-Mix white clay.   A template, made from a sheet of thin foam, helped me keep the tiles a consistent size.  Shown below is the blue template with one of the finished ceramic tiles to illustrate the clay shrinkage that occurs when clay is dried and fired.  Luckily, the smaller finished tiles work just as well in the intended space.
Template with Finished Tile Illustrating Clay Shrinkage   @FanningSparks
After rolling and cutting the rectangular tile base, it was time to add the design.  I had gathered a nice selection of textures and patterns while writing the blog posts Patterns by Mother Nature  and Texture by Mother Nature.  Flowers, foliage, shells, stones and other natural elements were my jumping off point.  I scouted out more inspiration from my photos and various online sources.  Some of the design ideas were crossovers from other mediums.  For instance, this starburst was originally designed for paper stitching.
Stitched Starburst Ceramic Tile   @FanningSparks
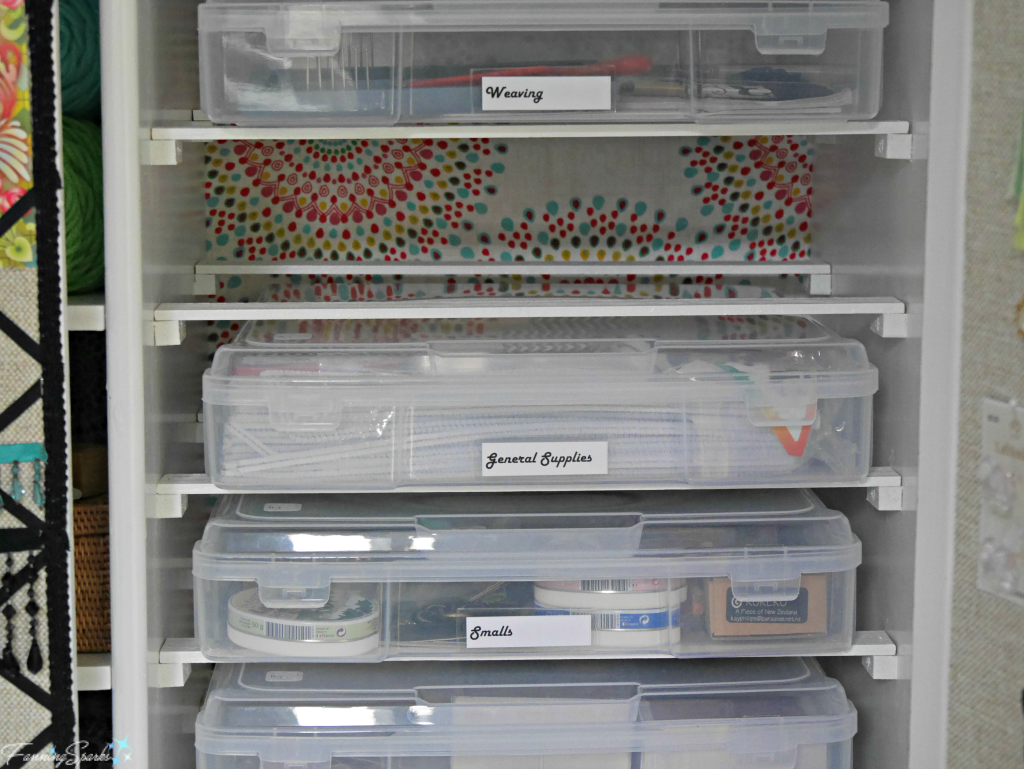
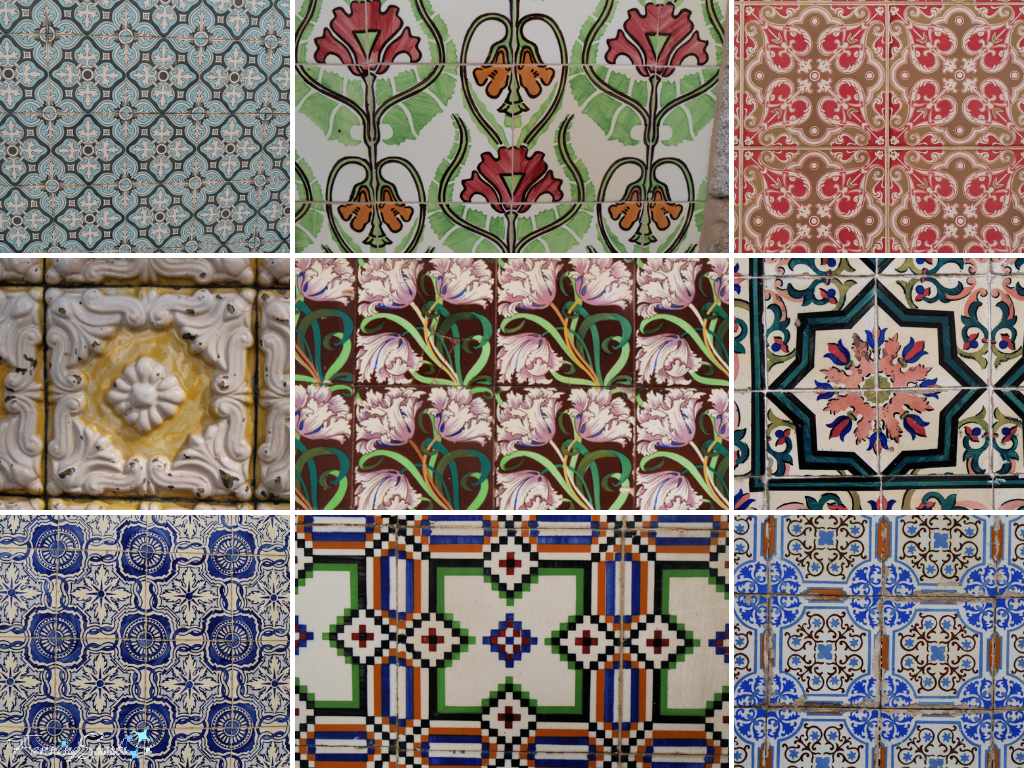
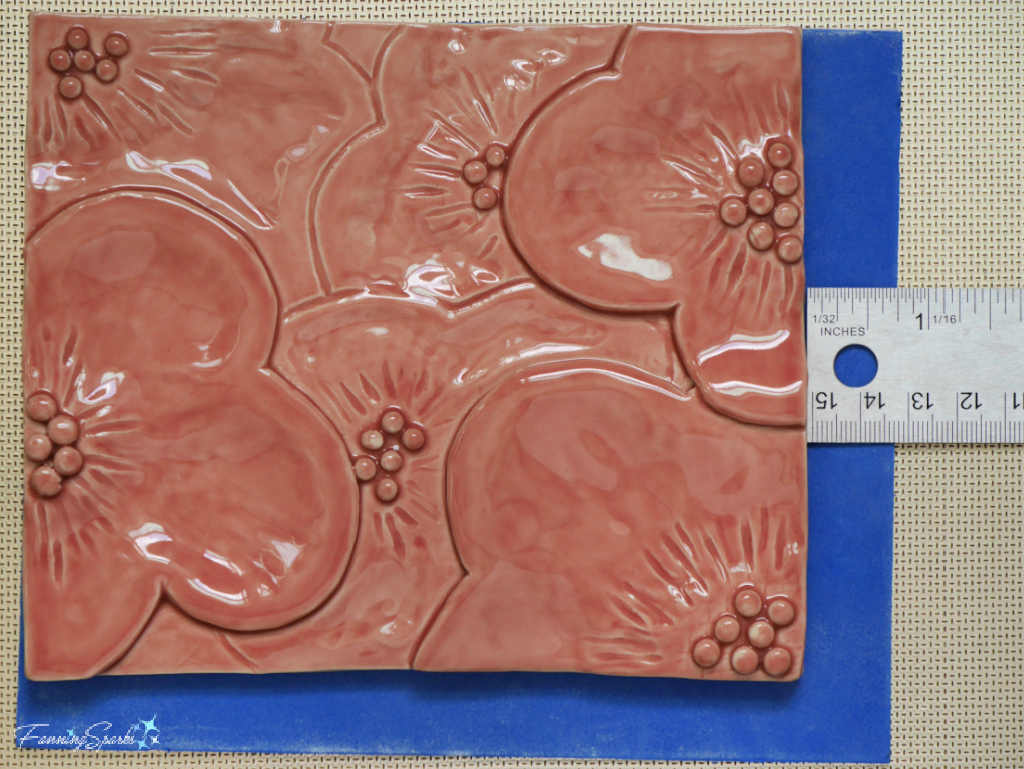
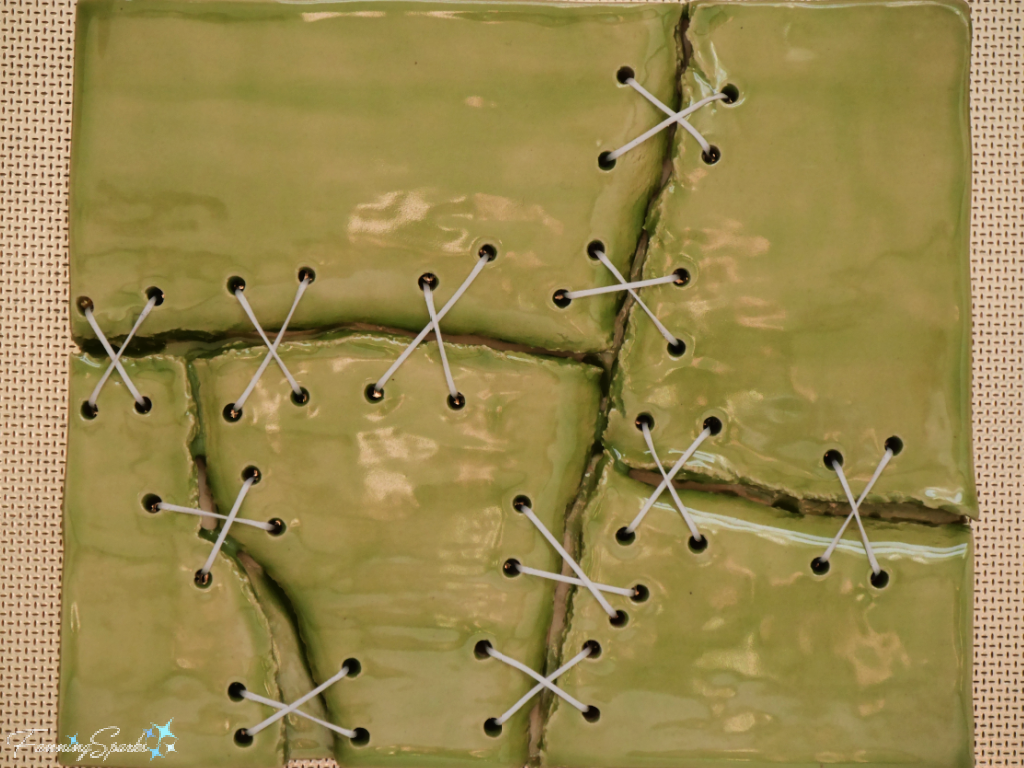
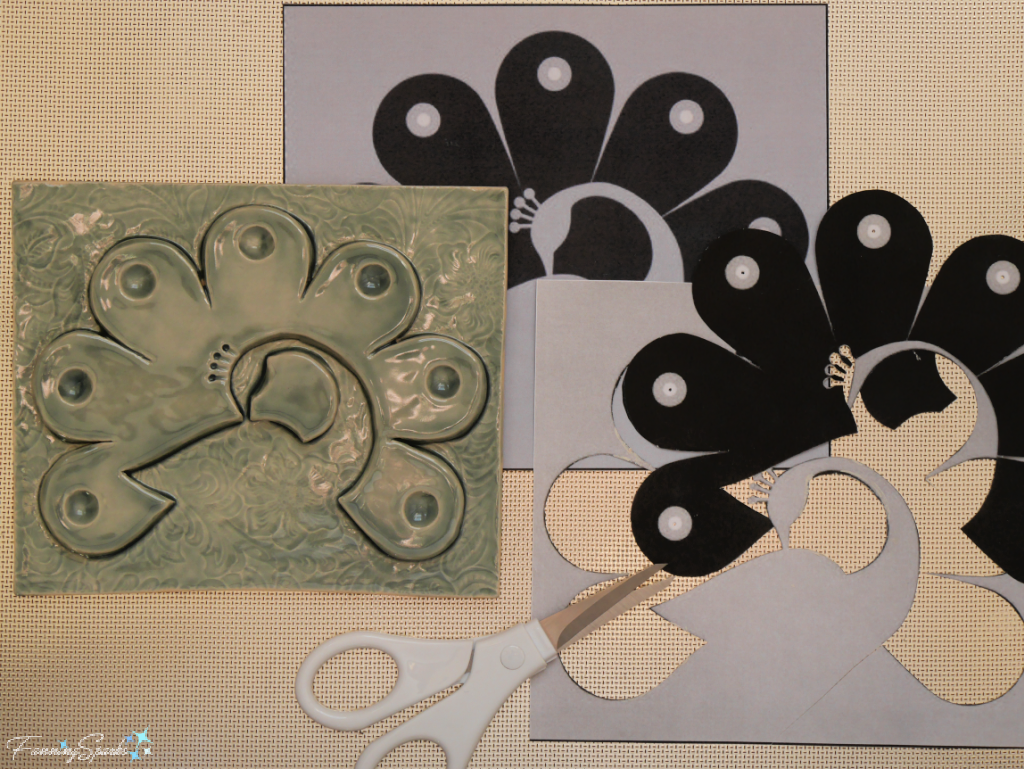
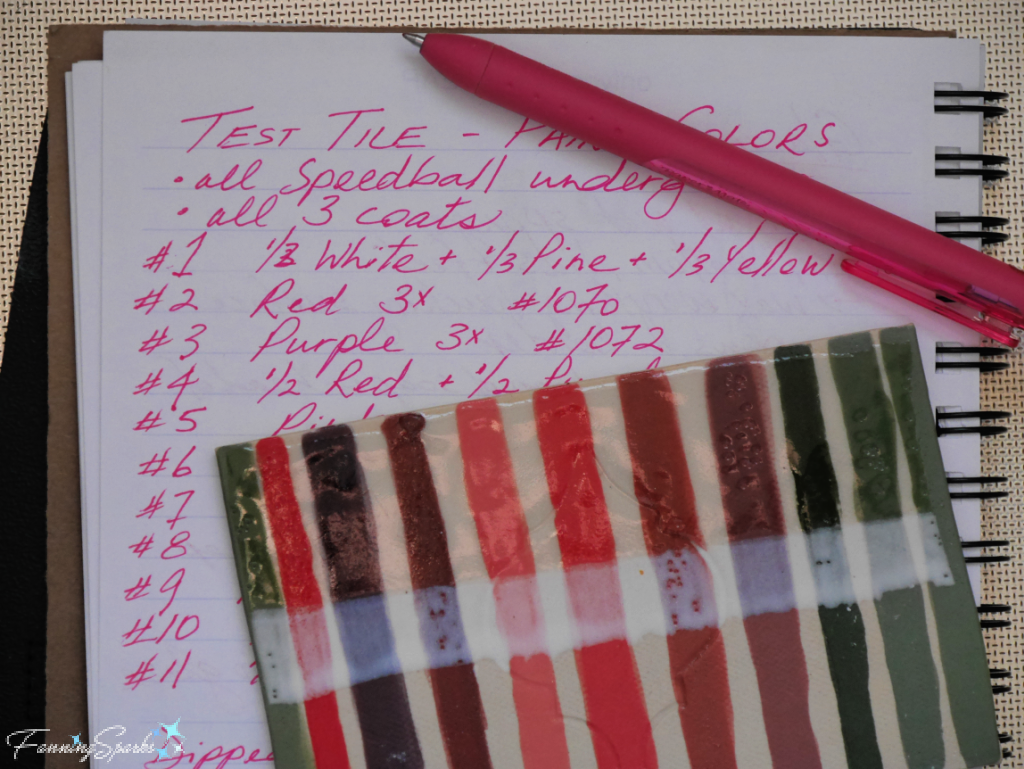
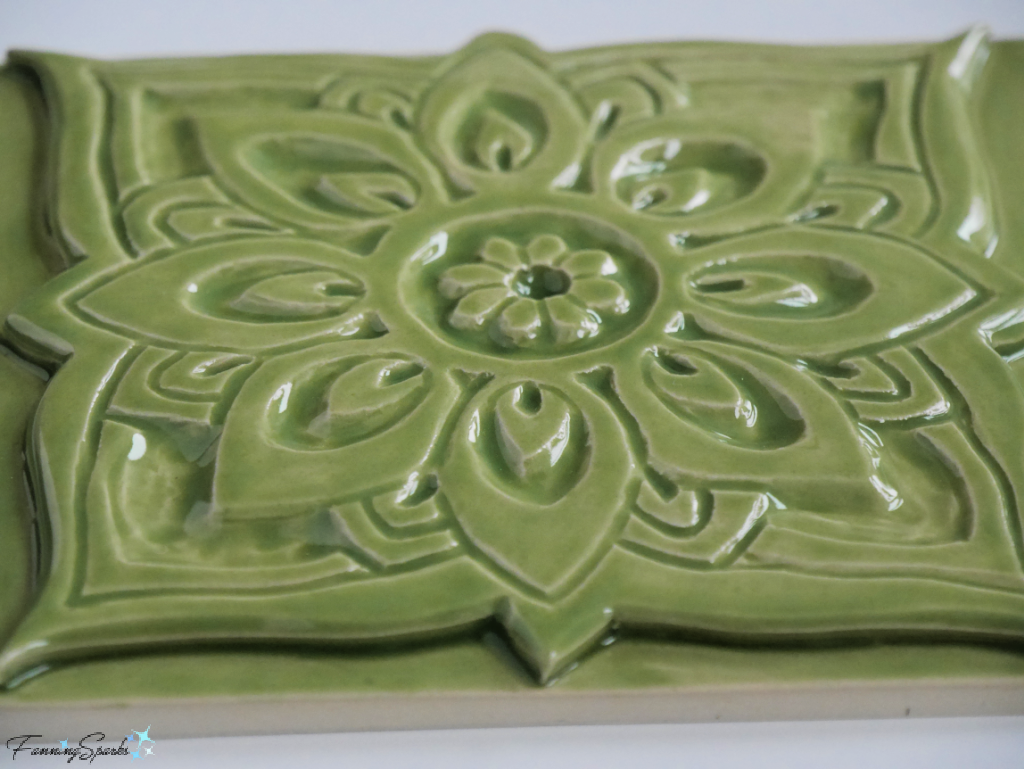
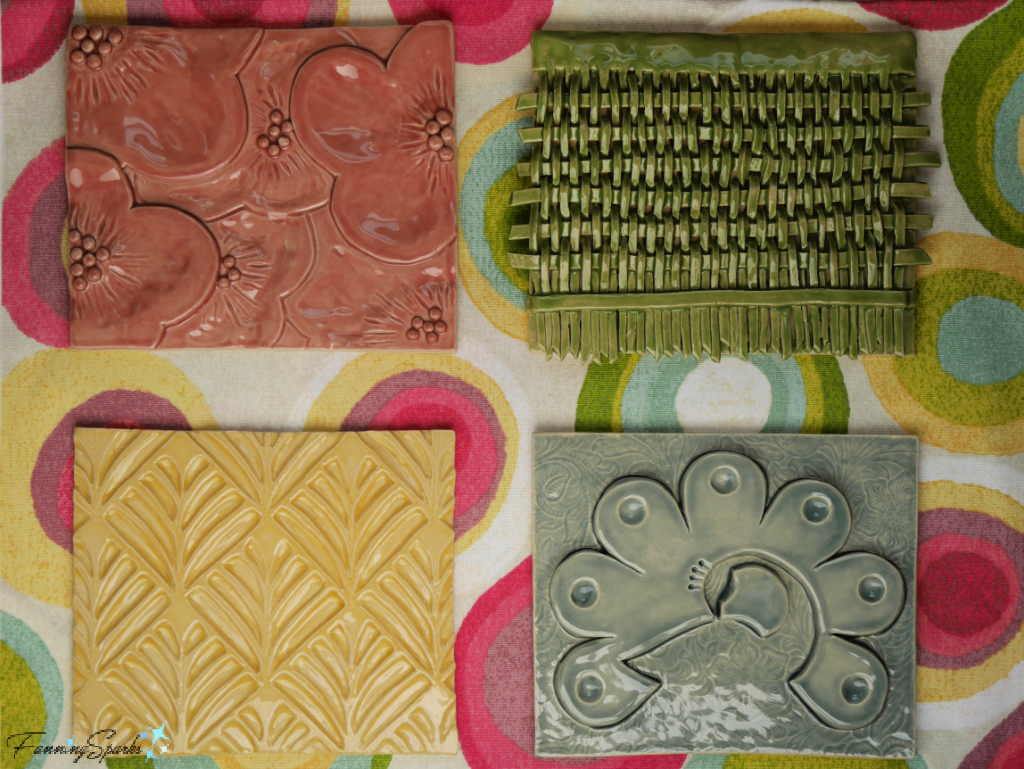
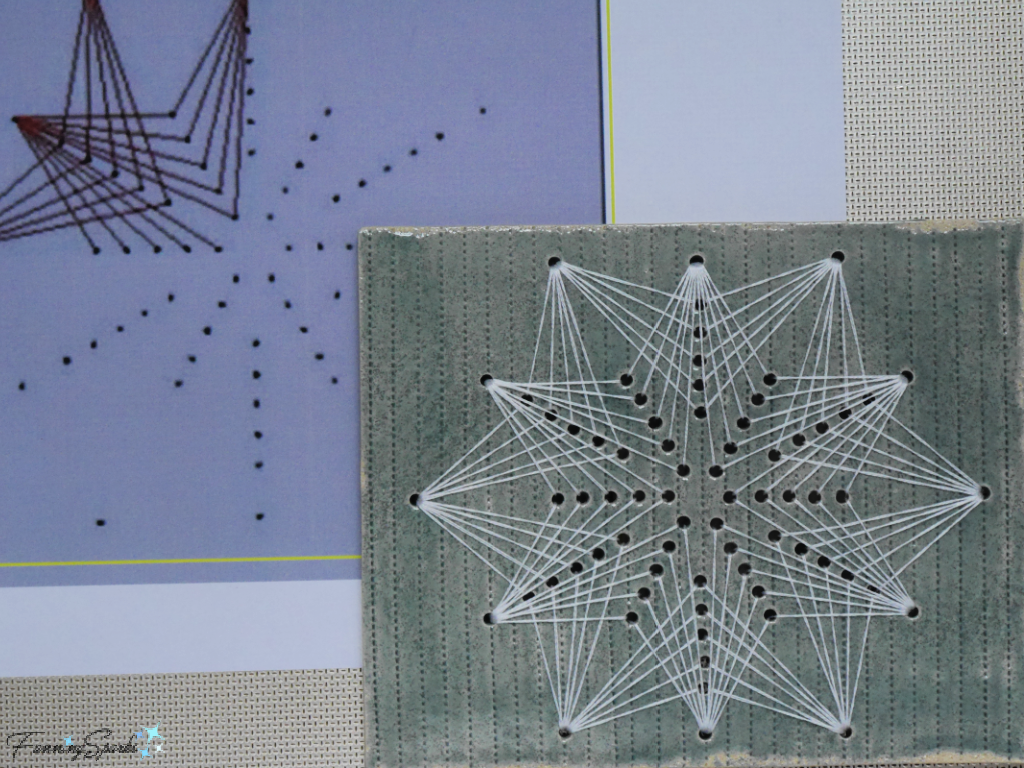
Design ideas started to spring up from the most unexpected places.  For instance, this weaving project which I shared in the blog post DIY Woven Statement Necklace Tutorial
Weaving Decorative Yarn into DIY Woven Necklace   @FanningSparks
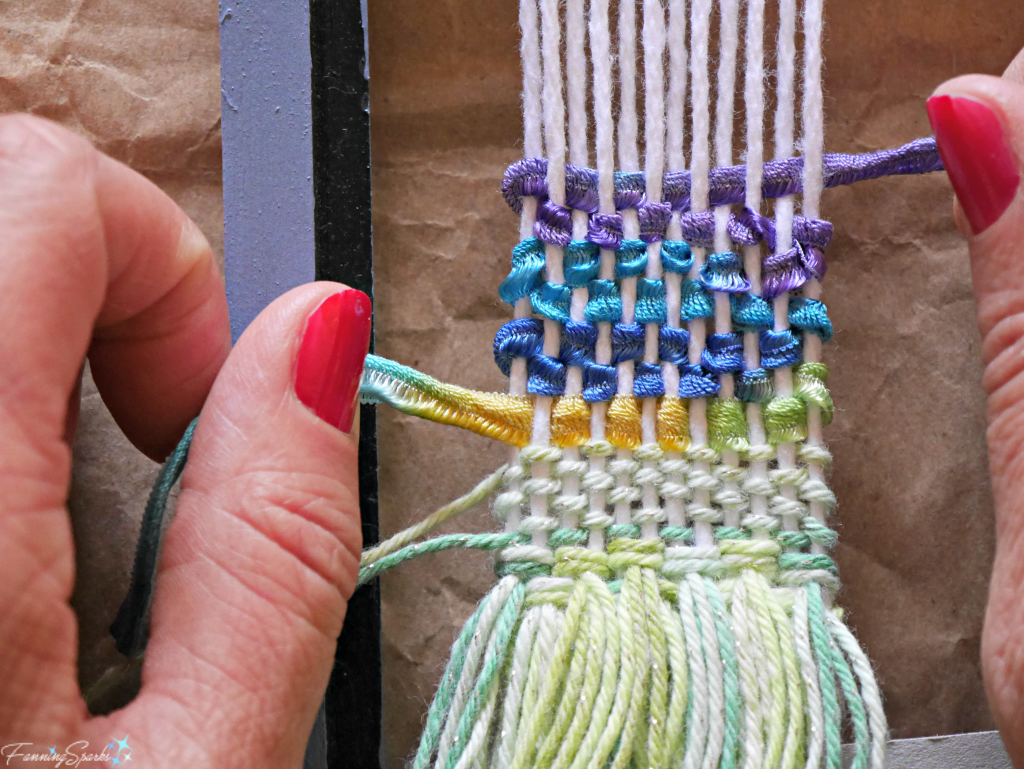
… inspired this intricate tile design.
Over Under Weave Ceramic Tile   @FanningSparks
While writing the blog post Inspired by Mother Nature’s Lace, I learned about the ancient art of net making which inspired this tricky piece.
Handmade Netting Ceramic Tile   @FanningSparks
Some designs even popped up again on subsequent projects.  I liked this mandala-inspired design so much…
Mandala-Inspired Ceramic Tile   @FanningSparks
… I used it again to embellish this denim jacket which I featured in the blog post From Classic Jacket to Wearable Art.
Simple Denim Jacket Becomes Wearable Art @FanningSparks
Most of the designs were prepared electronically for finetuning and sizing.  A few of the designs, like this torn and mended tile, were figured out on the fly.  The stitching, using Ritza 25 Tiger polyester thread from my leather crafting supplies (see More Info below), was done after the tile was fired.
Torn and Mended Ceramic Tile   @FanningSparks
On my first tiles I added simple shapes onto the rectangular tile base.  For this technique, I learned it’s best to use thinner clay for the added shapes—such as ⁵⁄₁₆” shapes on a ⅜” base.  As I gained experience, I started to carve out designs using some of the techniques I learned from woodcarving (see More Info below).  The below photo compares the two techniques—the stitched pink heart tile shows an additive process while the yellow art deco tile illustrates a subtractive technique.
Additive and Subtractive Carving Side by Side Comparison   @FanningSparks
Most of the designs were transferred from a paper template to the clay tiles.  I found it most effective to transfer the elements for a subtractive design by tracing over the paper pattern with a rounded tip to indent the clay.  For additive designs, however, I found it best to avoid marking the clay tile base and to prepare the design elements using positive and negative paper templates.
Peacock Design Transferred with Paper Templates  @FanningSparks
Here are my favorite tools for carving and sculpting clay.
My Favorite Tools for Carving and Sculpting Clay @FanningSparks
My plan was to incorporate a variety of surface textures into the tiles.  I learned a variety of items can be used to produce an interesting textural design on clay.  One option is to cover the clay surface with a piece of fabric (shown top left) or embossed vinyl (shown bottom left) while rolling it through the slab roller.  A light dusting of cornstarch can be used to prevent the clay from sticking to the surface.
Source of Background Textures on Ceramic Tiles   @FanningSparks
Another option is to manipulate the surface with a tool such as a ball stylus.  The below rounded scales were indented while the clay was wet and before they were added to the base.
Use Ball Stylus for Dented Surface   @FanningSparks
A few of my tile designs incorporated small holes.  This brass round hole cutter, part of a 3-piece set from Chinese Clay Art, bores neat, clean holes.  This was a great recommendation from a fellow Pottery Studio potter (Thank you Bill!).
Use Round Hole Cutter to Bore Holes   @FanningSparks
One more tip is to use sponge-tipped eye shadow applicators for smoothing edges and cleaning up elements in a clay piece.  I used them extensively to prepare this woven tile.
Use Sponge-Tipped Applicators to Smooth and Clean   @FanningSparks
After the design has been applied to the clay tile, it must be dried for firing.  I learned the hard way that flat pieces of clay have a tendency to warp during the drying process.  To avoid this problem, it’s important to handle the clay as little as possible and always support it with a flat surface.  It’s also important to let the clay dry slowly and consistently so all sections dry at the same rate.  All of these steps helped but the best tip came from another Pottery Studio potter (Thank you Bertille!).  Use small weights, made by filling a section of hose or tights with lentils, to keep the tiles flat as they dry.  The below photo shows these weights along with a comparison of a flat tile which was dried with weights (bottom pink tile) and a warped tile that was dried without weights (top white tile).
Use Weights to Keep Tile Flat   @FanningSparks
There are an infinite number of options for decorating and glazing clay.  As a result, deciding how to finish my tiles was one of the biggest challenges of this project.  My plan was to use colors that would match the color palette in our kitchen/ family room.  I tried several options in my quest to find the desired colors including Speedball Velvet Underglazes.  But I couldn’t find the colors, saturation or finish I had in mind.
Testing Speedball Underglazes for Color and Finish   @FanningSparks
Once again, the Pottery Studio folks offered a great suggestion: AMACO Celadon glazes.  The AMACO website describes the glaze this way “Like the beautiful ancient glazes they are modeled after, the AMACO Celadon glazes are glossy, transparent, and pool beautifully to add vivid accents to textured and carved surfaces.”  I couldn’t agree more!  The way the glaze color varies based on the surface texture—thinning on the mountains and pooling in the valleys—makes it the ideal choice for these tiles.
AMACO Celadon in Wasabi on Ceramic Tile   @FanningSparks
The colors are almost perfect, too.  I selected Weeping Plum C-53 (pink top left), Wasabi C-43 (green top right), Marigold C-60 (yellow bottom left) and Fog C-22 (blue bottom right).  To my eye, the green, yellow and blue are great matches.  Only the pink color isn’t quite right—I should have custom-mixed this color for a better match.  Luckily, the tiles aren’t displayed directly beside this fabric so the miss isn’t as obvious as it is in this photo.
My Selected AMACO Celadon Glaze Colors with Fabric   @FanningSparks
One final note for future reference, don’t forget about functionality!  In this case, the only functionality is a means to attach the tiles to a wall.  I probably should have built a small hanger in the back of each tile.  Instead, I used 3M Command Picture Hanging Strips.  I tested them first to confirm they could hold the weight and could eventually be removed.  They work perfectly.
Here’s a final look at my collection of handmade ceramic tiles.
OOAK Ceramic Tile Collection - 1 to 6   @FanningSparks
OOAK Ceramic Tile Collection - 7 to 12@FanningSparks

More Info

Listed below are the previous FanningSparks’ blog posts mentioned in this post:
. Talk About Tiles! features the beautiful tiles of Portugal
. Pinch Pot Bunny shares my first experience hand building clay and introduces OCAF’s School Street Pottery Studio
. Decorating With Collections offers examples and suggestions
. Patterns by Mother Nature features patterns spotted in the natural world
. Texture by Mother Nature features texture spotted in the natural world
. DIY Woven Statement Necklace Tutorial provides step-by-step instructions for an easy weaving project
. Inspired by Mother Nature’s Lace explores how the spider and its web have inspired innovations in science and art
. From Classic Jacket to Wearable Art shares how to embellish a simple denim jacket with fabric paint and hand embroidery
. A Leather Flower Frame to Set the Stage shares an easy leather crafting project and introduces the polyester thread mentioned in this post
. Flat-Plane Carving with Harley and Carving in Brasstown share my experiences with wood carving.
More information about AMACO Celadon glazes can be found on the AMACO website.
You can learn more about the Oconee Cultural Arts Foundation (OCAF) on their website.  Classes and workshops offered at the Watkinsville, Georgia, USA location are also listed.  OCAF’s School Street Pottery Studio hosts open studio hours for those with clay experience.  The Studio is run by a group of knowledgeable and generous volunteers.  Many thanks to Louise, Bertille, Bill, Aurora and all the other kind and generous folks at the Studio!

Today’s Takeaways

1. Stretching out a project over time allows for more and varied ideas.
2. Borrowing designs and techniques from other mediums can be very inspiring.
3. Decorating your home with your own artwork can be very gratifying.
Peg - FanningSparks Author

Nearly 500,000 people call the city of Atlanta Georgia home.  Considering that every home must have at least one door, that’s a lot of doors!  In striking contrast, there are less than two dozen miniature doors sprinkled throughout Atlanta’s neighborhoods.  The miniature doors, art installations by Karen Anderson Singer aka Tiny Doors ATL, are one-twelfth scale (1:12) resulting in tiny doors that are about 7 inches high.  How does this tiny collection of tiny doors even get noticed in the big city of Atlanta?
The Tiny Doors ATL website provides a partial answer to that question.  The Tiny Doors are designed to be interactive and engage their audience.  Tiny Doors ATL “painted the hashtag #TinyDoorsATL by [their first door in 2014] hoping people would upload photos to social media as a way to document not only the door itself, but also a visitor’s response to the door.”  With over 110K Instagram followers, it’s apparent the strategy was a good one.
Tiny Door #18 Atlanta Symphony Orchestra  @FanningSparks
Recently, I set aside a day to visit Atlanta and view as many Tiny Doors ATL installations as I could.  I used the Tiny Doors ATL map to plan my route in advance and I’m really glad I did.   There are no signs directing visitors to the Tiny Doors so locating them is a bit of a challenge.  As it turns out, actually finding a Tiny Door is part of the fun!
Today’s blog post includes an overview of the six Tiny Doors I was able to visit along with a few tips for finding them.
Tiny Door ATL’s first door was installed in July 2014 at the Krog Street Tunnel.  This vehicle/pedestrian tunnel crosses under a series of railway tracks to connect the neighborhoods of Inman Park and Cabbagetown.  Krog Street Tunnel is a wildly popular destination for artists and art lovers.  It boasts an ever-changing display of graffiti street art.
Krog Street Tunnel Graffiti Street Art  @FanningSparks
Tiny Doors ATL explains, “We selected the tunnel for Door #1 for a few reasons. First, Krog is an active street art location and we hoped this project would be one other artists would respond to in some way. Second, our tiny headquarters is in Reynoldstown and we love seeing this door evolve every day.”
The Krog Street Tunnel Tiny Door is ever-changing and rather challenging to locate.  It is located on the exterior corner at the tunnel’s southeast pedestrian entrance near the intersection of Krog St NE and Wylie St SE.  Here’s how it looked in February 2022.
Tiny Door #1 Krog St Tunnel Surroundings  @FanningSparks
The below photo provides a closer look at Tiny Door #1 – Krog St Tunnel with a small printed sign I made to help convey its size.  The sign is 3”x 4” which is approximately the same size as the screen on my iPhone.
Tiny Door #1 Krog St Tunnel with Sign  @FanningSparks
The Atlanta neighborhood of Grant Park is known for its Craftsman bungalows and Victorian mansions.  Its namesake park, encompassing 131 acres, is the oldest surviving city park in Atlanta.  It is home to the Atlanta zoo and two Tiny Doors.
Tiny Door 10W is located, at ground level, on a concrete post located in front of Milledge Fountain on Cherokee Ave SE.
Tiny Door #10W - Grant Park Surroundings  @FanningSparks
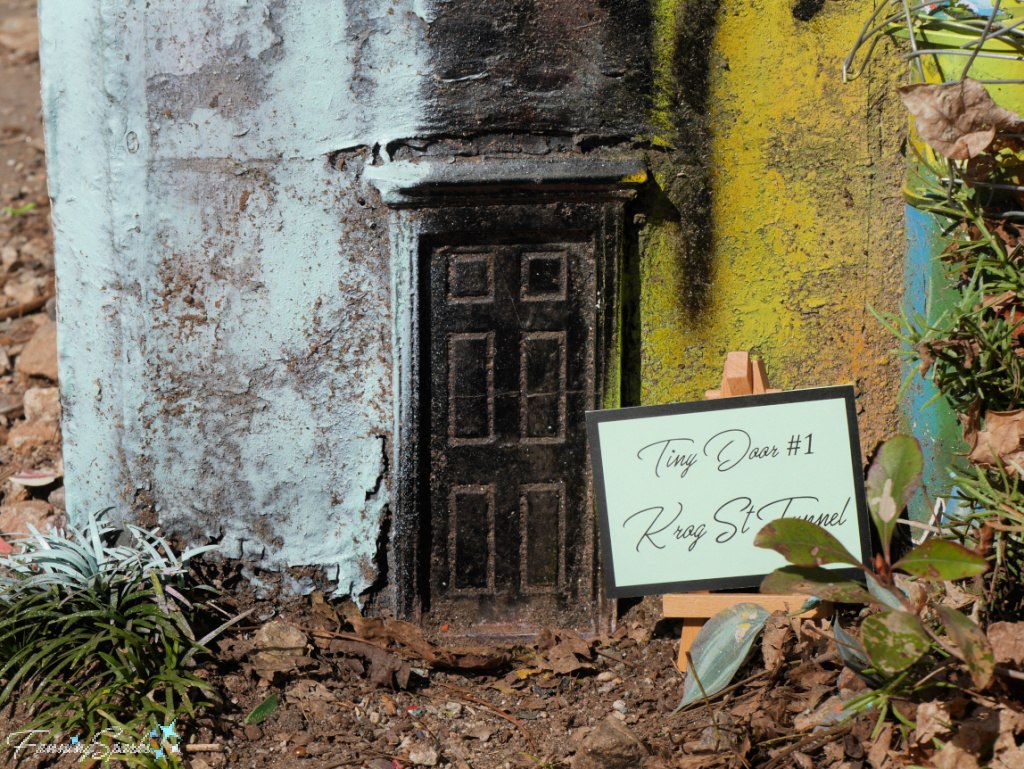
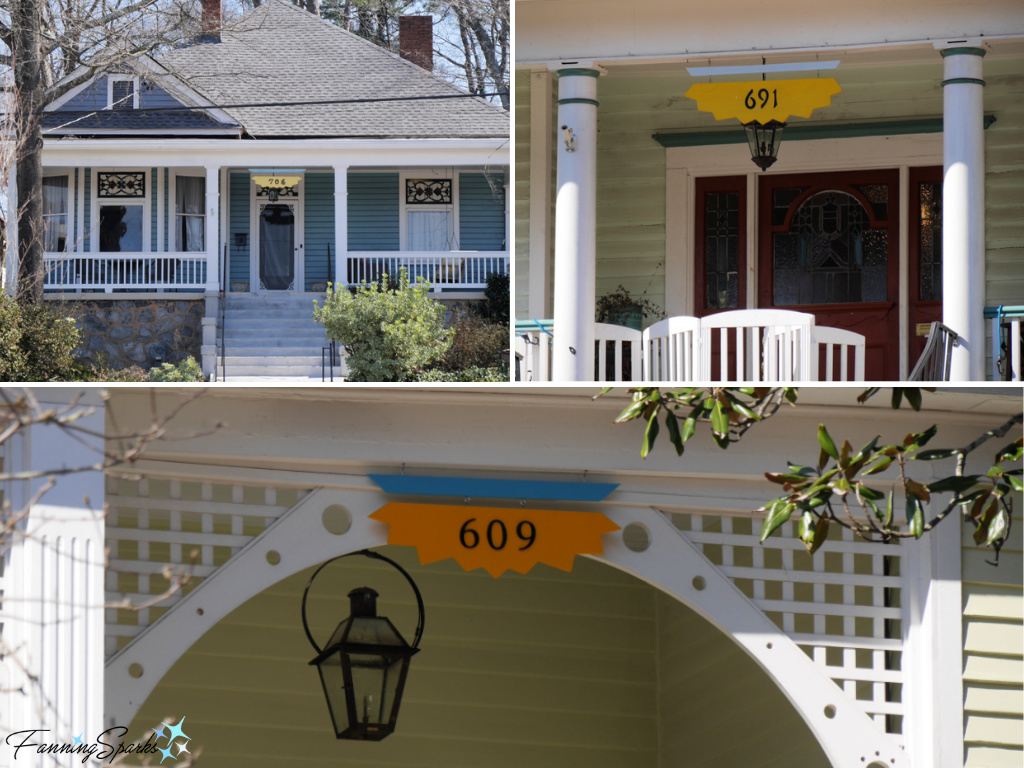
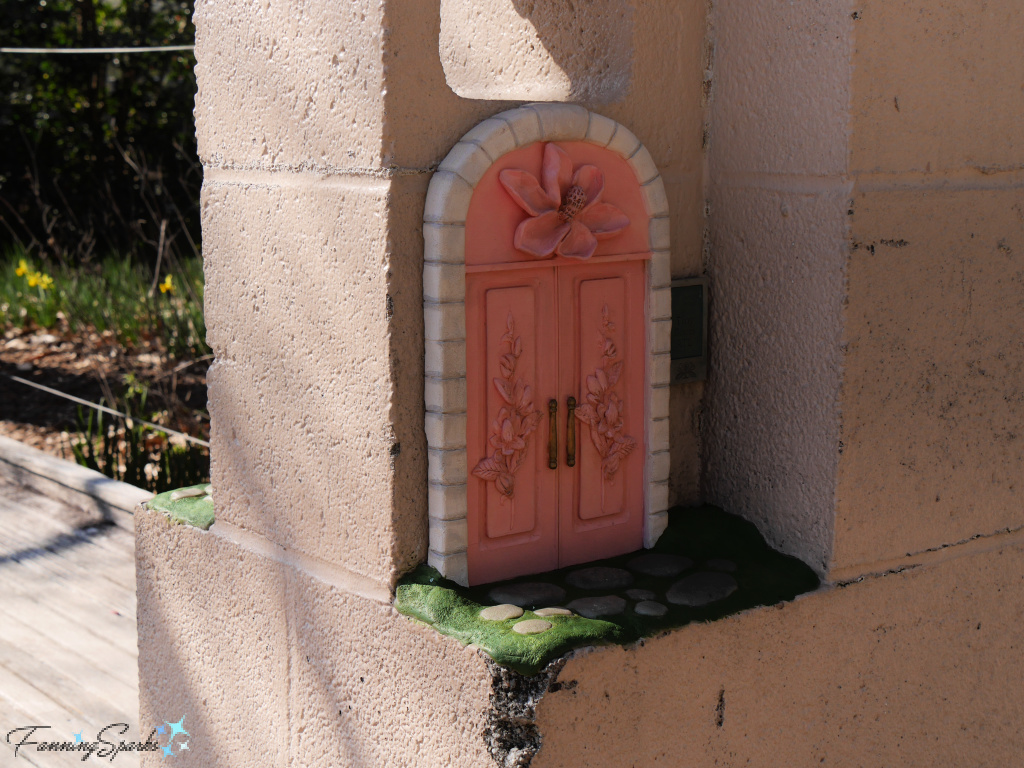
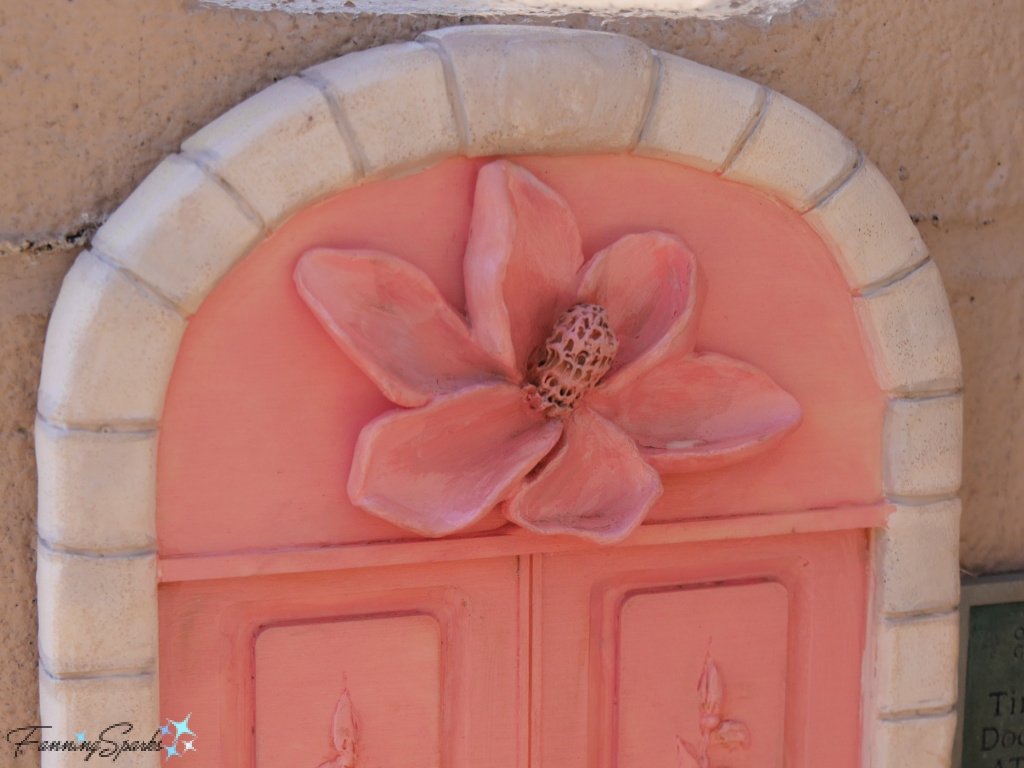
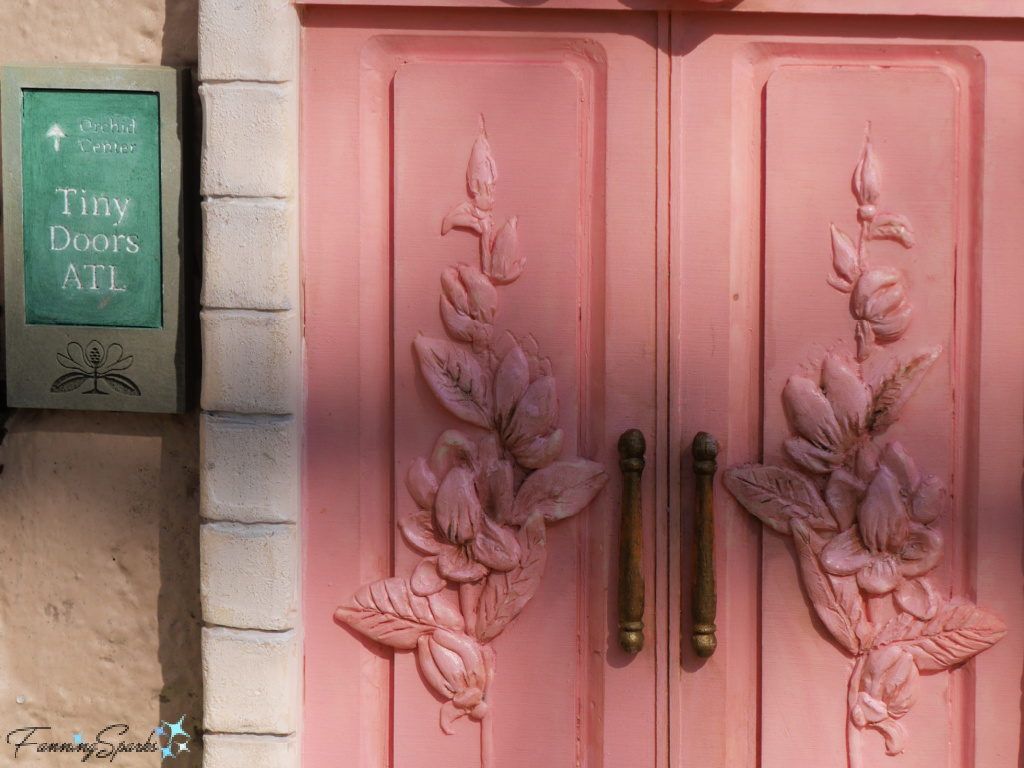
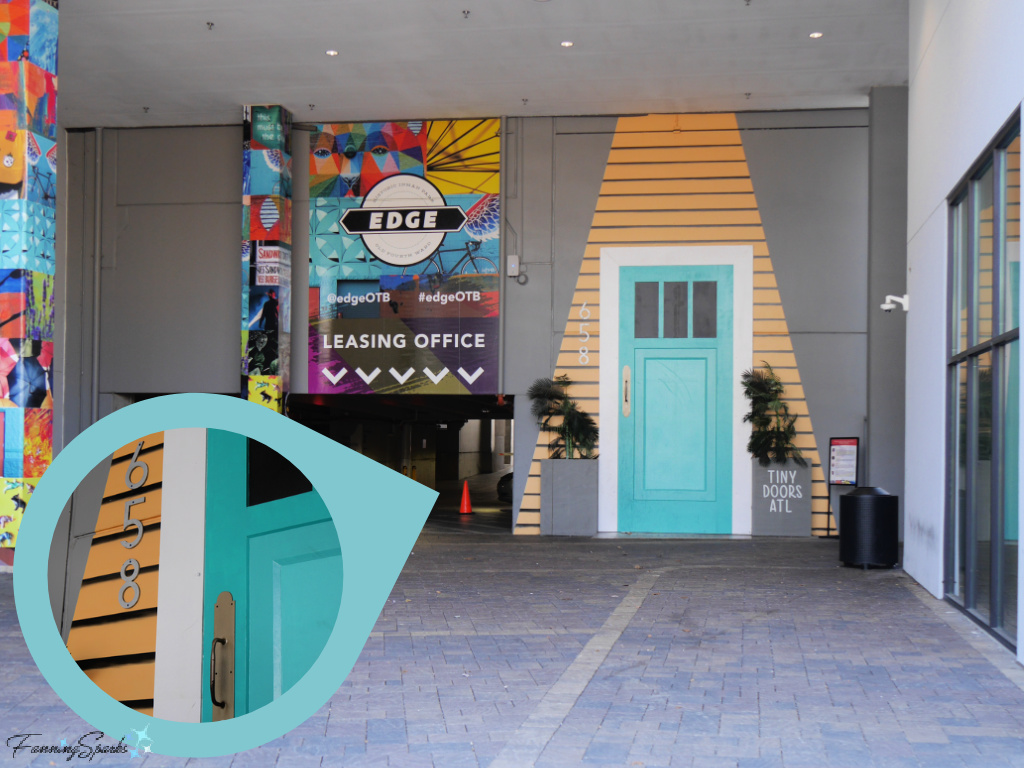
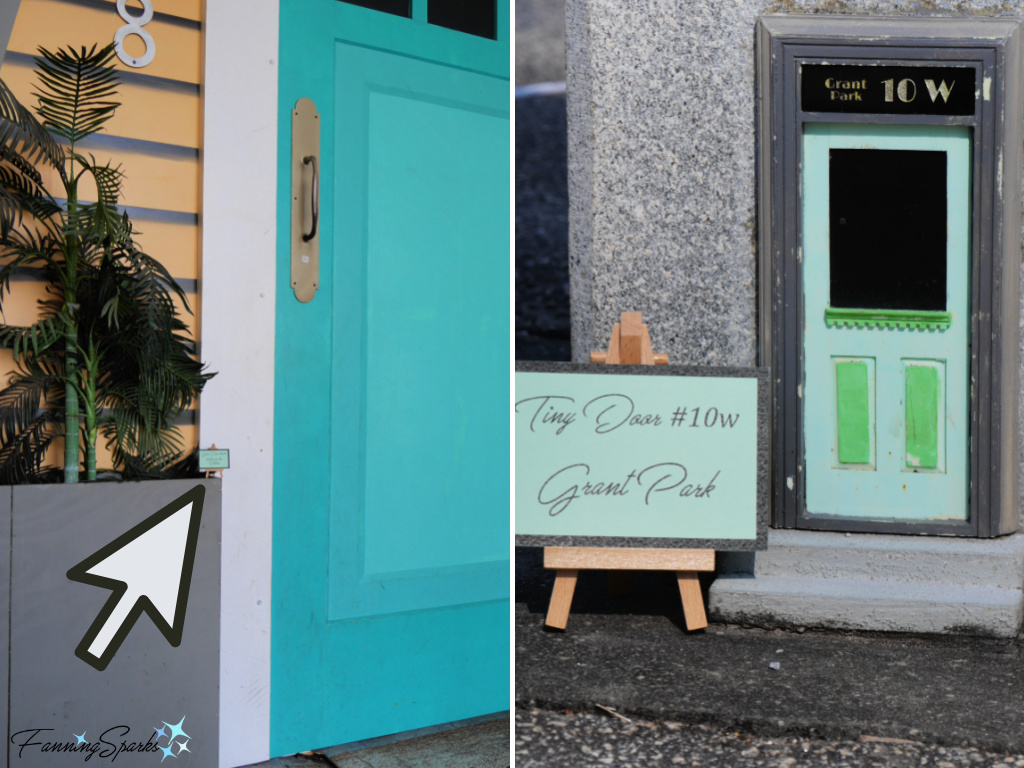
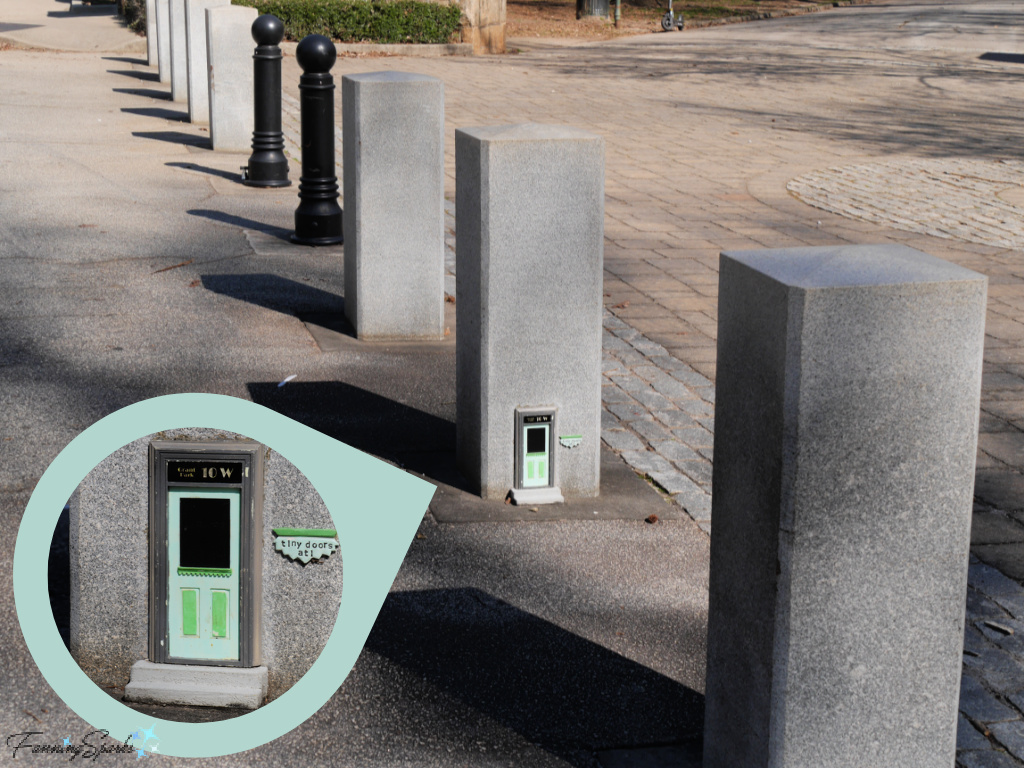
The Tiny Door’s Craftsman style architectural details, including the transom, dentil molding, and muted colors, are consistent with the houses in Grant Park.  The sunburst-shaped house number sign is a charming, distinctive feature of this neighborhood.
Grant Park Neighborhood Characteristics  @FanningSparks
Tiny Doors ATL strives to design doors that “reflect the spirit, architecture, and other unique elements of the surrounding community.”   Tiny Door #10W in Grant Park certainly accomplished this goal!
Tiny Doors Atlanta Grant Park #10W with Vintage Roller Skates  @FanningSparks
The second door in Grant Park, Tiny Door #10E, was the most difficult to find.  It is located, at ground level, in a tree along the Grant Park Trail near Fort Walker.  It is on the right side of the trail when walking up the hill.  It’s easy to miss, though, because it’s hidden behind the tree’s roots and only visible when looking back down the hill.
Tiny Door #10E - Grant Park Tree - Surroundings  @FanningSparks
Tiny Door #10E – Grant Park Tree is the only door that opens but, when I visited, the actual door was missing.  Perhaps that’s why someone posted a park ranger in the doorway!  This is a great example of the interactivity Tiny Doors ATL encourages with its art.
Tiny Door #10E - Grant Park Tree with Park Ranger  @FanningSparks
Tiny Doors ATL explains that all the other Tiny Doors are deliberately left closed to encourage a sense of wonder.  A visitor is invited to imagine for themselves what might be behind a Tiny Door.  They deliberately avoid using labels like “fairy, pixie, sprite, gnome, or troll” for the same reason.
The Tiny Doors in Grant Park were requested by the neighborhood’s residents.  Organizations, such as the Atlanta Symphony Orchestra, have also requested Tiny Doors.  Tiny Door #18 is located, to the left of the main entrance of Symphony Hall, at the Woodruff Arts Center at 1280 Peachtree St NE.
Tiny Door #18 - Atlanta Symphony Orchestra Surroundings  @FanningSparks
The piano key-inspired mural makes a striking background for this Tiny Door.  Tiny Doors ATL notes “The door is also higher than most, so that it’s easy to reach for folks in fancy symphony outfits and wheelchair accessible.”
Tiny Door #18 - Atlanta Symphony Orchestra  @FanningSparks
The newest Tiny Door was installed in December 2021 at the Atlanta Botanical Garden.  It is located at waist-level in the vine arbor, on the right side of the Great Lawn, as you walk towards the Dorothy Chapman Fuqua Conservatory.
Tiny Door Atlanta Botanical Garden - Surroundings  @FanningSparks
This is the only Tiny Door that is two-sided; the front and back are identical.
Tiny Door Atlanta Botanical Garden - Two-Sided Door  @FanningSparks
Tiny Doors ATL notes “The hand sculpting on this tiny door makes it one of the most intricate so far.”  The details on this Tiny Door are indeed amazing—a large magnolia blossom graces the arch above the door…
Tiny Door Atlanta Botanical Garden - Closeup of Magnolia Blossom  @FanningSparks
… floral bouquets adorn the door panels, door pulls add style and the tiny sign even follows the Garden’s branding.
Tiny Door Atlanta Botanical Garden - Closeup of Door Panel Carving  @FanningSparks
This was the only Tiny Door I viewed which isn’t numbered.  Tiny Doors ATL follows a specific naming convention—only doors that are free to visit and accessible to people of all ages are assigned a number.  Doors such as this one at the Atlanta Botanical Garden are assigned only descriptive names.  Other examples include the Aquarium Door at the Georgia Aquarium and the Swan House Door at the Atlanta History Center.  Tiny Doors ATL maintains a listing and map of all the Tiny Doors on their website.
I visited one more Tiny Door—although it wasn’t tiny!  Door #658 is known as the Giant Door.   It can be found at an apartment and condo complex called “EDGE on the Beltline” which is located at 670 DeKalb Ave NE.
Giant Door #658 - EDGE on the Beltline - Surroundings  #FanningSparks
Door #658 is 658 times the size of the other Tiny Doors.  Here’s a side-by-side comparison using my 3”x 4” signs for reference.
Comparison of Giant Door to Tiny Door  @FanningSparks
Looking back, I’m struck by the variety of the six Tiny Doors I visited.  Each one is a delightful reflection of its surroundings resulting in the perfect sampling of Atlanta neighborhoods.
Variety of Tiny Doors Atlanta  @FanningSparks

More Info

Tiny Doors ATL has installed Tiny Doors throughout the city of Atlanta, Georgia, USA.  To learn more, check out the Tiny Doors ATL website and Instagram account.   These are the best sources for up-to-date information.
I hope the directional tips and photos in today’s post are helpful.  The information is current as of February 2022.
If you’re interested in miniatures, you may also like the FanningSparks’ post, Miniature Garden in a Closed Terrarium – DIY Tutorial.

Today’s Takeaways

1. Consider visiting Tiny Doors ATL art installations in Atlanta Georgia.
2. Tiny Doors ATL invites viewers to interact with its installations physically and virtually.
3. Each Tiny Doors ATL installation reflects its surroundings and connects with its sponsoring community.
Peg - FanningSparks Author

Anyone who has ever been caught up in the fun of collecting knows that sharing the collection with others is one of its greatest rewards.  It’s obvious Allen Woodall feels this way about his massive lunch box collection.  Woodall established the Lunch Box Museum in Columbus Georgia where he shares his collection with the world.  He also shares the knowledge he’s gained in the book, The Illustrated Encyclopedia of Metal Lunch Boxes, which he co-authored with Sean Brickell.  I had the pleasure of visiting the Lunch Box Museum recently.  It’s a down-to-earth place tucked away in a delightfully overstuffed antiques shop called The River Market Antiques.
To be honest, it’s a little overwhelming at first!  There are rows and rows of vibrantly colored lunch boxes—all clamoring for attention.  But it doesn’t take long to spot familiar characters, TV shows, cartoons and bands from the past.
Popeye The Sailor Lunch Box  @FanningSparks
The Magic of Lassie Lunch Box  @FanningSparks
Wandering through the aisles, it becomes apparent that the most noteworthy lunch boxes are displayed in glass cases with small labels.
Glass Display Cases at the Lunch Box Museum  @FanningSparks
For instance, here’s a 1969 lunch kit (ie a lunch box with a matching thermos) featuring one of my old favorites The Archies.
The Archies 1969 Lunch Box  @FanningSparks
Other than carrying one to school for many years I didn’t know much about lunch boxes before my visit.  I’ve learned lunch boxes have a rather interesting story to tell.  According to the Smithsonian’s National Museum of American History, “Parents 100 years ago often gave their schoolchildren an empty tobacco or coffee tin to carry some fresh-picked strawberries and bread, a wedge of cheese, and possibly a handful of shelled hickory nuts. Other children carried a fancy store-bought lunch pail, a paper sack, or no lunch at all.”
Those “fancy store-bought lunch pails” took on a life of their own in 1935 when the below Mickey Mouse lunch box was introduced. It was the first lunch box decorated with a famous licensed character.  Experts report this lunch box sold for about 15 cents back in 1935.  Today, they are quite rare and are estimated to be worth about $2,350 USD.
Mickey Mouse 1935 Lunch Kit  @FanningSparks
But the rarest and, I assume, one of the most valuable items in Woodall’s collection is the Toppie lunch box.  Toppie, short for “Top Value Elephant”, was used by Kroger grocery stores to promote their Top Value Stamp program.  Customers could collect stamps in Kroger’s stamp books to earn merchandise such as alarm clocks, toy cash registers and the below 1957 lunch kit.  Nowadays, lunch box collectors estimate that only a dozen Toppie lunch boxes still exist.  Reportedly, one sold on eBay a few years ago for $6,287.50 USD.  A lunch box with a matching thermos is even more rare and valuable.
Toppie Top Value Stamp Program  @FanningSparks
Illustrated metal lunch boxes, such as the Toppie lunch box, had their heyday between 1950 and 1980.  Over 450 decorated models were created during this time period and the Lunch Box Museum is reported to have them all in its 2,000+ piece collection.  Woodall also has a number of duplicates which he sells at the museum.  I didn’t notice any with a six thousand dollar price tag but I did find a few surprises.  Check out this Space Shuttle lunch box with a cool $115 USD price tag.
Space Shuttle Lunch Box with Price Tag  @FanningSparks
In amongst all the flashy, brightly-illustrated lunch boxes, the Lunch Box Museum includes a few old classics like this 1960s workman’s lunch box.
Silver Dome 1960s Lunch Box  @FanningSparks
Here’s one for my Canadian readers, a well-used coal miner lunch kit from the 1940’s.
Coal Miners 1940s Lunch Kit  @FanningSparks
One of the most interesting stories I’ve learned about lunch boxes concerns a fierce competition between two rival manufacturers—Aladdin Industries from Nashville, Tennessee and American Thermos from Norwich, Connecticut (called King Steely Thermos (KST) after 1959).
As the story goes, in early 1949 Aladdin Industries was struggling financially and company executive were actively looking for ways to increase sales.  Metal lunch boxes were durable and lasted for years so demand was limited.  Then someone came up with the idea of putting decals on their plain red and blue lunch boxes.  The idea evolved to using a TV character and with astonishing speed they closed a deal to feature Hopalong Cassidy on their lunch kits.  Hopalong Cassidy was a fictional cowboy hero who starred in a series of books, movies and television shows.  The Hoppy (as the Hopalong Cassidy lunch kit became known) was a huge success.  Sales jumped from 50,000 units per year to 600,000 Hoppys in the first year.  This led to the realization “that if you could develop kits with favorite TV characters, you’d create a bonanza!  Overnight, the mundane, boring lunch box trade became Big Business.”
Hopalong Cassidy 1950 Lunch Box  @FanningSparks

But the story gets better; Roy Rogers, the famous singing cowboy whose 1952 box office ranking placed him as the most popular Western star for 10 consecutive years, was reported to be jealous of his TV rival’s success and wanted his own lunch box.  When he approached Aladdin Industries with the idea, however, he was reportedly told “One cowboy is enough”.  So he approached the American Thermos company.  Apparently, it took some effort to convince American Thermos that character lunch boxes were not merely a fad.  But after his third try, Roy Rogers closed a deal with American Thermos.  The resulting Roy Rogers and Dale Evans lunch box was released in 1953 to an unprecedented success—over 2.5 million lunch kits were sold in the first year.
It’s worth noting that the Roy Rogers lunch box design was a step up from the Hoppy.  It capitalized on the lunch box’s likeness to a television set and featured full-picture lithographed steel.
Roy Rogers and Dale Evans 1953 Lunch Box  @FanningSparks
Here are a few more lunch boxes that caught my eye at the Lunch Box Museum.  According to the experts, this 1954 Superman lunch box, in mint condition, could fetch as much as $13,000 USD.
Superman 1954 Lunch Box  @FanningSparks
Atom Ant 1966 Lunch Kit  @FanningSparks
Flipper 1967 Lunch Box  @FanningSparks
Many lunch boxes, such as the Zorro lunch box pictured below, carry the mark of their previous owners.  Keen collectors prefer lunch boxes without scratches, dents, rust or markings.  But, interestingly, Woodall reports that years ago when he sold The Smithsonian about 20 lunch boxes and thermoses, “They wanted the ones with wear and tear … If a kid had actually scratched their name on the box, it made it even more valuable.”
Zorro 1958 Lunch Box  @FanningSparks
Here’s another example of proud ownership.  I doubt young Della Abell took future collectors into consideration when she carefully wrote her name on her 1972 Miss America lunch box.
Miss America Lunch Box with Owners Name  @FanningSparks
All good things must, of course, come to an end.  And the metal lunch box craze was no exception to the rule.  The story of how metal lunch boxes fell out of favor is as interesting as how it began.  Numerous online sources report that in the early 1980s there was a growing concern about the safety of these containers.  Students were reportedly using metal lunch boxes as weapons and, as a result, a group of mothers in Florida lobbied successfully to have them banned.  Other states followed suit and the heyday of metal lunch boxes came to a screeching halt.  But the plot thickens!
A 2021 NPR (National Public Radio) article, Were Metal Lunch Boxes Really Banned?, debunks the story, declaring “it seems to be only an urban myth: NPR’s investigation found no laws on Florida’s books banning metal lunch boxes in schools.”   The article goes on to explain “So what brought about the end of kitschy metal lunch boxes? … the late ’70s saw the first plastic and vinyl lunch boxes, which were cheaper for companies to produce than metal boxes. Soft and flexible plastic lunch boxes were easier to squash into overloaded school backpacks. And so we said goodbye to the metal lunch box.”

More Info

See the Lunch Box Museum website for more information about this entertaining attraction located at The River Market Antiques in Columbus, Georgia, USA.  You may want to give yourself time to browse around the antique shop—not only is it stuffed with interesting vintage objects but if you make a purchase your admission fee to the museum may be waived.
Numerous online articles and blog posts feature or reference the Lunch Box Museum including:
. Roadside America: Lunch Box Museum
. Atlas Obscura: Lunch Box Museum
. History.com: Nine of the Most Collectible School Lunch Boxes, 1935 to Now
. NPR: Beyond The Pail: NPR Unpacks The History Of The Lunch Box
For a deep dive into the world of metal lunch boxes, you may want to check out the book The Illustrated Encyclopedia of Metal Lunch Boxes written by Allen Woodall (curator of the Lunch Box Museum) and Sean Brickell.  It is available from a number of online sites.
This is the link to the NPR article: Were Metal Lunch Boxes Really Banned?
If you like quirky attractions, you might also enjoy the FanningSparks’ blog post Counting Buttons Instead of Sheep about the Button King Museum in Bishopville, South Carolina.
If you’re interested in collecting, check out the blog post Decorating With Collections.

Today’s Takeaways

1. Sharing your carefully-curated collection with others is one of the greatest rewards of collecting.
2. Quirky, specialty museums can be entertaining and informative.
3. Consider taking a nostalgic trip down memory lane at the Lunch Box Museum in Columbus, Georgia.
Peg - FanningSparks Author

A recent ExploreGeorgia.org article promised: “Providence Canyon State Park offers a fascinating look at the nature that makes west Georgia unique, and winter is the perfect time to see it all.  In the absence of hardwood foliage and vegetation, visitors experience a landscape like nowhere else in the state”  I’ve wanted to visit Providence Canyon for some time and this was just the incentive I needed to make it happen.
Exploring Providence Canyon was the perfect way to spend a gorgeous winter day in Georgia.  The sun was shining, the temperature hit a balmy 67⁰F, and the scenic views were stunning!
Providence Canyon View from Rim  @FanningSparks
Providence Canyon is a Georgia State Park covering 1,108 acres and a series of 16 canyons.  Overall, Providence Canyon is 300 feet wide and 150 feet deep.  Interestingly, the canyon continues to grow because 3-5 feet of canyon wall is lost every year due to rainwater and erosion.
Visitors can hike down into the canyons to explore the canyon floor.  One of the first things a hiker will notice is the washout and the gullies crossing the hiking trail down to the canyon floor.  This soil erosion is a good indication of what’s to come.
Providence Canyon - Trail to Canyon Floor  @FanningSparks
At the bottom of the canyon, much of the trail follows the sandy, wet bottom of Turner Creek.  A variety of trees, including sweet gum, umbrella magnolia, tulip poplar, sycamore, maples and blackjack oaks, grow along the canyon floor.
Providence Canyon - Trail Along Canyon Floor  @FanningSparks
The canyon floors are peaceful and, except for the singing of birds, remarkably quiet.  The sandy path was covered in the footprints of other visitors—both human and wildlife.  White-tailed deer, red and grey foxes, raccoons, armadillos, birds, frogs and snakes are reported to live in the canyons.  I believe the animal tracks, pictured below in the vibrantly-colored sand, were left by raccoons.
Providence Canyon - Raccoon Tracks Along Canyon Floor Trail  @FanningSparks
Wayfinding signs direct hikers to the nine canyons accessible from the trail.  Signs also instruct visitors to stay off the canyon walls—no climbing is allowed.
Providence Canyon - No Climbing Warning Sign  @FanningSparks
As soon as the canyon walls come into sight, it’s obvious why these warnings are necessary—all the narrow openings, rounded boulders and layered rock faces tempt visitors to explore further.
Providence Canyon - Canyon Walls in Canyon 2  @FanningSparks
But it is enough to just look at the canyon walls.  The Park’s brochure explains “Some 43 shades in soil can be seen, and the splendor of the colors – ranging from light orange, salmon, red and scarlet to white, purples and pink – is a sight worth seeing.”  The various colors are attributed to different mineral deposits—oranges and reds from iron; purples and pinks from manganese, yellows and tans from limonite, and whites from kaolin.  The remarkable forms, rainbow colors and striped patterns on the colorful sedimentary walls are strikingly beautiful.
Providence Canyon - A Rainbow of Mineral Deposits  @FanningSparksProvidence Canyon - White and Purple Stripes on Canyon Walls  @FanningSparks
Providence Canyon - Orange and White Stripes on Canyon Walls  @FanningSparks
All along the canyon walls there is evidence of deterioration and washout.
Providence Canyon - Gullies and Crevices on the Canyon Walls  @FanningSparks
Looking up, there are areas where the trees grow up to the edge of the canyon rim.
Providence Canyon - Trees Along Canyon Rim  @FanningSparks
Some trees appear to be making a valiant effort to cling to the canyon walls…
Providence Canyon - Single Tree Clings to Cliff  @FanningSparks
… but most appear to lose the battle for survival.
Providence Canyon - Washout Under Tree Roots  @FanningSparks
In addition to exploring the canyon floor, visitors can hike the Park’s two trails—the Canyon Loop Trail (white blaze) and the Backcountry Trail (red blaze).  I chose the Canyon Loop Trail which circles 9 of the canyons and is 2.45 miles long. The trail climbs up out of the canyon, loops out around the canyon fingers and then follows the rim.  The views from the canyon rim are spectacular.
Providence Canyon - Red Ridge Viewed from Canyon Rim  @FanningSparks
The geologic formations which form the canyon are obvious from this vantage point.  Three major layers, originating from 59 to 80 million years ago, can be seen.  The top layer, called the Clayton Formation, is comprised of reddish clay sand.
Providence Canyon - View of Canyon Wall Through Trees  @FanningSparks
The middle layer, called the Providence Formation, is primarily yellow, purple, orange and white. The bottom layer, called the Ripley Formation, was once the ocean floor and is comprised of grayish clay.
Providence Canyon - White Pinnacle Viewed from Canyon Rim  @FanningSparks
Providence Canyon - View from Canyon Rim with White Cliffs on Right  @FanningSparks
A wooden fence traces the top edge of the canyon walls.  Visitors are continually reminded of the danger and warned not to climb on the fences or over the fence line.
Providence Canyon - Danger Warning Sign on Fence  @FanningSparks
Upon closer inspection, the fence line itself is a very real indicator of the canyon’s continual erosion.  There are numerous spots where an old stretch of fence has obviously been rerouted and replaced by a new section.
Providence Canyon - Abandoned Section of Fence on Canyon Rim  @FanningSparks
Check out the fence railing (entering and exiting from the left side of this photo) along the top of this precarious-looking cliff.  I chose to bypass that section!
Providence Canyon - Fence Along Cliff  @FanningSparks
It’s obvious the State Park’s warning that “canyon edges may collapse” is serious business.  In fact, back in 1994, a section of the Park Road that leads from the Park entrance to the Interpretative Center had to be rebuilt to safely avoid the damage of erosive forces.
Informational signs explain “The canyons grow in two ways; through surface water erosion and through undercutting and slumping by the force of underground water.  The heads of the canyons and the walls can be quickly eroded by the force of water from heavy and even light rainfall washing away the surface.  Dramatic changes come when water causes tons of earth to slump off the walls by undercutting.”  Evidence of undercutting is clearly visible along sections of the canyon rim.
Providence Canyon - Evidence of Undercutting  @FanningSparks
The forces of nature continually expand Providence Canyon but it hasn’t always been that way.  Up until the early 1800’s, an untouched forest of dense pine and hardwoods covered the area.  The land was relatively stable with a steeply sloped, undulating surface.  Early settlers moved to the area in the 1820’s.  They cleared the land and tilled the soil to begin cotton farming.  At the time, it was common practice to plow a slope from top to bottom as opposed to following the contours of the land and plowing from side to side.  Unfortunately, the lack of vegetation along with the top-to-bottom furrows severely altered how heavy rains affected the land.  Surface water gushed down the slopes and gullies began to form in the sandy soils.  In less than 25 years, the gullies were over five feet deep.  Today, the canyon is over 150 feet deep and 300 feet wide.  It’s a sobering reminder of the negative effects man’s actions can have on the natural world.
Despite the canyon’s origin, it’s impossible not to marvel at the beauty that is visible today.  It’s also amazing that a visitor can explore the canyon floor and then an hour or two later look back down on that same spot from high above on the canyon rim.  This photo taken from the canyon rim looks down onto the floor of Canyon 4.
Providence Canyon - Looking Down at Floor of Canyon 4  @FanningSparks

More Info

See the ExploreGeorgia.org article, Providence Canyon: A Must-See in Winter, which caught my eye and convinced me to visit this month.
Check out the Providence Canyon State Park website to learn more about this great park located in southwest Georgia, USA.  The Park is a popular destination especially since the pandemic struck.  There were only a dozen or so other people when I visited on a weekday in early February 2022.  However, a WRBL.com news article from early 2021 warns: “On the weekends the park is averaging between 400-500 visitors. Only 250 visitors are allowed to go onto the trails at a time. Due to the high volume of visitors on the weekend, the park routinely runs out of parking spaces for visitors.”  I don’t know if this is still the case but it would be worth checking with the Park before making the trip.
For a detailed analysis of the erosion of unconsolidated sediments at Providence Canyon State Park, see the article Providence Canyon, Stewart County, Georgia – Evidence of Recent Rapid Erosion by Emmett L. Williams in the June 1995 issue of Creation Research Society Quarterly Vol. 32 No. 1.
You may also enjoy these FanningSparks’ posts:
. Solid as a Rock explores the geoheritage of Nova Scotia, Canada.
. We Dined on the Ocean Floor in which I share my visit to Burntcoat Head on the Bay of Fundy which boasts the world’s highest tides.
. First Light at Peggy’s Cove celebrates daybreak on the rugged coastline near the iconic lighthouse in Peggy’s Cove, Nova Scotia.

Today’s Takeaways

1. Make time to appreciate the beauty in your own backyard.
2. Consider visiting popular destinations in the off-season.
3. Experience nature with a leisurely walk.
Peg - FanningSparks Author