Tulips are one of the best known symbols of the Netherlands. I’ve just returned from two wonderful weeks visiting this charming country, so it seems appropriate to focus on this much-loved flower in today’s blog post. My sister Marian and I timed our trip with the spring flower season hoping to see the tulips in bloom. The timing was perfect, although that was more a matter of luck than good planning—turns out, the tulips are blooming early this year. According to one local expert, they’re about 10 days ahead of their normal blooming time. Hurray! Our trip was packed with all things tulip—and so is this blog post.
We started our tulip extravaganza in Noorwijkerhout in the midst of the Bollenstreek (Bulb Region) in the province of South Holland. I mentioned this beautiful area in my previous post, A Virtual Visit to Lisse, in which I shared a visit to Lisse and the Keukenhof. The Bollenstreek was developed at the end of the 16th century and into the 17th century. The area is particularly well suited to the cultivation of flower bulbs due to its sandy soil and ideal climate.
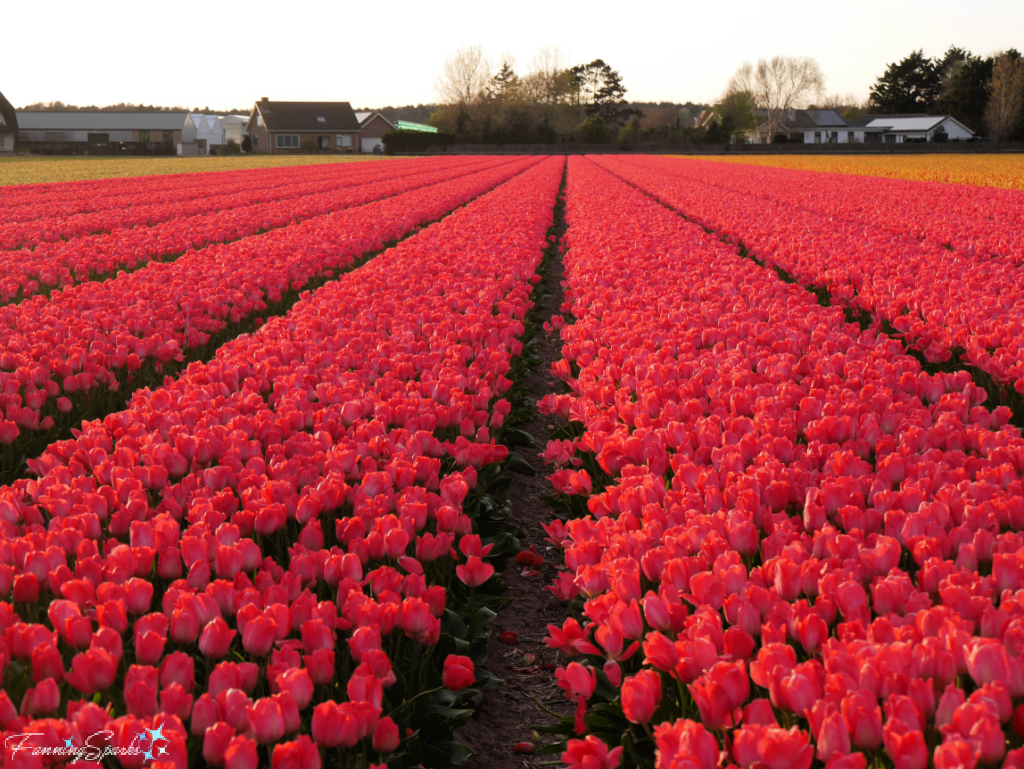
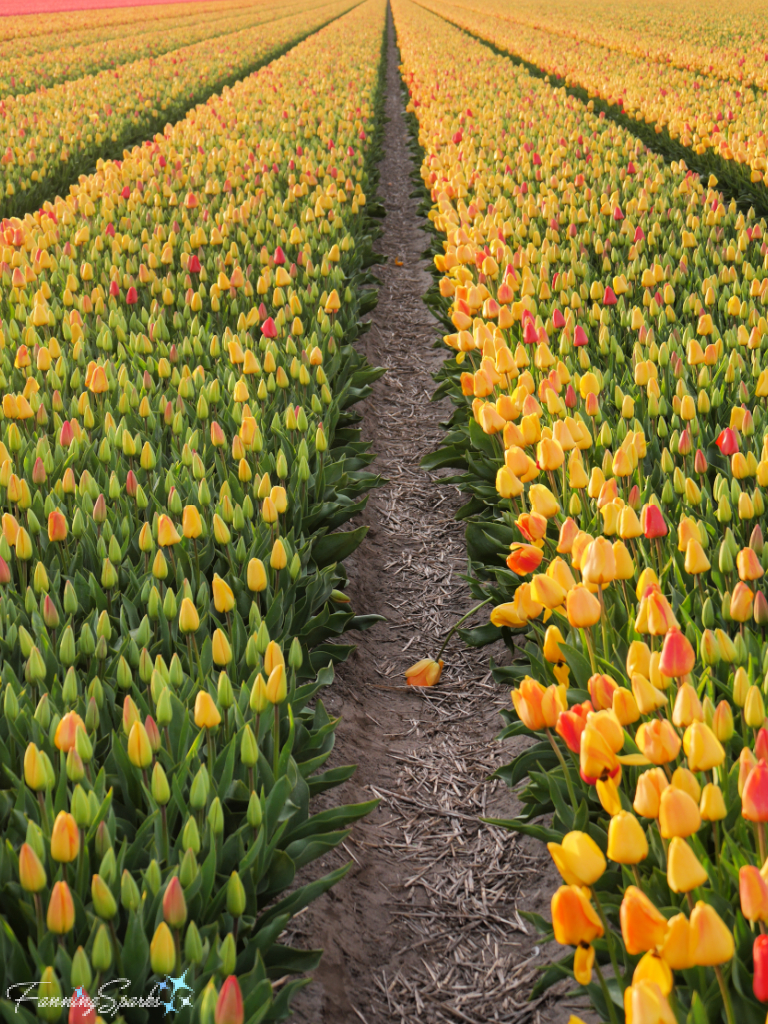
We were thrilled to discover a field of gorgeous tulips directly across the street from our hotel in Noorwijkerhout. The rows of red tulips were particularly beautiful in the soft evening light.

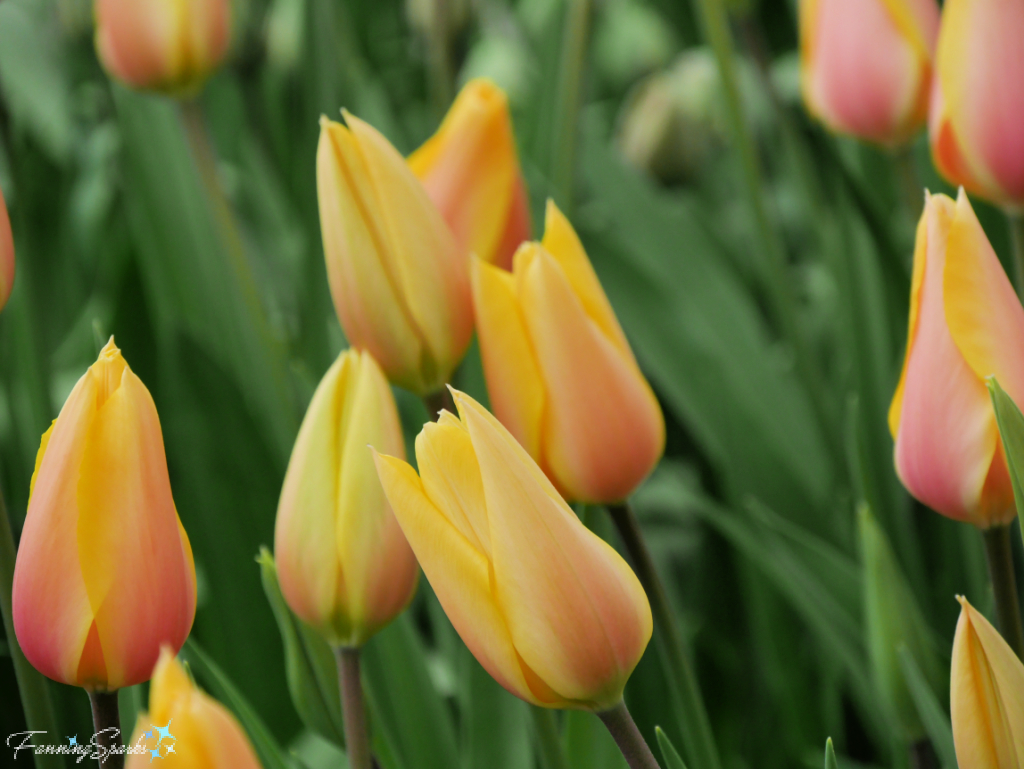
Nearby rows of yellow tulips were equally entrancing.
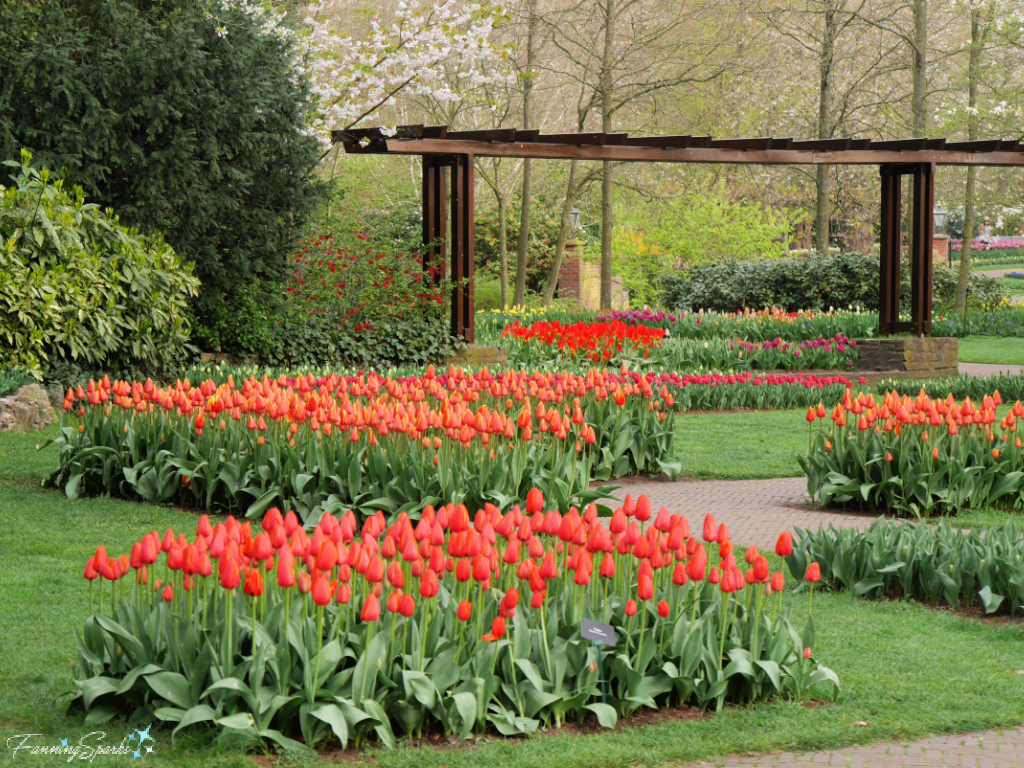
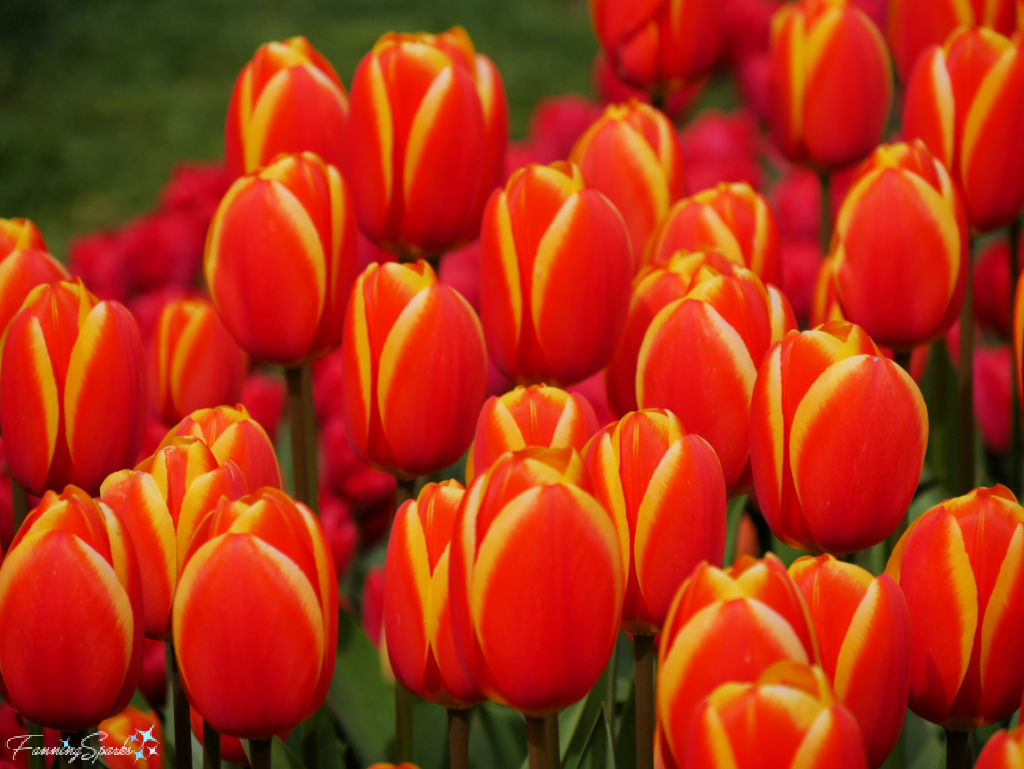
A highlight of our trip was a visit to Keukenhof, the world-famous spring garden showcasing Dutch flower bulbs, located in Lisse. The gardens were in full swing again this year after a 2-year hiatus due to the pandemic. They were stunning! Here are a few of my favorite shots of tulips.

The Keukenhof features the very best spring flowering bulbs from 100 flower bulb companies and growers. It provides a great opportunity to learn more about the various types of tulips. From a horticultural perspective, tulips are divided into 15 groups (divisions) based on their form, structure, size and blooming time. I created the below collage to illustrate 10 of these classifications with some of the tulips we saw.
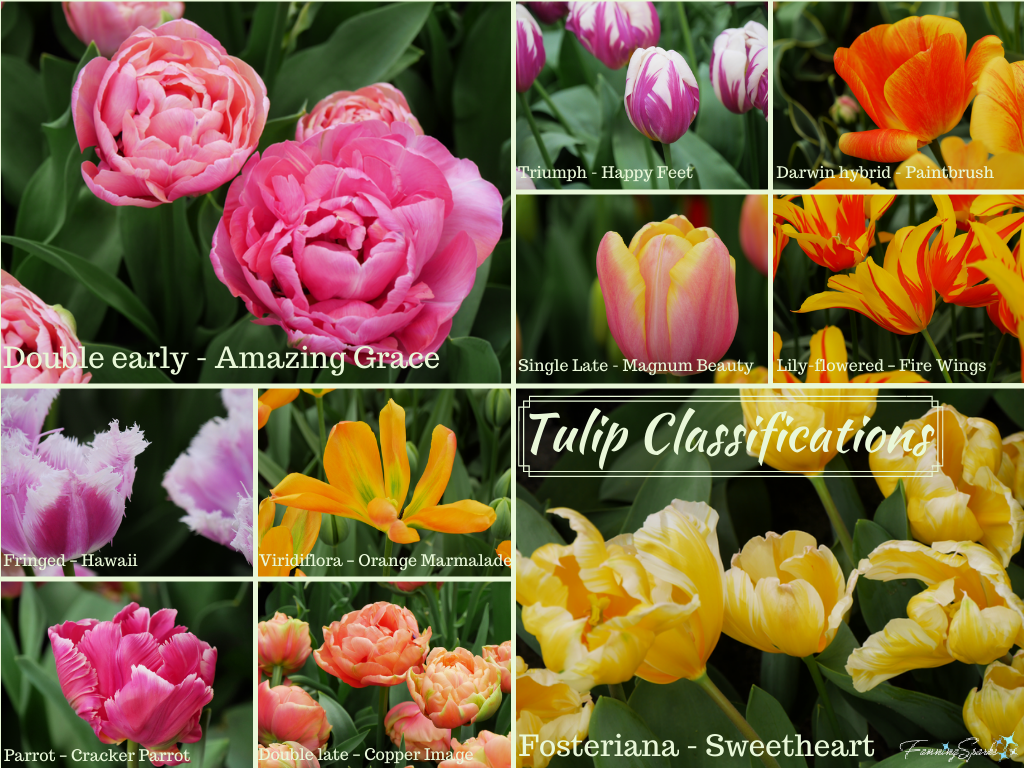
The complete list of classifications includes: 1 Single Early, 2 Double Early, 3 Triumph, 4 Darwin Hybrids, 5 Single Late, 6 Lily-flowered, 7 Fringed, 8 Viridiflora, 9 Rembrandt, 10 Parrot, 11 Double Late, 12 Kaufmanniana, 13 Fosteriana, 14 Greigii and 15 Species. These classifications are managed by the Royal General Bulb Growers’ Association (KAVB) which also gathers and registers all cultivars for the flower bulb industry.
It isn’t easy to discern all the differences between the various classifications but some of the characteristics are easy to identify. For instance, the difference between a single bloom, like this Single late called Blushing Beauty,…
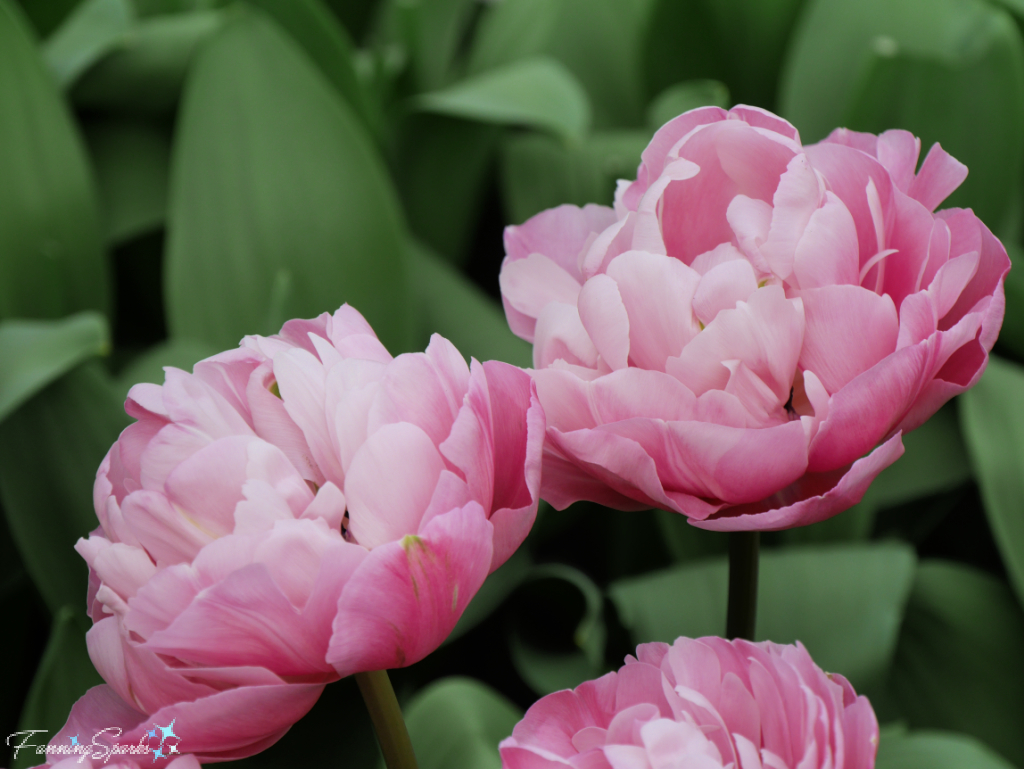
… and a double bloom, like this full, peony-like Double called 60-SW-05-1, is easy to spot.
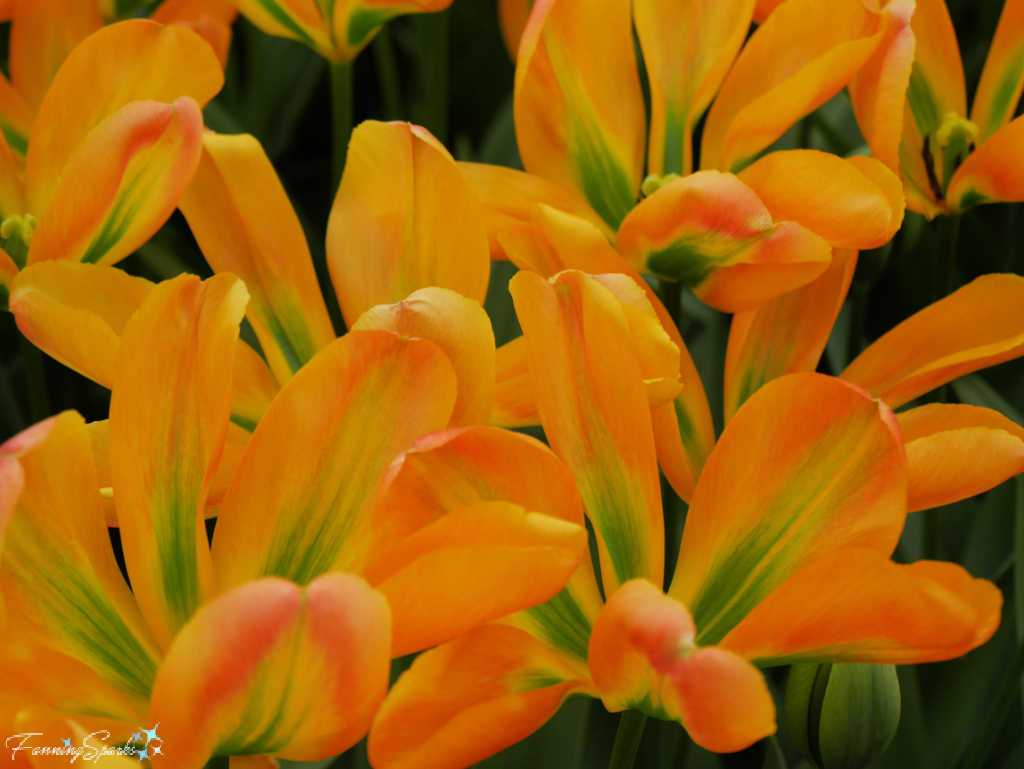
Other characteristics which are easy to spot are the green stripe, often referred to as a “flame”, which shows on the back of the petals of a Viridiflora tulip. The stripe is quite visible on the Orange Marmalade tulip shown below.
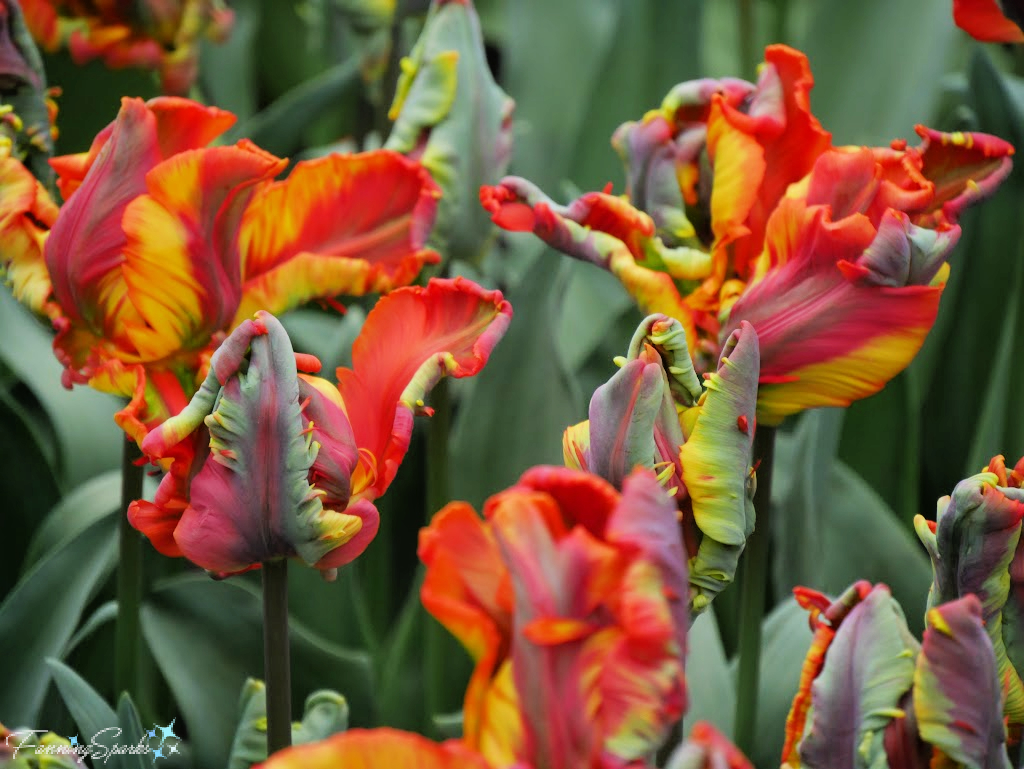
The unusual twisted petals of Parrot tulips are quite distinctive. In combination with the vivid colors of the Rasta Parrot shown below, these blooms do indeed bring to mind a parrot’s plumage.
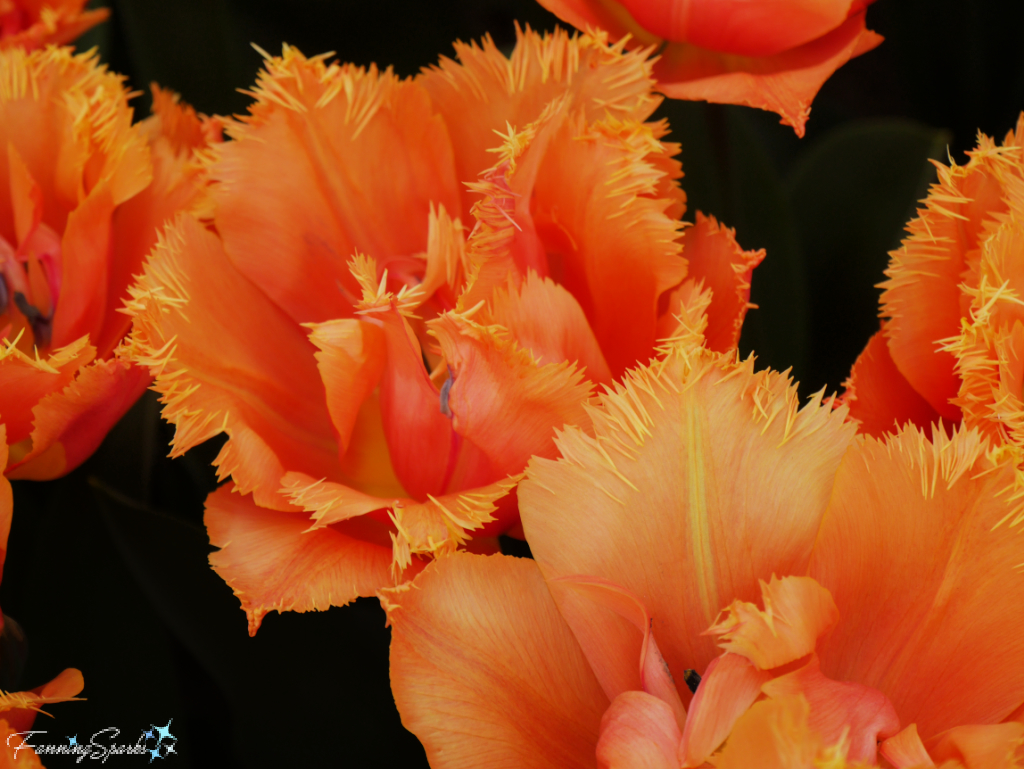
Fringed tulips have petals with spiked or fringed edges like those shown below on the Orange Passion tulip. The showy petals don’t look real but a quick touch verifies they are.
According to Liz Dobbs, author of the book Tulip, the Rembrandt tulip classification was used to identify “the blooms painted by the Dutch Old Masters (though not particularly by Rembrandt). The petals are streaked with colors caused by a virus.” Exhibits at Keukenhof confirm that, “In early years, the flamed or striped tulips were favoured as the most beautiful. The flamed tulip originated because of a virus which is carried by aphids from the one plant to another, so these popular tulips were actually diseased. Today the tulip grower does everything in order to keep the tulips healthy, and free of viruses. The flamed and striped tulips which still exist are virus free because of today’s improved cultivation methods.”
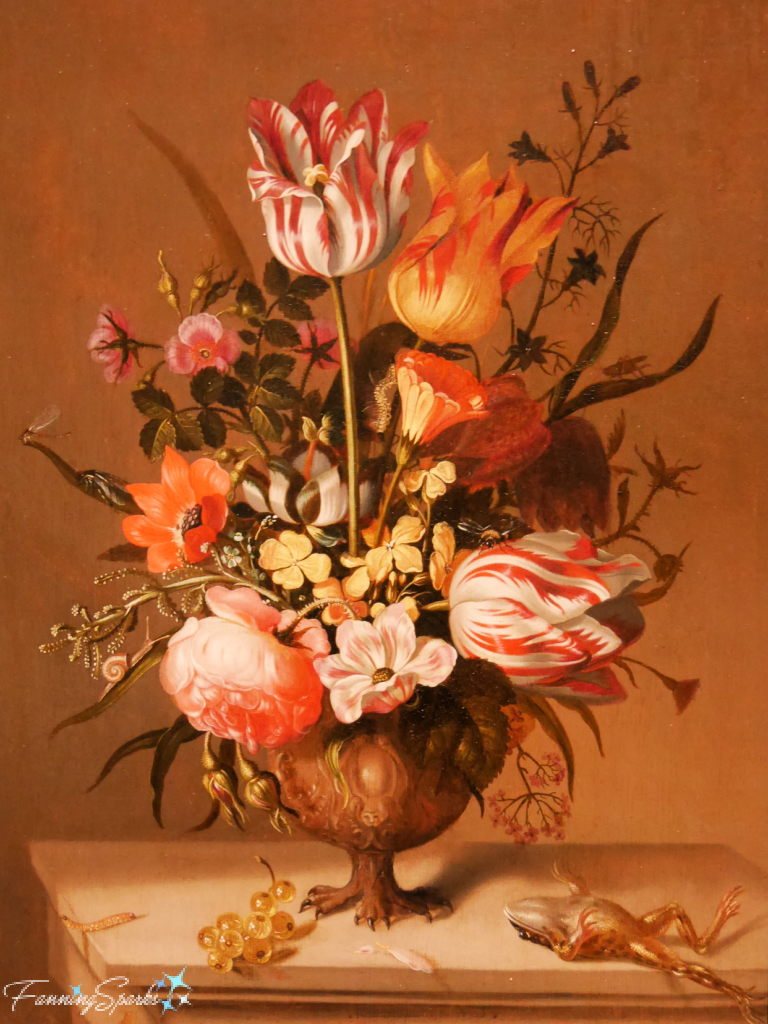
Below is an example of the tulip paintings mentioned by Liz Dobbs. Painted by Jacob Marrel (1614-1681), who specialized in portraits of blooming tulips, it is called Still Life with a Vase of Flowers and a Dead Frog. As described on the exhibit card at the Rijksmuseum where I saw this painting, “Tulip bulbs were collected fanatically in 17th century Holland, and astronomical prices were sometimes paid for a single bulb. In this painting as well, tulips play a leading role. The whimsically shaped red-and-white and red-and-yellow striped tulips were especially prized. Although nature creates them, it also lets them wither and die – just like the dead frog at the right.”
We were also able to view a splendid watercolor attributed to Jacob Marrel. It depicts the Semper Augustus Tulip, c. 1635, and was included in a tulip book.
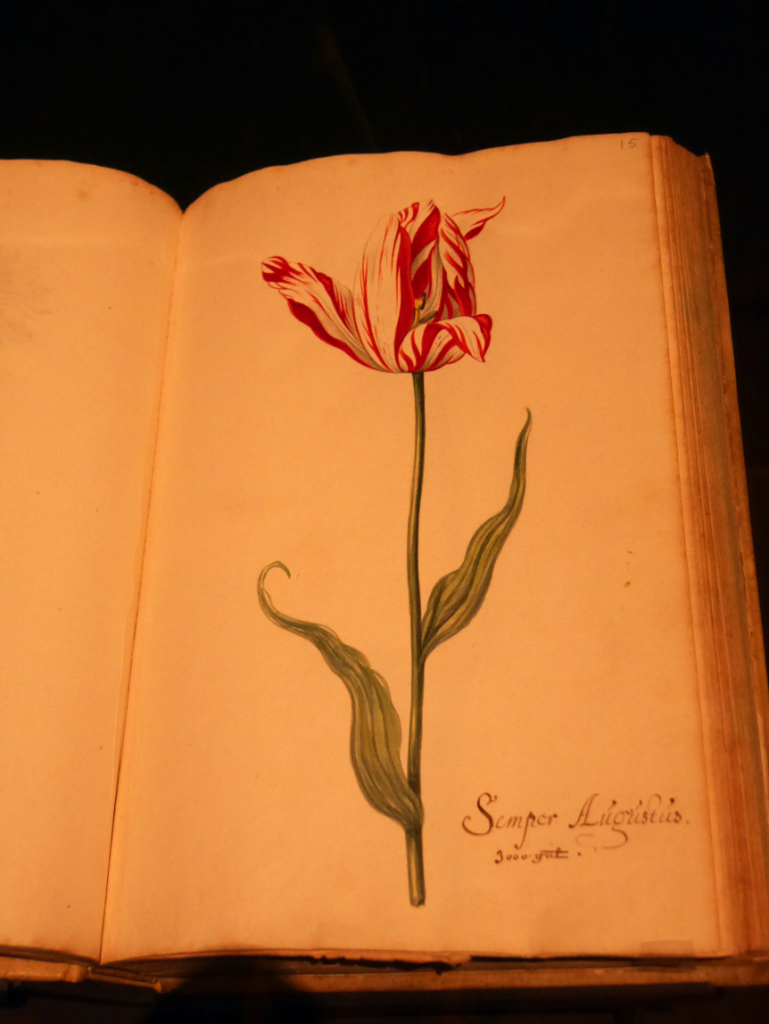
Tulip books were a special art form which surfaced during the height of Tulip Mania, the period of 1634-1637 during the Dutch Golden Age, when exotic tulips were extremely fashionable and rare. Prices reached extraordinarily high levels before the market collapsed in February 1637.
Colorful drawings of different types of tulips were bound together into a tulip book. This tulip book is believed to have been a sort of sales catalog because prices were included. The Semper Augustus tulip is considered the most famous and most expensive tulip in history. According to the Rijksmuseum gallery card, “The sum of 3000 guilders mentioned here was tenfold a carpenter’s annual salary. In February 1637, just before the crash, a record breaking 10,000 guilders was bid for this bulb.”
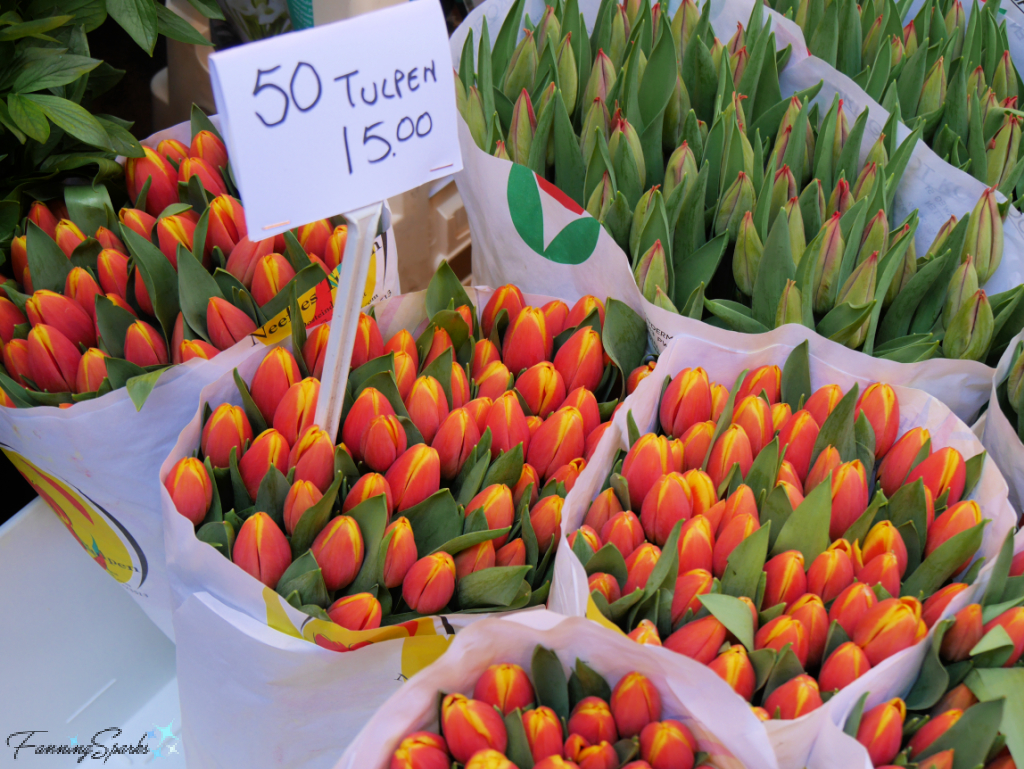
Thankfully, the price of tulip bulbs is no longer an issue and the average Dutch citizen can easily afford these beautiful flowers.
More Info
My recent trip to the Netherlands and Belgium was packed with fun and inspiration. I’m sharing the experience in a series of blog posts including:
. Come Tiptoe Through the Tulips (this post)
. Milling the Water of Kinderdijk in which I share my visits—an afternoon bike ride and a sunrise hike—to the beautiful windmills of the Kinderdijk.
. Painting Delftware in Delft about the charming city of Delft and our experience trying a centuries-old painting tradition at the historic Royal Delft factory.
. Expected and Unexpected Delights of Ghent in which I share the rich heritage and beautiful architecture of Ghent Belgium as well as unexpected delights such as innovative art installations and sweet wildlife sightings.
. Artworks as Big as Walls in Amsterdam sharing our experience visiting STRAAT, the graffiti and street art museum, in Amsterdam’s edgy arts community at NDSM.
Check out my previous blog post, A Virtual Visit to Lisse, in which I share memories of visiting the Netherlands in the spring.
The Keukenhof website claims “The most beautiful spring garden in the world” and I’m not about to argue. Keukenhof is located in Lisse, the Netherlands. You can learn more on the Keukenhof website. Please note the Keukenhof is only open for a limited time every spring—this year it’s from March 24 to May 15, 2022.
To learn more about the Royal General Bulb Growers’ Association (KAVB) check out their website.
The Rijksmuseum is located in Amsterdam, the Netherlands. It is the national museum of the Netherlands and tells the story of 800 years of Dutch history. Many famous Dutch masterpieces can be seen here. To learn more, check out their website.
Many thanks to my brother-in-law (Thank you Eric!) for recommending Rome2Rio. This online website/ app allows you to search for any city, town, landmark, attraction or address in the world and recommends how to get from A to B. Rome2Rio includes many options and combinations of options including flying by plane, taking a tram, train, subway, bus, taxi or ferry; driving a car, riding a bike or walking. Additionally, the website 9292.nl provides similar information, with a little more detail, specific to the Netherlands. I’d recommend both for a trip to the Netherlands.
Today’s Takeaways
1. A springtime visit to the Keukenhof and bulb fields of South Holland is an unforgettable experience.
2. Consider the story behind the subject—even a simple flower can have an intriguing past.
3. Consider setting a theme(s) for your next trip away from home.


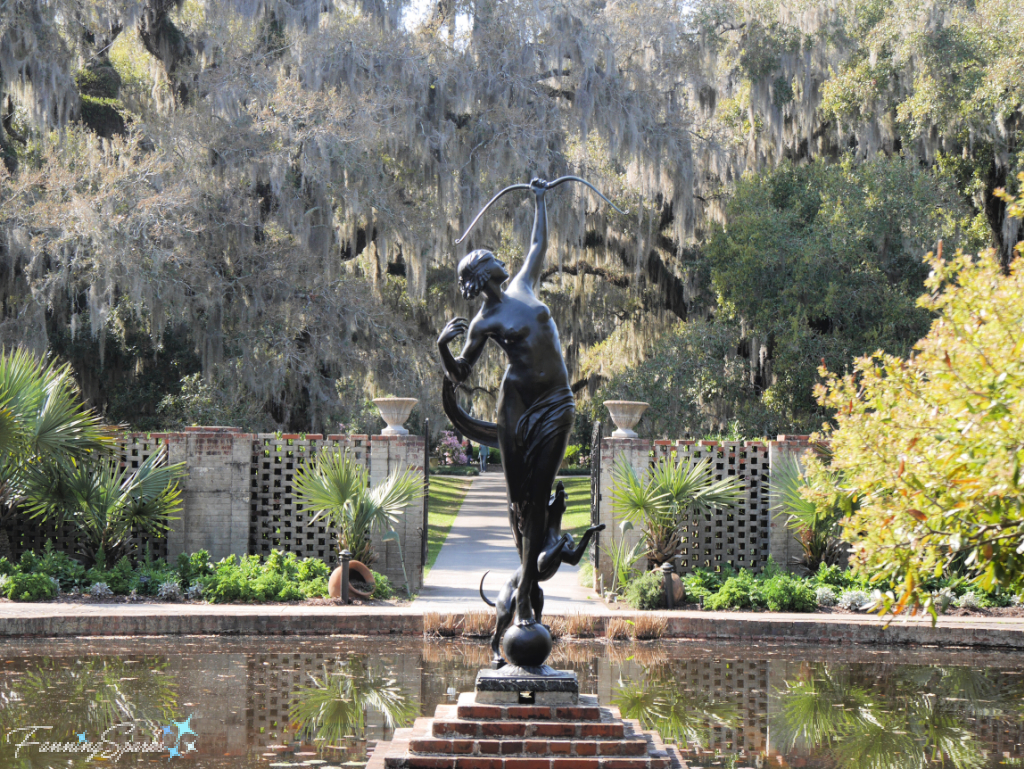
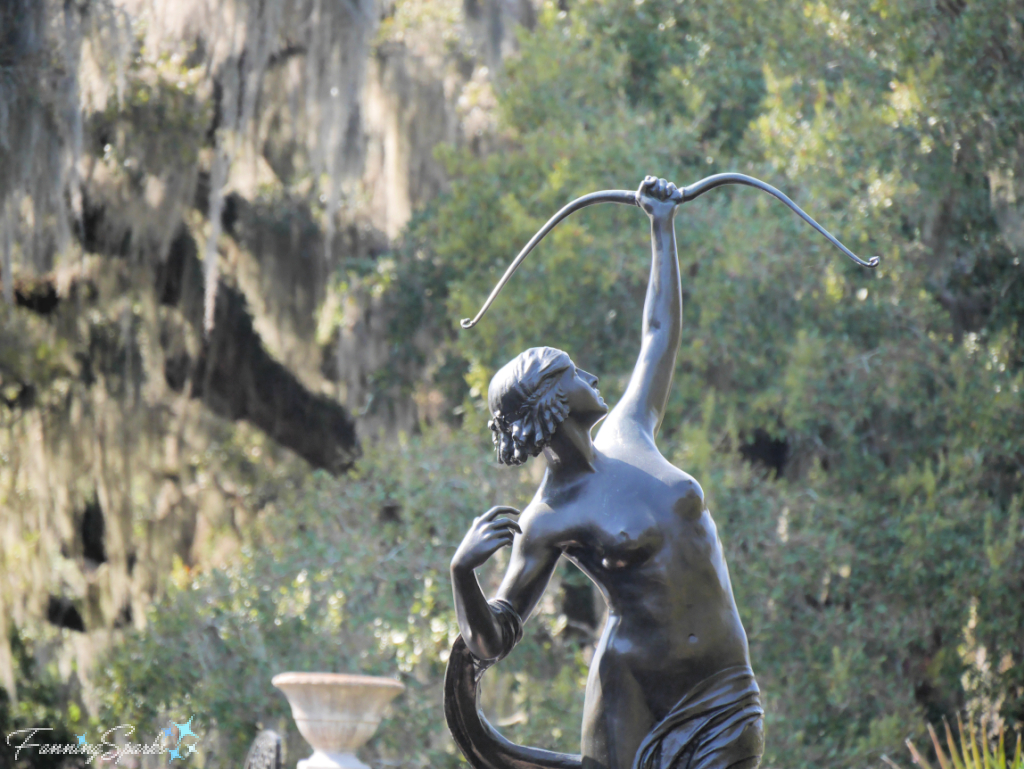
 This majestic bull, Toro Bravo, is by Charlotte Dunwiddie.
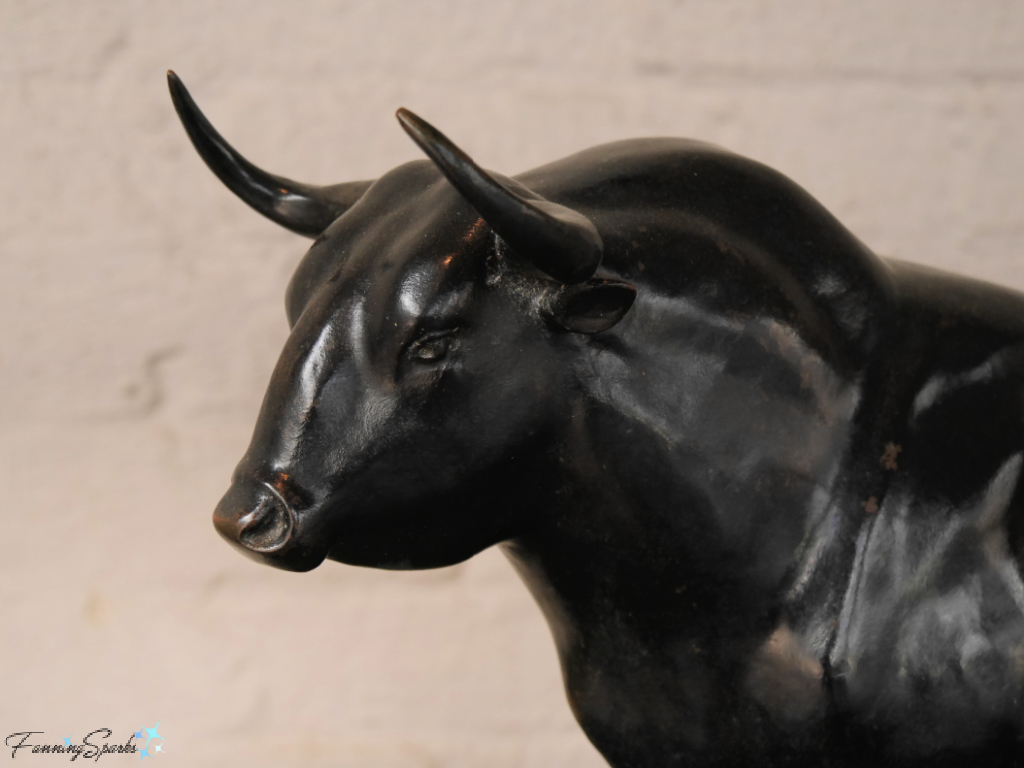

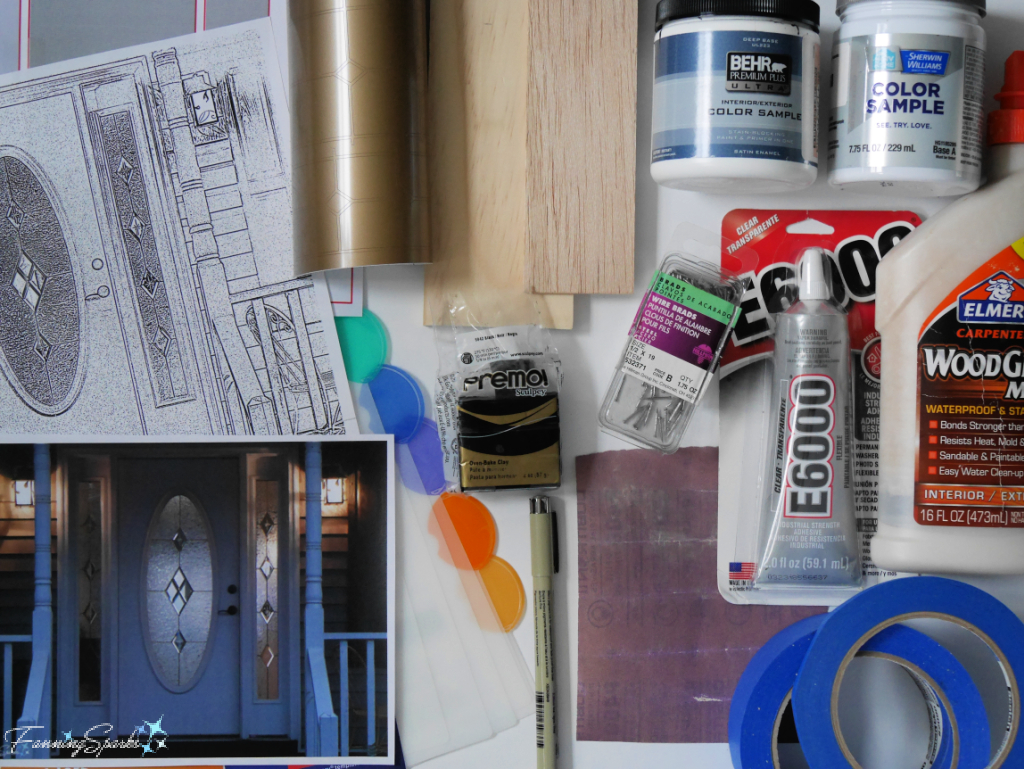 Equipment and Tools Needed
 Start by preparing 2 rectangles of wood for the base and top layers. I used ⅜” thick x 5 ½” wide pine project boards. Since the overall size of my piece was to be 7.9” high x 8.7” wide, I first had to glue the 2 pieces of wood together edge to edge.
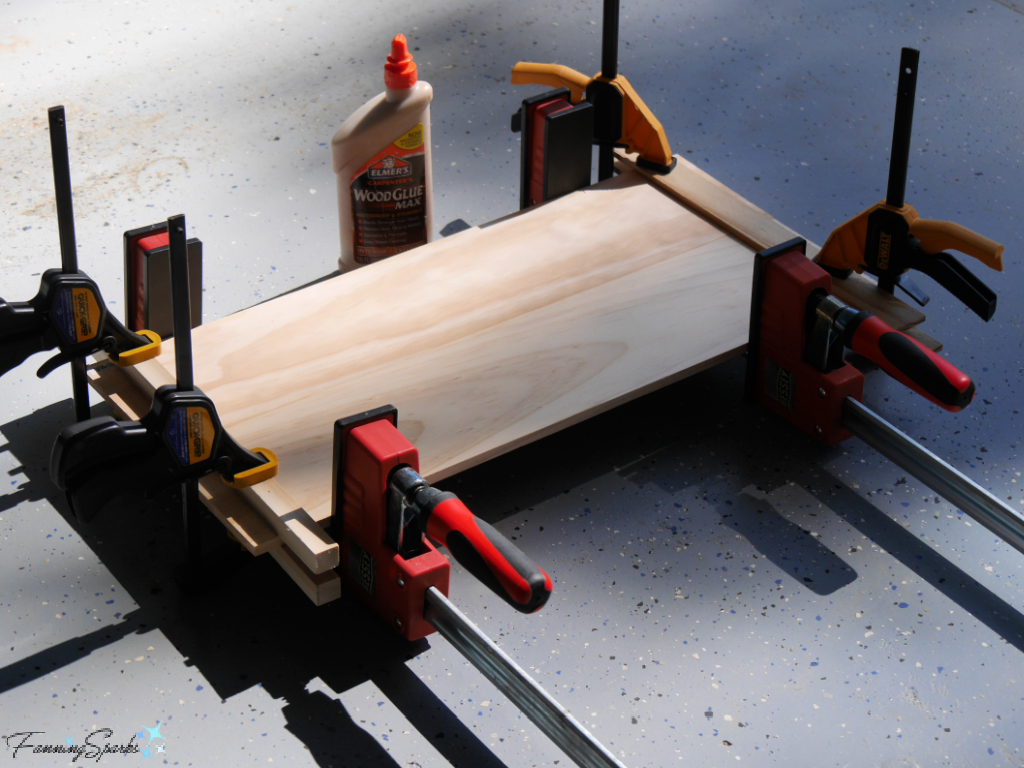
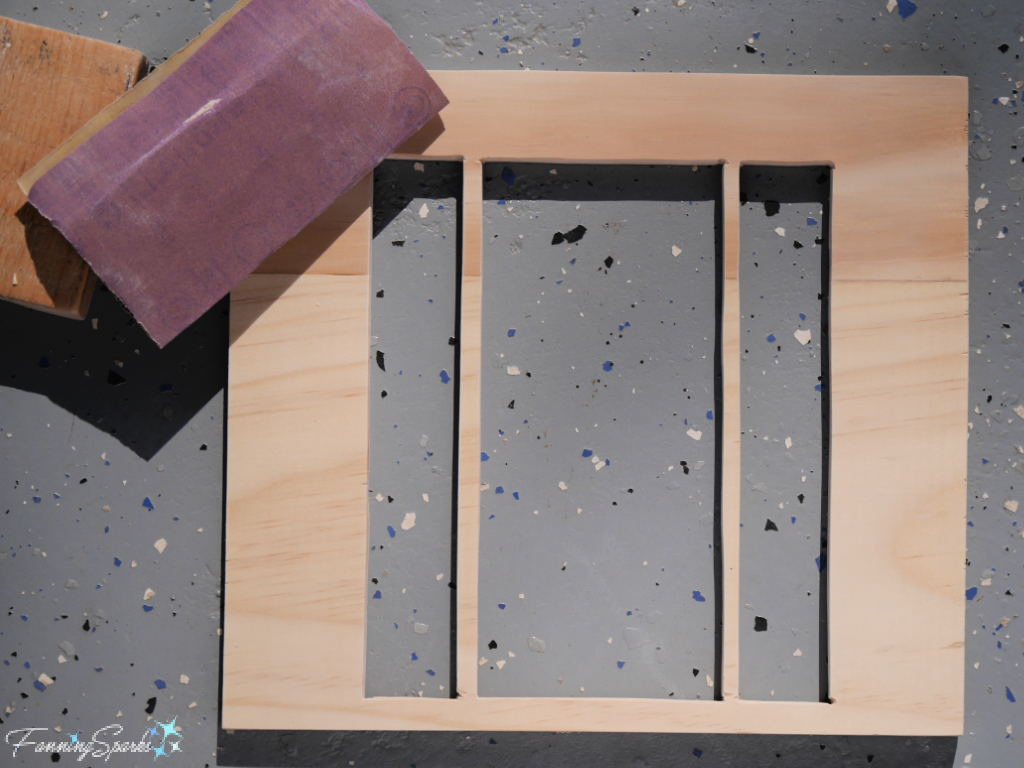
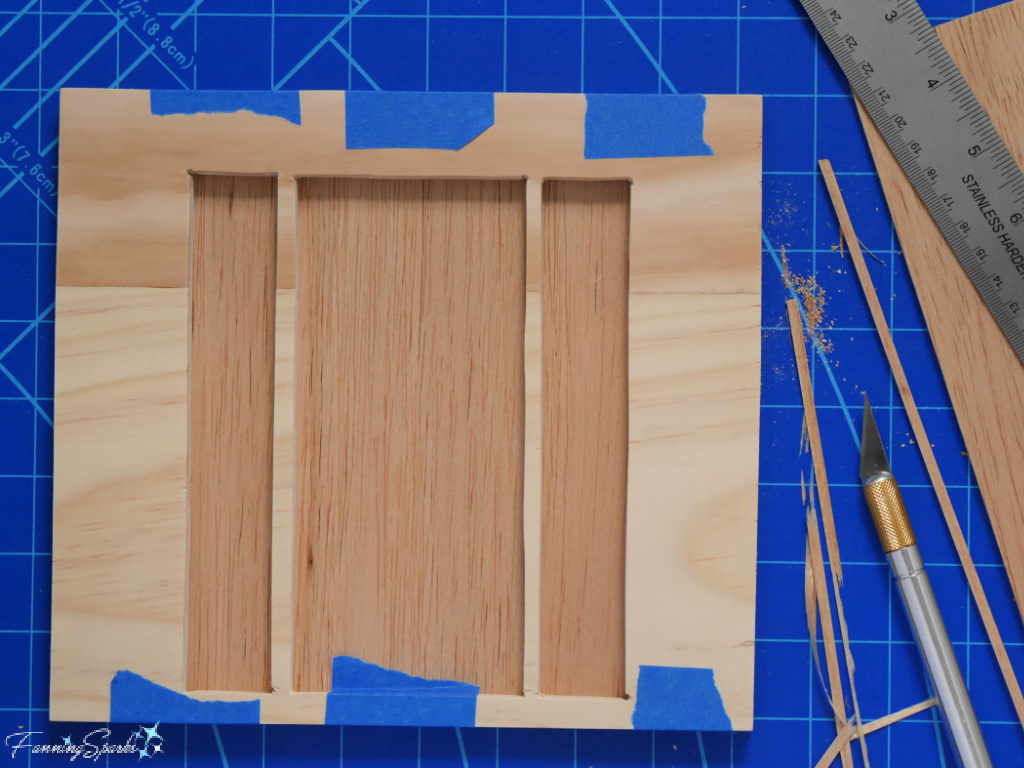


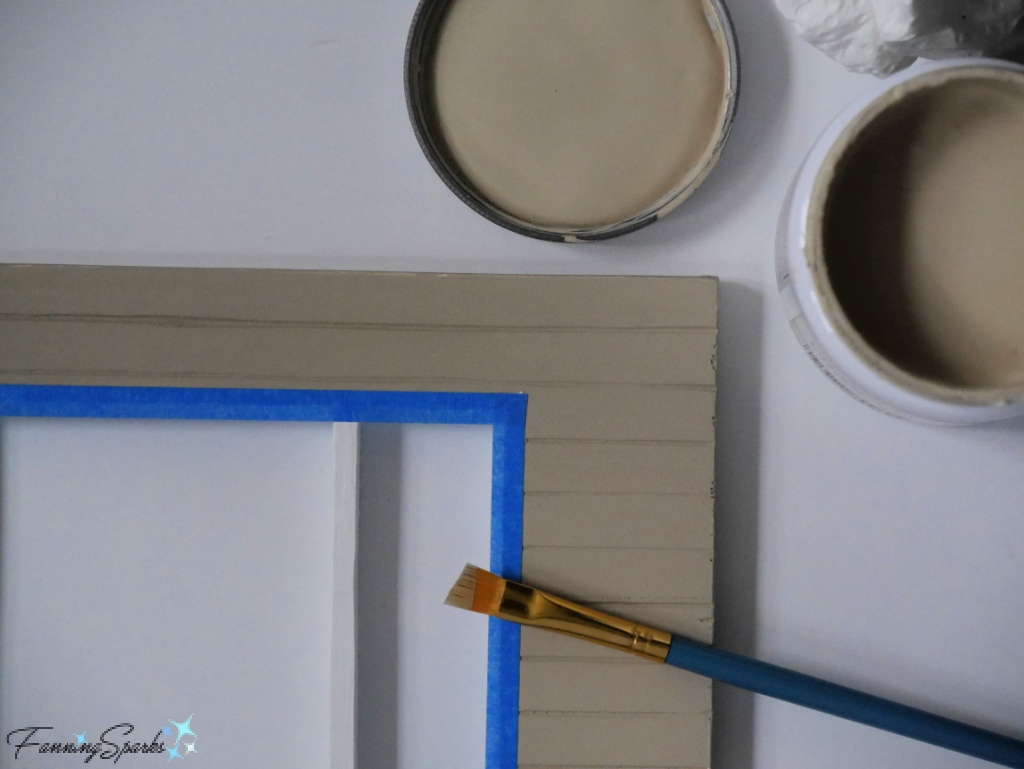
 Next, glue on the top layer and clamp it in place to dry.
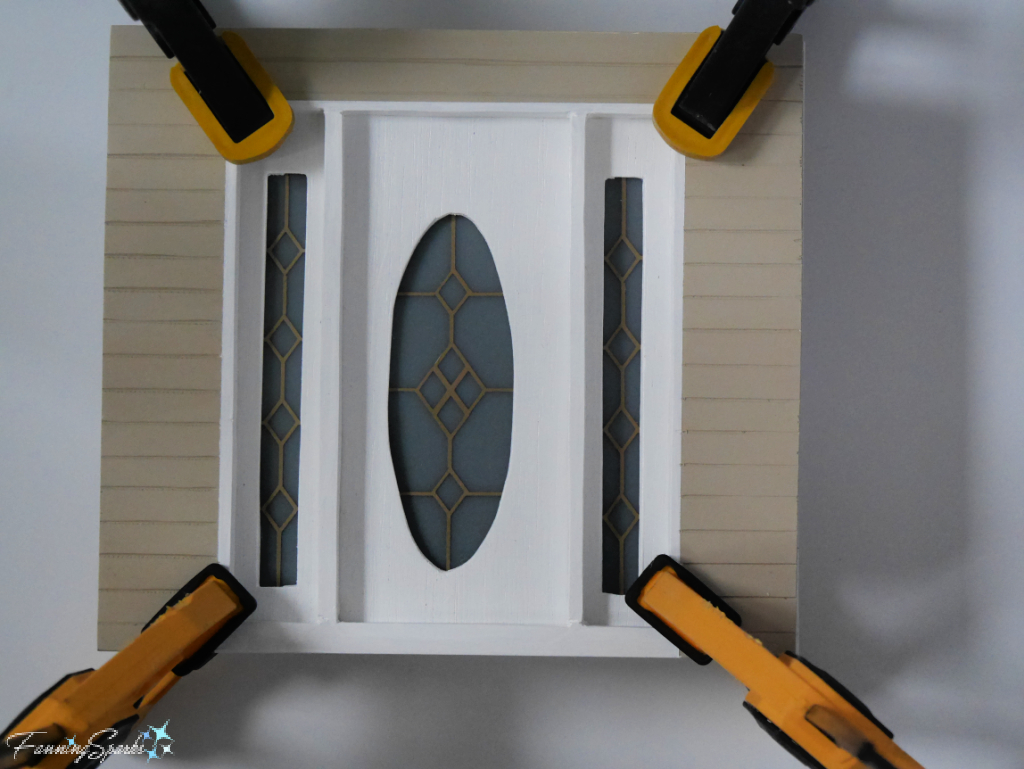


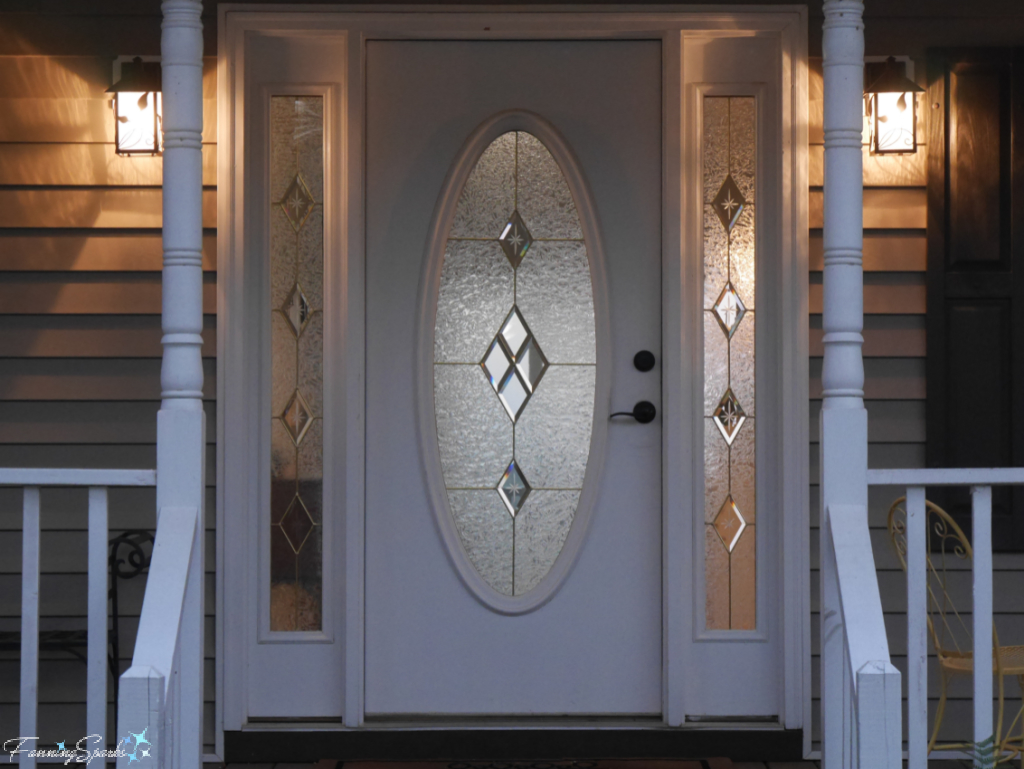
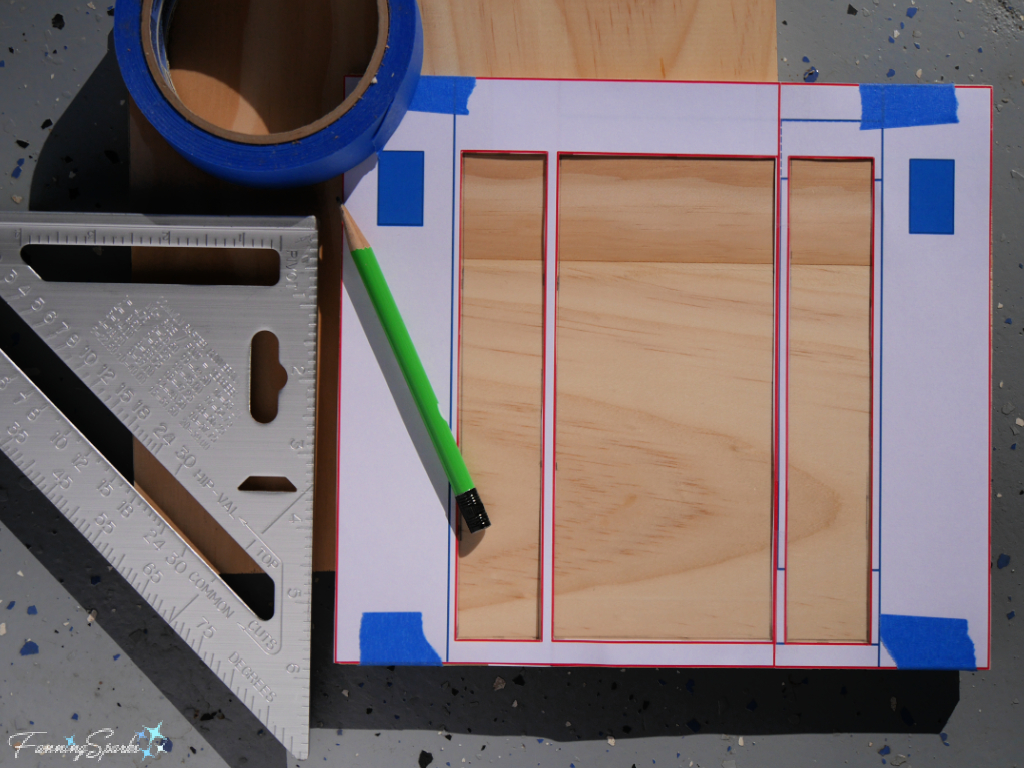
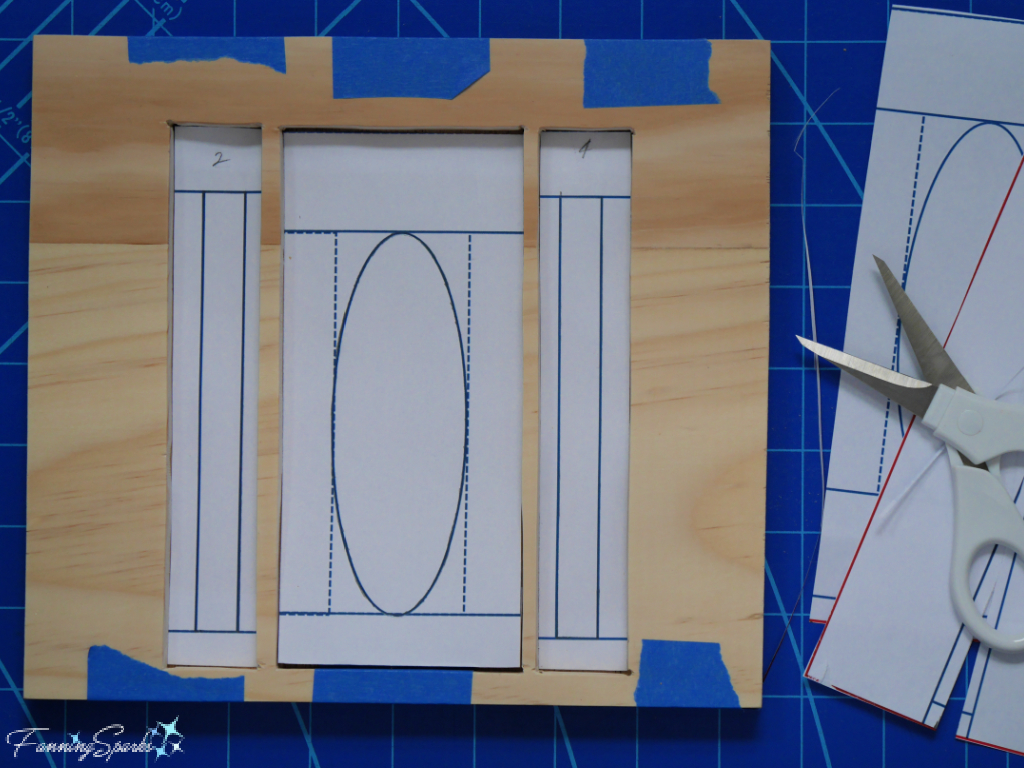
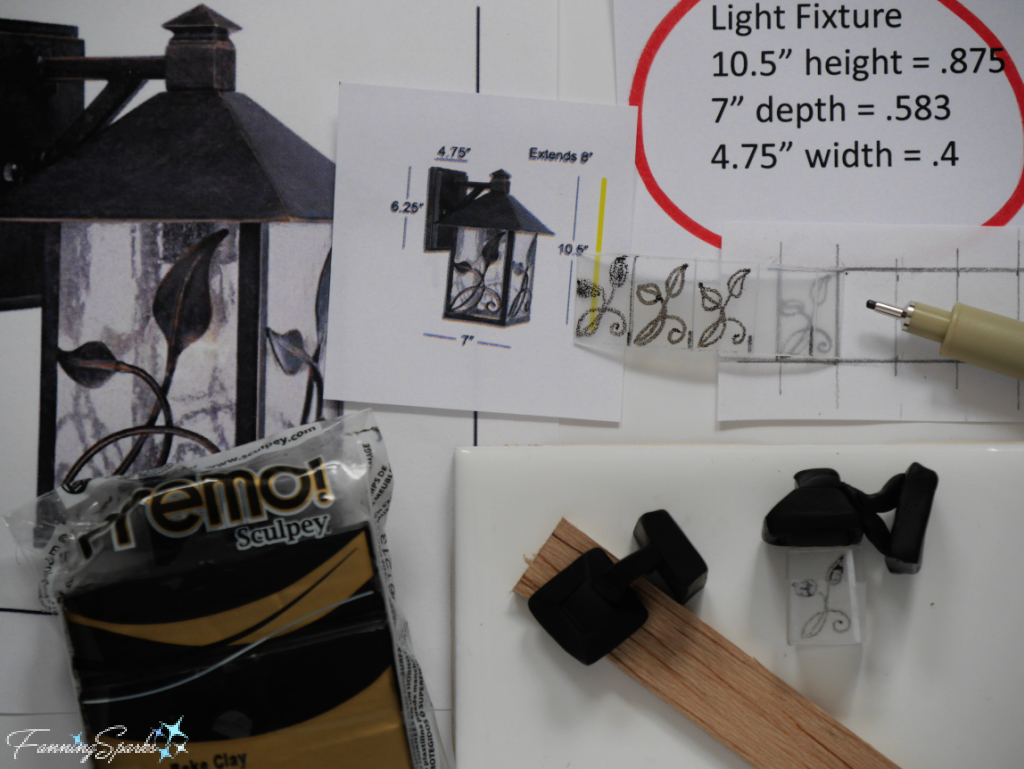
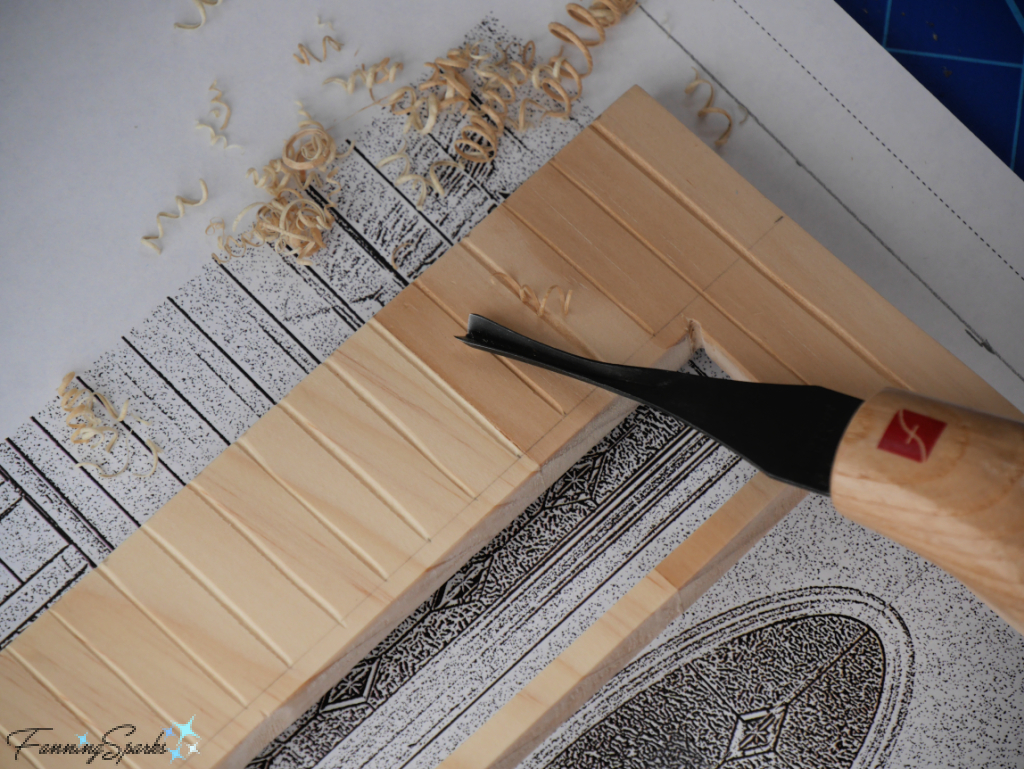
 Examine the door in your line drawing to ensure it is level (straight horizontally) and plumb (straight vertically). If not, use the tools under the Customize Before Resizing button. Rotate and Skew options, for instance, will allow you to straighten your design.
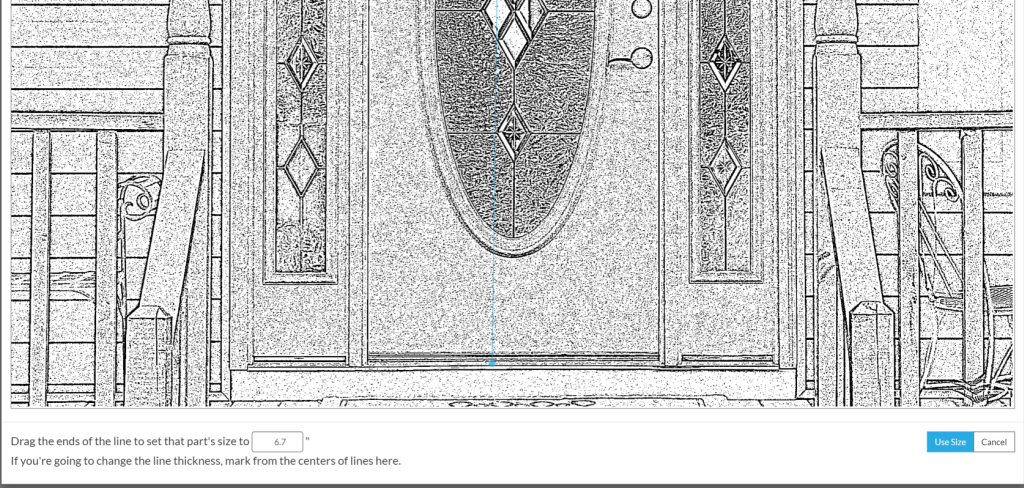
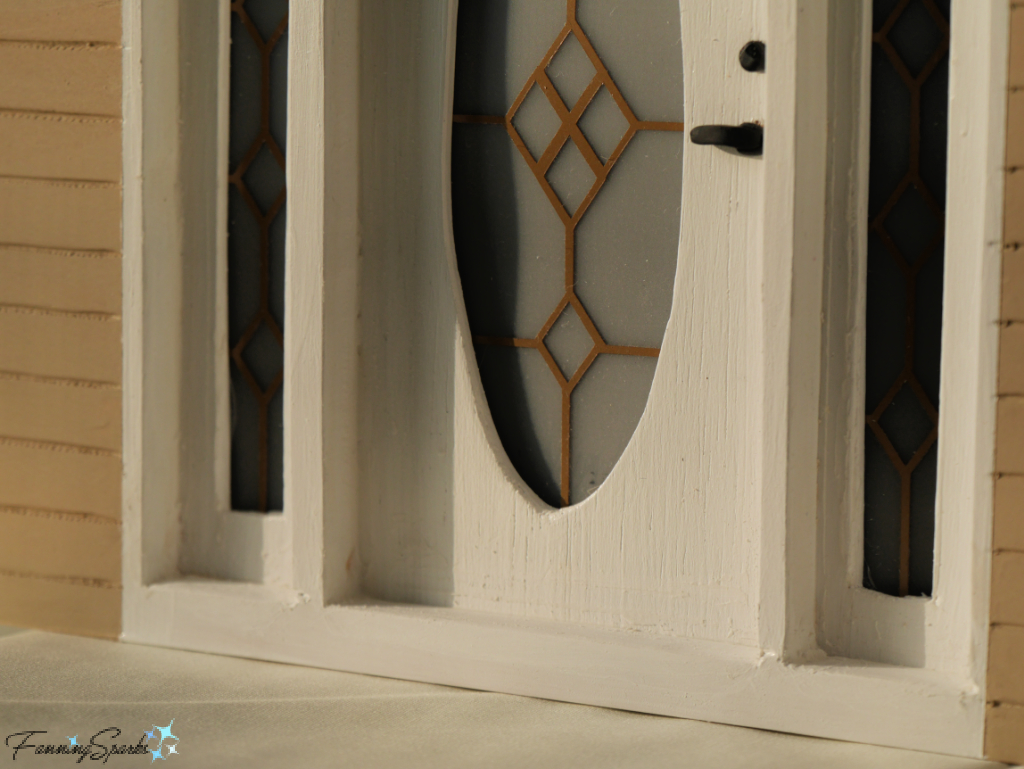
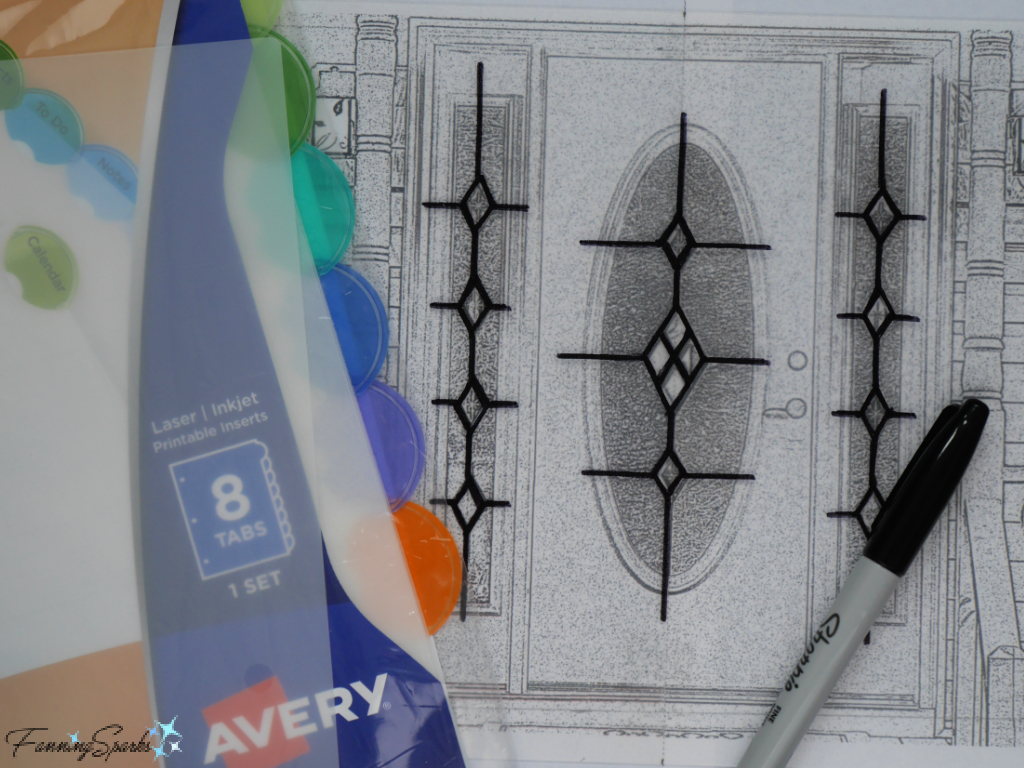
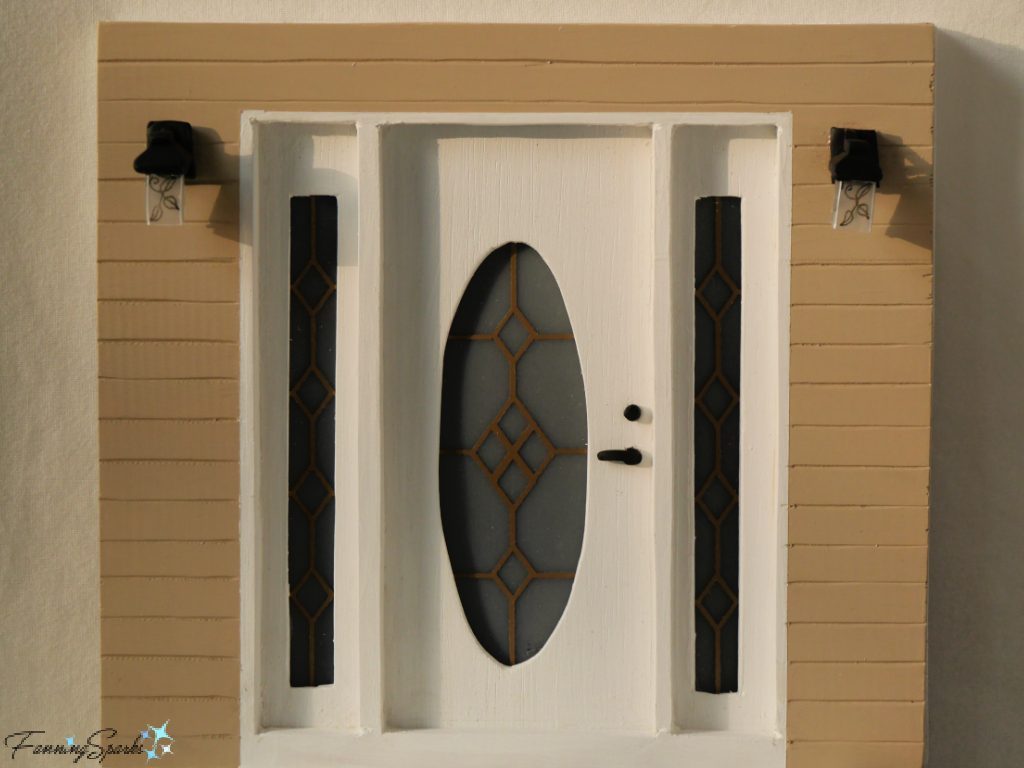
 This is the finished line drawing for my front door.


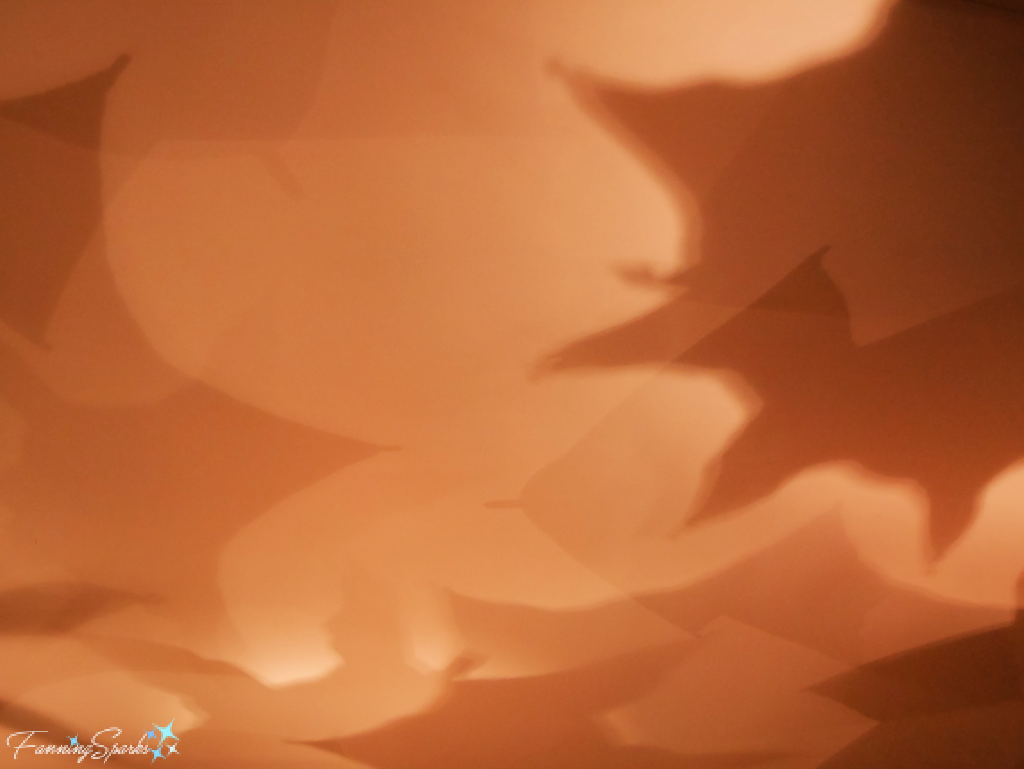
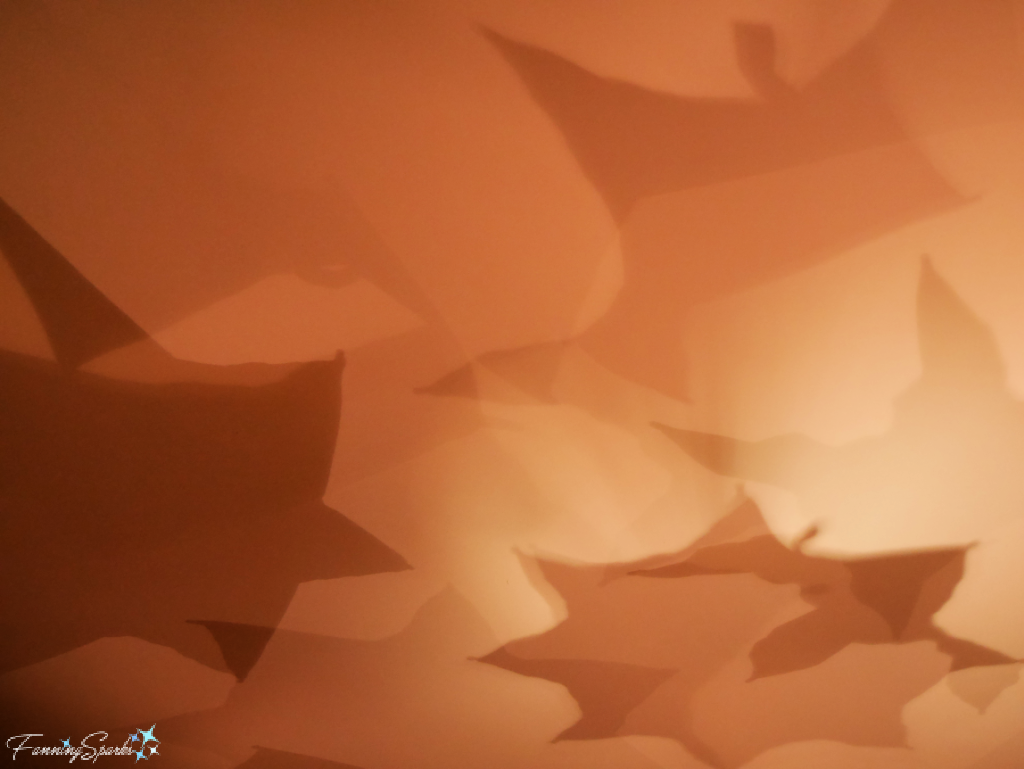
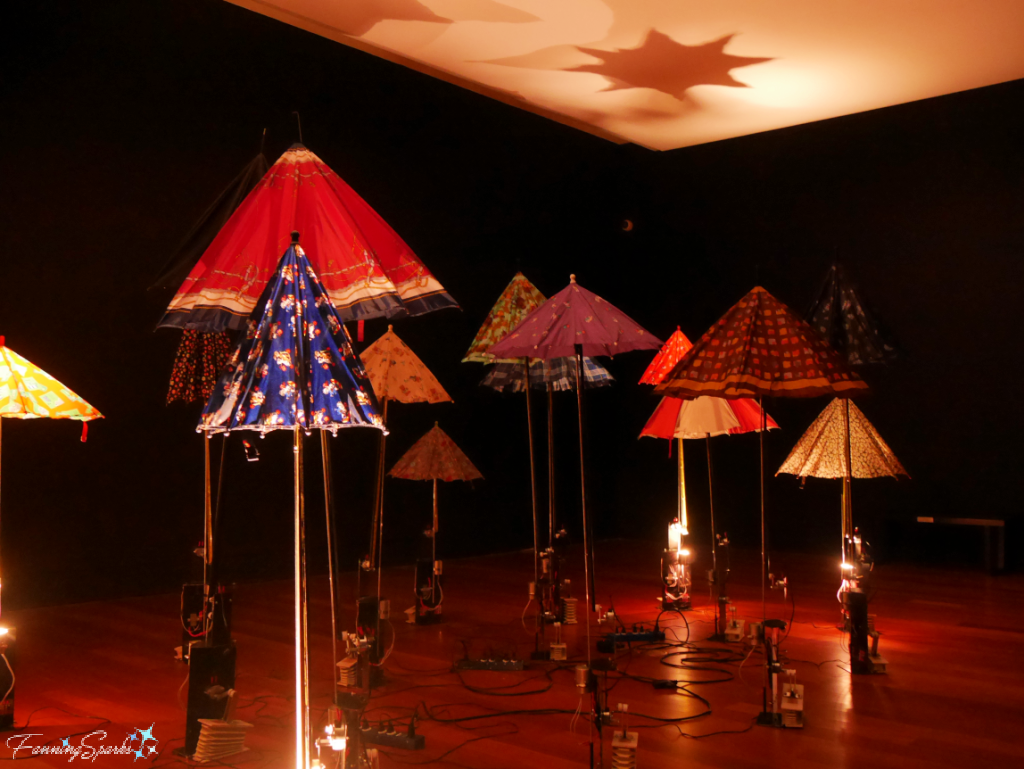 Halogen lighting is placed under the umbrellas projecting their shadows onto the ceiling. A plaintive melody, reminiscent of the inhaling and exhaling of breath, is synchronized with the shadow action. It’s a slow dance of light and shadow… mesmerizing in its simplicity.