Mother Nature continues to work her magic as spring swings into summer. Foliage and greenery is everywhere—in flower beds, gardens, lawns, roadsides, fields, forests and so on. It’s the perfect backdrop for the profusion of flowers that are the highlight of the year. But flowers are ephemeral—here one day, gone the next. Little wonder, artists and makers strive to capture and preserve their beauty.
Arguably, the simplest way to preserve flowers is to press them. And the simplest way to press flowers is to insert them within the pages of a book, letting the paper pages absorb the moisture and the weight of the book press them flat.
Another simple option is a flower press. A press is preferable when drying large pieces or many elements. It’s also easier to position the elements accurately. That’s why I decided to make my own press. It all started with a desire to preserve fern fronds. Before I knew it, I was pressing all manner of flower blossoms, grasses, seed heads and wild flowers!
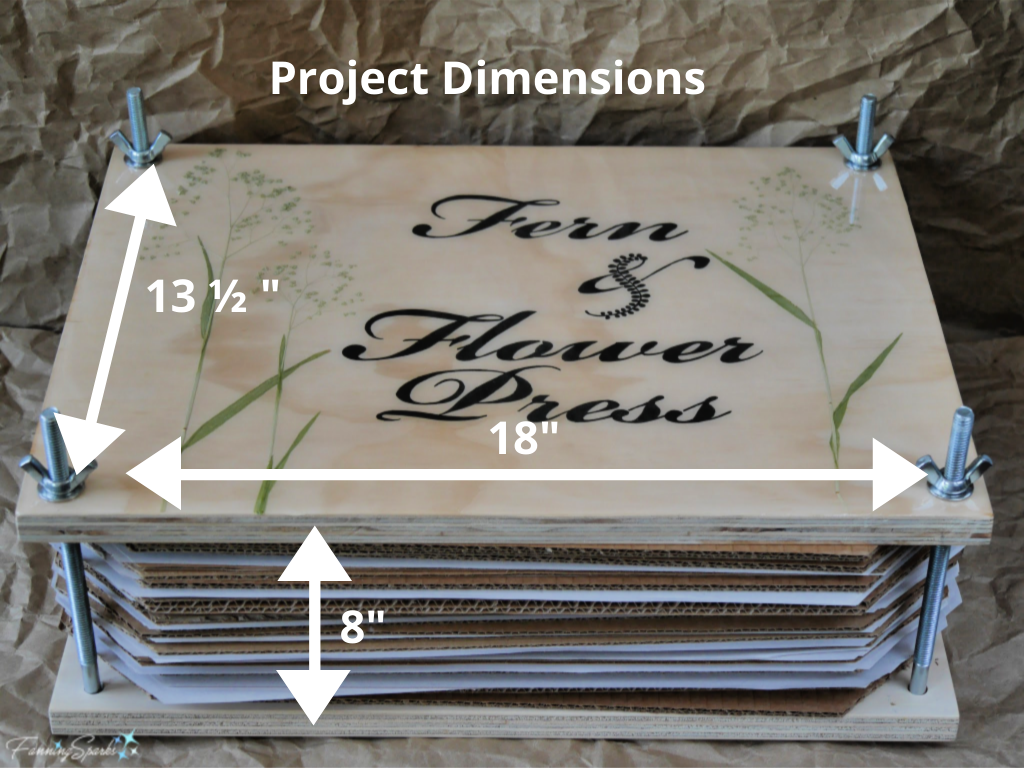
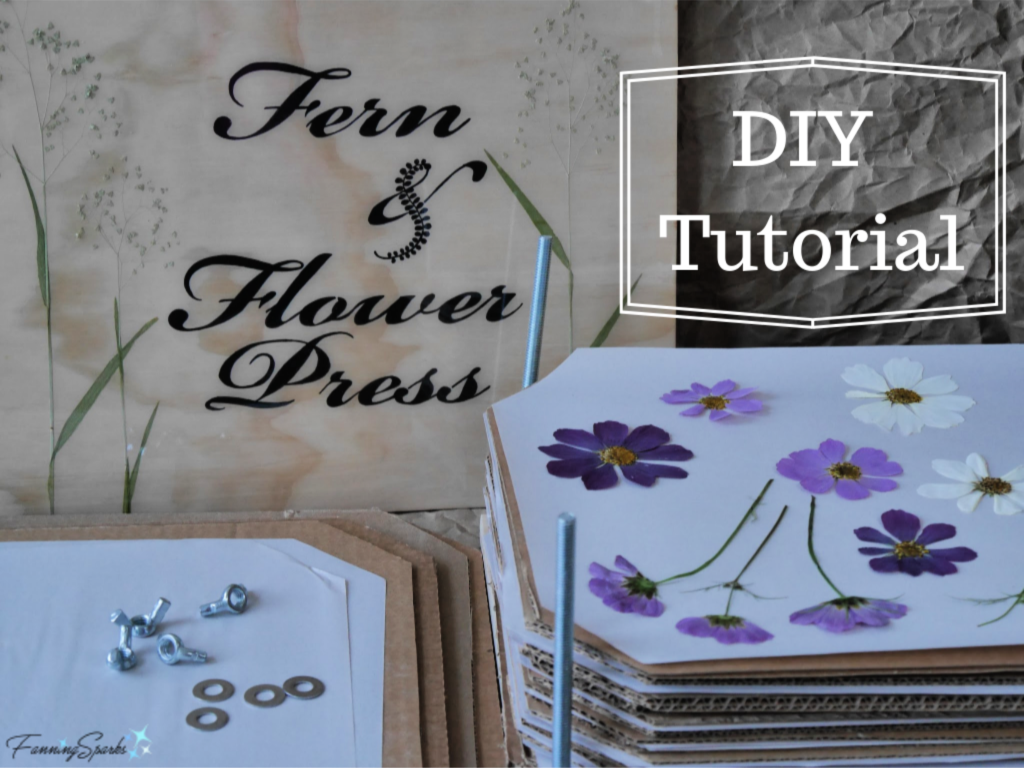
In today’s post, I’d like to share a DIY tutorial for making your own Fern & Flower Press. It’s straightforward and simple to construct. This is a generously-sized press specifically designed for large plant elements like fern fronds. It would be easy, however, to adjust the size if you prefer something smaller. Prior to making my own, I researched flower presses online and found that many are small 4-6” squares. The smallest ones are targeted to hikers and designed for collecting specimens while on the go. My Fern & Flower Press is 13½” x 18” x 8” and definitely not suitable for carrying on a hike!
Here are the step-by-step instructions to make your own Fern & Flower Press. It can be fun to decorate the Top Cover but it’s not necessary so I’ve shown the supplies, tools and instructions for decorating it separately.
Supplies Needed – To Make the Press
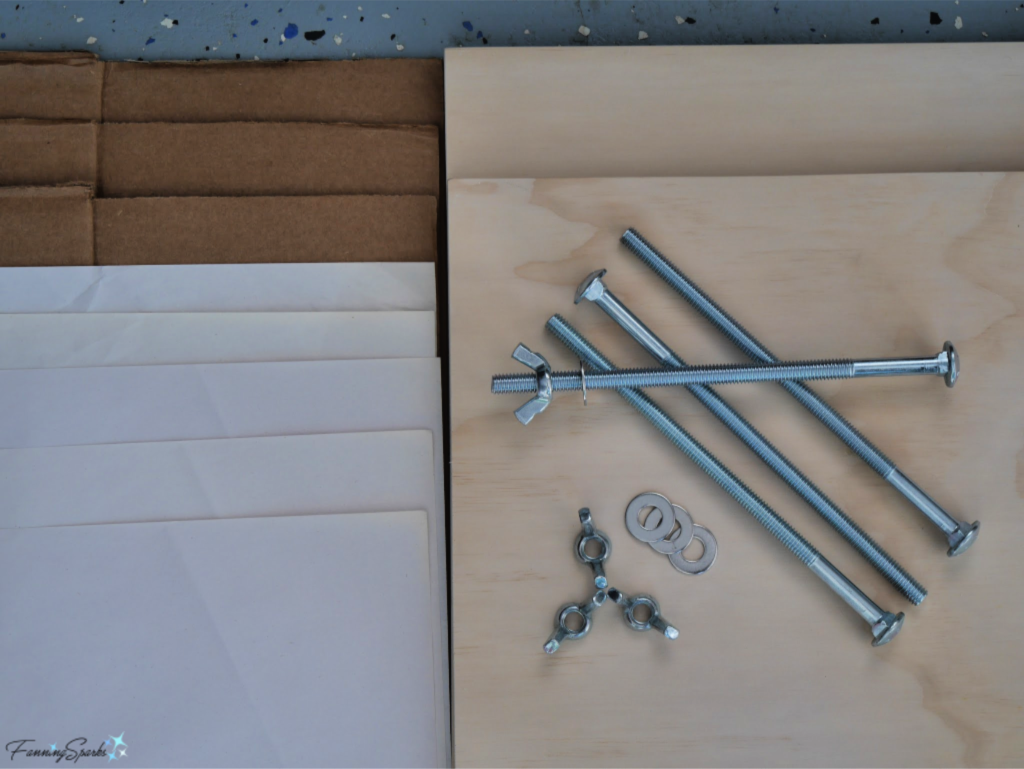
. Plywood 2 pieces 13 ½” x 18” I used ¾” hardwood plywood because that’s what I had available. You may prefer to use smaller, thinner or less expensive plywood—it will work just as well.
. Carriage Bolts 4 – 3/8 inch x 8 inch long My press holds 5-6” of pressing materials (ie about 24 layers of cardboard). If you prefer to use less layers, select shorter bolts.
. Wing Nuts 4 – 3/8 inch
. Flat Washers 4 – 3/8 inch
. Sandpaper
. Corrugated Cardboard about 24 – 13 ½” x 18” sheets of corrugated cardboard. I simply cut up old moving and shipping boxes.
. Paper about 72 – 13 ½” x 18” sheets of absorbent paper. I used 24” x 24” sheets of packing paper. Blotting paper, printer paper and cardstock are common choices for flower presses. They would, however, be difficult to find in the size needed for this press. Paper towels might be an alternative but only if the surface is smooth and pattern-free since indentations will transfer to the pressed materials.
. Paint, stain or wax (if desired).
Supplies Needed – To Decorate the Top Cover
. Paper
. Black Markers I used Sakura Pigma Micron waterproof markers in 08 and Brush.
. Pressed Plant Materials
. Waterbase Sealer I used Mod Podge Matte from PLAID.
. Epoxy Resin I used 8oz of ArtResin.
Tools Needed – To Make the Press
. Jigsaw (or whatever type of saw you prefer to cut wood)
. Square
. Tape Measure
. Sharp Point Used to indent the wood prior to drilling. A nail or screwdriver tip will work fine.
. Drill with 3 bits: ⅛”, ⅜” and ½”
. Pencil
. Utility Knife
. Scissors
Tools and Equipment Needed – To Decorate the Top Cover
. Computer and Printer
. Ruler
. Ball Stylus Clay Sculpting Tool or Dull-tipped Pencil
. Small Paint Brush
Instructions – To Make the Press
Step 1 – Cut Pieces Cut 2 identical rectangles of plywood. I cut mine to 13 ½“ x 18”.
Step 2 – Drill Holes Choose one of the plywood rectangles and place face up on work surface. At each corner, measure in ¾” from both edges. Mark at the crossing point and indent with the sharp point. Place second rectangle with face side up under the marked rectangle. Place on top of scrap wood to prevent tear out. Align edges and clamp together. I drilled all the holes with a ⅜” bit but the carriage bolts are rather tight for the Top Cover. If I had it to do over again, I would use this approach instead:
. Use ⅛” bit to drill through both layers of plywood keeping drill perfectly perpendicular to the surface. Unclamp.
. Use the ⅜” bit to enlarge the 4 drilled holes in the Bottom Cover.
. Use the ½” bit to enlarge the 4 drilled holes in the Top Cover.
Lightly mark top edge of both rectangles.
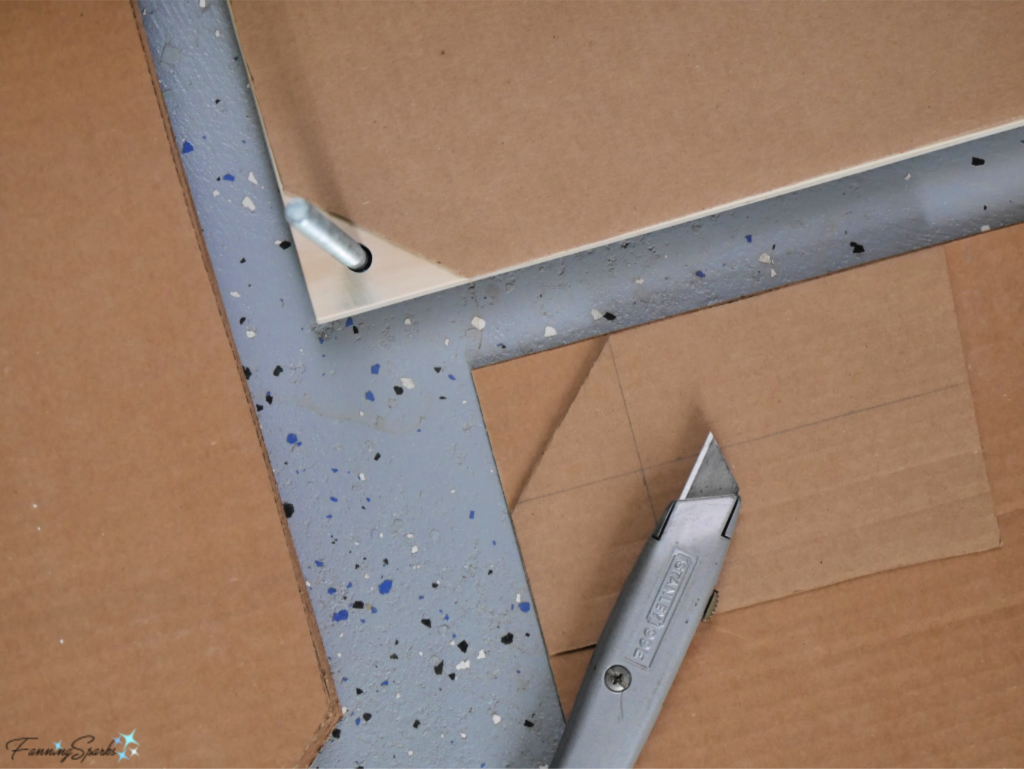
Step 3 – Cut Cardboard and Paper Simply place one of the covers on a piece of corrugated cardboard and cut around it with the utility knife. Make a template from a small piece of cardboard with a right angle corner. Measure in 2” from top and side of corner. Trim off corner diagonally (as shown below). Use this template to trim off all 4 corners. Cut 23 more cardboard sheets.
 Use one of the cardboard sheets to cut a piece of packing paper to the same size. I found it easiest to use scissors and cut multiple sheets of paper at once. Repeat to make 72 sheets of paper.
Step 4 – Finish Sand the top and bottom covers for a smooth surface. I chose to leave mine unfinished. Alternatively, you could paint, stain or wax the covers at this time.
Instructions – To Decorate the Top Cover
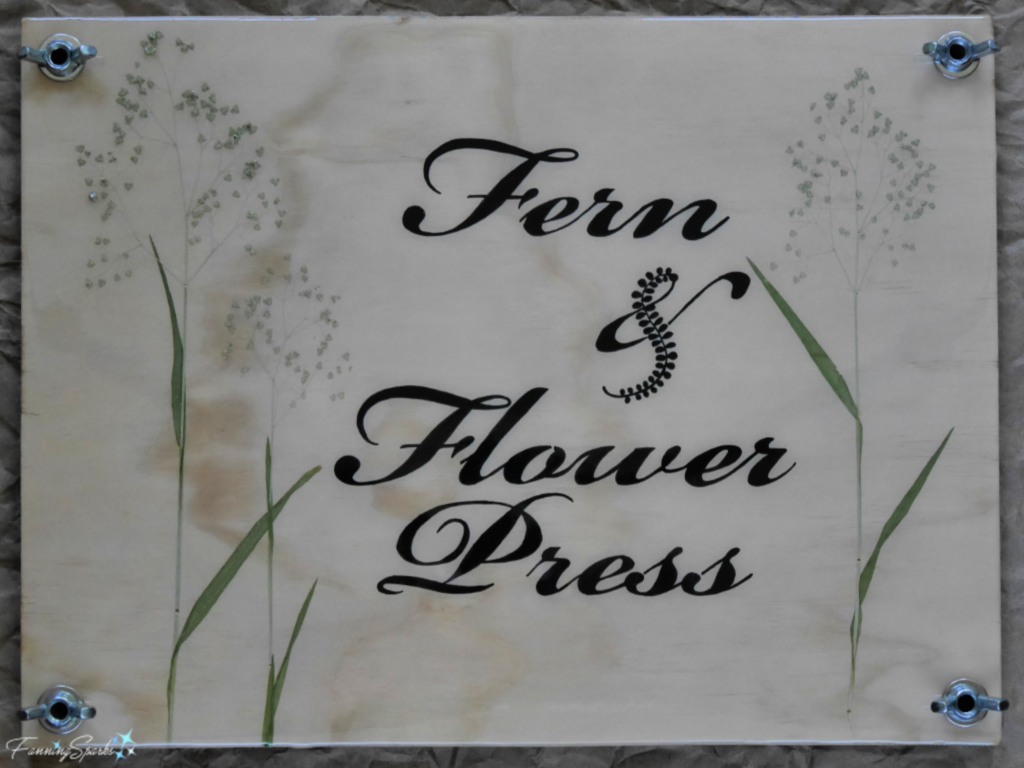
It isn’t necessary to decorate the top of the Fern & Flower Press but it adds a nice touch. It’s also a great opportunity to experiment with some of the plant material you’ve pressed. I chose to add a label in fancy script with some pressed grasses.
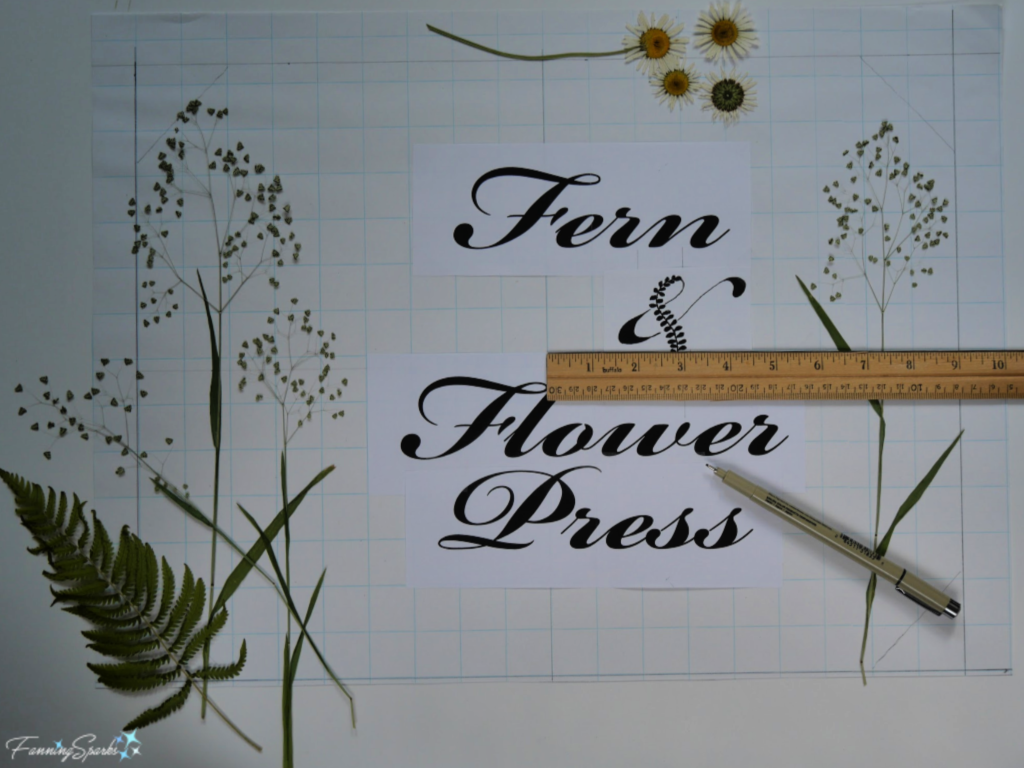
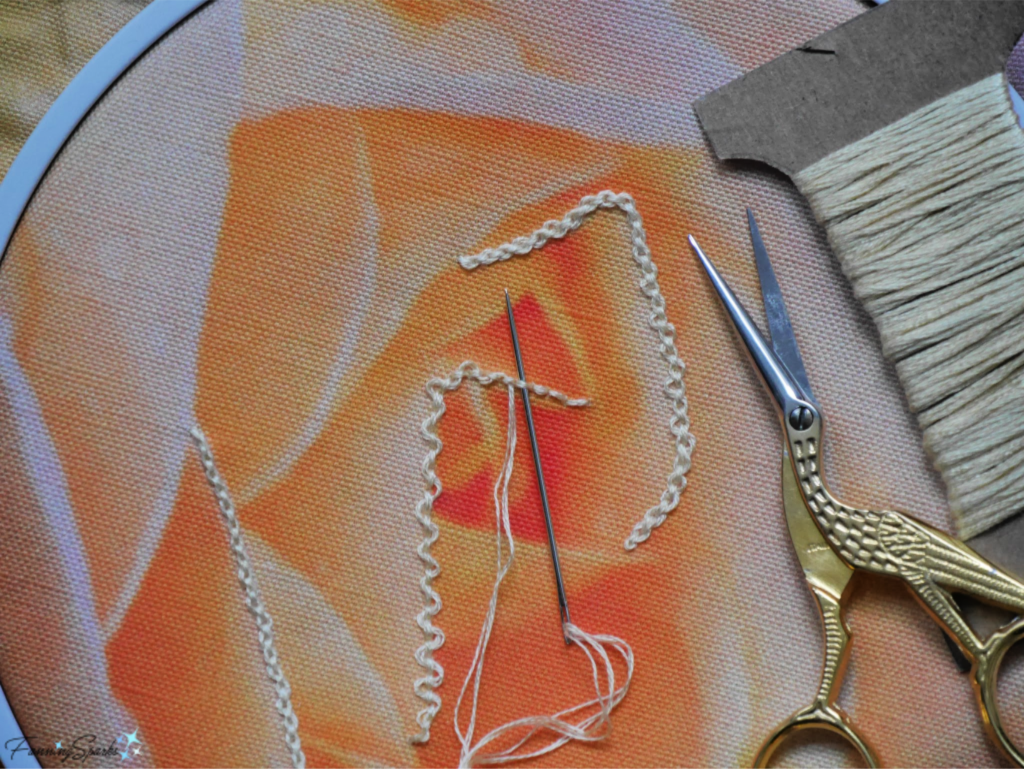
Step 5 – Prepare Top Cover Design Begin by selecting a font and mocking up the title on your computer. The lettering shown below uses Bickham Script Pro Regular in 287pt. After printing a copy, I used my black markers to dress up the ampersand. Lay out the components of your cover design on a piece of 13½” x 18” paper or directly on the Top Cover. I incorporated a few stems of Little Quaking-Grass (Briza minor) which I’d pressed in advance.
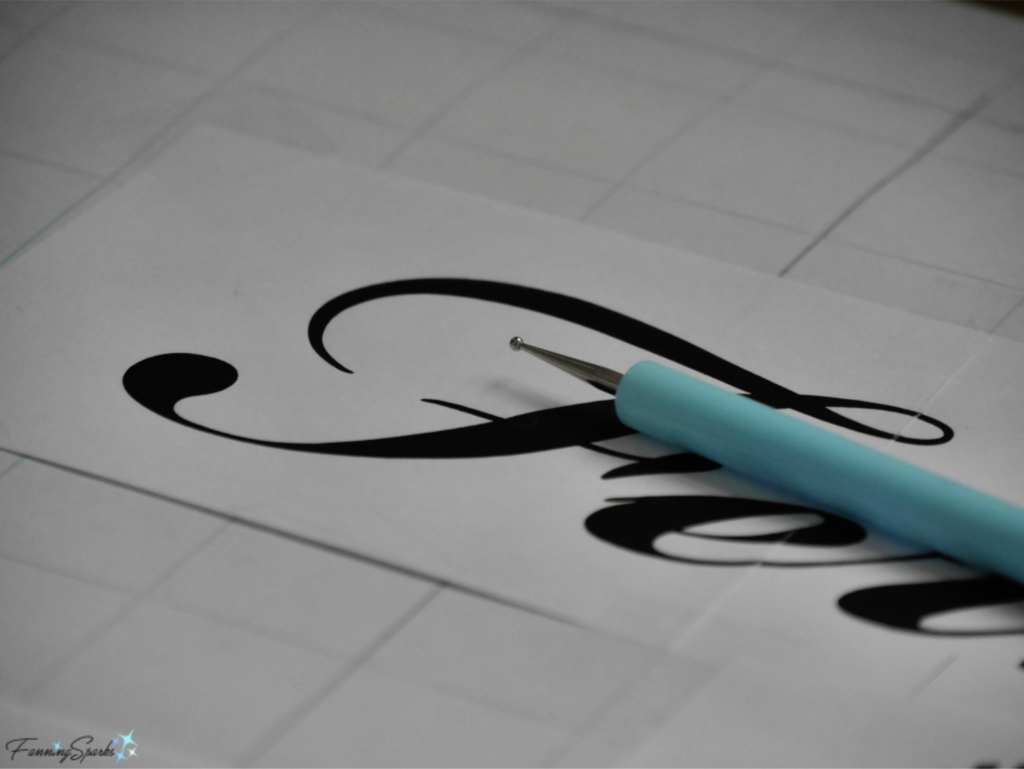
 Step 6 – Trace and Color Title on Top Cover Tape your final design to the Top Cover. Use a ball stylus tool or dull pencil to trace the letters pressing down to indent the surface of the wood. Check to ensure indentation is visible.
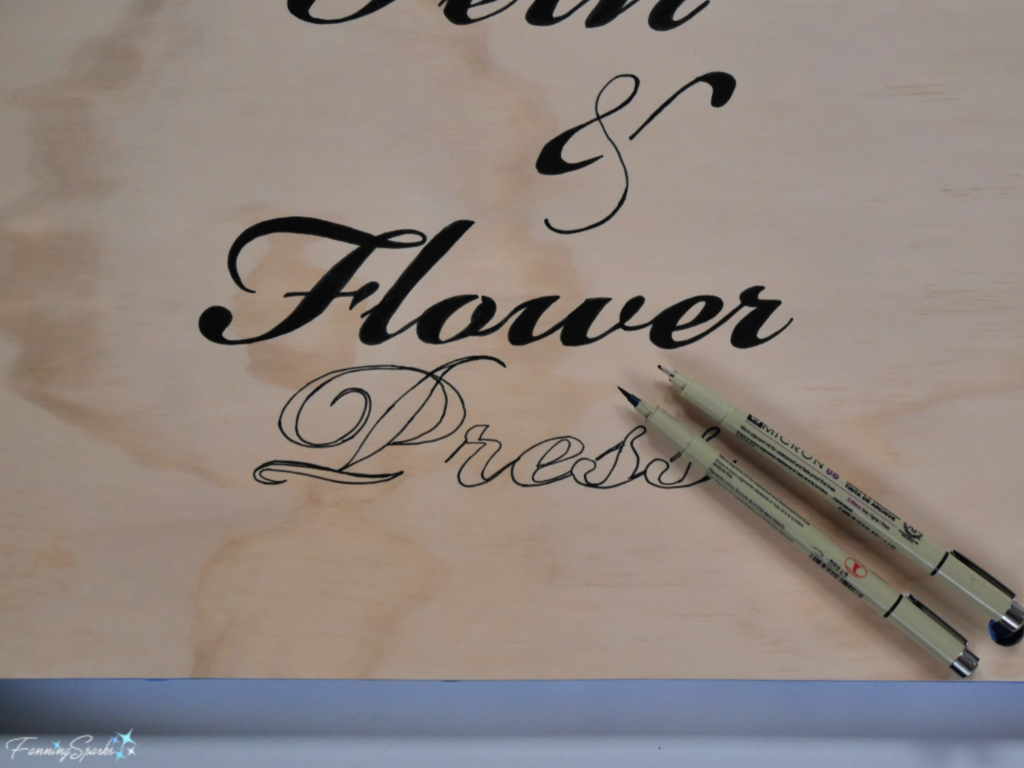
 Use 08 black marker to trace along the indentations. Fill in letters with brush tip black marker.
 Step 7 – Seal with Mod Podge Use small paint brush to apply a thin coat of Mod Podge matte finish over the entire surface of the Top Cover. Start with the lettering. Then apply Mod Podge to the areas where the dried materials will be positioned. Carefully, place the dried materials on the Mod Podge pressing down to attach all stems, leaves, seeds, etc to the surface of the wood.
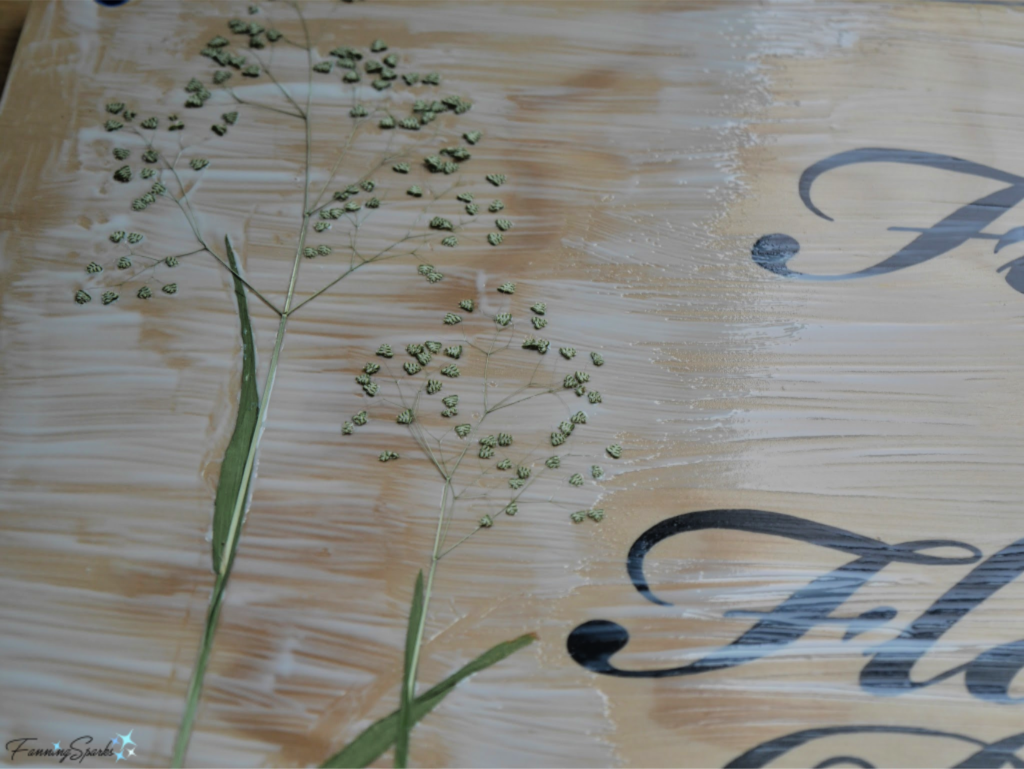 After placing everything as desired, prepare to apply a top coat of Mod Podge. The top coat can be thinned out with a little water if desired. The objective is to seal all the natural materials under the Mod Podge so everything stays in place when the resin coat is applied. Sealing also reduces the number of air bubbles in the next step.
Step 8 – Apply Resin Coat Apply a coat of epoxy resin over the Top Cover following the instructions provided by the resin manufacturer. This was my first resin project so I took care to study the process. I chose ArtResin and found their online guide and videos very helpful. The ArtResin instructions outline 6 steps: Prep, Measure, Mix, Pour & Spread, Finish and Wait. I’m really pleased with how the resin finish turned out—smooth and shiny—and am anxious to try a few more projects. I look forward to sharing the details as I learn more.
 Your new Fern & Flower Press is ready to use! Begin by gathering leaves, fronds, flowers, grasses, seed heads and any other plant materials you wish to dry and press. It’s best to cut plant materials early in the day as soon as they are dry. Avoid thick or dense elements such as roses or peonies. Work quickly to minimize drooping and wilting.
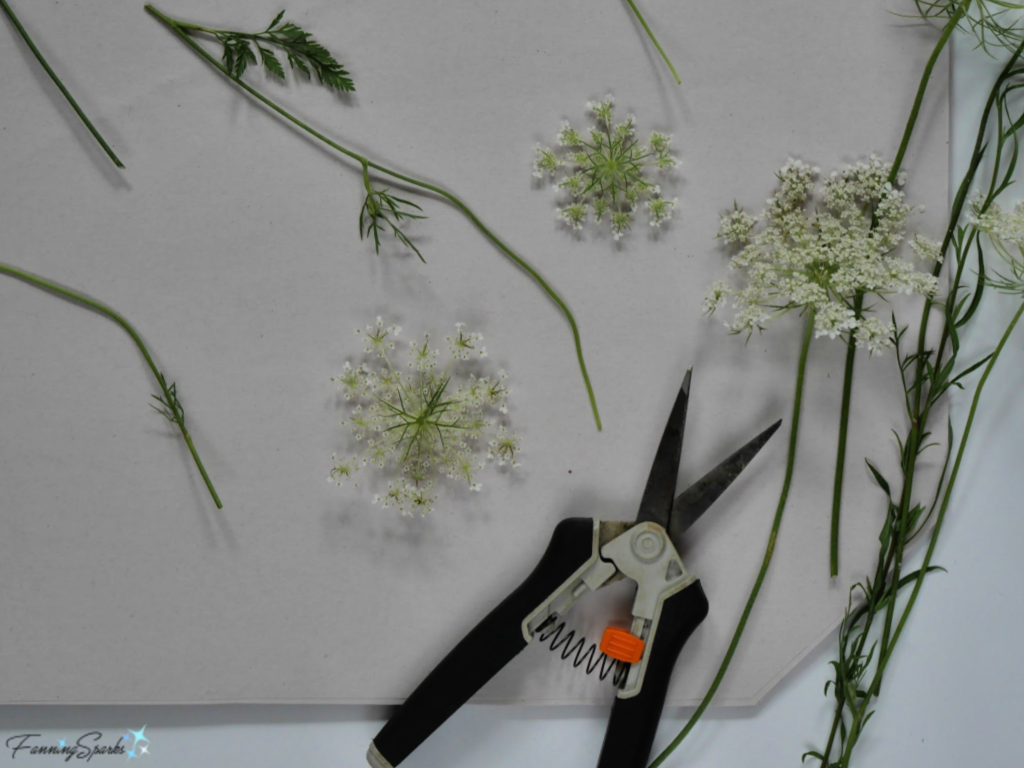
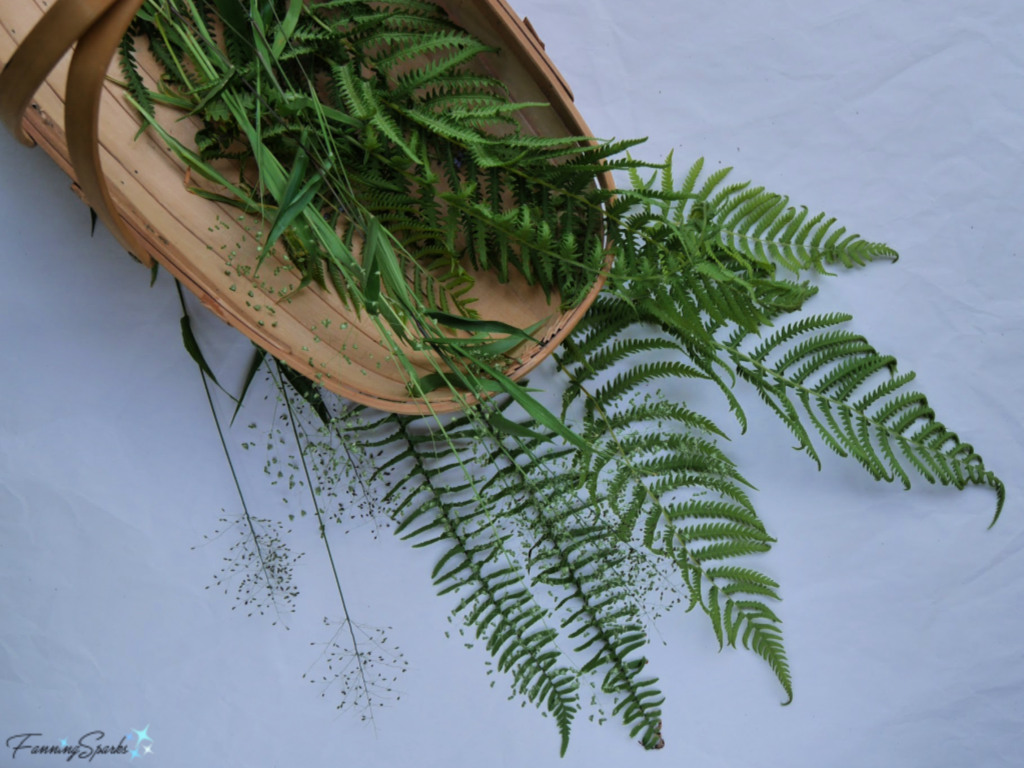 Separate and trim the materials to be pressed.
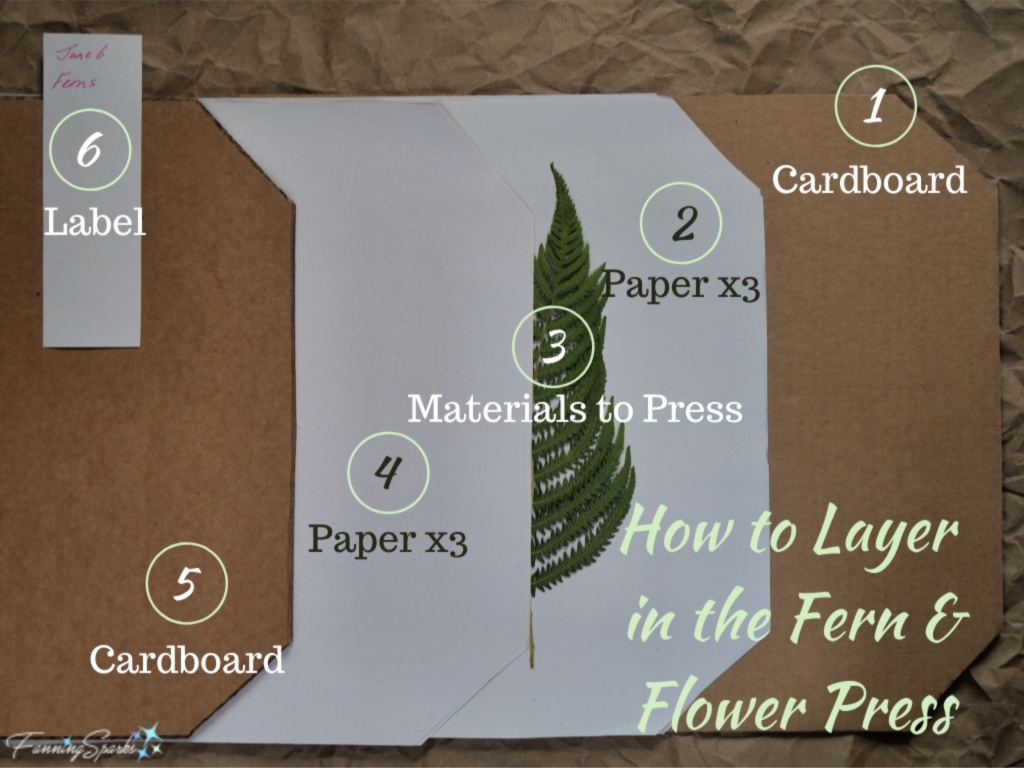
 To place plant materials in the press, layer the components as follows:
.1. Sheet of cardboard
.2. 3 sheets of paper
.3. Plant materials to be pressed facing down
.4. 3 sheets of paper
.5. Sheet of cardboard.
.6. Add a small label with the name of the materials and the date to track drying times.
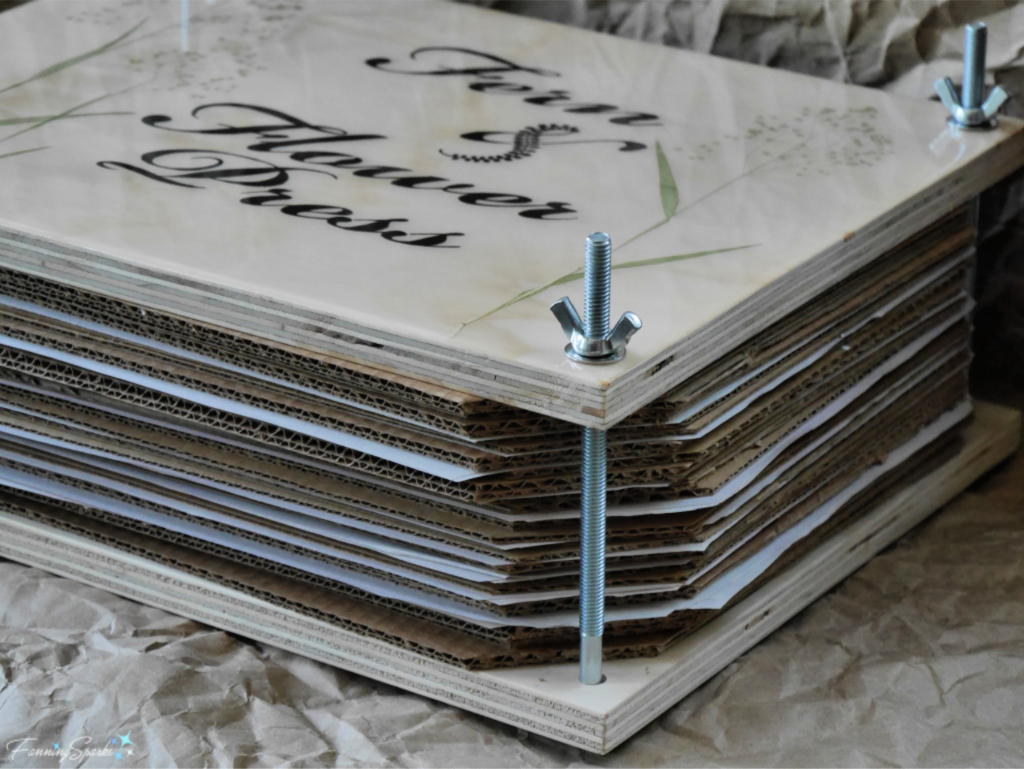
 Insert the carriage bolts into the Bottom Cover. Continue to build layers stacking them on the bottom of the press. When all layers are ready, slip the Top Cover onto the carriage bolts, slide on flat washers and tighten with the wingnuts. Ensure all 4 wingnuts are tightened equally.
 Now it’s time to let the press do the work. Drying times will vary but most plant materials are ready in about 2 weeks. You may need to re-tighten the wingnuts as the materials dry. While you’re waiting, start planning how you’ll use your beautifully pressed plant materials!
More Info
Please pin the below image for future reference.
 You can learn more about epoxy resin on the ArtResin website or Instagram page.
Update Aug 11, 2020: Check out my pressed flower project in the post Pressed Flower Girls Wall Art
or my newest Pinterest Board packed with Pressed Flowers inspiration.
Today’s Takeaways
1. Pressing is a fun and easy way to preserve flowers and other plant materials.
2. Consider making the Fern & Flower Press featured in today’s post.
3. Imagine the many uses for pressed flowers, ferns, leaves, grasses and other plant materials.


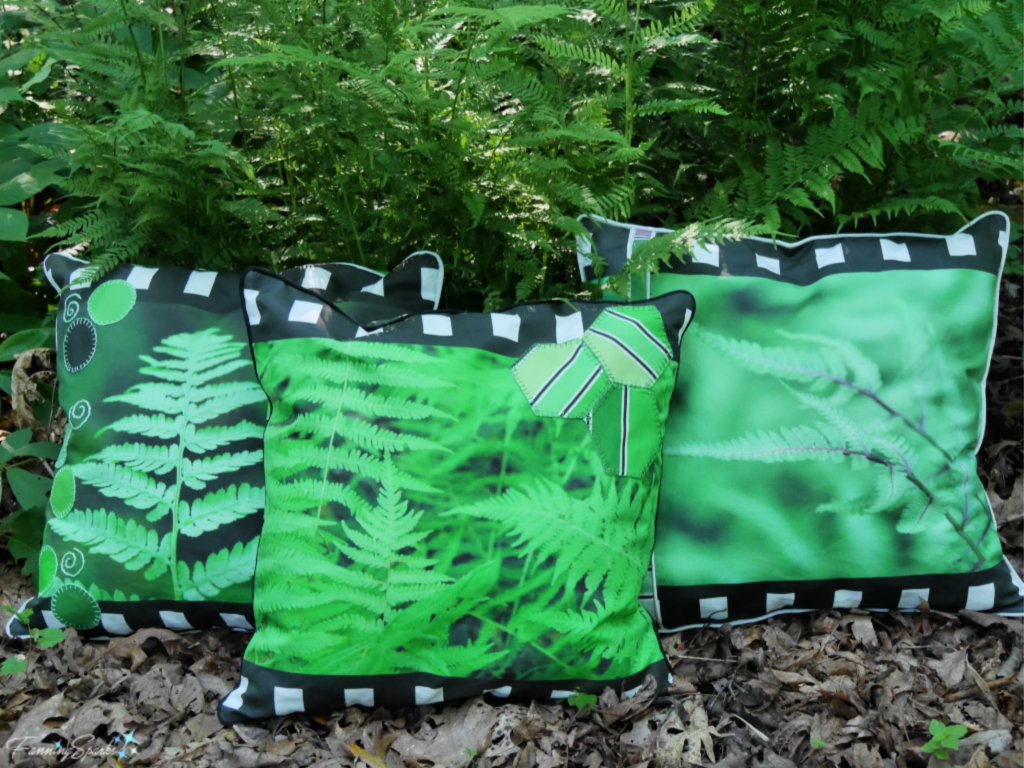

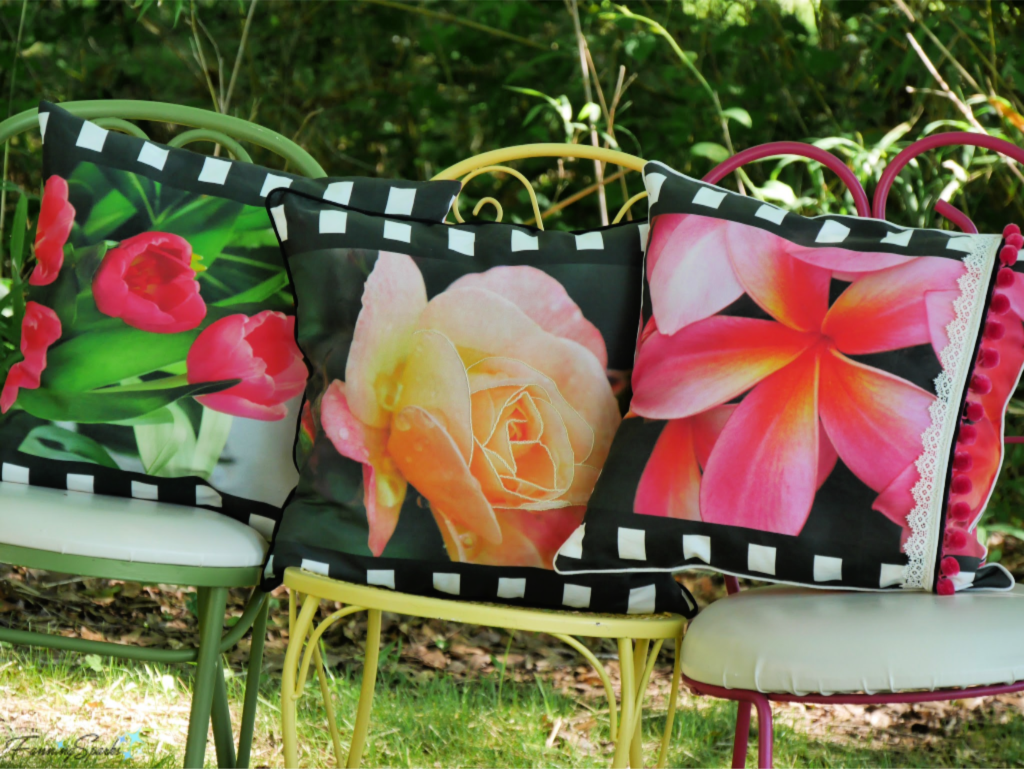
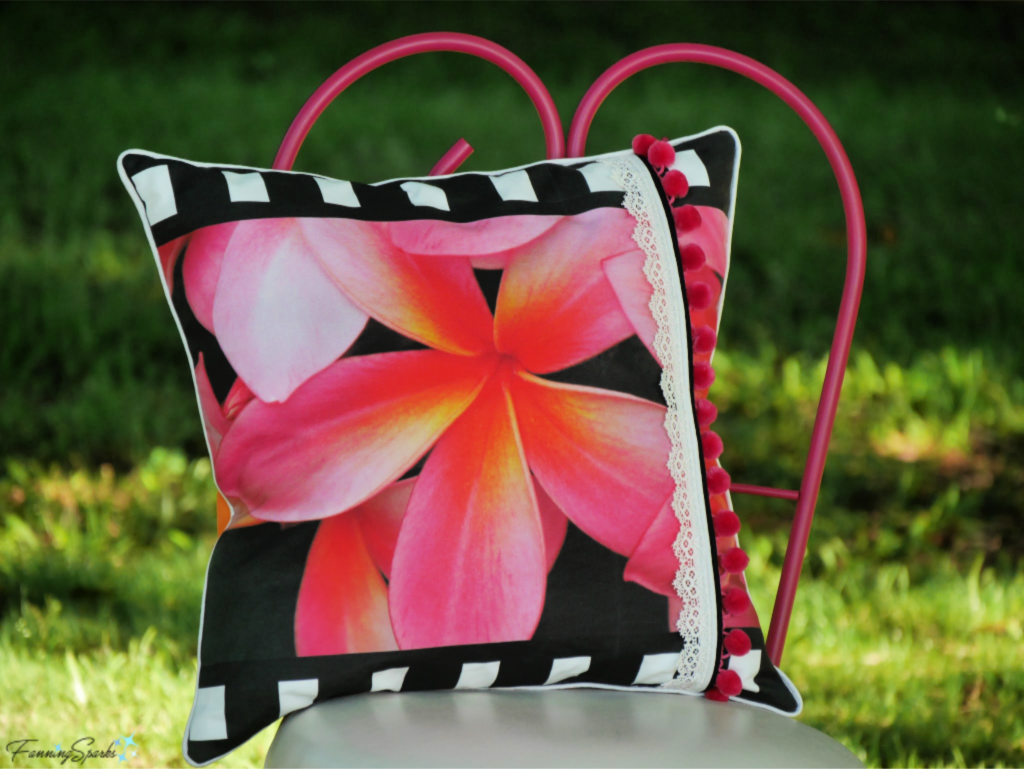
 Here’s how it turned out.
 For the back of the Southern Lady Fern pillow, I added a little twist with a diagonal section of the striped fabric.
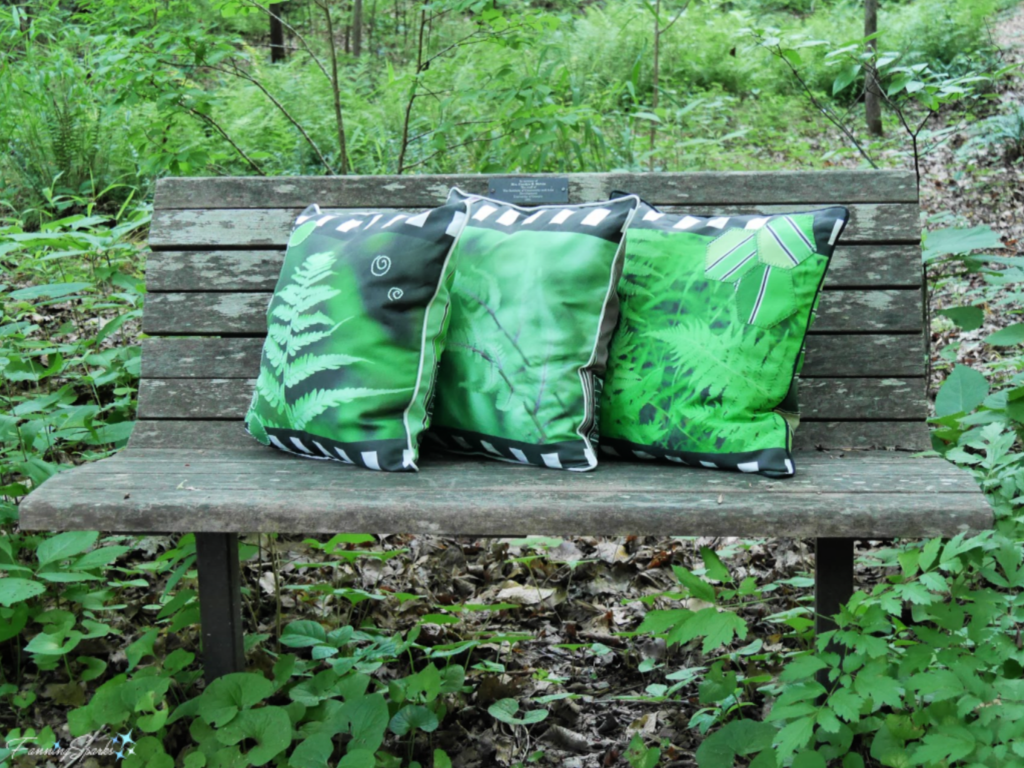
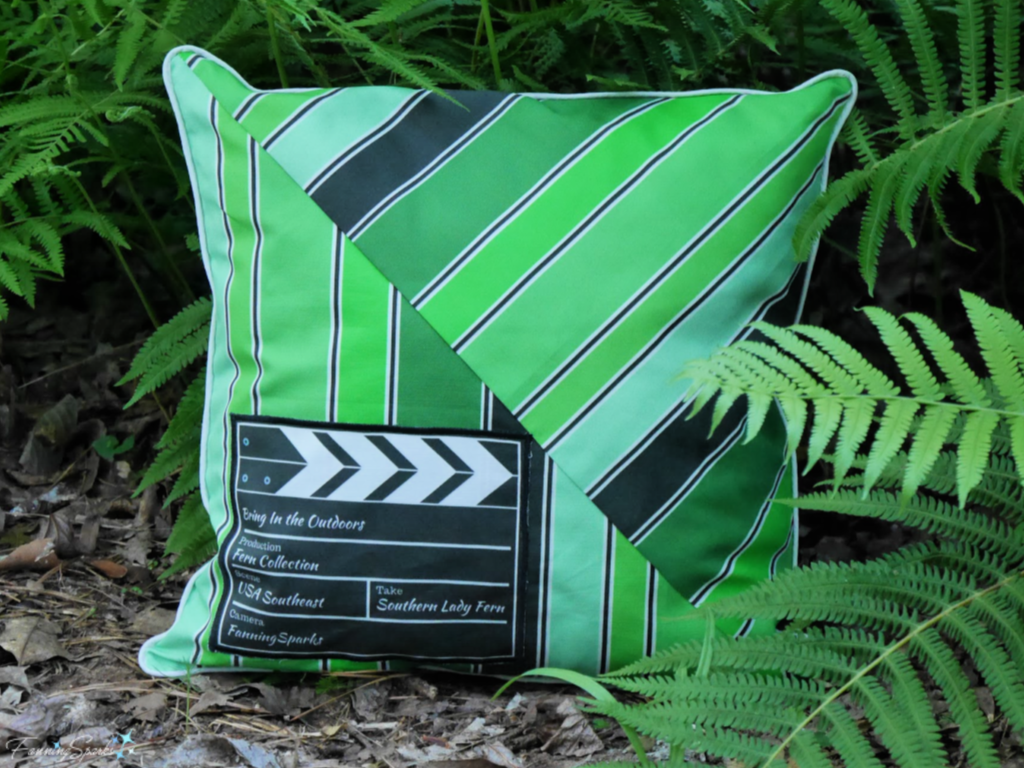 The Japanese Painted Fern (Athyrium niponicum ‘Pictum’) is considered one of the most beautiful ferns for the home shade garden thanks to its dramatic foliage and unique burgundy and silver coloring. Here’s how it looks on the pillow front design.
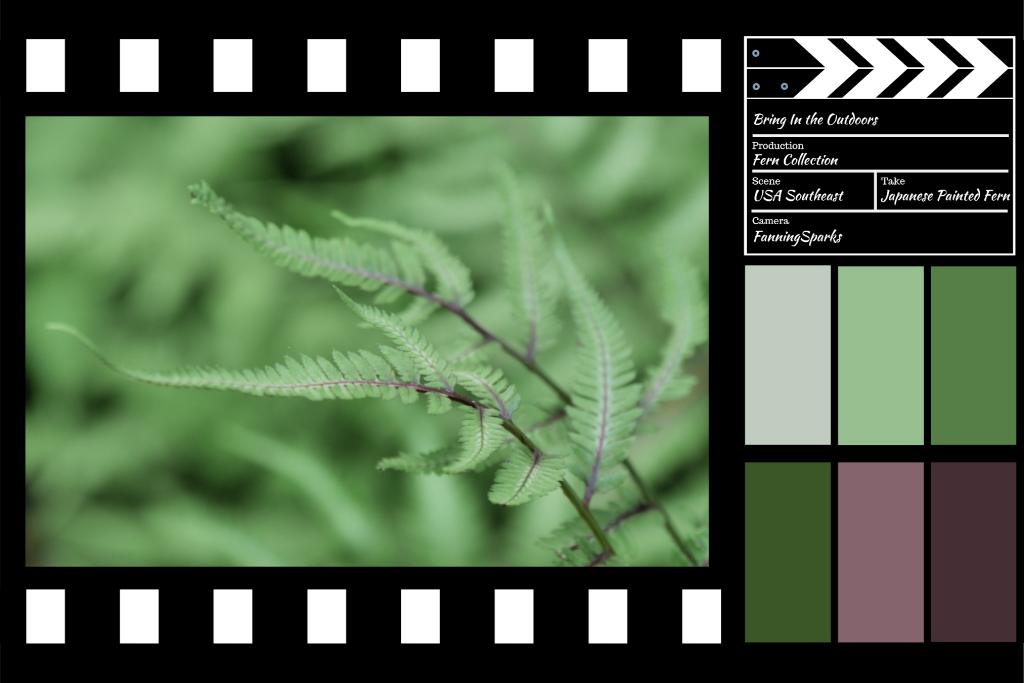 I added a narrow strip of the striped fabric on the pillow front to accent the various colors in this design. Here is the finished front of my Japanese Painted Fern pillow.
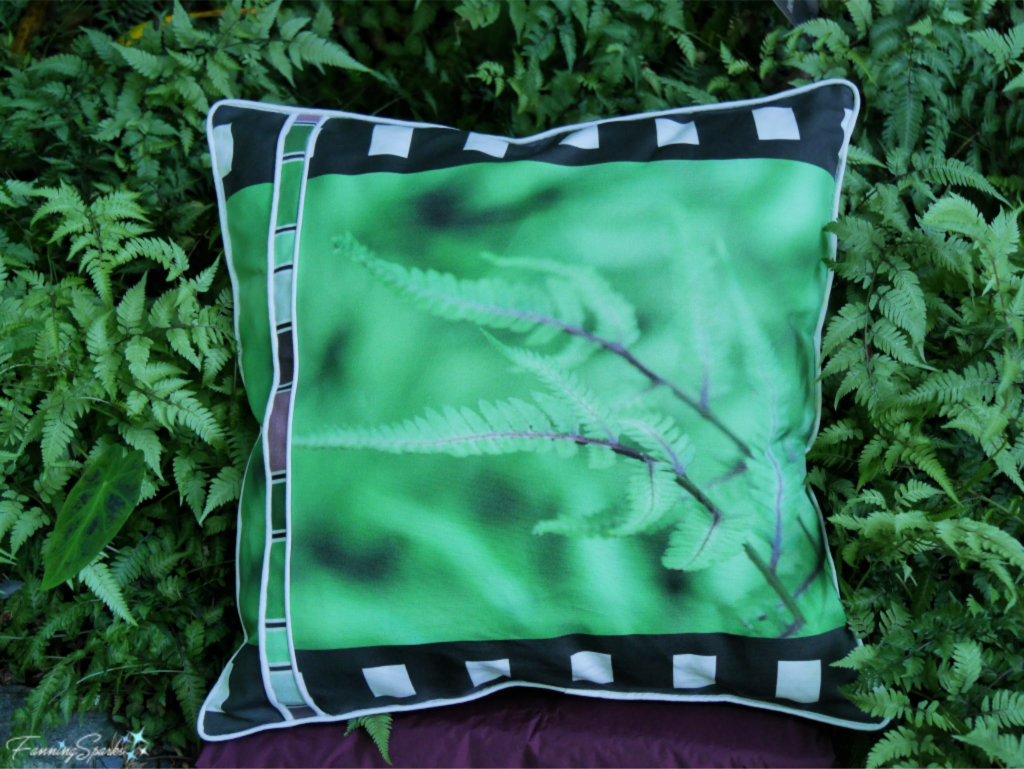 Here is the back of my Japanese Painted Fern pillow. I love this combination of greens and burgundies.
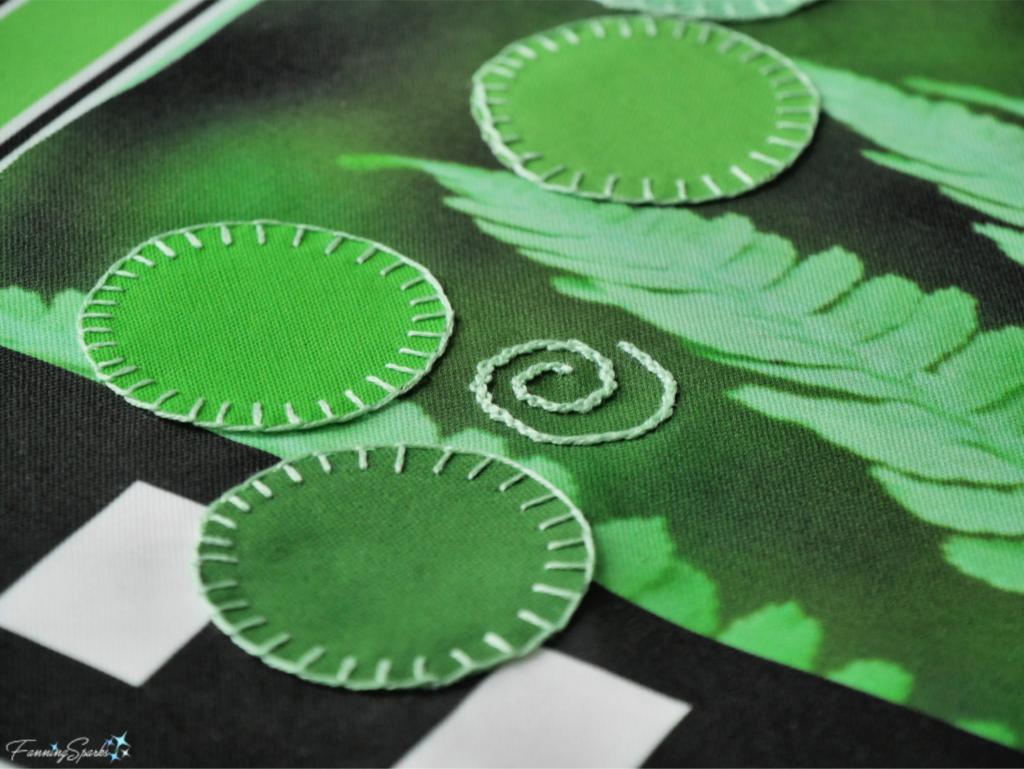
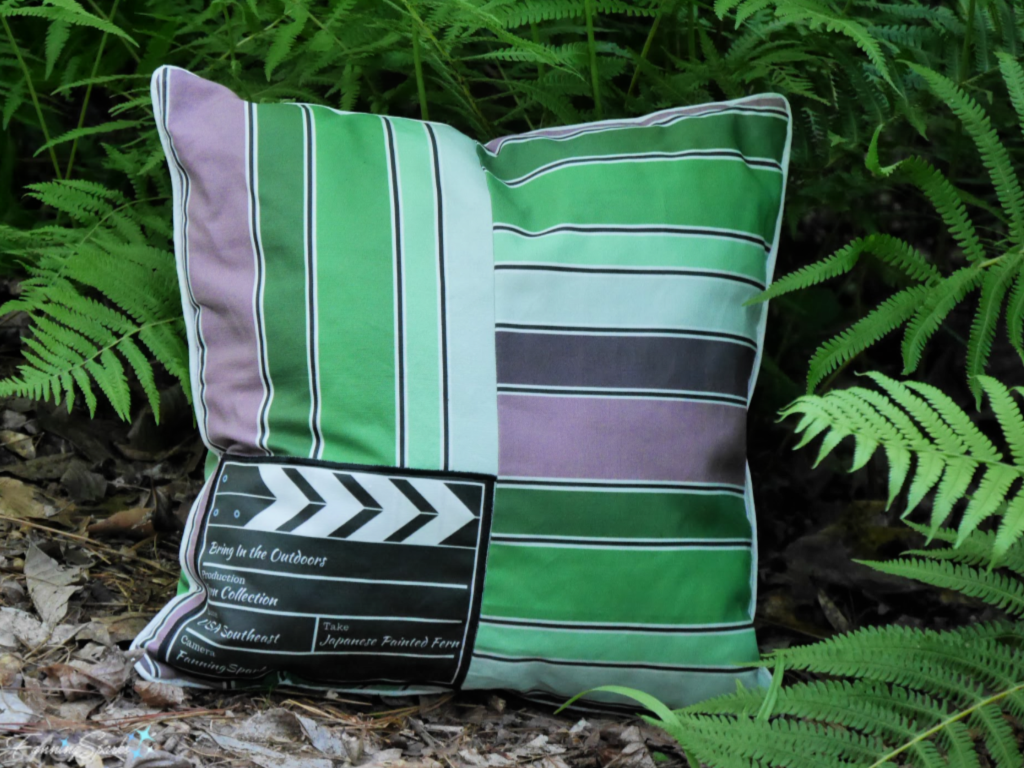 The third pillow in the collection is the New York Fern (Thelypteris noveboracensis). This is the pillow front design.
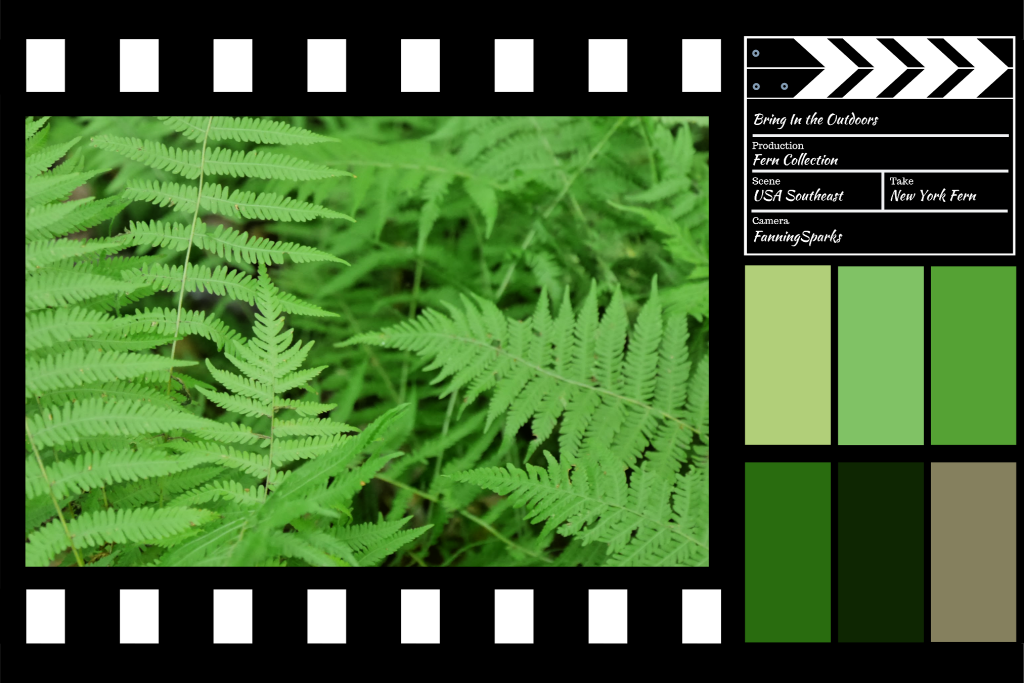 To add a little unexpected contrast, I appliqued hexagon shapes from the striped fabric on the pillow front.
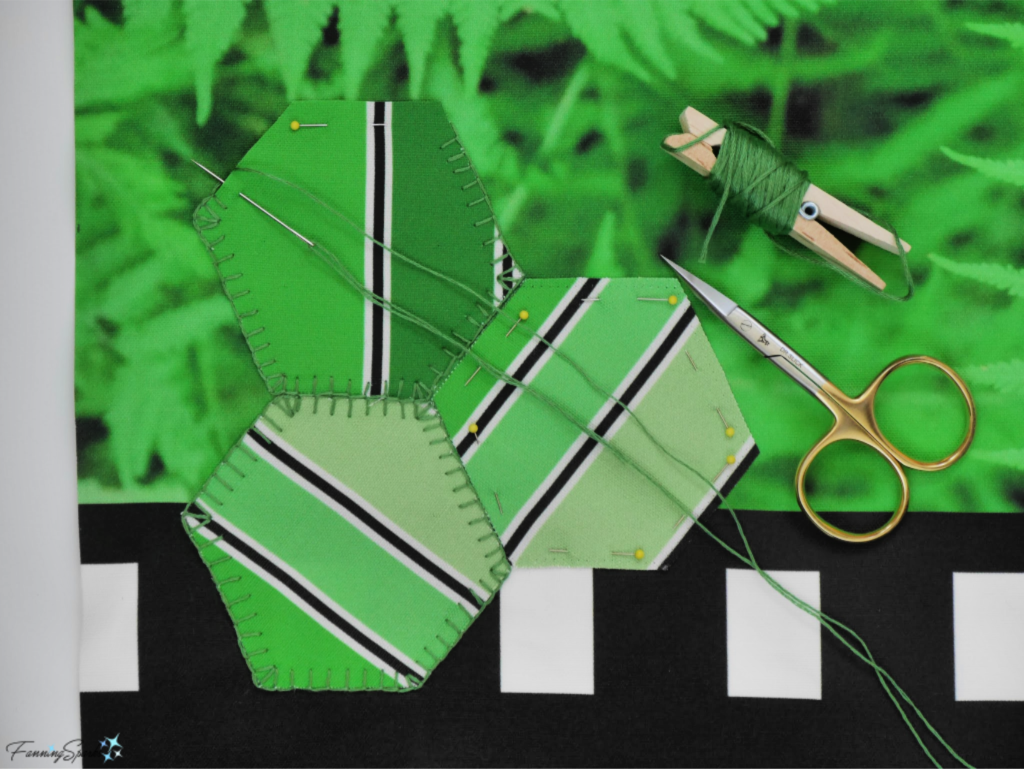 Here’s how the finished hexagons look on the front of the New York Fern pillow.
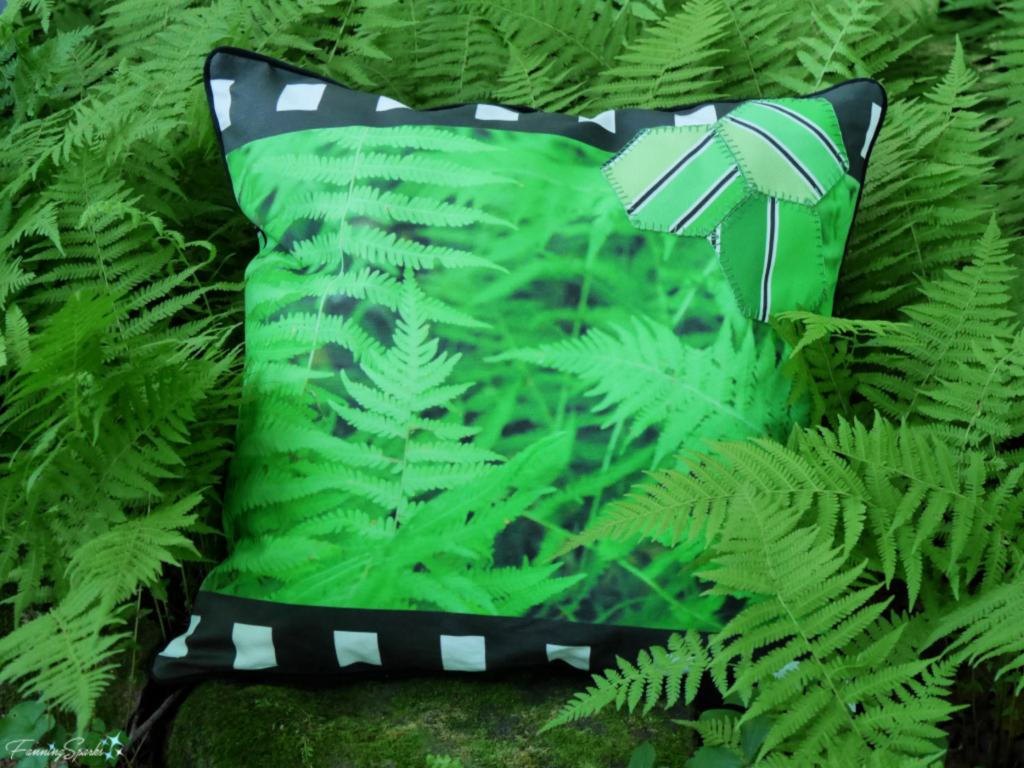 The hexagon shapes are repeated on the pillow back.
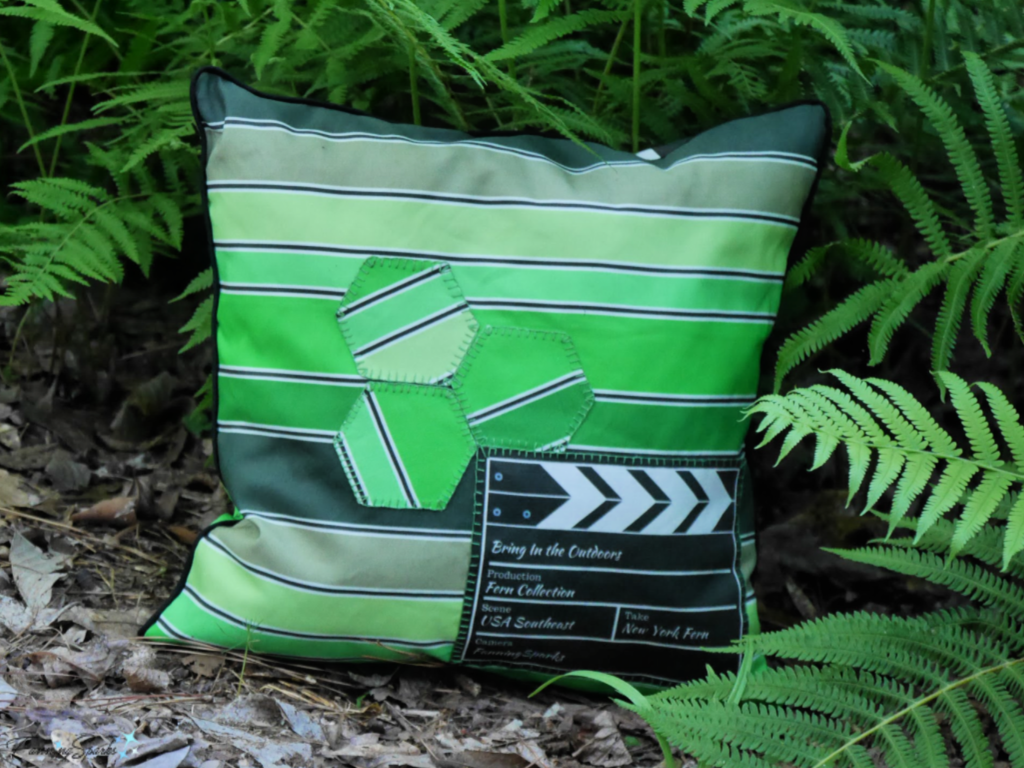 Last summer, I attended a class on Ferns and Fern Allies at the State Botanical Garden of Georgia (see
  I’m on the lookout for new and interesting ways to incorporate ferns into my home and surroundings. My favorite ideas are pinned on a Pinterest board,
  Sarah Whittingham, author of the book Fern Fever: The Story of Pteridomania, explains “The obsession with ferns was not confined to a few professional botanists but it affected men, women and children from all classes through the British Isles, the Empire and America. Books and articles encouraged thousands to set out on fern forays. Their overwhelming desire to ‘capture’ a rare specimen led them to wade through streams, scale rock faces, descend gorges and lean over fast-flowing rivers. Accidents were common, sometimes fatal, and over-collecting and even fern stealing were rife.” I’m sure I won’t be risking my life for a fern but I certainly understand the appeal!


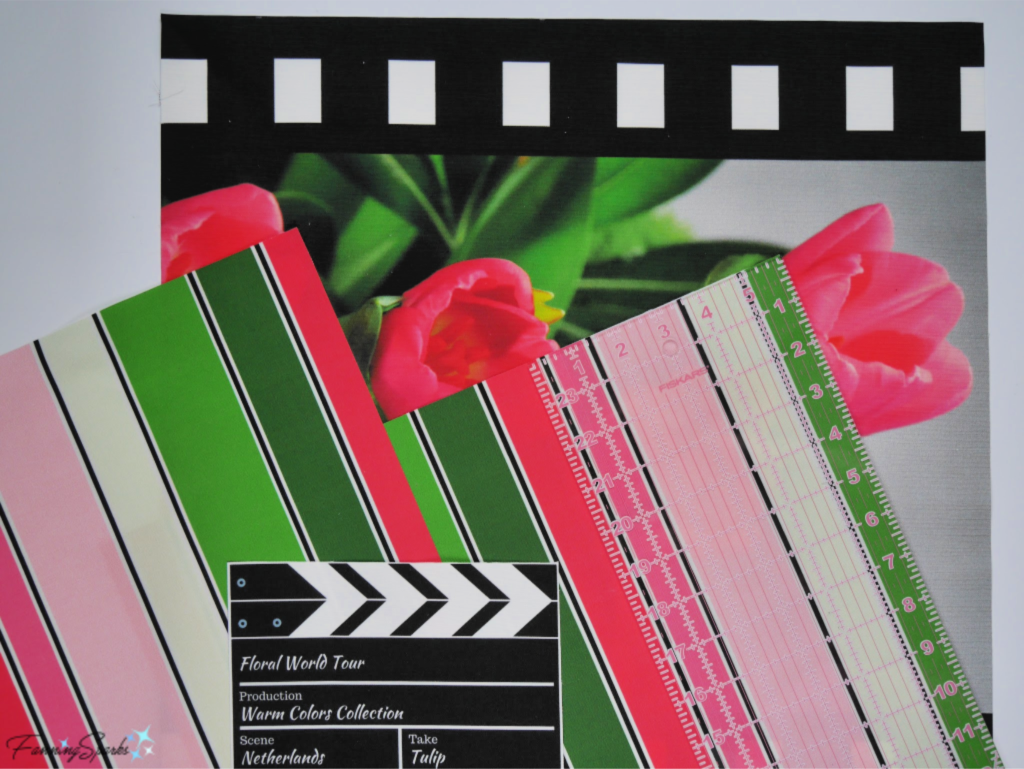
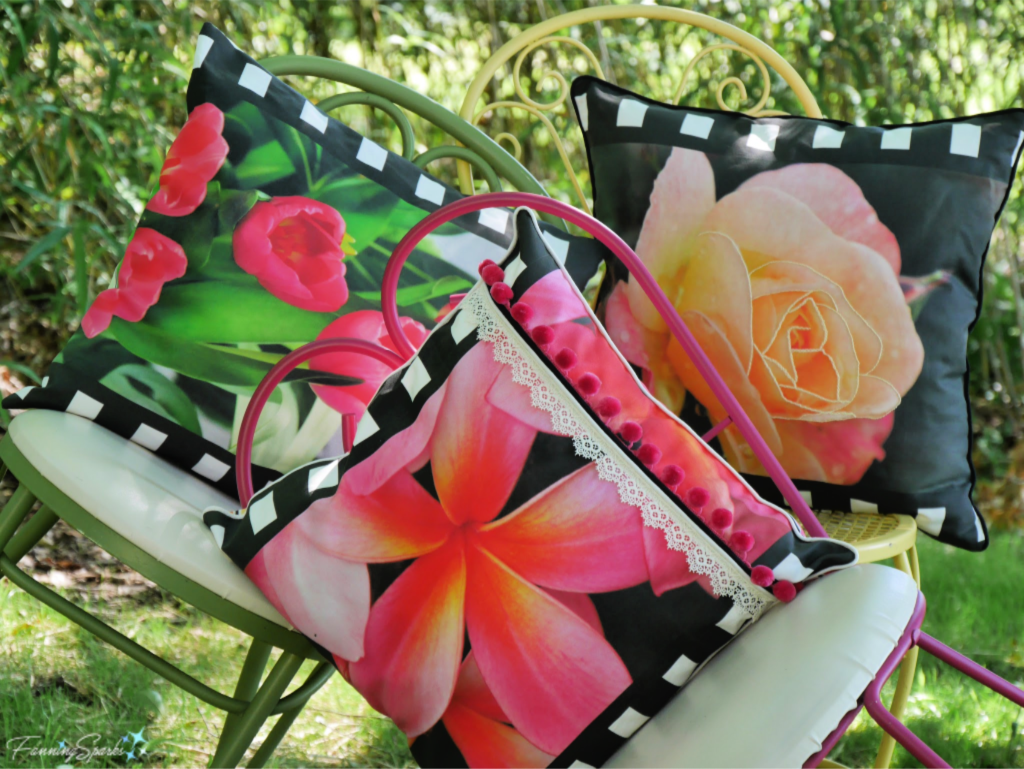
 The back of the pillow can also be customized. If you simply sew the back closed (ie instead of making an envelope closing), less fabric will be needed. The extra striped fabric can be used to change the direction of the stripes; instead of running the stripes vertically, they can be turned horizontally or sewn in a combination of horizontal and vertical (as shown on the pillow on the right).
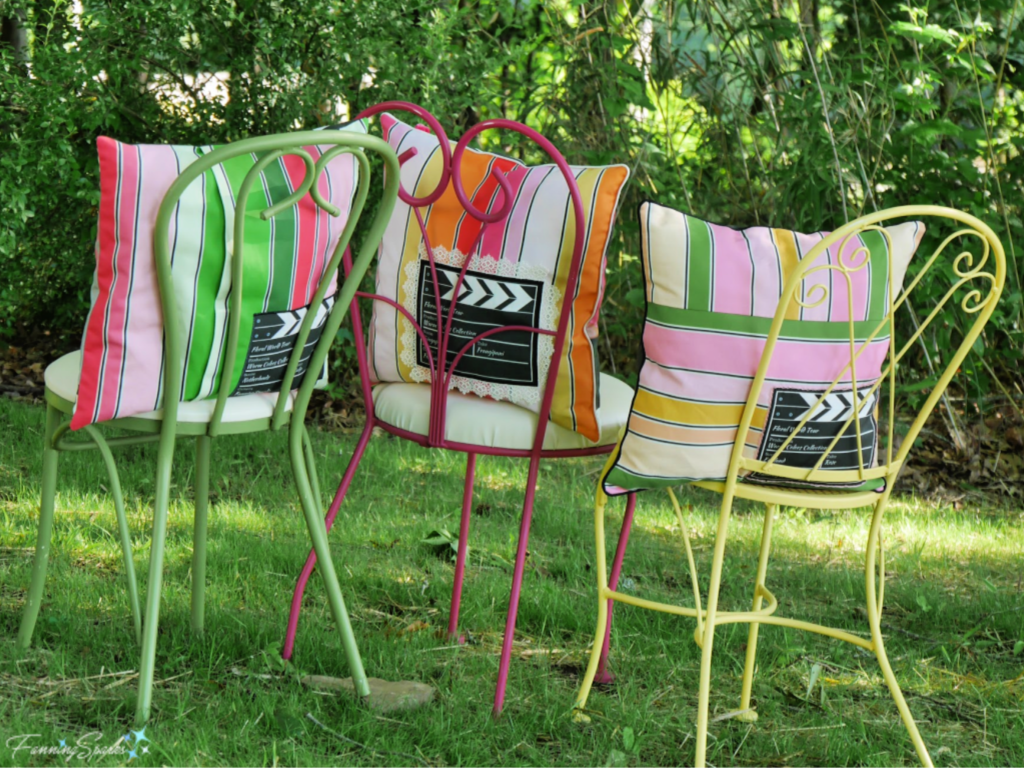


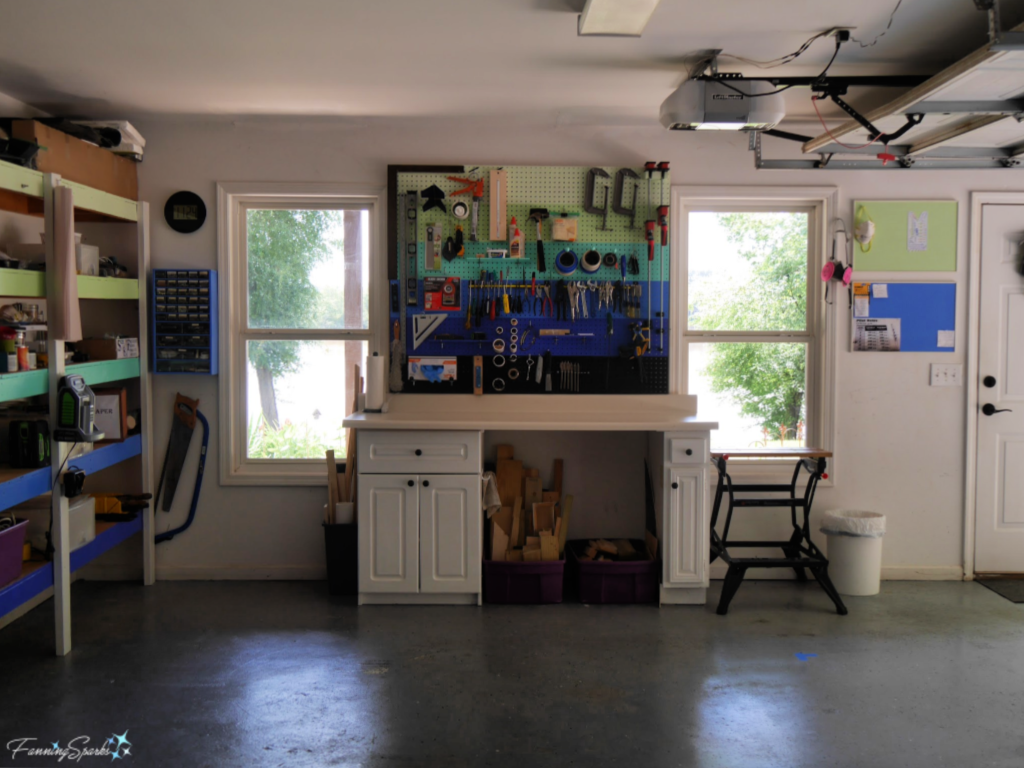 But it wasn’t always like this! Before last week, only a few tools like the jigsaw and drill were stored in the cabinet under the workbench. Many of the tools and supplies I used most frequently were stored on shelves on the opposite side of the garage. So every time I needed a hammer or a piece of sandpaper I had to walk around our second vehicle. I’m not complaining—I love having a dedicated workshop area and I really didn’t mind maneuvering around the vehicles. That being said, it wasn’t the most efficient setup and space was tight.
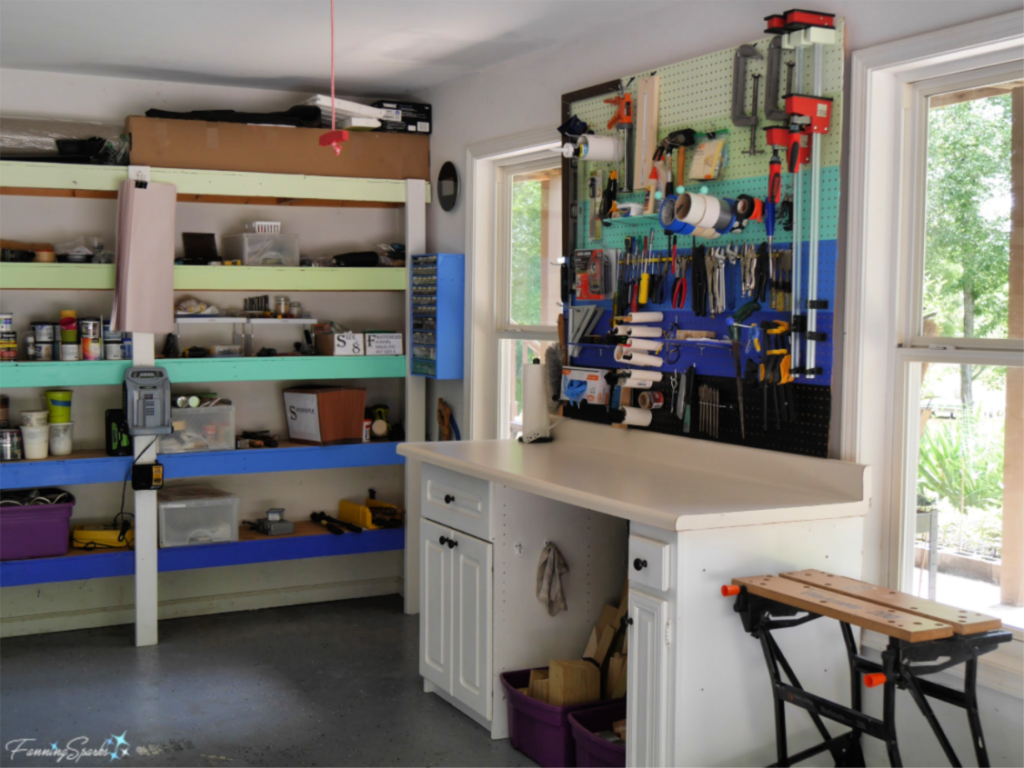 Hanging a pegboard and reorganizing isn’t ground breaking but I’m amazed at the improvement. Now my frequently used tools and supplies are within easy reach. It’s so much more efficient to simply reach for a tool than to interrupt my work flow to go fetch it. It’s also easier to keep my work surface cleared. Plus it’s so pleasant to spend time in this pretty workspace. I learned a few things along the way that I thought might be worth sharing. Here are my top 10 tips from our gussied up workshop.
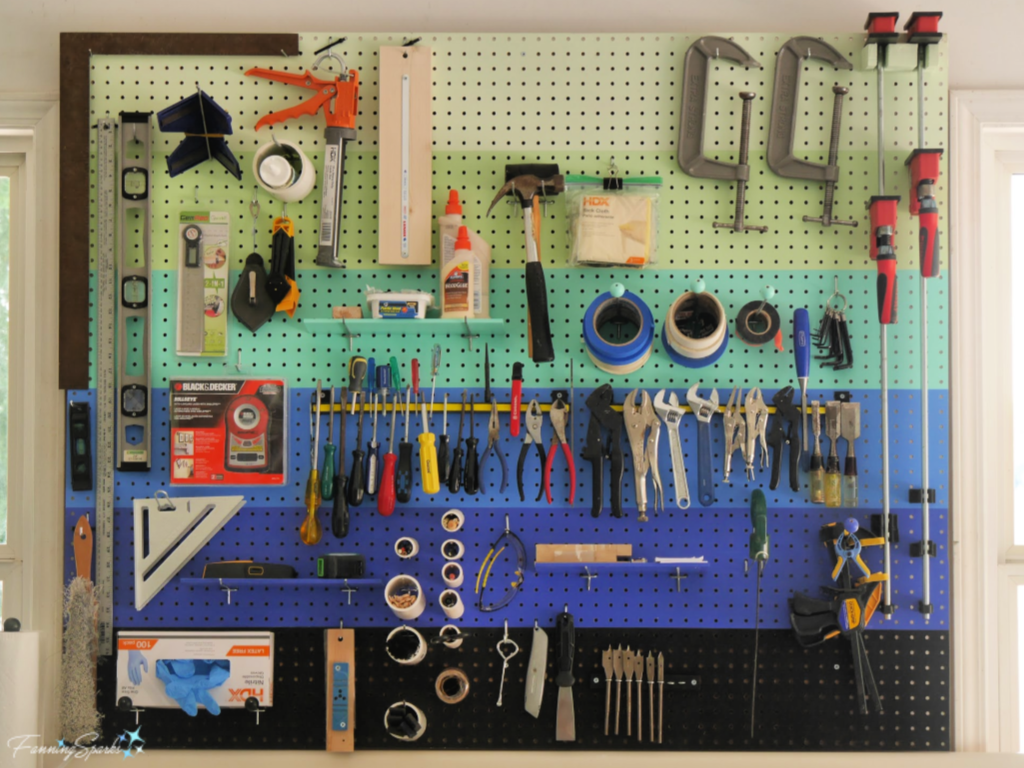 These steps should help maximize your pegboard space:
 Tip 3. Magnetic tool bars are great. We already had 2 magnetic tool storage bars so I moved then to the center of the pegboard and secured them to a supporting brace. I really like these bars because the magnets are strong and they hold a lot of items in a small space. The magnetic tool bars, with their bright yellow strips, are shown below.
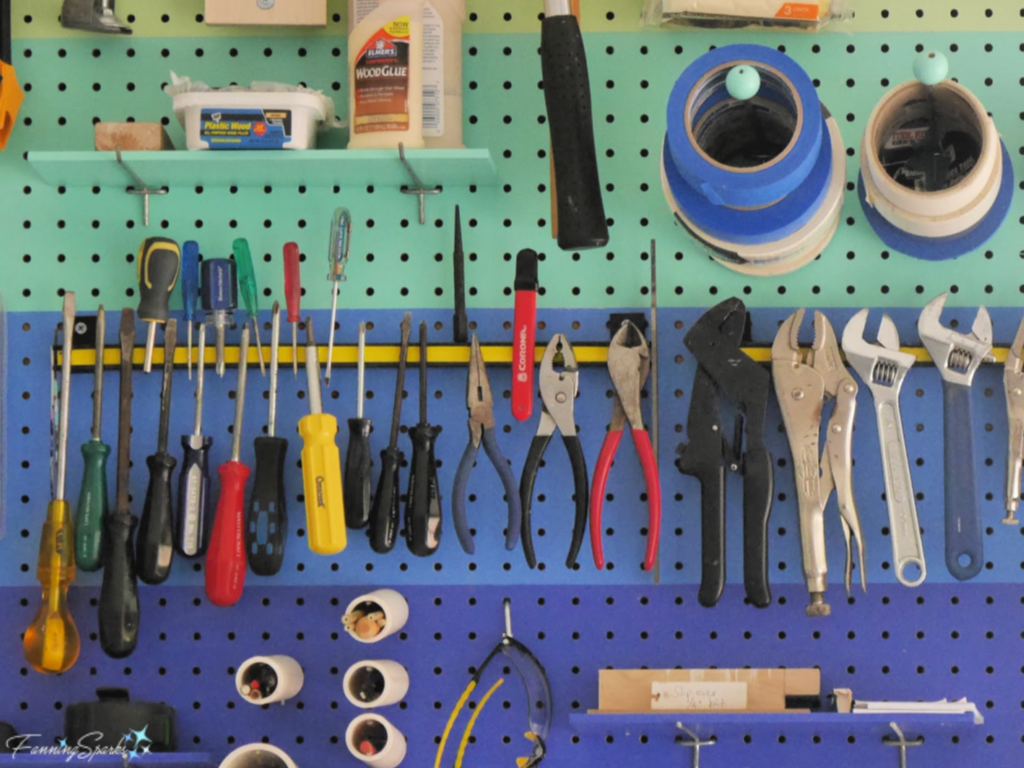 Tip 4. Select good pegboard hooks. There are lots of different formats and sizes of pegboard hooks and hangers on the market. I simply repurposed hooks we already had. Some of the hooks were duds and fell out every time I removed the item I’d hung. Other hooks, like the one highlighted below, stayed in place and worked much better.
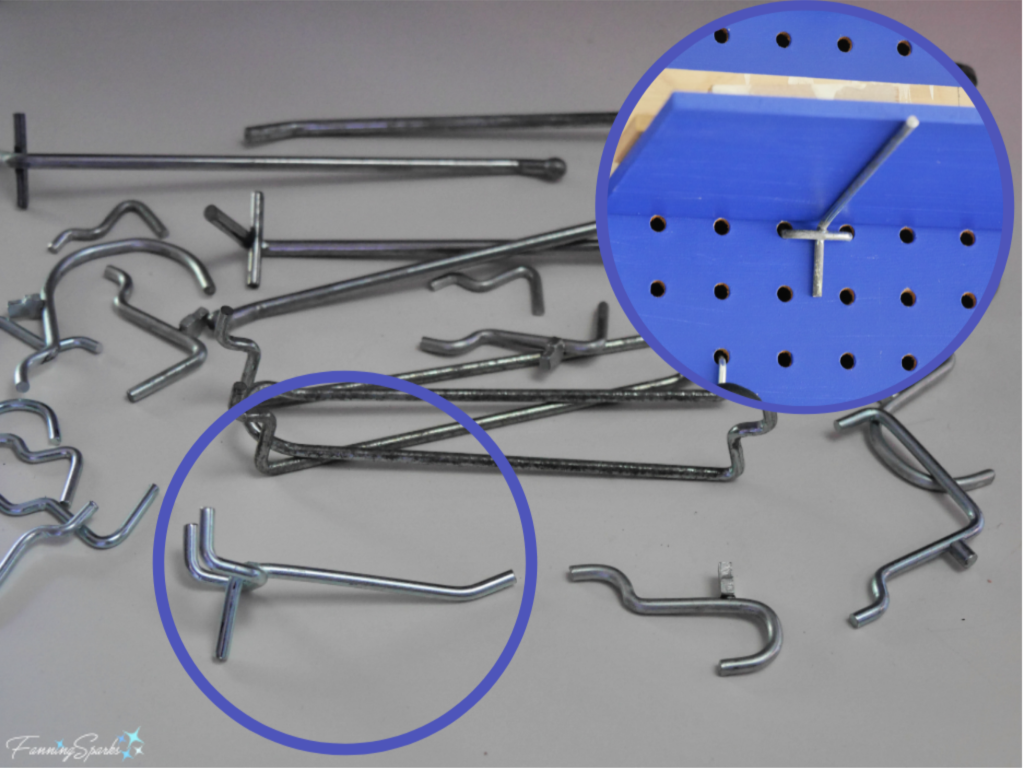 Tip 5. Lock in pegboard hooks. As mentioned, some pegboard hooks won’t stay in place. A simple fix is to secure them with a cable tie. This isn’t a perfect solution, though, because it only works along the edges where you can get your hand behind the pegboard. A quick online check suggests that “peg locks” are the latest solution to this problem. If you’re buying new hooks, consider including peg locks.
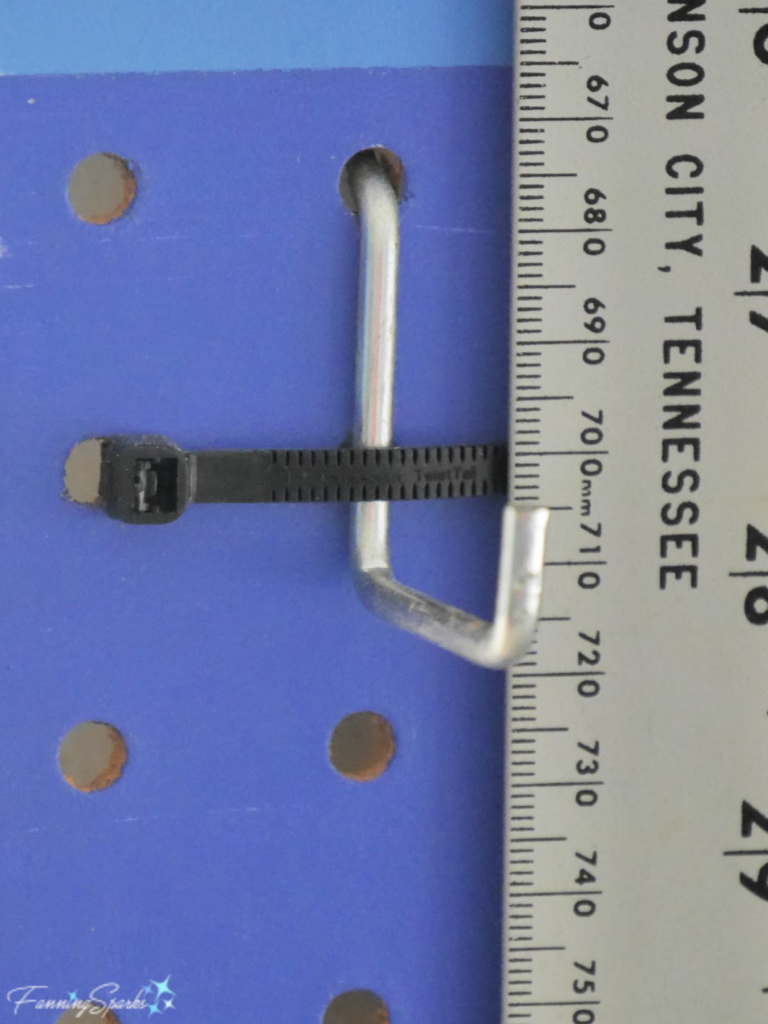
 Tip 7. Make small shelves. Some tools and supplies don’t lend themselves to being hung. My sanding block, wood filler and wood glue are examples. It’s easy to create a small shelf using 2 matching pegboard hooks and a small rectangular piece of wood or MDF. I simply laid my shelves across the hooks but you could easily secure them with cable staples.
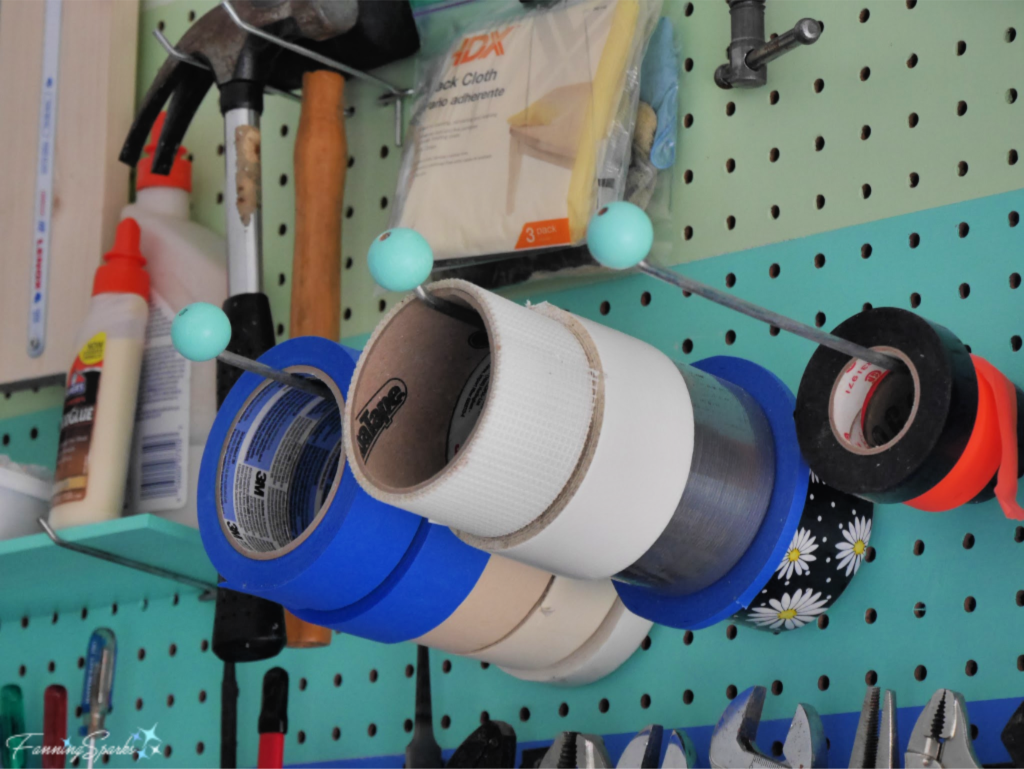
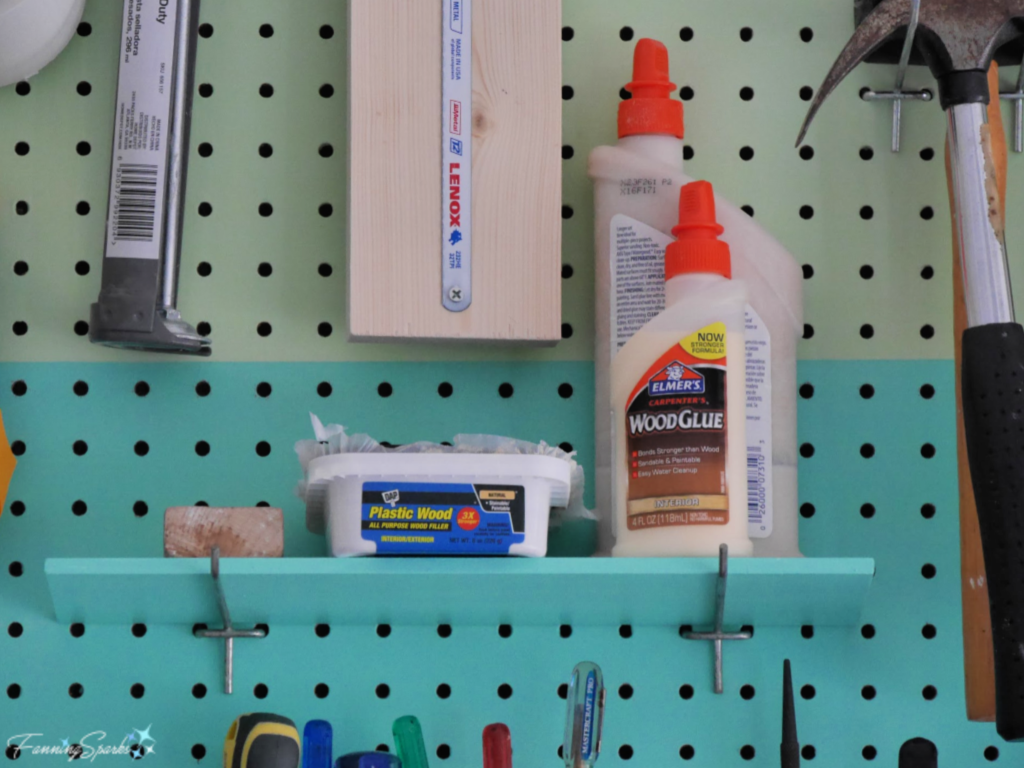 Tip 8. Hang sections of PVC pipe. Simply cut pieces of PVC pipe and slip them over a pegboard hook. These tubes are perfect for long narrow items like pencils, scissors, craft sticks and small foam paint brushes.
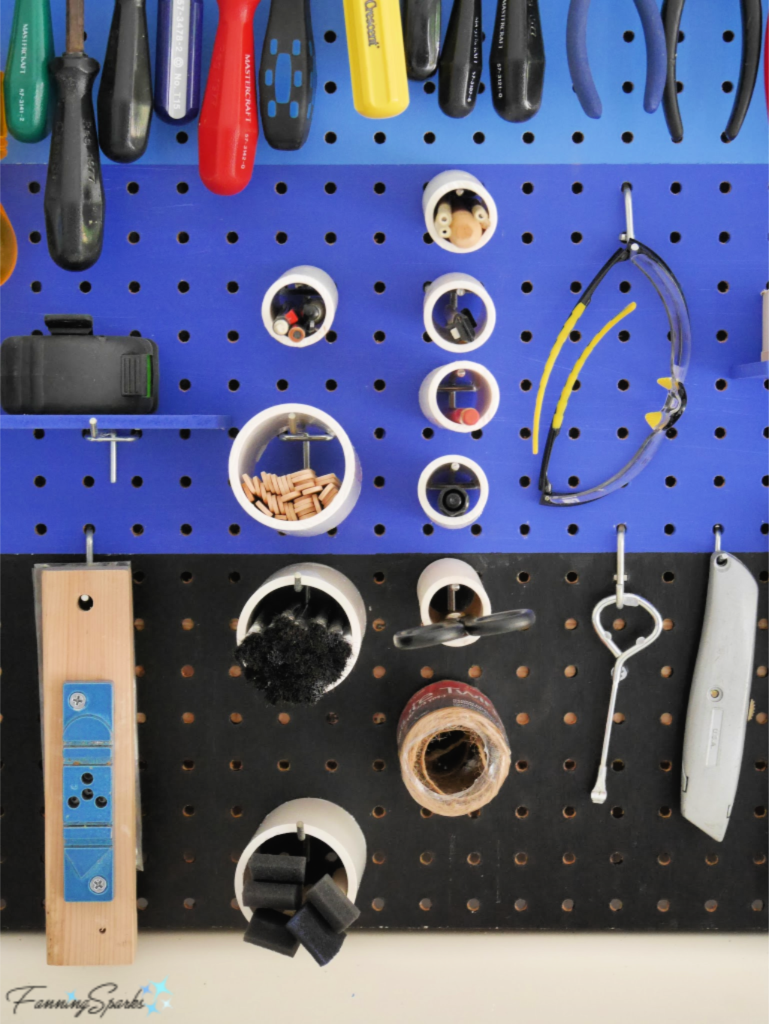
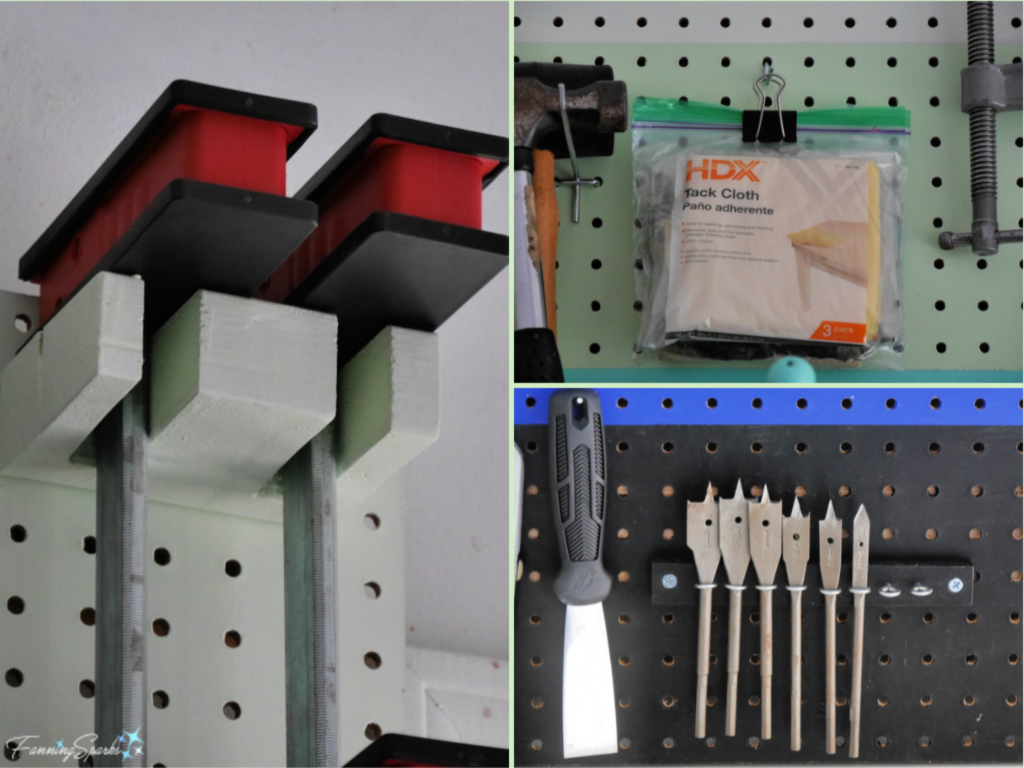 Tip 10. Add labels. Take a few minutes to label items that aren’t obvious. For instance, I like to store sandpaper in an accordion file sorted by grit. Labels make that clear. Another tip that might be helpful relates to fasteners. Whenever possible, I use size 8 fasteners. This has allowed me to build up a good inventory of size 8 screws, for wood and metal, in various lengths. Labels remind me of what goes where.
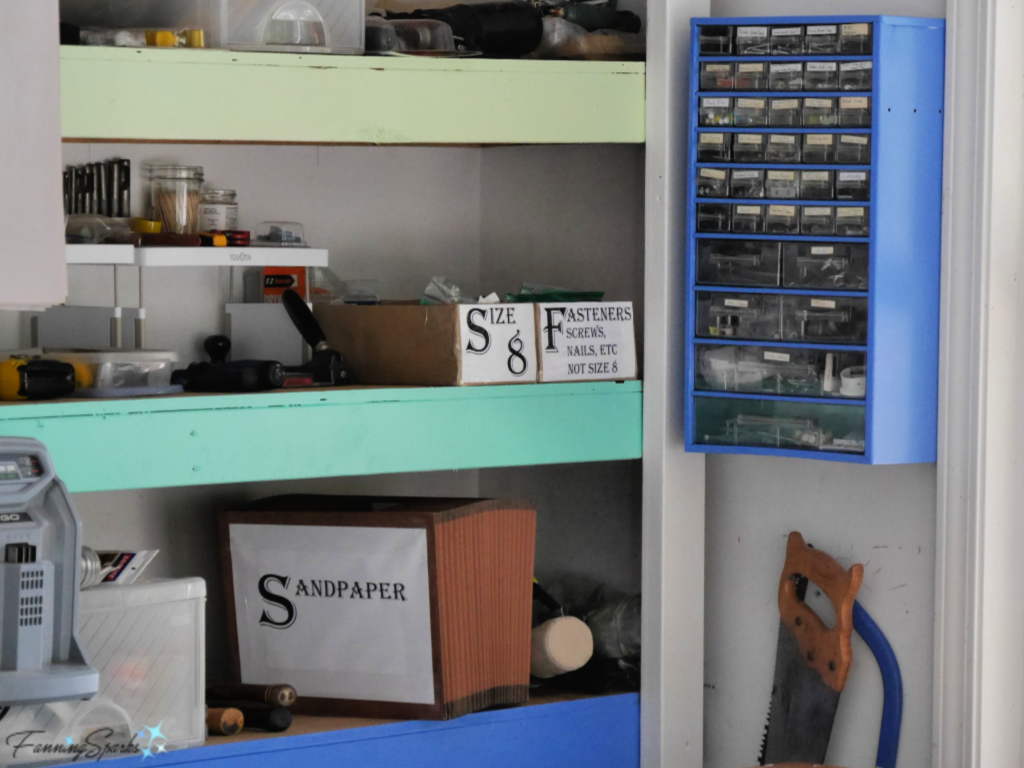 Bonus Tip. Paint with bright, cheerful colors. We re-purposed the pegboard from another location. As I was hanging it, I realized it was rather scuffed up and could use a fresh coat of white paint. But, hey, if I’m going to paint it anyway why stick with boring white? That’s when the 6-colored stripes emerged and things got a whole lot more interesting. Very little paint was needed—I just used leftover sample paint which I already had on hand. Although I didn’t set out to paint the pegboard, the faces of the built-in shelves and even my cork bulletin boards, I’m really glad I did.
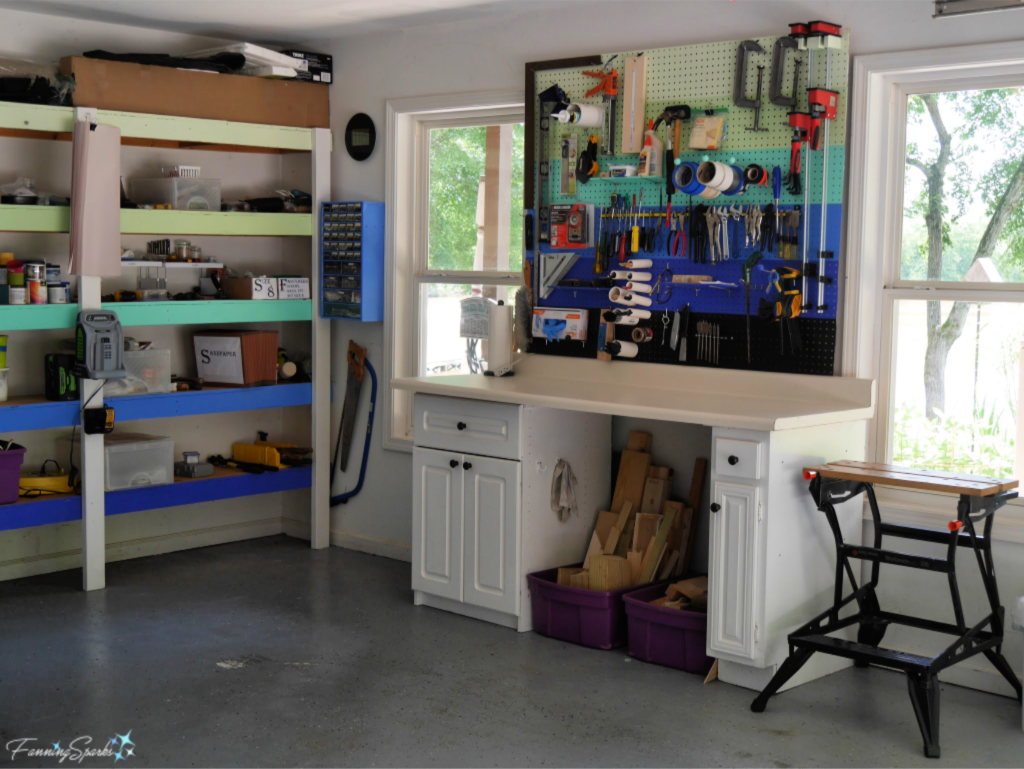 It’s back to project work in our new gussied up workshop! Here’s a sneak preview of one that’s under way.
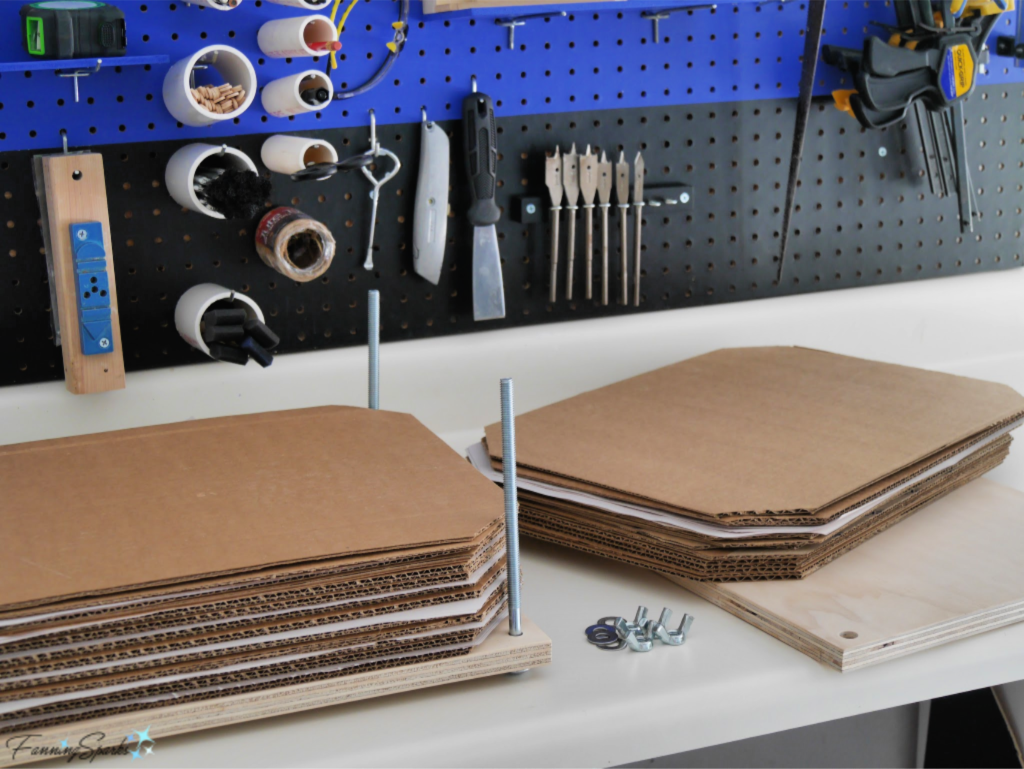


 And how could I ever forget the Wisteria lamp? This masterpiece of leaded-glass art by Clara Driscoll is on display at the Morse Museum in Winter Park, Florida. More Art Nouveau stained glass gorgeousness can be seen in my post
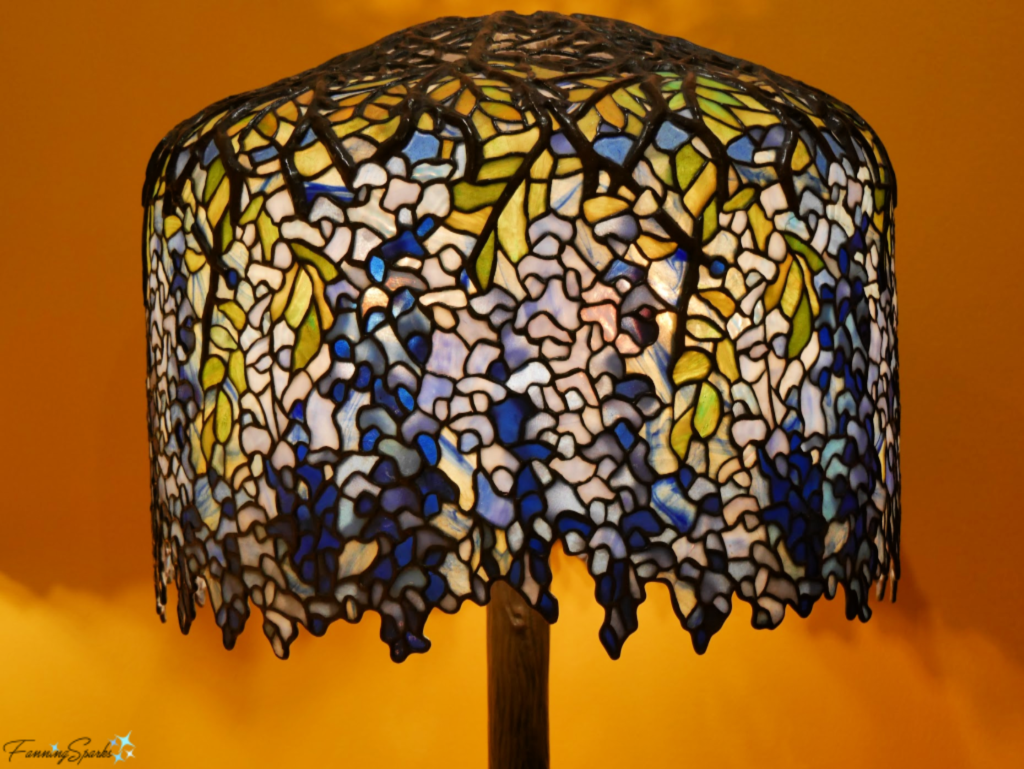

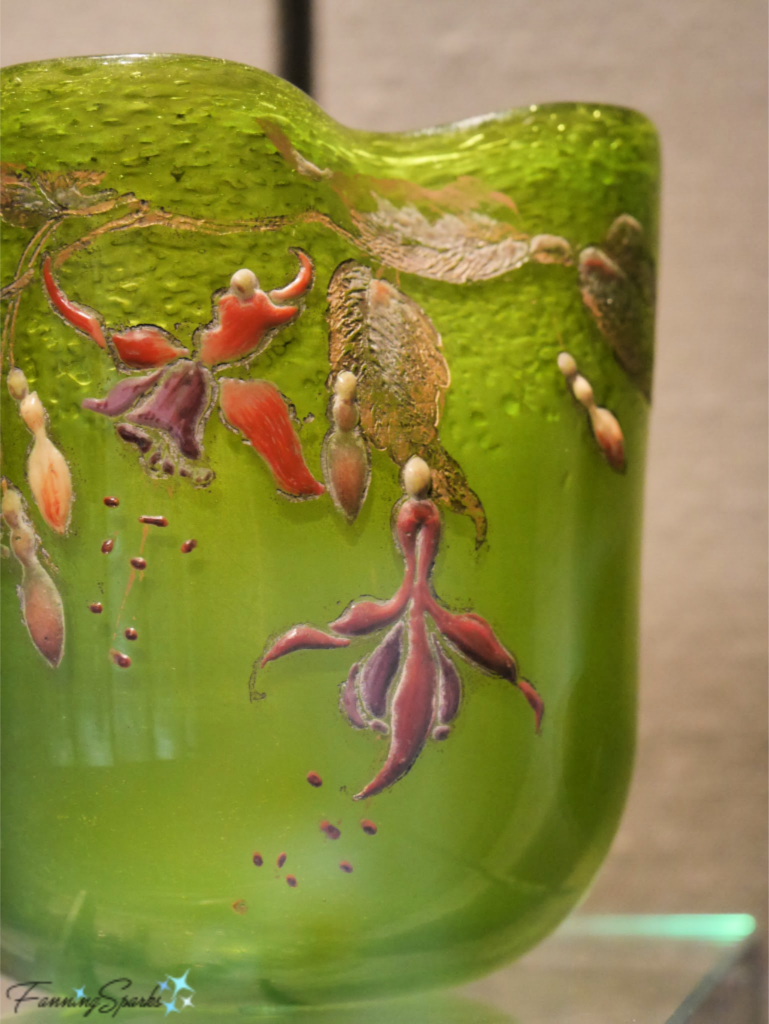
 Throughout the book, Verneuil suggests a range of interpretations for the Fuchsia including: 1. Napkin Ring 2. Decorative Vase 3. Stencil Border.
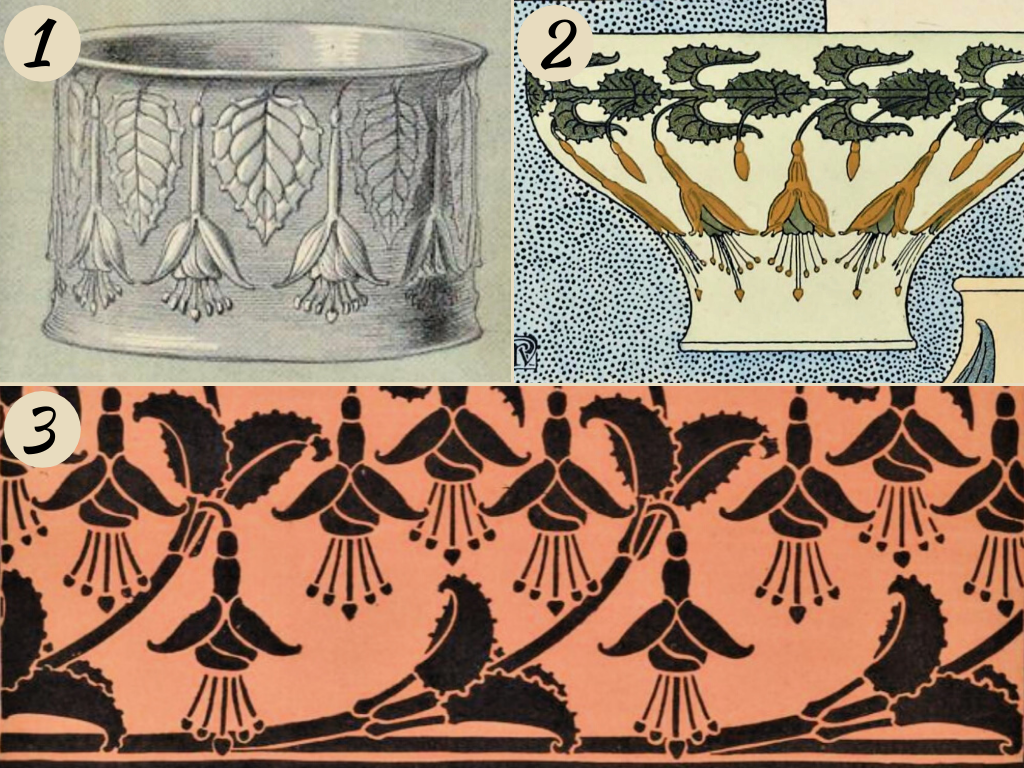
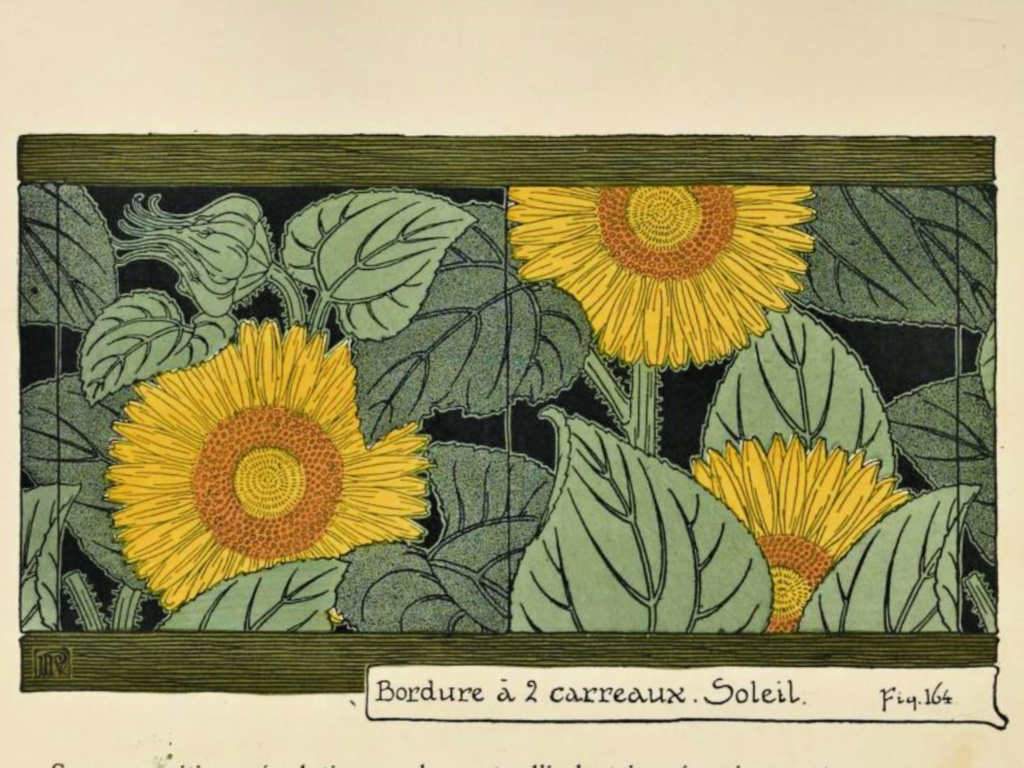
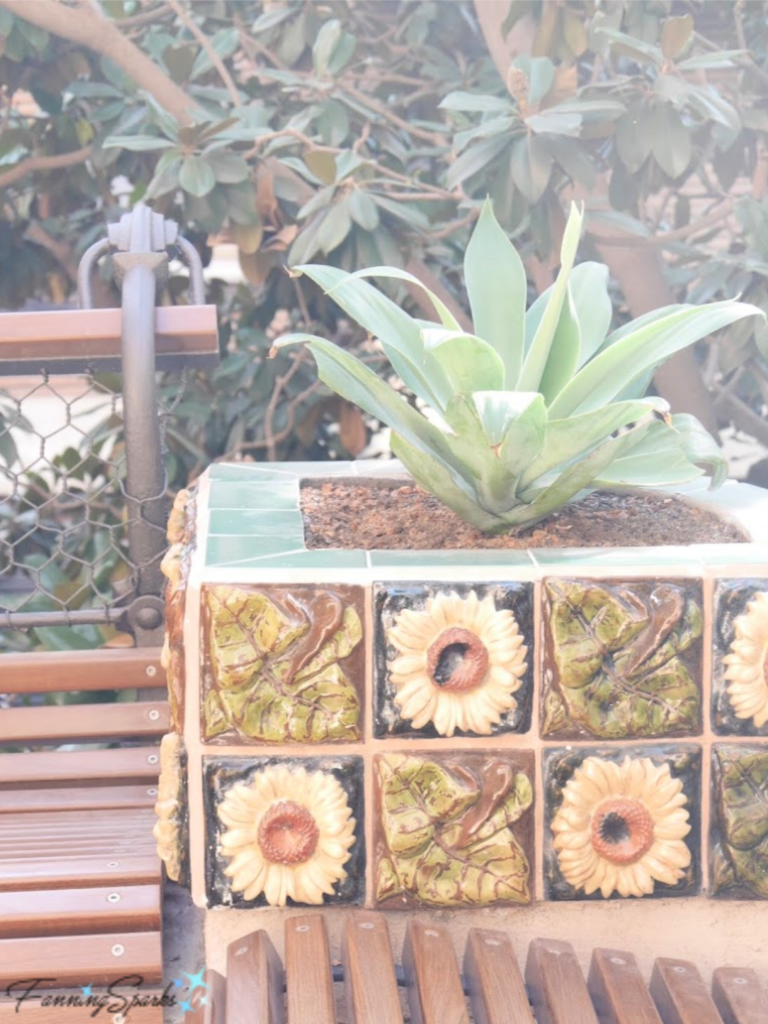
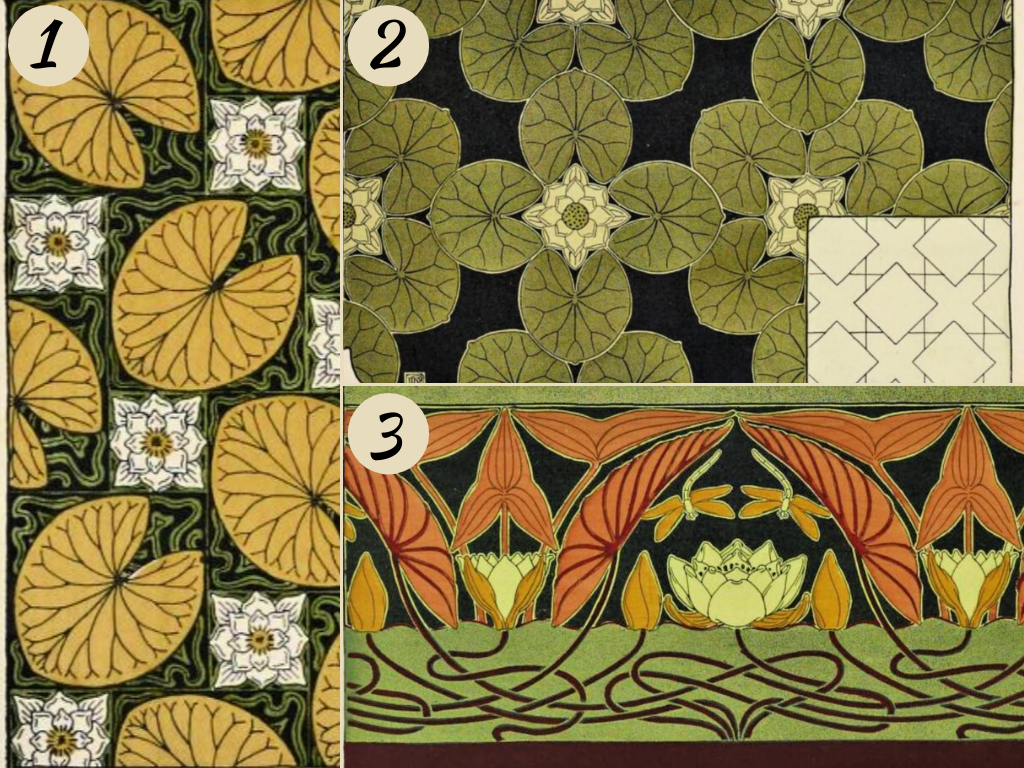
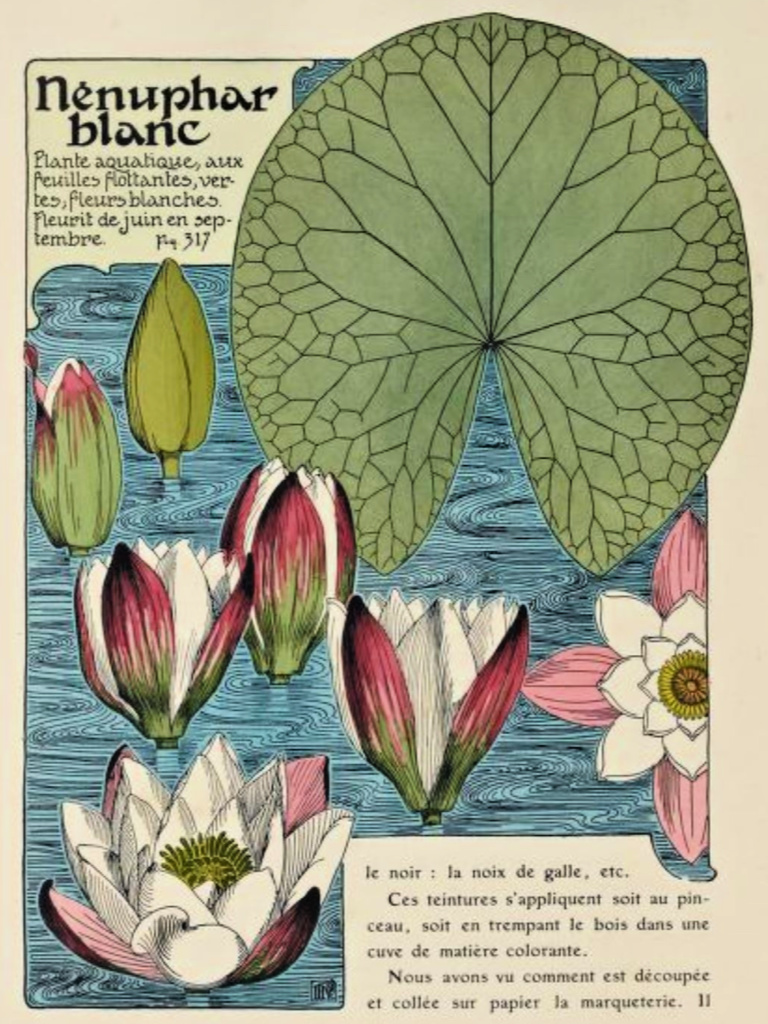 Verneuil suggests several interpretations of the Water Lily including: 1 Tiles 2 – Marquetry and 3 – Wallpaper Border.