Imagine the rhythmic song of the waves, the tang of salt in the air, the cool grit of sand underfoot and, with a little luck, a glimpse of light reflecting off a small surface. The glitter of light catches the eye and brings one in for a closer look. Is it a sea shell? A shiny stone? Or a piece of ocean-worn glass? Is it sea glass—that elusive treasure that lures beachcombers to shorelines around the world?
While the pursuit of sea glass may be a romantic endeavor, its origin is anything but. Sea glass, as I’ve learned, originates from old bottles and broken glass which was discarded along the shore or dumped into the ocean. Over time—between 20-40 years—the push and pull of the ocean tides combined with the chemical transformation from the salt water turns the glass trash into sea glass gems.
 For many sea glass fans, this unlikely transformation is part of the appeal. According to Jane Claire McHenry of Sea Glass Jewelry by Jane “…sea glass is symbolic of renewal and healing. I believe that a well-worn piece of sea glass is a testament to strength and survival, something that is almost spiritual. Sea glass philosophy is about accepting one’s imperfections and believing that persistence and time will smooth and soften them just as a jagged piece of sea glass is transformed over time into a new creation that is even more beautiful than before.”
 Just to clarify, the terms “sea glass” and “beach glass” are used interchangeably but, to be quite accurate about it, sea glass is formed by salt water while beach glass is formed by fresh water. The physical and chemical differences between the salt and fresh water environments produces slightly different characteristics in the glass. Another, more whimsical, term often used to describe sea glass is “mermaid’s tears”.
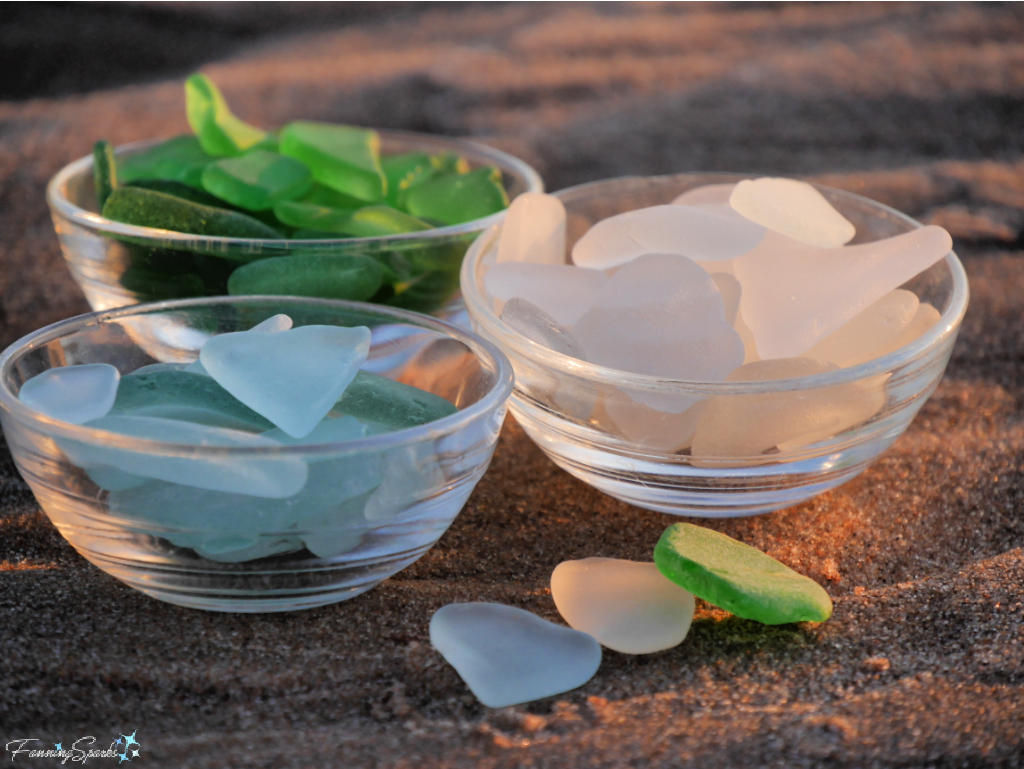
Sea glass can be found in a variety of colors. The most common colors are clear (which becomes a frosty white), green and brown. Colors can often be traced back to their origins. For instance, the most common source of brown sea glass is beer bottles. Wine bottles produce medium-dark green sea glass. Fragments of early, ordinary window glass transform into very light blue, almost white, sea glass.
Shown below, beside a naturally-rounded piece of sandstone, are 4 different colors of sea glass including clear (frosted white), seafoam, green and brown.
 The availability of different colors has led to designations of rarity. Categories such as of common, uncommon, rare and extremely rare are often used. But for the more sophisticated sea glass collector, sea glass guides provide more detailed categories. One guide I found online, the Carter Sea Glass Color and Rarity Guide, sorts sea glass into 81 descriptively named colors and rates them for rarity on a scale of 1 to 10.
The below photo features clear sea glass gems which have transformed to frosty white.
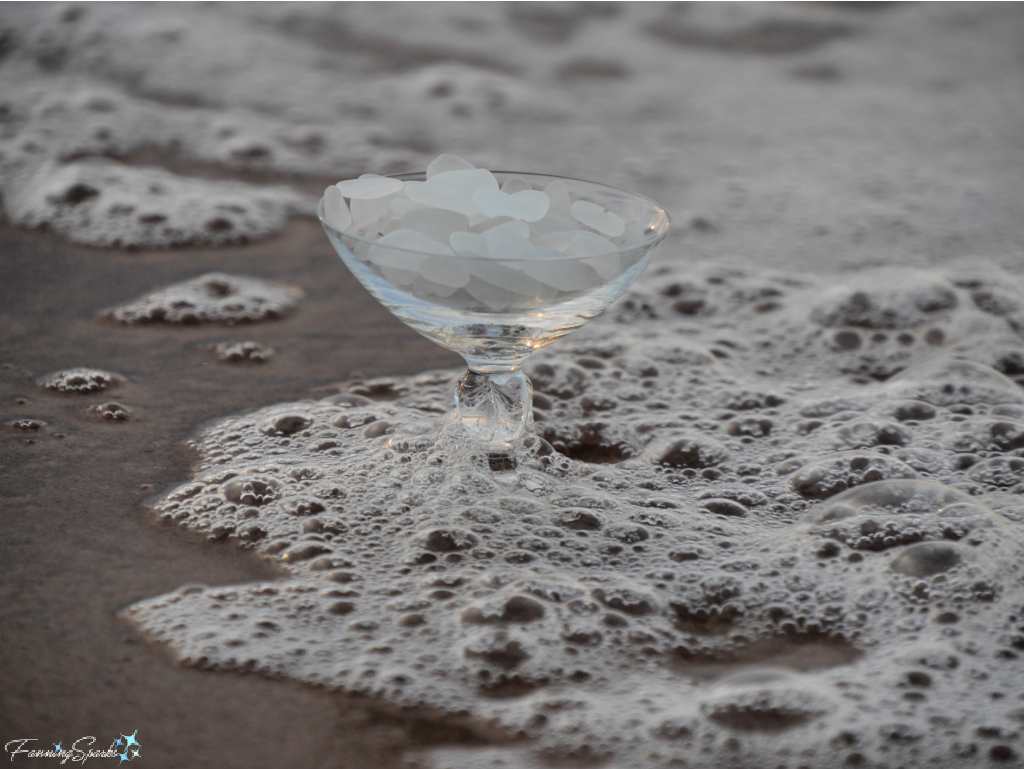 Blue-colored sea glass is less common and eagerly sought after but it’s not as rare as orange and red.
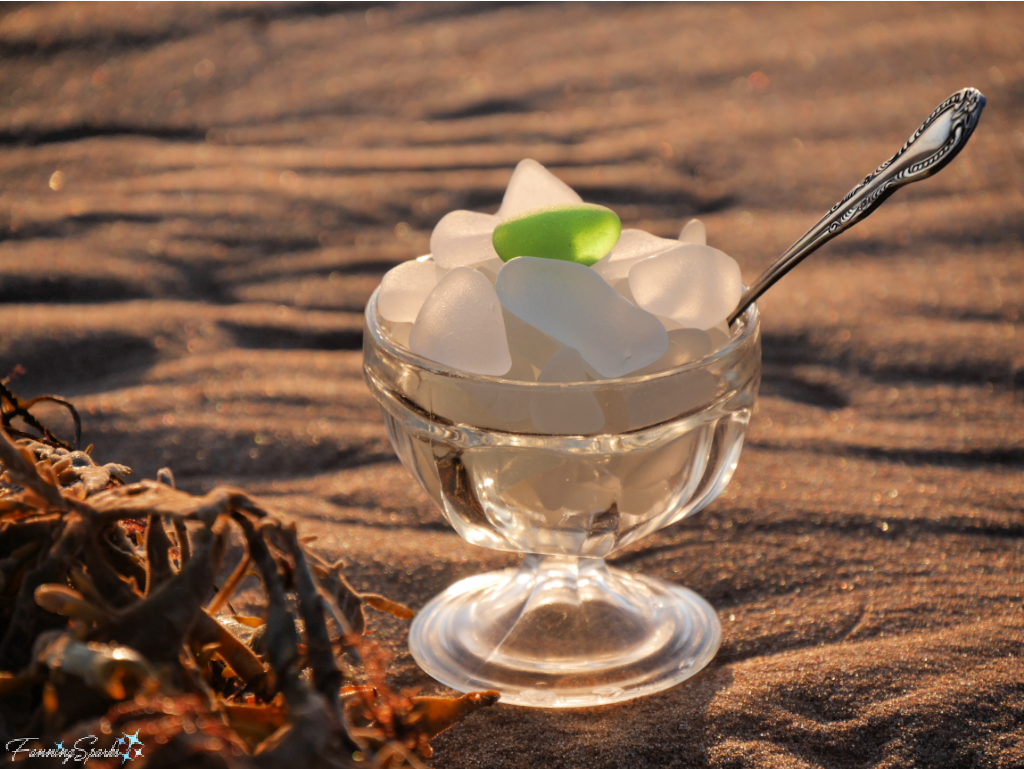
 Just for fun, here’s a sundae dish serving up pieces of clear and seafoam sea glass topped off with a piece of green sea glass.
To increase my odds of actually finding a sea glass gem on my first hunt, I did a little research online and quizzed an experienced “picker” (Thank you Bert!). Here are the tips that worked for me:
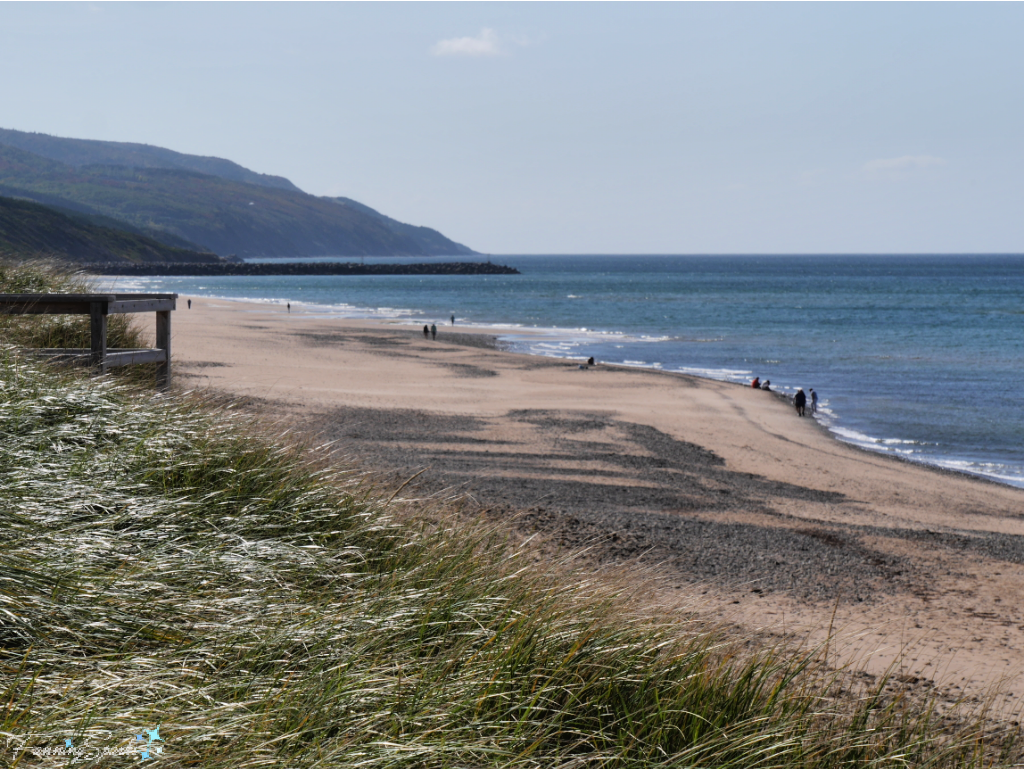
1. Location Select a destination that is known for being a good source of sea glass. Be aware of the rules and regulations since some locations do not allow beachcombers to keep their finds. Keep in mind, sea glass picking has been popular for many years and desirable locations may not be as prolific as they once were. Beautiful Inverness Beach on Cape Breton Island in Nova Scotia is a great location for sea glass picking.
 2. Timing Ocean waves carry sea glass to the shore so it makes sense to go at low tide or when the tide is on the way out. Another factor to consider is weather—picking is reported to be better after a storm. Getting to the beach early to be the first picker, or simply to enjoy the sunrise, is another option. The below masterpiece, courtesy of Mother Nature, was sunrise at Crowbush Cove on Prince Edward Island’s north shore.
 3. Technique Walk slowly and scan the ground. Some people recommend walking along the “wrack” which is the furthest point the tide has carried debris. Alternatively, sea glass gems can be found by sifting through small stones or searching amongst rocks.
4. Logistics Bring deep pockets or a bag that won’t rip. Keep both hands free for picking.
5. Attitude Be realistic—don’t expect to find a large piece of extremely rare red glass on the first outing. Be patient and enjoy the experience!
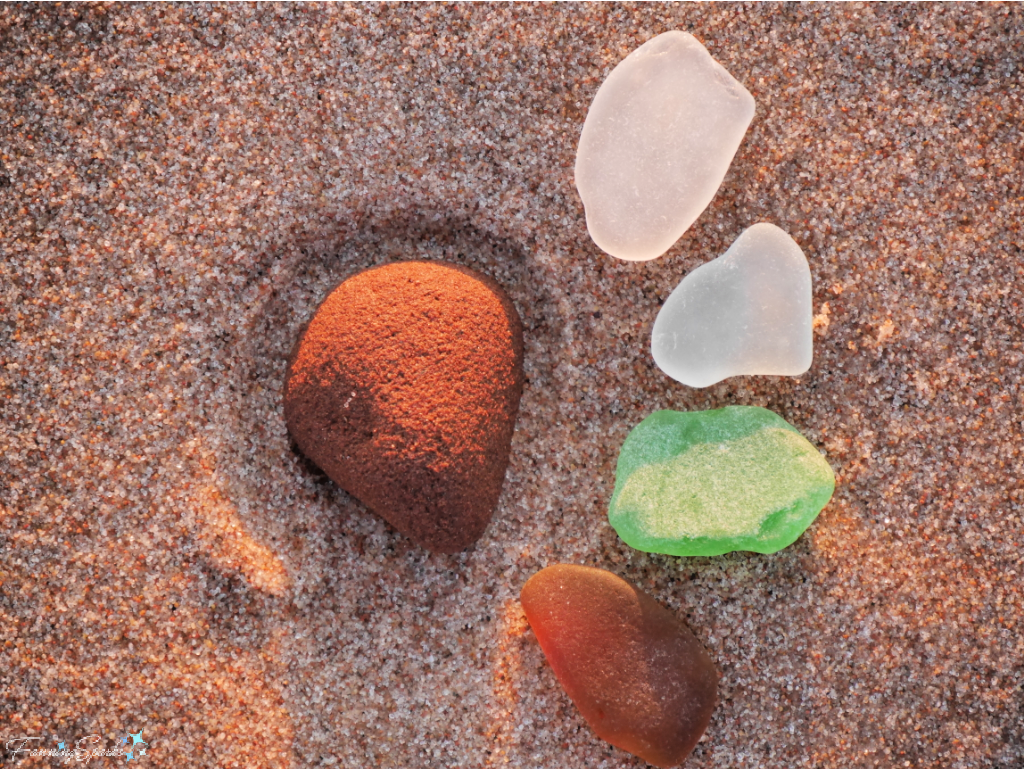
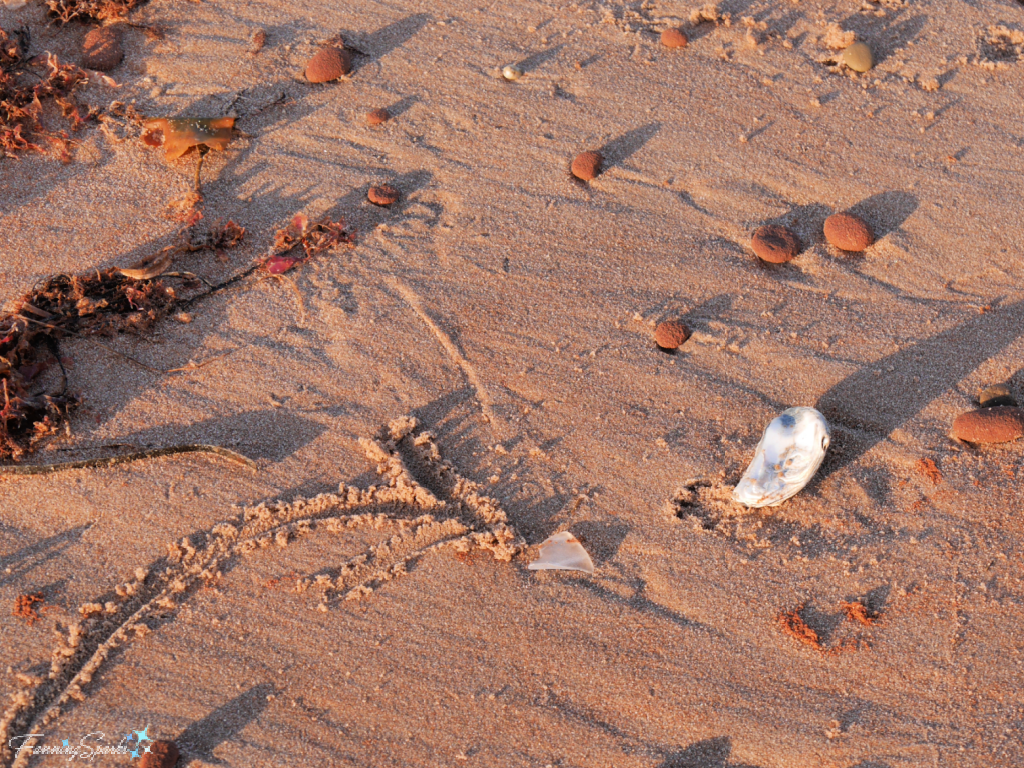
Here’s the first piece of sea glass I found. For the record, I drew the arrow in the sand so it would show up in the photo—there are no arrows pointing to sea glass gems on the beach!
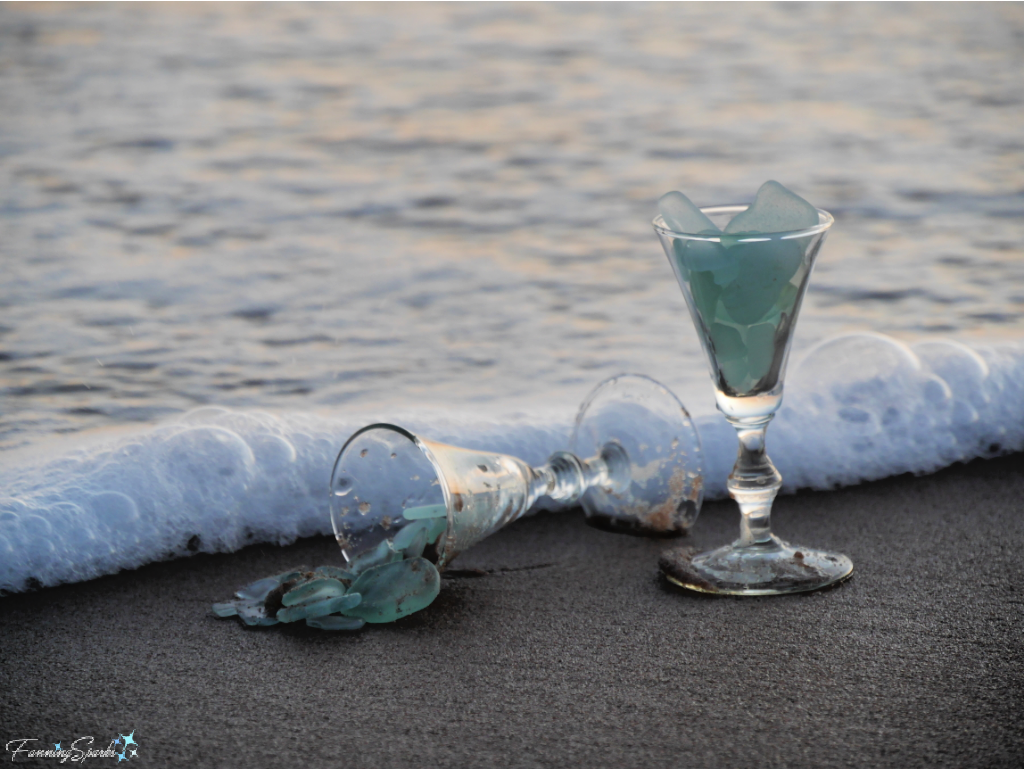
 One final tip: when getting creative and staging photos of sea glass in the waves, remember the ocean can reclaim that glass as easily as it delivered it in the first place! (Don’t worry; no sea glass was lost in the making of this photo.)
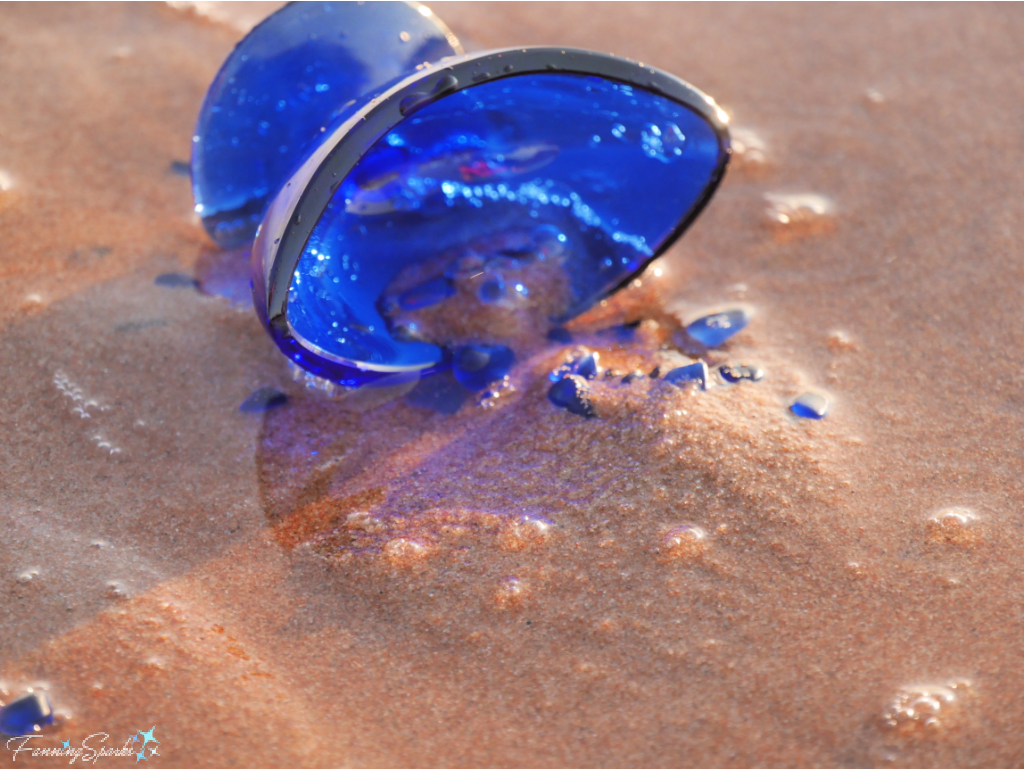
More Info
Special thanks to my always generous mother-in-law, Bertha, for kindly sharing her passion for sea glass as well as a considerable portion of her own collection.
There is the question, of course, of what to do with all this lovely sea glass. Incorporating it into a necklace or other piece of jewelry is a popular choice. Displaying it in a clear glass bowl or vase, especially under water in a shallow dish, is a great option. There are dozens of possibilities. I’ve started a Pinterest board to collect ideas and spark inspiration. Check it out here.
The North America Sea Glass Association provides resources on sea glass, hosts sea glass festivals and “educates the collector, consumer and retailer as to the properties and benefits of genuine, pure, natural beach unaltered sea glass”. Interestingly, as the supply of natural sea glass dwindles, there is a growing trend towards creating sea glass artificially. This can be done by altering, grinding, acid etching, sand blasting or tumbling pieces of glass to replicate genuine sea glass. Since it’s much easier and less expensive to make artificial sea glass than to find genuine sea glass, it’s important for consumers to be aware of this practice.
Beachcombing magazine (formerly Glassing Magazine) has lots of interesting articles about sea glass. “Beachcombing is a print and digital magazine dedicated to beachcombing, beach travel, coastal arts, and coastal living. Each issue is full of stories about sea glass and beach glass, shells, fossils, beach rocks, driftwood, and more from shorelines around the world.”
Check out the beautiful Sea Glass Jewelry by Jane on her website or Instagram account.
Today’s Takeaways
1. Arguably, Mother Nature’s power and beauty is most evident where the ocean meets the land.
2. Consider strolling a shoreline in pursuit of sea glass gems.
3. Sometimes the most beautiful treasures have the most unlikely beginnings.


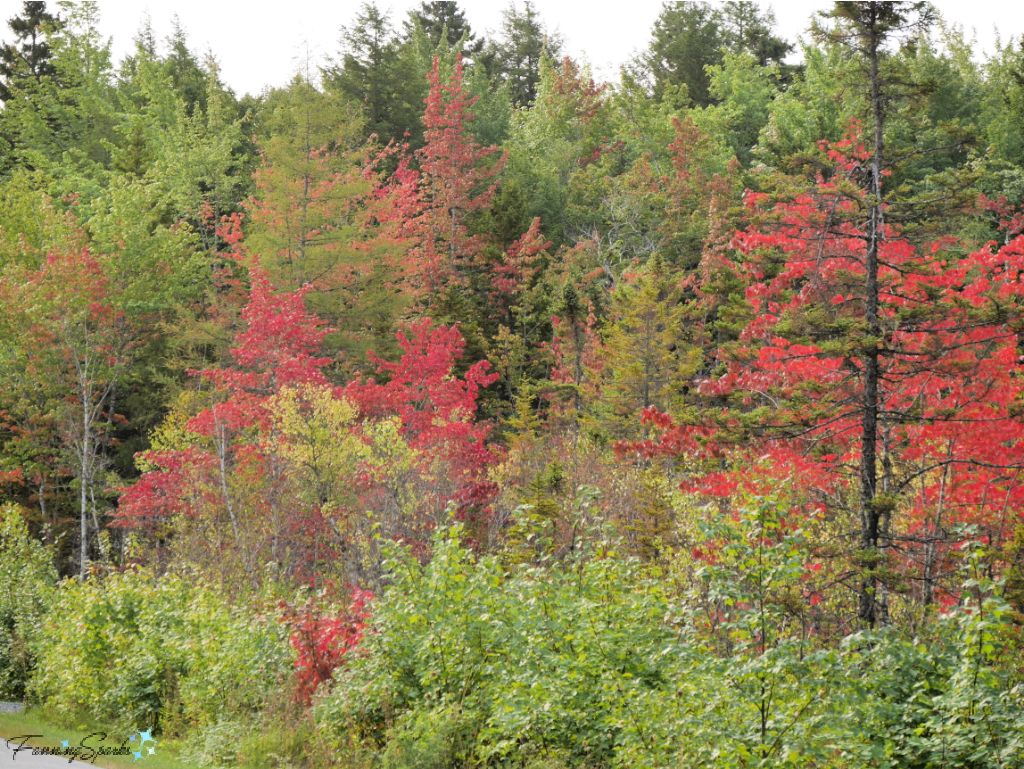 The leaves have just started to turn color in Nova Scotia. According to my brother, who knows such things, the first trees to turn are those that are unhealthy or are rooted in wet areas. The gorgeous red maple leaves shown below were indeed in a wet swampy area.
 Mother Nature outdid herself with these fall colors! Check out the vibrancy of these scarlet leaves backlit by sunlight.
 Red is not the only color on Mother Nature’s palette—there are yellows, golds, oranges, peaches, pinks and a myriad of greens.


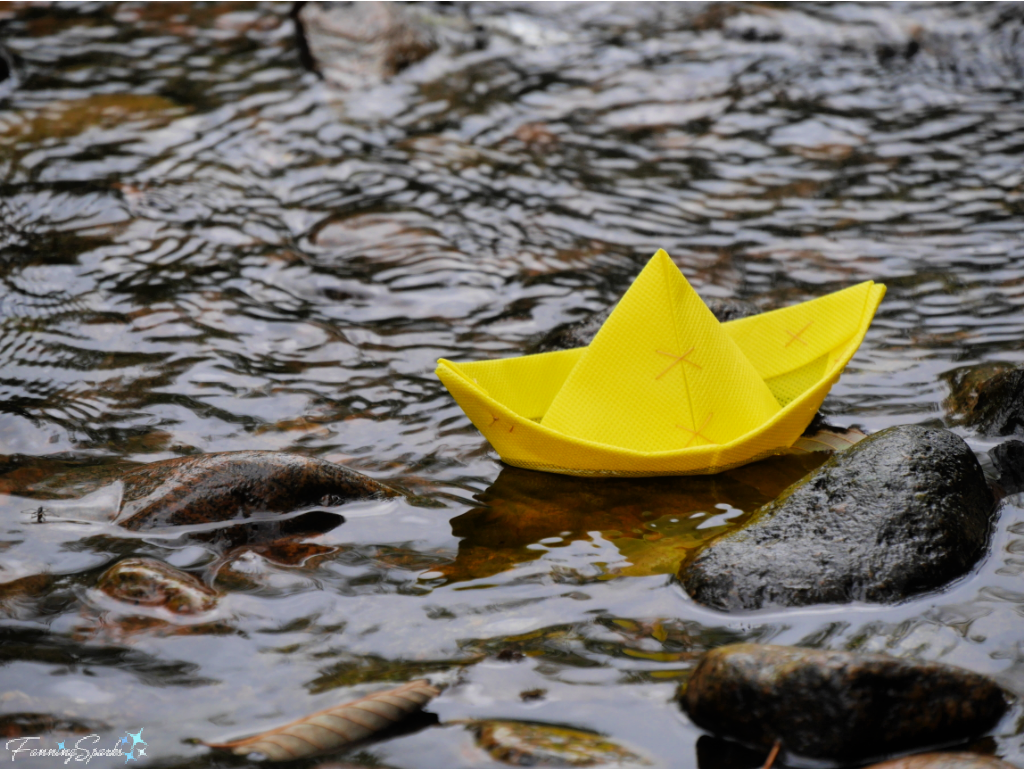
 These gorgeous colors are fleeting, of course. They don’t stay on the trees for long. Luckily, colored leaves can also be lovely after they’ve fallen—especially if they land in water.
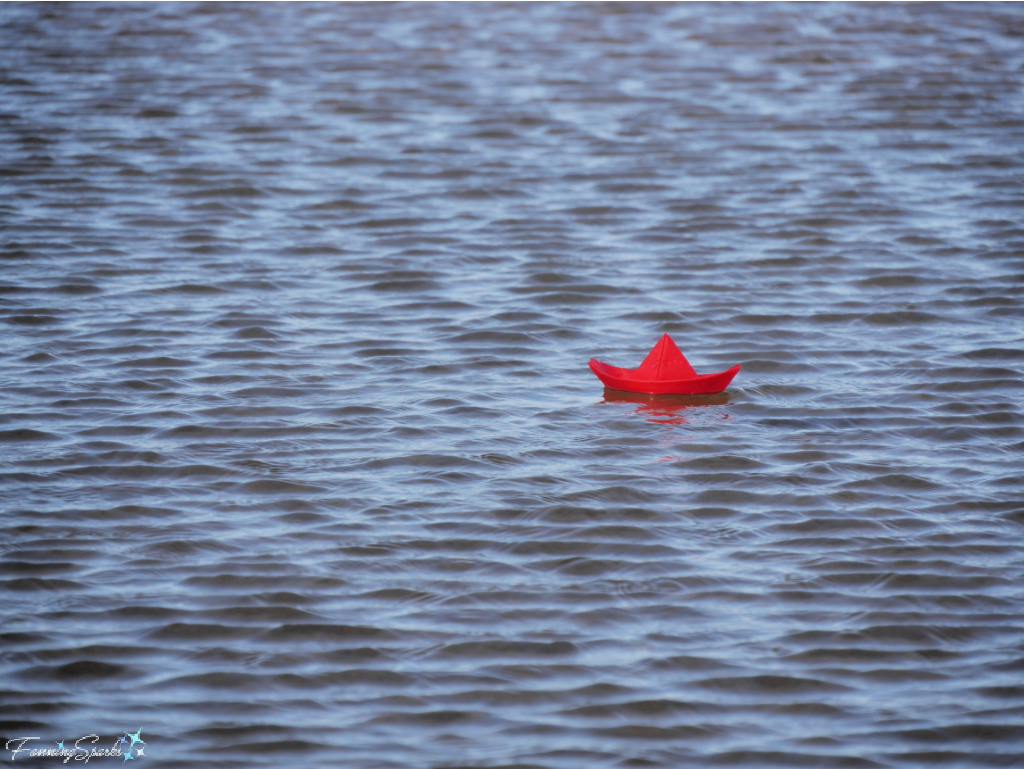
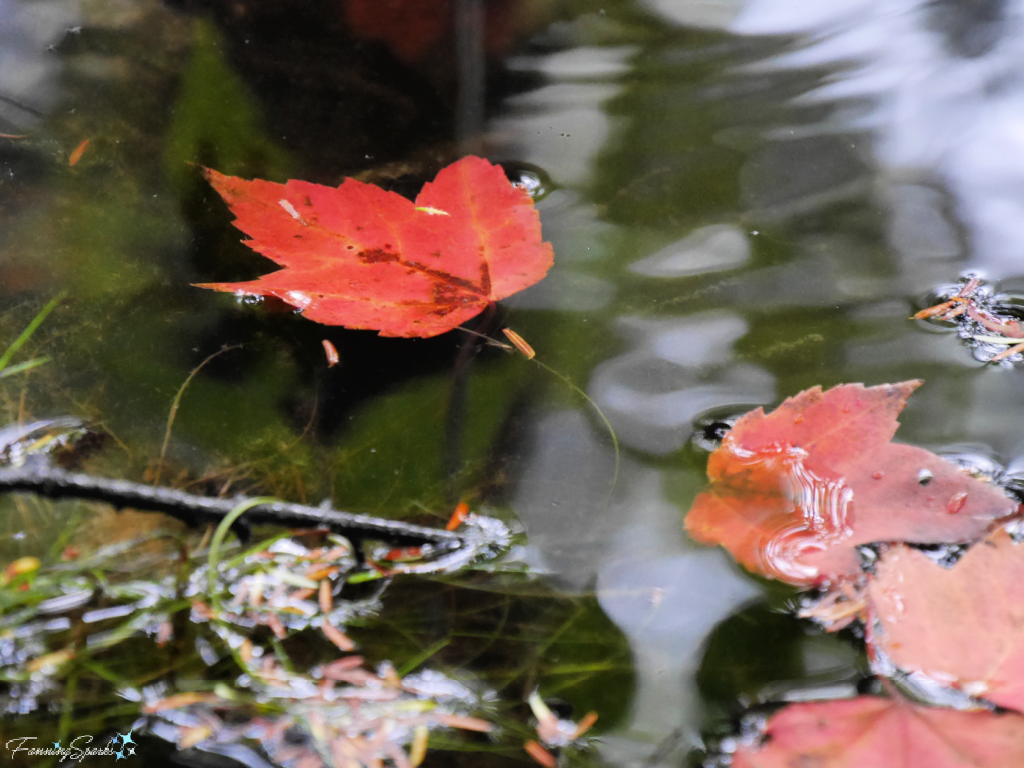 Turns out, that wet, swampy area I spotted along the road provided the perfect backdrop for my new floating boats. The water was dark, shallow and calm. Here’s one of my favorite photos of my little orange floating boat.
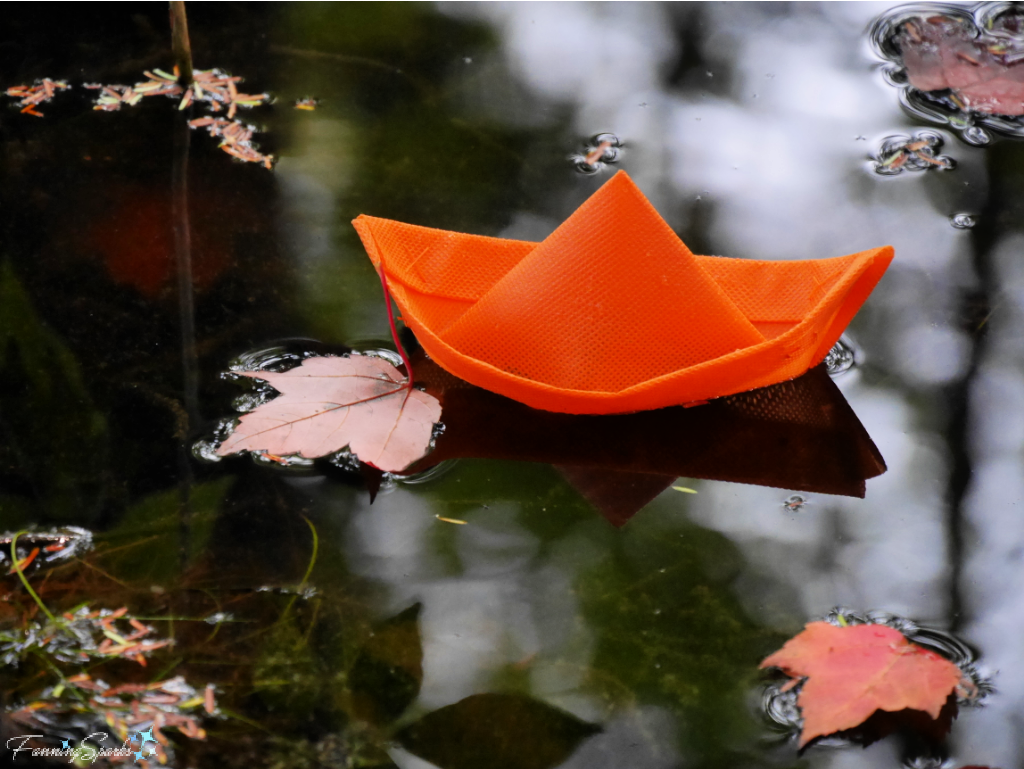 Here’s a red floating boat in the same setting. I love the contrast between the dark reflections and the colorful leaves.
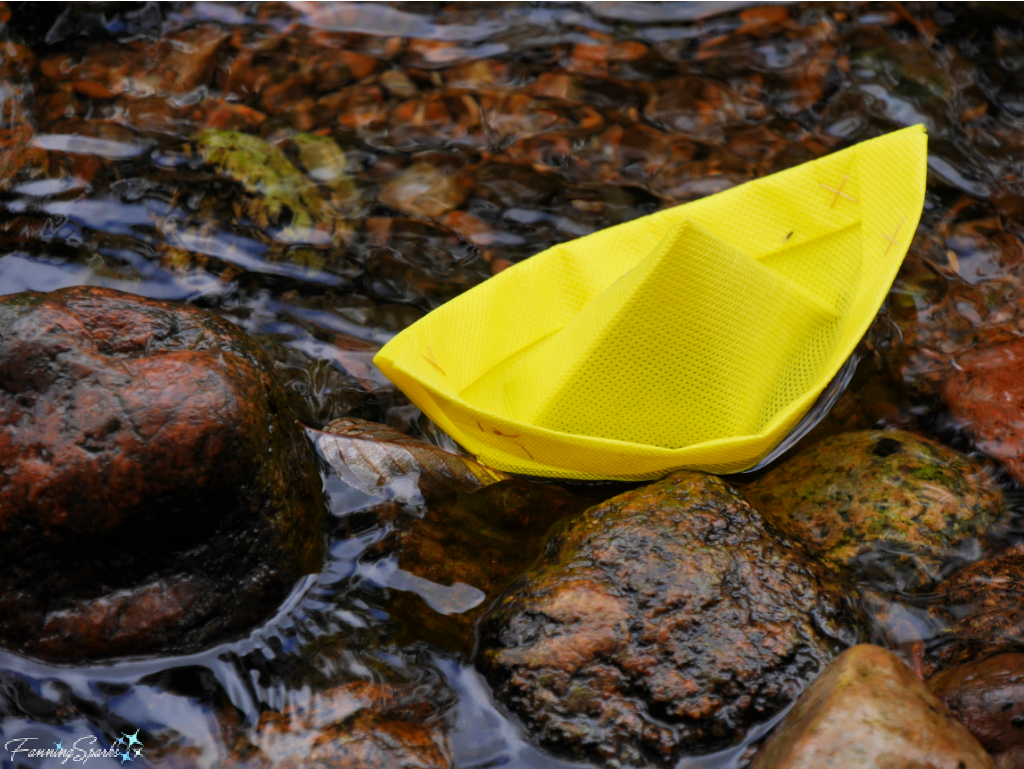
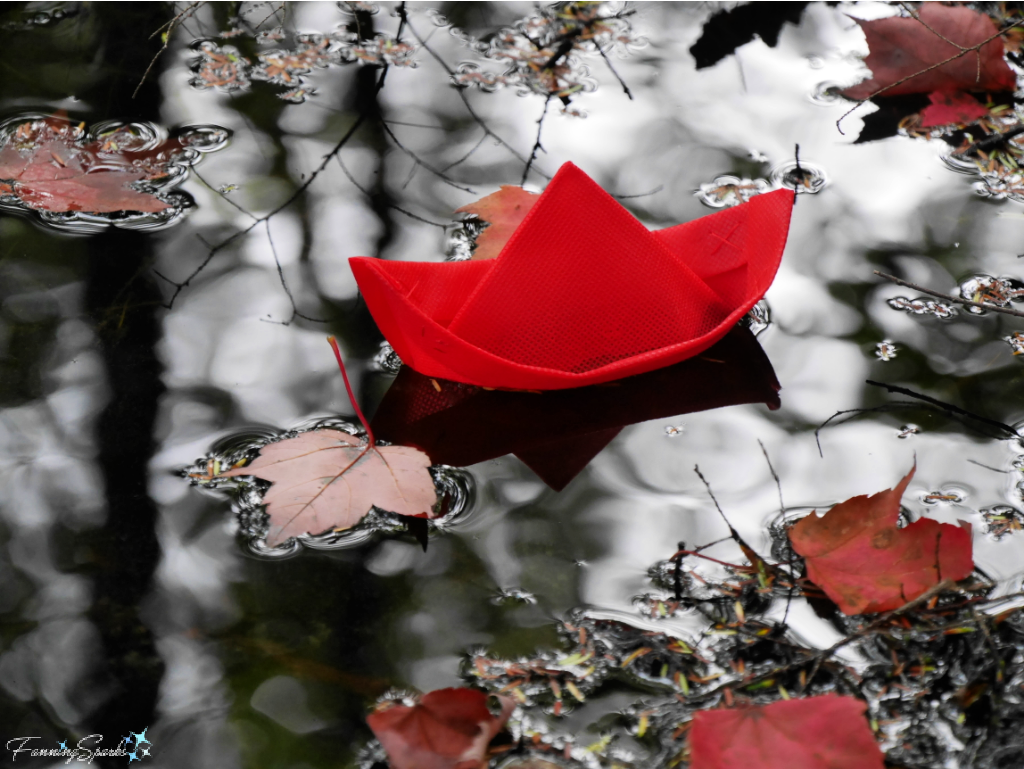 The brilliant yellow of this floating boat is a nice counterpoint to the moody setting.
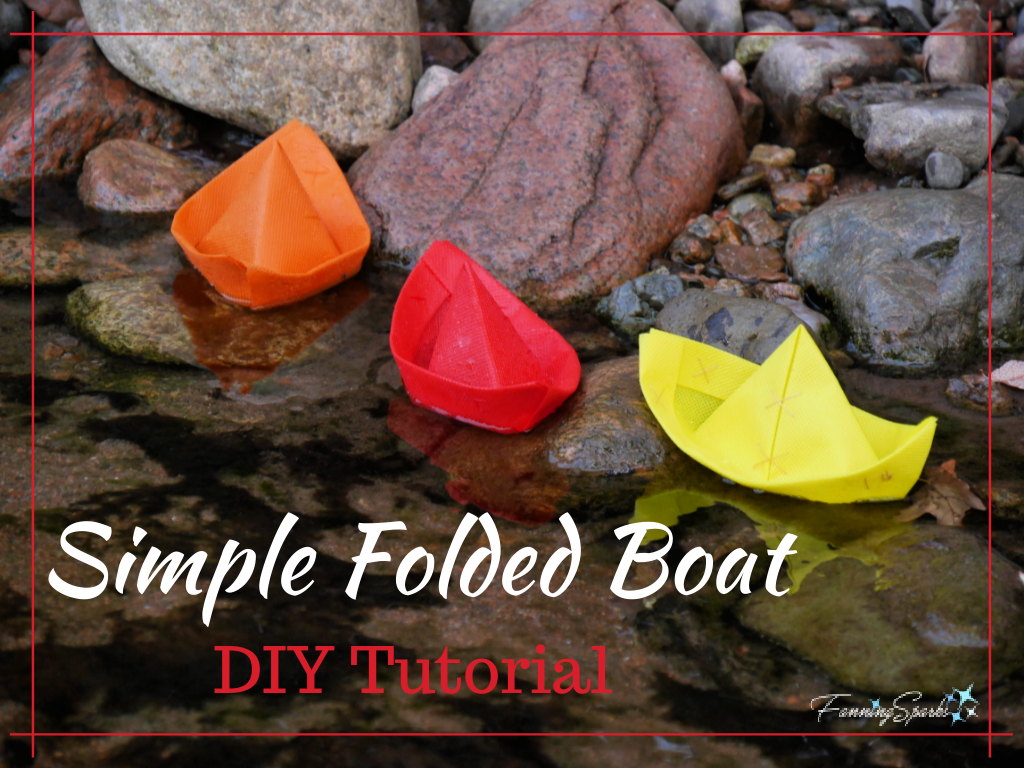
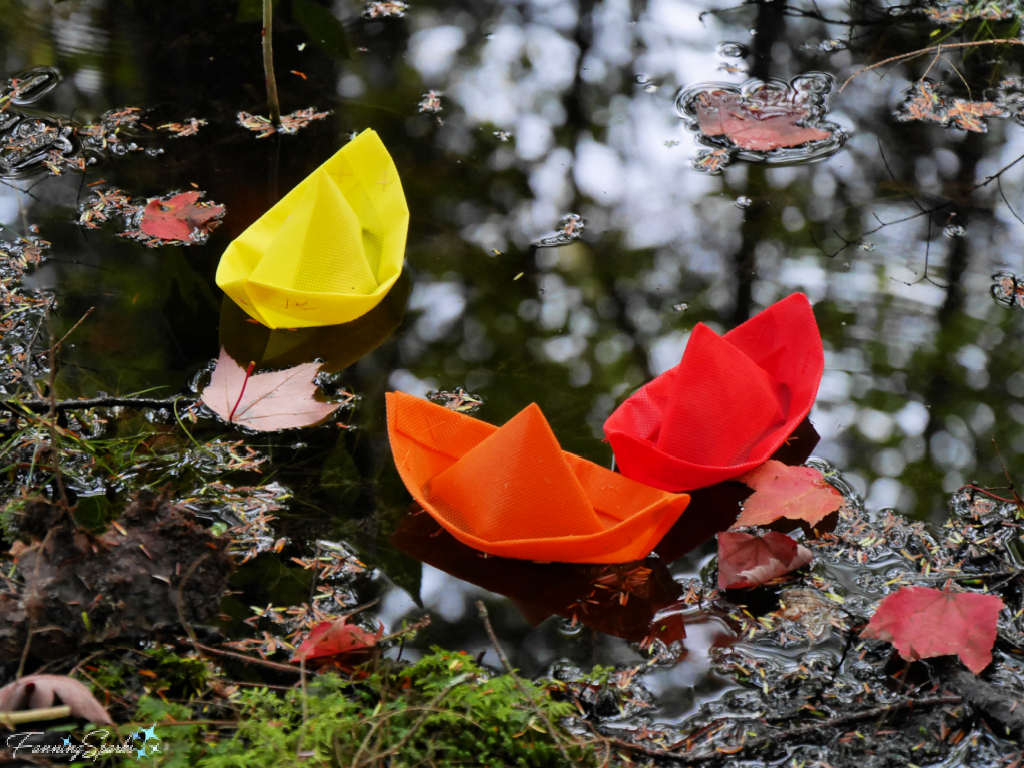
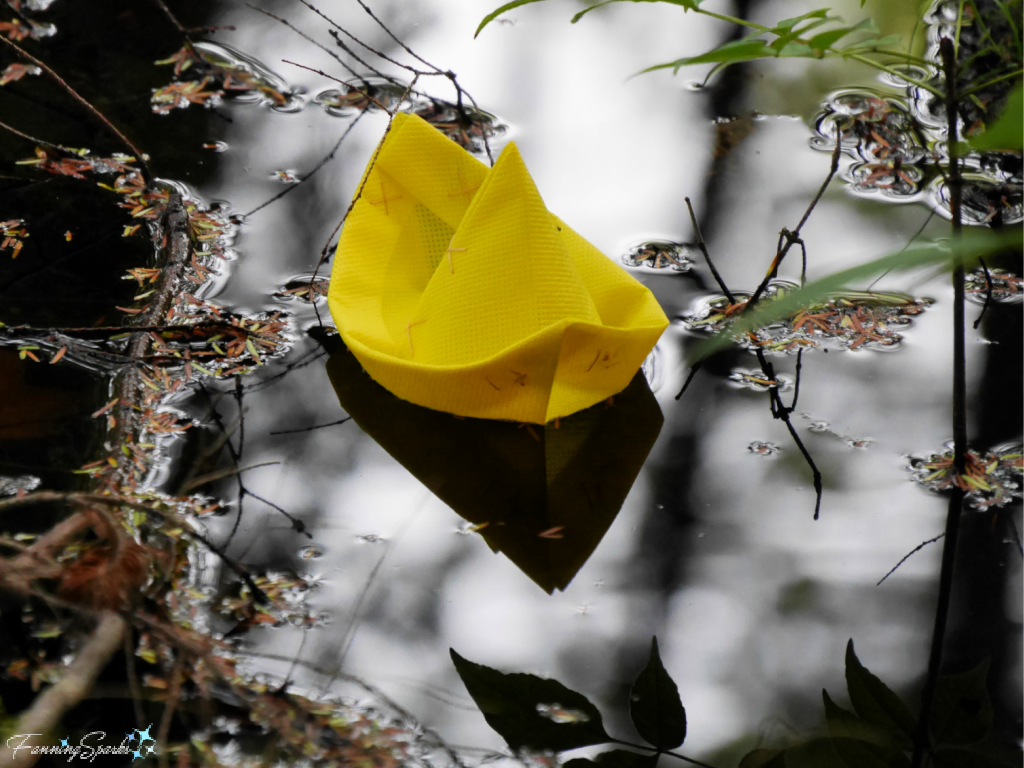 And here they are together—a trio of colorful, floating boats amongst the fallen leaves.
 I just love that inky, black water! It’s the perfect foil for the gorgeous fallen leaves and the bright little boats. Plus it captures the most stunning reflections. But the location itself is anything but stunning. Here’s the broader view.
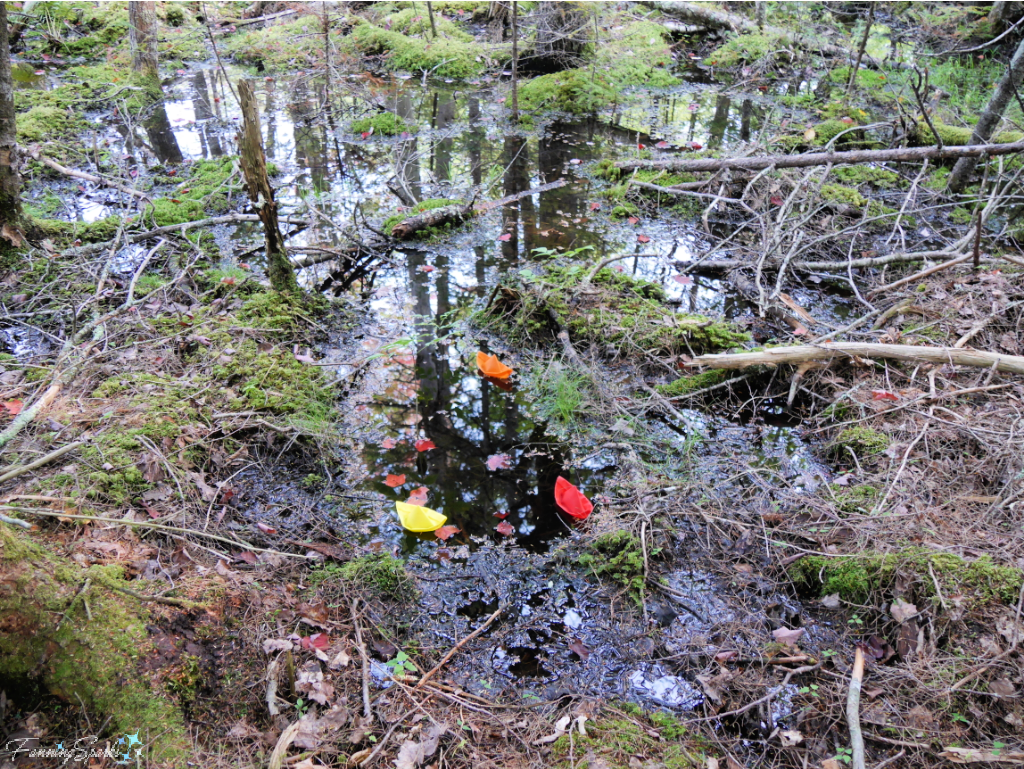 One would never guess such an ordinary, lackluster setting could lead to extraordinary photos. Circling back to my opening comment, sometimes the most unlikely of places can indeed lead to the most amazing photos. Have you had a similar experience? Please share in the comments below.

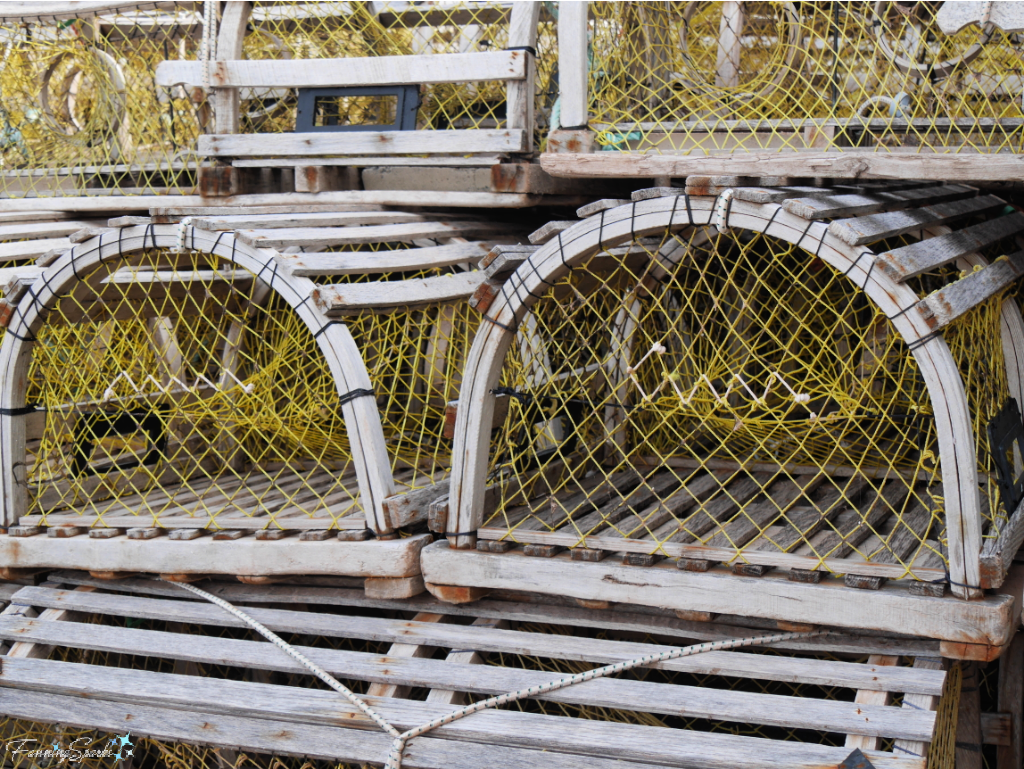
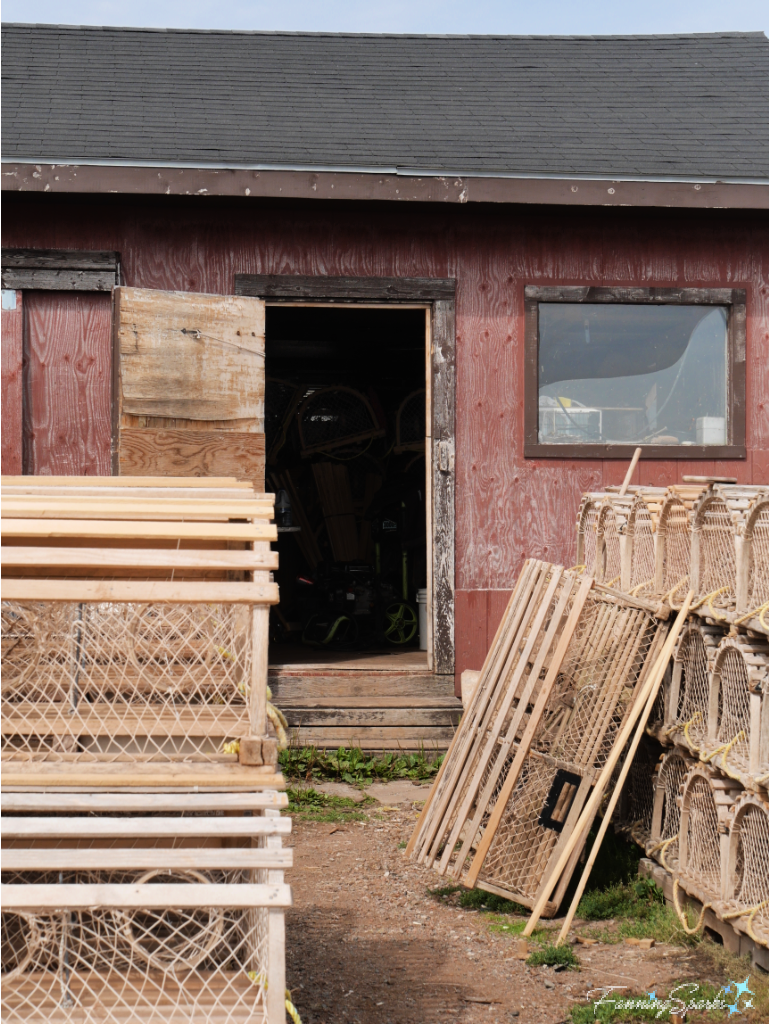
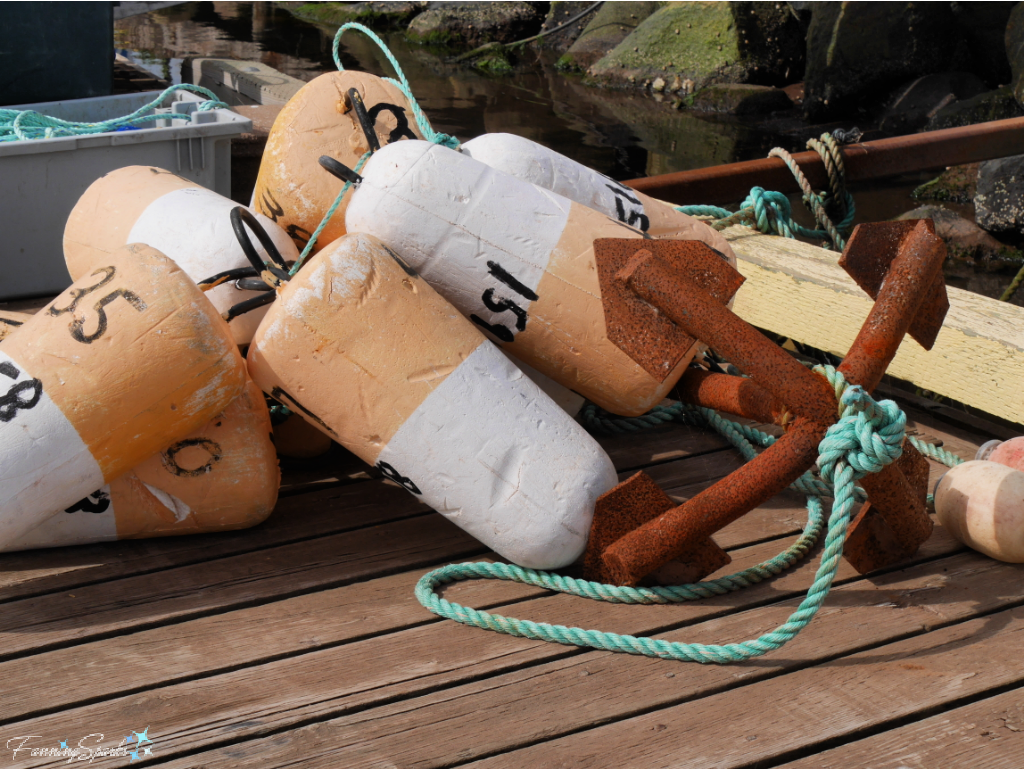
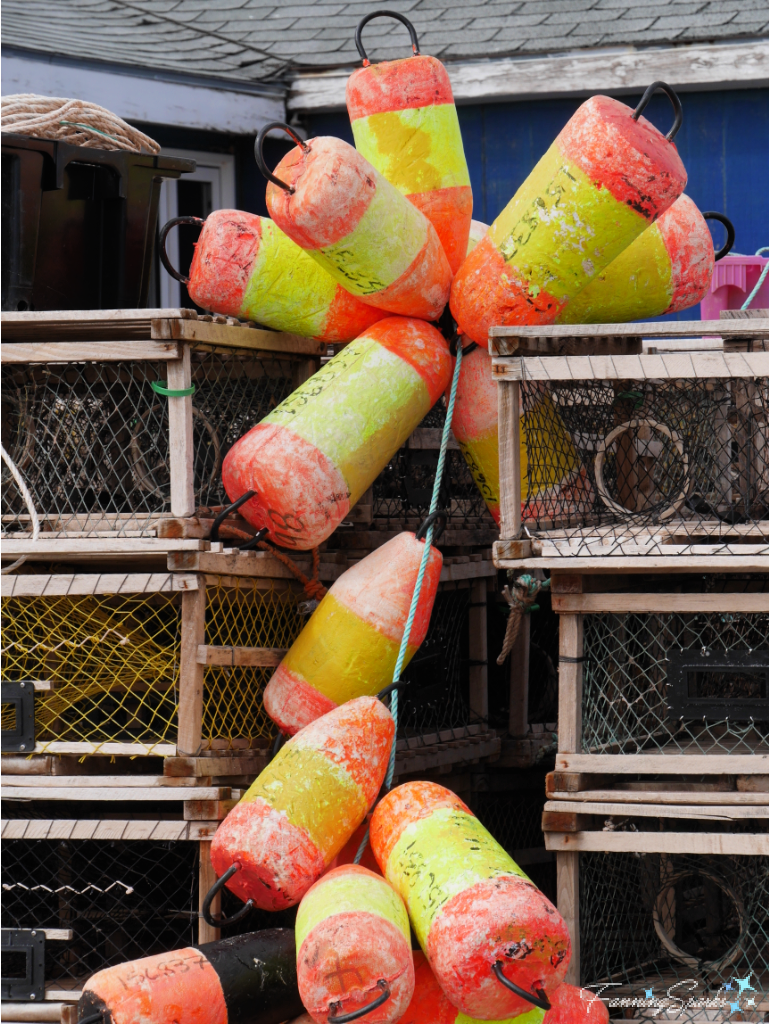
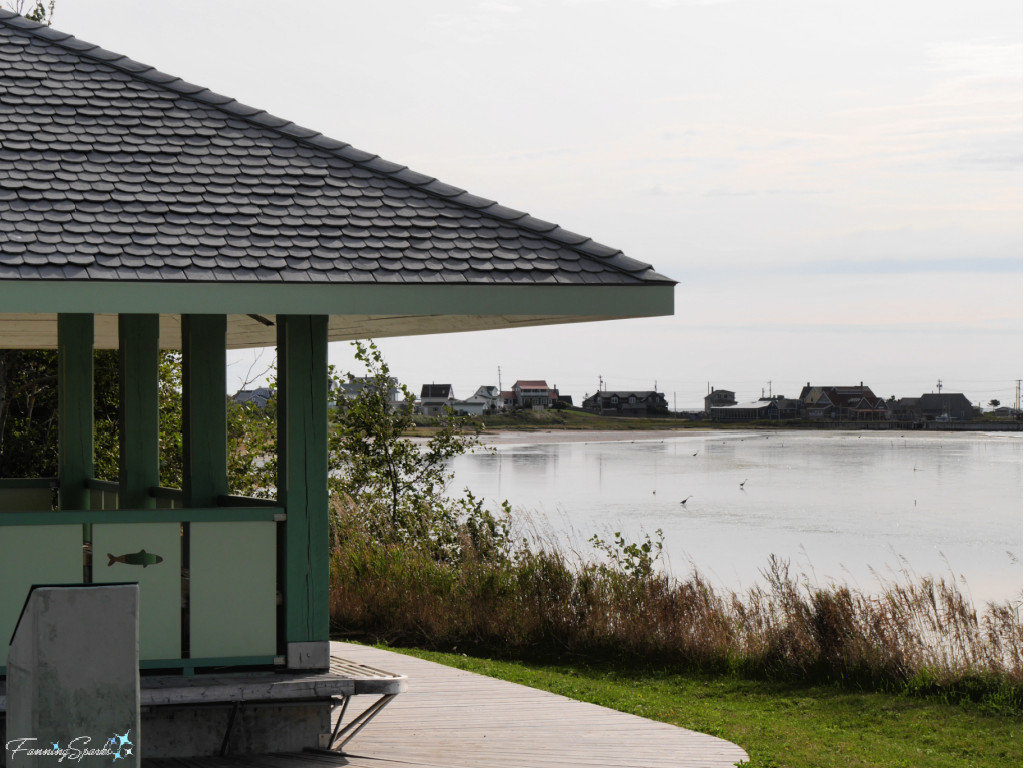
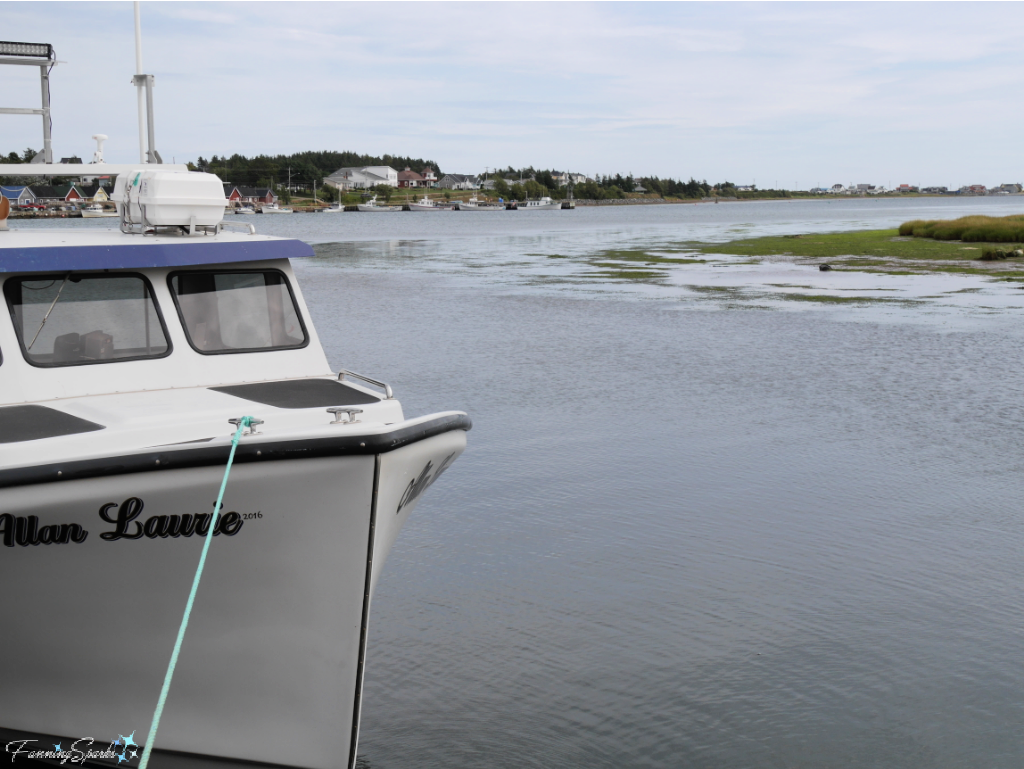 North Rustico has a proud tradition of living with the sea and fishing is the primary industry. The harbor is home to about 40 fishing vessels.
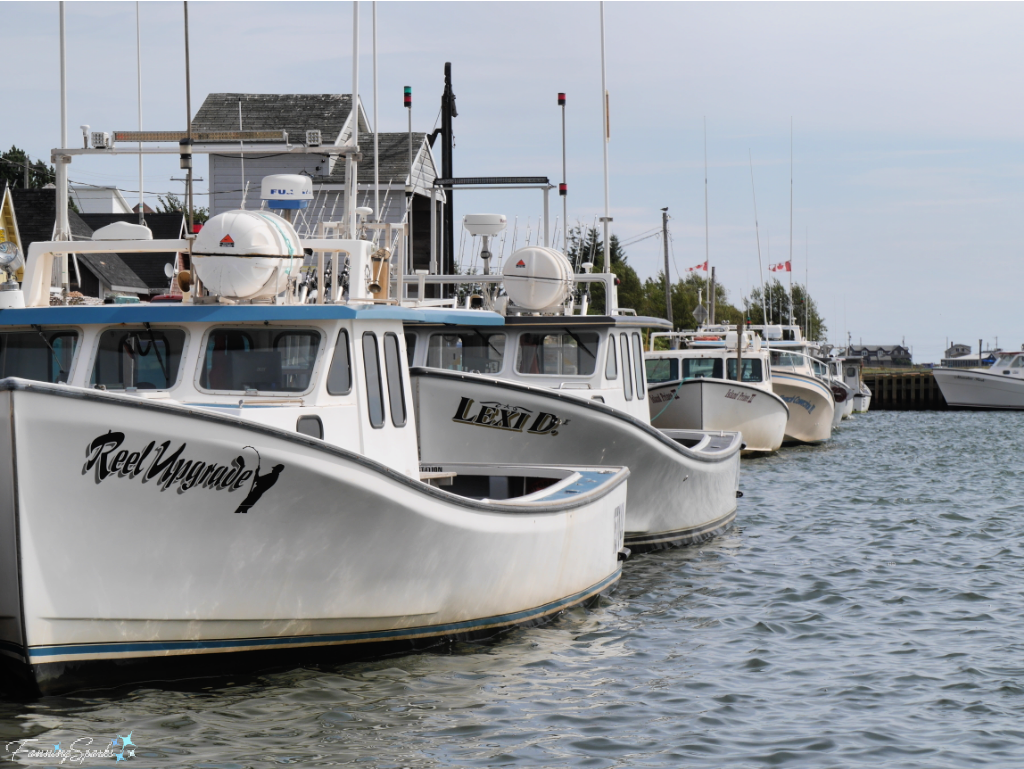

 It’s the perfect place to enjoy the antics of the shorebirds as they forage for food along the beach.
 A flock of industrious sandpipers are joined by a Ring-billed Gull (Larus delawarensis) .
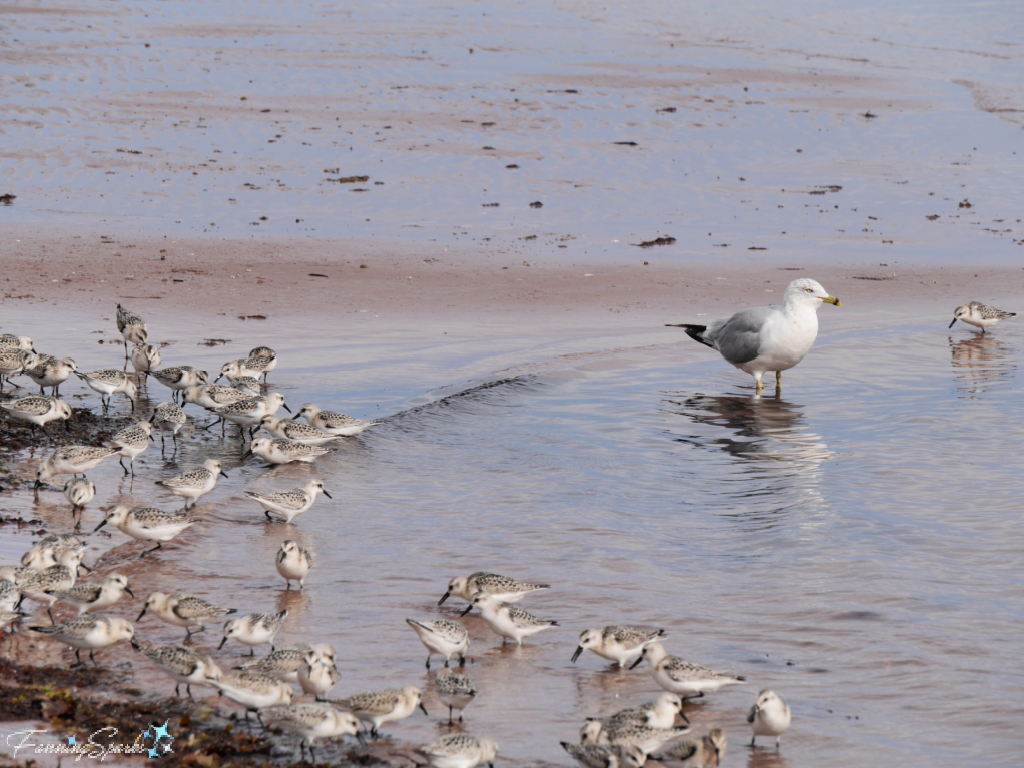 This cute, chubby bird is a Semipalmated Plover (Charadrius semipalmatus).
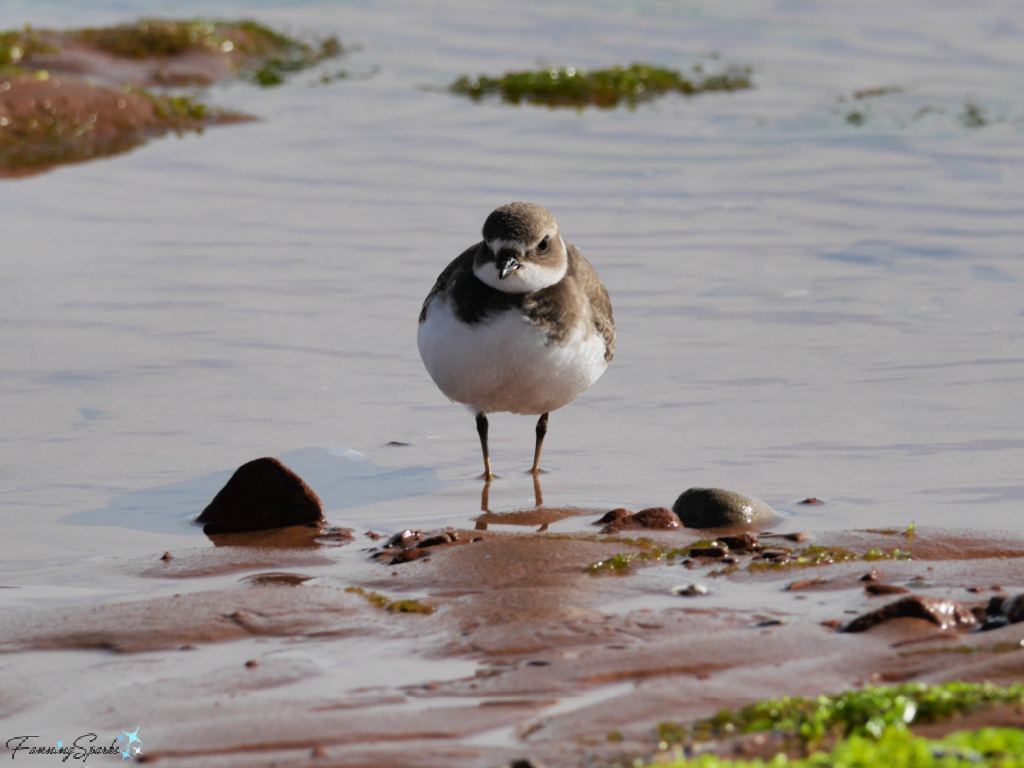 As if the ample bird population doesn’t provide enough challenging subjects, the abundant Island sandstone is just begging to be stacked into a cairn for a photo.

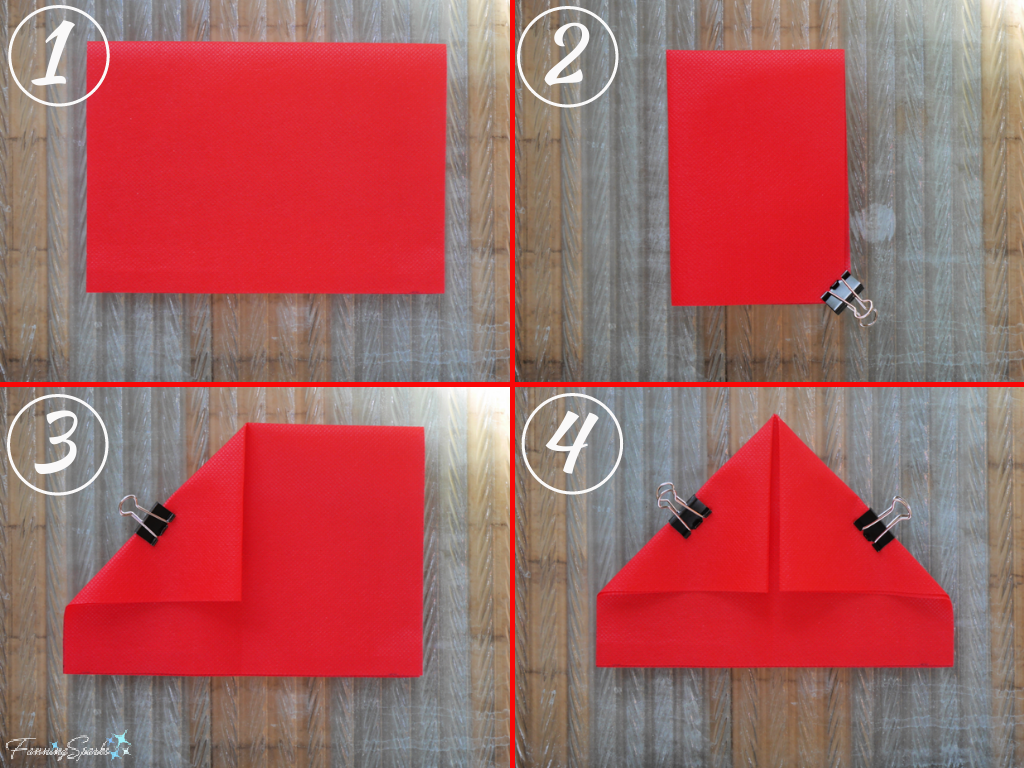
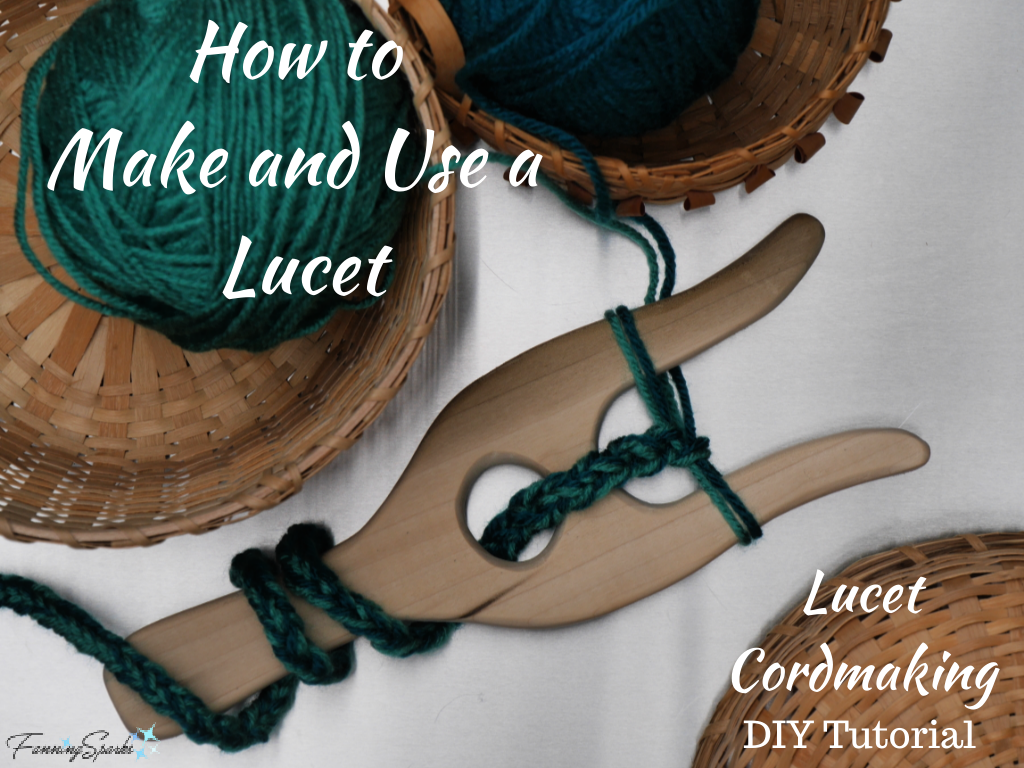
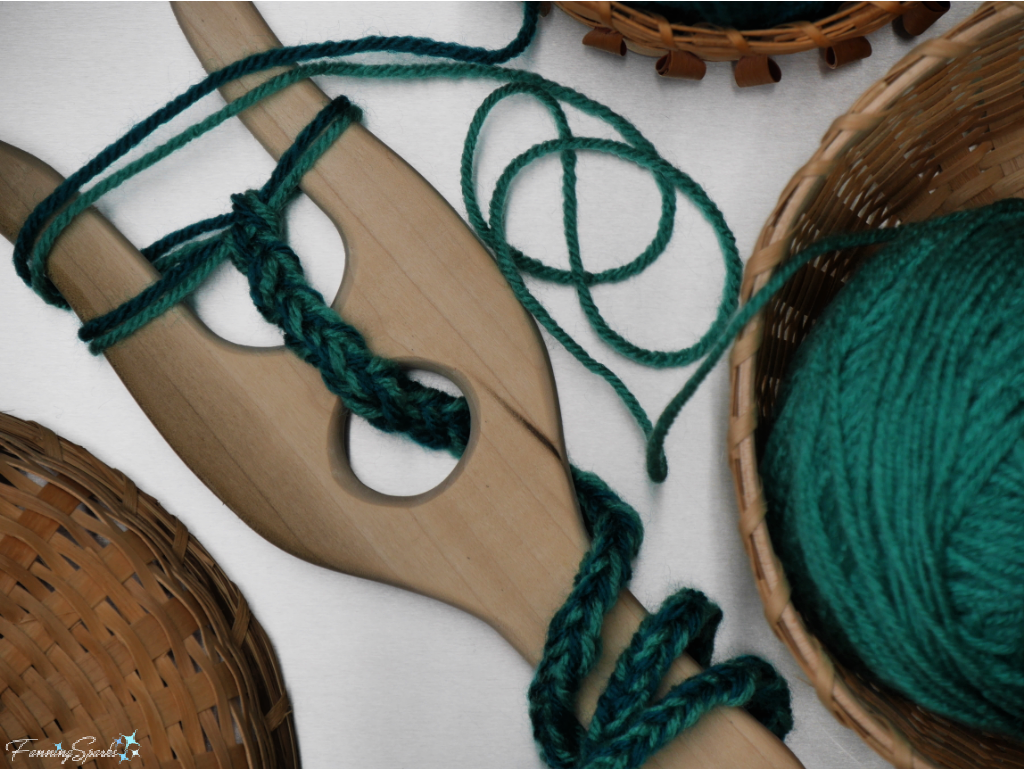 A lucet makes a strong, square woven cord. One advantage of luceted cord is it doesn’t unravel when cut. Another advantage of this method is that it’s not necessary to pre-cut the cording material. If using yarn, for instance, you work directly from the ball of yarn and continue until the desired length is reached.
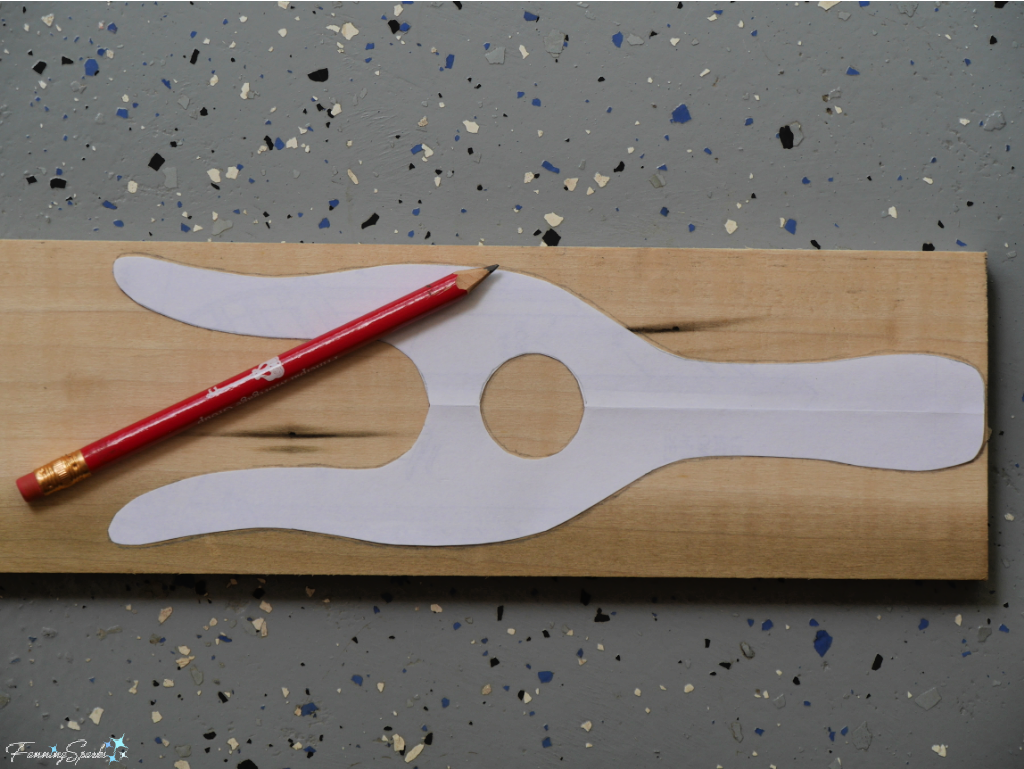 Use jigsaw to cut along marked lines.
 TIP: Use the drill to bore a series of holes in the center hole to make it easier to cut with the jigsaw.
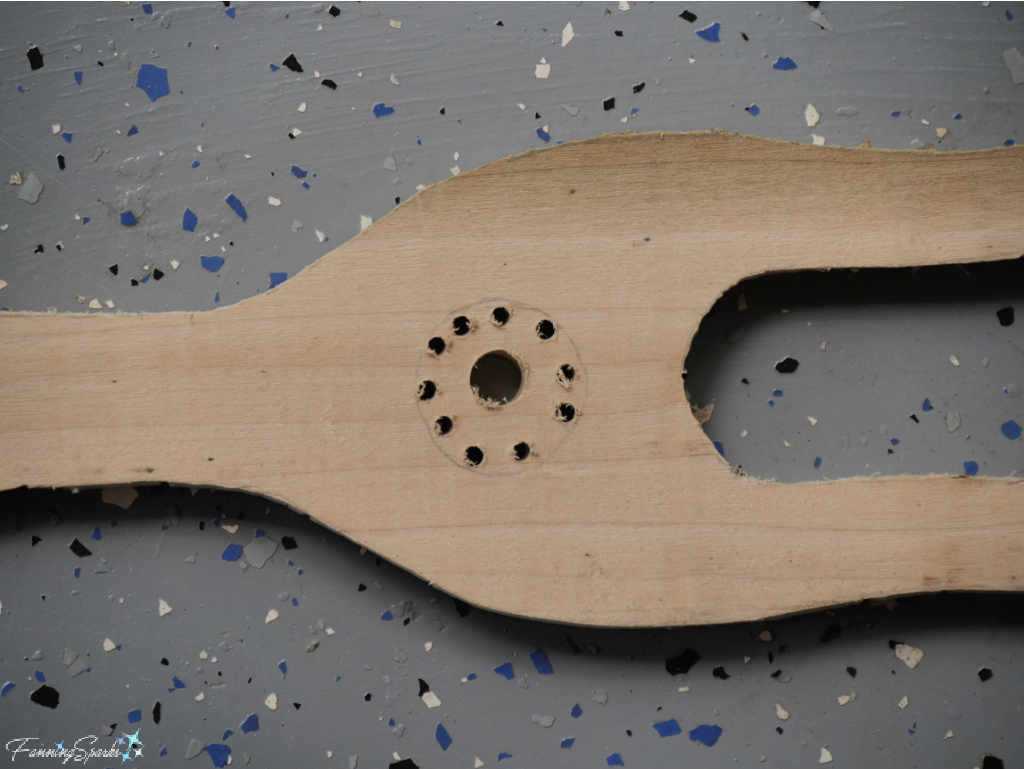 I made two lucets. Here’s how they looked at this stage.
 Step 3 Finish and Sand Use a wood carving knife to round the edges of the lucet.
 Sand smooth with fine and extra fine grits sandpaper. This is an important step since any roughness, especially along the prongs, can snag your cording material.
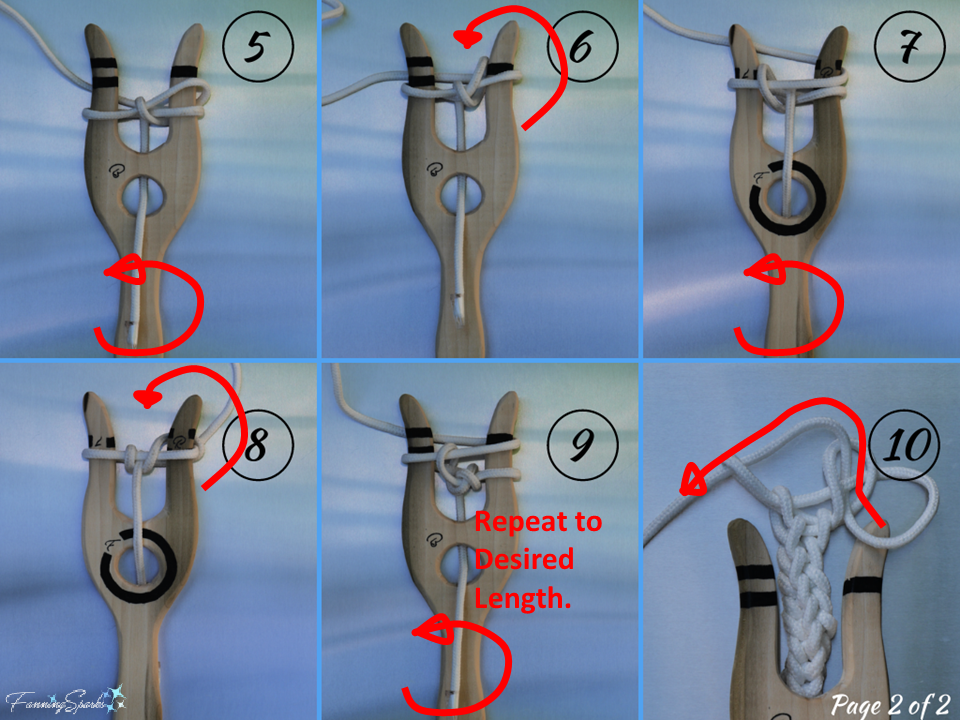
 Instructions to Use Lucet
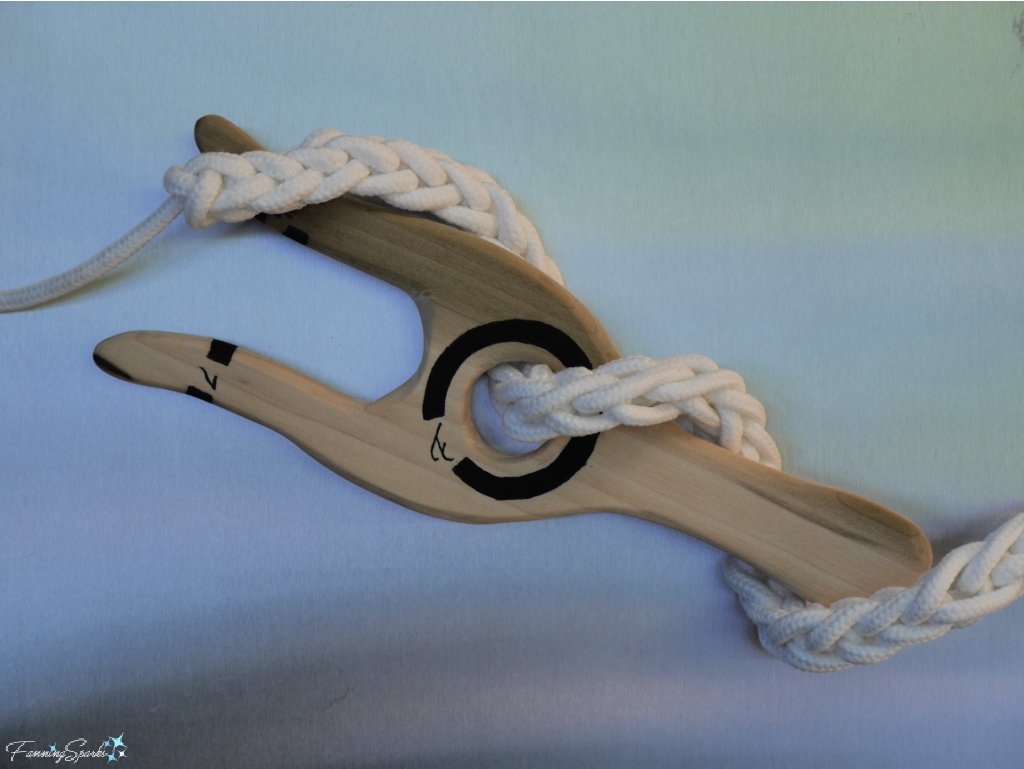 I used rope for this demonstration but you can use string, yarn, twine or other fiber strands. Results will vary from individual to individual and from one material to another but 1 foot of ¼” rope gave me 1 inch of luceted cord. Plan for approximately 1’ to 1”.
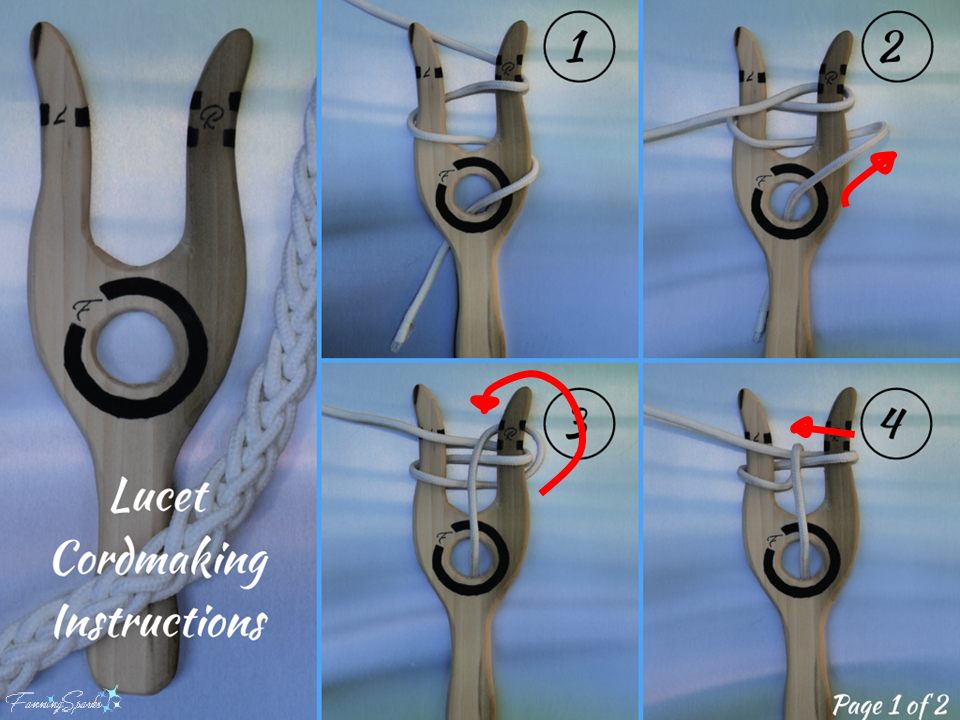
 Once you get the hang of it, cordmaking goes surprisingly fast. I’ve been experimenting with different materials and tweaking my technique. Using a double strand of yarn, in two different colors, makes an interesting cord. And, of course, there’s the follow-on question of how to use all this lovely cord. But that’s a topic for another day!
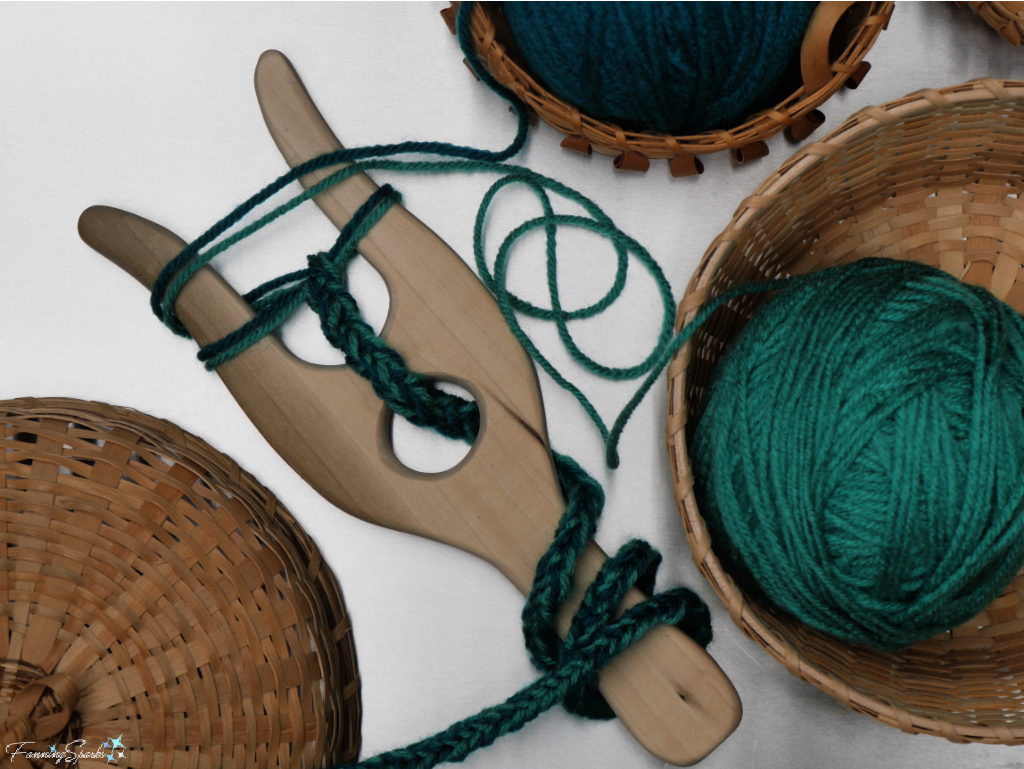

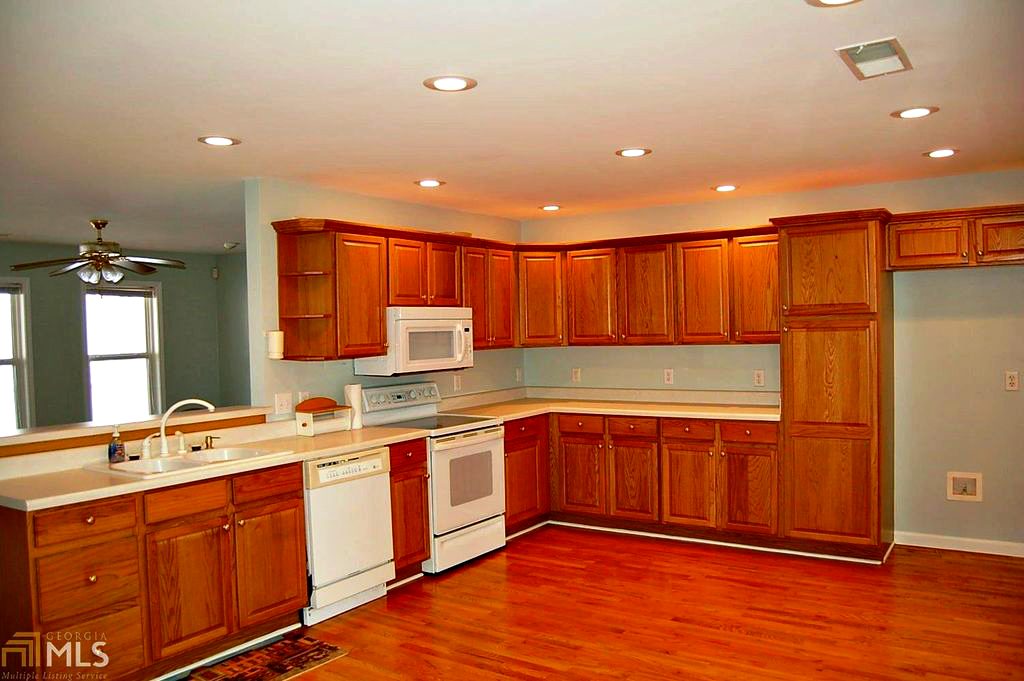 The kitchen underwent a significant transformation when we first moved in. We maintained the original layout but made a number of improvements. We kept the original cabinets, extended them to the ceiling, painted them white and replaced the hardware. We reconfigured the countertops and had them replaced with granite. We had new tile backsplash installed. We replaced the appliances, the sink and the faucet. Here’s how the kitchen looked after the renovations.
 We also had a new pony wall and banquette constructed to separate the front entry and create an eat-in area. I shared the details of this change in the post
 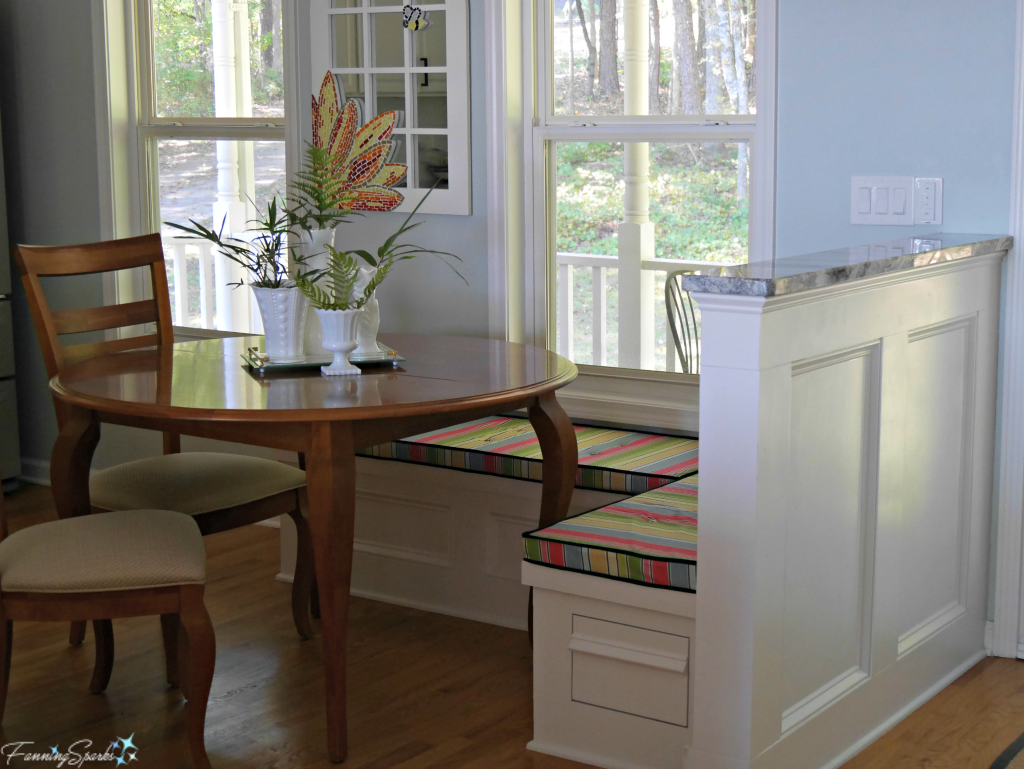 One thing we didn’t change was the lighting. We simply ran out of steam and decided to delay new light fixtures. A series of recessed can lights were the only source of lighting in this area. They provided acceptable task lighting but did nothing for ambient, accent or decorative lighting.
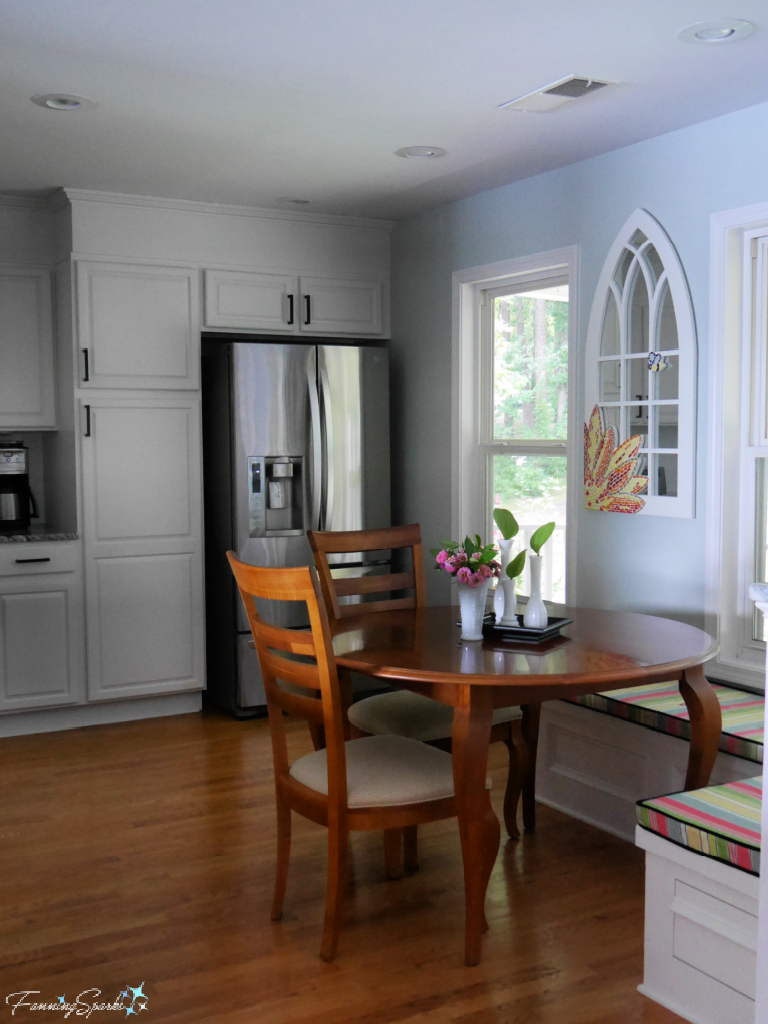
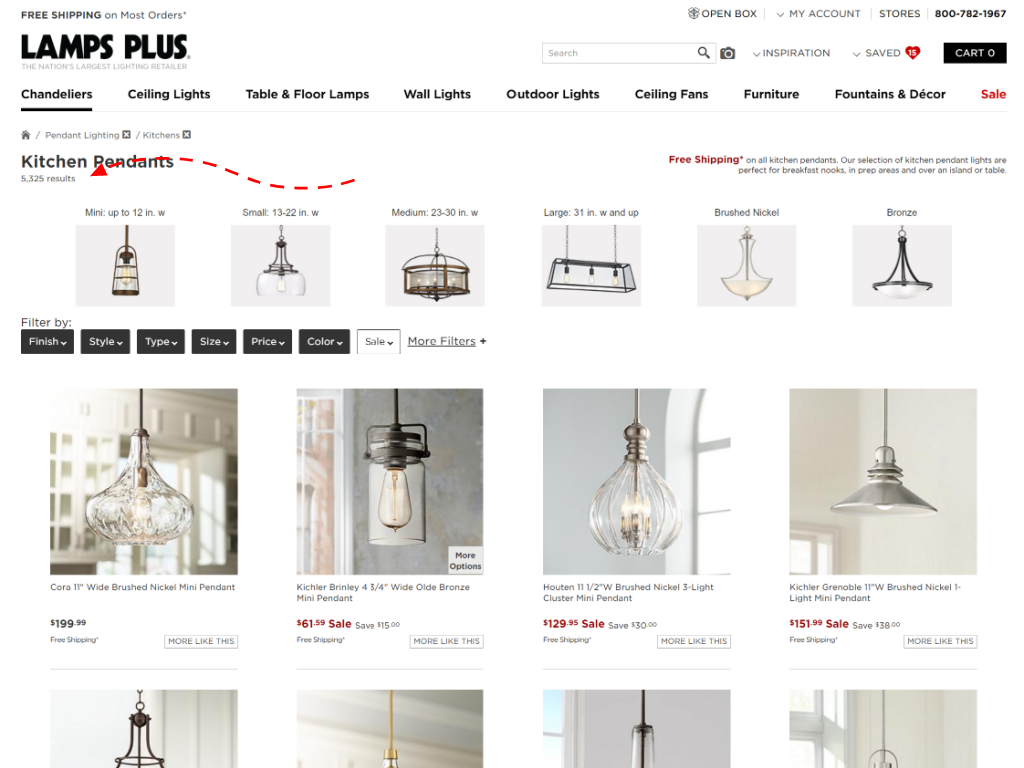 Selecting light fixtures online can be challenging. The first step is to narrow down the choices. The above screenshot shows 5,325 results for kitchen pendants… over 5,000 options! The search filters allowed me to narrow down the options by Finish, Style, Size, Price, and so on. The Save Option allowed me to “heart” the fixtures I liked and add them to a wishlist. These are, of course, fairly standard features for an online shopping site. But the shopping aid that is noteworthy and made my search much more manageable is the View In Your Room feature.
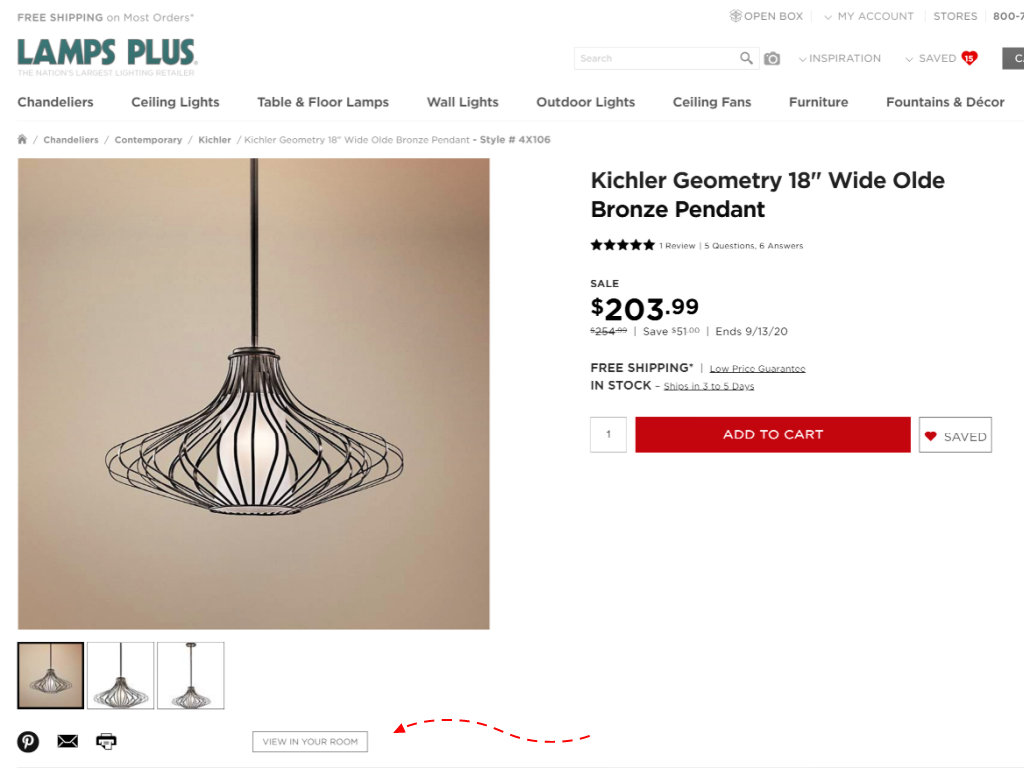
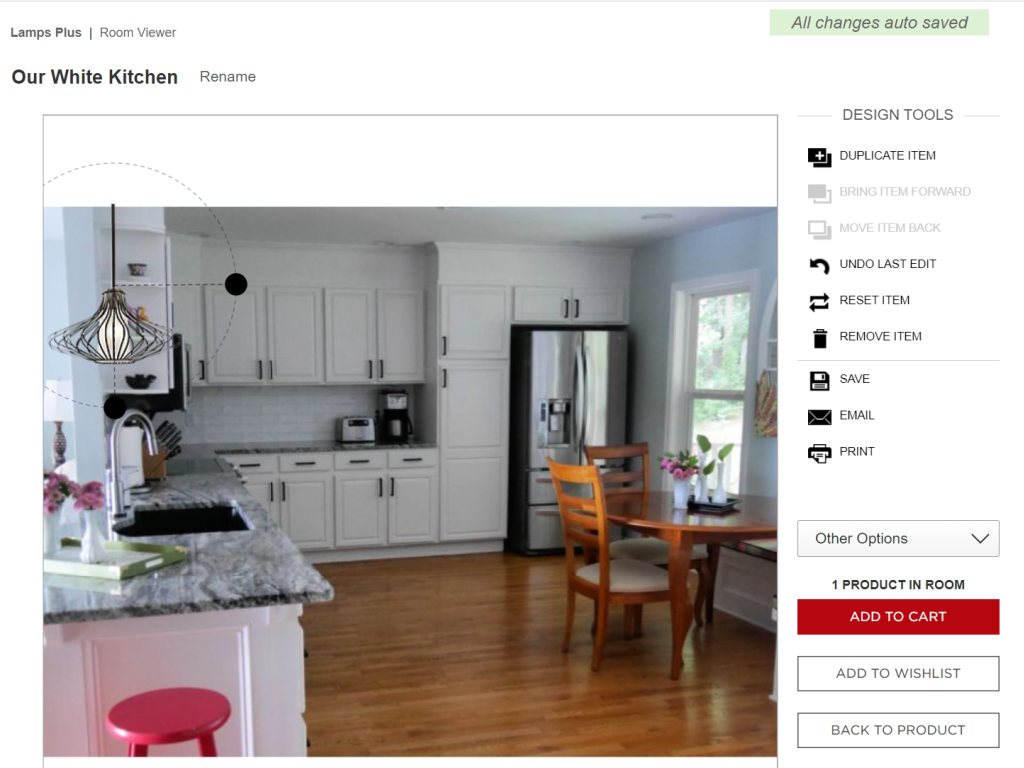 One thing to keep in mind when using the LampsPlus Room Viewer feature is scale. You can easily resize the fixture to make it look good in the Room Viewer photo but, obviously, the actual fixture is a specific size. It’s difficult to determine how big or small the light fixture will be in the actual space. That’s when I switched my selection process from online to hands-on.
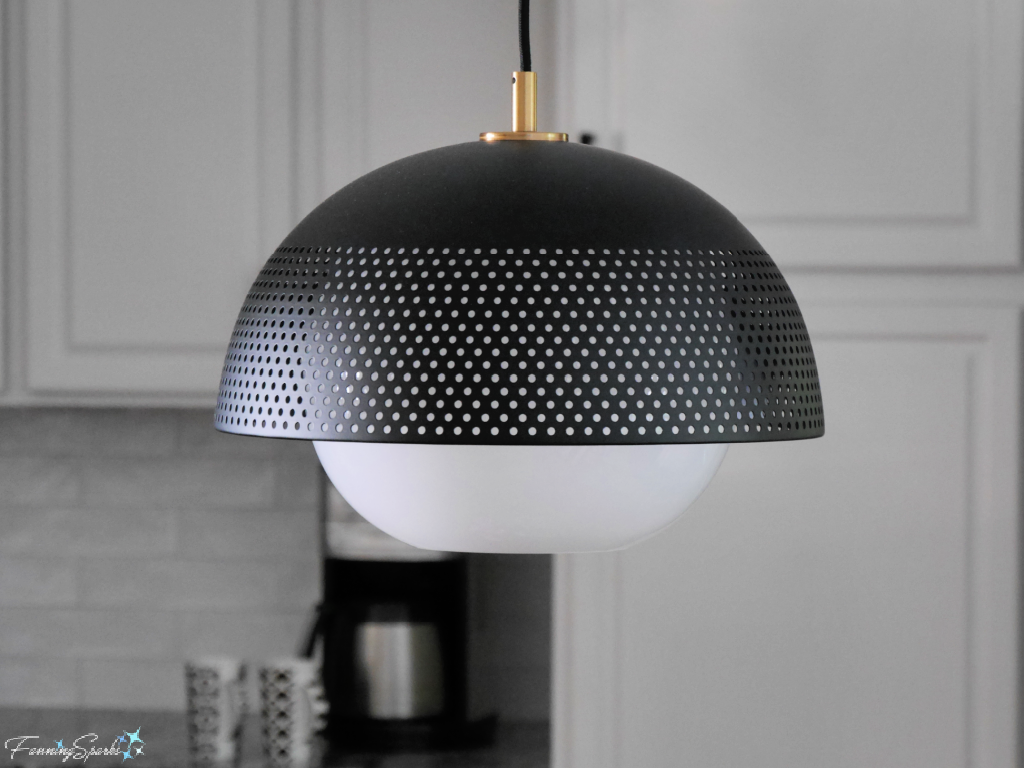
 In my opinion, it adds great visual interest without taking over the space. The generously-sized, open black metal frame creates a light, sculptural effect. This pendant light is the Kichler Geometry 18” wide in old bronze.
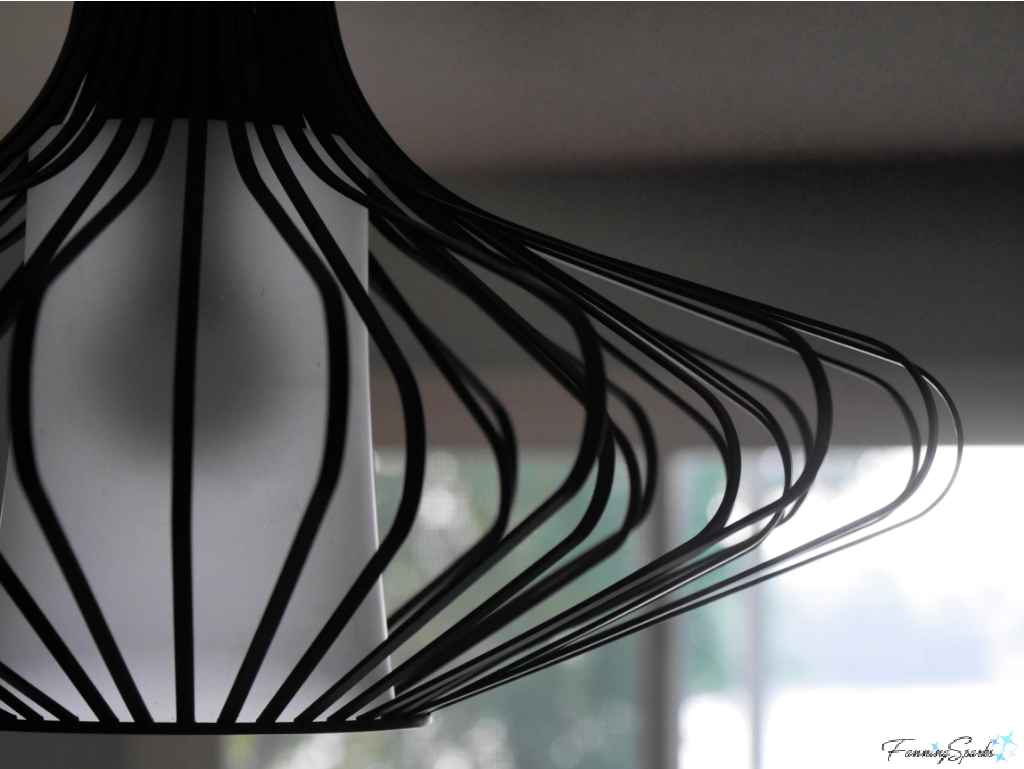 We kept things cohesive by choosing light fixtures in a combination of black metal and white glass but mixed it up with different forms, sizes and details. Here’s the new pendant light over the dining table.
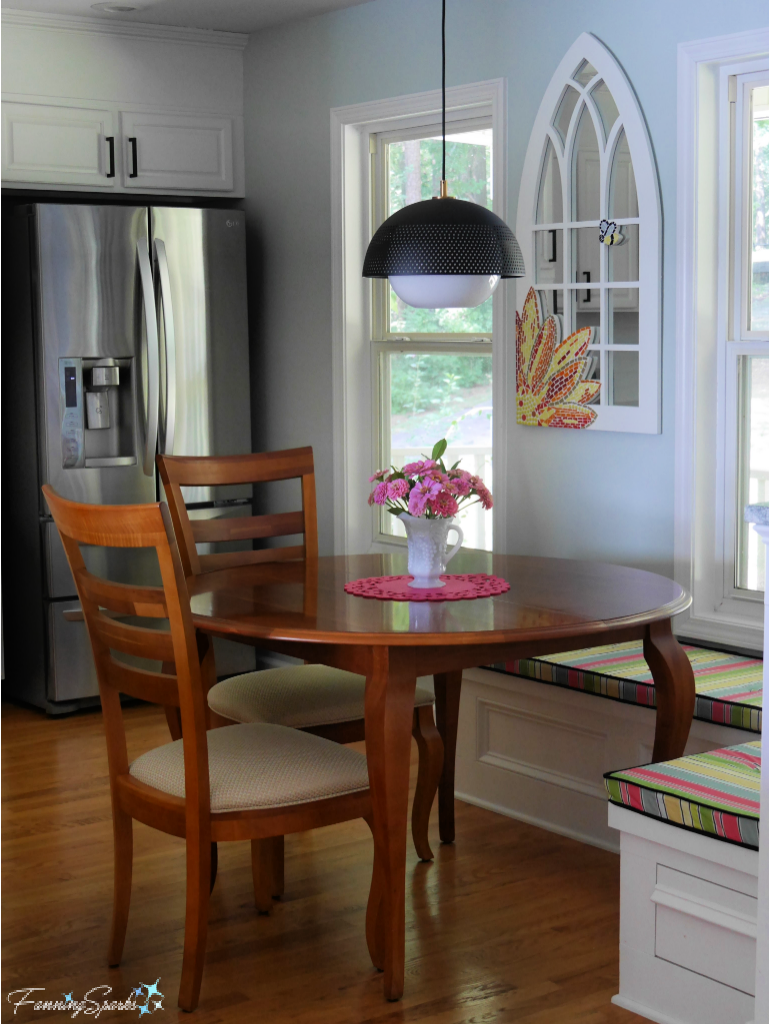
 Having selected a new close-to-ceiling fixture for the front entryway, we decided to install the same fixture in the other entryway. This photo shows that fixture along with the pendant over the counter. The close-to-ceiling fixture is the Possini Euro Deco 16” wide in bronze.
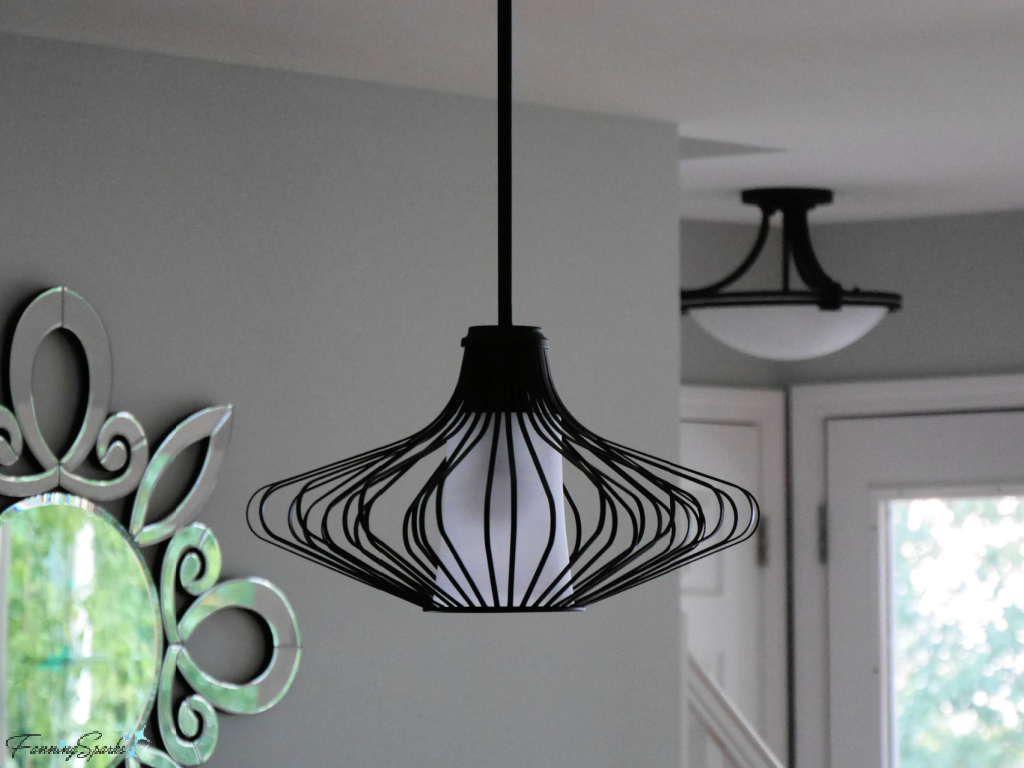 Of course, lights have to be turned on to get the full effect. We had dimmer switches installed on the pendant lights which allows them to serve as task lighting when set to high and ambient lighting when set to low. Here are the over counter and dining table pendant lights.
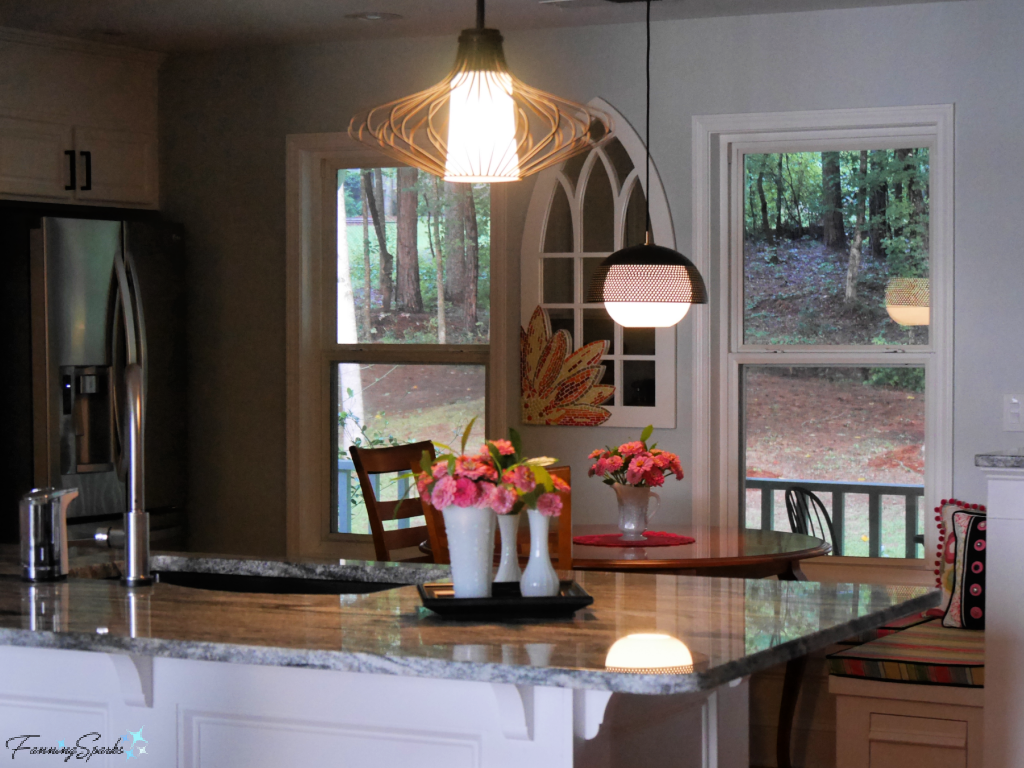 In this next photo, the over counter pendant light fixture and the entryway close-to-ceiling fixture are shown.
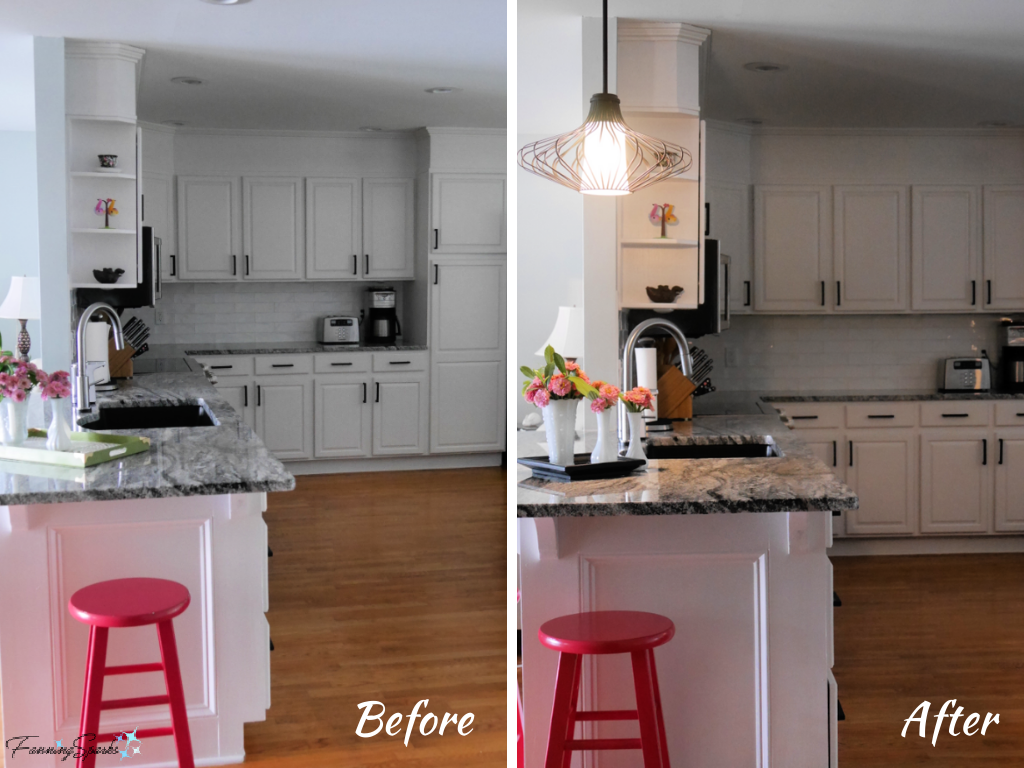
 It’s always fun to see a side-by-side comparison–here’s the counter area before and after the new pendant light fixture. I think Randall Whitehead was right…decorative lighting does indeed add “visual sparkle to a space.”