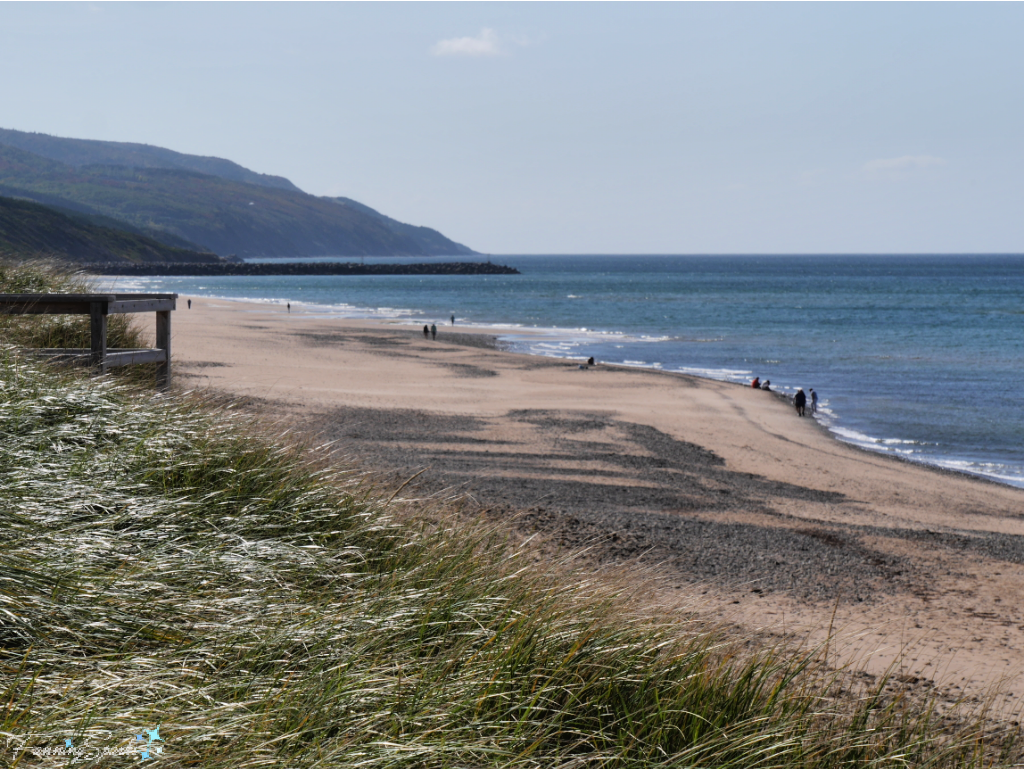
Along the Camino Portugués, an ancient pilgrim route from Portugal to the Cathedral of Santiago de Compostela in northwest Spain, traditional wayfinding methods have been replaced with modern, bold, yellow arrows. (See my post Following the Yellow Arrows about my adventure walking this trail around this time last year.) I do recall, however, one spot along the forest path between Esposende and Viana do Castelo (shown below) where a fork in the trail was marked with a pile of stones. I didn’t know it was called a “cairn” nor did I know that a cairn is “read” by looking for a small stone at the side of the pile. A small stone on the right indicates you should turn right. While a stone on the left side would indicate turning left. Luckily, I guessed correctly and continued along my merry way.
A cairn is defined as “a heap of stones piled up as a memorial or as a landmark”. Throughout the ages, people built cairns to indicate various items of significance including trails, graves, altars, property boundaries and hunting grounds. Cairns are still used for wayfinding in some backcountry locations.
Nowadays, a different version of cairn—the stacked stone tower—is popping up wherever an abundance of stones are found. These stacks don’t serve any specific purpose; they are typically created for amusement and entertainment. I confess to building a few myself. Here’s my first attempt created with the beautiful red sandstone of Prince Edward Island.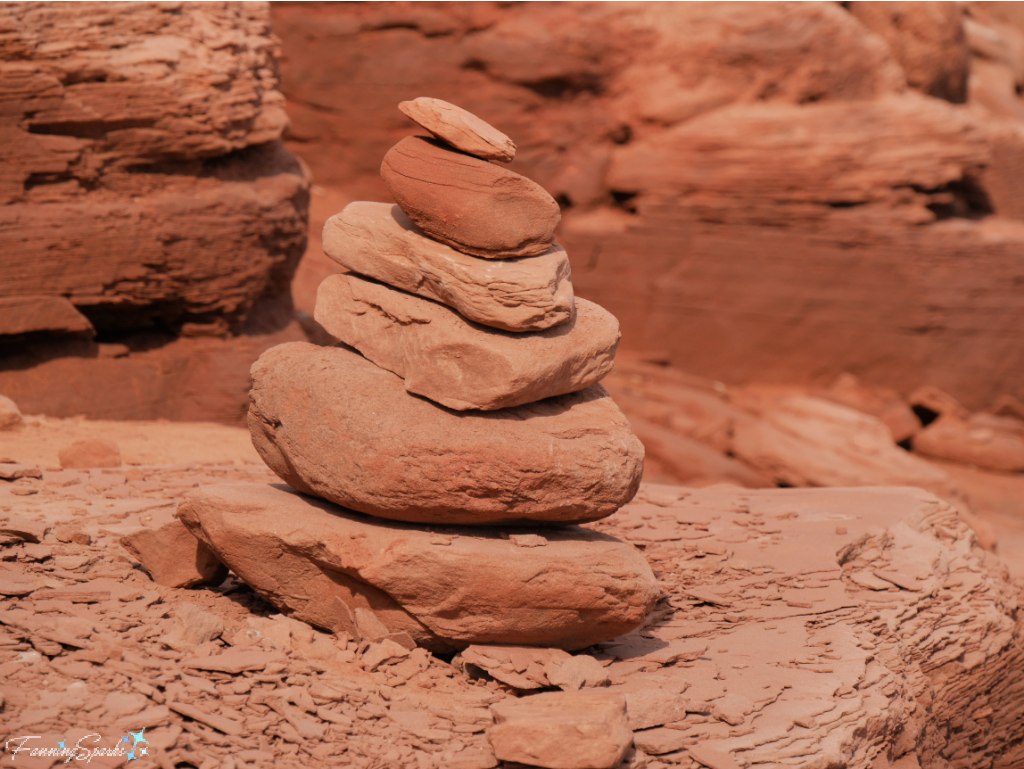
My next attempt resulted in this precarious version.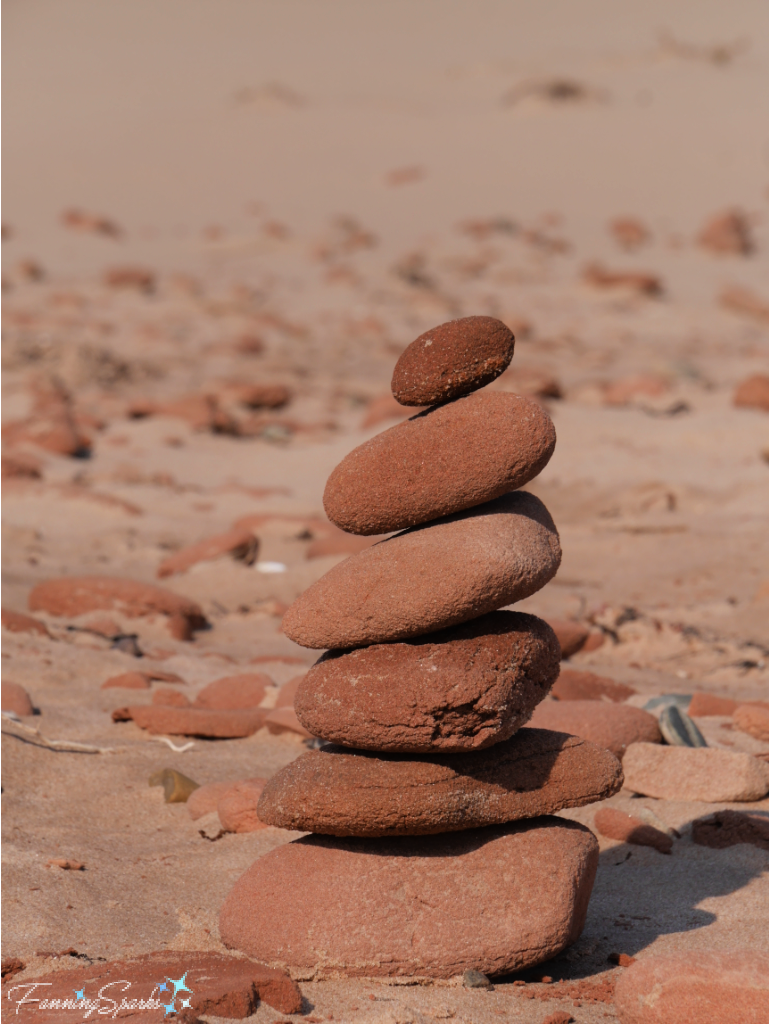
Obviously, the point is to build a tower that doesn’t topple over. Oops! 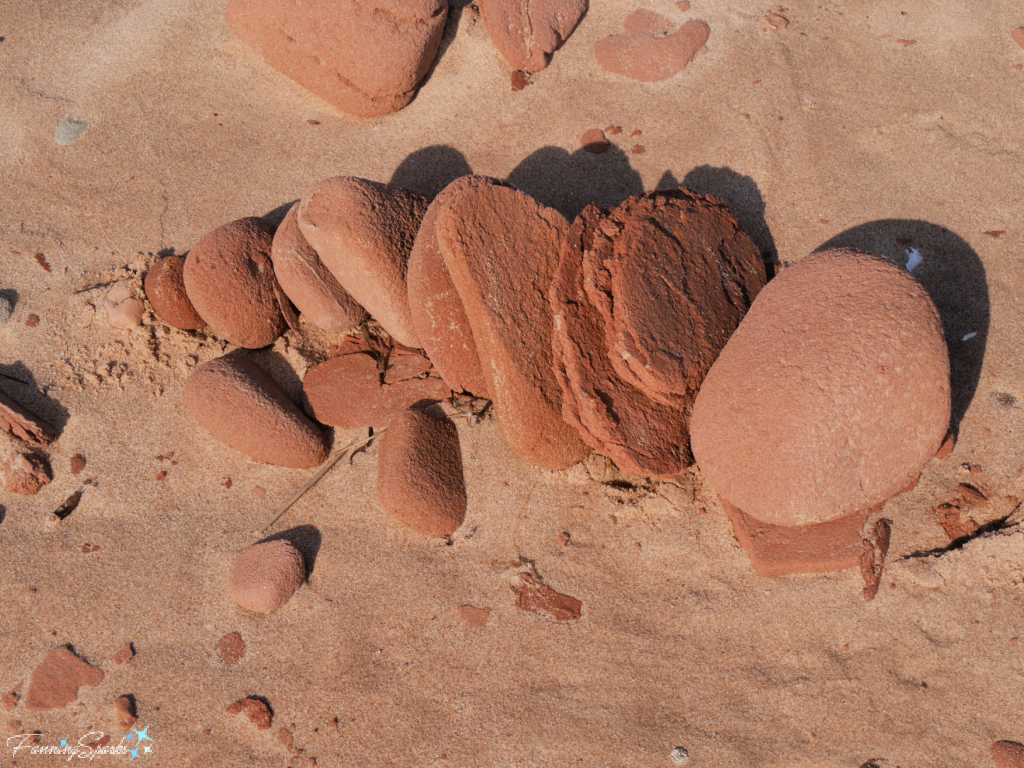
This third version, built with river stones, looks a little more promising.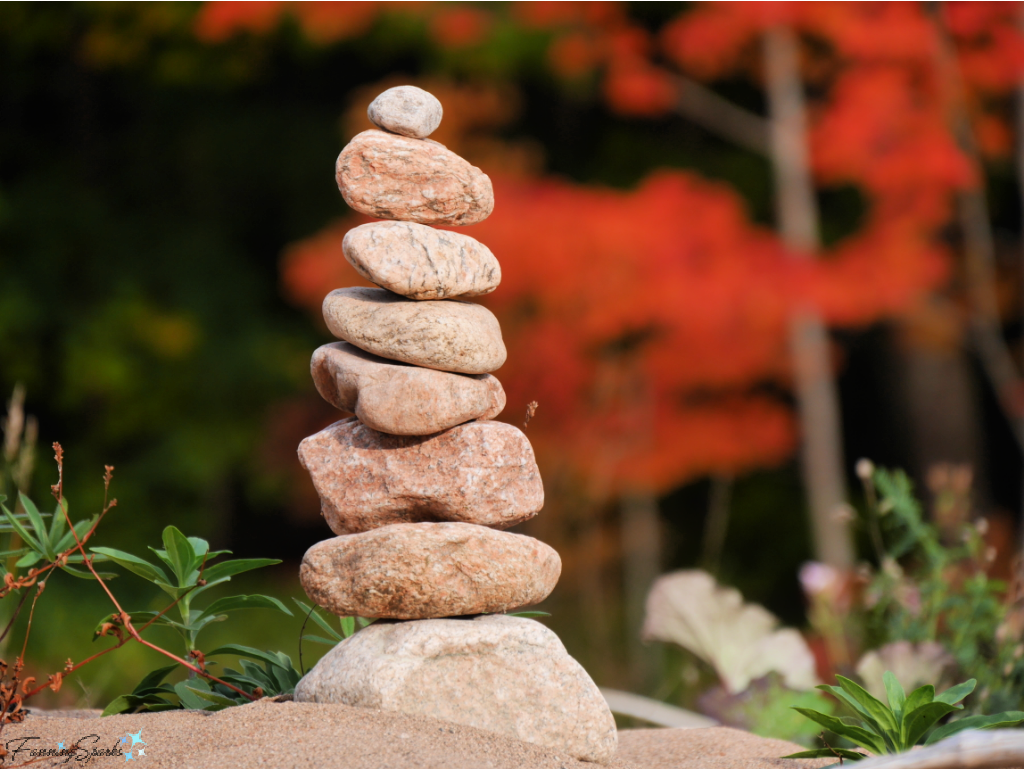
My rudimentary attempts pale in comparison to some of the ornamental stacked stones I’ve seen in my travels. Here’s a stunning accomplishment I spotted along the Camino between Viana do Castelo and Caminha, Portugal. My online research reveals this would likely be considered “rock or stone balancing”.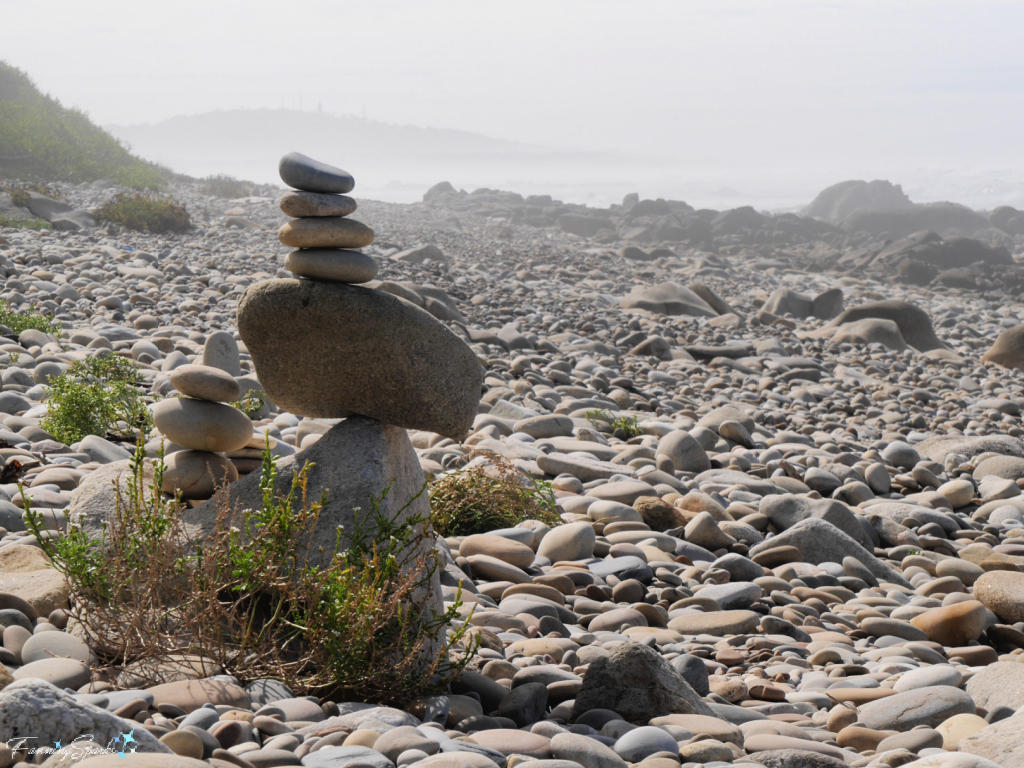
“Rock balancing or stone balancing (stone or rock stacking) is an art, discipline, or hobby in which rocks are naturally balanced on top of one another in various positions without the use of adhesives, wires, supports, rings or any other contraptions which would help maintain the construction’s balance.” says Wikipedia. Here’s a closer look at the structure.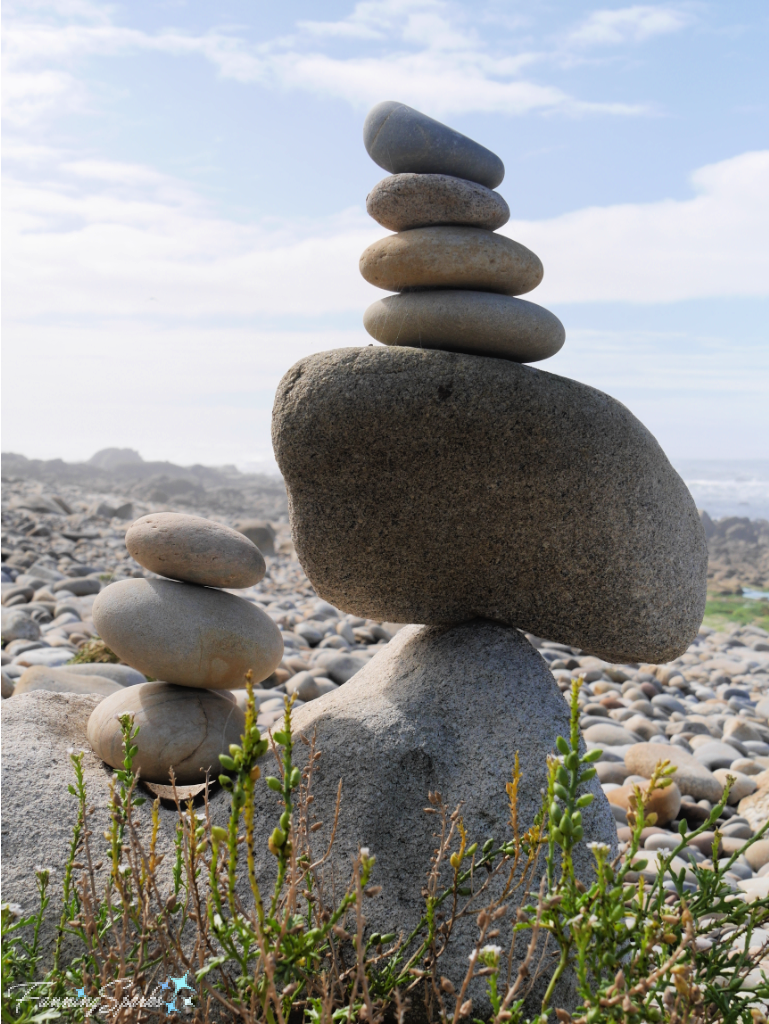
Here’s another impressive example of stone balancing. I spotted this one at Peggy’s Cove in Nova Scotia.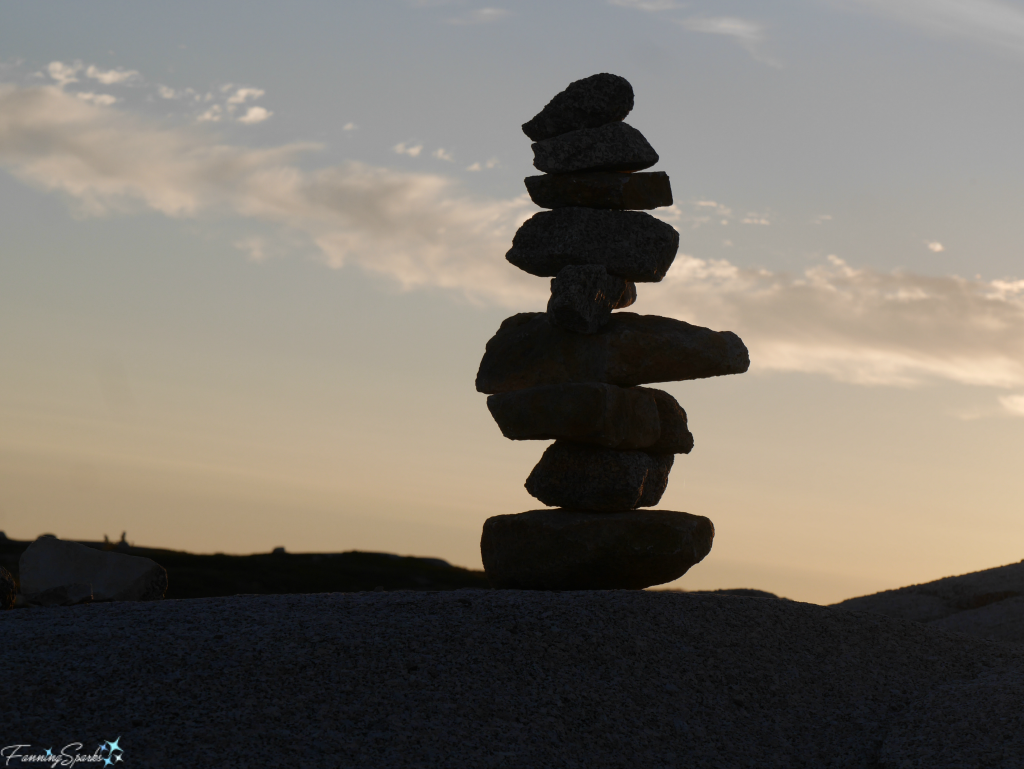
The below figure, a specific version of a cairn called an inuksuk, was also spotted at Peggy’s Cove.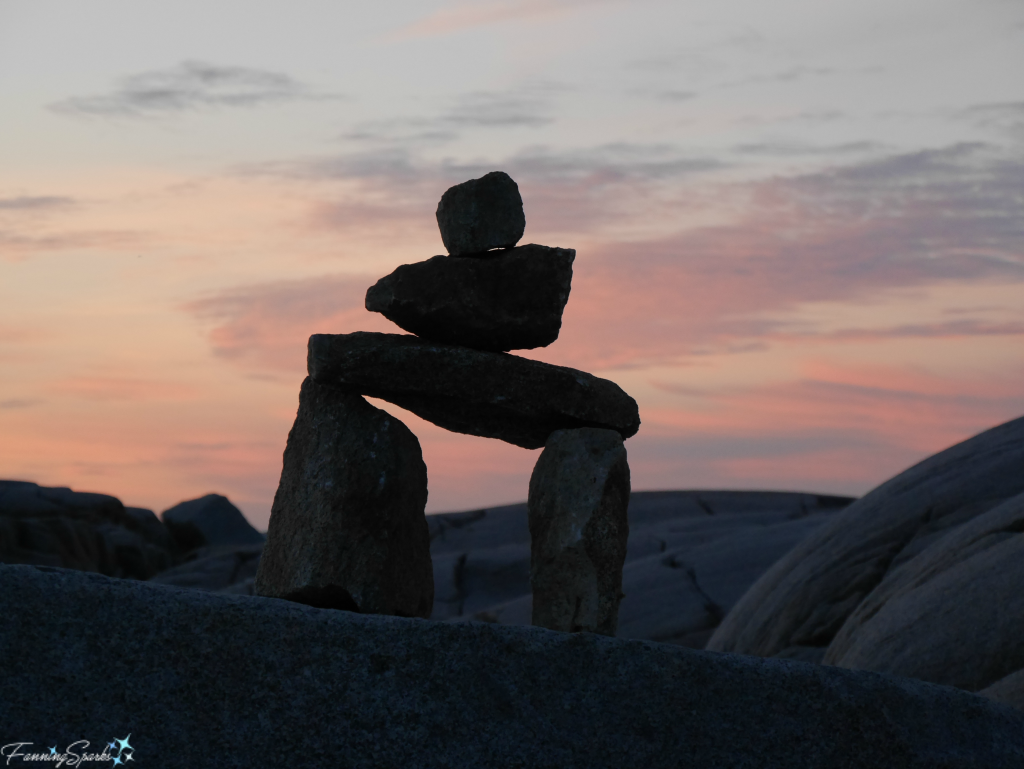
Inuksuit (plural for inuksuk), were traditionally constructed by the Inuit and used to communicate throughout the Arctic. Inuksuit are sculptures of piled stone in the shape of human figures. Turns out, building an inuksuk, especially one that’s stable and graceful, is more difficult than it appears. 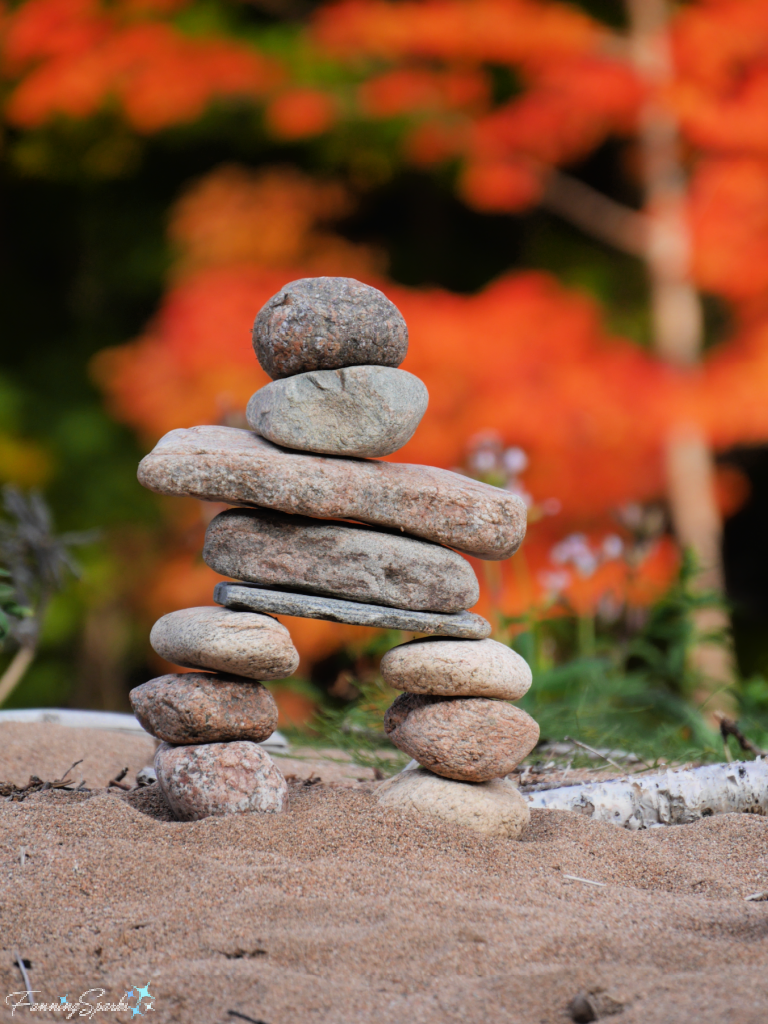
While researching tips for stone stacking, I learned there is quite a controversy around this practice. Back in 2012, David B. Williams, author of the book Cairns: Messengers in Stone gave this advice: “I would offer the idea of leave no trace, meaning don’t build cairns unless they serve a purpose”. But a recent article on BigThink, headlined “Stone stacking destroys the environment for clicks and likes”, makes a much stronger statement. The author Kevin Dickinson reports that “stone stacking has surged in popularity” and that “stone stackers have flocked to national and state parks to enjoy the discipline among nature’s beauty”. This view of stone stacks atop the granite rocks of Peggy’s Cove provides visual evidence.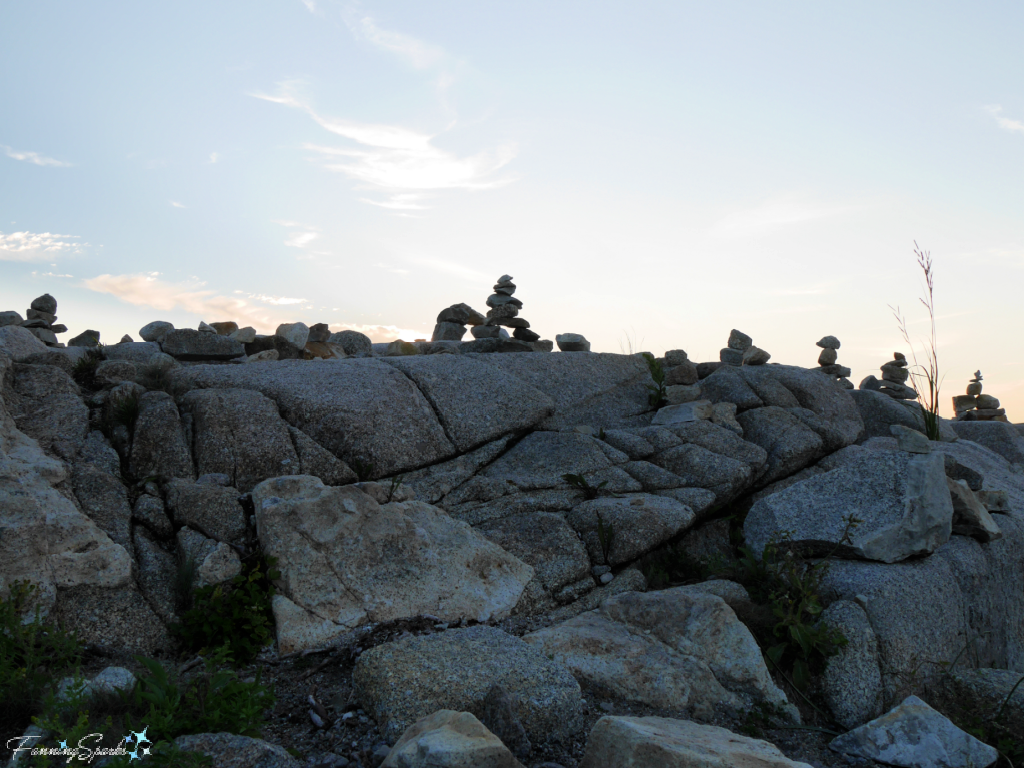
The BigThink article goes on to explain that environmental damage can result from widespread stone stacking and shares the findings of a scientific case study conducted on Maderia Island, Portugal. The scientists wrote: “We use this case in point to argue that, in areas of conservation concern, authorities should impose restrictions to this practice and quickly dismantle stone towers to avoid a contagious effect that often encourages the construction of more such structures“.
An article by Leave No Trace Center for Outdoor Ethics, reinforces these concerns and then goes on to offer an easy alternative. “By respecting the following recommendations we can keep our wild spaces wild, while enjoying rock stacking, and the freedom of expression that comes along with it.
. Leave What You Find, officially designated cairns need to be left in place. Altering these cairns in any way poses a threat to visitor safety, and the ethic of the area visiting.
. When making your own rock stacks stick to durable surfaces. Many times along streams and rivers, one will be walking in riparian areas. Use designated trails and durable surfaces to minimize impacts.
. When collecting rocks only collect ones that are loose from soils, sands, and silts. This will minimize the impact of erosion.
. Build your stacks, take pictures, and then return all of the used rocks to their original locations.
. Leave the area how it was originally found to maintain the wildness of the area.”
Duly noted!
Another option I find intriguing is to build a few stone stacks in my garden. Perhaps a few carefully-constructed stone stacks, similar to the one pictured below, would work. This one is actually very small as all the stones fit into the palm of one hand. But with larger stones, probably reinforced for safety, I think it would be amazing nestled in amongst the flowers.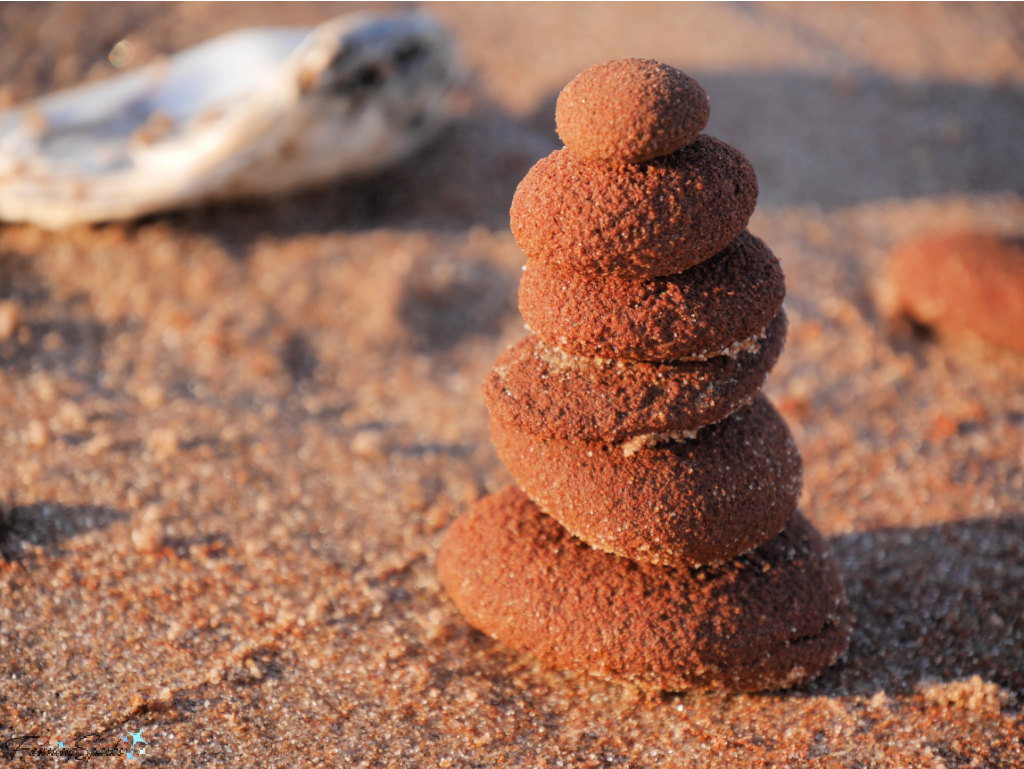
More Info
You can learn more about my experience walking the Camino through Portugal in the post Following the Yellow Arrows. Check out more of Nova Scotia’s rugged beauty in the post First Light at Peggy’s Cove.
Here’s the link to the Rock Balancing article in Wikipedia.
Amazingly, there’s a World Rock Stacking and Skipping Championship held in Llano, Texas as part of Llano Earth Art Fest every year.
You can learn more about inuksuit on the Canadian Encyclopedia website.
David B. Williams’ book Cairns: Messengers in Stone can be found on Amazon. Here’s an interesting interview of the author from the Wandering Educators website. Or you can learn more about the author on his Geology Writer website.
Here is the link to the BigThink Article on stone stacking and to the Leave No Trace article which offers the easy alternative shared above.
Today’s Takeaways
1. Humans have used piles of stones to communicate for centuries.
2. Stacking stones, when done with respect for nature, can be an entertaining challenge.
3. Help protect the outdoors by adopting Leave No Trace practices.

 For many sea glass fans, this unlikely transformation is part of the appeal. According to Jane Claire McHenry of Sea Glass Jewelry by Jane “…sea glass is symbolic of renewal and healing. I believe that a well-worn piece of sea glass is a testament to strength and survival, something that is almost spiritual. Sea glass philosophy is about accepting one’s imperfections and believing that persistence and time will smooth and soften them just as a jagged piece of sea glass is transformed over time into a new creation that is even more beautiful than before.”
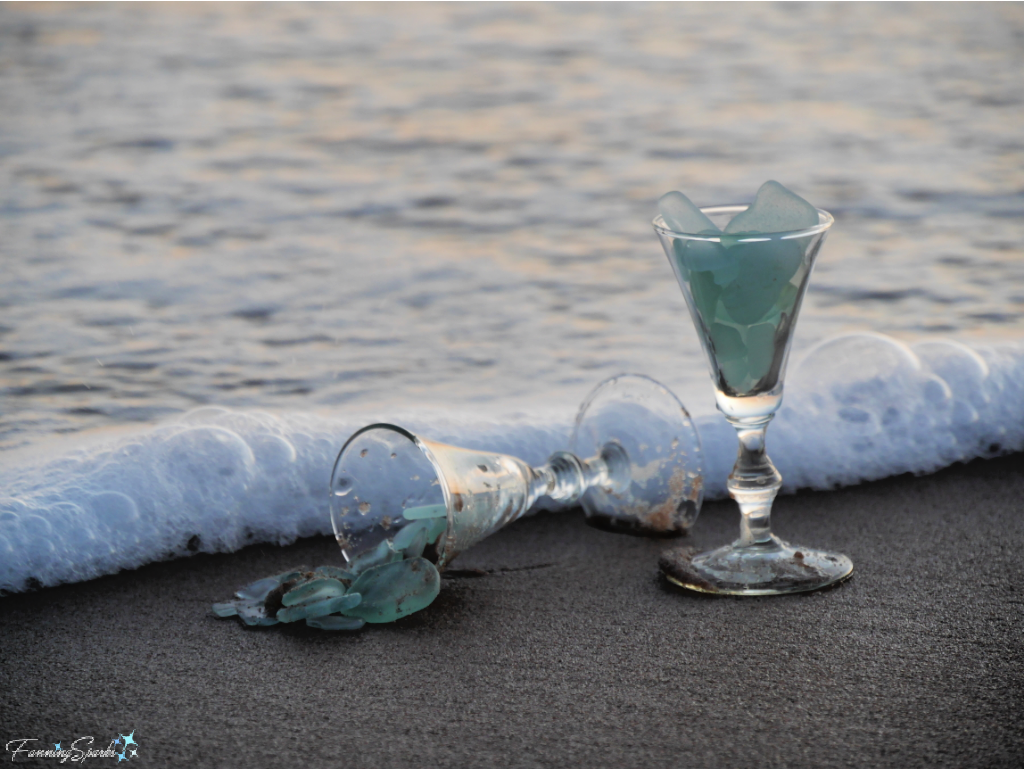 Just to clarify, the terms “sea glass” and “beach glass” are used interchangeably but, to be quite accurate about it, sea glass is formed by salt water while beach glass is formed by fresh water. The physical and chemical differences between the salt and fresh water environments produces slightly different characteristics in the glass. Another, more whimsical, term often used to describe sea glass is “mermaid’s tears”.
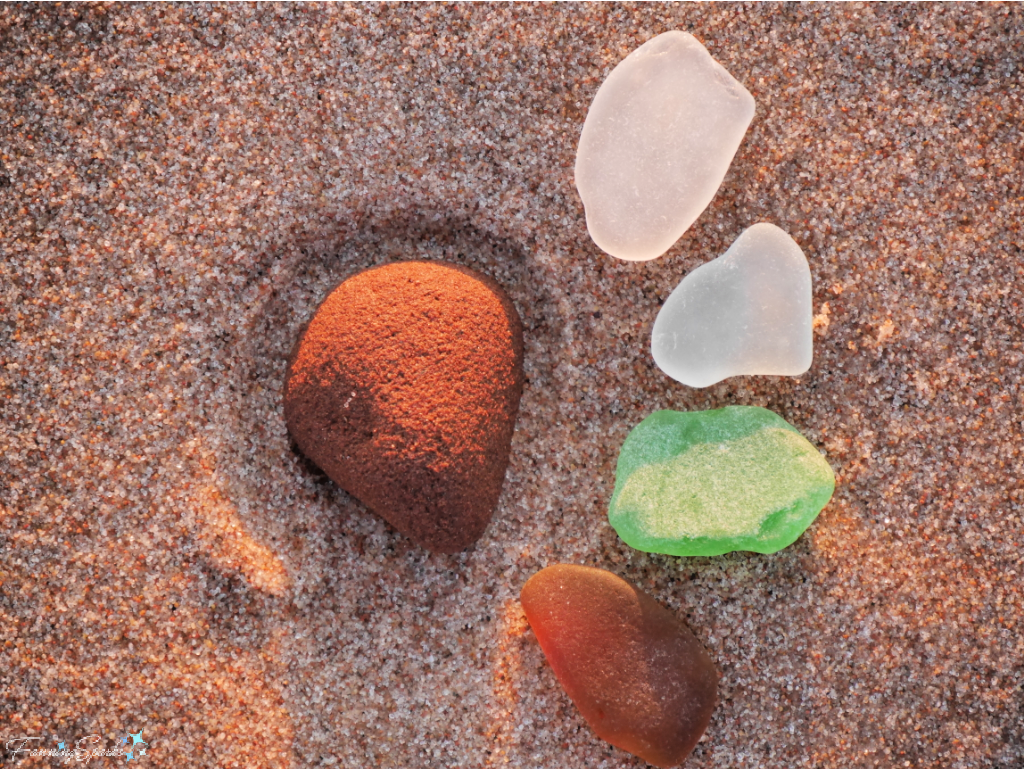 The availability of different colors has led to designations of rarity. Categories such as of common, uncommon, rare and extremely rare are often used. But for the more sophisticated sea glass collector, sea glass guides provide more detailed categories. One guide I found online, the Carter Sea Glass Color and Rarity Guide, sorts sea glass into 81 descriptively named colors and rates them for rarity on a scale of 1 to 10.
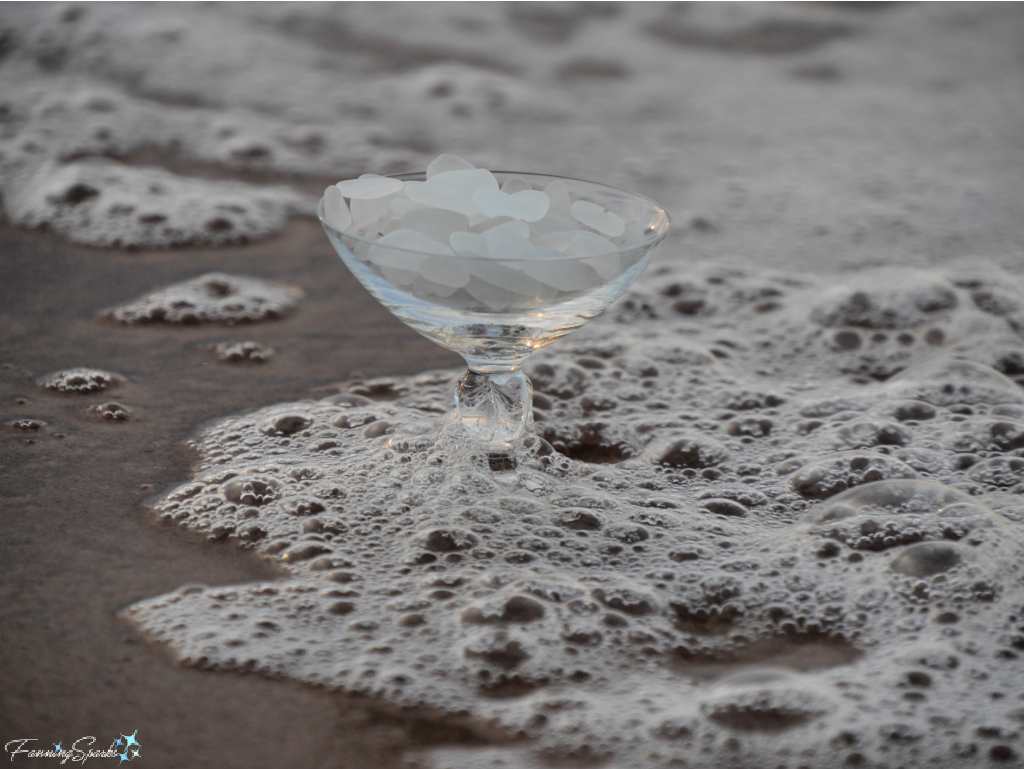 Blue-colored sea glass is less common and eagerly sought after but it’s not as rare as orange and red.
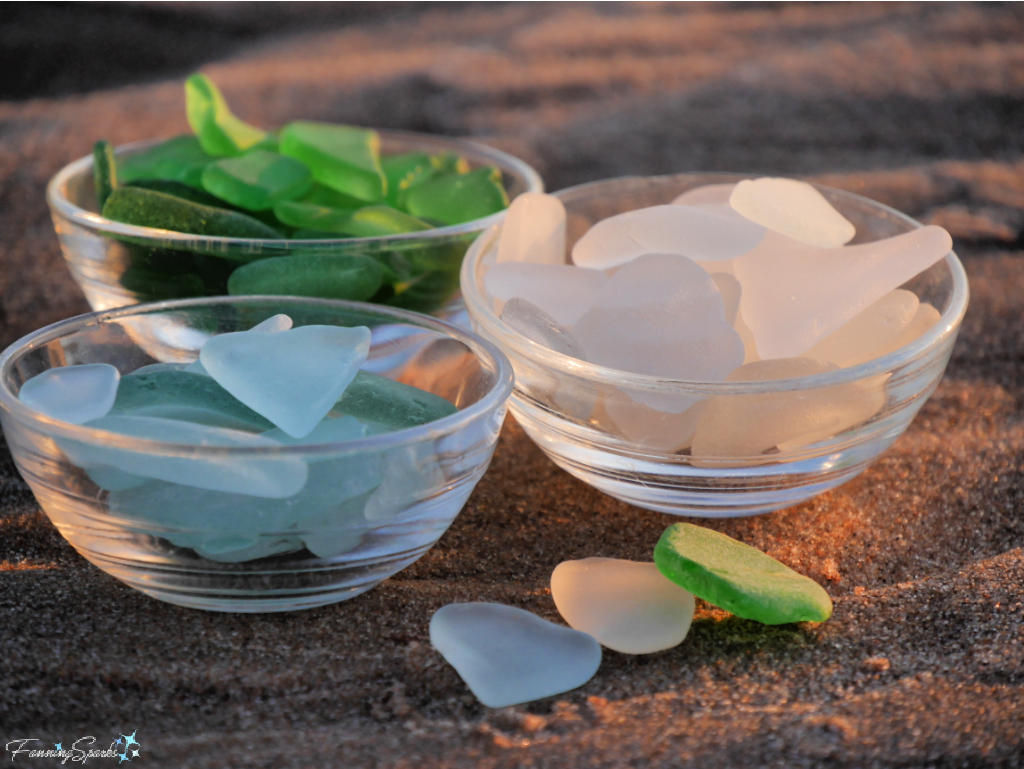
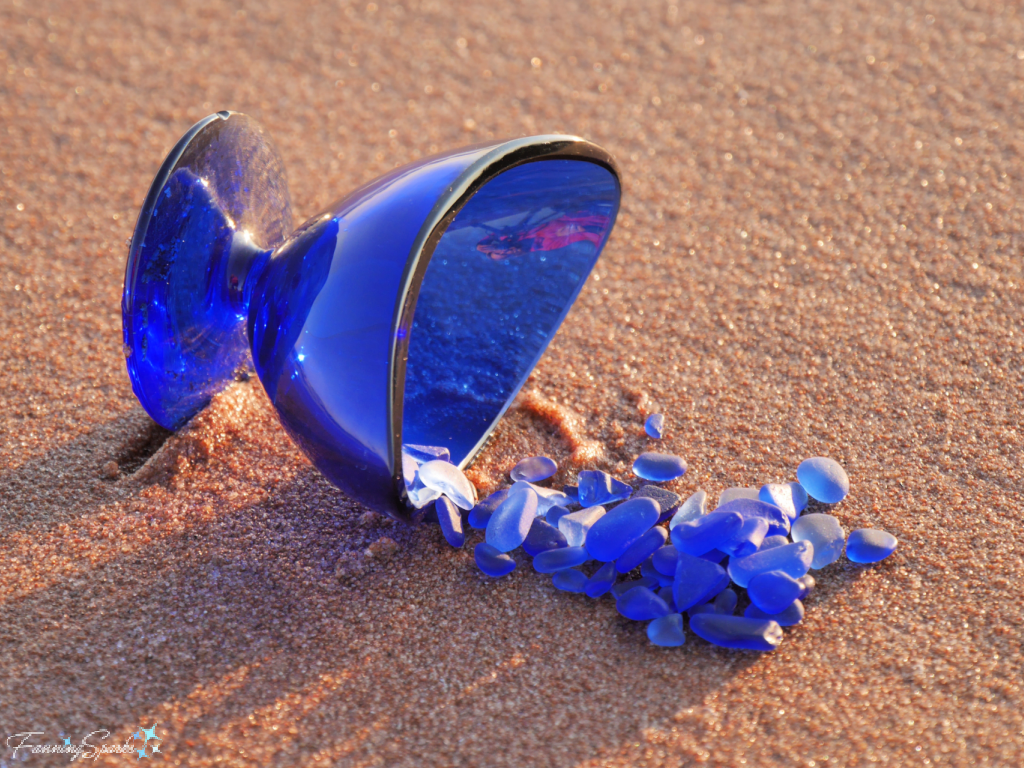 Just for fun, here’s a sundae dish serving up pieces of clear and seafoam sea glass topped off with a piece of green sea glass.
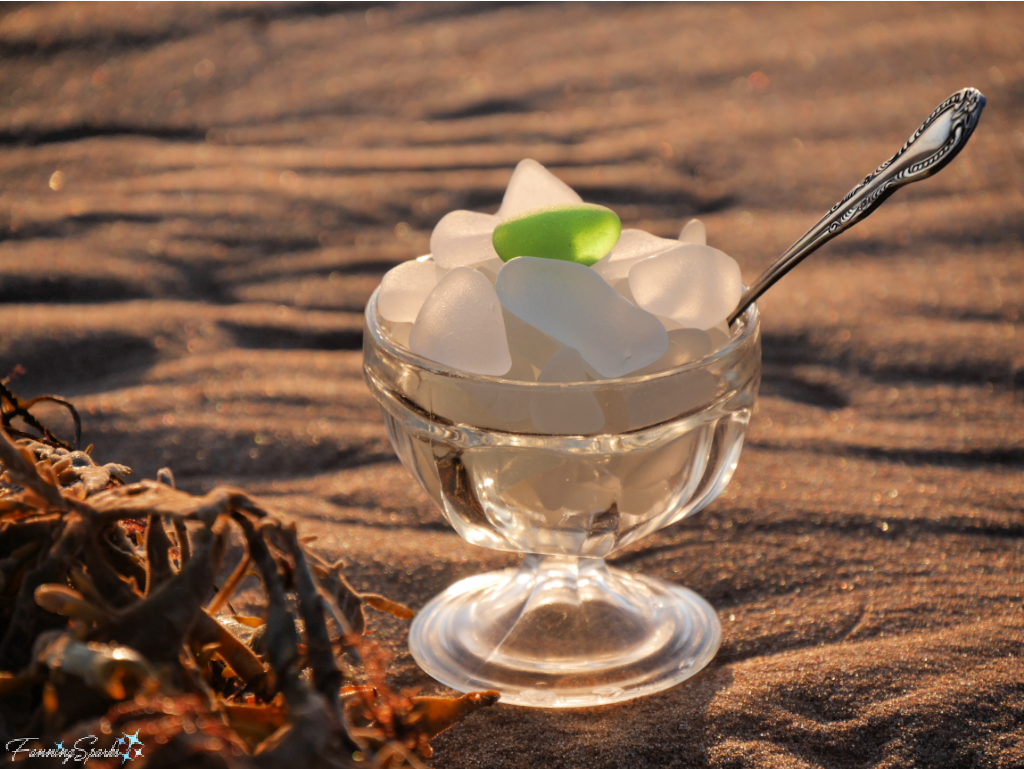
 2. Timing Ocean waves carry sea glass to the shore so it makes sense to go at low tide or when the tide is on the way out. Another factor to consider is weather—picking is reported to be better after a storm. Getting to the beach early to be the first picker, or simply to enjoy the sunrise, is another option. The below masterpiece, courtesy of Mother Nature, was sunrise at Crowbush Cove on Prince Edward Island’s north shore.
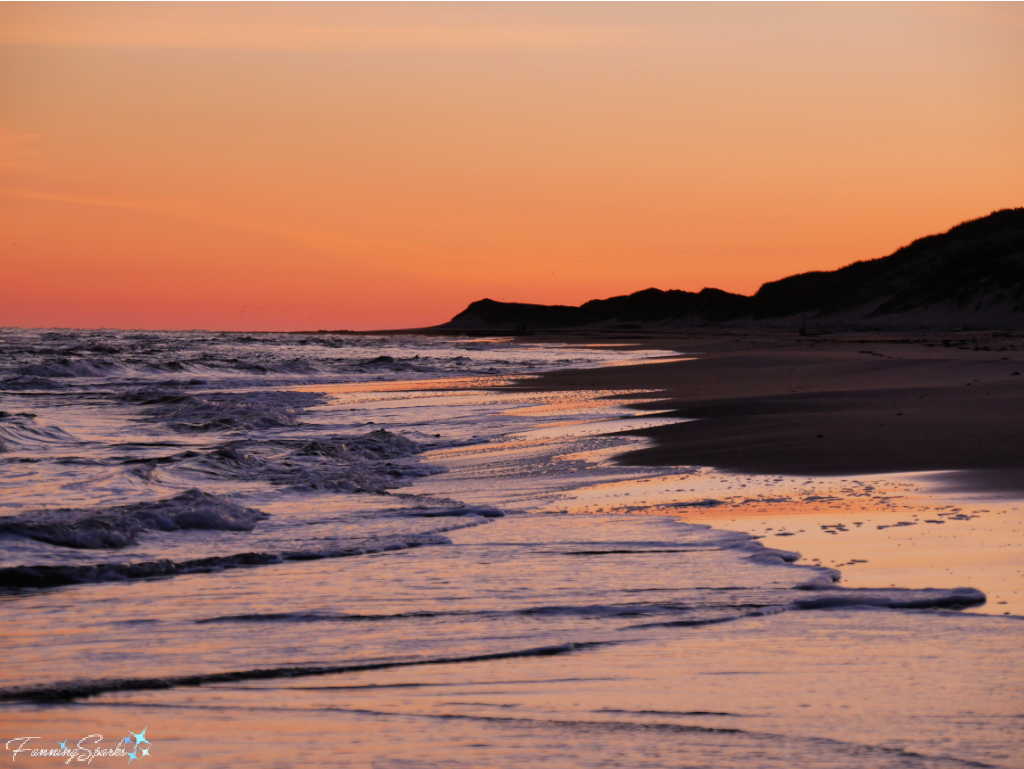 3. Technique Walk slowly and scan the ground. Some people recommend walking along the “wrack” which is the furthest point the tide has carried debris. Alternatively, sea glass gems can be found by sifting through small stones or searching amongst rocks.
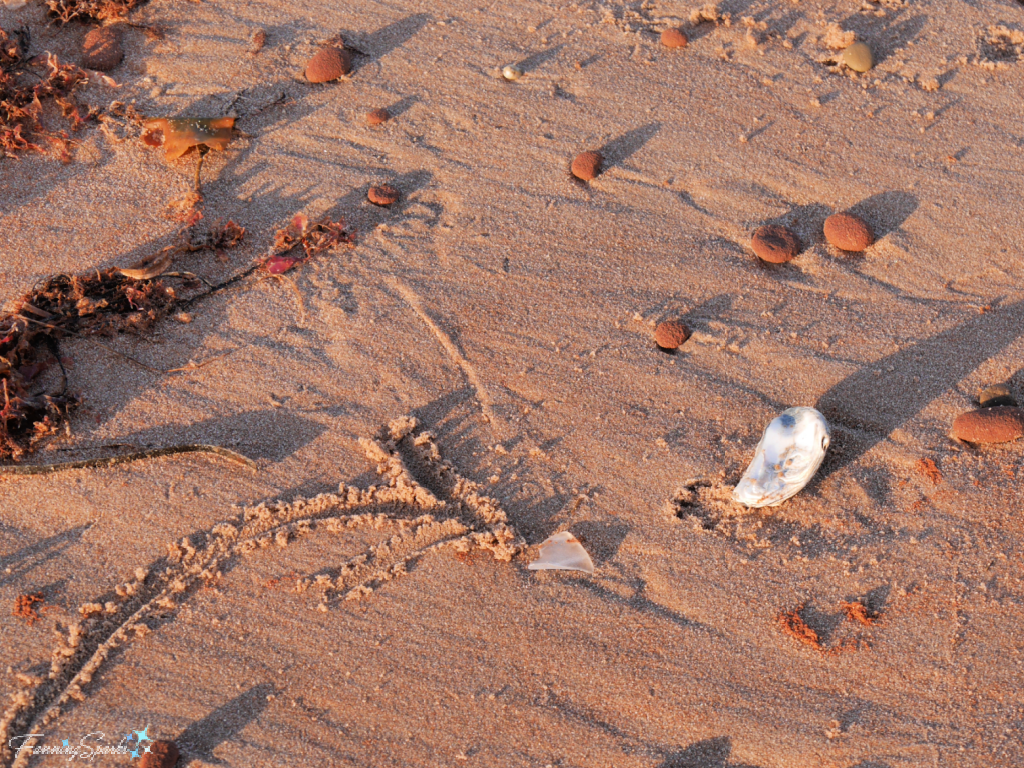 One final tip: when getting creative and staging photos of sea glass in the waves, remember the ocean can reclaim that glass as easily as it delivered it in the first place! (Don’t worry; no sea glass was lost in the making of this photo.)
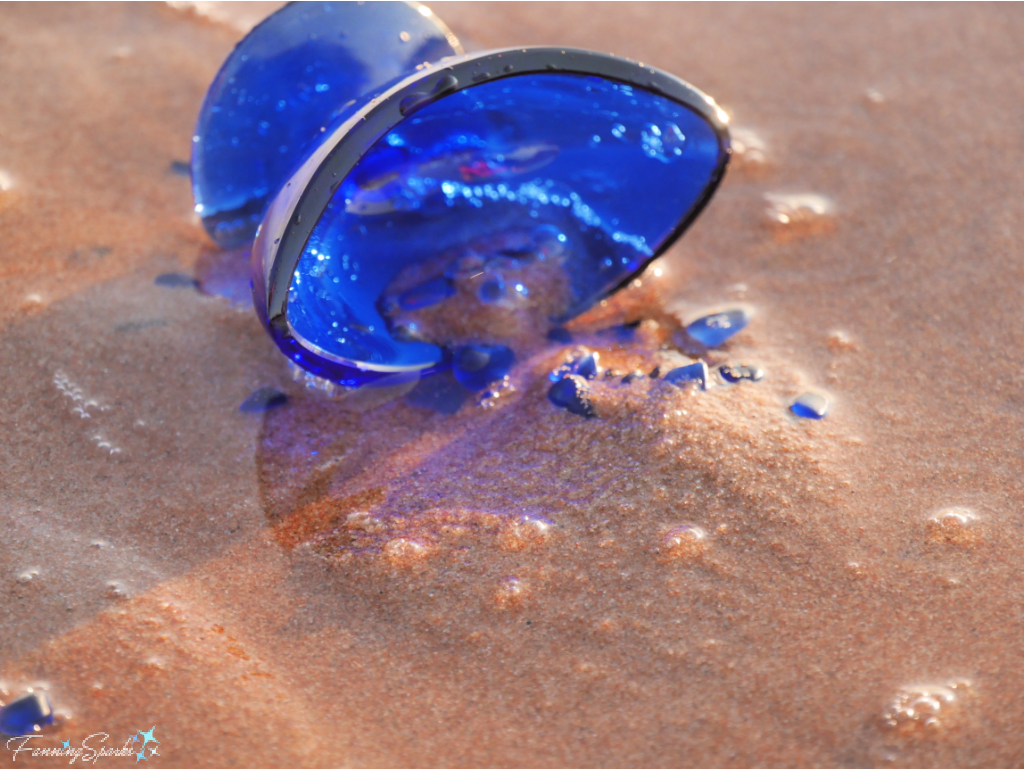


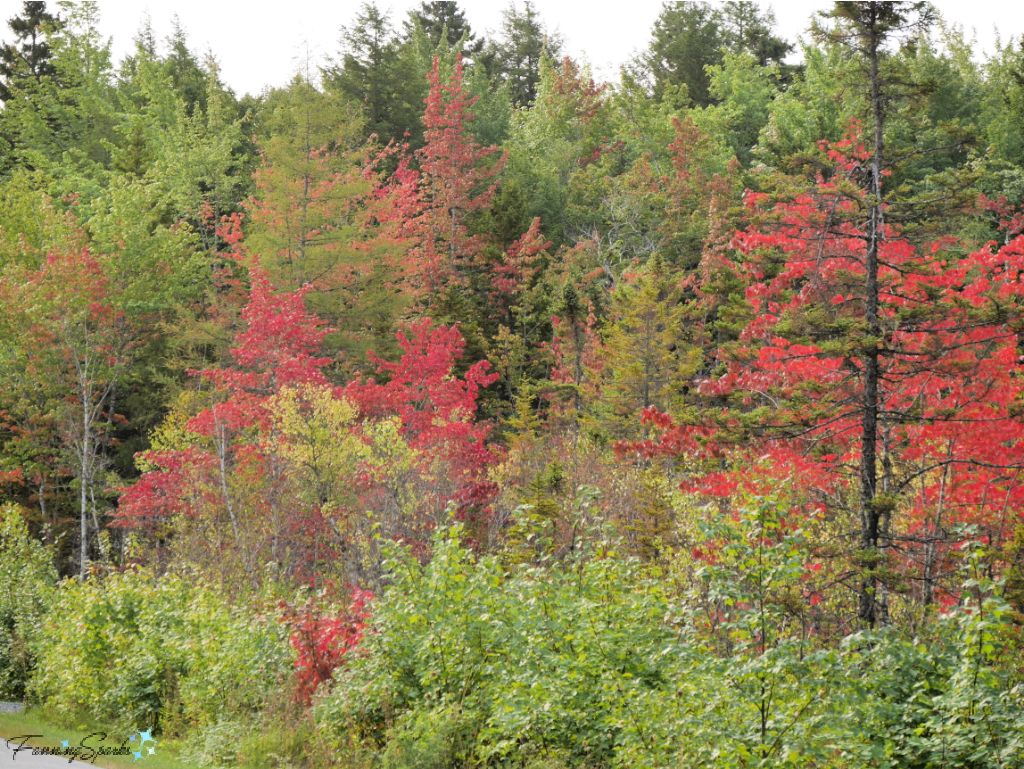 The leaves have just started to turn color in Nova Scotia. According to my brother, who knows such things, the first trees to turn are those that are unhealthy or are rooted in wet areas. The gorgeous red maple leaves shown below were indeed in a wet swampy area.
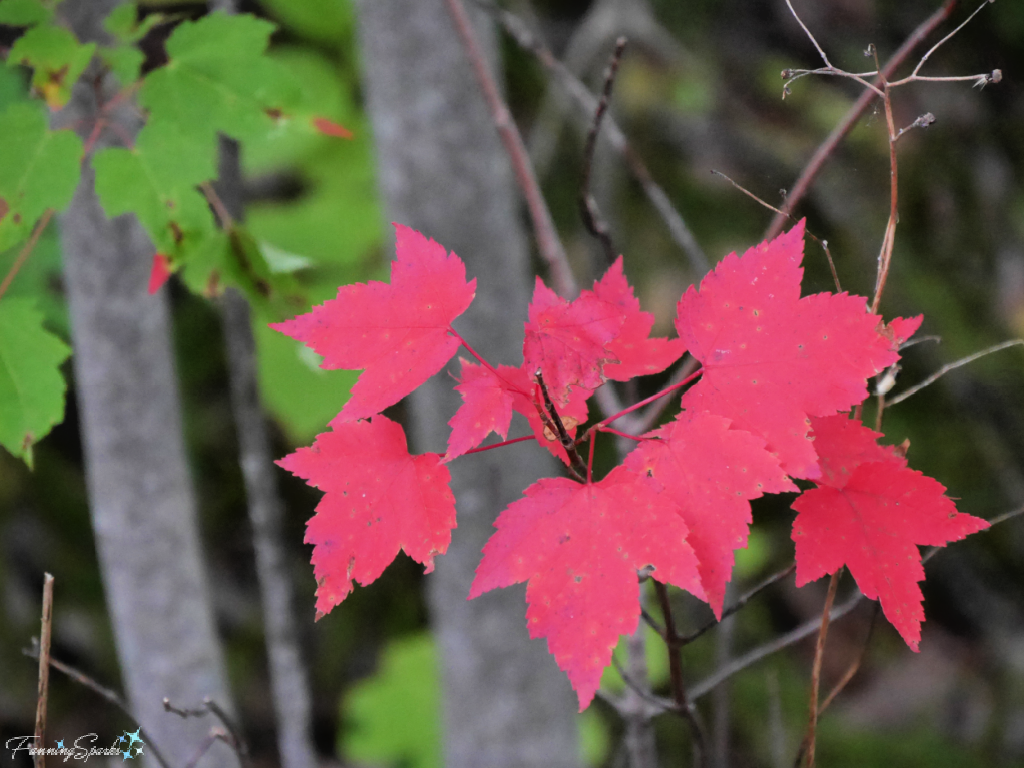
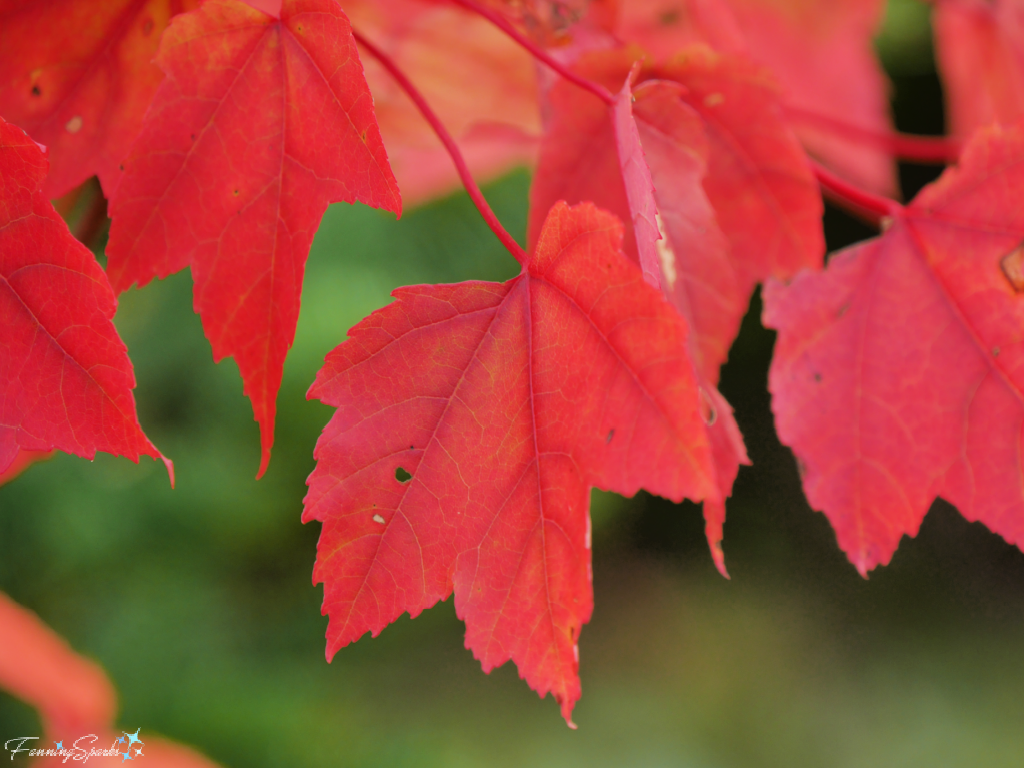 Mother Nature outdid herself with these fall colors! Check out the vibrancy of these scarlet leaves backlit by sunlight.
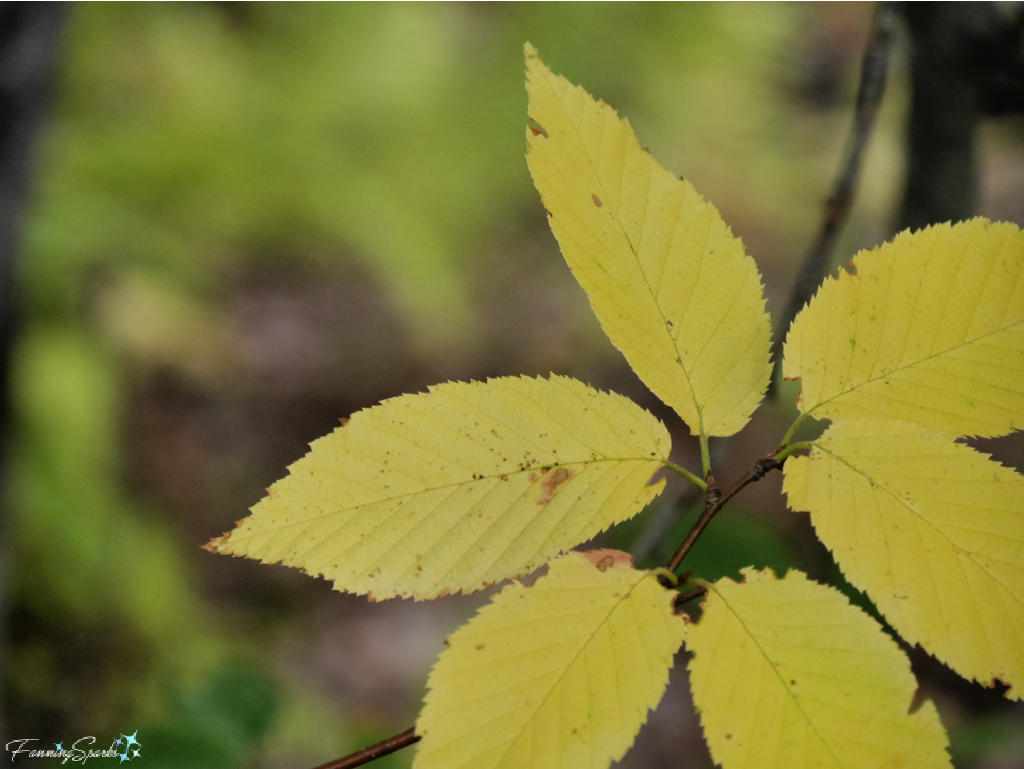
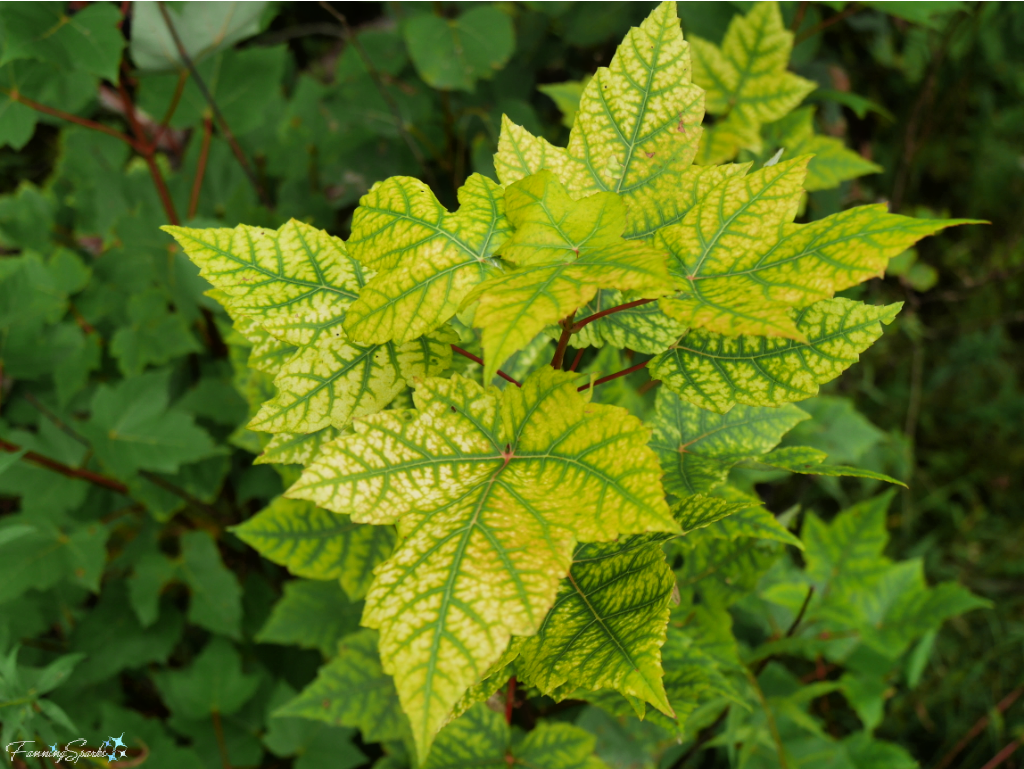
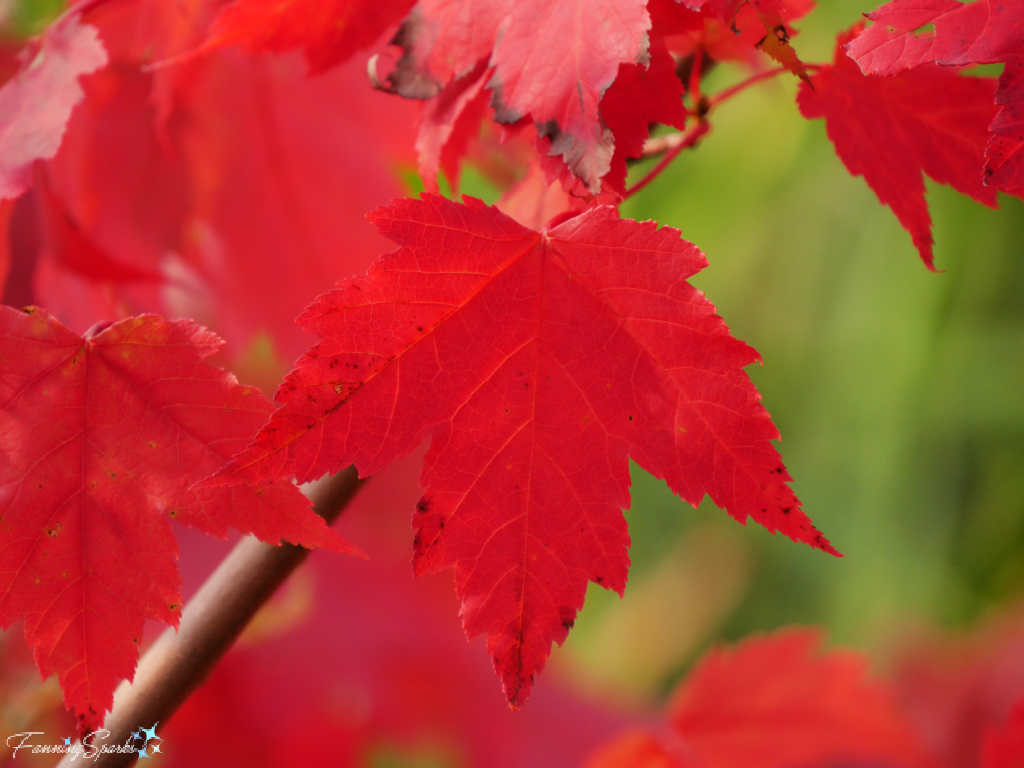 Red is not the only color on Mother Nature’s palette—there are yellows, golds, oranges, peaches, pinks and a myriad of greens.
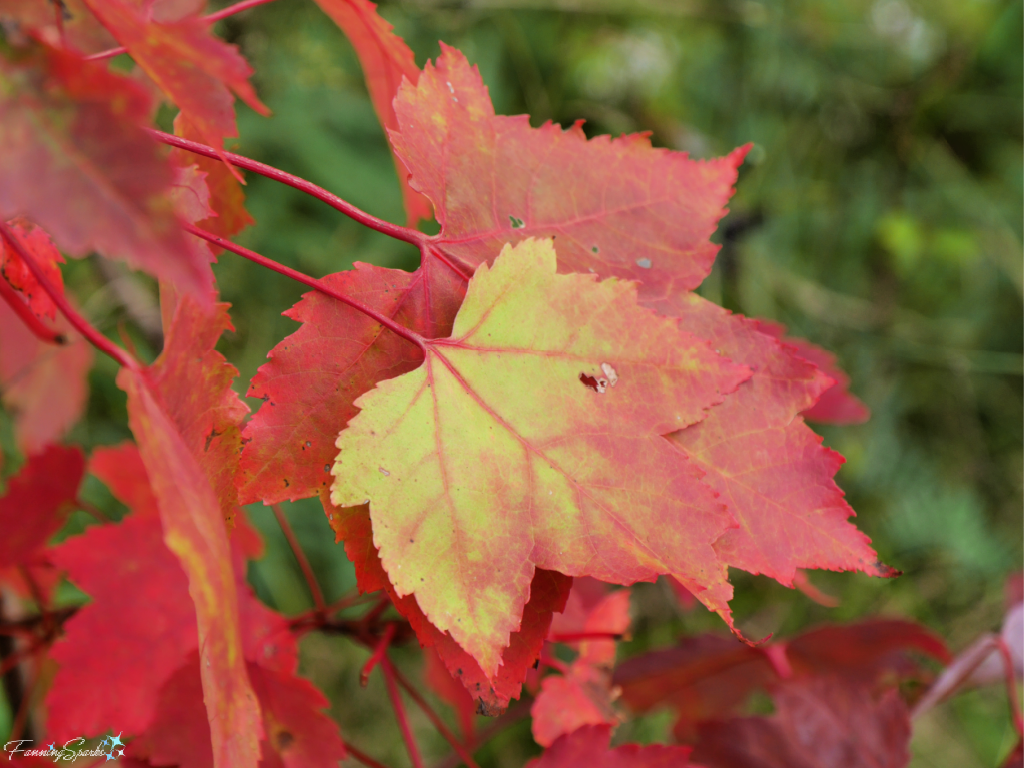

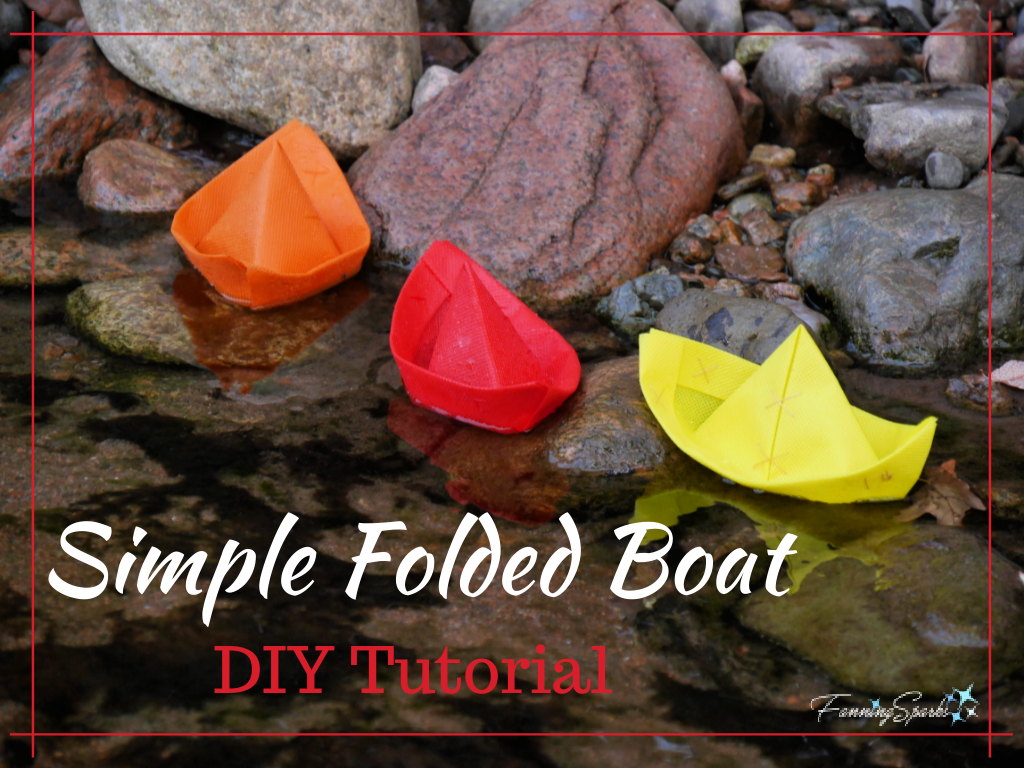
 These gorgeous colors are fleeting, of course. They don’t stay on the trees for long. Luckily, colored leaves can also be lovely after they’ve fallen—especially if they land in water.
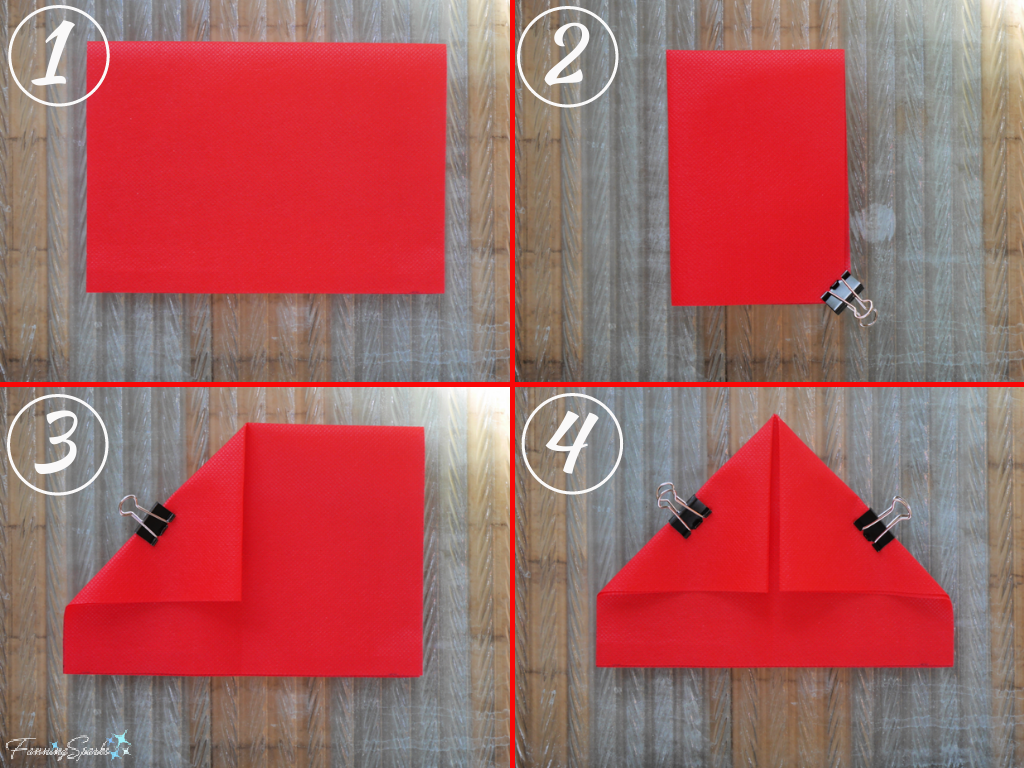
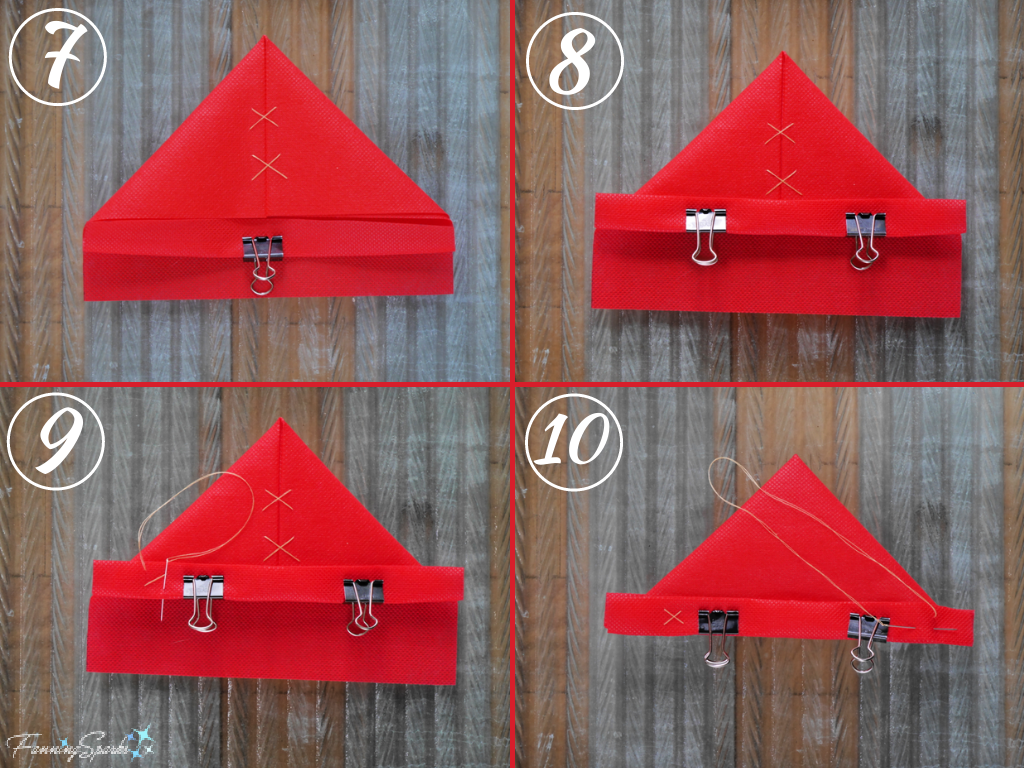
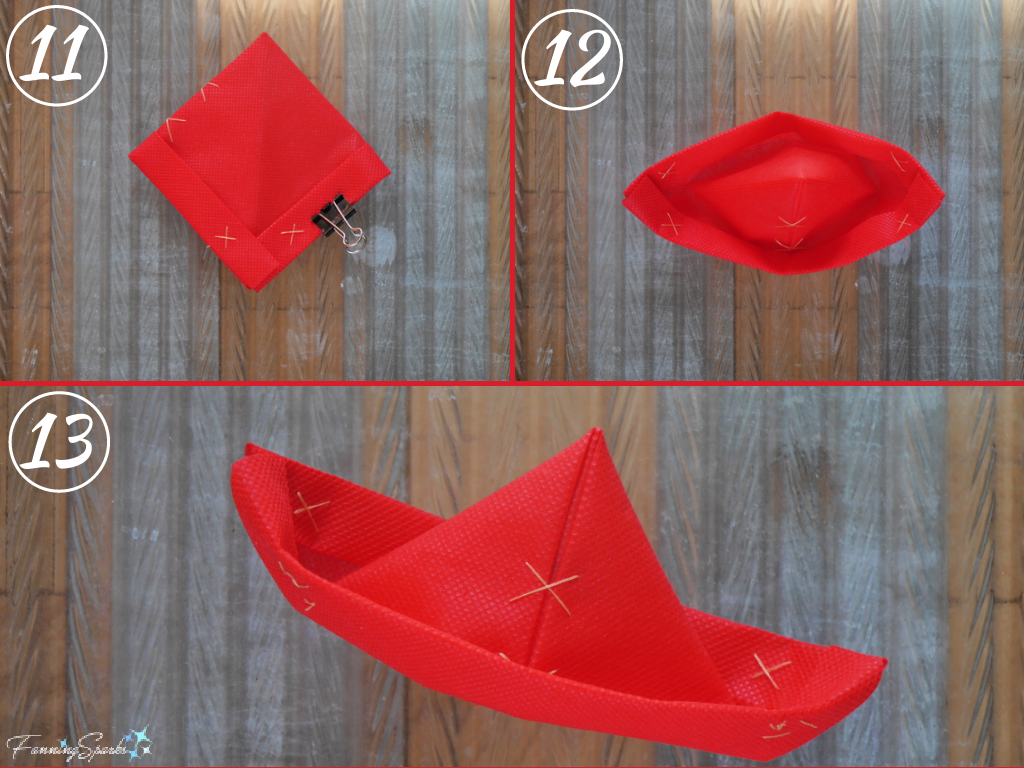
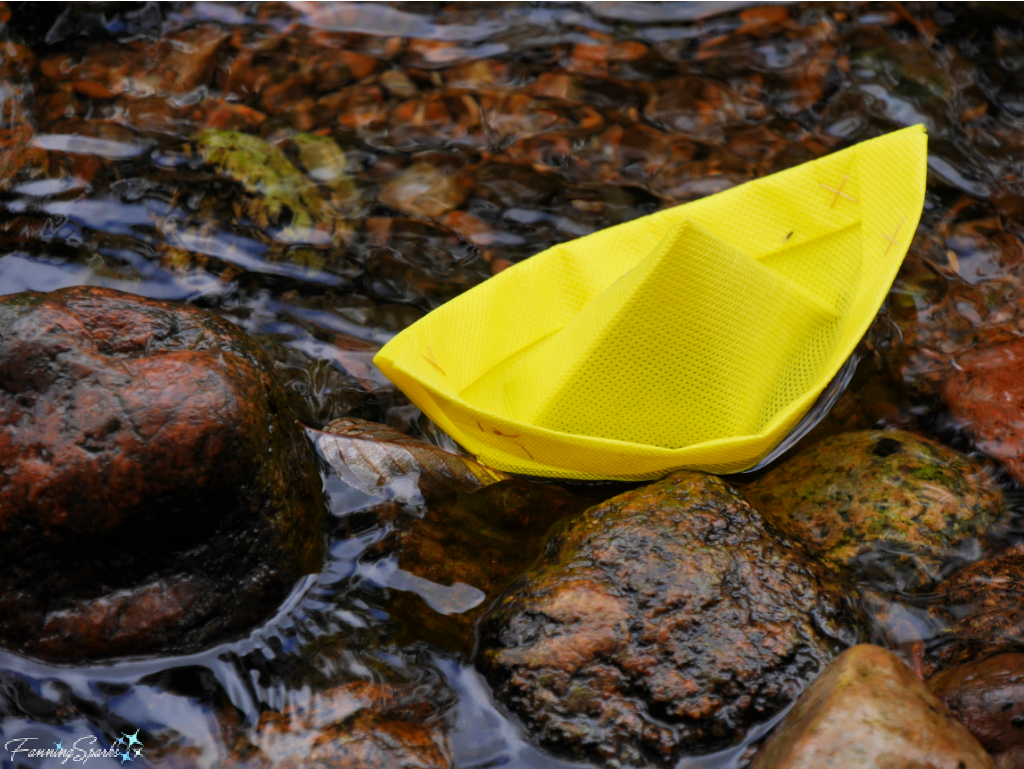
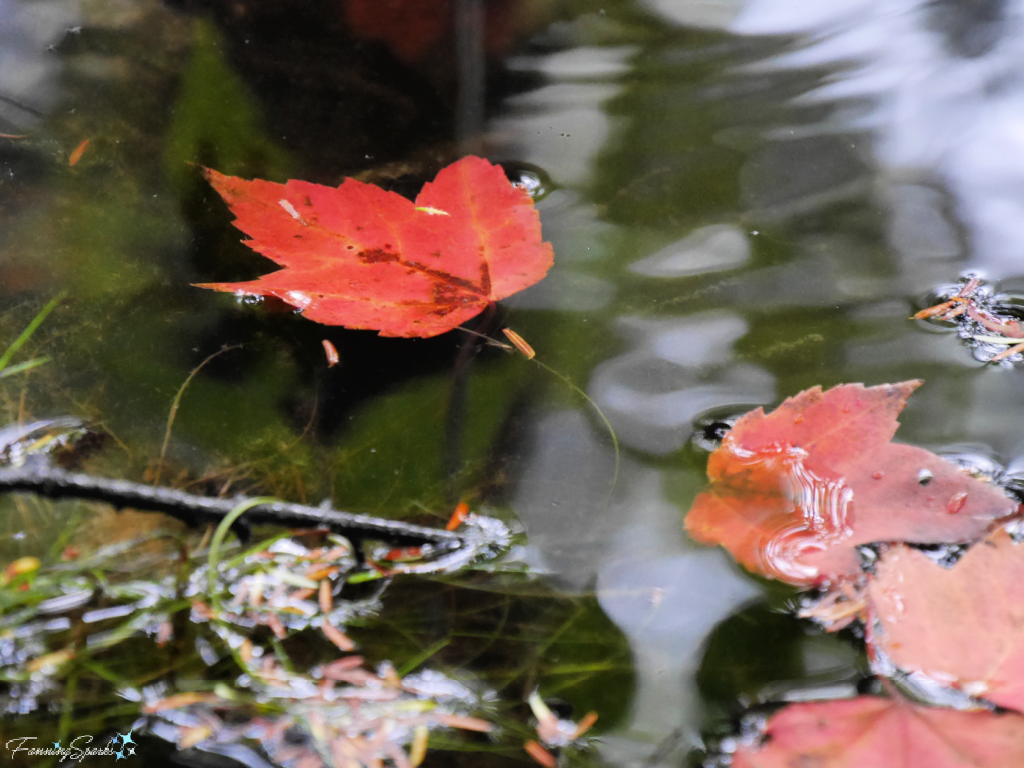 Turns out, that wet, swampy area I spotted along the road provided the perfect backdrop for my new floating boats. The water was dark, shallow and calm. Here’s one of my favorite photos of my little orange floating boat.
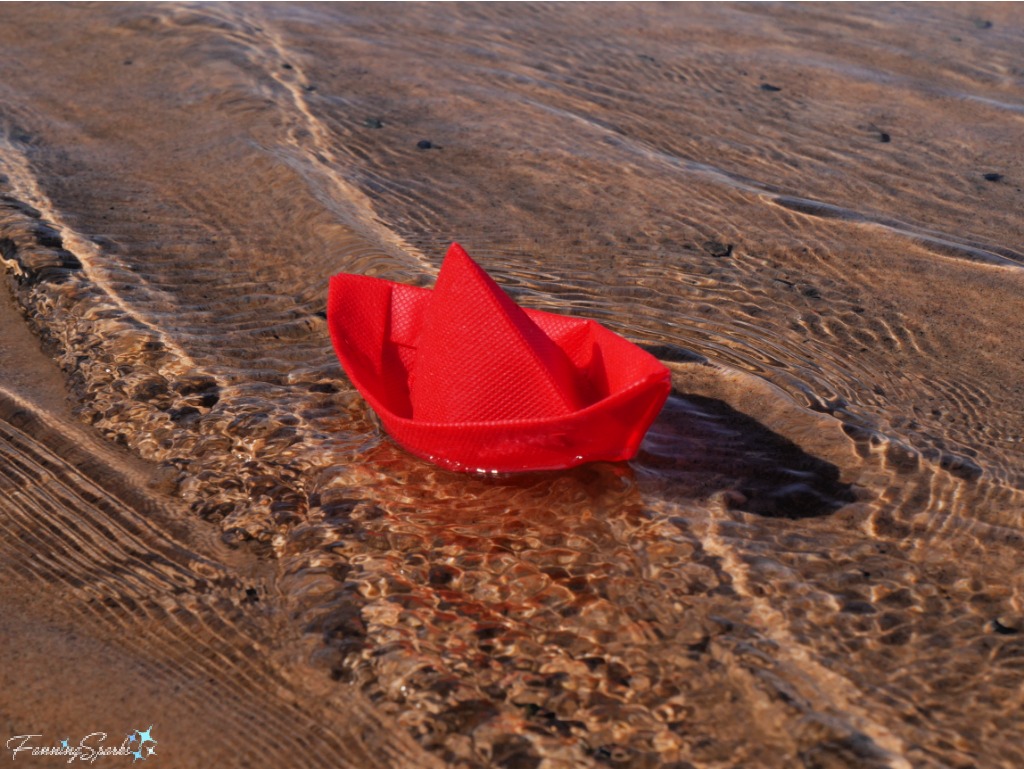
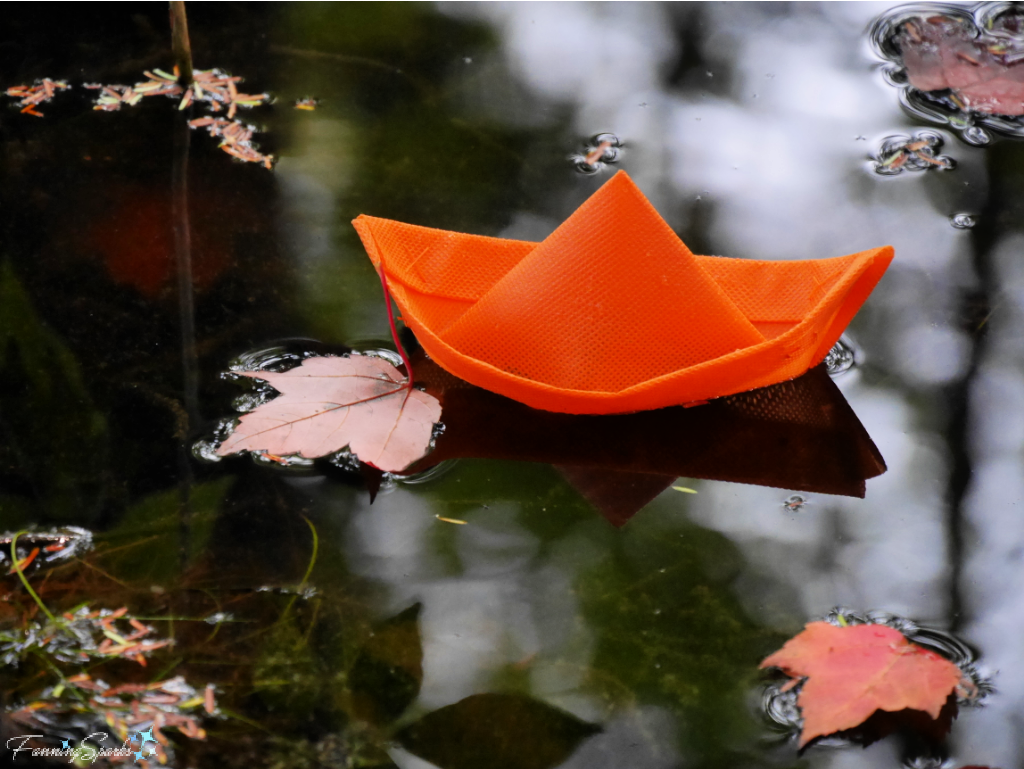 Here’s a red floating boat in the same setting. I love the contrast between the dark reflections and the colorful leaves.
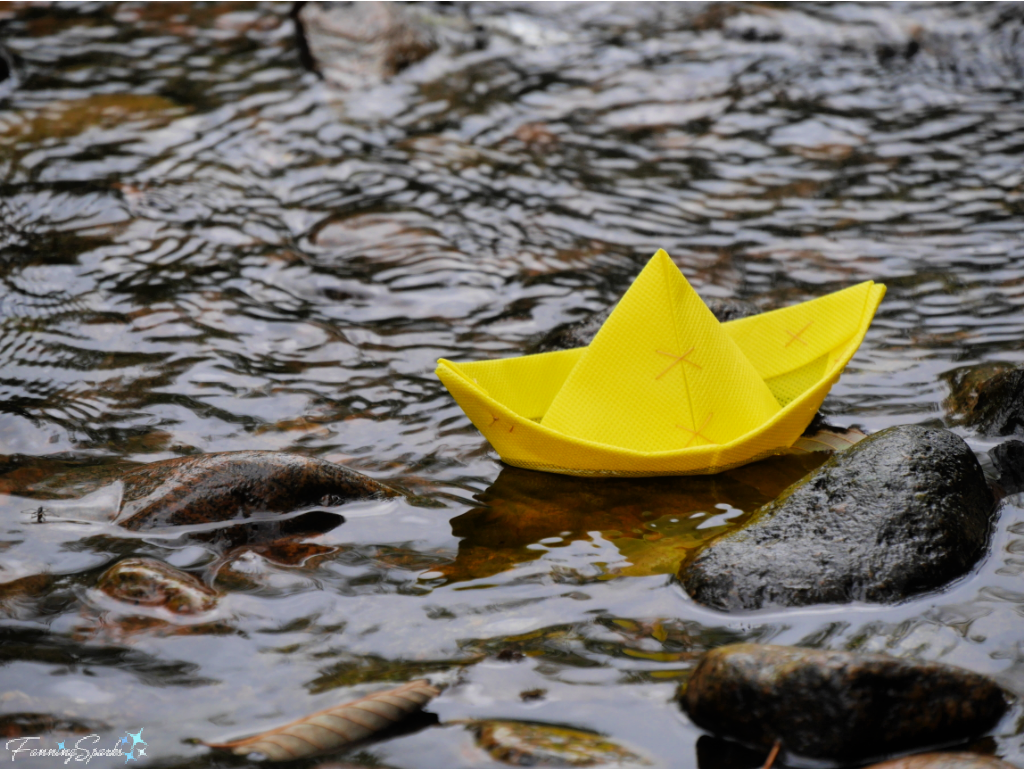
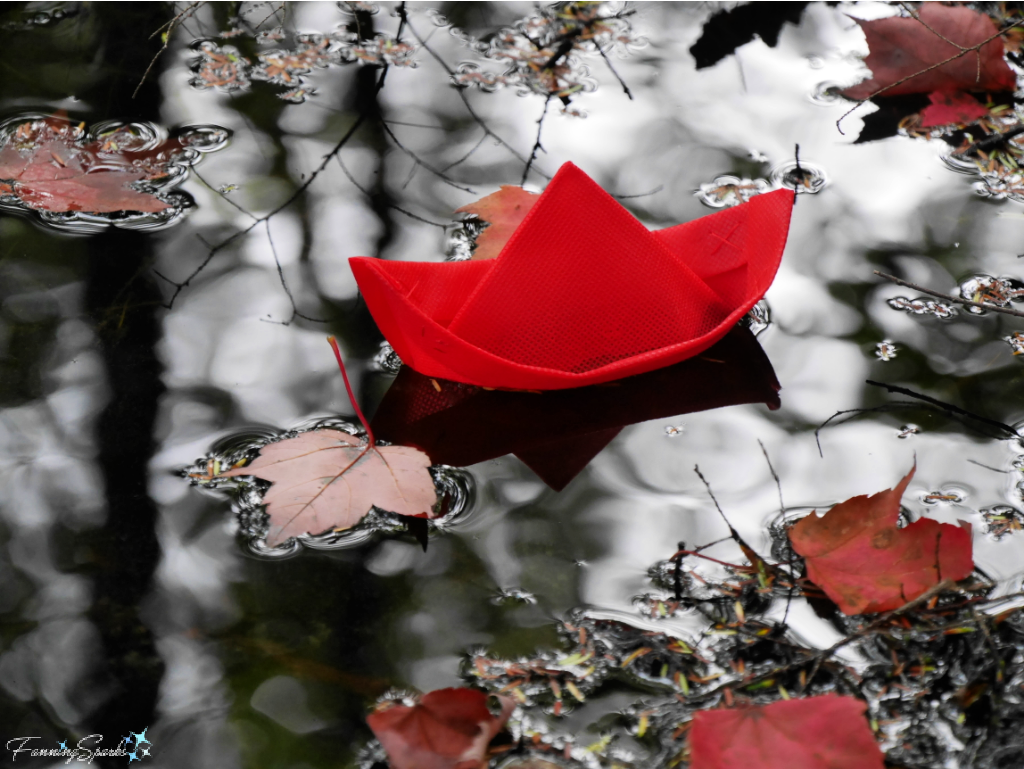 The brilliant yellow of this floating boat is a nice counterpoint to the moody setting.
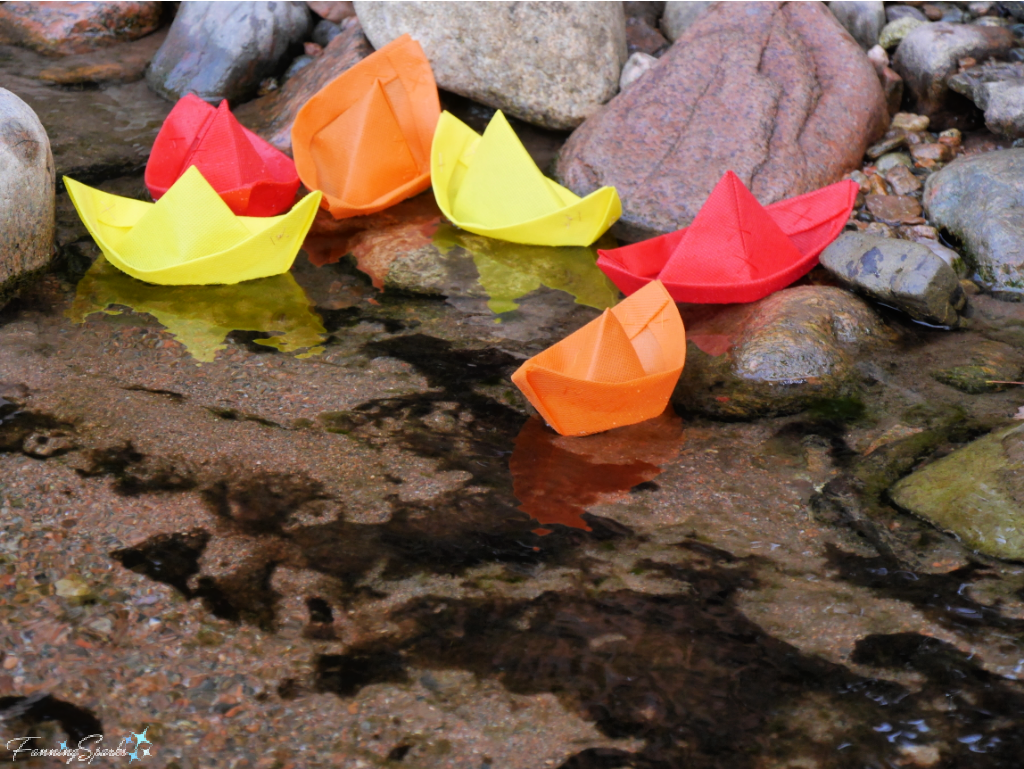
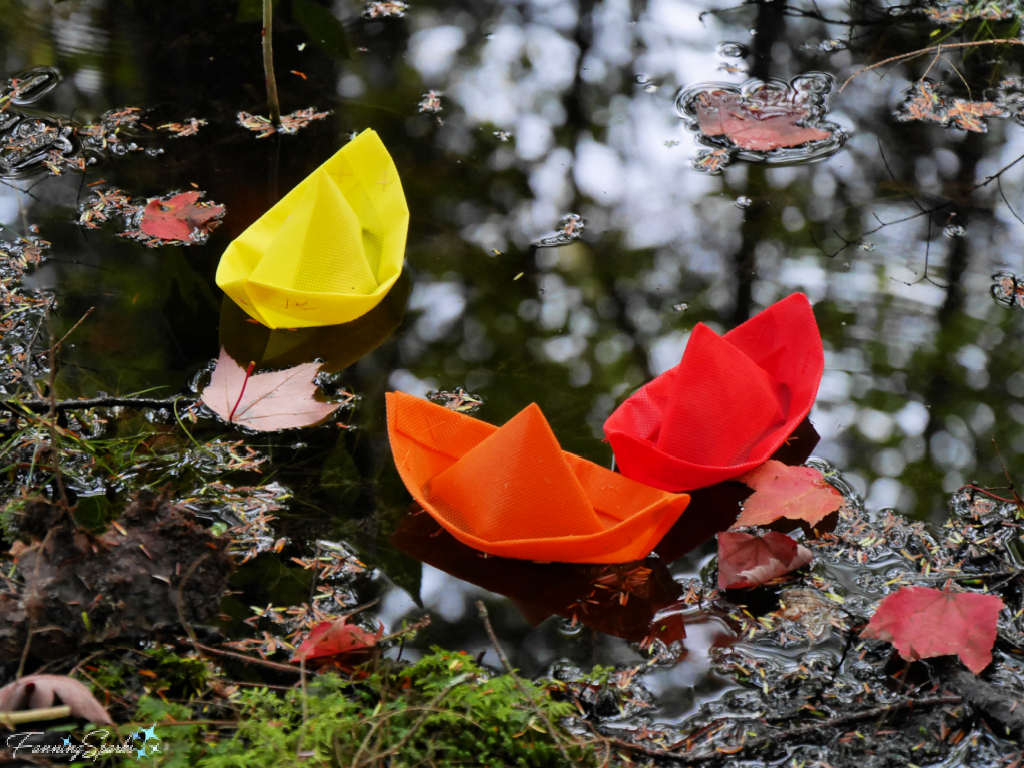
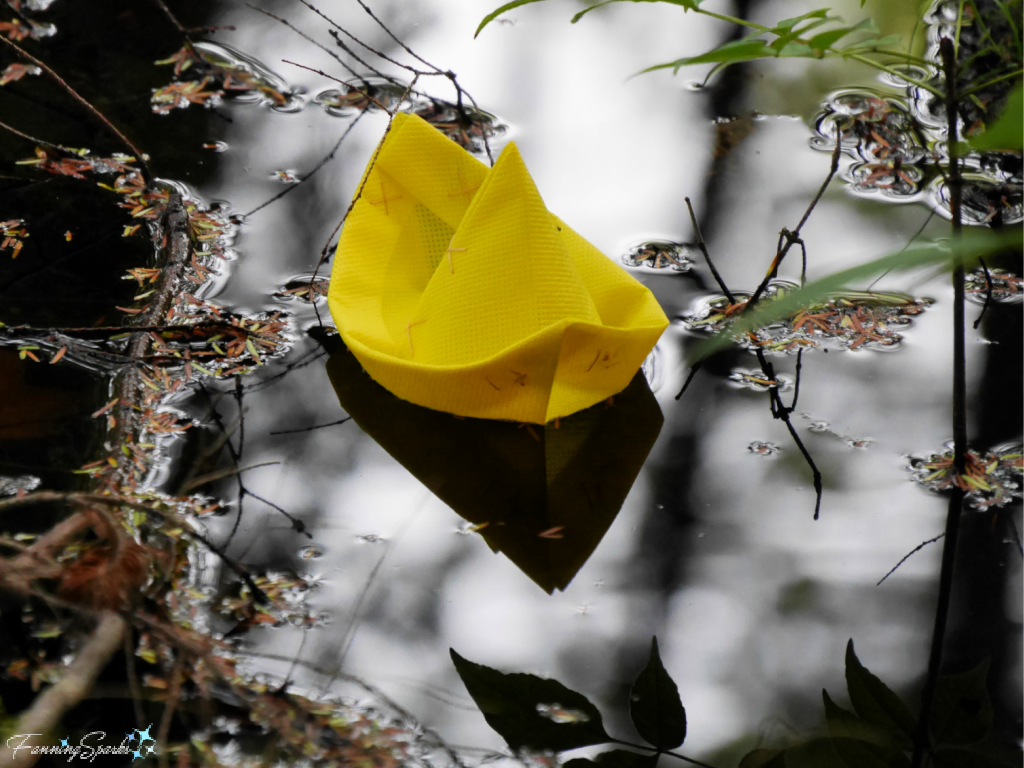 And here they are together—a trio of colorful, floating boats amongst the fallen leaves.
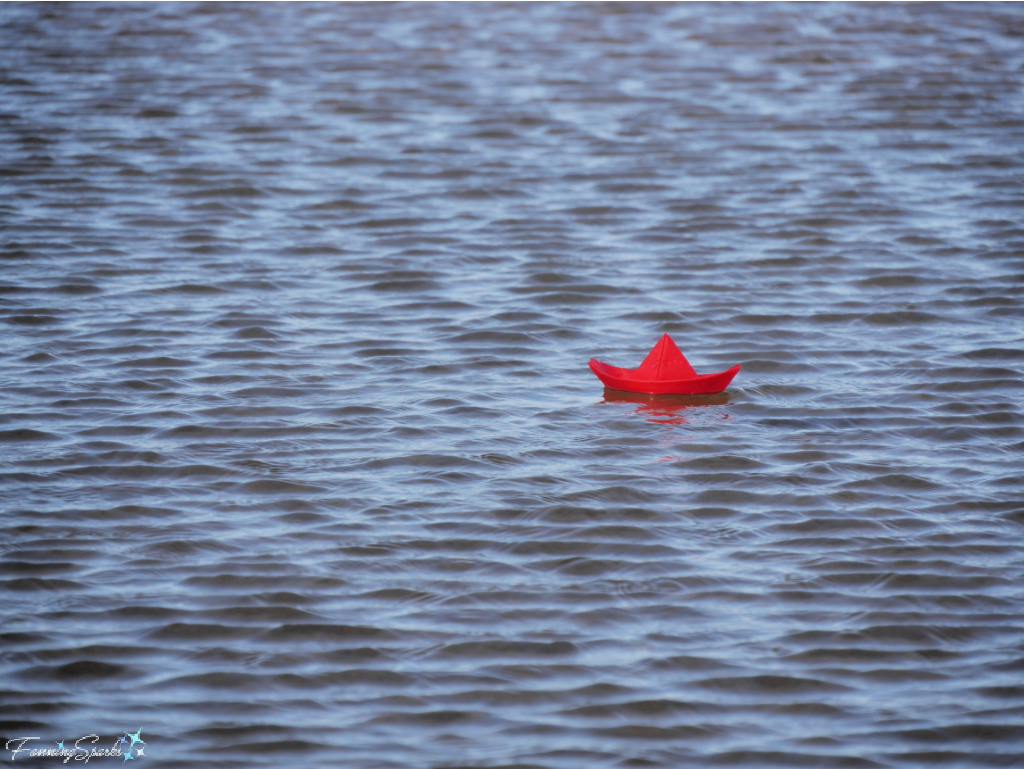
 I just love that inky, black water! It’s the perfect foil for the gorgeous fallen leaves and the bright little boats. Plus it captures the most stunning reflections. But the location itself is anything but stunning. Here’s the broader view.
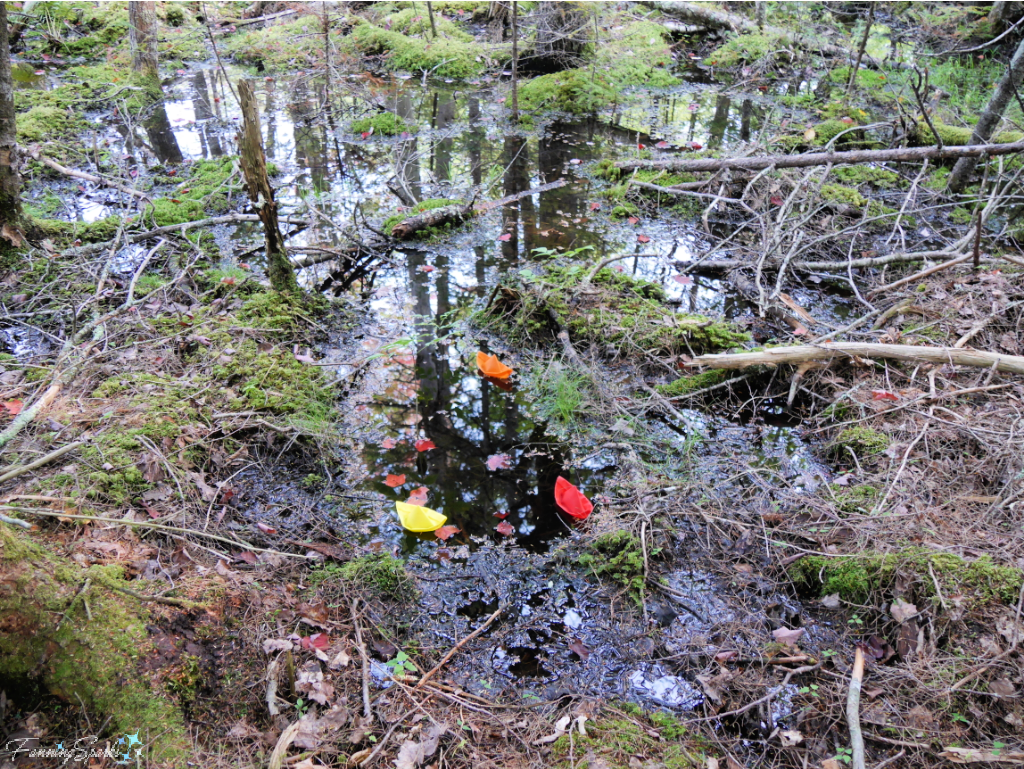 One would never guess such an ordinary, lackluster setting could lead to extraordinary photos. Circling back to my opening comment, sometimes the most unlikely of places can indeed lead to the most amazing photos. Have you had a similar experience? Please share in the comments below.

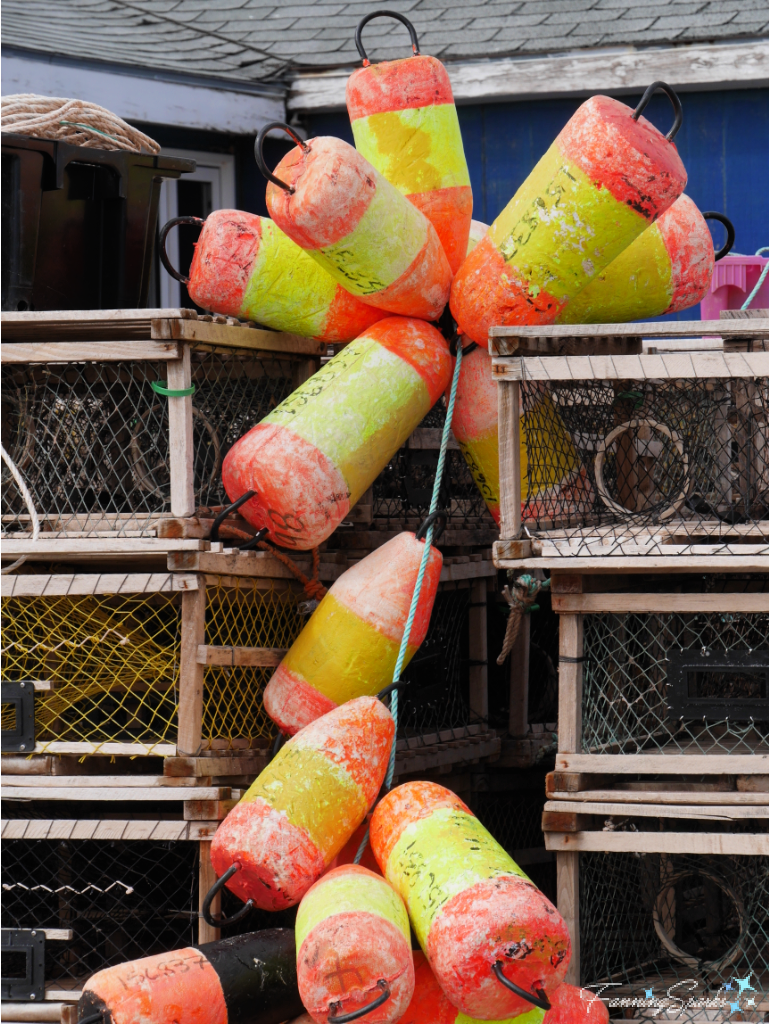
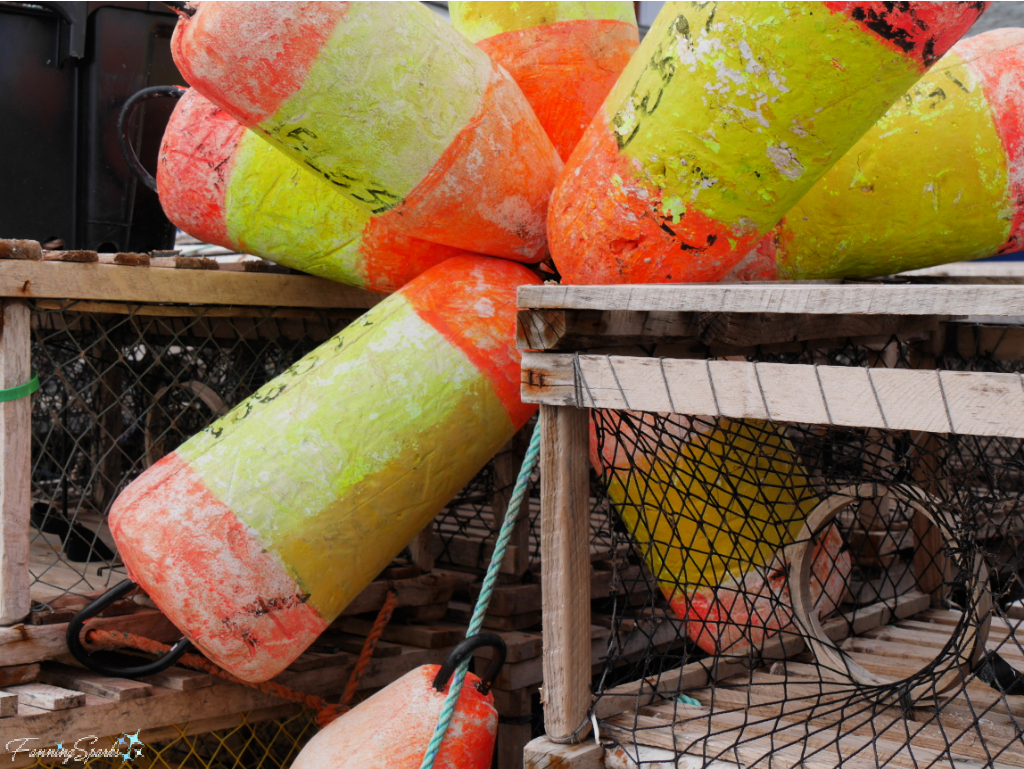
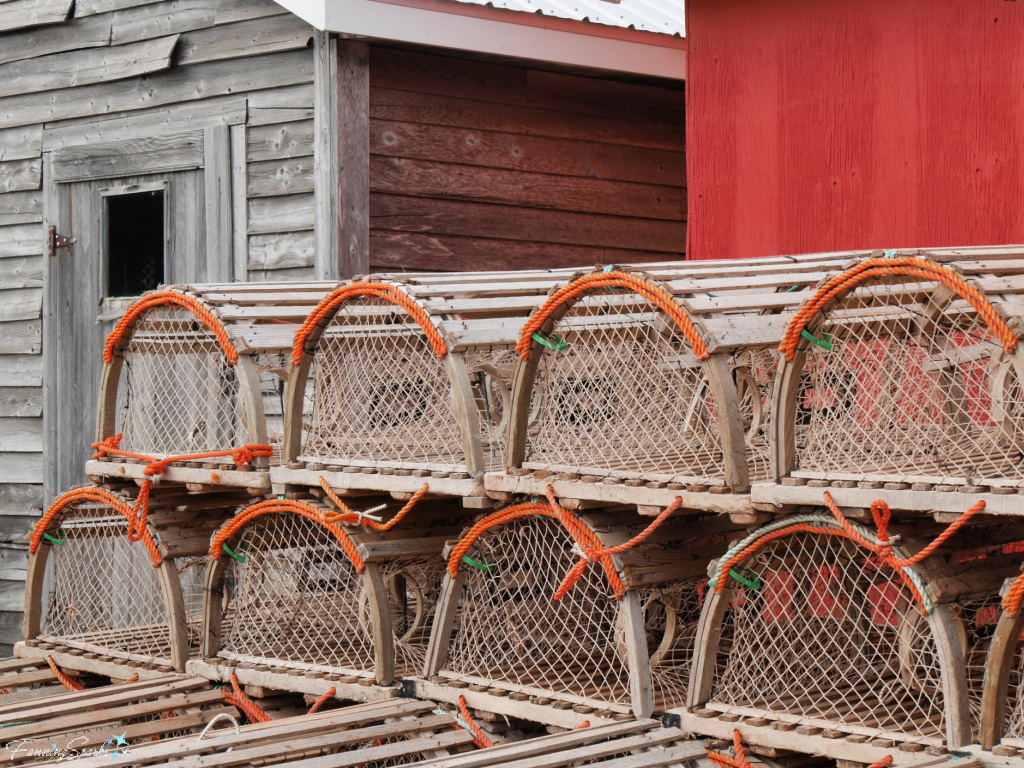
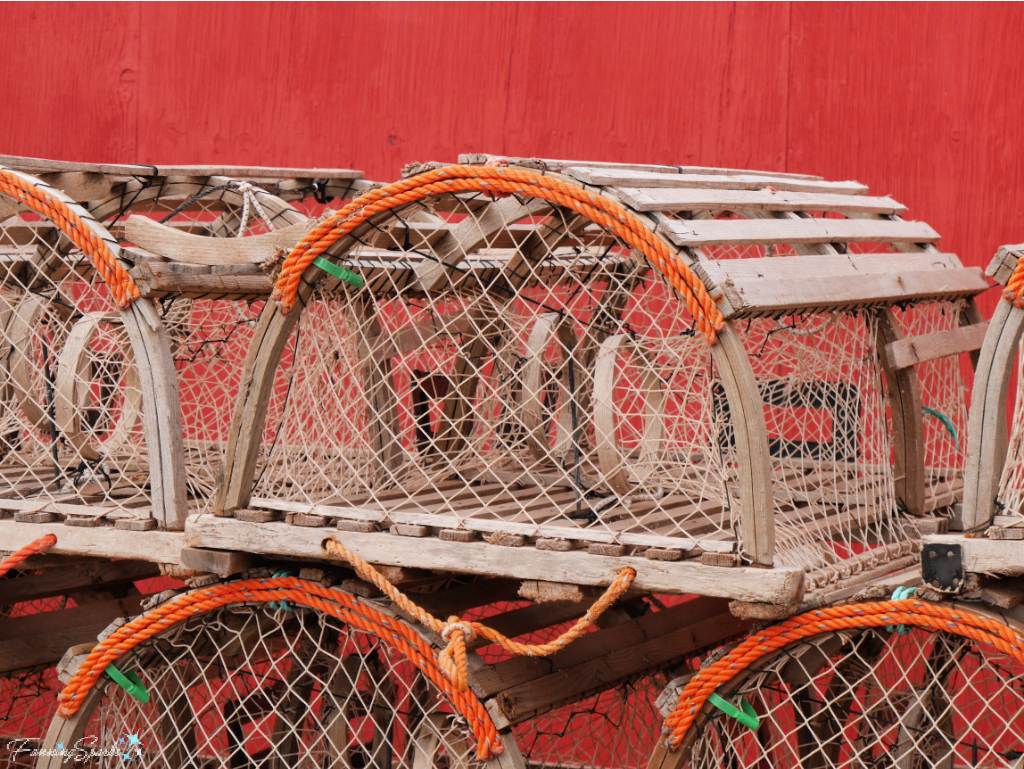
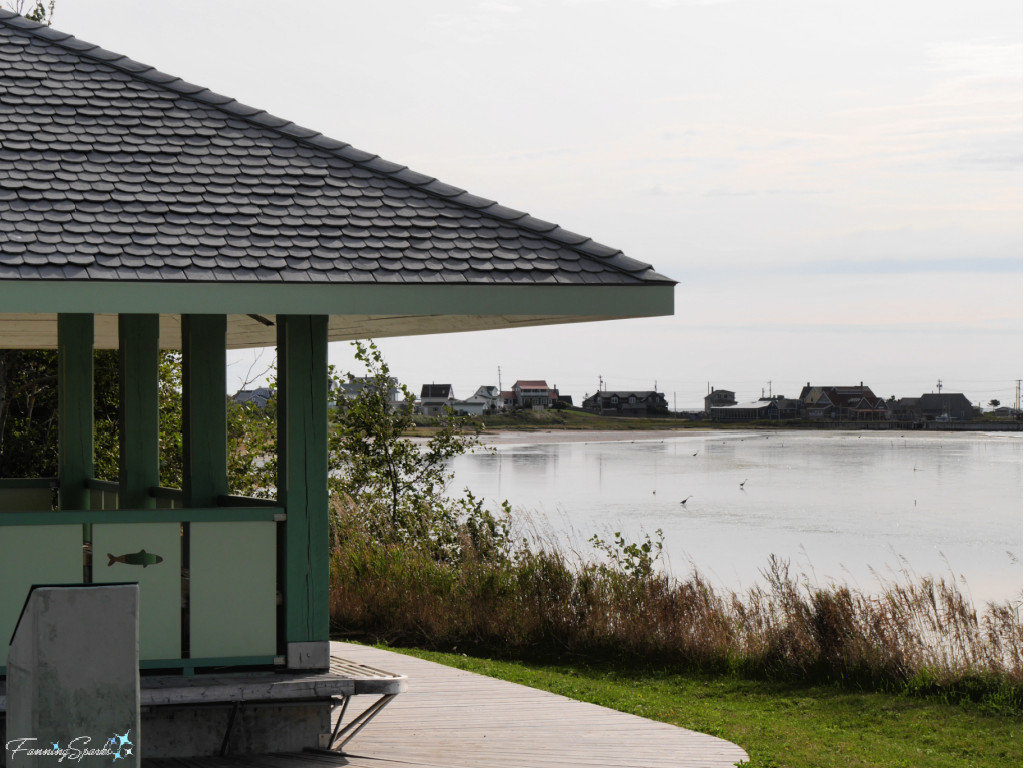
 North Rustico has a proud tradition of living with the sea and fishing is the primary industry. The harbor is home to about 40 fishing vessels.

 It’s the perfect place to enjoy the antics of the shorebirds as they forage for food along the beach.
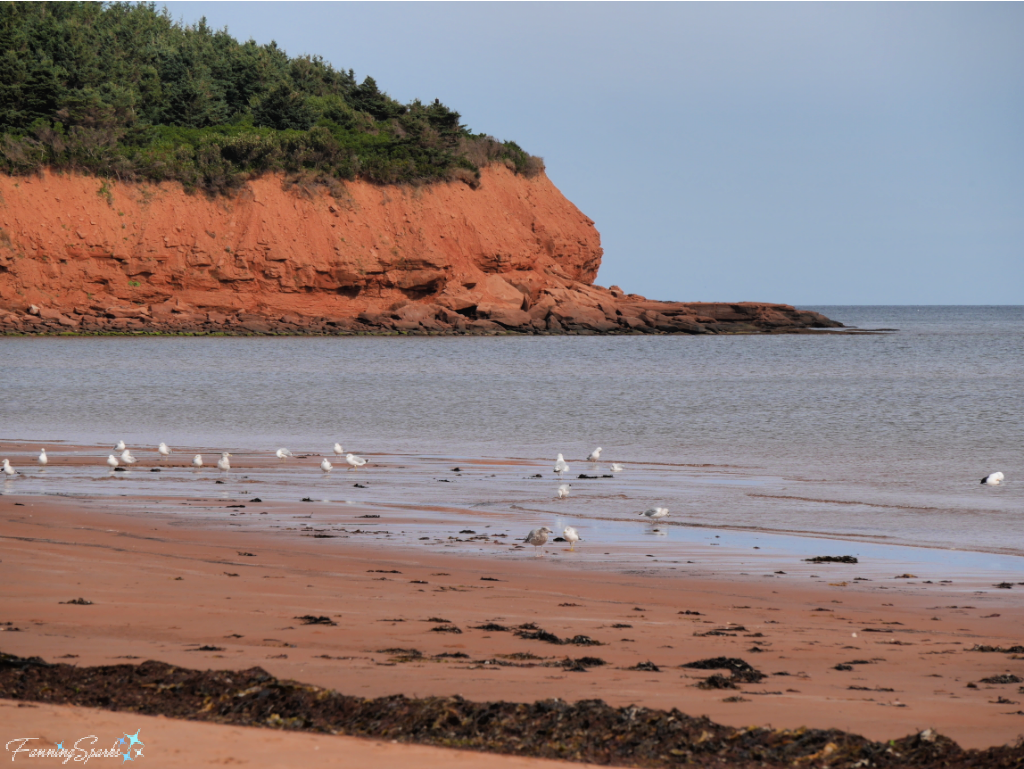 A flock of industrious sandpipers are joined by a Ring-billed Gull (Larus delawarensis) .
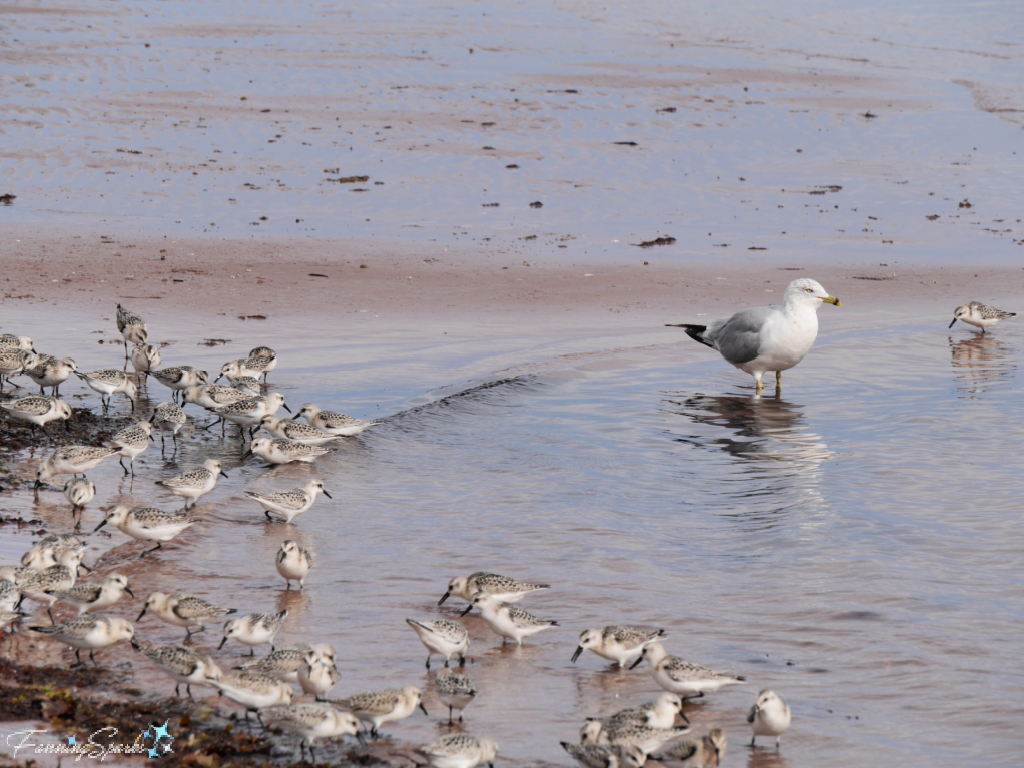 This cute, chubby bird is a Semipalmated Plover (Charadrius semipalmatus).
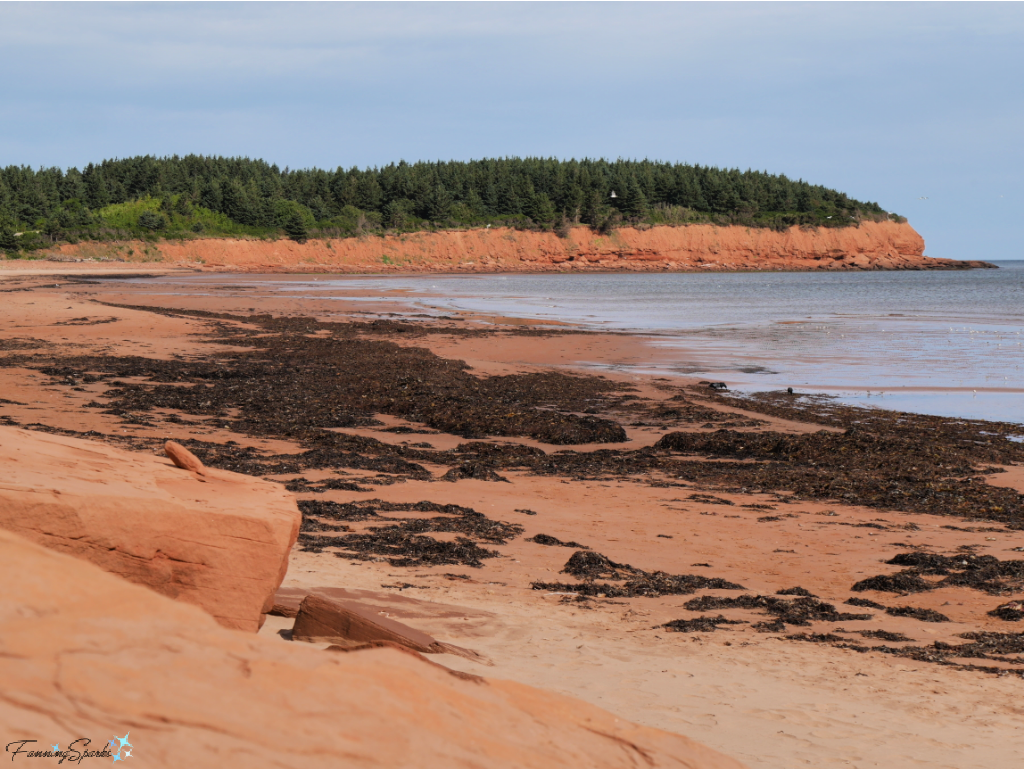
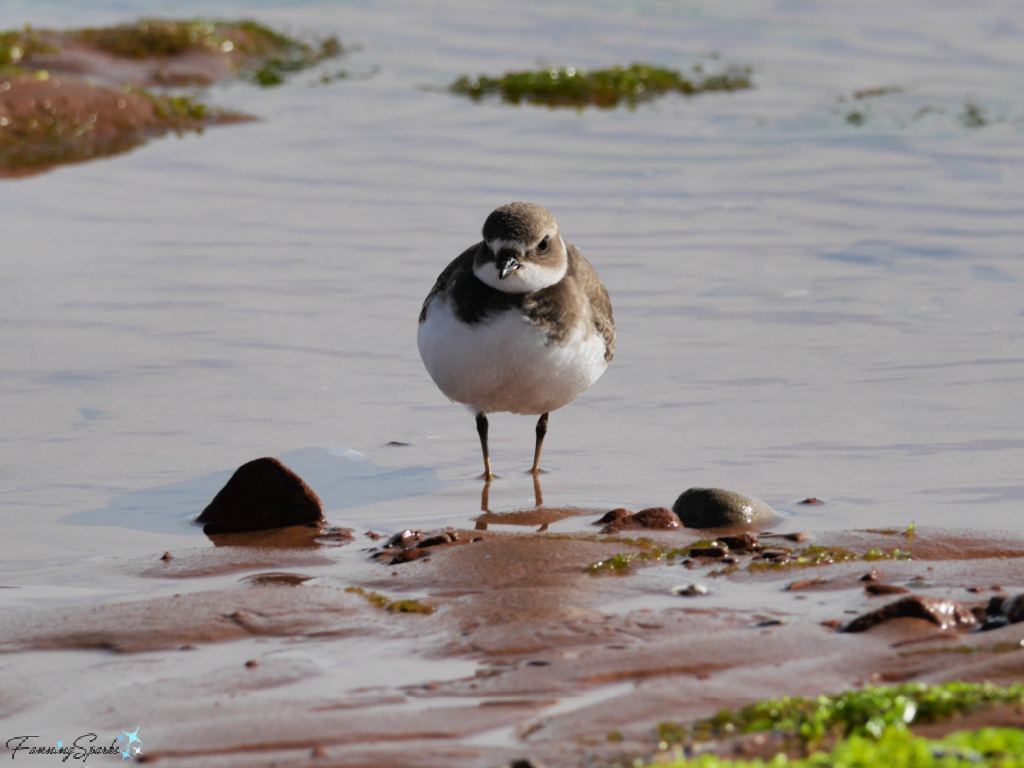 As if the ample bird population doesn’t provide enough challenging subjects, the abundant Island sandstone is just begging to be stacked into a cairn for a photo.

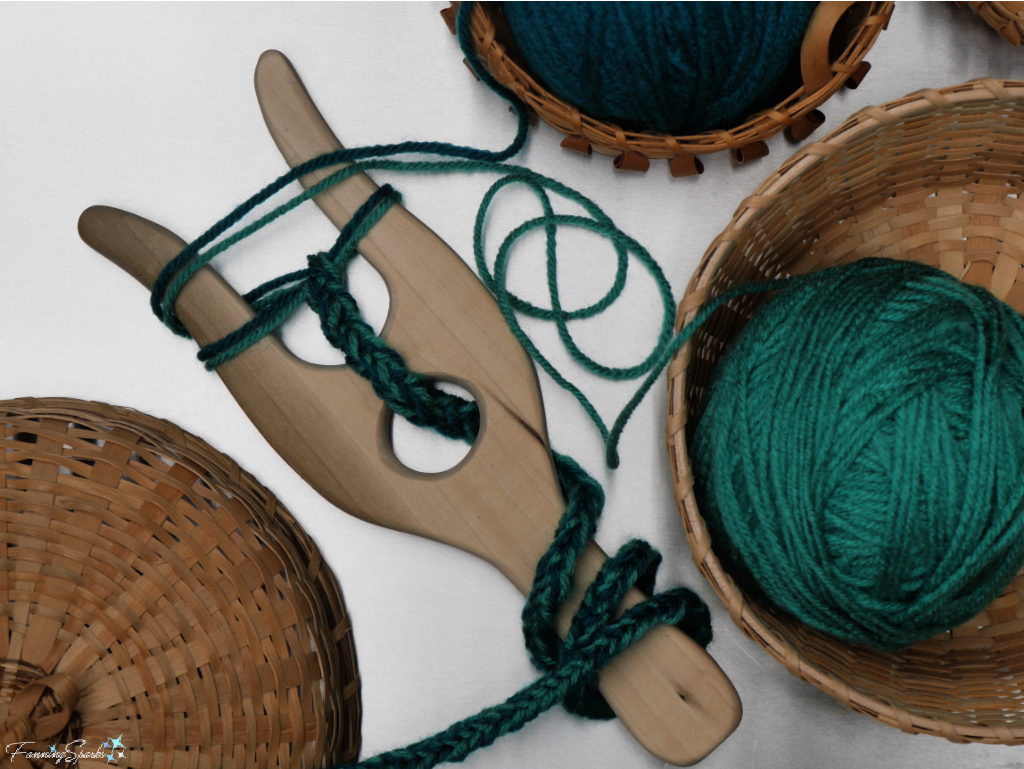
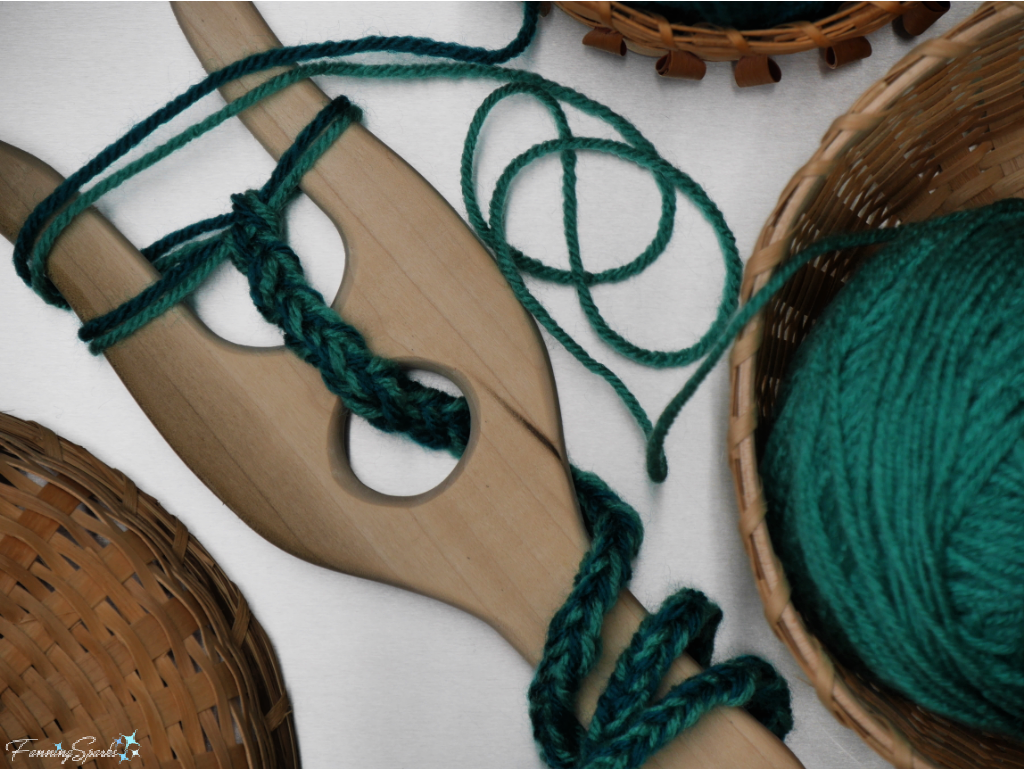 A lucet makes a strong, square woven cord. One advantage of luceted cord is it doesn’t unravel when cut. Another advantage of this method is that it’s not necessary to pre-cut the cording material. If using yarn, for instance, you work directly from the ball of yarn and continue until the desired length is reached.
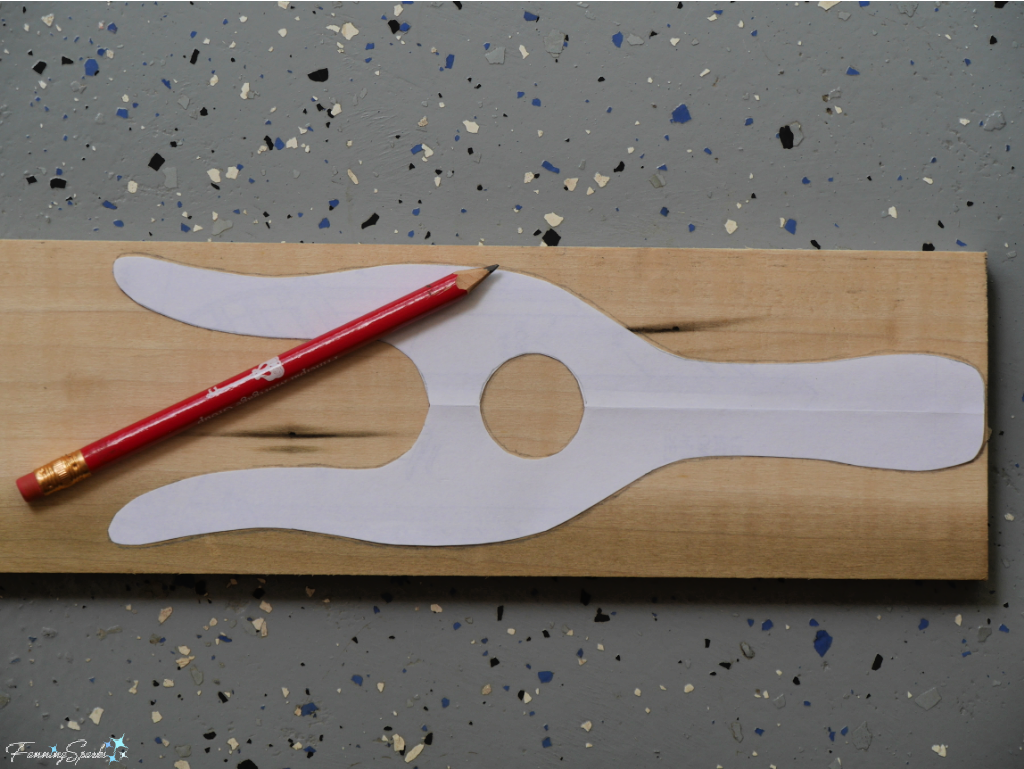 Use jigsaw to cut along marked lines.
 TIP: Use the drill to bore a series of holes in the center hole to make it easier to cut with the jigsaw.
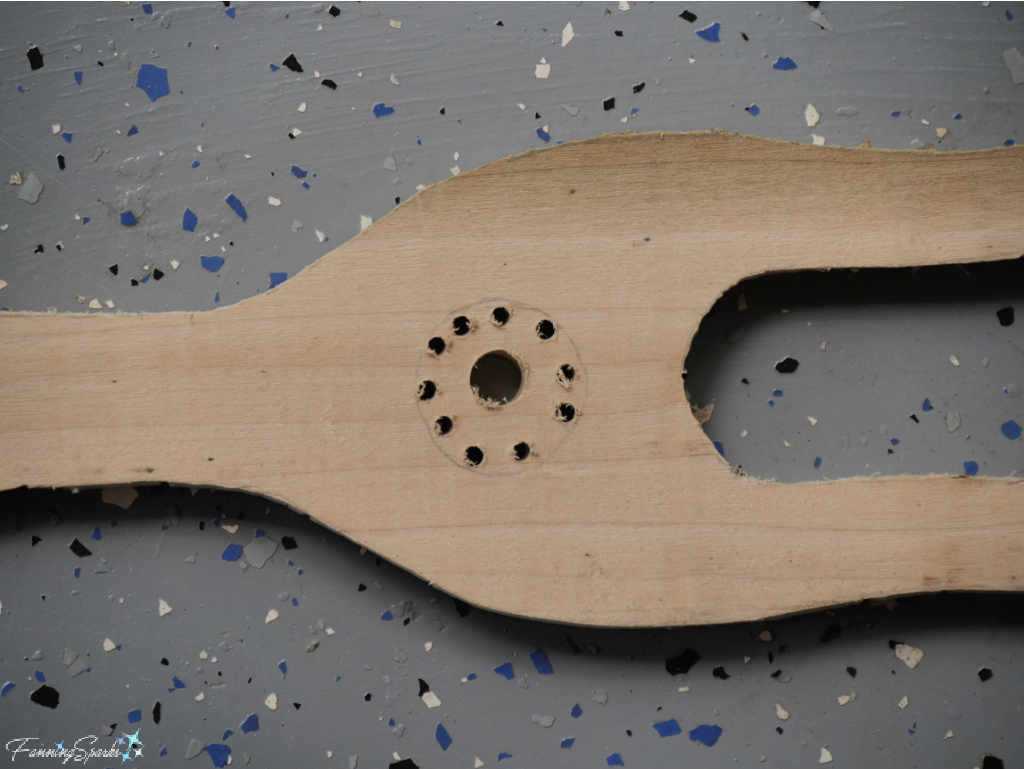 I made two lucets. Here’s how they looked at this stage.
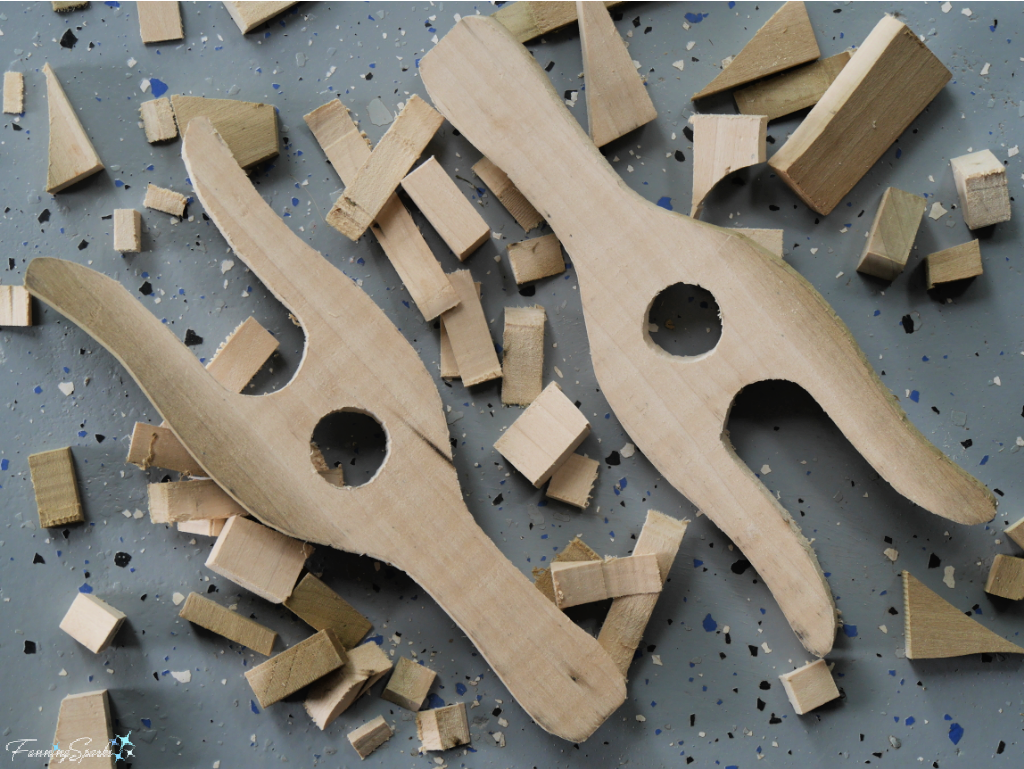 Step 3 Finish and Sand Use a wood carving knife to round the edges of the lucet.
 Sand smooth with fine and extra fine grits sandpaper. This is an important step since any roughness, especially along the prongs, can snag your cording material.
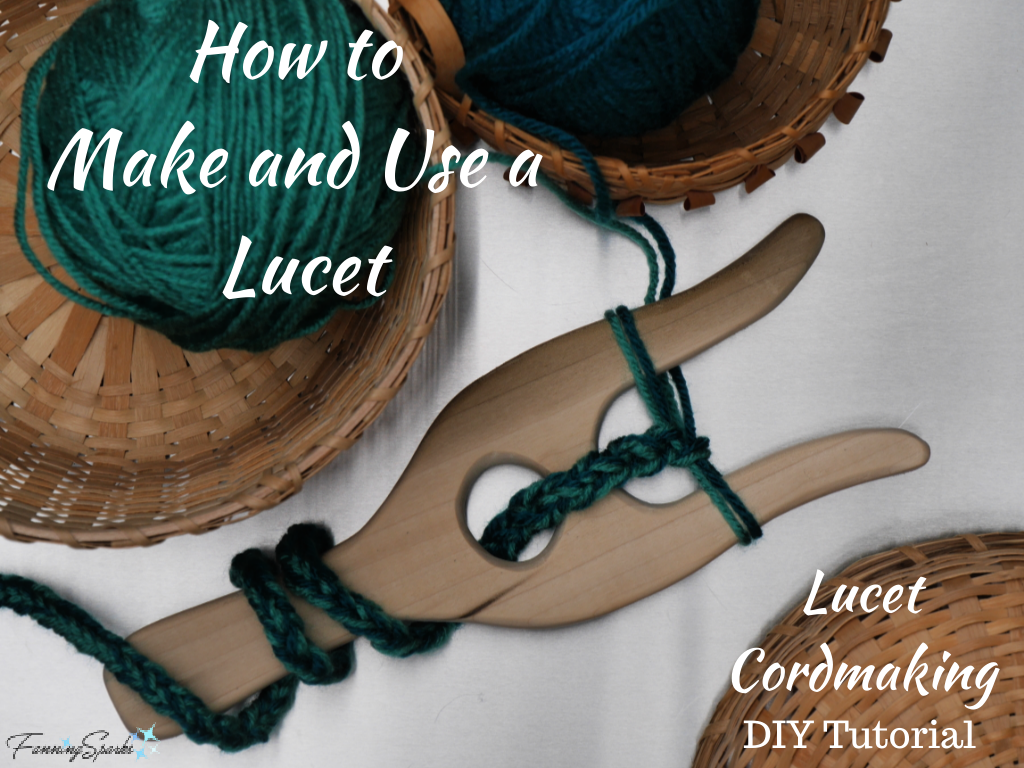
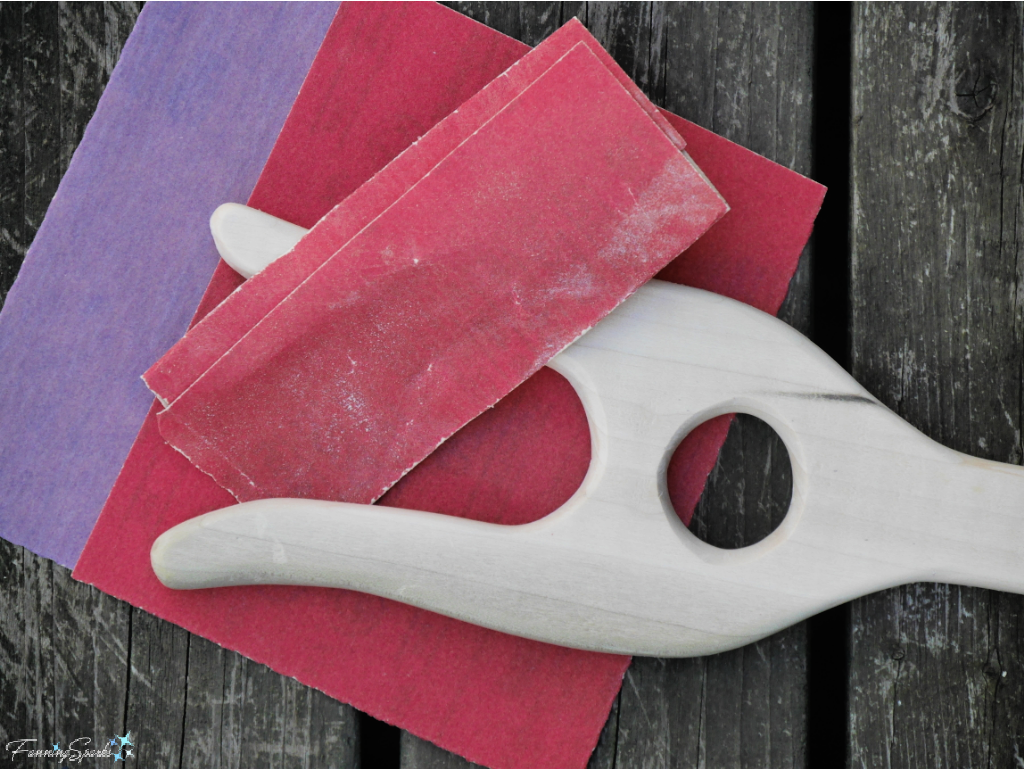 Instructions to Use Lucet
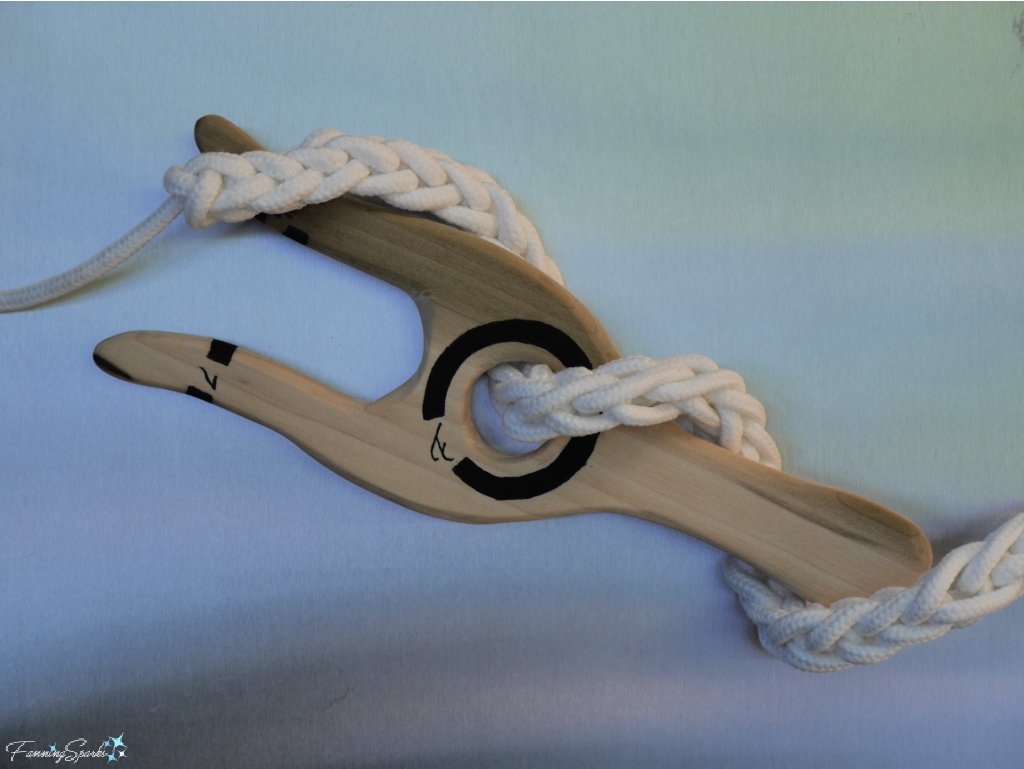 I used rope for this demonstration but you can use string, yarn, twine or other fiber strands. Results will vary from individual to individual and from one material to another but 1 foot of ¼” rope gave me 1 inch of luceted cord. Plan for approximately 1’ to 1”.
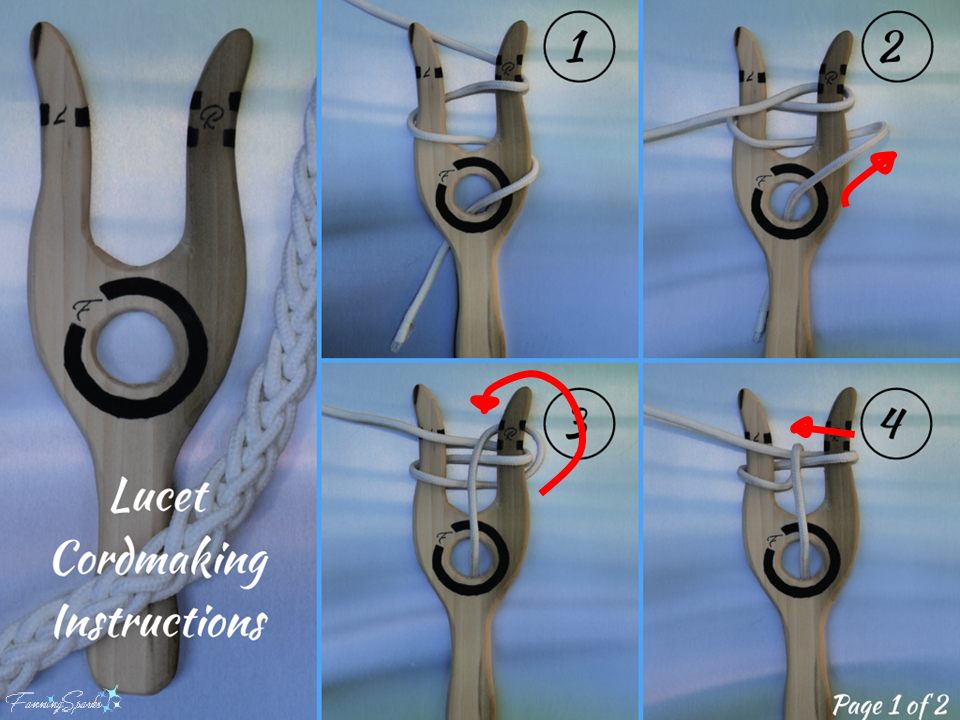
 Once you get the hang of it, cordmaking goes surprisingly fast. I’ve been experimenting with different materials and tweaking my technique. Using a double strand of yarn, in two different colors, makes an interesting cord. And, of course, there’s the follow-on question of how to use all this lovely cord. But that’s a topic for another day!