There was an interesting research study conducted by Oxford University that involved juggling. The study, led by Dr Heidi Johansen-Berg of the Department of Clinical Neurology in 2009, demonstrated that learning a new task or skill resulted in changes in the white matter of the brain. (see More Info). The complex new skill they chose to teach the study participants was juggling! Juggling also builds hand-eye coordination; helps improve concentration and focus; and helps improve rhythm and timing. There’s a strong case to be made for learning to juggle. For those already able to juggle, there are always more juggling techniques and patterns to learn as well as more and different objects to juggle.
My online research suggests the ideal object for beginner jugglers is a sphere shape, about 2.5 inch in diameter, stuffed with millet, and weighing about 130 grams. The size fits comfortably in most hands. The shape flies through the air smoothly. The millet stuffing is malleable making the balls easier to catch. The balls stay put when dropped—they don’t bounce or roll away. It’s surprisingly easy to make felt balls to fit this bill. Actually juggling them, though, has proven to be more difficult. I’ve gleaned a few tips for the basic, 3-ball, cascading juggle which I share towards the end of this post.
This post includes step-by-step instructions to make a set of felt juggling balls and a convenient, carrying pouch.
The felt juggling ball is made with 6 panels or, more accurately, it is a hosohedron with 6 spherical lunes. My fabric pouch is embellished with a fun juggler—you may recognize this popular emoji! The possibilities for embellishing the pouch are endless. For instance, you could simply use a colorful fabric or you could personalize it with the juggler’s name. The construction techniques are similar to those used to make the Valentine’s Juggling Hearts from my last post. Basic sewing skills are used—the balls are sewn by hand and the pouch is sewn by machine.
Supplies Needed
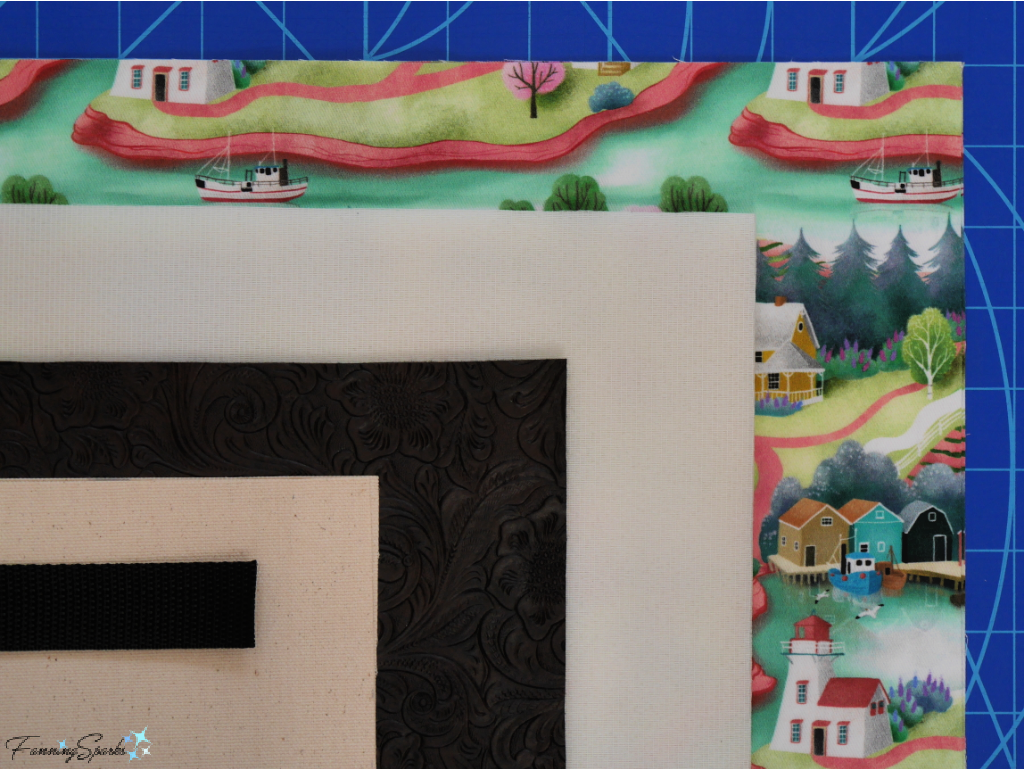
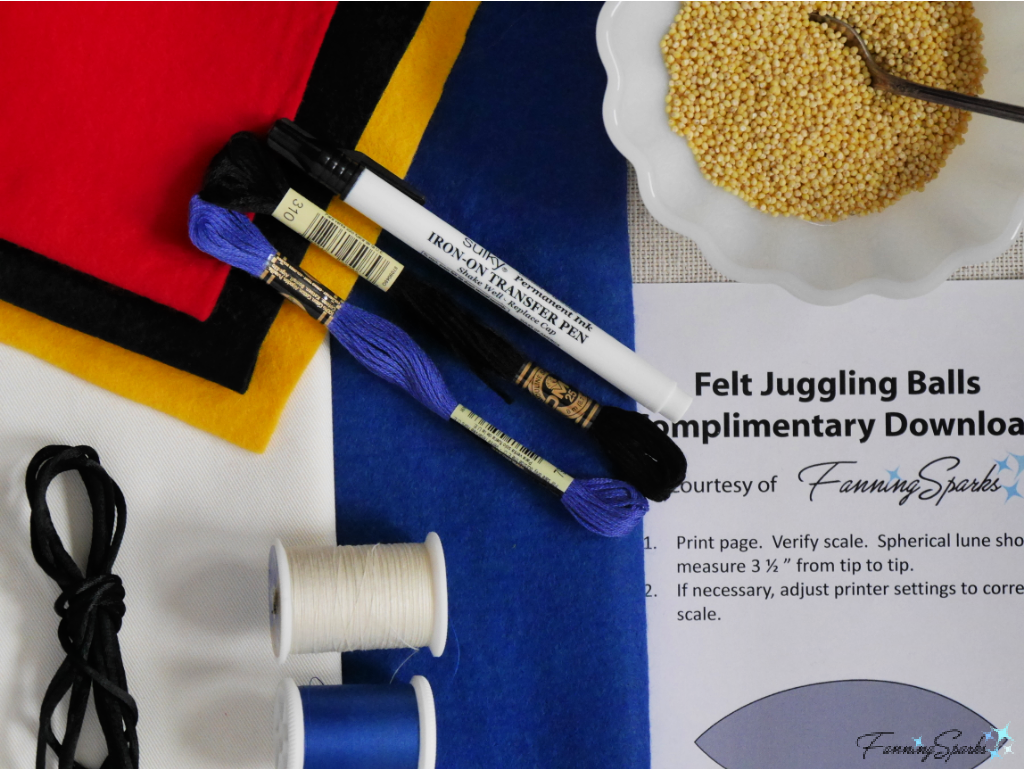
The following supplies and materials are needed for this project:
. Template – Felt Juggling Balls – Complimentary Download to print the template for the lunar panels.
. Paper – For printing template.
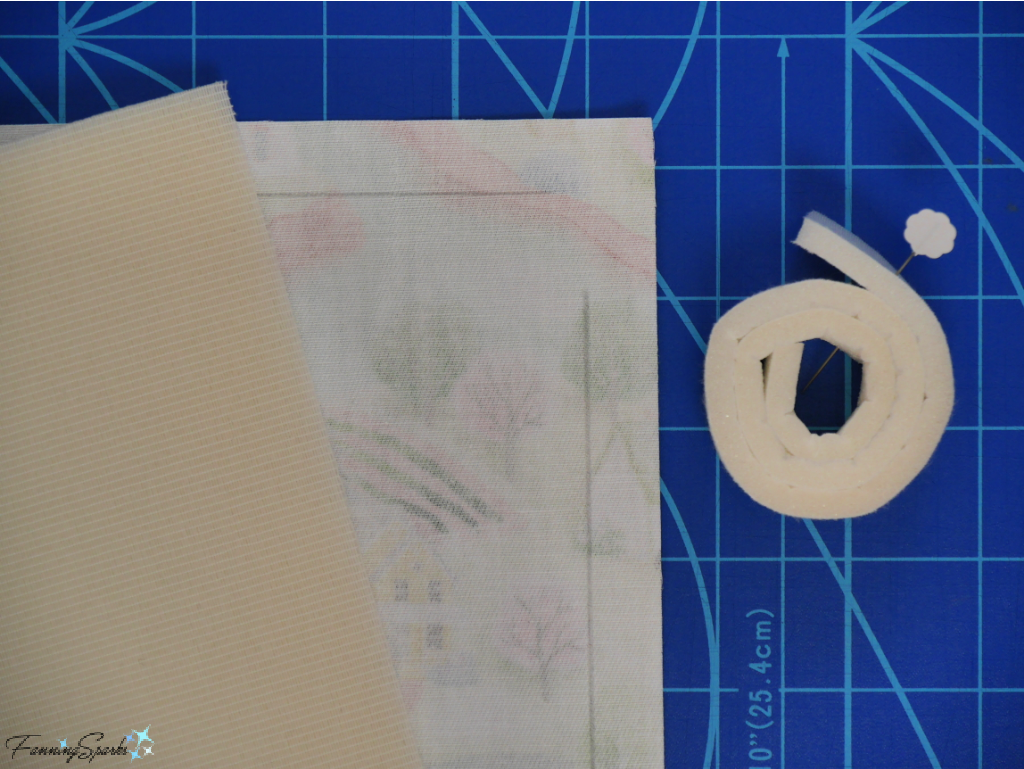
. Felt – THREE 8” x 5” pieces of Wool Blend Felt in your choice of color(s).
. Fabric – 10” x 13” piece of sturdy woven fabric for pouch. To add a design like the emoji juggler, choose a light colored fabric with at least 35% polyester content (the polyester insures permanency of the ink transfer).
. Thread – To match the felt and fabric.
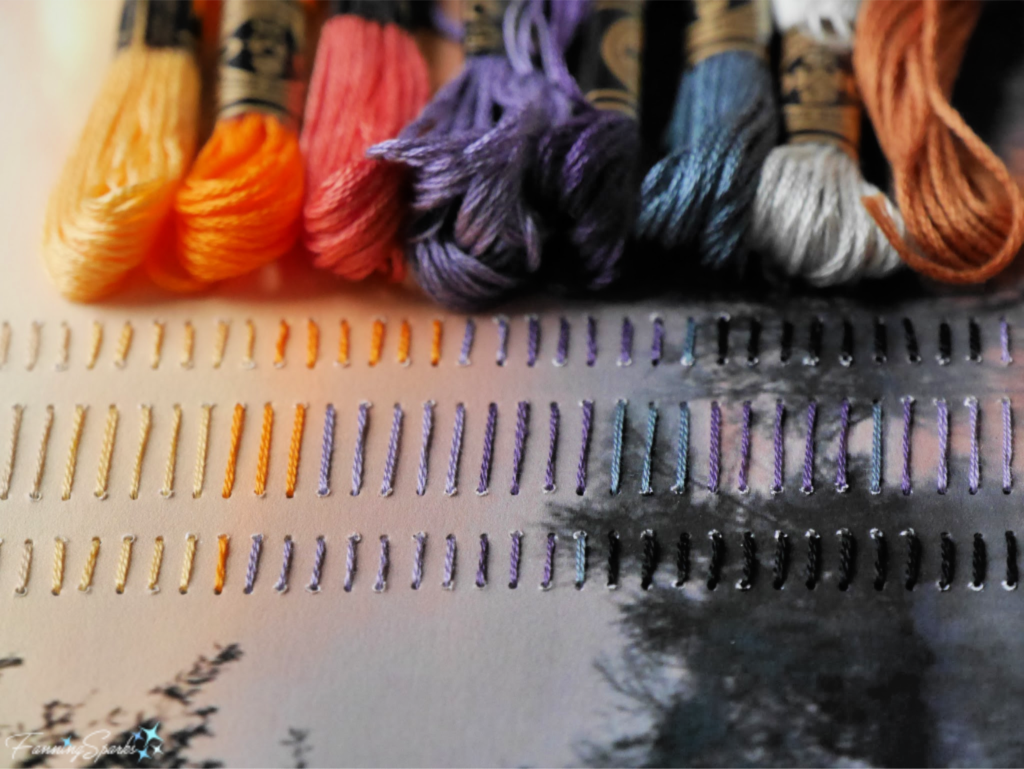
. Embroidery Floss (Optional) – Can be used to embellish the pouch with felt applique. Alternatively, you could use fabric glue.
. Millet – Approximately 300g (12oz) for 3 balls. I found Hulled Millet at the grocery store. Alternatively, you could use small grained rice. These small grains are, of course, NOT suitable for small children.
. Cord – TWO 16-24” lengths of cord, ribbon or string to use as the drawstring.
Tools and Equipment Needed
. Printer
. Sewing Machine
. Iron
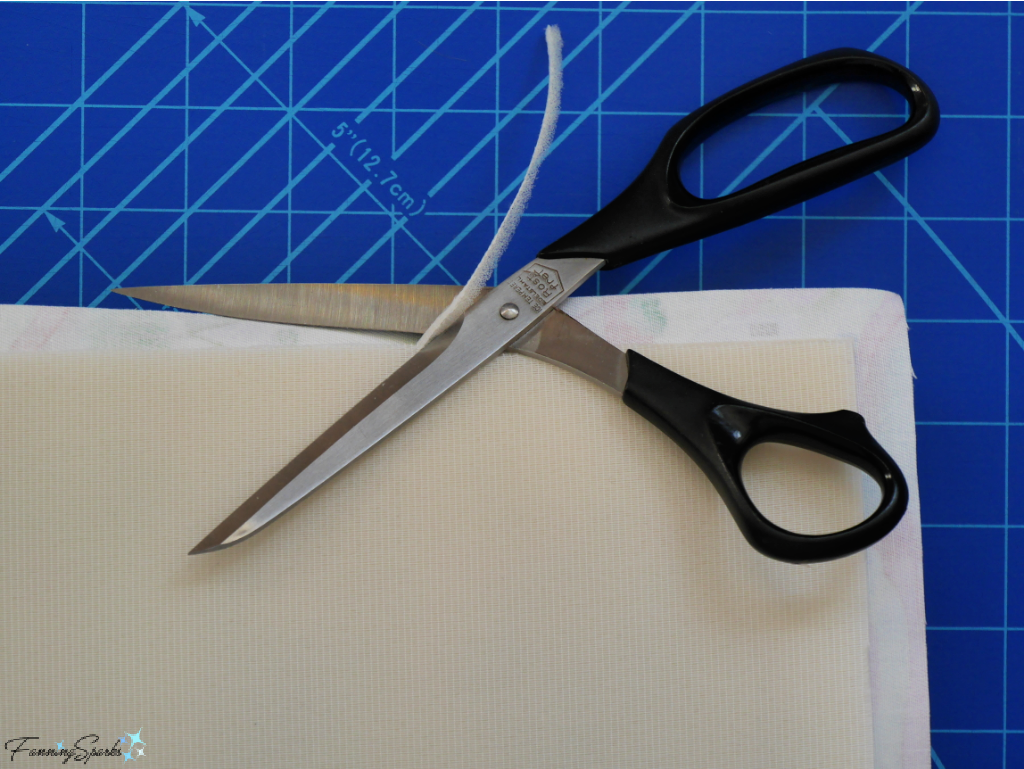
. Scissors – Scissors with short, sharp blades such as embroidery or applique scissors.
. Sewing Needle
. Pins – Sewing pins preferably with flat heads.
. Marker – Fabric marker or chalk.
. Container – A bowl, dish or plastic container to hold the millet while filling the heart.
. Funnel – Small funnel for filling the hearts with millet.
. Spoon
. Ruler
. Sulky Iron-On Transfer Pen (Optional) – This handy permanent ink marker can be used to embellish the pouch.
. Safety Pin or Bodkin – For pulling cord through casing.
Instructions to Make Felt Juggling Balls and Pouch
Step 1 Prepare Template Download Felt Juggling Balls – Complimentary Download to print the template for the lunar panel and end circle. Take care to ensure the scale is accurate on your printed version. See specifics in the download document.
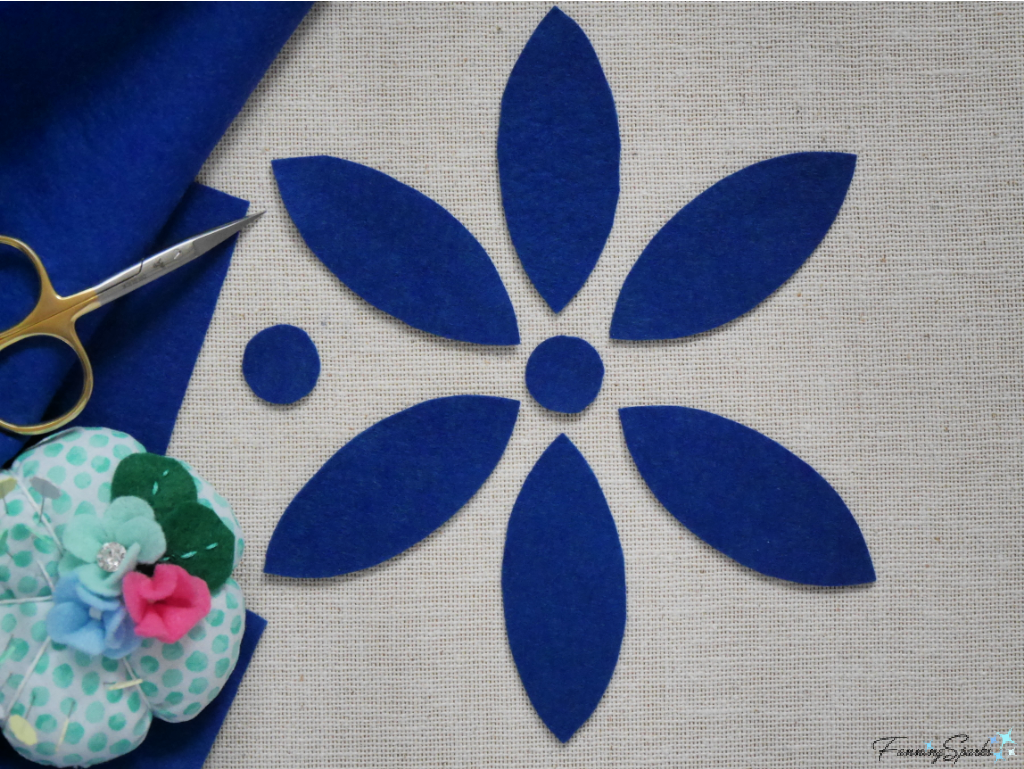
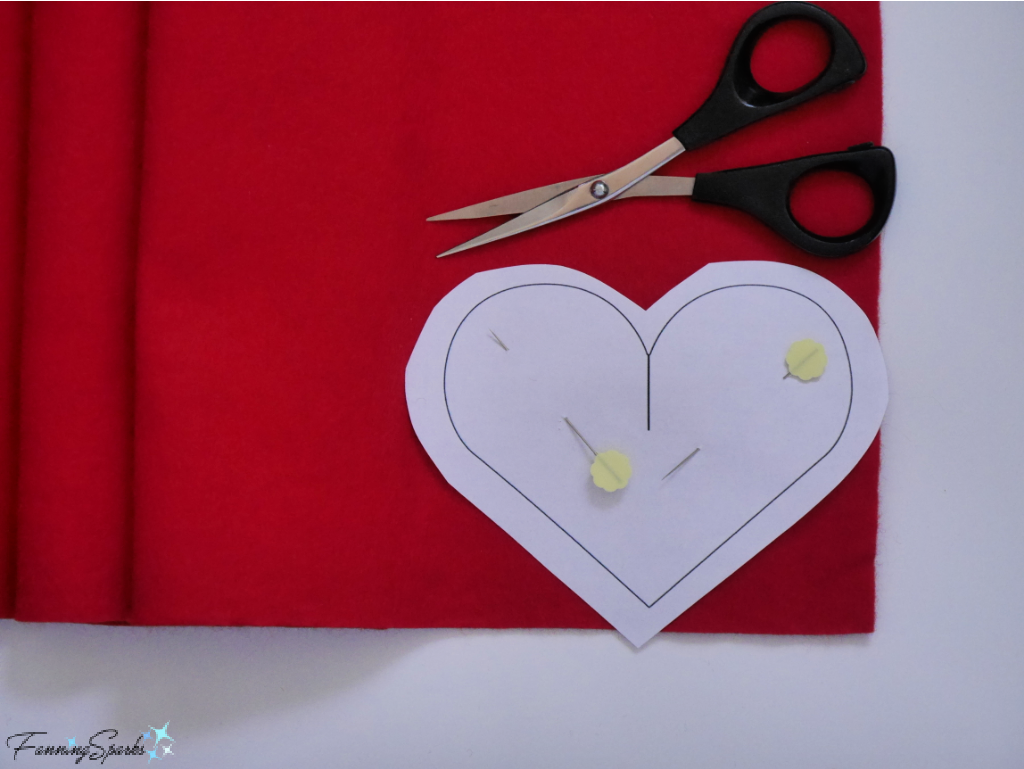
Step 2 Cut Parts Trim excess paper from the pattern leaving a narrow border around the outside of the shapes. Pin pattern to the felt using flat-headed pins. Cut out the shapes (paper and felt) using scissors with short, sharp blades.
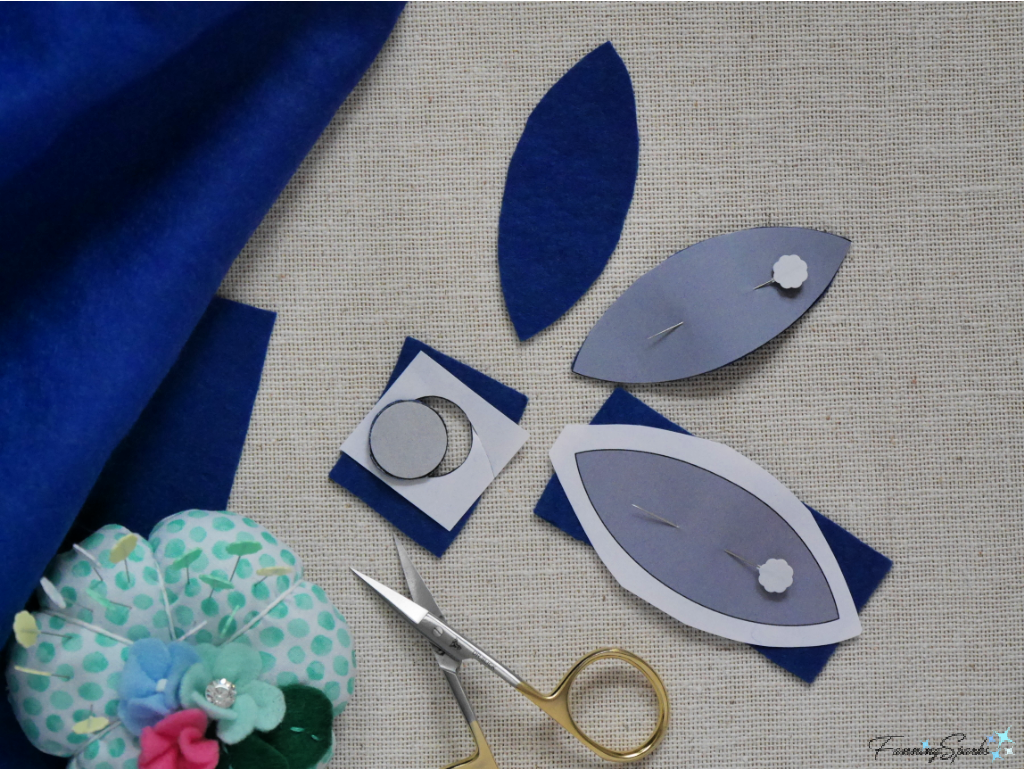 Cut 6 lunar panels and 2 end circles for EACH ball. Use a fabric marker or chalk to clearly mark the wrong sides of the cut pieces.
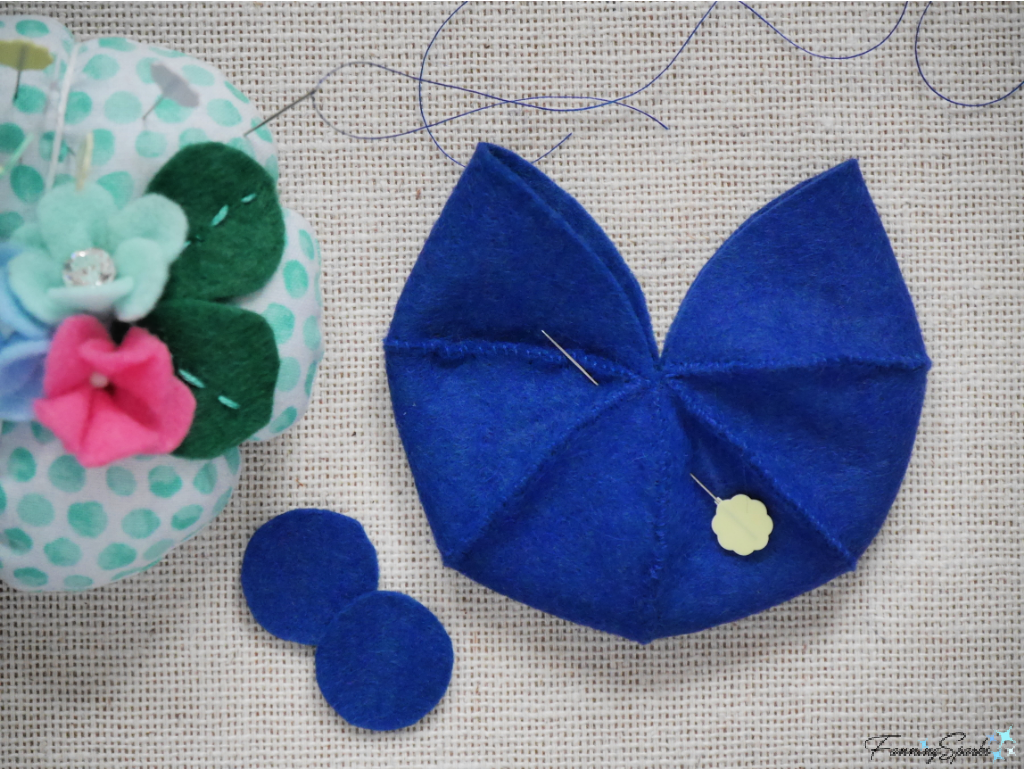
 Step 3 Sew Juggling Ball Align a pair of matching lunar panels with RIGHT sides together. Pin. Check that the two pieces are identical especially at the tips. Sew only one side of the lunar panels. Use a single strand of matching sewing thread and a whipstitch/ overcast stitch (or your stitch of choice). Note: I’m using white (instead of blue) thread for visibility in the photo below. Take your time to firmly secure the lunar panels with small, strong, even stitches, spaced close together, catching both edges in each stitch.
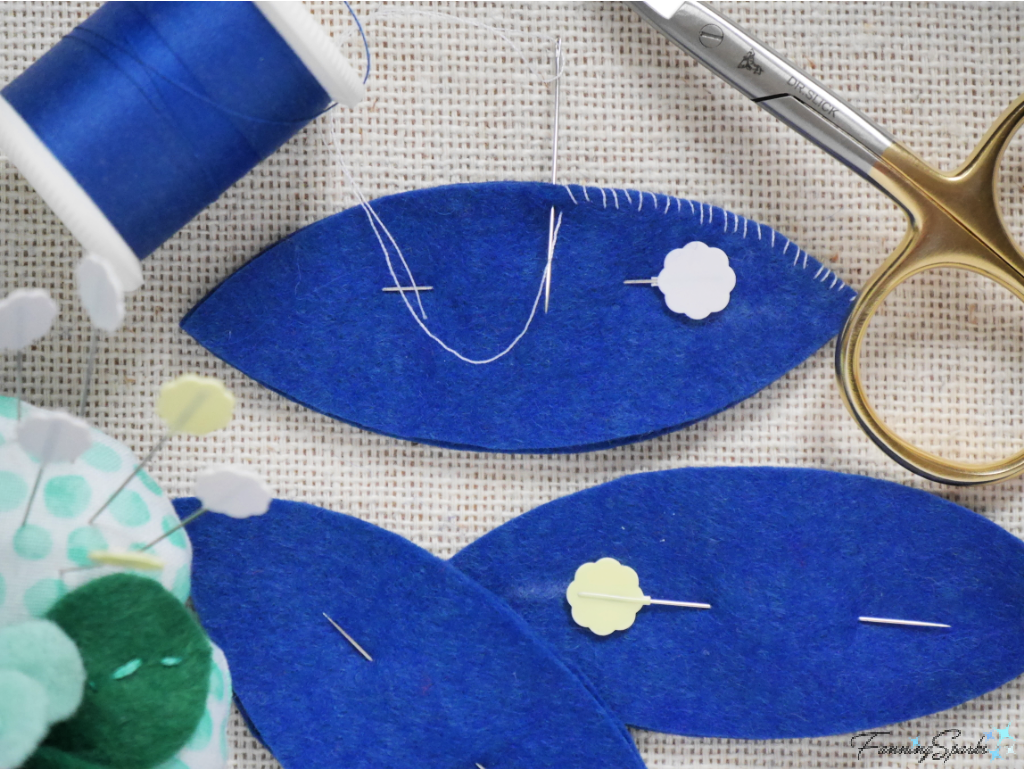 Repeat this process with the other 2 sets of lunar panels. You should have 3 pairs of lunar panels stitched together along one side. Prepare to sew 2 sets of lunar panels together by tucking one set of panels inside the other. Ensure the RIGHT sides are facing. Once again, take care to align the tips. Connect the final set of lunar panels in this same manner.
Check all the seams to ensure there are no gaps or weak spots. Do this by inserting your finger into the ball and running it along the length of each seam. If you are able to see your finger through the seam, go back and reinforce that section with additional stitches.
 Sew the final seam connecting the first and sixth lunar panel sides. Stop sewing about 1” before the tip leaving a small opening for turning and filling. At this point, you may want to sew the other 2 balls together. Follow the same process, as outlined in this step, for each set of 6 lunar panels.
 Step 4 Fill Juggling Ball Gradually turn the ball right side out. Take care not to stretch the felt at the opening. Insert finger into the turned ball. Run finger along each seam, firmly pressing it smooth and flat. Working over a container or bowl, insert a small funnel into the unsewn opening in the ball. Use a spoon to slowly scoop the millet into the funnel. Carefully tamp down the millet so it runs into the ball. Remove funnel. Spoon small amounts of millet directly into the ball. Use the spoon handle to gently pack the millet into the ball.
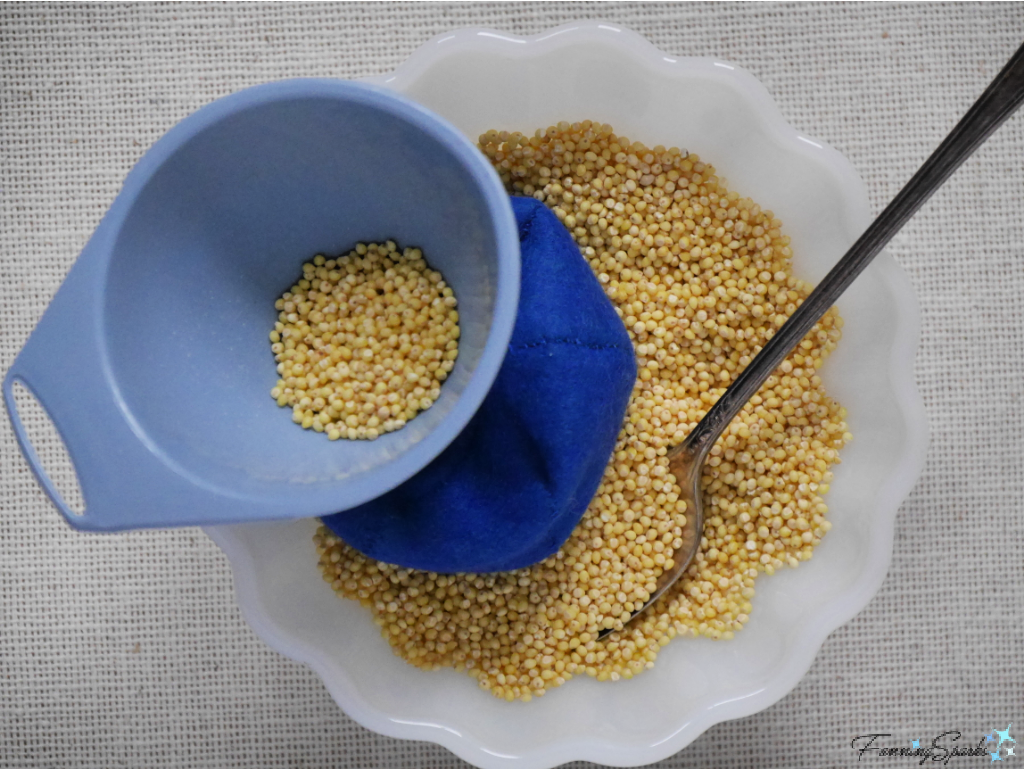 Fill the ball as full as possible while ensuring you can still grasp the edges of the opening. Pin the opening. Sew the opening closed with a whipstitch/ overcast stitch. Repeat on the other 2 juggling balls.
Step 5 Sew End Circles Fold a felt end circle in half to find its center. Align this center point with the end point of a felt ball where the tips of the panels converge. Pin. Sew felt circle in place with a whipstitch/ overcast stitch (or your stitch of choice) with tiny, tight stitches. Repeat at the other end of the ball. Repeat on the other 2 balls.
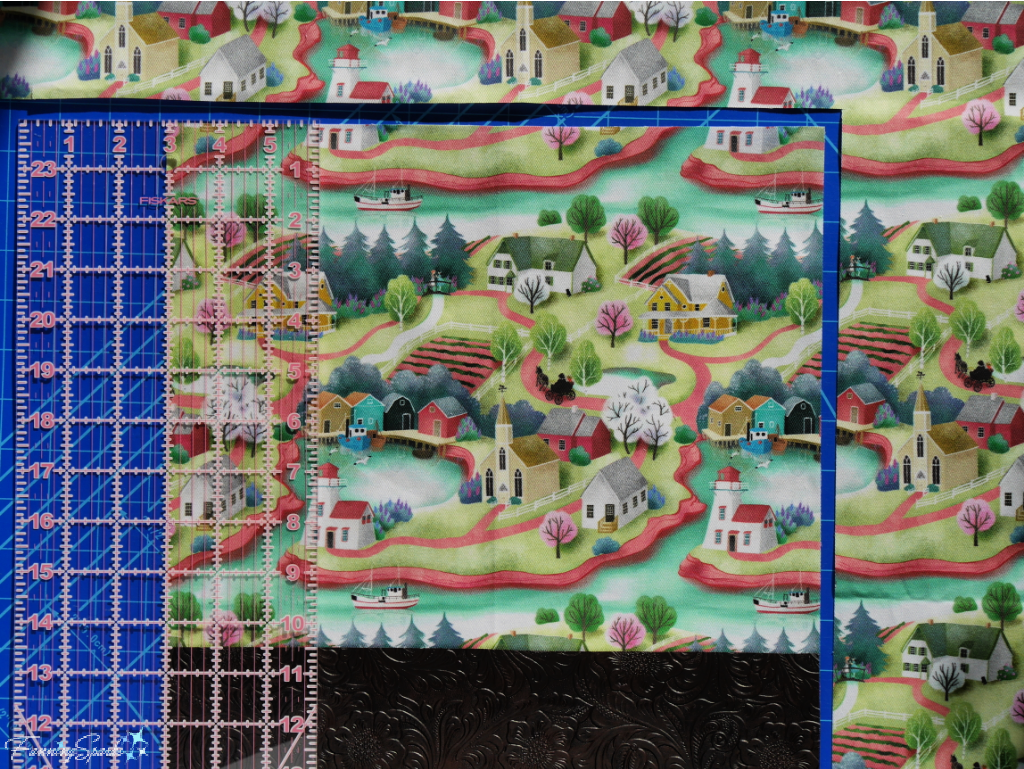
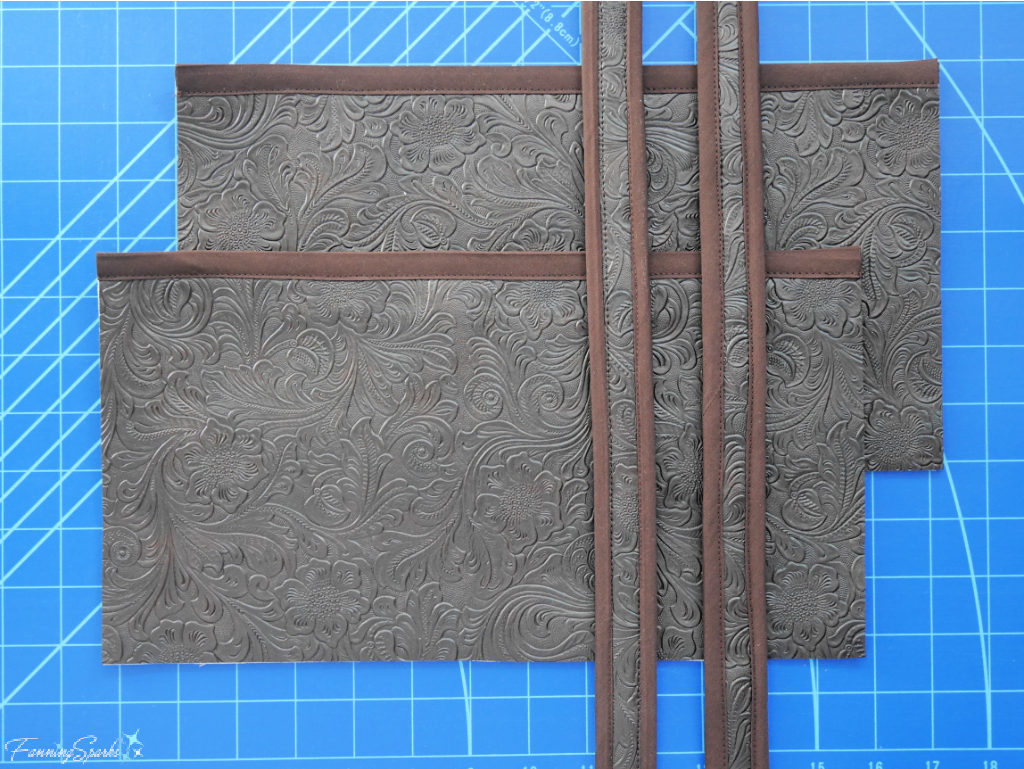
 Step 6 Cut Pouch Parts Cut TWO 10” x 6 ½ “ rectangles from fabric.
Step 7 Embellish Pouch Front I chose to embellish my pouch with an emoji juggler using a combination of permanent ink and felt applique. As noted above, you can customize the embellishment in any way you wish or you can skip it. Here’s the process I followed.
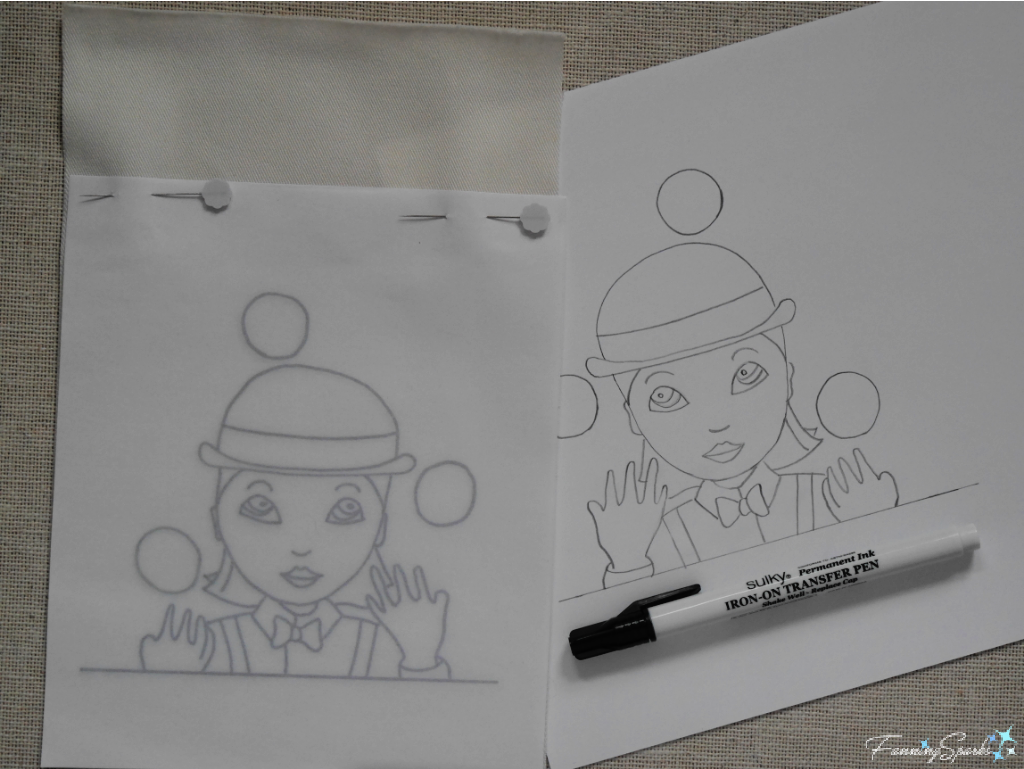
The key to this treatment is a Sulky Iron-On Transfer Pen in black ink. These pens are designed to transfer designs onto fabric for needlework projects. You simply trace (or draw) your design on paper with the fine-tipped marker and then use a hot iron to transfer the design onto the fabric. You can embroider the design or, since the transferred design is permanent, it can be left as is. The biggest advantage of this technique, in my opinion, is that you can perfect your design on paper first. Create your design on paper and then trace it with the transfer pen. If the design isn’t quite the way you want it, simply start with another piece of paper. The transferred image will be exactly the same as your paper tracing.
Be sure to follow the manufacturer’s instructions for the correct way to use the pens and transfer your image.
The below photo shows the emoji juggler I used for my design. The original, on plain printer paper, is shown on the right. I used a copier to make a copy for tracing. Then I carefully traced the lines with the transfer pen. Because you can’t erase the transfer pen, it took a few tries to get a clean tracing. The copy is shown, face down, on my fabric on the left. Note the design is reversed on the fabric. You’ll want to take that into account if your design has a specific direction. For instance, a design with lettering or words would need to be mirrored before tracing with the transfer pen.
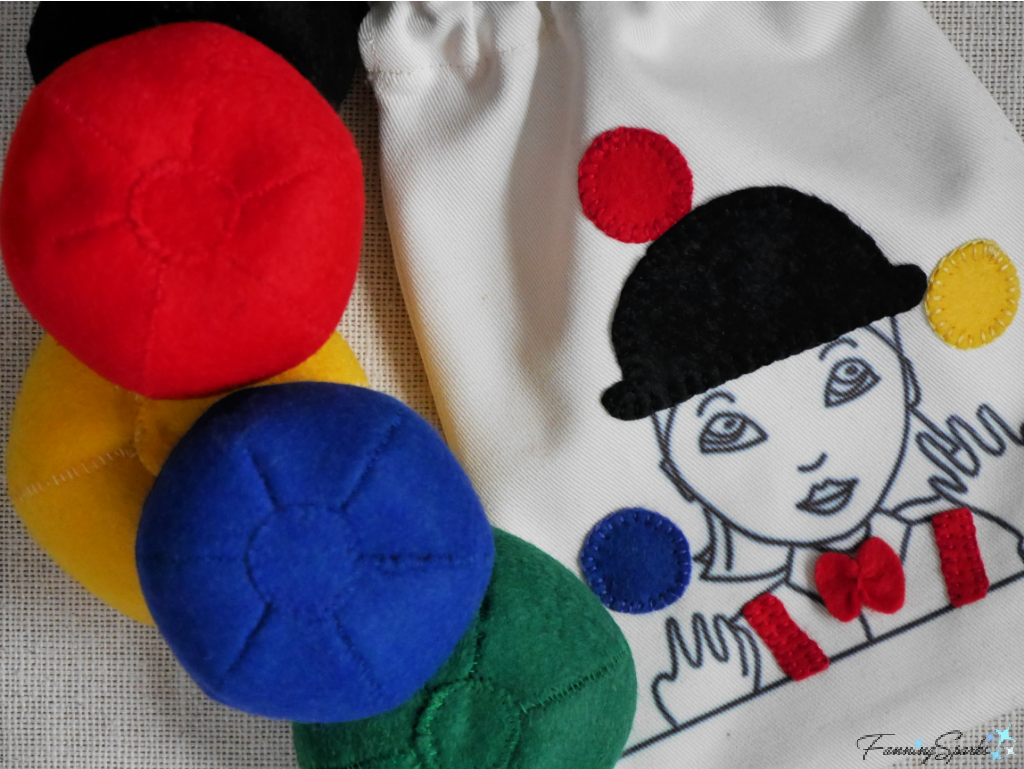
 I chose to add a few felt appliques for a little color and punch on my emoji juggler. I simply cut these pieces, a hat, 3 balls, bowtie and suspenders, from small pieces of felt. Then I hand-stitched them into place with a blanket stitch using 2-strands of matching embroidery floss. Alternatively, you could use fabric glue to attach felt pieces.
 Step 8 Sew Pouch Note: Take care not to touch the transferred design with a hot iron as you construct the pouch.
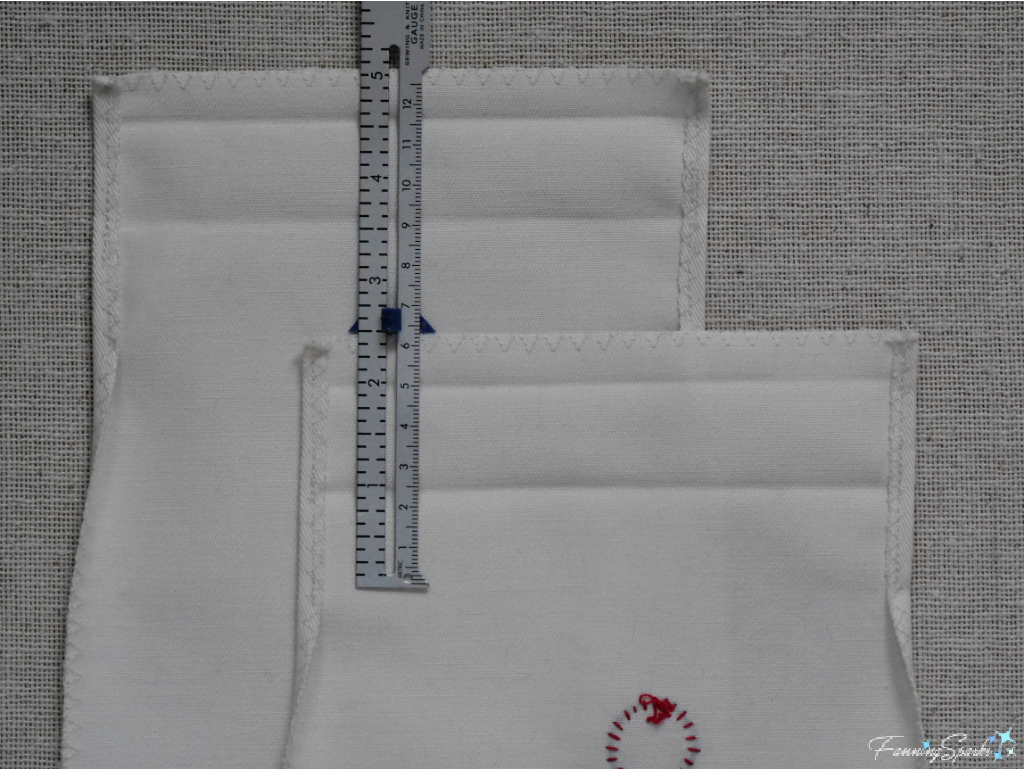
Use a sewing machine with matching thread to sew the pouch. Start by finishing all the edges of the 2 pouch panels. Use a zigzag or overcast stitch to prevent fraying.
The drawstring pouch opens at the top. A casing, made by folding and stitching down the top edge of the fabric panels, holds the drawstring cord. To make the casing, place the front pouch panel on your ironing surface with the wrong side facing up. At the right and left sides of the panel, measure down 2½“ from the top and mark. Fold over ¼“ along the 2½“ sections and press. Sew the folded sections stitching close to the edge. Repeat on back pouch panel. Return the front pouch panel to your ironing surface with the wrong side facing up. Fold down ½“ from the top edge. Press. Fold down another 1”. Press. Repeat on back pouch panel.
 Pin folds. Make a tiny snip into the seam allowances on the sides just below the folded edge. Sew across the top edge of the front pouch panel. Sew a second seam along the folded edge. Repeat with back pouch panel.
 Prepare to sew front and back pouch panels together. Place the pouch panels on your working surface with the right sides together. Align edges and pin. Stitch ¼” seam along the sides and bottom—beginning and ending at the folded edge. Turn the pouch right side out. Push out the seams and corners. Press edges.
Use a safety pin or bodkin to pull the cord through the casing. One cord will enter and exit on the right side of the pouch. The other cord will enter and exit on the left side of the pouch. Knot the ends of the cord. Close the pouch by pulling the knotted cord ends in opposite directions. Open the pouch by pulling the panels apart.
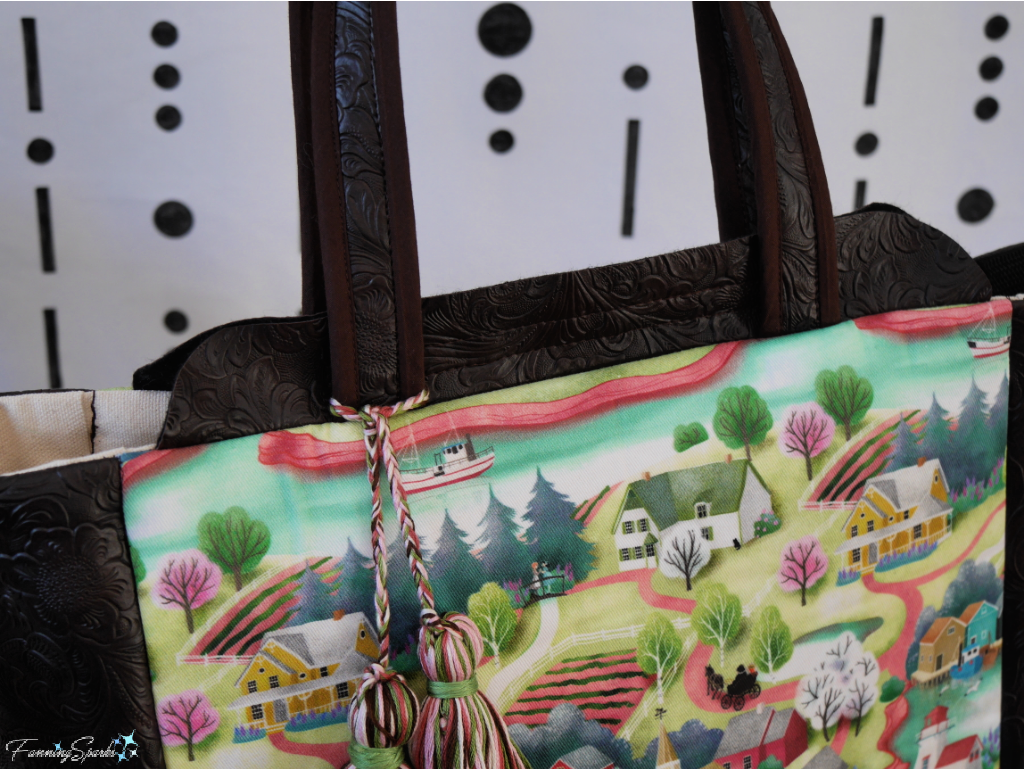
Here’s my finished pouch with my new juggling balls. Let the games begin!
 There are a number of free online resources that will teach you how to juggle. I suggest checking out the videos on the International Jugglers Association website (see More Info) or on YouTube. Look for a 3-Ball Cascade—this seems to be the easiest technique for beginners to learn. Here are a few tips I gleaned by comparing several resources:
- Start by tossing and catching one ball. Add a second ball after you can reliably complete 20 tosses without a drop. Add a third ball after you reach the same level with 2 balls.
- Don’t look at your hands while juggling. Instead look forward at, or above, eye level and let the balls enter your field of vision. Some sources suggest taping an “X” on the wall and focusing your eyes on the X.
- Cup the ball softly in the palm of your hand. Start with the ball in your dominant hand. For 3 balls, start with 2 balls in your dominant hand—one in the palm and the other in the middle of your fingers.
- Learn to throw consistently—from both hands. Toss the ball in a smooth arc. Every toss should reach the same height. Tosses should be parallel to your body.
- Develop a smooth rhythm. Some sources suggest saying “toss” and “catch” as you go. When you’re tossing 2 balls, you should hear “toss, toss, catch, catch”. The sequence for tossing 3 balls is “toss, toss, catch, toss, catch, catch”.
- Expect to drop the ball. Some sources suggest practicing over a bed or sofa so it’s easier to retrieve dropped balls.
- All sources emphasize the importance of practicing over time.
After you’ve mastered the basics, you may want to add more balls or try new techniques. Or you could strive to replicate the Flying Karamazov Brothers’ signature move called the Danger/Terror Trick. “They gradually introduce 9 items (ukulele, skillet, fish, egg, block of dry ice, salt shaker, cleaver, torch and bottle of champagne) – then juggle them all at once only to end up cooking the fish and the egg in the skillet and drinking the champagne!”
More Info
You can download the project template here: Felt Juggling Balls – Complimentary Download.
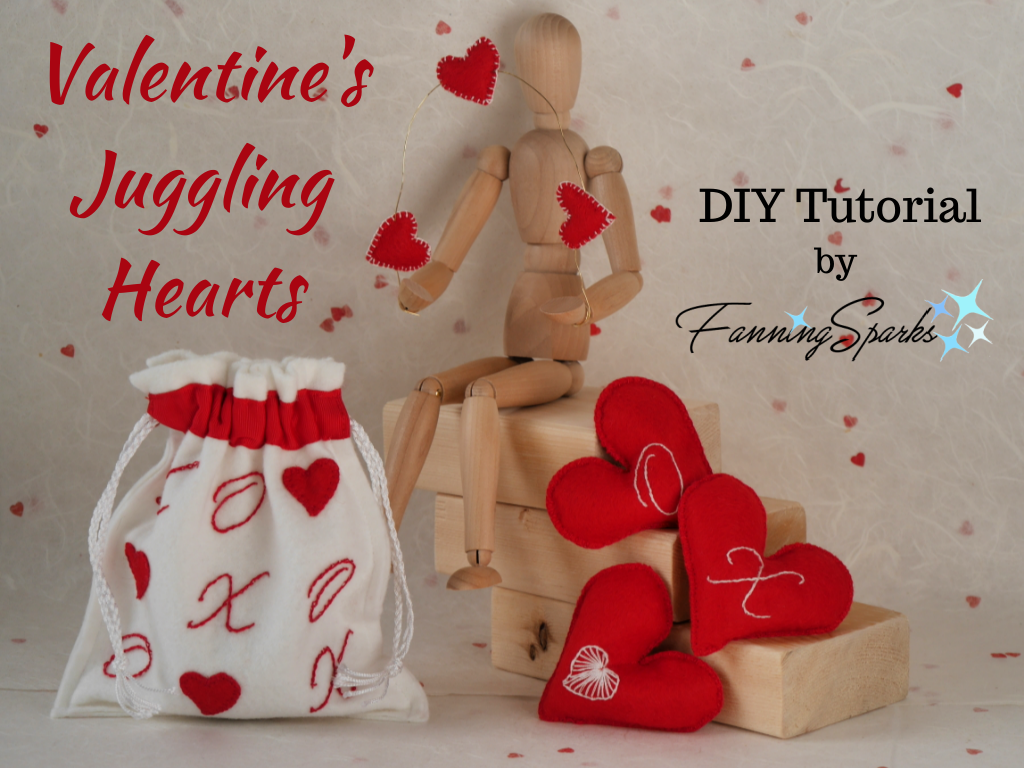
You may also enjoy the post Valentine’s Juggling Hearts – DIY Tutorial.
There’s a wealth of information, including tutorials for jugglers, on the International Jugglers Association website.
You can learn more about how Juggling Enhances Connections in the Brain from the Oxford University study here.
Today’s Takeaways
1. There’s a strong case to be made for learning to juggle.
2. Equip yourself with the proper tools when learning a new skill or task.
3. Consider making your own felt juggling balls with today’s tutorial.


 Step 3 Sew Heart Slit Fold a felt heart vertically along the cut slit with right sides together. Use a whipstitch/overcast stitch to sew the two sides of the slit together with tiny, tight stitches. The sewn slit adds shape and dimension to the heart. Repeat on the other five felt hearts.
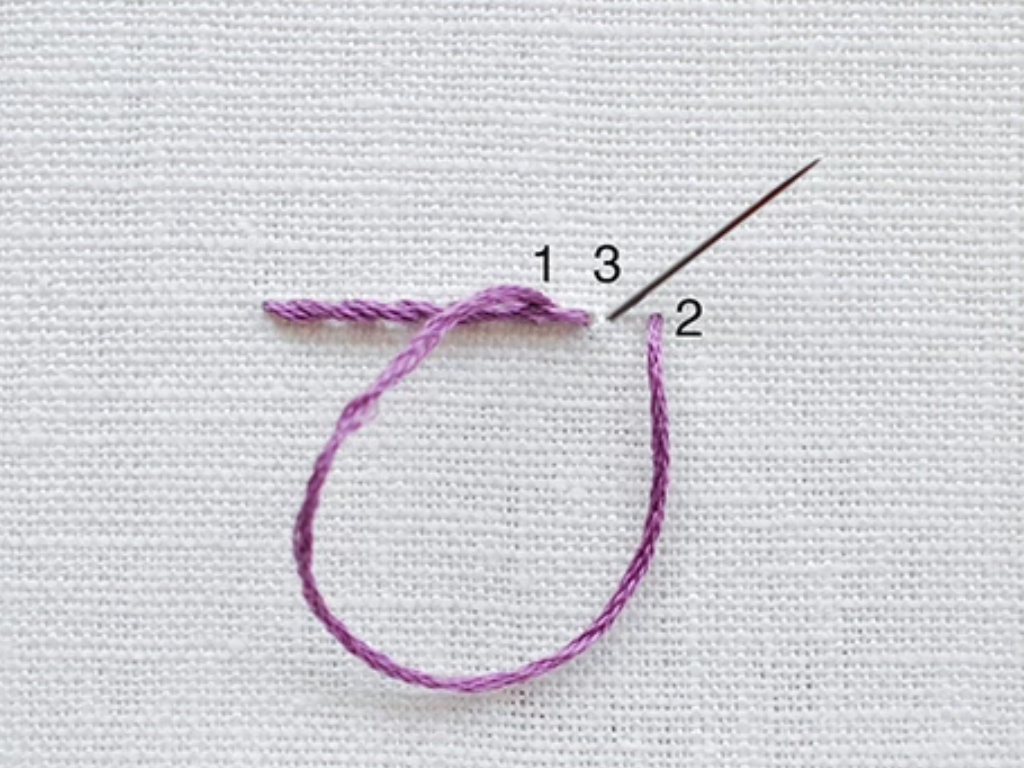
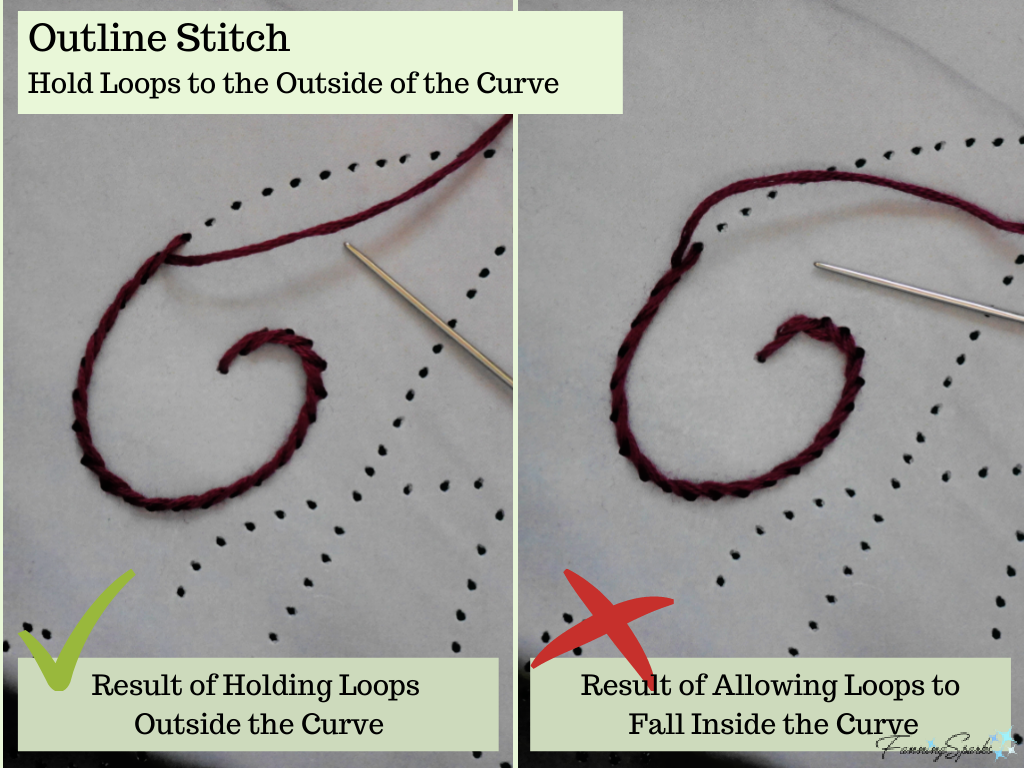
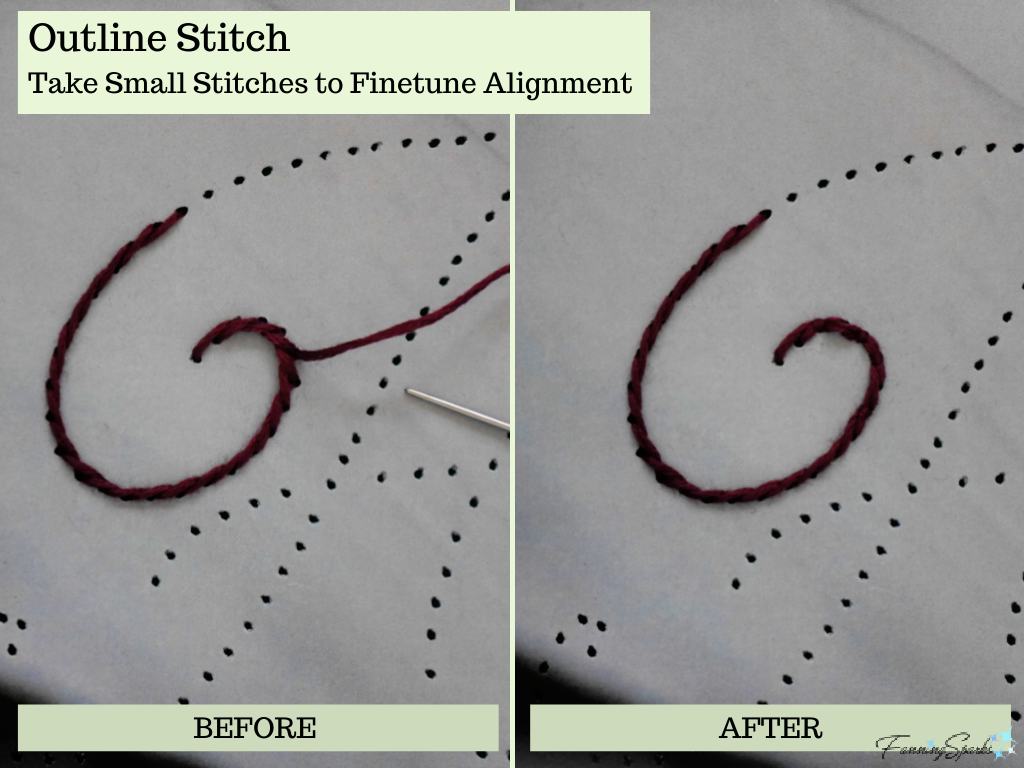
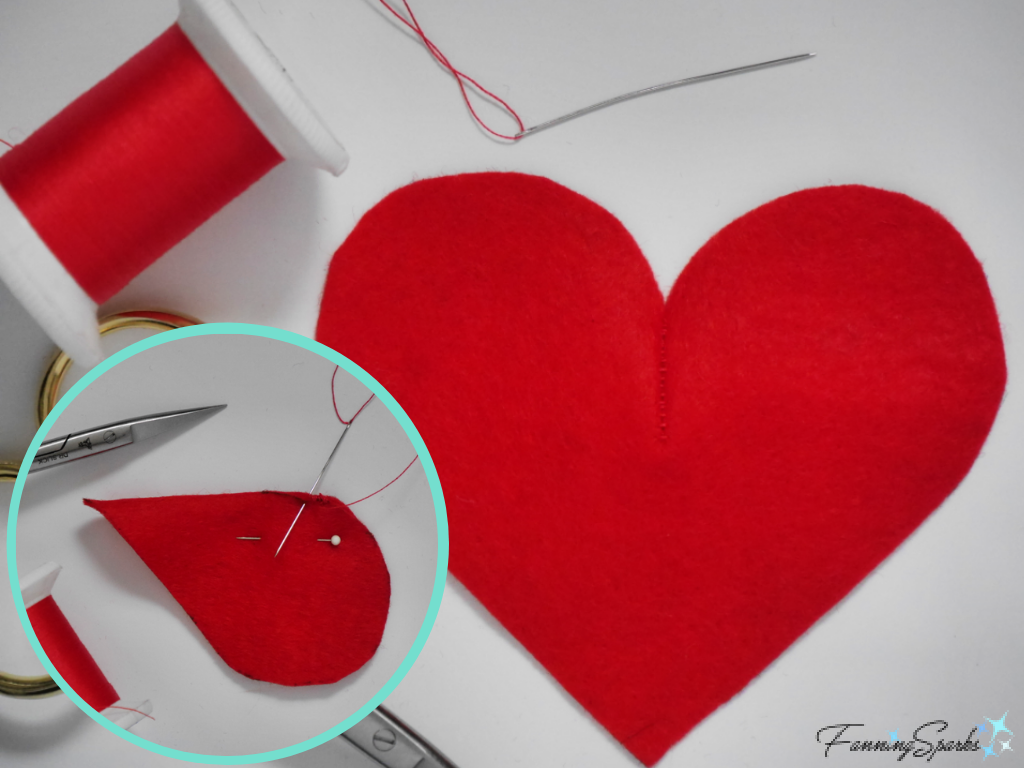 Step 4 Embroider Heart Lay a piece of tissue or parchment paper over one of the heart design patterns. Trace the outline of the heart as well as the inside design (X, O and heart). Trim the outside edge of the tissue paper heart. Align the tissue paper heart with a felt heart and pin in place. Use an outline/stem stitch (or your stitch of choice) to embroider the design onto the felt heart with 2 strands of white embroidery floss. If you’re new to embroidery or need a refresher, check out the More Info section at the end of the post. Stitch through the tissue paper. After stitching is completed, carefully tear away the tissue paper. Repeat on the other five felt hearts embroidering 2 X’s, 2 O’s, and 2 hearts.
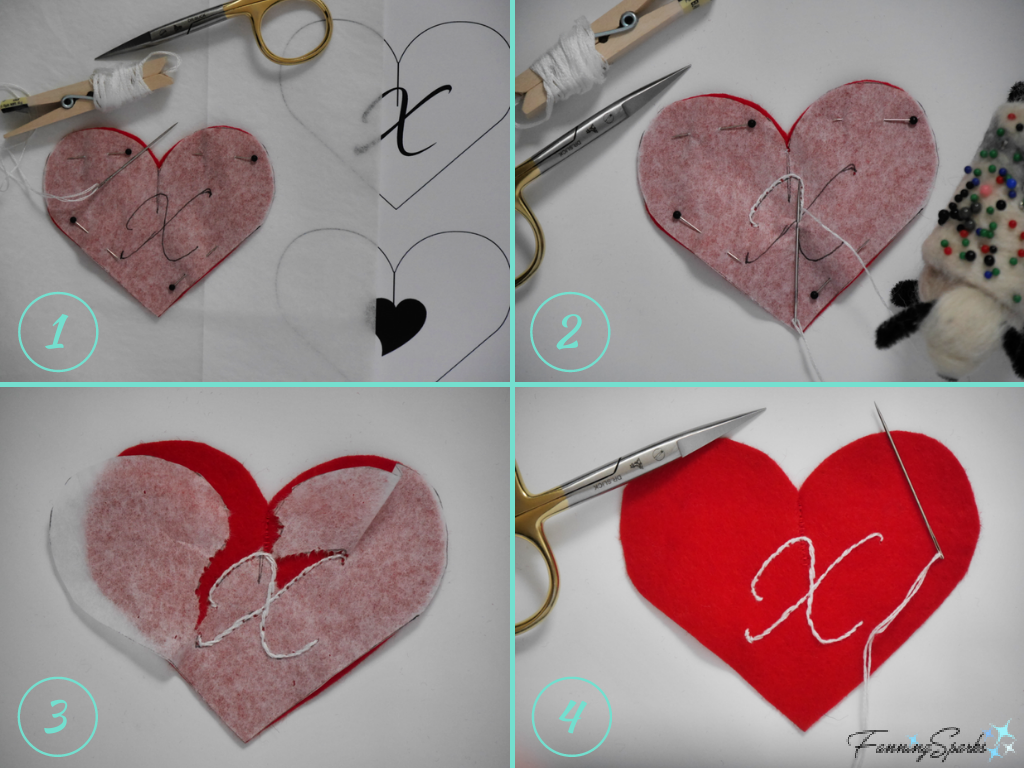 Step 5 Sew Hearts Together Align a pair of matching hearts with WRONG sides together. Pin. Use a single strand of matching sewing thread. (Note: I’m using white thread for visibility in the photo below.) Use a whipstitch/ overcast stitch (or your stitch of choice) to sew the hearts together. Leave a small 1” opening along one of the long sides. Take your time to firmly secure the hearts with small, strong even stitches, spaced close together, catching both edges in each stitch. You don’t want the filling to come out when the juggling begins!
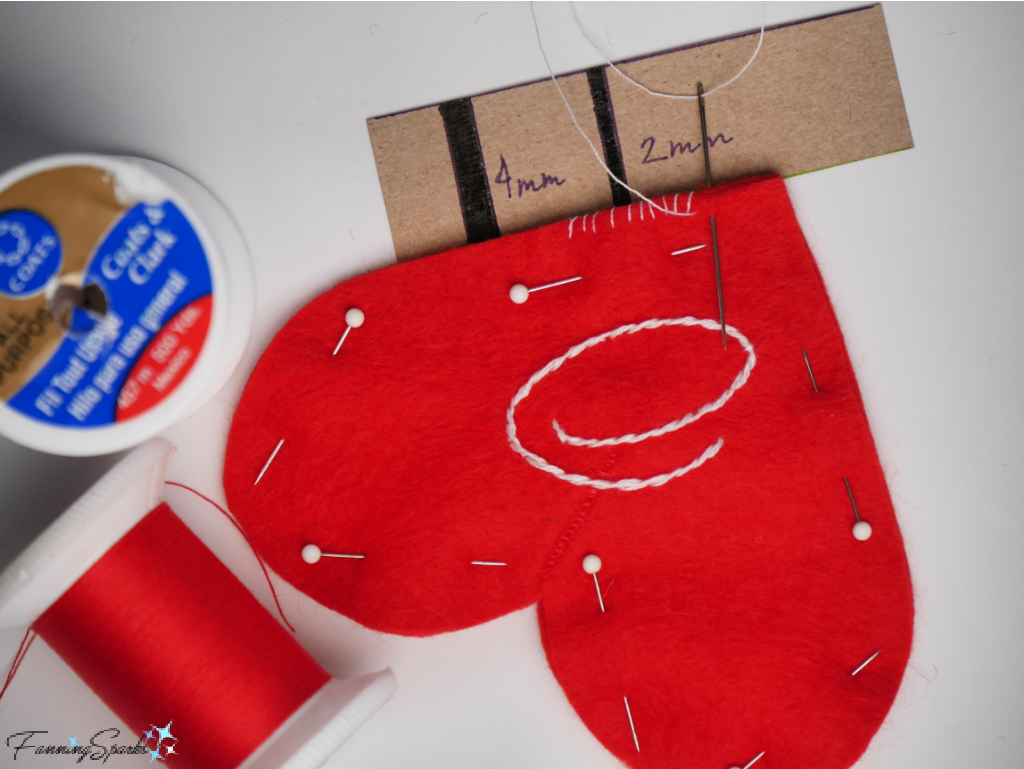 Step 6 Fill Heart Working over a container or bowl, insert a small funnel into the unsewn opening in the heart. Use a spoon to slowly scoop the millet into the funnel. Carefully tamp down the millet so it runs into the heart. Remove funnel. Spoon small amounts of millet directly into the heart. Use the spoon handle, or a thin stick such as a chopstick, to gently push the millet into all the sections of the heart.
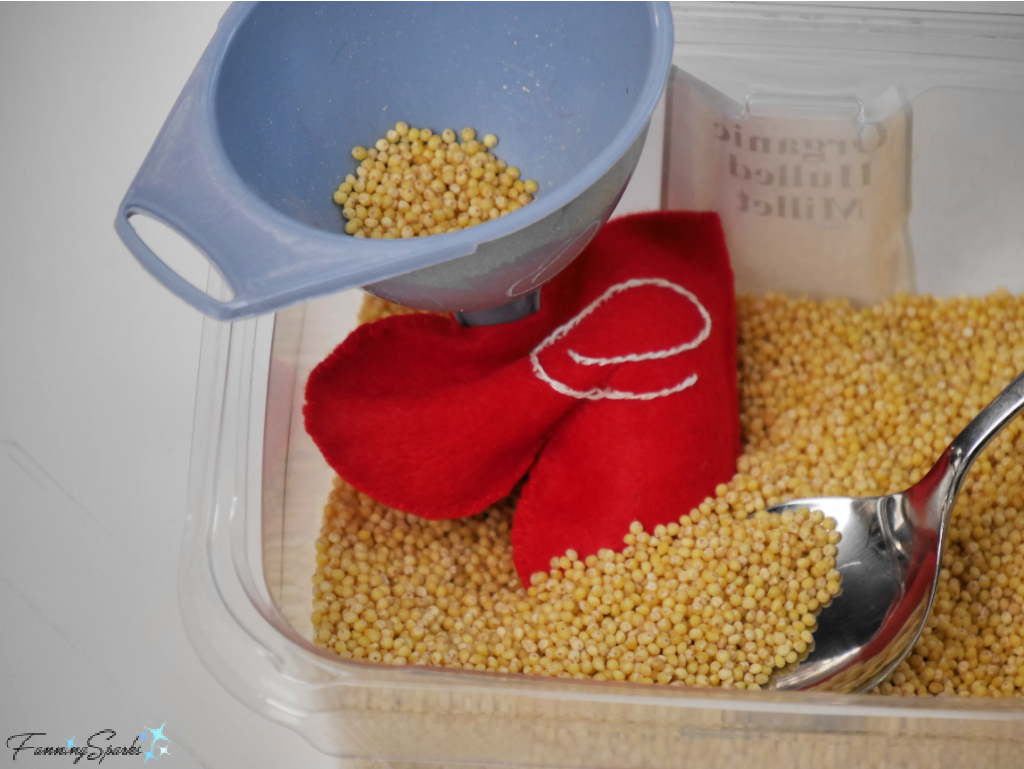 Fill the heart as full as possible while ensuring you can still grasp the edges of the opening. Pin the opening. Sew the opening closed with a whipstitch/ overcast stitch. Repeat on 2 remaining hearts.
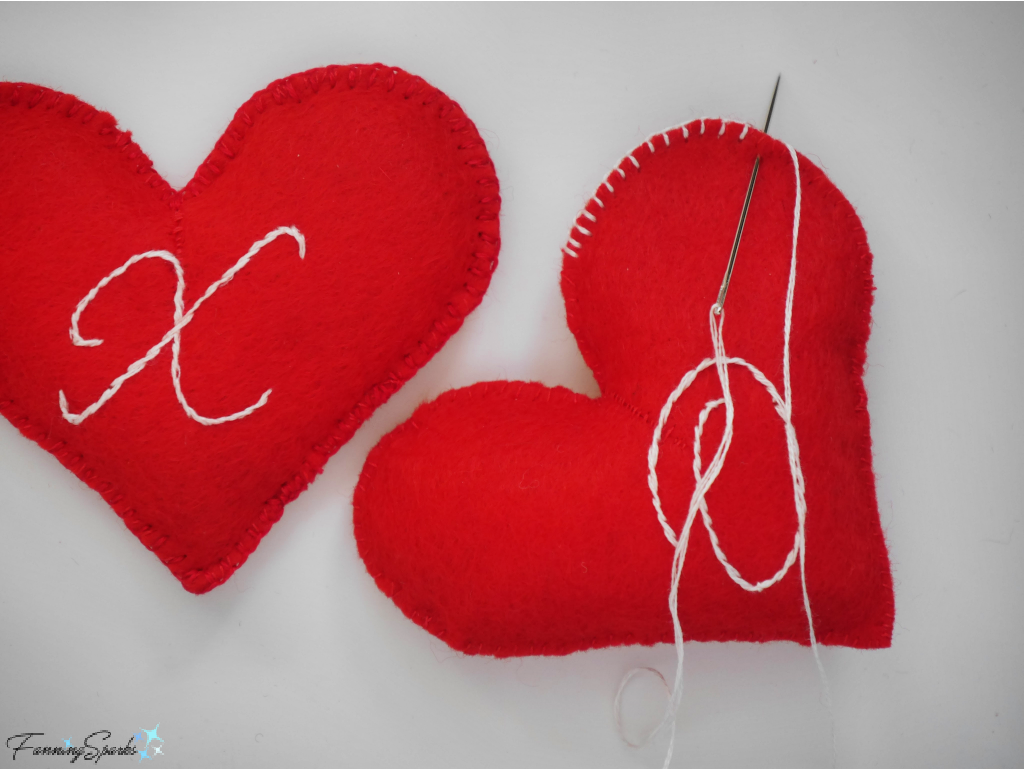 Step 8 Cut Pouch Parts Cut TWO 10” x 6 ½ “ rectangles from white felt. Cut TWO 7 ½“ lengths of 1” red grosgrain ribbon. Cut THREE small applique hearts from red felt using the method described above in Step 2.
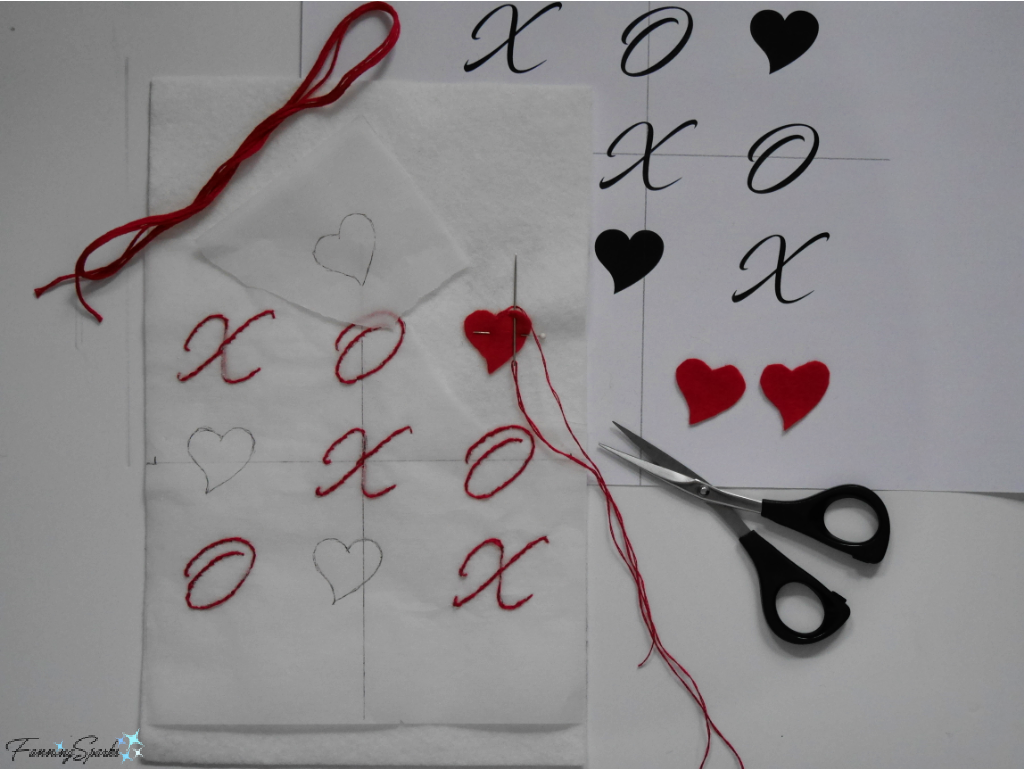 Repeat for the remaining 2 small hearts. After stitching is completed, carefully tear away the remaining tissue paper. It’s best to press down on the embroidery stitches with the fingers of one hand while tearing the tissue paper with the other hand.
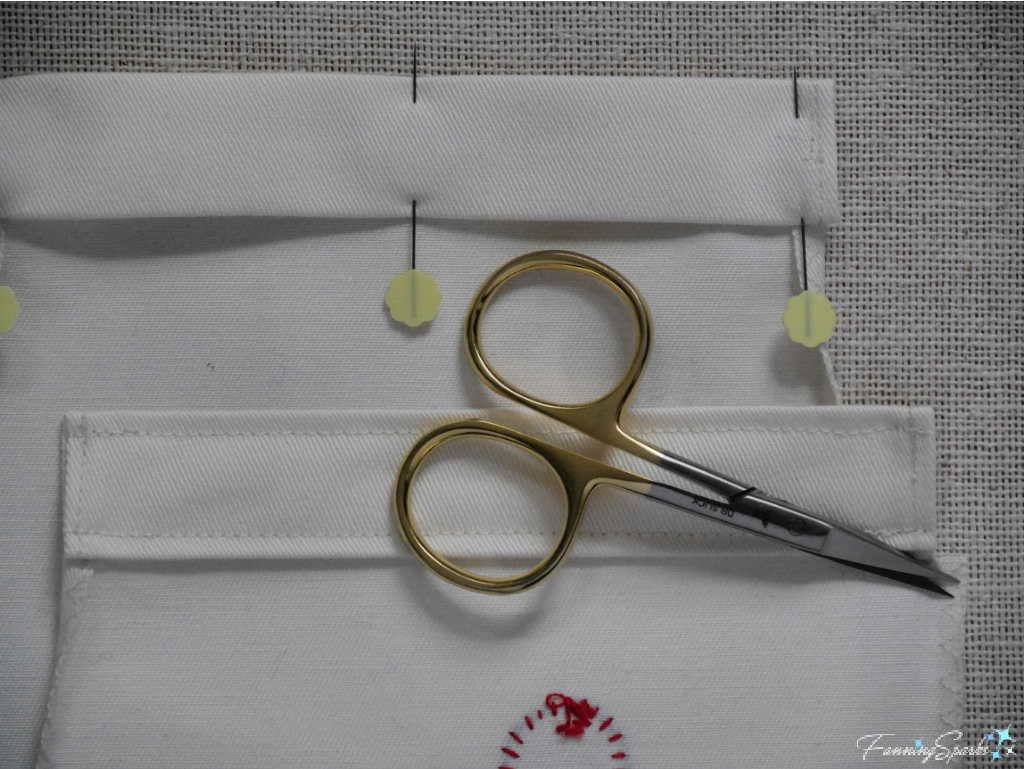
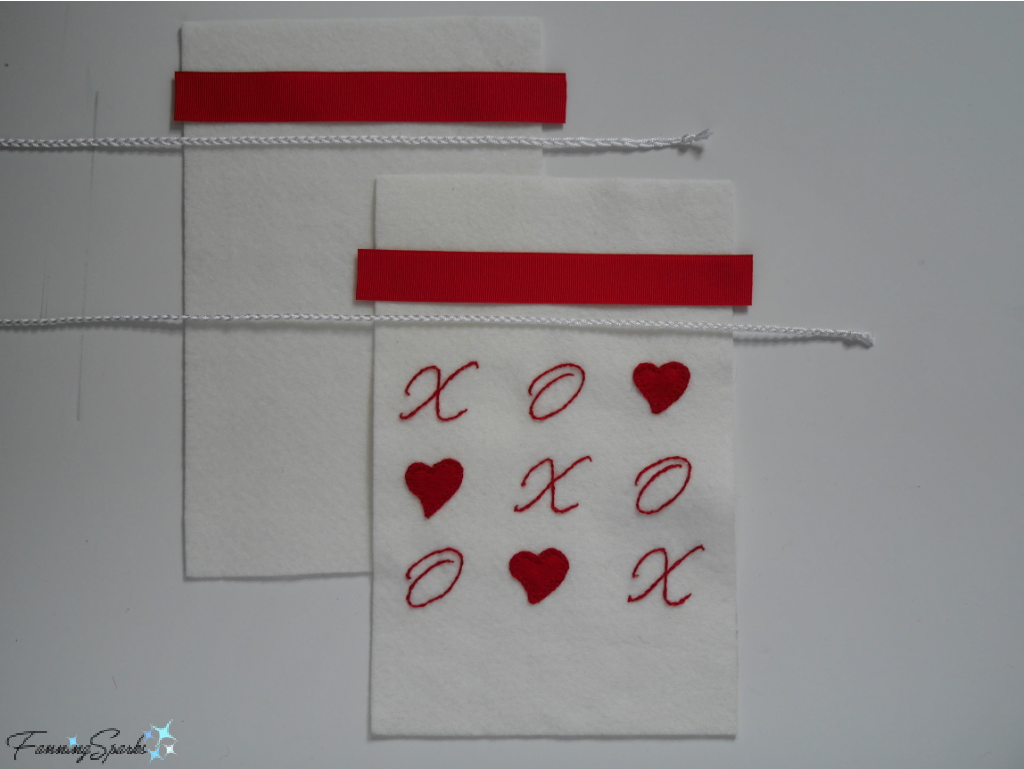 Start by making the casing. Place front pouch panel on working surface with the wrong side facing up. Fold down 1½“ from the top edge. Press. Unfold top edge. Place front pouch panel on working surface with right side facing up. Measure down ½” from pressed fold edge and align top edge of grosgrain ribbon with this line—top edge of ribbon is 2” from top edge of panel. Pin ribbon in place. Ends of ribbon should extend over side edges by ½“. Fold ribbon ends to the back side of the panel. Pin and stitch ribbon ends at the side edges of the front pouch panel. Repeat with back pouch panel.
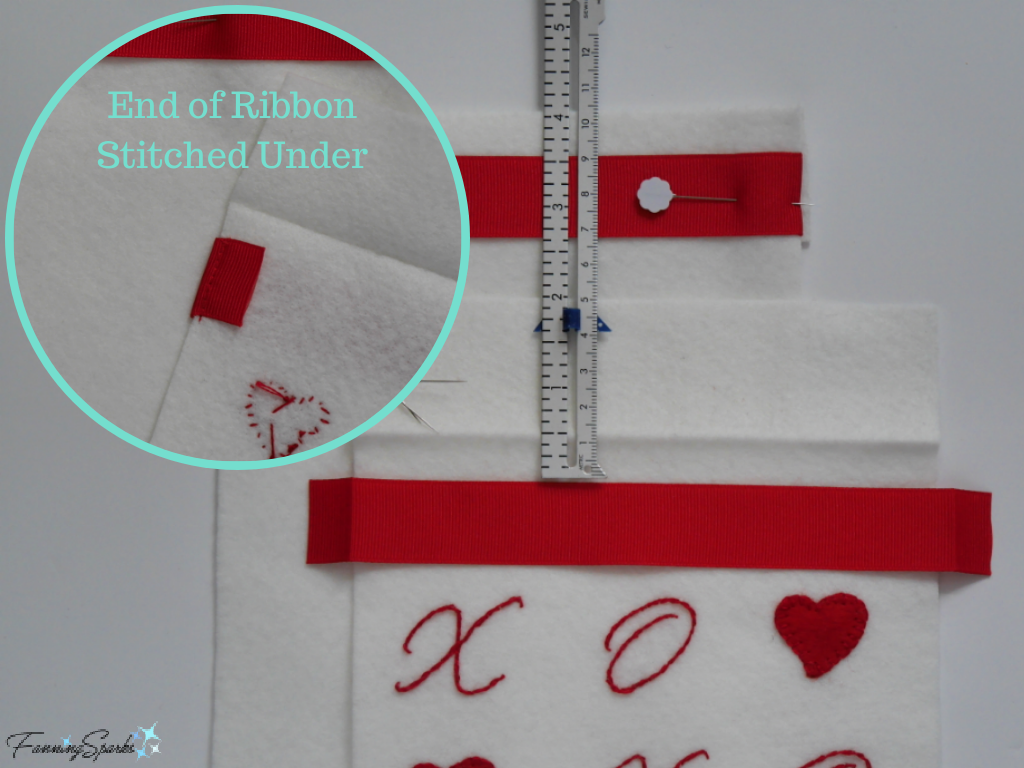 Place front pouch panel on working surface with the right side facing up. Refold the top edge to the back at the pressed fold which is 1½” from top edge. Ensure ribbon is placed straight and level at ½” from folded edge. Pin ribbon in place. Stitch across the panel along the top and bottom edges of the ribbon. Repeat with back pouch panel.
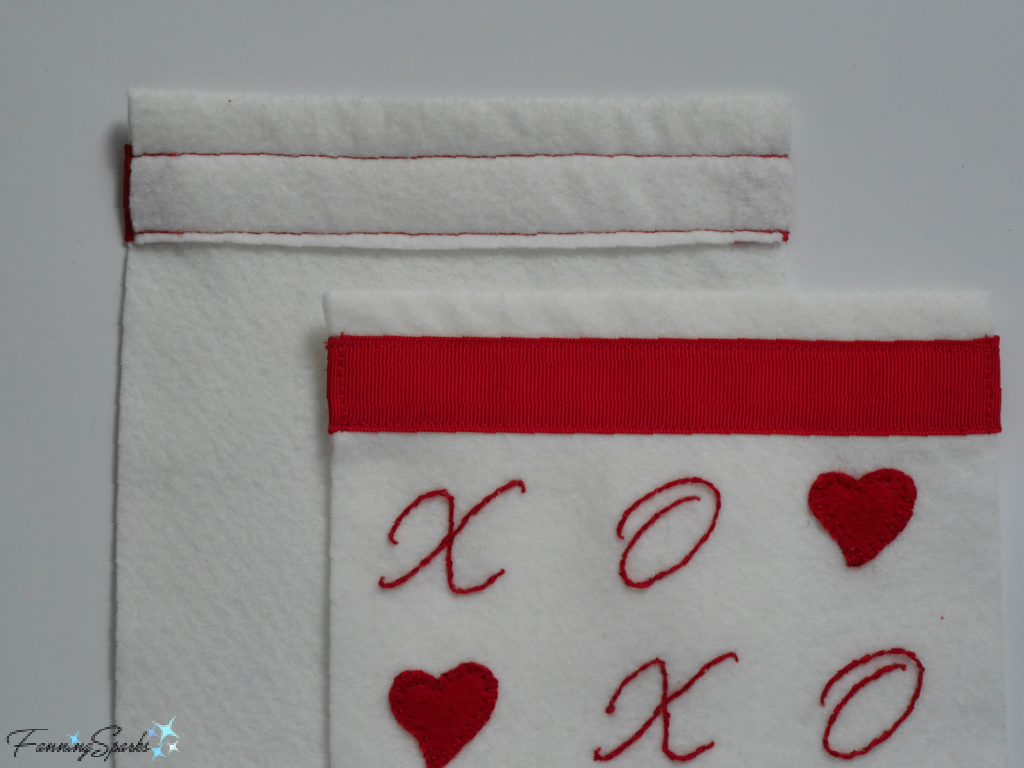 Prepare to sew front and back pouch panels together. Place back pouch panel on working surface with wrong side facing up. Place front pouch panel on back panel with right side facing up. The two panels should match and the ribbon ends should align. Pin in place. Stitch ¼” seam along the sides and bottom—beginning and ending at the bottom edge of the ribbon.
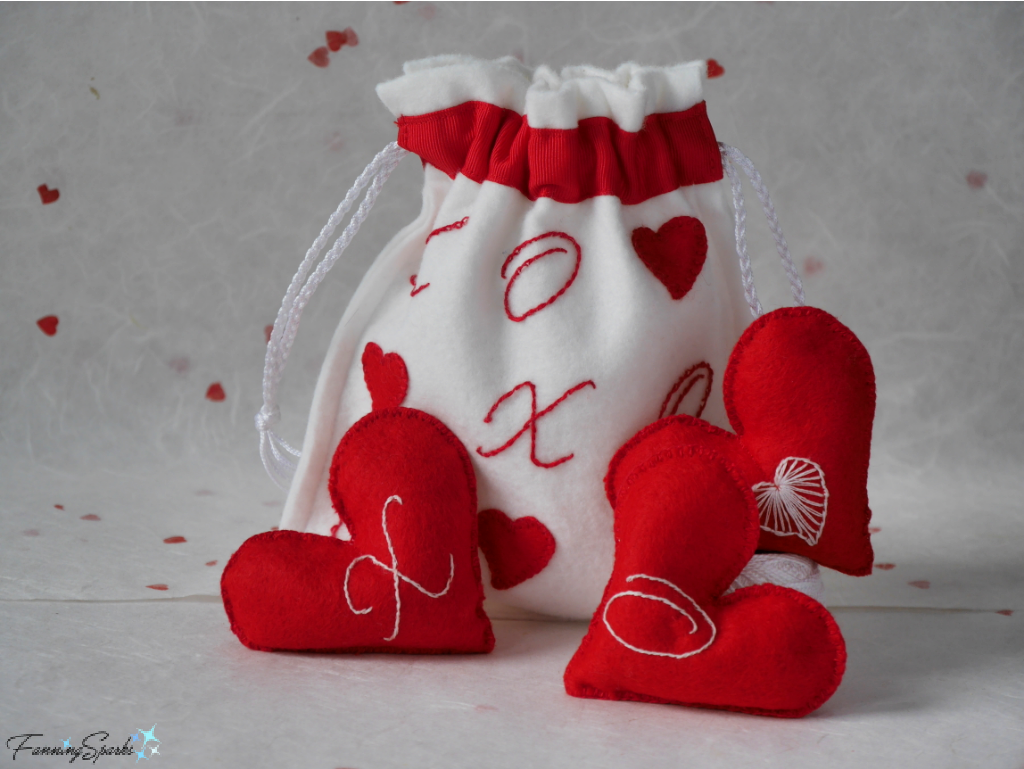
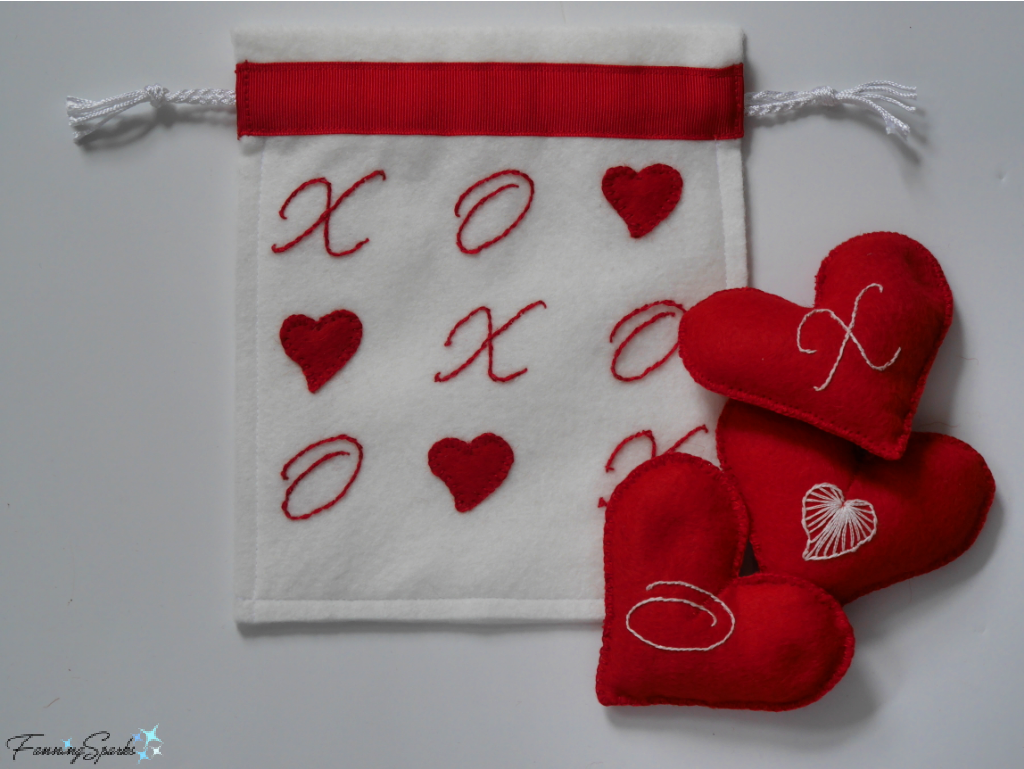 Your Valentine’s Juggling Hearts are ready to share with a fun-loving person in your life. Happy Valentine’s Day!
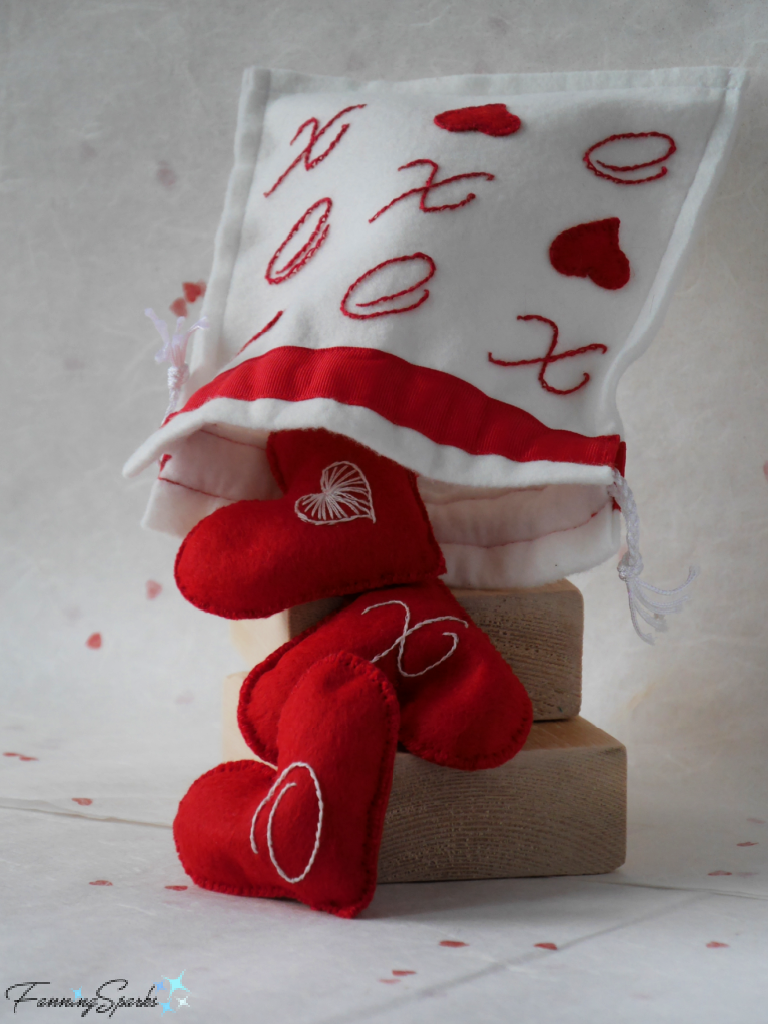

 Our hotel was in the Montmartre district close to the beautiful Sacré-Coeur Basilica.


 Despite the cool wintertime temperatures, there were lots of people strolling along the Via Partenope enjoying Naples’ seaport.
 There were many beautiful views on that trip to Italy. We rented a car and drove along the magnificent Amalfi Coast. We spent a couple of nights in the small, scenic town of Ravello which is designated as a UNESCO World Heritage Site. The town was magical and the views were spectacular. This was the view from our hotel room balcony.
 Here’s the same view at night.


 That brings me full circle—back home to Georgia and our beautiful views of Lake Oconee. Sunrise over the lake is always beautiful but some conditions, such as a drastic temperature change, saturate the color and heighten the drama.