Cordmaking is the ideal portable handicraft. It’s straightforward to learn, easy to start and stop, conveniently compact and lightweight, and doesn’t require much concentration. It’s well-suited to occupy your hands while on a long car trip, watching TV or attending a Zoom call. The repetitive motions can be very relaxing and soothing… even meditative. Cordmaking is a simple process—you manipulate fiber strands into a knotted cord.
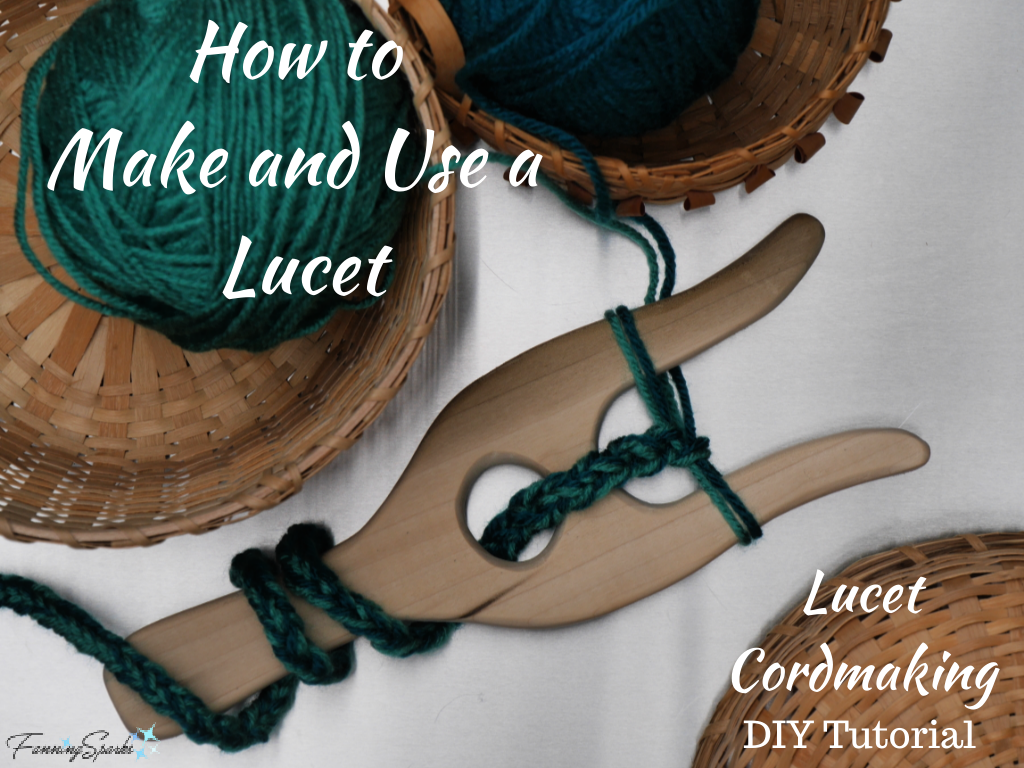
There are many techniques for making cord, such as braiding and twisting, but the method I’d like to share is using a lucet. A lucet is a simple tool that resembles a two-pronged fork. It’s surprisingly simple to make and use. I’ll show you how in today’s tutorial.
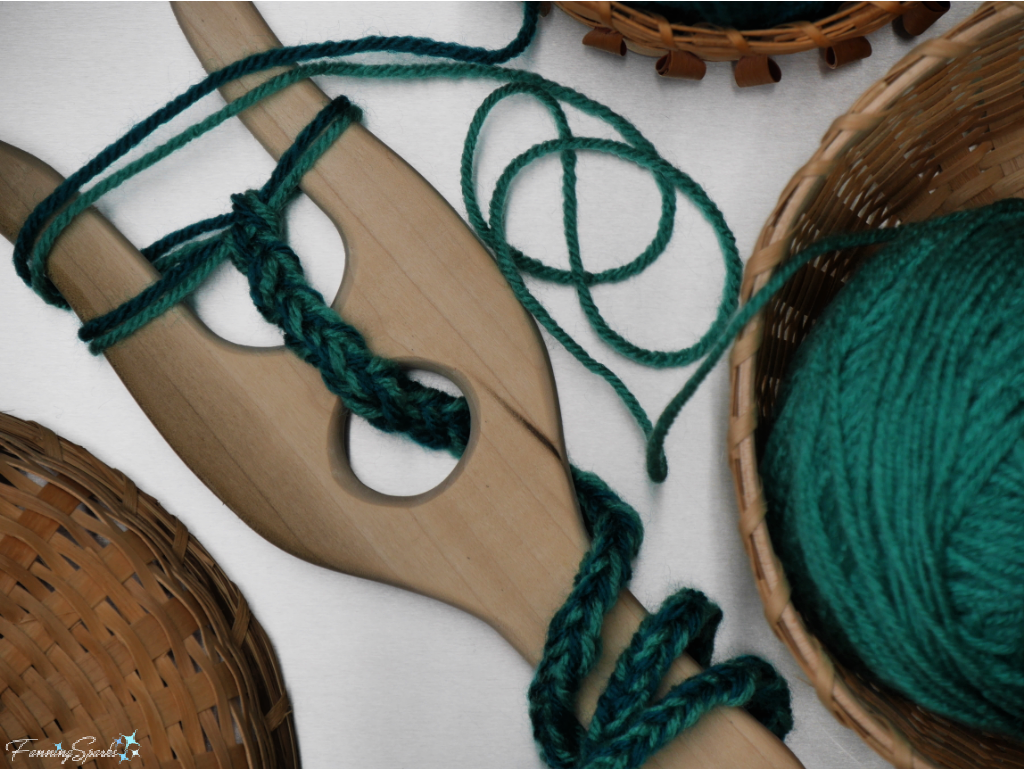 A lucet makes a strong, square woven cord. One advantage of luceted cord is it doesn’t unravel when cut. Another advantage of this method is that it’s not necessary to pre-cut the cording material. If using yarn, for instance, you work directly from the ball of yarn and continue until the desired length is reached.
Lucet cordmaking has a long history. It is believed to date back to the time of the Vikings (800-1050 AD). The original lucet, or “tvinningsben” (said to mean “twisting string” in Scandinavian), was fashioned from bone or horn and used to make strong cord or rope from wool, flax or leather. An archaeological find of braided cord remnants, retrieved from a woman’s burial site in Gotland, Sweden, are believed to have been made with a lucet.
We won’t be making a tvinningsben out of bone in today’s tutorial but I will be showing you how to make a lucet out of wood.
Supplies Needed
Very few supplies are needed to make the lucet:
. Template Download DIY Lucet – Complimentary Download to print the template for the lucet
. Wood Piece of ½” pine or poplar slightly larger than 3 ½” x 9”
. Paper for printing template
. Sandpaper in fine and extra fine grits I used 220 and 400 grit.
Tools and Equipment Needed
The following tools and equipment will be needed:
. Printer for printing template
. Scissors
. Pencil
. Jigsaw
. Drill
. Wood carving knife or similar tool to round off edges
Instructions to Make Lucet
Step 1 Prepare Template Download the DIY Lucet – Complimentary Download to print the template for the lucet. Take care to ensure the scale is accurate on your printed version. See specifics in the download document. Trim template with scissors.
Step 2 Cut and Drill Wood Trace template on wood.
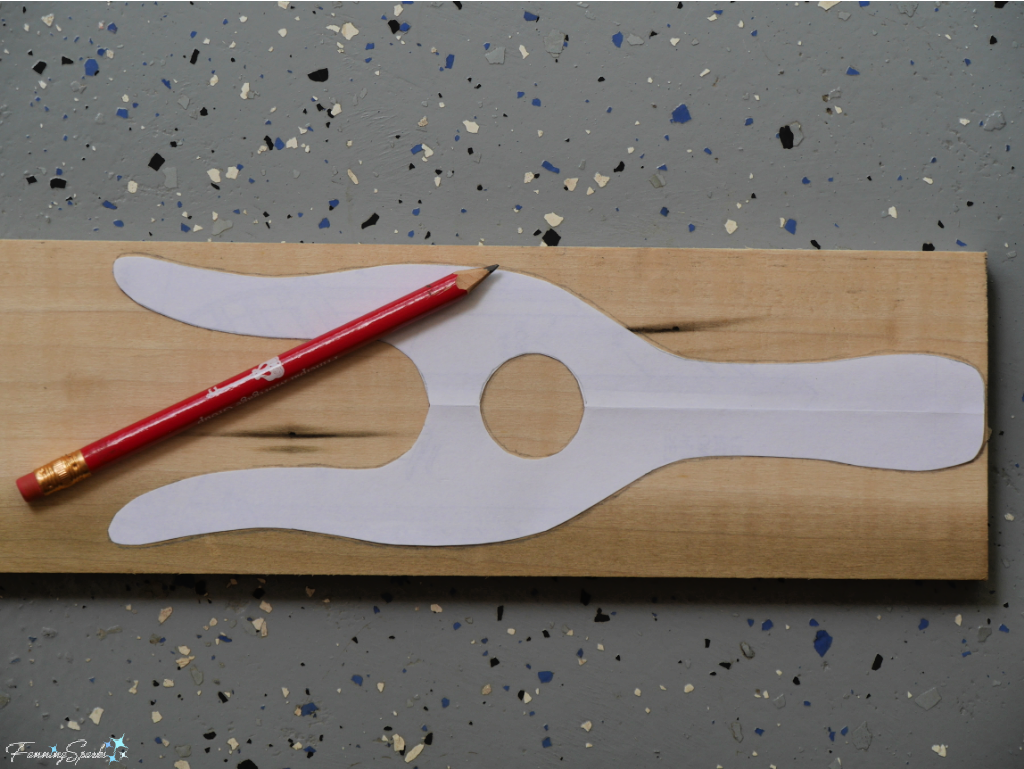 Use jigsaw to cut along marked lines.
TIP: Make a series of relief cuts, just up to the cutting line, to make it easier to cut the inside curve.
 TIP: Use the drill to bore a series of holes in the center hole to make it easier to cut with the jigsaw.
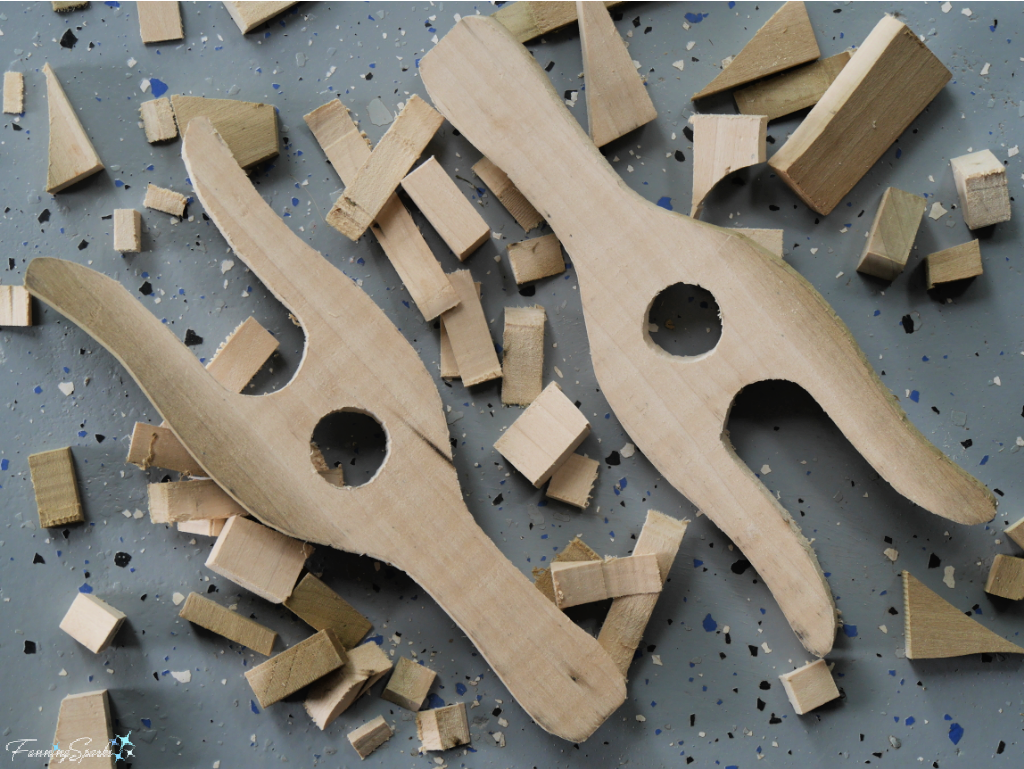
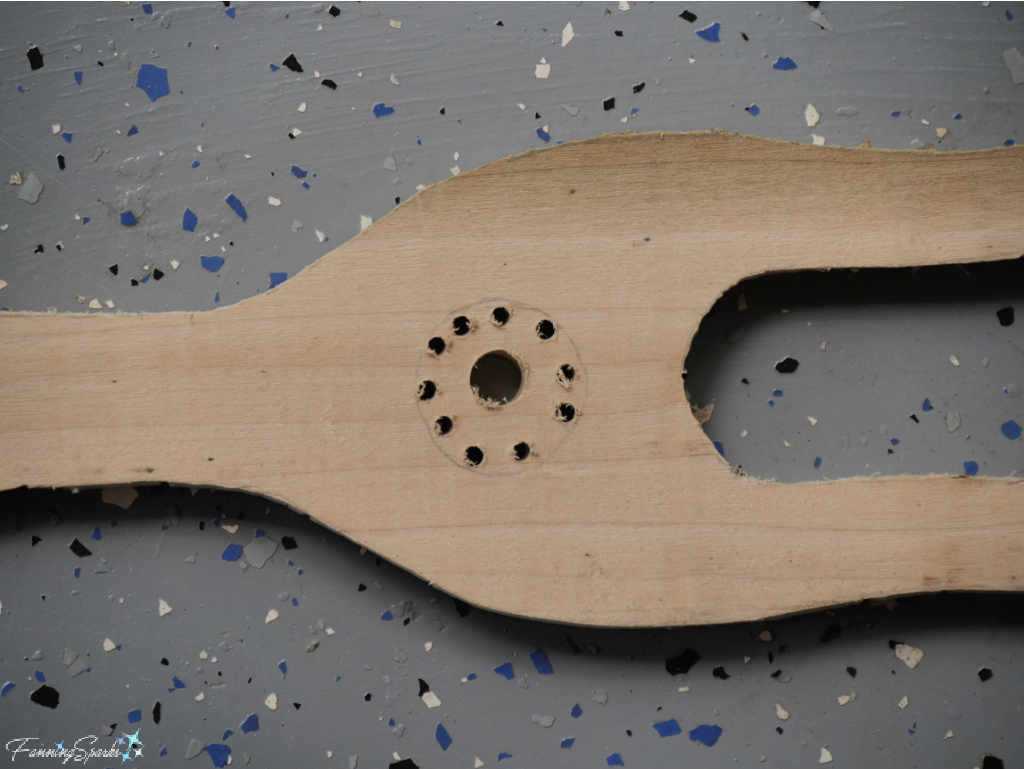 I made two lucets. Here’s how they looked at this stage.
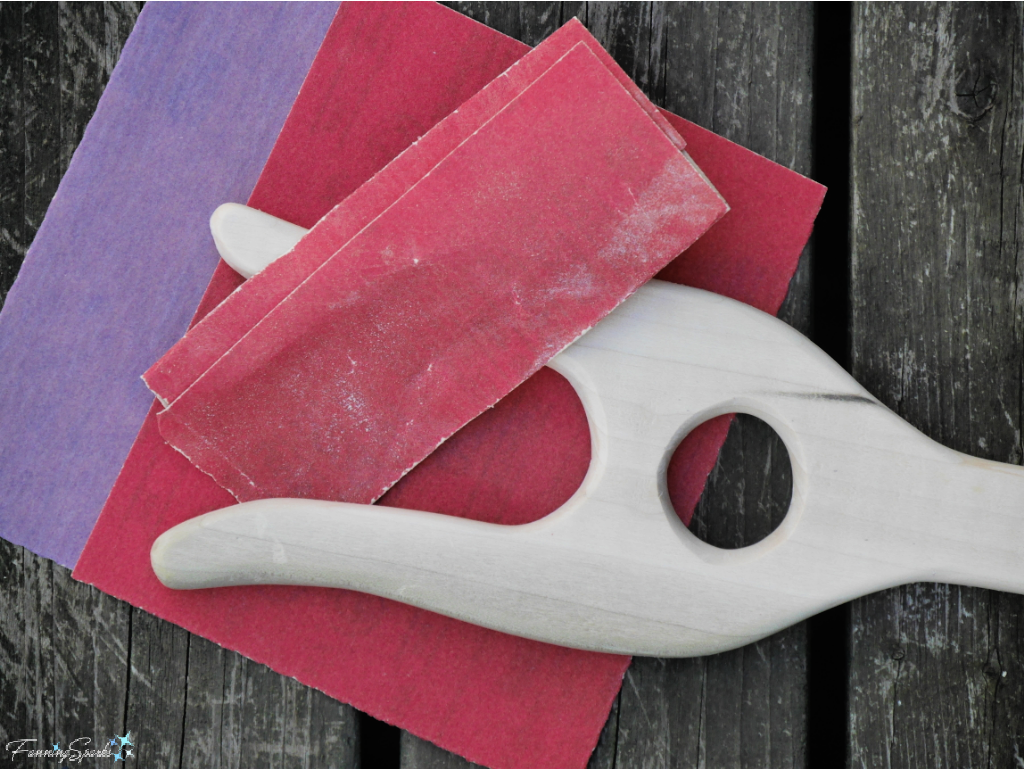
 Step 3 Finish and Sand Use a wood carving knife to round the edges of the lucet.
 Sand smooth with fine and extra fine grits sandpaper. This is an important step since any roughness, especially along the prongs, can snag your cording material.
 Instructions to Use Lucet
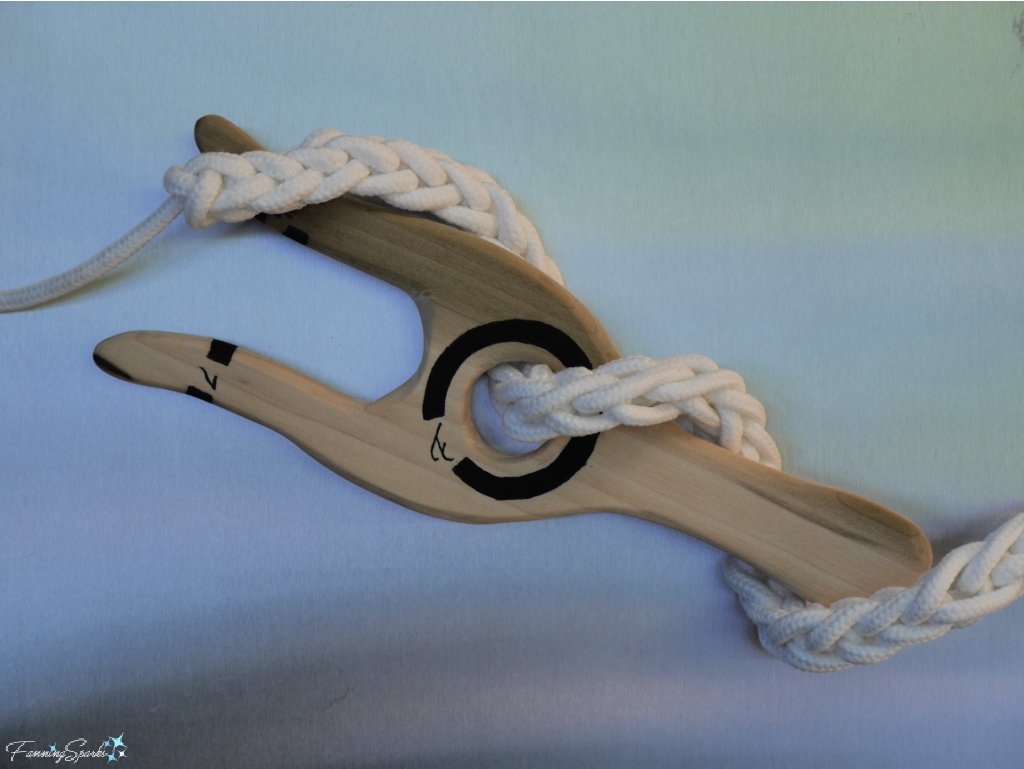
These instructions are for a single turn, right handed technique. There are several variations on this technique including left-handed, no turning, multiple threads and decorative additions such as beads. In this technique, all the action takes place on the prong on the right side. You continually flip over the lucet—over and back—to alternate which prong is on the right side. I’ll refer to this prong as the working prong.
To help clarify the instructions, I marked the Left Prong (“L” and single band), Right Prong (“R” and double band), Front Face (“F” and single circle) and Back (“B”) on this lucet.
 I used rope for this demonstration but you can use string, yarn, twine or other fiber strands. Results will vary from individual to individual and from one material to another but 1 foot of ¼” rope gave me 1 inch of luceted cord. Plan for approximately 1’ to 1”.
Tip: To determine how much cording material you’ll need for an actual project, make a test sample first. I found it easiest to mark my rope with a few stitches of brightly colored thread at the 6”, 18” and 30” points. I reserved the first 6” for the tail and corded past the 30” mark. By measuring my finished cord between the 6” thread marker and the 30” thread marker and dividing by 2, I was able to determine I used 12” of rope for every 1” of finished cord.
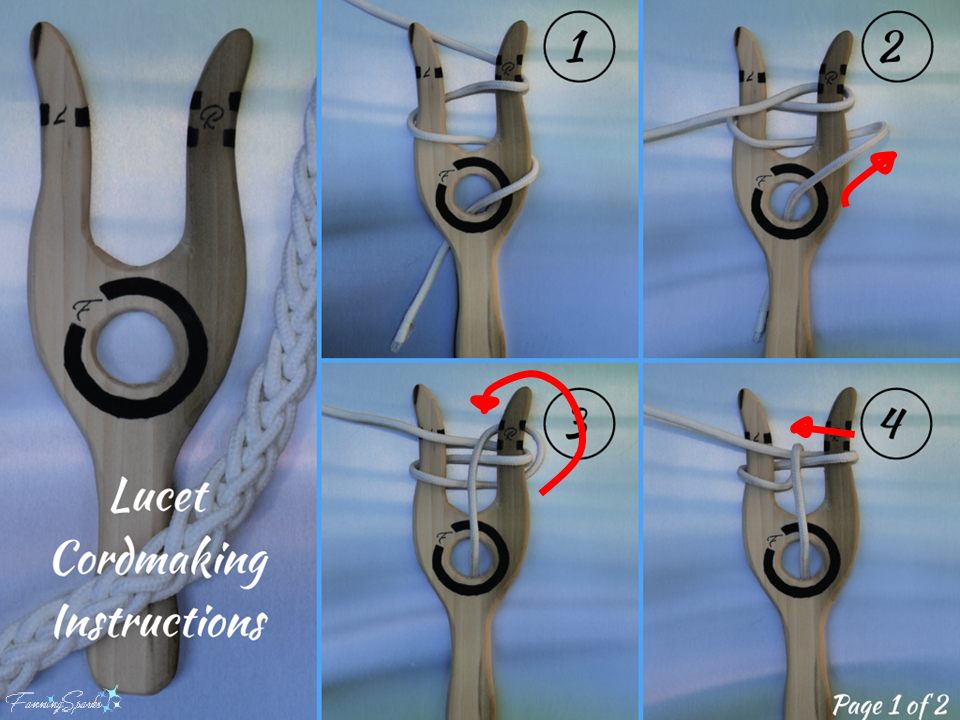
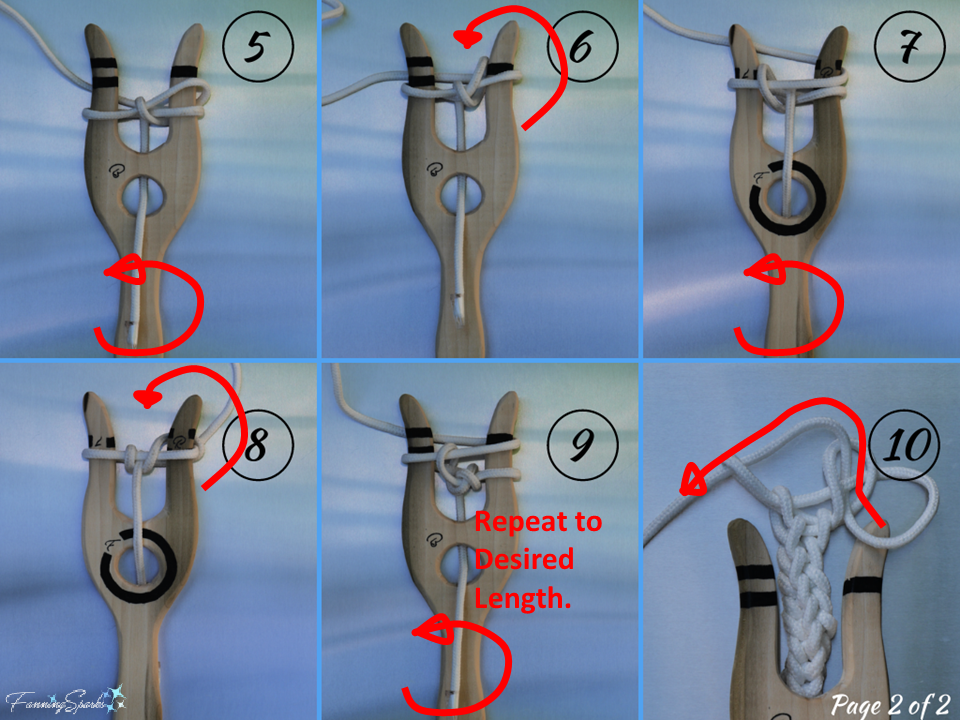
Please reference the photo below for these Lucet Cordmaking Instructions.
Step 1. Insert the rope through the hole toward the back leaving a 4-8” tail. Loosely wrap the rope in a figure eight around the prongs as shown in Figure #1. Hold the lucet and the tail in your left hand.
Step 2. Use the finger and thumb from your right hand to “pinch” the bottom loop on the working prong (ie right prong) and pull out slightly. See arrow in Figure #2.
Step 3. Slip the rope up and over the working prong, moving rope loop from the front to the back, as shown by the arrow in Figure #3.
Step 4. Gently slide the knot towards the center. Keep the working end of rope towards the left.
Step 5. Flip the lucet over by turning towards the left. See arrow in Figure #5. This should result in the rope being wrapped around the working prong above the first loop. Note the working prong is now the left prong positioned on the right side.
Step 6. As we did in Steps 2-4, use finger and thumb from right hand to pinch the bottom loop on the working prong, pull out slightly, slip the rope up and over the working prong, and gently slide the knot towards the center.
Steps 7-9. This is where the technique becomes repetitive. Flip, slip up and over. Flip, slip up and over. Flip, slip up and over. Adjust and fine-tune as you go to maintain a consistent tension. Keep the completed cord centered and flowing through the hole smoothly. Flip, slip up and over. Flip, slip up and over.
Step 10. When you reach the desired length, gently slip the loops off the lucet prongs and pull the end of the rope through the loops. Tighten.
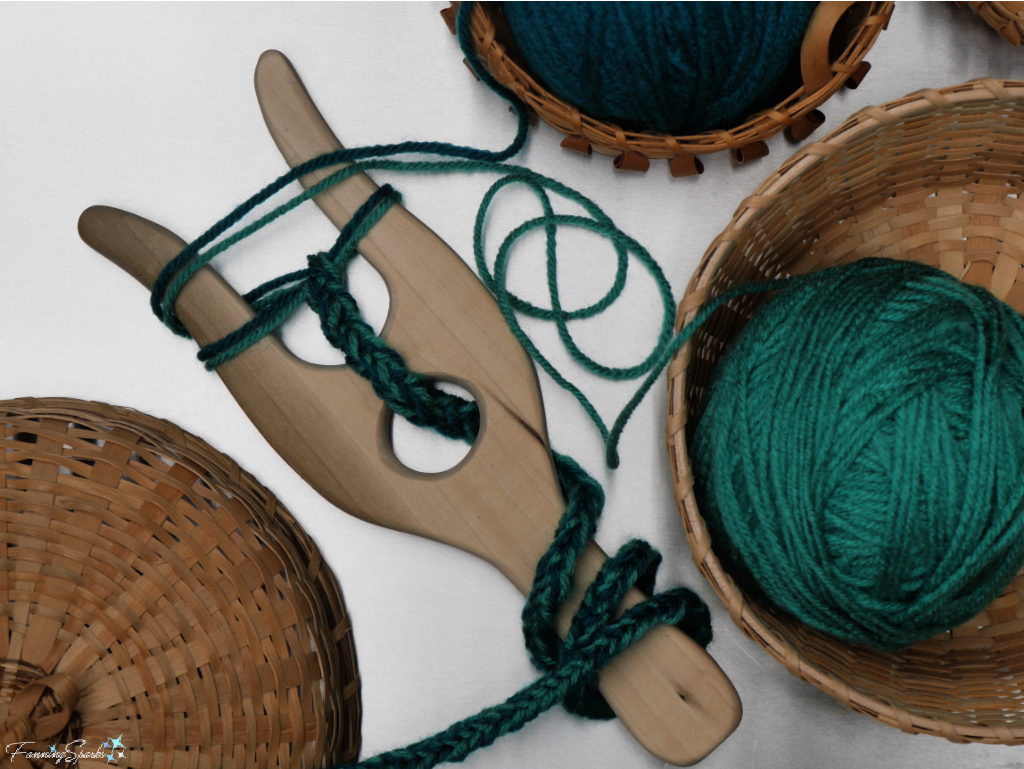
 Once you get the hang of it, cordmaking goes surprisingly fast. I’ve been experimenting with different materials and tweaking my technique. Using a double strand of yarn, in two different colors, makes an interesting cord. And, of course, there’s the follow-on question of how to use all this lovely cord. But that’s a topic for another day!
More Info
You can download the lucet template here: DIY Lucet – Complimentary Download
Stitch Diva Studios features uncommon knit and crochet designs as well as lucet tutorials.
Stephen Willette is a maker of heirloom fiber art tools including lucets. He also offers video tutorials on how to use them.
Please pin this image to share and save for future reference.
Today’s Takeaways
1. Cordmaking with a lucet is an unusual, old world handicraft.
2. Consider making your own wooden lucet.
3. The simple, repetitive movements of lucet cordmaking can be very relaxing.


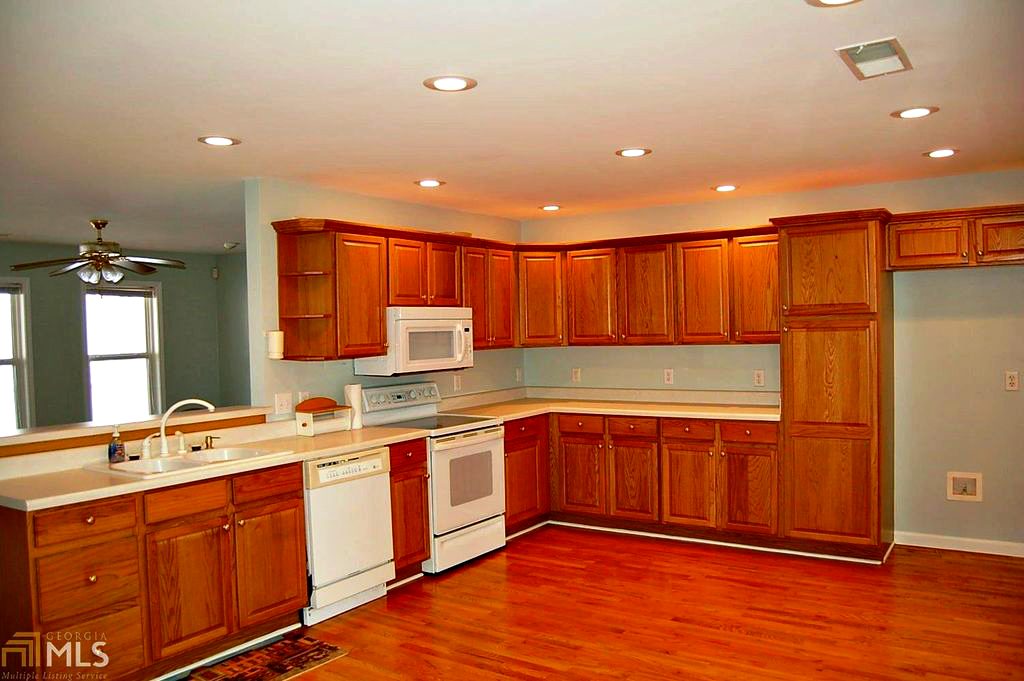 The kitchen underwent a significant transformation when we first moved in. We maintained the original layout but made a number of improvements. We kept the original cabinets, extended them to the ceiling, painted them white and replaced the hardware. We reconfigured the countertops and had them replaced with granite. We had new tile backsplash installed. We replaced the appliances, the sink and the faucet. Here’s how the kitchen looked after the renovations.
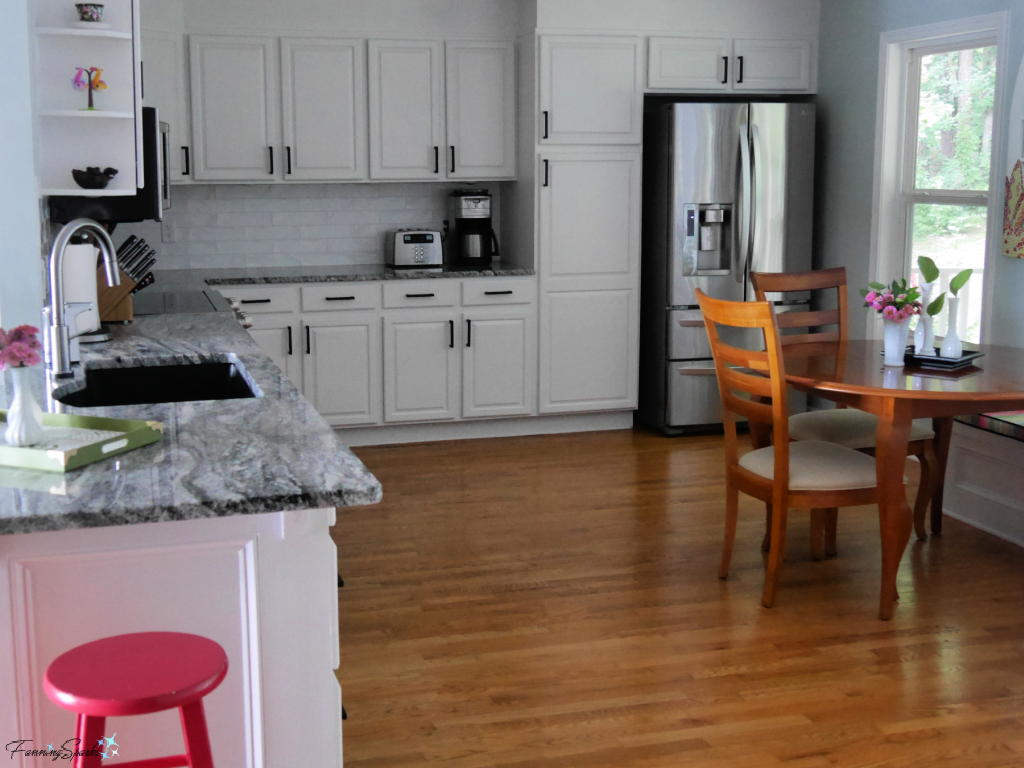 We also had a new pony wall and banquette constructed to separate the front entry and create an eat-in area. I shared the details of this change in the post
 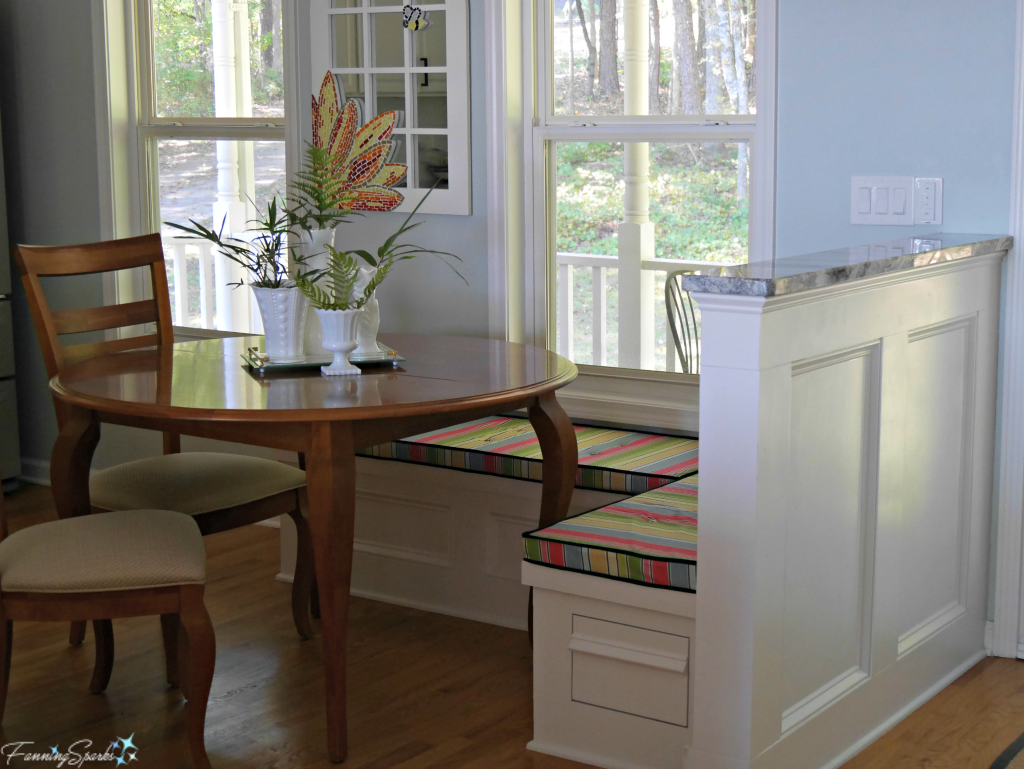 One thing we didn’t change was the lighting. We simply ran out of steam and decided to delay new light fixtures. A series of recessed can lights were the only source of lighting in this area. They provided acceptable task lighting but did nothing for ambient, accent or decorative lighting.
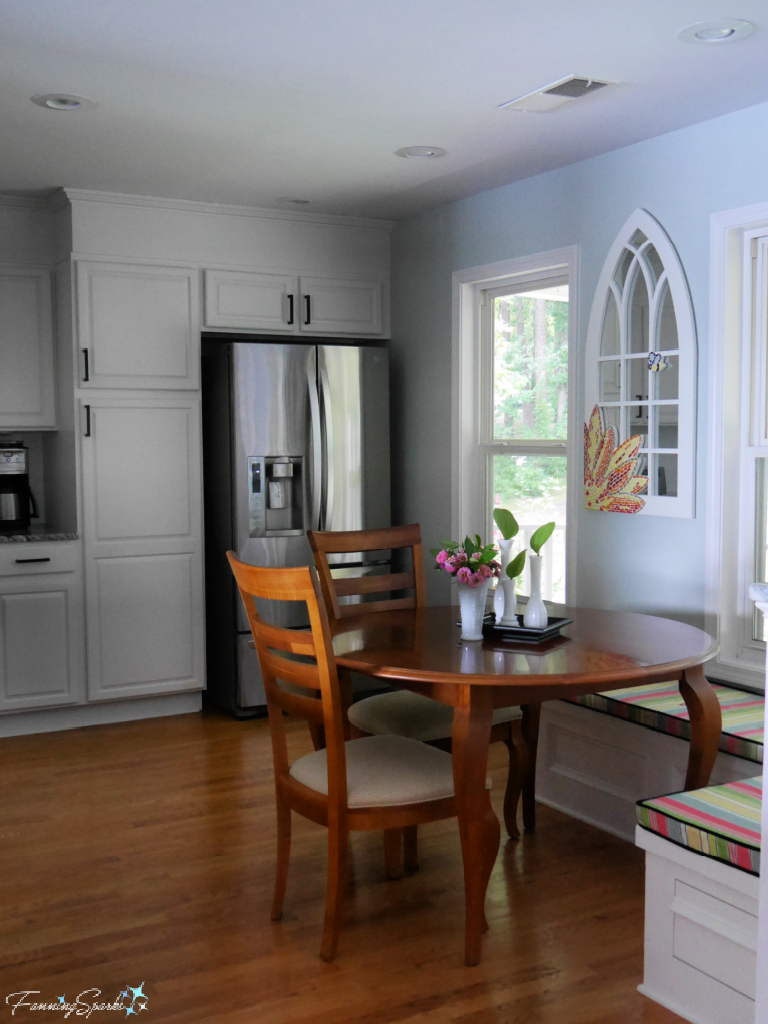
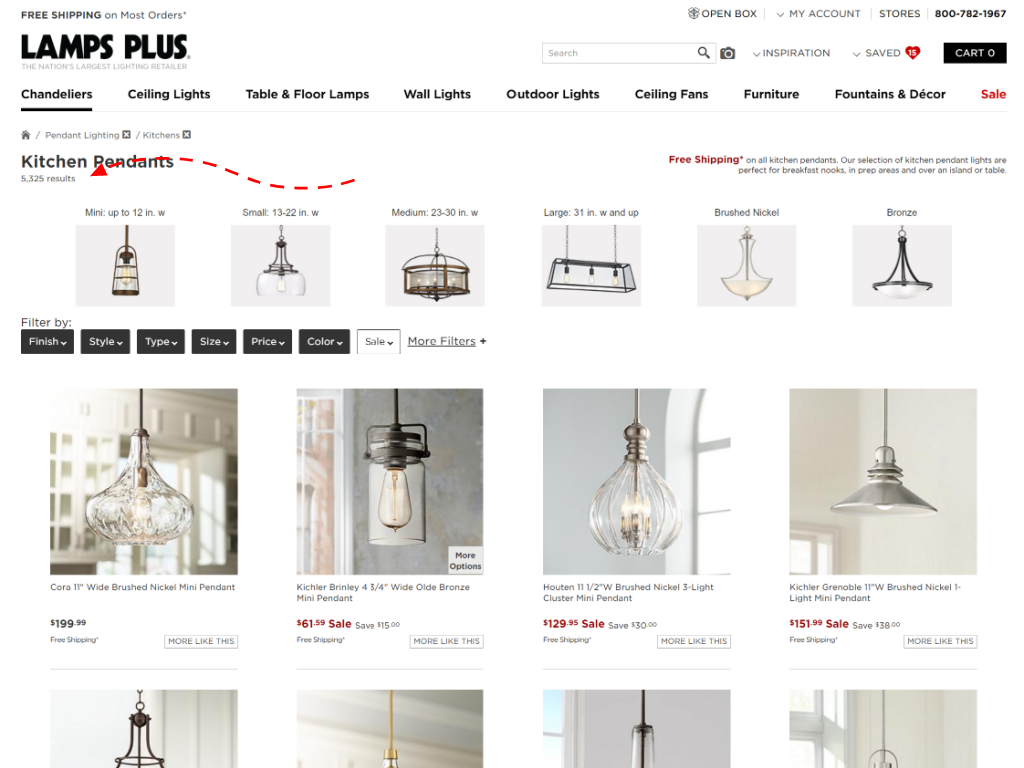 Selecting light fixtures online can be challenging. The first step is to narrow down the choices. The above screenshot shows 5,325 results for kitchen pendants… over 5,000 options! The search filters allowed me to narrow down the options by Finish, Style, Size, Price, and so on. The Save Option allowed me to “heart” the fixtures I liked and add them to a wishlist. These are, of course, fairly standard features for an online shopping site. But the shopping aid that is noteworthy and made my search much more manageable is the View In Your Room feature.
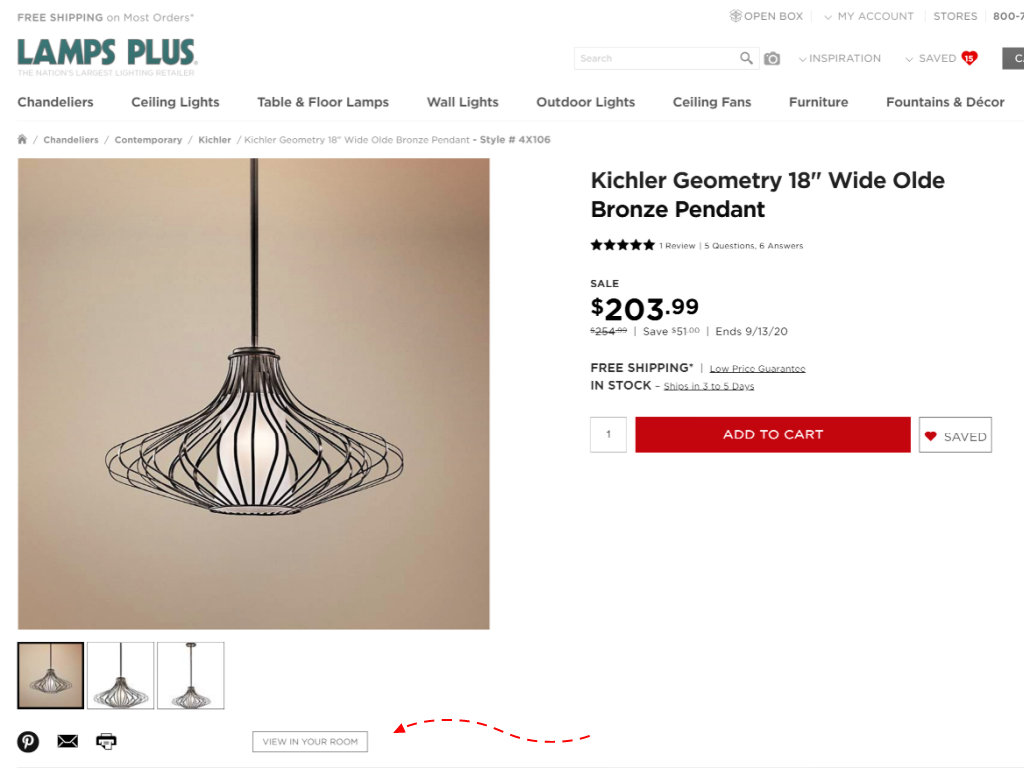
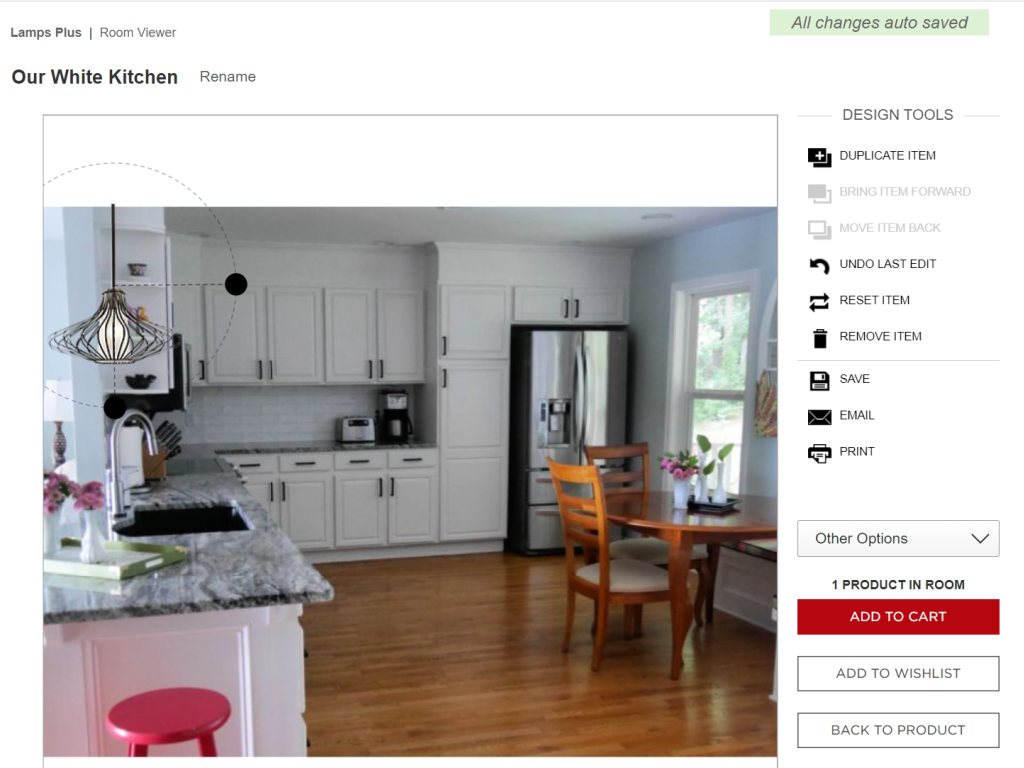 One thing to keep in mind when using the LampsPlus Room Viewer feature is scale. You can easily resize the fixture to make it look good in the Room Viewer photo but, obviously, the actual fixture is a specific size. It’s difficult to determine how big or small the light fixture will be in the actual space. That’s when I switched my selection process from online to hands-on.
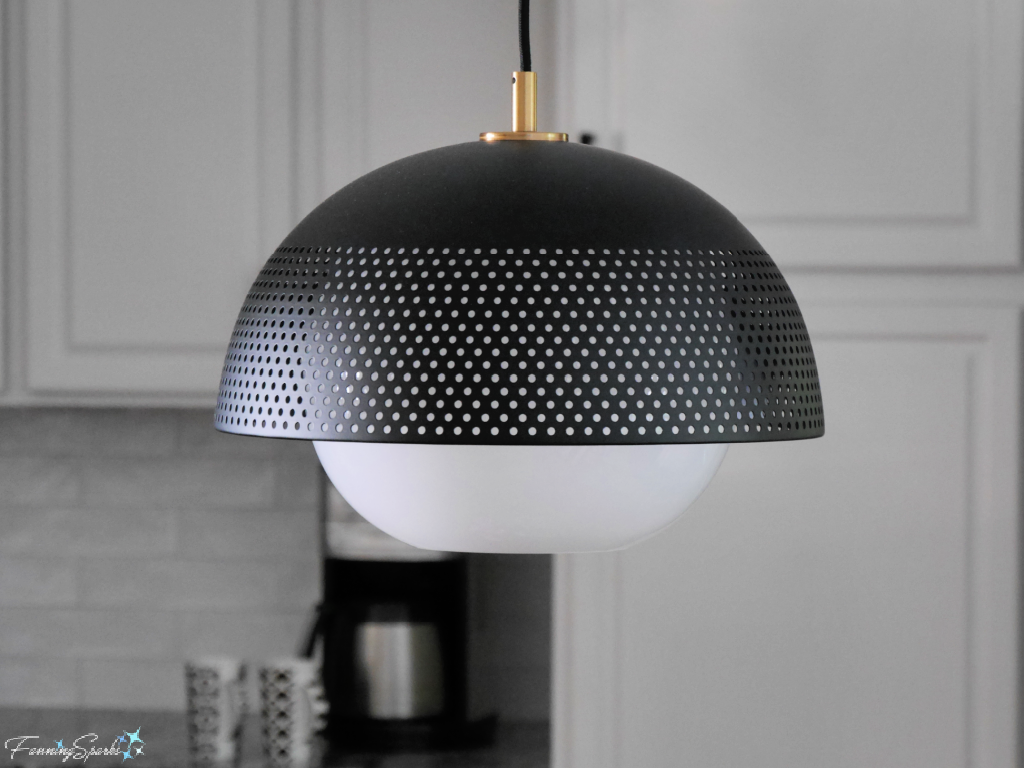
 In my opinion, it adds great visual interest without taking over the space. The generously-sized, open black metal frame creates a light, sculptural effect. This pendant light is the Kichler Geometry 18” wide in old bronze.
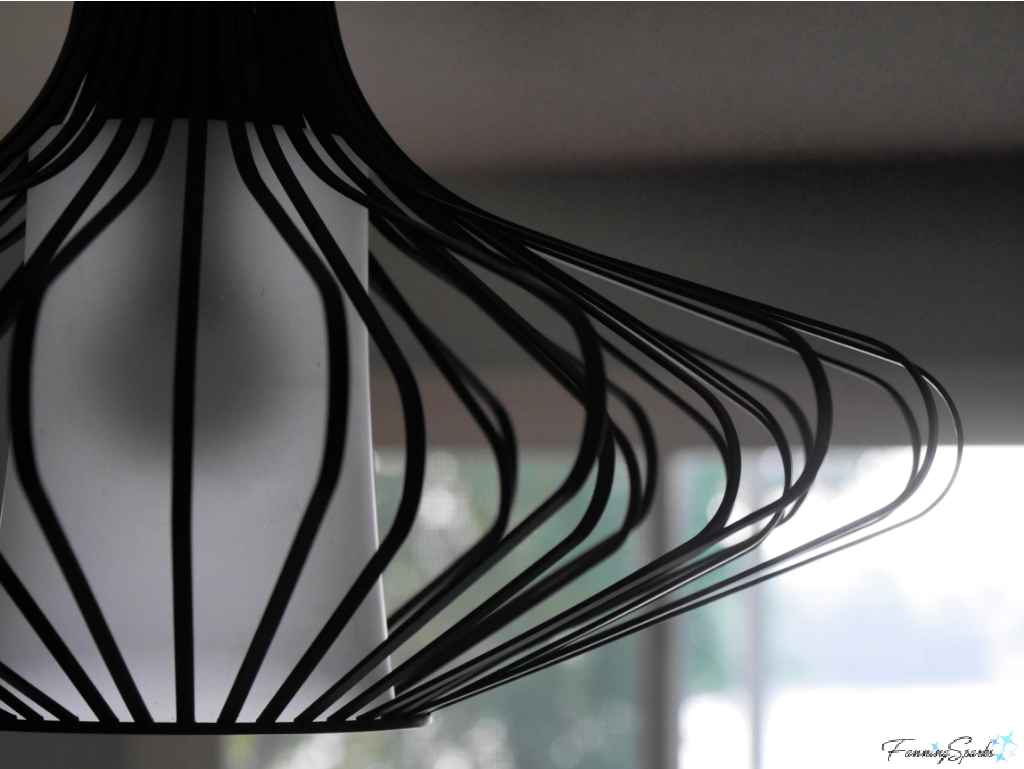 We kept things cohesive by choosing light fixtures in a combination of black metal and white glass but mixed it up with different forms, sizes and details. Here’s the new pendant light over the dining table.
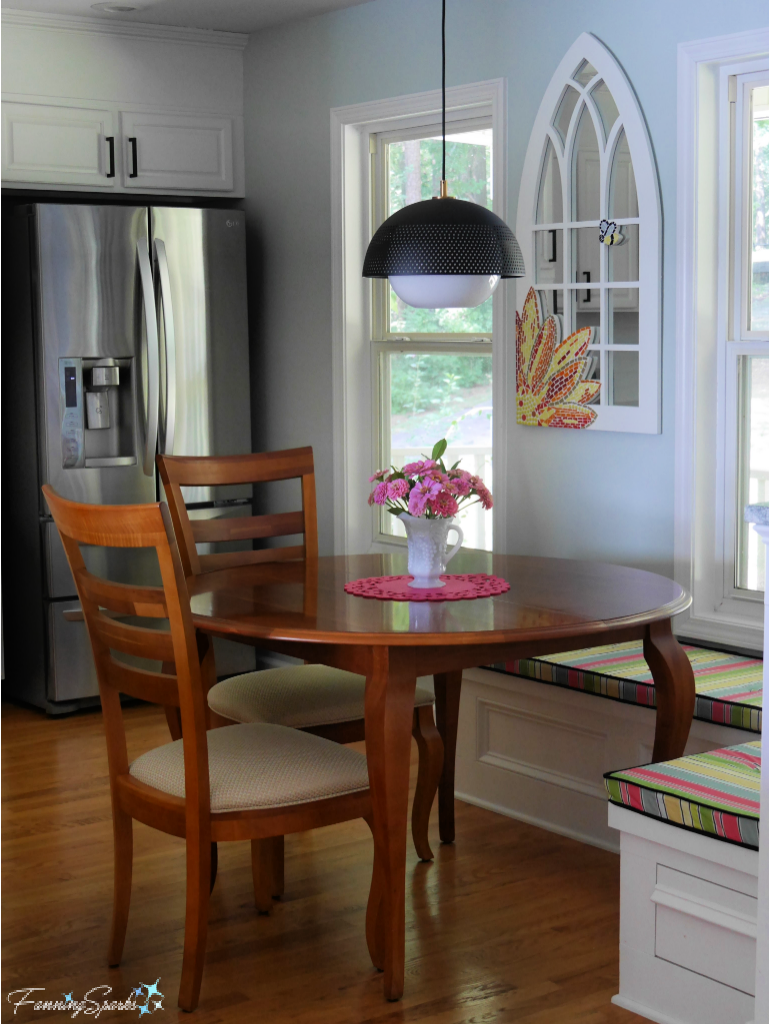
 Having selected a new close-to-ceiling fixture for the front entryway, we decided to install the same fixture in the other entryway. This photo shows that fixture along with the pendant over the counter. The close-to-ceiling fixture is the Possini Euro Deco 16” wide in bronze.
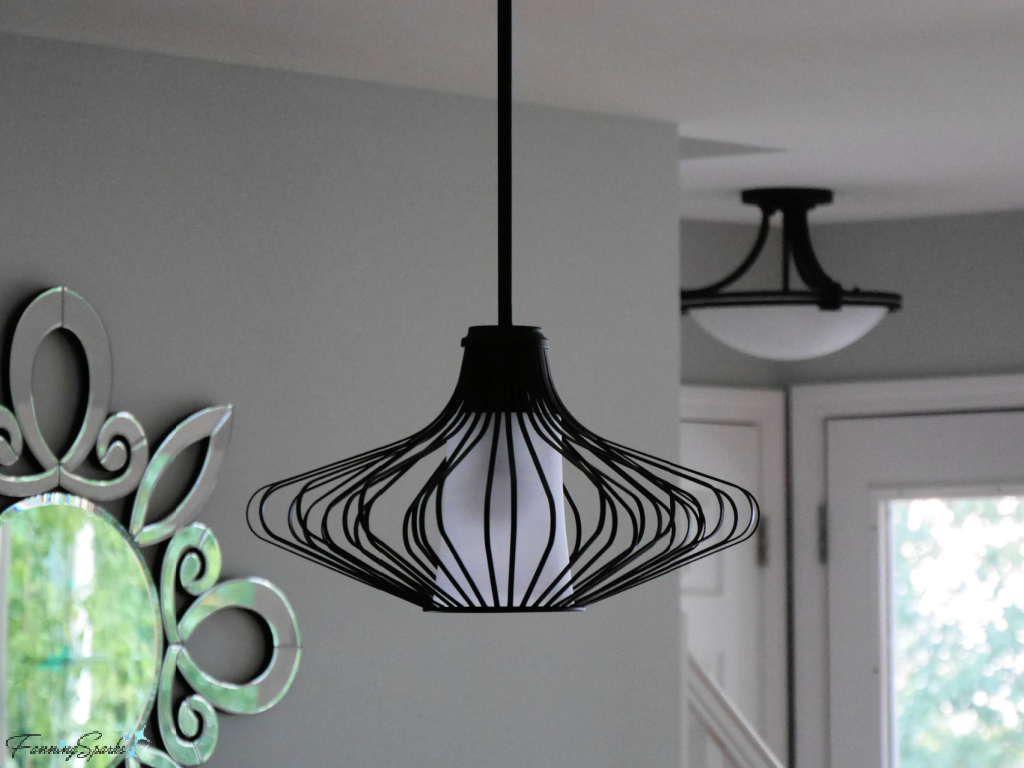 Of course, lights have to be turned on to get the full effect. We had dimmer switches installed on the pendant lights which allows them to serve as task lighting when set to high and ambient lighting when set to low. Here are the over counter and dining table pendant lights.
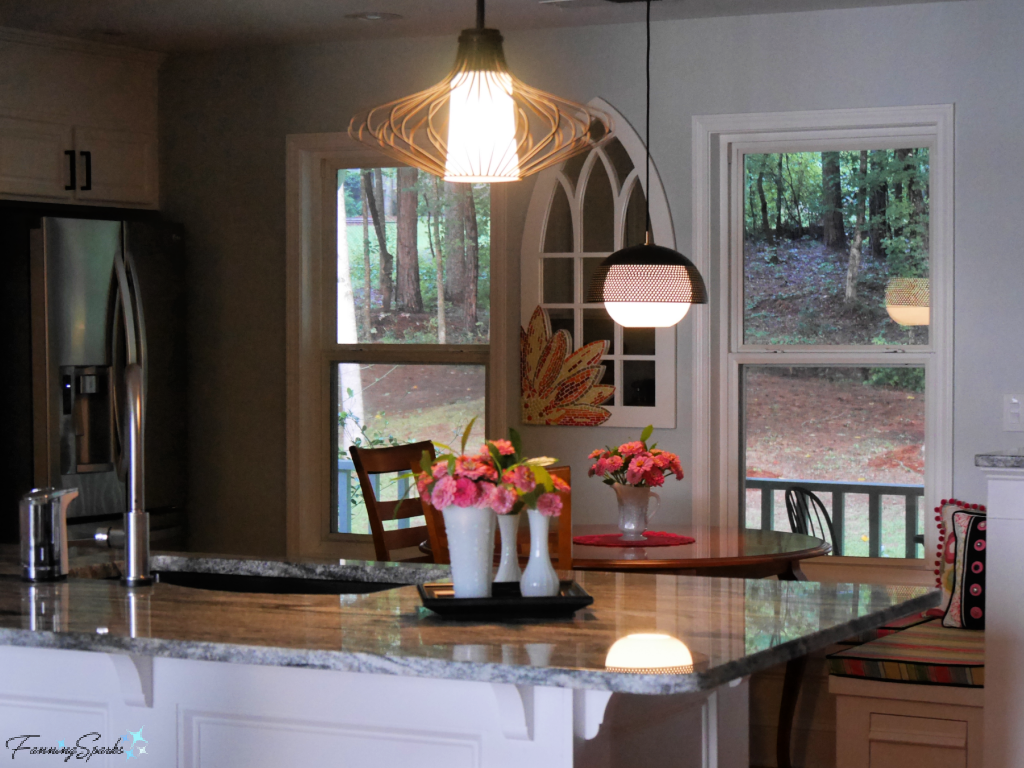 In this next photo, the over counter pendant light fixture and the entryway close-to-ceiling fixture are shown.
 It’s always fun to see a side-by-side comparison–here’s the counter area before and after the new pendant light fixture. I think Randall Whitehead was right…decorative lighting does indeed add “visual sparkle to a space.”
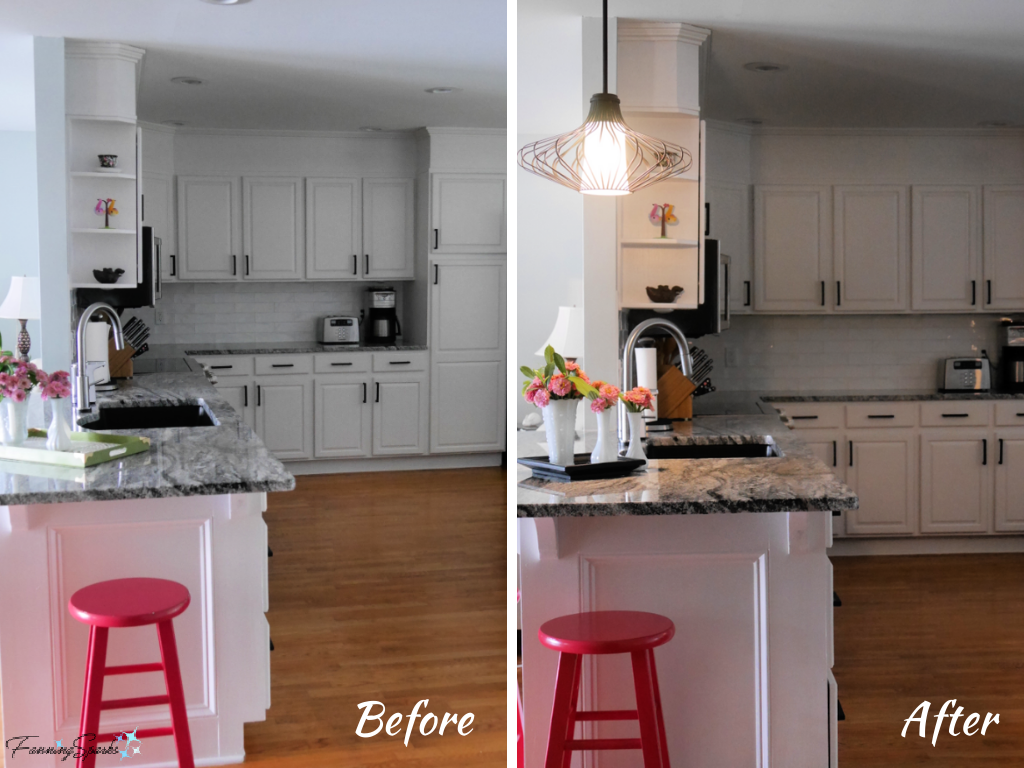

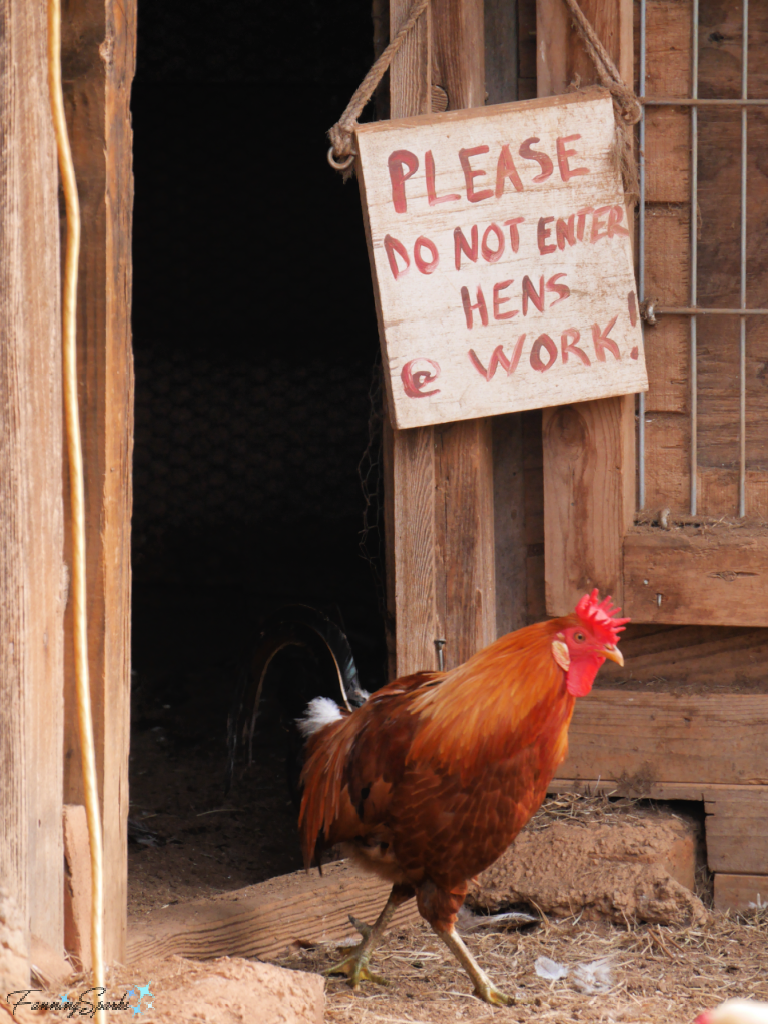
 Whether you’re a diehard chicken fan or simply curious (like me), the barnyard at Hundred Acre Farm in Madison, Georgia is a great place to visit. This quaint farm setting is home to about 200 chickens plus ducks, turkeys, peacocks, horses, goats, dogs, a donkey and probably others I didn’t even see. The chickens are raised “free range” with the ability to roam from the chicken roost to the green pastures. In fact, you’ll want to drive slowly along the farm’s main driveway to avoid chickens crossing the road to get to the other side (Sorry… I just couldn’t resist referencing that age-old riddle!).
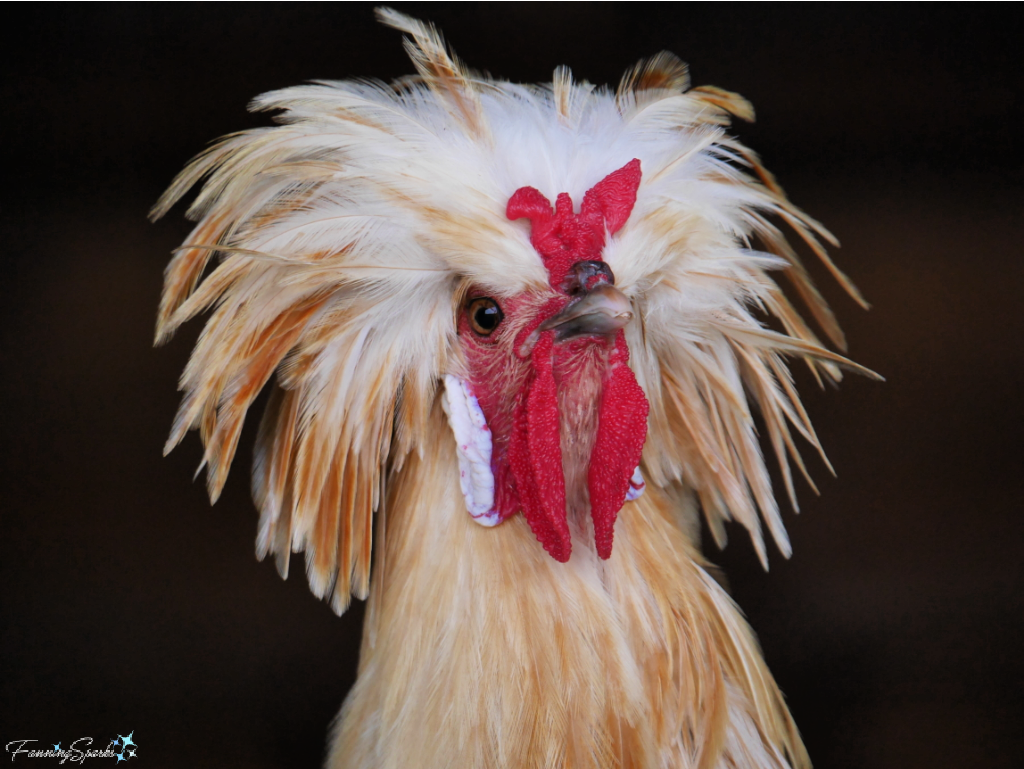
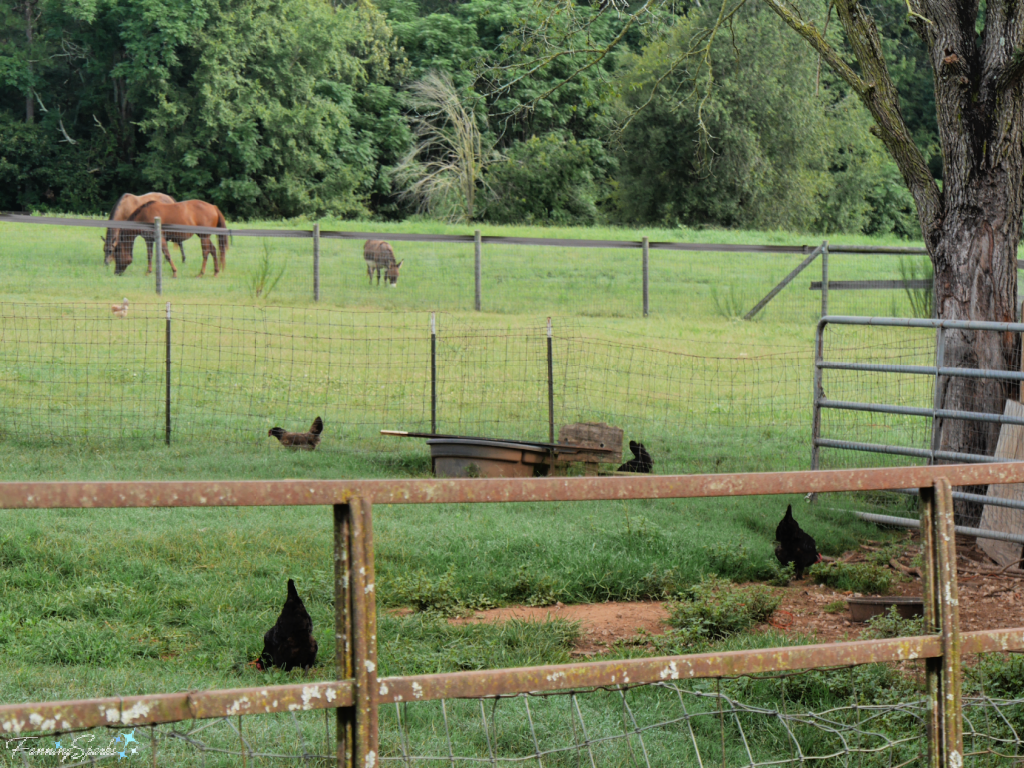 One of the most interesting aspects of the flock at Hundred Acre Farm is the variety of chickens. I’m no chicken expert but according to the folks at the Farmhouse Inn (Thank you Kristen and Crystal!) there are actually about 8 different breeds. I’d like to share some examples in today’s post.
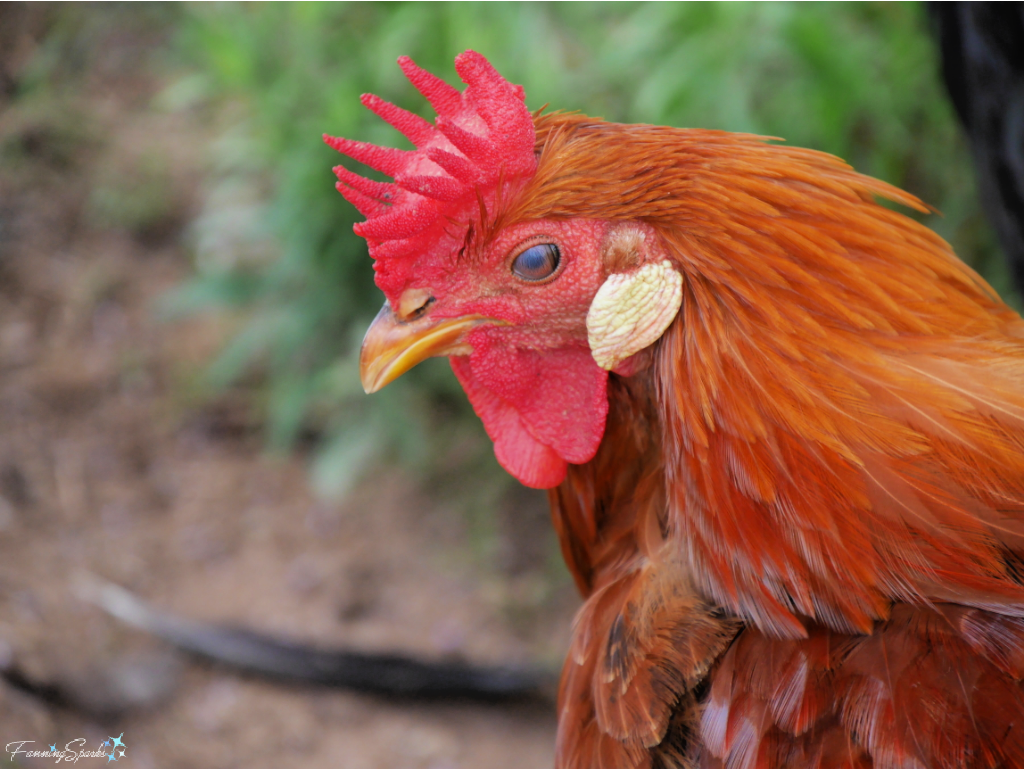 Of course, it takes some effort to look this good! Here’s the rooster preening himself. Preening is a form of grooming that helps release new feathers from their sheaths, remove debris and pests, and distribute oil over the feathers.
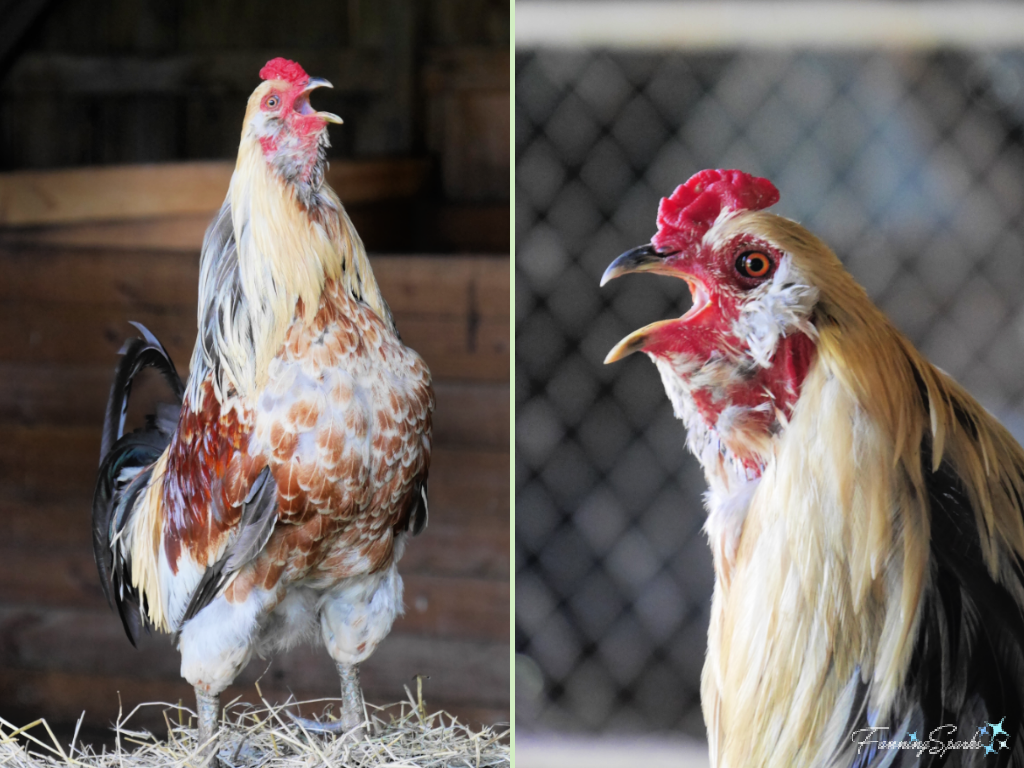
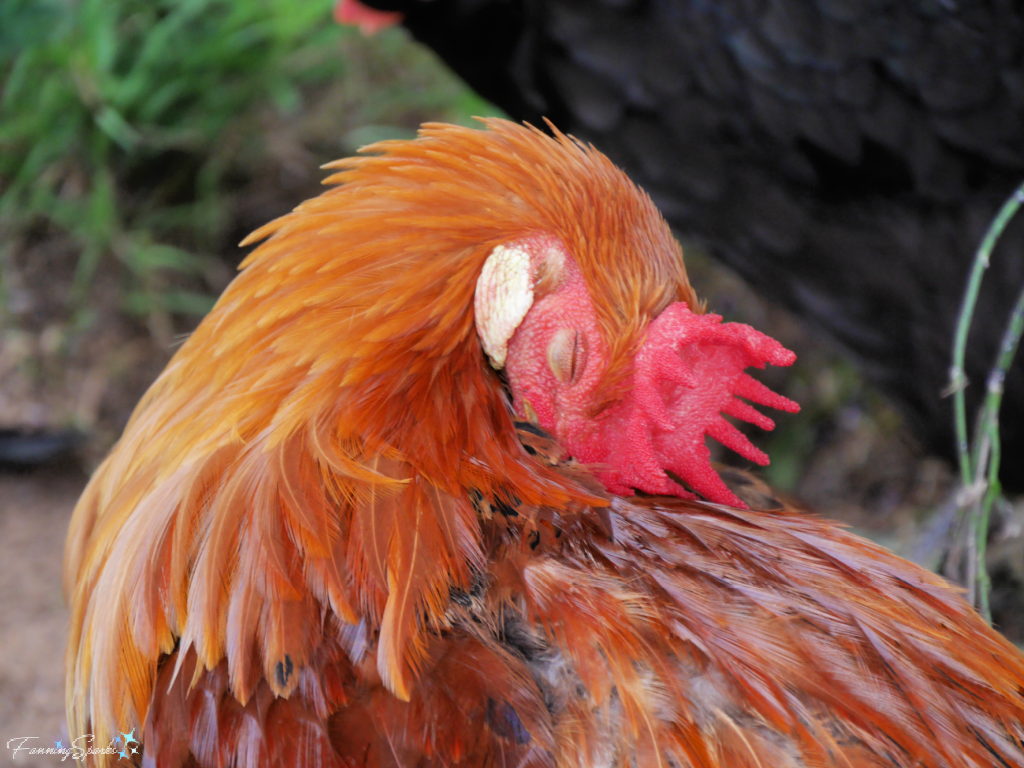 But the Rhode Island Red isn’t the only handsome gentleman in this barnyard. The Brahma chicken, in Light, Dark or Buff colored varieties, is noteworthy for its large size. It is “often described as “The King of Chickens,” says the Backyard Poultry website. Here’s a beautiful Buff Brahma rooster proudly strutting his stuff.
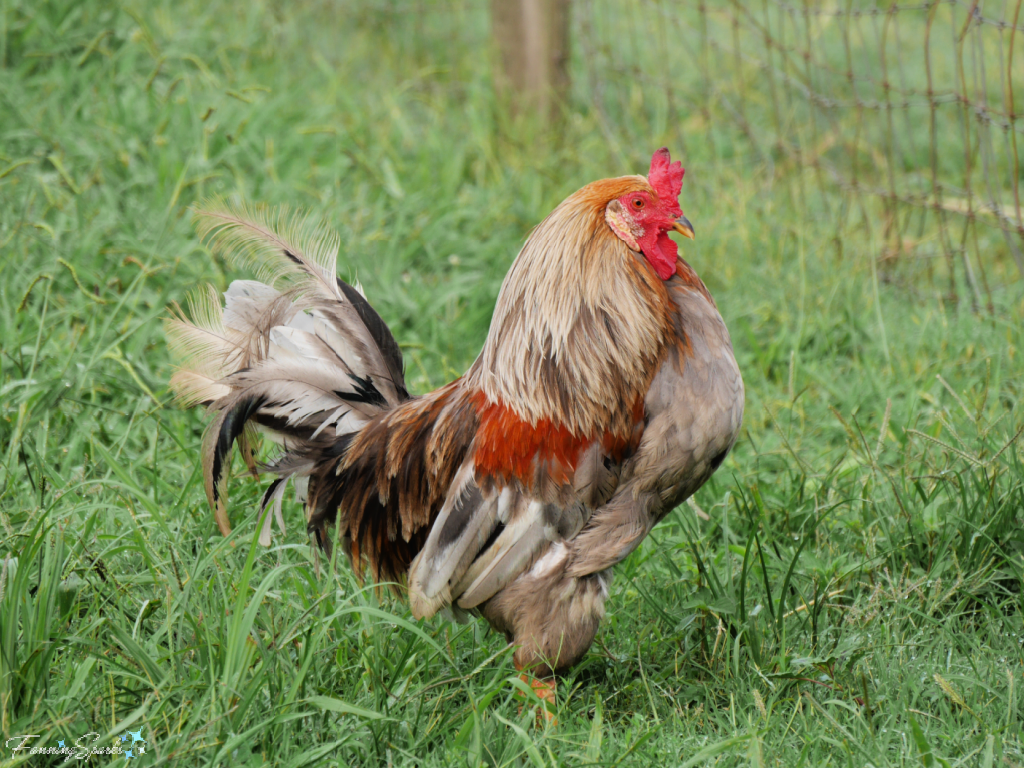 Thanks to the Backyard Poultry website, I’ve learned that roosters serve a few purposes. The most obvious is breeding. “One good reason to have a rooster is that you want chicks! Hens don’t need a rooster in the flock to lay eggs, but they do need a rooster in the flock to lay fertile eggs.” Roosters can also serve to protect the flock, be raised as livestock for meat, or, rather surprisingly, become family pets.

 Other female duties include raising the young. This DeKalb Amberlinks mother hen was watching over her chicks in the barn. Hens, are said to, guard their chicks fiercely.
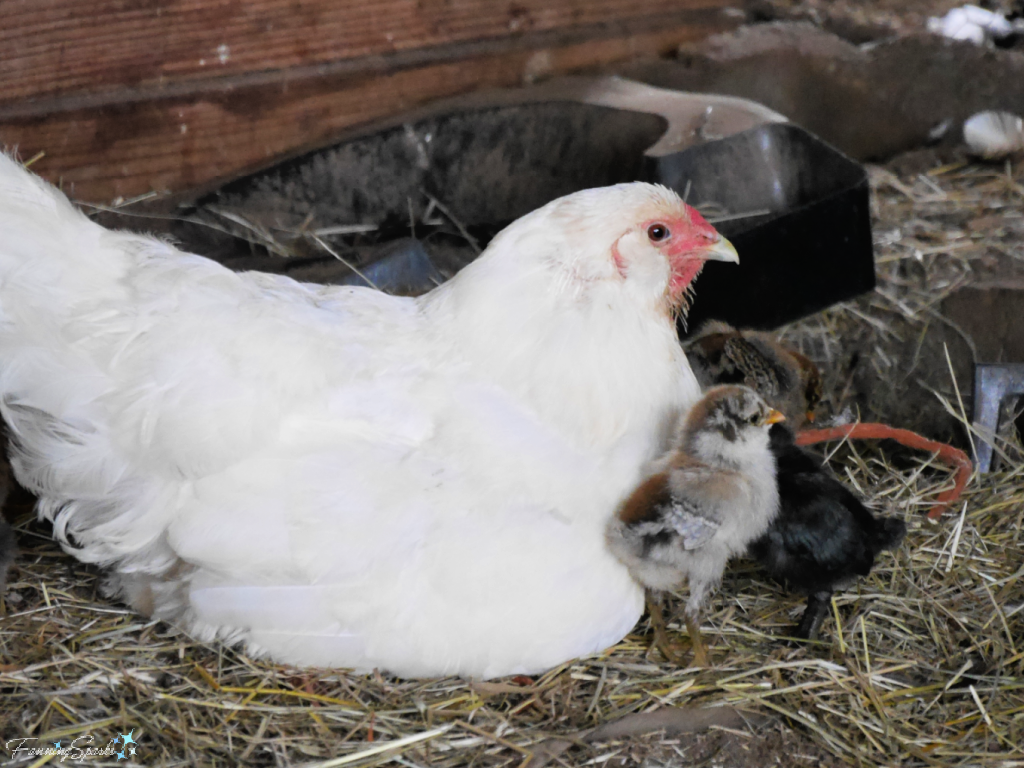 Eventually, Mom led the kids out of the barn…
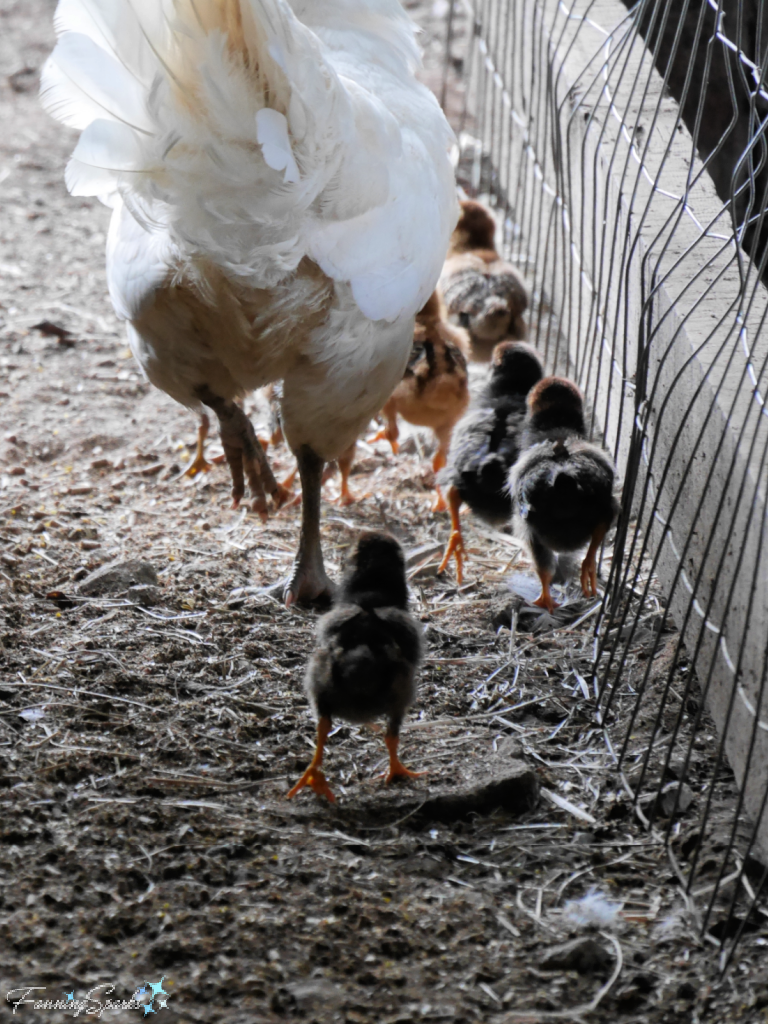 ……and out to the field. Unlike some birds, mother hens don’t feed their chicks directly. Instead they lead them to food and water and call them towards edible items.
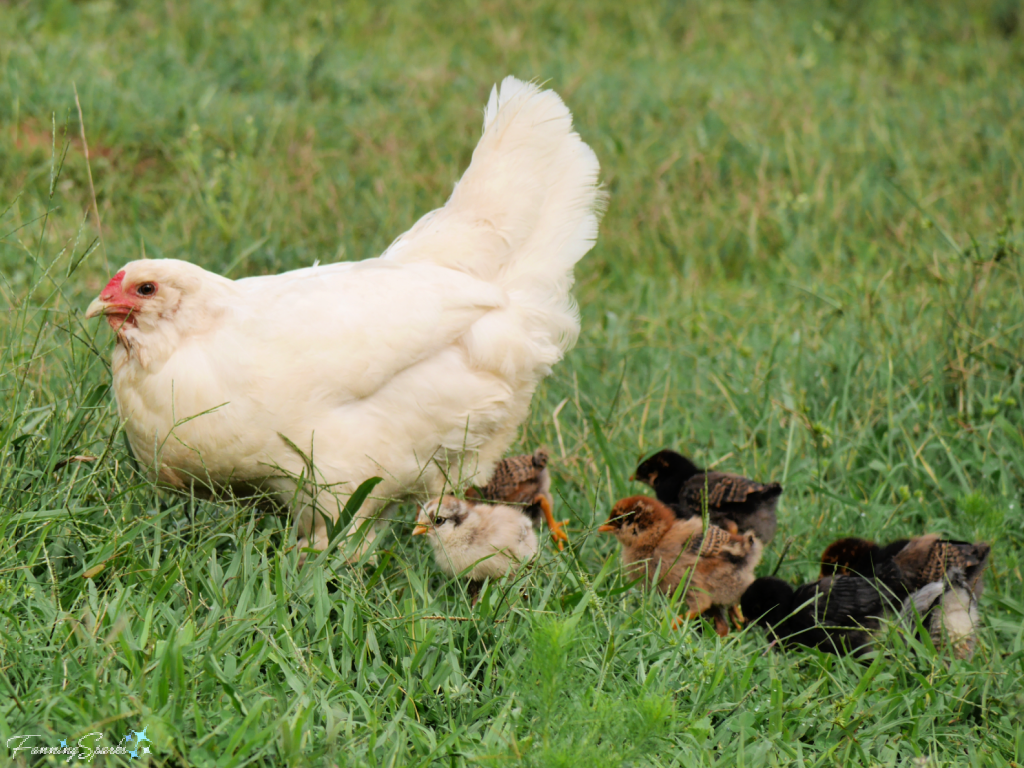 While the chickens are busy earning their keep, there are other barnyard residents who merely have to look good like this handsome peacock…
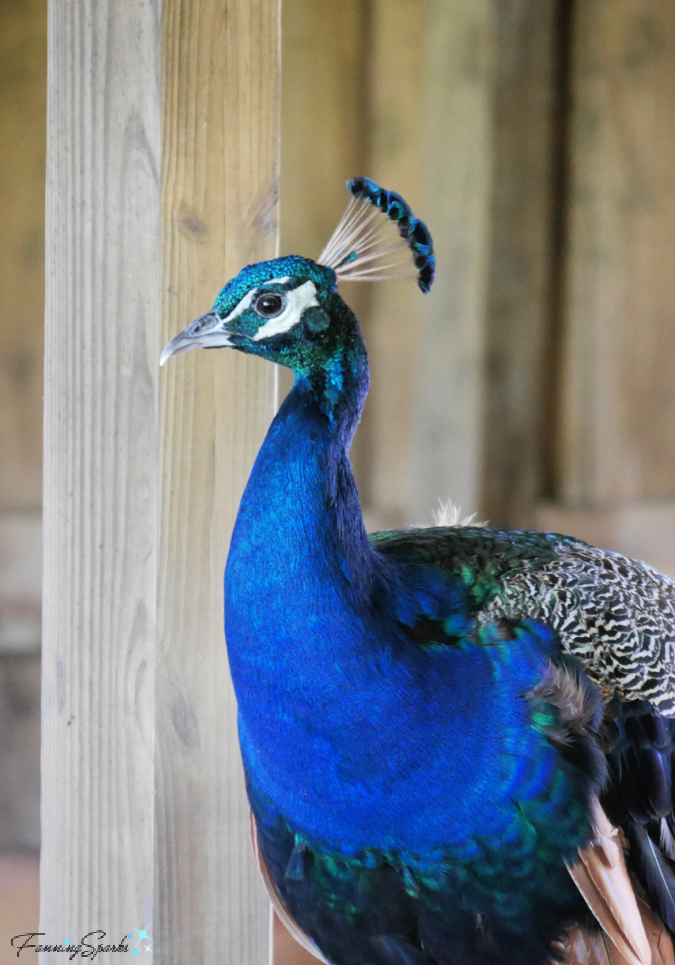
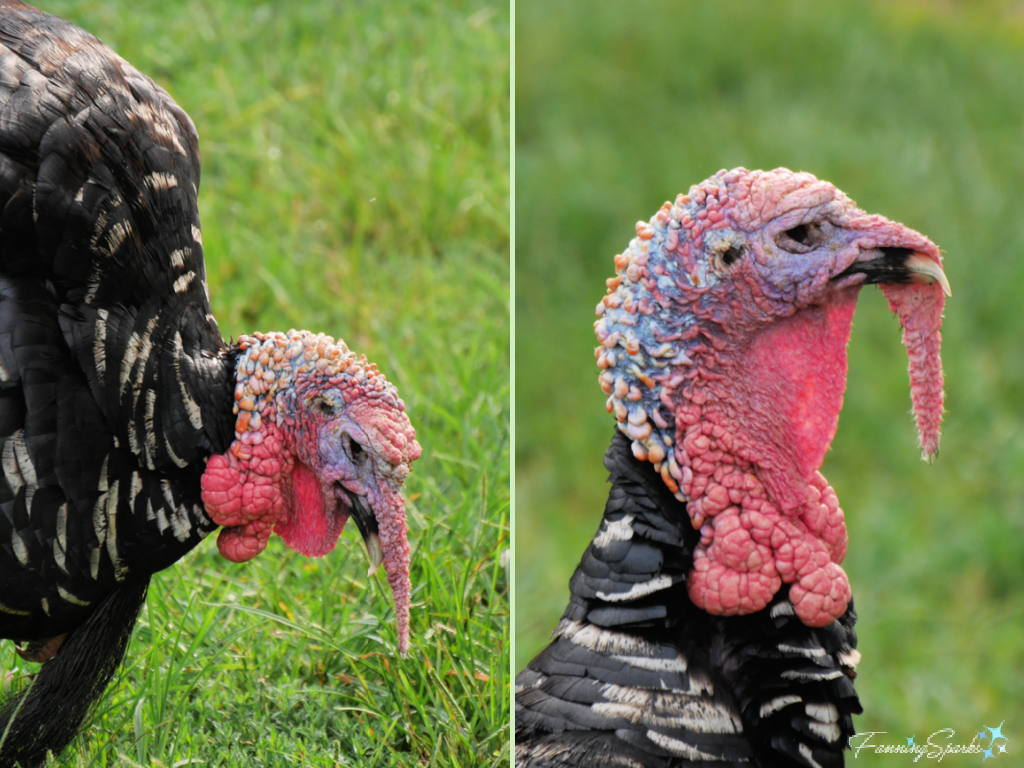 Luckily, a female turkey sees it differently and finds those fleshy outgrowths on the turkey’s head and throat, called caruncles, rather attractive. At least that’s what I read into this description from Wikipedia “In anatomical terms, the snood is an erectile, fleshy protuberance on the forehead of turkeys. Most of the time when the turkey is in a relaxed state, the snood is pale and 2–3 cm long. However, when the male begins strutting (the courtship display), the snood engorges with blood, becomes redder and elongates several centimetres, hanging well below the beak…”
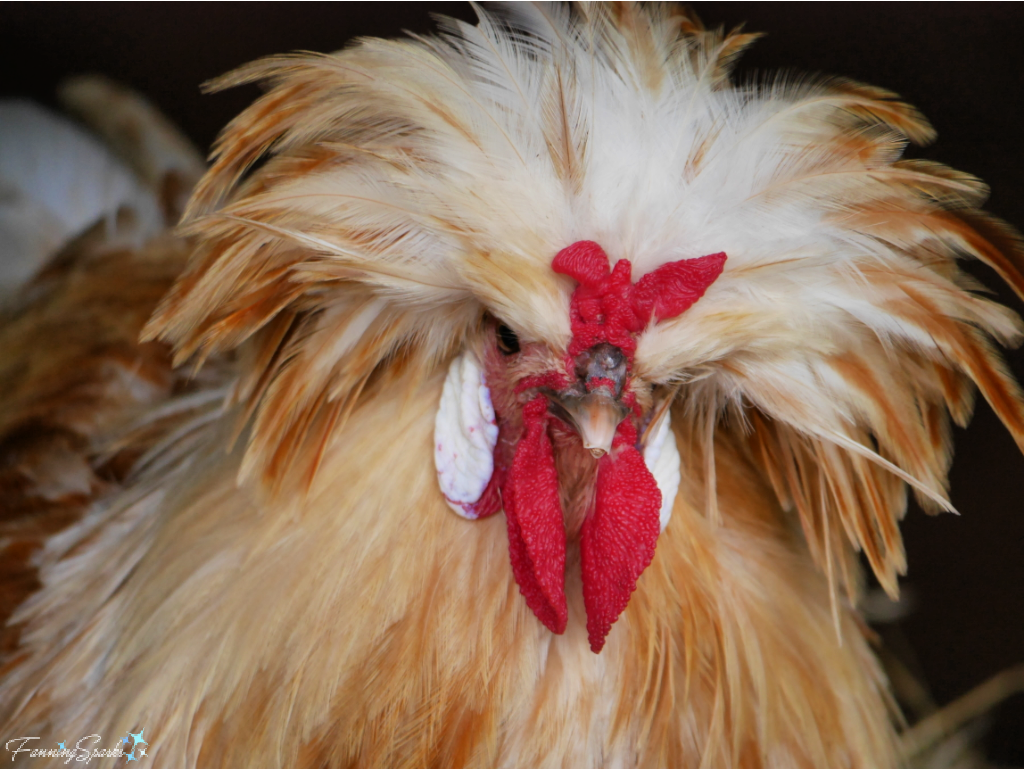

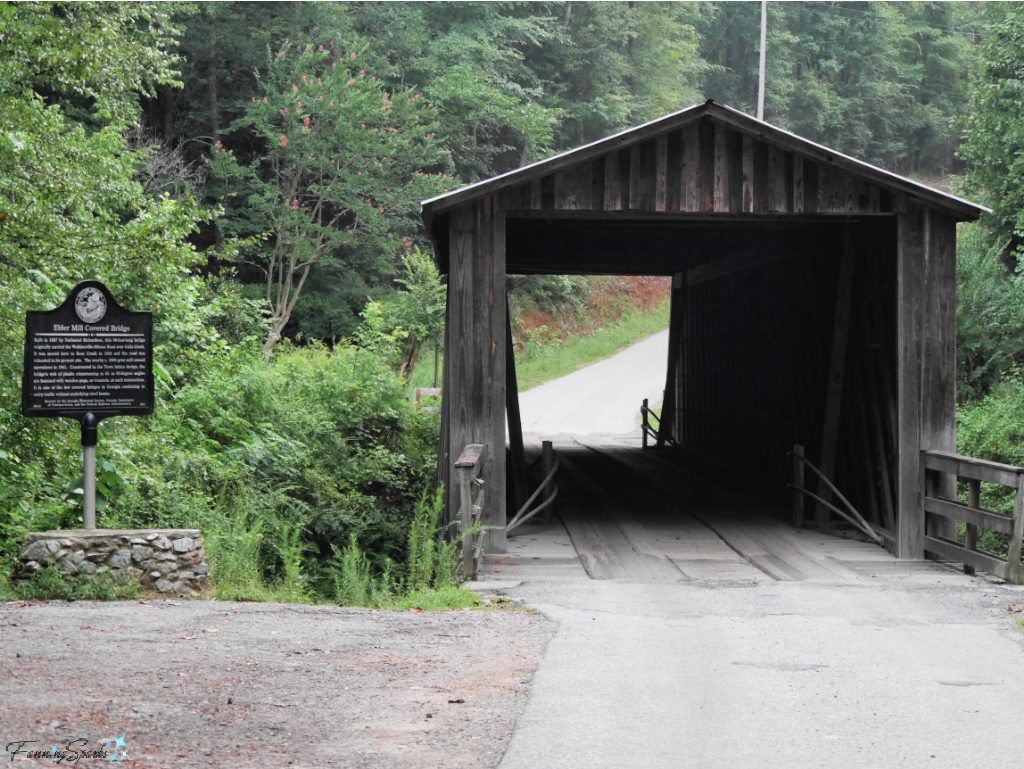
 The Town lattice design, mentioned on the historical marker, comes into view as you walk into the bridge. A network of closely spaced diagonal elements forms the “lattice”.
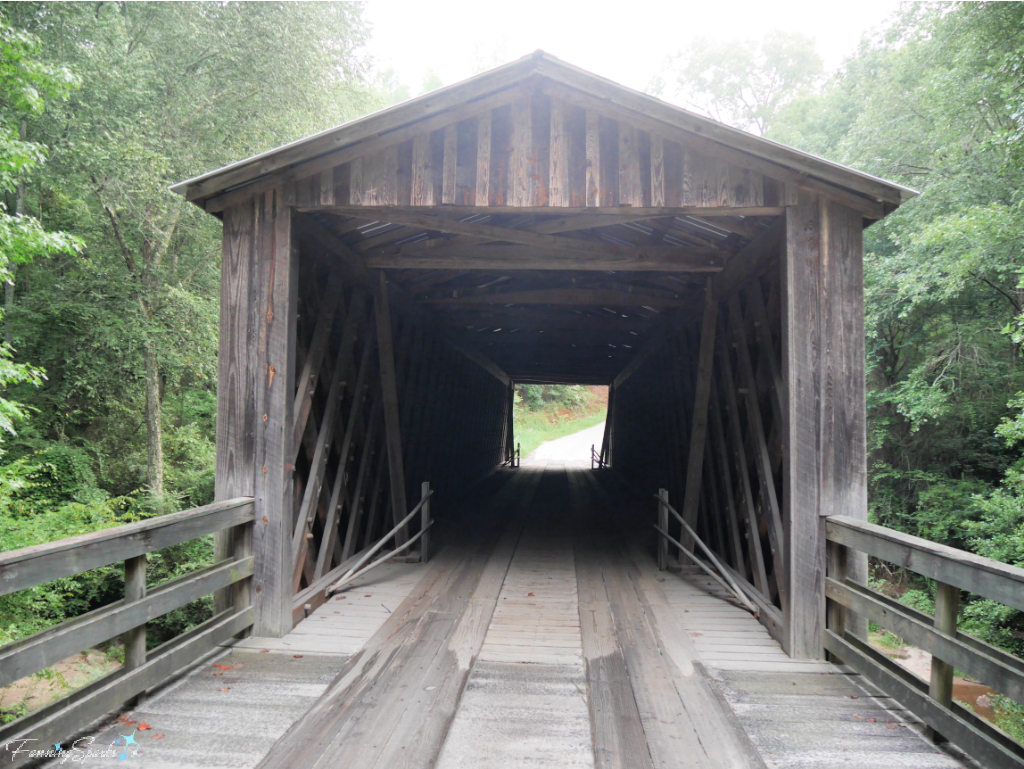 The lattice is clearly visible in the below photo. Interestingly, there is a series of sequential numbers “16, 19, 18, 21, 20, 23, 22, 25, 24…” marked on the diagonal planks. The Georgia Department of Transportation provides this explanation “The wooden members of the bridge were often cut off-site, including boring of the holes for trunnels, and assembled in place. Builders used a numbering system to allow easy onsite assembly of the bridge pieces in a “pre-fab” fashion; the numbers are still visible on lattice members in many bridges.”
 Here’s a closer look at the trunnels, also called wooden pegs or tree-nails, used to connect the lattice planks.
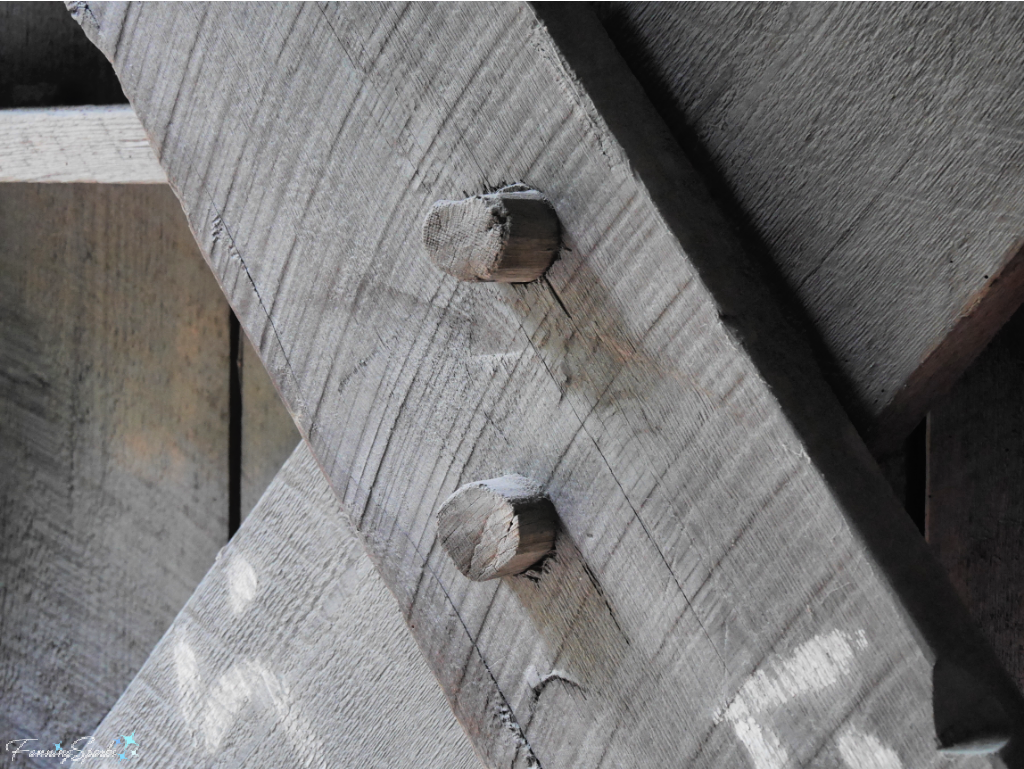 According to Wikipedia, the wooden lattice bridge design was patented in 1820 by architect Ithiel Town. “The design was of great importance because it could be built quickly by relatively unskilled workers from readily available material. The design also avoided the need for the heavy piers needed for stone arches. The design was widely known throughout the world and made Town wealthy.”
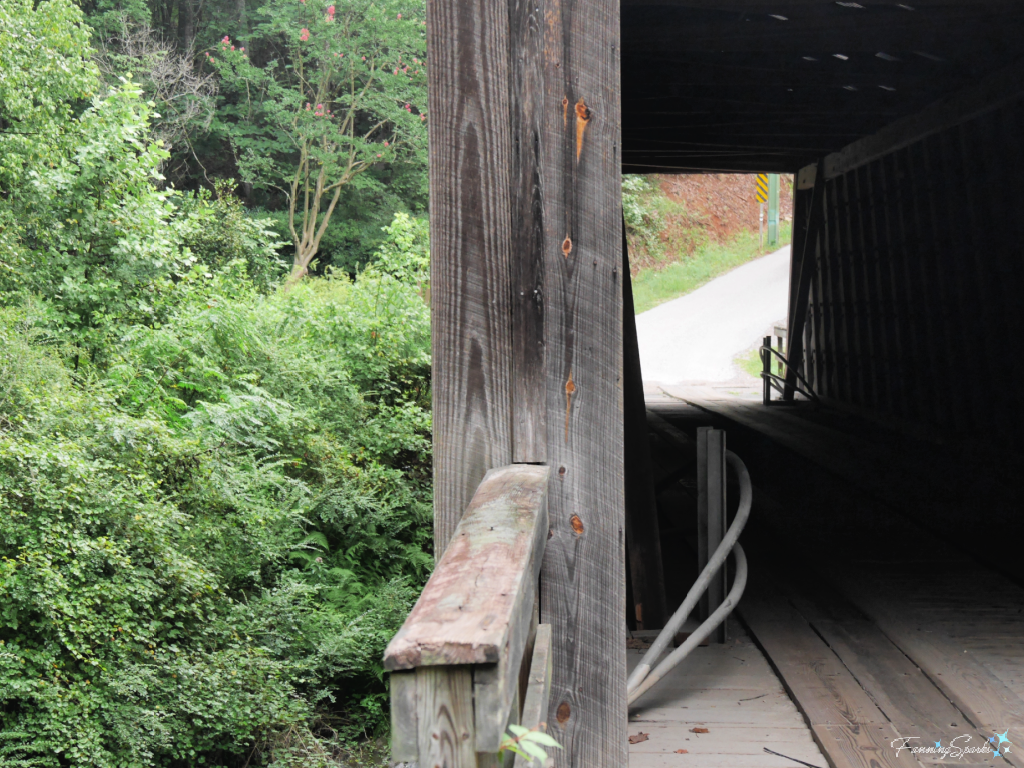
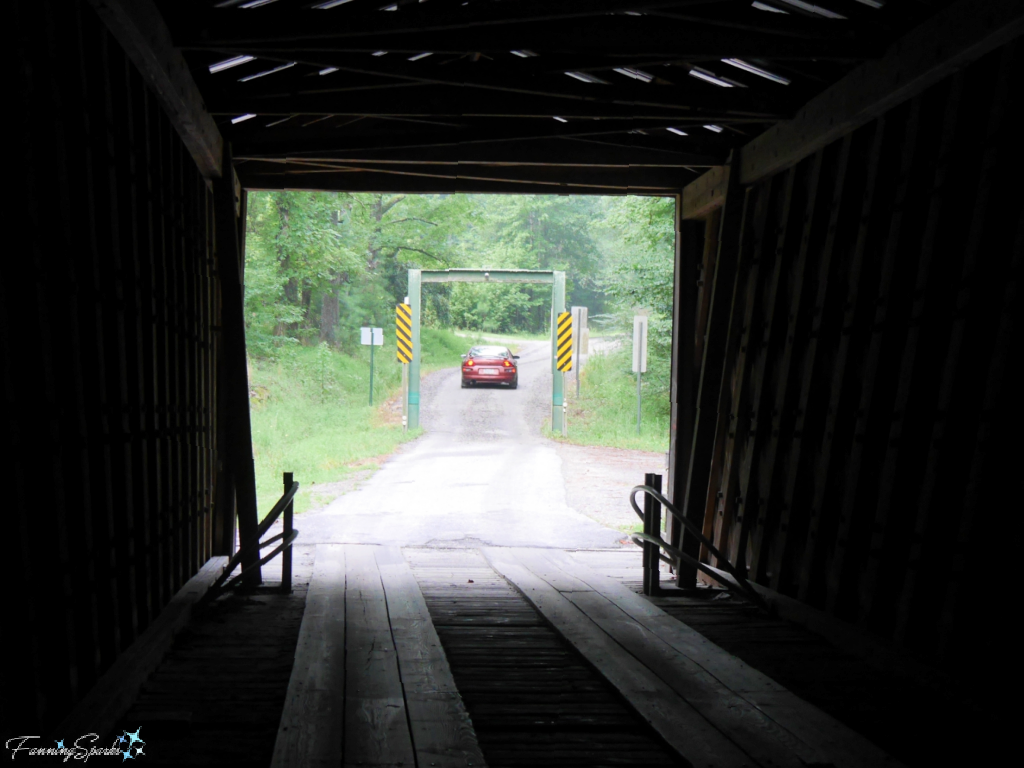 Some covered bridges have openings, or windows, along the sides but the Elder Mill Covered Bridge is completely closed in. Wooden siding, as shown in the below photo, covers the sides of the bridge.
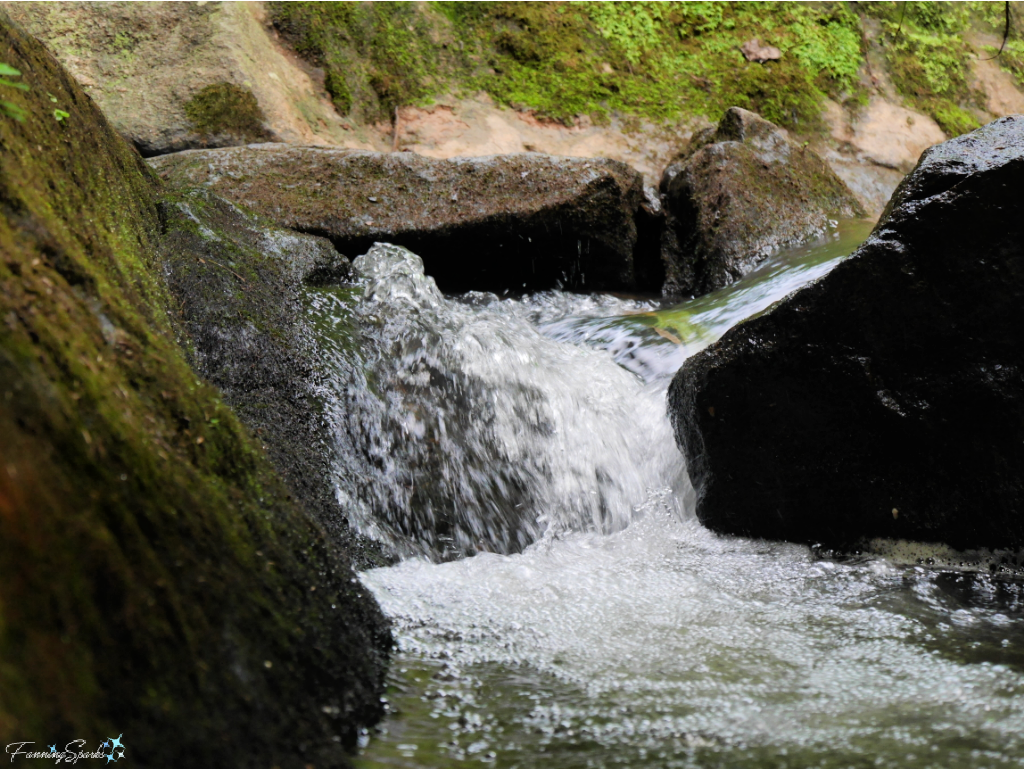
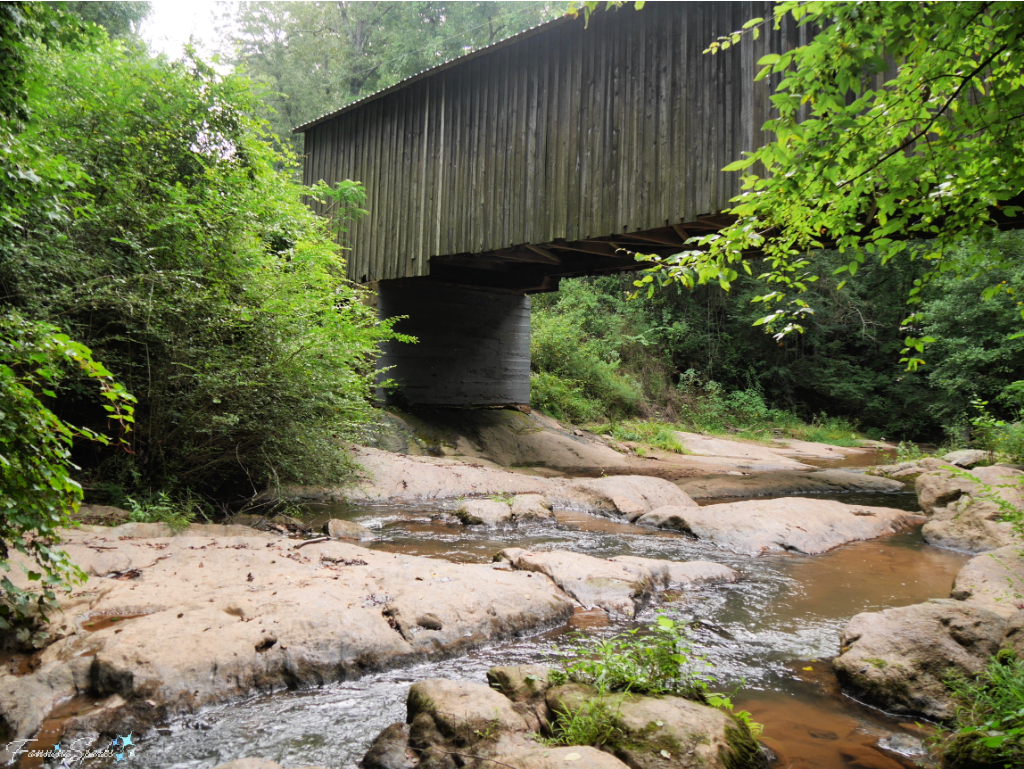 A short path takes the visitor down to Rose Creek. There are large, smooth rocks and a gently flowing, shallow stream. It’s a pleasant area for wading and exploring. The area is somewhat restricted, however, as it is surrounded by private property. No Trespassing and Private Property signs provide clear instruction.
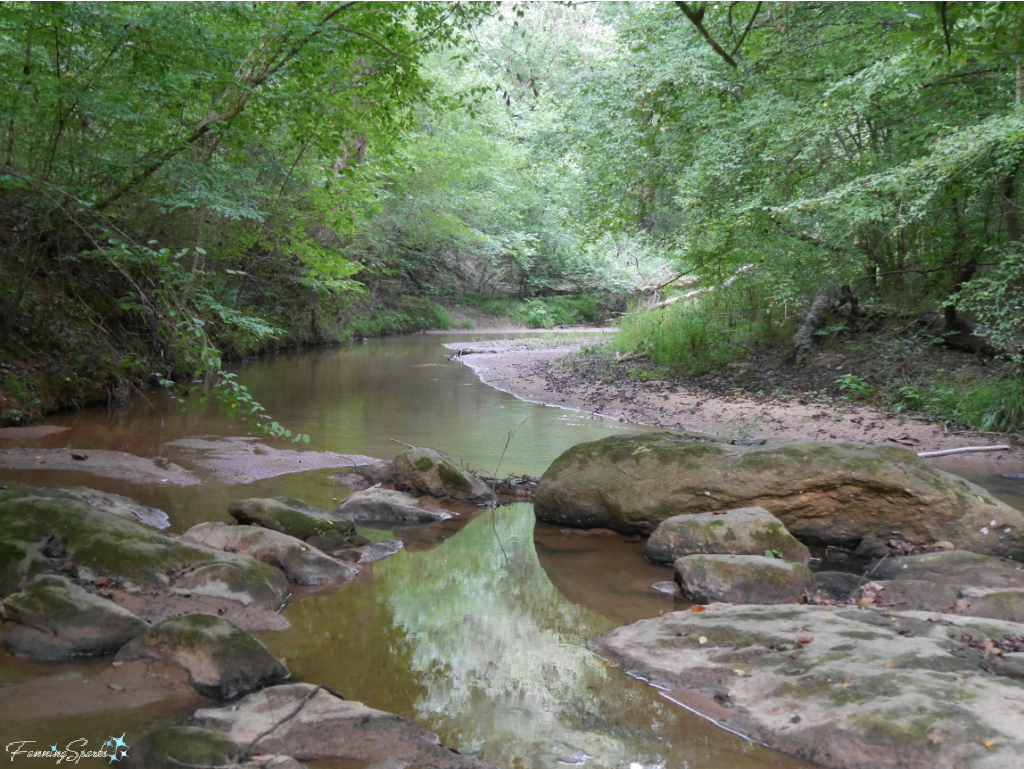


 I tried drying and pressing some Rose of Sharon flowers in my new
  It’s best to cut the Rose of Sharon flowers when they are partially open and to remove the stamens before putting them in the flower press. Check out my previous post
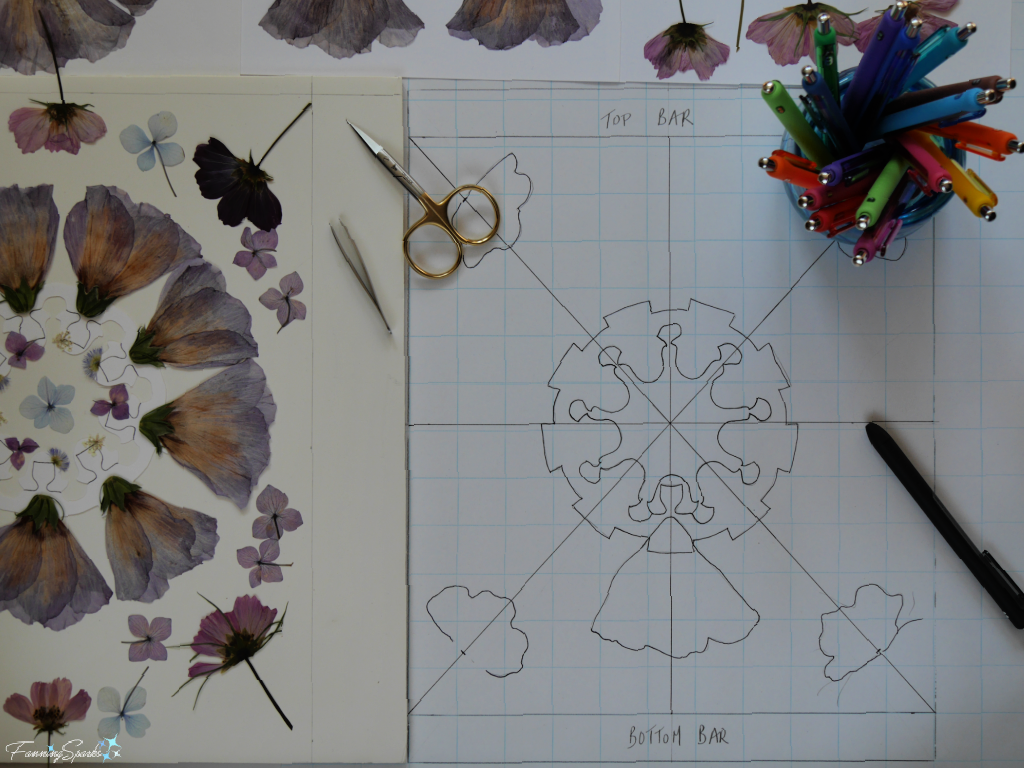
 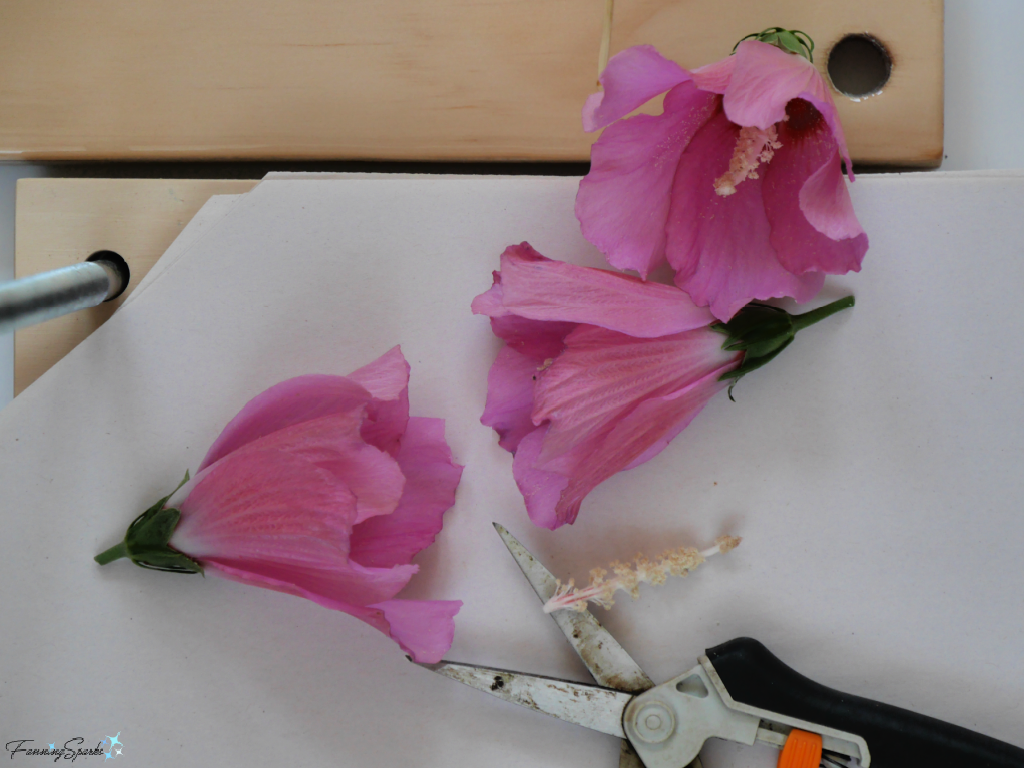 Cosmos and hydrangea also have thin, delicate flower petals which dry beautifully. The flowers pictured below took about 2 weeks to dry.
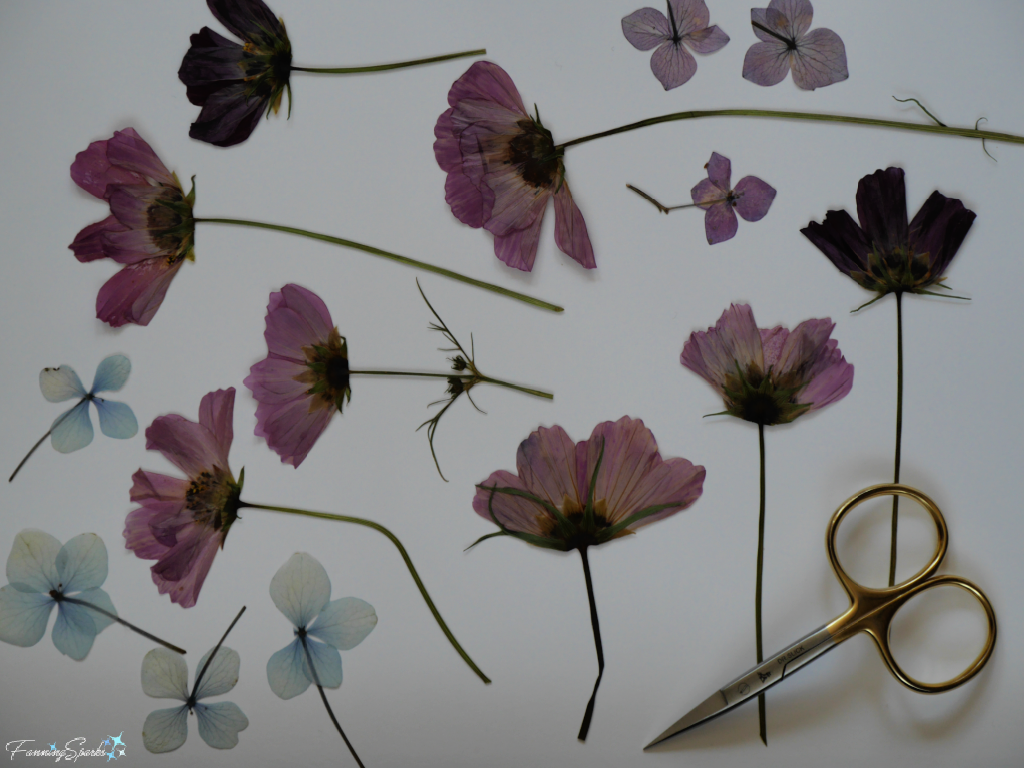

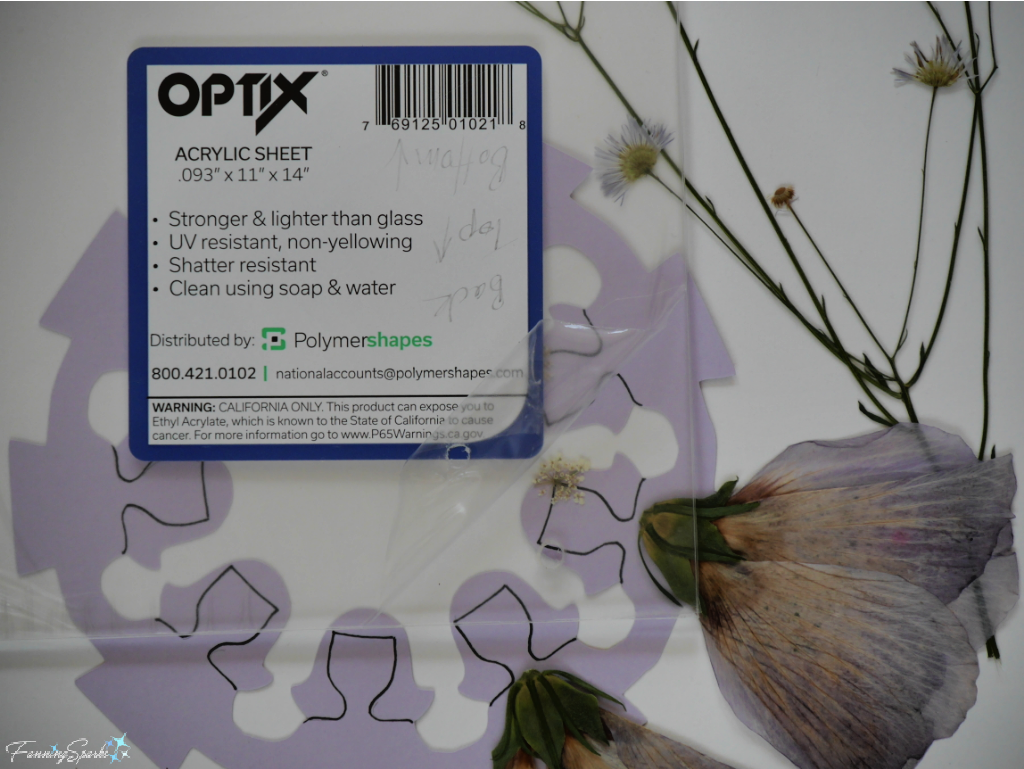
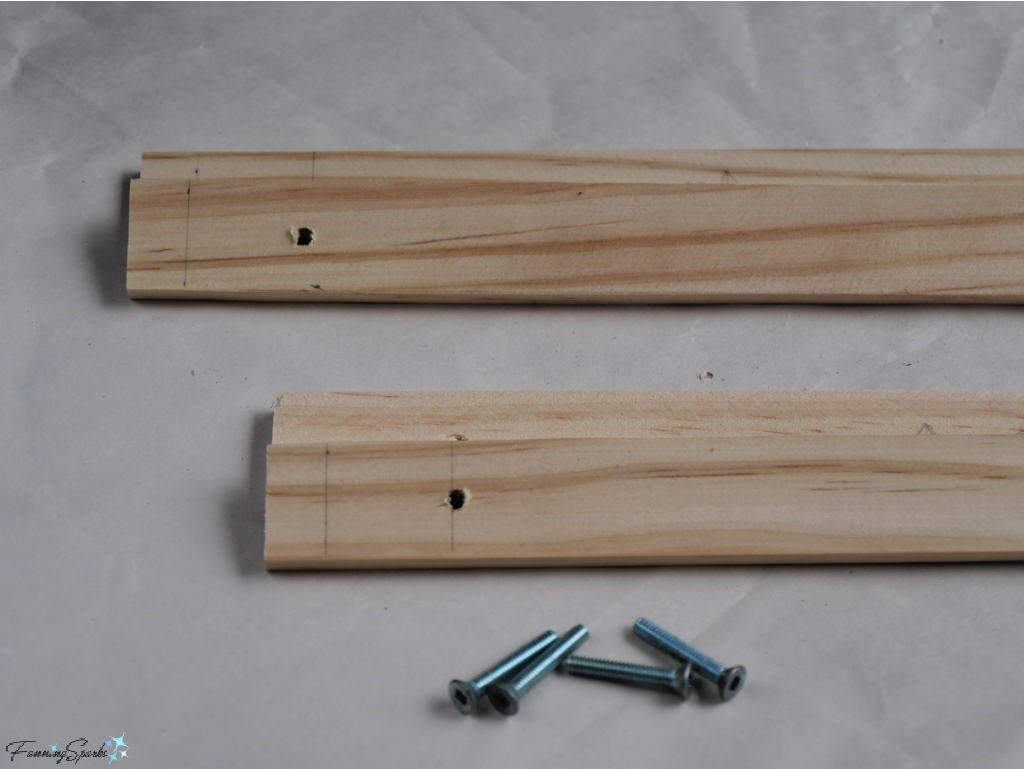 The trick to drilling acrylic, as I learned online, is to drill slowly and work in gradual increments. Starting with a 1/16″ bit and gradually working my way up to a 11/64″ bit resulted in neat and clean holes. Note the holes in the acrylic are slightly bigger than the holes in the wood so the screws can slip through without resistance.
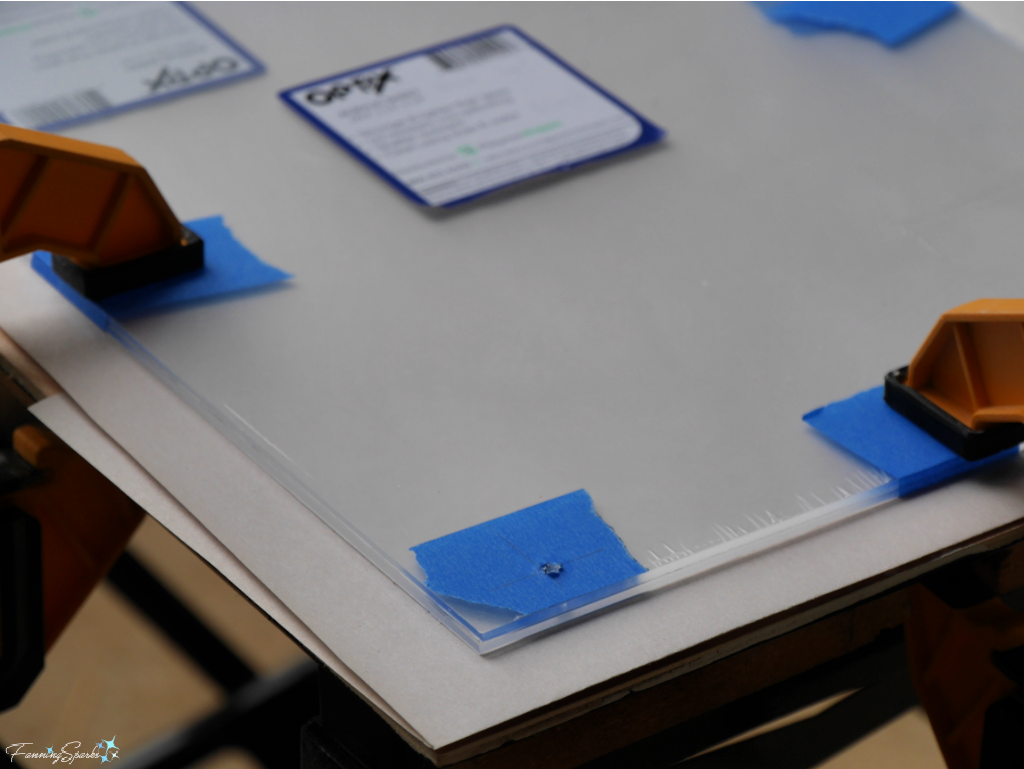 To finish the wooden bars, I sanded them smooth and then stained them with some General Finishes Gel Stain left over from another project. This product produces great results but does require a few steps and a little patience.
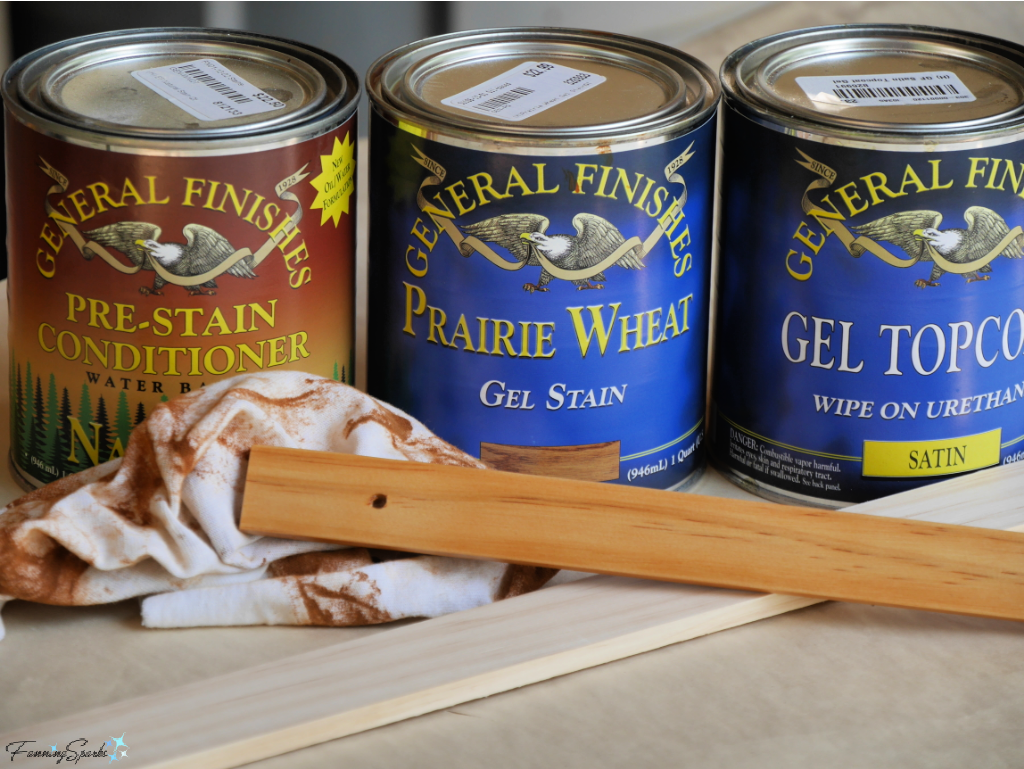
 The next step was to glue the cut paper dolls and the dried flowers to the back sheet of acrylic. Using a small paintbrush, I carefully covered the back of each element with Matte Mod Podge. Tweezers were helpful for lifting and placing the tiny delicate pieces. After drying the piece overnight, I used wet cotton swabs to remove smudges and smears.
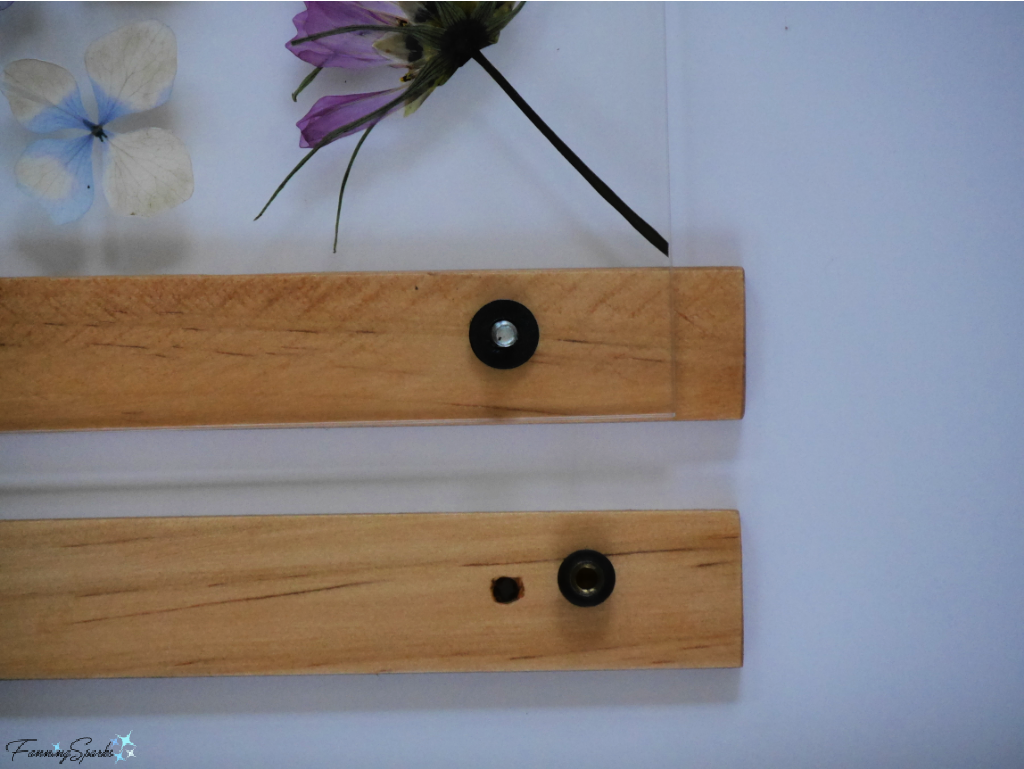
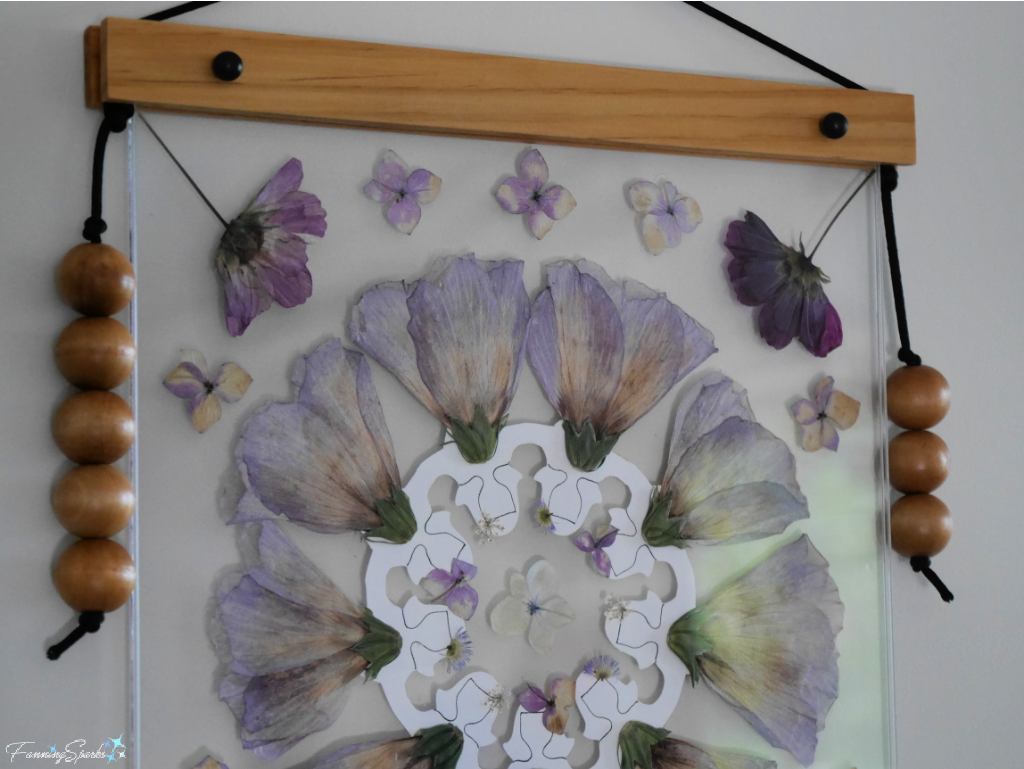 Here’s the completed piece. Now the lovely Rose of Sharon flowers can live on as pretty Pressed Flower Girls!