
Hello All,
Instead of a post this week, I will simply wish you and your loved ones a safe and joyous holiday season!
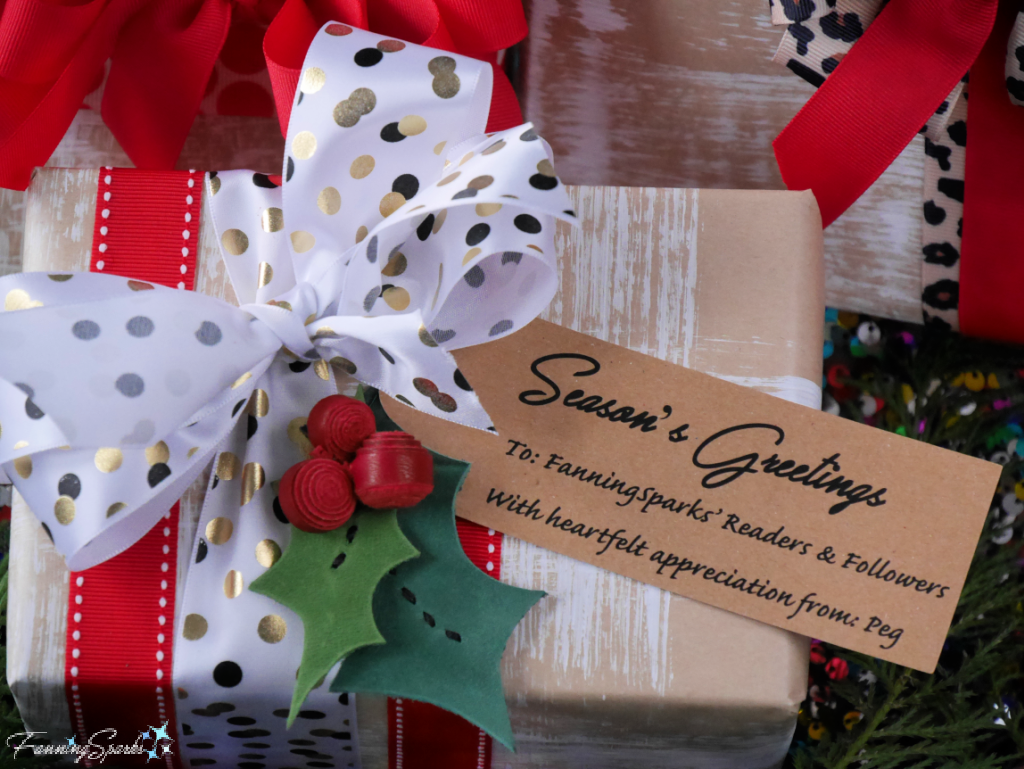

Hello All,
Instead of a post this week, I will simply wish you and your loved ones a safe and joyous holiday season!
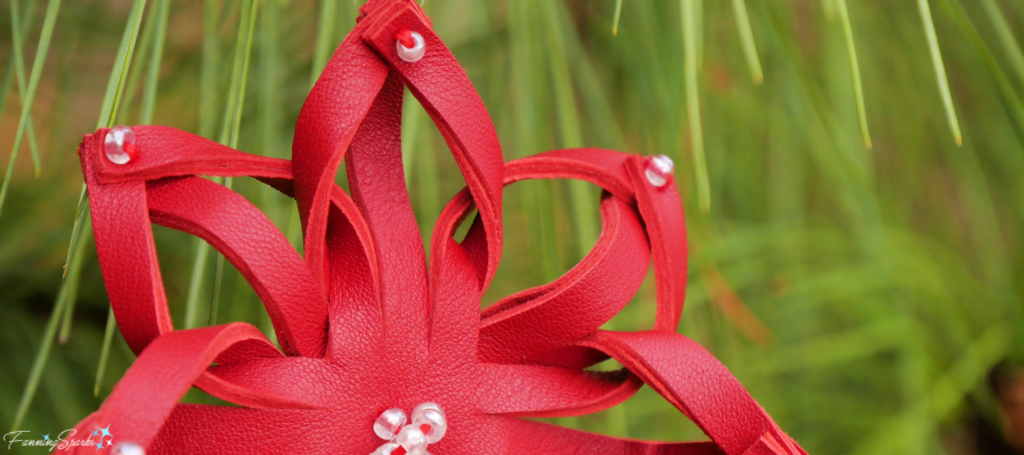
Leather is probably not the first material that comes to mind when decorating for the holidays. But leather has several properties that merit a second look—it’s strong, durable, flexible and amazingly versatile. Leather is used for a wide variety of items including furniture upholstery, car seats, saddles, footwear, clothing, handbags, luggage, bookbinding, jewelry and sports equipment. After the success of my camera bag, see My First Leathercrafting Project blog post, I decided to experiment with a few, small leather Christmas ornaments.
I’m really pleased with how this red leather snowflake turned out!
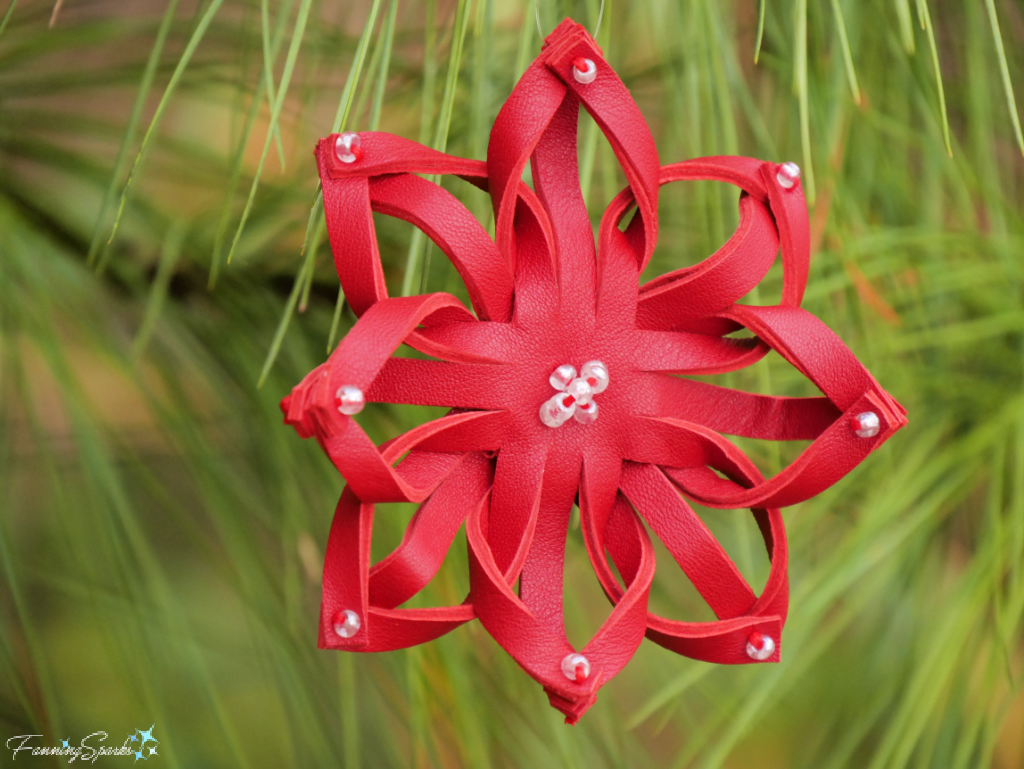
This pretty ornament takes a cue from the traditional snowflakes children make with paper and paste. But unlike a paper snowflake, this leather snowflake will maintain its shape and last for many years. This leather snowflake isn’t quite child’s play but it is easy to make with the step-by-step instructions and download template provided in this post. Why not give it a try?
Supplies Needed
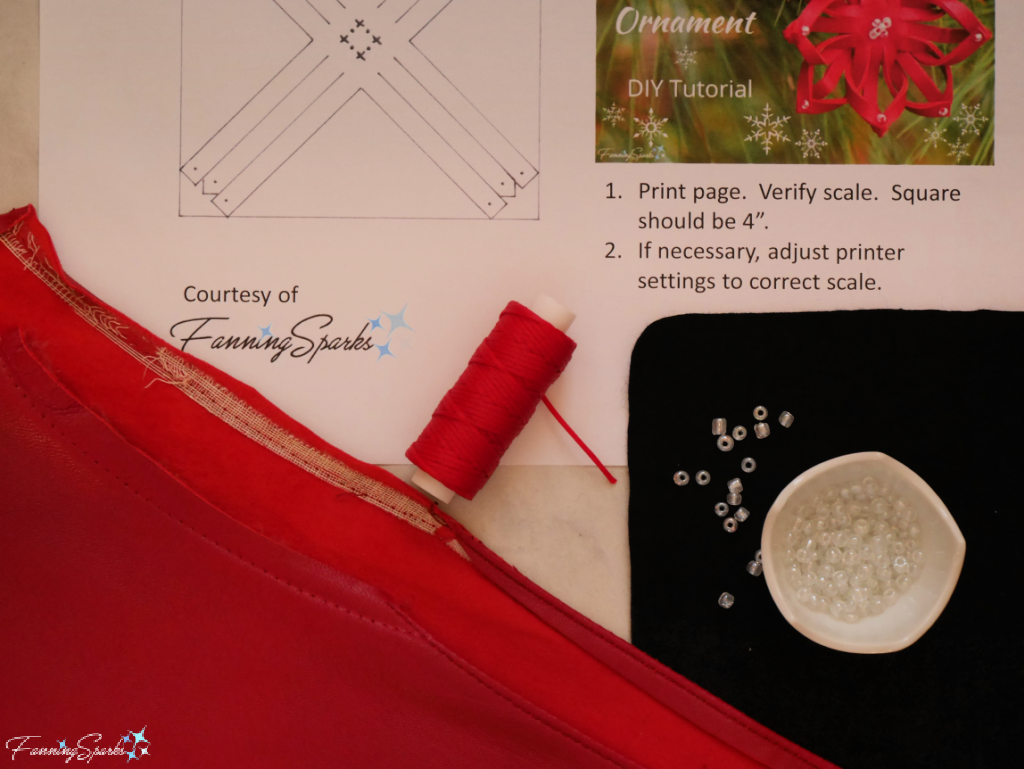
. Template: Download Red Leather Snowflake Ornament – Complimentary Download to print the template.
. Paper: A few sheets of white paper for printing template.
. Leather: FOUR 4” x 4” squares of 2 oz/ 0.8 mm leather See Step 1 for specifics and suggestions.
. Waxed Braided Cord: About 5 feet. I chose red to match the red leather.
. Beads: SIXTEEN 6/0 glass seed beads. I chose clear crystal luster beads from Bead Treasures.
Equipment and Tools Needed
. Scissors: To cut leather and paper.
. Contact Cement: To glue leather. I used Weldwood Contact Cement.
. Printer: To print template.
. Marker or Pen: I was pleased to discover my favorite Pilot FriXion marker leaves a clear line on leather and, most importantly, can be completely erased from the smooth surface.
. Clips: To hold paper template and leather together. Binder or bulldog clips will work fine but I prefer Clover Wonder Clips because the flat bottoms keep materials flat. Wonder Clips are typically found with quilting tools and materials.
. Awl: To pierce and stretch holes in leather. An awl, such as the Craftool Scratch Awl sold by Tandy Leather, is ideal but a sharp-pointed ice pick or heavy darning needle will also work.
. Heavy Plastic Surface (optional): To work on when piercing leather. Tandy Leather’s Poly Cutting Board is ideal but a plastic cutting board could work as well.
. Needle: To stitch the leather. A Leather Stitching Needle is ideal but any needle with a blunt point and an eye large enough to hold the waxed braided cord will work.
. Thimble (optional)
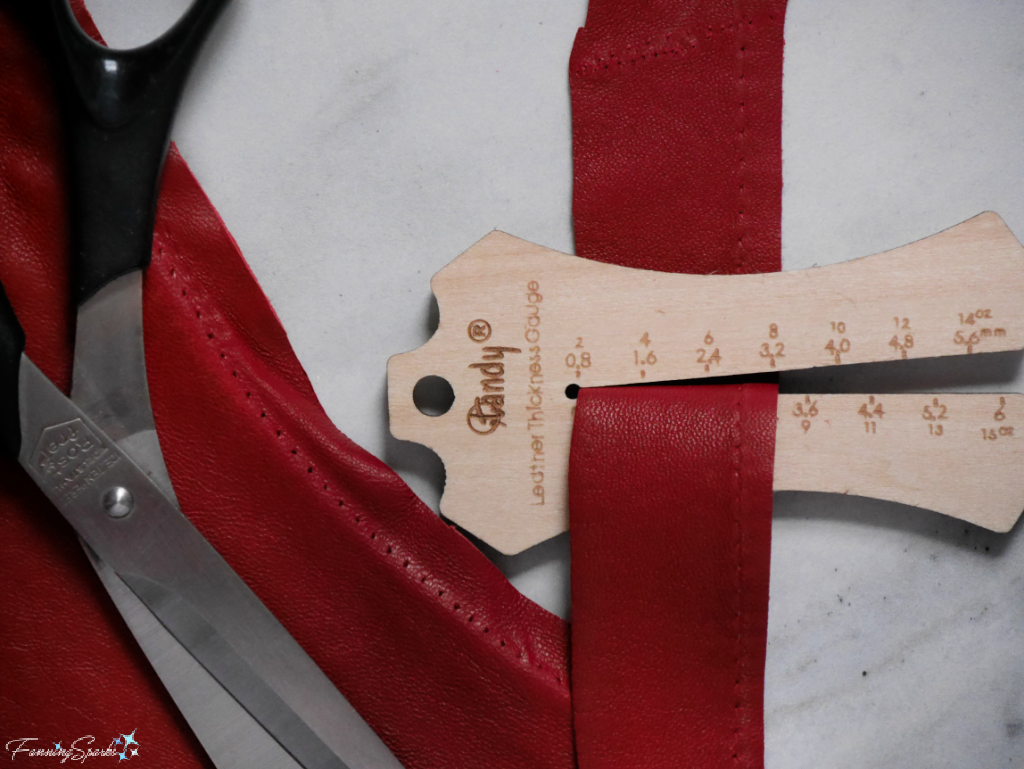
Step 1 – Select Leather The trick to making these leather ornaments is to choose leather that will bend easily meaning you want leather that’s about the thickness used for garments not belts. I repurposed an old red leather jacket for my ornaments. Alternatively, you might try Cricut’s craft leather sheets, Mirage Craft Cut sheets from Tandy Leather, or leather scraps from online leather sellers such as TheLeatherGuy or Springfield Leather. These products are available in a variety of colors and finishes. As illustrated in the photo below, the red leather from my jacket has a weight/ thickness of 2 oz. /0.8 mm.
Step 2 – Prepare Leather In order to hide the rough side of the leather, I glued together two pieces of leather, back to back, using Weldwood Contact Cement. It’s much easier to glue your pieces of leather together BEFORE cutting them to size. Please take note of the manufacturer’s safety precautions including working in a well ventilated area. Apply the contact cement to the back of one piece ensuring complete coverage. Then gently lay the back of the other piece onto the glued surface smoothing it out carefully. Take care not to get contact cement on the front side of the leather. Alternatively, you could choose to let the rough side of the leather show and use only a single layer.
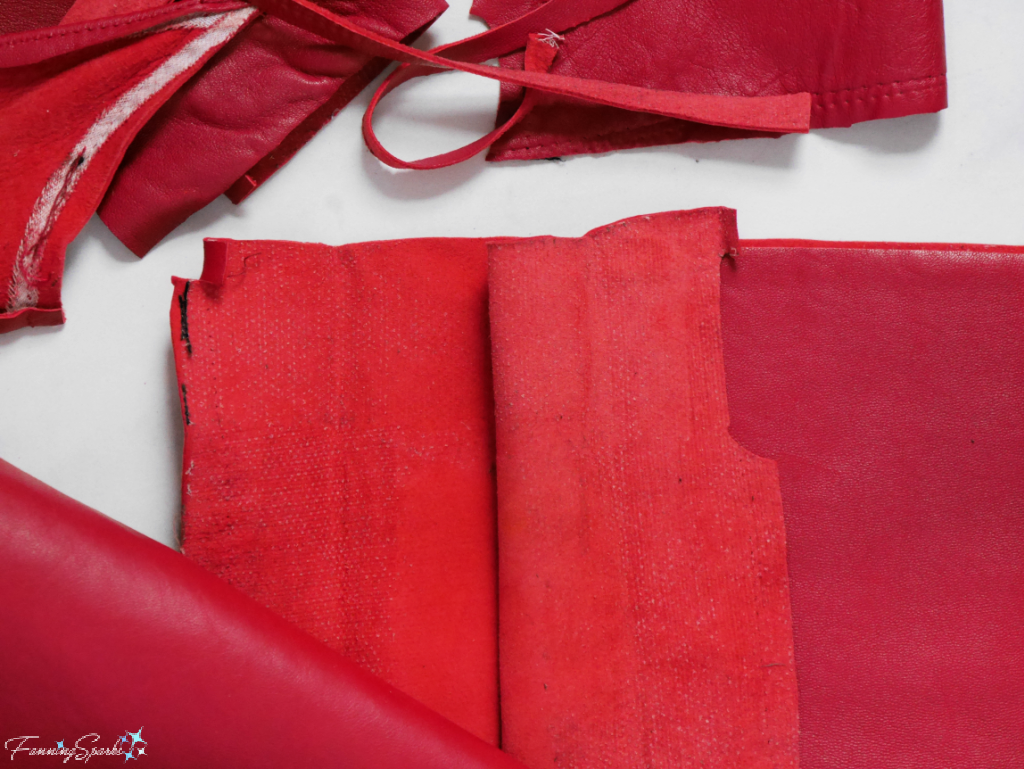
After the contact cement has dried, cut TWO 4” x 4” squares of your leather. I found it easiest to mark my cutting lines on the leather with a Pilot FriXion marker and then cut inside the lines. I carefully erased any remaining lines with the marker’s eraser.
Step 3 – Print Pattern Download the Red Leather Snowflake Ornament – Complimentary Download and print the template. Take care to ensure the scale is accurate on your printed version. See specifics in the download document. Print TWO copies. Trim around the outside of the paper squares.
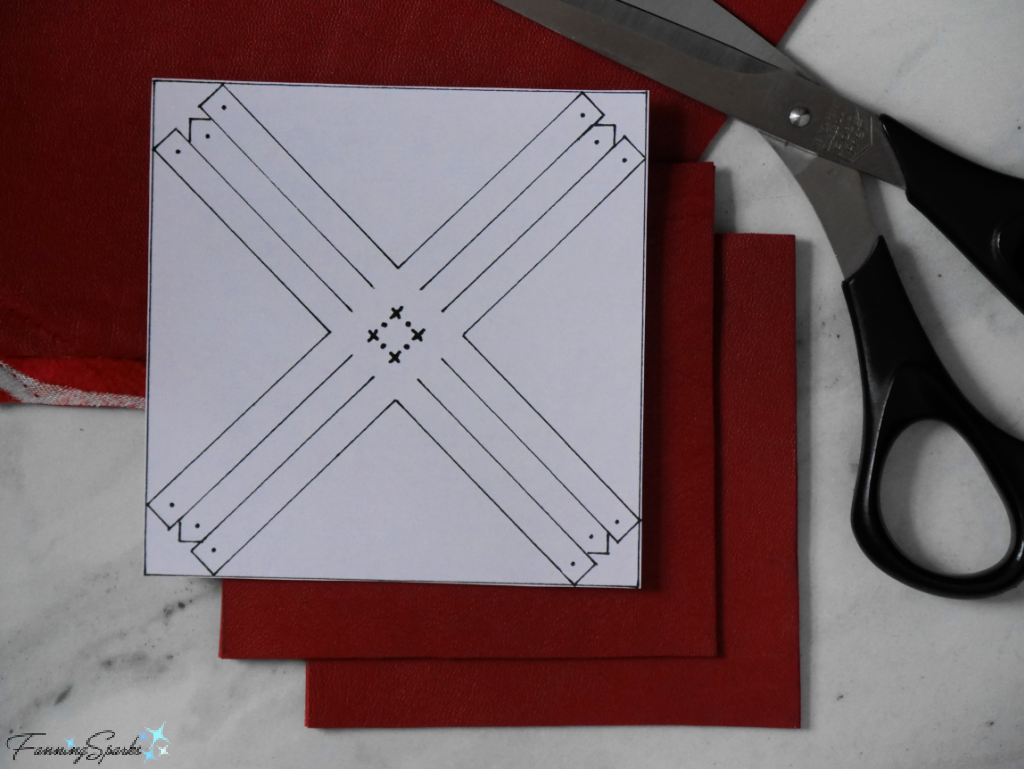
Step 4 – Cut Leather Align the paper square template with one of the leather squares. Use clips to hold it in place. As noted in the Supplies Needed section, I prefer Clover Wonder Clips because they allow the squares to remain flat. Use scissors to cut the leather.
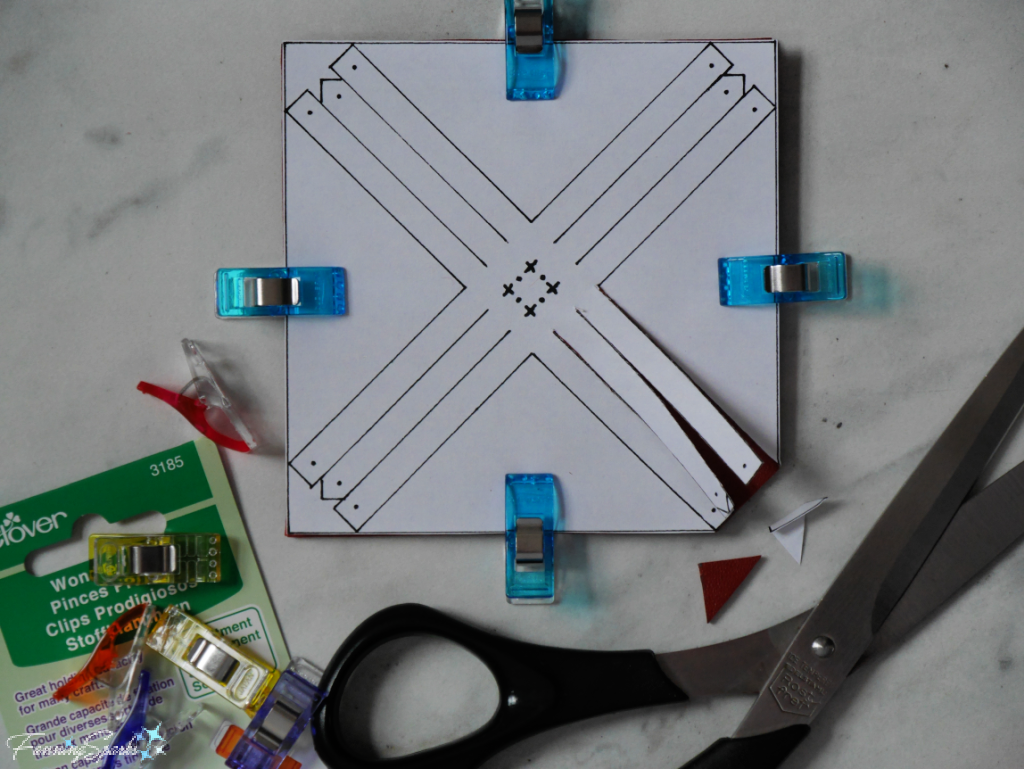
This should result in TWO crosses of leather similar to those shown below.
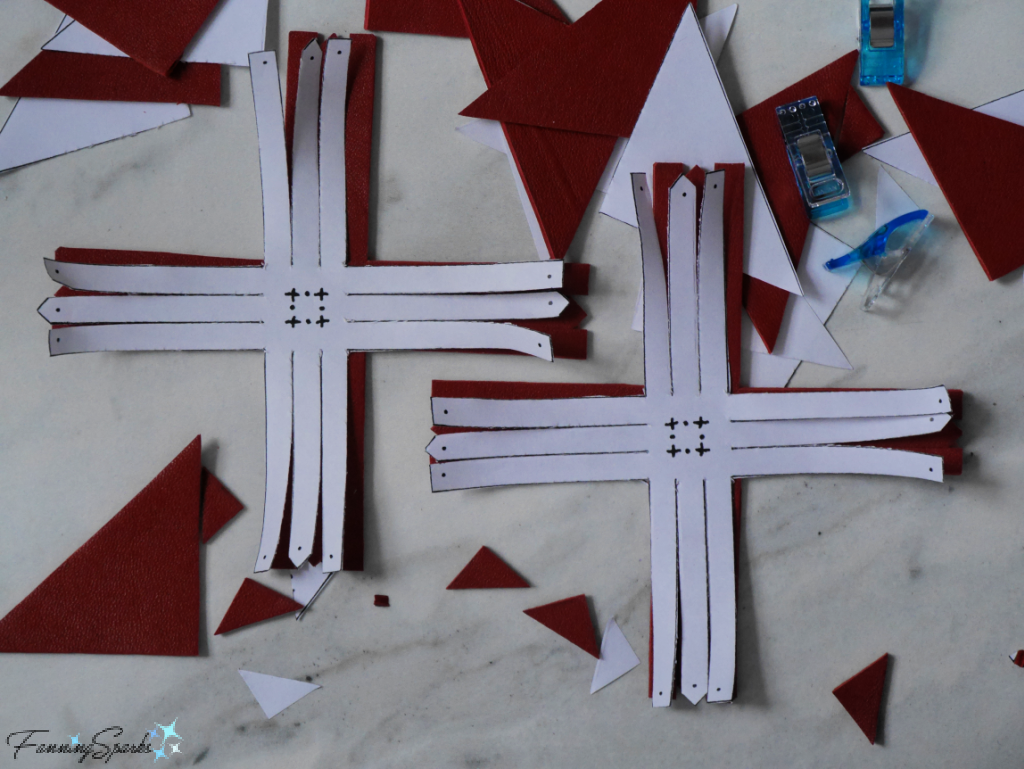
Step 5 – Pierce Leather Align the paper template with one of the leather crosses and use clips to hold in place. Use an awl to pierce one of the holes at the end of a cross piece. Do NOT yet pierce the center holes. It’s helpful to have a thick plastic surface to press the awl down into. After piercing the leather, gently slide the awl into the hole to stretch out the leather. Repeat for the remainder of holes at the ends of the cross pieces.
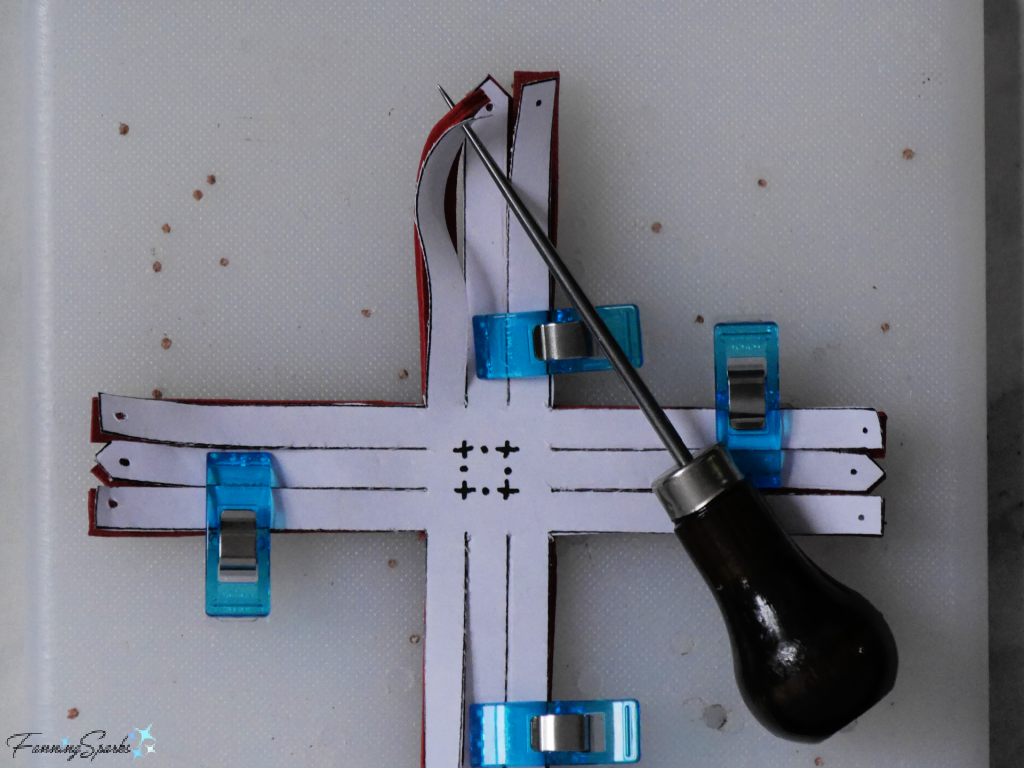
Both crosses need four holes at their centers. But it’s important to note the hole placement is not the same on the two crosses. On one cross, pierce four holes at the dots marked on the template. On the other cross, pierce four holes at the Xs marked on the template.
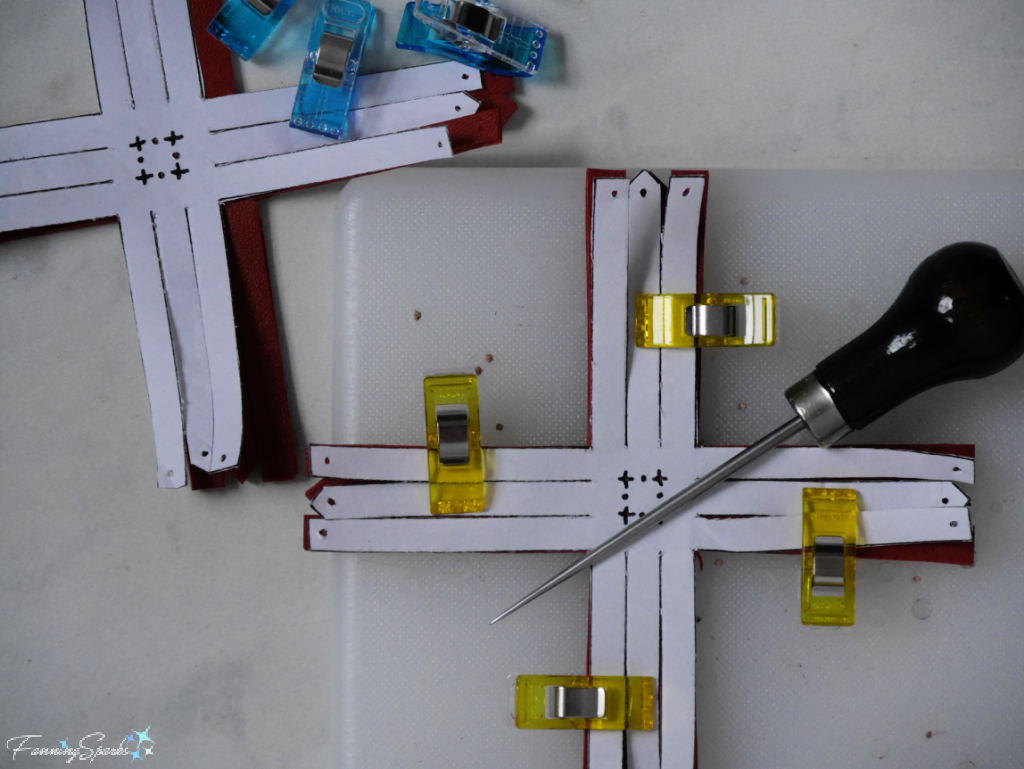
Step 6 – Stitch Snowflake Center The two leather crosses are stitched together with a large cross stitch embellished with glass seed beads. Lay the two leather crosses, right sides up, on your working surface as shown in the below photo. Align the 4 center holes. Thread a needle with about 8” of waxed braided cord. Insert the needle into one of the holes at the back. Leave a thread tail of about 2”. Pull the threaded needle up through the set of holes from the back to the front.
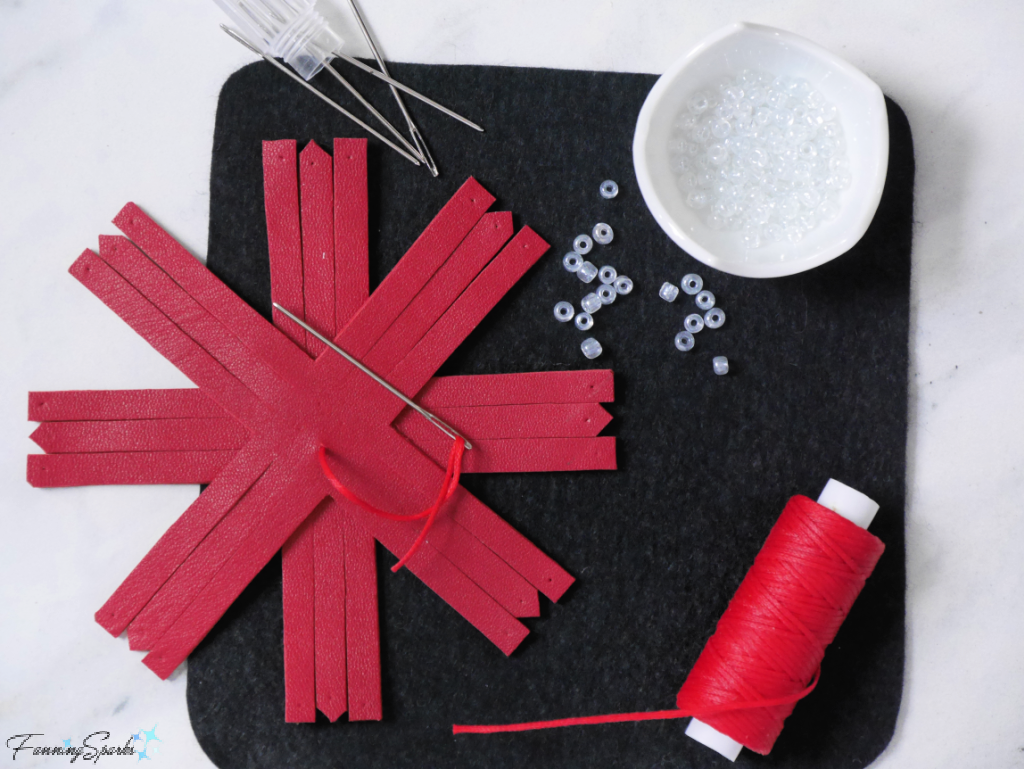
Temporarily, remove the needle from the cord. Slide 3 glass beads onto the cord. Re-thread the needle with the cord. If you’re lucky the glass beads will slide over your threaded needle and you won’t need to remove the needle for this step.
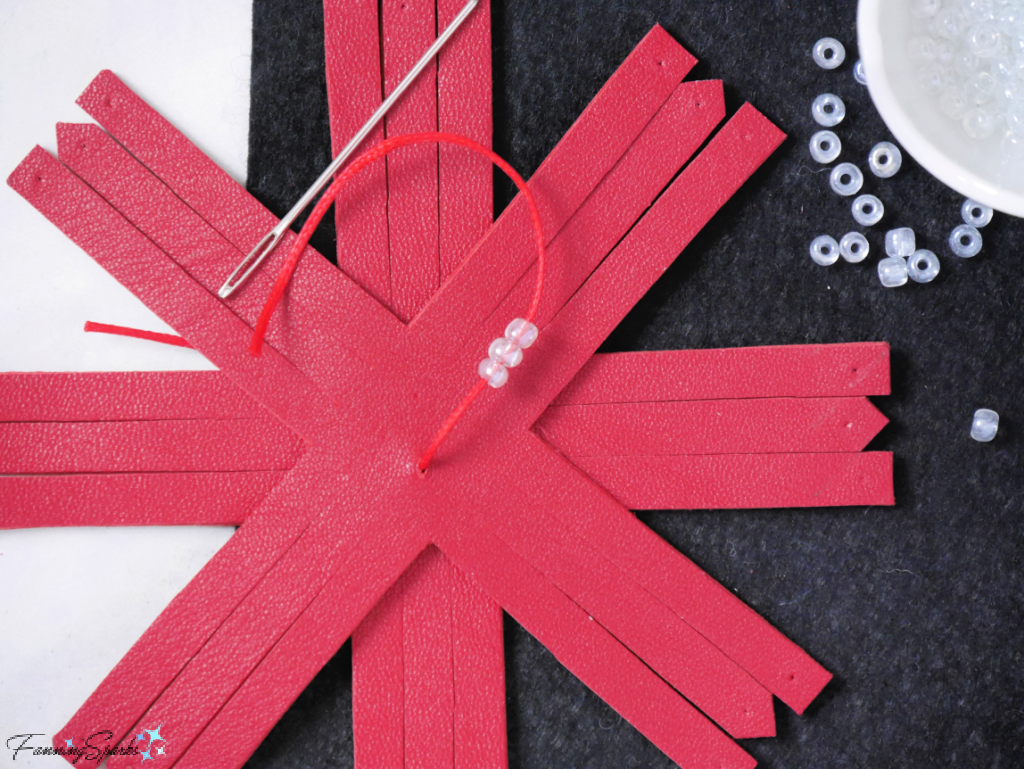
Insert the threaded needle into the opposite hole (diagonally across from the first one) and pull the needle down through the set of holes from the front to the back. Gently pull the cord tight ensuring the the row of beads are snug against the leather. Make the second stitch in the same way, bringing the threaded needle back up through another set of holes. Temporarily, remove the needle from the cord. Slide 5 glass beads onto the cord, re-thread the needle and pull it down to the back.
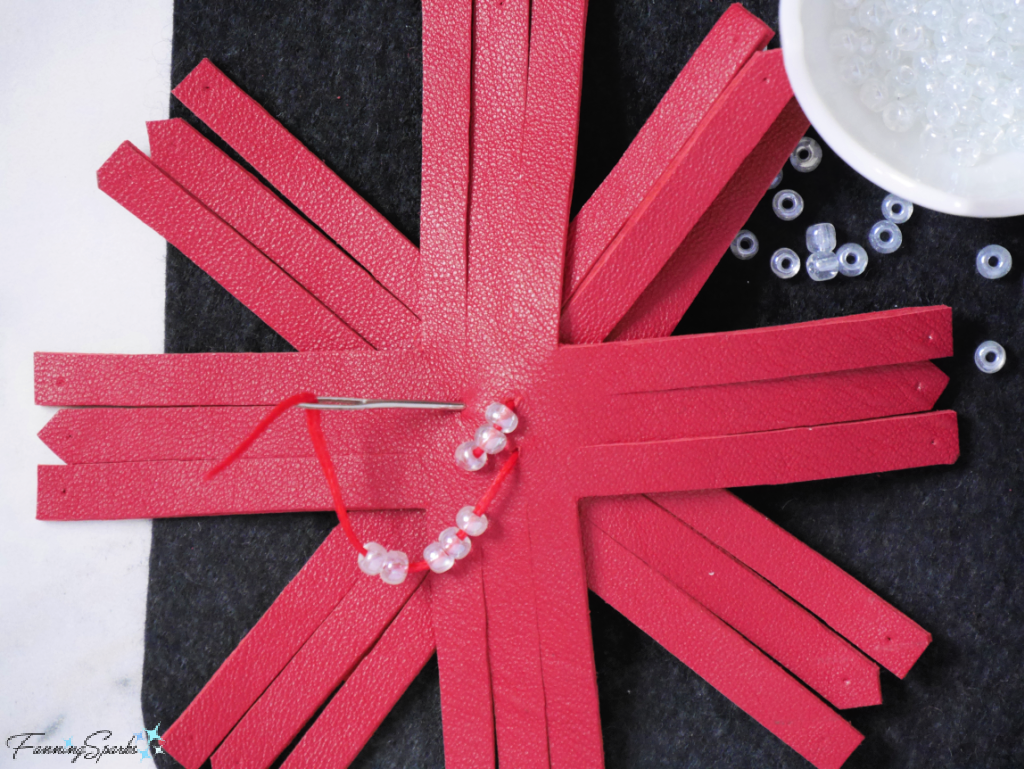
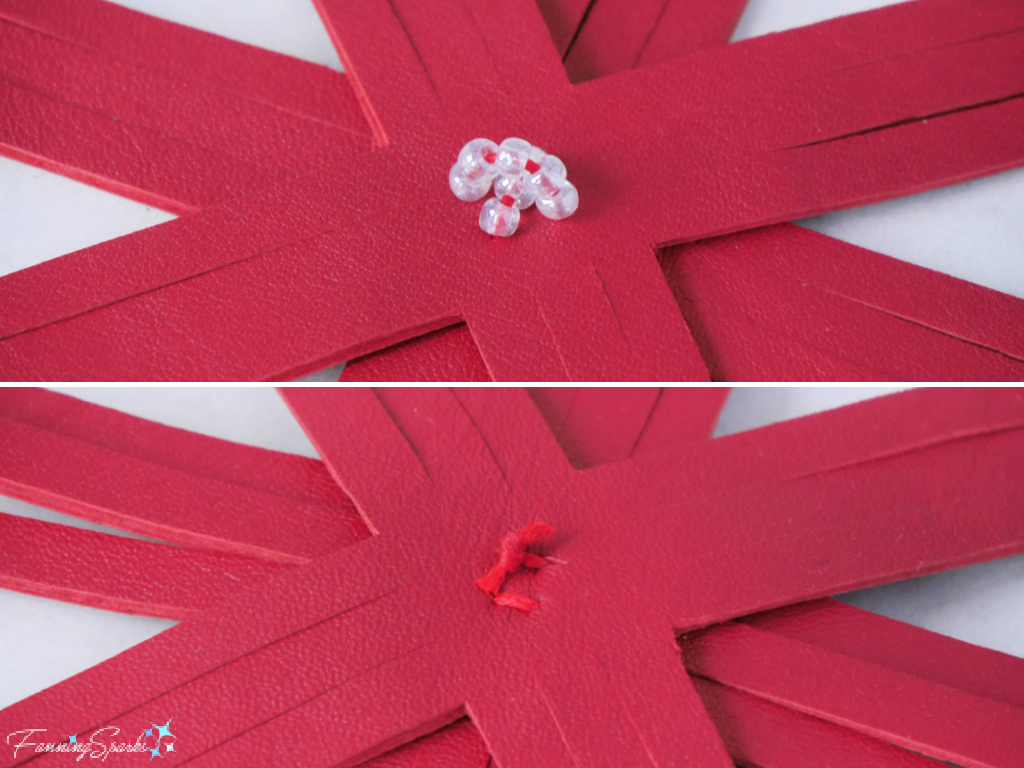
Gently pull the cord tight ensuring the second row of beads sits smoothly over the first row of beads. Secure the cord at the back by inserting the needle into the beginning cord tail (as close to the leather as possible) and pulling the cord through. Then pull the cord ends tight, tie a small knot and snip off the ends. The front and back should look like this.
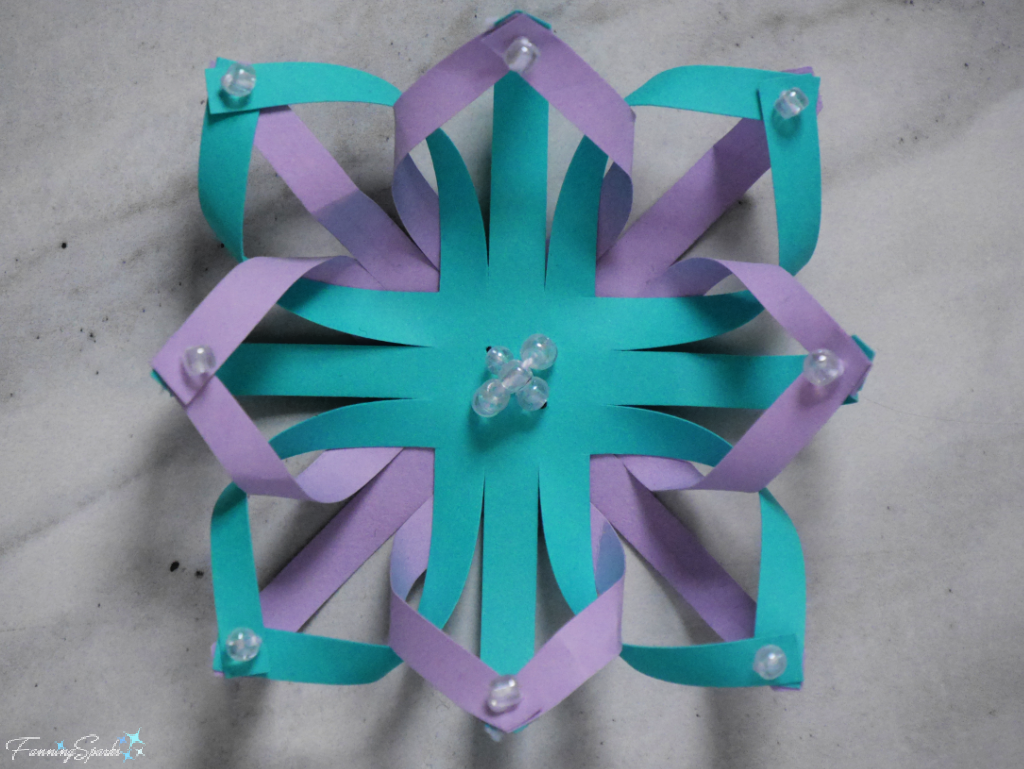
Step 7 – Stitch Snowflake Points The next step is to make the points on the snowflake. I mocked up a paper snowflake in two colors—aqua and mauve—to show this step more clearly. Notice how the aqua cross sits on top of the mauve cross and the two colors are woven into eight points.
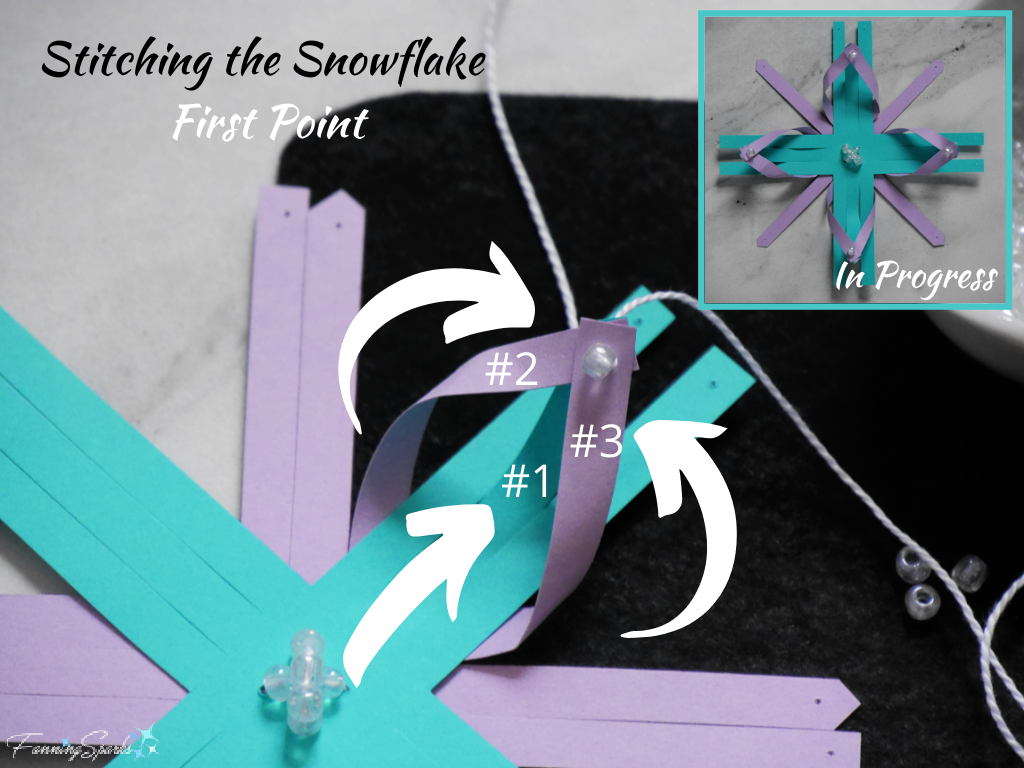
Each point is made by stacking and stitching 3 spokes together. As shown in the below graphic, start with a center aqua spoke (#1) and bring your threaded needle up from the back. Next pick up the first mauve spoke to the left (#2), flip over the end and bring your needle up from the back. Then pick up the first mauve spoke to the right (#3), flip over the end and bring your needle up from the back. Pull your threaded needle to the front, slip on a glass bead and pass your needle back through the same holes. Align the 3 tips, squaring the ends and gently pull the thread tight. Then tie a knot at the back and snip the threads. Move on to the next center aqua spoke and repeat the process 3 more times. At this point, the snowflake should look as shown in the top right.
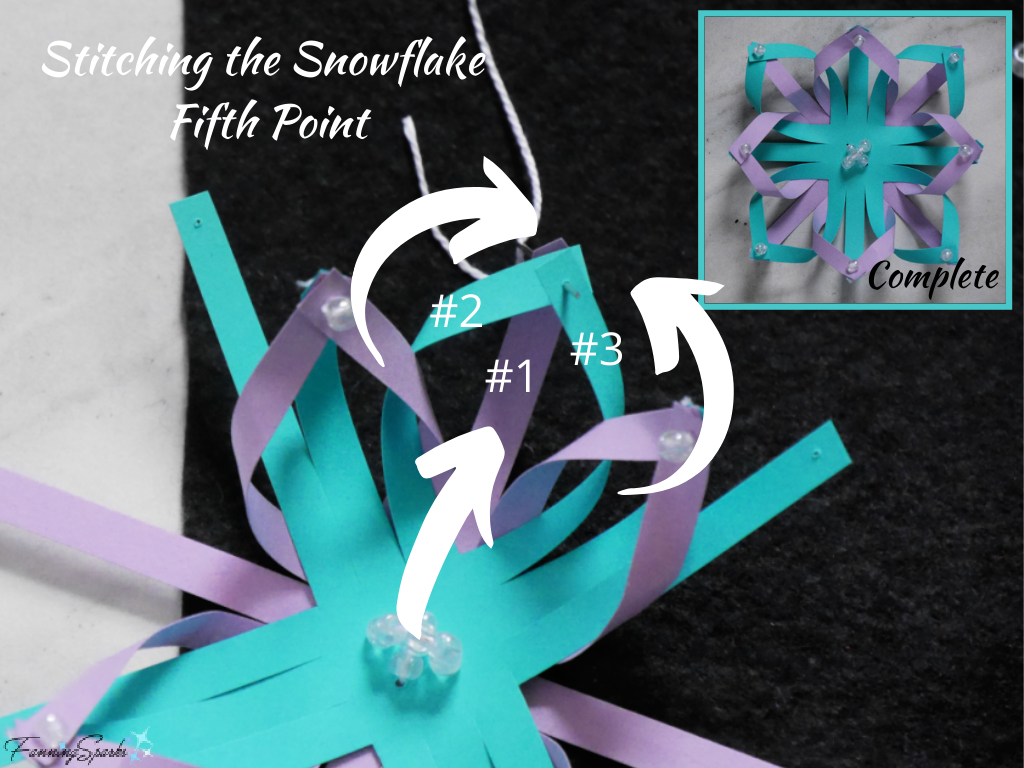
The next step is to make points with the mauve spokes at the center. As shown in the below graphic, start with a center mauve spoke (#1) bringing your threaded needle up from the back. Next pick up the first aqua spoke to the left (#2), flip over the end and bring your needle up from the back. Then pick up the first aqua spoke to the right (#3), flip over the end and bring your needle up from the back. Notice the aqua spokes pass through the points you stitched in the first round. Finish the stitch in the same way as the previous stitches. Repeat for the remaining 3 sets of spokes. At this point, the snowflake should look as shown in the top right.
The same process is used to make the leather snowflake. The top leather cross replaces the aqua paper cross and the bottom leather cross replaces the mauve paper cross. Follow the steps as outlined above simply substituting the relevant leather spokes for the paper ones. Use about 6” of cord and 1 glass bead to stitch each point.
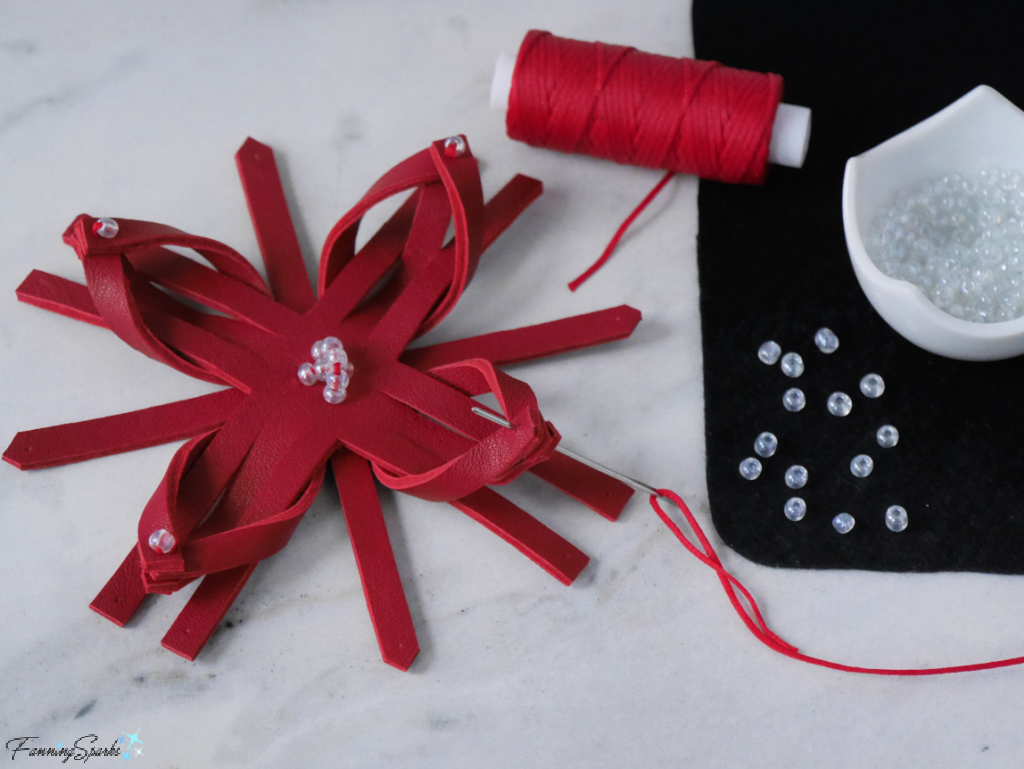
If you find it difficult to pull the threaded needle through the holes in the leather, gently wiggle the needle while pulling it through. If the problem persists, use the awl to carefully enlarge the hole. A thimble could also come in handy. As before, you may need to remove your needle to slip the glass bead onto the cord. After threading the 3 spokes, take care to align the 3 tips and shape the spokes into a plump point.
Secure the cord at the back by inserting the needle into the beginning cord tail (as close to the leather as possible) and pulling the cord through.
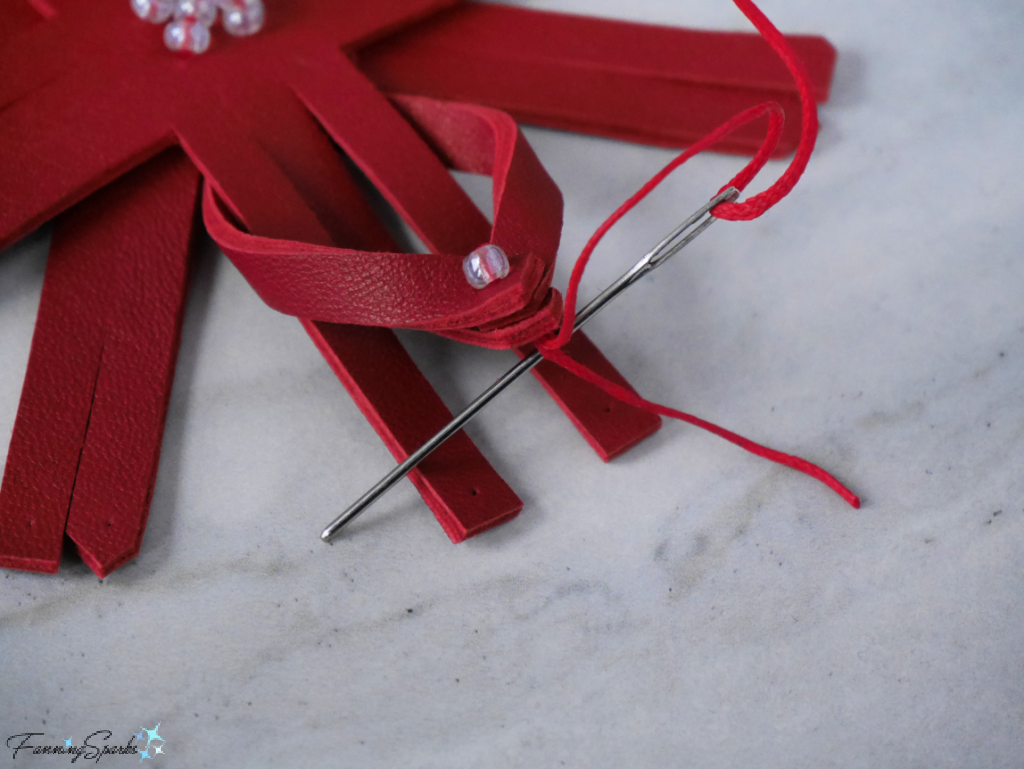
Then pull the cord ends tight, tie a small knot and snip off the ends. Stitch all 8 points.
Step 8 – Attach Hanger
The final step is to add a hanger or tie to your new leather snowflake. You could simply tie a short length of waxed cord to one of the snowflake points. Or you might prefer to use a length of ribbon, a strip of leather or a piece of clear fishing line.
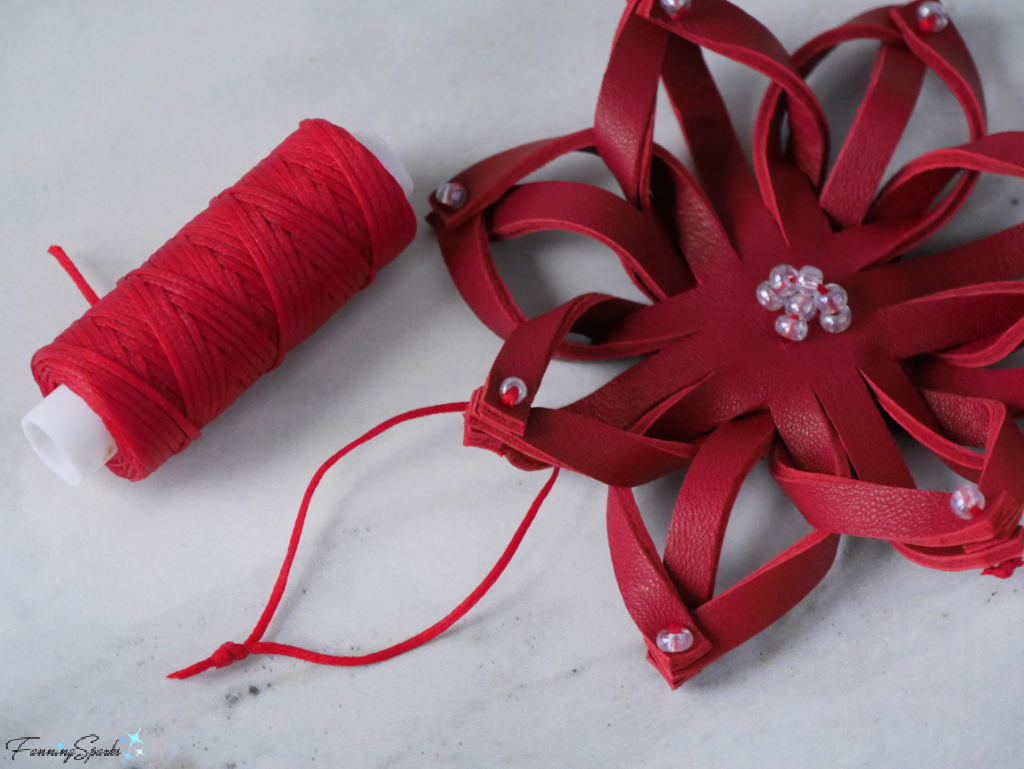 Your new leather snowflake is ready! It looks lovely on the Christmas tree but it would also make a gorgeous gift topper.
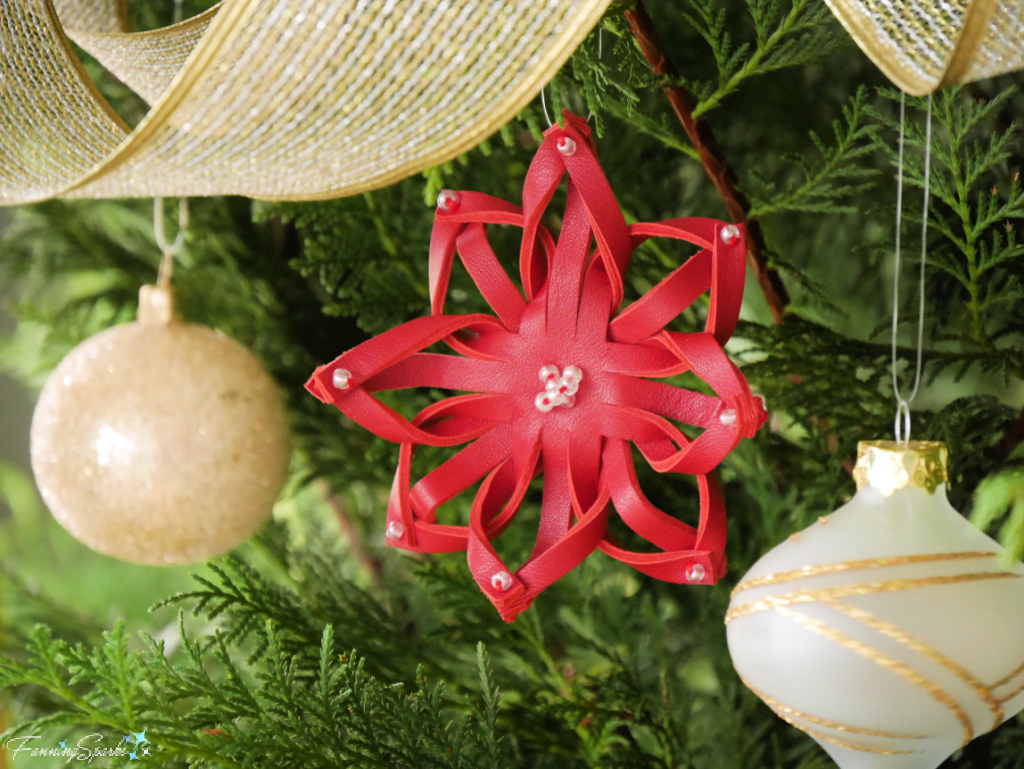
You can download the project template here: Red Leather Snowflake Ornament – Complimentary Download.
Please pin this image to share or save for future reference.
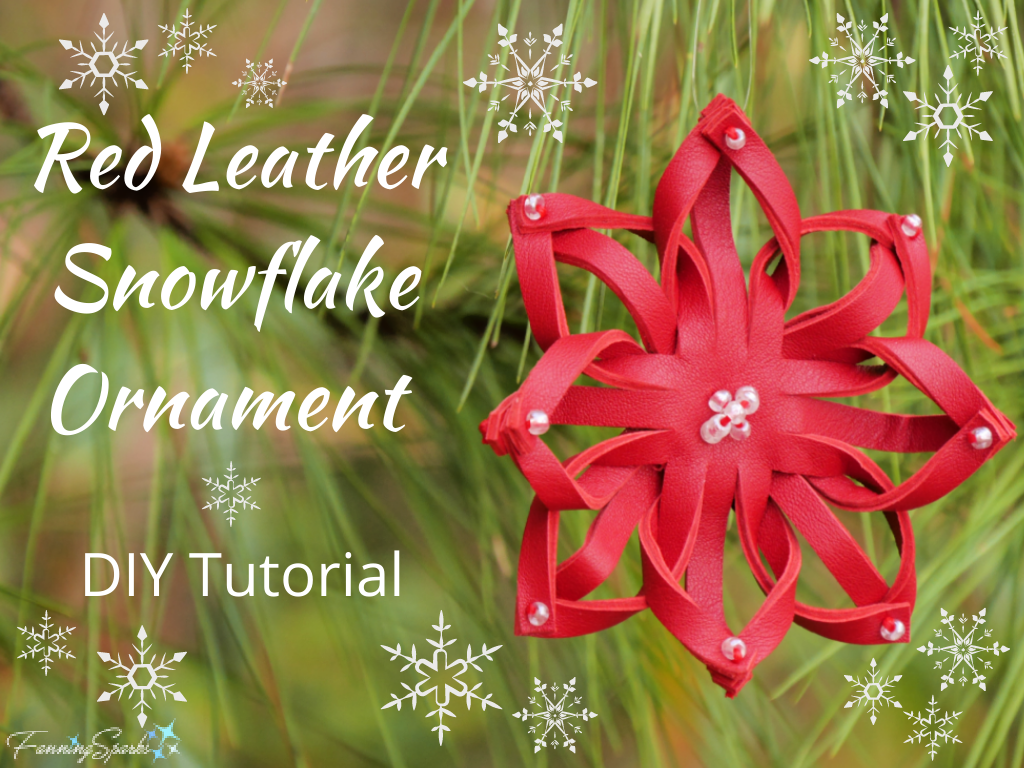 You can learn more about working with leather in my previous post My First Leathercrafting Project.
Check out the post 8 Tips to Jazz Up Your Gift Wrapping including how to use gift toppers.
I used several products from Tandy Leather to make this project. But there are other highly regarded online vendors who specialize in leather including TheLeatherGuy and Springfield Leather.
1. Leather is an unexpected choice for holiday decorating.
2. Leather is strong, durable, flexible and amazingly versatile.
3. Consider making your own leather ornament following the tutorial in today’s post.
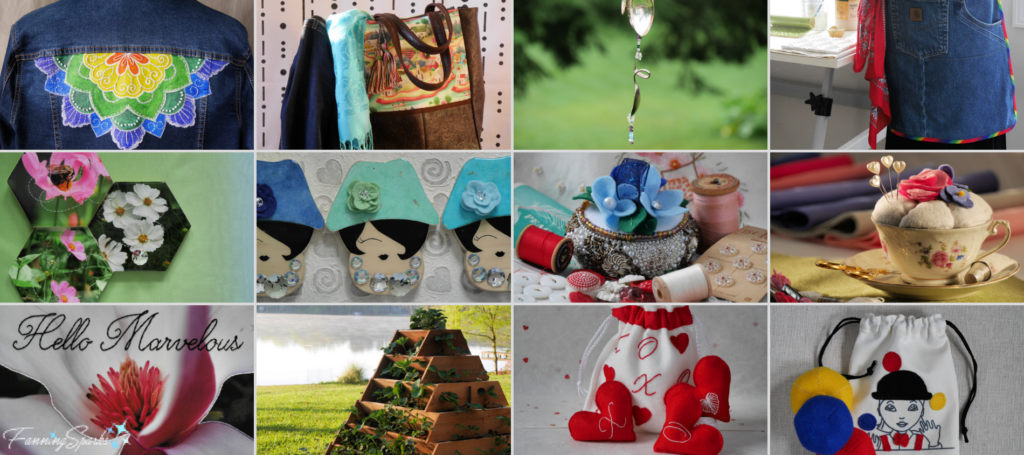
As promised, today’s post includes a roundup of ideas to Make-and-Give. I’ve shared a variety of making projects over the last year and provided detailed tutorials for several of them. All of these items are unique and special—perhaps one or two would be ideal for someone on your holiday gift list.
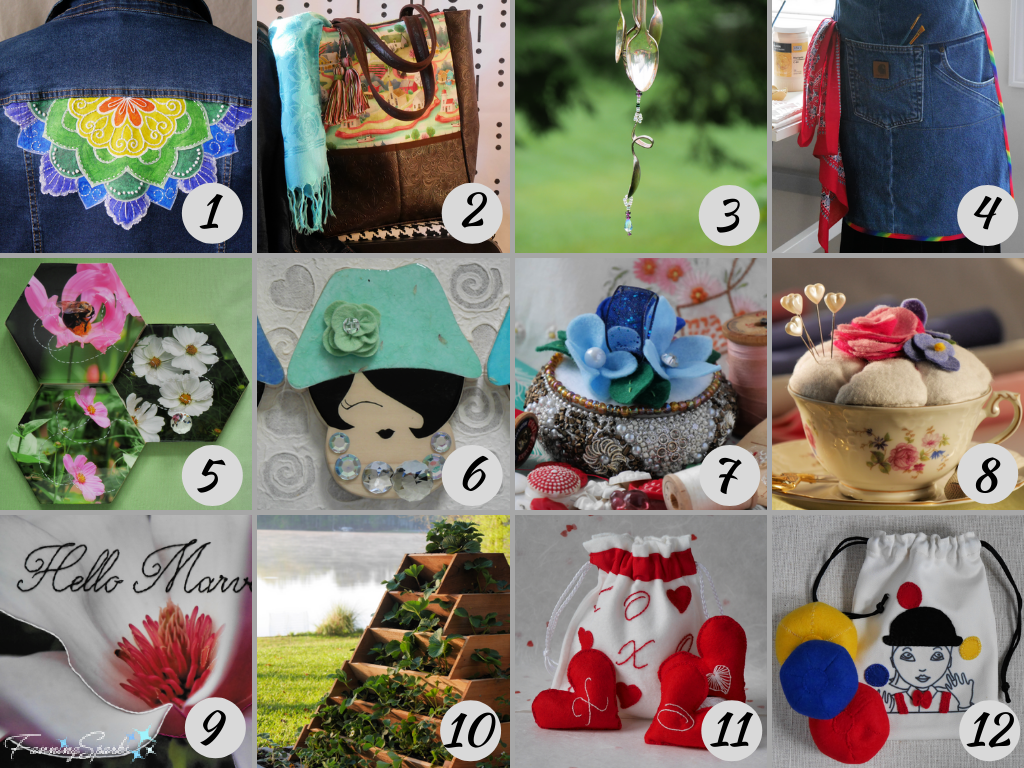
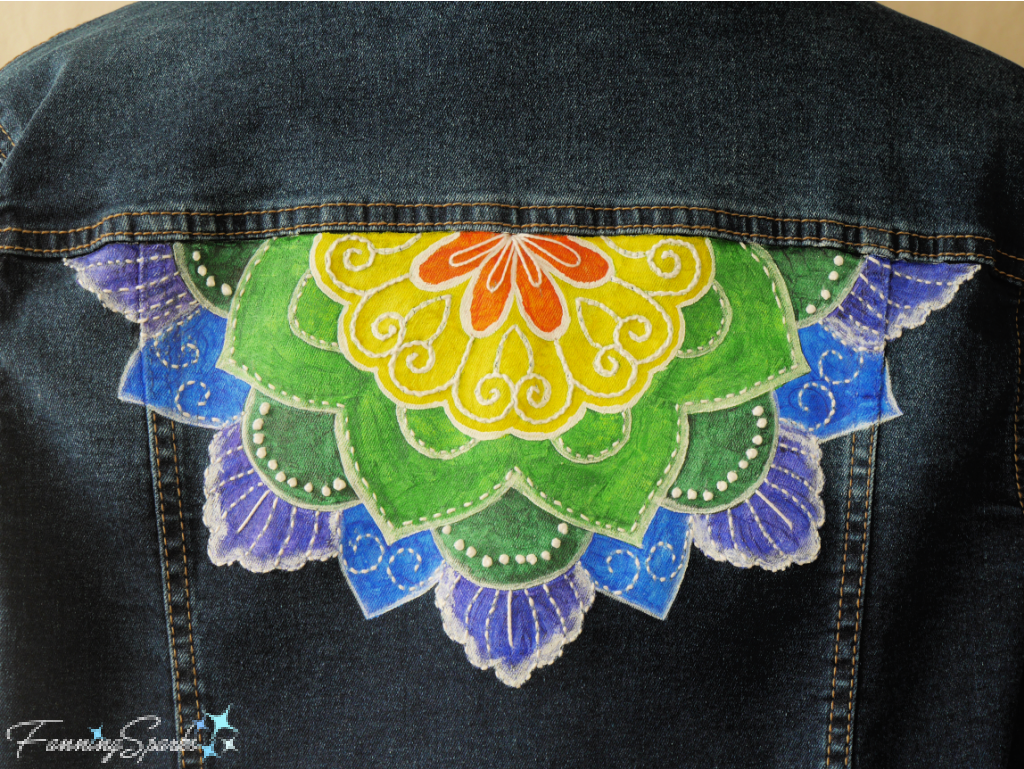
1. From Classic Jacket to Wearable Art
I can state with confidence that a custom-designed, hand-embellished denim jacket makes a great gift. At least, that’s how it seemed when I gave my sister the one featured in the From Classic Jacket to Wearable Art post. This project involves embellishing a classic denim jacket with fabric paints and embroidery. You don’t have to be a seasoned maker to tackle this project, just choose your design and follow along with the process described in the post. This is a great opportunity to get creative and make something unique and special.
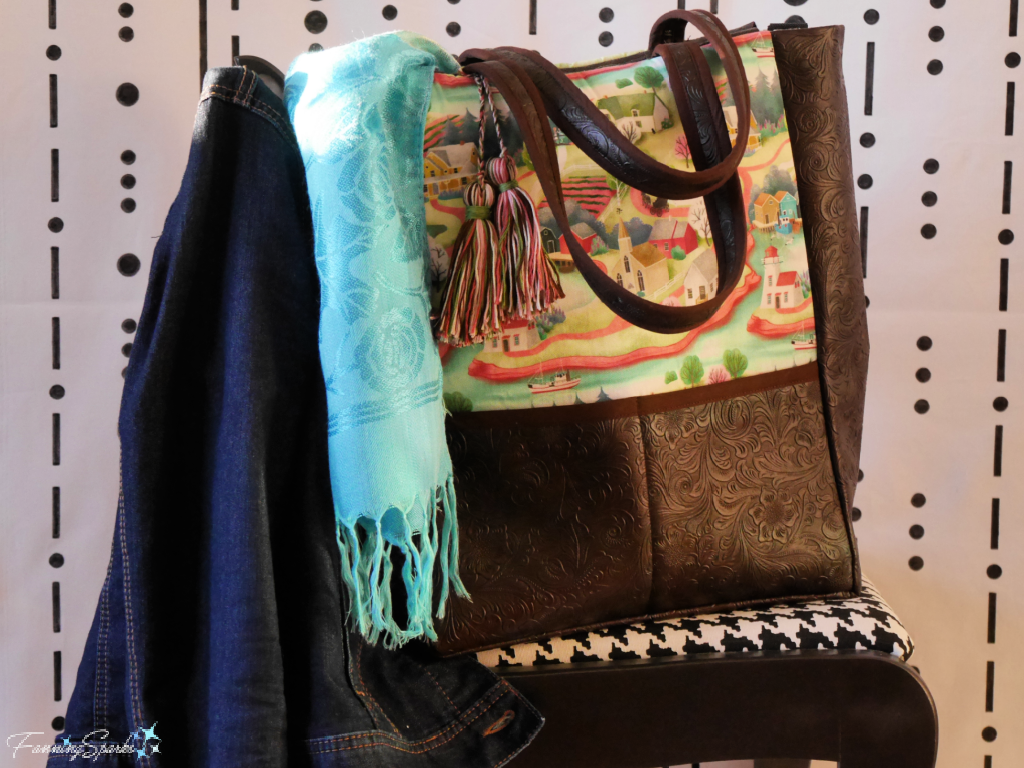
2. Kindred Spirits Tote Bag
Back in January, I made a tote bag specifically tailored to my needs and preferences. I’ve used it nearly every day since. The design, size, configuration and decorative elements have stood the test of time. This tote bag easily holds everyday items such as a smart phone, face mask, hand sanitizer, keys, water bottle, sunglasses, laptop, camera and so on. It would be an ideal gift for someone on the go. This project requires a sewing machine and sewing skills. Check out the Kindred Spirits Tote Bag post for advice on how to make your own one-of-a-kind tote bag.
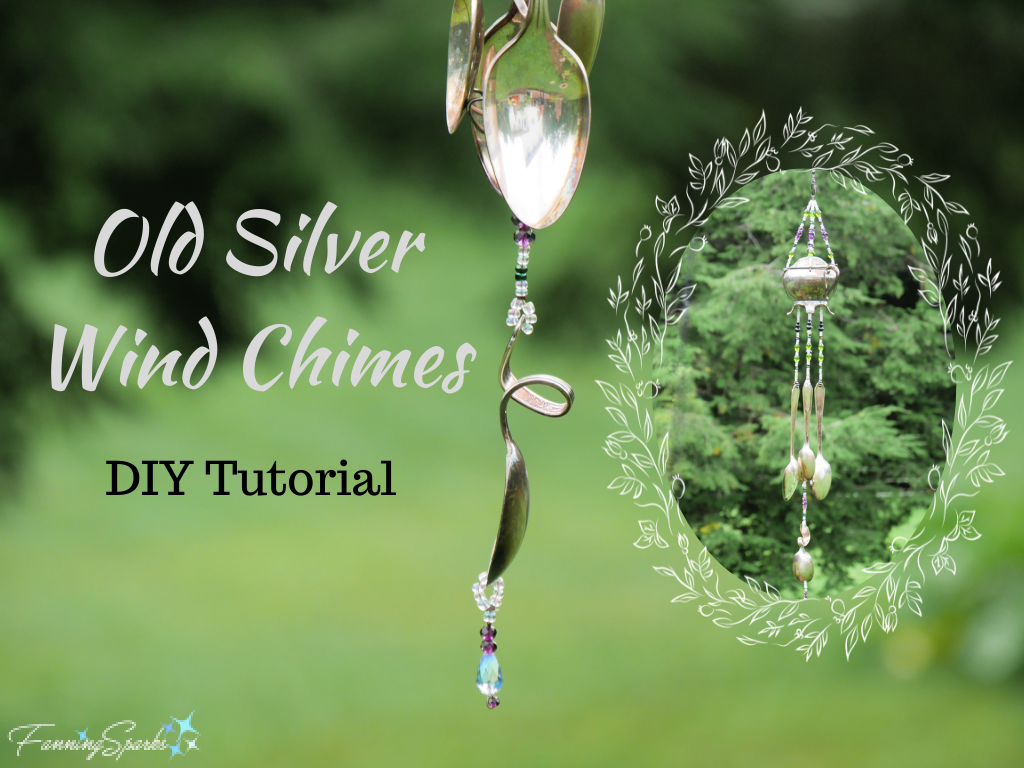
 3. Old Silver Wind Chimes – DIY Tutorial
There’s something magical about the soft tinkling of wind chimes in the gentle breeze. If you know someone that might appreciate this magic, consider making them a set of wind chimes from repurposed vintage silver. In the Old Silver Wind Chimes – DIY Tutorial post, I share step-by-step instructions for transforming a vintage, silver-plated sugar bowl (or creamer) and cutlery into pretty wind chimes. Glass beads are strung on fishing line to tie it all together. It’s a fun project that doesn’t require any specialized tools or skills.
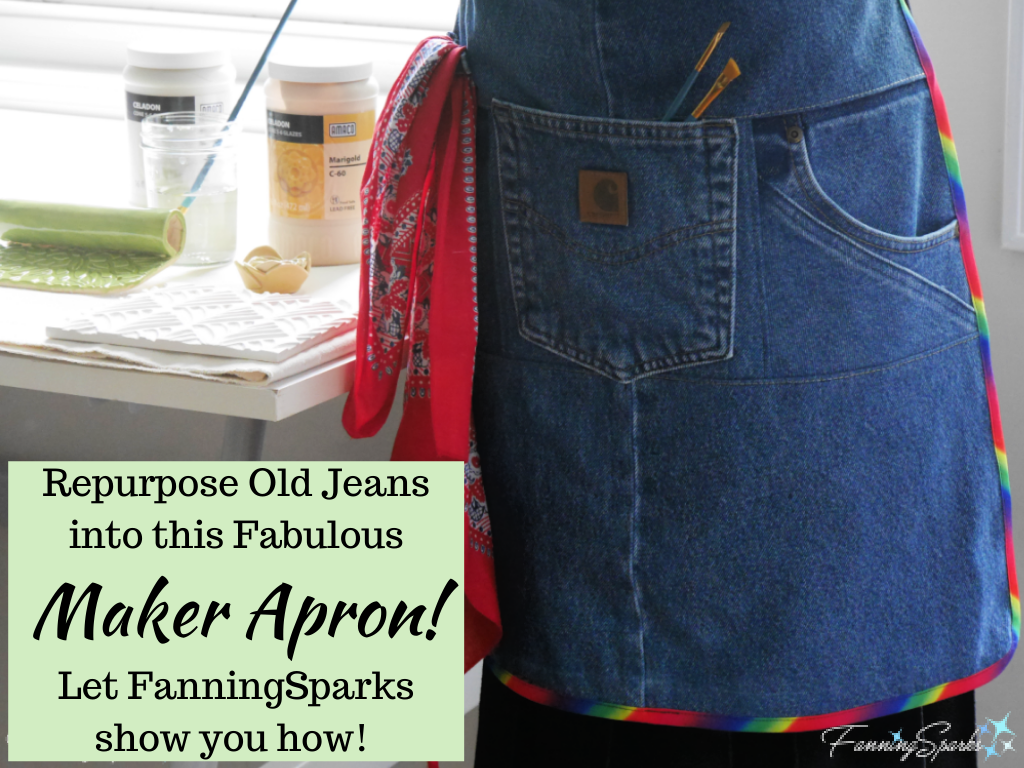
4. Maker Apron – DIY Tutorial
This project would be ideal for someone who likes to cook, paint, garden, work with wood, make pottery, or participate in any other messy pastime. It is made from a simple pair of thrifted denim jeans. The Maker Apron – DIY Tutorial post provides step-by-step instructions for this basic sewing project.
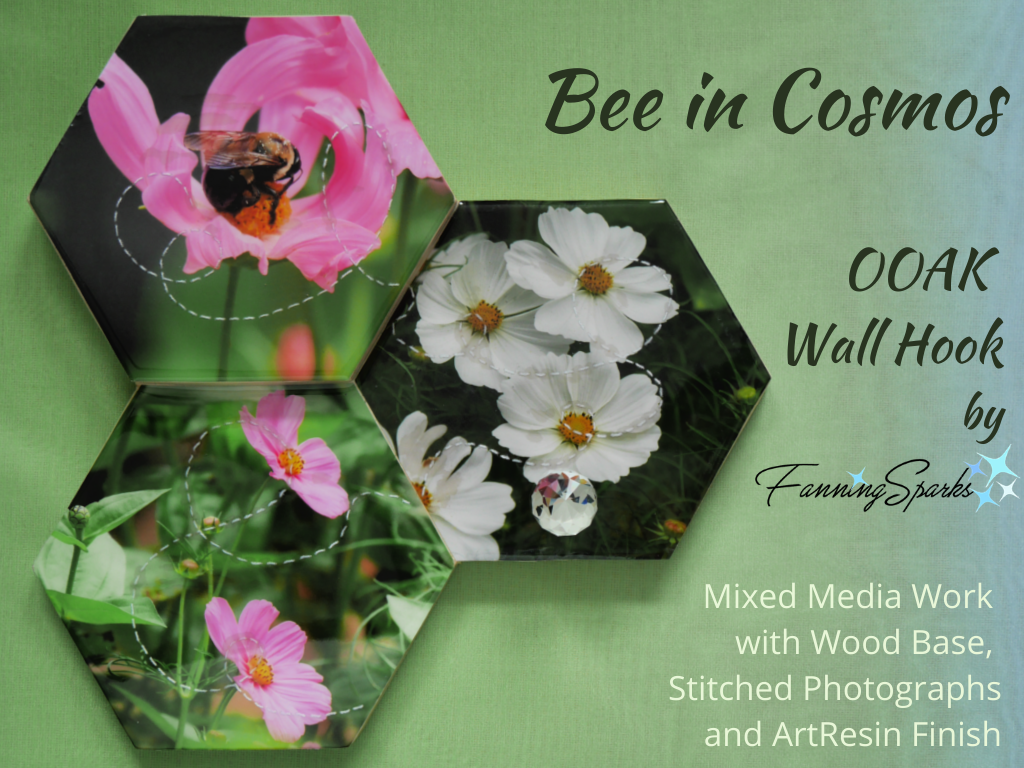
5. Bee in Cosmos OOAK Wall Hook
I’m always on the lookout for ways to incorporate my favorite photos into functional items in my home. This one-of-a-kind (OOAK) wall hook does that perfectly. I’ll readily admit that a wall hook would be a rather odd gift. But a wall hook tailored to the recipient’s specific needs and featuring a photo that is meaningful to them would be very thoughtful. For instance, how about a set of wall hooks, featuring photos of family members, specifically designed for a set of mudroom cubbies? Or what about a wall hook designed to hold someone’s baseball cap collection? Or one designed to capture keys while featuring a photo of the recipients first home? My OOAK wall hook, featuring a bee in cosmos flowers, is described in the Bee in Cosmos OOAK Wall Hook post and can easily be modified to meet your needs.
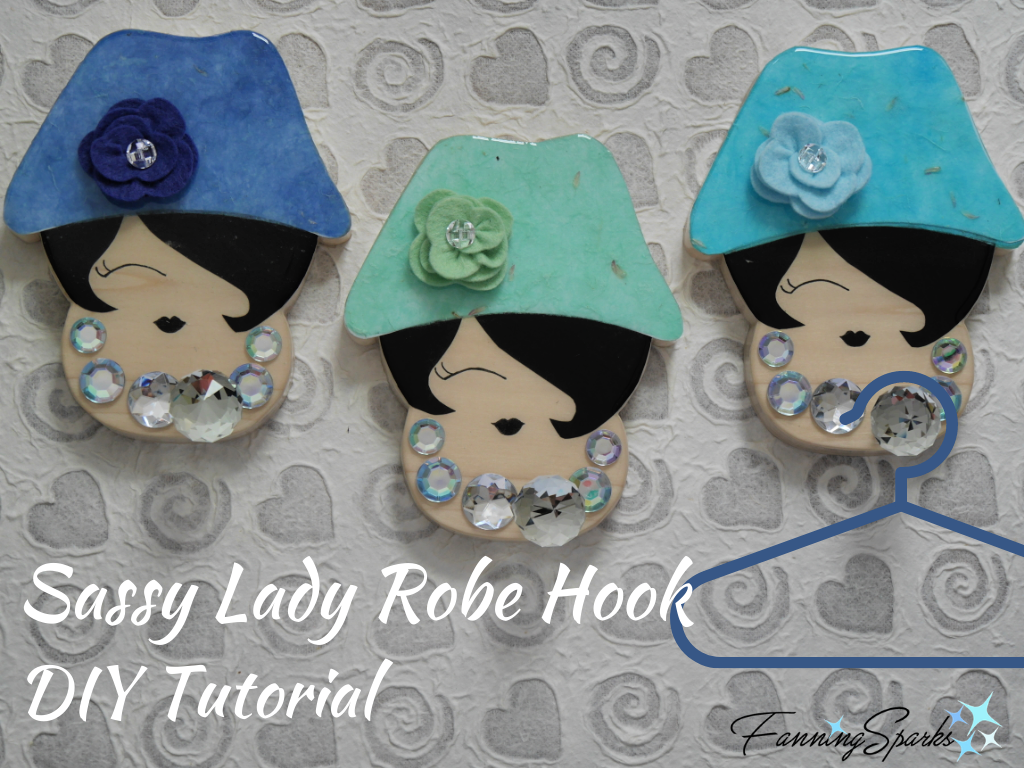
6. Sassy Lady Robe Hook – DIY Tutorial
Once you start noticing wall hooks, you may be surprised by how many hooks are used in the average home. Wall hooks, coat hooks, robe hooks, back-of-door hooks, closet hooks and so on. The Sassy Lady Robe Hook – DIY Tutorial post puts a different spin on the typically uninspired robe hook. I made a set of three for the inside of my clothes closet and I still enjoy the little spark of joy they give me every time I open the closet. Perhaps someone you know would appreciate the same feeling. The post includes step-by-step instructions and a full-size template for this beginner woodworking and paper crafting project.
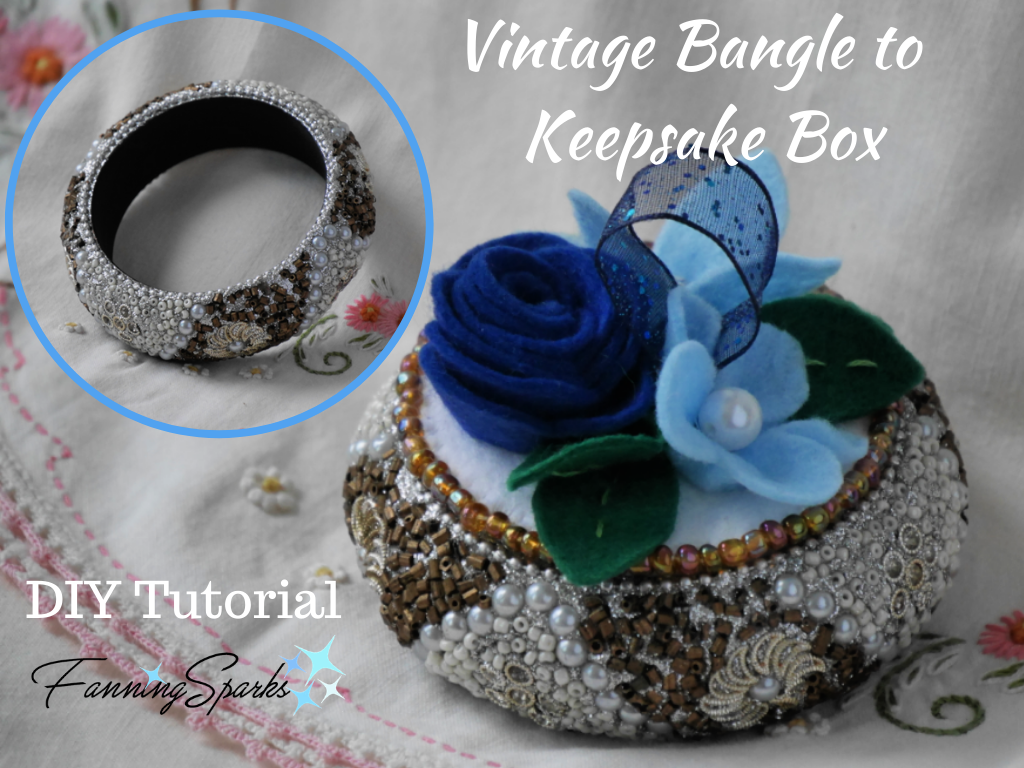
7. Vintage Bangle to Keepsake Box – DIY Tutorial
A small, pretty keepsake box may be just the ticket for a few favorite pieces of jewelry or a treasured collection of trinkets. In the post, Vintage Bangle to Keepsake Box – DIY Tutorial, I describe how to repurpose a chunky, vintage bangle into a pretty, little keepsake box. It’s a straight forward hand-sewing project using felt flowers, glass beads and embroidery. Detailed instructions, as well as full-size templates for the felt flowers, are shared in the post.
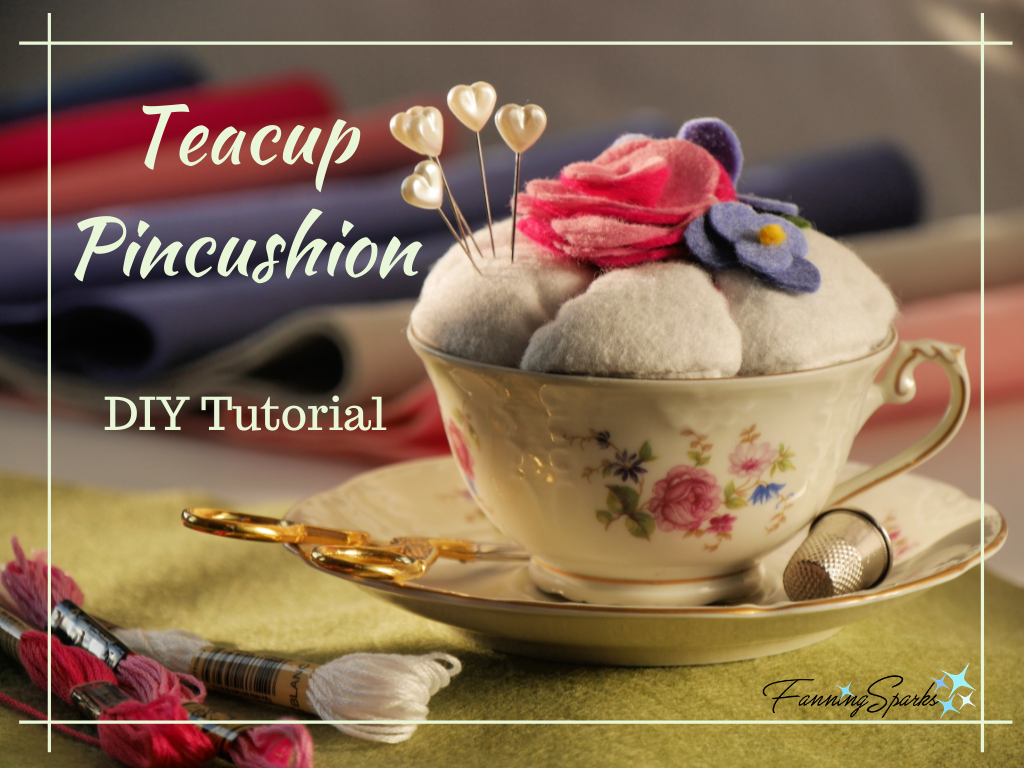
8. Teacup Pincushion – DIY Tutorial
Anyone who sews on a regular basis knows that a good pincushion is a necessity. But those who sew infrequently, only to fix a hem or reattach a button for instance, could also benefit from a handy, little pincushion. In either case, the pincushion presented in the Teacup Pincushion – DIY Tutorial post may fit the bill. This hand-sewing project uses felt and embroidery to repurpose a china cup and saucer into a pretty pincushion. If the teacup is a cherished family treasure, as was the case in my project, that’s even better. Detailed instructions, as well as full-size templates for the felt flowers, are shared in the post.
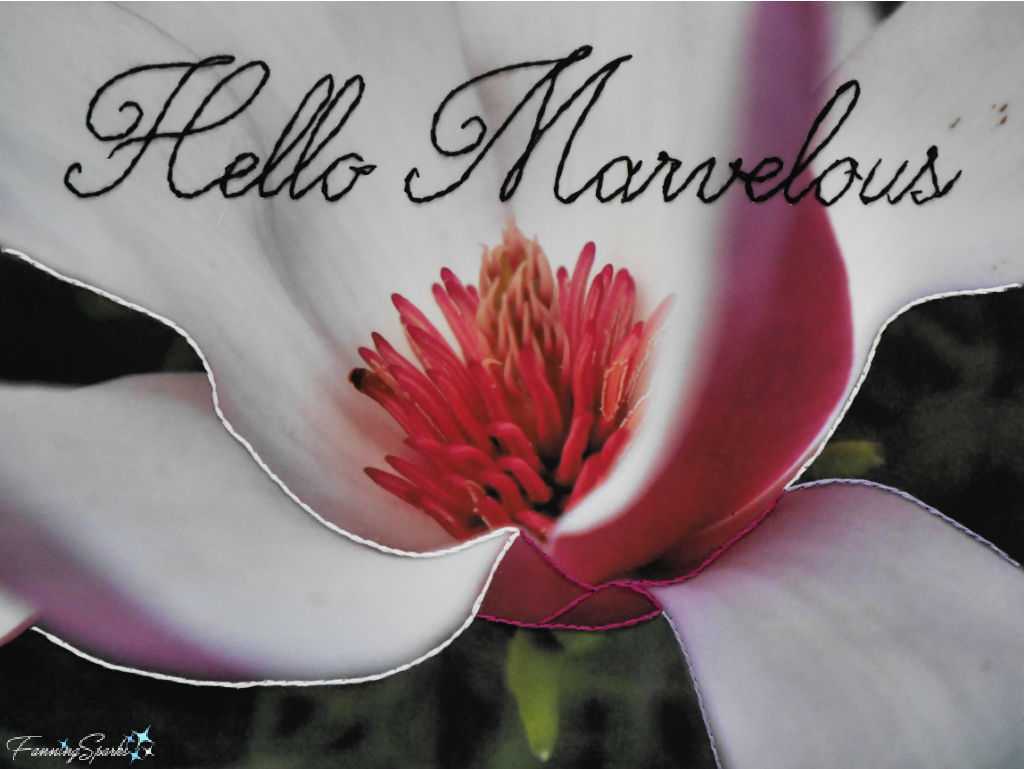
9. Hello Marvelous Photo Embroidery – DIY Tutorial
It’s amazingly popular to use inspirational quotes as wall art. This photo embroidery project puts a unique spin on the trend. I chose to embroider the words “Hello Marvelous” to remind me of the Aristotle quote “In all things of nature there is something of the marvelous.” The beauty of this project is that any photo can be used. Check out my Paper Stitching inspiration board on Pinterest for over 300 ideas. Select your own favorite photo and inspirational message. Then embroider your message on the photo. Check out the step-by-step instructions in the Hello Marvelous Photo Embroidery – DIY Tutorial post for guidance on this easy embroidery project.
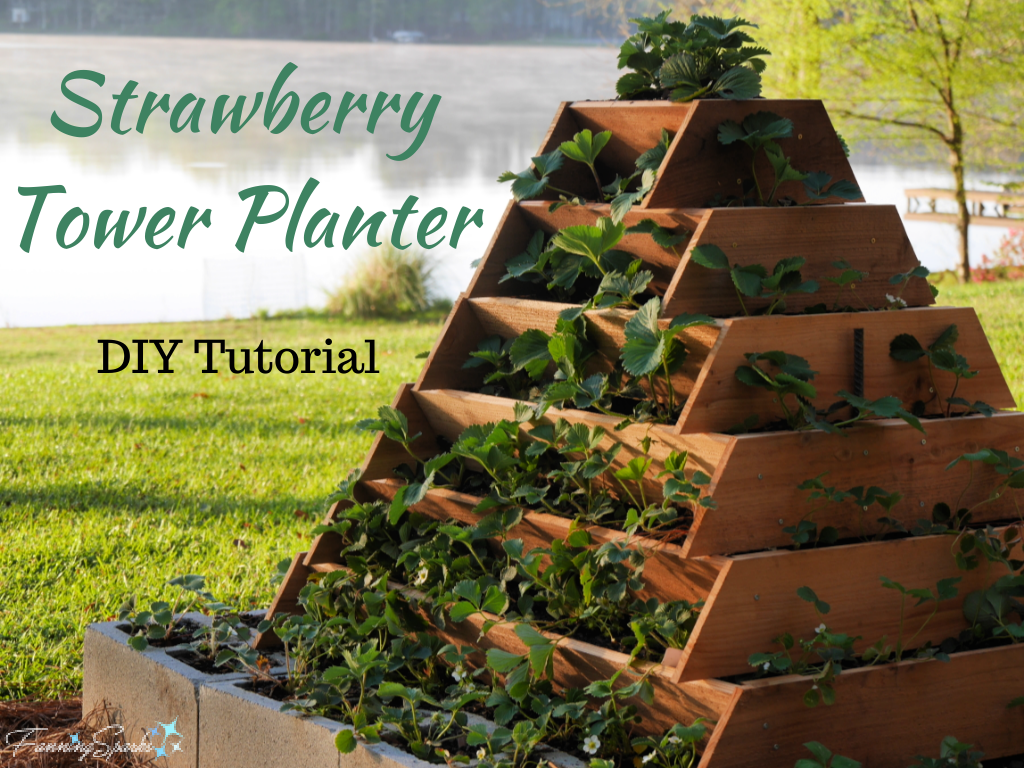
10. Strawberry Tower Planter – DIY Tutorial
For something completely different, how about a strawberry tower planter for your favorite gardener? This beginner woodworking project requires only basic tools and a few supplies. With the step-by-step instructions provided in the Strawberry Tower Planter – DIY Tutorial post, it isn’t difficult to build.
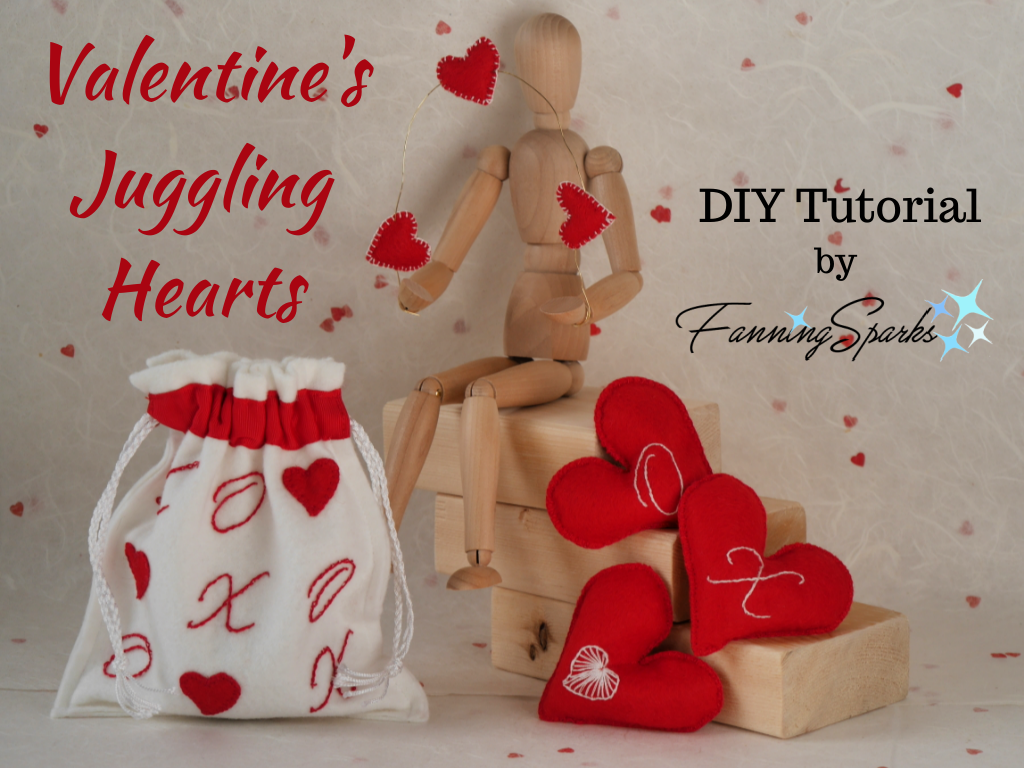
11. Valentine’s Juggling Hearts – DIY Tutorial
Although these juggling hearts were presented for Valentine’s Day, they are equally relevant for the upcoming holidays. This is an easy sewing project using felt. In fact, it’s easier to make the juggling hearts than to juggle them! See the Valentine’s Juggling Hearts – DIY Tutorial post for detailed step-by-step instructions and templates to make these hearts for the fun-loving person on your holiday gift list.
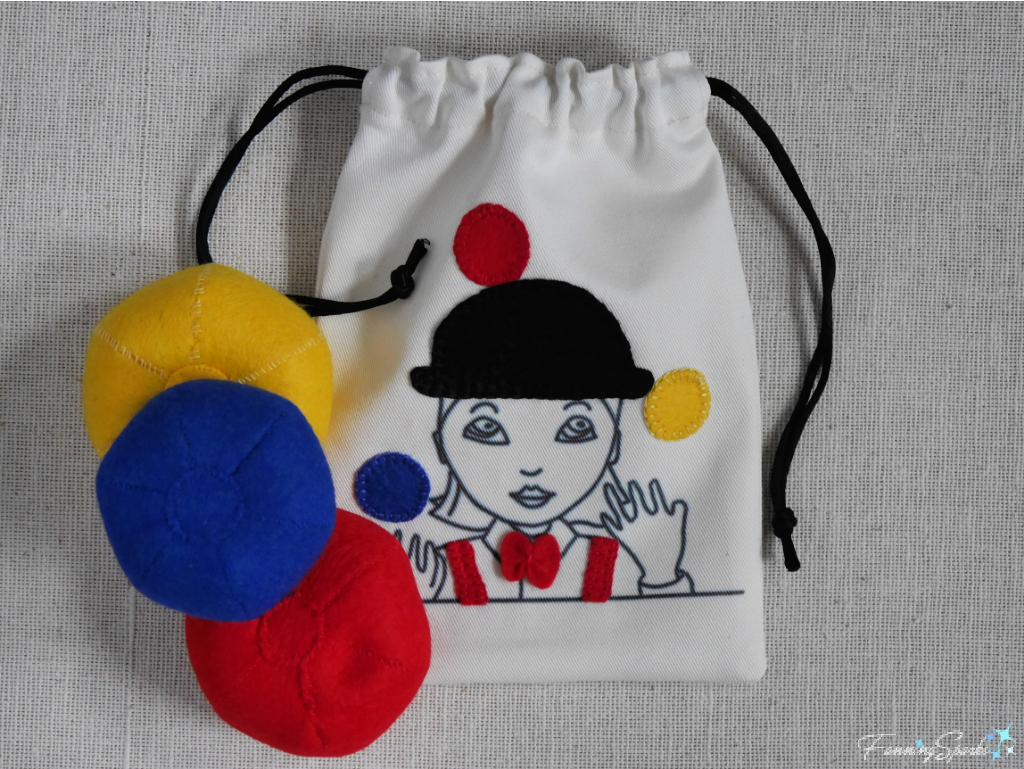
12. Felt Juggling Balls with Pouch – DIY Tutorial
For someone who takes juggling a little more seriously, you might want to consider juggling balls instead of juggling hearts. According to my research, the ideal object for beginner jugglers is a sphere shape, about 2.5 inch in diameter, stuffed with millet, and weighing about 130 grams. All of these specifications are met with the felt juggling balls featured in the Felt Juggling Balls with Pouch – DIY Tutorial post. Templates are provided in a complimentary download. Step-by-step instructions walk you through making your own set of juggling balls.
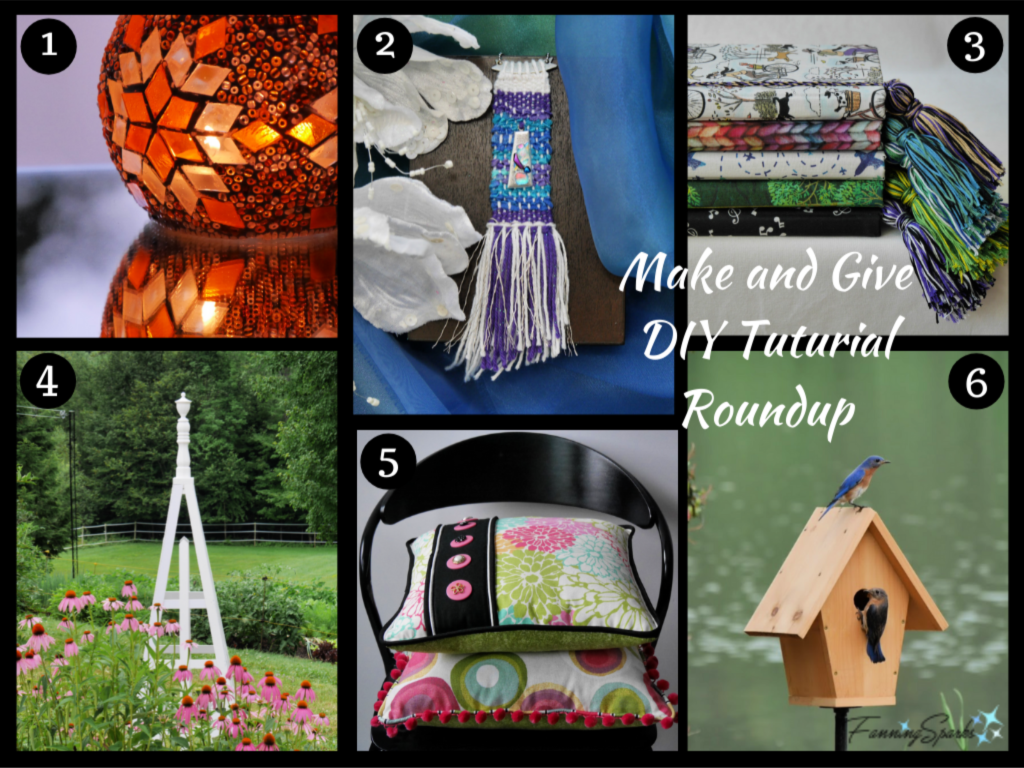
This completes the 2021 Make & Give Roundup of FanningSparks’ projects. You may also want to consider some ideas from previous years. Check out the post, Make and Give DIY Tutorial Roundup, for a variety of make-and-give ideas from 2019.
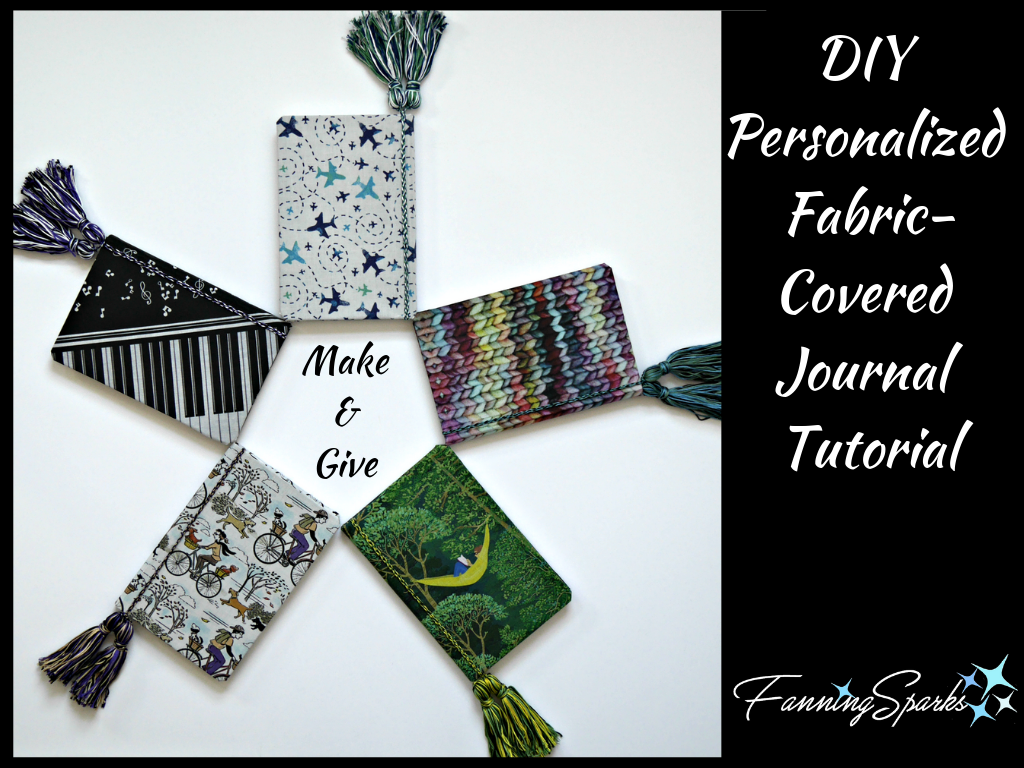
 If I were to choose only one make-and-give project from 2019, it would be the fabric-covered journals. I’ve given several to family members and they were well received. It’s an easy project that requires only basic crafting skills. Simply select fabric that reflects the interests of the recipient and then follow the step-by-step instructions provided in the DIY Personalized Fabric-Covered Journal Tutorial Part 2 post.
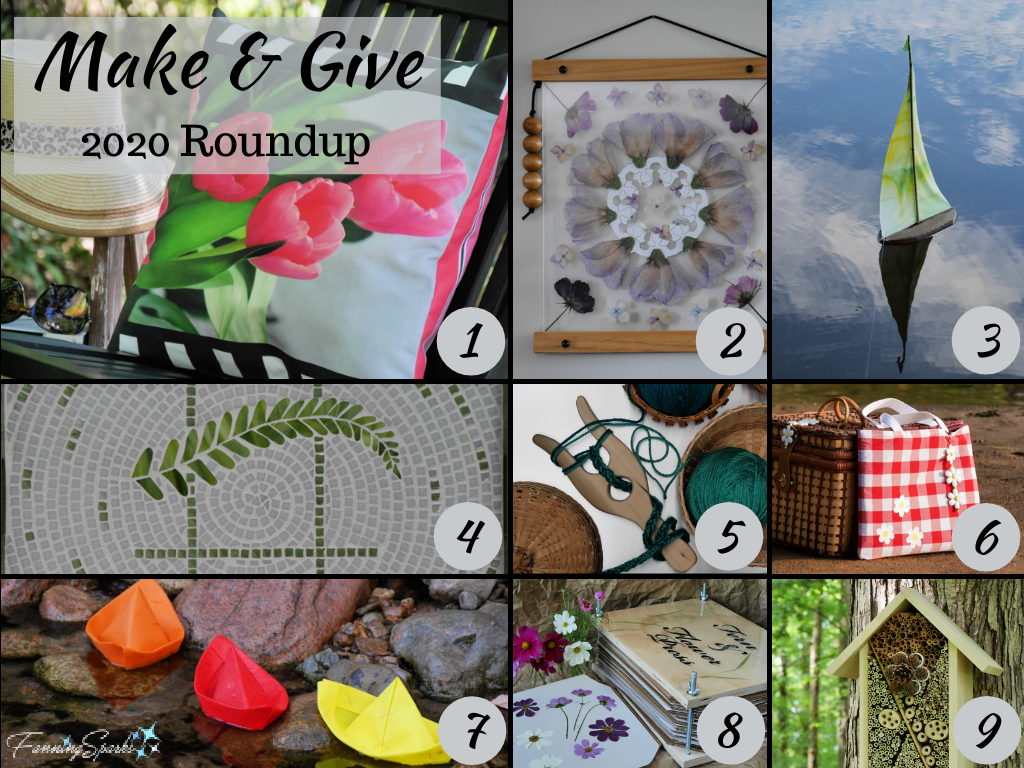
Check out the Make & Give 2020 Roundup post for gift-giving inspiration from 2020.
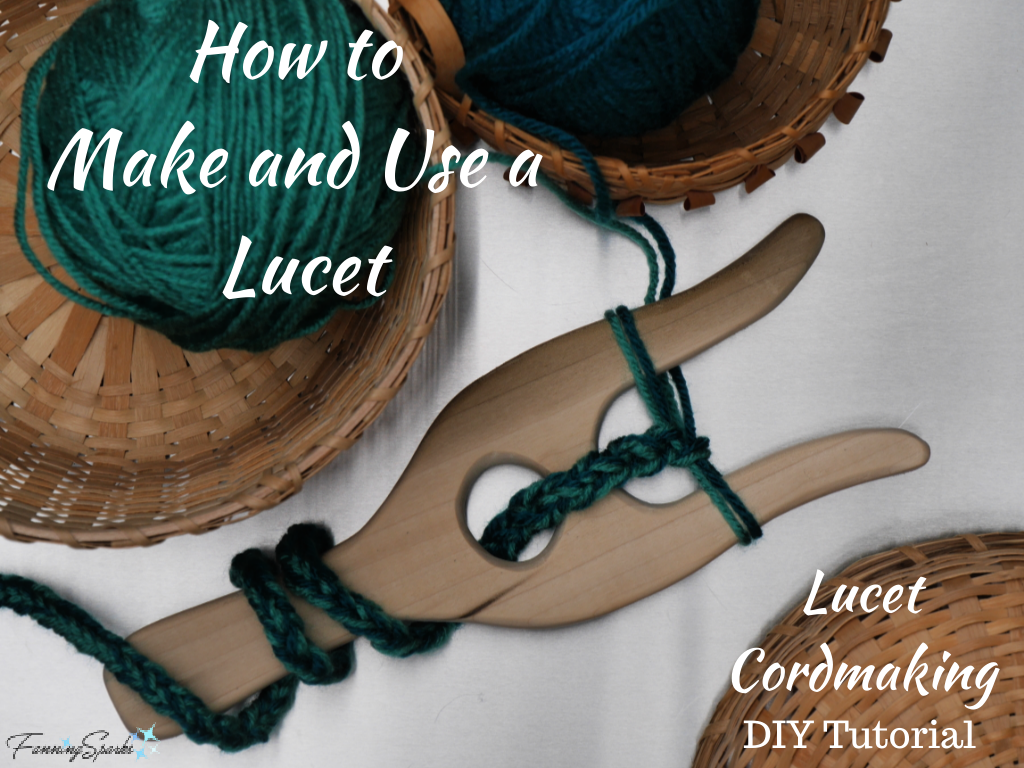
My first choice from the 2020 roundup would be the cordmaking lucet. There’s been a great deal of action in Pinterest around this project—over 1,000 people have pinned it! The lucet requires only basic woodworking skills to make. Detailed instructions, as well as a full-size template for the lucet, are shared in the Lucet Cordmaking – DIY Tutorial post. I also share detailed instructions, along with step-by-step photos, explaining how to make cord using a lucet.
You may also enjoy Inspiration for the Holiday Season which is a roundup of previous posts about holiday travel, decorating and traditions.
1. The holiday season offers an opportunity to get creative.
2. Handmade gifts signal care and affection.
3. Consider making and giving gifts this holiday season.
As we slip into the final month of the year, the 2021 holiday season is officially underway! It’s time to take a step back and focus on gratitude. It’s time to celebrate life with holiday traditions. Today’s blog post is packed with holiday inspiration—it’s a roundup of previous posts about holiday travel, decorating, traditions and gift-giving. Let the festivities begin!
Holiday Travel
Some destinations are known for their holiday celebrations. The attraction may be garden light shows, winter scenery, beautiful decorations, Christmas markets or special holiday events. Unfortunately, travelling for pleasure has not yet returned to the openness we enjoyed pre-COVID-19 but those able to travel safely within the US Southeast might want to consider a visit to Savannah Georgia, Madison Georgia or Asheville North Carolina. All are known for their festive holiday events and décor.
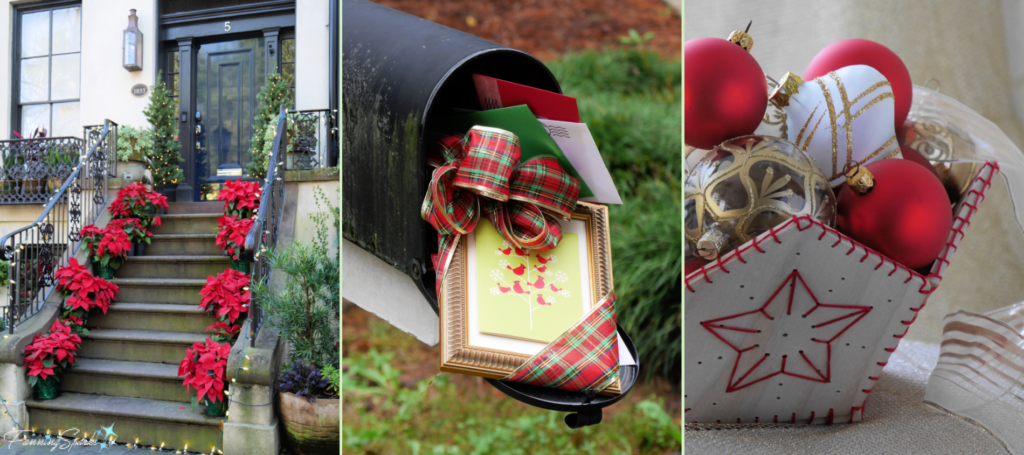
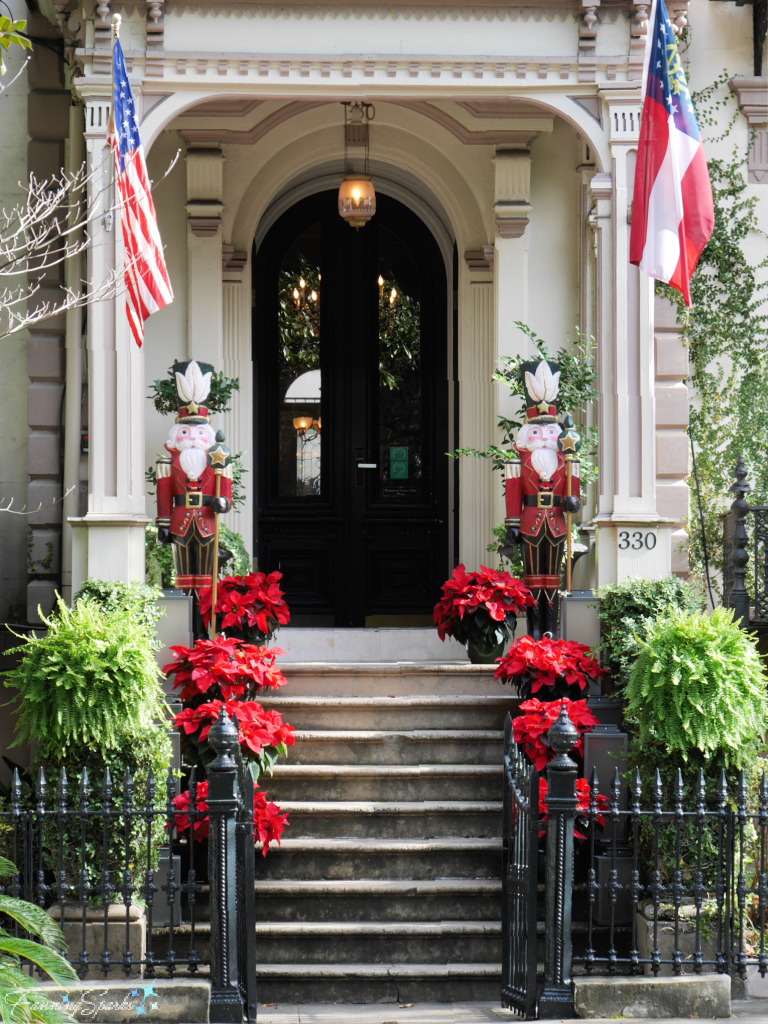
Graceful public squares, moody oak trees and beautiful historic homes are the hallmarks of Savannah Georgia. This charming city is a delight to visit any time of the year but it’s even more appealing during the holiday season. Here are a few photos of this special destination. Check out the post, Holiday Visit to Savannah, for more.

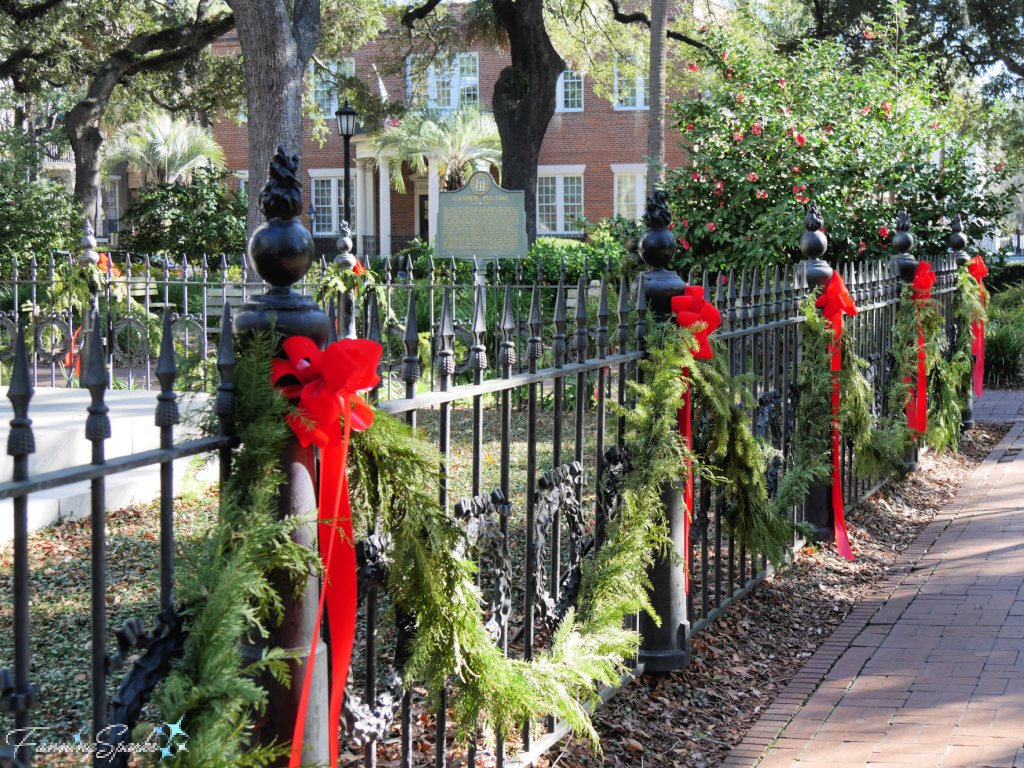
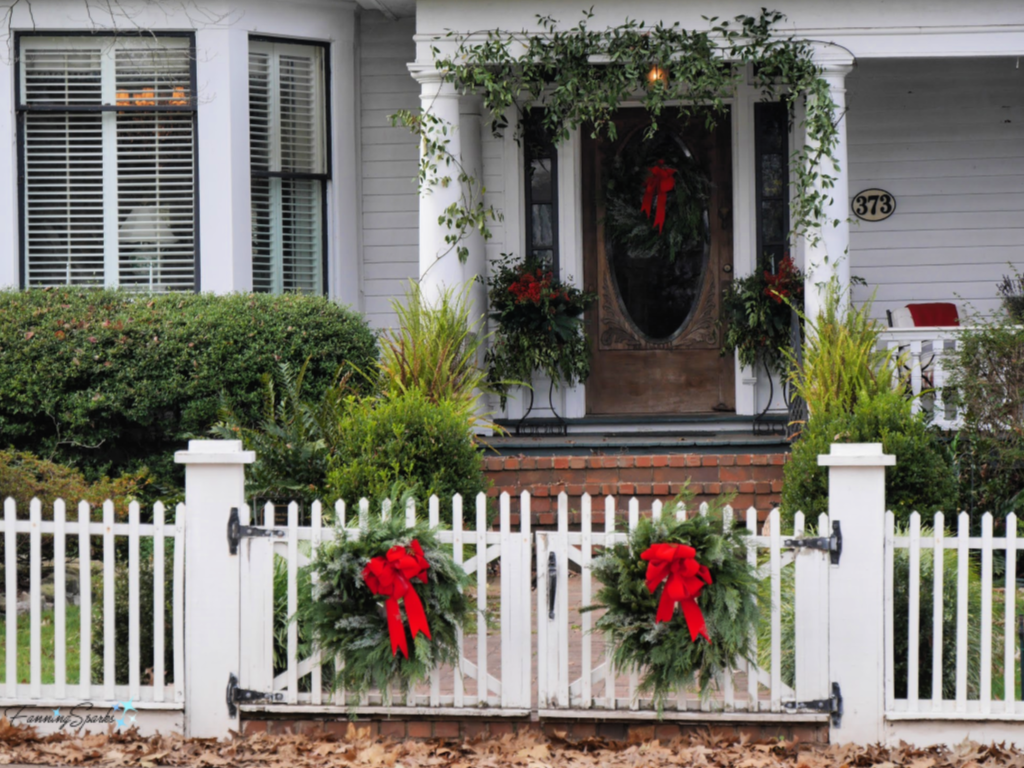
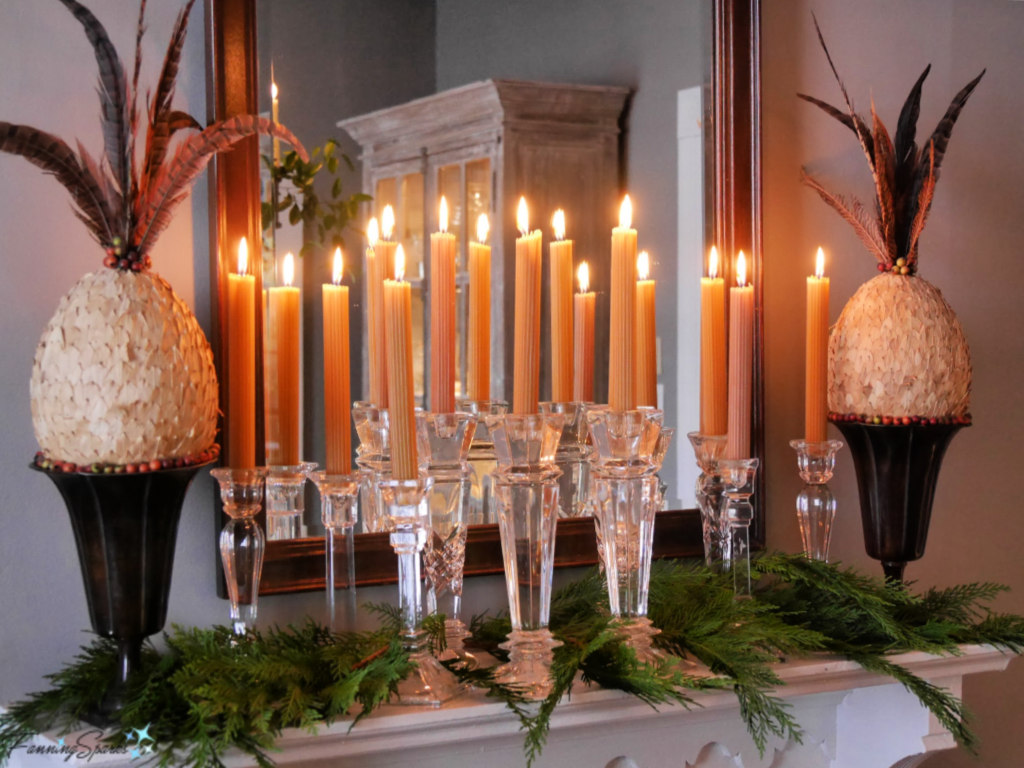
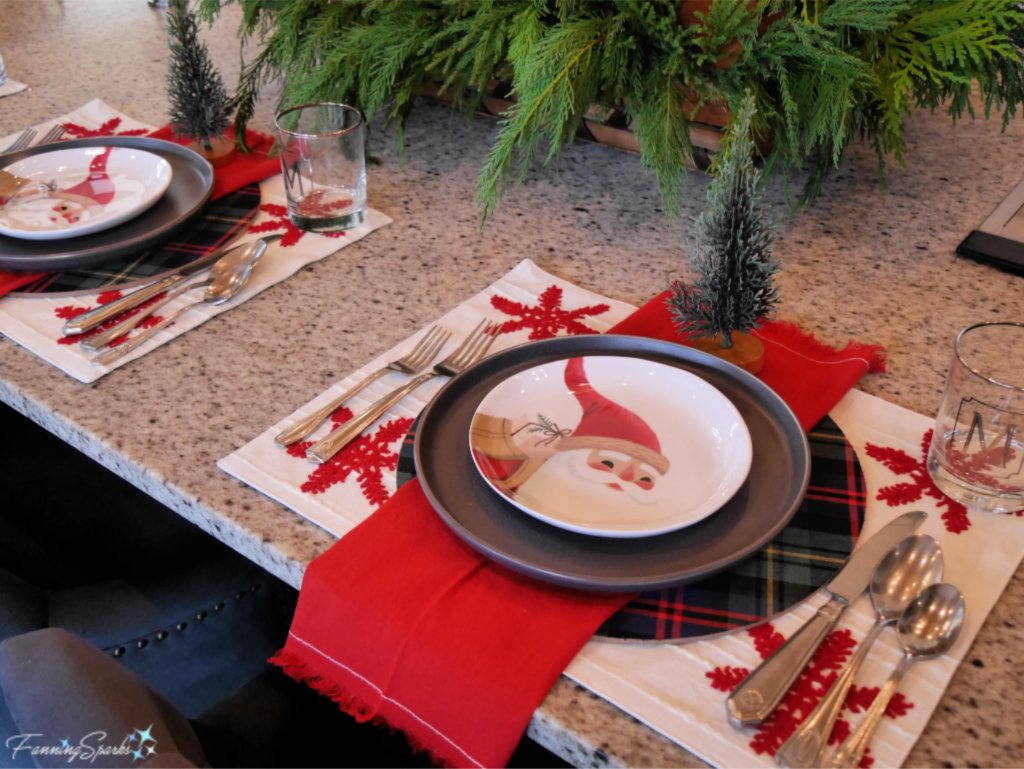
Madison Georgia, a lovely southern town close to where I live, is also known for its historic homes and holiday hospitality. The annual Holiday Tour of Homes is a treasured tradition and, although the 2021 home tour was cancelled, it’s still possible to enjoy the sights on a self-guided walking tour. Here are a few photos from previous home tours. Check out the post, Madison Decks the Halls, for more holiday finery.
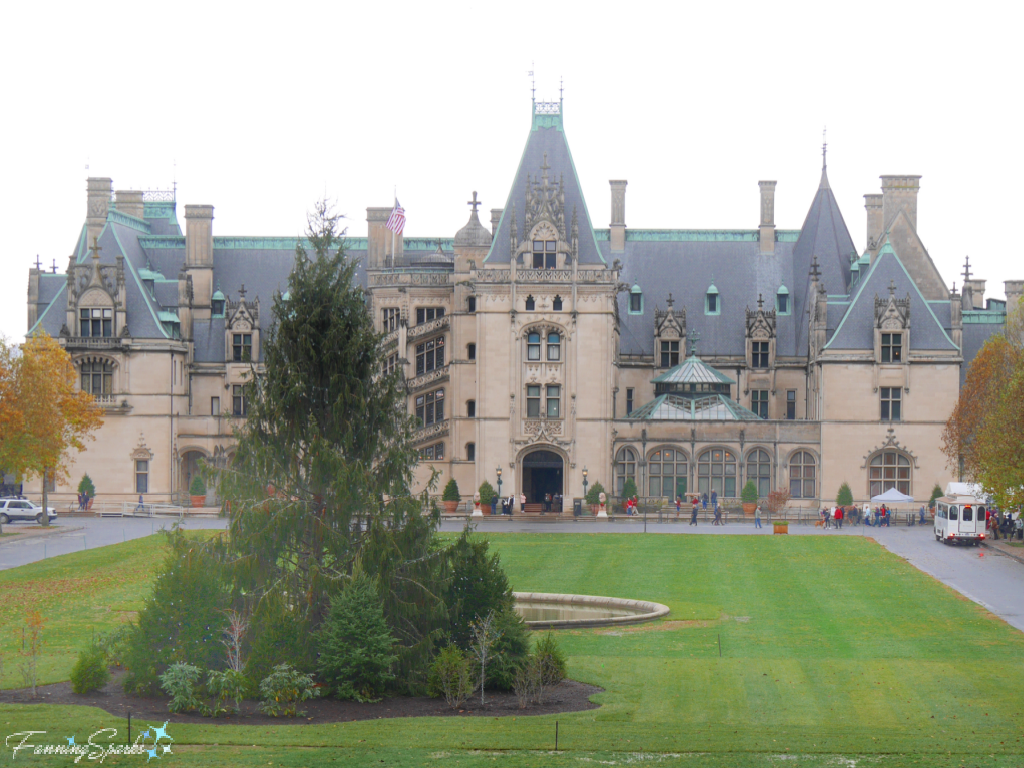
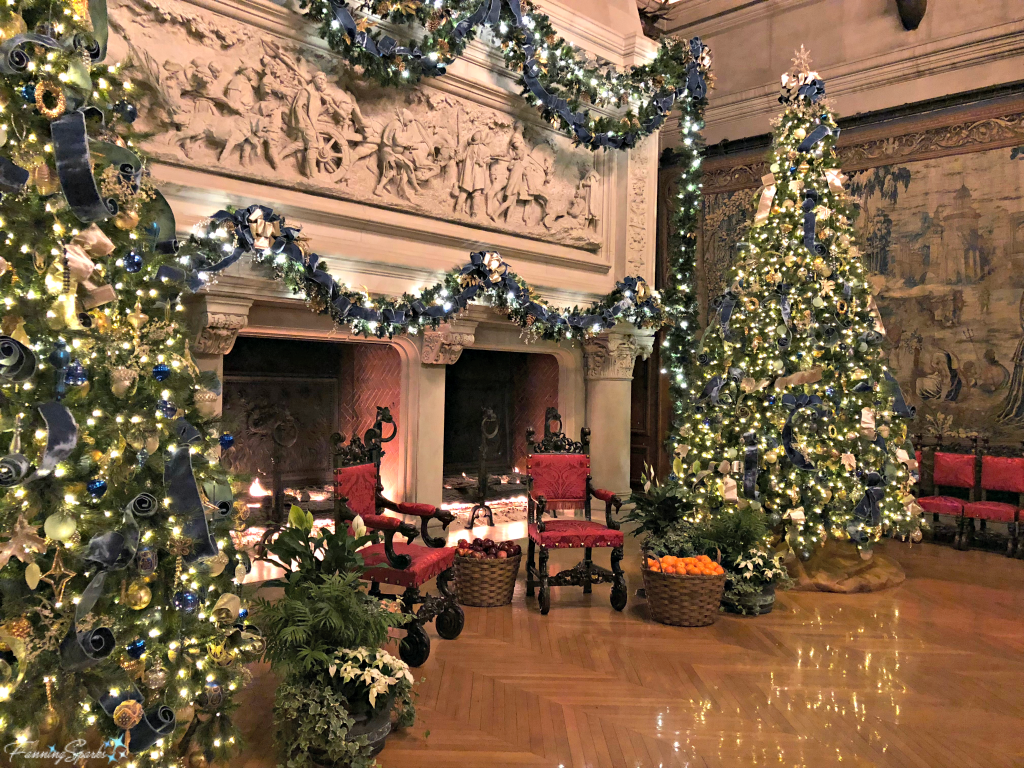
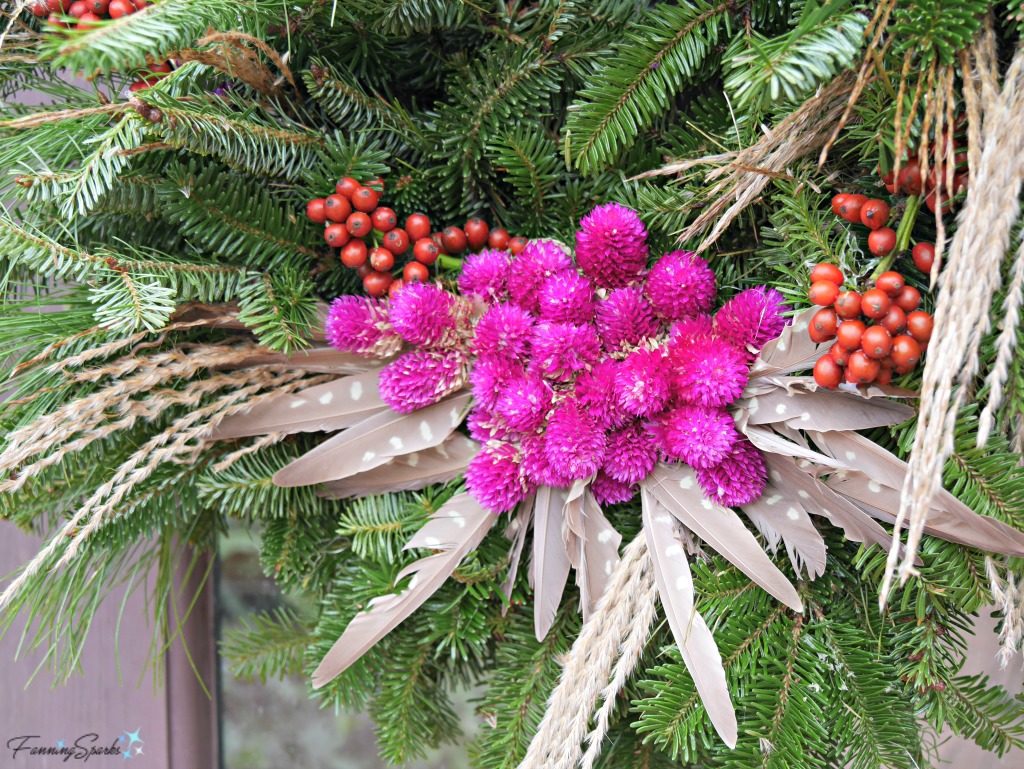
The city of Asheville North Carolina boasts many attractions and reasons to visit but none are as awe-inspiring as Biltmore. The owners of this large, private, Châteauesque-style mansion and astonishing, 8,000-acre estate have been celebrating the holidays in style for over 125 years. Here’s a peek into what Biltmore holds in store. Check out the post, Holiday Wreath Inspiration from Biltmore, for more.
 Holiday Decoration
Decorating our homes and surroundings for the holidays distinguishes this time of year. Some folks embrace traditional holiday décor while others decorate in their own unique styles. I favor traditional décor but I take this opportunity to try a few new and different things. Here are a few examples from previous posts.
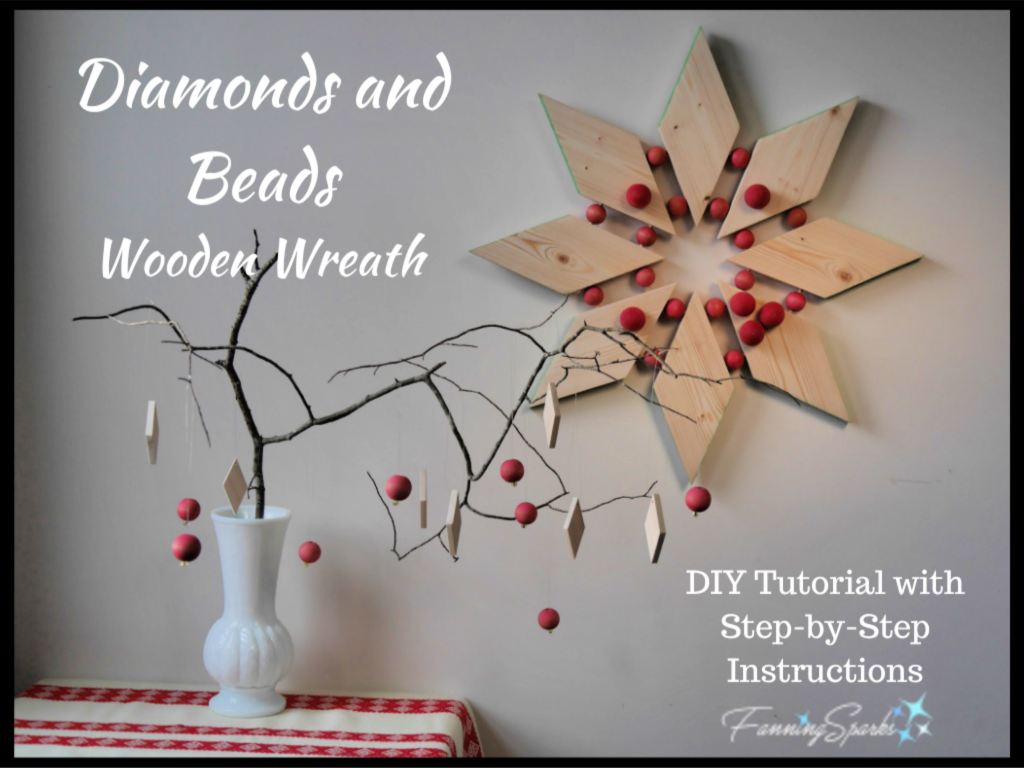
See the post, Diamonds and Beads Wooden Wreath, for a full tutorial.
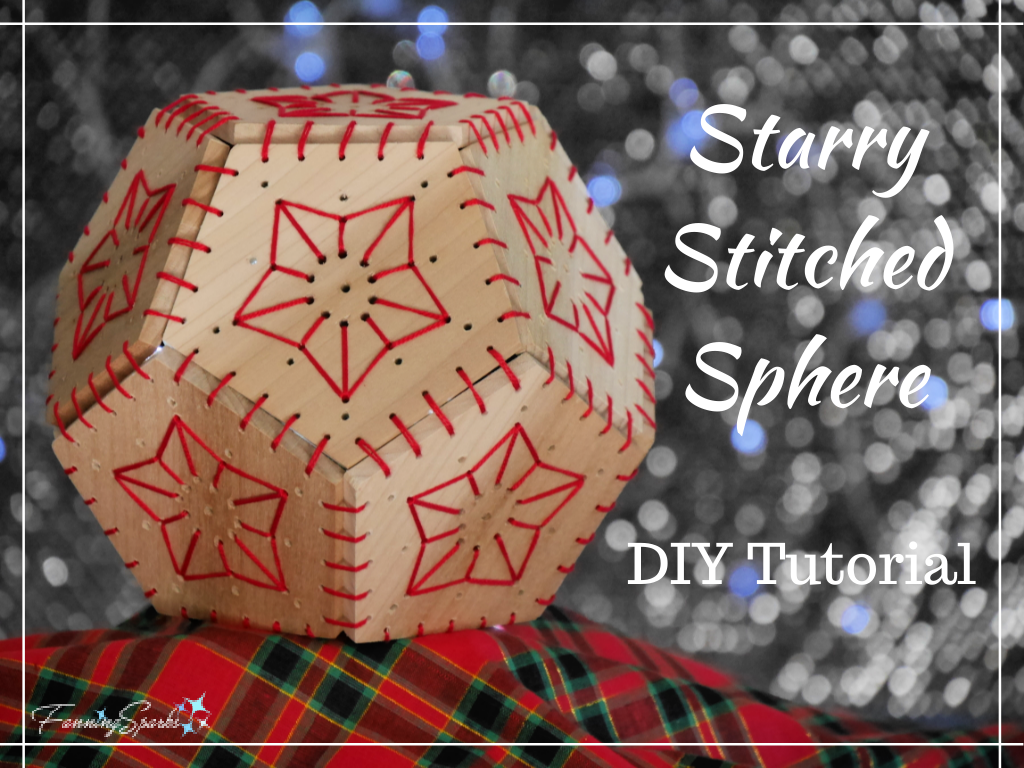
See the post, Starry Stitched Sphere – DIY Tutorial, for step-by-step instructions.
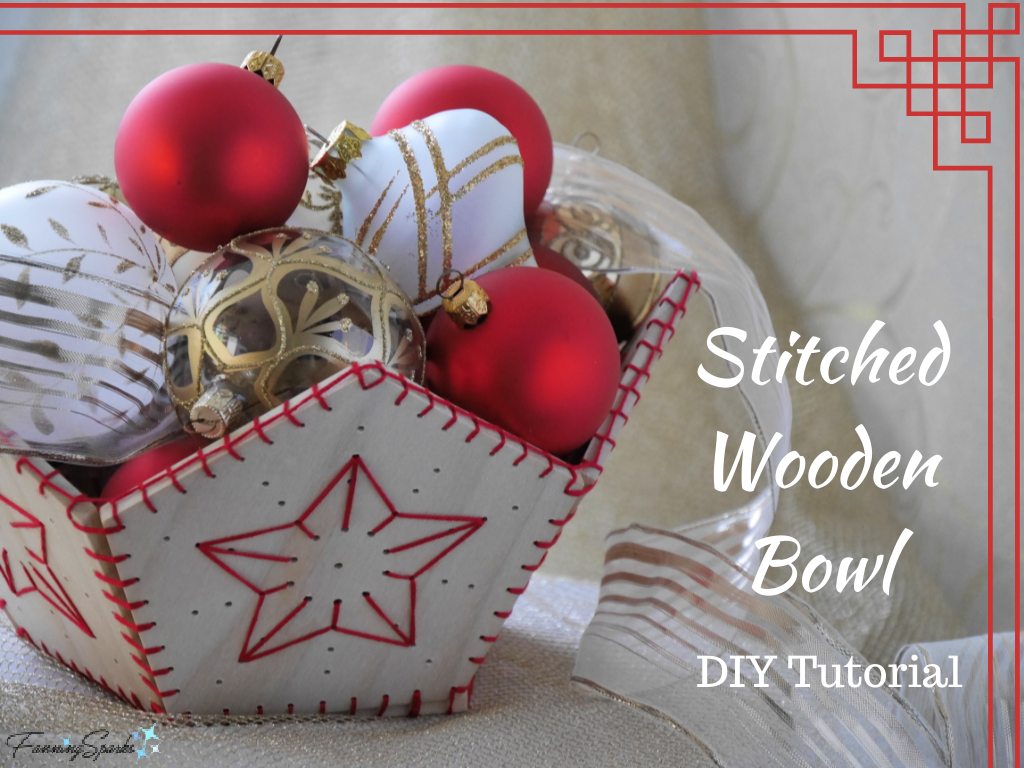
 See the post, Stitched Wooden Bowl – DIY Tutorial, for step-by-step instructions.
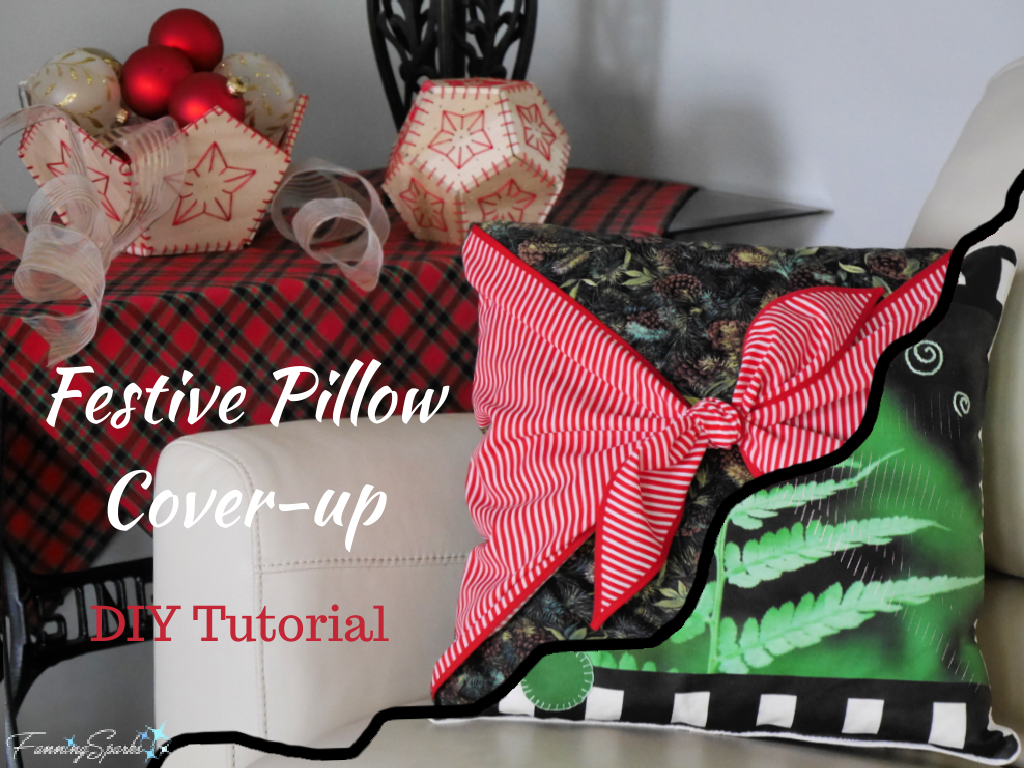
Moving away from wooden décor elements, I’ve found a way to temporarily introduce cheerful colors and patterns with decorative pillows. This Festive Pillow Cover-up dresses up regular, decorative pillows for the season. See the post, Festive Pillow Cover-up – DIY Tutorial, for easy step-by-step instructions.
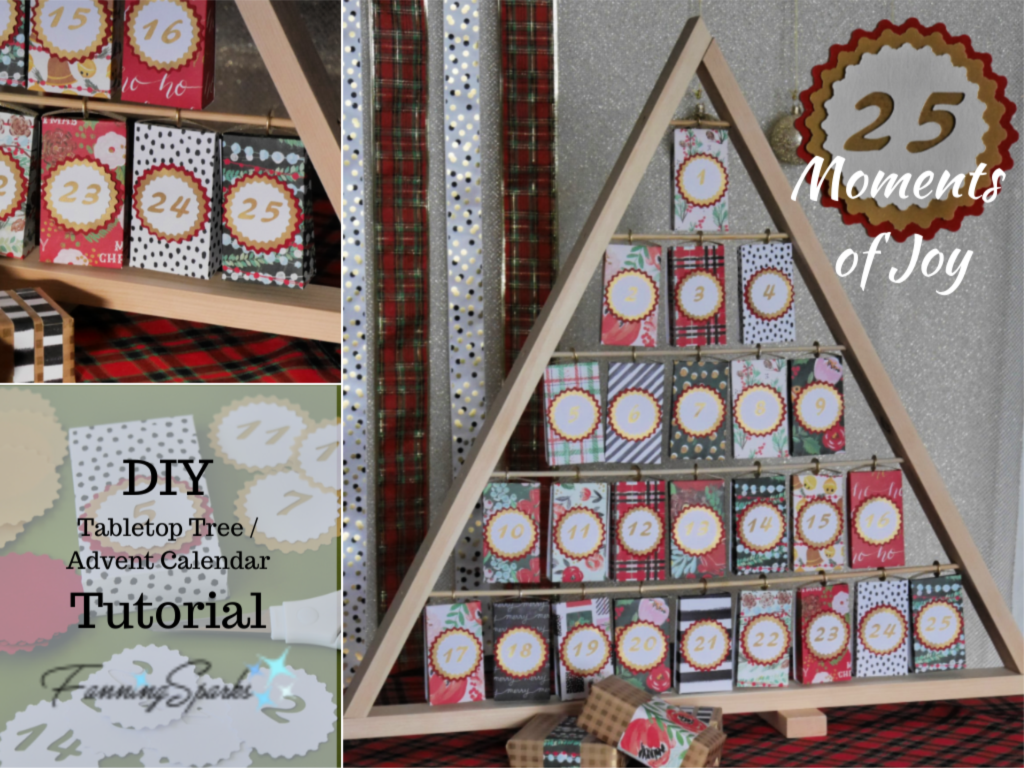
 Some holiday decorations are associated with treasured traditions. The advent calendar, for instance, is used to countdown the days to December 25. A few years ago, I created my own version of advent calendar as a gift. Check out the post, 25 Moments of Joy Tabletop Tree/Advent Calendar, for a detailed tutorial.
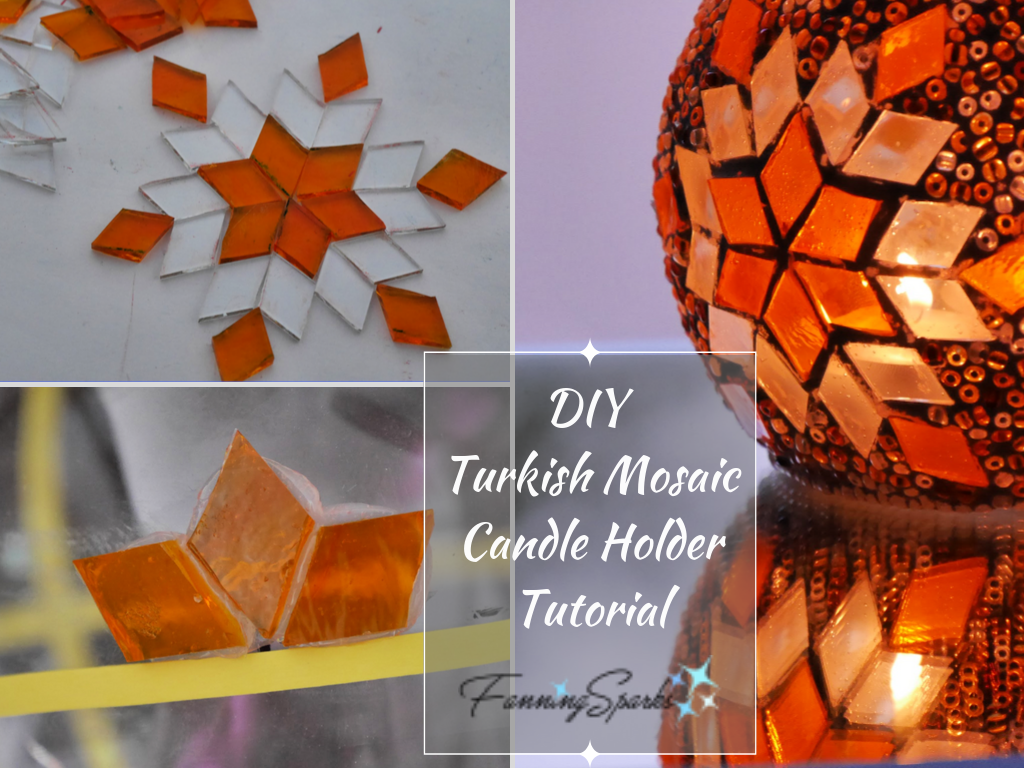
One more holiday decorating project I’d like to share in this roundup is a glass, mosaic, tealight candle holder. This project has become my most popular blog post. While these Turkish Mosaic Candle Holders are not limited to the holidays, they are a great option for adding color and sparkle. Check out the post, DIY Turkish Mosaic Candle Holder Tutorial, for detailed step-by-step instructions.
 Holiday Traditions
Decorating is, of course, not the only holiday tradition. Special foods and enjoying delicious meals together is a universal way to celebrate. Exchanging greetings and giving gifts are other special traditions.
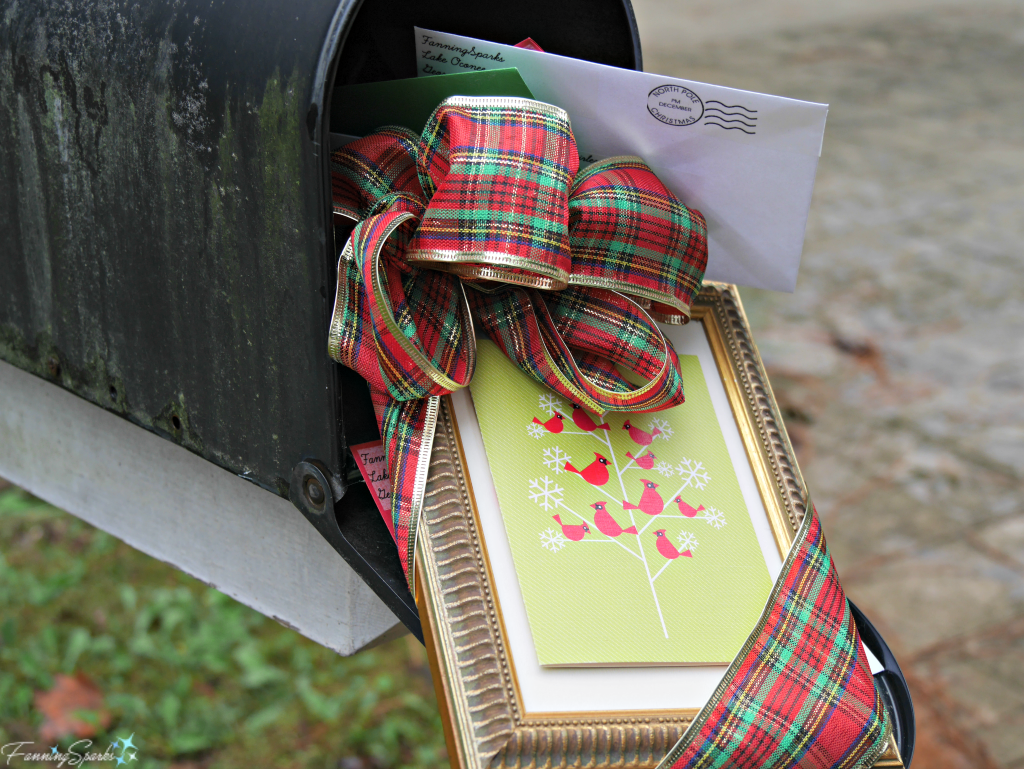
In the post, Win-Win with your Holiday Cards, I make the case for sending old-fashioned greeting cards featuring the work of local artists.
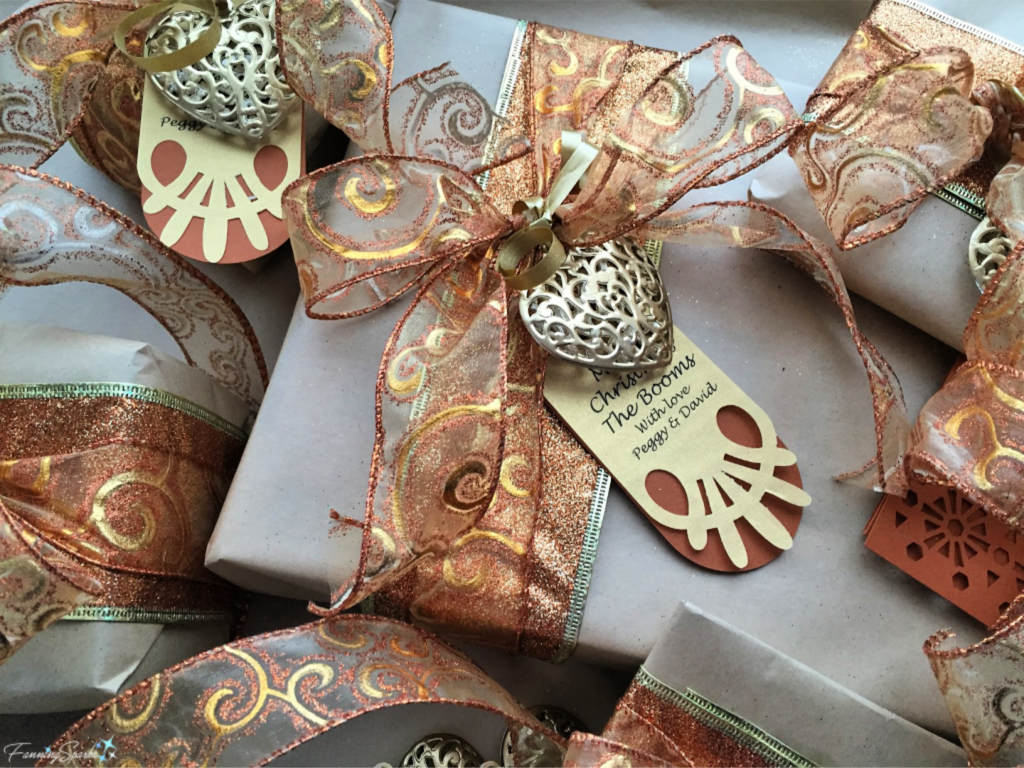
One of my favorite holiday traditions has always been gift wrapping. Check out the post, 8 Tips to Jazz Up Your Gift Wrapping, for some inspiration.
Holiday Gift-Giving
Speaking of gifts, I’m a big proponent of handmade gifts. So this is the ideal time to roundup the DIY tutorials I’ve shared during the year. All of these projects are made by hand resulting in unique, one-of-a-kind items that make ideal gifts.
Check out the post, Make and Give DIY Tutorial Roundup, for a variety of make-and-give ideas from 2019.
There are even more ideas in the post, Make & Give 2020 Roundup.
I’ll roundup the 2021 tutorials for another Make-and-Give post but, in the meantime, check out this Tutorials index.
UPDATE Dec 7, 2021: Check out the new Make & Give 2021 Roundup here.
I hope today’s Holiday Inspiration post sparks some ideas for this holiday season.
Here is a summary of the FanningSparks blog posts shared in today’s post:
Holiday Travel:
. Holiday Visit to Savannah
. Madison Decks the Halls
. Holiday Wreath Inspiration from Biltmore
Holiday Decoration:
. Diamonds and Beads Wooden Wreath
. Starry Stitched Sphere
. Stitched Wooden Bowl – DIY Tutorial
. Festive Pillow Cover-up – DIY Tutorial
. 25 Moments of Joy Tabletop Tree/ Advent Calendar
. DIY Turkish Mosaic Candle Holder Tutorial
Holiday Traditions:
. Win-Win with your Holiday Cards
. 8 Tips to Jazz Up Your Gift Wrapping
Holiday Gift-Giving:
. Make and Give DIY Tutorial Roundup
. Make & Give 2020 Roundup
1. It’s time to take a step back and focus on gratitude. It’s time to celebrate life with holiday traditions.
2. Decorating our homes and surroundings for the holidays distinguishes this time of year.
3. Unique, one-of-a-kind handmade items make ideal gifts.
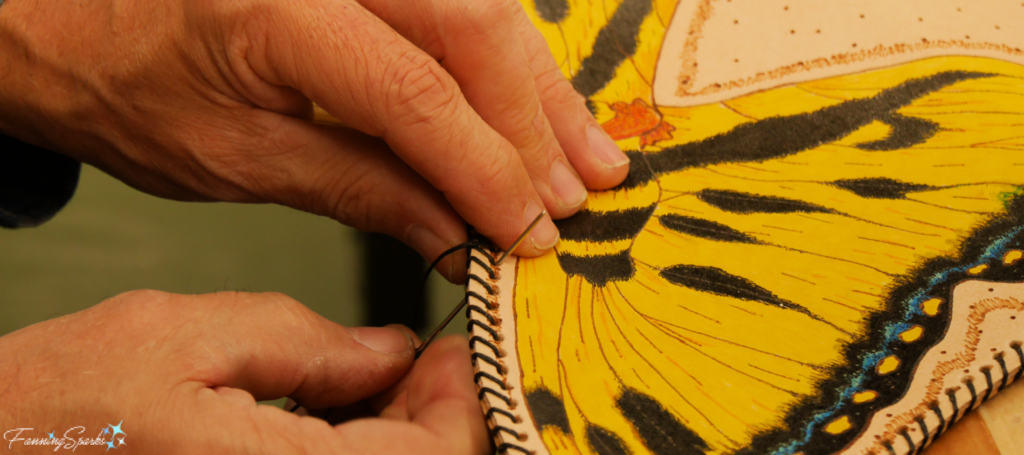
In today’s post I share another peek into a week-long class experience at the John C Campbell Folk School. The topic is leathercrafting and the class, Create Your Perfect Leather Bag, was taught by Tom Slavicek. I’ve wanted to try making with leather for some time but could never quite figure out how to get started. Now I know!
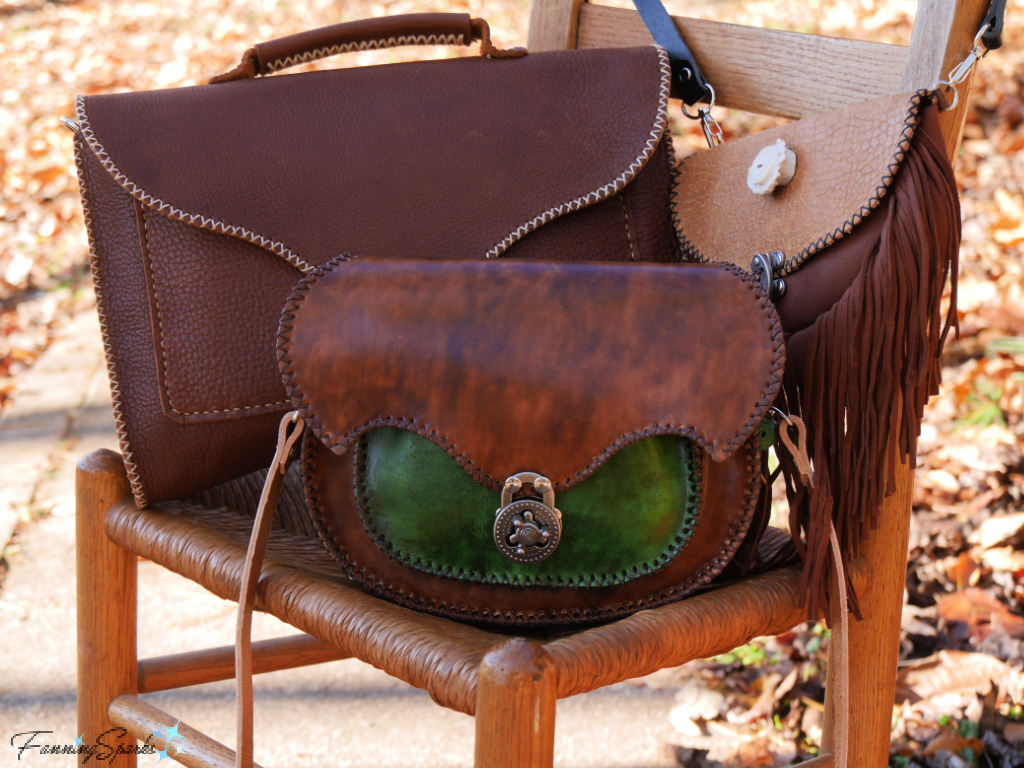
Tom is a knowledgeable leather artist with over 10 years of experience. His specialty is crafting one-of-a-kind leather shoulder bags, belt pouches, “Mountain Man” leather goods and more. Here are a few of the sample bags Tom brought to show the class.
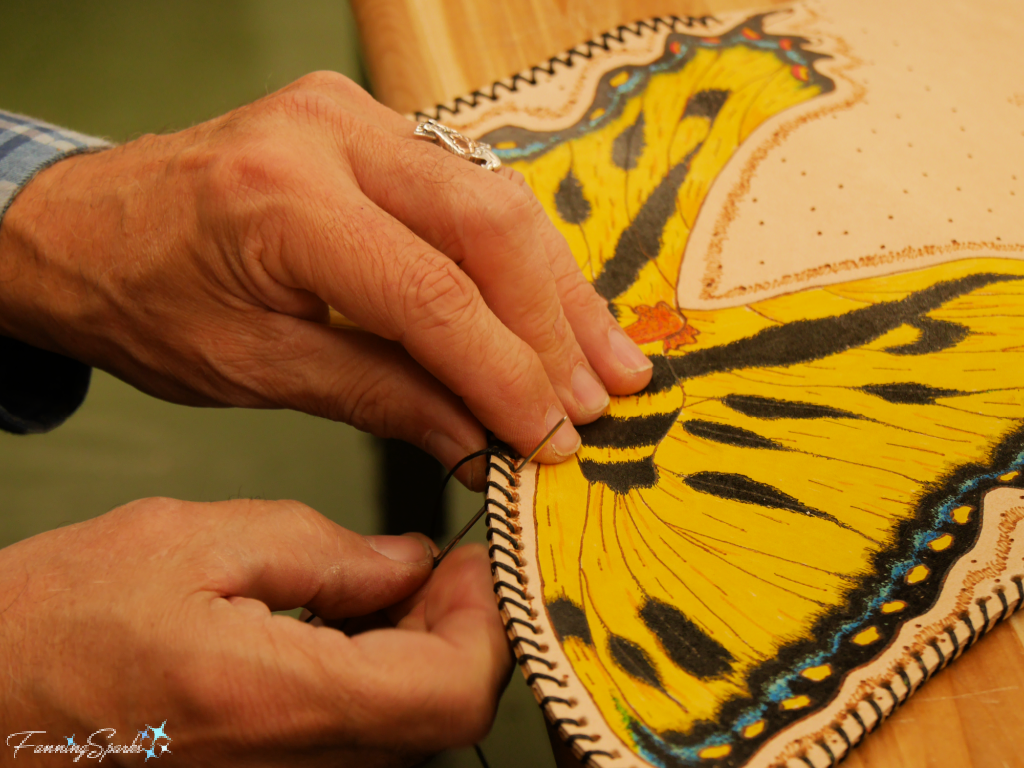
The next photo shows Tom stitching a beautiful butterfly wing bag. This unique crossbody purse will feature an innovative design, rich color and intricate details.
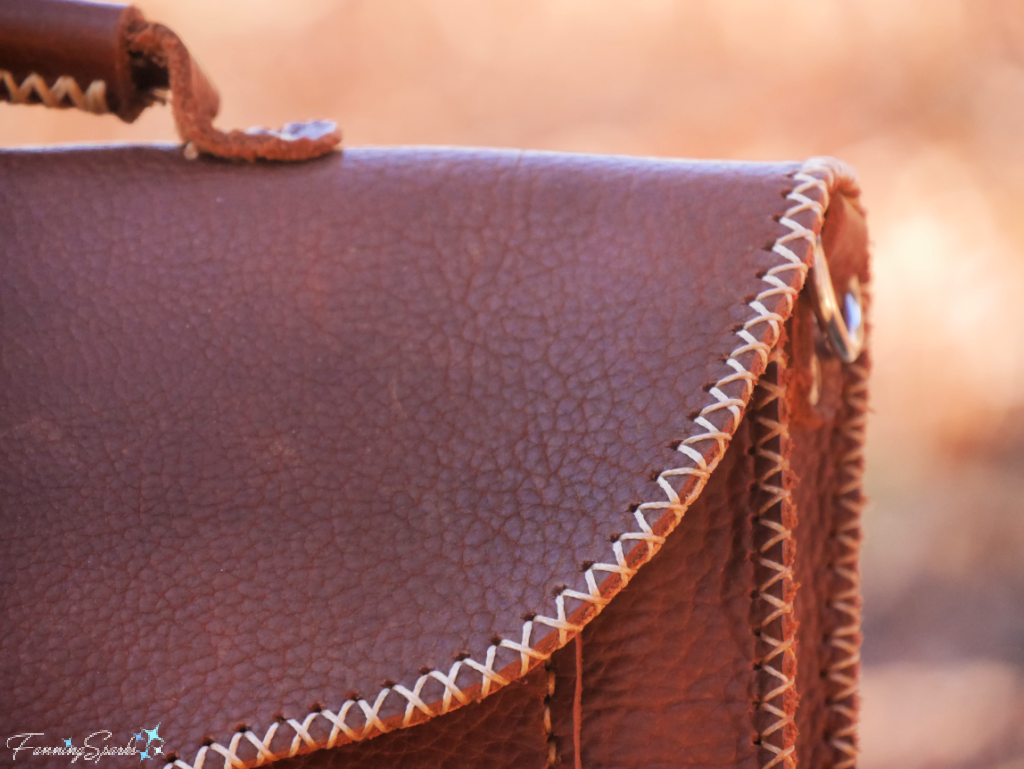
Tom’s stitching is amazingly precise—neat and even—something I really appreciated when I tried to make my stitches look like his.
Tom’s class description promises “Customize a leather bag to your style with hand-tooled designs and textures, decorative hand stitching, pockets, buckles, straps, closures, and rivets. Expect to create one or more bags, based on size and detail.” We did, indeed, make our own customized bags. Our small class of seven turned out a wide variety of bags including belt bags, tote bags, crossbody bags, backpacks, drawstring bags and messenger bags. But we weren’t limited to just bags and purses, we also made belts, key fobs, wallets, tool holders, bag charms, tassels, buttons, earrings and (in the case of one particularly creative student) a leather crown for family game night.
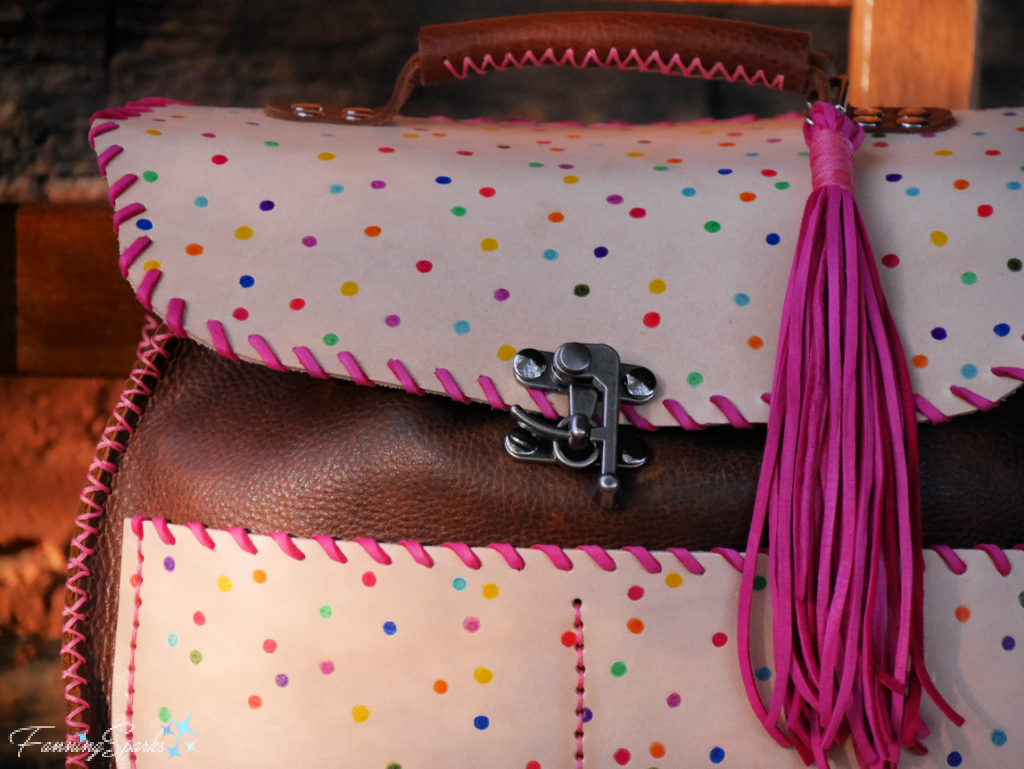
I chose to make a backpack camera bag as my main project. One of Tom’s patterns was easily modified to fit my exact requirements. My bag is 12″ across x 10″ high x 6″ deep. But best of all my new camera bag is uniquely mine. It’s anything but your typical nondescript, black camera bag. It’s one-of-a-kind—fun, whimsical and full of joy!
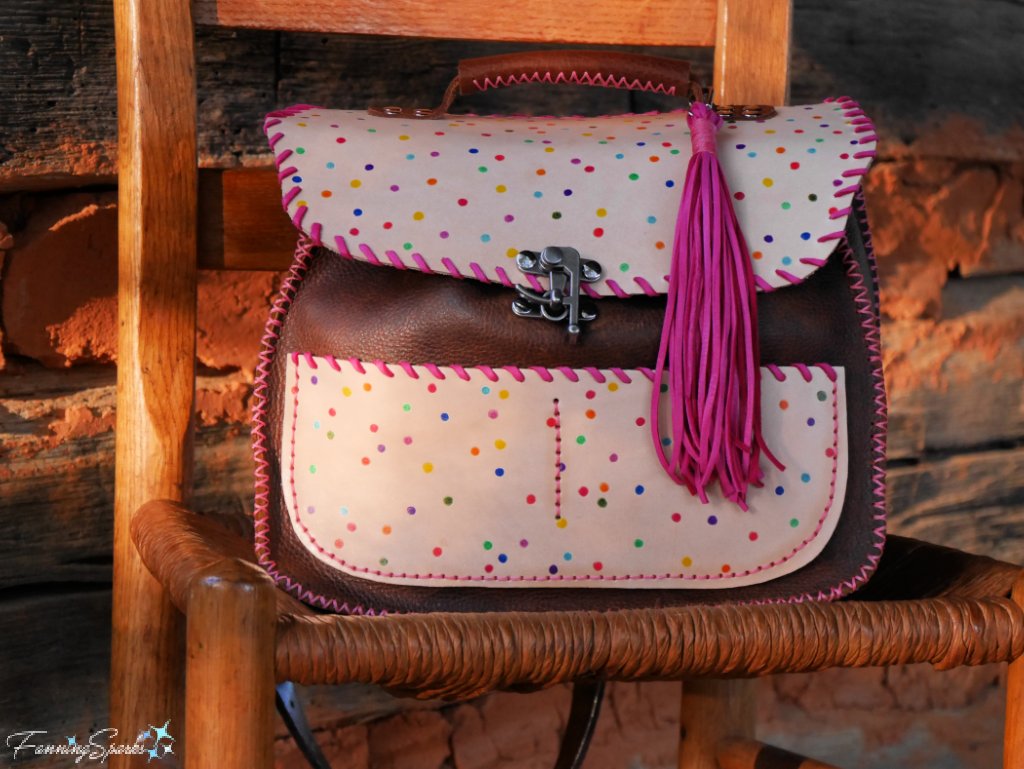
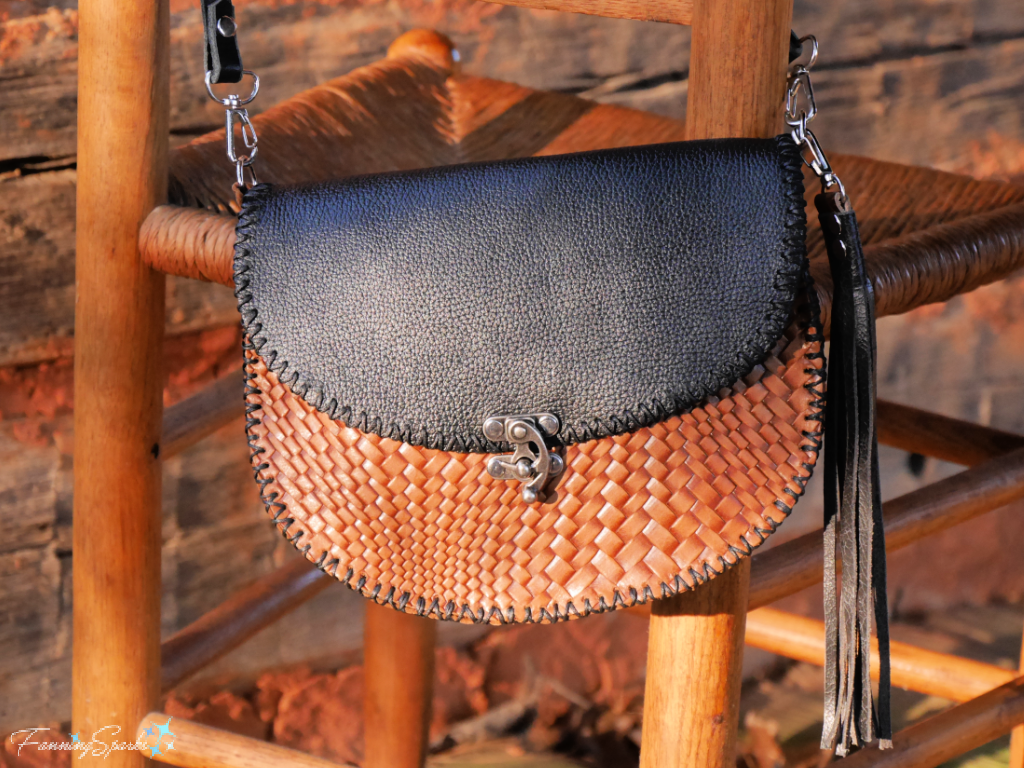
Our class started by making a Half Moon Bag. Tom had all the materials prepared so we were able to choose our own components and dive right in. He also provided a 19-page instruction booklet complete with photos and step-by-step instructions. This was the ideal way to start—we learned the basics of leathercrafting while working on a low-risk, beginner project thus setting the foundation for our one-of-a-kind, advanced projects. This is my half moon leather bag made with embossed leathers, cross stitched outside seams, swing clasp, adjustable shoulder strap and decorative leather tassel.
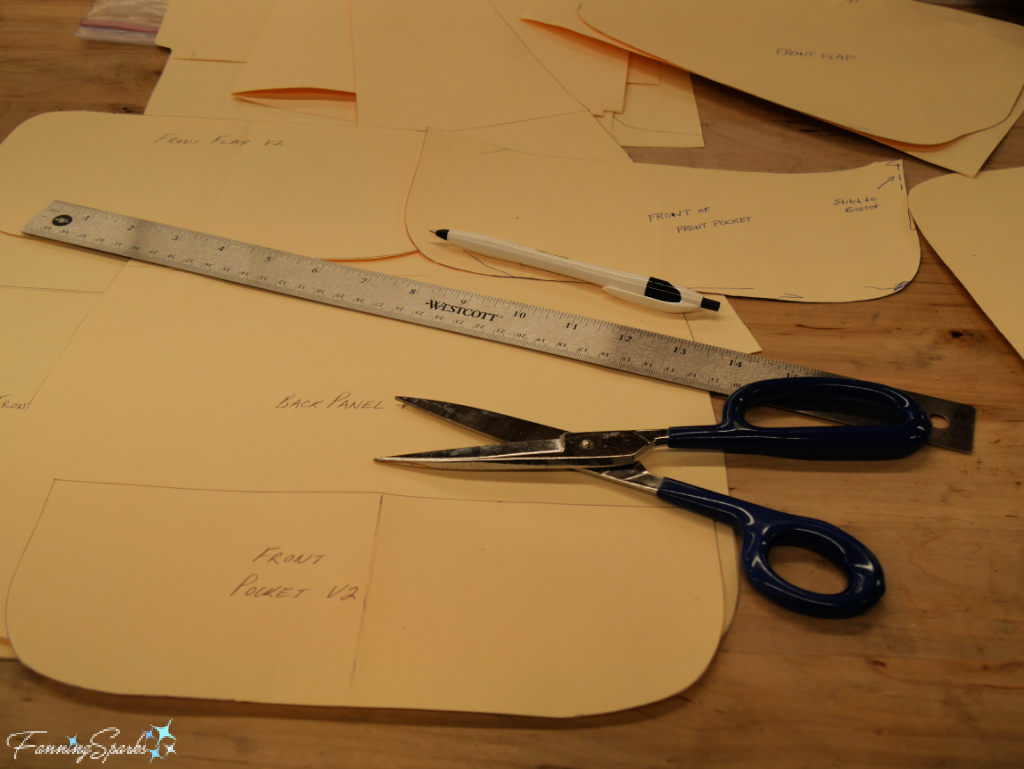
I came into Tom’s leathercrafting class hoping to make a custom camera bag. So I was thrilled to be able to tailor every aspect of the bag including its functionality, form, size, color, texture and style. I started with one of Tom’s backpack templates and modified it to fit my camera gear. We learned to prototype our ideas with heavy paper. This is a great way to test the size and fit of the components, think through the construction and visualize the final result.
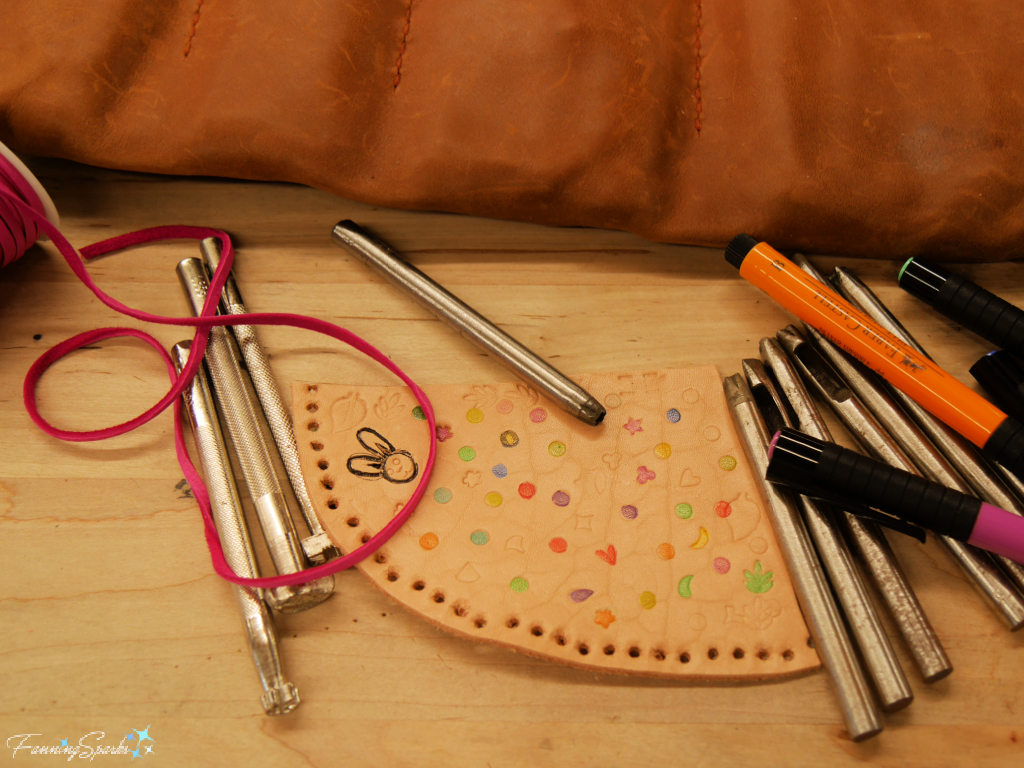
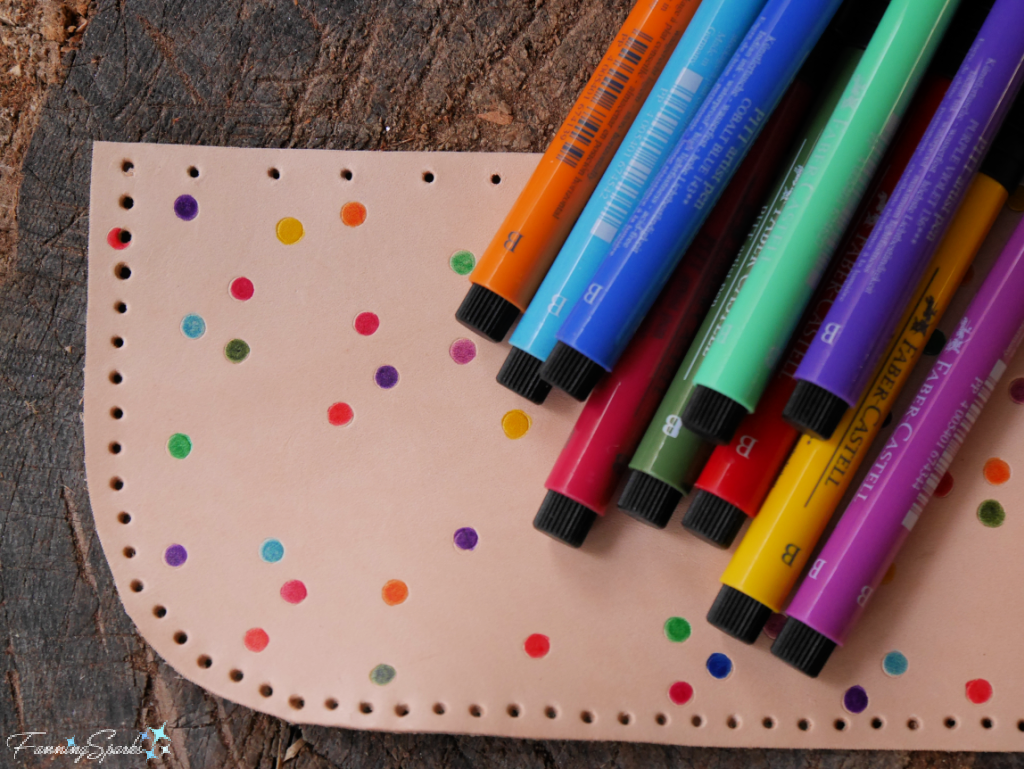
Having selected the form and size of my camera bag, I spent some time considering the design elements—color, pattern and style. I decided to go with a cheerful confetti design made by stamping tiny circles with a round punch and then coloring them in bright colors. Tom recommended Faber-Castell Pitt Artist Pens which are India ink with brush nibs—the ink is permanent, waterproof, has high light fastness and is acid free. I also decided to incorporate some ⅛ inch, fuchsia-colored, deerskin lace from Tandy Leather.
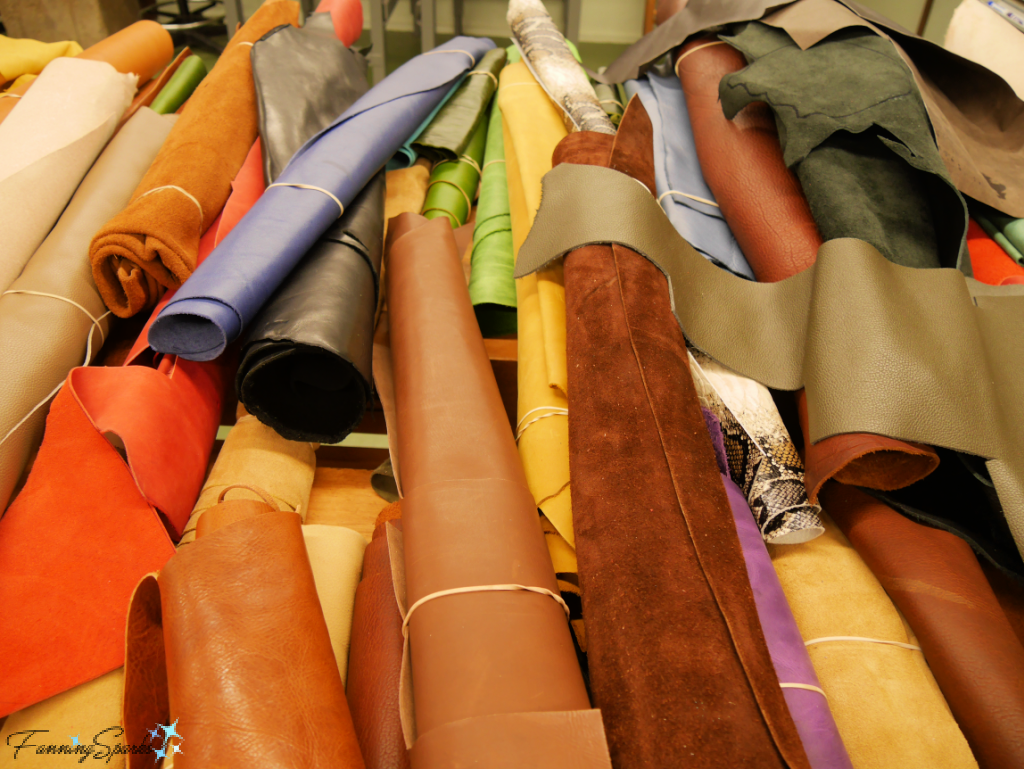
Next I selected leather from the generous supply Tom brought for the class.
I chose a brown-colored, oil-tanned, cowhide in 4 to 5 oz thickness for the main body and a natural-colored, veg-tanned, cowhide in 5 to 6 oz thickness for the flap and front pocket. A camera bag must be able to handle the wear and tear of constant use. I can’t worry about scratches and creases every time I set the bag on the ground. That’s the reason Tom recommended the brown cowhide—it has a distressed look which will develop a vintage-looking patina over time. With these decisions made, it was time to cut out the parts for my camera bag using Craftool Sure-Grip shears. 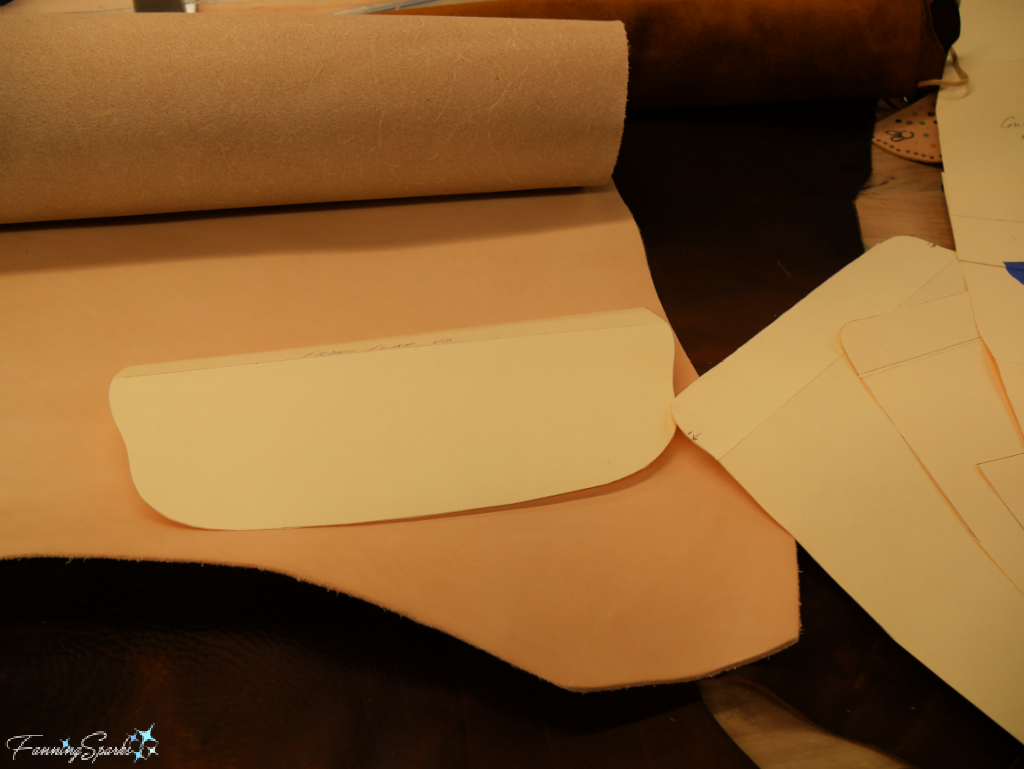
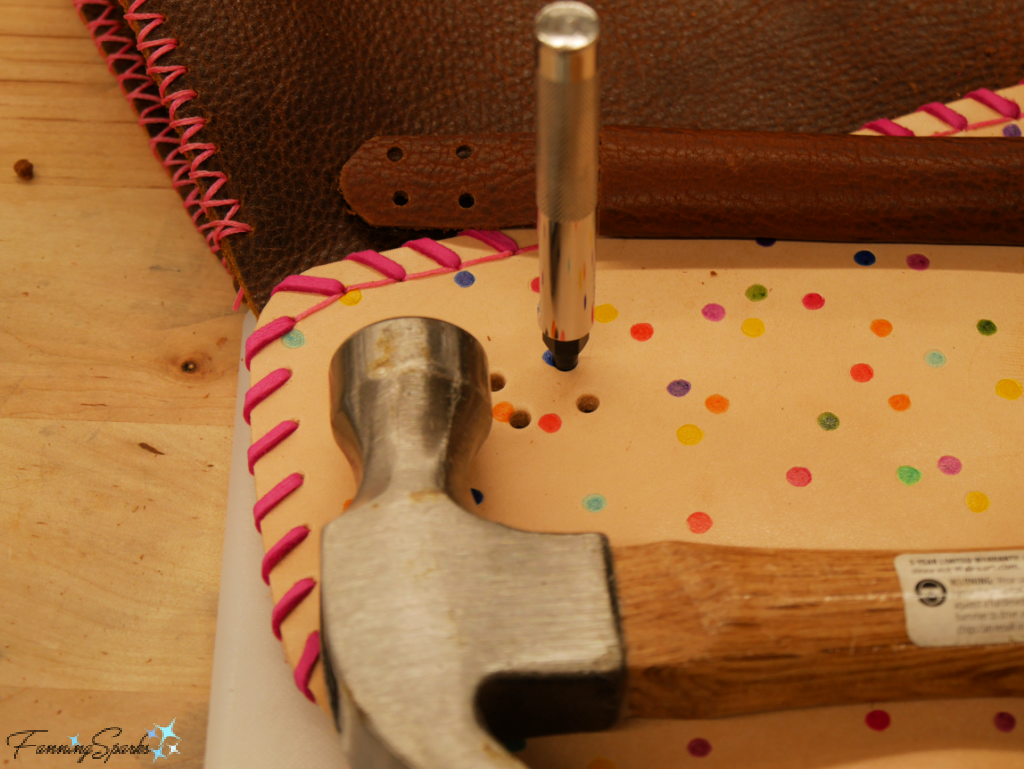
The first step in construction is to punch holes in the leather. For most of the holes, I worked on a small poly cutting board and used a Craftool 4-in-1 leather punch to make neat 3/32” round holes along the edge of the leather parts.
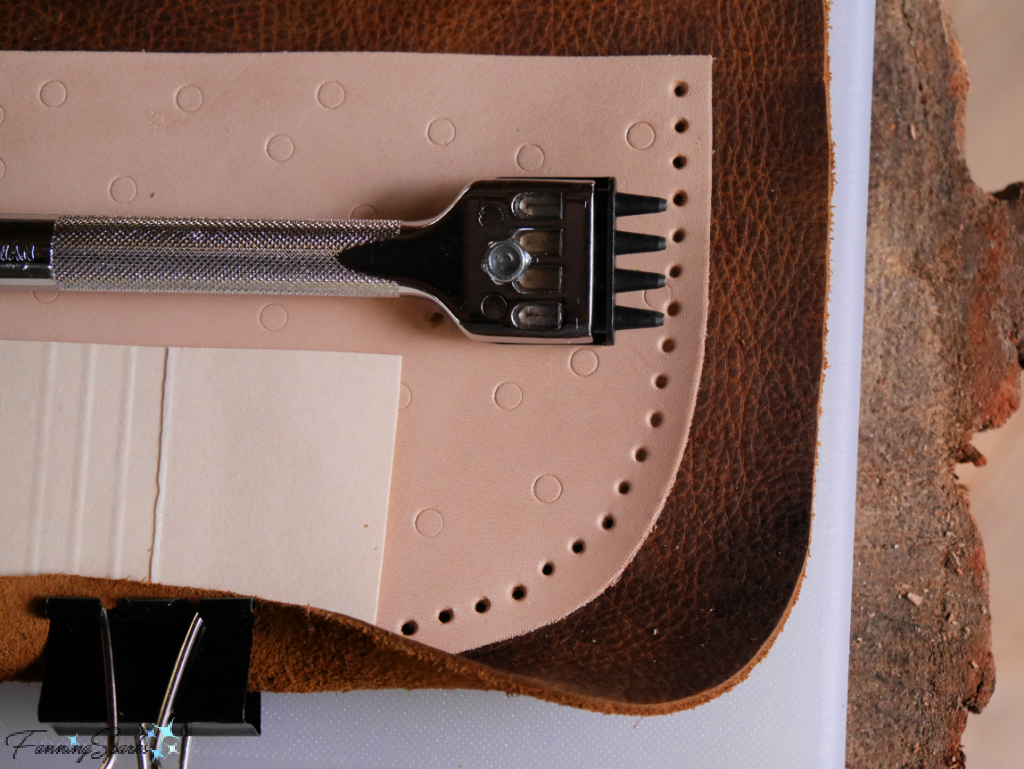
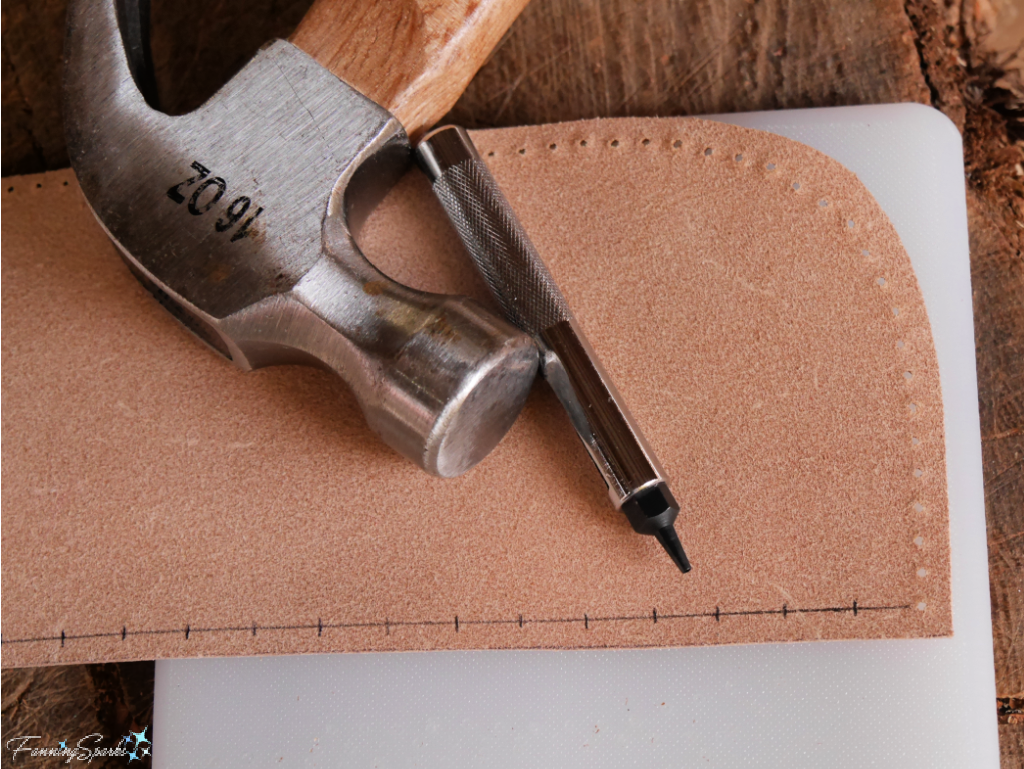
The fuchsia-colored deerskin lacing required wider spacing so I punched individual holes, set ¼ inch apart, with the 3/32” single-hole punch from my Tandy Leather mini punch set.
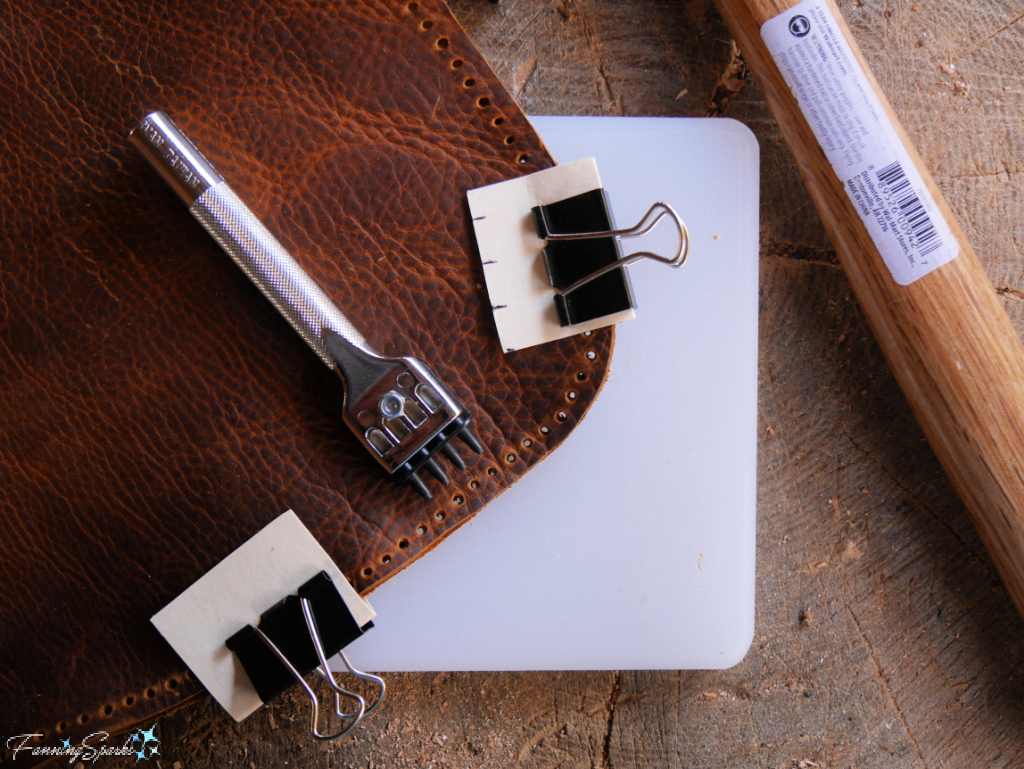
To ensure correct alignment, some parts were clamped and punched at the same time. The photo below shows the back and front panels being punched together.
Embellishing the front pocket and flap was a simple process of randomly stamping small circles over the surface and then coloring them with my chosen colors in Faber-Castell Pitt Artist Pens.
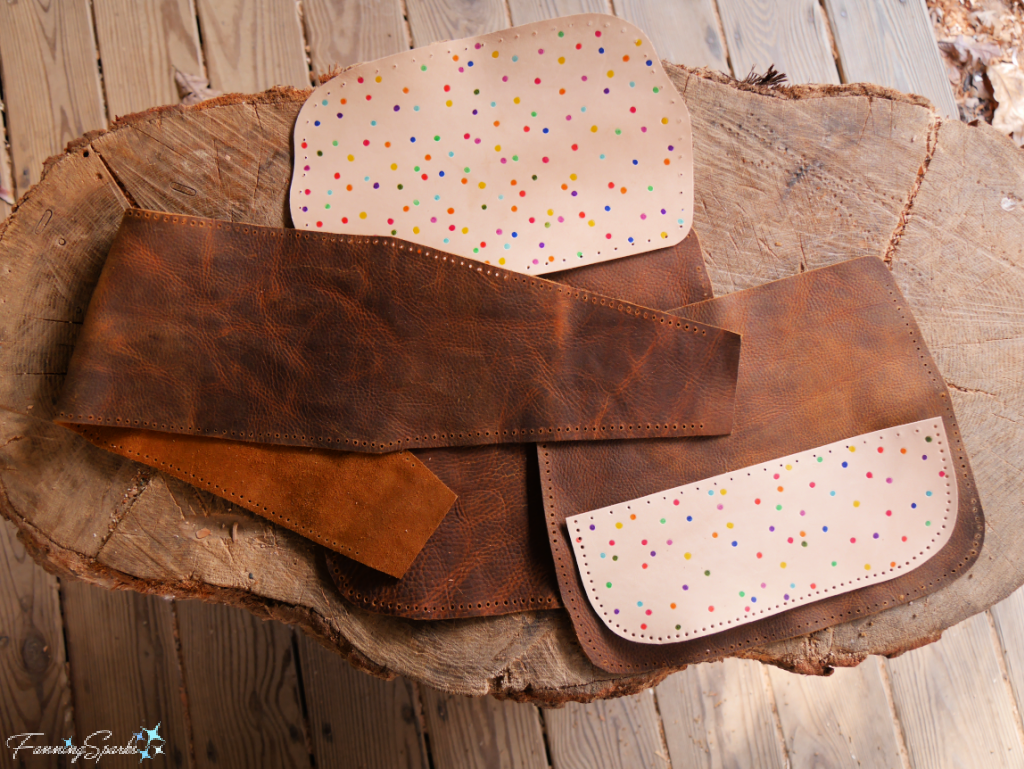
To enhance the distressed look of the brown leather, I used my hands to roll and wring the leather. Then all the leather parts were sealed with a light coat of Fiebing’s Saddle Lac for transparent protection. By the end of the second day, the parts for my camera bag were cut, embellished and punched.
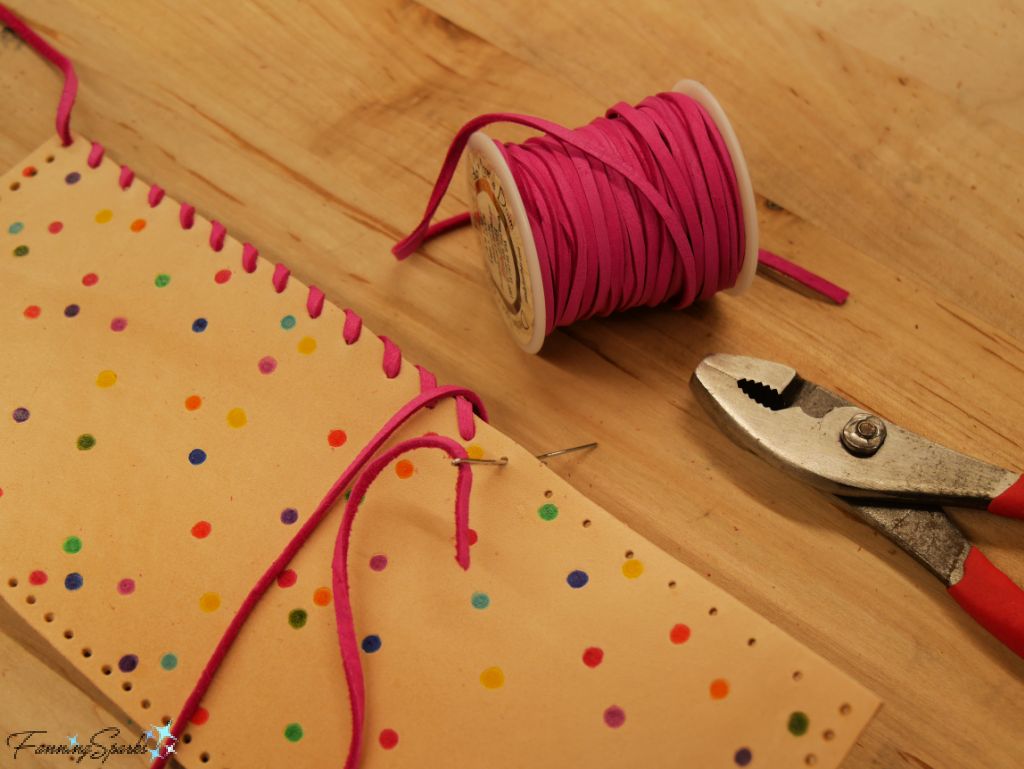
The second major step of construction is stitching. I started with decorative whipstitching along the pocket and flap. The deerskin lace was too thick for the eye of the stitching needle so Tom suggested improvising with a paper clip and pliers. It worked surprisingly well!
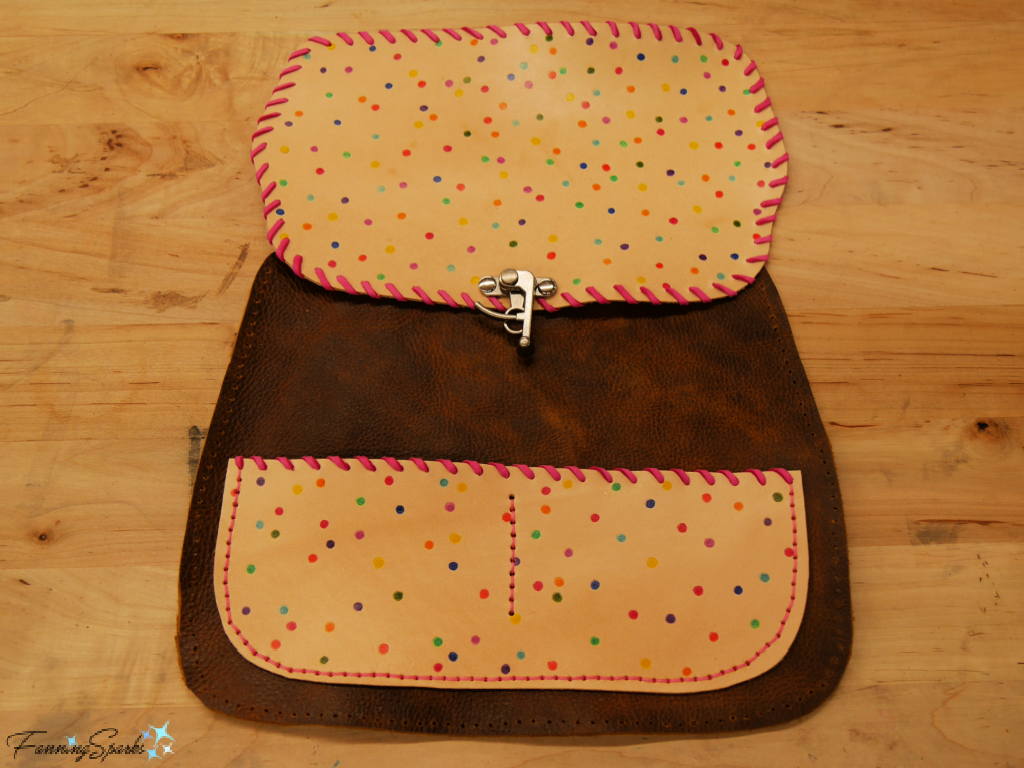
The front pocket was attached first. I stitched it to the front panel with a backstitch. Then I laid the flap over the front panel to position the top of the swing clasp closure. After punching two holes, the clasp was attached with medium rivets using a standard rivet setter. The finished pocket and front panel, with the flap laid in position, are shown below.
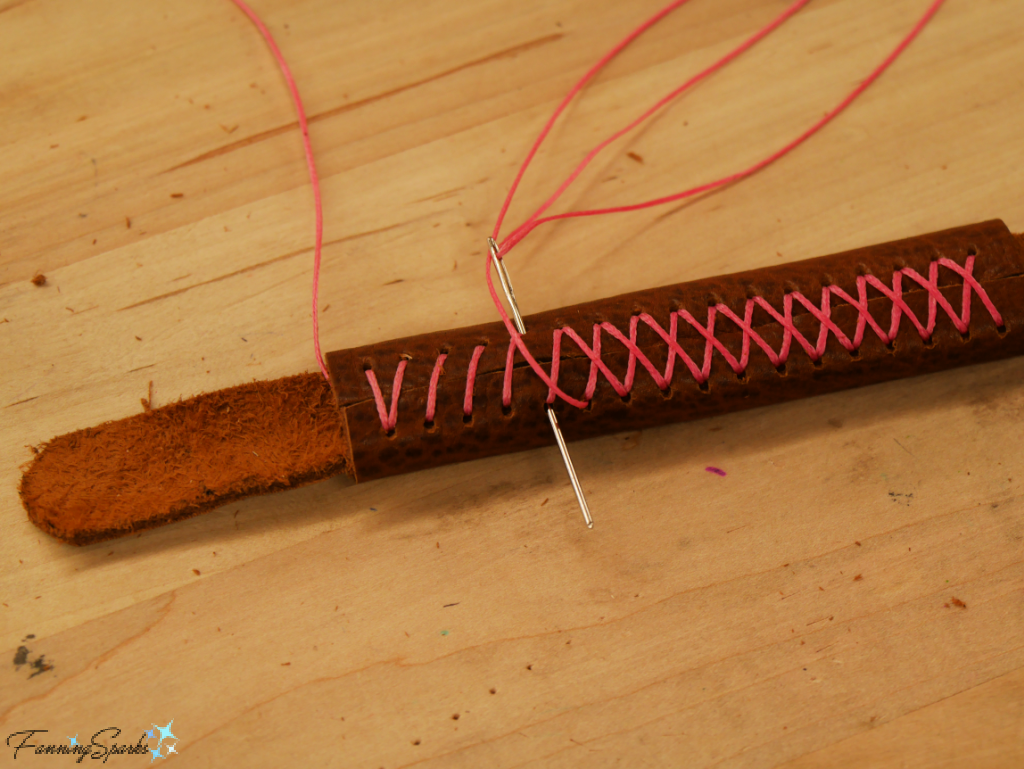
For the main body of the bag, I chose to make my stitching visible on the outside. Before I could start stitching, however, I had to align the parts. By carefully counting the number of holes in the back/front panels and comparing to the number of holes in the gusset, I was able to center the panels on the gusset. I used a blunt, stitching needle and fuchsia-colored, waxed, braided cord in a cross stitch to attach the parts. The cross stitch was done in two passes—I stitched all the way from one end of the seam to the other keeping the stitches angled…
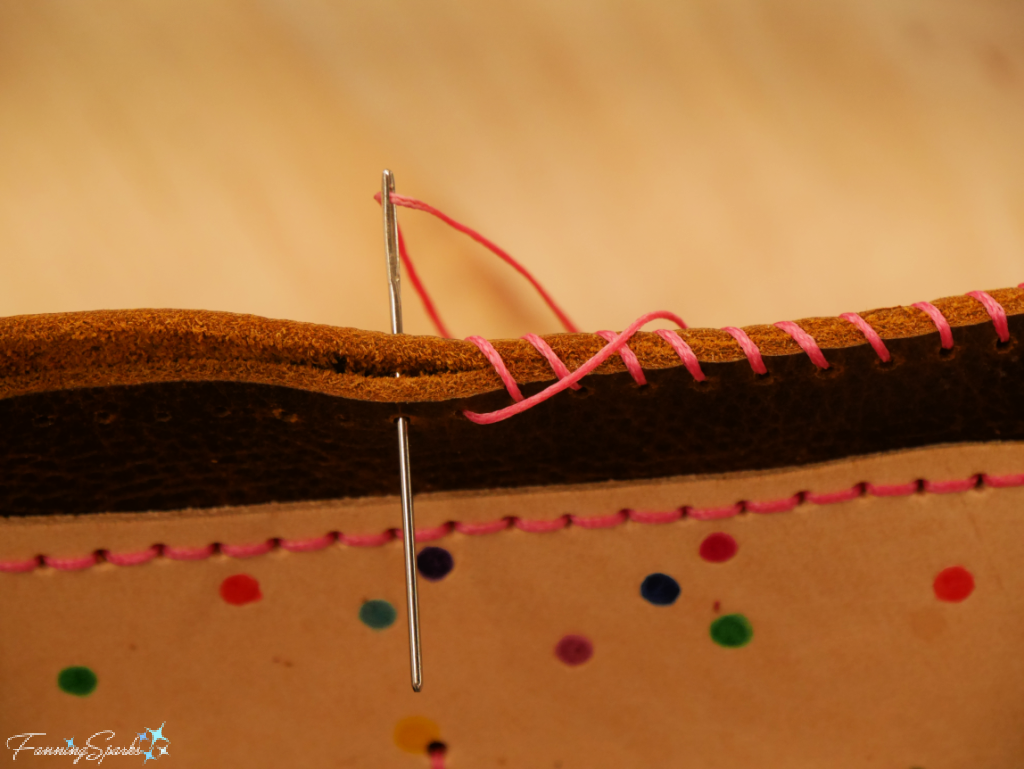
… then reversed direction and returned to the original starting point creating Xs along the edge.
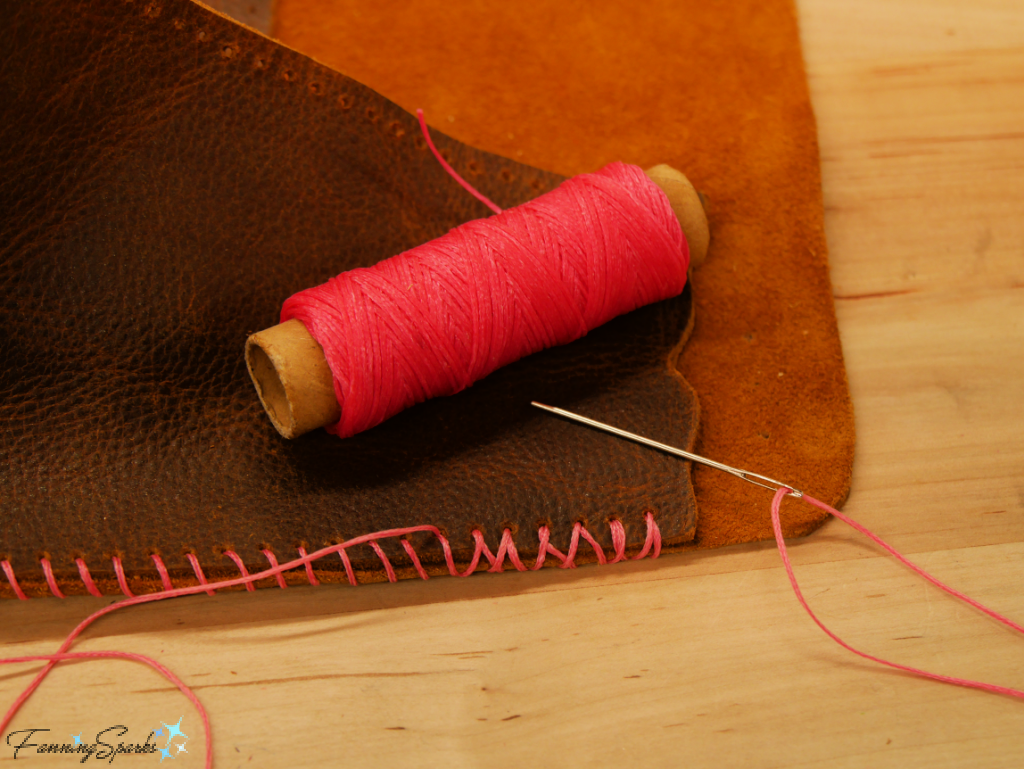
After attaching the front and back panels to the gusset, it was time to attach the flap to the top of the back panel. This seam required a backstitch so it wouldn’t interfere with the decorative lacing.
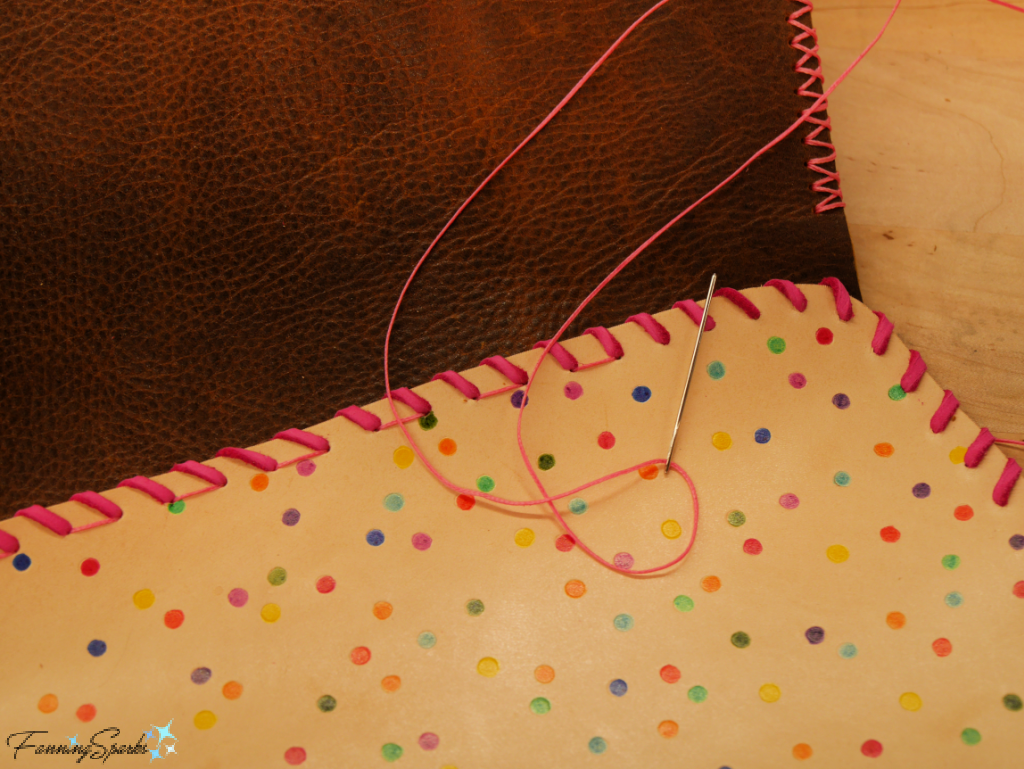
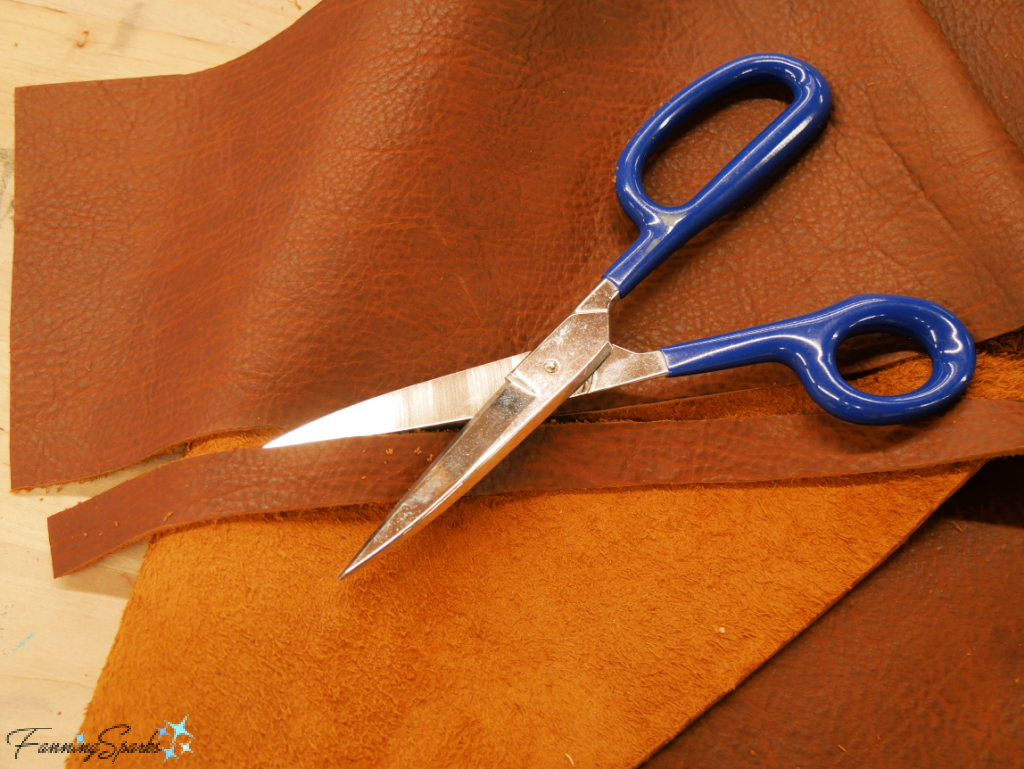
At this stage, the major components—front pocket, front panel, gusset, back panel and flap—were assembled. It was time to shift attention to closures, straps and handles. I cut ¾” strips of leather for this purpose.
A camera bag requires a strong, sturdy carrying handle. Tom recommended reinforcing the top flap (the area where the handle would be attached) with a rectangular piece of heavyweight 7 to 8 oz leather. I glued it in place with Weldwood contact cement. The carrying handle was made with two rectangular pieces of leather—one ¾” wide by about 8½” long and the other about 2½” wide by 4¼” long. As shown below, the shorter piece was wrapped around the longer piece and stitched in place.
After carefully positioning the carrying handle, the spots for the rivets were marked on the flap. I punched the holes and set the rivets to securely attach the carrying handle.
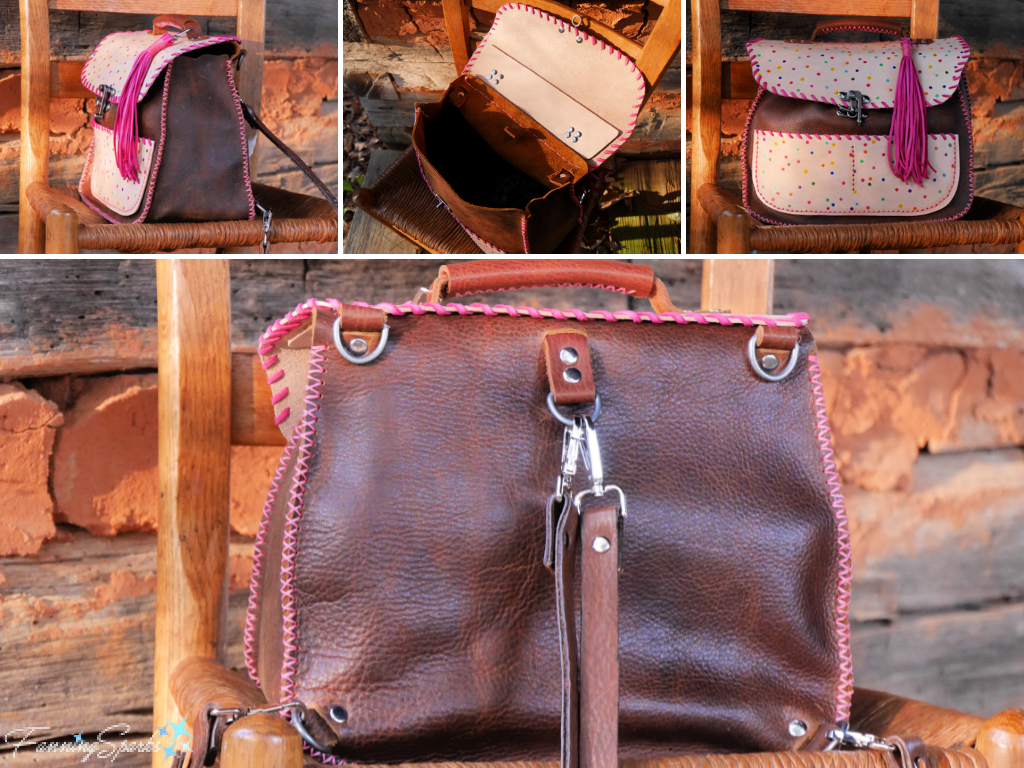
In designing my ideal camera bag, I created multiple ways to carry the bag—a carrying handle, an over-the-shoulder strap and adjustable backpack straps. The straps are attached with short strips of leather and D rings. Originally I used four D rings, one in each corner of the back panel, but after trying it out I added one more D ring at the top center.
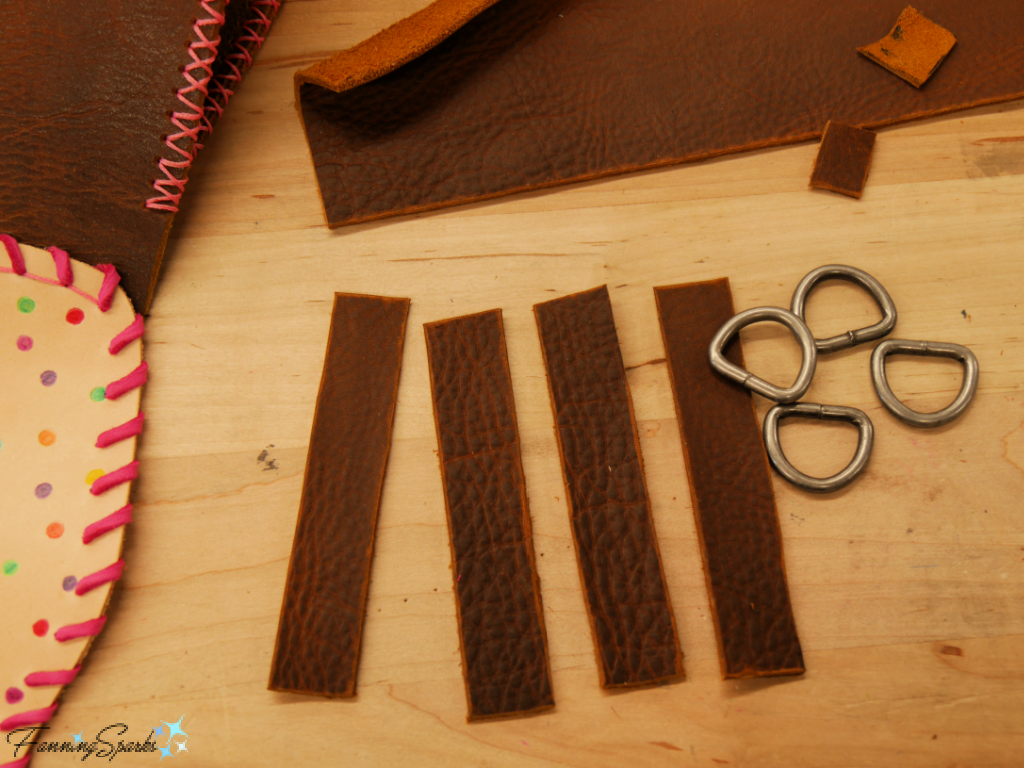
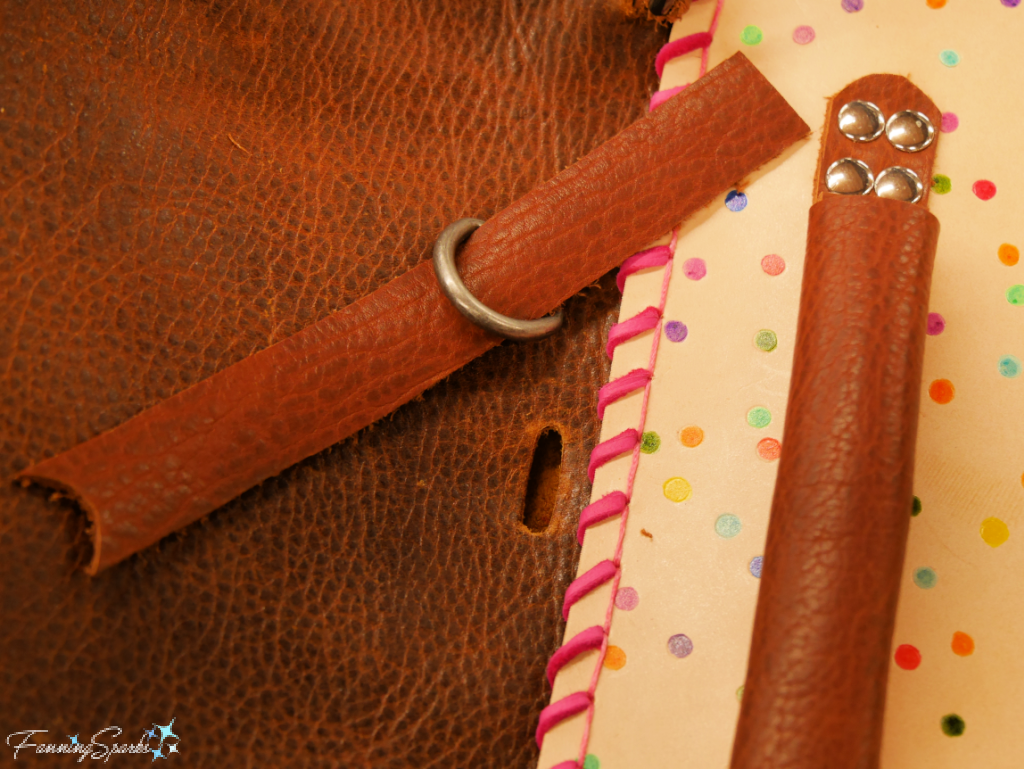
A ¾” oblong punch was used to cut slots in the back panel. The D rings were slipped onto the leather strips and the ends were pulled through the slots. Then the ends were locked in place with rivets.
The shoulder straps were made with two 31” long by ¾” wide strips of the brown leather backed with a heavy strip of natural-colored leather. After burnishing the cut edges with a Craftool wood slicker, I used a wool dauber to apply Fiebing’s Edge Kote along the edges and back of the shoulder straps. The straps were cut to the desired length and rivets were used to attach buckles and swivel snaps. Several holes were punched in the straps so the length can be adjusted when they were buckled. All of this was accomplished by the end of the third day.
The next day, I made a fun, tassel with pieces of the fuchsia-colored deerskin lacing. This is the end result—my one-of-a-kind, whimsical leather camera bag!
Thanks to a stroke of luck, the padded dividers from my old camera bag fit perfectly inside my new bag so my camera and lenses are safely cushioned. Here are a few additional views showing the side, inside and back of my new whimsical leather camera bag.
Learning to work with leather and making my first leather projects was a highlight of my time at the John C Campbell Folk School. This class marks the end of my Work Study session. It’s time to return home and build upon some of the new skills I’ve learned.
Many thanks to Tom Slavicek and my fellow classmates for an excellent learning experience. Tom’s ability to guide multiple students through the creation of multiple custom projects is amazing. His thoughtful attention to detail, clear concise guidance and unflagging enthusiasm put everyone at ease and gave us the confidence to think big. You can learn more about Tom Slavicek and see photos of his leather work on his Black Eagle Leather website.
We used several products from Tandy Leather during our class. As noted on their website “Tandy Leather was founded in 1919 with the dream of sharing leathercraft with the world. Today, we’re proud to continue this legacy as trusted source of quality leather, tools, and teaching materials for leatherworkers everywhere”. They also offer an extensive online library of free designs, templates and inspiration in the Tandy Leather Leathercraft Library.
I participated in a 6-week Work Study Program at the John C Campbell Folk School. Look for Work Study on the Folk School website for more info or check my FanningSparks’ blog posts about my Work Study Program experience.
I’ve had the pleasure of attending several Folk School classes and shared my experiences in the following posts:
. Weave a Market Basket
. From Sheep to Shawl
. Flat-Plane Carving with Harley
. Center, Open, Pull
. Swept Away by Broom Making
. You CAN Put All Your Eggs in this Basket
1. Leathercrafting is quite doable with a little knowhow and a few tools.
2. A wide range of items, customized for your personal preferences, can be made from leather.
3. Consider learning a new skill at the John C Campbell Folk School or a similar educational venue near you.
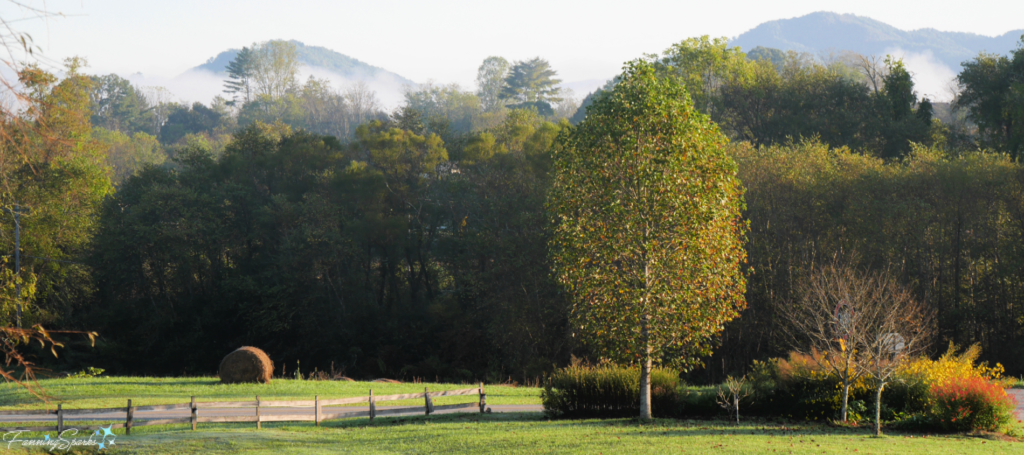
After nearly one hundred years and countless students and instructors, the Folk School has accumulated a number of noteworthy special places. I consulted a mix of Folk School participants in preparation for this post by asking “What is your favorite spot on campus?”. Turns out, there are as many favorite spots and reasons for considering them special as there are people.
There are spots which remind us of the shoulders upon which we stand with their deep connection to the past. There are spots where we can slip away to let Mother Nature soothe our souls. There are spots where we like to gather with friends. And there are spots which hold our own special memories. Of course, there are the beloved studios where we can immerse ourselves in creativity and making but I already covered these spots in my previous post Folk School Studios—Where the Magic Happens. So I did my best to boil it all down into today’s post.
Farm House
Let’s start with the Farm House because this is where it all began. The front page of the second edition of the Folk School newsletter, issued in August 1926, showcases the Farmhouse.
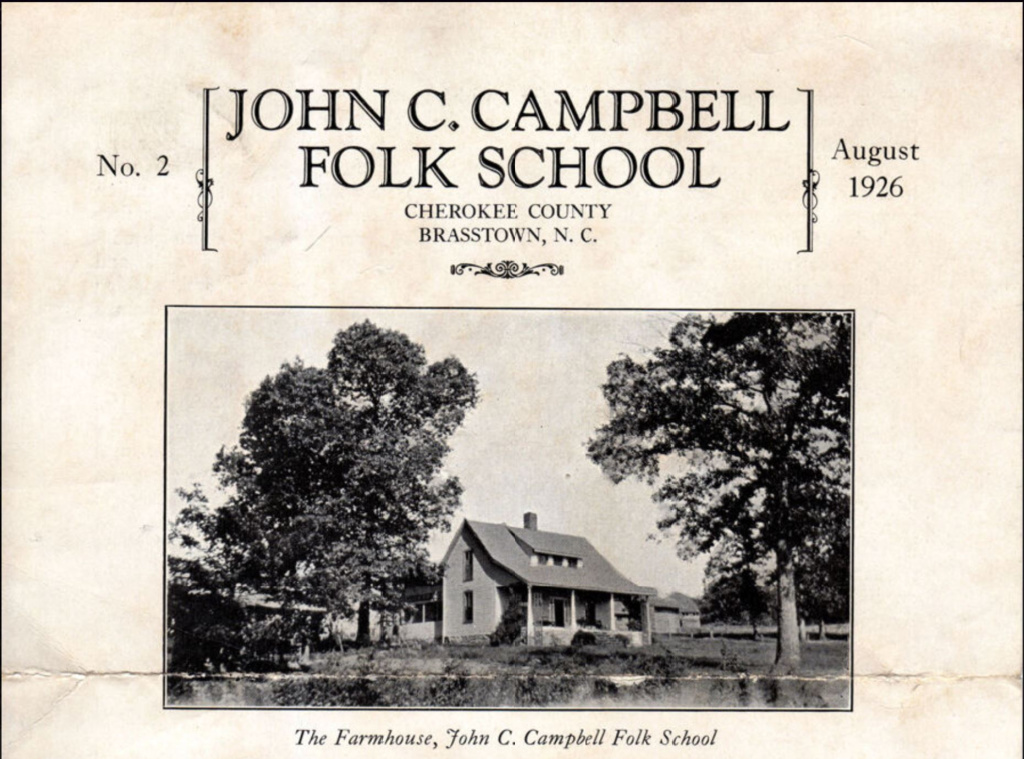
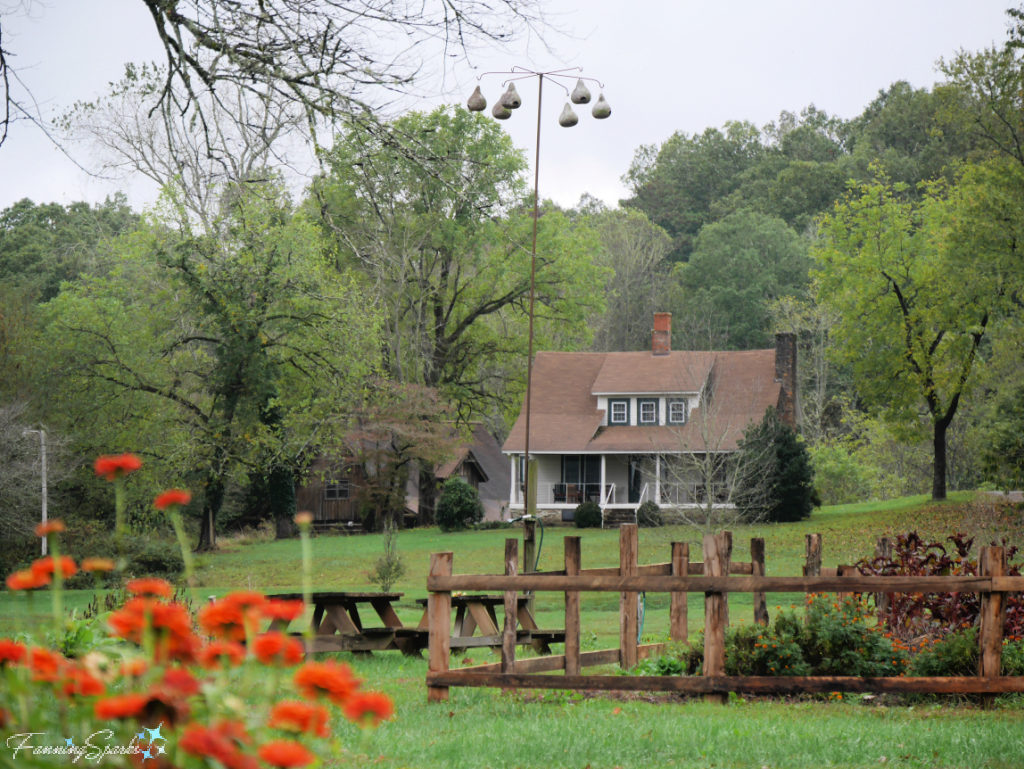
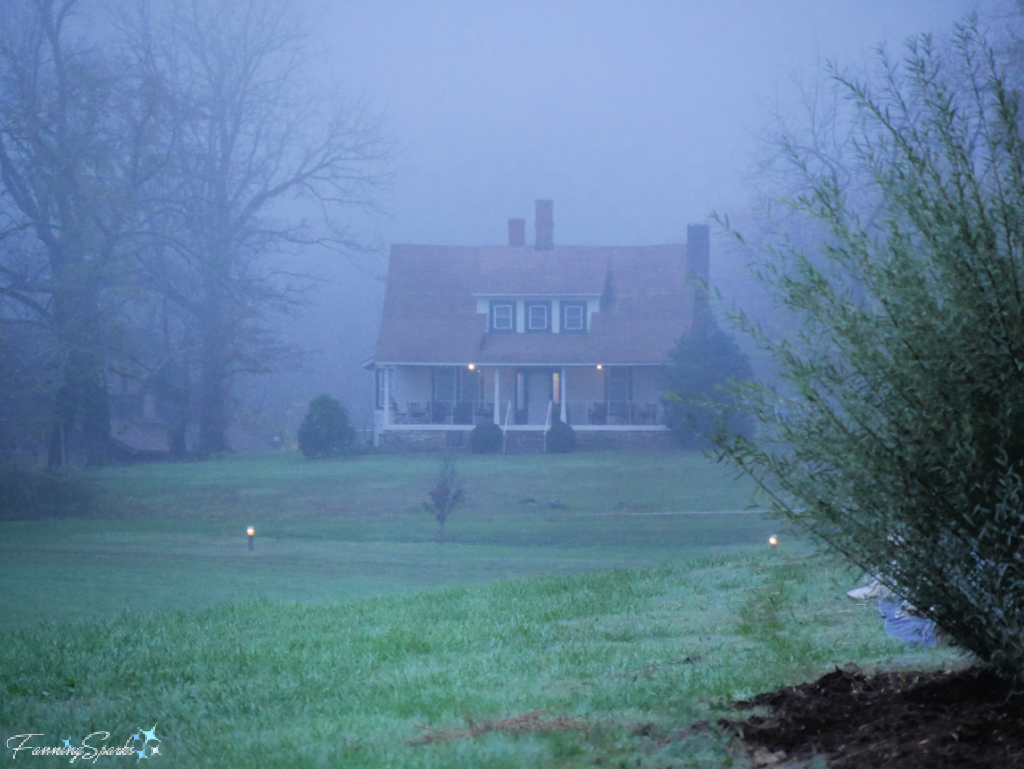
The bulletin’s authors, Olive D. Campbell Director and Marguerite Butler Treasurer, explain “The last few months, since our first bulletin in March, have been important ones in the life of the John C Campbell Folk School. The faded yellow homestead on our farm, sadly in need of paint and repairs, has become a trim gray farmhouse with green trimmings and rose-covered trellises.” Despite its impressive pedigree, this small, unassuming structure is easy to overlook. Here’s how the Farm House looks today as viewed from the School’s gardens.
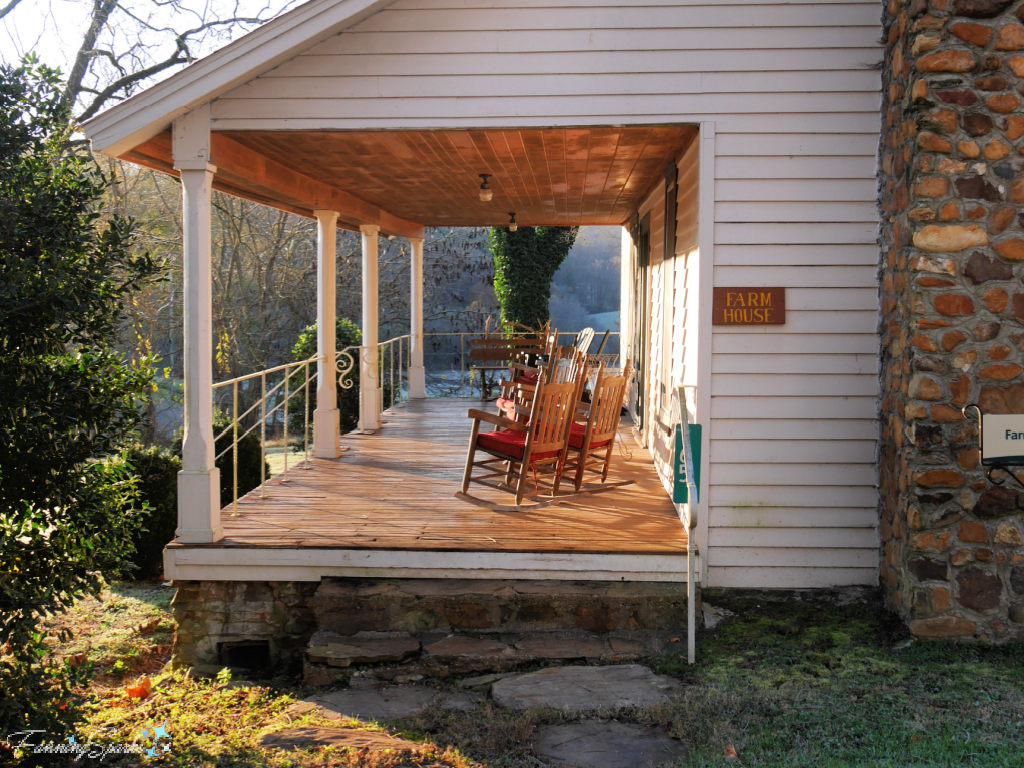
A closer look reveals an inviting front porch in the early morning sunshine.
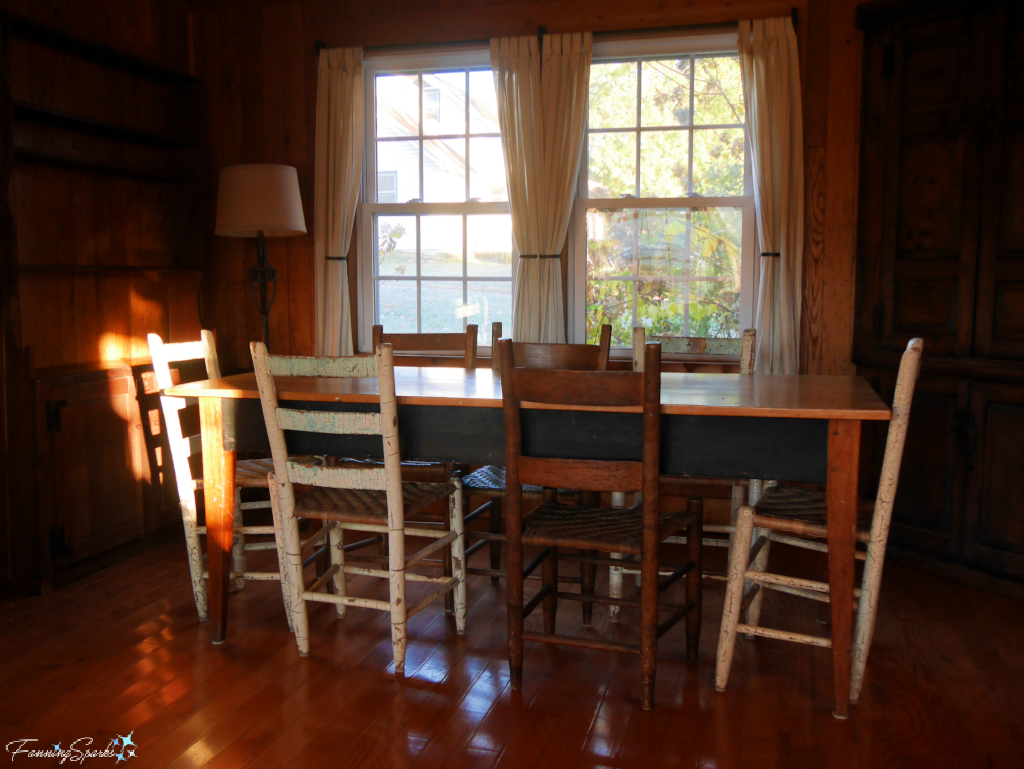
 Here’s a peek inside the Farm House. It’s intriguing to imagine Olive Campbell hosting a meal at this table.
Log Museum
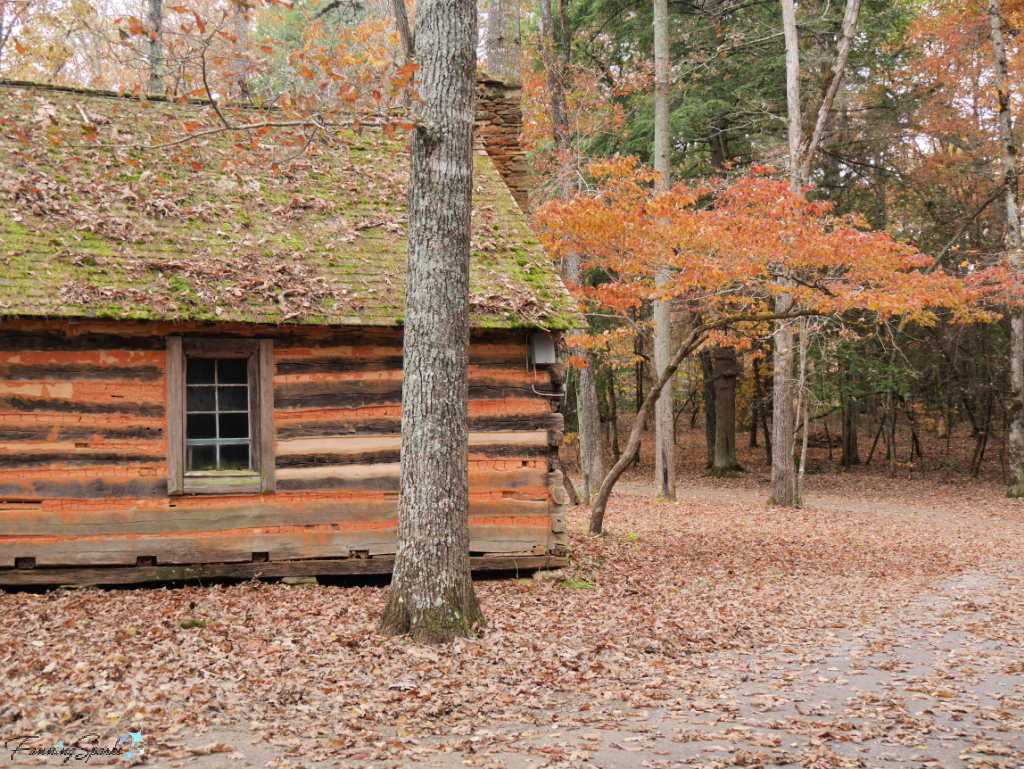
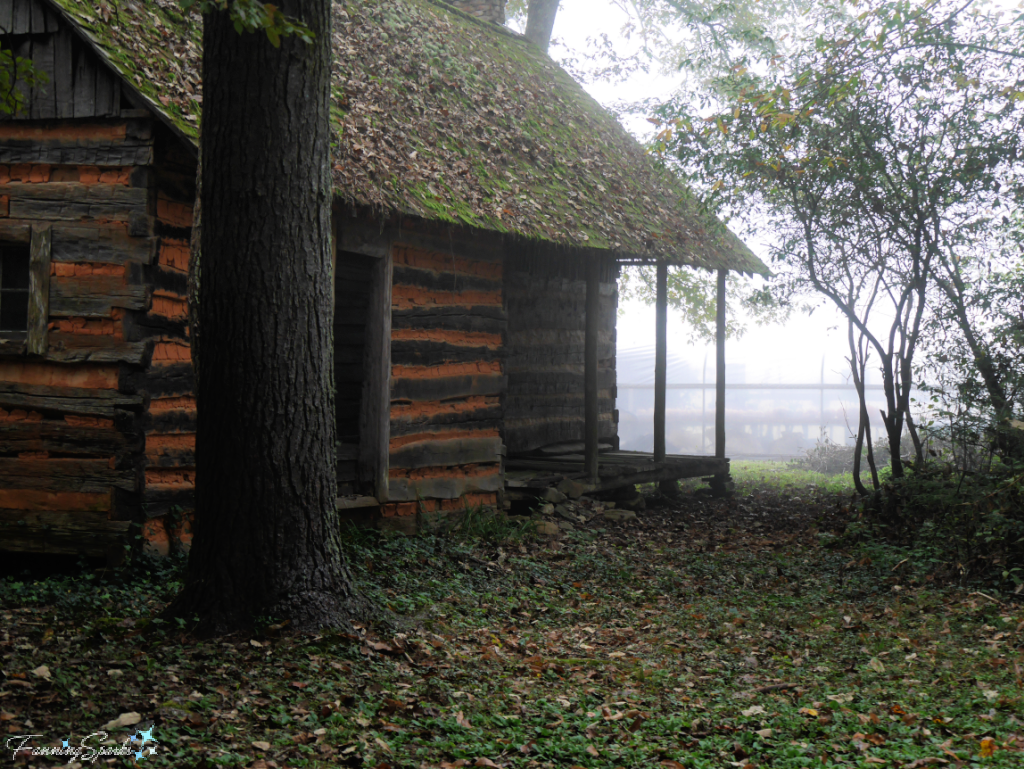
Another favorite spot with a strong connection to the early days of the Folk School is the Log Museum. This structure was built in 1926 for the express purpose of housing traditional artifacts. It was constructed by members of the community who relocated and combined two existing cabins—the Brendle Cabin from Clay County and the Caldwell Cabin from Cherokee County. There is a series of eight photographs from 1926, believed to have been taken by Marguerite Butler (Bidstrup), chronicling the construction of the Log Museum (see More Info below). Today the Log Museum, which is located in front of the School’s gardens, looks like this.
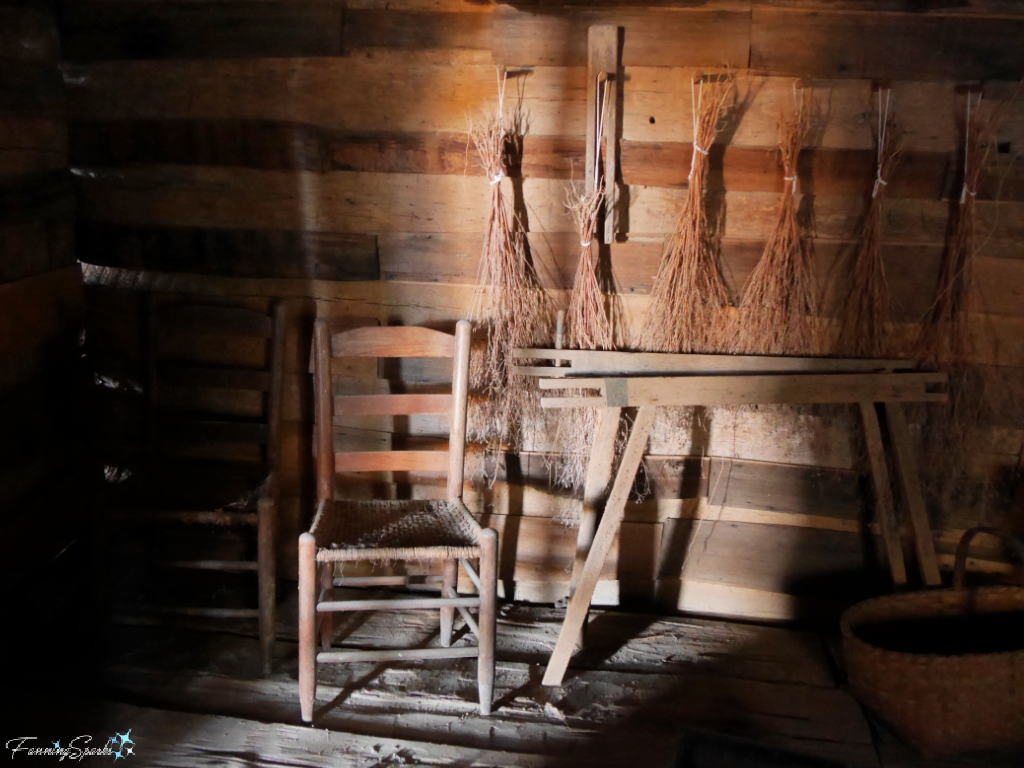
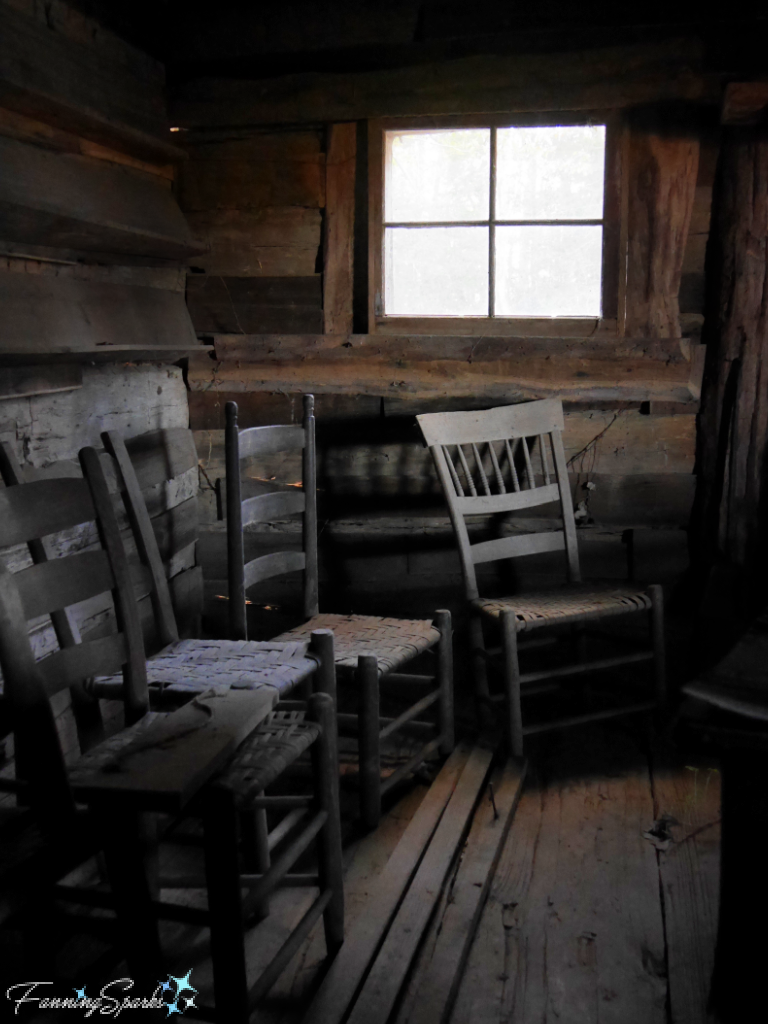
A peek inside reveals some interesting old items. As noted in the Western Carolina University (WCU) Hunter Library Digital Collections “The original intent of the Log Museum was to preserve the “old ways” and craft traditions of pioneer times; the hand-hewn cabins housed community-donated relics such as a loom, spinning wheel, butter churn, rifle, ceramic vessels, hearth brooms, and farm implements.” It appears some of these relics may still be in place.
Spring House
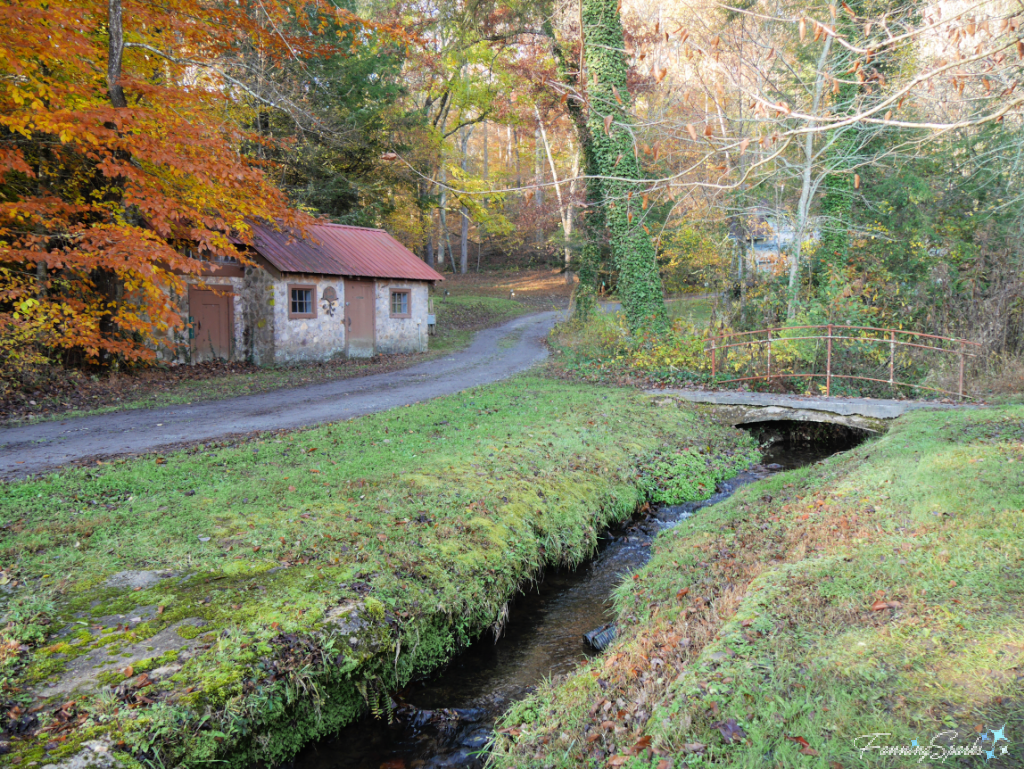
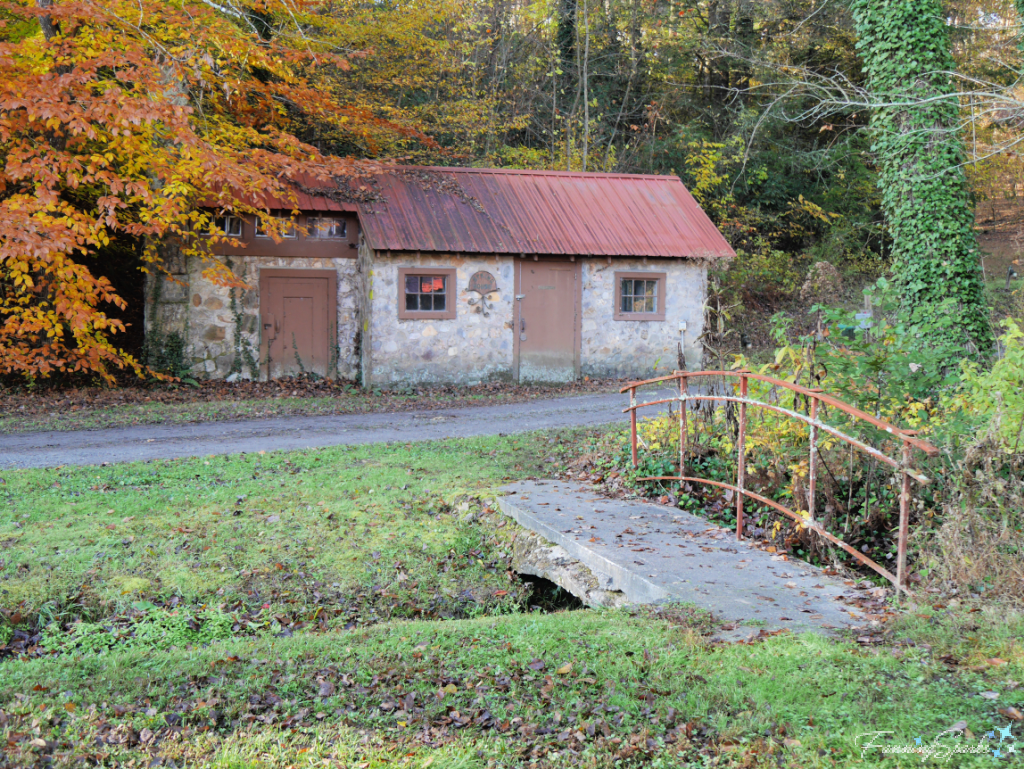
Another favorite spot with deep roots in the Folk School’s past is the Spring House. Georg Bidstrup, a Dane who came to the Folk School in June 1926 to run the farm and provide recreational activities for the students, is credited with constructing a springhouse, dairy barn and coop creamery. A photo from around 1930 shows three men standing outside the Spring House holding containers of milk (see More Info below). As noted in the WCU Hunter Library Digital Collections “Milk was stored in Spring House where it was kept cool by a running spring viaduct that cut through the building.”
Today, the historic Spring House sits quietly behind the Clay Spencer Blacksmith Shop. The bubbling little stream, the simple foot bridge and the beautiful trees make this an idyllic spot.
Rhythm Pavilion
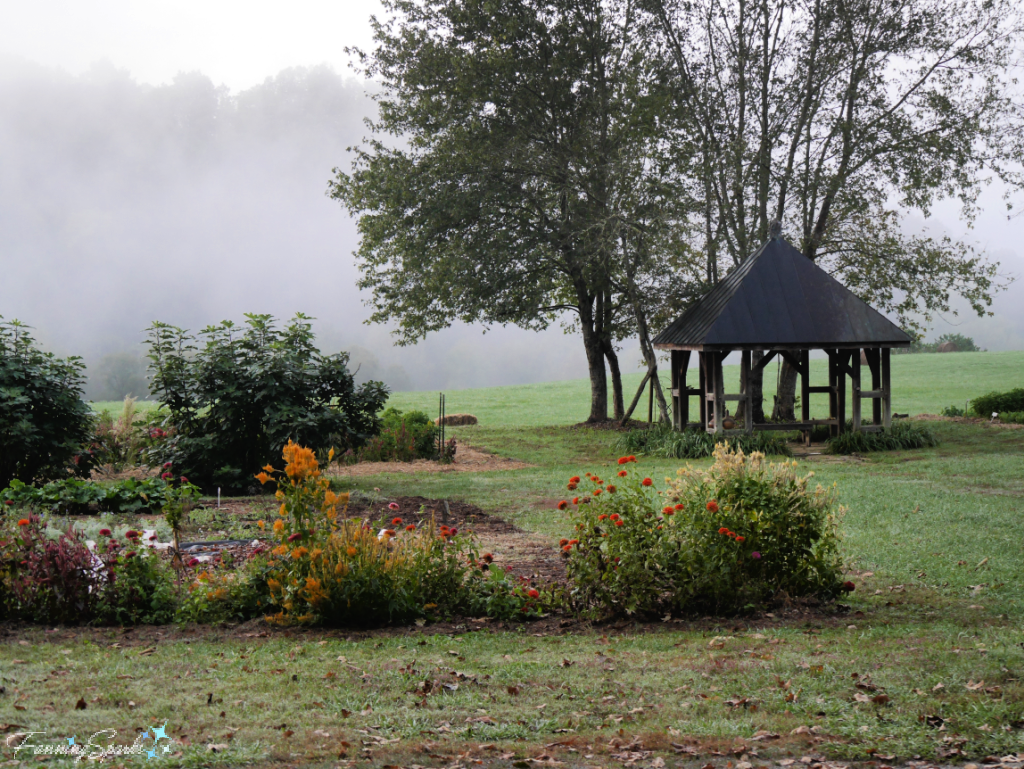
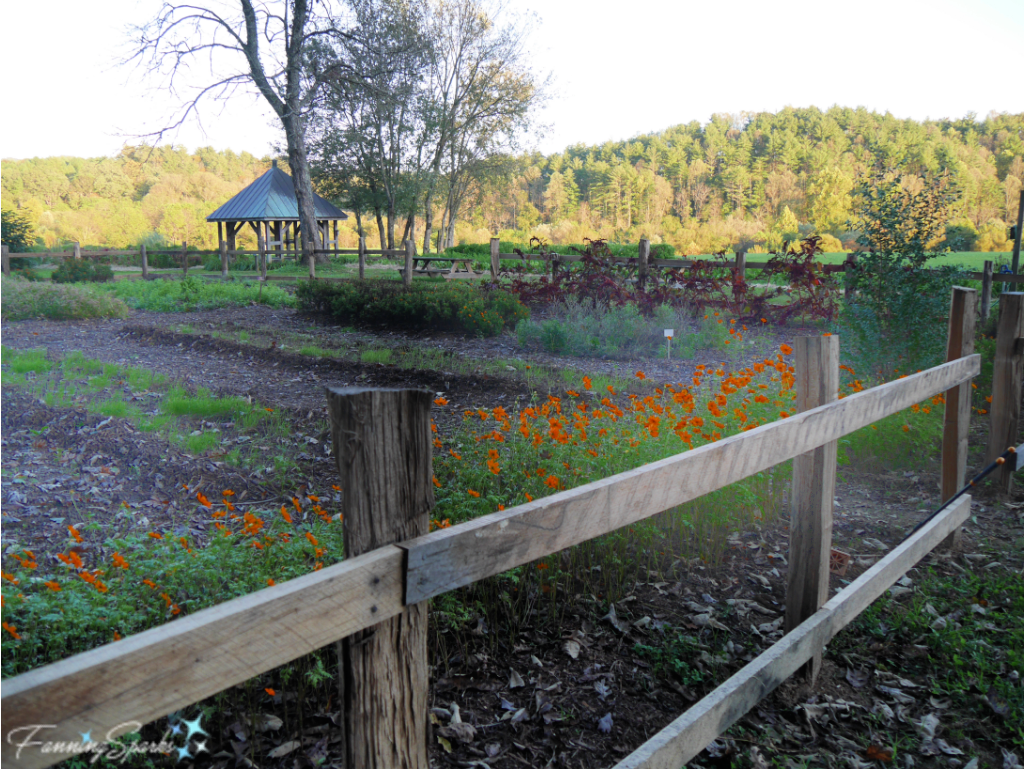
Some of our favorite spots on the Folk School campus are dedicated to the memory of loved ones. The John Neil Davidson Rhythm Pavilion is a case in point. It is a simple gazebo situated at the edge of the vegetable garden with a gorgeous view of the surrounding mountains.
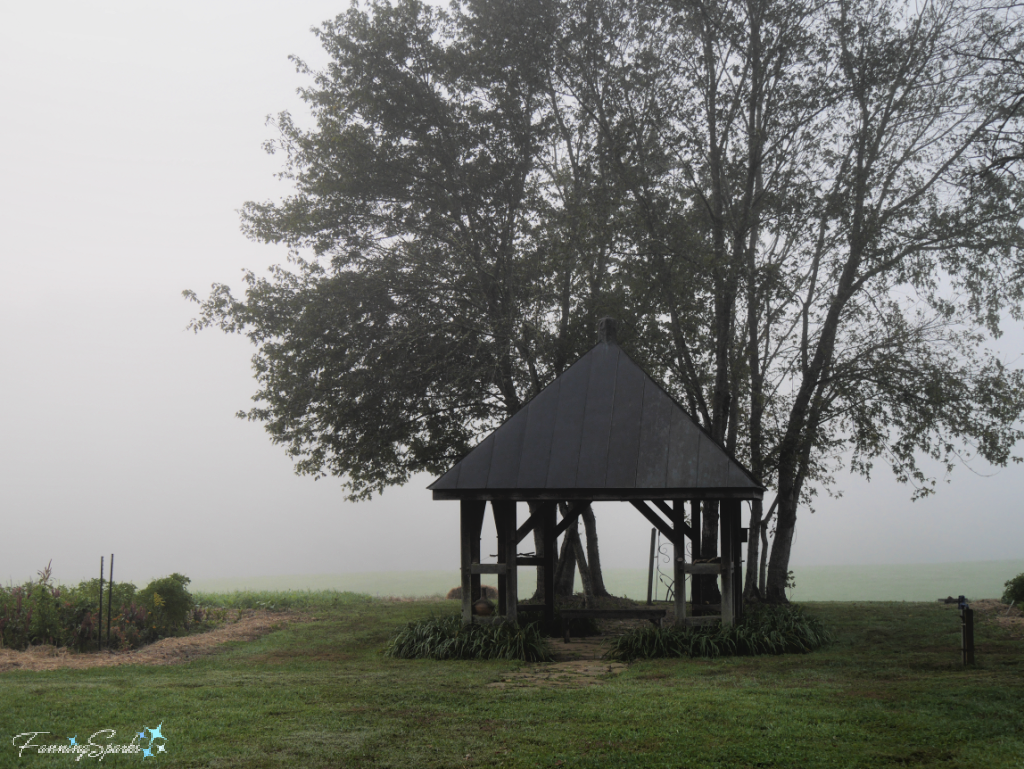
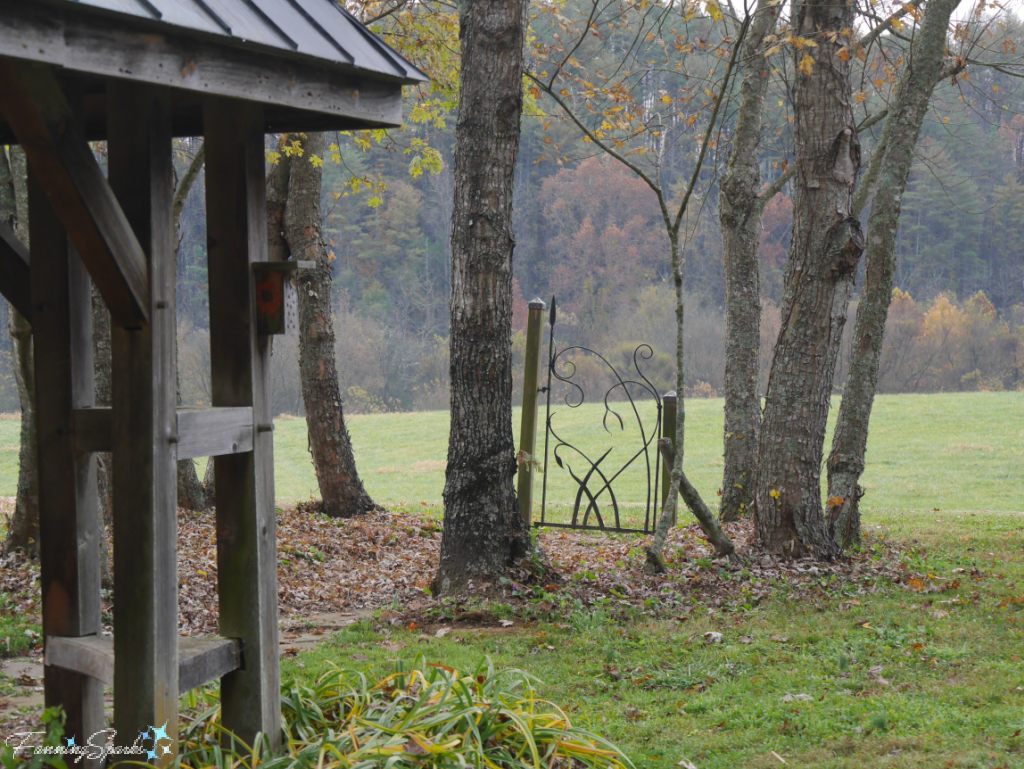
Rainbow Bridge
The pretty metal garden gate shown above leads to a mown path through the hayfield. I often follow this path to visit another favorite spot. Rainbow Bridge is part of the Little Brasstown Creek trail—a natural walking path that follows the banks of the creek. The highly-rounded arch of Rainbow Bridge is an unexpected surprise amidst the untamed landscape. It always reminds me of the stunning moon bridges I saw in China and Japan.
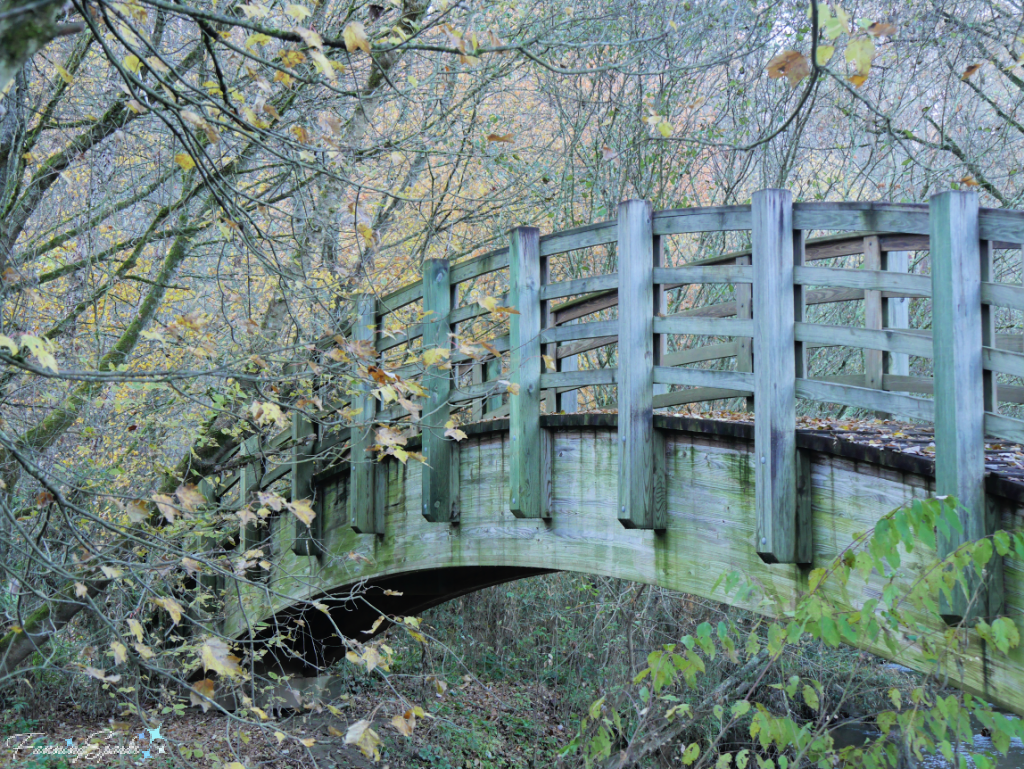
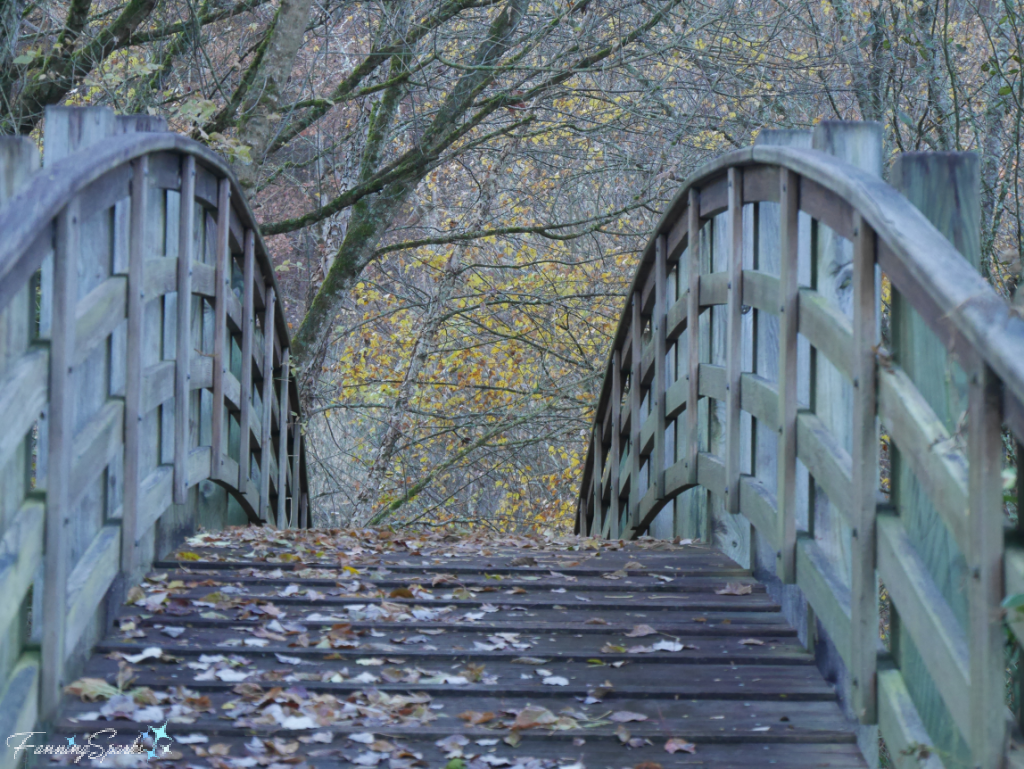
The Gardens
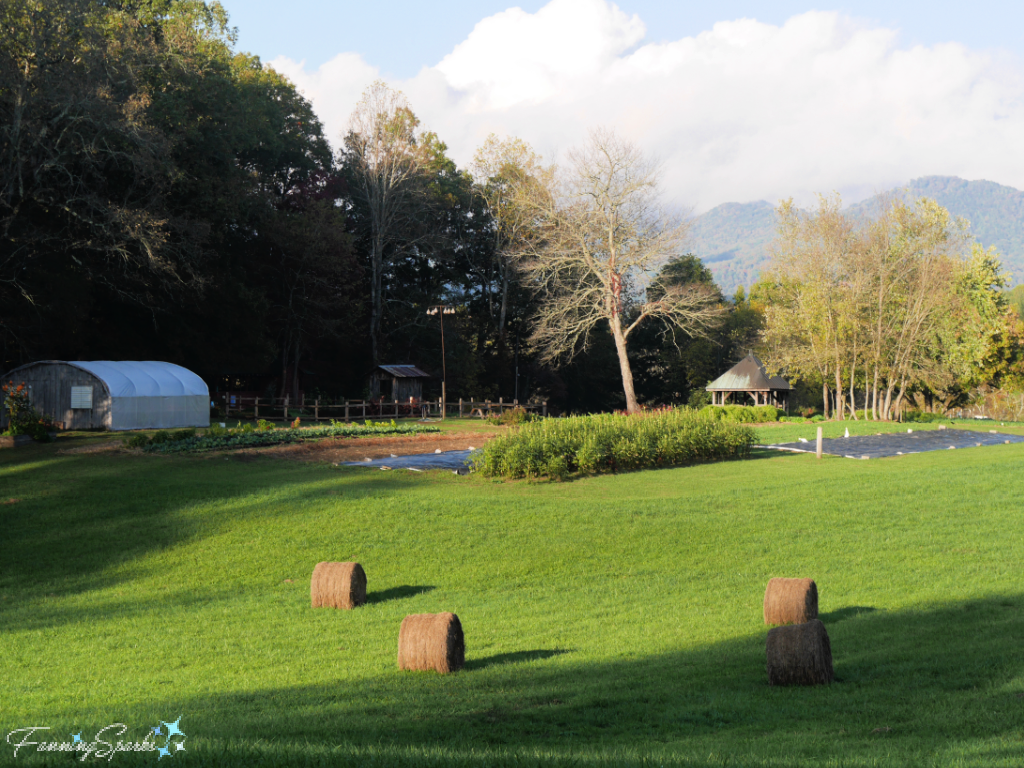
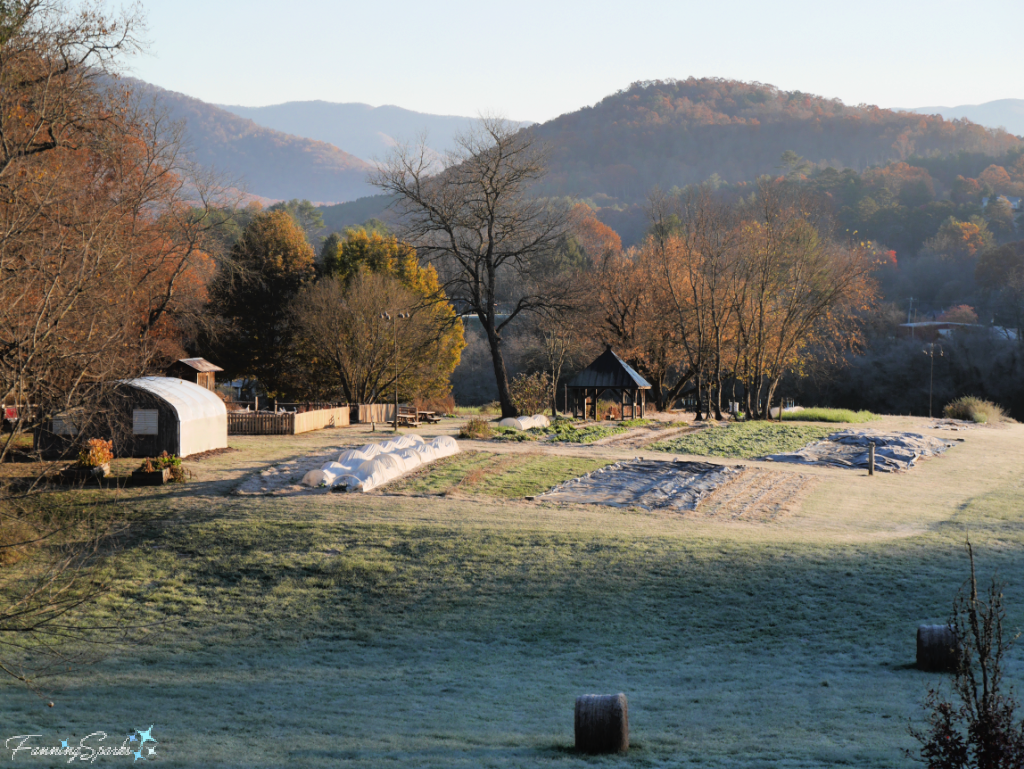
Work Study Program participants spend a lot of time in the School’s vegetable gardens. The last few weeks we have been harvesting, weeding, transplanting, mulching and getting the gardens ready for winter.
Judging from the frost on the ground, it looks like we got the row covers installed just in time!
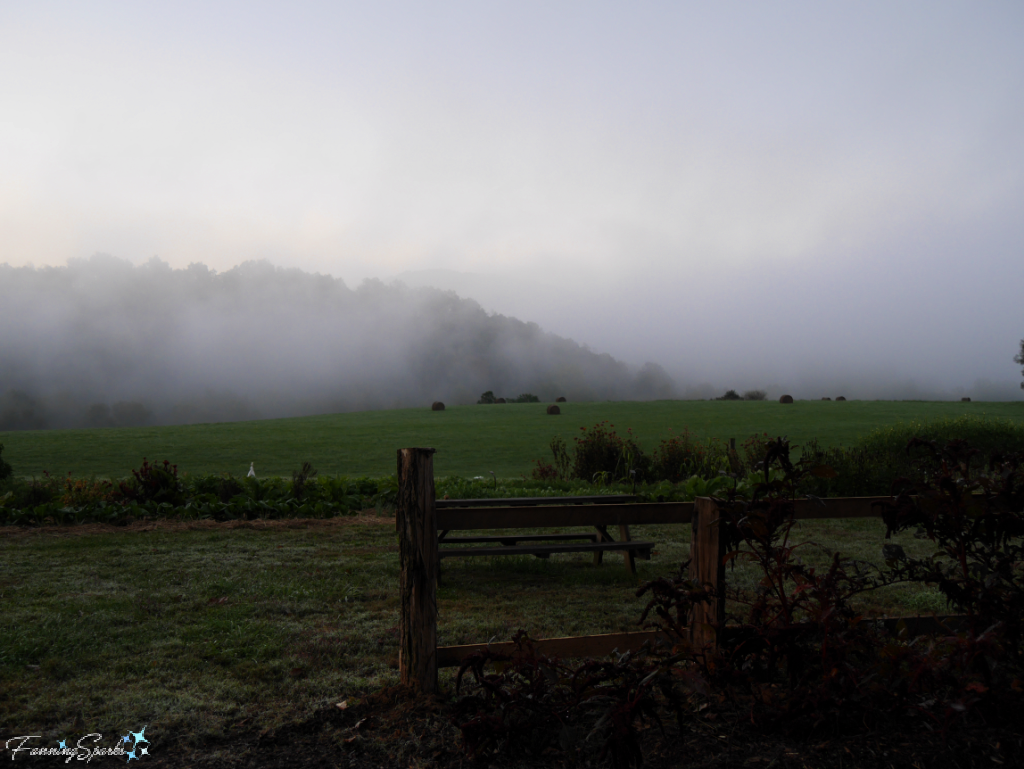
 The gardens are beautiful at any time of the day but they’re absolutely stunning on a misty mountain morning.
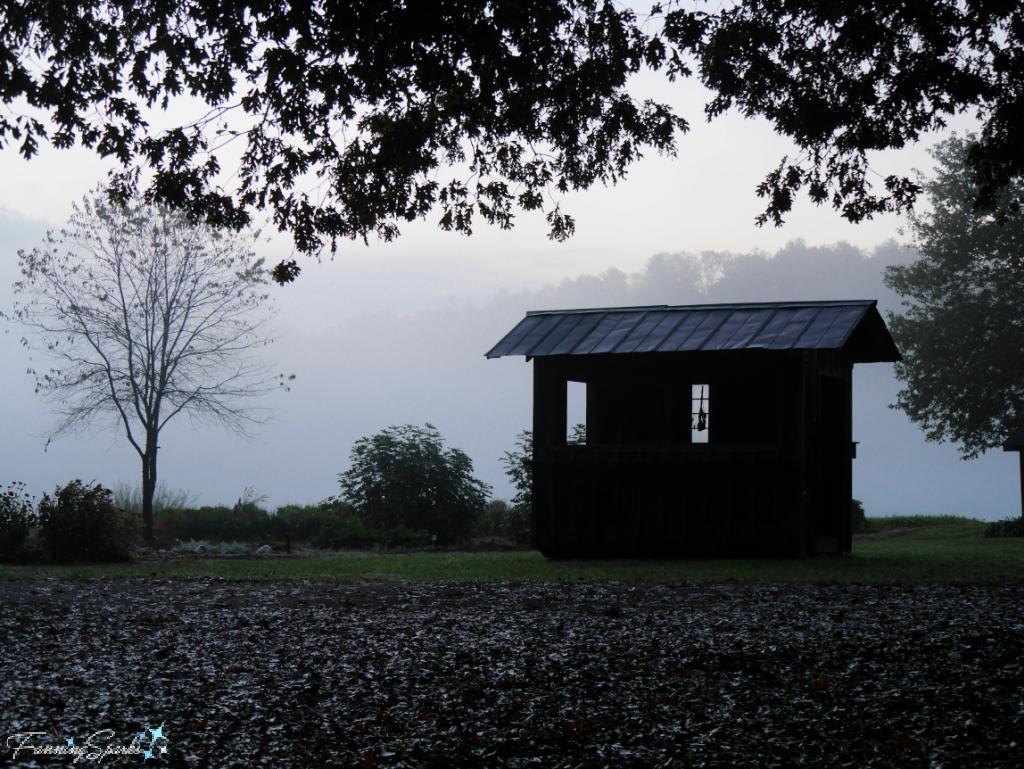
It’s fun to see how the School’s gardens change and evolve. For instance, there’s a renewed focus on growing plants for natural dyeing. These photos show the early stages of the new Dyer’s Garden.
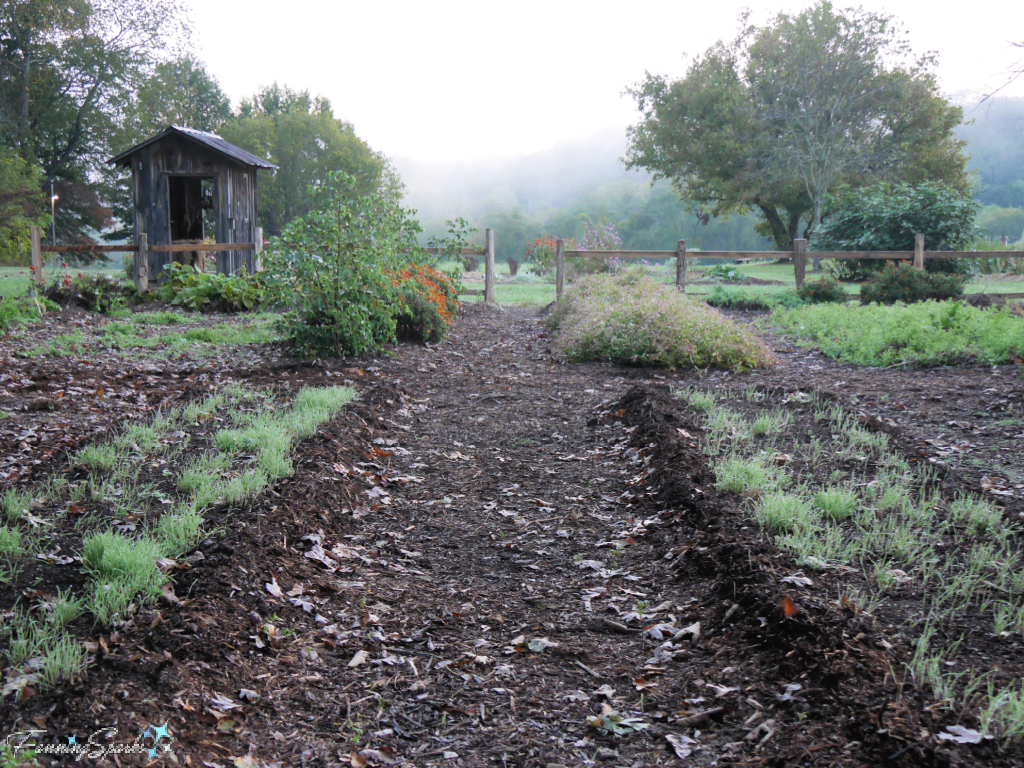
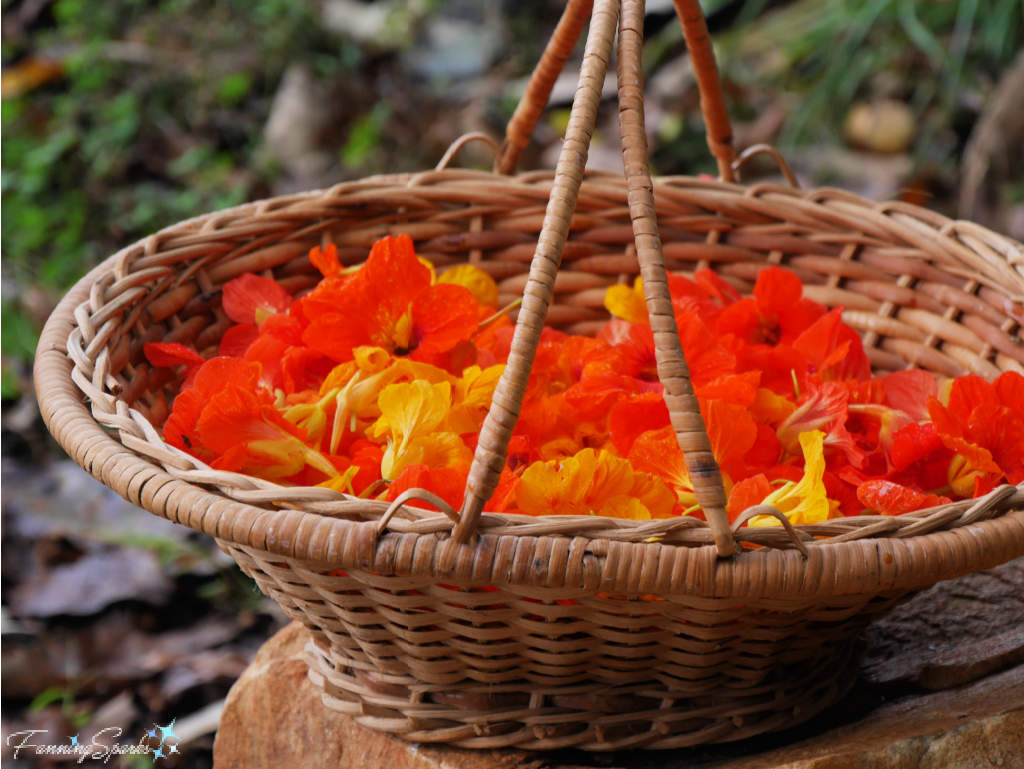
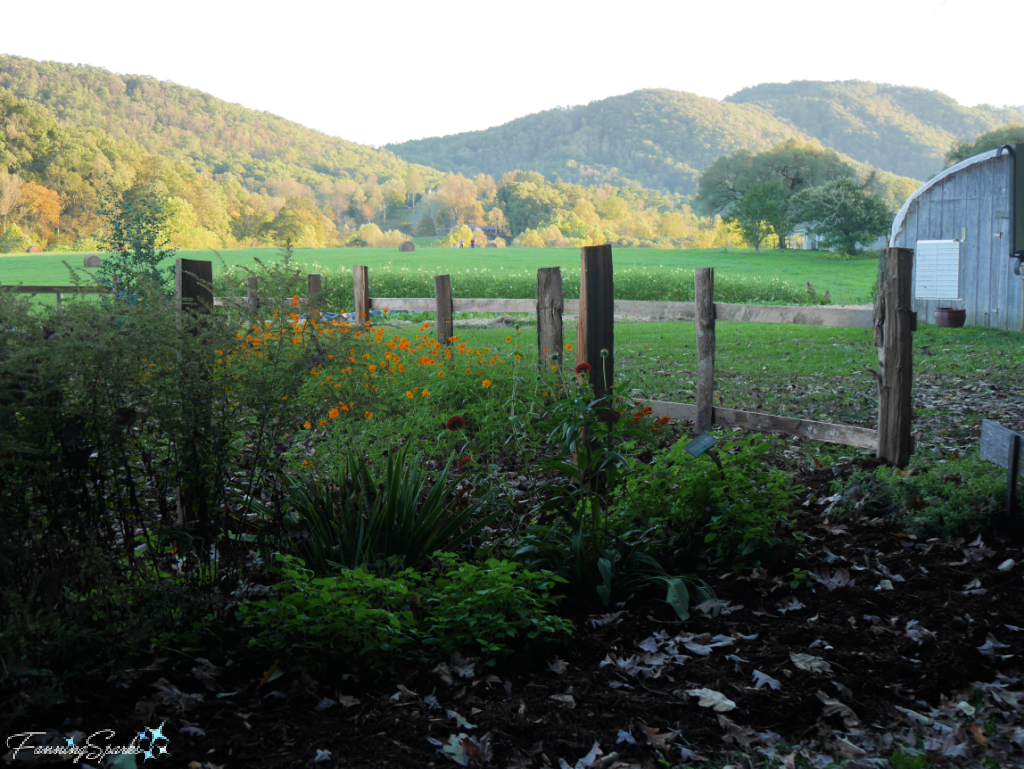 The gardens continue to provide a variety of fresh vegetables and, surprisingly, edible flowers for the School’s Dining Hall. Harvesting nasturtiums was a special treat—especially on days when you were the one serving them up for students at the Dining Hall’s salad bar.
Moulton Gardens
Another special spot established in memory of a loved one is Moulton Gardens. Dedicated to Gertrude E Moulton M.D., this little-known space is tucked in the woods on the way to the Woodturning Studio.
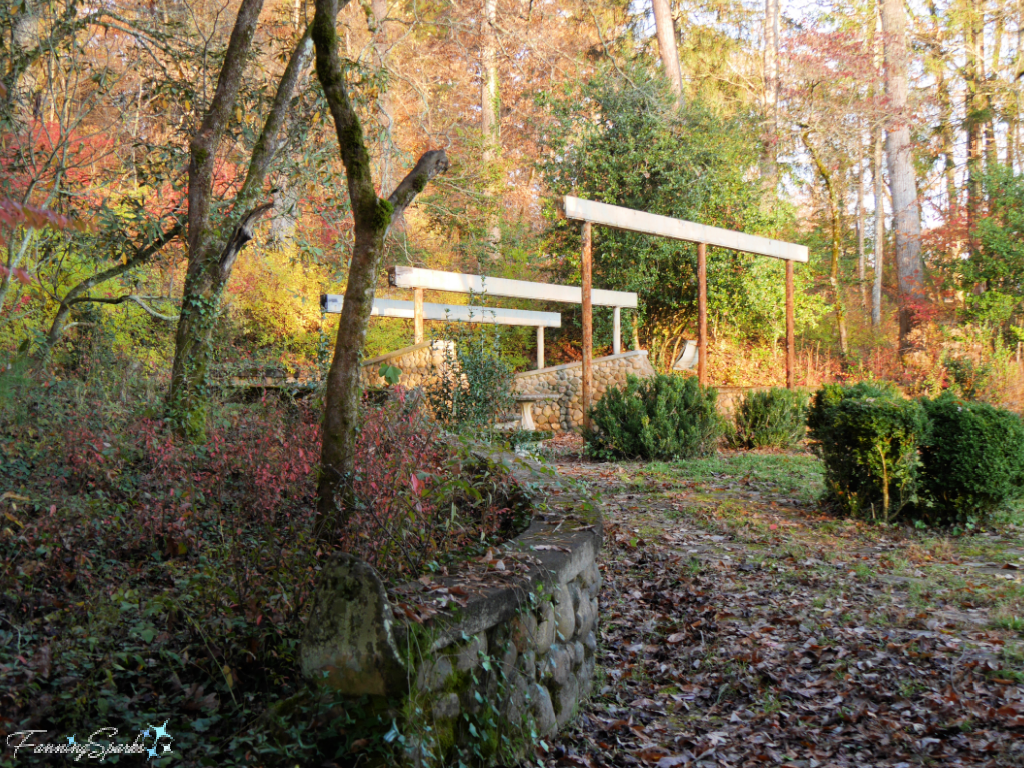
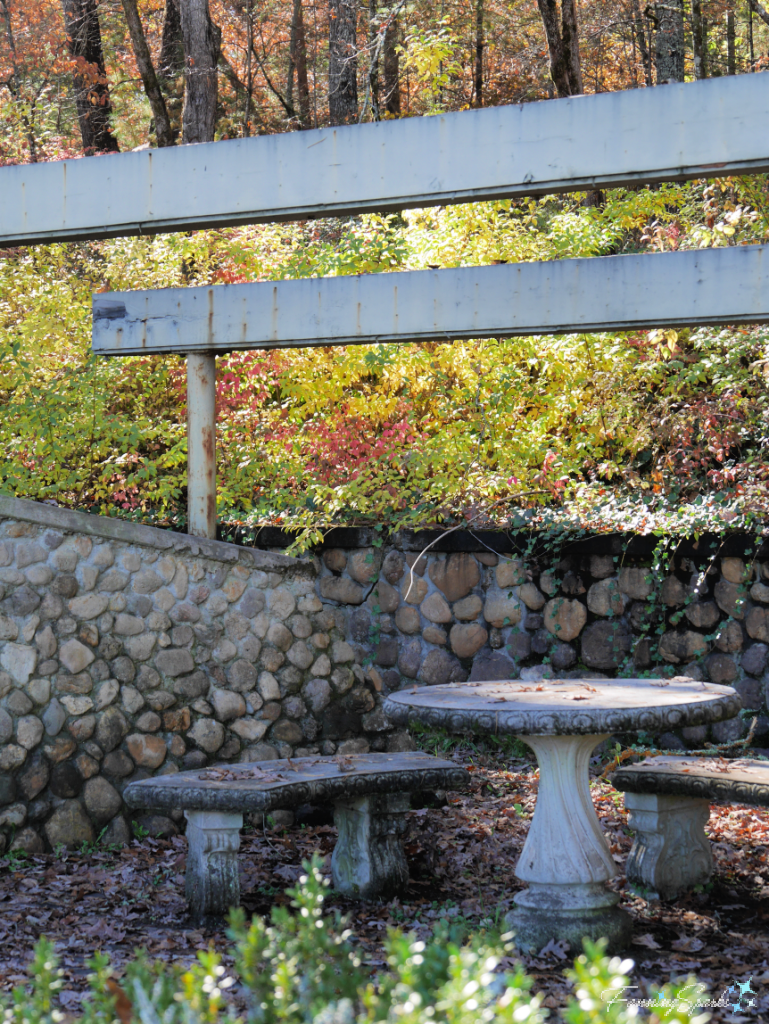 Moulton Gardens offers a spectacular view of the mountains especially in the early morning.
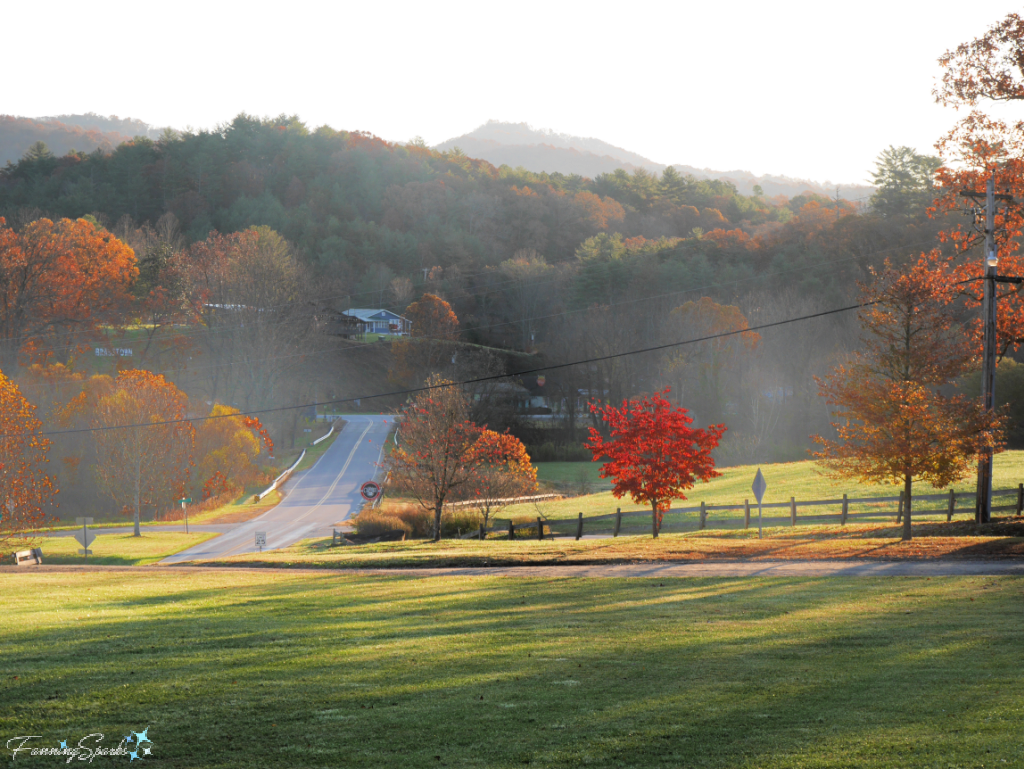 Views from Davidson Hall
Speaking of spectacular views, the campus is surrounded by them! Davidson Hall is a favorite spot for enjoying the scenery.
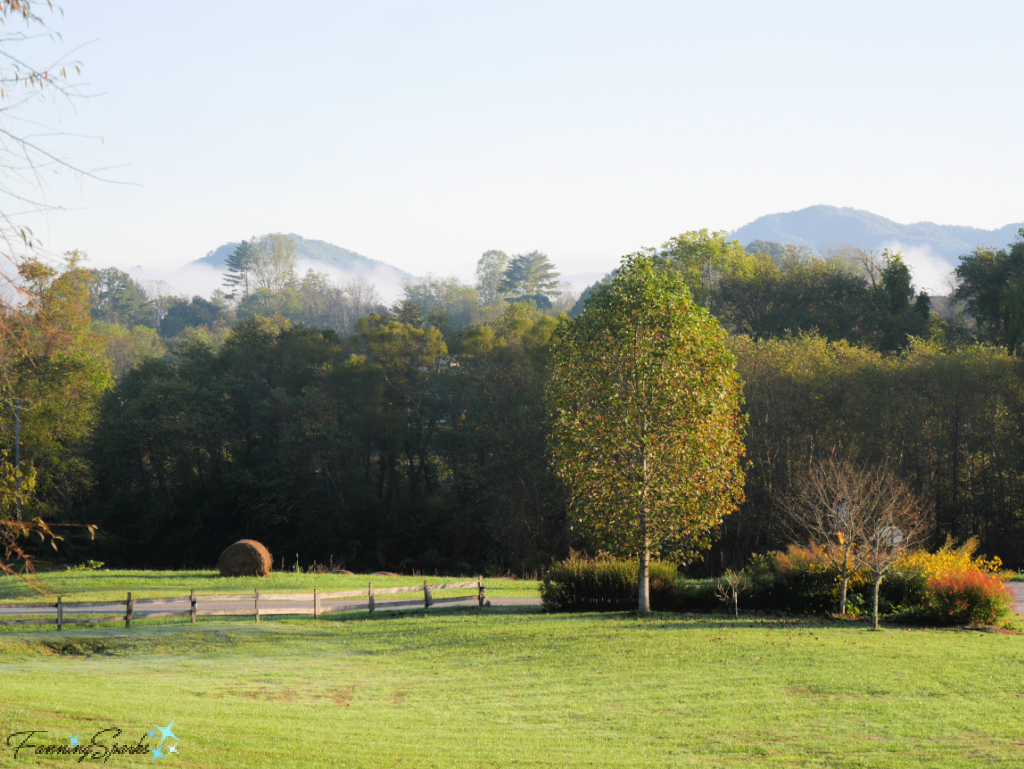
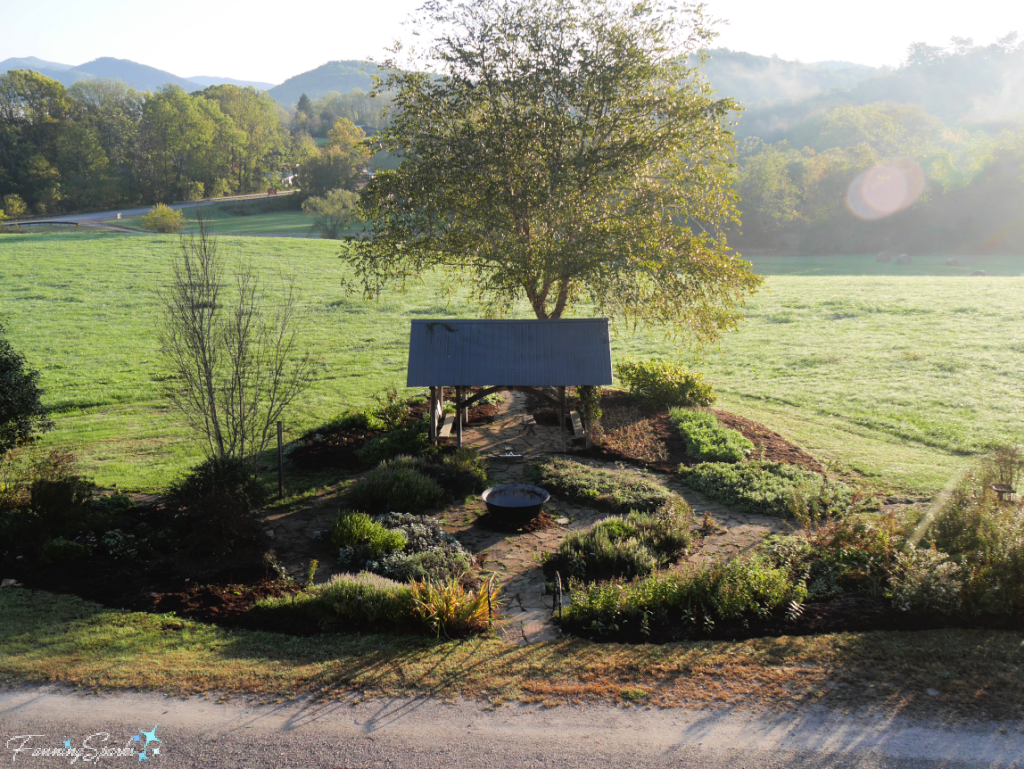
Views from Orchard House
Another popular favorite spot to absorb and thoroughly enjoy the beautiful views is Orchard House.
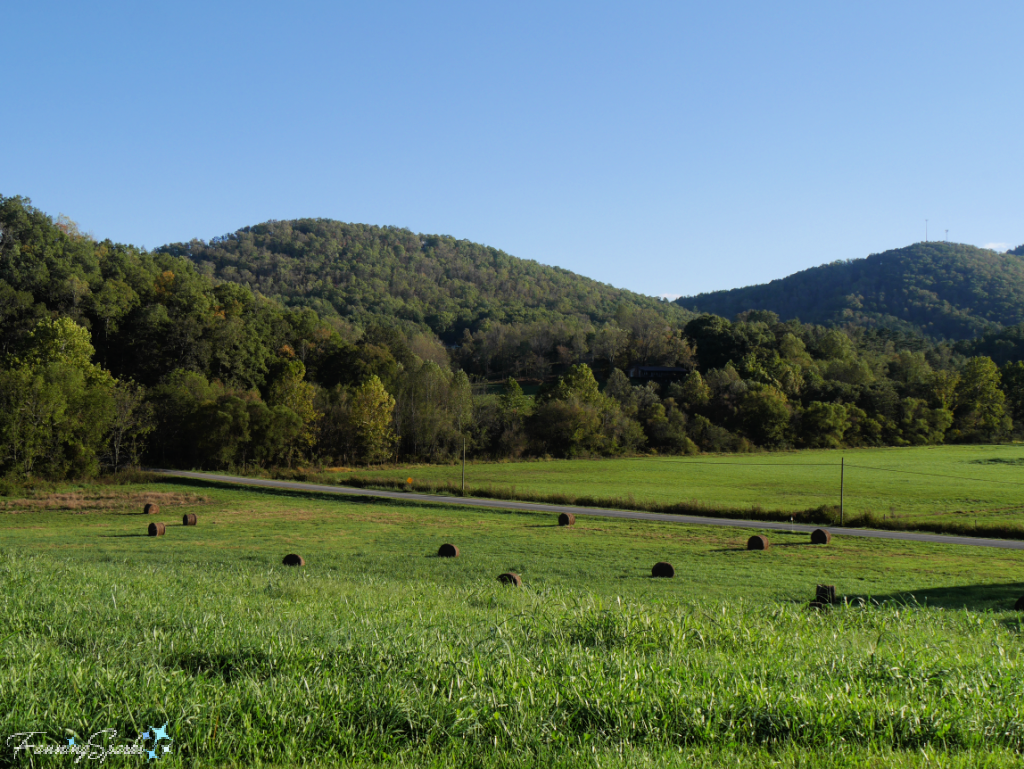
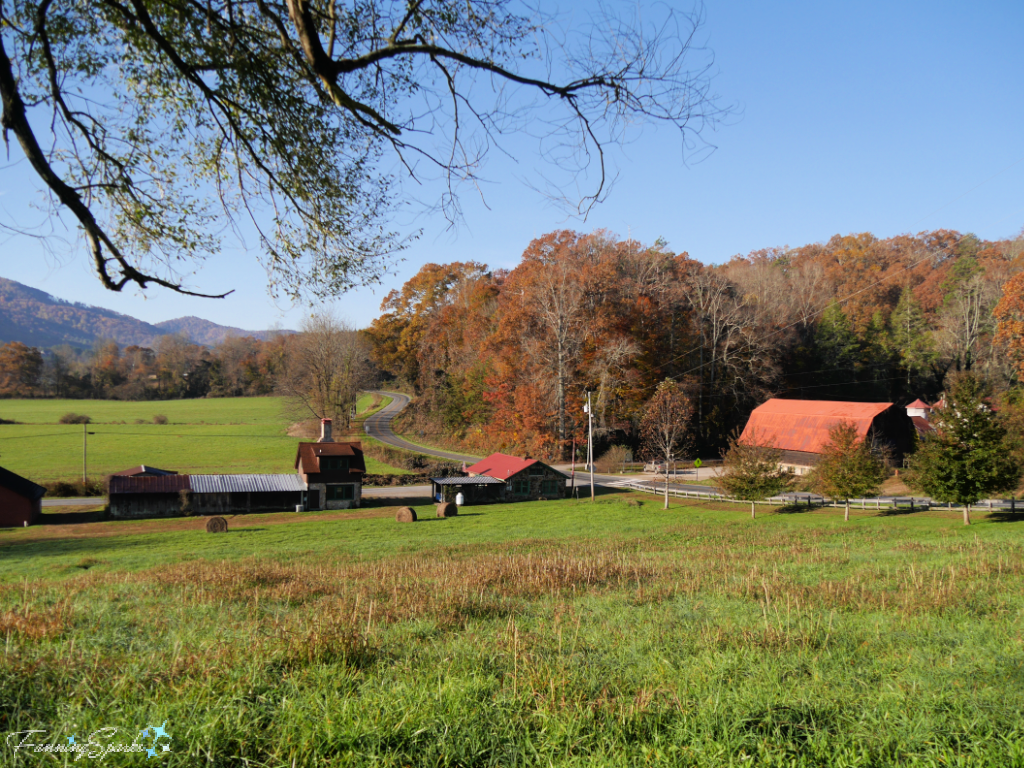
Walking Paths to Keith House
To wrap up this list of favorite spots, I’ll include a photo from the wooded walking paths heading to Keith House. Students walk these lovely natural trails multiple times a day as they traverse the campus from housing to Dining Hall to studio.
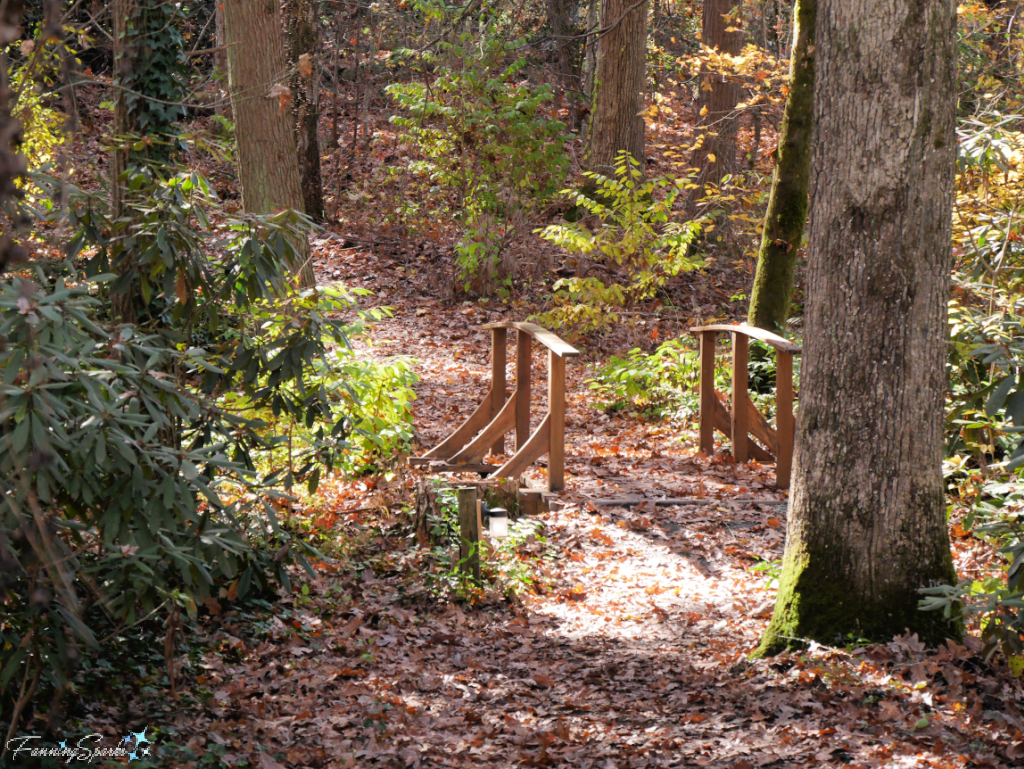 For folks familiar with the John C Campbell Folk School, did you see your favorite spot in today’s post? Or did we miss one? Please feel free to share in the comments below.
To learn more about the history of the John C Campbell Folk School, check out the Craft Revival section of the Western Carolina University Hunter Library Digital Collections. As noted on the website “The Craft Revival project’s primary objective is to create a web-based digital history documenting the Craft Revival movement that occurred in western North Carolina from 1895 to 1945. A main component of the project is a virtual collection of documents, photographs, craft objects, and artifacts that tells the story of the Craft Revival. This virtual collection consists of digital surrogates that reside together in a database, maintained by Western Carolina University’s Hunter Library”.
Here are links to the archived photos specially mentioned in this post:
. There is a series of eight photographs from 1926, believed to have been taken by Marguerite Butler (Bidstrup), chronicling the construction of the Log Museum.
. A photo from around 1930 shows three men standing outside the Spring House holding containers of milk.
For more information about the Folk School campus, see my previous posts:
. Folk School Studios—Where the Magic Happens
. A Makers’ Playground
. Artistic Details Around Campus
I’m currently participating in a 6-week Work Study Program at the John C Campbell Folk School. To learn more about the program, look for Work Study on the Folk School website or check my FanningSparks’ blog posts about my Work Study Program experience.
1. There are as many favorite spots and reasons for considering them special as there are people.
2. Make time to recognize those who went before us and the contributions they made.
3. Find and savor your own special place as a source of comfort, joy or wonder.