
In today’s post I share another peek into a week-long class experience at the John C Campbell Folk School. The topic is leathercrafting and the class, Create Your Perfect Leather Bag, was taught by Tom Slavicek. I’ve wanted to try making with leather for some time but could never quite figure out how to get started. Now I know!
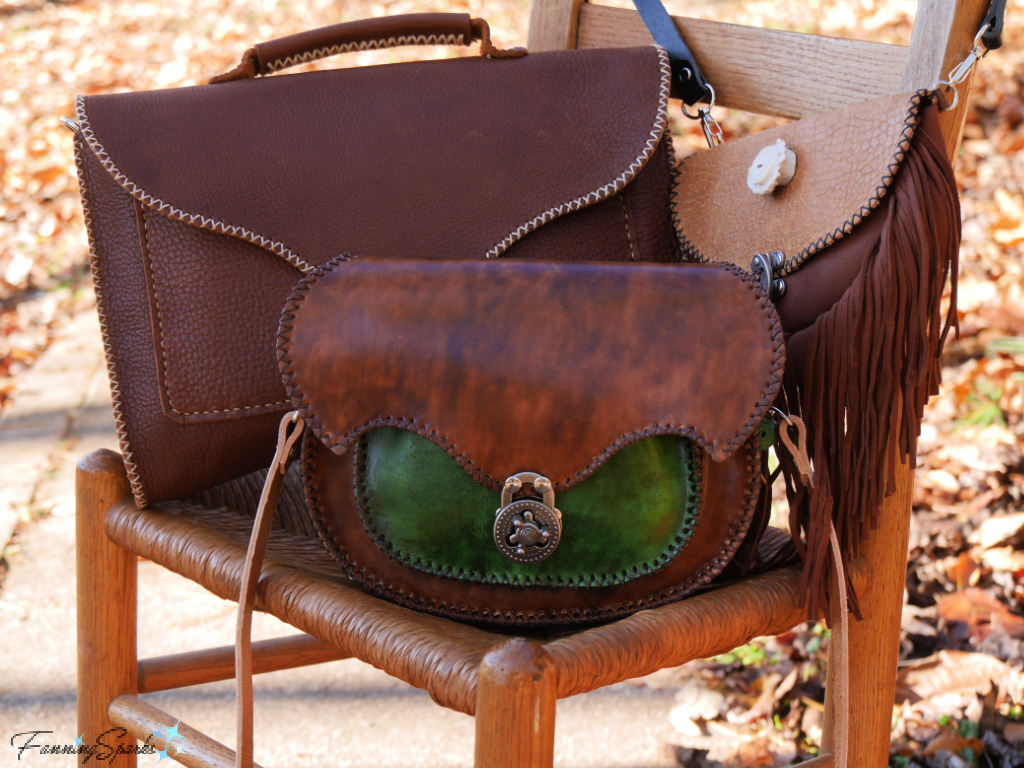
Tom is a knowledgeable leather artist with over 10 years of experience. His specialty is crafting one-of-a-kind leather shoulder bags, belt pouches, “Mountain Man” leather goods and more. Here are a few of the sample bags Tom brought to show the class.
The next photo shows Tom stitching a beautiful butterfly wing bag. This unique crossbody purse will feature an innovative design, rich color and intricate details.
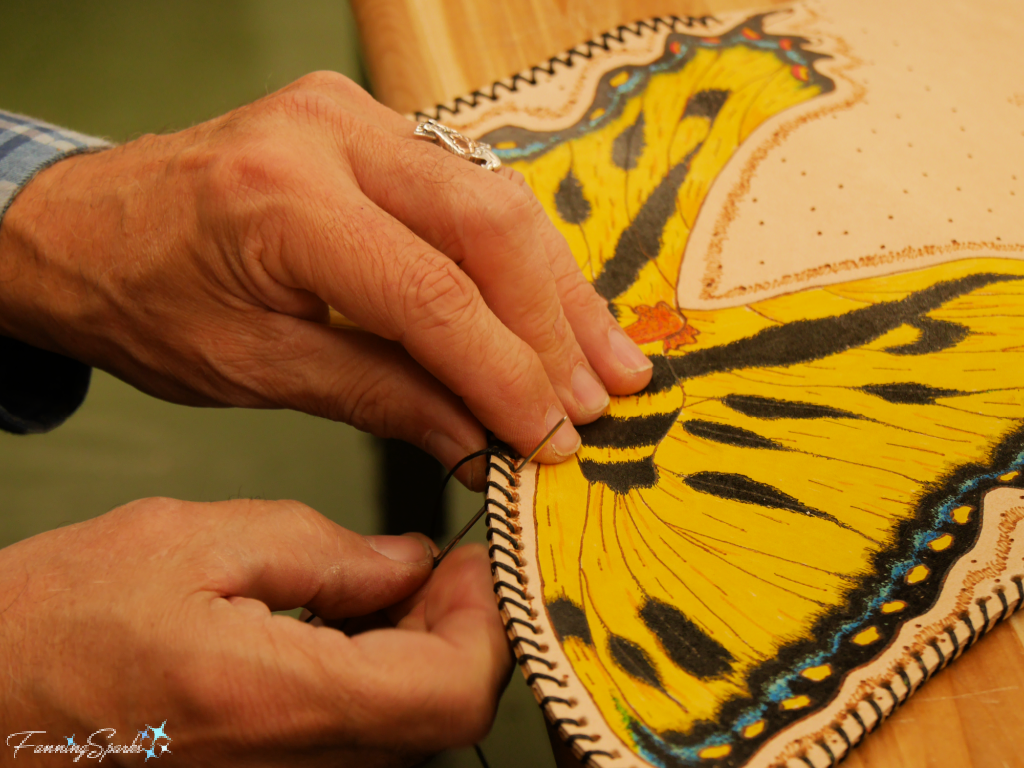
Tom’s stitching is amazingly precise—neat and even—something I really appreciated when I tried to make my stitches look like his.
Tom’s class description promises “Customize a leather bag to your style with hand-tooled designs and textures, decorative hand stitching, pockets, buckles, straps, closures, and rivets. Expect to create one or more bags, based on size and detail.” We did, indeed, make our own customized bags. Our small class of seven turned out a wide variety of bags including belt bags, tote bags, crossbody bags, backpacks, drawstring bags and messenger bags. But we weren’t limited to just bags and purses, we also made belts, key fobs, wallets, tool holders, bag charms, tassels, buttons, earrings and (in the case of one particularly creative student) a leather crown for family game night.
I chose to make a backpack camera bag as my main project. One of Tom’s patterns was easily modified to fit my exact requirements. My bag is 12″ across x 10″ high x 6″ deep. But best of all my new camera bag is uniquely mine. It’s anything but your typical nondescript, black camera bag. It’s one-of-a-kind—fun, whimsical and full of joy!
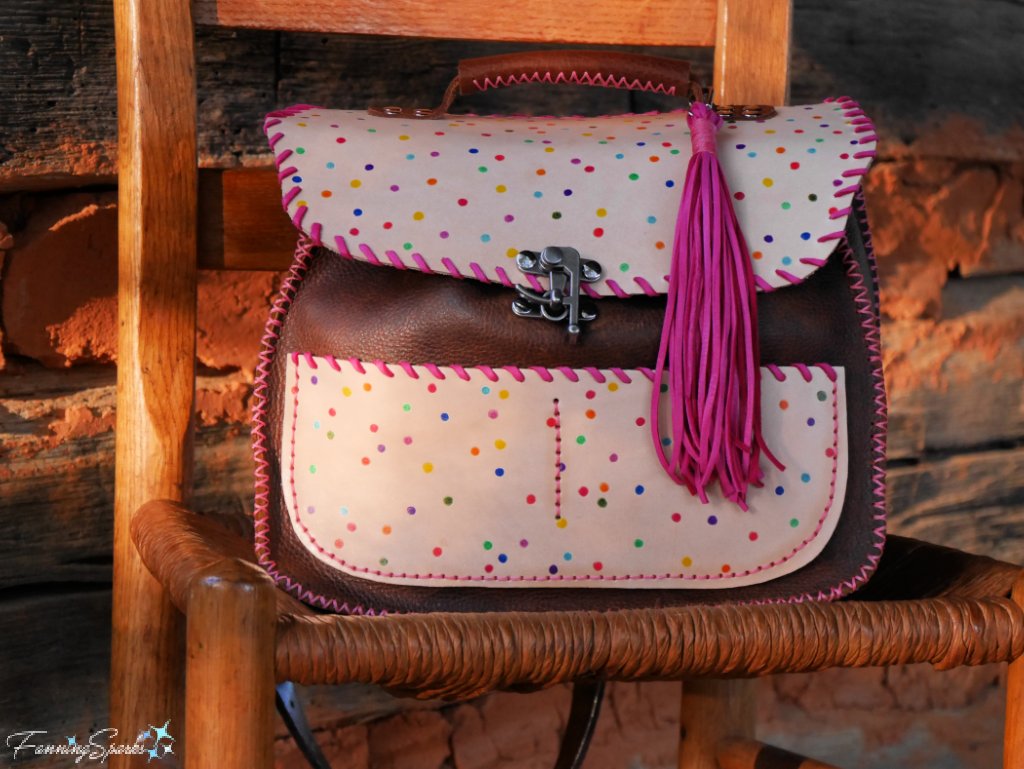
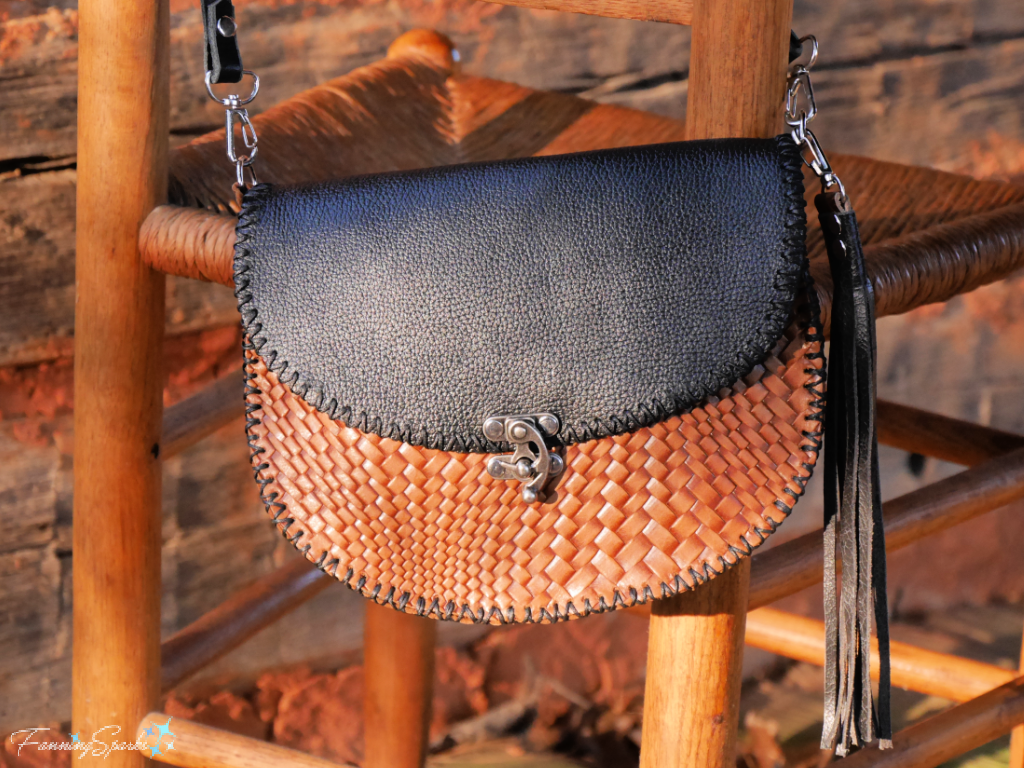
Our class started by making a Half Moon Bag. Tom had all the materials prepared so we were able to choose our own components and dive right in. He also provided a 19-page instruction booklet complete with photos and step-by-step instructions. This was the ideal way to start—we learned the basics of leathercrafting while working on a low-risk, beginner project thus setting the foundation for our one-of-a-kind, advanced projects. This is my half moon leather bag made with embossed leathers, cross stitched outside seams, swing clasp, adjustable shoulder strap and decorative leather tassel.
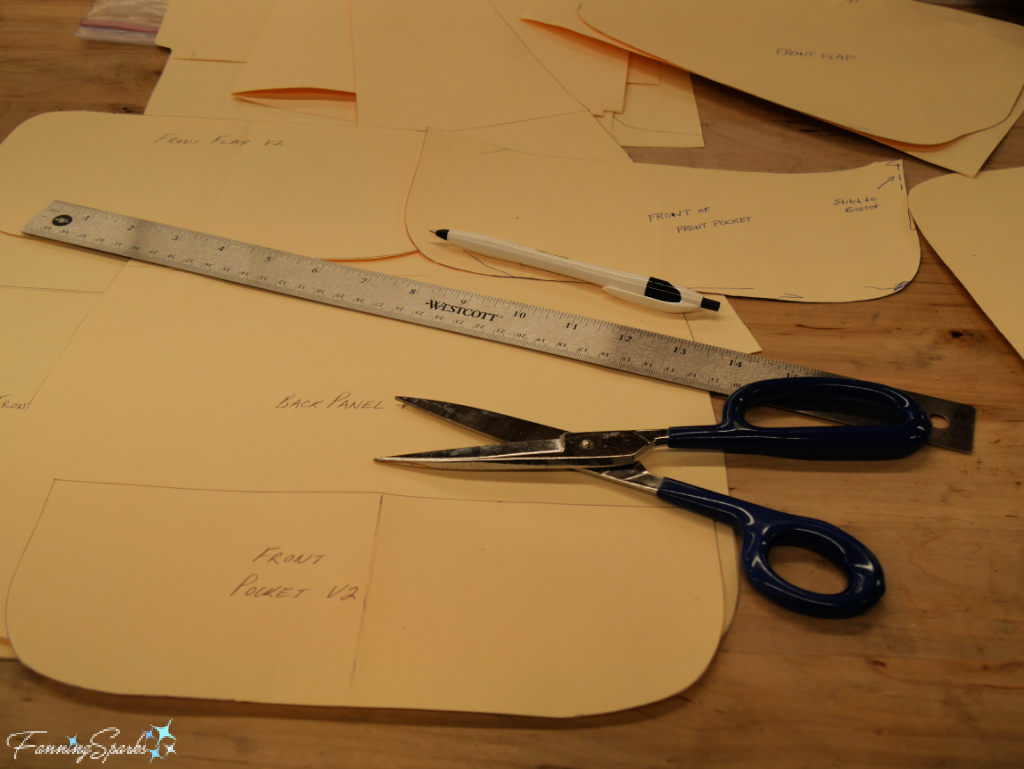
I came into Tom’s leathercrafting class hoping to make a custom camera bag. So I was thrilled to be able to tailor every aspect of the bag including its functionality, form, size, color, texture and style. I started with one of Tom’s backpack templates and modified it to fit my camera gear. We learned to prototype our ideas with heavy paper. This is a great way to test the size and fit of the components, think through the construction and visualize the final result.
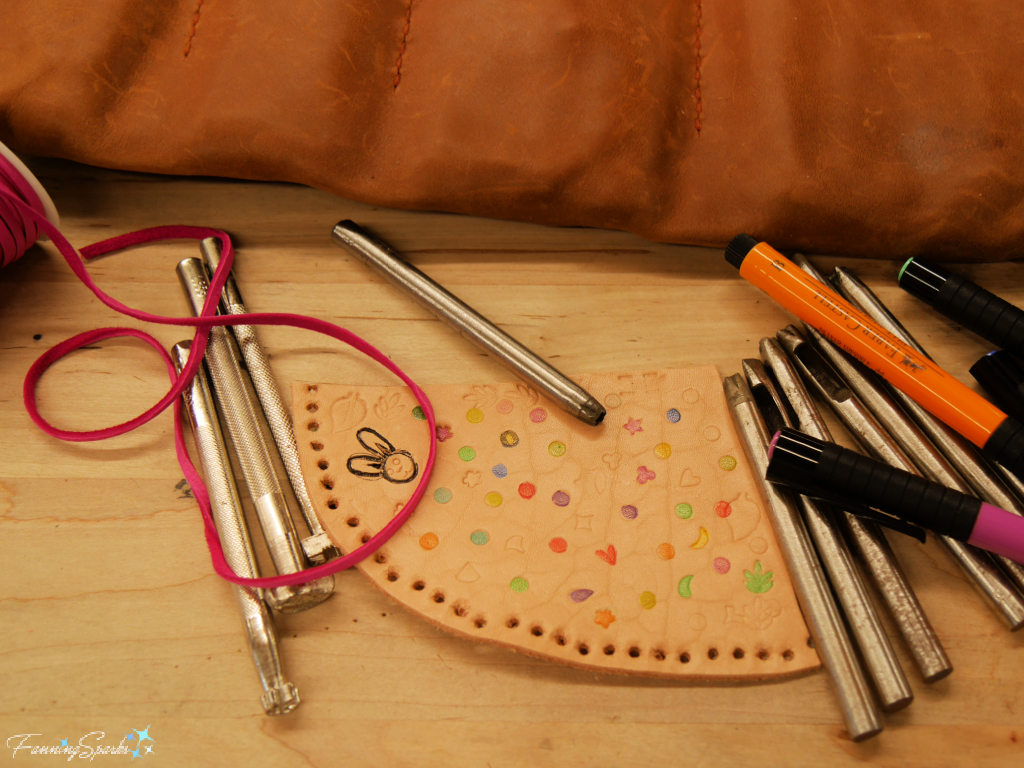
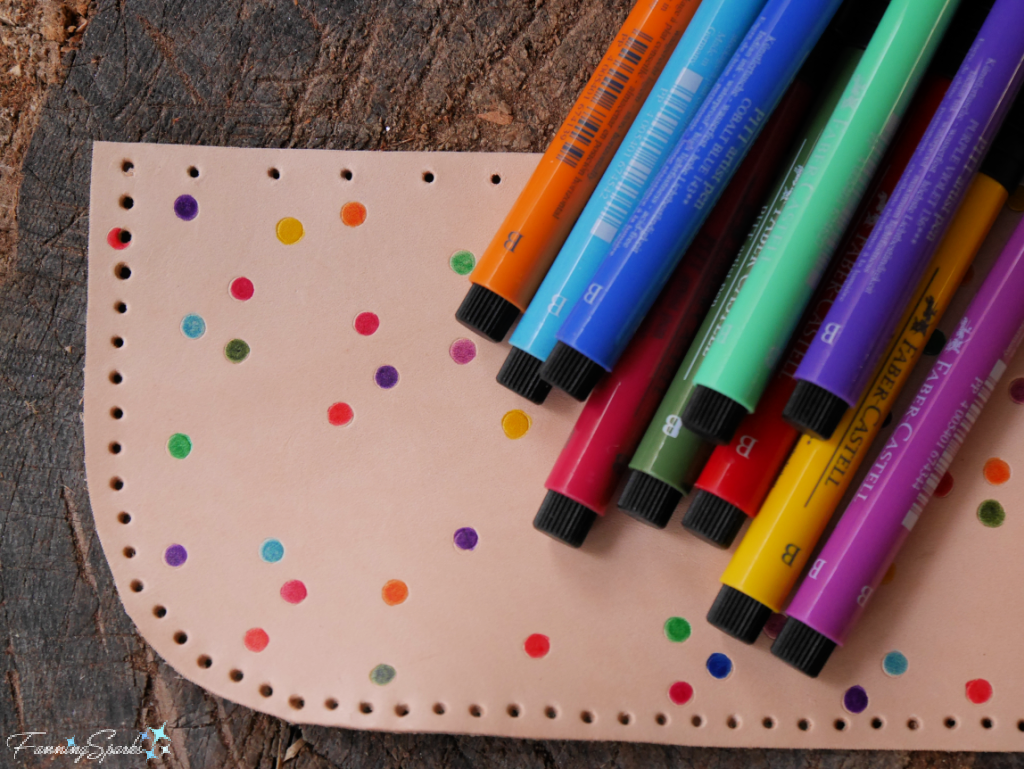
Having selected the form and size of my camera bag, I spent some time considering the design elements—color, pattern and style. I decided to go with a cheerful confetti design made by stamping tiny circles with a round punch and then coloring them in bright colors. Tom recommended Faber-Castell Pitt Artist Pens which are India ink with brush nibs—the ink is permanent, waterproof, has high light fastness and is acid free. I also decided to incorporate some ⅛ inch, fuchsia-colored, deerskin lace from Tandy Leather.
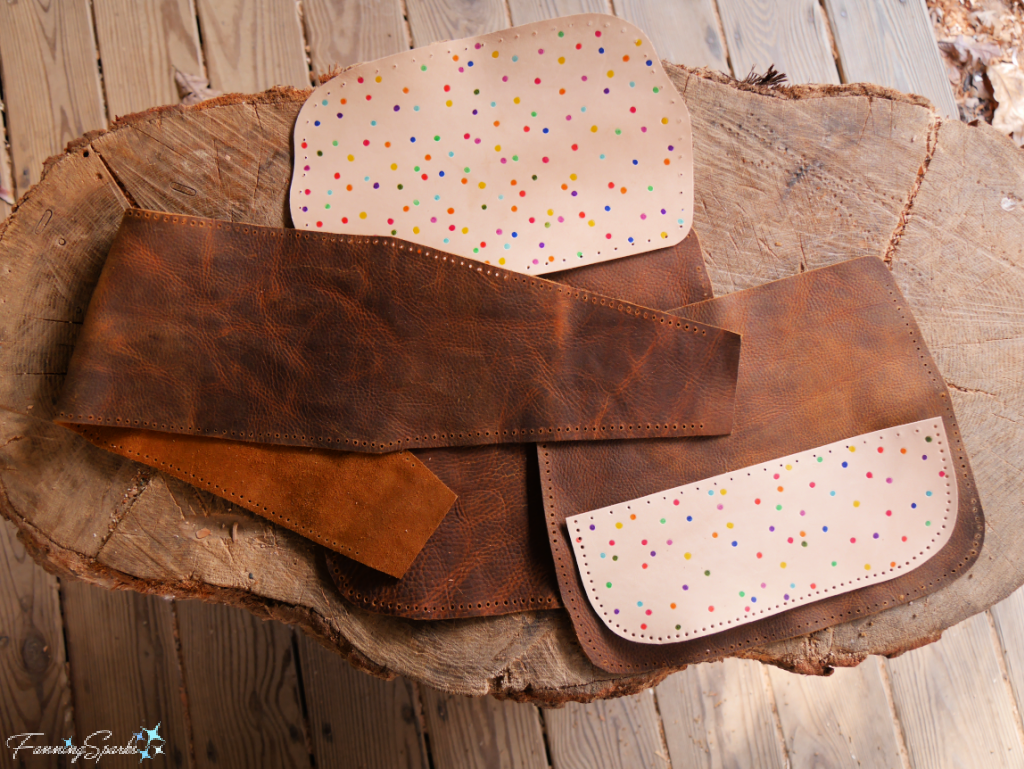
Next I selected leather from the generous supply Tom brought for the class.
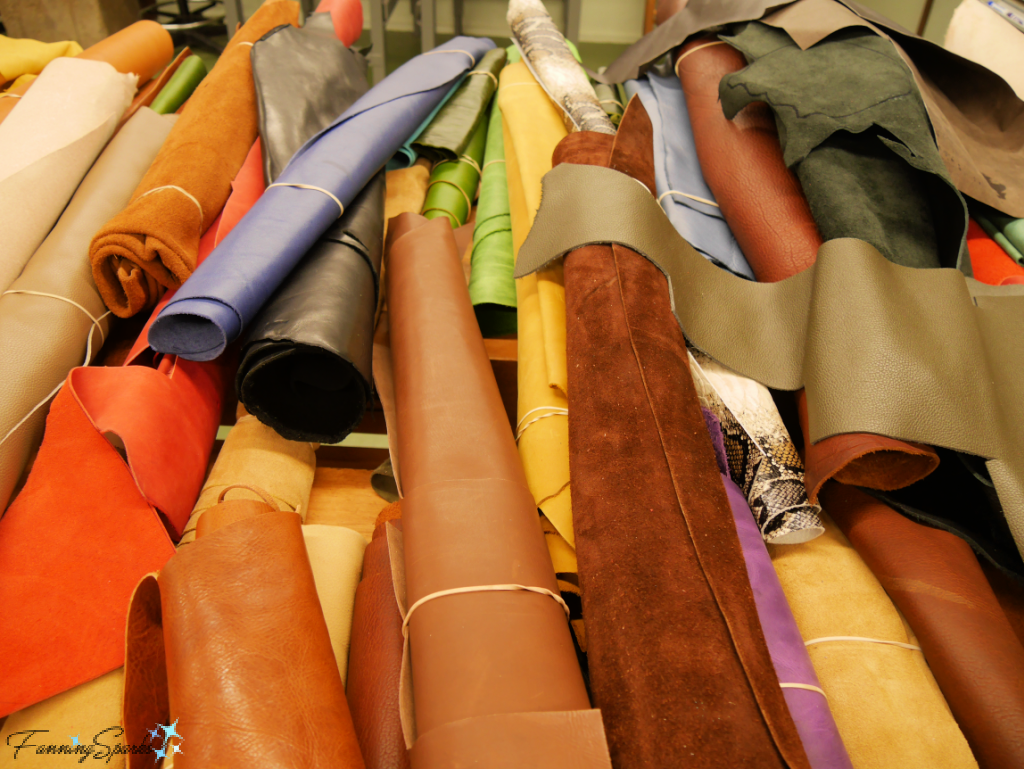
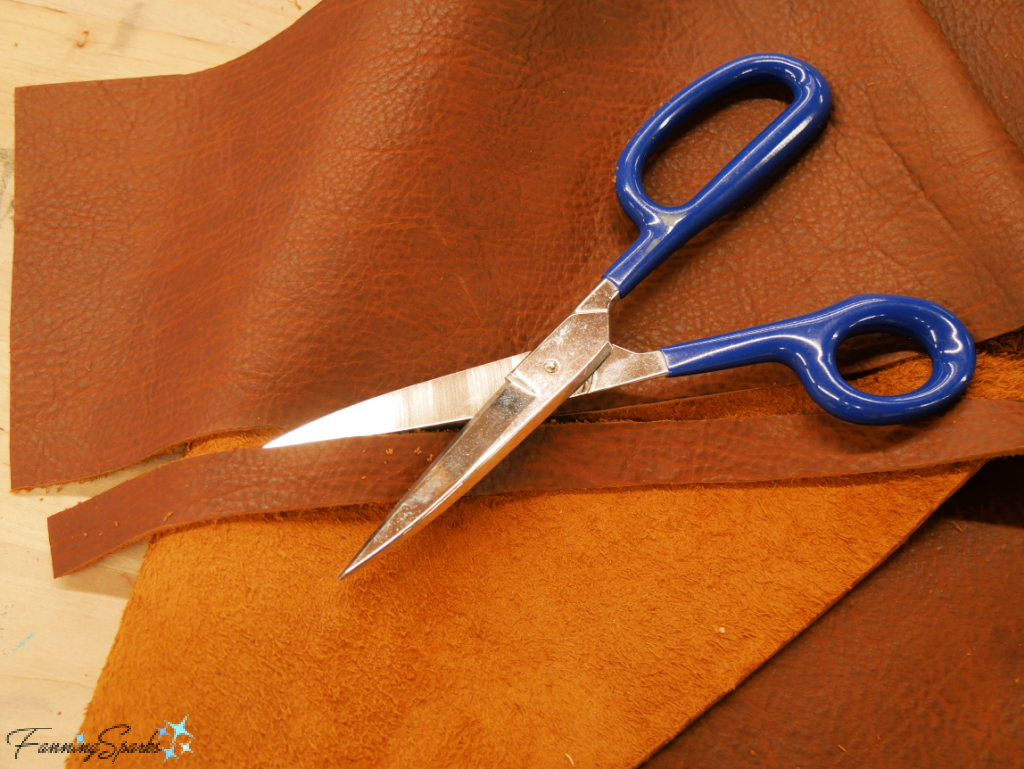
I chose a brown-colored, oil-tanned, cowhide in 4 to 5 oz thickness for the main body and a natural-colored, veg-tanned, cowhide in 5 to 6 oz thickness for the flap and front pocket. A camera bag must be able to handle the wear and tear of constant use. I can’t worry about scratches and creases every time I set the bag on the ground. That’s the reason Tom recommended the brown cowhide—it has a distressed look which will develop a vintage-looking patina over time. With these decisions made, it was time to cut out the parts for my camera bag using Craftool Sure-Grip shears. 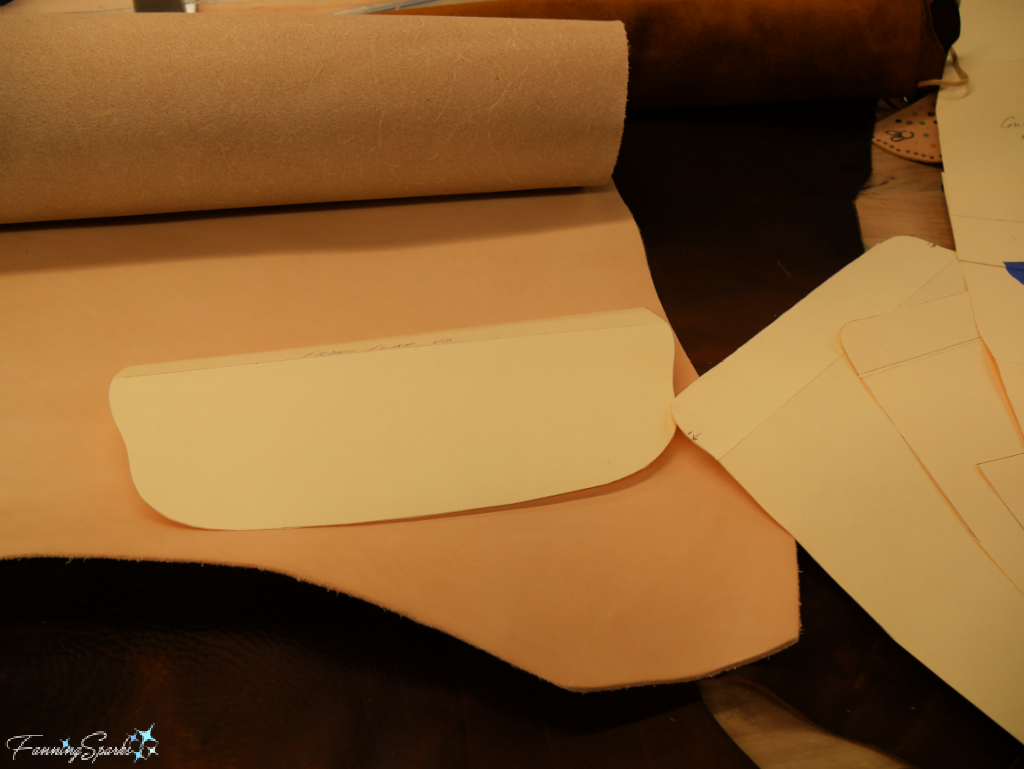
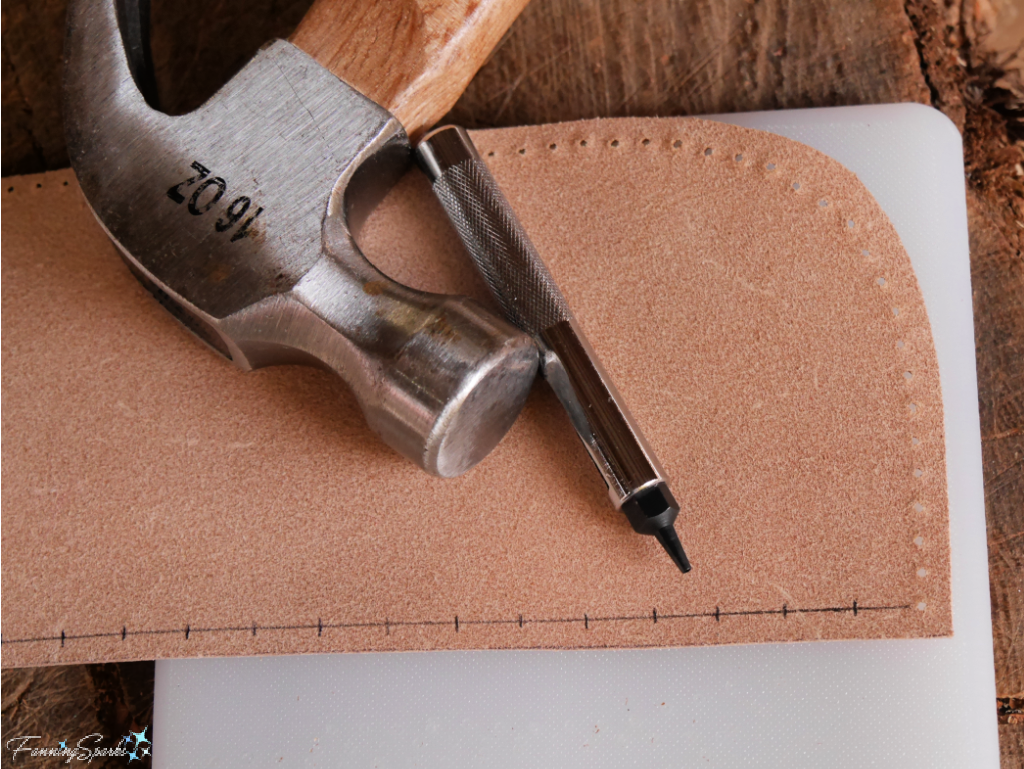
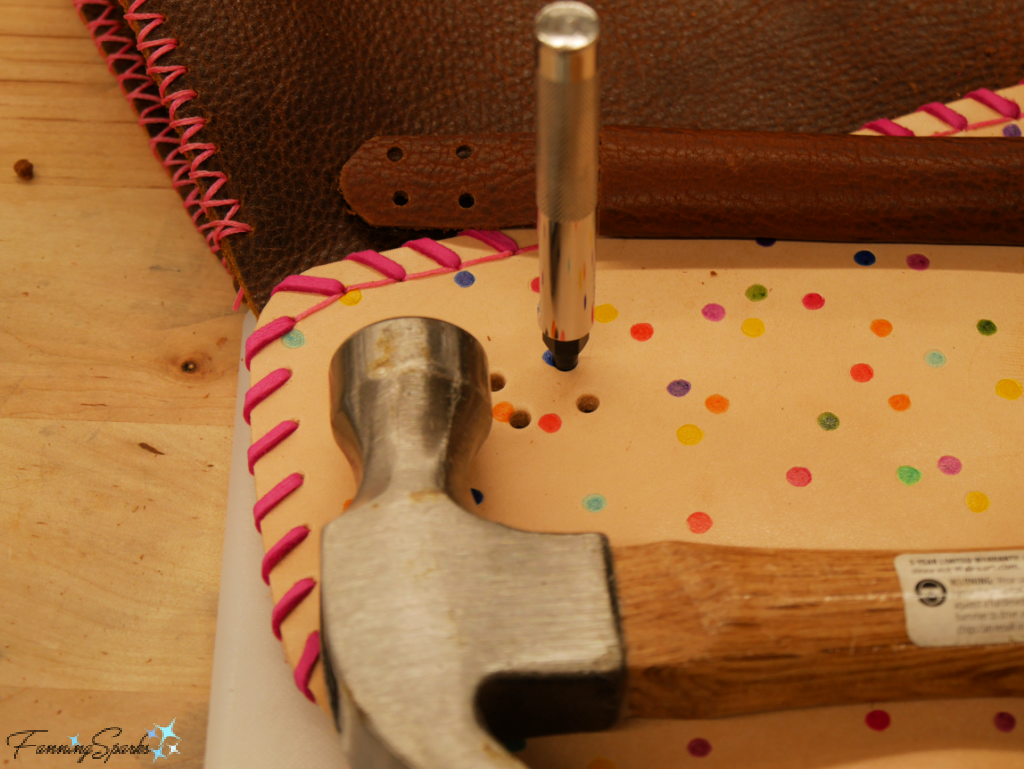
The first step in construction is to punch holes in the leather. For most of the holes, I worked on a small poly cutting board and used a Craftool 4-in-1 leather punch to make neat 3/32” round holes along the edge of the leather parts.

The fuchsia-colored deerskin lacing required wider spacing so I punched individual holes, set ¼ inch apart, with the 3/32” single-hole punch from my Tandy Leather mini punch set.
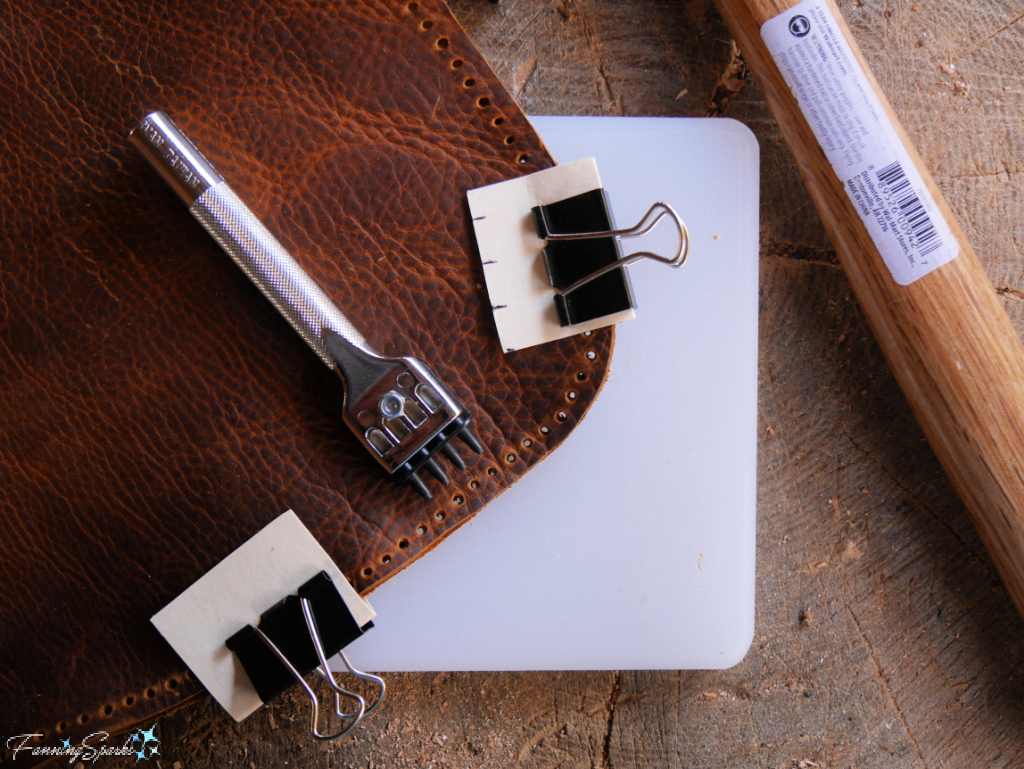
To ensure correct alignment, some parts were clamped and punched at the same time. The photo below shows the back and front panels being punched together.
Embellishing the front pocket and flap was a simple process of randomly stamping small circles over the surface and then coloring them with my chosen colors in Faber-Castell Pitt Artist Pens.
To enhance the distressed look of the brown leather, I used my hands to roll and wring the leather. Then all the leather parts were sealed with a light coat of Fiebing’s Saddle Lac for transparent protection. By the end of the second day, the parts for my camera bag were cut, embellished and punched.
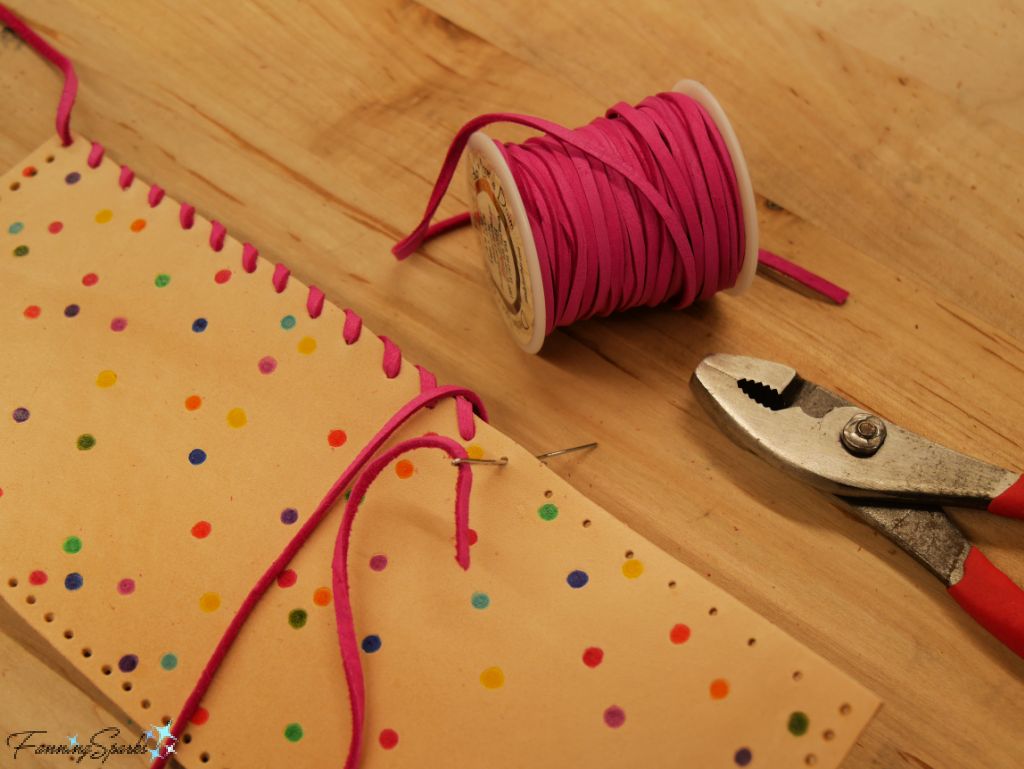
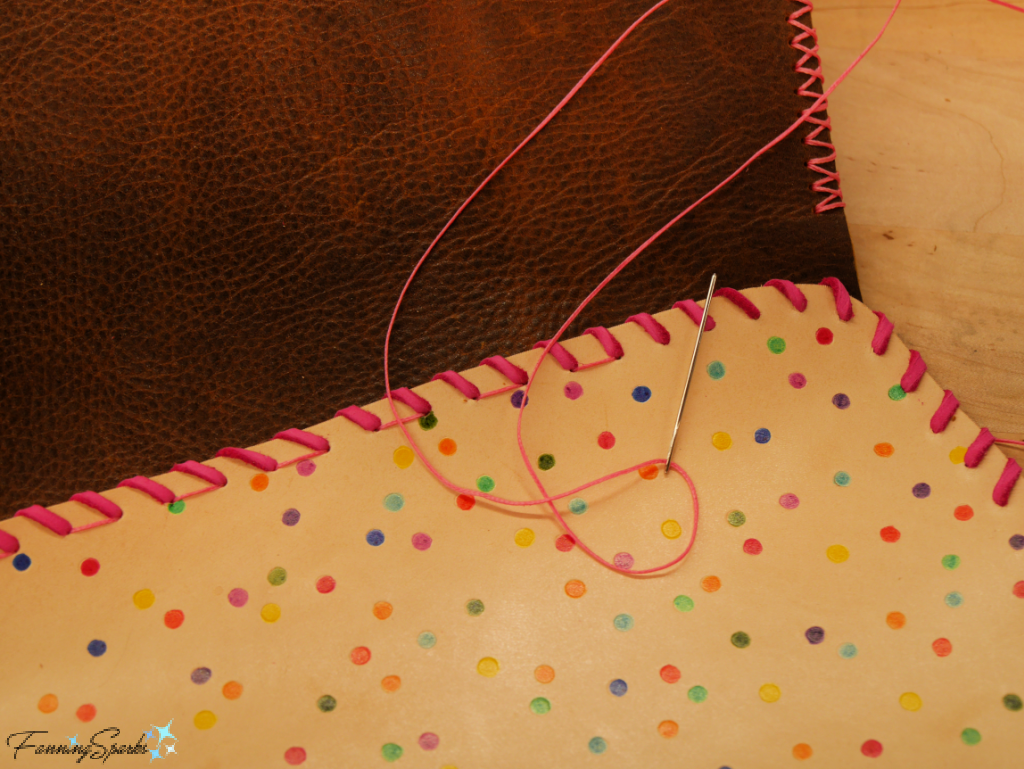
The second major step of construction is stitching. I started with decorative whipstitching along the pocket and flap. The deerskin lace was too thick for the eye of the stitching needle so Tom suggested improvising with a paper clip and pliers. It worked surprisingly well!
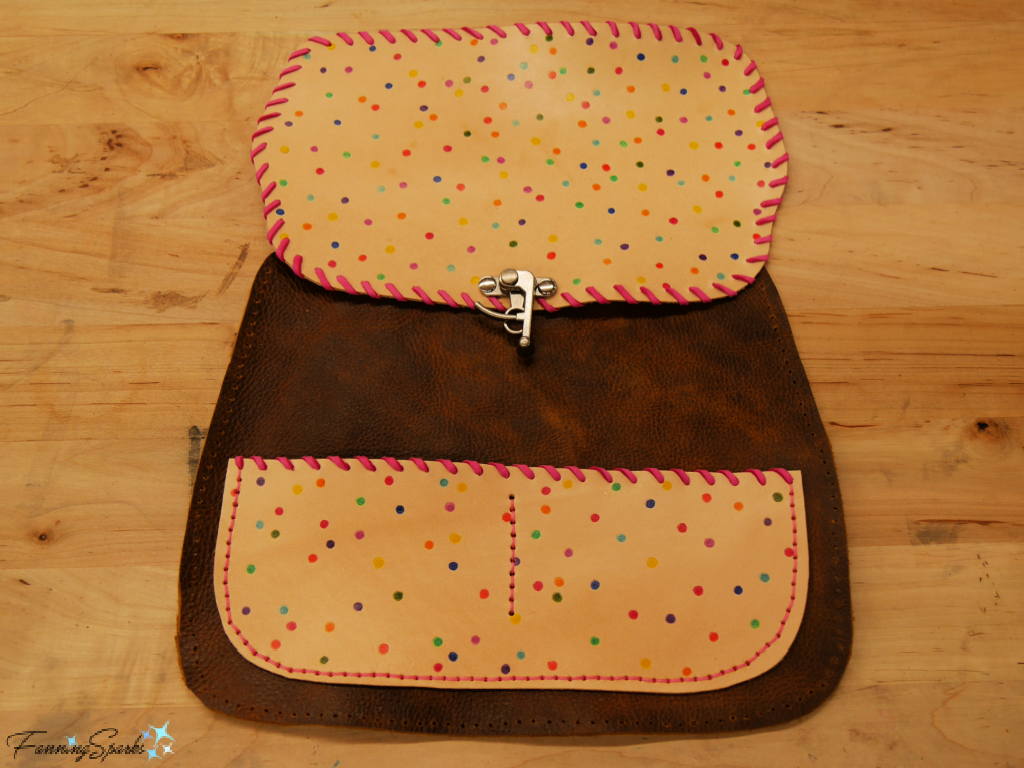
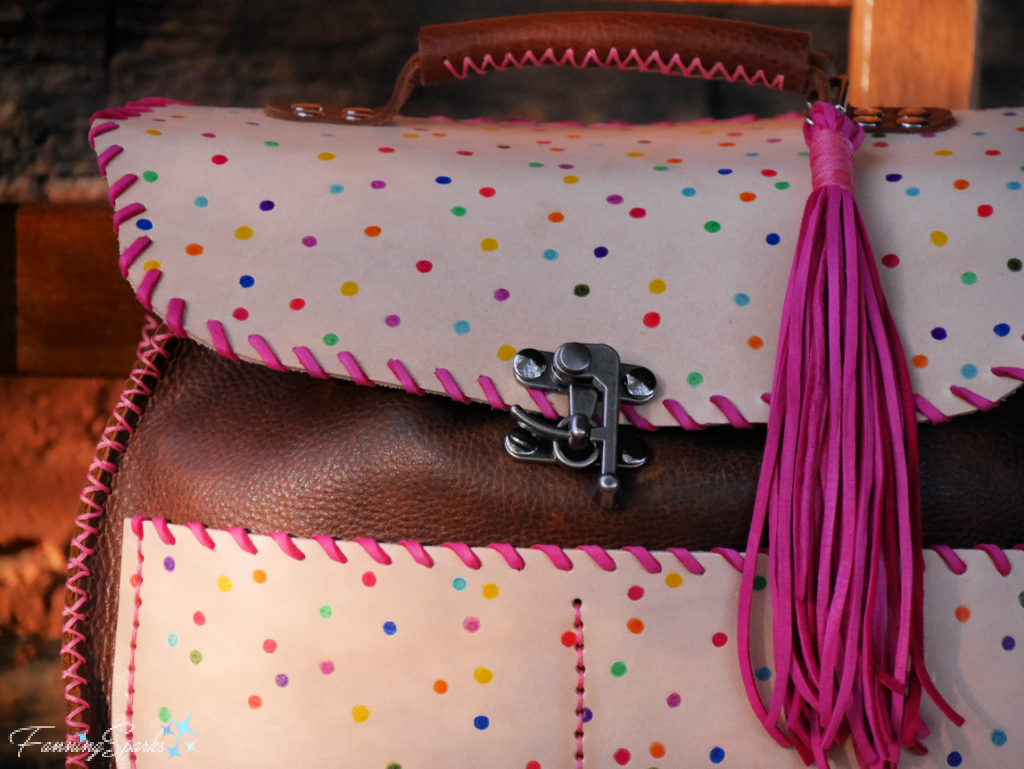
The front pocket was attached first. I stitched it to the front panel with a backstitch. Then I laid the flap over the front panel to position the top of the swing clasp closure. After punching two holes, the clasp was attached with medium rivets using a standard rivet setter. The finished pocket and front panel, with the flap laid in position, are shown below.
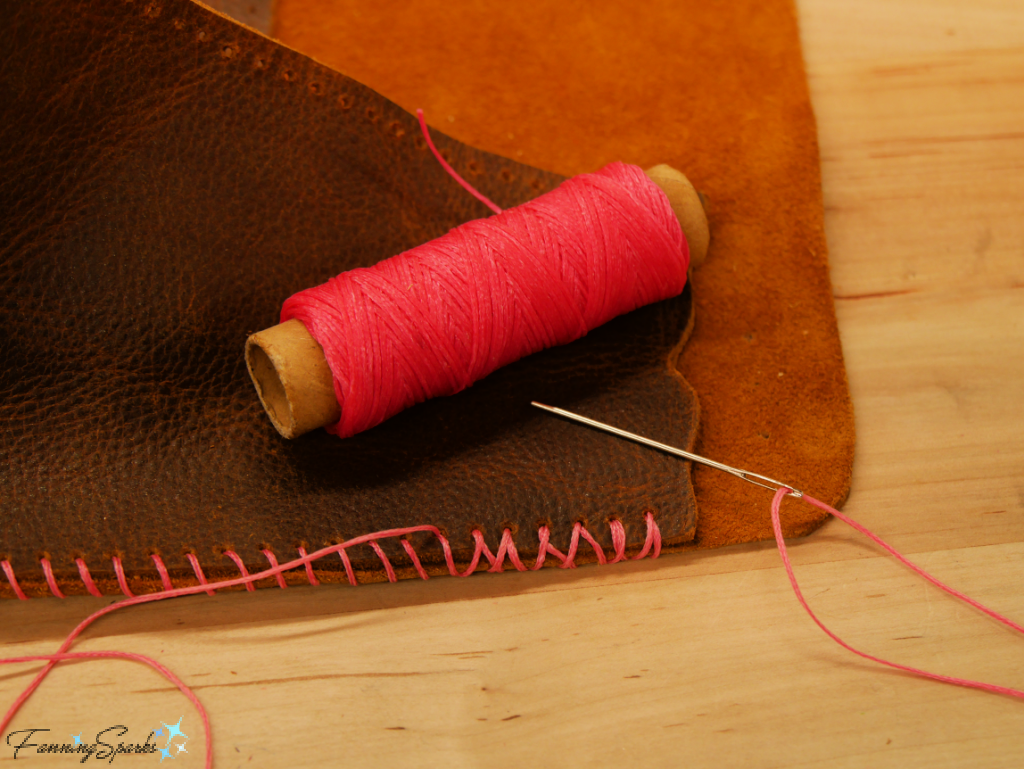
For the main body of the bag, I chose to make my stitching visible on the outside. Before I could start stitching, however, I had to align the parts. By carefully counting the number of holes in the back/front panels and comparing to the number of holes in the gusset, I was able to center the panels on the gusset. I used a blunt, stitching needle and fuchsia-colored, waxed, braided cord in a cross stitch to attach the parts. The cross stitch was done in two passes—I stitched all the way from one end of the seam to the other keeping the stitches angled…
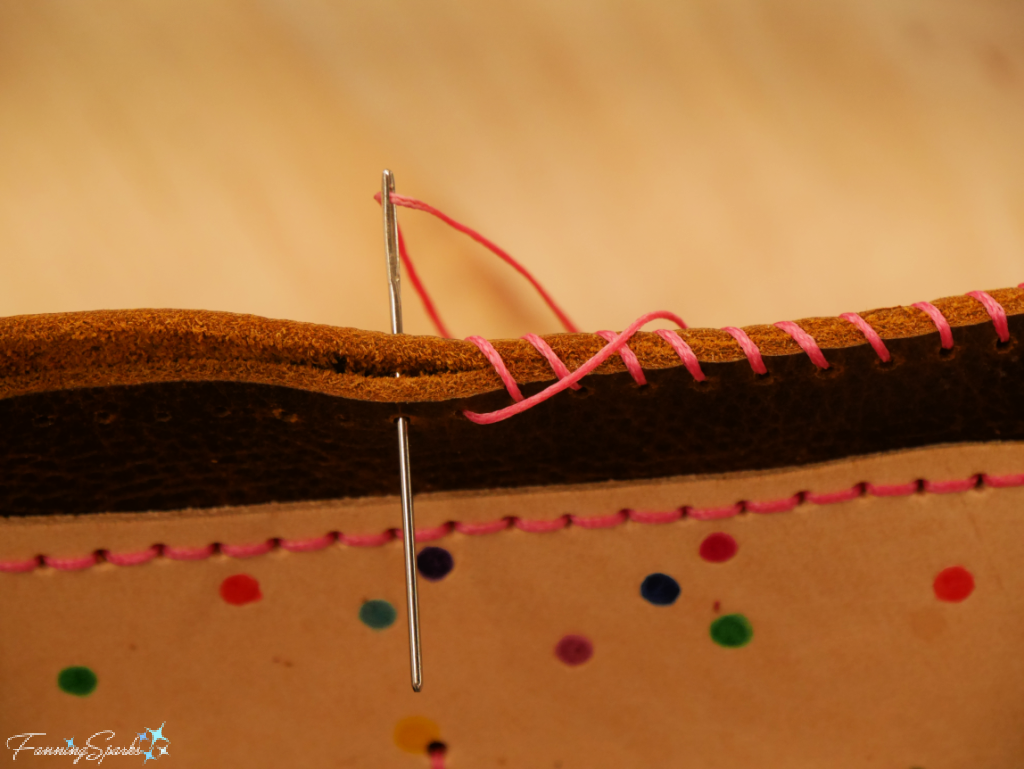
… then reversed direction and returned to the original starting point creating Xs along the edge.
After attaching the front and back panels to the gusset, it was time to attach the flap to the top of the back panel. This seam required a backstitch so it wouldn’t interfere with the decorative lacing.
At this stage, the major components—front pocket, front panel, gusset, back panel and flap—were assembled. It was time to shift attention to closures, straps and handles. I cut ¾” strips of leather for this purpose.
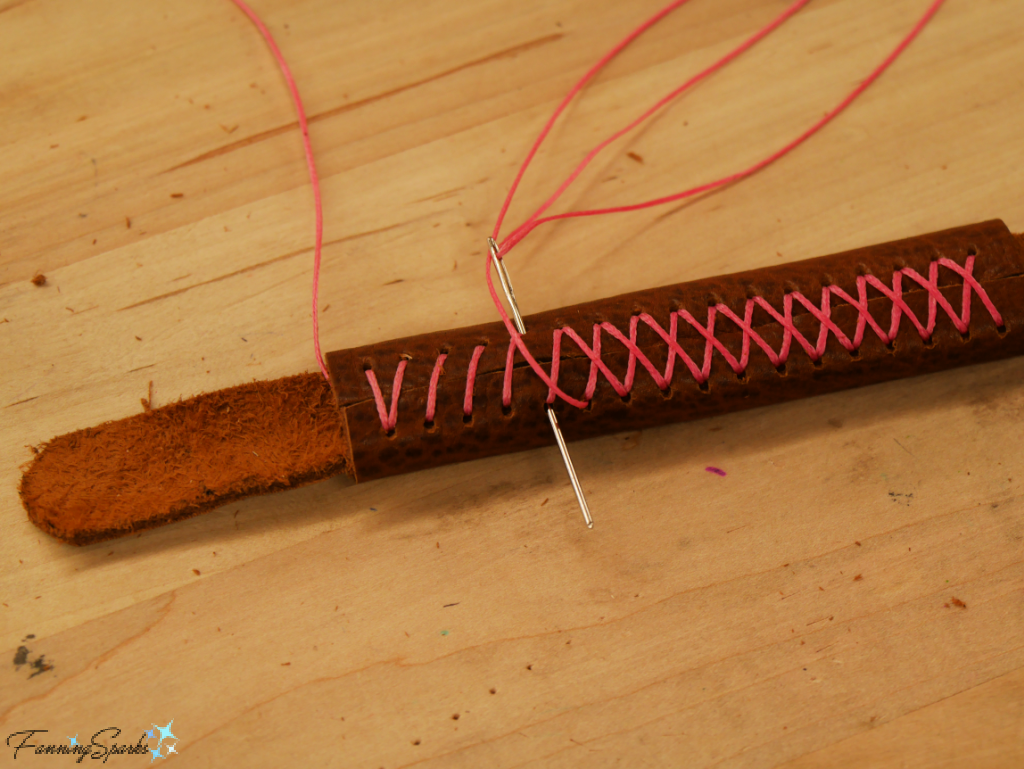
A camera bag requires a strong, sturdy carrying handle. Tom recommended reinforcing the top flap (the area where the handle would be attached) with a rectangular piece of heavyweight 7 to 8 oz leather. I glued it in place with Weldwood contact cement. The carrying handle was made with two rectangular pieces of leather—one ¾” wide by about 8½” long and the other about 2½” wide by 4¼” long. As shown below, the shorter piece was wrapped around the longer piece and stitched in place.
After carefully positioning the carrying handle, the spots for the rivets were marked on the flap. I punched the holes and set the rivets to securely attach the carrying handle.
In designing my ideal camera bag, I created multiple ways to carry the bag—a carrying handle, an over-the-shoulder strap and adjustable backpack straps. The straps are attached with short strips of leather and D rings. Originally I used four D rings, one in each corner of the back panel, but after trying it out I added one more D ring at the top center.
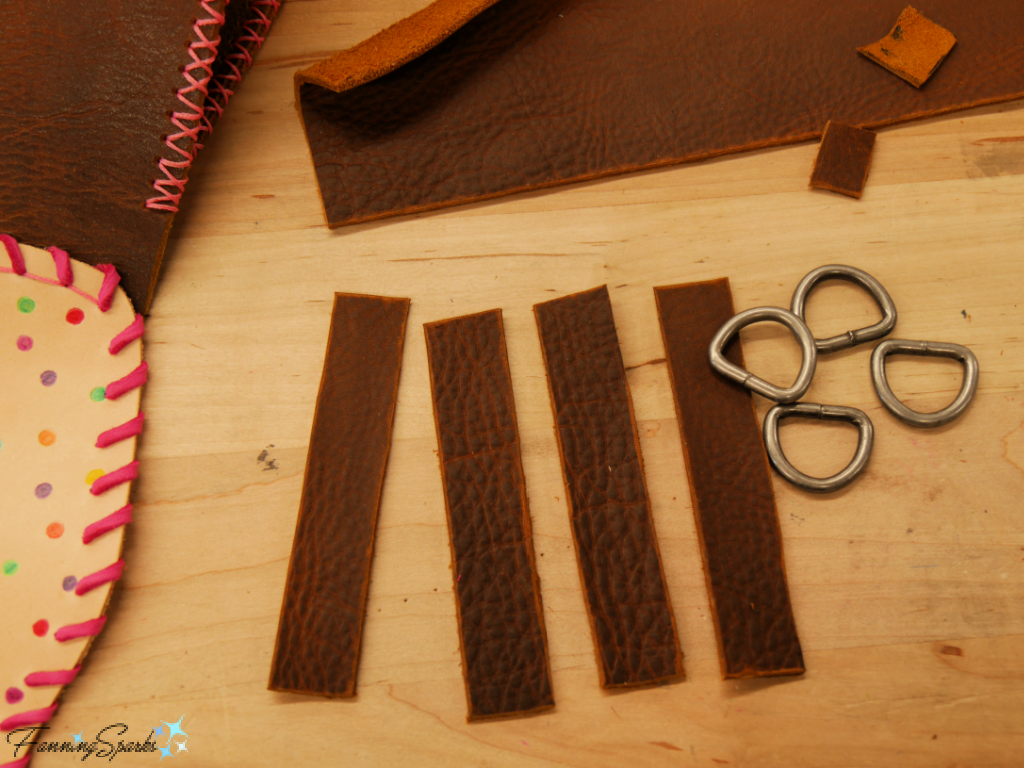
A ¾” oblong punch was used to cut slots in the back panel. The D rings were slipped onto the leather strips and the ends were pulled through the slots. Then the ends were locked in place with rivets.

The shoulder straps were made with two 31” long by ¾” wide strips of the brown leather backed with a heavy strip of natural-colored leather. After burnishing the cut edges with a Craftool wood slicker, I used a wool dauber to apply Fiebing’s Edge Kote along the edges and back of the shoulder straps. The straps were cut to the desired length and rivets were used to attach buckles and swivel snaps. Several holes were punched in the straps so the length can be adjusted when they were buckled. All of this was accomplished by the end of the third day.
The next day, I made a fun, tassel with pieces of the fuchsia-colored deerskin lacing. This is the end result—my one-of-a-kind, whimsical leather camera bag!
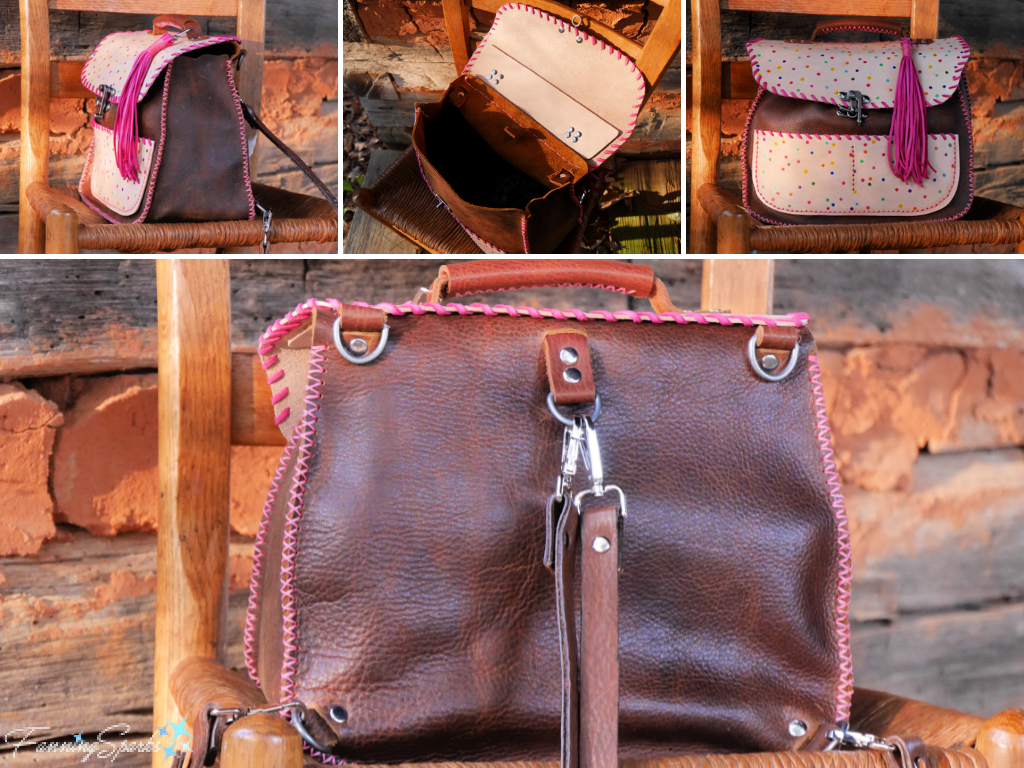
Thanks to a stroke of luck, the padded dividers from my old camera bag fit perfectly inside my new bag so my camera and lenses are safely cushioned. Here are a few additional views showing the side, inside and back of my new whimsical leather camera bag.
Learning to work with leather and making my first leather projects was a highlight of my time at the John C Campbell Folk School. This class marks the end of my Work Study session. It’s time to return home and build upon some of the new skills I’ve learned.
More Info
Many thanks to Tom Slavicek and my fellow classmates for an excellent learning experience. Tom’s ability to guide multiple students through the creation of multiple custom projects is amazing. His thoughtful attention to detail, clear concise guidance and unflagging enthusiasm put everyone at ease and gave us the confidence to think big. You can learn more about Tom Slavicek and see photos of his leather work on his Black Eagle Leather website.
We used several products from Tandy Leather during our class. As noted on their website “Tandy Leather was founded in 1919 with the dream of sharing leathercraft with the world. Today, we’re proud to continue this legacy as trusted source of quality leather, tools, and teaching materials for leatherworkers everywhere”. They also offer an extensive online library of free designs, templates and inspiration in the Tandy Leather Leathercraft Library.
I participated in a 6-week Work Study Program at the John C Campbell Folk School. Look for Work Study on the Folk School website for more info or check my FanningSparks’ blog posts about my Work Study Program experience.
I’ve had the pleasure of attending several Folk School classes and shared my experiences in the following posts:
. Weave a Market Basket
. From Sheep to Shawl
. Flat-Plane Carving with Harley
. Center, Open, Pull
. Swept Away by Broom Making
. You CAN Put All Your Eggs in this Basket
Today’s Takeaways
1. Leathercrafting is quite doable with a little knowhow and a few tools.
2. A wide range of items, customized for your personal preferences, can be made from leather.
3. Consider learning a new skill at the John C Campbell Folk School or a similar educational venue near you.


2 Comments
@Marian, Thanks! Leathercrafting opens up a whole new world of possibilities! Peg
Beautiful bag! Congrats on tackling another craft.
As always a great story.