In my last post, Carving in Brasstown, I shared some examples of wood carvings made by the talented artists of Brasstown Carvers. I also introduced our Thursday evening carving get-togethers, where a small group of local folks gather at the John C Campbell Folk School, to share making and support each other in the tradition of the Brasstown Carvers.
This week, I’d like to share a beginning woodcarver’s perspective. One of the aspects of woodcarving that appeals to me is only a few simple tools and materials are needed to get started. All that’s needed is a small carving knife, a thumb guard and a piece of basswood. Granted, like any activity, you will likely want to add more tools and use different varieties of wood as you become more proficient.
Our carving group starts with roughed out shapes of basswood. But several steps must have been completed to get to this point. Richard Carter, Carving Support at the Folk School and our beloved group leader, roughs out the carving blanks for our group. Richard kindly agreed to prepare a few examples of the different stages so I could share them with you.
Richard uses a pattern to draw an outline on the carving blank.
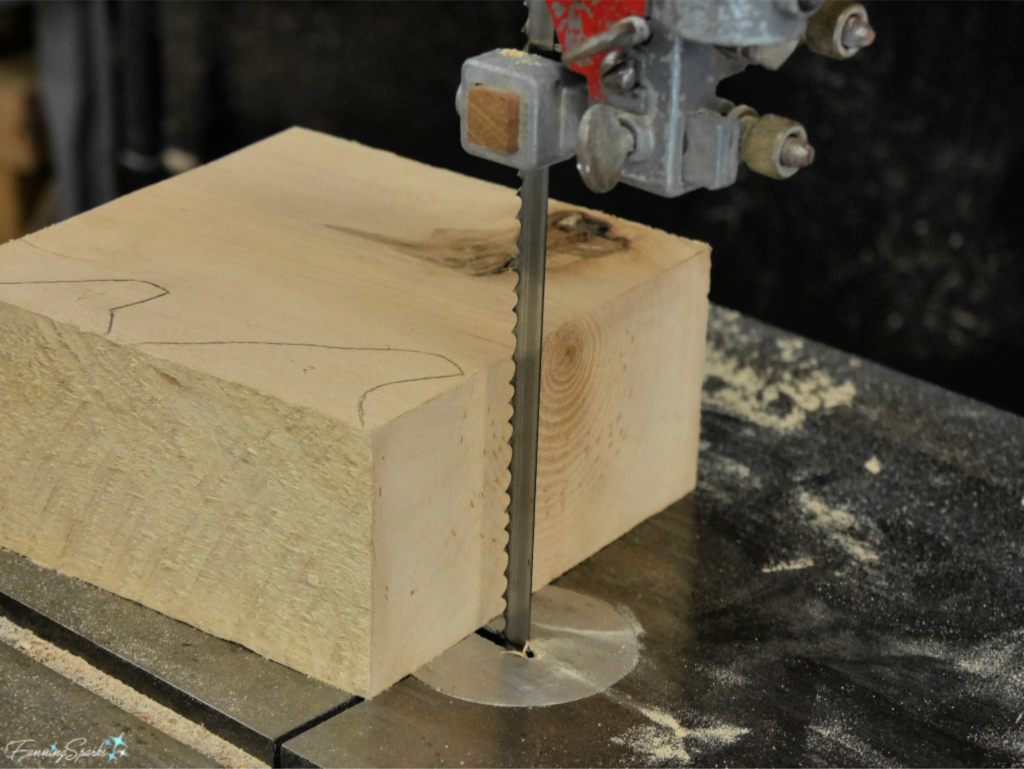
 We use basswood because it is soft, has a fine grain and is easy to carve. The wood is light colored with a creamy tint. Richard uses a band saw to cut the basswood shapes.
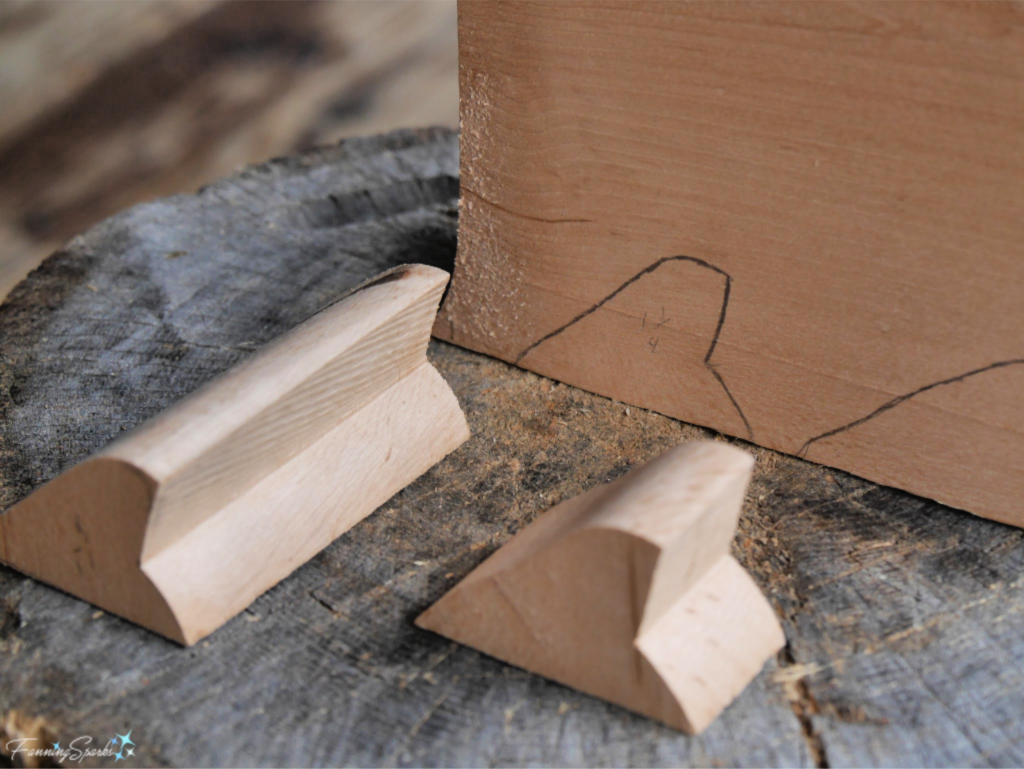
 Because he’s been doing this a long time, Richard has some short cuts to make this process as efficient as possible. For instance, he typically uses extra thick wood for the first cuts and then “slices off” several figures with the table saw. Pictured below is a roughed out shape (on the left) which will be sliced into 3 small frogs (on the right).
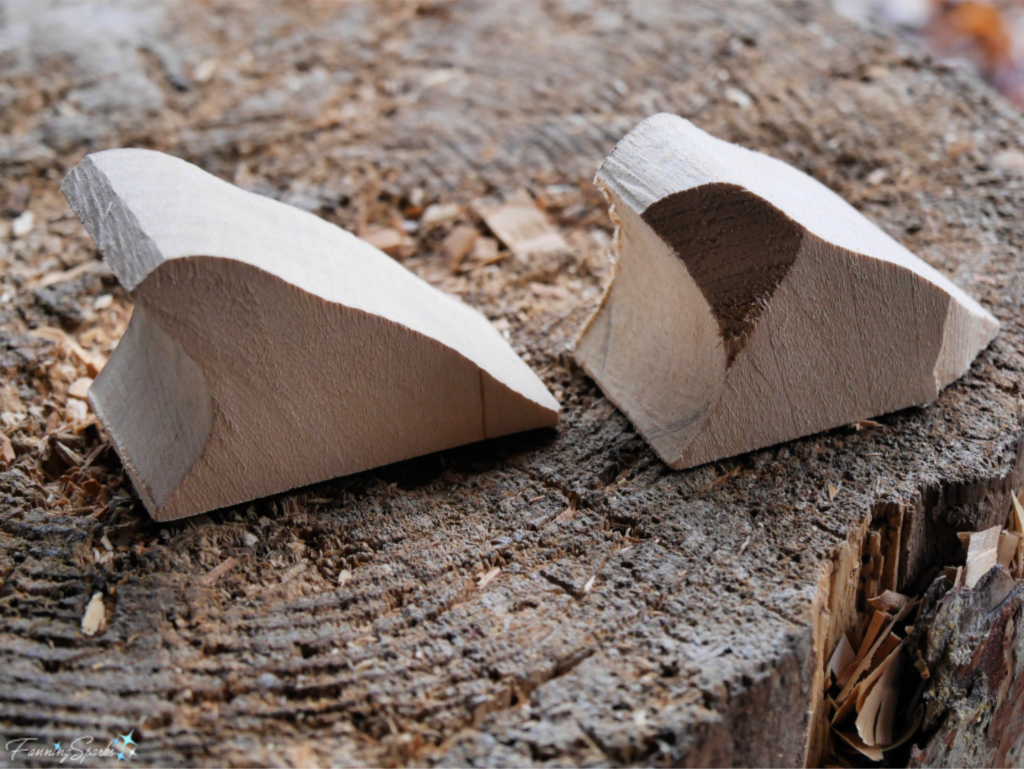
 Next a coping saw can be used to trim off sections of the wood. In the photo below, the roughed out frog on the left is the result of band and table saw cuts while the roughed out frog on the right has also been trimmed with the coping saw. This is the shape the woodcarvers will start carving.
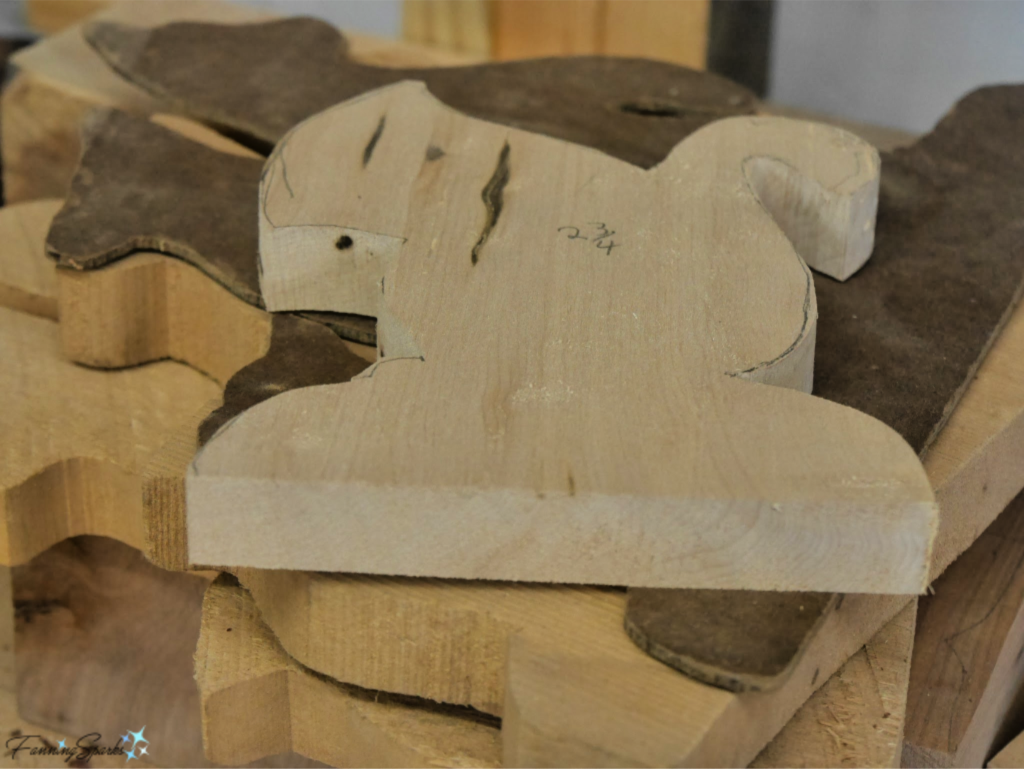
 Richard helps us get started by sketching out our cuts and carvings with a pencil. According to a Brief Introduction to Woodcarving by the Charlotte Woodcarvers (see More Info below): “A Sharp Pencil Is An Essential and Indispensable Woodcarving Tool! Before you start to carve, mark center line(s) on the wood. … Using a center line as a reference you can divide halves into quarters, quarters into eighths, etc. Pencil lines will serve as an aid in orienting or laying out the pattern for the carving and will help maintain symmetry. Also mark the outline of the design on the wood to show where you want to make stop-cuts, remove excess wood, or indicate intricate details that you want to carve. Pencil marks are temporary; knife cuts are permanent! You can make and erase pencil marks until you have laid out the figure or design you desire before making any permanent cuts.” The roughed out frog, in the below photo, has the initial sketched lines.
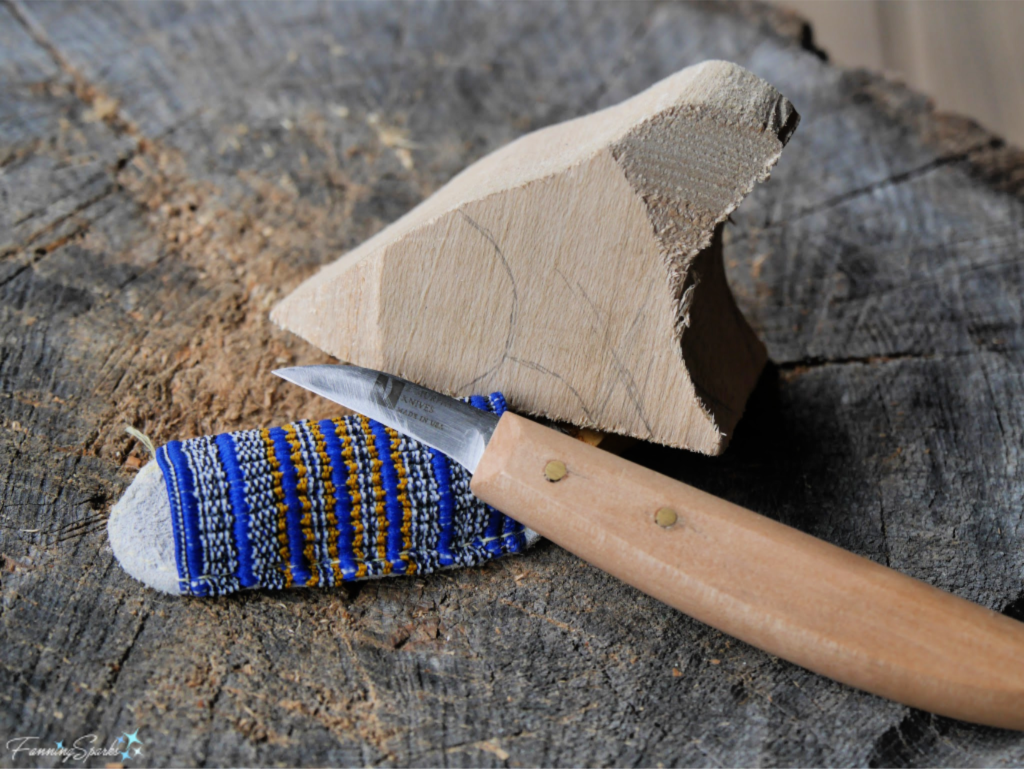
My carving knife and thumb guard are also shown in the below photo. A carving knife consists of a blade that is about an inch and a half long, with a long handle designed for a comfortable grip. The thumb guard is worn on the hand holding the knife. I also wear a BladeX5 cut resistant glove on the hand holding the wood. But as the Charlotte Woodcarvers warn on their website: “Sooner or later you will get cut, so try to make the cut as minimal as possible!” … As you carve be aware of the path a tool might take if it slips and try to keep your hand and body out of the tool slips so you won’t get cut!”
Another important safety measure is to keep your knife sharp. You’re more likely to force the cut with a dull knife and thus more likely to cut yourself with a dull knife than a sharp one.
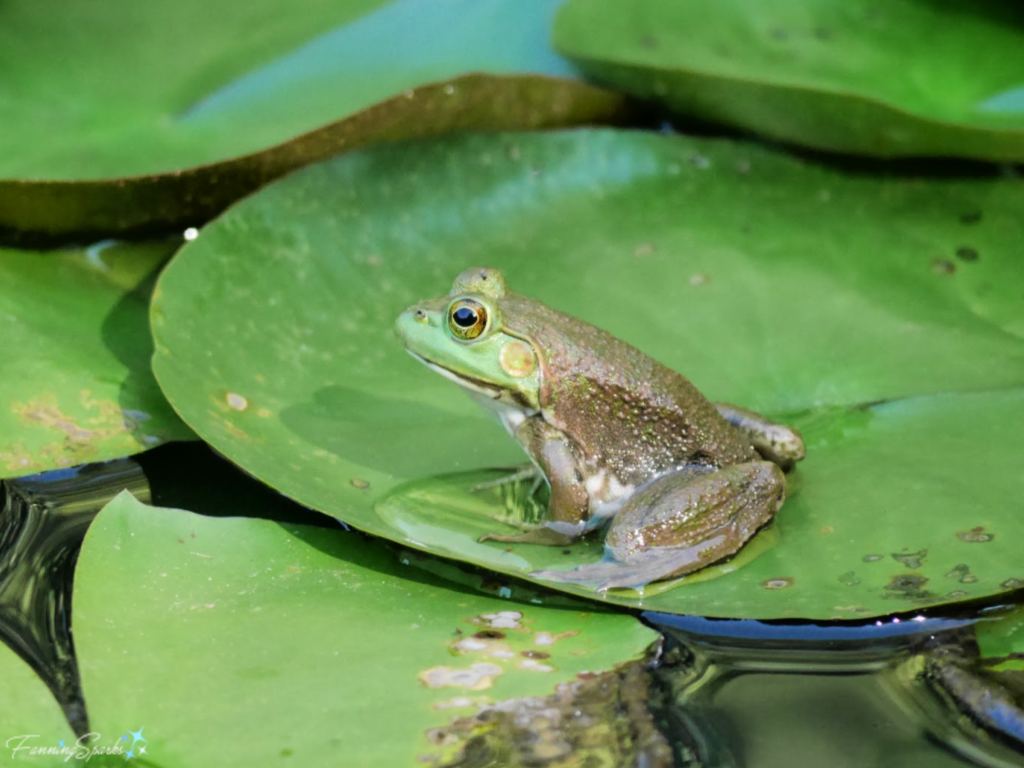
 Use the carving knife to slowly remove the unwanted wood. There are many techniques but beginners usually start with a simple straight push cut. This is where the magic happens as a (hopefully) recognizable shape emerges from the wood. It’s also the most challenging part. Richard advises us to look to real life for guidance. If you’re carving a cat, for instance, watch a cat, study its shape, and notice how it moves. Photographs or design sketches are also helpful to guide the carving. Richard intuitively knows how much to carve and where but someone like me might find a photo like this helpful.
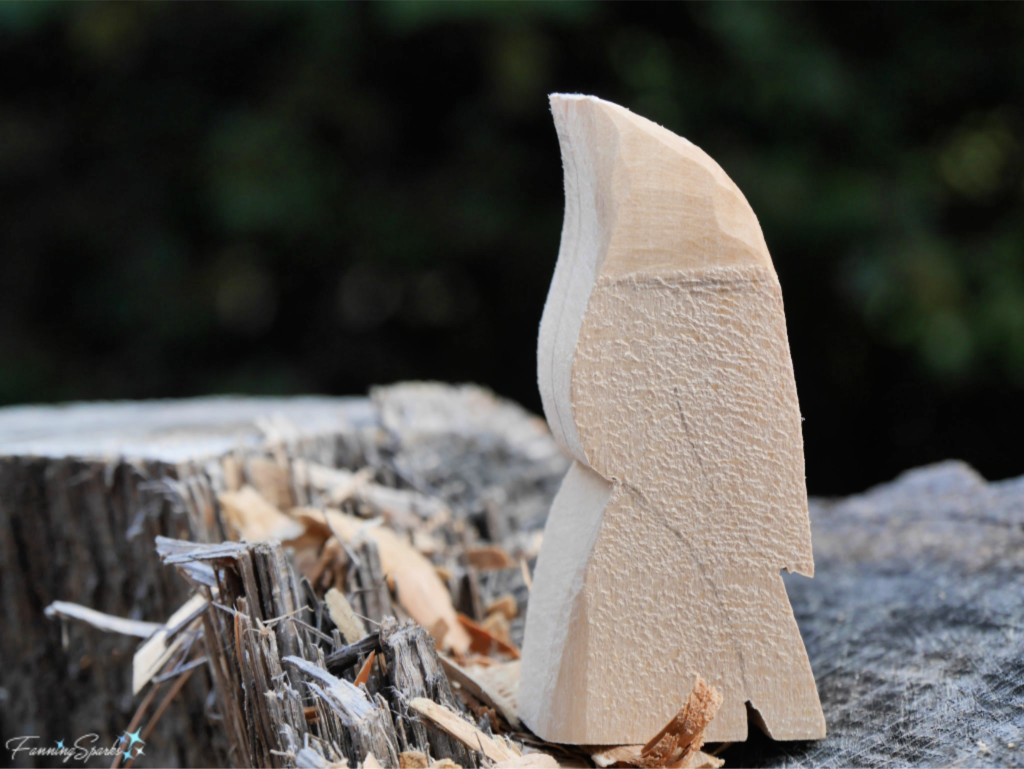
 I’m currently working on my second woodcarving. You can see where I’ve started shaping the bird’s head. I just take it slow, being careful to work with the grain and remove small sections at a time.
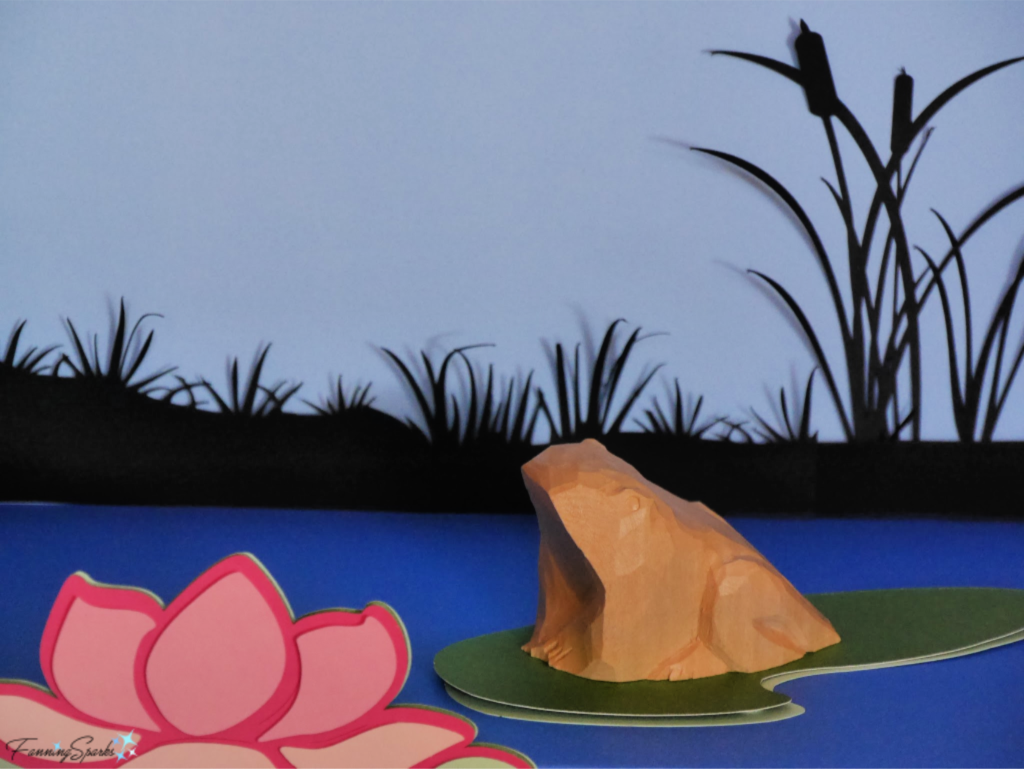
 Carving is done from rough to fine; finishing with the details such as eyes, faces, feathers, etc. These details, especially the faces, are often the most difficult to get right. Carving styles vary. Brasstown Carvers’ carvings are typically either rustic where the tool marks remain visible or sanded with a shiny smooth finish. Here’s Richard’s finished frog in a little shadow box setting I made for it.
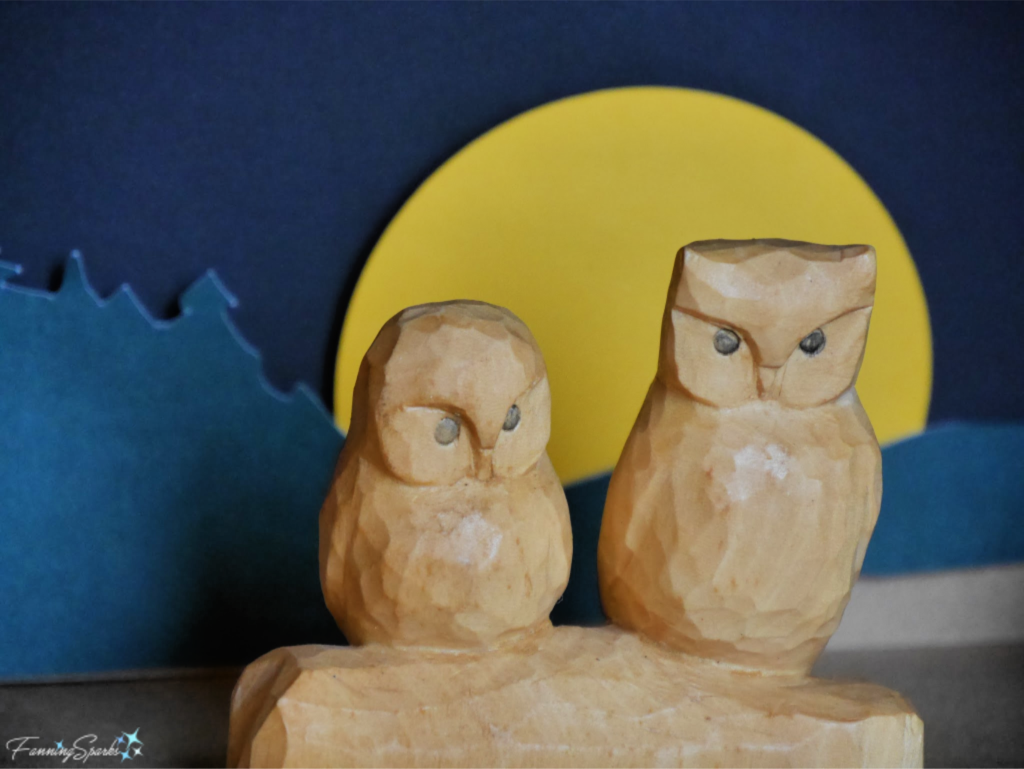
 I love the way woodcarvings look in shadow box settings. The setting showcases the carving and gives it presence. I can envision it in a small frame hanging on the wall. You may have noticed I used a similar technique with the Brasstown Carvers’ pieces in my last post. Here’s a pair of owls from Sue McClure.
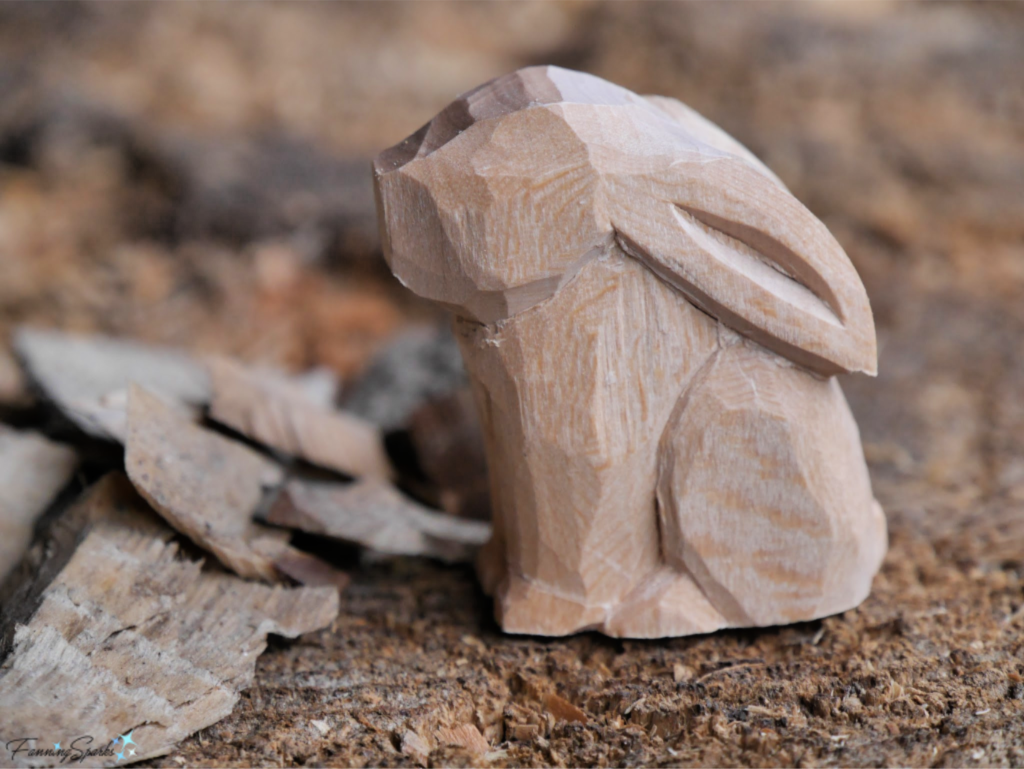
 Richard hasn’t quite finished this adorable little rabbit …
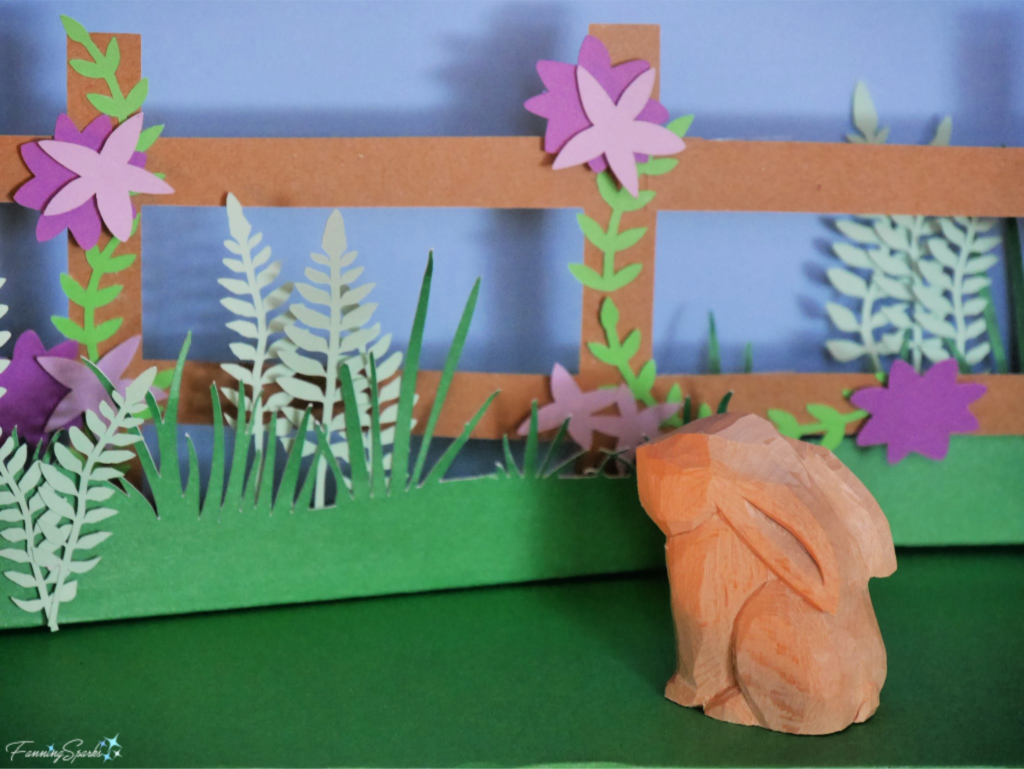
 …but it looks right at home in this garden scene.
 I’ll wrap up with a shout out to Richard Carter. Many thanks for your help with this post, Richard! I know your woodcarving fans (and there are many of us) appreciate your kind and gentle guidance.
More Info
Woodcarving classes are popular at the John C Campbell Folk School. I counted about 20 different classes scheduled for the remainder of this year (2019). To check them out, go to the Find a Class page on the Folk School website. Then select See All 49 Subjects under By Subject in the left search box, check Woodcarving and click Apply in the popup box.
I found helpful information for beginner woodcarvers on the Woodcarving Illustrated website under How To > Get Started Carving, as well as, on the Charlotte Woodcarvers website under Resources > For New Carvers.
I’m currently participating in the Work Study Program at the John C Campbell Folk School. You can learn more about the program in my post First Impressions as a Work Study Student. Or check out the following posts to learn about the Folk School experience.
. Weave a Market Basket
. Artistic Details Around Campus
. Carving in Brasstown.
Today’s Takeaways
1. Good safety practices are important in woodcarving. Take care to develop safe habits as you learn.
2. Invest in a quality knife that’s purpose built for carving.
3. Know that it will take time to build your woodcarving skills. Start with the basics and gradually add more complex techniques.


 The traditional craft of woodcarving has a special place in the Folk School’s history. A number of experimental programs were put in place when the Folk School was first established in 1925. Back in the day, a group of local men would gather on a wooden bench on the porch of Fred O. Scroggs’ general store in Brasstown. These men would whittle wood with their pocket knives to pass the time. When they ran out of wood, they started carving the wooden bench on which they sat. Scroggs tried to stop this activity by driving nails into the bench but the local men simply carved around the nails. The original bench, known as the Carving Bench, is on display at the Folk School History Center today.
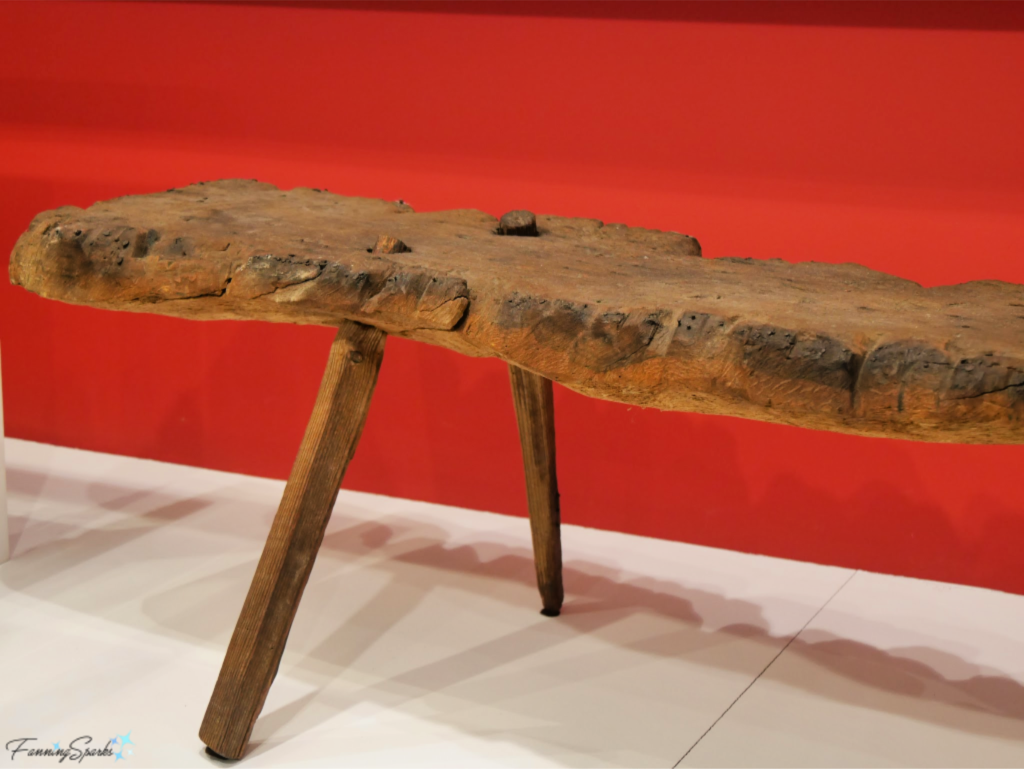 You can still see the nails that Fred O. Scroggs used in his attempt to deter the local men from carving away his bench.
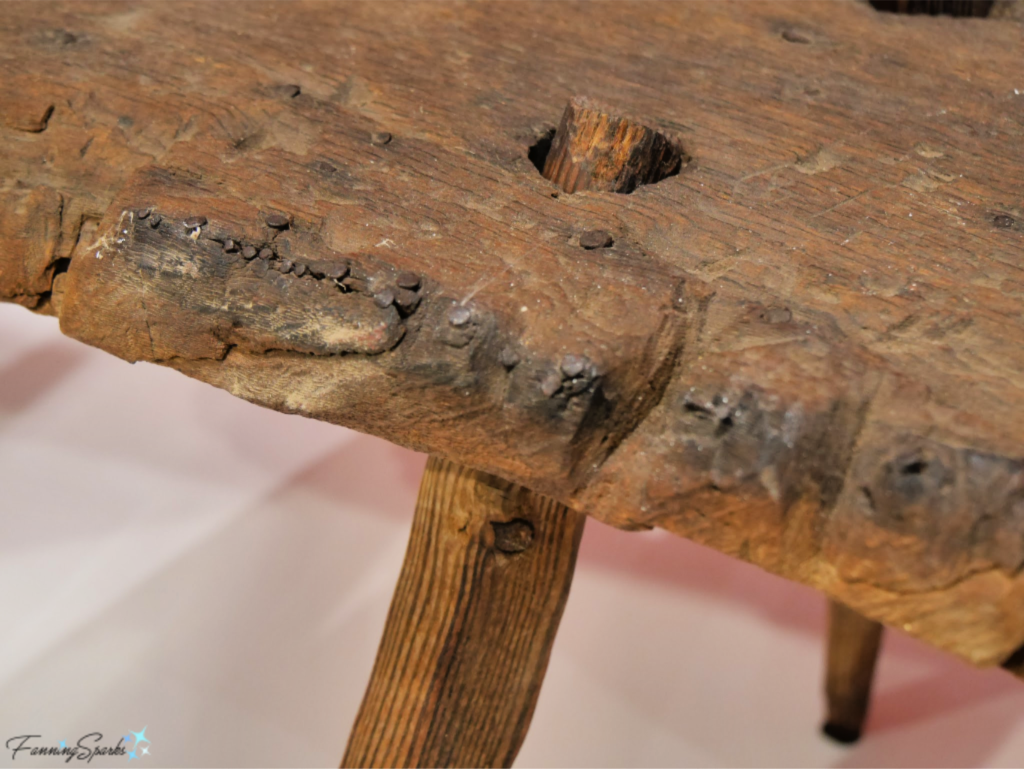 As the story goes, Olive Dame Campbell (co-founder of the Folk School) noticed the local carvers and asked them what they were making. “Shavings” they replied. She saw past their response and recognized the potential of their woodcarving skills. She proposed a woodcarving class to teach these men how to create shapes with their knives. In this program, the Folk School provided the men with blocks of wood, equipment, instruction and bookkeeping. In turn, the men would carve wooden figurines and bring them back to the Folk School to sell. Over time, the program evolved to a weekly routine whereby the carvers would come to the Folk School every Friday morning to deliver their finished carvings, meet with the carving staff and fellow carvers, and pick up new blocks of wood. This illustrious group of carvers became known as the Brasstown Carvers.
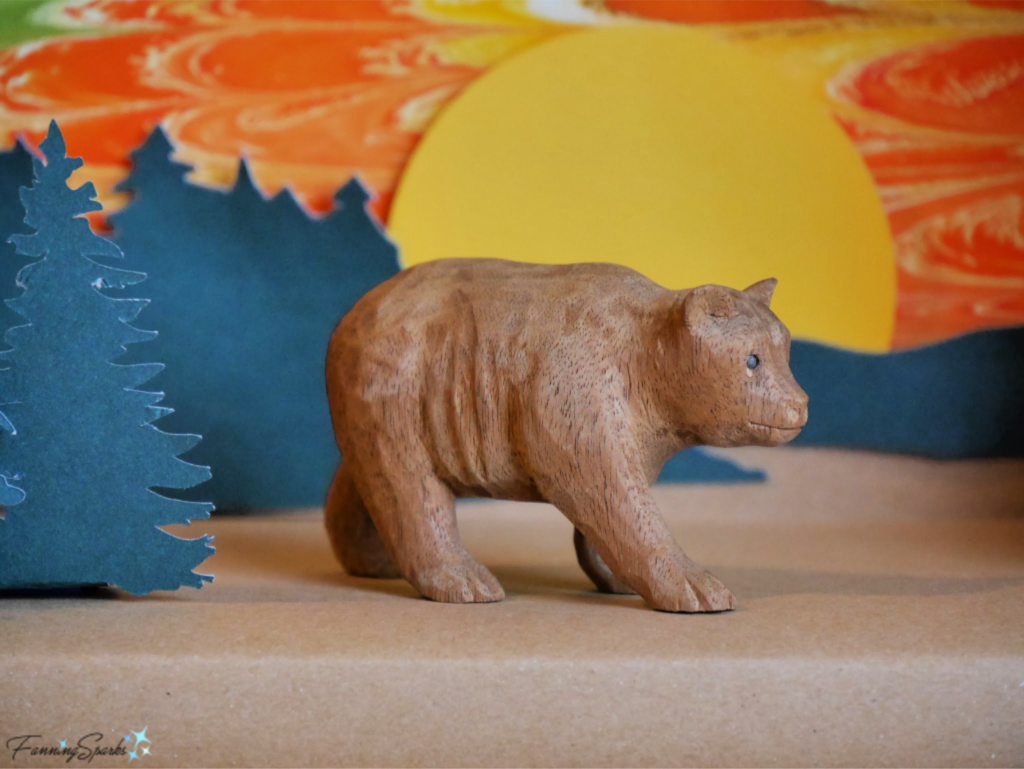 Ben Hall carved this squirrel. Ben was one of Brasstown’s most prolific carvers. At a time when opportunities to earn a cash income were scarce, Ben Hall and his brothers John and Elisha chose to stay put and carve. “In 1936 Ben Hall reported that he would rather carve than work at building a TVA dam and noted that carving enabled him to buy glasses for his son. … By the 1940s, 45 carvers received pay for their work. … A 1942 roster lists their income for the year. Ben Hall was paid the most—$758.00.”
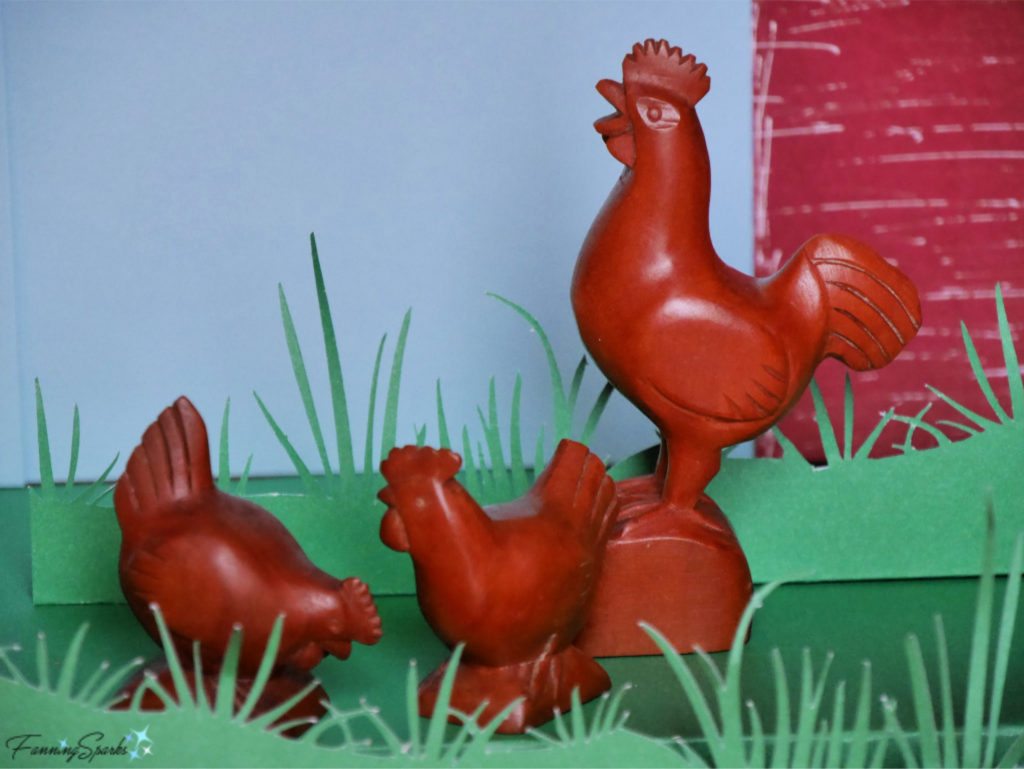
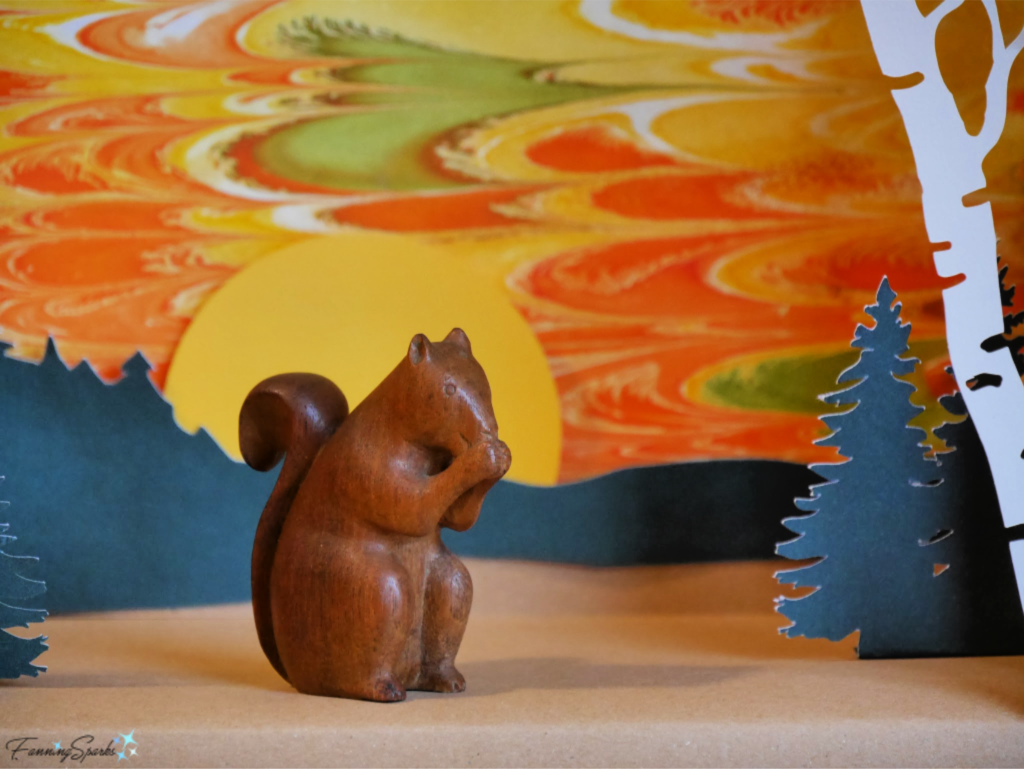 These next two carvings, the doe and the pair of owls, were carved by Sue McClure (1916-1994). Sue was known for her wide range of subject material including bears, deer, and chicken. In a Dec 1, 1947 letter, from Sue to Murray Martin, the carving instructor at the John C. Campbell Folk School, she wrote:“… seams as though I haven’t seen you all in a very long time and it has been over 3 weeks you see how much I think of you all and my carving when I hatfo stay away for only 3 week I think it is years…”. Sue went on to say that carving was the most enjoyable work she’d ever done.
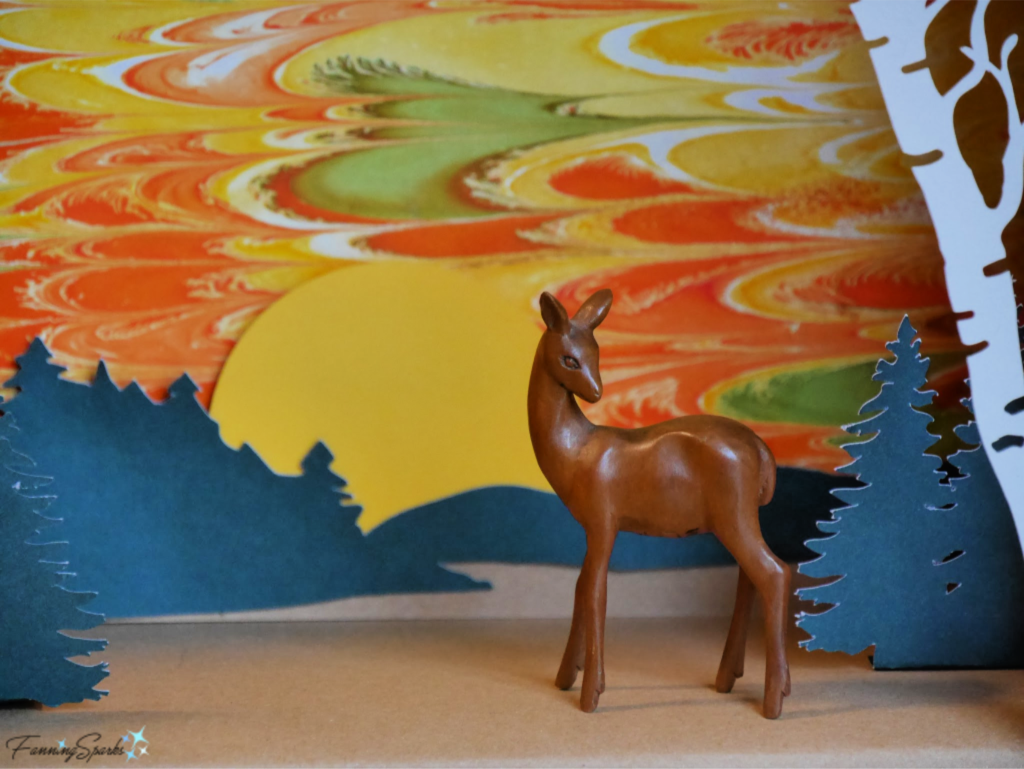

 This clever bench, located outside the Craft Shop, is similar to the one I used to stage my new basket in my previous post,
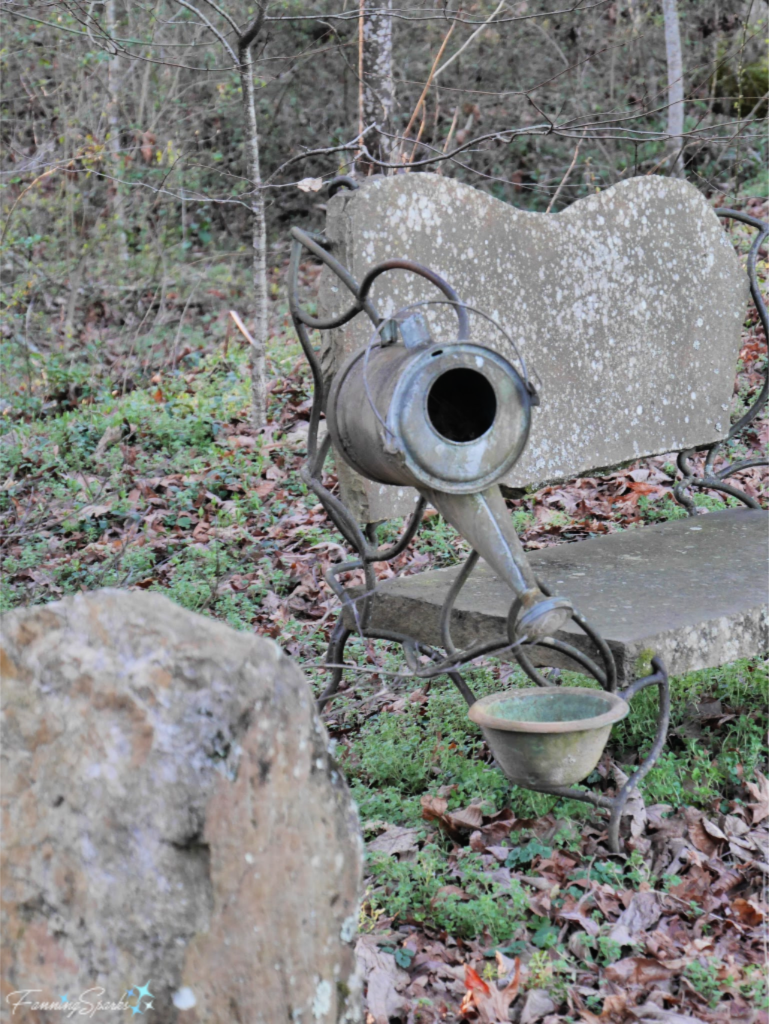
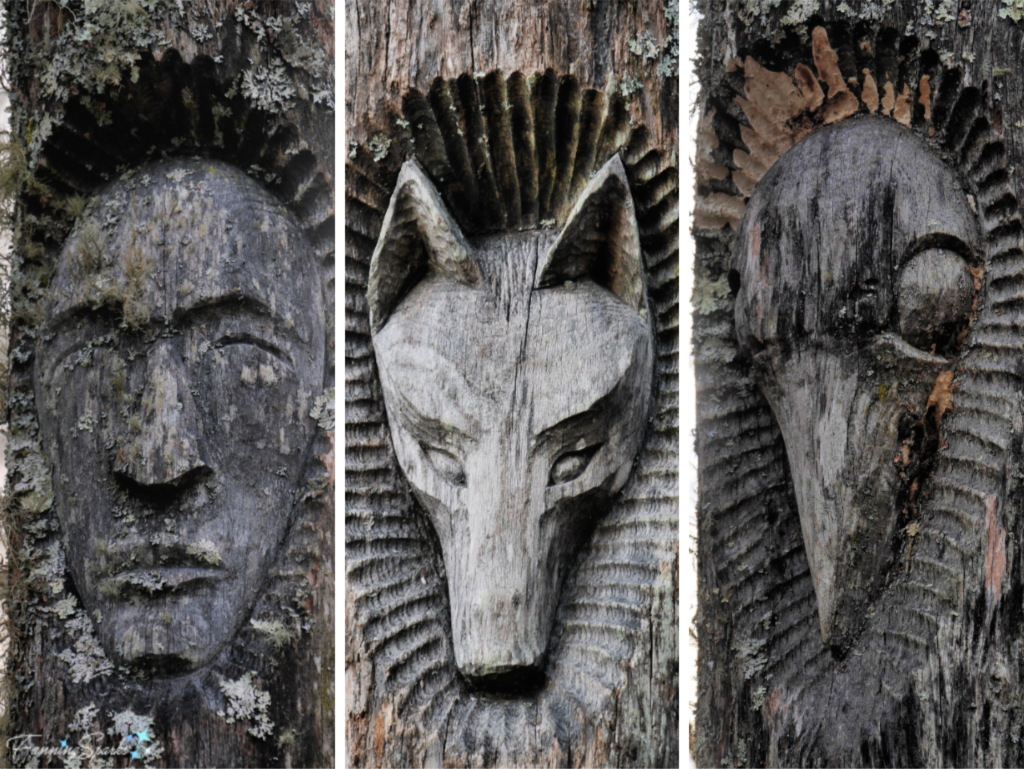 There is an abundance of interesting metalwork around campus. This beautiful metal gate from the Garden area has made its way into every one of my Folk School posts thus far.
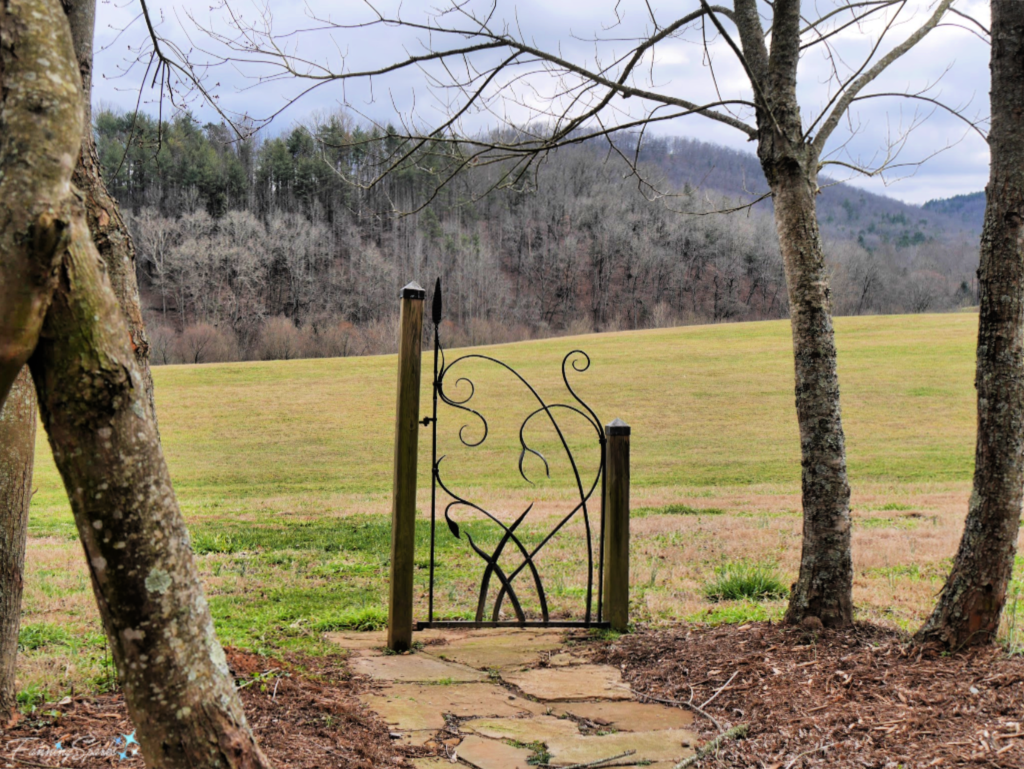 Here’s my favorite door handle found on the Big Barn. Isn’t that ram’s head amazing?
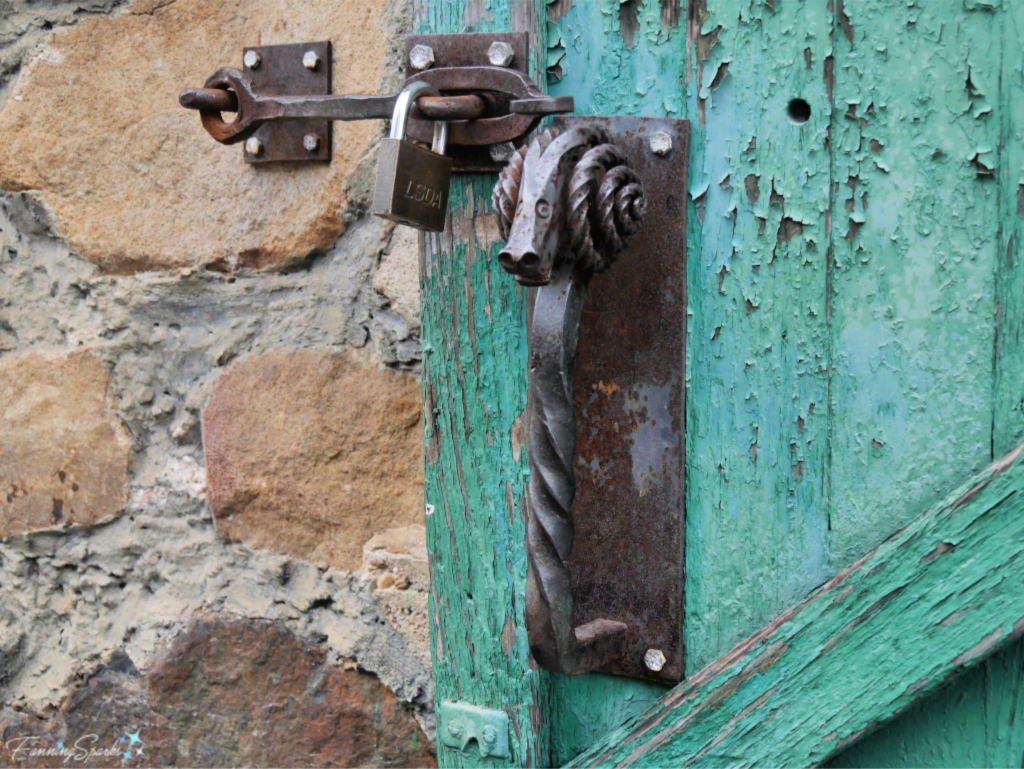 This fun cat sculpture, made from recycled metal parts, is nestled in the garden in front of Keith House.
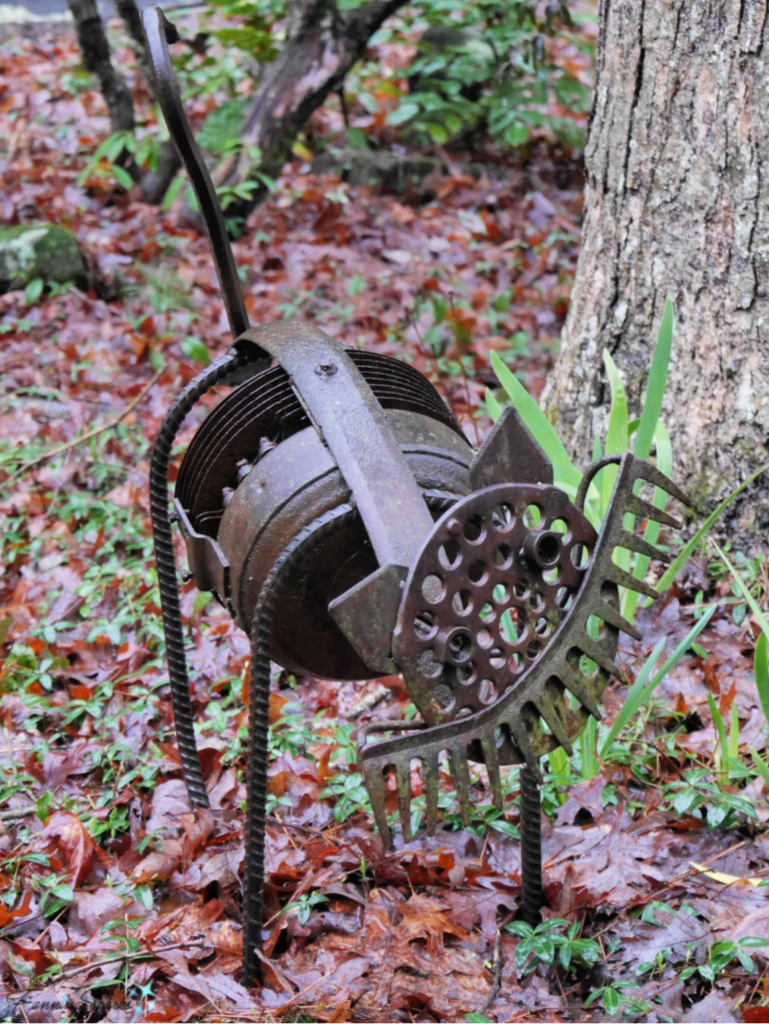 This striking rooster sculpture soars above the Vegetable Garden.
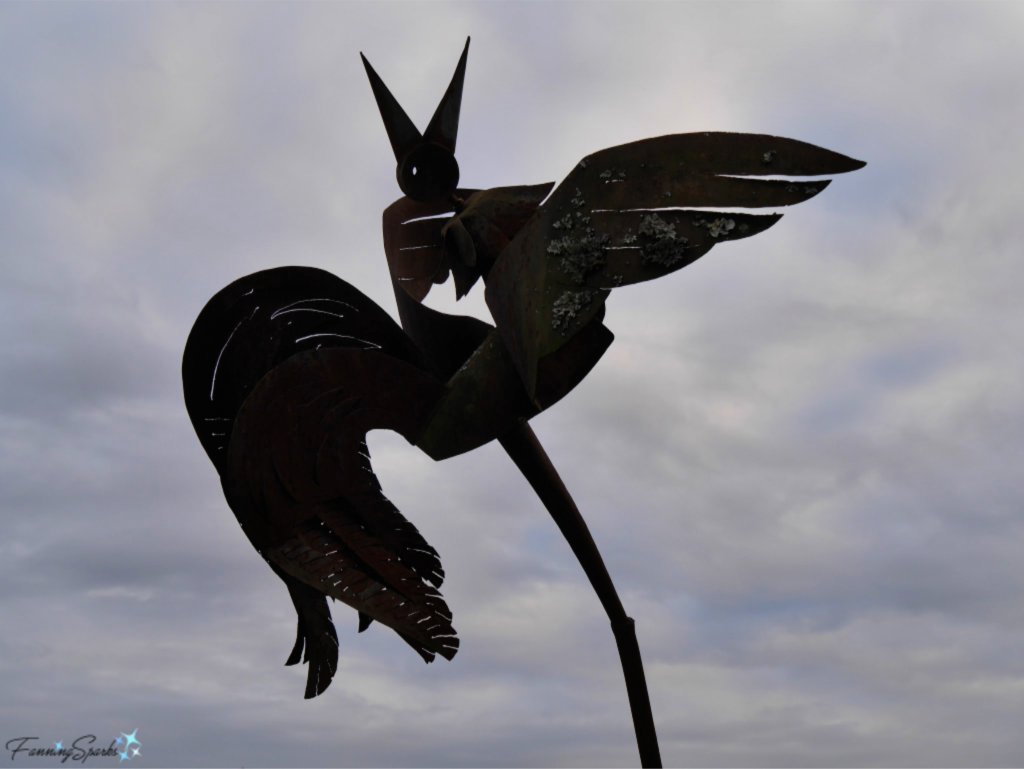 And here’s the real thing, also found in the Vegetable Garden area. Isn’t he handsome?
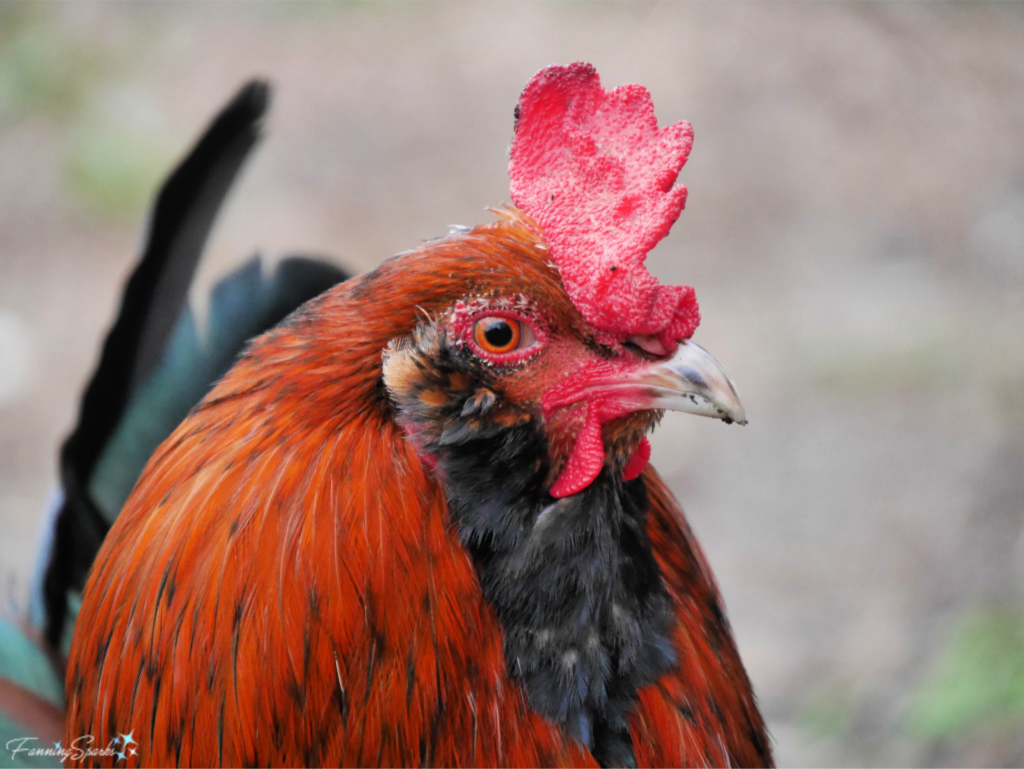 Studio entrances have their own unique personalities. Here’s an interesting outdoor weaving displayed at the Fiber Arts Studio.
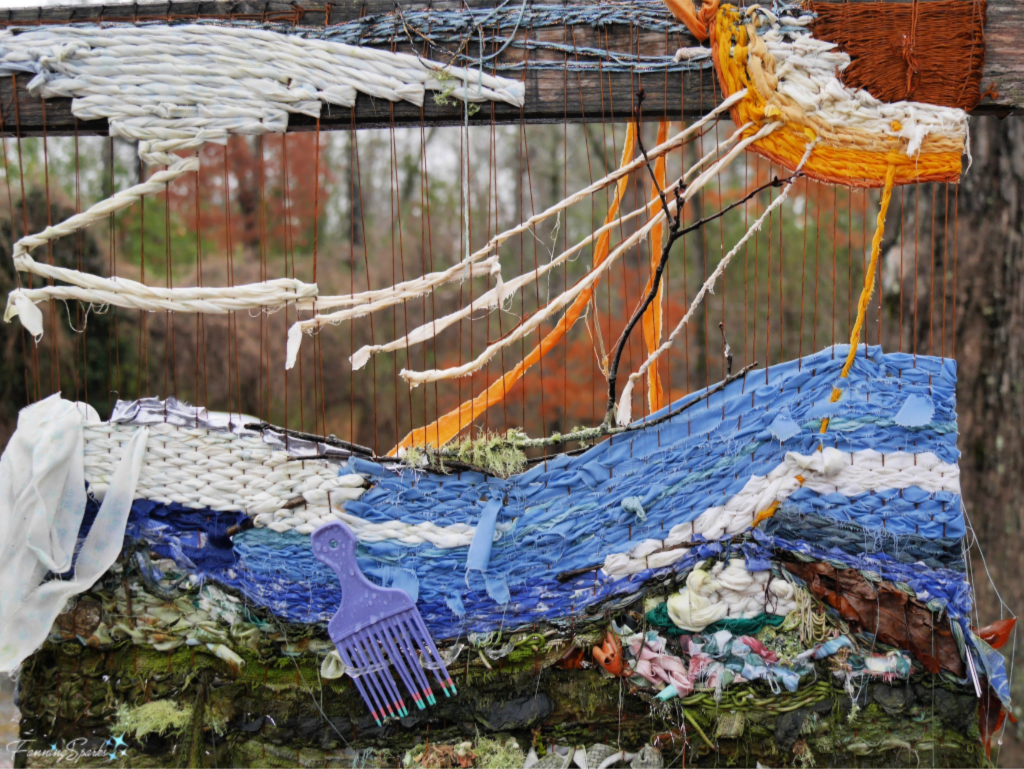 The entrance to the Woodcarving Studio is graced with the carving of a whale.
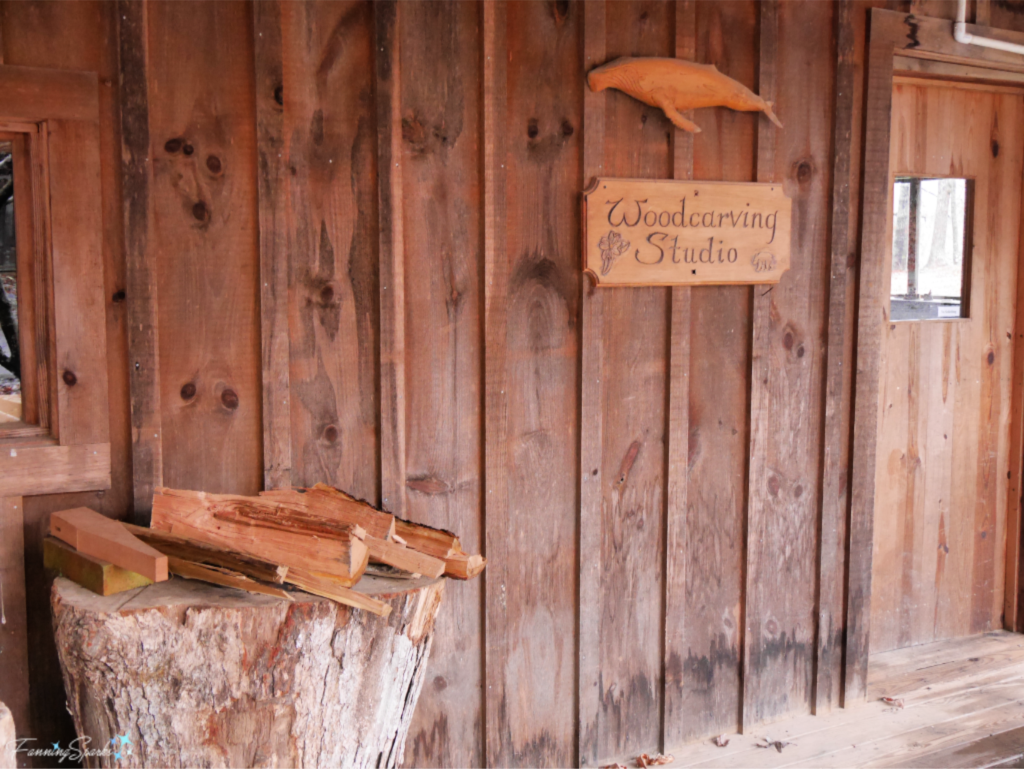 Not to be outdone, the Maintenance and Housekeeping department has their own unique Studio sign.
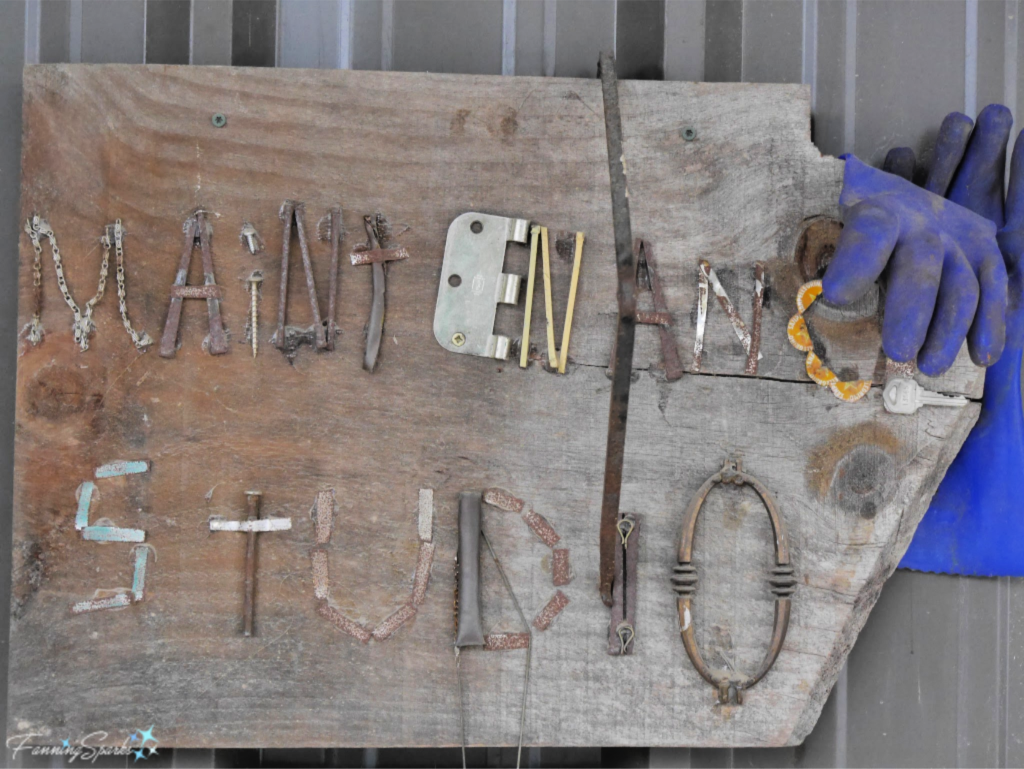

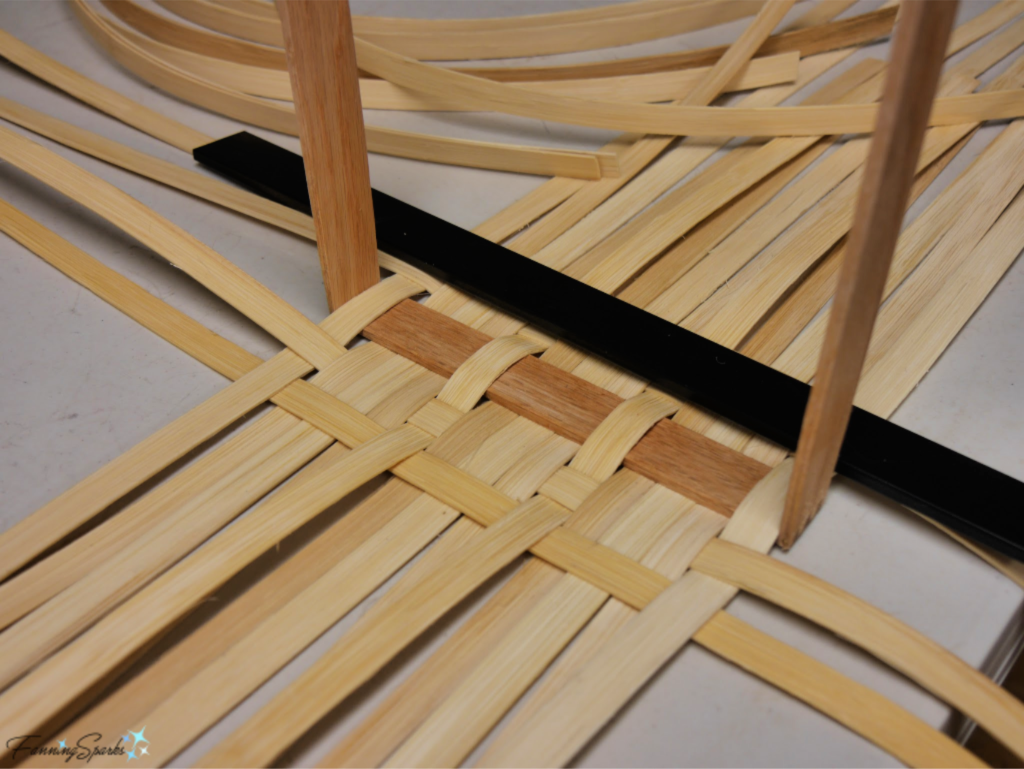 Here you can see the base woven to size with everything still flat.
 After folding up the stakes and holding them in place with rubber bands and clothespins, the basket started to take shape.
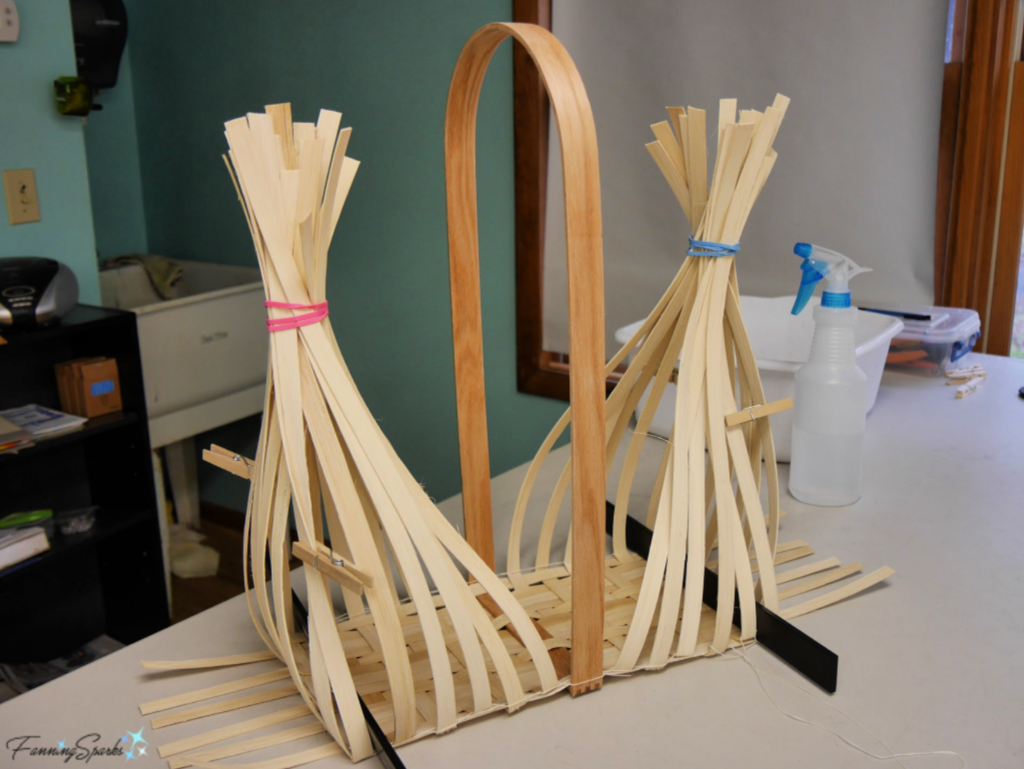 As you might expect, the next step was to weave up the sides of the basket. The twine you see in the below photo is used to keep the base square. This was one of the special techniques Susan shared with the class.
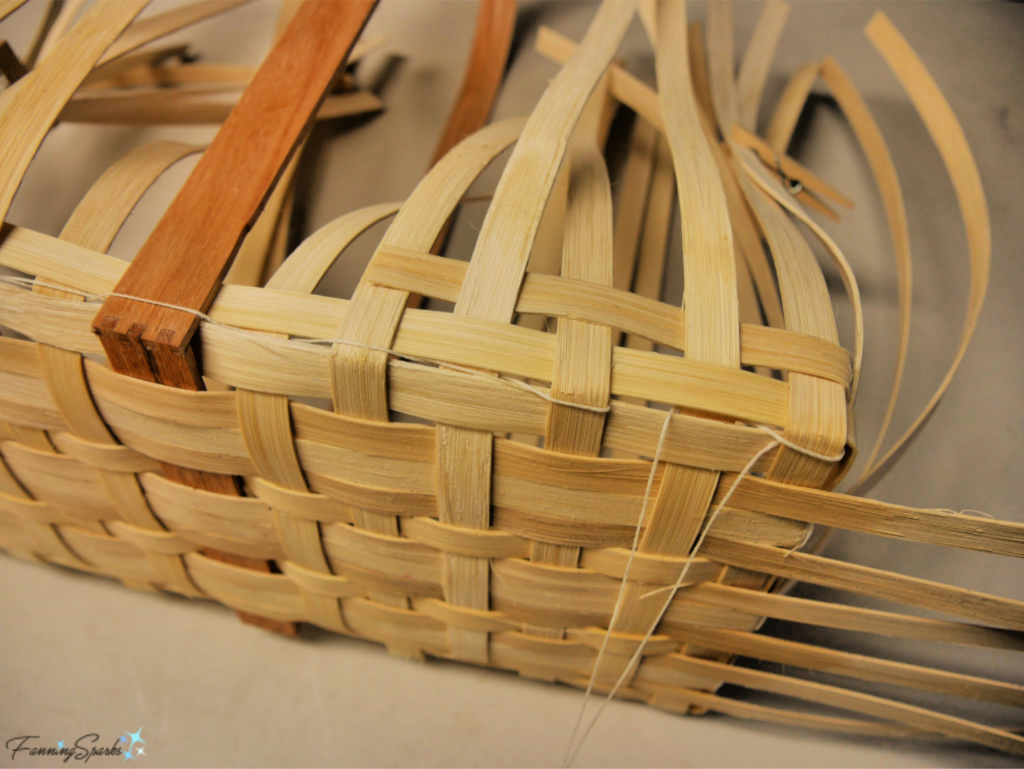
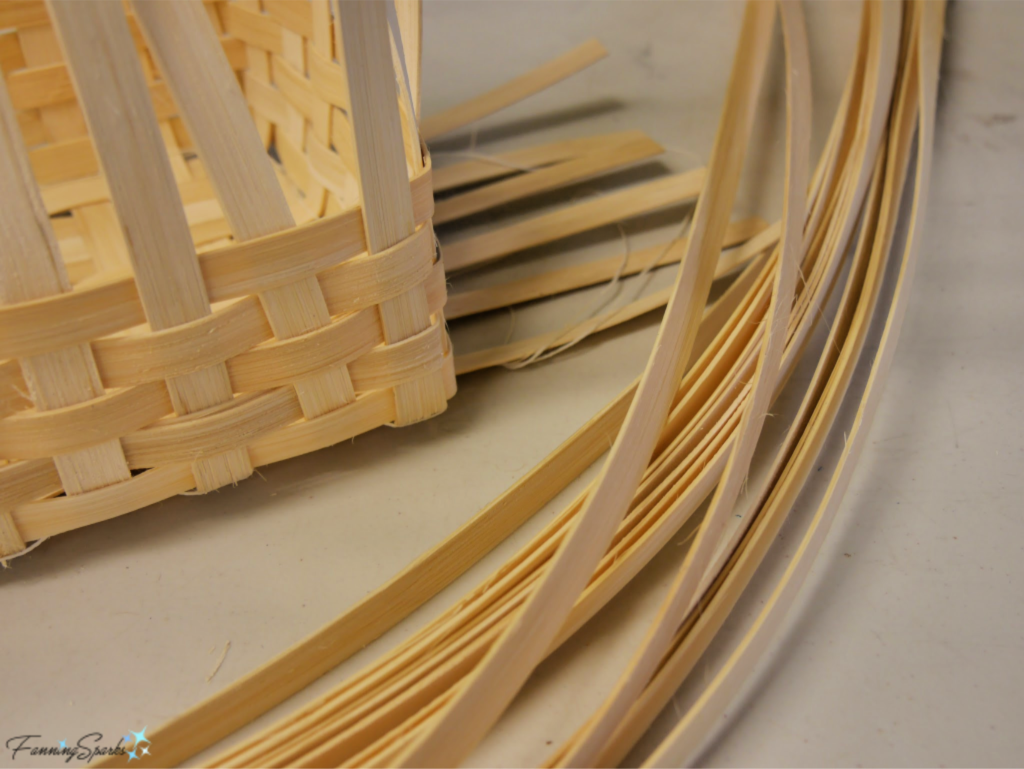 Things got really interesting about midway up the basket when we started experimenting with round reed and twining.
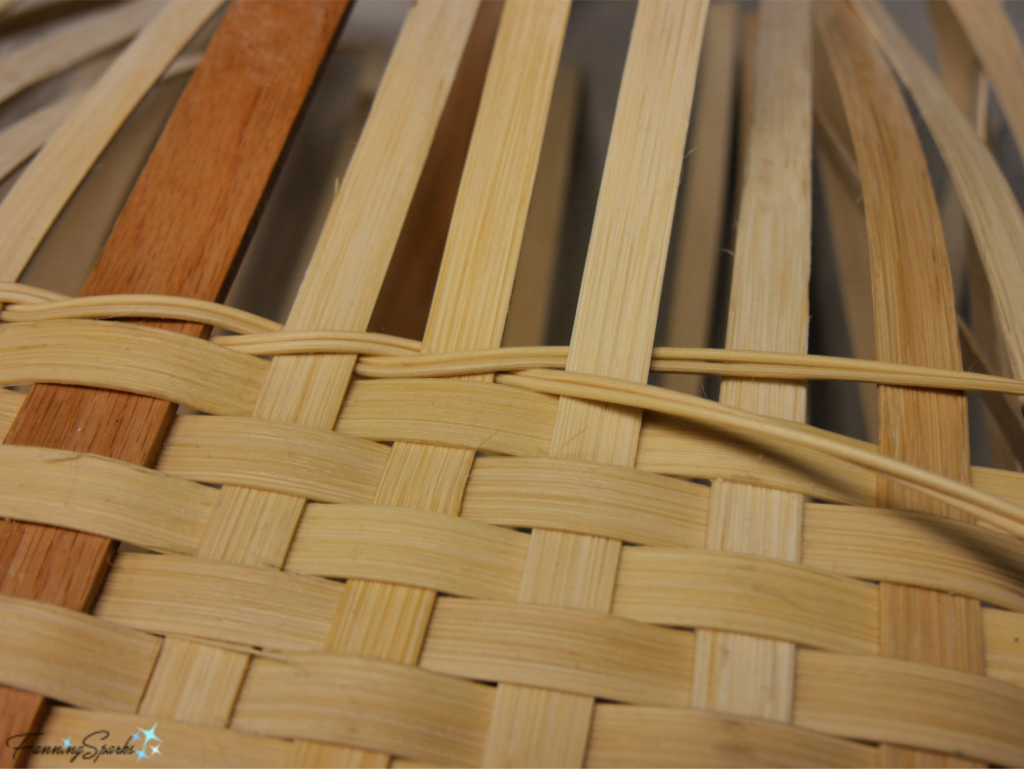 I chose to add 4 rows of twining arranged in an arrow pattern (visible at the bottom of photo below). Next we adjusted our “weavers” (ie the horizontal strips of reed) to taper the sides around the handle.
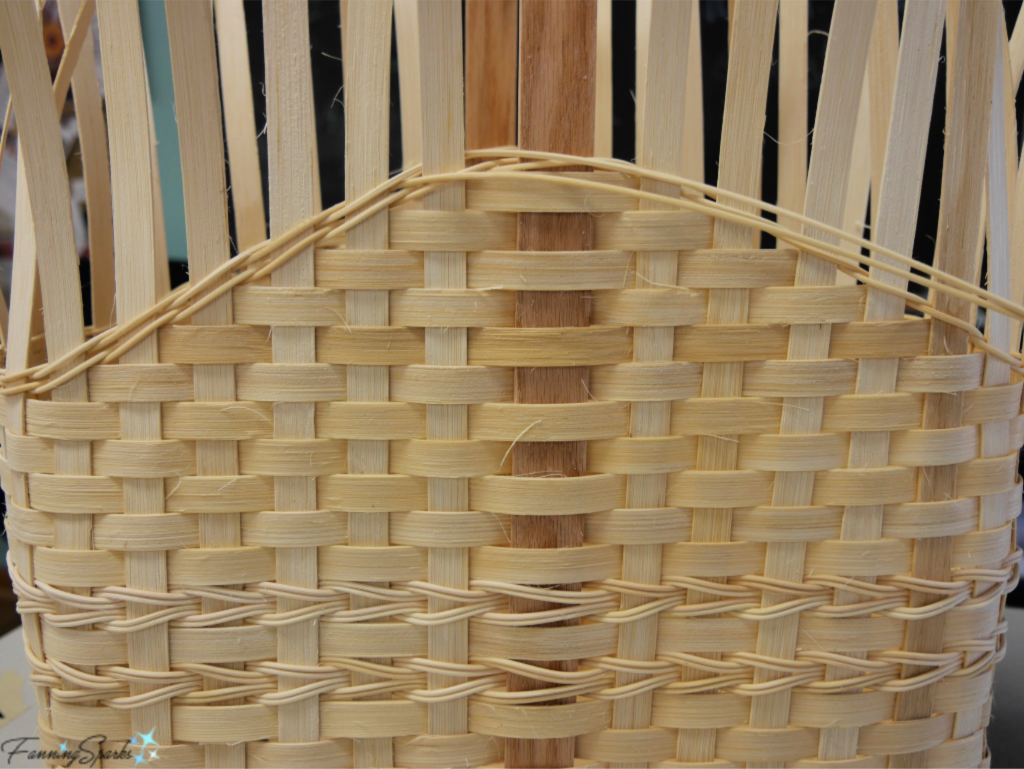 Finishing up the rim and adding the pretty embellishments involved a number of tricky steps. Here’s the top edge in progress.
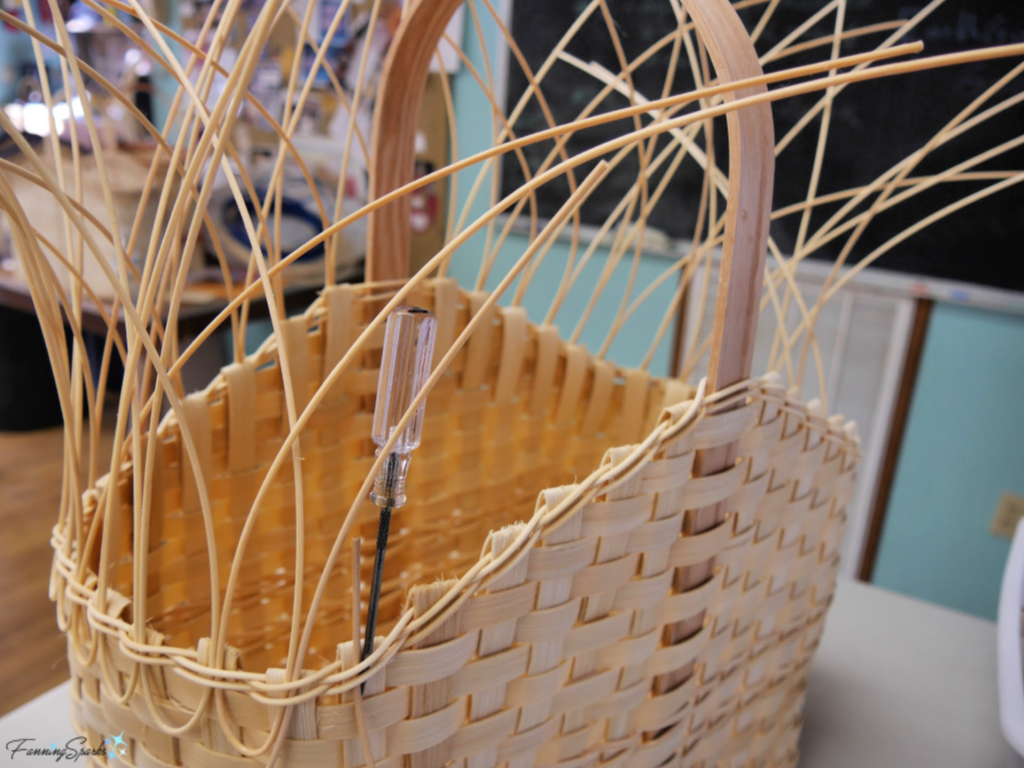
 Just as I was finishing the rim, I made a mistake and cut the inside ends too short. Ooops! Luckily, some expert advice and a little glue solved the problem.
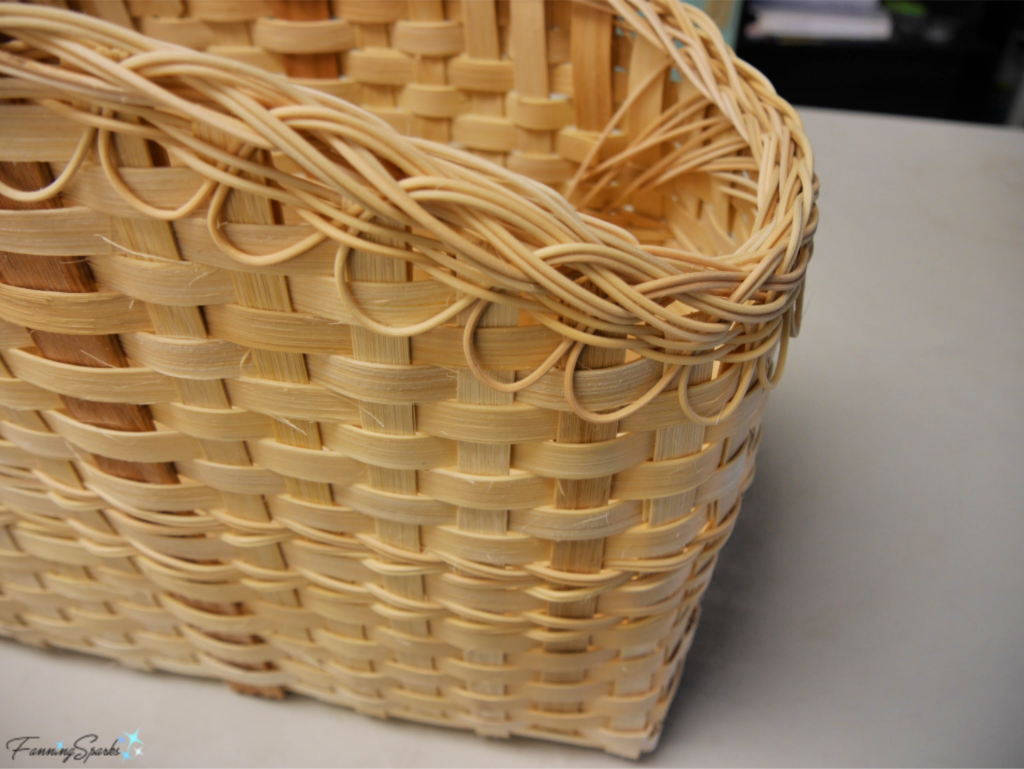
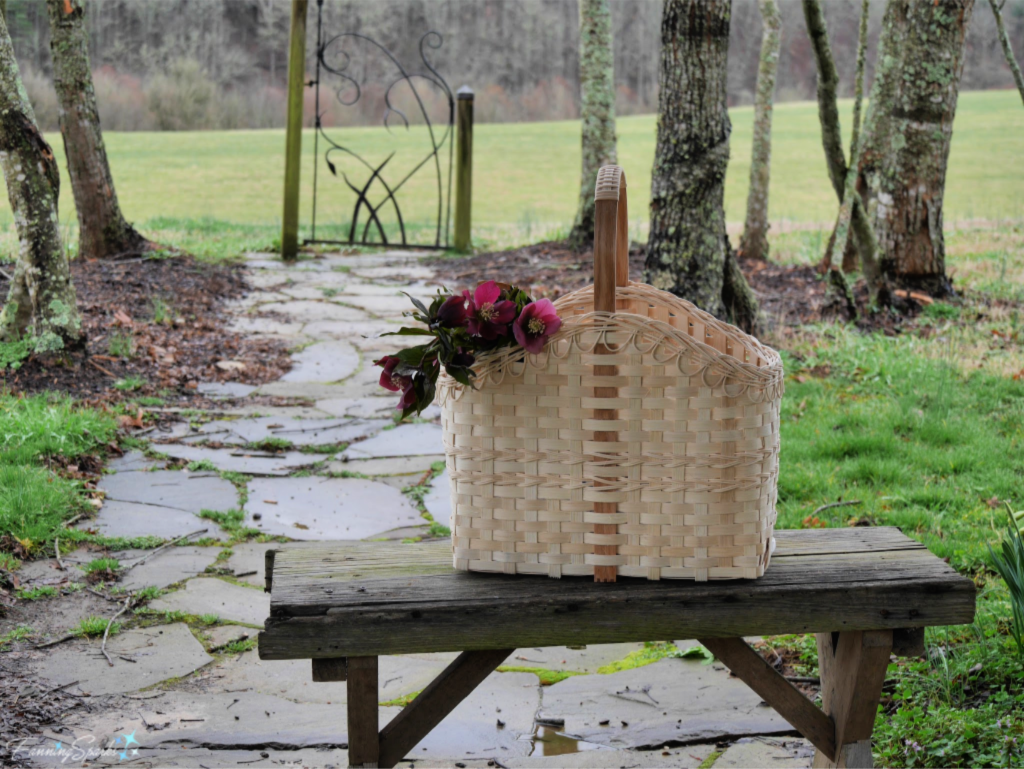
 Despite that little misstep, I’m proud to say my market basket turned out beautifully. The sides are nice and straight. The corners are square and level. The double stripes of twining, the lacy finish on the rim and the interwoven wrap on the handle dress it up nicely. Here’s my finished market basket photographed in the Keith House Community Room at the Folk School.
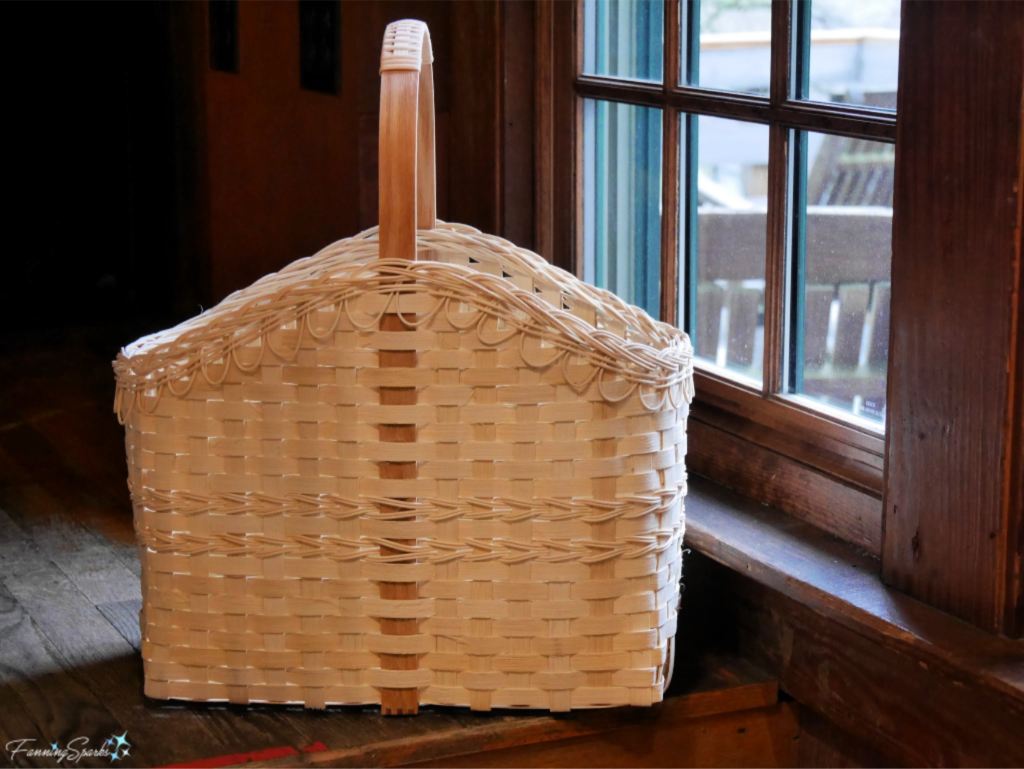 Here it is in our class display at the Student Exhibit.
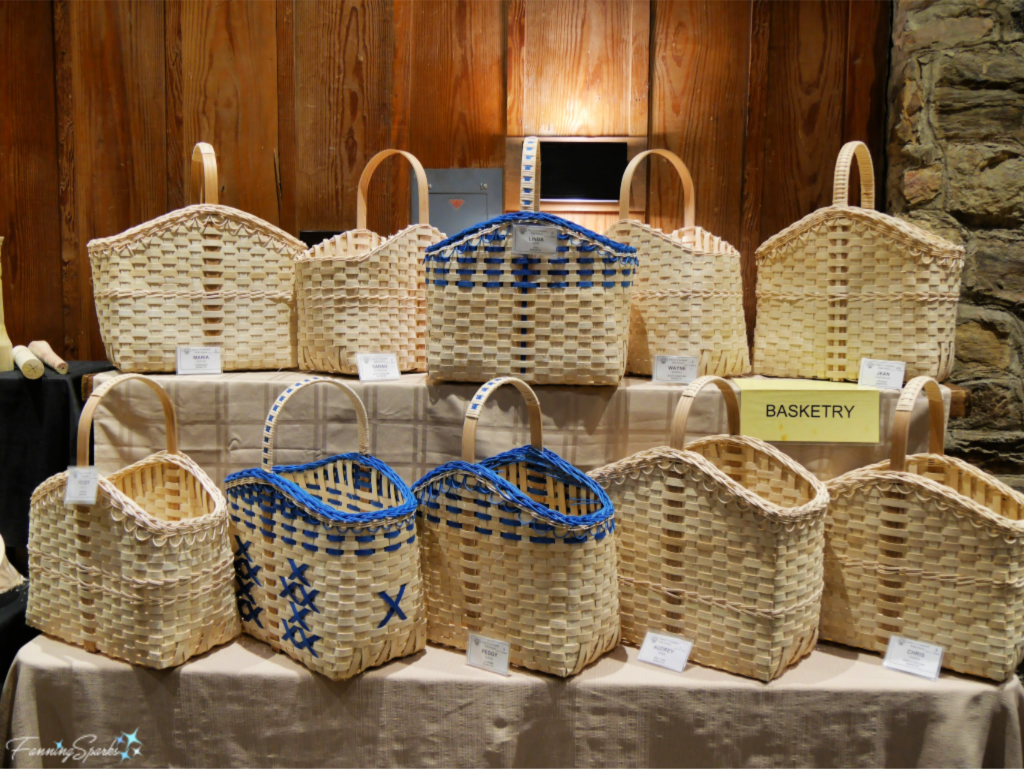 The Student Exhibit is a beloved tradition at the Folk School. On the last day of class, all students display their projects in Keith House. It’s an opportunity for everyone to share what they’ve made and to see or hear everyone else’s work. It’s great fun as we’re all in awe of what has been accomplished! The funny thing is that students are inevitably drawn to exhibits of a new craft they’d like to try and they immediately start making plans to return to the Folk School!
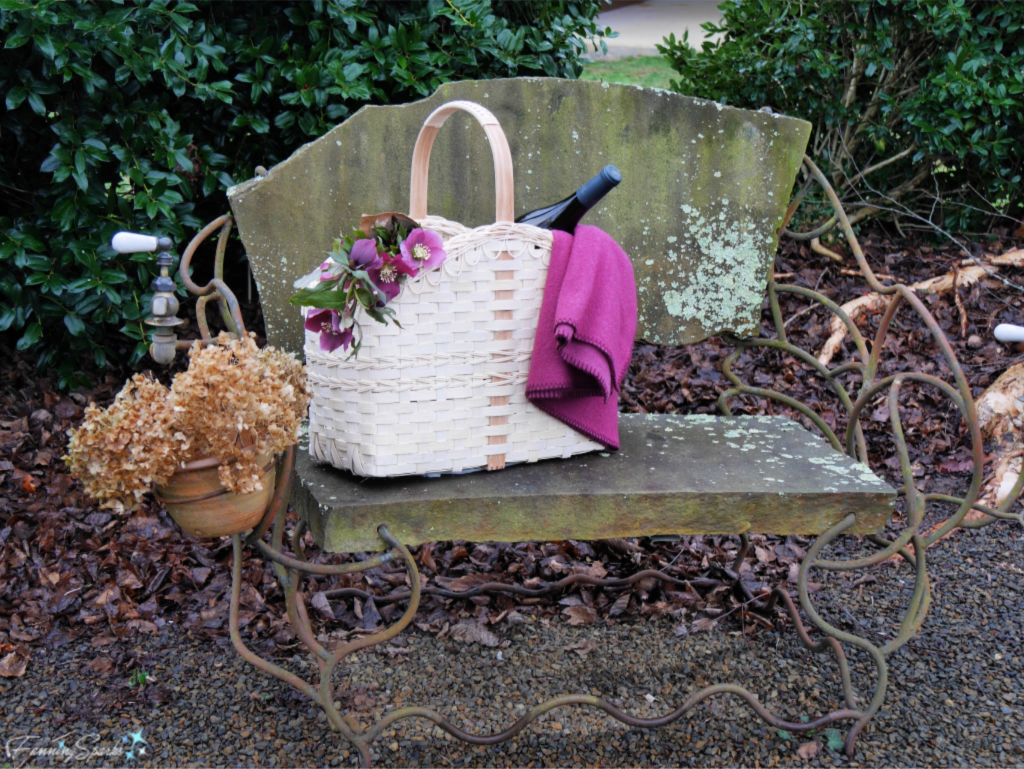 This bench is a splendid marriage of stone and metal with the most amazing little details. Notice how the artist incorporated a vintage tap handle and clay flower pot into the bench design.
 I’d like to wrap up with a special thanks to my fellow Basketry students and our instructors Susan B Taylor and John Roller. You all made it a great experience!


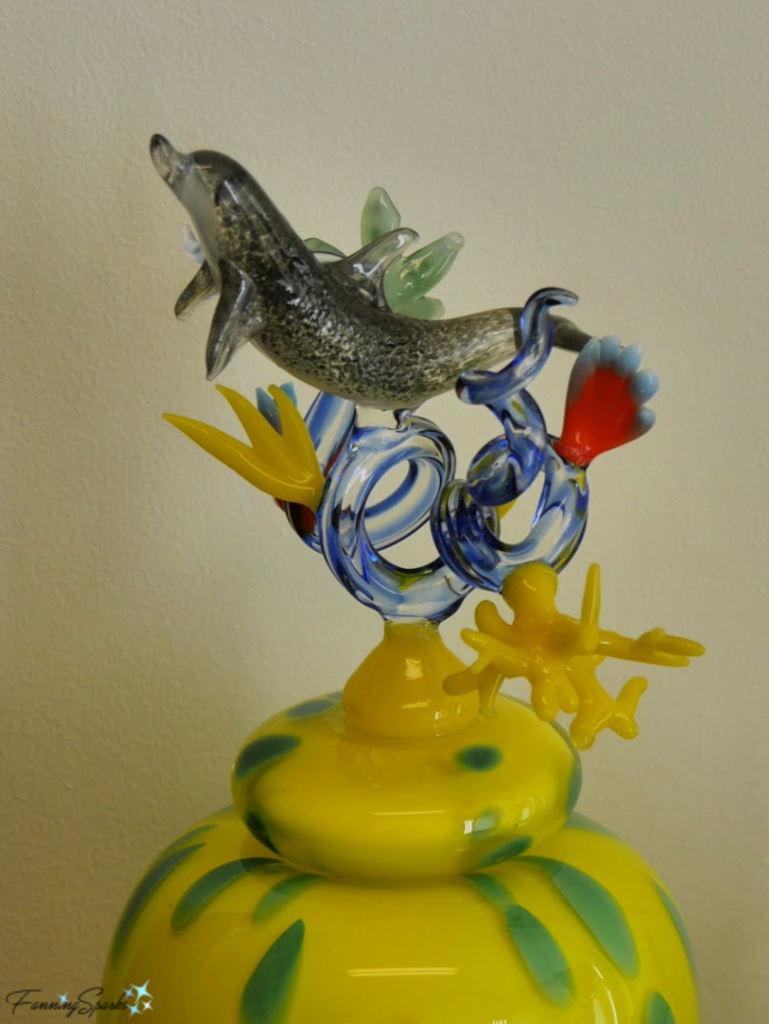
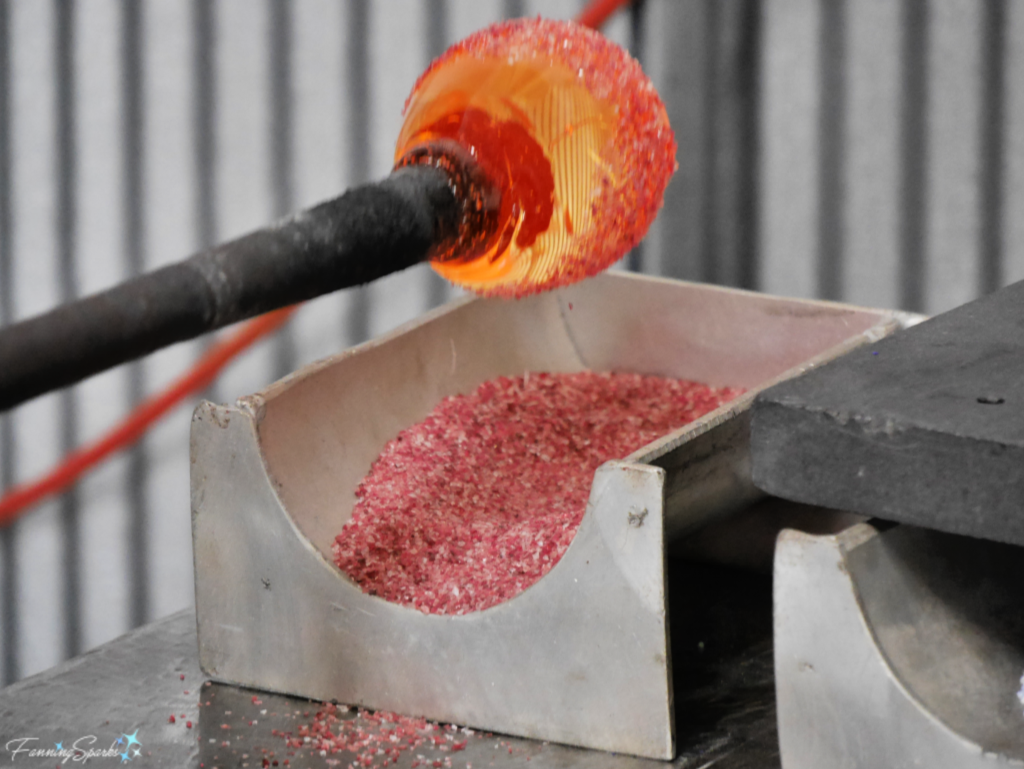
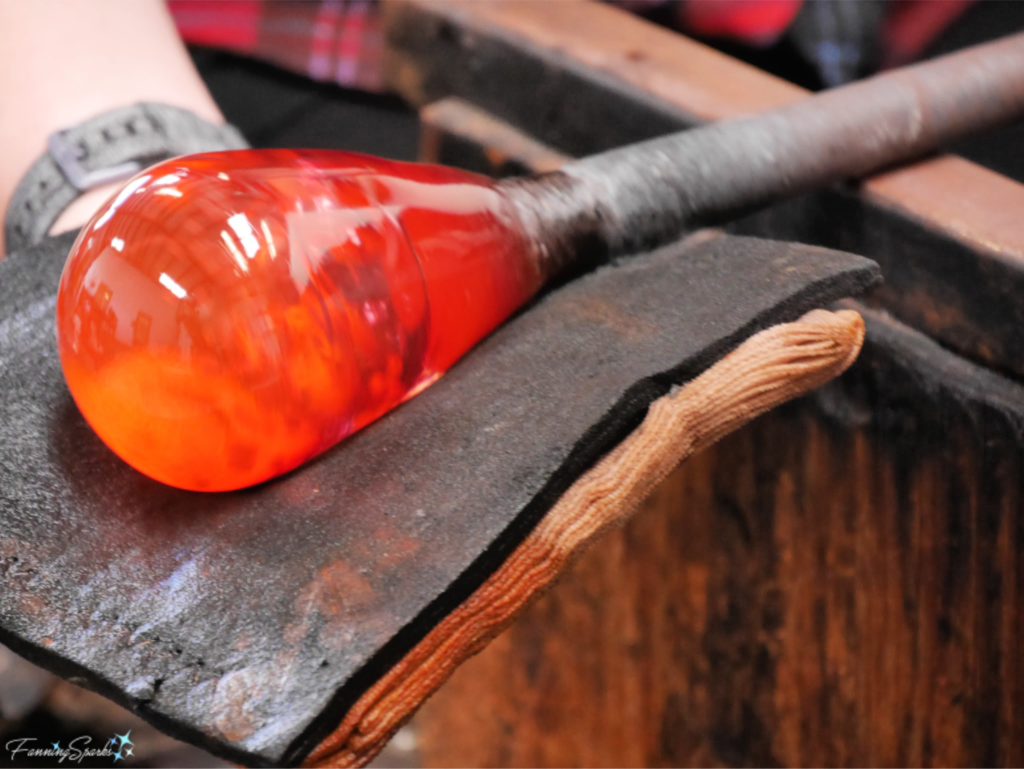
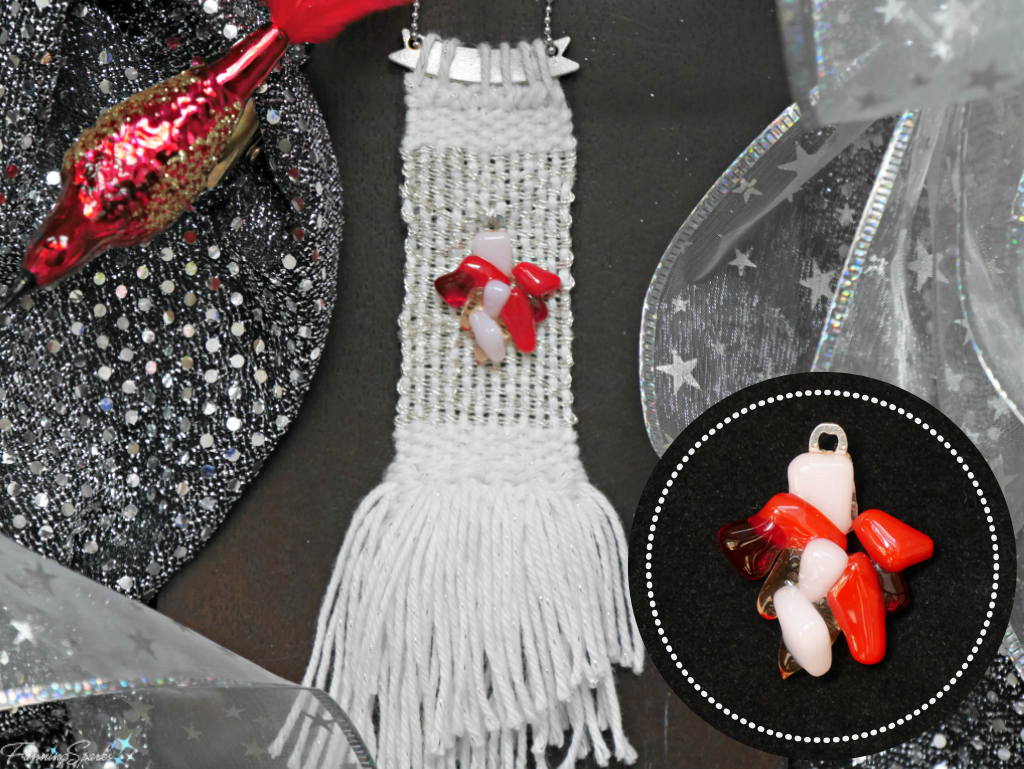
 This pretty plaque was created with glass fusing.
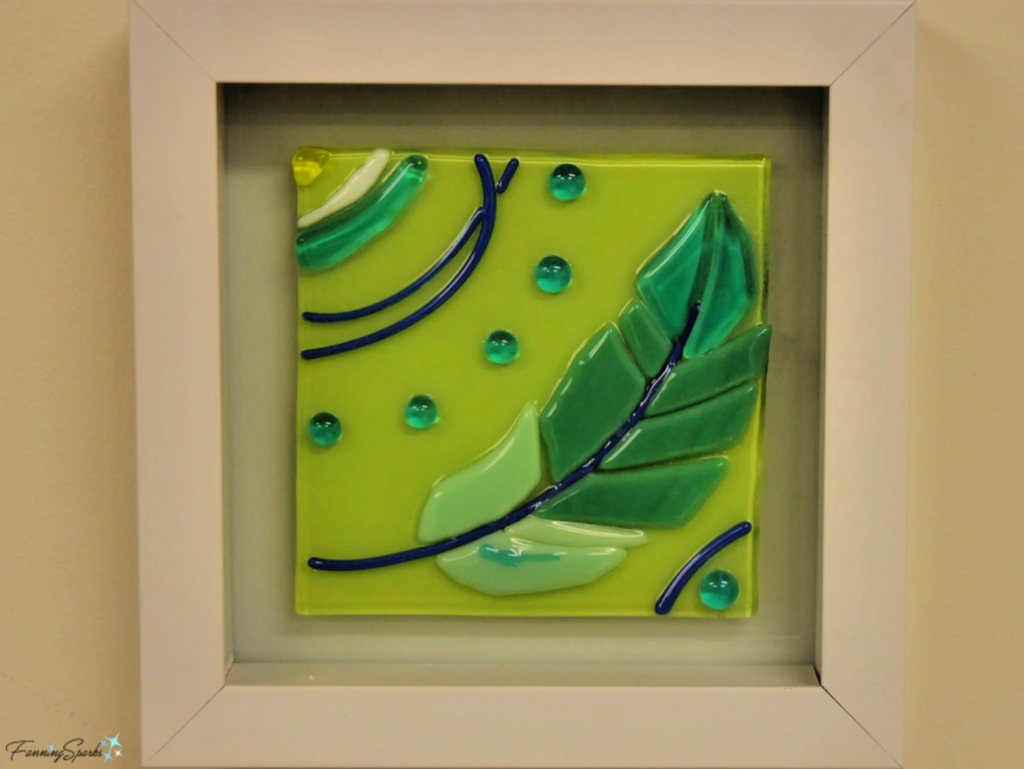 3. Cold glass techniques include grinding, polishing, etching, and engraving. According to Wikipedia, traditional stained glass work and lead crystal also fit in this category. Lead crystal, such as the well-known Waterford Crystal, is made by cutting glass with a diamond saw, or copper wheels embedded with abrasives, and polishing it to give gleaming facets.