My Dad always used to joke that “The best crop to grow in Nova Scotia is rocks!” After years of picking rock to clear farming land, he would have known. Rocks may be a hindrance to farmers and gardeners but they are an integral part of the geological heritage of a place.
Nova Scotia, on Canada’s east coast, “has long been recognized for its rich and diverse geology” say authors J.H. Calder and G.J. DeMont in their article Geoheritage in Nova Scotia. It is “a heritage that defines our landscape, is reflected in our industrial history, and has influenced some of the greatest ideas that have shaped human understanding of our place in the history of life.”
The iconic view of Peggy’s Cove lighthouse sitting proudly on huge granite rocks is a great example. It is a “story of fire and ice: magma cooled deep in the Earth’s crust and 380 million years later was shaped by the last glaciers.”

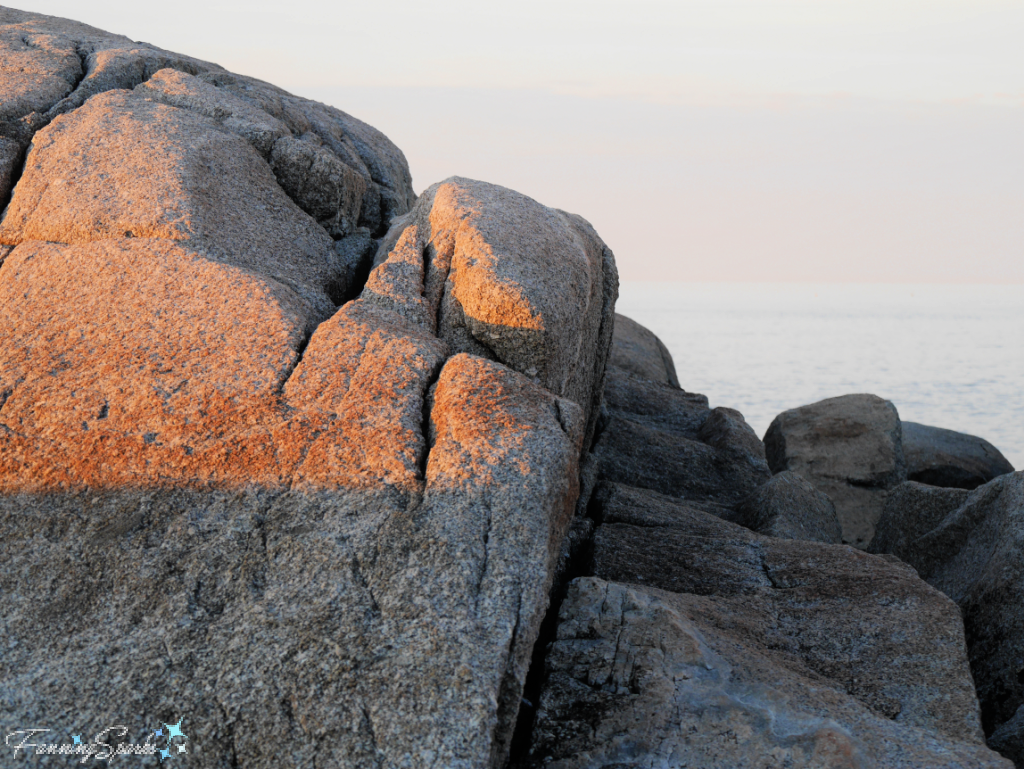
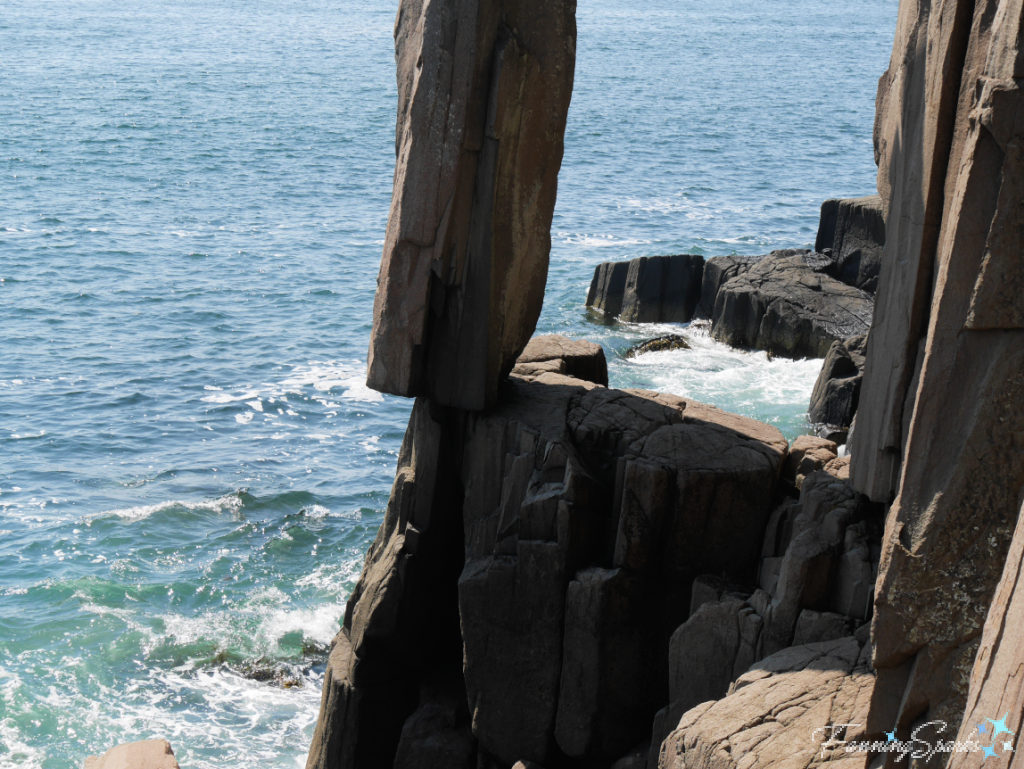
The rocks along the coastline of nearby Island Rock Head, Nova Scotia are similar. They originate from the Devonian to Carboniferous geological history period and are categorized as “granite batholith”. Wikipedia defines a “batholith” as a “large mass of intrusive igneous rock … that forms from cooled magma deep in Earth’s crust”.

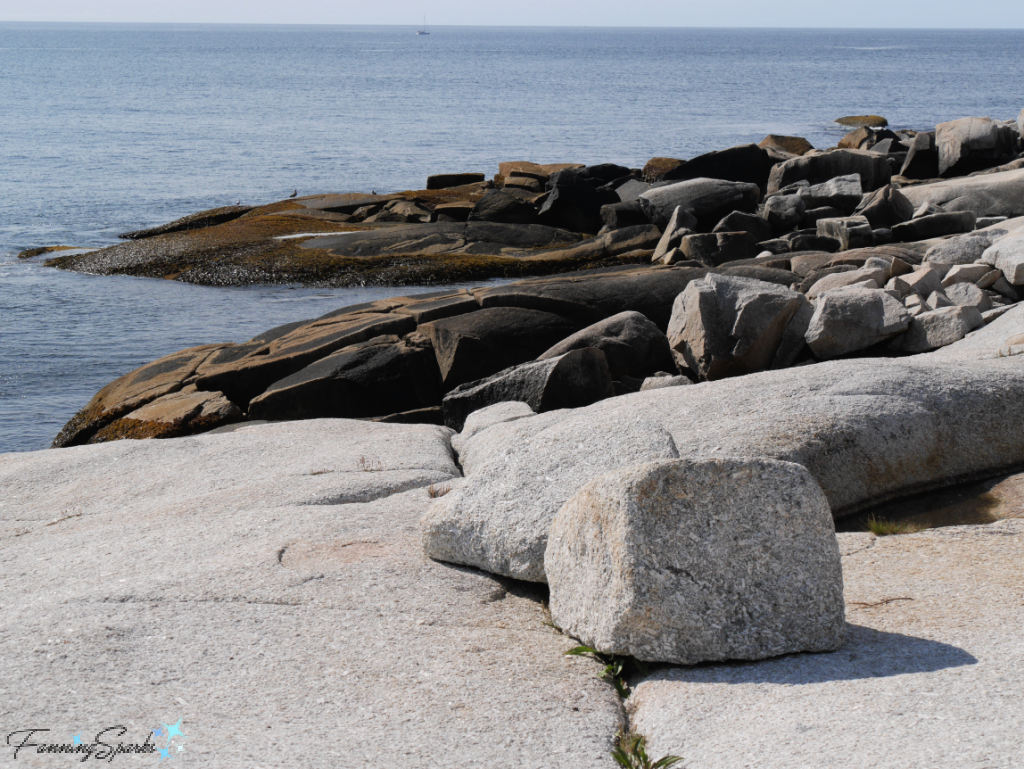
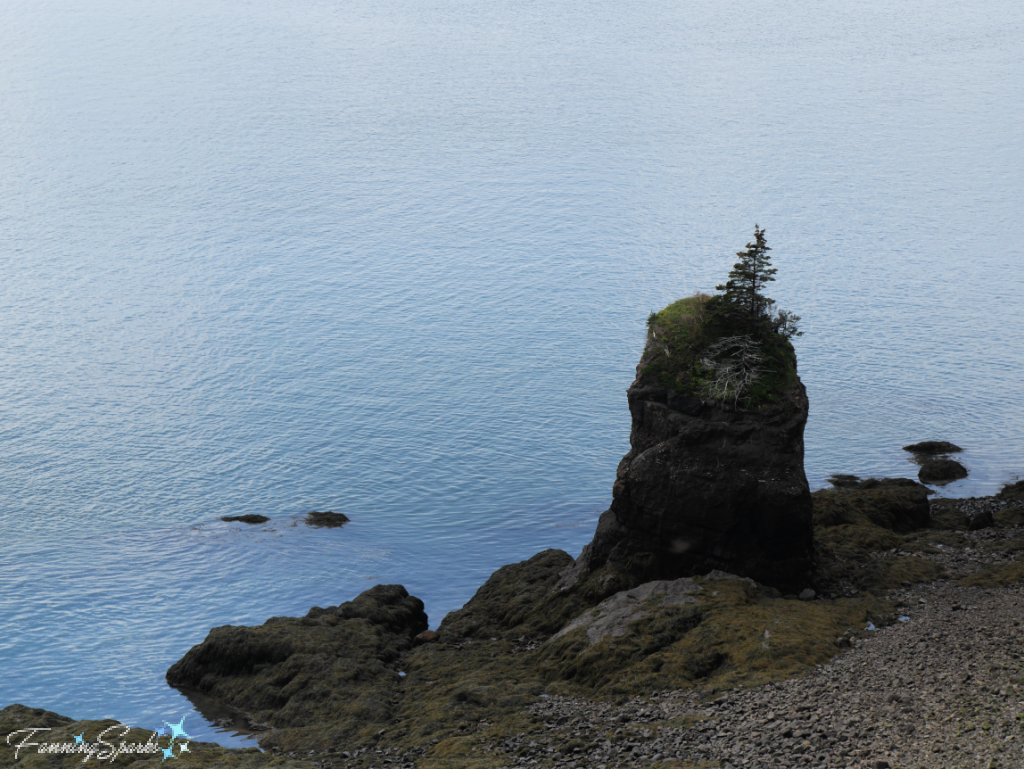
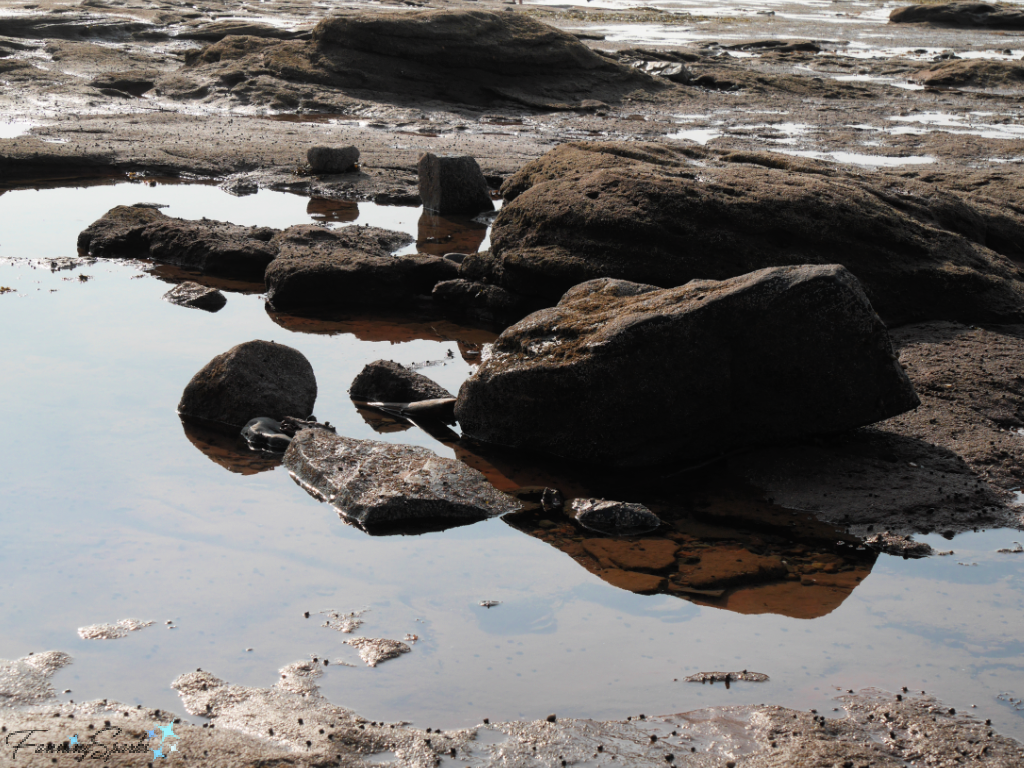
A recent kayaking adventure in Prospect, Nova Scotia provided a different view of the dramatic shoreline. Here the geology is described as an “erosional glacial landscape” originating from the Quaternary period. The view shown below greets the visitor as they enter Lower Prospect.
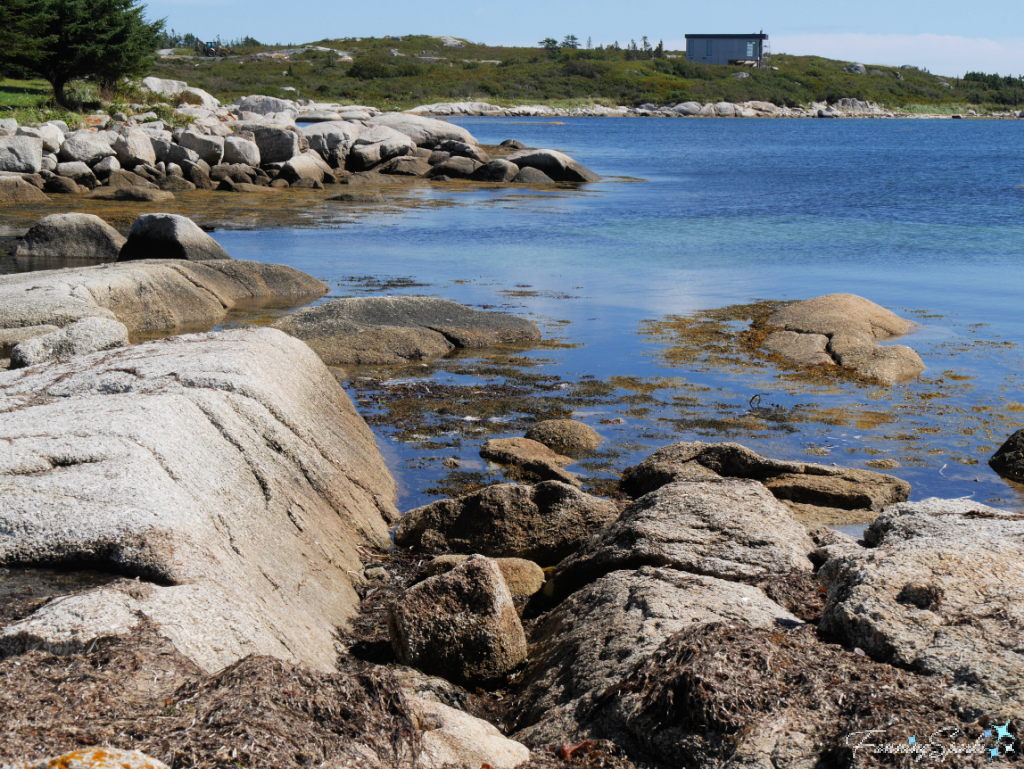
We kayaked to Hearn Island where we enjoyed a short hike and spectacular views.


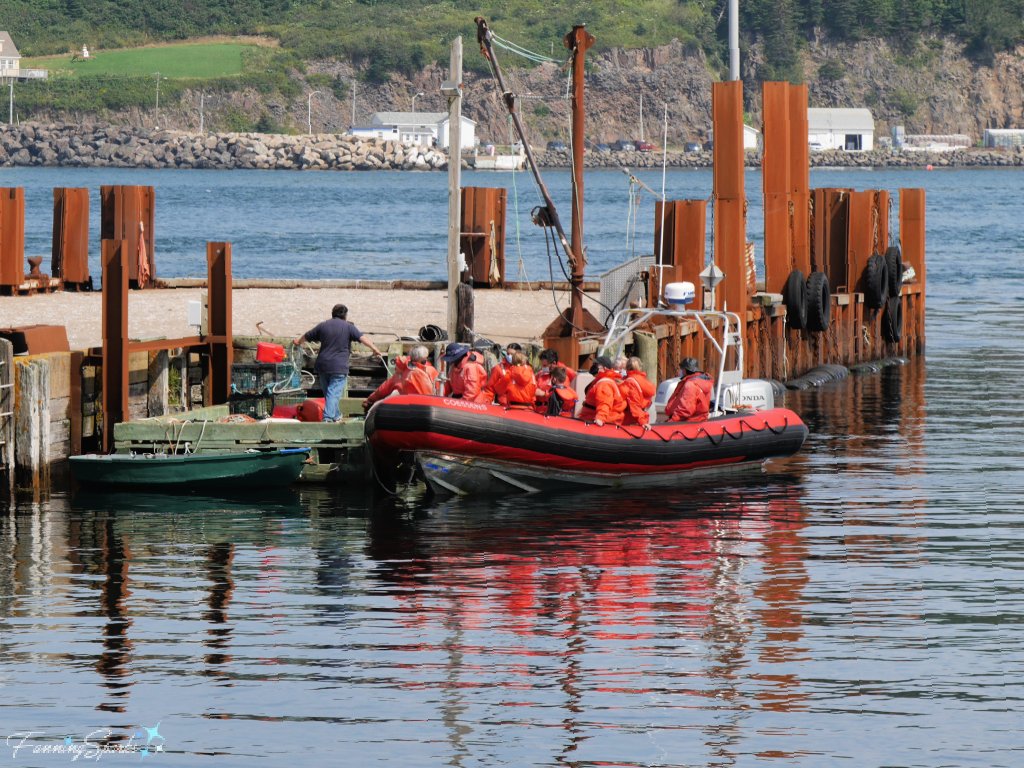
The geoheritage of the Digby, Nova Scotia area is noticeably different. On Brier Island, the rocks are columnar basalt, cooled from magma in the Triassic period. The columns along the shores of Seal Cove were eerily visible through the fog.
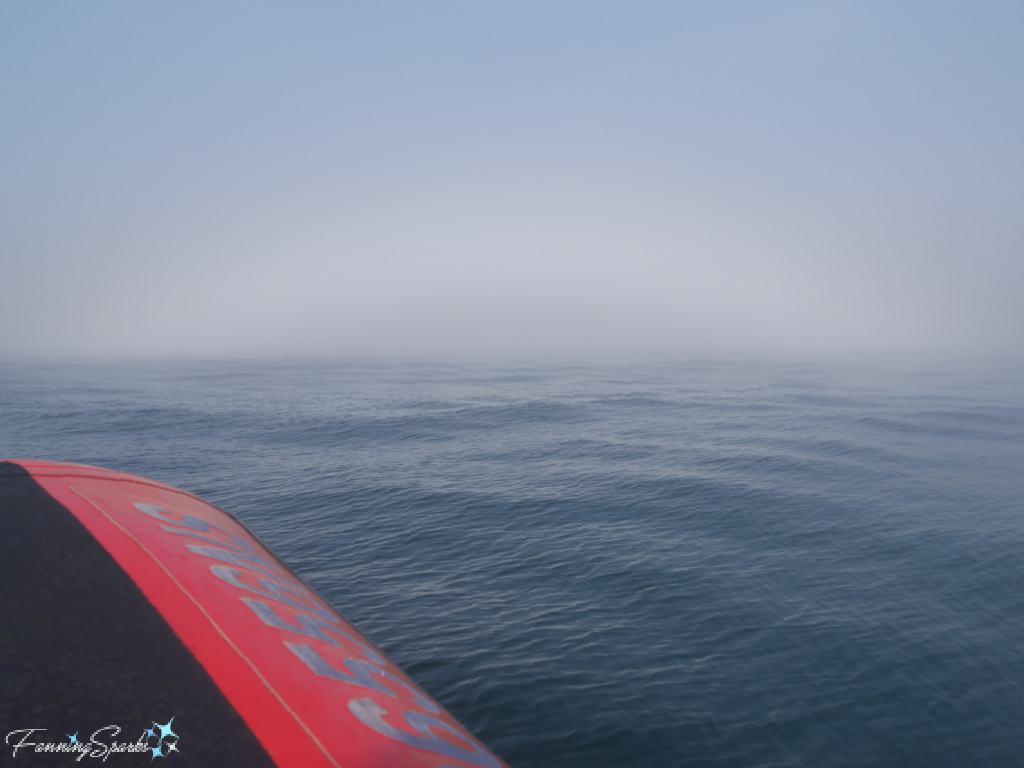
 Fog also shrouded the rocky cliffs in the Nature Conservancy of Canada Reserve on the island’s west coast.

This heart-shaped rock was propped up near the Brier Island Lighthouse. How it came to be is a mystery.

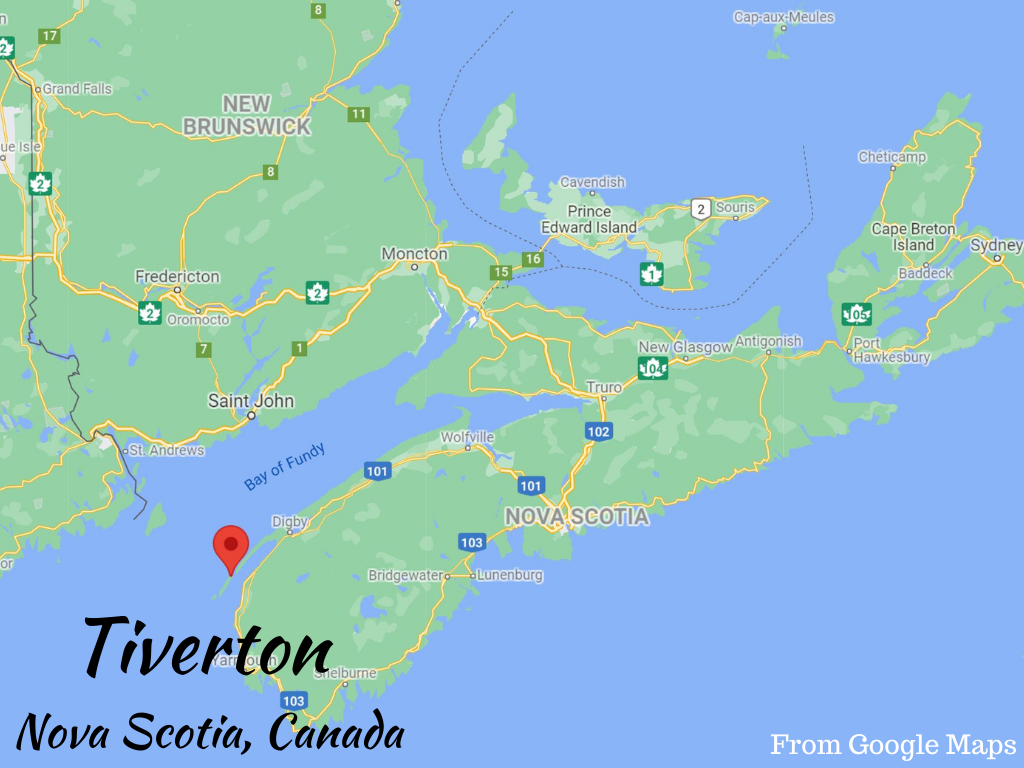
Arguably the most astonishing example of basalt columns is Balancing Rock in Tiverton on Long Island. This 20-foot finger of volcanic rock, estimated to weigh 20 tonnes or more, is balanced precariously on the edge of the rock below.

The basalt column, known as Nature’s Time Post, seems to defy gravity.
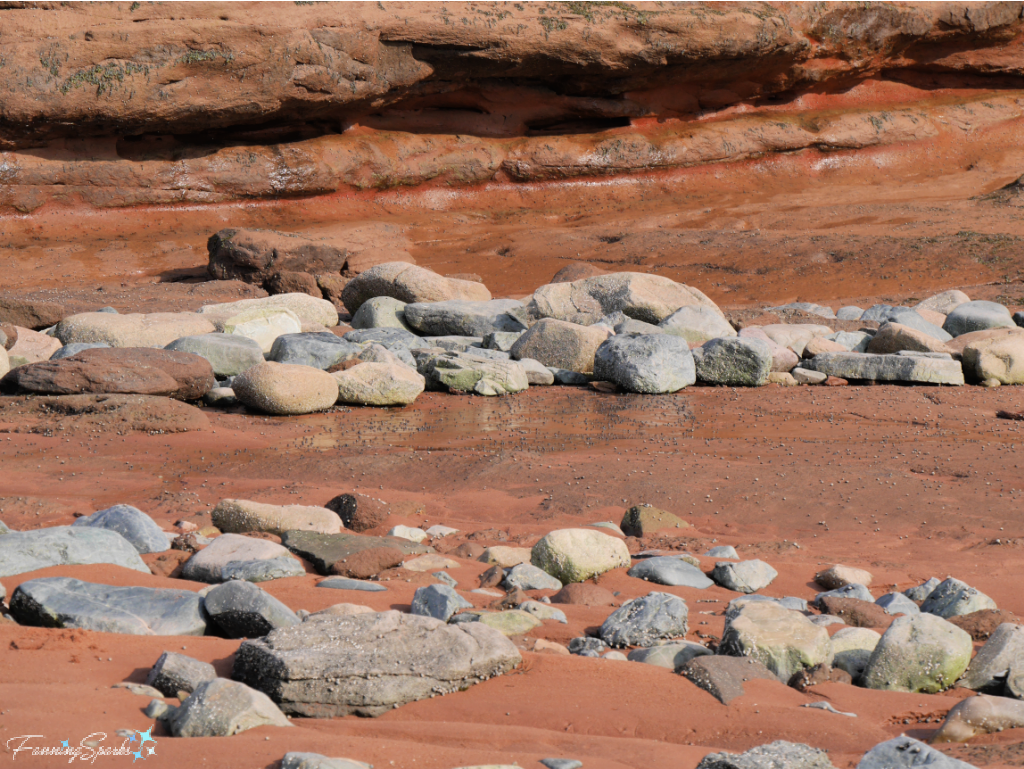
The Bay of Fundy, the site of the world’s highest tides, provides yet another perspective of Nova Scotia’s geoheritage. Burntcoat Head, for instance, holds a “fossil menagerie of life in the early days of the dinosaurs including creatures found nowhere else on Earth”. Pictured below are the cliffs of Burntcoat Head in the warm glow of sunset. Check out the post We Dined on the Ocean Floor for more photos and background on Burntcoat Head.

Interestingly, Nova Scotia boasts a UNESCO Global Geopark along the north shore of the Bay of Fundy. The Cliffs of Fundy Geopark is one of only 163 UNESCO Global Geoparks around the world. These geoparks are “single, unified geographical areas where sites and landscapes of international geological significance are managed with a holistic concept of protection, education and sustainable development.”
The Cliffs of Fundy UNESCO Global Geopark celebrates the highest tides in the world, honors the ethical space of the Mi’kmaw people and their oral traditions of cultural geoheritage, and provides evidence of the Earth’s incredible natural history with the massive Cobequid Fault.
On Partridge Island, in the Parrsboro area of the Geopark, visitors can enjoy an eco-tour hiking trail. This is one aspect of the amazing view that rewards hikers at the trail’s lookoff.
It was low tide when we visited nearby Five Islands but the beautiful skies more than made up for the lack of water!

Nova Scotia is not the only Maritime province with an interesting geoheritage. Most of Prince Edward Island’s north shore is rolling dunes and wide beaches of fine sand but Thunder Cove is different. There a visitor will find sandstone cliffs, caves and sea stacks carved and shaped by the ocean and the winds.

The below sandstone sea stack is dubbed Teacup Rock for its unusual shape.

Learning about the geoheritage of the Maritimes has been fascinating. It’s heartening to see my native province of Nova Scotia celebrate its natural and cultural sites of geological significance. But there is much more to learn and I look forward to delving deeper during my next visit.
More Info
You can learn more about visiting Nova Scotia and Prince Edward Island on their respective tourism websites or check out these FanningSparks’ posts:
. Watching Humpbacks on the Bay of Fundy
. We Dined on the Ocean Floor
. The Perfect Reminder of Green Gables
. Shutter Therapy in North Rustico
. Beacons of Light
. In Pursuit of Sea Glass
. Falling Leaves and Floating Boats
. First Light at Peggy’s Cove
See the Geoheritage Resources section of Nova Scotia’s Geoscience and Mines Branch website for more information about Nova Scotia’s geoheritage including a virtual tour and the 2009 Report of Activities by J.H. Calder and G.J. DeMont.
Wikipedia is a great place to learn the basics of the geologic time scale.
Check out the Cliffs of Fundy Geopark website for information about the Cliffs of Fundy UNESCO Global Geopark.
Today’s Takeaways
1. Nova Scotia, on Canada’s east coast, “has long been recognized for its rich and diverse geology”.
2. “Geoheritage can be defined succinctly as geological features that inform humanity of its relationship with the Earth.”
3. Consider the geoheritage of the places you live and visit.


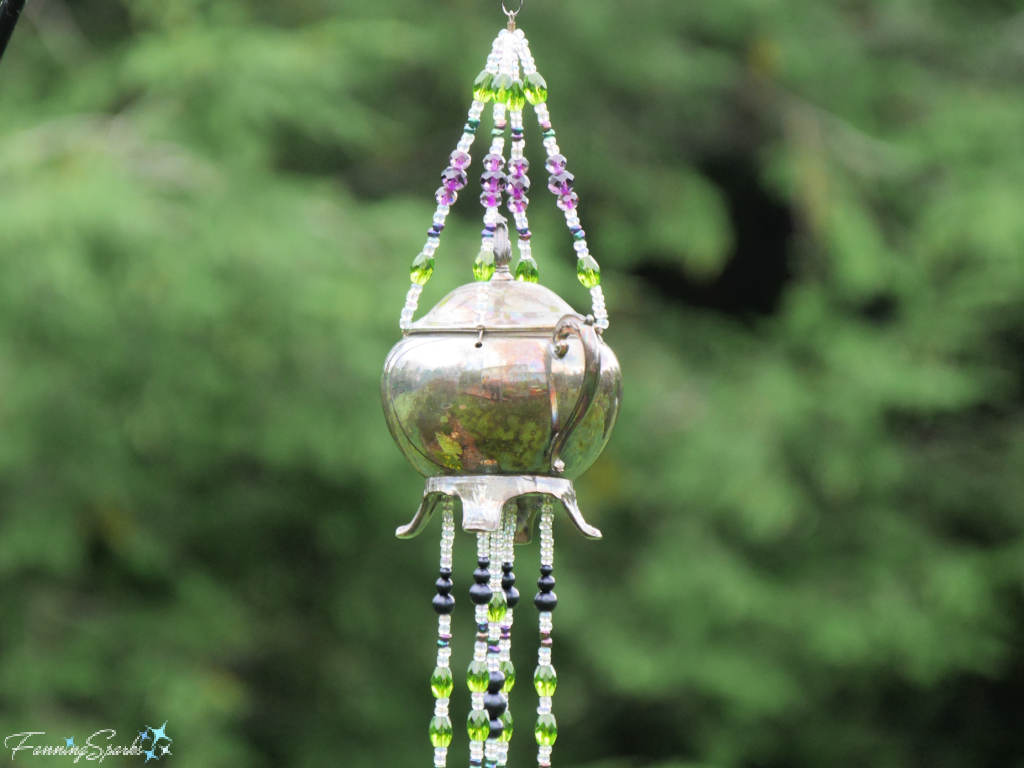 This project is completed with silver-plated cutlery hung from glass-beaded strands. The spoons catch the breeze and produce a pleasant soft tinkling sound. Here’s a closer look.
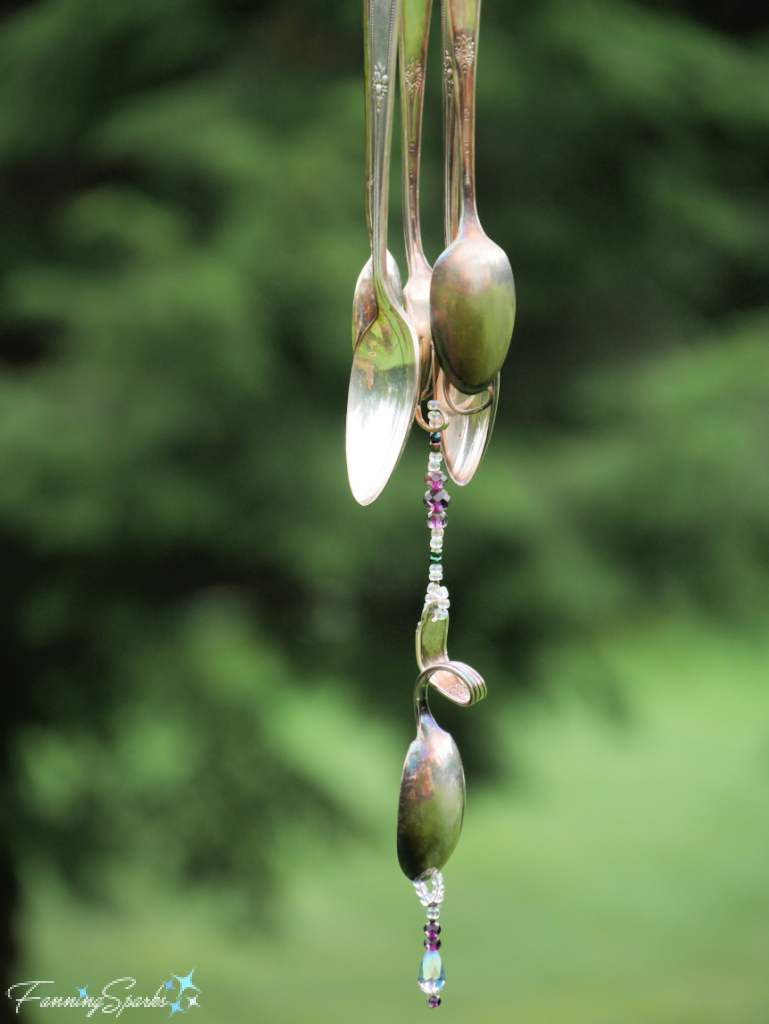
 Let’s get started.
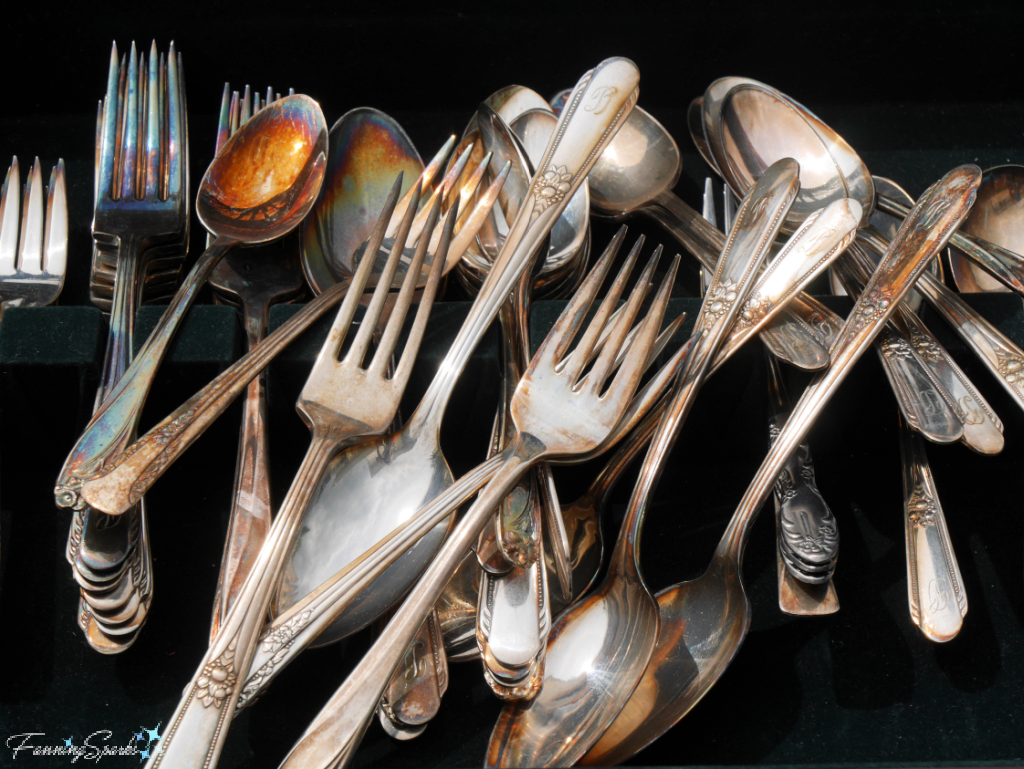 . Beads: Approximately 60” of Glass Beads. Glass beads may be more expensive than other materials but they catch the light beautifully and they tend to weather better. Choose an assortment of colors, shapes and sizes. I purchased a variety of beads, as shown below, to make colorful and interesting hangers but I didn’t use nearly as many beads as shown. I found it helpful to include some “filler” beads (ie the white ones) to really let the other beads stand out. Ensure your glass beads will fit onto your beading wire.
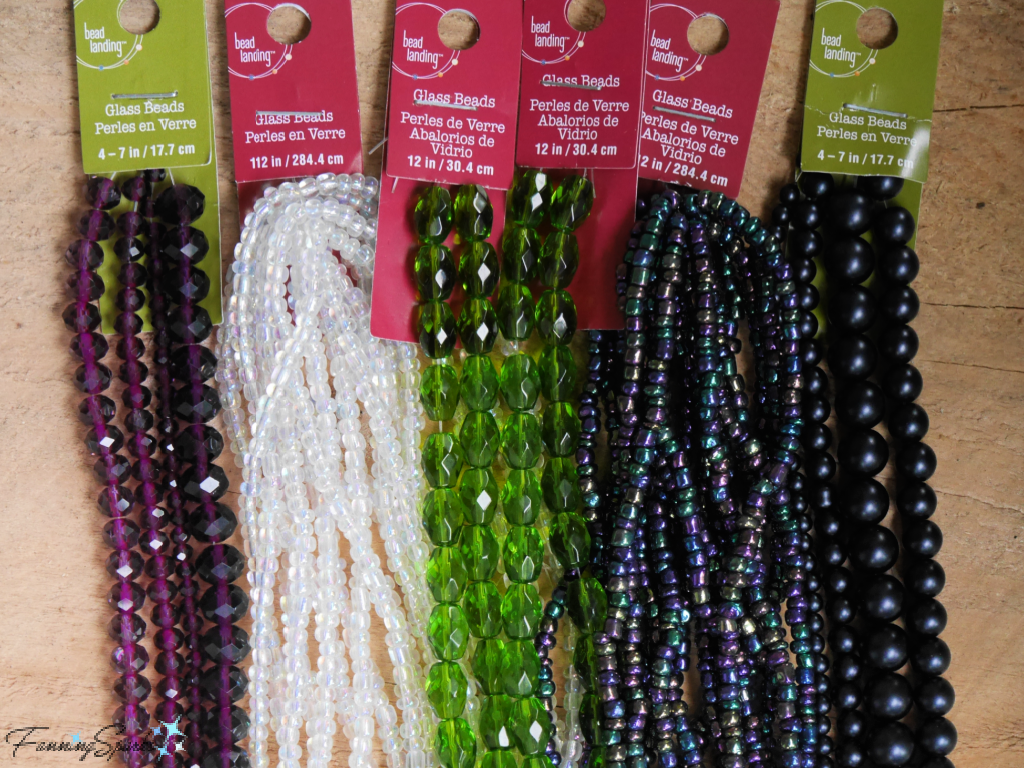 . Teardrop Beads: A teardrop-shaped glass bead adds a nice touch to the bottom of the wind chimes. If using a creamer, teardrop beads are the perfect way to end the bead strands coming out of the creamer’s spout (see photo in Step 12).
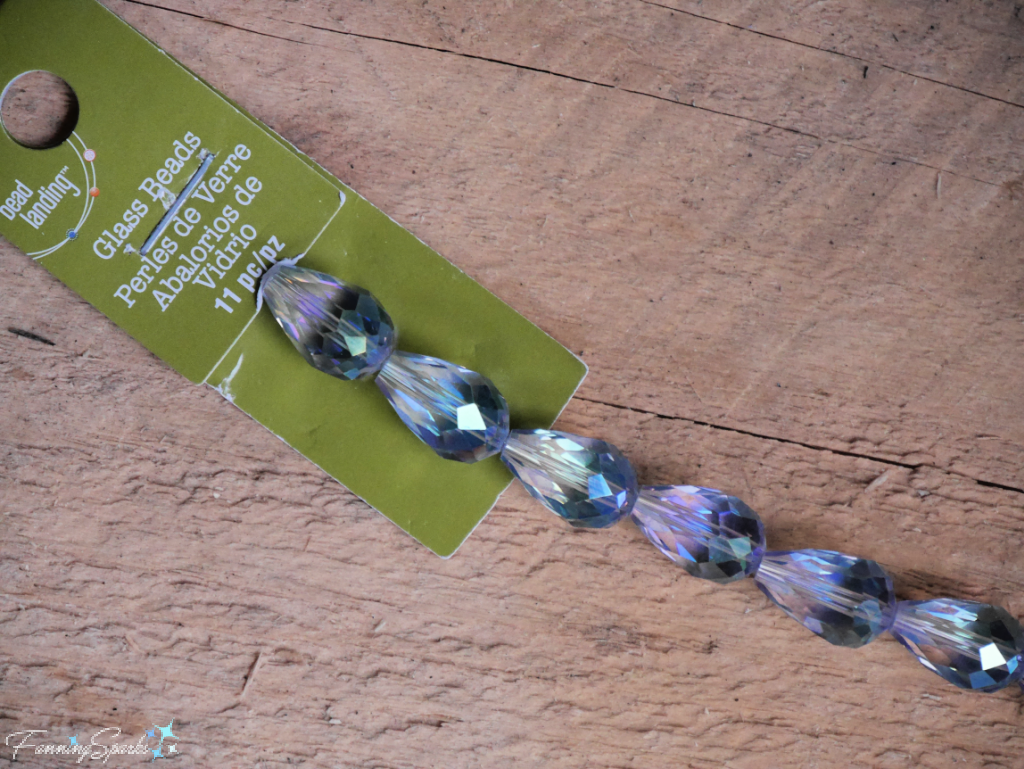 . Beading Wire: Approximately 100” (9 ft) of Beading Wire. This stringing material is made of multiple strands of thin steel wire coated with a layer of nylon. Surprisingly, this type of wire is available as a beading supply and as a fishing supply. I’ve seen 7-strand Beading Wire in the beading section at my local craft store. But I raided my husband’s fly fishing gear and selected a spool of 40-lb Knottable Wire Bite Tipper from RIO. I reasoned that fishing line would be more durable and stand up better to the outdoor conditions I expected my wind chimes to endure. Ensure your beading wire will fit into your glass beads.
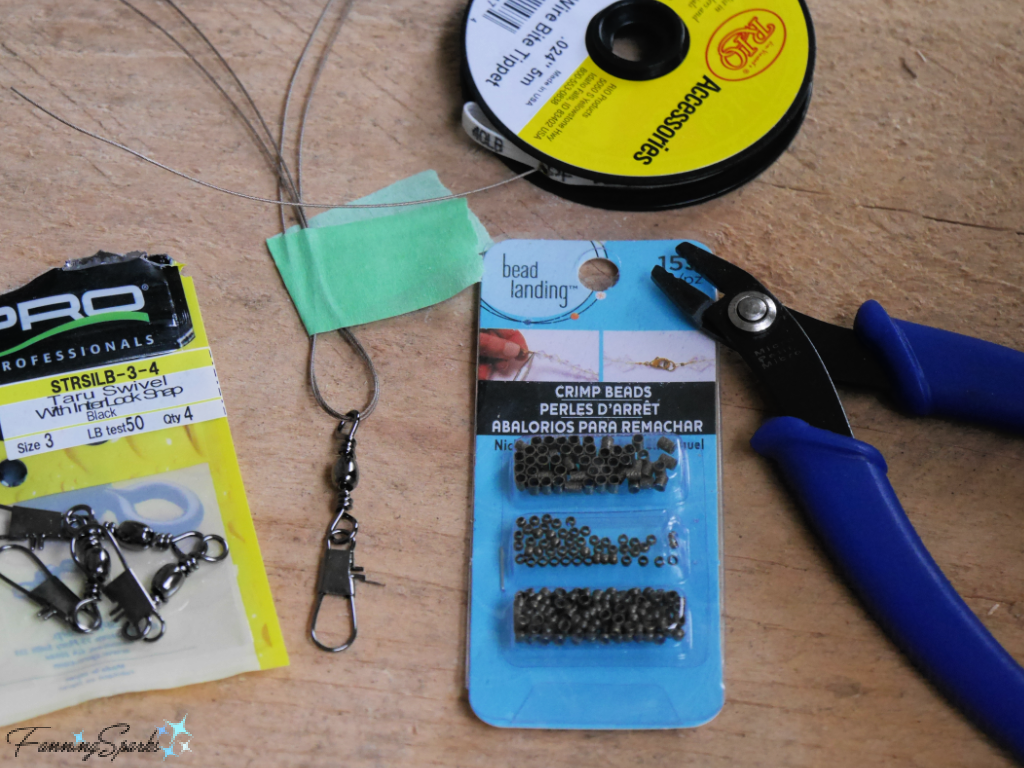 Tools and Equipment Needed
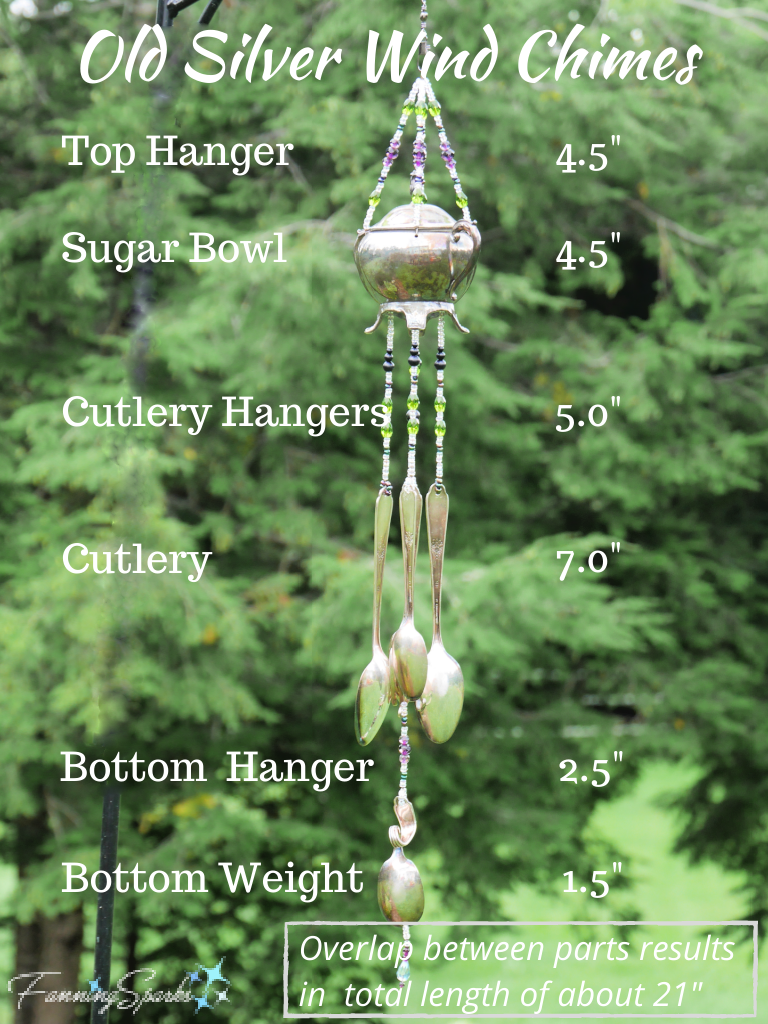 Step 1 – Select Components Select your featured component—it could be a lidded sugar bowl or a creamer as shown in this tutorial. Alternatively, you could use a teapot but the hangers would likely need to be longer so increase the number of glass beads and length of beading wire accordingly.
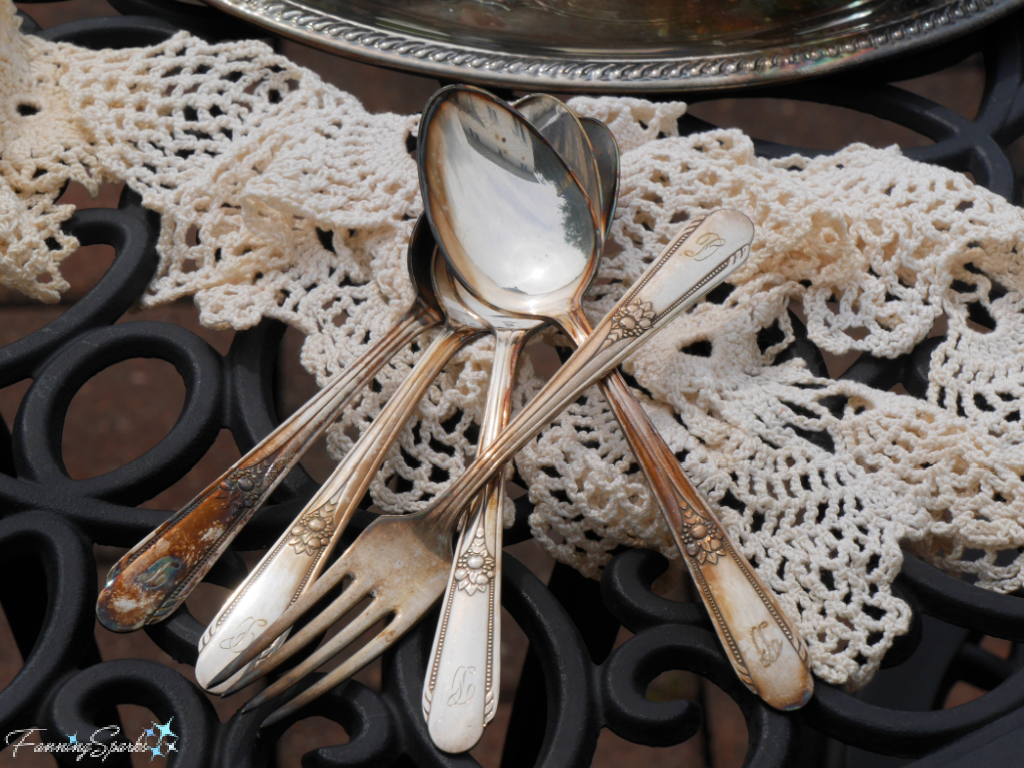 Step 2 – Flatten Spoons and Fork Work on a block of scrap wood. Hold a spoon firmly against the wood block and hit it with a rubber mallet to straighten/flatten the spoon handle. The idea is to straighten the handle a little so the spoon will hang vertically. Optionally, you may also want to hit the spoon bowl a few times to flatten it a little. Repeat with the remaining spoons and fork.
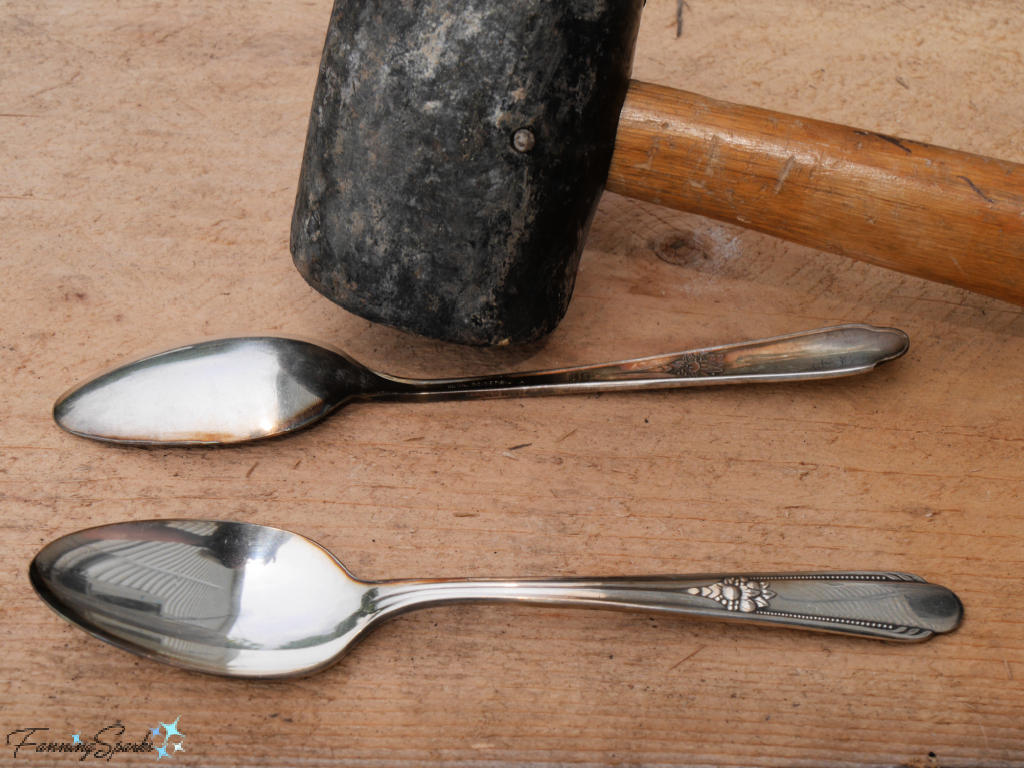 Step 3 – Bend Fork Use flat-nose pliers to grip one of the fork’s tines. Slowly bend the tine out and into a graceful curl. It’s helpful to use round-nose pliers for the final bending. Alternate the direction of the tine curls. Curling out the fork tines increases their contact with the bowls of the spoons meaning the wind chimes will produce more music.
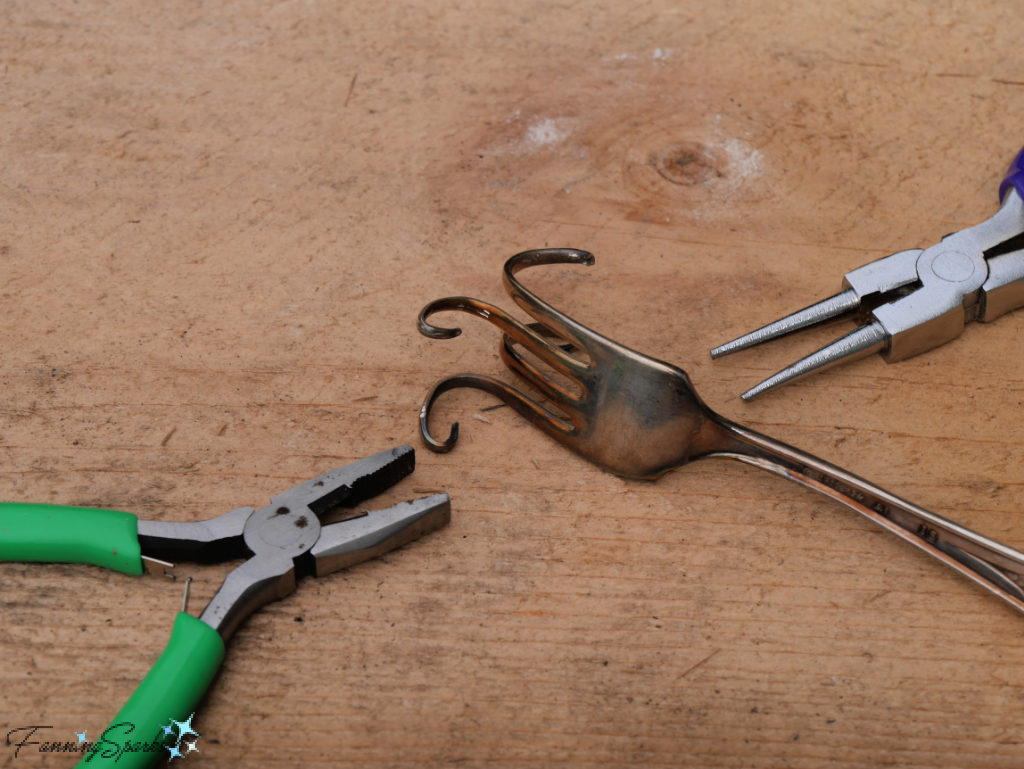 Step 4 – Drill Holes in Spoons and Fork Start with a spoon. Choose a spot at the top of the handle—centered and about ¼” from the tip—to drill a hole for hanging. Indent this spot with a sharp nail and a hammer. Use the drill with a bit for drilling metal. Drill through the spoon handle at the marked spot. Take care to clear away metal filings since these can be sharp. Use a hammer to knock off and flatten any sharp edges or tear-out on the backside of the drilled hole. Repeat for the remaining spoons and fork. Drill a second hole in the fork just above the top of the tines in the center.
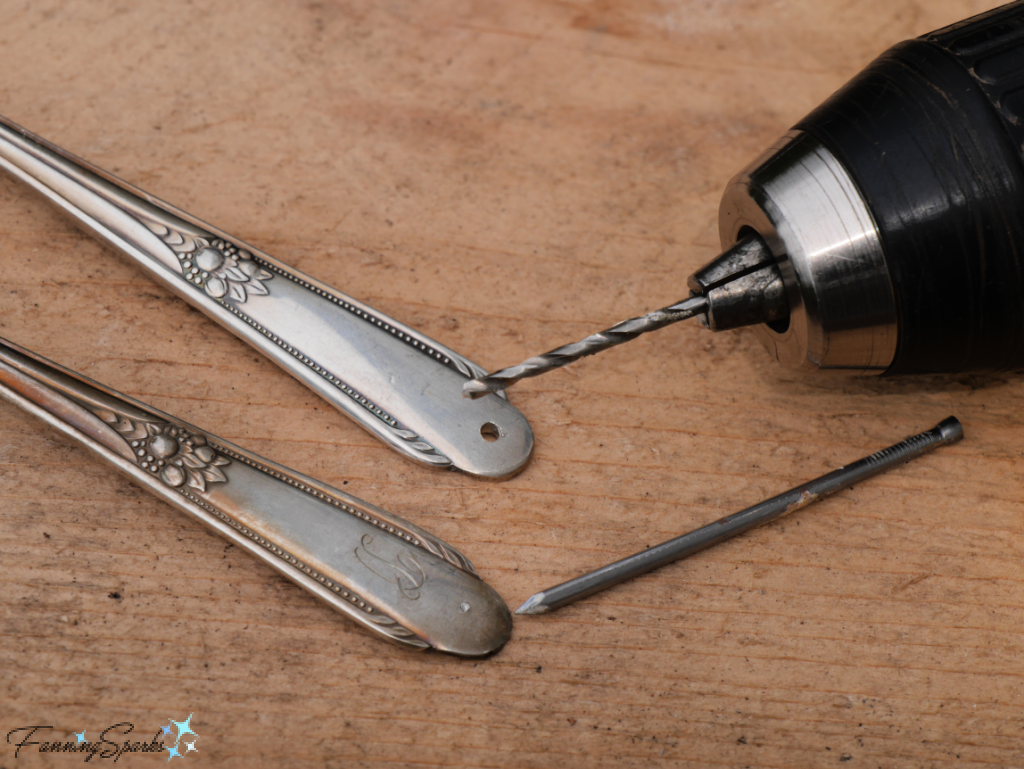 Step 5 – Drill Holes in Sugar Bowl Choose 4 spots on the bottom of the sugar bowl for drilling holes. It’s easiest to align these with the bowl’s feet. As above, indent the selected spots with a sharp nail and hammer. Drill the holes. Locate the center of the bottom, mark and drill. Use a hammer to gently smooth out the backside of the drilled holes.
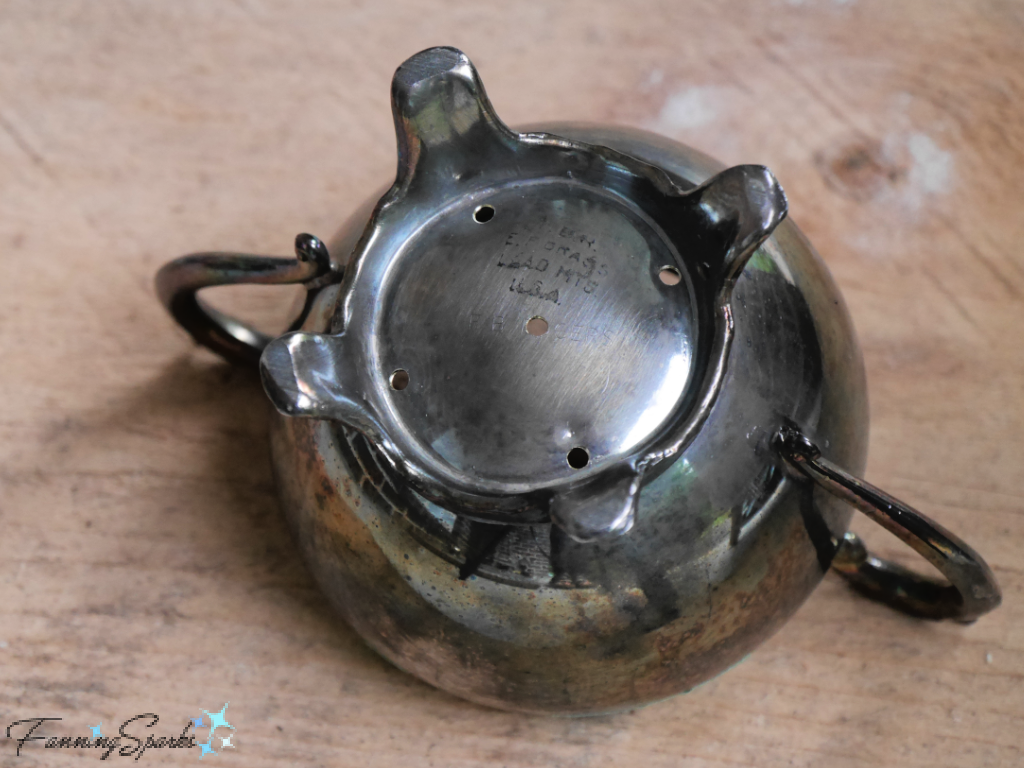 Next drill holes along the top rim of the sugar bowl. Choose 4 spots at an equal distance from the handles and the top edge. Due to the curved edge, drilling these can be tricky.
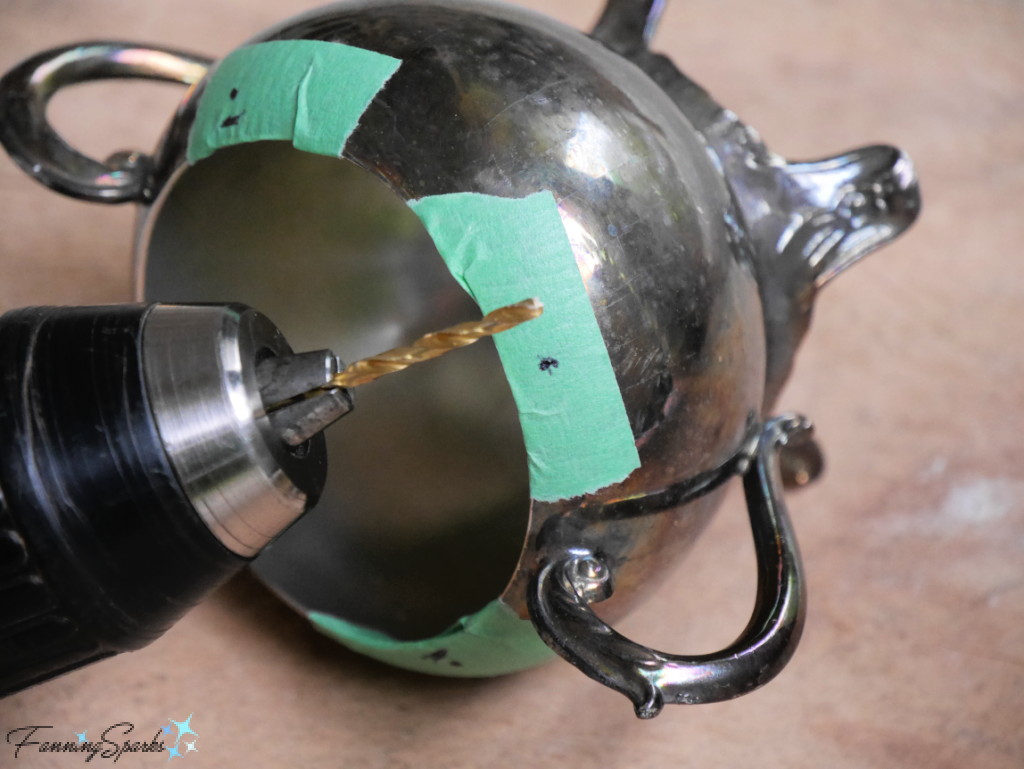 If using a creamer, drill a hole in the center of the creamer’s spout.
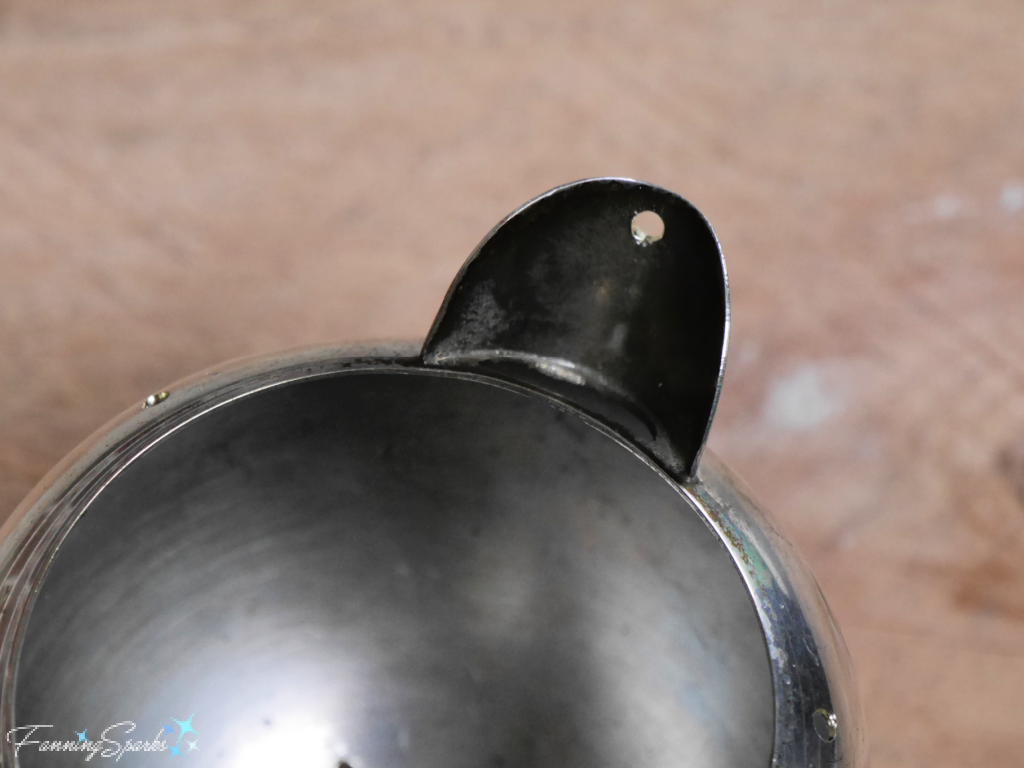 Step 6 – String Beads for Top Hanger Place a piece of fabric on your working surface to keep your beads from rolling away. Cut 2 pieces of beading wire each 16” long. Insert both pieces through the bottom of a swivel snap fitting. Fold wires in half. Slip a crimp bead onto the wire ends and slide it up to the swivel snap fitting. Use crimping pliers to squeeze the crimp bead and lock it into place.
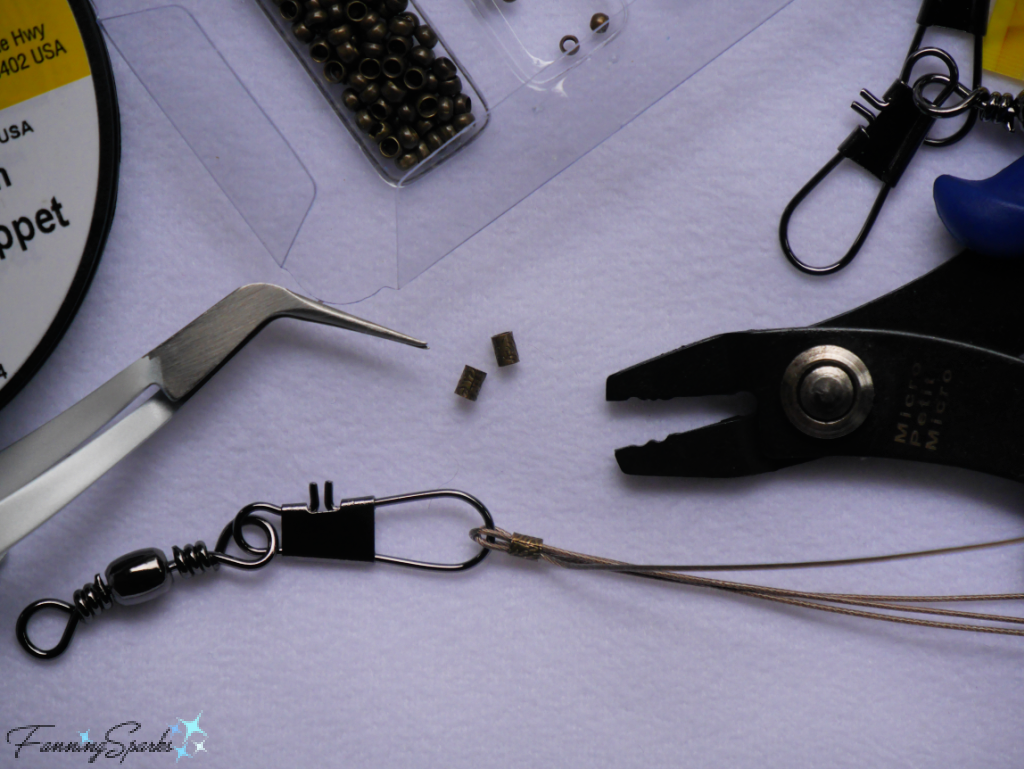 Take a few minutes to plan your bead design. The beaded section should be about 4.5” long. You may want to play around with different combinations of colors and shapes to create a pleasing pattern. Once happy with your design, string the beads onto one of the wires ending with 1 or 2 crimp beads. Then finish with a small crimp bead positioned at the end tip of the wire. Use the crimping pliers to squeeze the end crimp bead into place—temporarily keeping the beads in place while you work on the other sections.
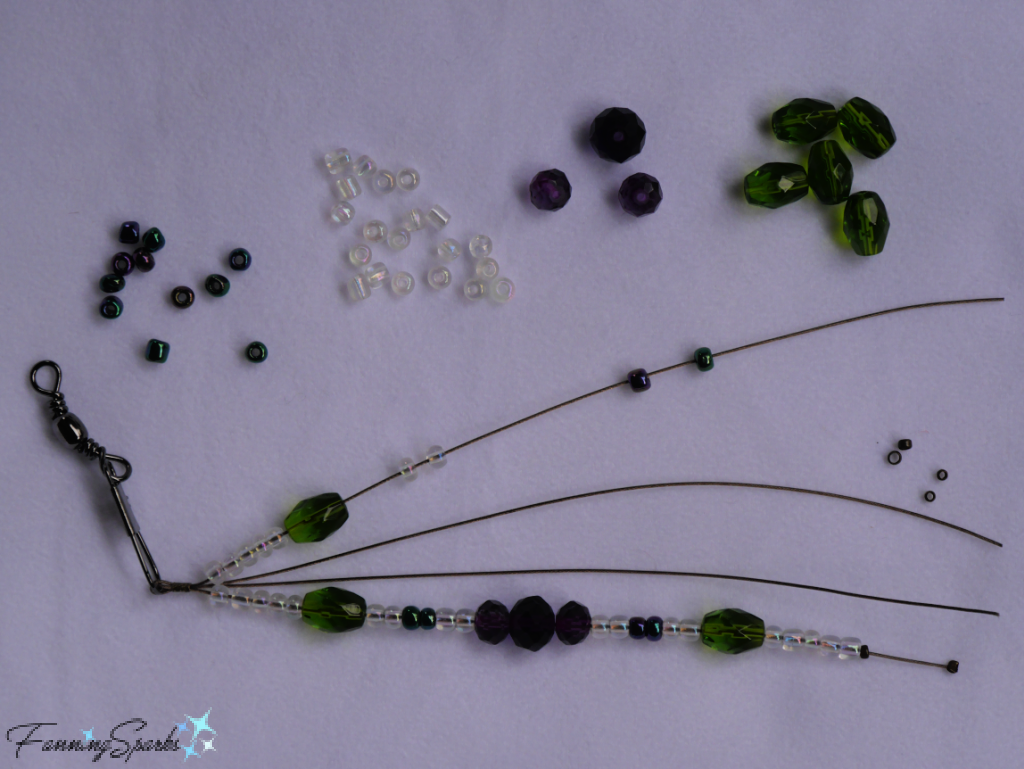 Step 7 – Attach Top Hanger Prepare to attach the beaded wires into the 4 drilled holes on the top edge of the sugar bowl. Snip off the crimped bead from the end tip of the wire. Thread the end of the wire through the drilled hole and back up through 3-5 beads. Ensure beads are snug against the swivel snap fitting at the top.
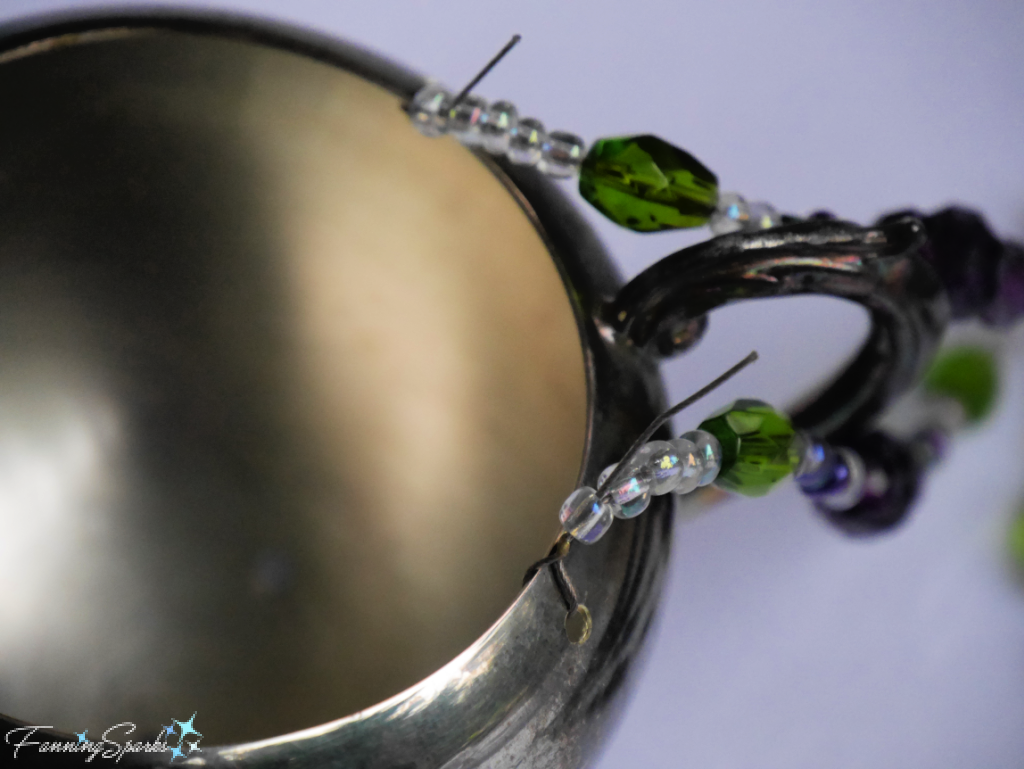 If using a lid on a sugar bowl, put the lid in place and adjust the wire loops to fit. Lock in place, by squeezing the remaining crimp bead(s) with the crimping pliers. Trim off the end of the wire with the cutting pliers. Repeat for the 3 remaining wires.
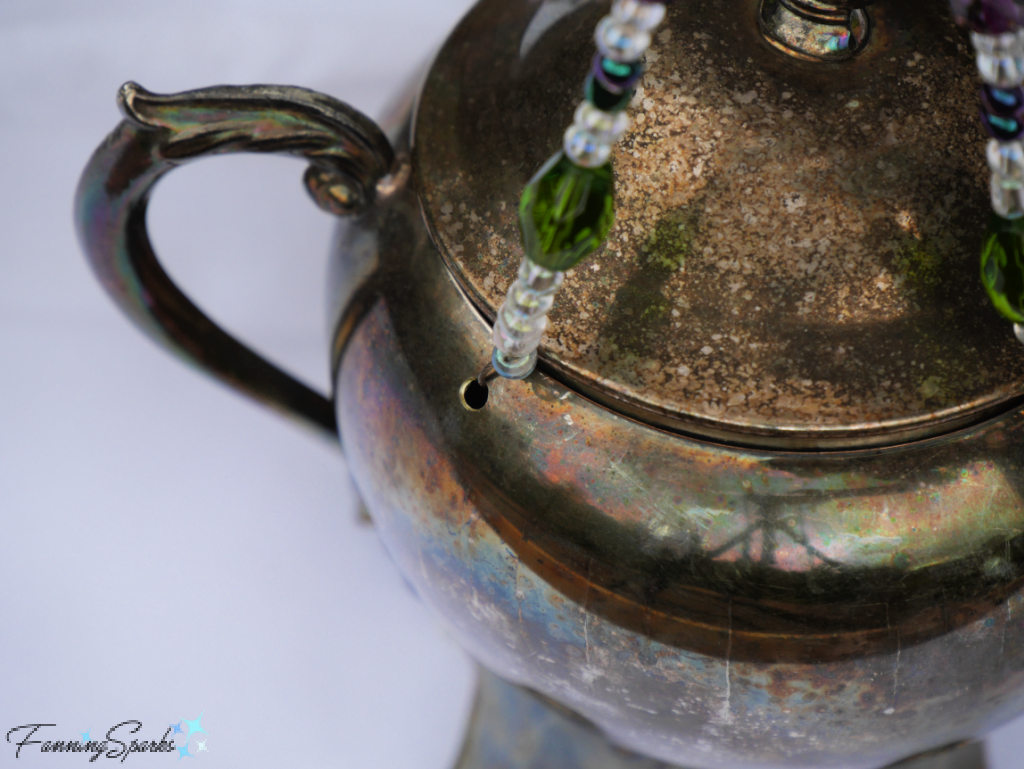 Step 8 – String Beads for Cutlery Hangers Cut a piece of beading wire 10” long. Squeeze a small crimp bead onto one end of the wire. Thread a plain bead onto the wire, slide up to the crimped bead, loop wire around and thread back through bead. Place the beaded end of the wire inside the sugar bowl and pull the wire down through the drilled hole. Repeat for the remaining 4 drilled holes.
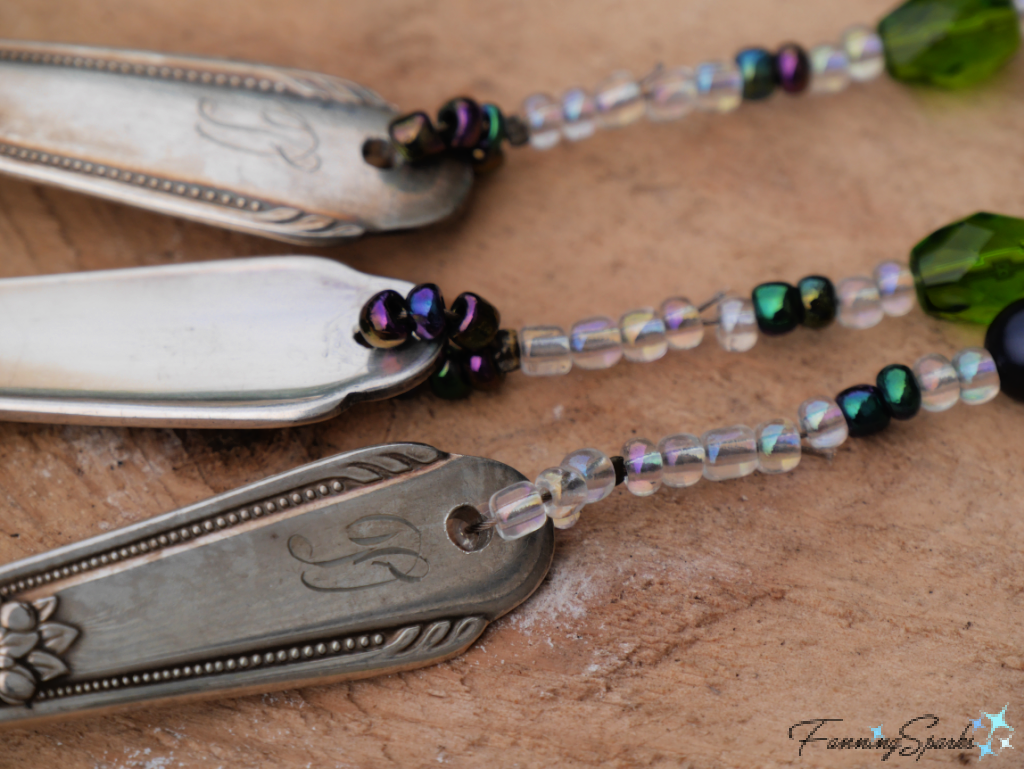
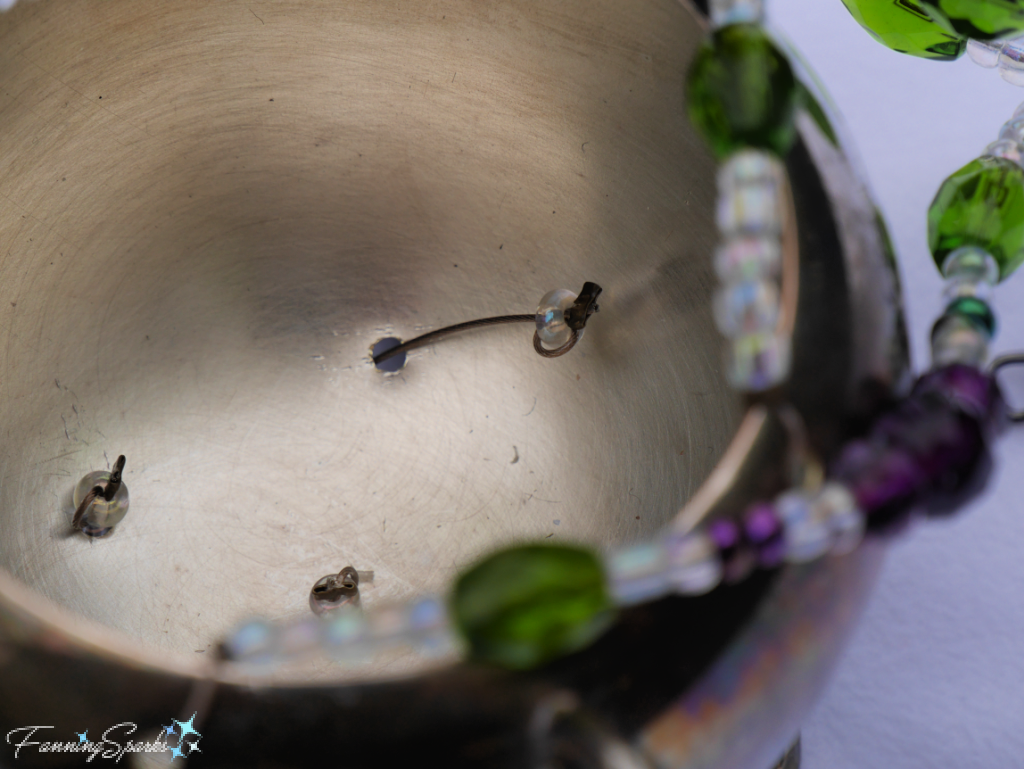 String the beads onto one of the beading wires in your desired pattern. The beaded section should be about 5” long. Choose 6 small plain beads to wrap around the spoon handle. Add 3 of the small plain beads and a crimp bead to the wire. Then squeeze another crimp bead on the very end of the wire to temporarily hold the beads in place. Repeat for remaining 4 wires.
 Step 9 – Attach Cutlery Prepare to attach the spoons and fork to the beaded wires. Start with one of the beaded wires and one spoon. Push all the beads up against the bottom of the sugar bowl. Snip off the crimped bead from the end tip of the wire. Thread the end of the wire through the drilled hole in the spoon handle, from front to back, add 3 small plain beads and pull the wire back up through the crimp bead and the last 3-5 beads above the crimp bead. Lock in place, by squeezing the crimp bead with the crimping pliers. Trim off the end of the wire with the cutting pliers. Repeat for the 4 remaining wires.
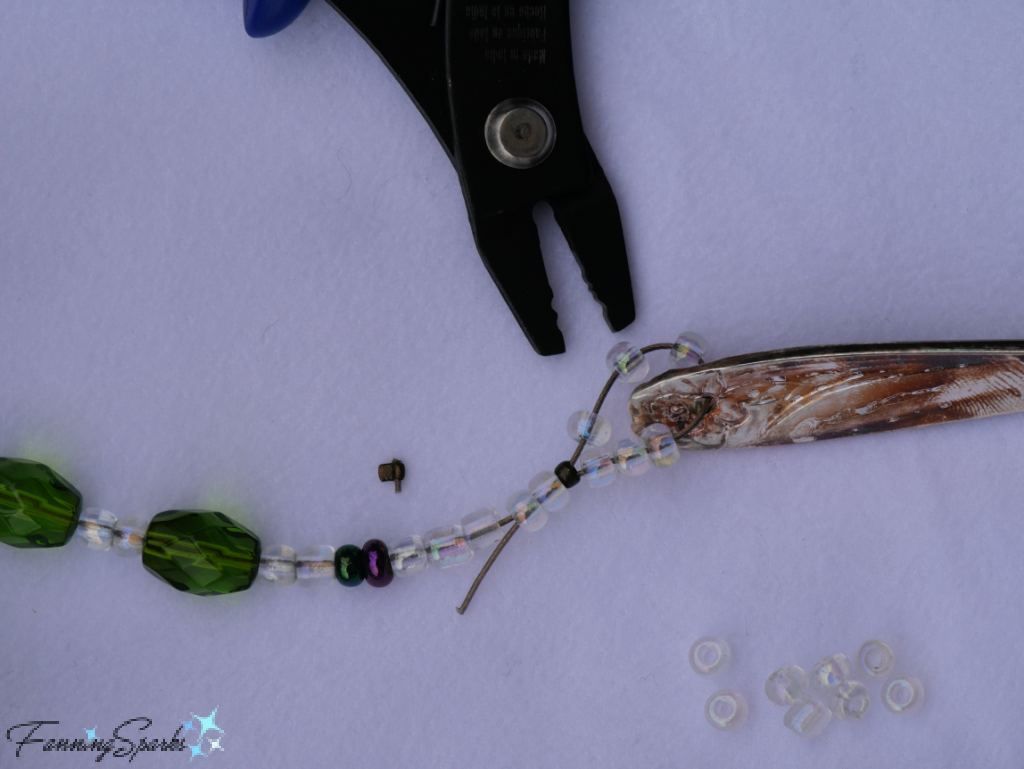
 Step 10 – Prepare Bottom Weight Hold the handle of the spoon with a set of flat-nose pliers. Then use your other hand to bend the spoon handle into an interesting shape. Work carefully to gradually bend the handle. Drill a hole in the handle of the spoon if not done previously. Drill hole at the tip of the spoon bowl.
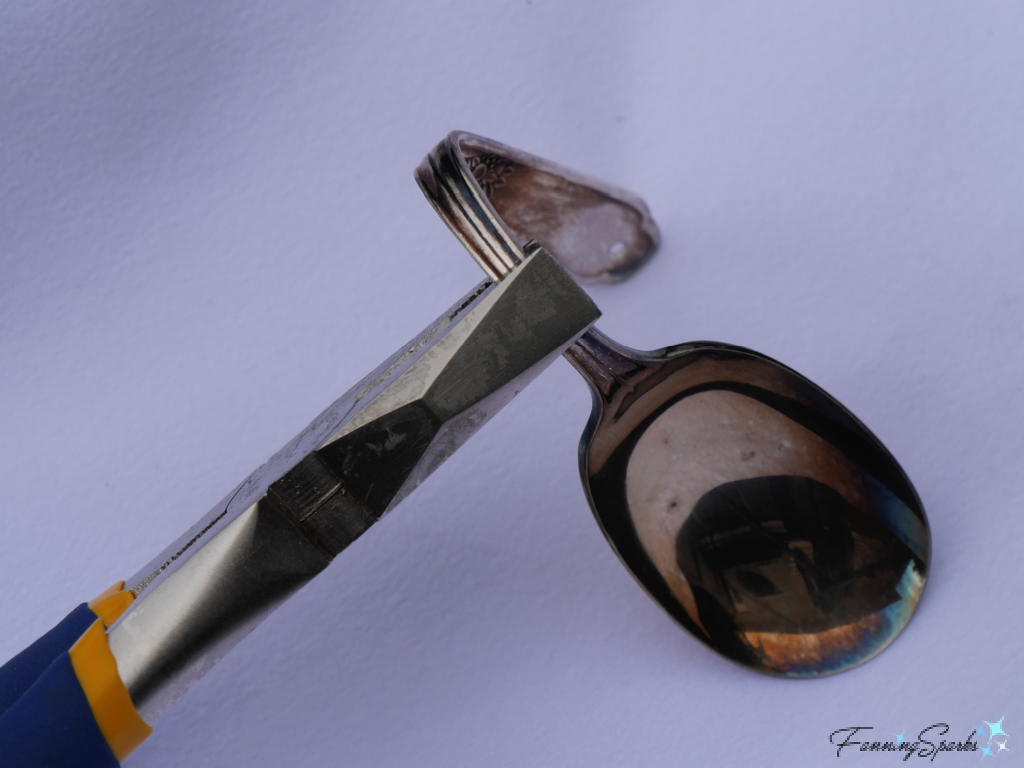 Cut an 8” piece of beading wire. String a small single bead onto the wire and center. Pull both ends of the wire through a teardrop bead. String 2-3 beads and a crimp bead onto the double wire. Then separate the 2 wires and prepare to attach to the tip of the spoon. Choose 7 small plain beads. Thread 4 small plain beads on one end of the wire. Thread the same end of the wire through the drilled hole in the spoon’s bowl, from front to back, add 3 more small plain beads and pull the wire back up through the crimp bead and the last 2-3 beads above the crimp bead. Pull the second end through the beads in a similar way. Lock in place, by squeezing the crimp bead with the crimping pliers. Trim off the ends of the wire with the cutting pliers.
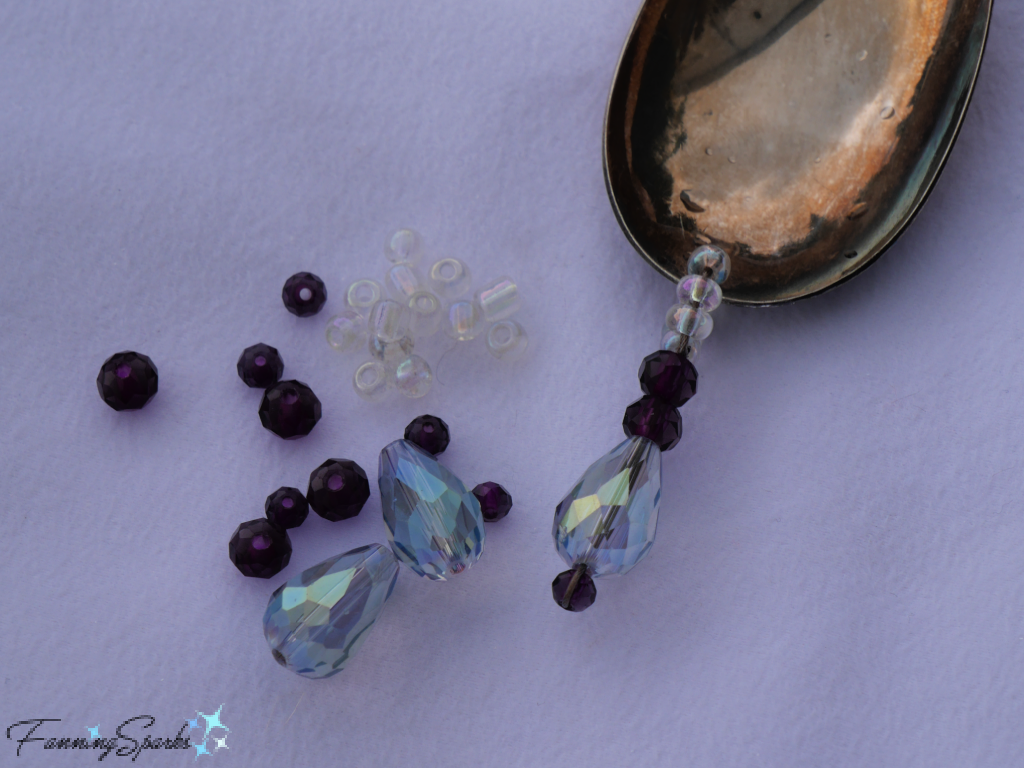 Step 11 – Attach Bottom Weight Prepare to attach the bottom weight to the fork. Drill a hole in the fork just above the top of the tines, if not done previously.
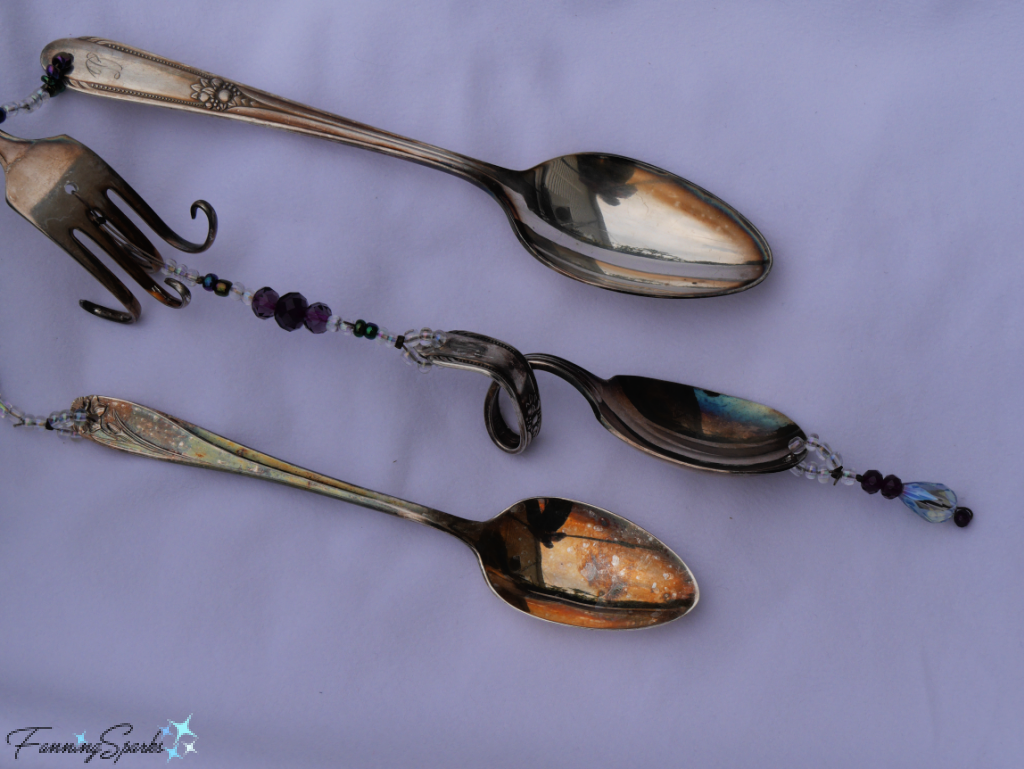 Step 12 – Add Beads to Creamer Spout If using a creamer, prepare to string beads for the creamer’s spout. Cut 3 pieces of beading wire, approximately 6” long. Begin each wire with a teardrop bead using the same technique as described in Step 10 Prepare Bottom Weight. String beads onto the beading wire in your desired pattern. Hold the beaded sections in place on the spout to judge the final length. The beaded sections shown below are 3.5”, 3” and 2.5”. The objective is to create a graceful arch simulating streams of water pouring from the spout. When satisfied with the beaded sections, prepare to attach them to the creamer’s spout.
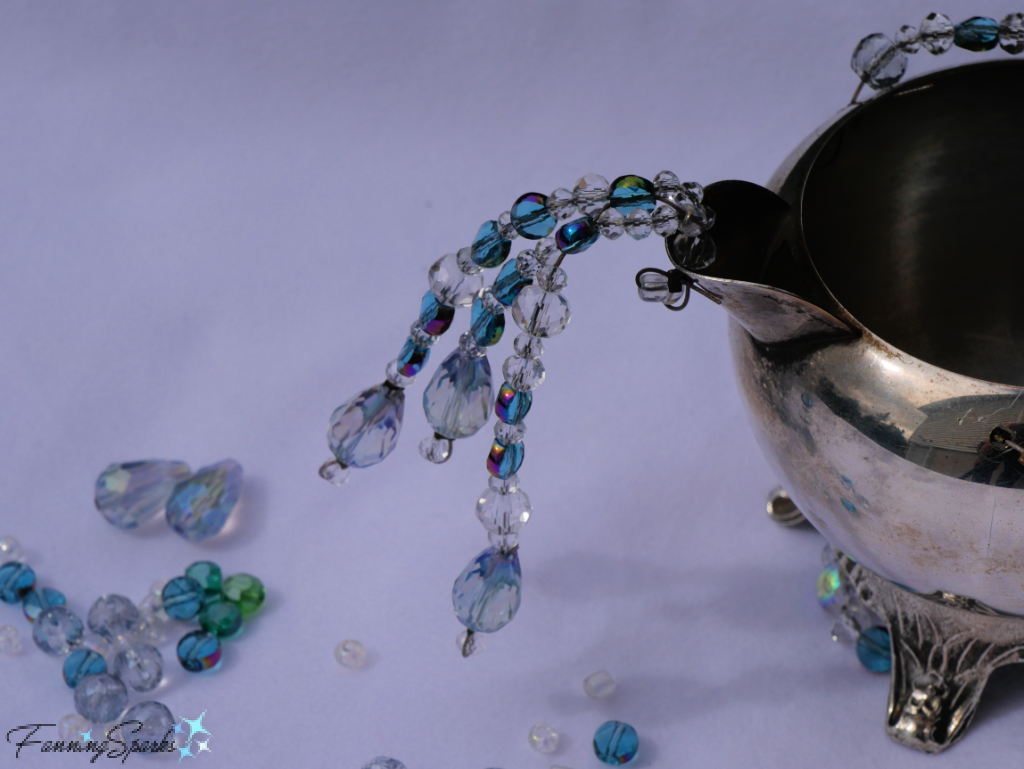 Step 13 – Hang and Enjoy! Get ready to enjoy the sparkling lights and sweet sounds of your new Old Silver Wind Chimes!
 Special thanks to Marian, my sister, for crafting along with me on this project. She gets full credit for the beautiful creamer wind chimes shown in this post.

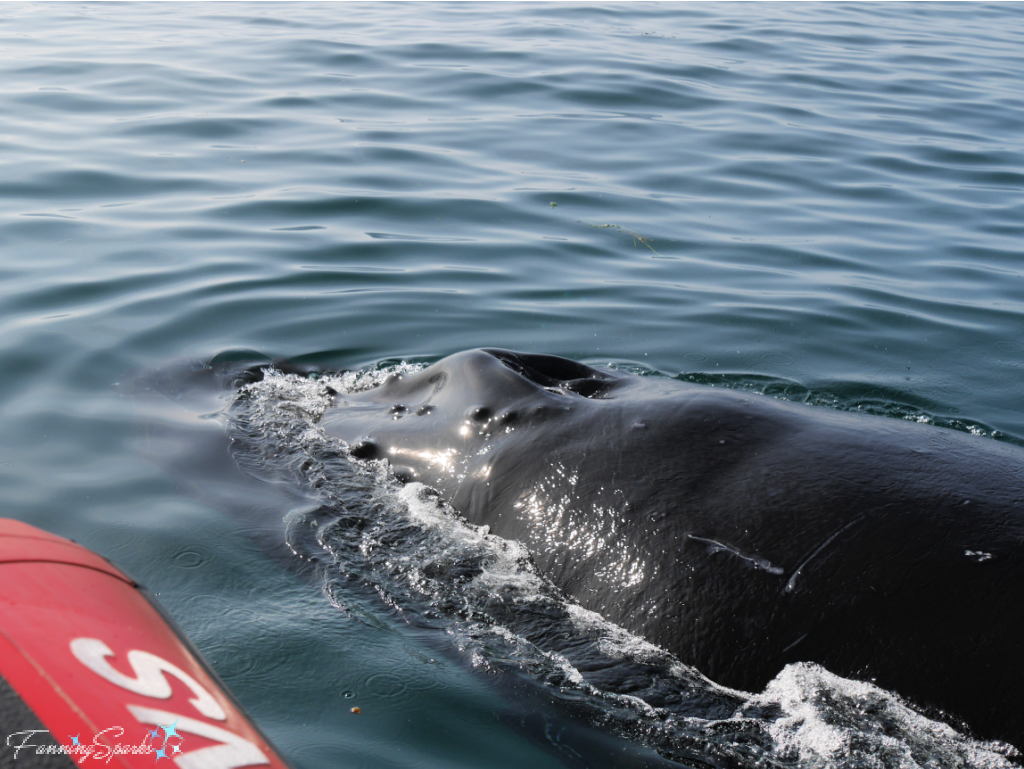
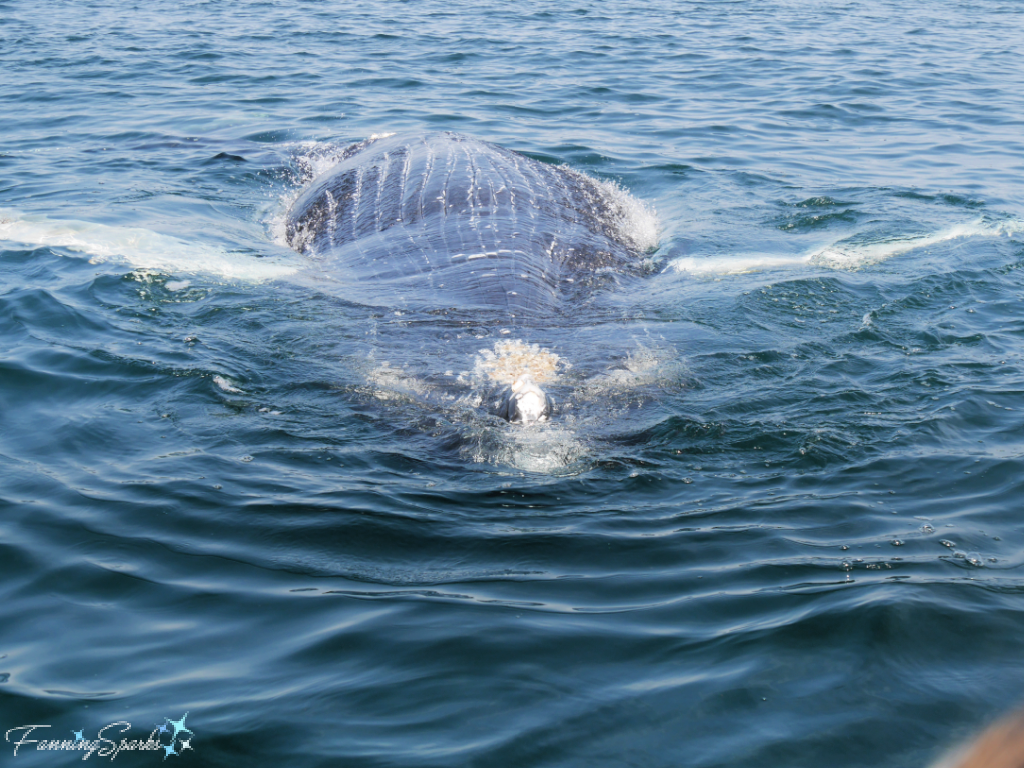
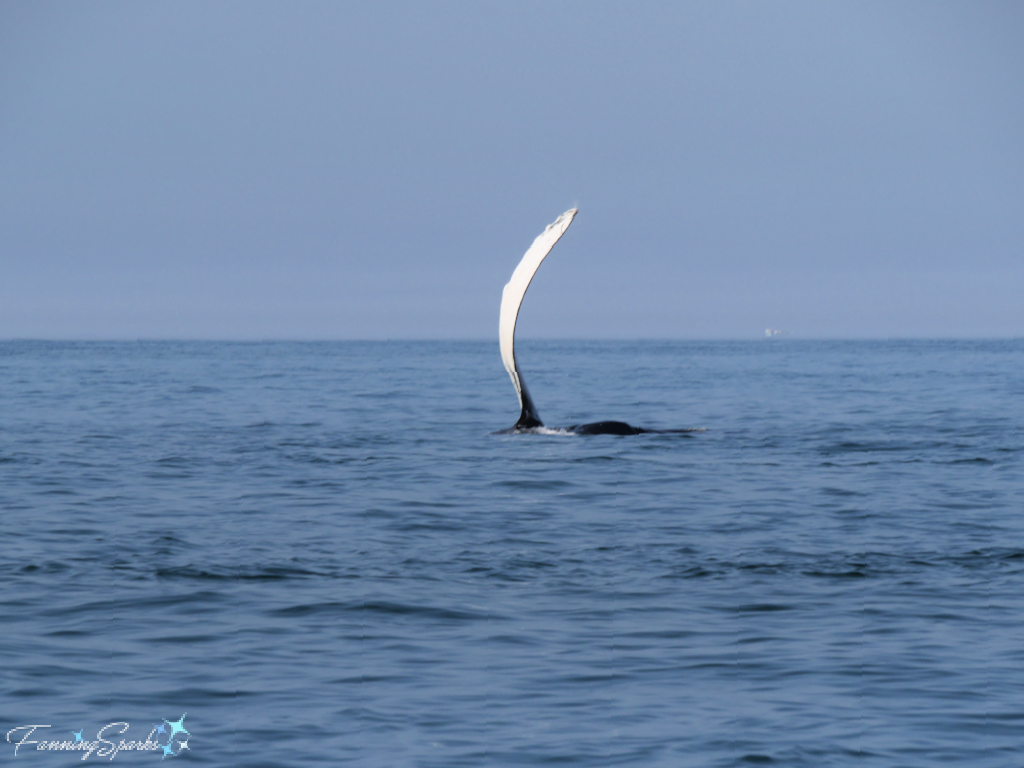
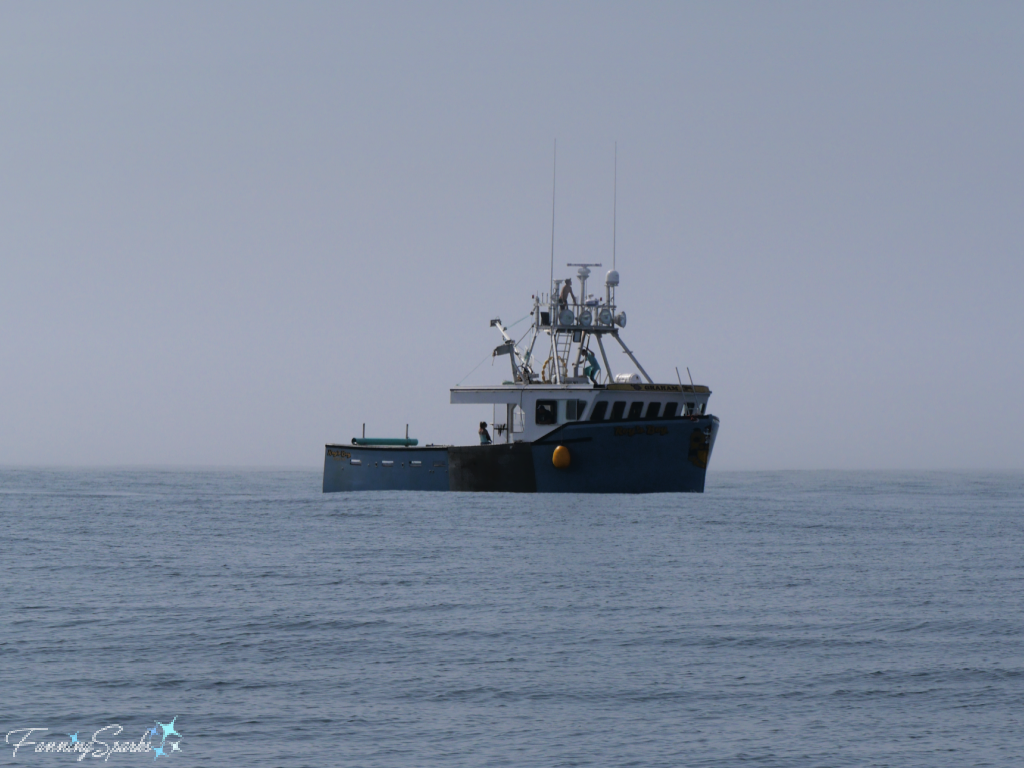 And then they came! A humpback whale surfaced off in the distance!
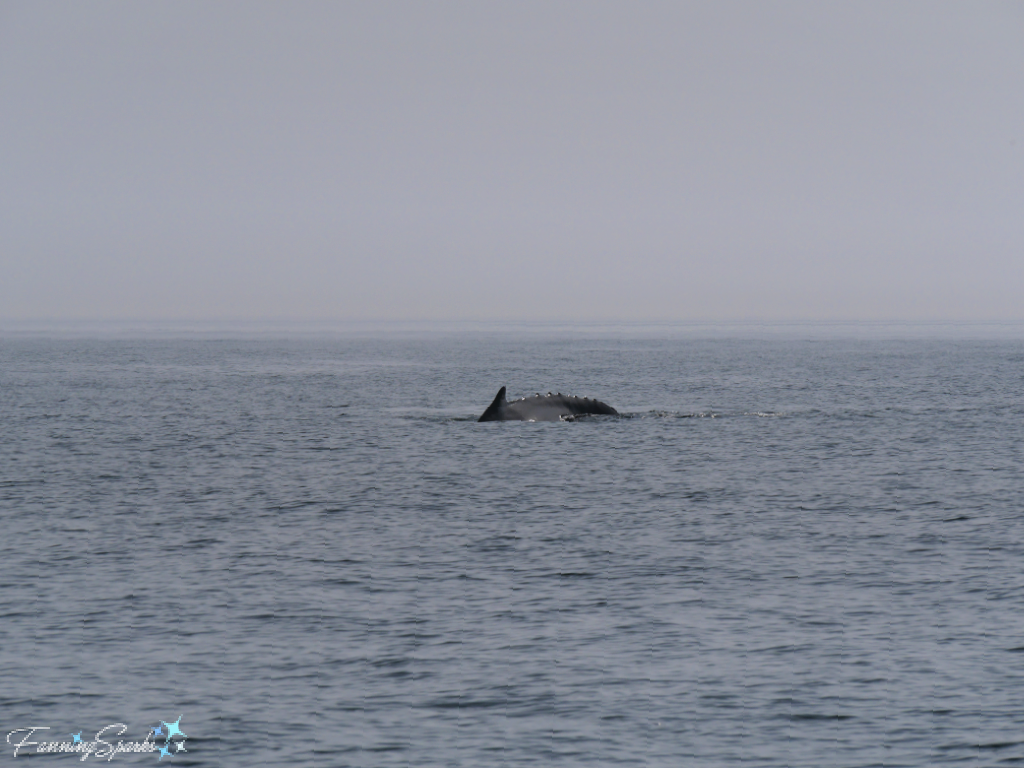

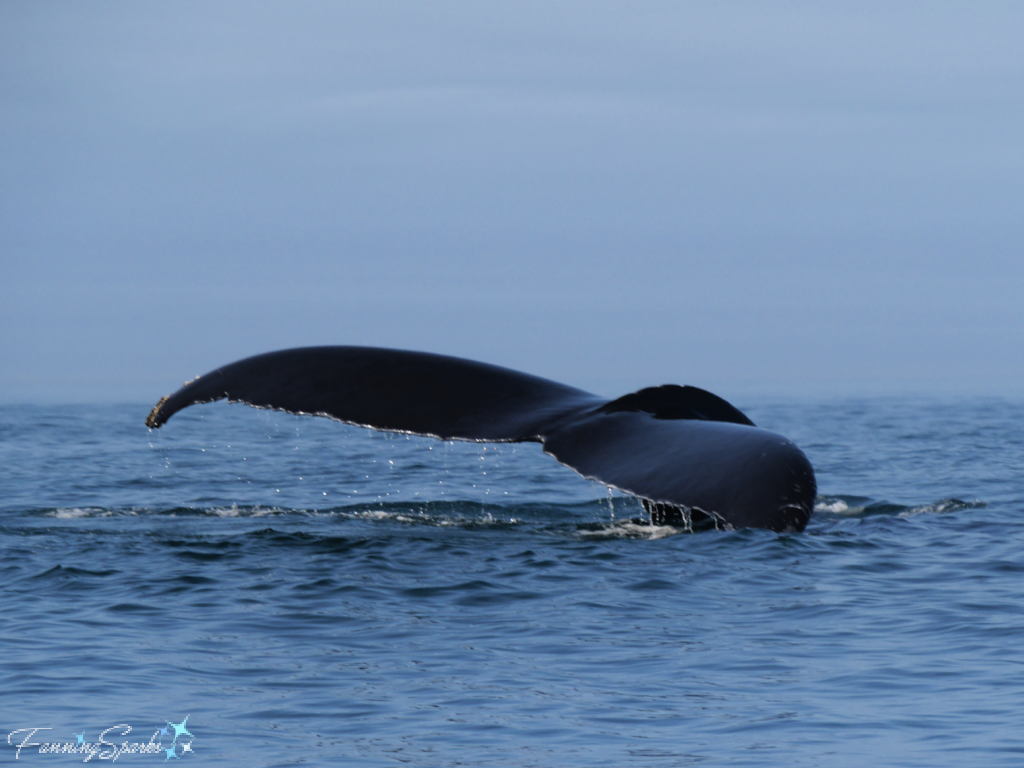
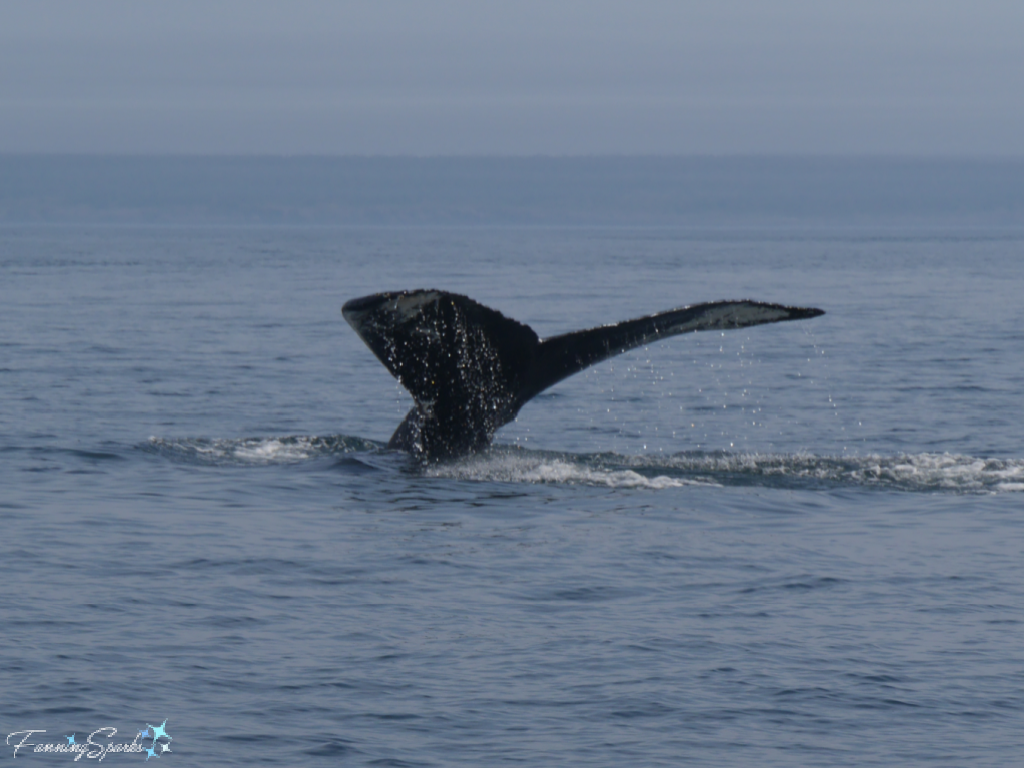

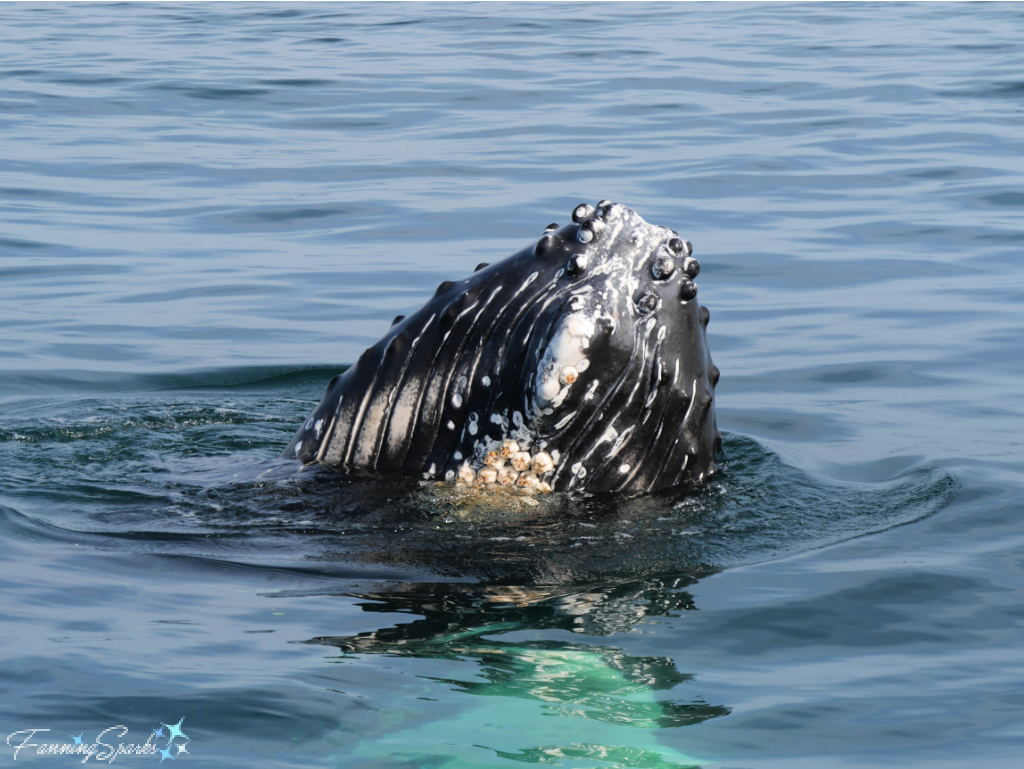

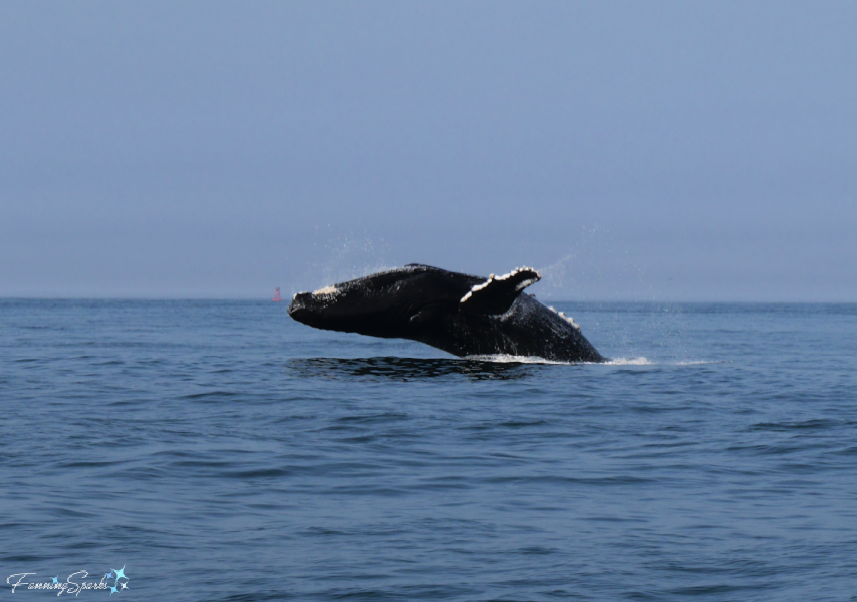
 We also witnessed lots of flippering or flipper slapping. NOAA says “Humpback whales are the most famous flipper slapper, as they possess the longest flippers of all cetaceans (around 1/3 of their body size). … A cetacean at the surface rolls onto its side, raises a flipper out of the water, and then hits the surface with it. The whale may do it once or several times in a row.” Check out this flipper action!
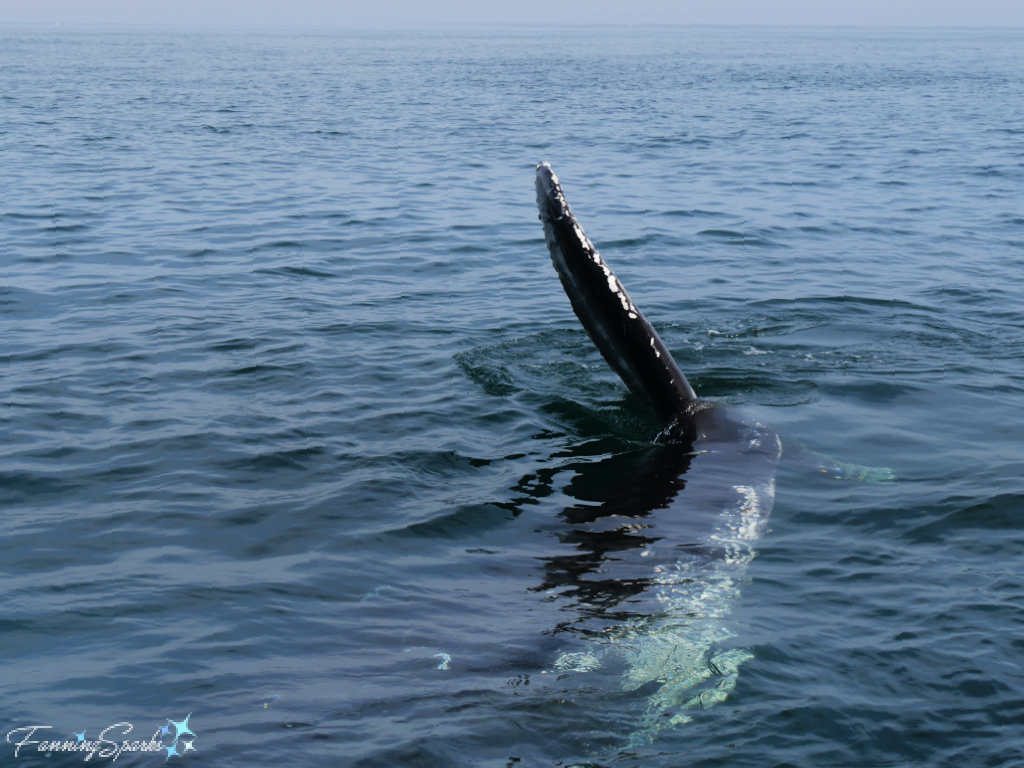


 Wikipedia puts it this way “the tides that flow through the channel are very powerful. In one 12-hour tidal cycle, about 100 billion tonnes of water flows in and out of the bay, which is twice as much as the combined total flow of all the rivers of the world over the same period. They are as powerful as 8,000 train engines or 25 million horses.” Imagine—25 million horses!


 Later in the day, we enjoyed with a nice glass of white wine…
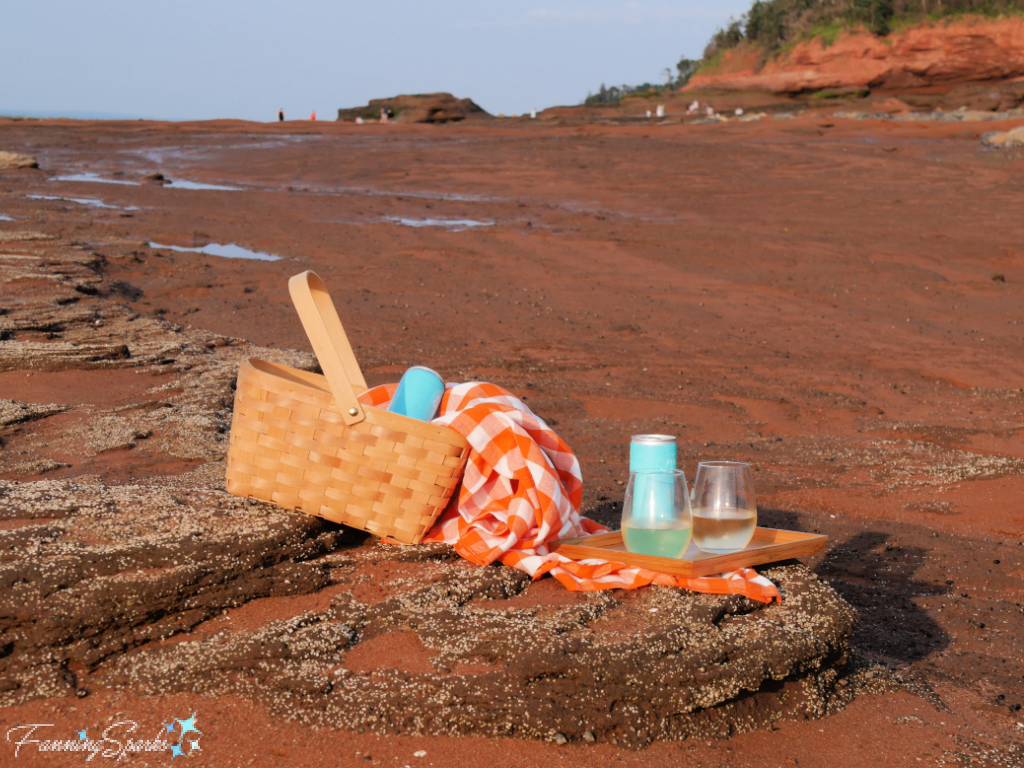 …followed by cheese, crackers and fresh fruit.
 It was a simple meal in an extraordinary setting!
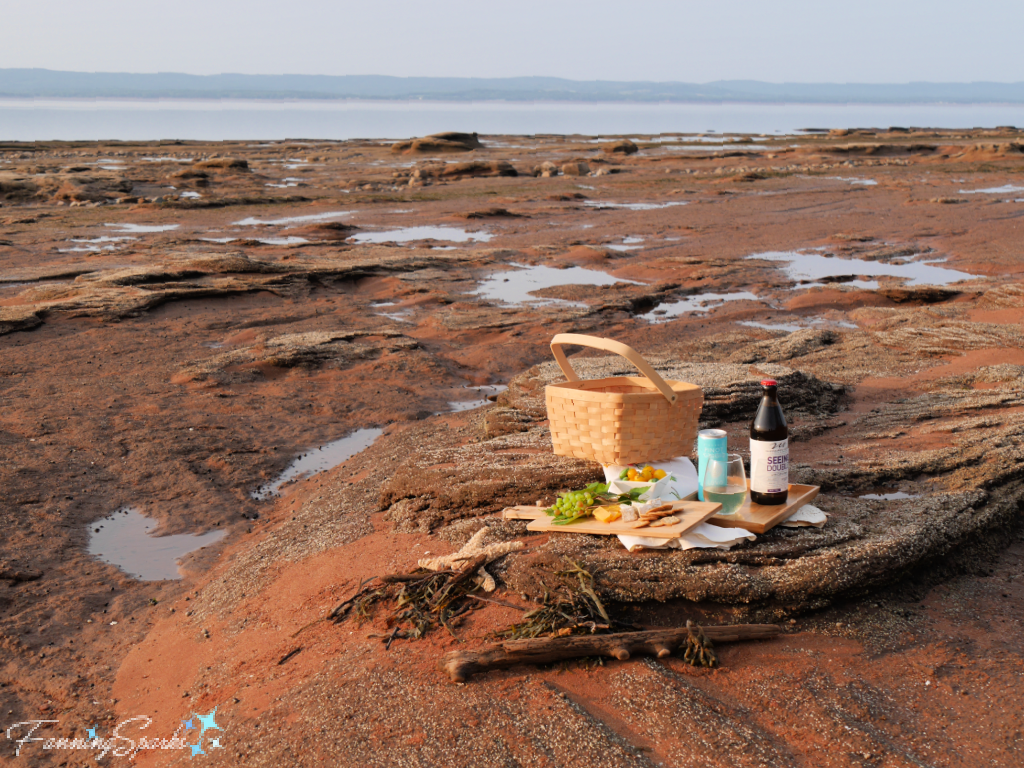


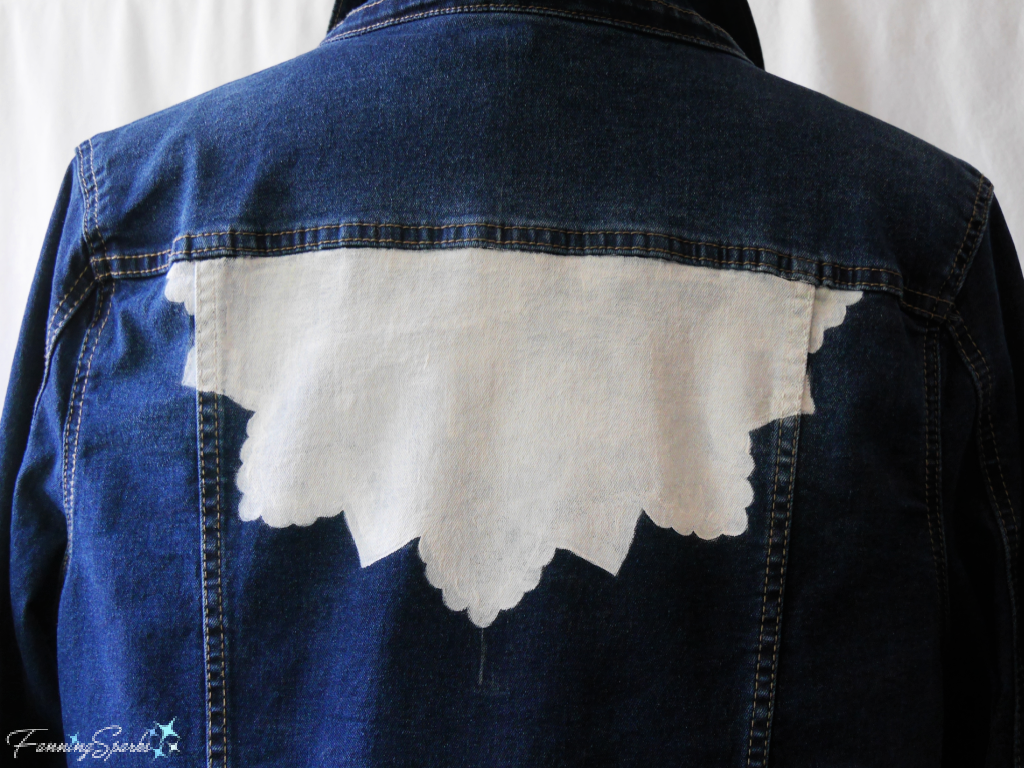
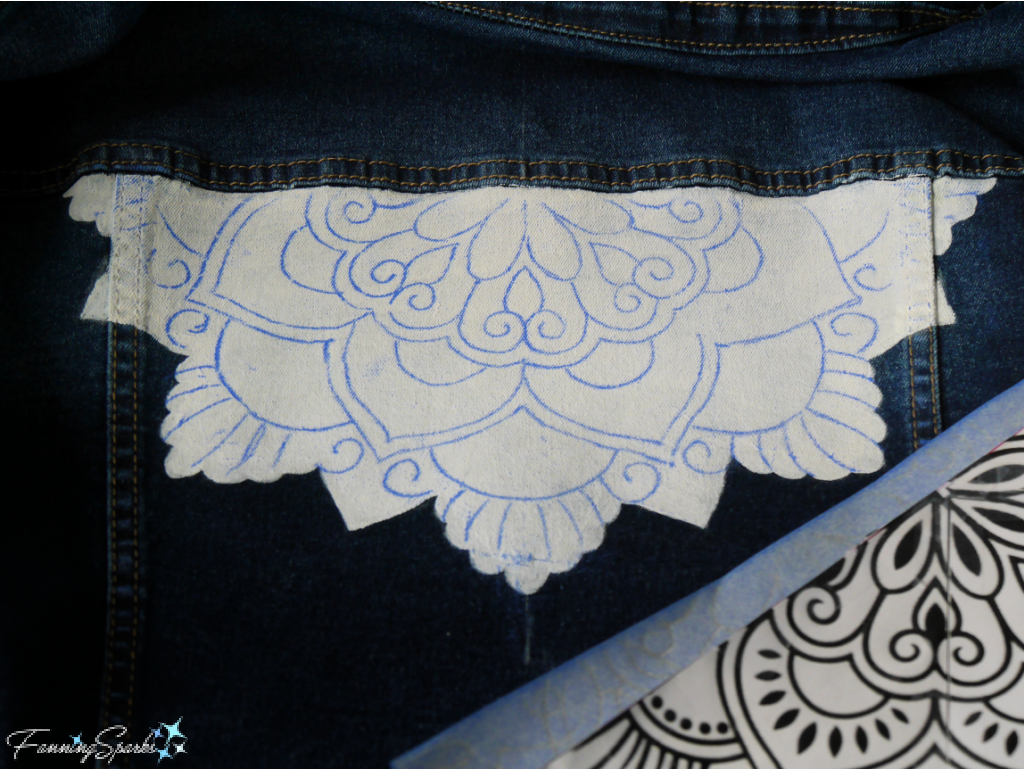
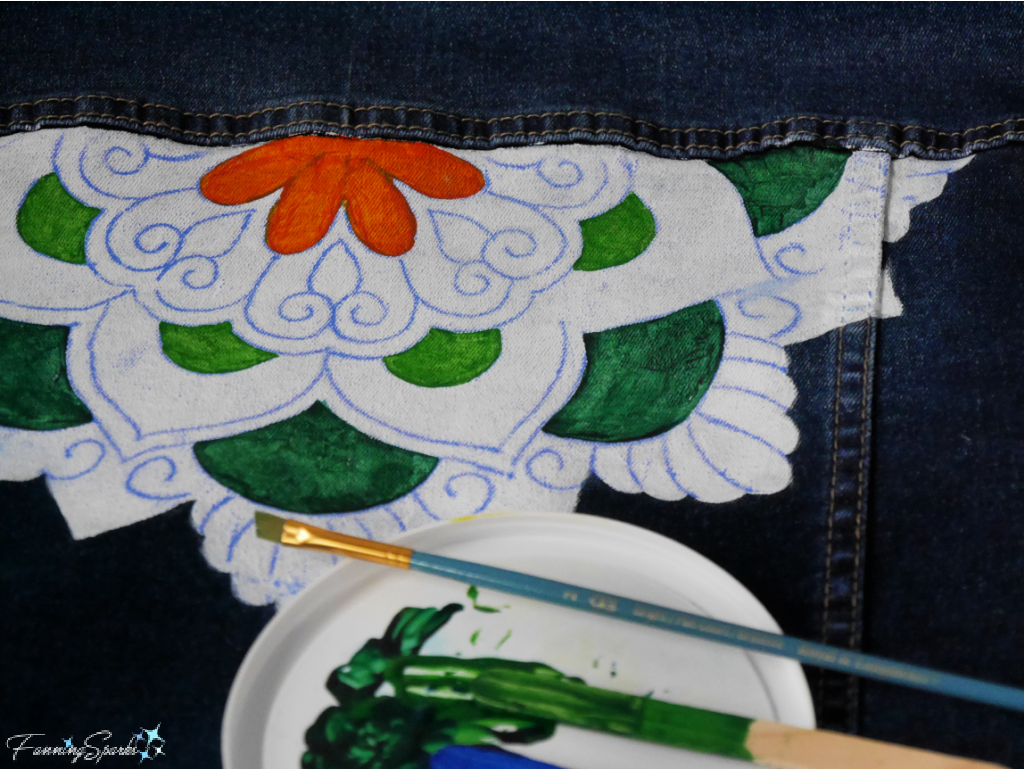
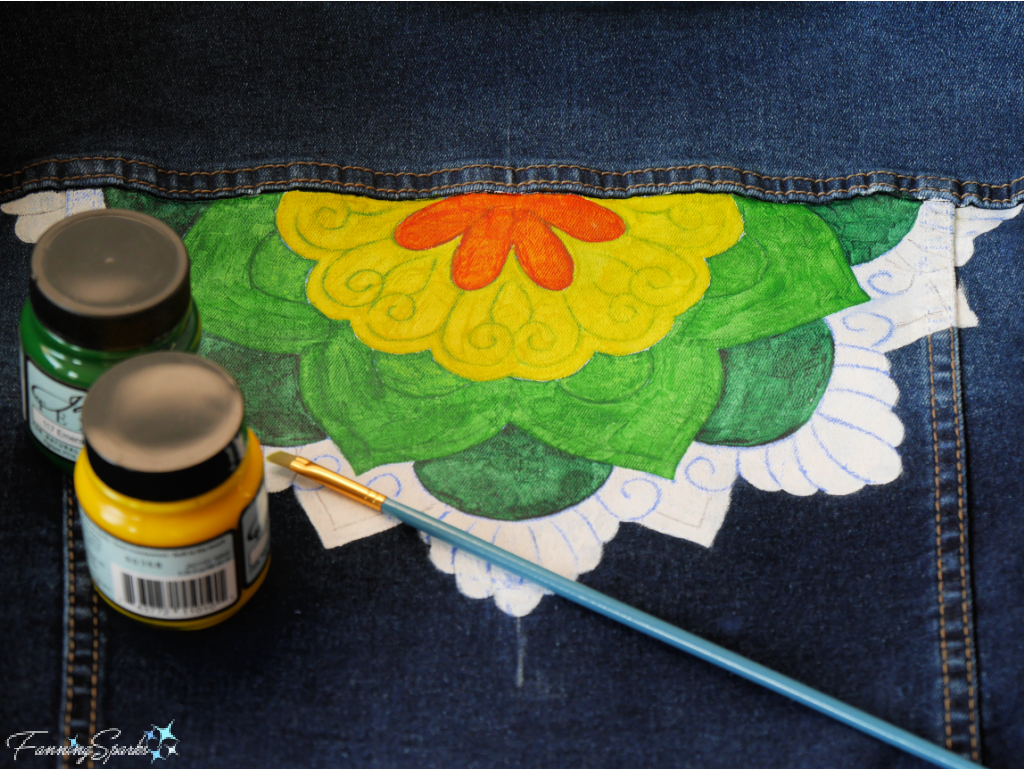
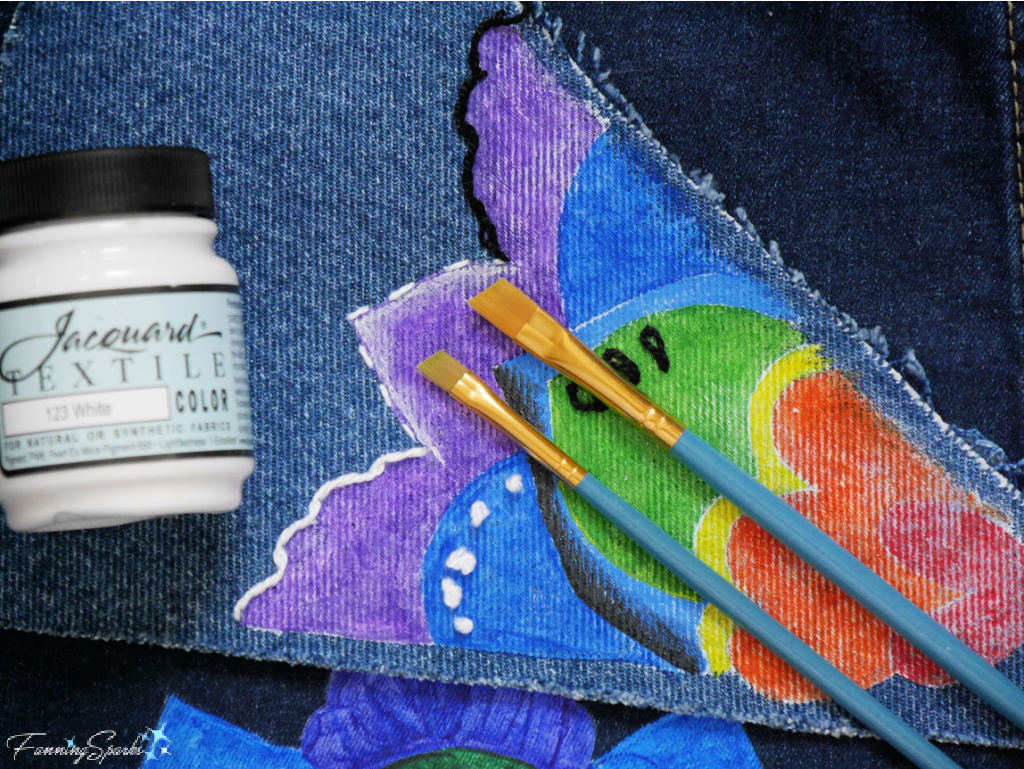
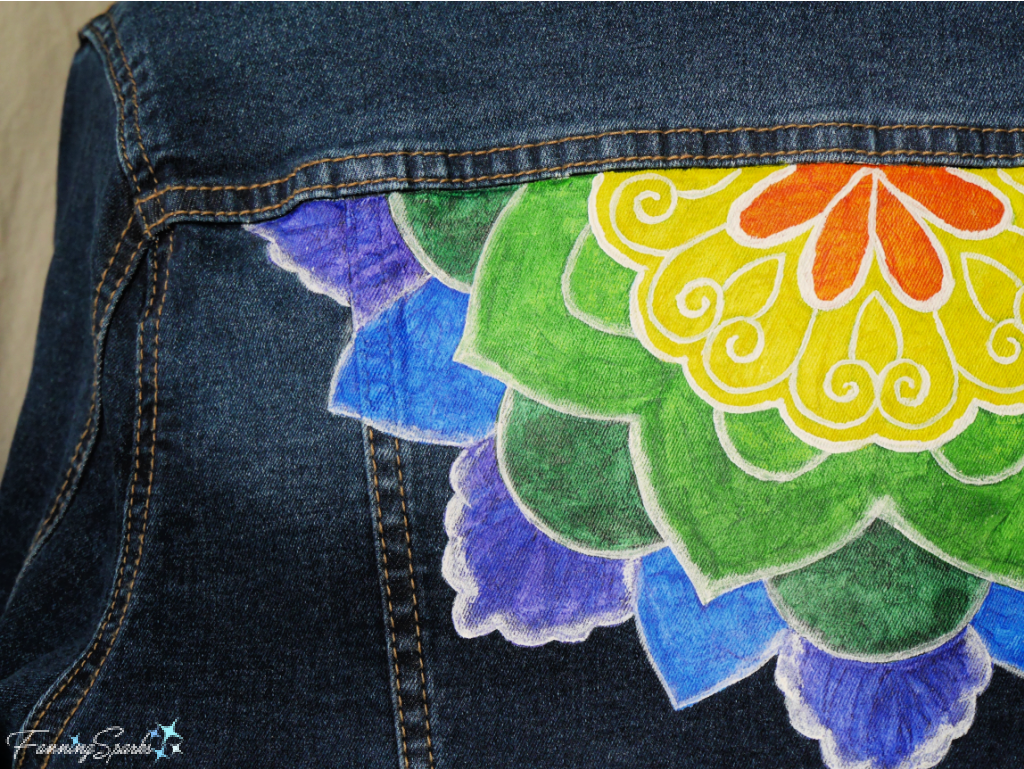
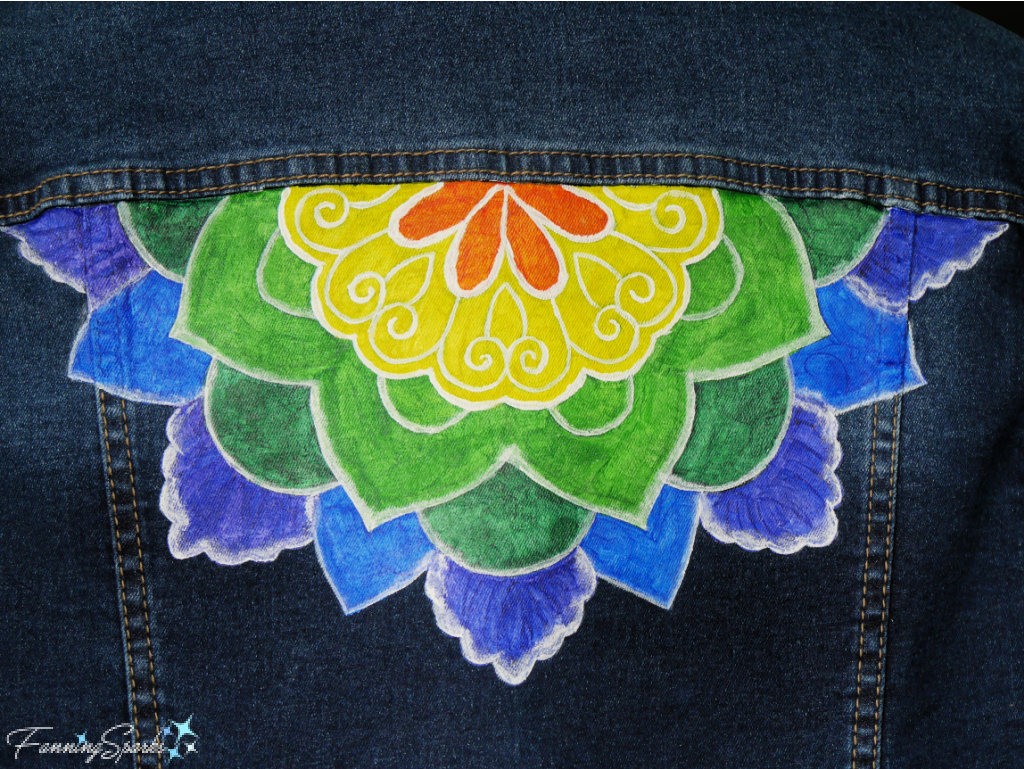
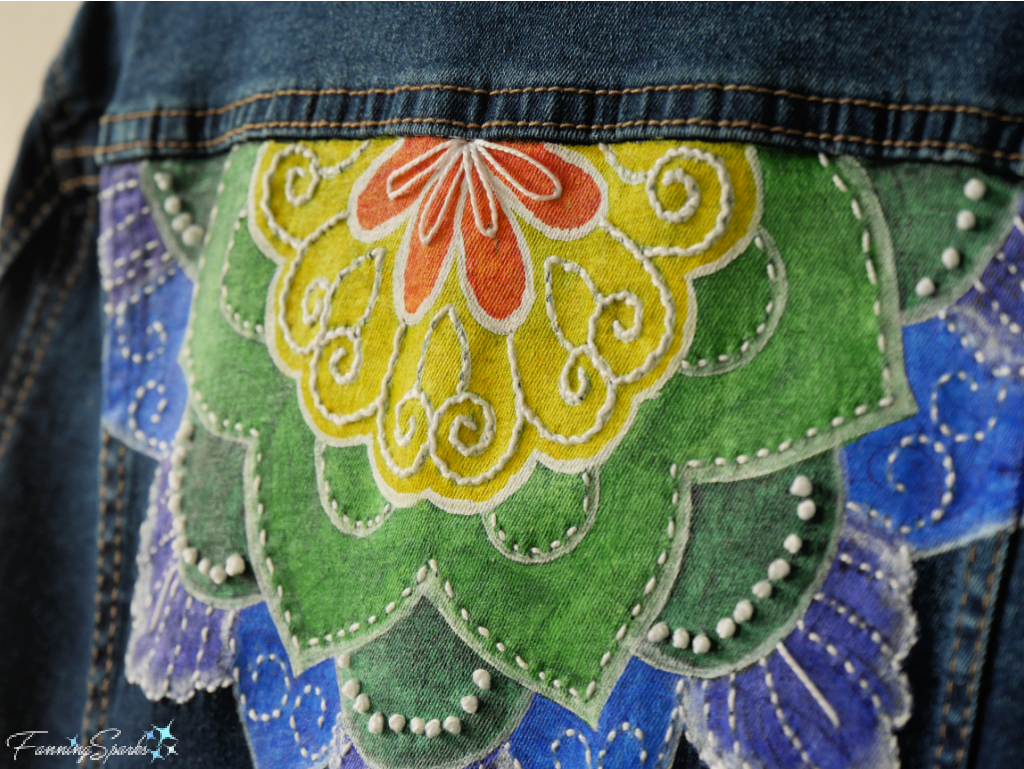

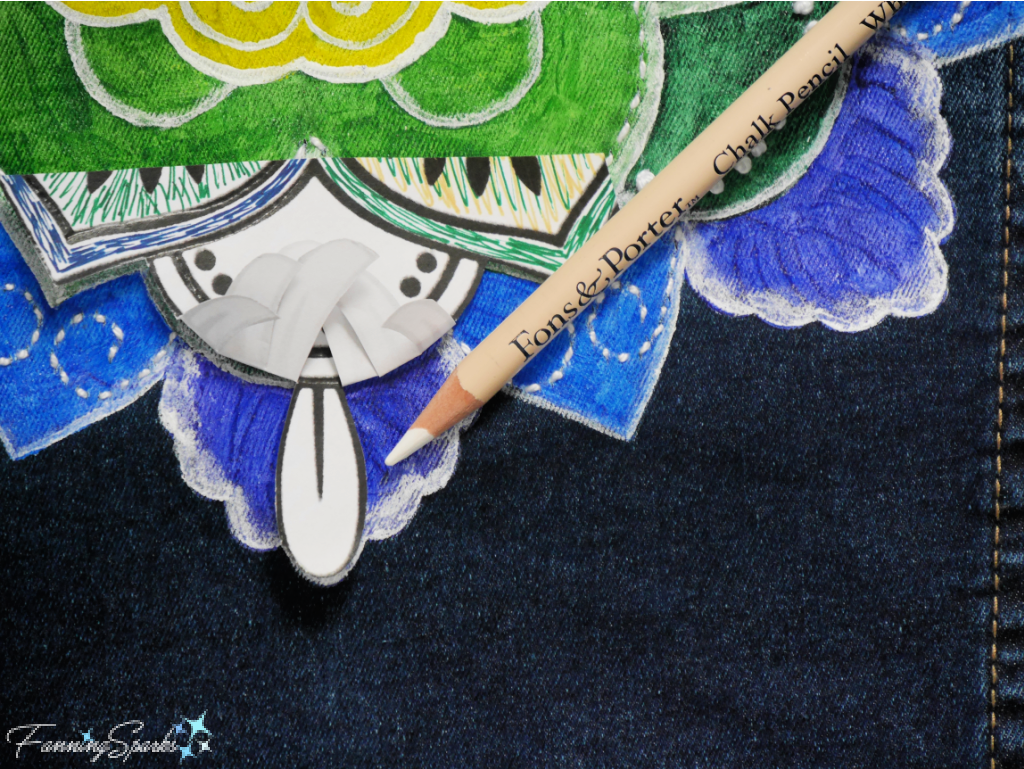
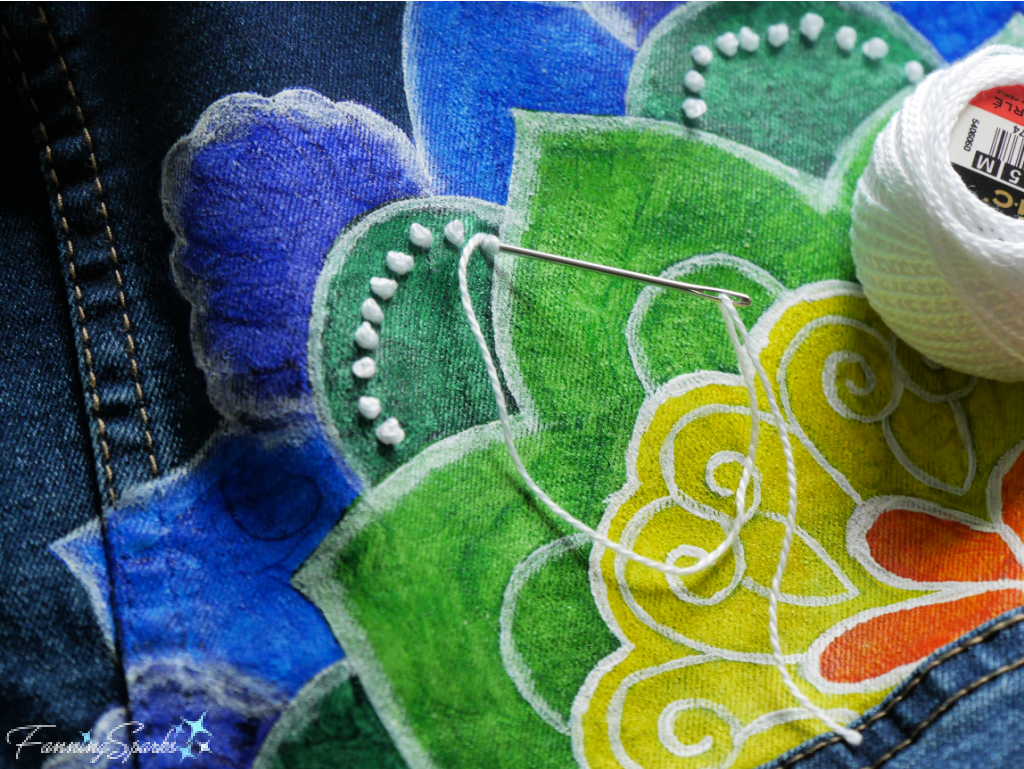
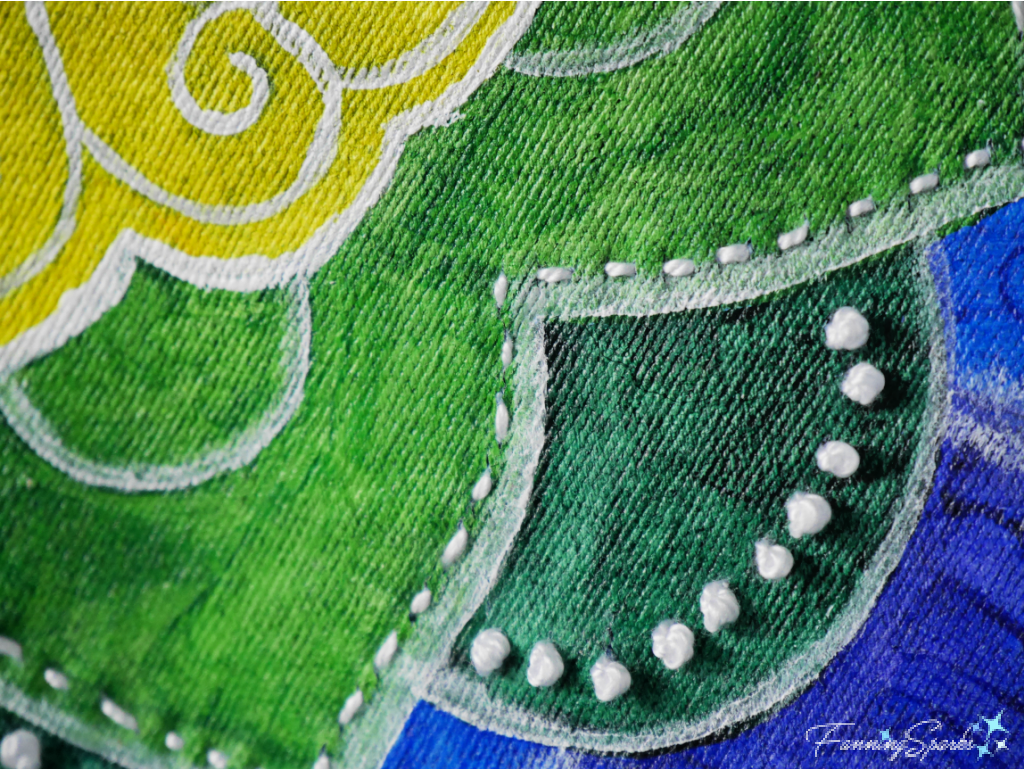

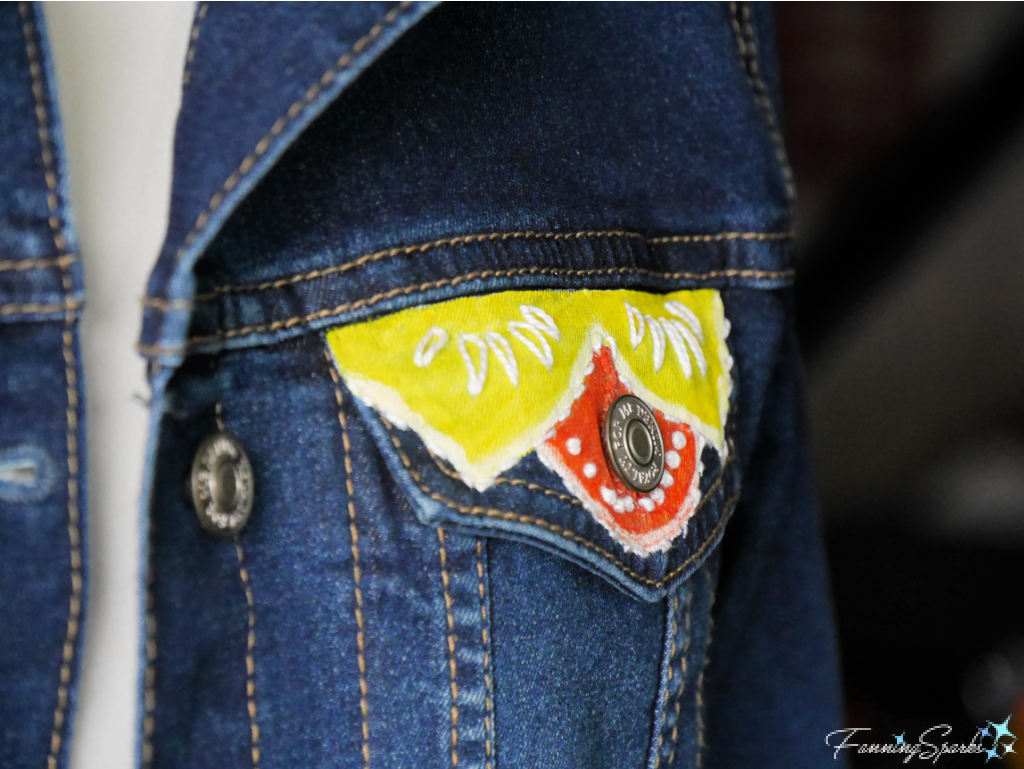
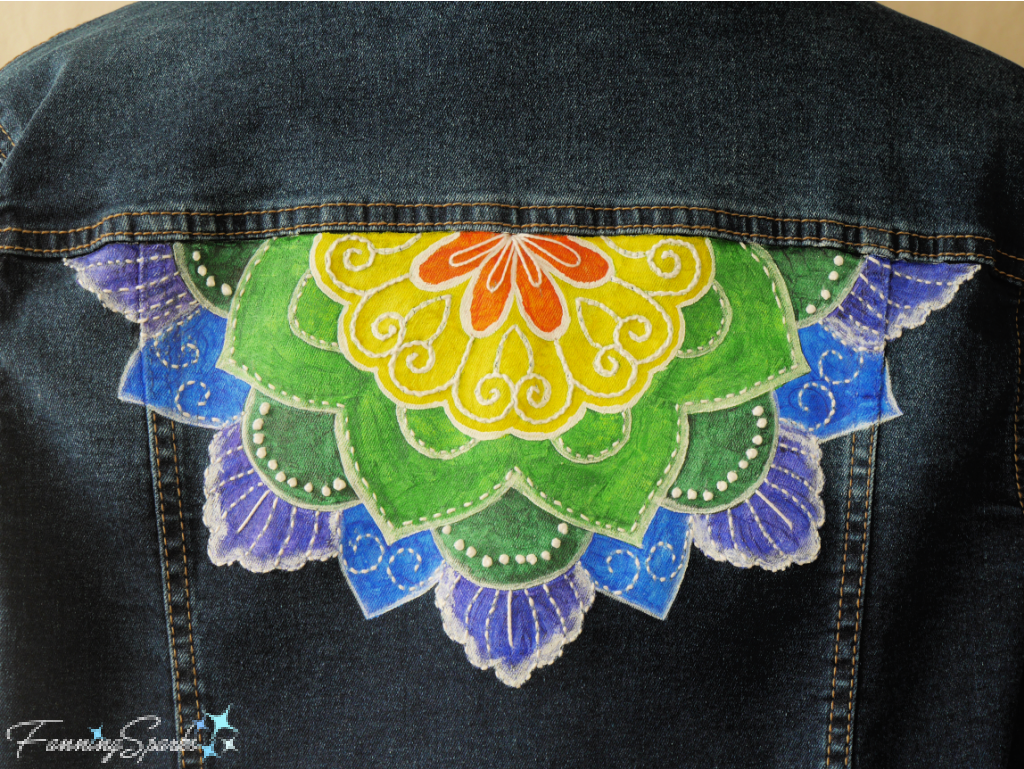
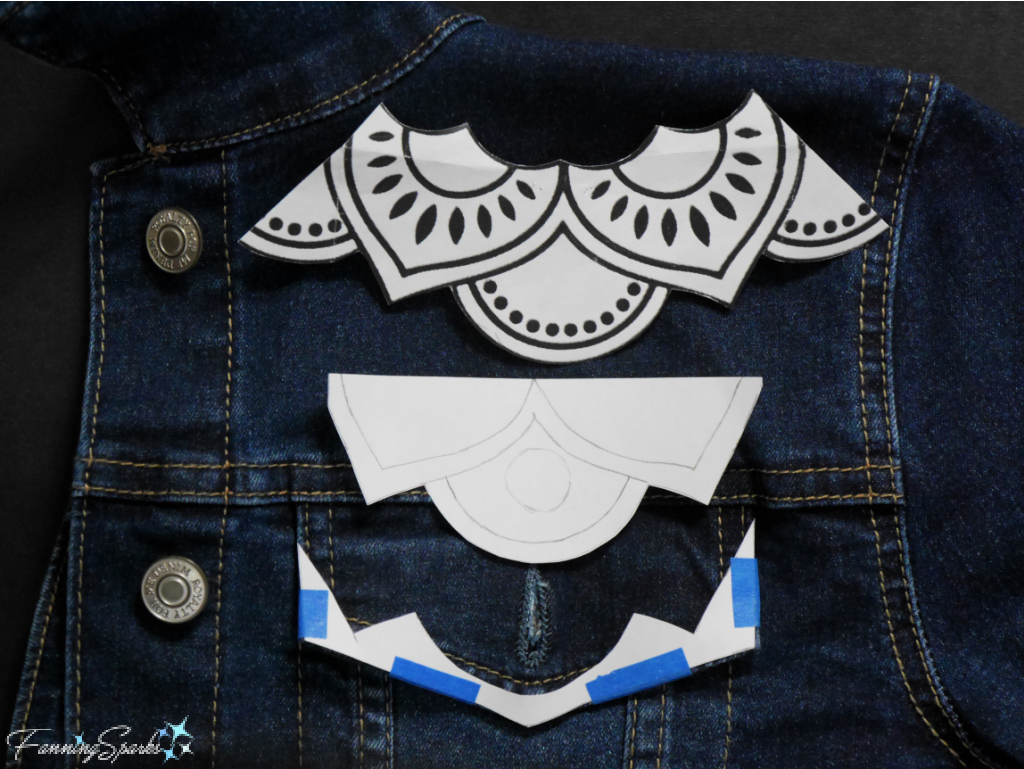 Then painted and embroidered them in the same way as the back.

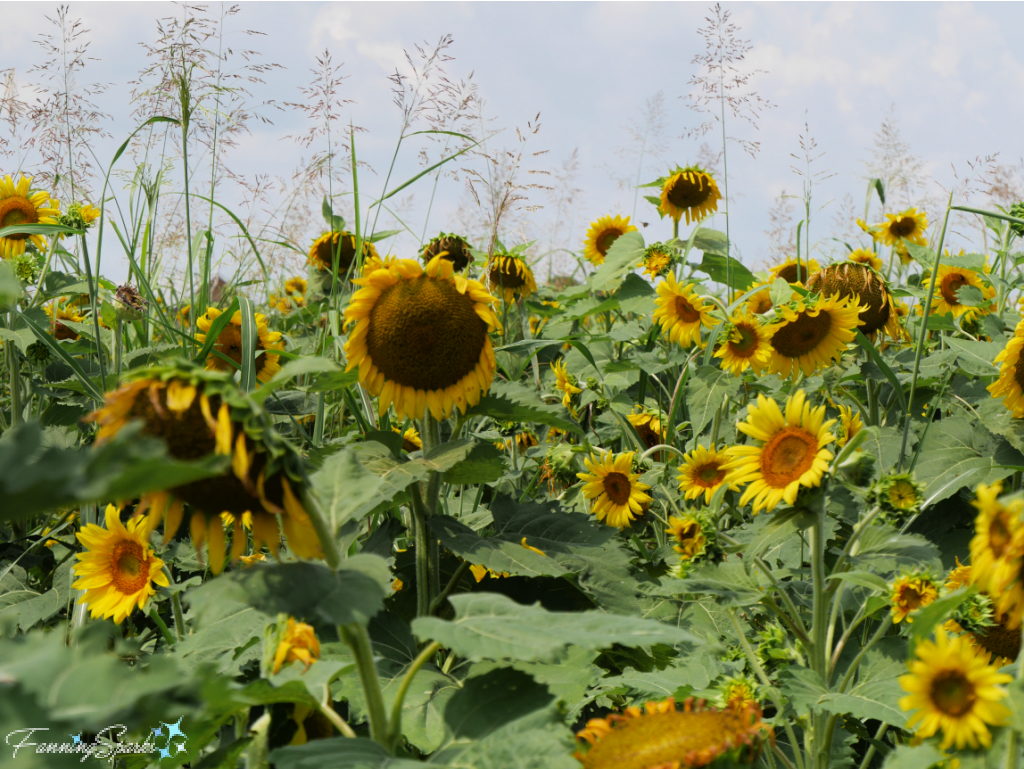


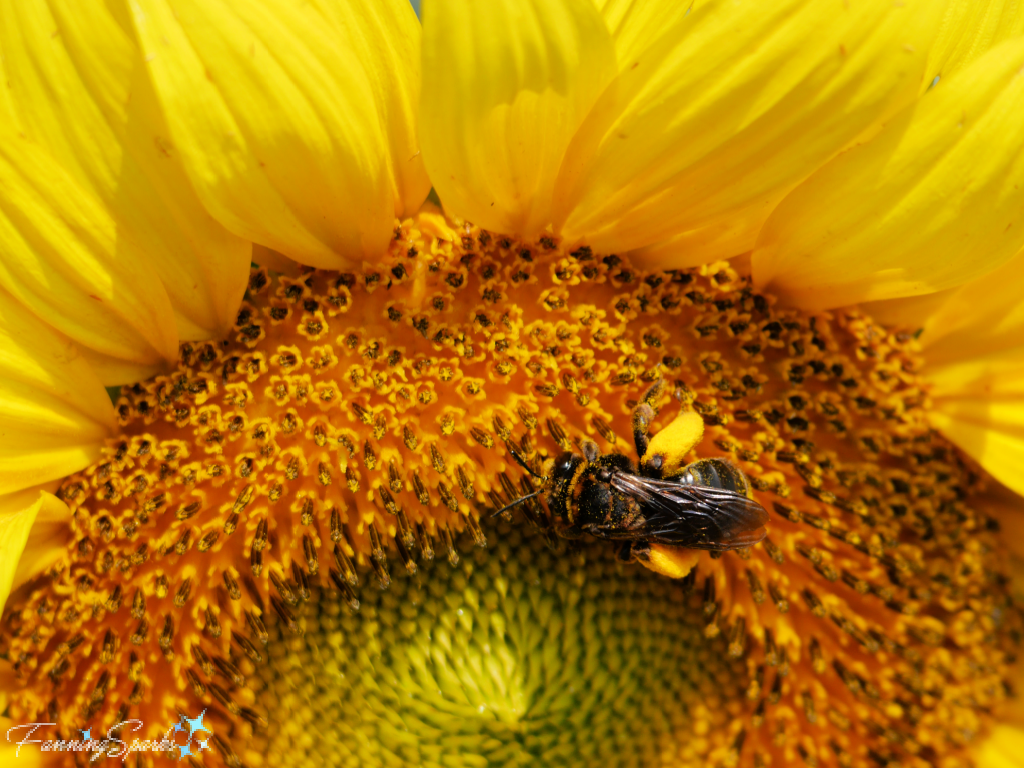
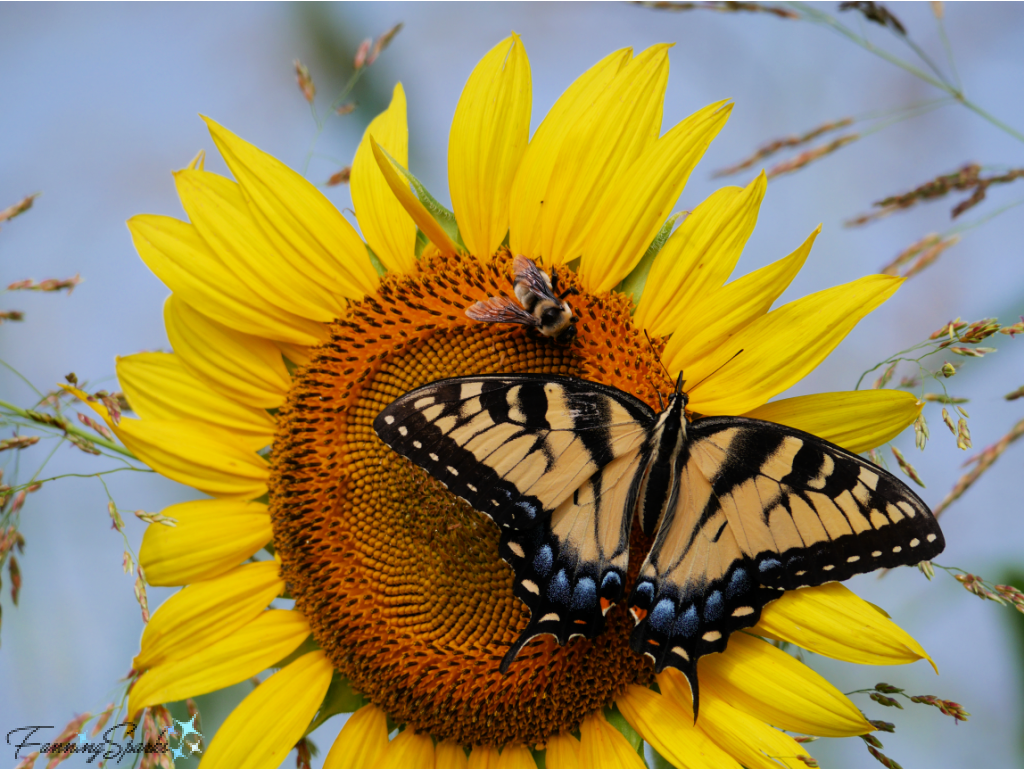


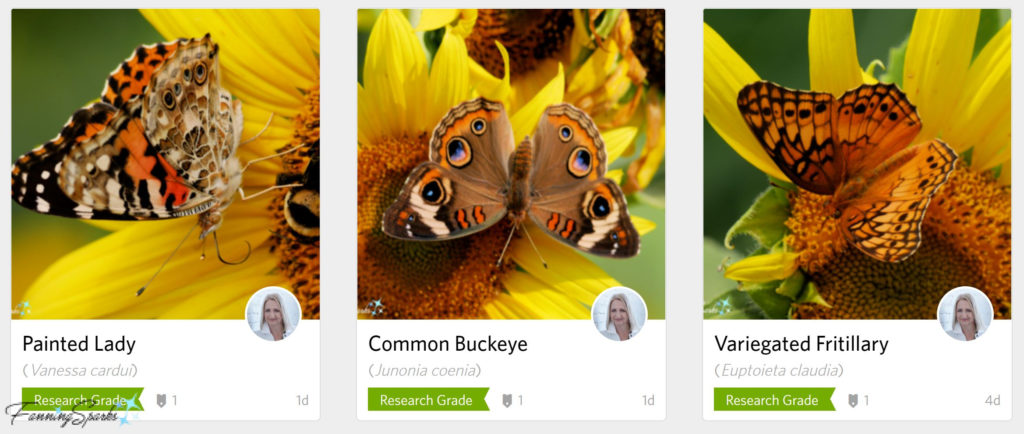
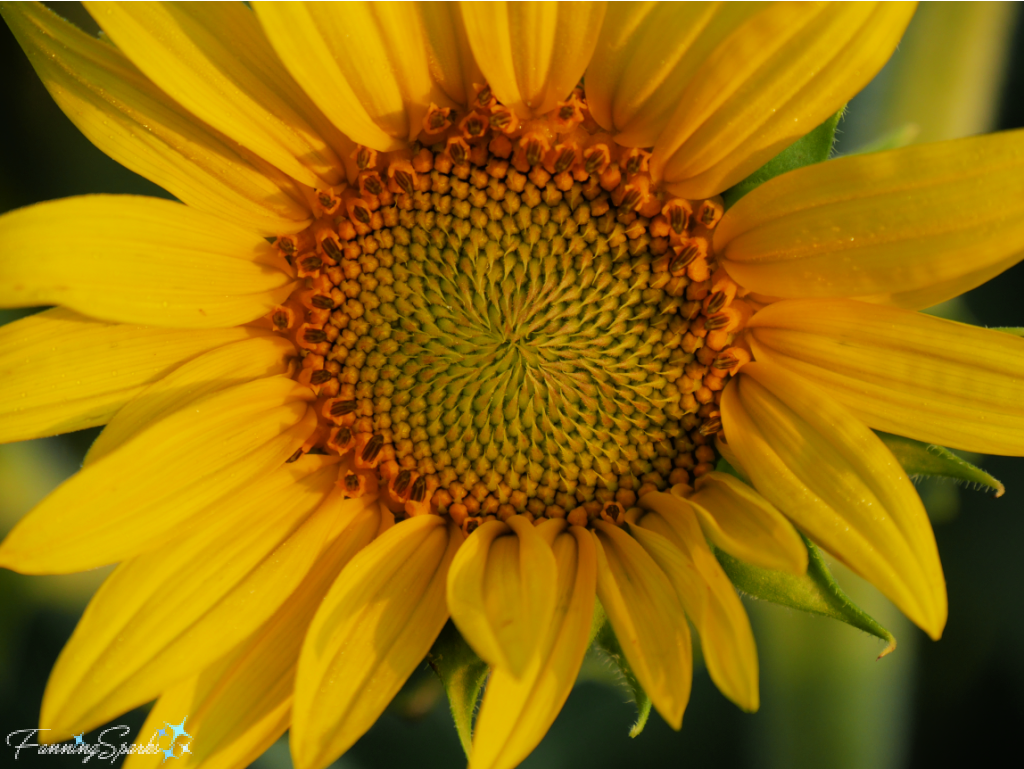
 Despite getting distracted by beautiful butterflies and carried away by all-things-sunflower, I got back to my original purpose in visiting the U-Pick Sunflower field. The timing was ideal as the fine folks at Farmview Market were running a promotion to showcase their cheerful sunflowers. I was able to cut 6 stalks, with numerous sunflower heads, for free!
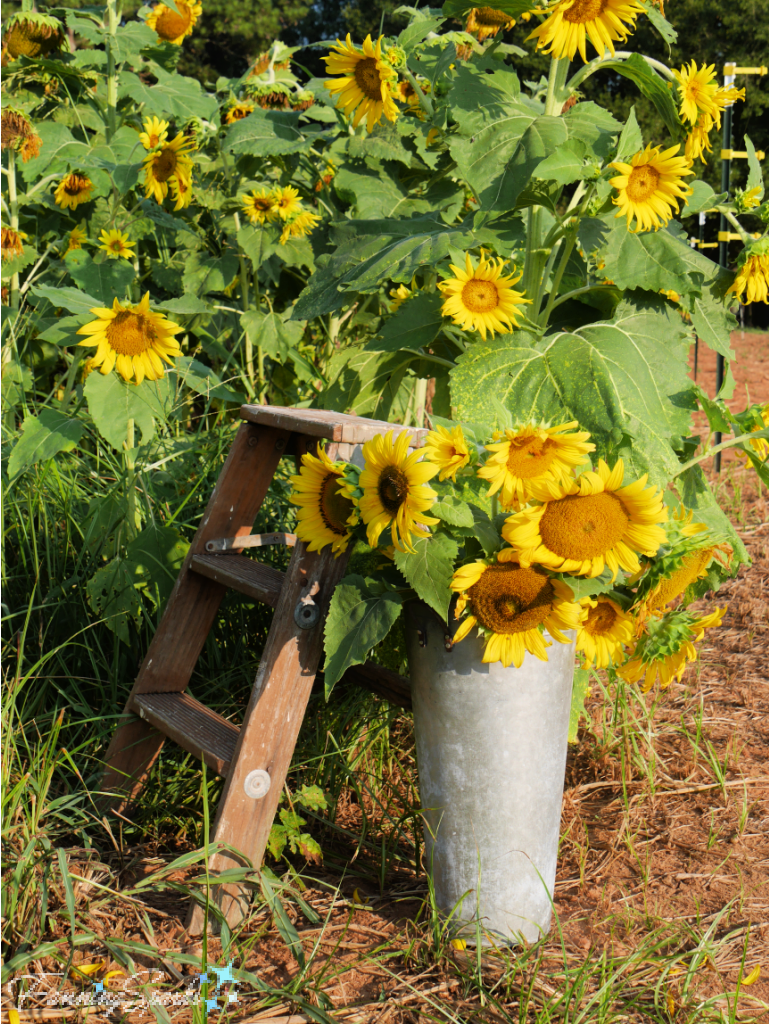
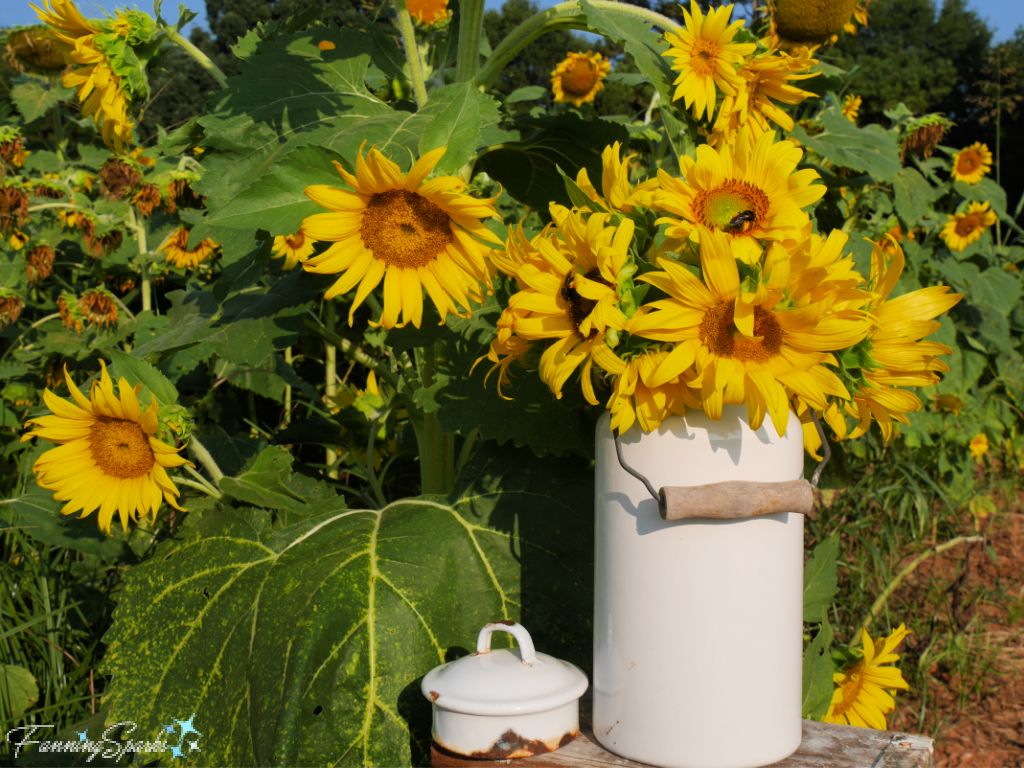
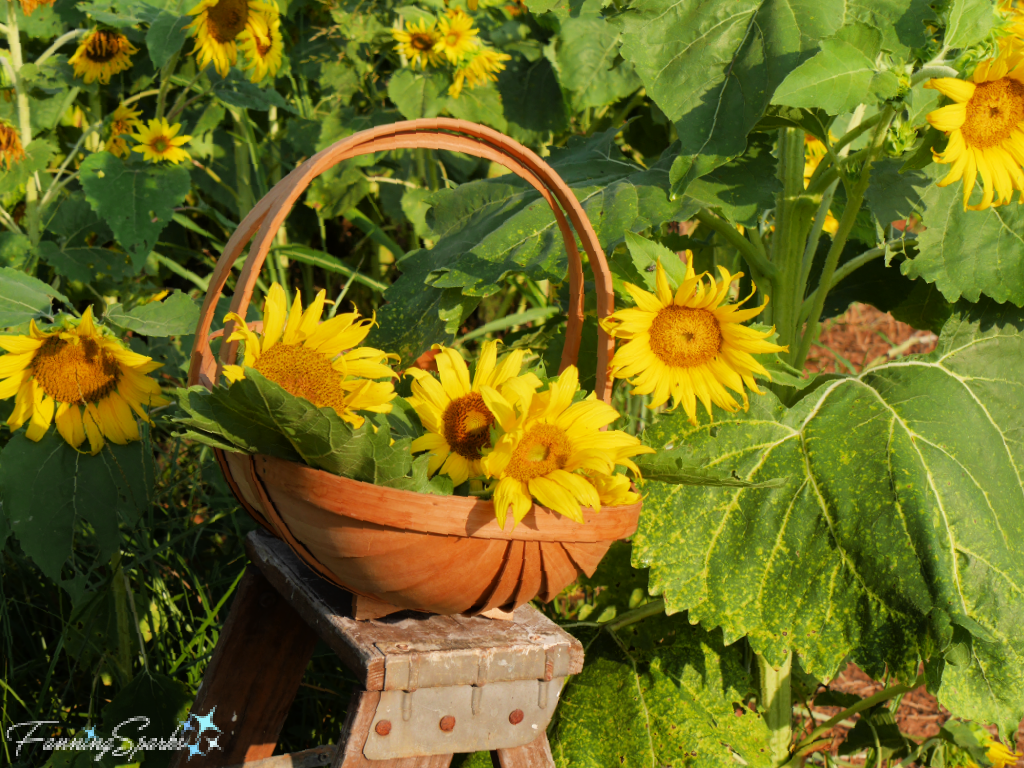 Speaking of pretty, isn’t this vintage, white enamelware perfect for this bouquet?