Author

Peg

Browsing

Eye miniatures were a thing about 200 years ago.  These miniature portraits, usually painted with watercolor on ivory and incorporated into jewelry, focused solely on the eye.  I’m sure the Flamingos weren’t singing about eye miniatures when they performed the romantic love song “I Only Have Eyes For You” but that song insists on popping into my head whenever I think about eye miniatures!
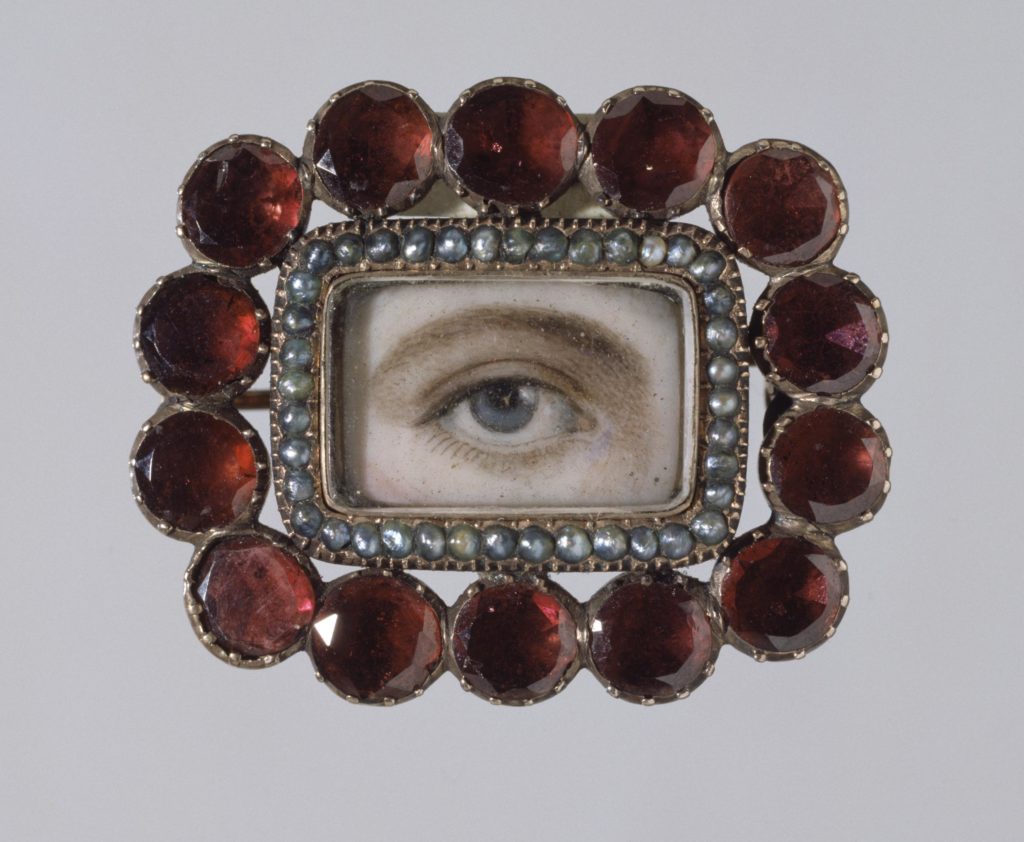
At first glance, eye miniatures might seem a little creepy but in light of the history behind them they become rather endearing.  Here’s the scoop.  Eye miniatures, typically depicting the eye of a spouse, loved one or child, were worn as brooches, pendants, rings and other jewelry.  Here’s an example of an eye miniature set in a frame of pink stones from the Victoria & Albert Museum in London.  As is often the case with eye miniatures, the painter and the subject are unknown.
Eye Miniature Unknown - Credit Victoria & Albert Museum London
Eye miniatures were also incorporated into small vessels such as toothpick holders and snuffboxes.  Here’s an example of a portrait of a woman’s left eye on an elaborate memorandum case from the Philadelphia Museum of Art.
Memorandum Case with Portrait of Womans Left Eye – Philadelphia Museum of Art
The eye is clearly depicted on these miniature paintings but the subject’s identity isn’t immediately recognizable and may only be known to the recipient.  This mysterious twist, led to the term “lover’s eyes” and the practice of exchanging secret eye portraits as a token of love.  The Prince of Wales (later King George IV) is credited with reviving the practice in 1785 when he sent a portrait of his eye to his clandestine lover, Maria Fitzherbert.  Maria was a twice-widowed Catholic and deemed an unfit match for the future King of England.  Apparently, the Prince wore Maria’s eye portrait hidden under his lapel.
Less than 1,000 of the original eye miniatures have survived.  They have become a highly desirable collector’s item with several major museums including a handful in their collections (see More Info below).  I first became intrigued by eye miniatures when I saw the collection at the Victoria & Albert Museum in London many years ago.
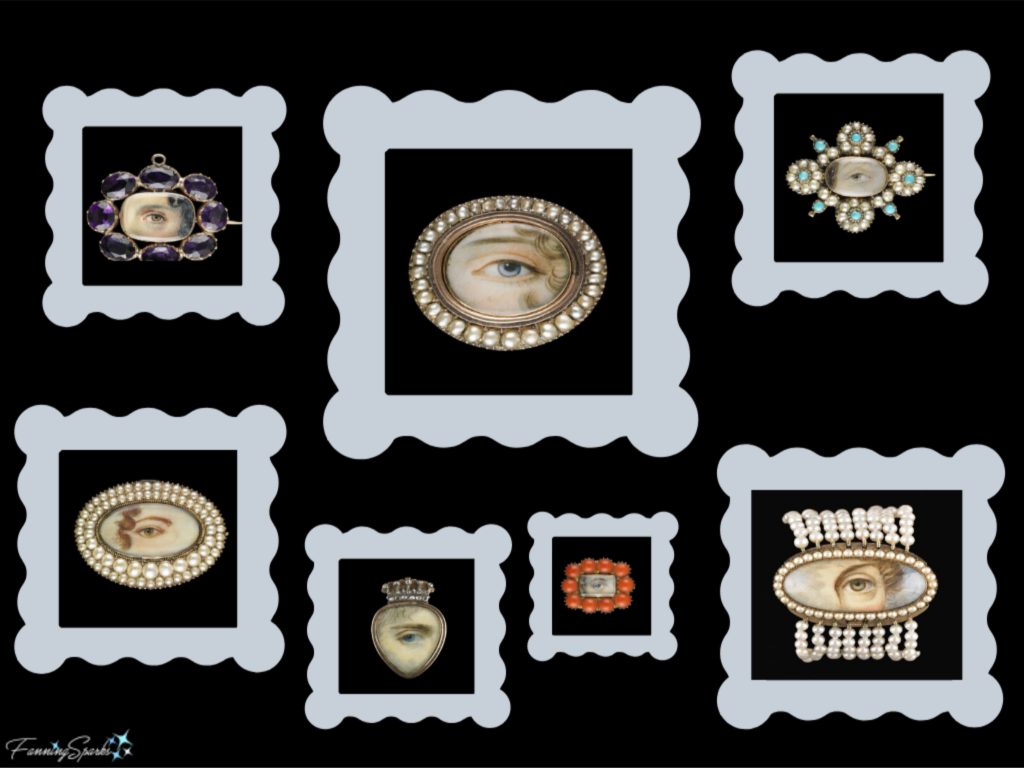
Since then I’ve learned that the largest collection of eye miniatures, the Skier Collection, is owned by a private collector in Birmingham, Alabama, USA.  David Skier, an eye surgeon, and his wife Nan collected lover’s eyes for decades.  Back in 2012, they shared their collection with the public when it was exhibited at the Birmingham Museum of Art and several other prominent museums around the USA.  There’s a book about the collection called “The Look of Love: Eye Miniatures from the Skier Collection” by Graham C. Boettcher.  Below is a collage I pulled together with eye miniatures from a Feb 24, 2012 Vanity Fair online article, called A Lover’s Gaze.  I was unable to find source and photographer credits but it appears these photos are from The Look of Love book.
Collage of Eye Miniatures from Skier Collection.   @FanningSparks

Eye Miniature Pin – DIY Tutorial
Valentine’s Day seemed the perfect time to share this story of lover’s eyes.  Plus I couldn’t resist attempting to make one myself.  As it turns out, with a good photo and a little polymer clay, anyone can make one of these tokens of affection to exchange with loved ones.
If you’ve never worked with polymer clay, give it a try—it’s much easier than you might think.  This eye miniature pin is quite easy and quick to make.  Plus it’s low cost—you just need to purchase a few supplies for about $10 US and you can use tools you probably already have around the house.  Here are the detailed step-by-step instructions to make your own Eye Miniature Pin.
Supplies Needed
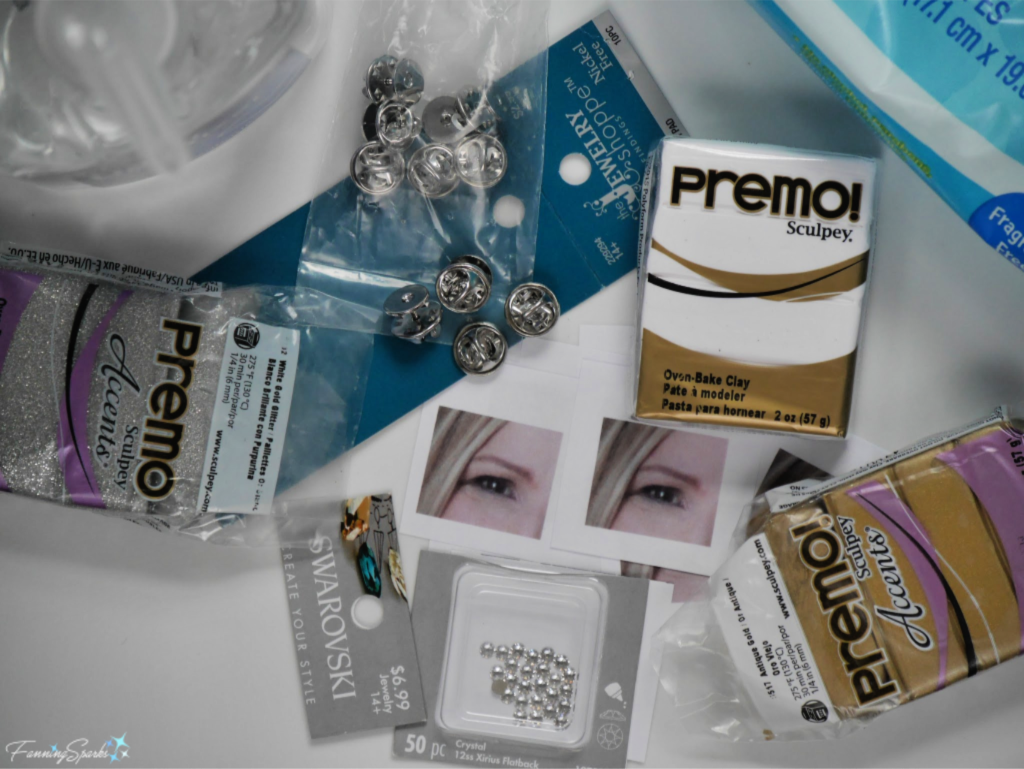
The following supplies are needed to make an Eye Miniature Pin:
Photo: A laser photocopy of the eye image.  See Step 1 Prepare Eye Photo below for detailed specifications.
Polymer Clay: 1 package of white clay.  White gives the clearest image.  I like the Sculpey Premo brand but I’m sure other brands like FIMO would work equally well.
Polymer Clay: 1 package of clay for decoration.  I tried a few different options including Sculpey Premo Accents in Antique Gold, Yellow Gold Glitter, Silver, and White Gold (silver) Glitter.  I liked the silver glitter the best but you can use whatever color and effect you wish.
Tie Tack: 10mm pad.  Alternatively, you could use a small pin back.  19mm, which was the smallest size I could find, would work fine.
E6000 adhesive
Hand Sanitizer: Small amount of clear hand sanitizer.
Baby Wipes: To clean hands and/or tools between colors.
Swarovski Crystals: These are entirely optional.  I found the crystals really upped the look of the pin but they also upped the cost.  I bought a package of 50 12ss Xirius Flatback Crystals and used about half of them.
Supplies Needed - DIY Eye Miniature Pin Tutorial   @FanningSparks

Tools Needed
Photo Editing Software or App.
Working Surface:  A smooth, flat working surface.  I use a 12 x 12 ceramic floor tile but a simple table surface will do.  Note: Sculpey warns that polymer clay can damage fine furniture so be sure to use a barrier like wax paper or aluminum foil to protect the surface.
Baking Tile:  A ceramic tile, such as a 4×4 wall tile, with a perfectly flat surface that will fit in your oven.  Alternatively, you could use a piece of foil.
Roller:  You can use an old wooden rolling pin, a straight, smooth round glass/jar or an acrylic roller specifically designed for polymer clay.  I have the luxury of using an Amaco pasta machine/ clay conditioning machine to condition and roll my clay.
Knife: A utility knife, like an Exacto knife, will work fine.  You can also use a slicing knife, which is a long slender blade, specifically designed for polymer clay.
Hard Card:  An old credit card or hotel key card can be used to smooth the clay.
Oven:  You can use your kitchen oven to bake the polymer clay.  See specific advice taken from Sculpey’s website in More Info section below.  I use an Amaco polymer clay and craft oven.  Sculpey Premo must be baked at 275⁰ for 30 minutes.  Be sure to check the specific instructions for the brand of clay you’re using.

Instructions for Eye Miniature Pin
Step 1  Prepare Eye Photo  The most important part of this project is the photo.  I tried a variety of materials and techniques before getting the results I wanted.  Don’t expect to have a crystal clear photo on your eye miniature pin.  Transferring the photo to polymer clay significantly reduces the quality.  But by choosing a good quality photo with the following characteristics you should get a recognizable likeness on your pin:
. Image should be good quality with high resolution
. Image should be color
. Eye should be clearly focused
. Eye should have a catchlight (meaning a highlight or spot of light reflected on the eye)
. Eye should be looking at the viewer.  In her book “Treasuring the Gaze”, author Hanneke Grootenboer claims it’s the subject’s gaze rather than his or her eye that makes eye miniatures special.  She says “intimate vision brings the gaze of another deep into the heart of private experience”.  So that’s worth considering!
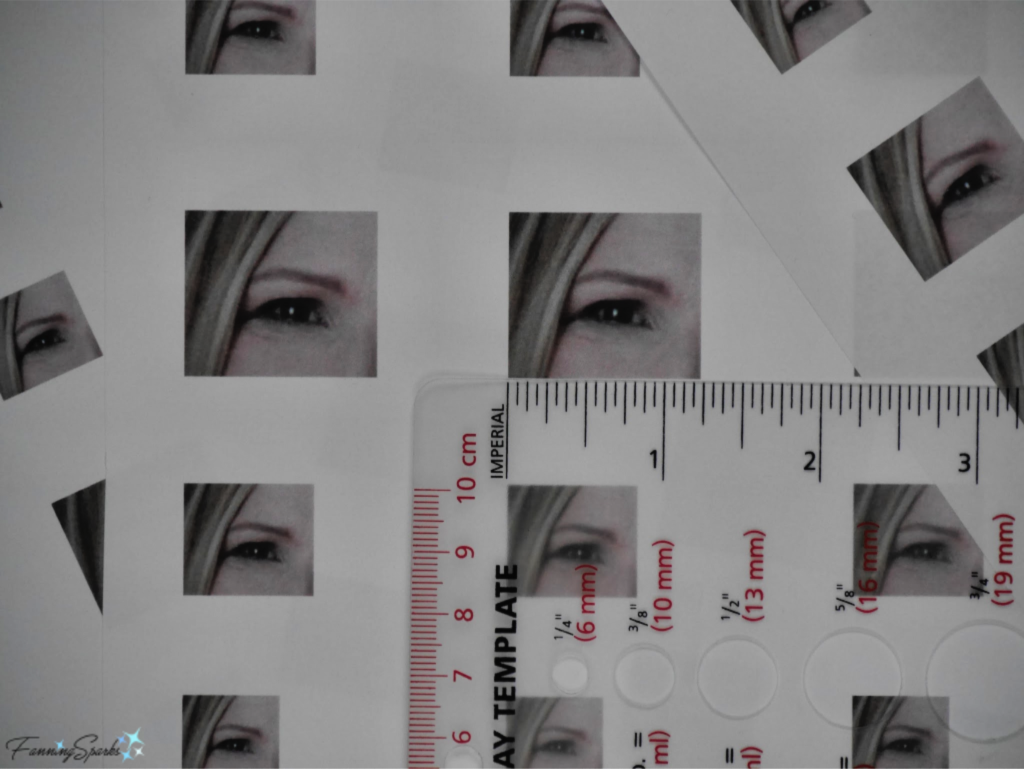
Use photo editing software to crop and size the photo image.  Take care not to compromise the quality of the image.  I used www.canva.com which is a simplified, online graphic-design tool that can be used for free.  I’m sure there are dozens of tools and apps that would accomplish the same thing.  The objective is to prepare a file you can take to a Printing/ Copy Shop for printing.  I had the most success with a printed eye image of 1¼” x 1”.  Obviously, you can print numerous images of this size on a single sheet of paper.  Don’t extend the eye to the very edges and also leave a blank border around the image. Most importantly, flip over the image horizontally (aka mirror) so it will be rendered properly on the pin.  If you forget this step, like I did the first time, your eye will be reversed from real life.
Photo Image Specifications - DIY Eye Miniature Pin Tutorial   @FanningSparks
Take your prepared photo image file to a Printing/ Copy Shop to be printed.  It must be laser printed (vs inkjet) on regular paper with no recycled content (vs photo paper).  I had the best success with 28 lb (vs 20 lb) copy paper at Office Depot.  Logically, you should be able to create the same thing on your own laser printer but, despite several attempts, I wasn’t able to achieve satisfactory results with our home printer.
TIP: Prepare several images and make a few pins.  It’s easy to make more than one and it increases your chances of getting a good result.

Step 2 Prepare Polymer Clay  Cut a piece off the block of white polymer clay.  You’ll only need about ¼ of a block for each pin.  Work the clay in your hands to condition it and make it malleable.  If you’re not familiar with the basics of polymer clay, you may want to check out the advice in the More Info section below before you start.  Use the roller to roll out the clay on your work surface.  You want a square section about 2”x2” with a thickness of about ⅛”.  Carefully, move the clay square onto the baking tile.  Use the hard card to carefully smooth the surface of the clay square.  It’s important to have a perfectly smooth, level surface for transferring your photo.  Bumps and dents will damage the photo.
If you decided to make multiple pins, prepare a square of clay for each one.

Step 3 Transfer Photo  Trim around the eye image leaving a border of about ¼”.  Carefully place the eye image, face down, on the prepared clay.  Press the image into place by rubbing gently with your fingertips.  Use the hard card to carefully rub the image onto the clay square.  Do not move the image.
Transferring Image to Polymer Clay - DIY Eye Miniature Pin Tutorial   @FanningSparks
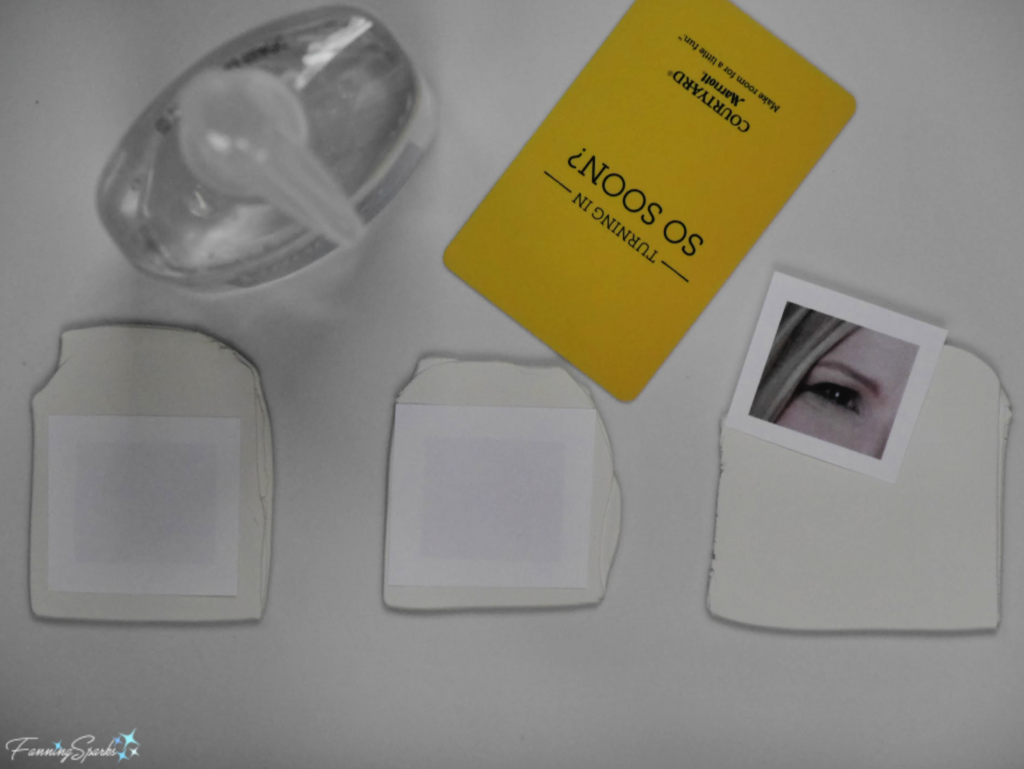
Put a few drops of hand sanitizer on the back of the paper and rub gently gliding over the entire surface.  Carefully hold the image in place along its border.  Take care not to press into the clay and not to move the image.  Allow the hand sanitizer to evaporate.  Repeat this same process, applying hand sanitizer and letting it dry, 2 more times.  Always take care not to move the image.
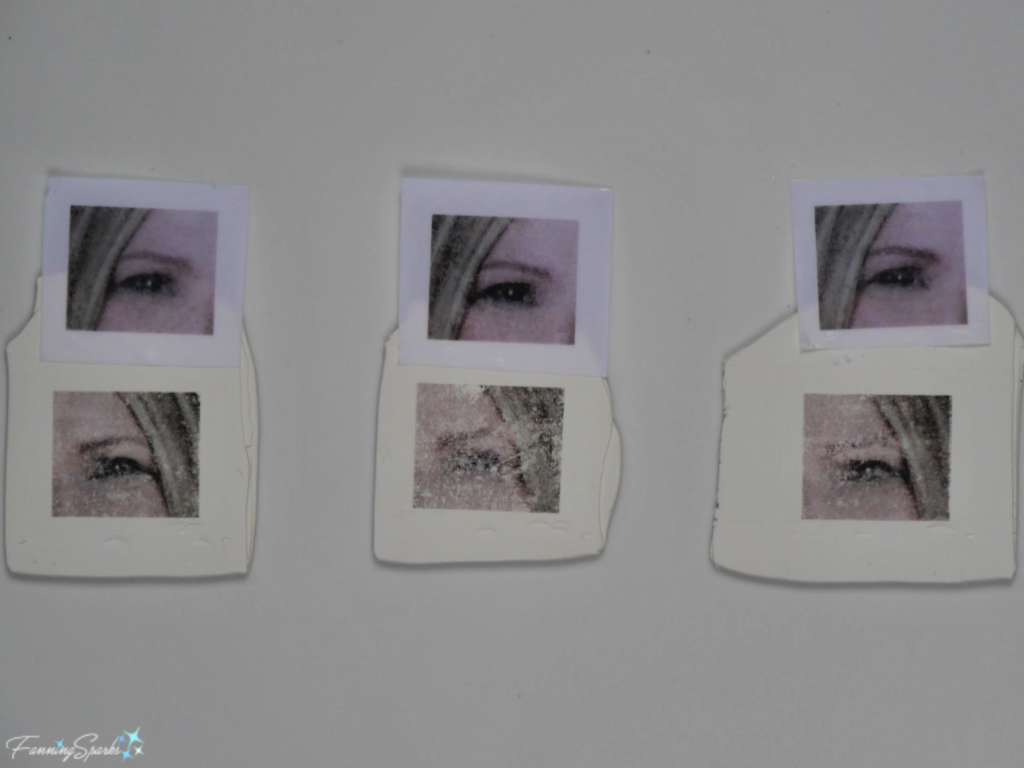
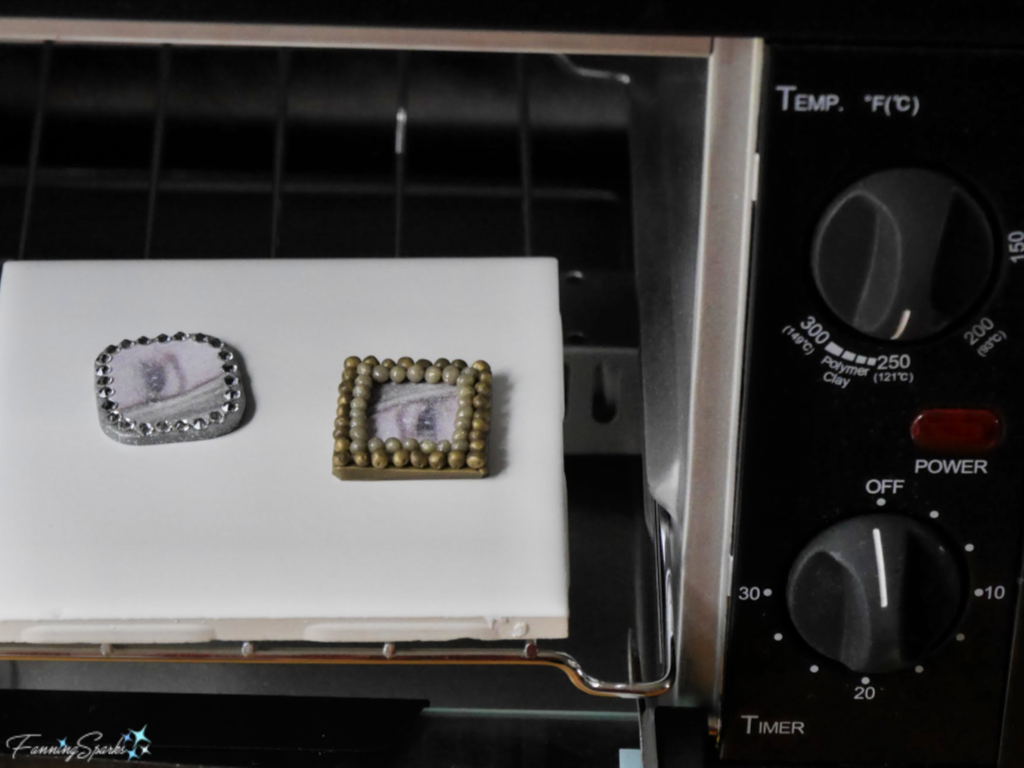
Apply hand sanitizer one last time and rub into place.  The paper is likely to start disintegrating or pilling which is OK.  This time, instead of letting the hand sanitizer evaporate, carefully peel back the photo paper from the clay.  The image should remain on the clay.  The results are likely to vary from one clay square to the other.  Notice the difference between the left and center images in the photo below, the left image is clear but the center image is smudged and damaged.  I’m not sure why but I assume I either rubbed too hard or moved the image during this step.
Transferred Images - - DIY Eye Miniature Pin Tutorial   @FanningSparks
After you’ve selected the best image(s), allow the sanitizer to dry.

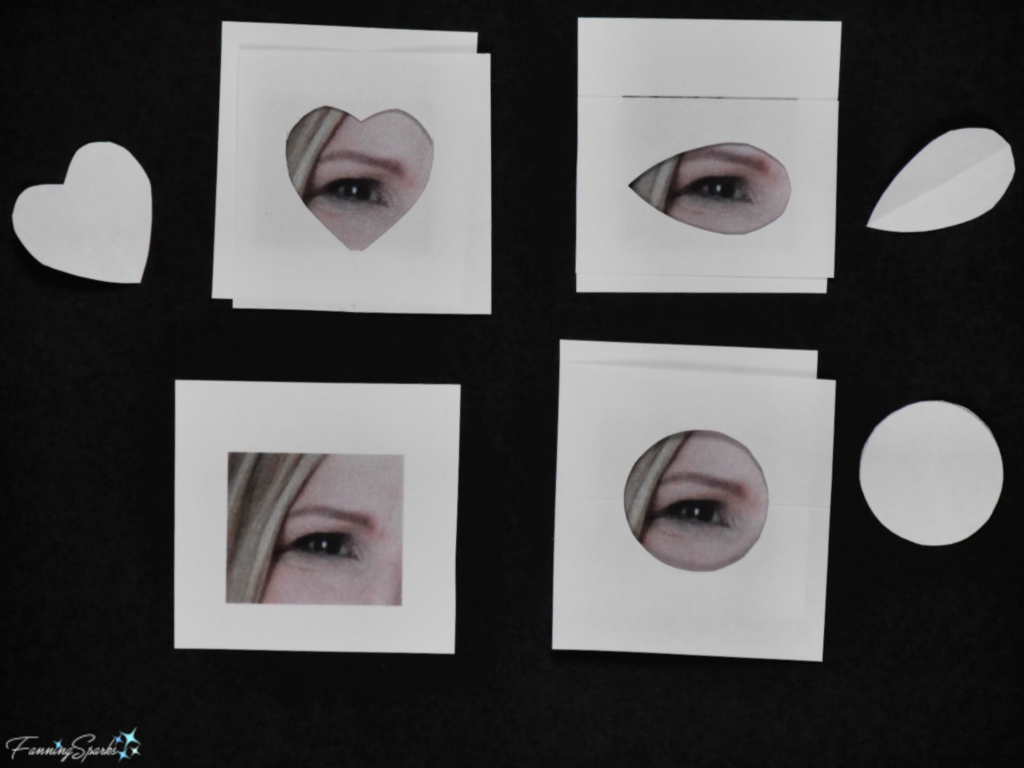
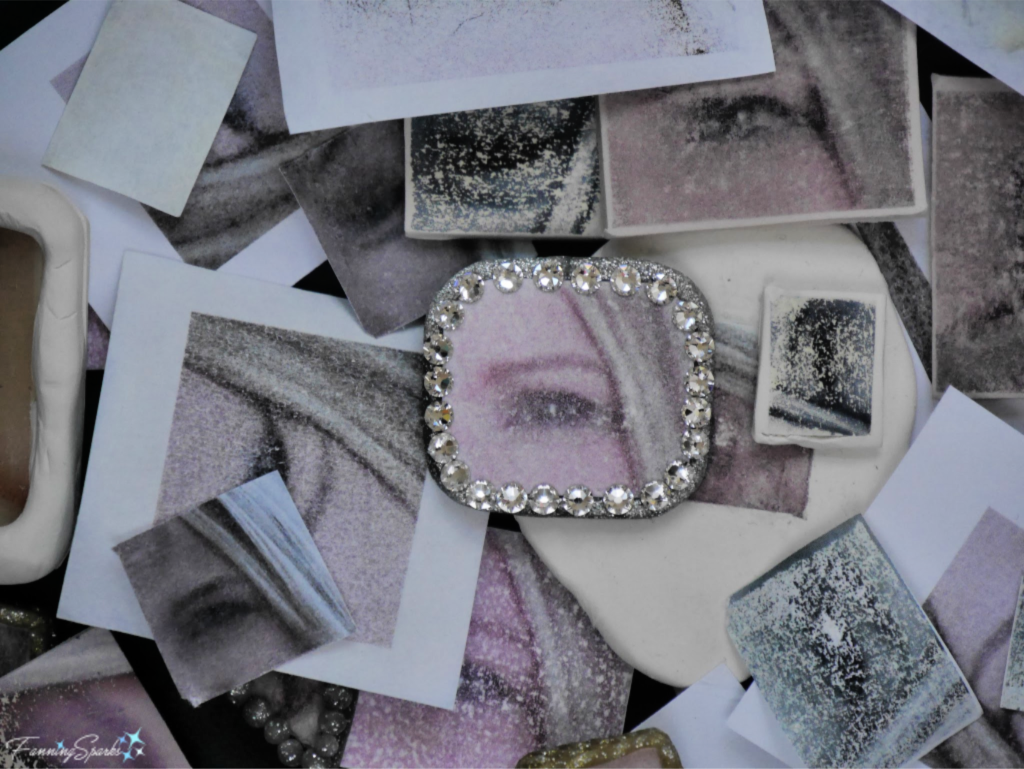
Step 4 Embellish Pin Now it’s time to have some fun and embellish your pin.  There are endless possibilities.  Have another look at the photos at the top of this post for inspiration or check out the museum websites linked in More Info below.  If you wish to shape your pin into something other than a square/rectangle, this is the time to cut it into the desired shape. I simply used scissors and a piece of scrap paper to try a few options for shape and size.
Designing Pin Shape - DIY Eye Miniature Pin Tutorial   @FanningSparks
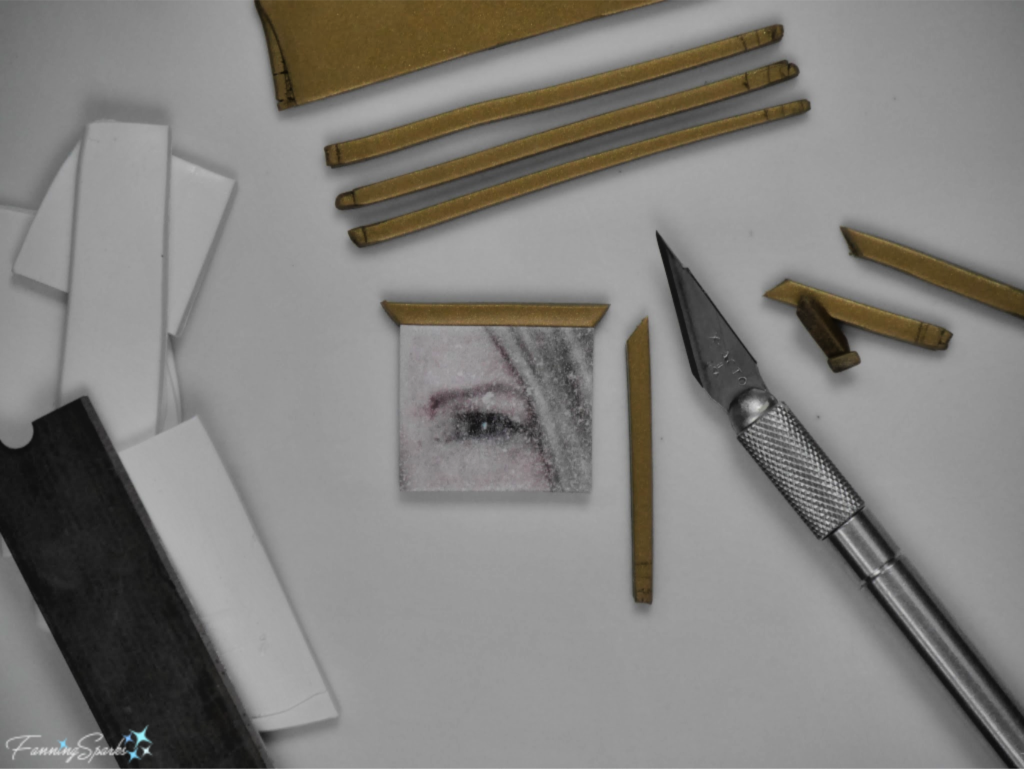
Taking care not to touch or distort the transferred image, use the knife to trim away the edges.  It’s best to remove all the white clay.  Then add on a slender frame in a decorative colored polymer clay.  To do this, cut off a piece of the polymer clay to condition and roll it in the same way as you did the white clay (see Step 2 Prepare Polymer Clay).  Cut thin strips of the decorative colored clay and trim to fit around the transferred image.  As noted in the Supplies Needed section, I tried a few different options including Sculpey Premo Accents in Antique Gold, Yellow Gold Glitter, Silver, and White Gold (silver) Glitter.  In this photo, I’m using the Antique Gold.
Making Polymer Clay Frame - DIY Eye Miniature Pin Tutorial   @FanningSparks
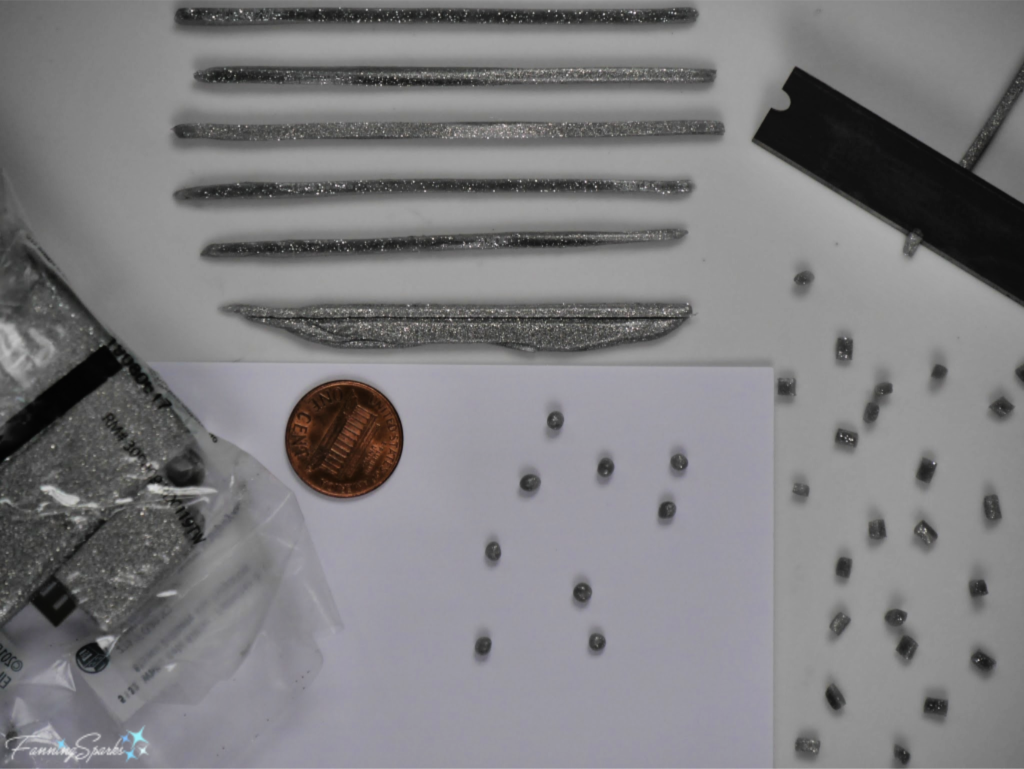
Add any additional embellishments.  You could add another layer of decorative colored clay to build up the frame around the photo.  Another option is to roll a thin coil of clay and twist it for added interest.  Then lay sections of the twisted coil on top of the frame.  You could add beads or crystals along the edge—just insure they are made of glass so they won’t melt when you bake the clay.  Yet another option is to make tiny beads as shown below.  Start with thin strips of clay, slice into mini-cubes and then roll cubes into balls and lay beads around the image.
Making Beads to Embellish Frame - DIY Eye Miniature Pin Tutorial   @FanningSparks

Step 5 Bake Clay
Preheat the oven to the recommended temperature (eg Sculpey Premo is baked at 275⁰ for 30 minutes). Place the baking tile with the clay in the oven for the recommended time.  Remove from oven and allow to cool.
Baking Eye Miniature Pins - DIY Eye Miniature Pin Tutorial   @FanningSparks

Step 6 Attach Back
Use E-6000 adhesive to attach a tie tack to the back of your Eye Miniature Pin.
After a lot of experimentation, I’m quite pleased with my final Eye Miniature Pin .  I liked the below embellishment option the best—a White Gold (silver) Glitter frame with a single row of tiny Swarovski Crystals.
Finished Eye Miniature Pin - DIY Eye Miniature Pin Tutorial   @FanningSparks

More Info

You can see more Eye Miniatures in the online collections of several museums including:
. Victoria and Albert Museum, London, UK
. Statens Museum for Kunst, Denmark
. The Metropolitan Museum of Art, New York
. Philadelphia Museum of Art
This Feb 24, 2012 Vanity Fair article, A Lover’s Gaze, includes a slideshow of eye miniatures.

The below excerpt about Polymer Clay Basics is from the FAQ section on the Sculpey website.
“How Do You Use Polymer Clay?
In a variety of ways! No matter what you create, however, you’ll follow a few consistent steps:
. Condition your clay: Before working with polymer clay, you want to condition it, which helps with its flexibility. Knead and stretch the polymer clay with your hands, or use a pasta machine.
. Protect your surface area: Grab some wax paper, disposable foil or a metal baking sheet to protect your work area, as polymer clay can affect certain finishes. If you have a glass or marble workspace, however, you’re good to go without any protective material.
. Bake your creation: All you need to bake your polymer clay creation is your household oven — you can use a toaster oven too. Pre-heat your oven of choice to the recommended temperature. Check your temperature with a pre-baking test or oven thermometer before popping your creation inside on a piece of foil or a baking sheet.
. Sand, buff, paint and glaze your design: After your polymer clay has finished baking, take it out to cool and cure. Once it’s cooled, buff and sand your creation before painting and sealing it with a glaze.
. Store your clay: Following your crafting session, make sure you store your leftover clay in a cool, dry area. Aim to use a container or bag made of polypropylene plastic — if you see the number five recycling symbol on the bottom of the bin, then its polypropylene plastic.”

Today’s Takeaways

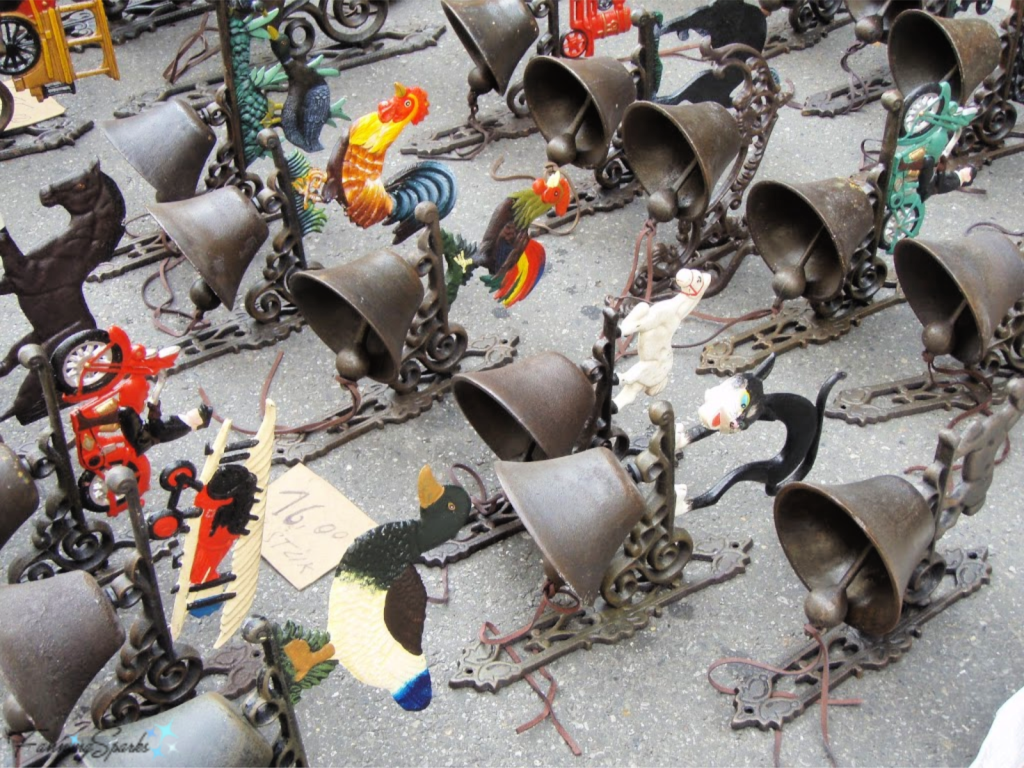
1. Seek out obscure fads and customs from the past for inspiration.
2. Polymer clay is a versatile medium that’s fun, easy and inexpensive.
3. Consider exchanging eye miniatures this Valentine’s Day.
Peg - FanningSparks Author

It started out like any other Sunday, lazily sipping coffee and easing into the day—an ordinary Sunday morning.  An hour or so later, I found myself surrounded by a couple dozen people I’d never met, milling around, introducing ourselves and checking out the space.  There was a low buzz of excitement.  Just as folks were getting a little restless, a whirlwind of energy burst into the room.  It was Corrina Sephora Mensoff and we were gathered in her metal art studio.  She introduced herself, extended a warm welcome and thanked everyone for participating.  Then as all good leaders do, she shared her vision and explained our roles for the day.  We were volunteers ready and eager to help with a community art project.
Corrina has been commissioned by the City of Smyrna, Georgia to create a piece of public art for a city park.   She designed the “Gateway Willow Tree Arch”, a graceful, 11-foot-tall willow tree with sweeping branches and dangling leaves.  Here’s the design sketch she shared with us.
Design for Gateway Willow Tree Arch by Corrina Sephora   @FanningSparks
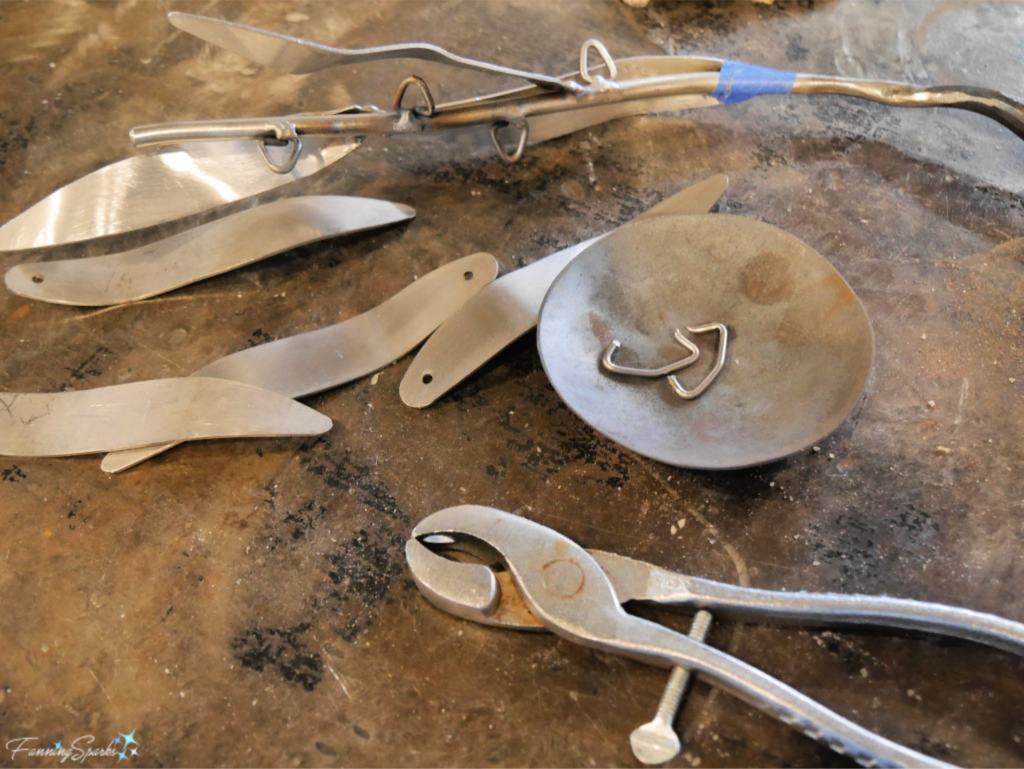
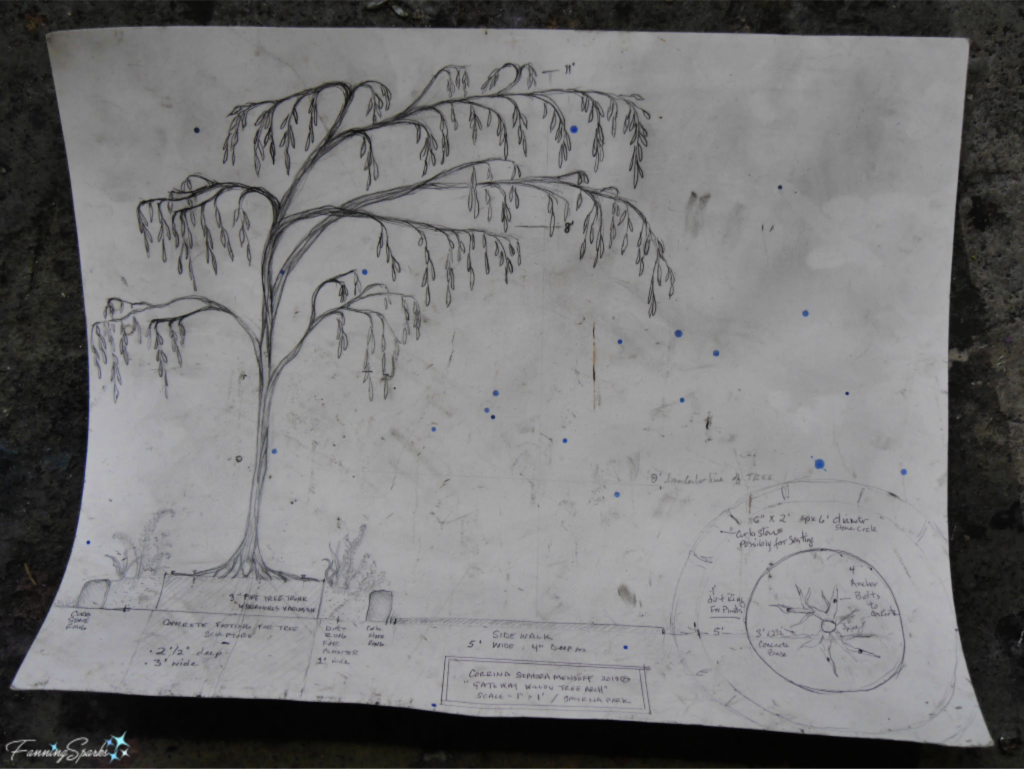
The work was obviously in flight with numerous components evident around the studio.  The main tree trunk and branches, made of fabricated mild steel, was erected in the studio.
Steel Tree Trunk wip - Gateway Willow Tree Arch by Corrina Sephora   @FanningSparks
The branch tips and leaves were made of stainless steel.
Steel Branches and Leaves wip - Gateway Willow Tree Arch by Corrina Sephora   @FanningSparks
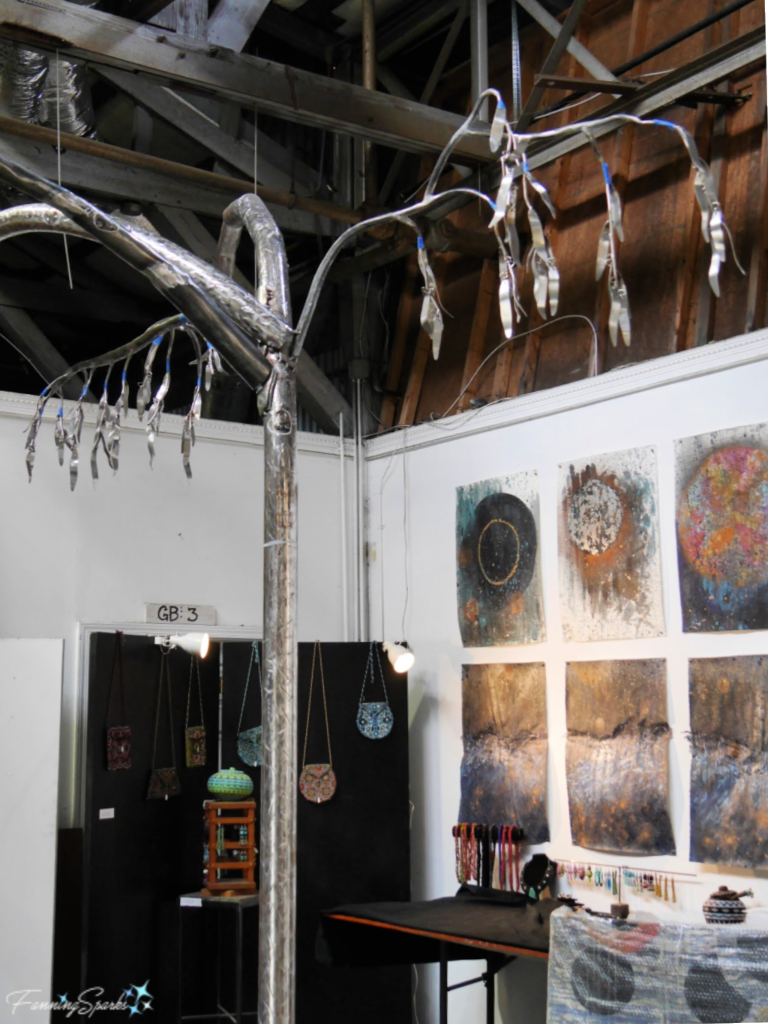
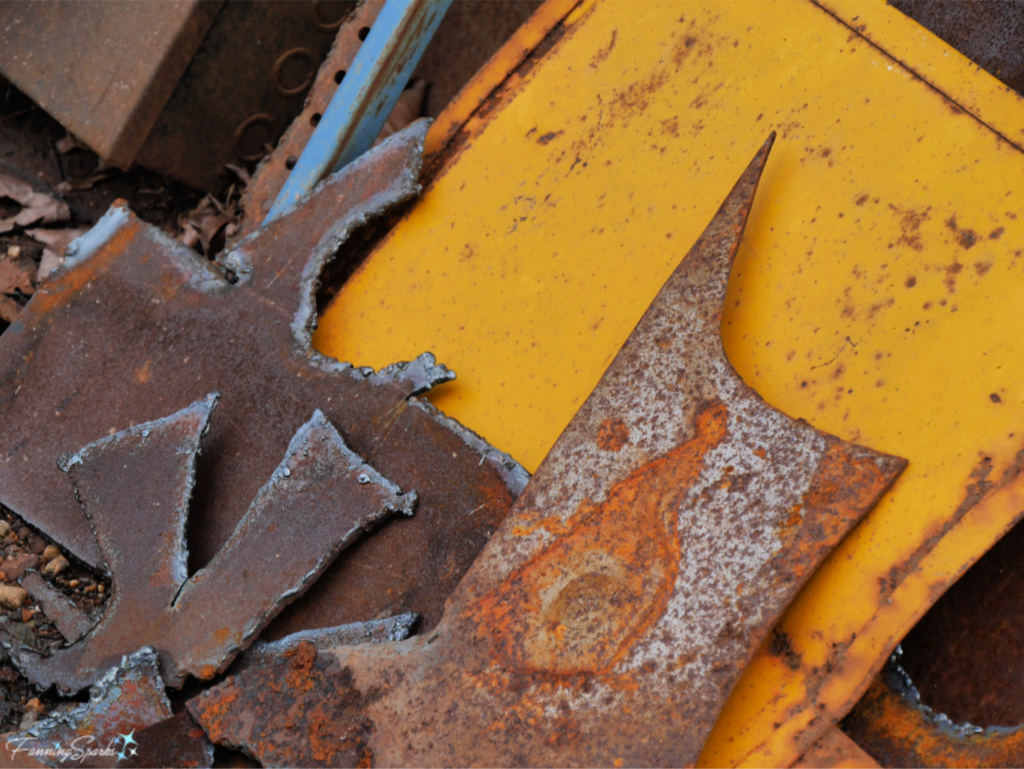
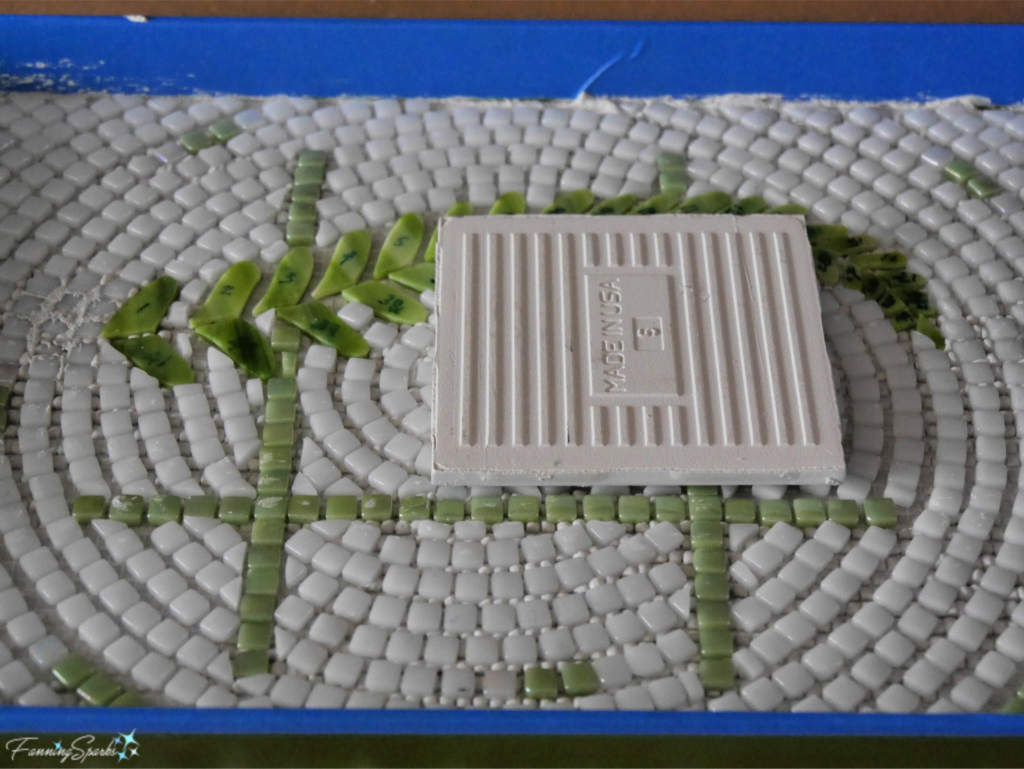
The leaves, hundreds of them, were custom-made by waterjet cutting.
Stainless Steel Leaves wip - Gateway Willow Tree Arch by Corrina Sephora   @FanningSparks
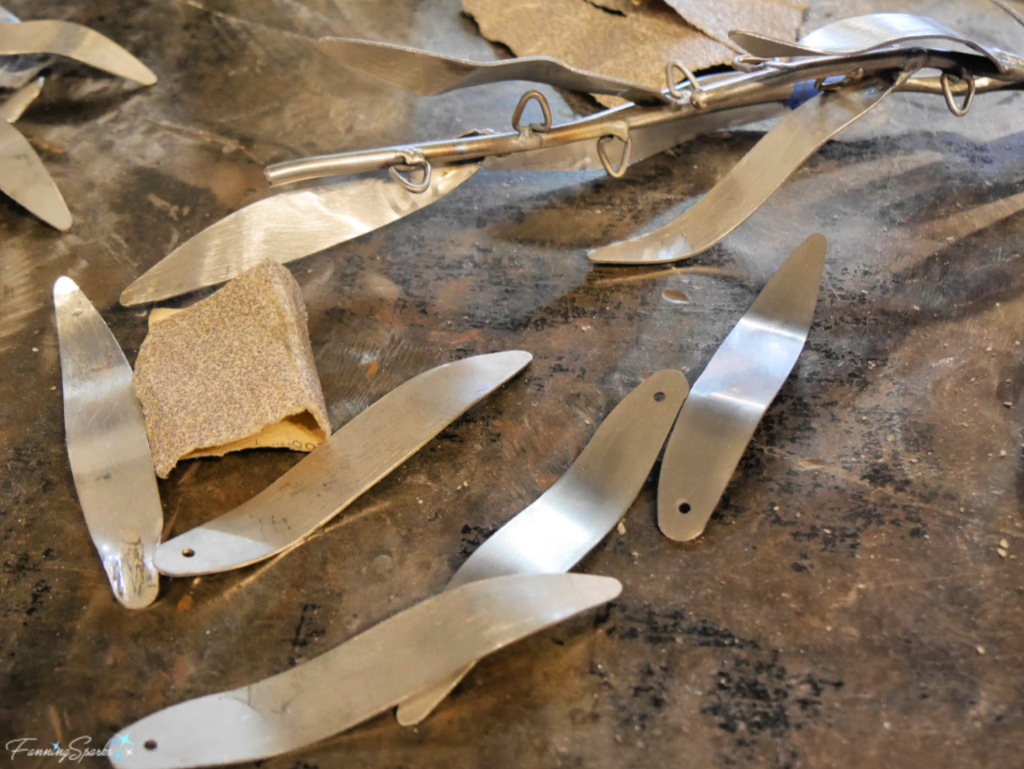
Corrina and her team, Richard and Miriam, explained that we’d be working in 3 pods or teams.  Each team would focus on a different task—one group would shape, sand and attach leaves, another group would seal welded seams, and the final group would paint the mild steel sections of the branches as indicated by blue painter’s tape.
Stainless Steel Leaves wip - Gateway Willow Tree Arch by Corrina Sephora @FanningSparks
We quickly aligned ourselves with a pod and dug in.  I was in the second pod and we were responsible for sealing the welded seams.  We used a plastic metal product called “Bondo” to cover areas where water might seep in or collect and cause rust.  V-shaped areas between branches and roots required particular attention.  The work was quite straightforward and left lots of opportunity to chat with fellow volunteers.  Here’s a look at the tree root section we sealed.
Mild Steel Tree Roots wip - Gateway Willow Tree Arch by Corrina Sephora   @FanningSparks
As the morning went on, we were able to move around between pods to try different tasks and meet other people.  Here’s my work area for attaching leaves with 3 sizes of oblong leaves, a branch with attachment loops already welded in place, stainless steel “hog rings”, and special pliers.  I used the pliers to compress the hog ring after slipping on a leaf and attaching it to a triangular loop.
Attaching Leaves Work Station wip - Gateway Willow Tree Arch by Corrina Sephora   @FanningSparksOur group made good progress and finished the painting and sealing by early afternoon.  A second team of volunteers joined just as the paint and Bondo had dried enough to roll into the next steps of the process.
This was my first opportunity to participate in a community art project.  I really enjoyed the experience especially getting to know the other volunteers.  Folks had diverse backgrounds and I learned they chose to participate for a variety of fascinating reasons.  It was also great fun to hang out in Corrina’s Studio.  The studio is located at the Goat Farm Arts Center in West Midtown, Atlanta, Georgia.
Corrina Sephora Studio Entrance @FanningSparks
It’s obvious real work happens there!  Here’s a glimpse of some of the equipment, tools and materials.
Working Studio - Corrina Sephora’s Studio   @FanningSparks
Anvils in Corrina Sephora’s Studio   @FanningSparks
Metalworking Tools in Corrina Sephora’s Studio   @FanningSparks
Scrap Metal at Corrina Sephora’s Studio @FanningSparks
There were several projects underway and lots of finished art to admire.  In the below photo, the forged and fabricated steel piece in the foreground featuring the boat is called “Where Have I Come From, What Will I Leave Behind?”.  The beautiful painted circular pieces on the wall are from Corrina’s body of work “Somewhere Between the Deep Blue Sea and the Edge of the Universe”.
Somewhere Between the Deep Blue Sea and the Edge of the Universe on wall with Where Have I Come From, What Will I Leave Behind? in foreground by Corrina Sephora   @FanningSparks
This stunning piece, “Ambrosial Ascension”, is made of wood, acrylic, aerosol, pigment, copper and gold leaf.
Ambrosial Ascension by Corrina Sephora   @FanningSparks
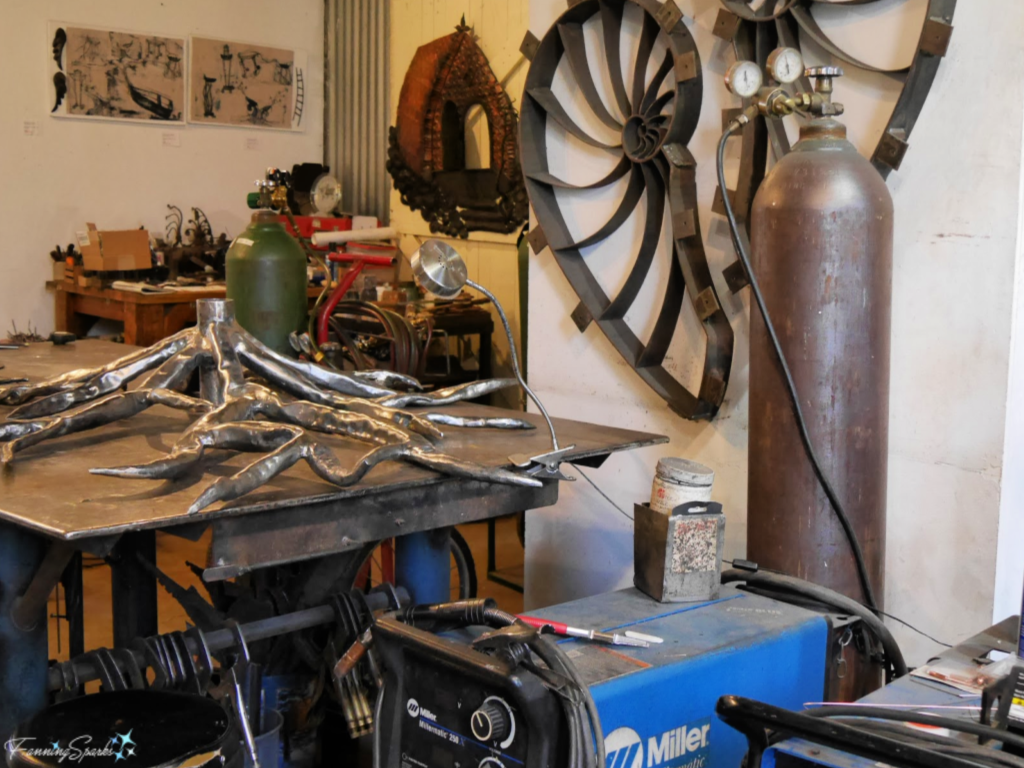
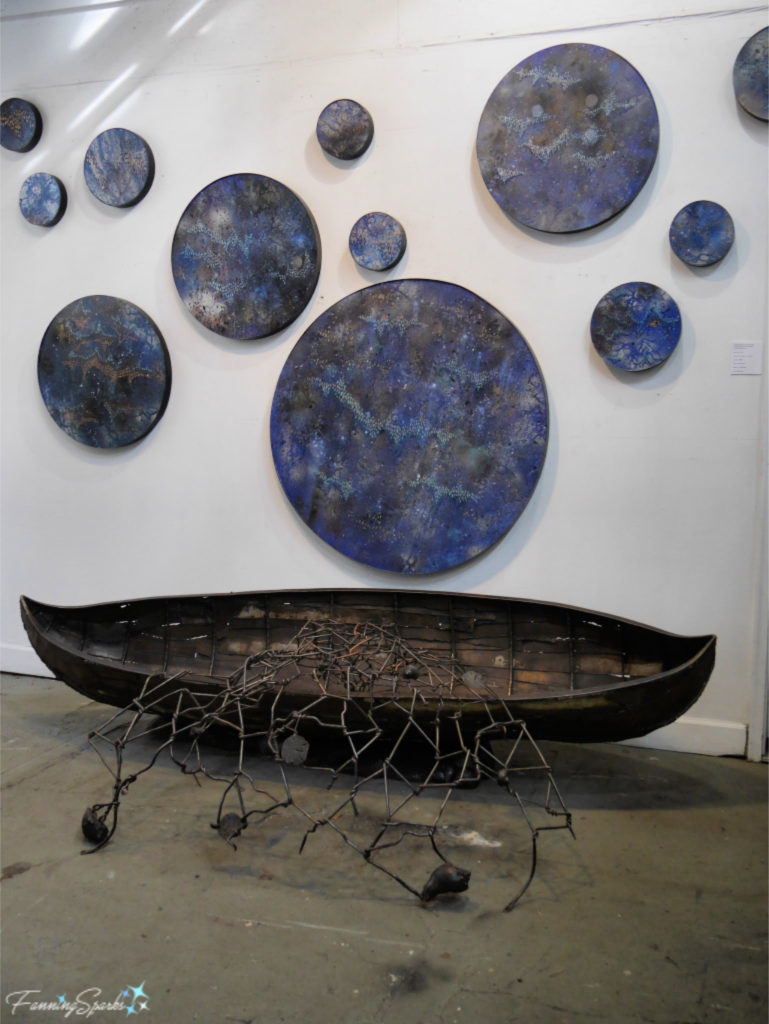
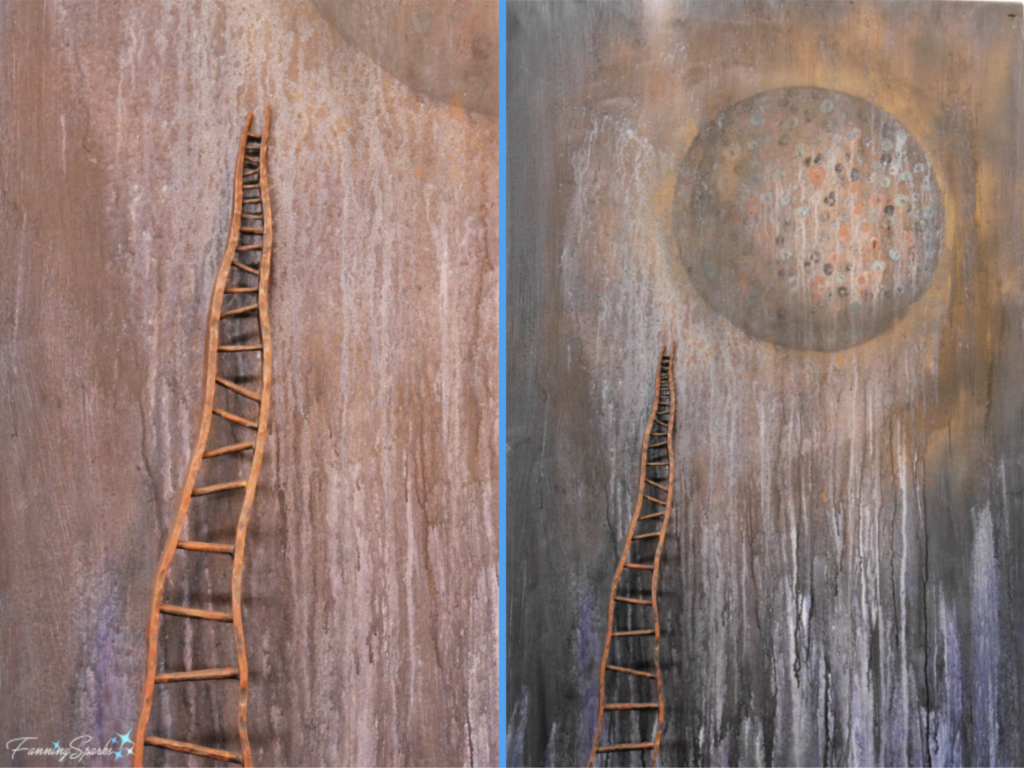
The below artwork is part of Corrina’s body of work called “Blood of the Earth” in which she is “setting the metal free through the process of transforming these weapons of violence into something new.”  When asked on the Today Maybe Forever Podcast about her intention in exhibiting this work, Corrina explained her objective was to trigger a community conversation for change.
Blood of the Earth works by Corrina Sephora   @FanningSparks
The below forged, fabricated and recycled steel sculpture was displayed outside Corrina’s studio.  It is called “Transcendence” and depicts a thoughtful evolution from simple rowboat to soaring bird.
Transcendence by Corrina Sephora   @FanningSparks
It may have started out as an ordinary Sunday, but it turned out to be anything but!  Many thanks to Corrina, Richard, Miriam and my fellow volunteers for making this wonderful experience possible.

More Info

You can learn more about Corrina Sephora Studio on her website and on Instagram.  Note Corrina offers a variety of metalworking classes and workshops at her studio in Atlanta.  I also enjoyed listening to interviews of Corrina on 2 podcasts, Peachy Keen and Today Maybe Forever.
I’ve set a goal for myself to visit as many of Corrina’s public art works as possible.  So far, my hit list includes the following in the Atlanta, Georgia, USA area:
. The Promised Land at the Martin Luther King, Jr. National Historical Park (450 Auburn Avenue NE, Atlanta) Website
. Start Where You Are at Legacy Park in Decatur (S. 500 Columbia Drive, Decatur)
. Sun, Moon, Nautilus Passage at Atlanta Botanical Gardens (1345 Piedmont Avenue, Atlanta) Website
. Life Cycle Boat at Atlanta Freedom Park (586 Candler Park Drive, Atlanta) Website
. Freedom of Flight at Hardy Ivy Park (300 W Peachtree St NW)
. And soon (dedication expected to be mid-March 2020), the Gateway Willow Tree Arch at a park in Smyrna. (I believe it will be the Concord Linear Park on Concord Road near downtown Smyrna).
I learned about this community arts project from a friend who forwarded the Eventbrite announcement (Thank you, Jackie!).

Visiting artist studios is one of my favorite things to do, check out the following posts where I had an opportunity to dive into the world of a professional artist:
. A Visit to Clara’s Loom – weaving and fiber art with Celia Dionne on the Alabama Gulf Coast, USA
. A School for Makers – sewing and embroidery at Alabama Chanin in Florence, Alabama, USA
. Artisan Transforms Quahog Shells – carving with Marcia Poirier at Wildabout Wampum in Cocagne, New Brunswick, Canada
. Peeking Behind the Studio Curtain – woodworking with Walt Cottingham, fused glass with Cat Martin, and weaving with MaryJo Lanik in Henderson County, North Carolina, USA
. A Real Hot Glass Experience – glass blowing at Gilbert Glassworks in Santa Rosa Beach, Florida, USA
. Rug Hooking in my Home Province – rug hooking with Deanne Fitzpatrick in Amherst, Nova Scotia, Canada
. Learning from the Ancient Masters – Roman mosaics at Studio Cassio in Rome, Italy
. Making Curls and Swirls with a Filigree Master – silver filigree with António and Rosa Cardoso at AC Filigranas in Gondomar, Portugal.

Today’s Takeaways

1. Consider participating in a community art project.
2. Working on a joint art project helps build community.
3. Engaging in the making of public art adds heart to the artwork.
Peg - FanningSparks Author

There’s something about a collection of thoughtfully arranged items that adds instant personality.  By definition, a collection is “a group of objects or works to be seen, studied, or kept together”. Typically, collections have a theme—a common thread—that ties the objects together.  The theme could be functional whereby all the collected objects have a similar purpose.  Here’s an example of a collection with a common function—this group of magnifying glasses adds fun and interest in the 2016 Southern Living Idea House.
Collection to Magnifying Glasses   @FanningSparks
The theme of a collection could also be based on form or color.   The below collections of blue transferware plates and violet glass cloches, spotted at Camp Boxwoods during a previous Madison in May Spring Tour of Homes, are great examples of objects with similar functions, forms and colors.  They are beautifully arranged above a china cabinet.
Collection of Transferware and Cloches   @FanningSparks
This simple collection of colored glass bottles—with a similar function and form—was displayed along a window ledge in the same room.  It’s a lovely vignette with the glass of the bottles playing off the glass of the window panes.
Collection of Colored Glass Bottles   @FanningSparks
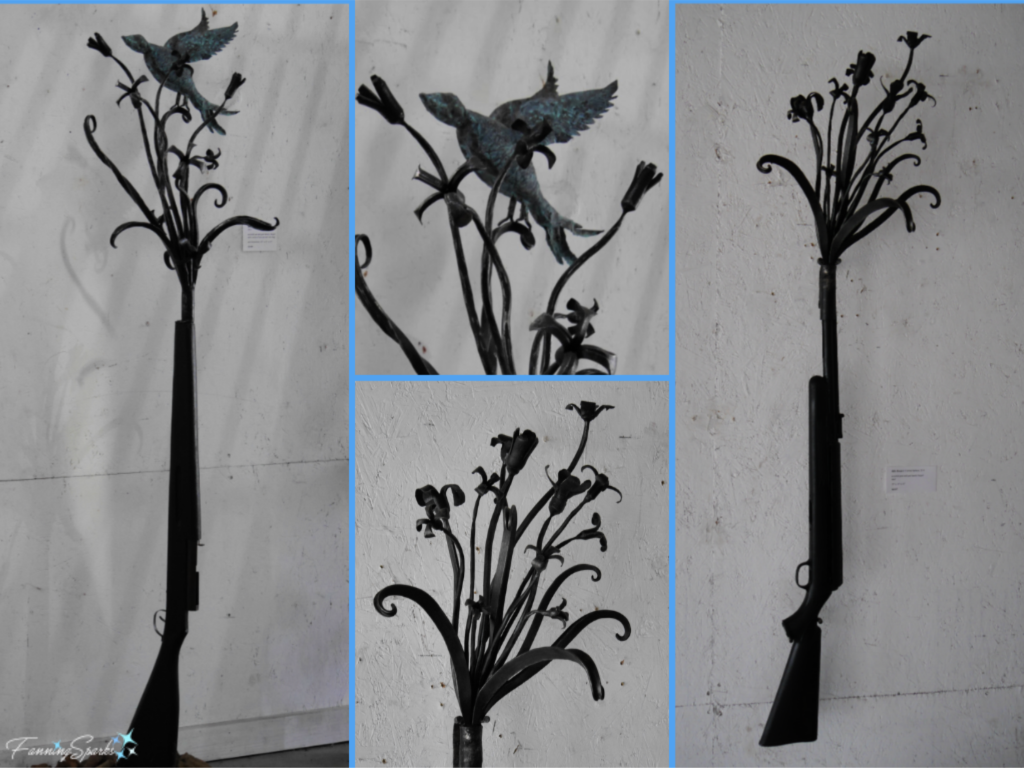
A collection of prints, all featuring cranes and local birds, was the focal point of the foyer in last year’s Southern Living Idea House.  Similar, but not identical, mattes and frames connect the prints and tie it all together.
Collection of Bird Prints @FanningSparks
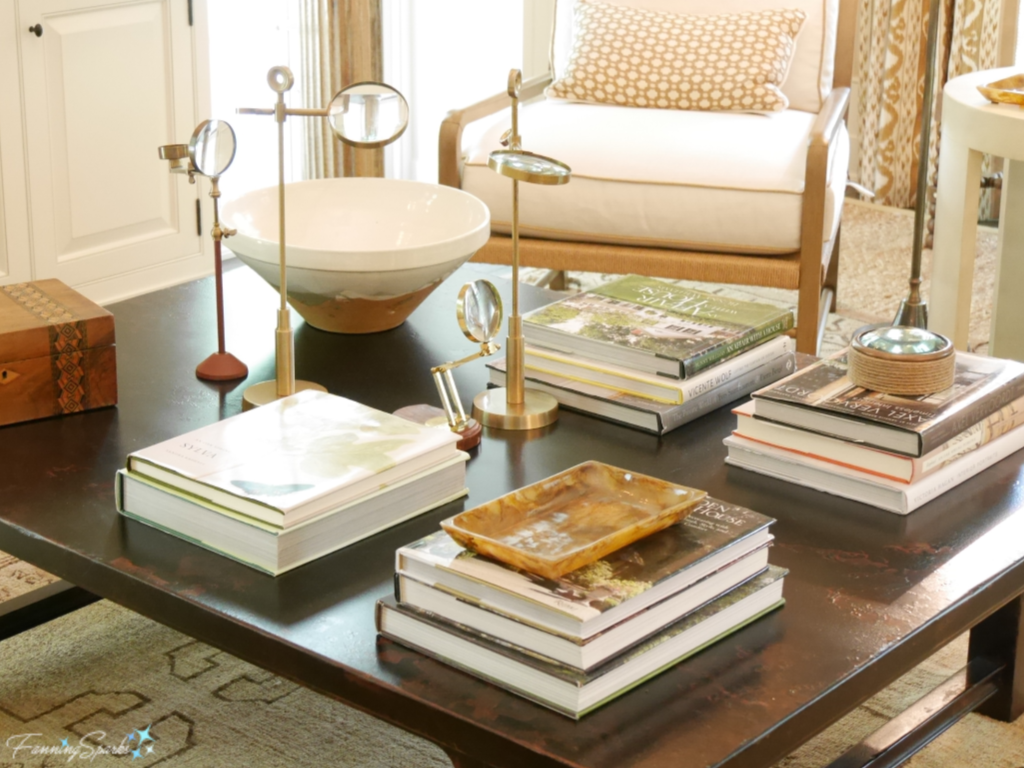
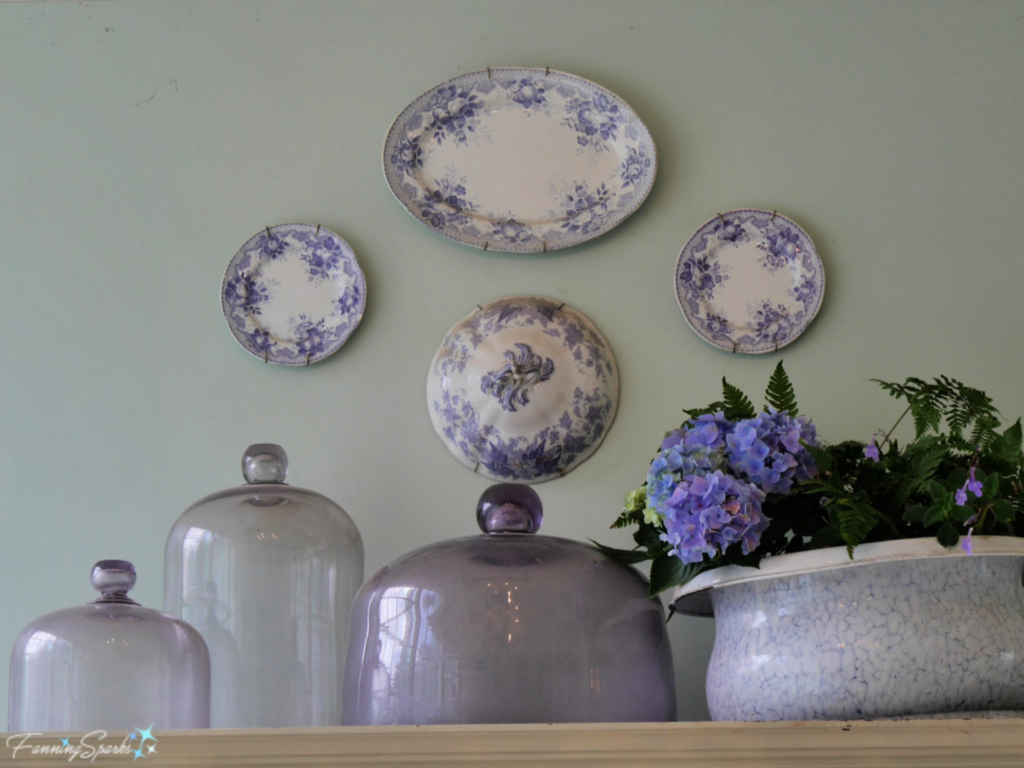
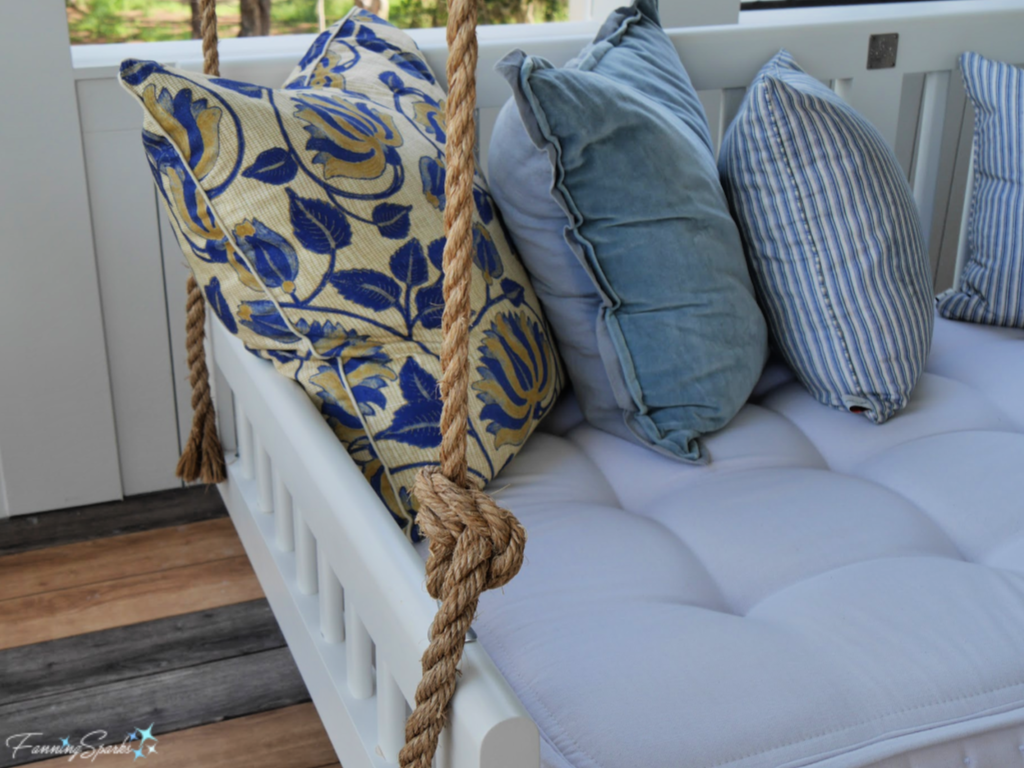
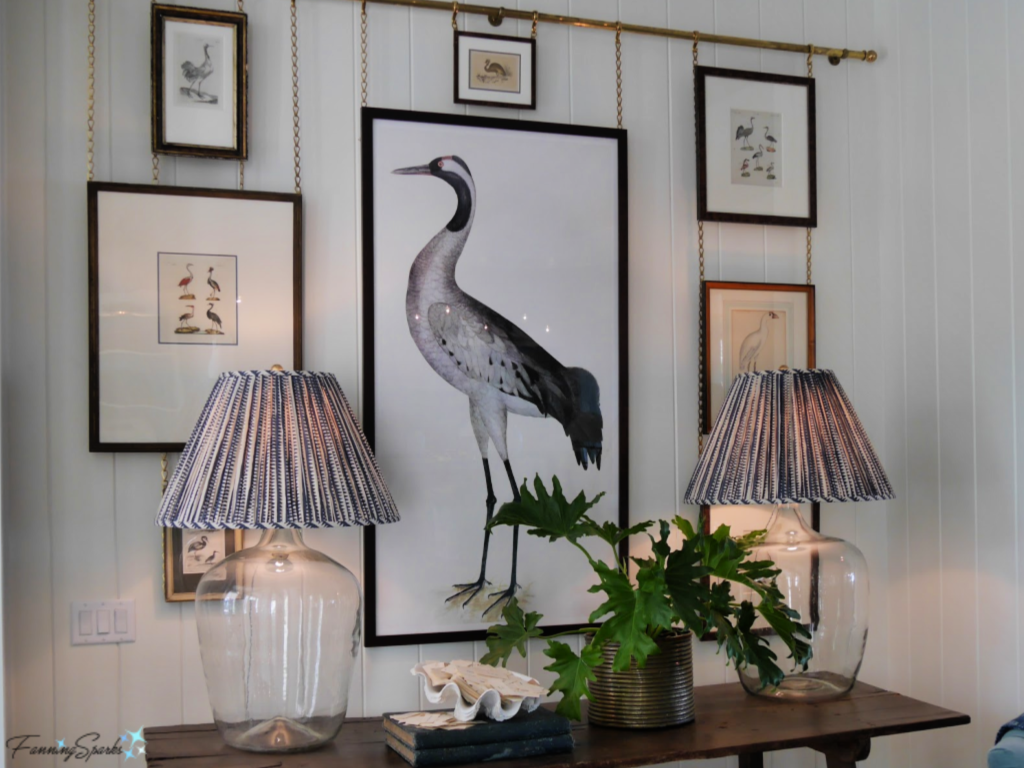
In the same Idea House, the seating area of the living room featured several collections.  Anyone who loves to read will appreciate how the designer wove a significant collection of books into this setting.  Several outstanding pieces of blue and white pottery have been artfully incorporated into the space.  The grouping of pillows on the sofa could also be considered a small collection.
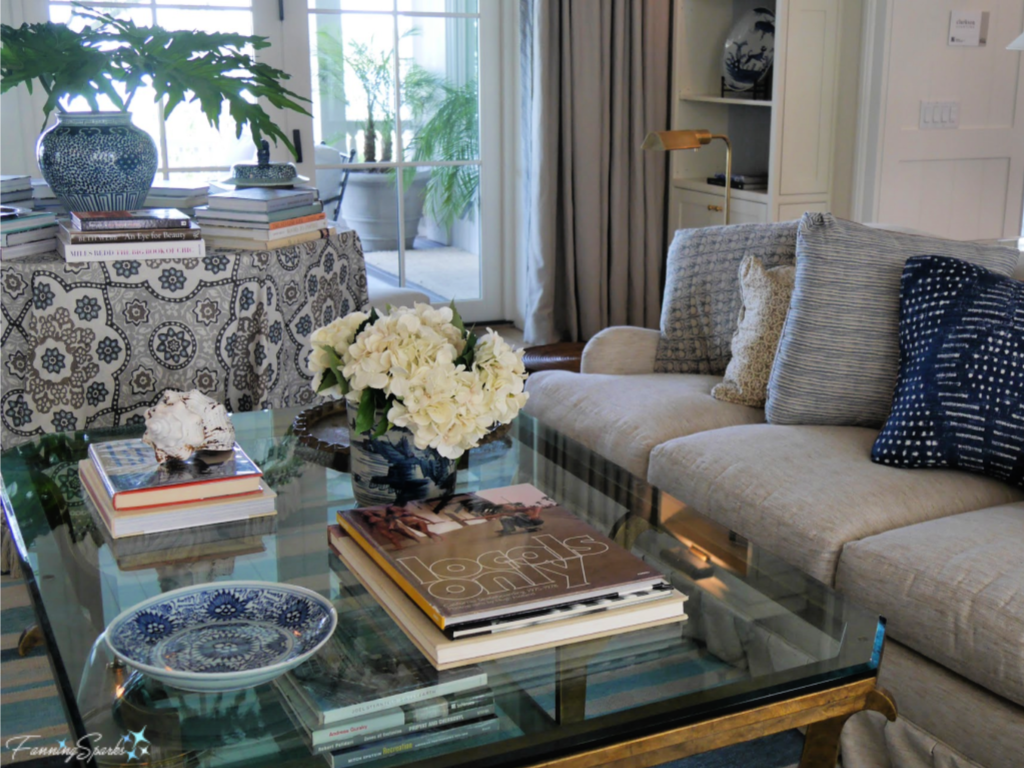
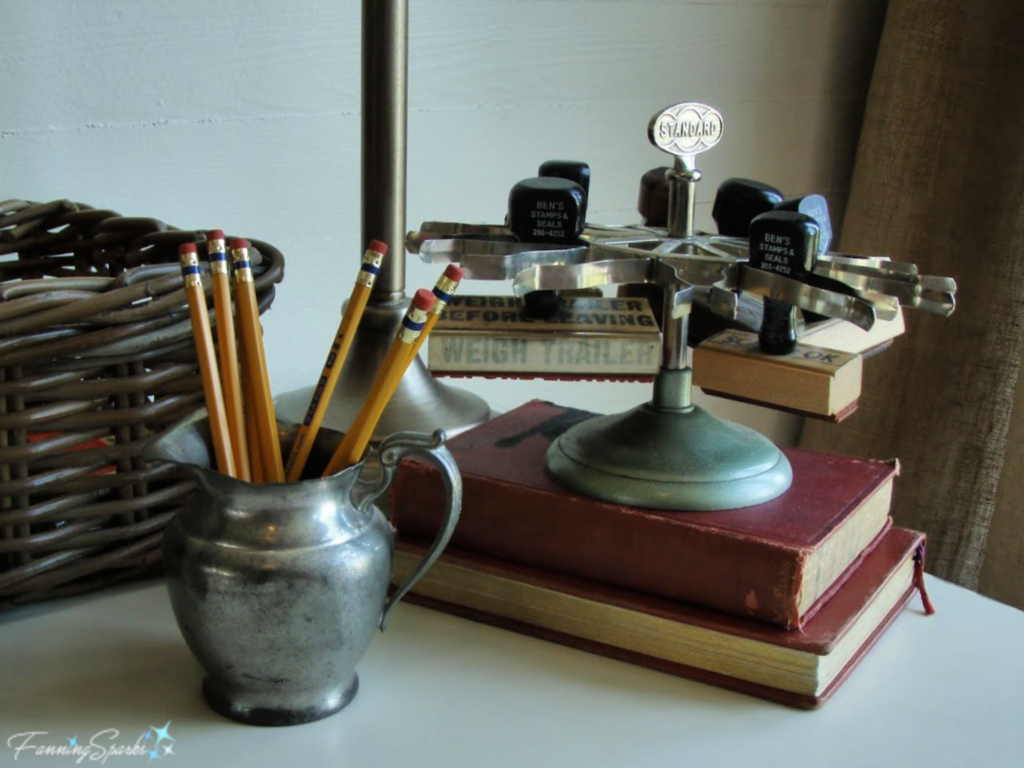
Collections of Books, Pottery and Pillows   @FanningSparks
In this next example, a collection of pillows on a porch swing is tied together through a similar function and color.
Collection of Pillows   @FanningSparks
Dorothy Draper is often credited with being the first professional interior designer.  In her heyday, back in the 1940s and 50s, she was the most famous decorator in the United States.  She had many prestigious decorating assignments including luxury hotels, restaurants, nightclubs, private homes and even airplanes. But what made her special, in my opinion, is she actively encouraged others to decorate their own homes.  She offered advice to the everyday homeowner in a monthly advice column in Good Housekeeping and she authored a book called Decorating Is Fun!: How to be Your Own Decorator.  Many of the decorating tips she shared are still relevant and meaningful today.  One of these tips was to decorate with your hobbies.  She wrote:  “Don’t sprinkle your collection out of sight in a meaningless jumble …  groups of small objects, when they are well-arranged, become important and effective.
Someone who loves baking might, for instance, enjoy collecting wooden rolling pins.   In this collection, spotted at the 2012 Southern Living Idea House, the rolling pins are cleverly tucked into the shelf bracket of a set of kitchen shelves.
Collection of Rolling Pins   @FanningSparks
This small collection of vintage rubber stamps, spotted at the same Idea House, adds fun and interest to the home office.
Collection of Rubber Stamps   @FanningSparks
This display of rustic bells demonstrates that collections can be displayed outdoors as well as indoors.  These bells, spotted during an Atlanta Garden Tour, add interest and personality to the yard.
Collection of Garden Bells   @FanningSparks
Here a collection of vintage gardening tools is displayed on the exterior of a garden shed.  This dramatic display was spotted in Susanne Hudson’s garden during a Penny McHenry Hydrangea Festival garden tour.
Collection of Garden Tools   @FanningSparks
There were a number of interesting collections spread throughout her garden.  Here a series of glass jars is used to display a gorgeous collection of seashells in the greenhouse.
Collection of Glass Jars with Seashells   @FanningSparks
It’s encouraging to note a successful collection doesn’t have to be expensive.  It can be a grouping of similar items gathered from nature and arranged in an interesting way.  Here a simple collection of feathers makes a stunning statement.
Collection of Feathers @FanningSparks
The below collection of interesting and vintage cabinet knobs, spotted during a Madison in May tour, demonstrates another factor to consider.  As the collector explained to me “My husband, an architect, said that the most insignificant object assumes importance if you have a lot of it.  Hence the springs, the buttons, the wood coat hangers, the yardsticks and rulers, the walking sticks…”  The house was packed with charming and delightful collections.
Collection of Cabinet Door Knobs   @FanningSparks
Here’s a collection of springs which was displayed under a glass-topped coffee table.  This is a great example of where an abundance of an insignificant object gives it importance.
Collection of Springs   @FanningSparks
Displaying a collection in a fun and interesting way is only part of the story.  For many collectors, the act of collecting—the hunt to find the perfect item—is the best part of the experience. There are as many sources for this hunt as there are types of collections.  It could be an antique market such as this one I visited in Tongeren, Belgium several years ago.  This was a vintage collector’s paradise!  There were metal dinner bells….
Dinner Bells at Tongeren Market   @FanningSparks… wooden stamps…
Wooden Stamps at Tongeren Market   @FanningSparks
… folding rulers and whole lot more.
Vintage Rules at Tongeren Market   @FanningSparks
Boutiques and gift shops may be another source for a collection.  Of course, artwork—whether purchased or DIY— is always a great item to collect and display.
I’ve been thinking about collections lately because I’m in the midst of designing a handmade collection for this wall in our entryway.  It’s only a collection of green paper rectangles taped to the wall at this point.  I realize it doesn’t look like much yet but it’s pretty amazing in my head!
Planning a Collection for My Entryway Wall   @FanningSparks

More Info

You may also enjoy my post about Decorating with Texture.
Check out the posts, Madison in May – 15 Favorite Fotos and Ideas from the Idea House for more information and photos from the house and garden tours mentioned in this post.
You can learn more about the Southern Living Idea Houses, the Madison in May Tour of Homes, the Penny McHenry Hydrangea Festival, and the Tongeren Belgium Antique Market on the linked websites.

Today’s Takeaways

1.  “Groups of small objects, when they are well-arranged, become important and effective.”
2. “The most insignificant object assumes importance if you have a lot of it.”
3. A collection doesn’t have to be expensive to add personality and charm.
Peg - FanningSparks Author

Today I’m sharing my new, one of a kind (OOAK) mosaic serving tray.  This tray has been in the works for several months.  It was one of those projects that kept being put on the back burner when I got distracted by something else.  So I’m really pleased to have it finished.  I think it was worth the wait, too.  Here it is—my new OOAK mosaic serving tray.
Coffee Served on OOAK Mosaic Tray   @FanningSparks
When I set out to design the tray, there were several elements I wanted to incorporate including a playful tic-tac-toe grid and a charming fern motif.  Ferns, as I learned when attending a class called Ferns and Fern Allies at the State Botanical Garden of Georgia in Athens are actually quite fascinating.  See my post, Southern Ladies, Christmas Stockings and Hairy Armpits, to learn why.
Mosaic Tray Tic-Tac-Toe Grid   @FanningSparks
I also wanted to try laying the background in a traditional tile pattern.  I learned some key points about laying tesserae (ie the small pieces used in mosaic work) in the course of researching classic mosaics (see my post Learning from the Ancient Masters).  In her book, Mosaic Traditions and Techniques, author Sonia King provides the following explanation: “Mosaic is all about flow and pattern. … There are two aspects to how tesserae are laid: andamento and opus.  Andamento is Italian for trend or course.  How one ‘courses’ the tesserae can determine the rhythm and flow of a piece. Varying the widths of the rows and the spacing between create a sense of movement  … the pattern… is determined by the opus.  Opus is the Latin work for a creative work, meaning the way in which a mosaic is worked.”  King then goes on to explain the most common ways of working a mosaic which I’ve recreated for you here.  They are: 1 Opus palladianum, 2 Opus vermiculatum, 3 Opus circumactum, 4 Opus regulatum and 5 Opus tessellatum.
Most Common Ways of Working a Mosaic.   @FanningSparks
I used two of these patterns on the mirror frames I made for our master bathroom.  This photo shows the opus regulatum along the border and opus palladianum in the “bubbles corner”. You can read more about these mirrors in my post Pair of Mosaic Mirrors Completed.
Custom Made Mosaic Mirror for Master Bath by FanningSparks. @FanningSparks
My post Gaudí’s Trencadis Mosaics is packed with examples of opus palladianum which is also referred to as “crazy paving”.
Park Guell Serpentine Bench with Beautiful Trencadis. @FanningSparks
Most of the patterns repeat so it’s not difficult to imagine the same design filling a larger space.  But that’s not the case with Opus vermiculatum which King describes as “laying tesserae in a worm-like, winding manner”.  The actual pattern created with this winding manner can vary greatly.  For instance, Opus vermiculatum can be used to depict the irregular lines of hair, a halo effect around another design element or, as is the case in my serving tray, a winding pattern like a spiral.
Design Elements for my OOAK Mosaic Serving Tray.   @FanningSparks
Another concept I learned from King’s book is the role of positive and negative space in mosaics.  King explains “The tesserae are positive and the spaces in between are the negatives. … You should keep in mind that in many ways the grout lines and spaces are just as important.”  With careful planning, the grout lines of the negative space can be used to enhance the design.  I decided to try using negative space in my design by leaving the frond stalk to be filled with grout.
After settling on the design, I realized I’d need small tesserae to lay out this design on my tray.  To date, most of my mosaic projects have been made with ¾” x ¾” vitreous glass tiles but this project uses 8mm (5/16”) square recycled glass tiles from Elementile.  I chose tiles in Eggshell White, Iridescent Spring Pea Green Tint 1 and Iridescent Eggshell White (see More Info below).  The fern frond is cut from a sheet of stained glass in medium yellow-green with white opal highlights from Hobby Lobby.
8mm Glass Tiles and Stained Glass for OOAK Mosaic Serving Tray.   @FanningSparks
The 8mm tiles did make it easier to create the details of this pattern.  But working with such small tesserae presented a few new challenges such as the need to use tweezers to place the pieces.
Using Tweezers to Place 8mm Tiles.  @FanningSparks
The fern frond was challenging as well due to the small pieces.  Typically, when glass is cut into shapes like these, the edges are ragged and it’s necessary to grind them smooth.
Cut Pieces of Stained Glass for Fern Frond.  @FanningSparks
This was especially true for the tiny curved pieces at the tip of the frond.  It’s not possible, however, to hold such tiny pieces on the grinder.  I figured out the best way around this problem was to leave a long “tail” at the end of each piece.  This provided me with a handle of sorts to use while grinding.  After the piece was nicely finished, I was able to nip off the tail with a simple, straight cut.
TIP: On Small Pieces of Glass Leave a Tail to Hold While Grinding.   @FanningSparks
Another lesson learned on this project was the importance of “keystoning”.  This technique is relevant to the center of the spiral where the inside curve forces a tight fit.   In my first attempt, I used half pieces of tiles to fill this center spot but the result wasn’t great.
Mosaic Tray WIP Showing Tile Placement at Center of Spiral   @FanningSparks
So I decided to try cutting tiles into a keystone shape instead.  This involved nipping off two adjacent corners from the tiles. The keystone shape fits together nicely and resulted in a much better layout.
Mosaic Tray WIP Showing Keystone Tile Placement at Center of Spiral   @FanningSparks
Adhering the pieces to the tray also involved some trial and error.  I like to use a self-adhesive fiberglass mesh such as QuikStik Mosaic Mesh™ (see More Info below).  The mesh, which I raved about in my post about the mosaic mirror frames, is a great time saver because it eliminates entire steps in laying out the tesserae.  This was an important consideration for this tray because of the high number of tesserae involved.  I didn’t count the actual number of pieces, but according to the Mosaic Art Supplies’ Tile Calculator (see More Info below) which I used to calculate my requirements, this 17 ½ “ x 11” tray needed around 1600 8mm tiles. That’s a lot of tiles to place in their specific positions!
Mosaic Tray WIP with Lots of Tiles to Place   @FanningSparks
After the tesserae were all placed on the mesh, it was time to permanently adhere the tesserae to the tray using thinset mortar.  This was the tricky bit.  I put down a thin layer of thinset and carefully placed the mesh and tiles on top.  I’d read that you should press a flat 4”x 4” tile onto the surface to ensure it is level and smooth.  This was a great tip and worked very well.
Mosaic Tray WIP Using Flat Tile to Level   @FanningSparks
Pressing down with the flat tile also forced the thinset mortar up through the mesh.  This is exactly what was needed. But it required that the layer of thinset mortar be a consistent depth.  I had simply eyeballed the thinset mortar to get it level and smooth but, as it turns out, that wasn’t good enough.  After pressing down with the tile, some tesserae made good contact with the thinset and were properly seated.  But other tesserae were still sitting on top of the mesh and didn’t even touch the thinset.
Mosaic Tray WIP Thinset Mortar Issue With Inconsistent Depth   @FanningSparks
Good contact with the thinset mortar is needed to ensure tesserae don’t come off the tray.  I corrected the situation by letting the thinset dry and then testing every single tesserae individually.  Any that were not securely adhered in the thinset, I glued into place with clear silicone. This was a rather tedious, but necessary, extra step.  In hindsight, I wish I had taken the time to ensure the thinset mortar layer was the same depth across the entire surface.  Next time I’ll use a simple toothpick for this check.  I’ll determine the desired depth and then mark it on a toothpick.  By inserting the toothpick at various positions across the surface, I will be able to measure the thinset layer to ensure it is the desired depth everywhere.  Then I can make any necessary adjustments before moving on.
The next steps were to apply the grout and the sealer.  I was eager to see how depicting the frond stalk with the negative space of the grout line would turn out.   It looks even better than I hoped.
Finished OOAK Mosaic Serving Tray   @FanningSparks
My plan is to use this new serving tray on our porch.  It will be handy for carrying morning coffee, lunch or evening drinks from the kitchen.
Coffee Served on the Porch at Sunrise   @FanningSparksCoffee Served on the Porch at Sunrise   @FanningSparks

More Info

The tray used in this project was a thrift store find.  It is 17 ½” x 11” and made of plastic.  I covered the original fake wood finish with green spray paint.
The 8mm Recycled Glass Mosaic Tile by Elementile were purchased from Mosaic Art Supply.  I’d highly recommend Mosaic Art Supply as an online source of supplies and helpful reference material.  I’ve always had a good experience purchasing from them plus their online reference info found under Learn to Mosaic is clear, practical and reliable.   I often use their Mosaic Tile Calculator.
The self-adhesive fiberglass mesh I used is QuikStik Mosaic Mesh™ from Skeew.   There’s also a wealth of helpful information about making mosaics which you can access on the Skeew website under How To > Make Mosaics > Articles.
Several previous posts from the FanningSparks blog were mentioned in this post including:
. Southern Ladies, Christmas Stockings and Hairy Armpits
. Learning from the Ancient Masters
. Pair of Mosaic Mirrors Completed
. Gaudí’s Trencadis Mosaics.
You might also enjoy the post DIY Turkish Mosaic Candle Holder Tutorial which includes a full tutorial, with detailed step by step instructions, for a great beginner mosaic project.
If all that isn’t enough to spark an idea, check out my latest Pinterest board Mosaic Artwork – FanningSparks Favs.  It’s packed with mosaic inspiration.

Today’s Takeaways

1. Consider challenging yourself to try new techniques and approaches in your chosen art form.
2. Take note of what went well and what could be improved when completing an art, craft or design project.
3. Seek out and study the work of others for inspiration.
Peg - FanningSparks Author

Anyone who has ever visited South Carolina’s Lowcountry would be familiar with the sweetgrass basket.  These baskets, arguably the region’s best known art form, are rooted in Gullah traditions.  The art of making sweetgrass baskets can be traced back to enslaved West Africans on the rice plantations of the Southeast.  The first sweetgrass baskets, large round flat baskets called fanner baskets, were used during the rice harvest to separate the grain from the husk.  The forms and sizes of the baskets evolved over time as their usage expanded into different household functions.  Sweetgrass baskets are still made the traditional way.  They are coiled by hand, applying the skills passed down from generation to generation, using only simple tools and local natural materials.
Sweetgrass Baskets by The Gullah Dream Weaver.   @FanningSparks
I recently had the opportunity to learn about sweetgrass basket making at the Coastal Discovery Museum in Hilton Head, South Carolina.  Our instructor, Daurus Niles known as The Gullah Dream Weaver, is an 8th generation sweetgrass basket maker.
The Gullah Dream Weaver Sweetgrass Baskets Display.   @FanningSparks
Daurus learned the art of sweetgrass basketry from her grandmother and other family members.  Here are a few closeups of her outstanding work
Lidded Sweetgrass Basket by The Gullah Dream Weaver.   @FanningSparks

Looped Handle on Sweetgrass Basket by The Gullah Dream Weaver.   @FanningSparks

Amazing Pattern on Sweetgrass Basket by The Gullah Dream Weaver.   @FanningSparks
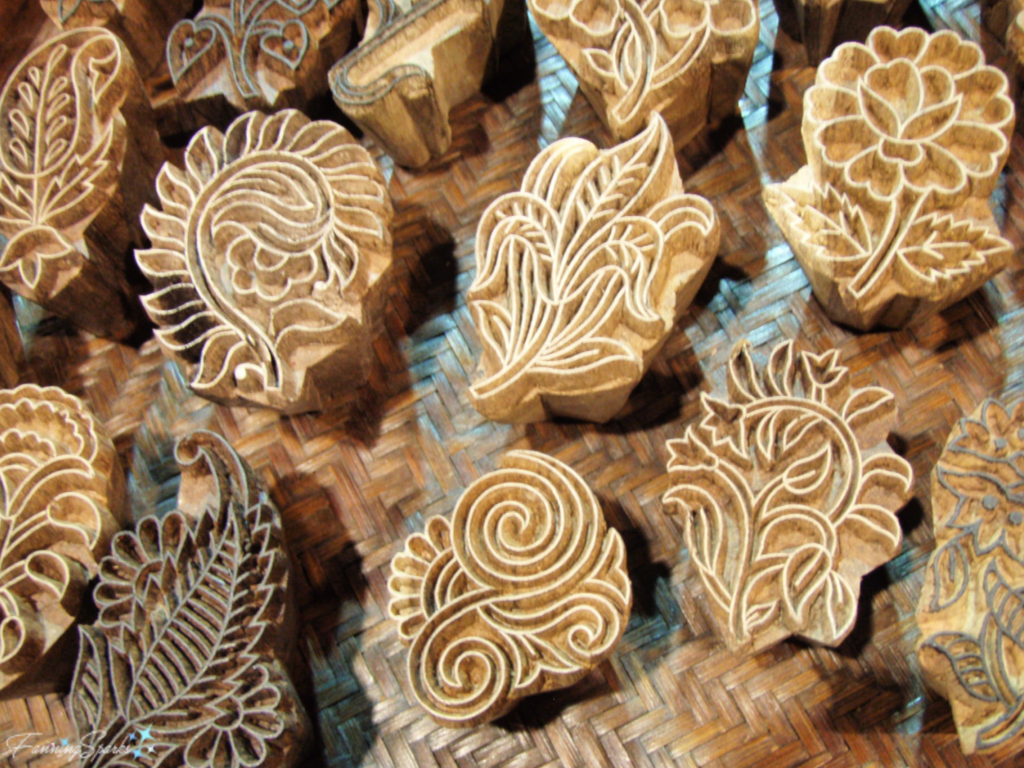
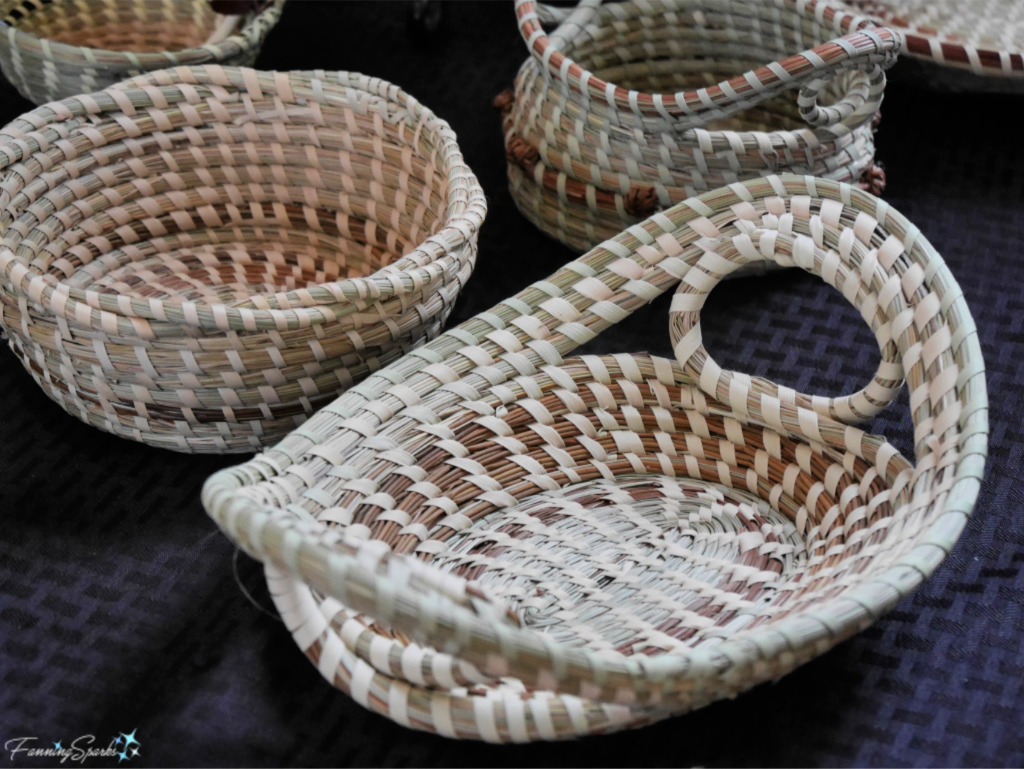
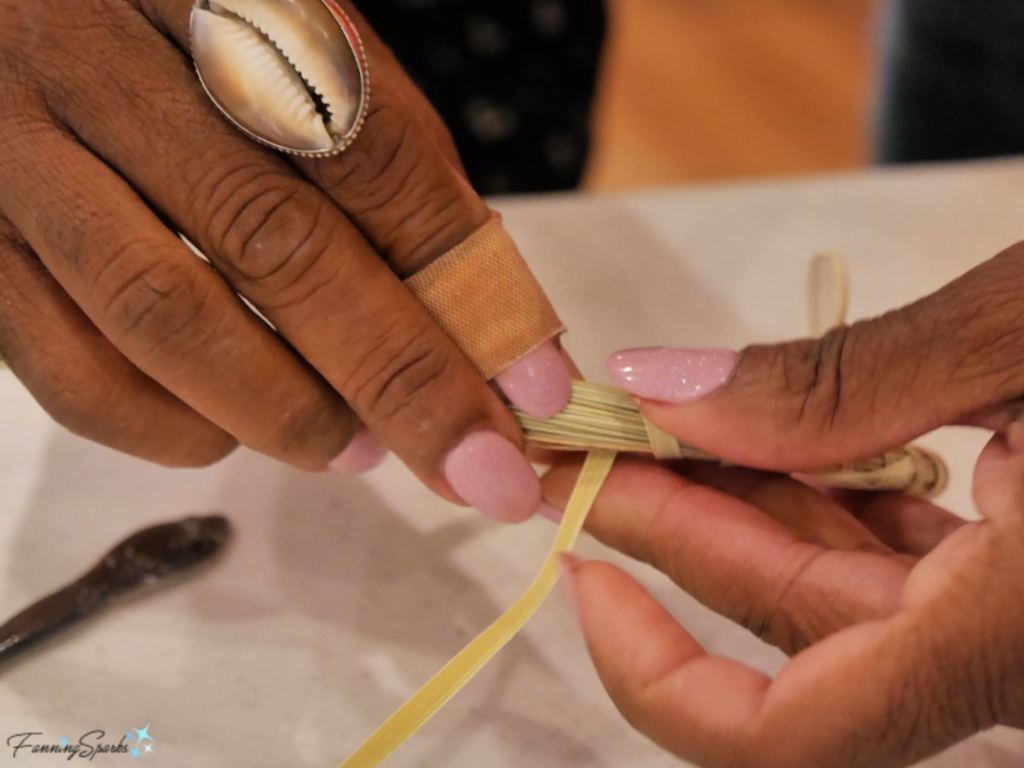
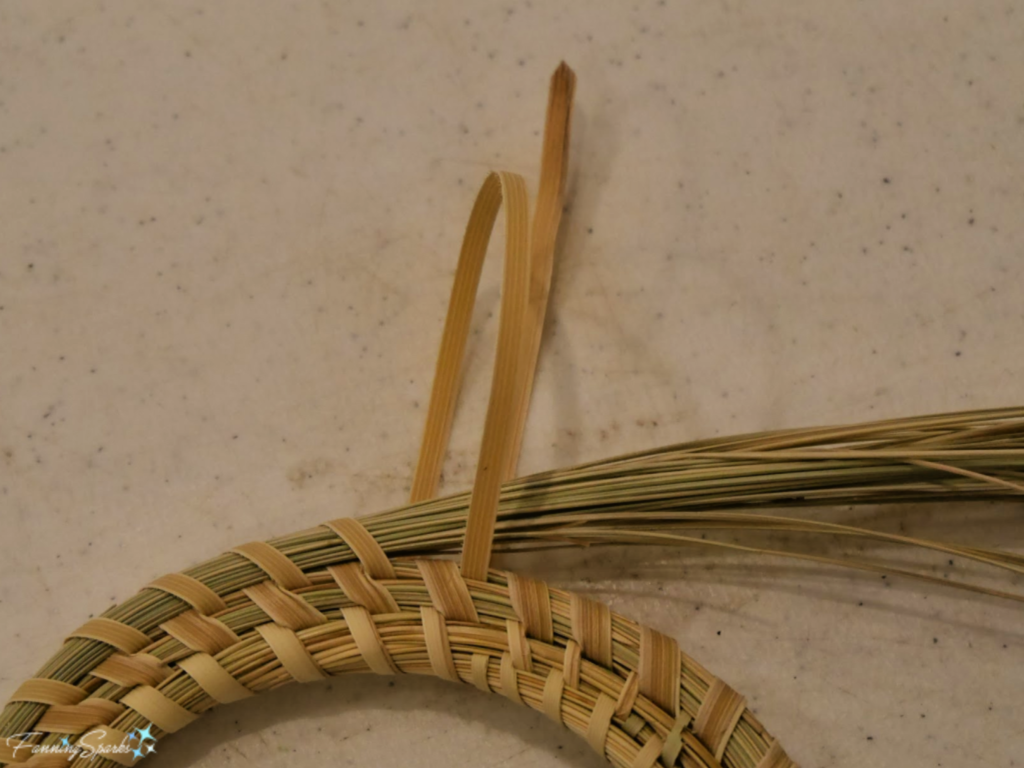
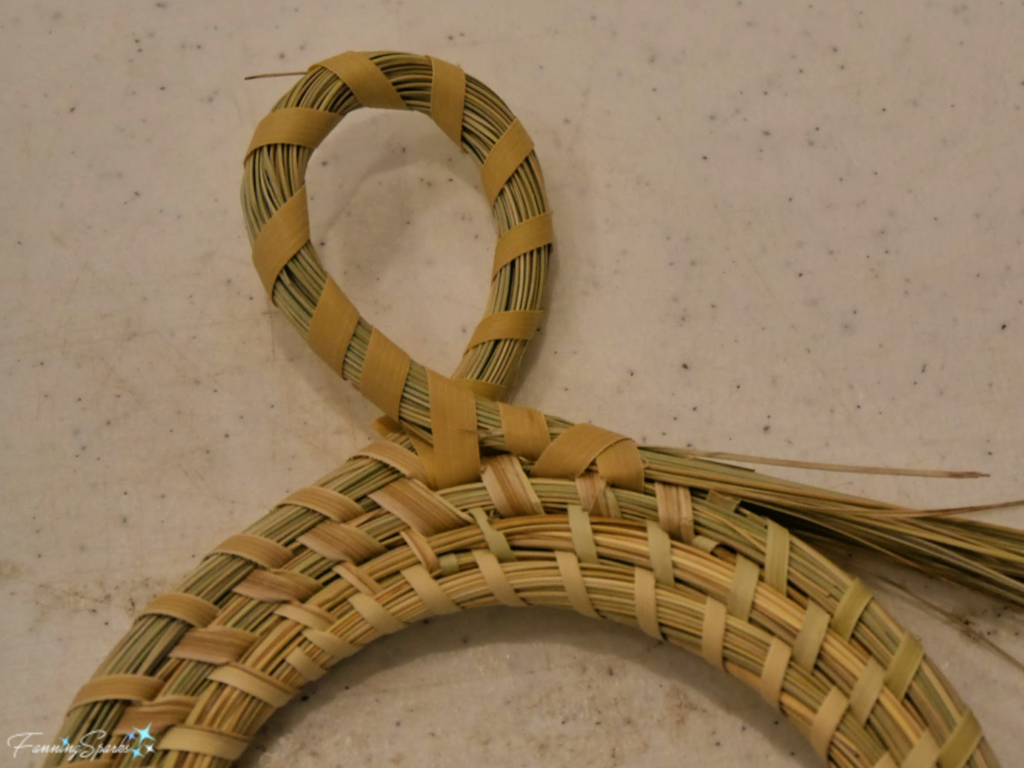
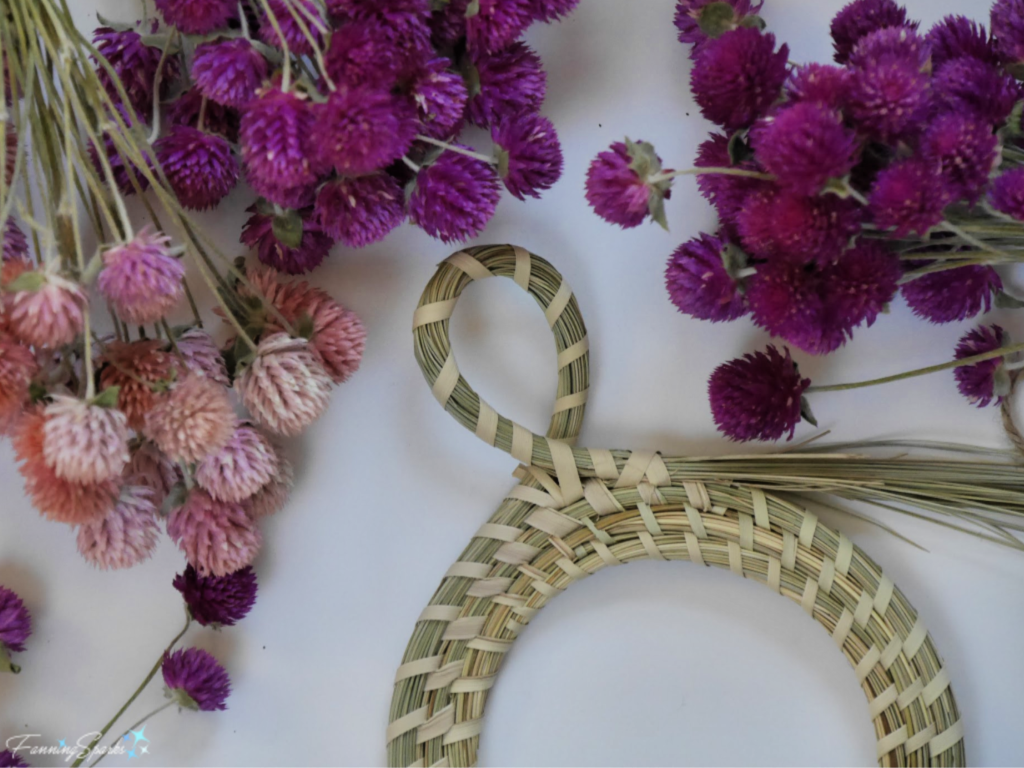
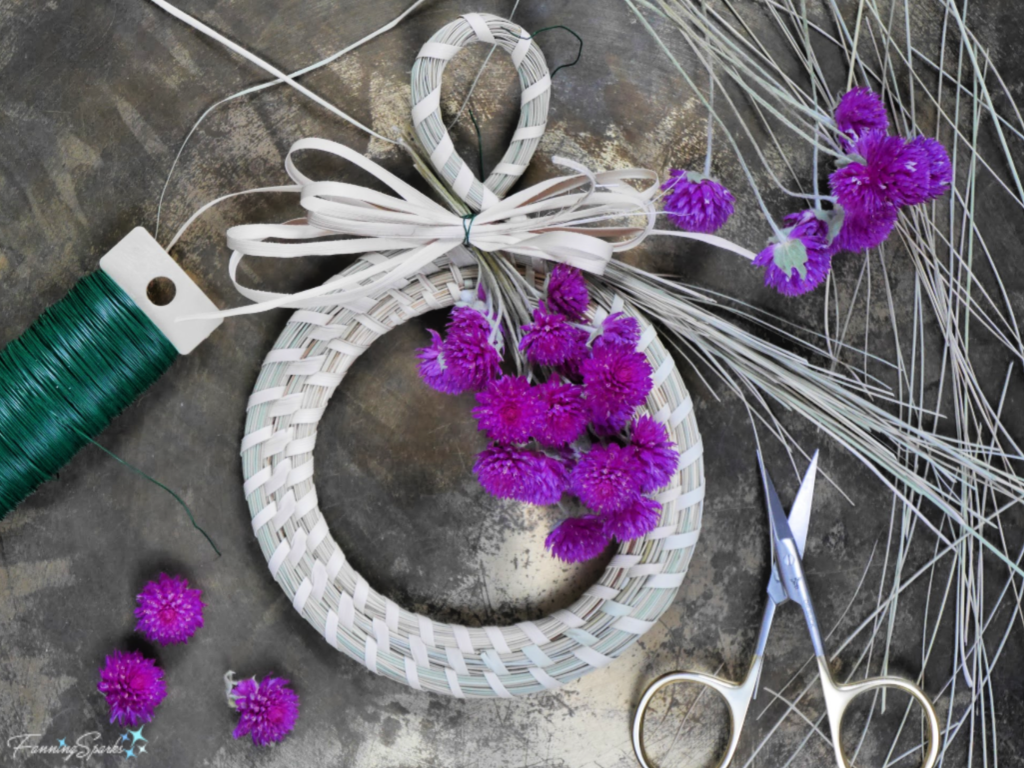
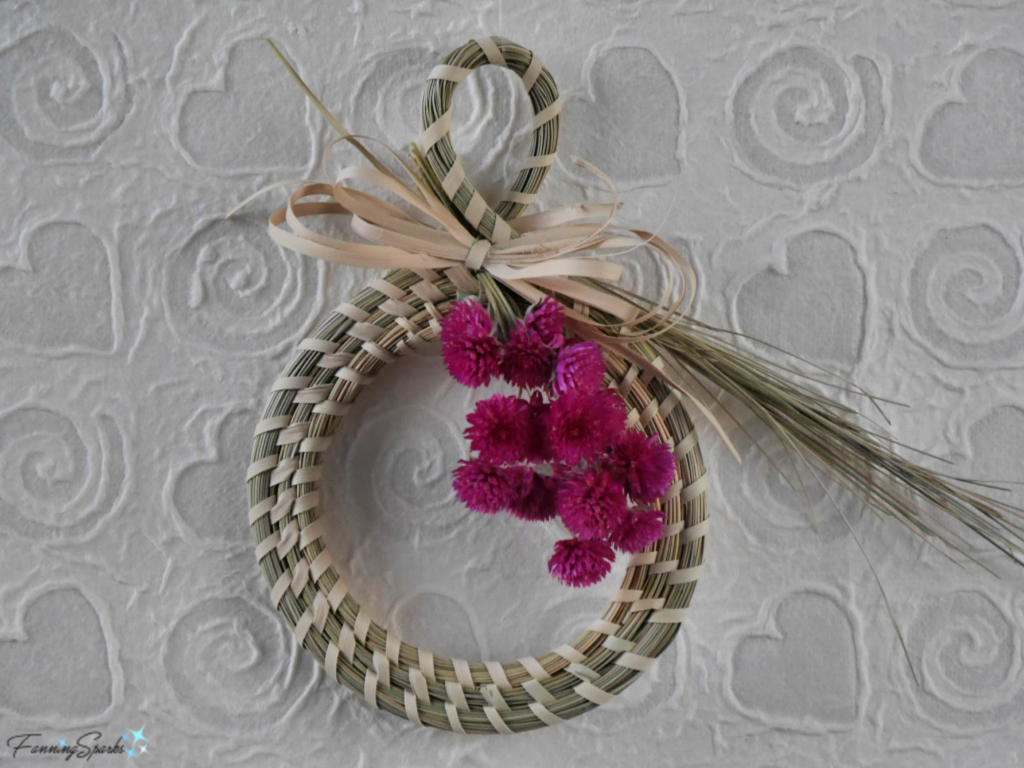
Usually the class learns how to make a small sweetgrass basket.  But during the month of December, Daurus switches it up and has the class weave a small sweetgrass wreath.  She’s a great instructor—knowledgeable, attentive and patient.  To make the most of our time (the class is 2 hours long), Daurus starts the wreathes.  Here’s my starter wreath along with the simple tools we used—a pair of scissors and a “nail bone” (actually a repurposed spoon handle).
Tools and Starting Form for My Sweetgrass Wreath. @FanningSparks
Palmetto fronds, stripped into narrow ribbons, are woven around strands of sweetgrass.  Here’s a closeup of Daurus demonstrating the weaving technique.
Daurus Niles Demostrates Sweetgrass Weaving.   @FanningSparks
We learned how to use the nail bone to make a small opening in the previous row of sweetgrass, just big enough for the palmetto ribbon, and insert the pointed end of the palmetto ribbon up and through the sweetgrass.
Wrapping Palmetto Ribbon Around Sweetgrass.  @FanningSparks
We learned how to “refill” the sweetgrass bundle as we came to the ends of the strands.  The goal is to keep the sweetgrass consistent and smooth while taking evenly spaced stitches with the palmetto.  After weaving three full circles, we added a hanging loop at the top.
Adding a Hanging Loop to the Sweetgrass Wreath.   @FanningSparks
The class was before Christmas so many of the participants decorated their wreaths with red berries and holiday greenery.  Since I wanted to display my wreath year-round, I decided to take it home to decorate.  I wanted to find a way to embellish it with dried flowers.  The flowers shown below, globe amaranth, came from the cutting garden I grew this past year.  You can read more about that experience in the post Zinnias Rock! And More Cutting Garden Tips.  Note that in the post I was disappointed with the globe amaranth (Gomphrena globosa) I had planted.  But it rallied later in the season and I was able to harvest a huge quantity of magenta, mauve and cream blooms like those pictured below.
Dried Globe Amaranth Flowers with Sweetgrass Wreath.   @FanningSparks
After some trial and error, I decided to make a small bow from palmetto frond and add a simple bunch of magenta blossoms.
Decorating Sweetgrass Wreath with Dried Globe Amaranth Flowers.   @FanningSparks
I’m pleased to share my very own sweet sweetgrass wreath with special thanks to Daurus Niles and the Coastal Discovery Museum.
My Very Own Sweet Sweetgrass Wreath.   @FanningSparks

More Info

The Coastal Discovery Museum, on Hilton Head Island in South Carolina, offers a number of activities including tours and workshops.  You can learn more about their Sweetgrass Basketry classes here.
There’s a great article about Daurus Niles, The Gullah Dream Weaver, in the Hilton Head Local Life magazine.  Check it out here.  Daurus is quoted as saying “Who would’ve thought you could take materials from the earth and make art that’s displayed all over the world? We started out doing this as a way of life, and it’s still a way of life, and now we’re being displayed at the Smithsonian Museum and the White House.”
You can see the sweetgrass baskets at the Smithsonian American Art Museum here.

Today’s Takeaways

1. Many of today’s art forms are rooted in the making of functional items that were once required for daily life.
2. It’s fascinating to trace the passing of knowledge and skills from generation to generation.
3. Consider ways to learn about and help preserve traditional arts and crafts.

Peg - FanningSparks Author

This time last year, I tried a new approach for my new year’s resolutions.  I selected a single word to work towards during the year.  To keep it top of mind, I created a visual reminder in the form of a stitched photo.  The first step was to select a photo to represent the word.  I had the photo enlarged and printed on heavy matte paper.  Then I used embroidery floss to stitch my word on the photo.
My word for 2020 is “Savor”.  It’s meant to remind me to stop and savor the good things in life.  I chose the below photo of a sunrise over Lake Oconee to remind me to savor moments of beauty.
Savor My Word for 2020.   @FanningSparks
The official definition of “savor” includes “to appreciate fully; enjoy or relish”.  To fully appreciate a moment, requires engaging all the senses.  Moments worth savoring are not only seen.  Any of the senses—sight, hearing, touch, smell and taste—could trigger a moment to savor.  Examples of auditory triggers might be birds singing, church bells ringing or a favorite piece of music playing.  In the photo below, the pleasant fragrance of the lovely bouquet of roses caught my attention.  When I stopped to appreciate it more fully, the graceful arc of the branch, the raindrops from a recent shower, the contrast of the pink blossoms against the green foliage and the silky feel of the rose petals all contributed to this special moment.
Branch of Roses. @FanningSparks
Relishing and fully enjoying experiences is another opportunity to savor.  It could be savoring precious time spent with family and friends.  A family gathering, celebration or event could be examples.  A simple backyard picnic, in a pleasant setting with a tasty meal, is something worth savoring.
Picnic Lunch Under Wisteria. @FanningSparks
Fully appreciating a physical activity such as a nature hike or a kayak ride is another example of savoring.  I took the below photos while paddling on Fishing Lake near our previous home in Villa Rica, Georgia.
Kayaking into the Sunrise. @FanningSparks
Feather Floating in Sunrise. @FanningSparks
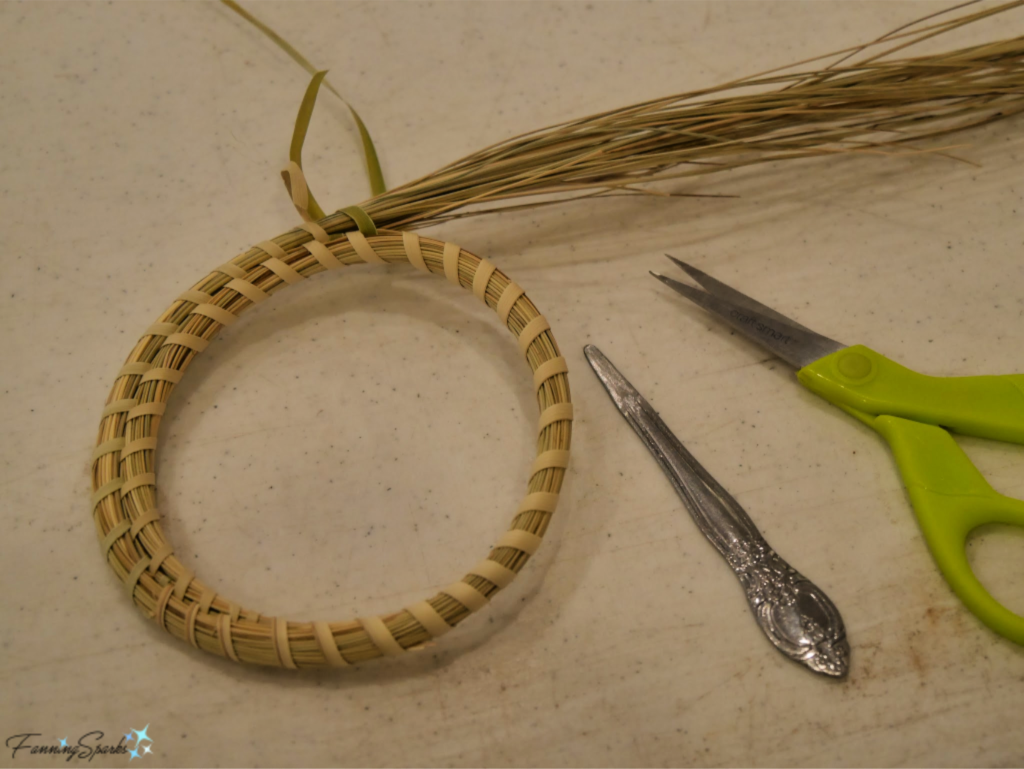
Most people look forward to and savor the novelty of traveling and exploring new destinations.  On a grander scale, having the once-in-a-lifetime experience to watch this magnificent leopard while on an African safari was definitely something I savored.
Leopard on Lookout.   @FanningSparks
Leopard Yawning.   @FanningSparks
Leopard Looking Ahead.   @FanningSparks
While beauty is often found in the natural world, it can also be man-made.  Here’s an outstanding example of man-made beauty worth savoring.  This is the spectacular Palau de la Música Catalana in Barcelona, Spain.
Palau de la Musica Barcelona Ceiling. @FanningSparks
Palau de la Musica Barcelona Stained Glass Ceiling. @FanningSparks
Another experience that many people savor (and as you might have guessed something that resonates with me) is the joy of creativity and the art of making.  Designing the stitching on the sunrise photo, especially adding the rows of color coordinated stitches, was an experience I savored.
Embroidered Photo of Sunrise Closeup.   @FanningSparks
These moments are fleeting—they don’t last forever—so it’s even more important to savor them when they occur.  A quick search of gratitude practices, shows that savoring is a critical part of feeling true gratitude.  It’s about slowing down long enough to recognize and appreciate the good in life.

Now, to take a moment and look back at last year.  My word for 2019 was “Harmony”.  Honestly, I rather expected my focus on harmony would taper off and be forgotten after a few weeks.  But it didn’t actually work out that way.  Instead, I’m happy to report, I was able to keep my goal of harmony in mind throughout the year.
Harmony My Word for 2019 Stitched on Photo. @FanningSparks

More Info

Last January, I introduced my word for the year in my post Harmony: My Word for 2019.
You can learn more about my African safari experience in the post Majestic Lovable Elephants.
The Palau de la Música Catalana in Barcelona, Spain is definitely worth visiting.
I’ve become quite enamoured of paper stitching especially on my own photos.  You can find examples in these posts:
Season’s Greetings 2018 
Harmony: My Word for 2019 
Joyous Greetings 2019
Check out my Pinterest board with Paper Stitching inspiration.  I created it a year ago and have been adding to it ever since.  I’ve discovered some incredible fiber artists stitching on paper to create amazing artwork.
Jan 16, 2021 Update: Paper stitching is an easy project.  Only basic design and hand sewing skills are involved.  Check out the post, Hello Marvelous Photo Embroidery – DIY Tutorial, for step-by-step instructions to embroider your own printed photo.

Today’s Takeaways

1. Think about selecting a single word to represent your goals for the new year.
2. Make a conscious effort to savor special moments.
3. Consider paper stitching as a way to embellish your favorite photos.
Peg - FanningSparks Author