
When it comes to making, some ideas just need time to percolate before the actual creating can begin. A pleasing sight, an interesting detail, a novel approach, uncommon materials or an intriguing story can all spark an idea. Sometimes the idea moves from vision to reality swiftly. Other times, the idea is only partially formed, it changes direction, it stalls, it gets scrapped and it starts over.
Occasionally, ideas merge and come together unexpectedly―at least, that’s how it happened for me on this latest project. Read on to see how this special project commemorates a life changing event for me.
It all started with a walk on the beach and the treasures I found there. 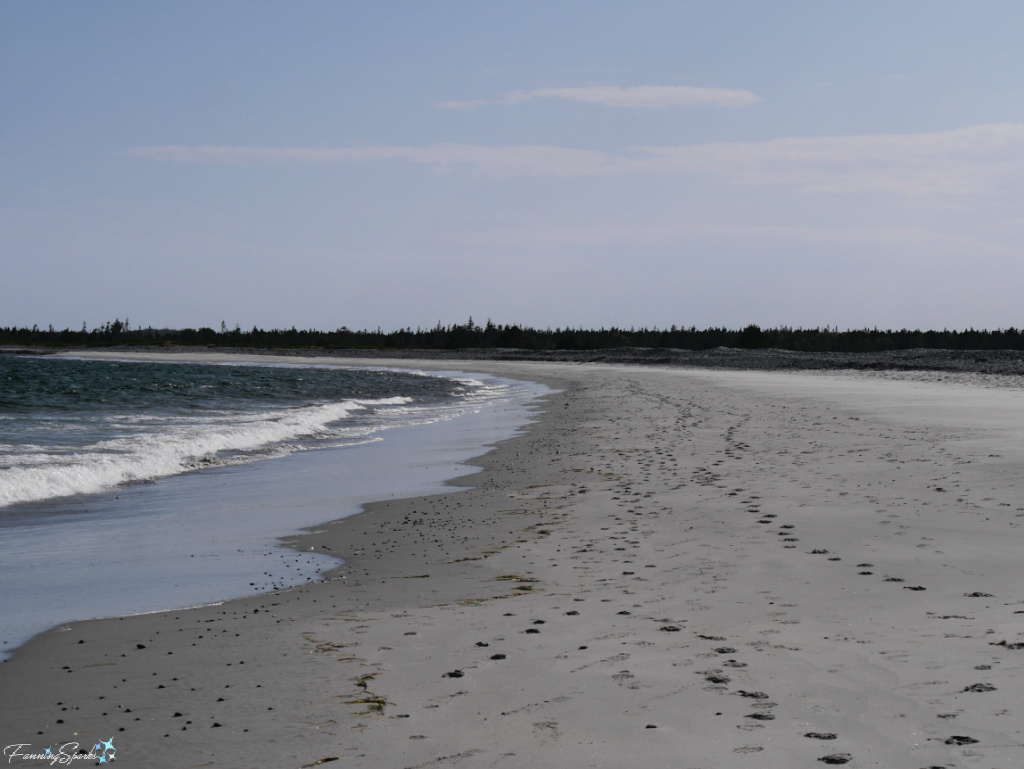
Here’s the small stash of driftwood from my beach walks. I originally shared this photo in my previous blog post Catch My Drift with a vague promise to share the project I planned to make. 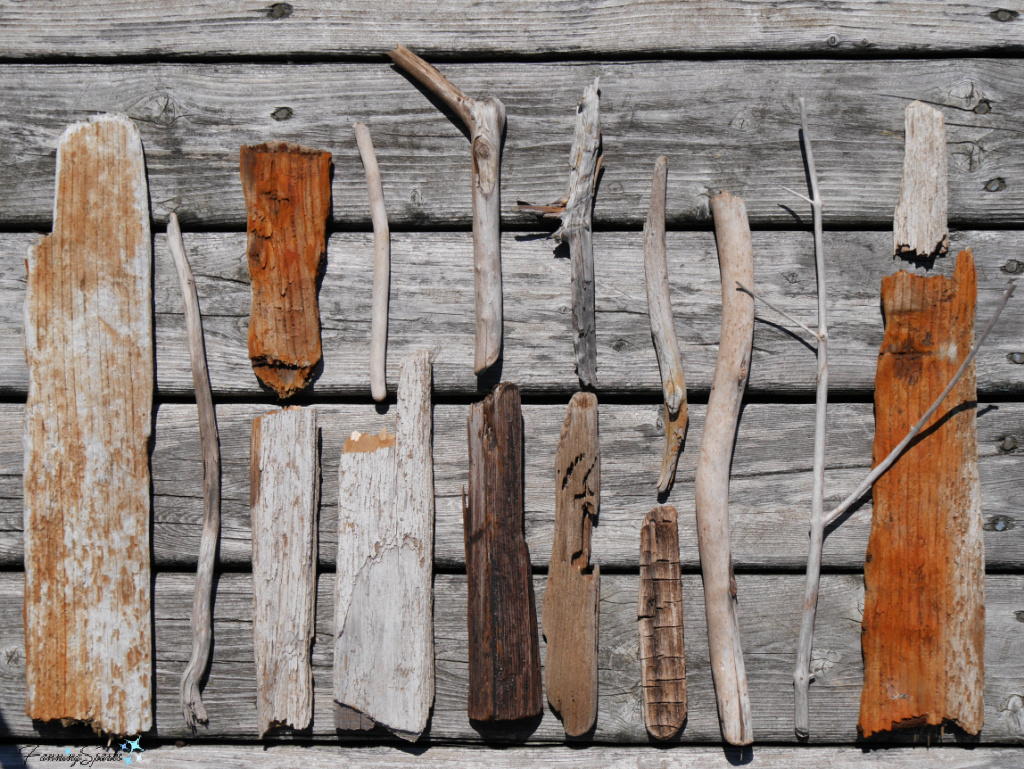
By casting a wide net, I was able to find a variety of ways to use driftwood (see Driftwood Art Roundup). This shop window display suggests yet another possibility for driftwood art.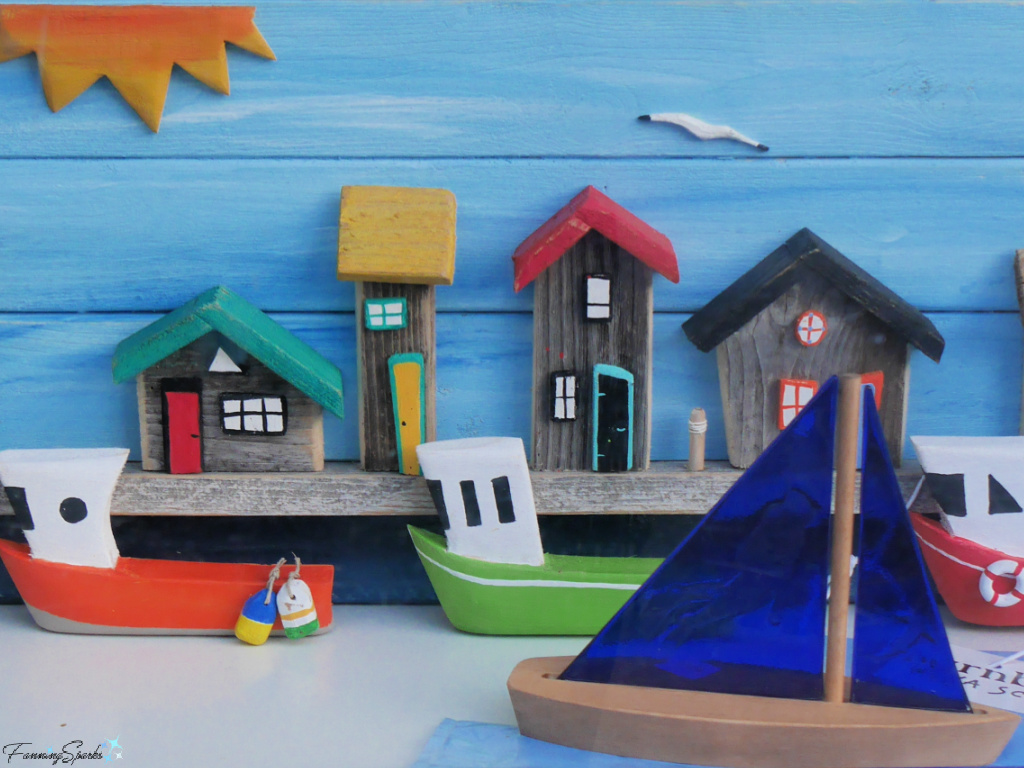
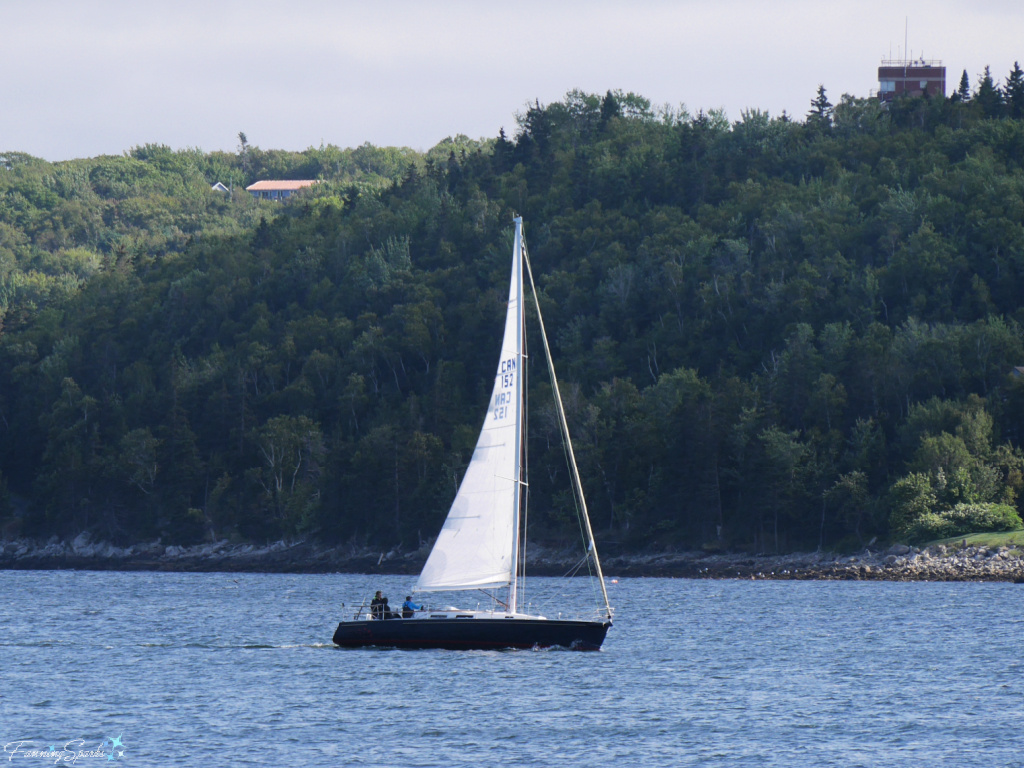
A parallel train of thought was triggered by the beautiful sight of sailboats on the open water. 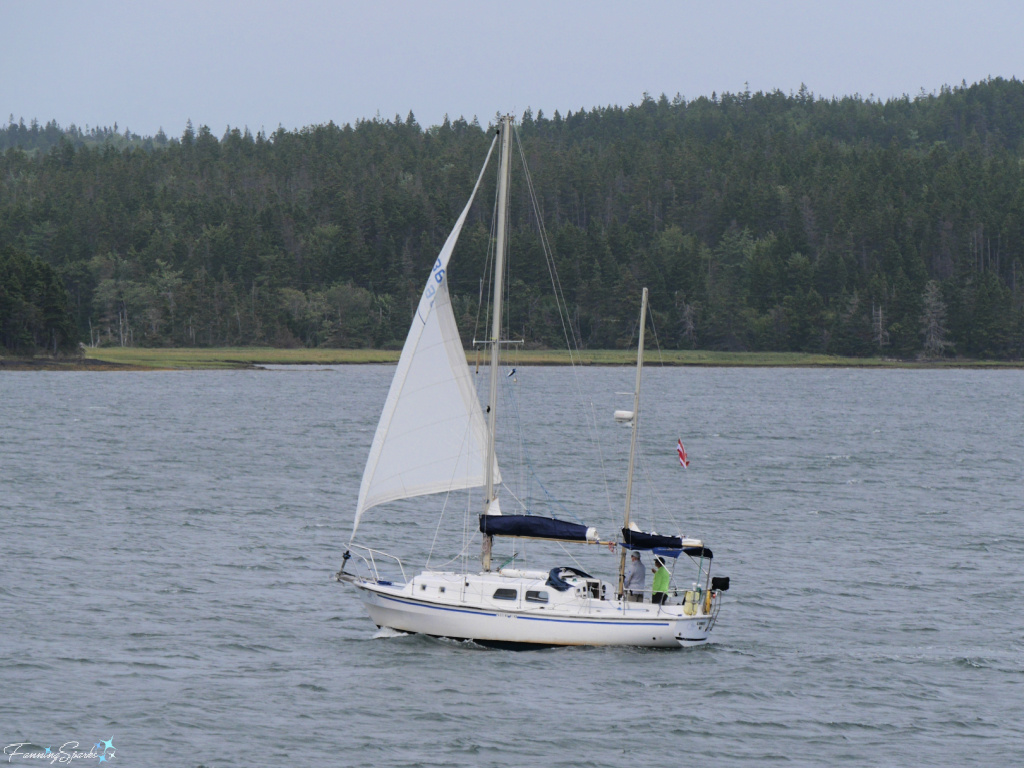
This idea gained momentum when I spotted these splendid ship models at the Fort Point Museum in LaHave.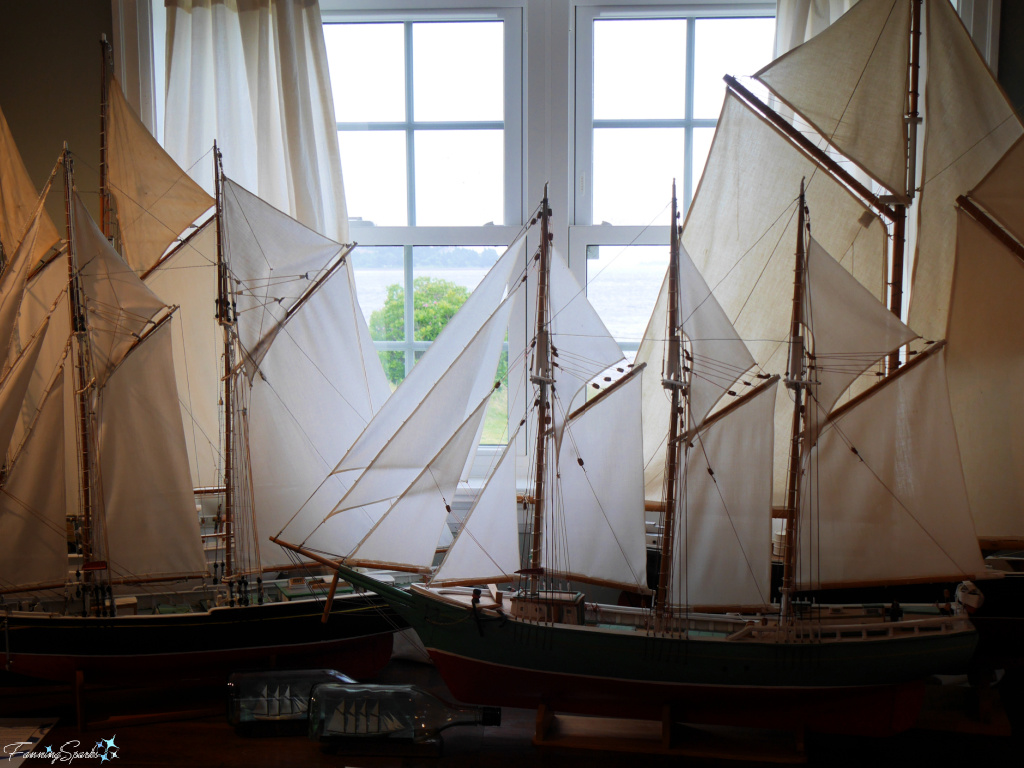
Then, along came the colorful maritime signal flags with their fascinating and important story (see Cracking the Code).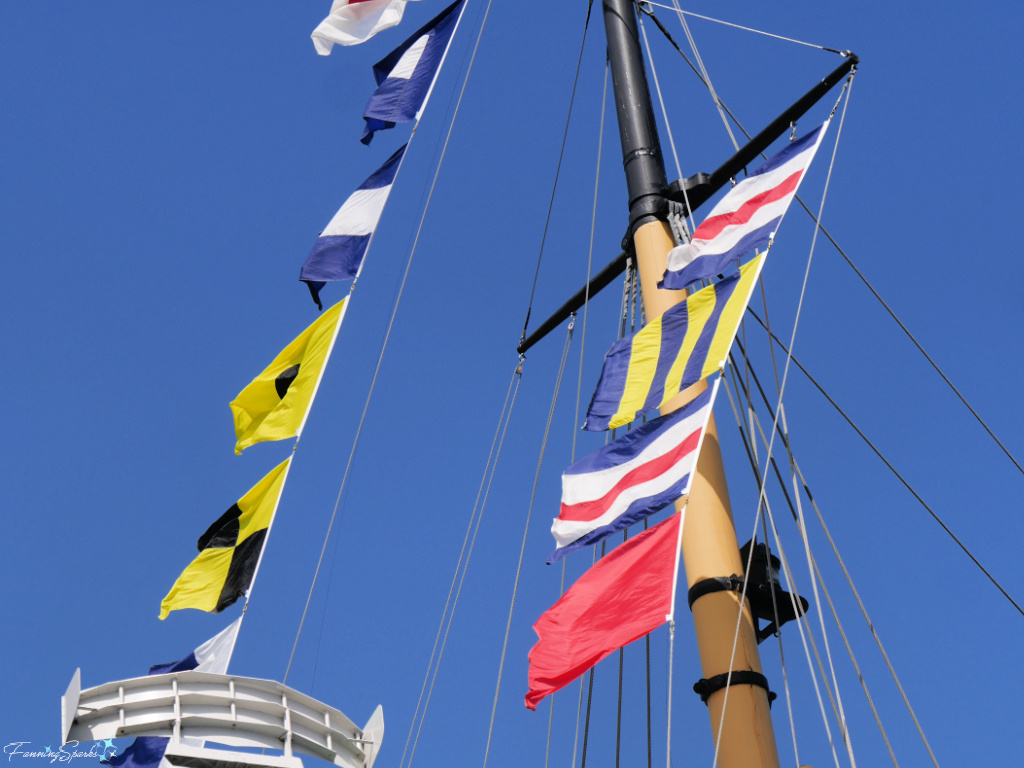
While searching my photo archives for examples of ensigns, I came across the below photo from the Keukenhof gardens, the world-famous spring gardens in the Netherlands. The quirky wooden shoe sailboat proudly wearing a Dutch flag sparked another creative idea.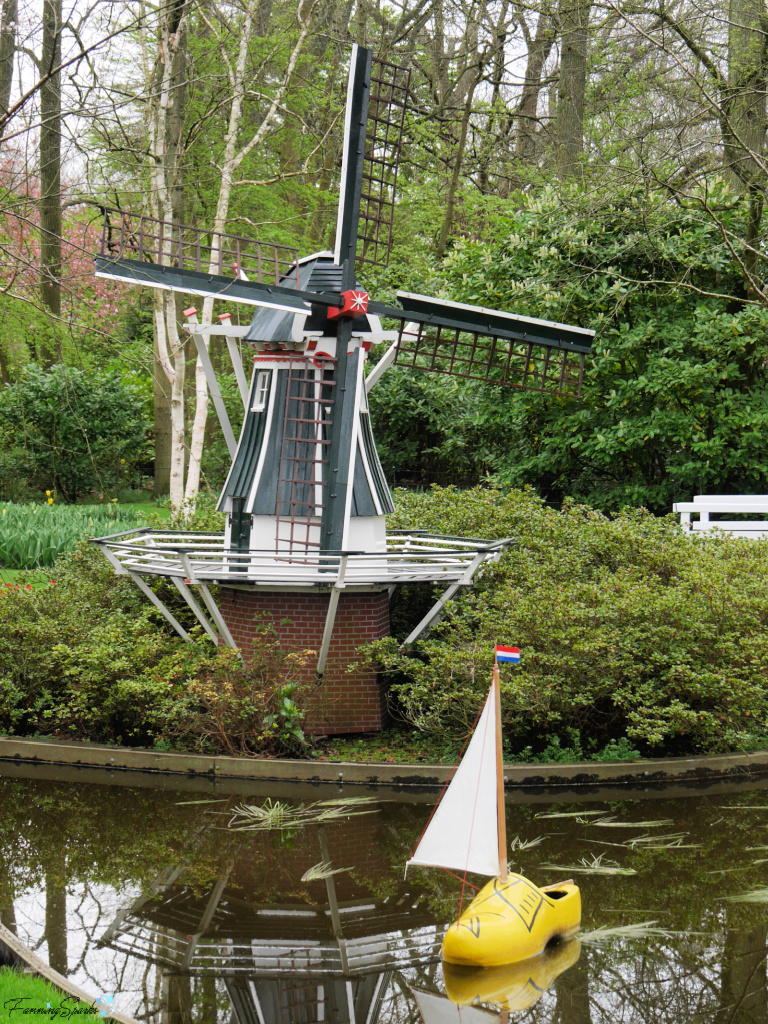
So, “the idea” finally came together and I decided to combine driftwood, sails and signal flags. Here’s how my signal flag driftwood sailboat turned out.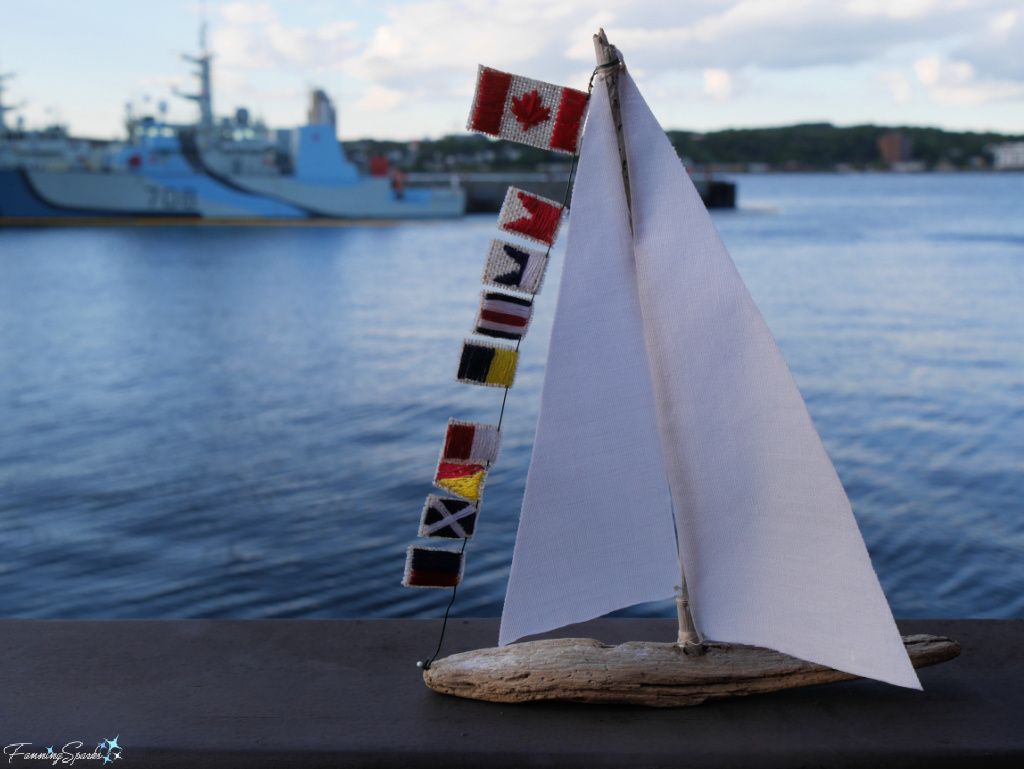
After I finally settled on a vision, the project actually came together quickly. The first step was to select pieces of driftwood to create rustic “sailboat” forms. I found it easiest to start with the sailboat body. Long, narrow, flattish pieces of driftwood that sit firmly on a level surface seem to work best. My sailboat bodies vary from 10 to 20cm (4-8”) long; all are about 2.5cm (1”) wide and all are less than 2.5cm (1”) high.
Then I selected driftwood “sticks” to create the mast. I chose long, straightish pieces in scale with the sailboat body. Most of my masts are about 2.5cm (1″) longer than the sailboat body.
Having selected a body and mast for the sailboat, the next step was to drill a hole in the body. I found the center, lengthwise and crosswise, in the sailboat body. Then selected a drill bit about the same size as the bottom of the mast and bored a shallow hole at the mark trying not to drill all the way through the body. I test fit the two parts making sure the sailboat frame sat firmly on a flat surface.
Then I added a little glue in the hole and inserted the mast.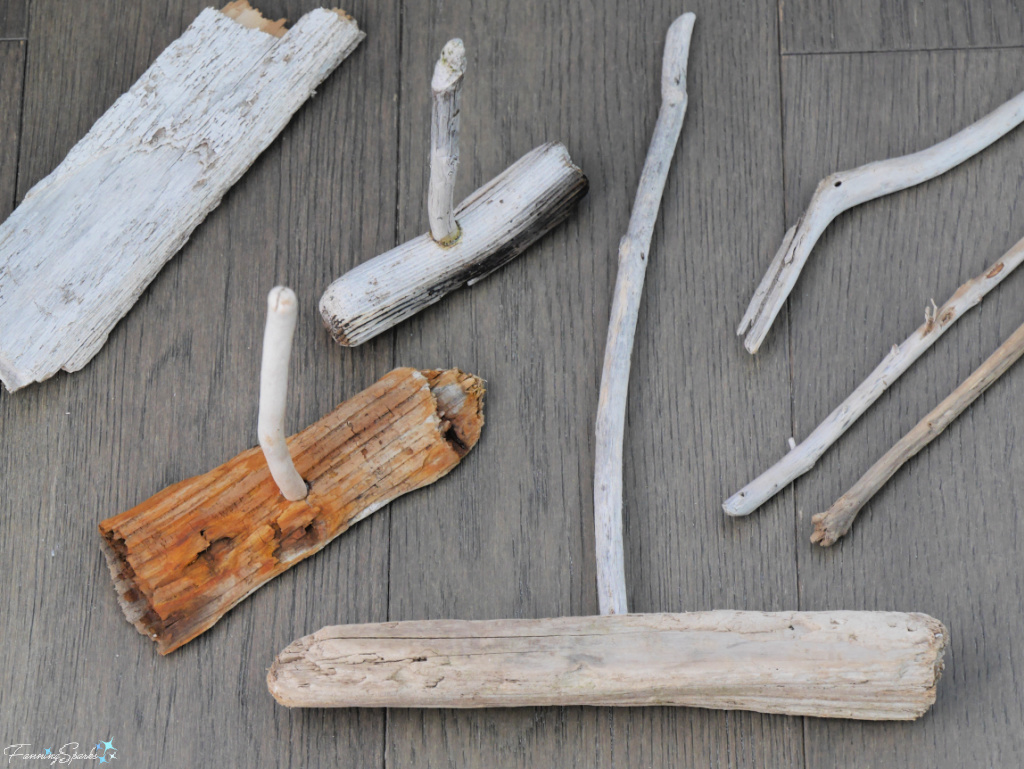
The next step was to add sails. I started by making paper templates―a necessary step because the driftwood mast wasn’t straight. I simply taped the paper sails to the mast to check for fit.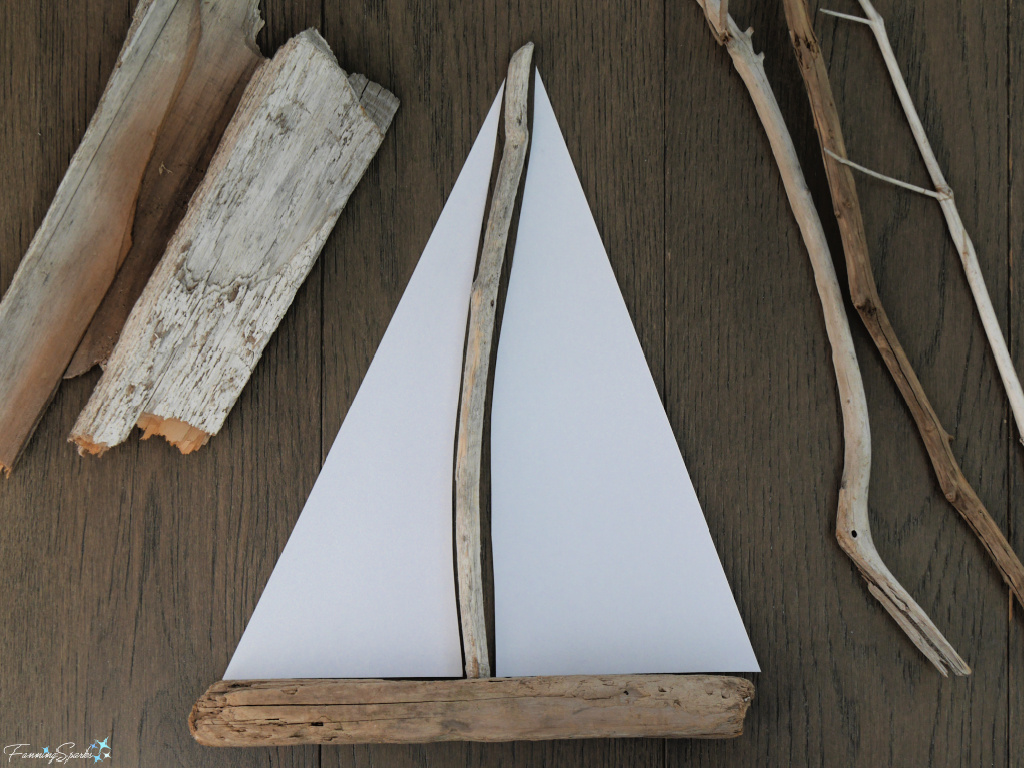
A variety of materials could be used to create the sails―paper, felt, fabric, lace and crocheted pieces would all be suitable.
My first idea was to repurpose a few of my vintage handkerchiefs to make sails. 
The idea was to showcase the hankie’s pretty embroidery in the sail. 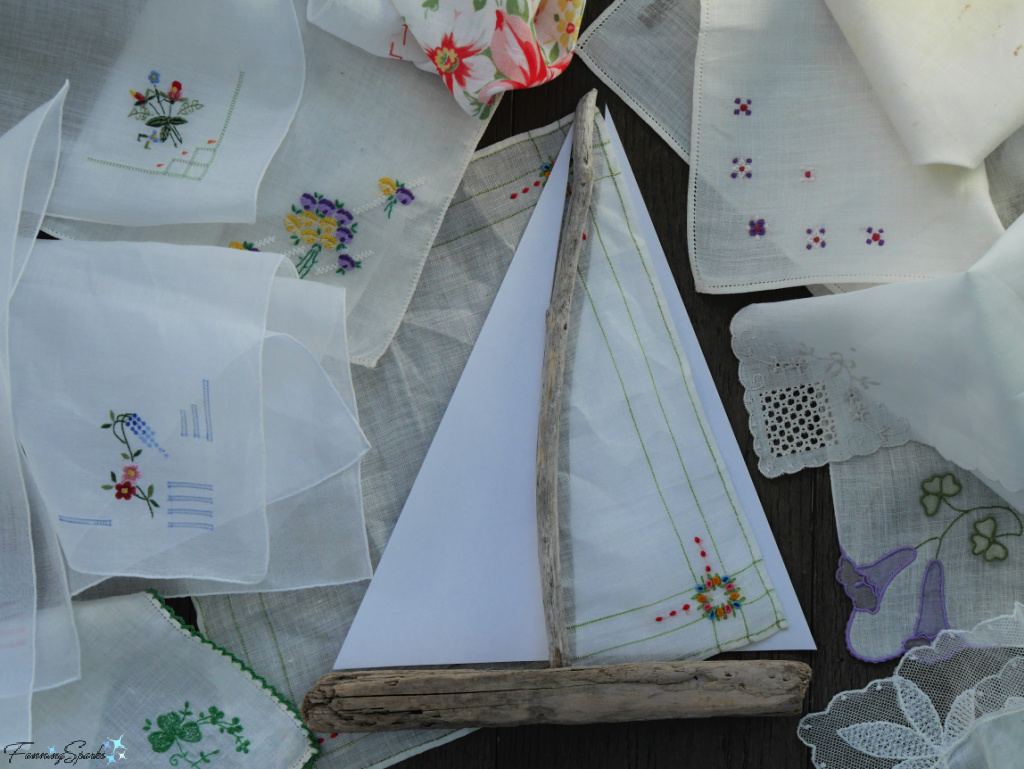
Next, I considered a piece of lace. I tested this idea with a piece of fancy manufactured lace. 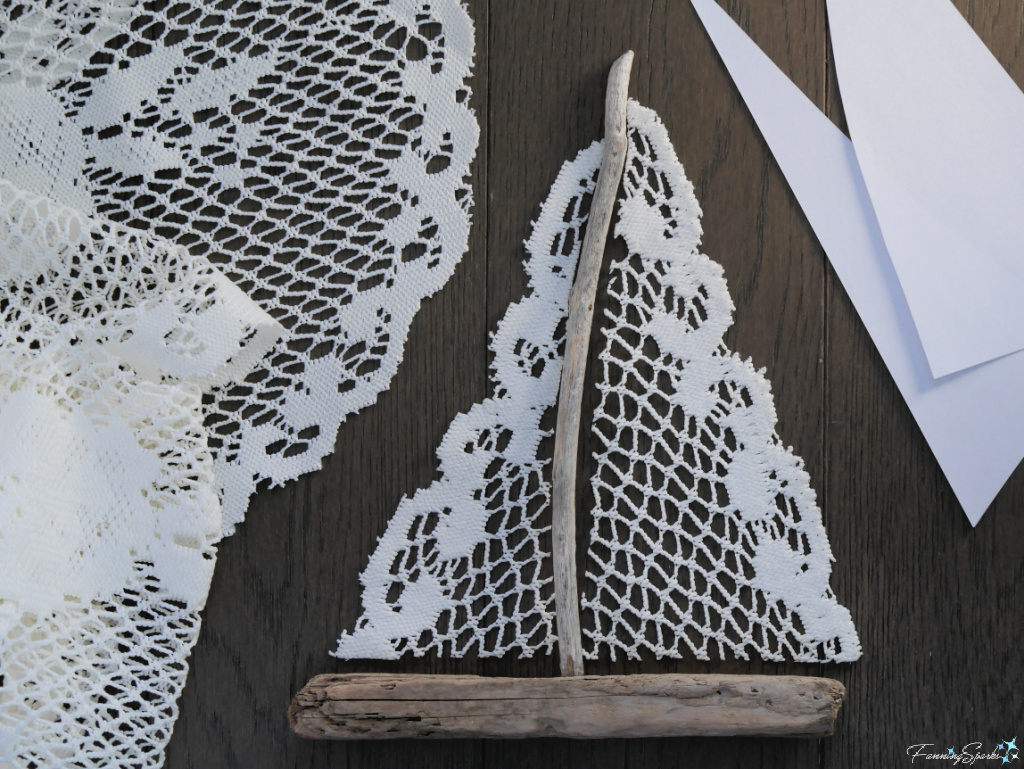
Fabric was the next option I tried. A firm fabric in traditional white seemed like the best option since, in my mind, plain white sails are iconic. 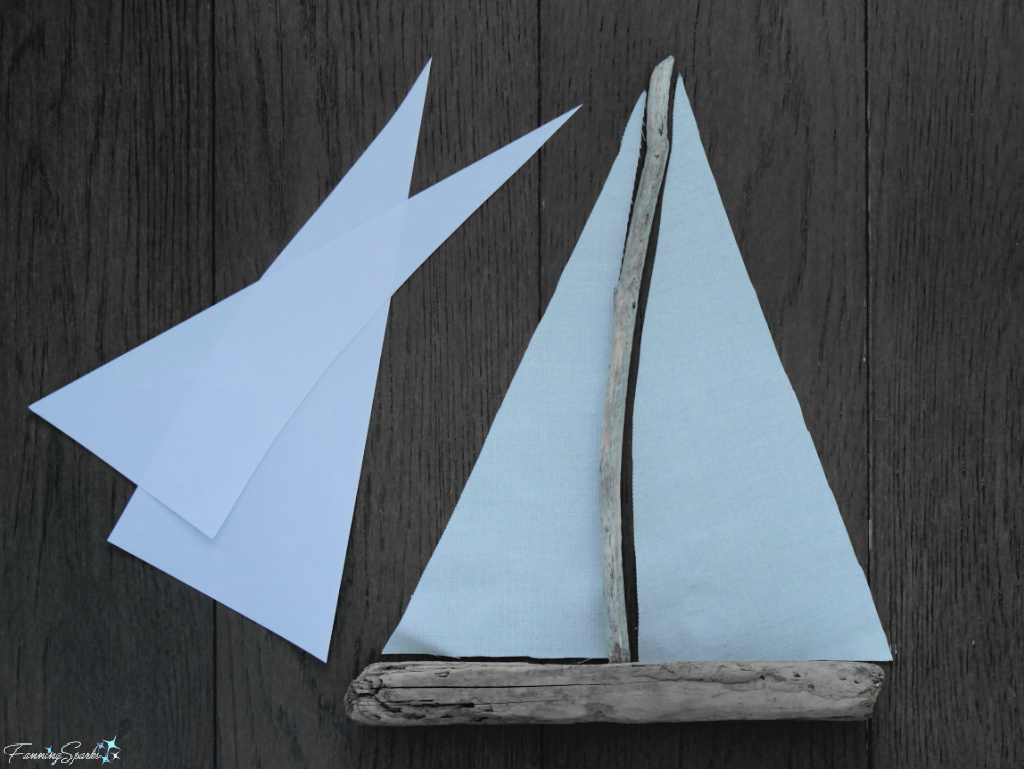
All three options―vintage hankie, fancy lace and plain fabric―looked good. But when I factored in my plan to showcase a message with signal flags, it seemed like the hankie embroidery and the fancy lace might compete with the colorful flags. Not to mention the fact that I couldn’t quite bring myself to cut up those vintage hankies and ruin the fine hand-stitched embroidery!
After sorting out the sails, it was time to address the signal flags. Here’s the official reference from the International Code of Signals for Visual, Sound, and Radio Communications.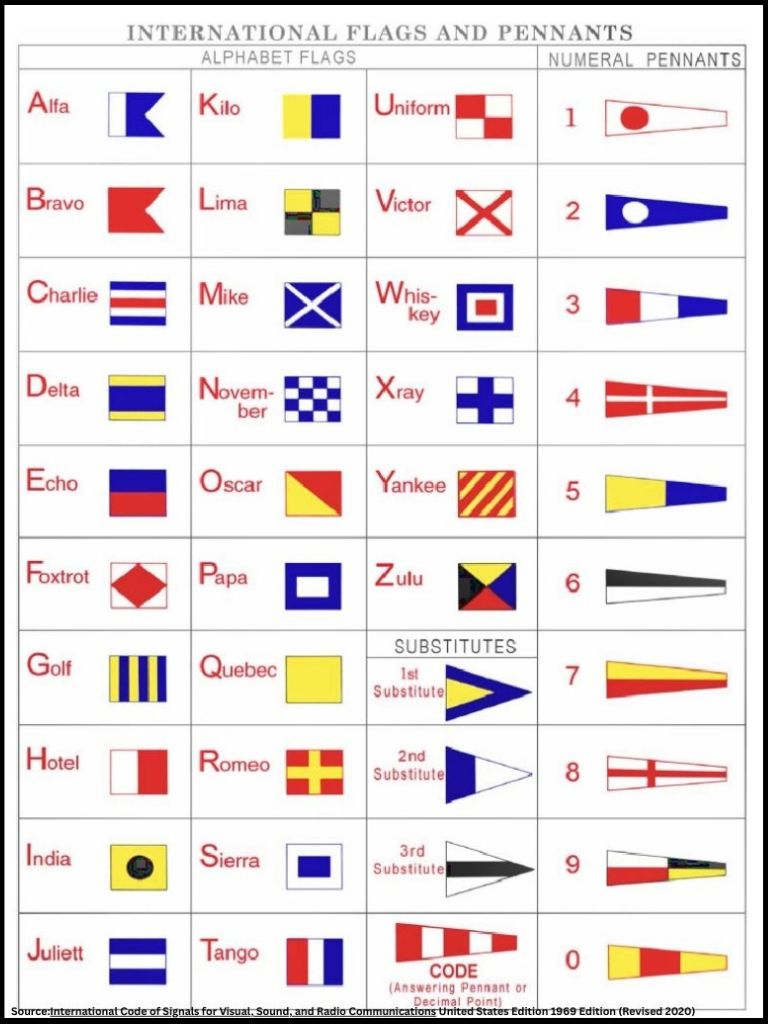
It was surprisingly difficult to determine the correct dimensions for the signal flags because the experts can’t seem to agree if the flags are perfectly square or slightly rectangular. After considerable fact checking, I concluded the signal flags are meant to be in 8:10 proportions.
In real life, maritime signal flags require maximum visibility and experts advise to use as large a set of flags as possible. They are available in a variety of sizes. For instance, one online flag maker sells maritime signal flags in 9 different sizes with letter flags ranging from 20 to 183cm (8” to 72”) “on the fly”.
Interestingly, maritime flags are “typically measured by the height of the flag (the side closest to the pole or staff, i.e. hoist) by the length of the flag (the top or bottom of the flag extending from the hoist to the free end, i.e. fly)” according to Captain PJ Russell in his book Sea Signalling Simplified: A Manual of Instructions for the New International Code of Signals.
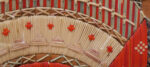
I made a few driftwood sailboats but decided to add signal flags to only one of them. The mast on this sailboat is 20cm (8”) high. My signal flag message is short and simple―with only two 4-letter words. I also decided to add my national ensign―the flag of Canada―at the top of the mast. See my previous blog post, Cracking the Code, for more information about national ensigns.
The signal flags have a hoist of 1.2cm (½”) and, in keeping with the 8:10 proportions, a fly of 1.5cm (⅗”). The Canadian flag has a hoist of 3.2cm (1¼”) and, as per the official 2:1 proportions, a fly of 1.6cm (⅝”).
Here’s how my 20cm (8”) driftwood sailboat looks with the national ensign and signal flags mocked up in paper.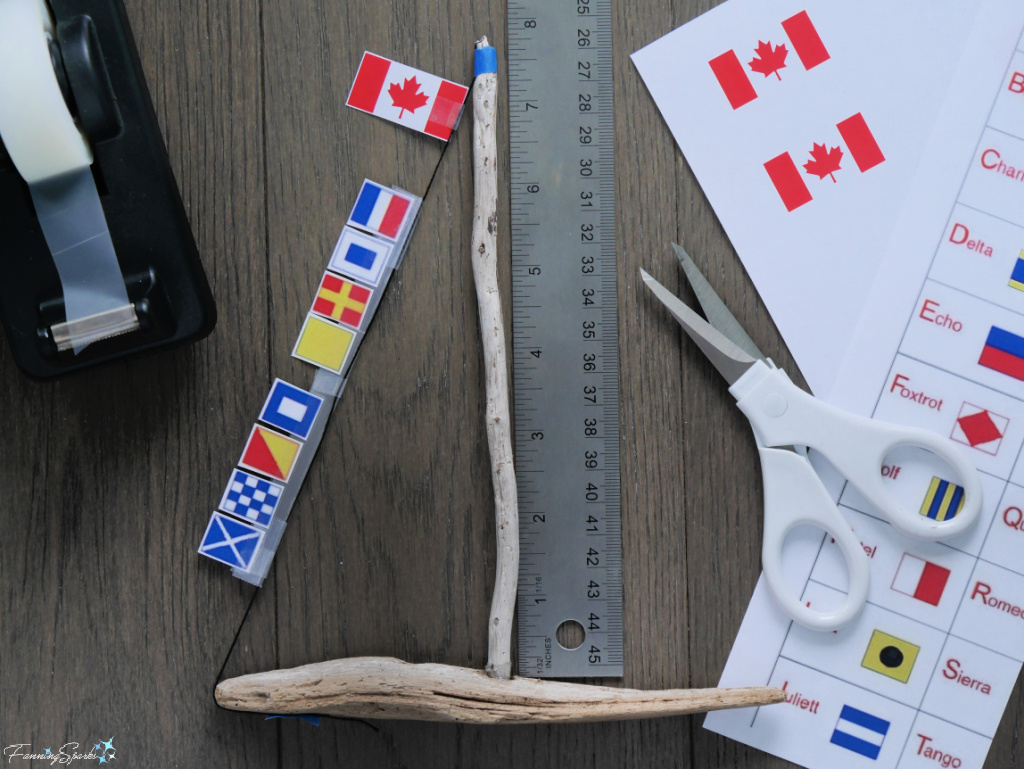 Obviously, the quickest and easiest approach would be to make the flags out of paper. Alternatively, they could be made from fabric and embroidery for a more polished approach. I chose the second option.
These flags required very little fabric―only about 8 x 8cm (3 x 3”). Luckily, I had a few scraps of embroidery fabric in my stash. I can’t recall the specifics on this fabric but it has a nice, even weave meaning it has a grid with the same thread count (approximately 10 threads per cm/25 threads per inch) vertically and horizontally.
I started by meticulously counting out the threads in my fabric. To create an embroidered surface of 1.5 x 1.2cm (⅗ x ½”) surrounded with a 1 thread border, I calculated I would need rectangles of 18 threads x 15 thread. I pulled out threads between the rectangles to clearly mark the sections.
Then I sealed the border lines to prevent the future edges from fraying. A mixture of 50% white glue and 50% water works well for this purpose. It dries clear and remains pliable enough to stitch through.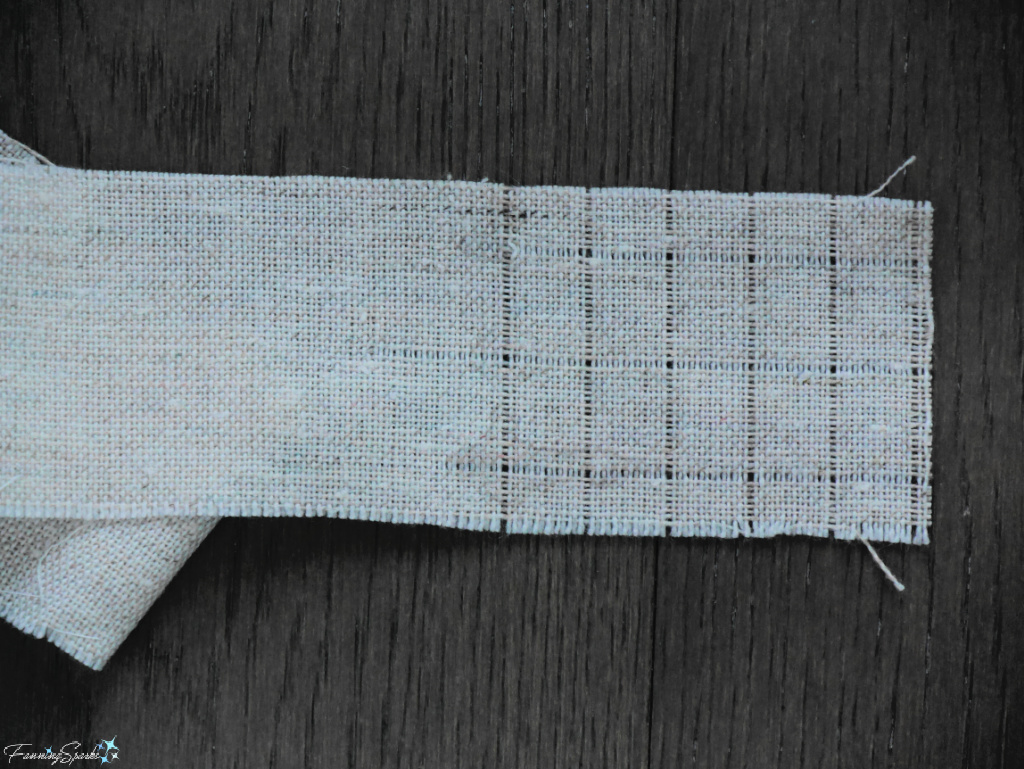
The idea was to keep the fabric intact until all the embroidery is completed―so, embroider then cut. I chose to use a satin stitch with two strands of embroidery floss in the standard colors of red, yellow, white and blue to create my flags. 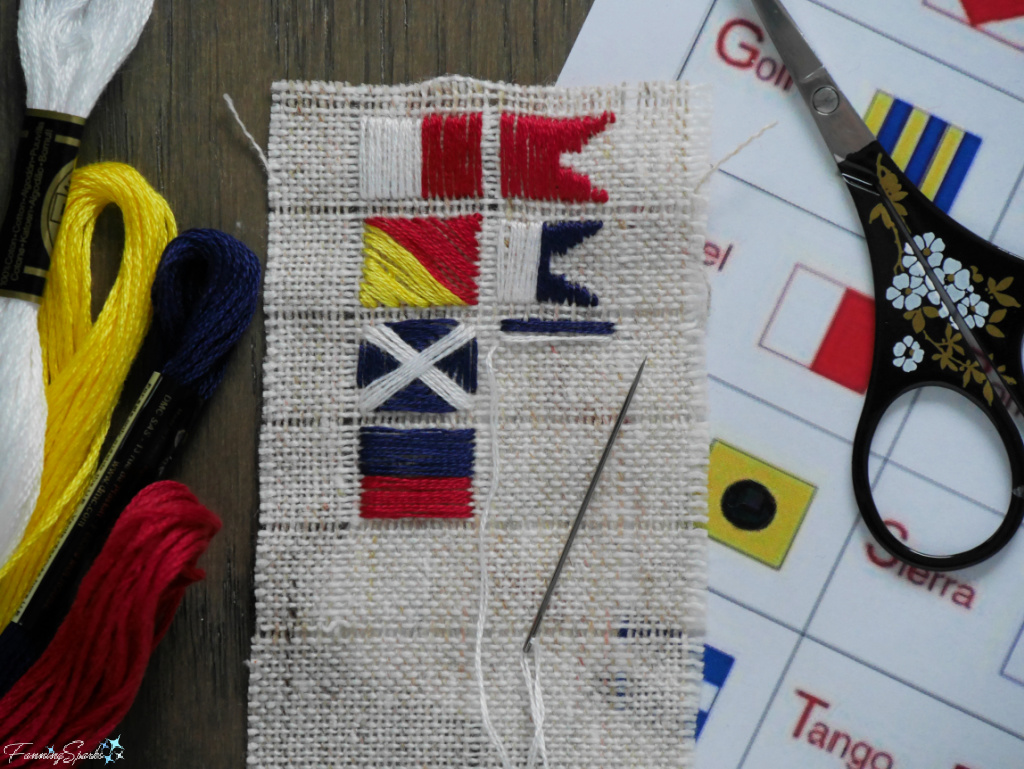
After the flags were stitched, I very carefully cut them out along the pulled thread lines and re-sealed the cut edges with the 50/50 glue mixture.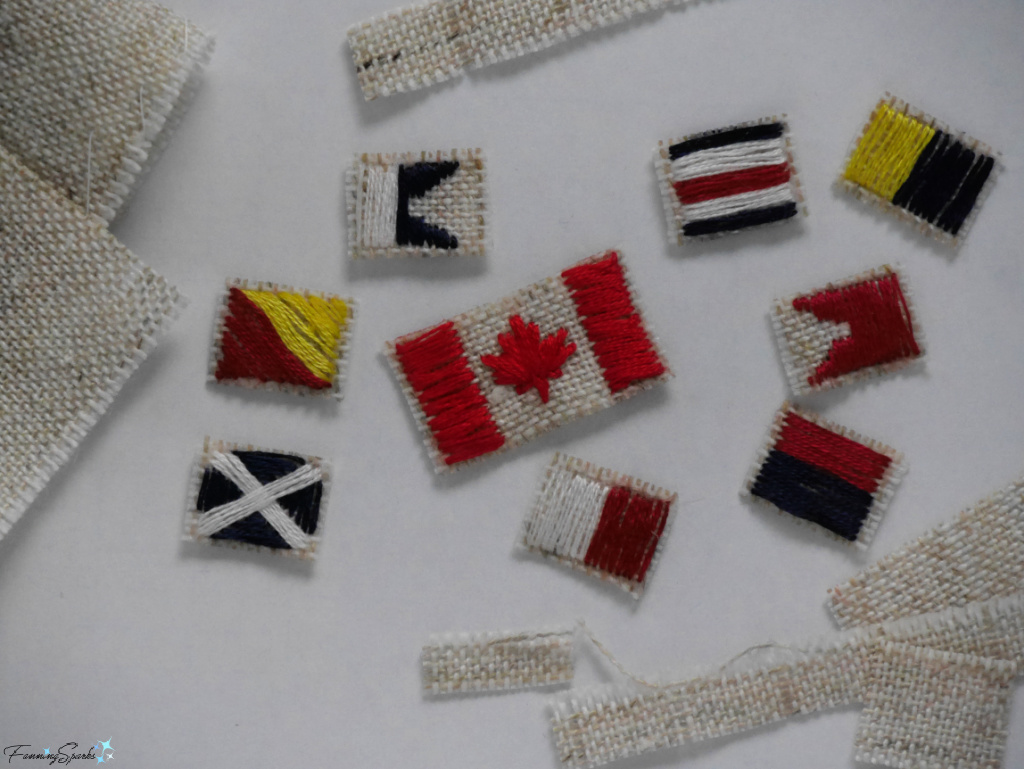
The final step was to assemble the sailboat. I started by stringing my flags onto a piece of fine wire. In hindsight, I wish I’d made the border wider along the hoist edge of my flags. My borders were so narrow it was tricky to string the flags onto the wire without ripping out the fabric.
It took a little thought to get the flags strung correctly. First, I had to ensure the flags would be in the right order since signal flags are read from top to bottom. Secondly, I had to consider which side of each flag to attach so the best side would show and the flag would fly correctly. And finally, I had to consider how to attach the flags so the wire would be hidden behind them instead of passing in front of them.
Shown below is a partially completed set of flags. I didn’t do this on purpose but a closer look reveals the ‘O’ Oscar flag is backwards. Dang! I sure wish I’d noticed that before I put everything together and had to redo it all.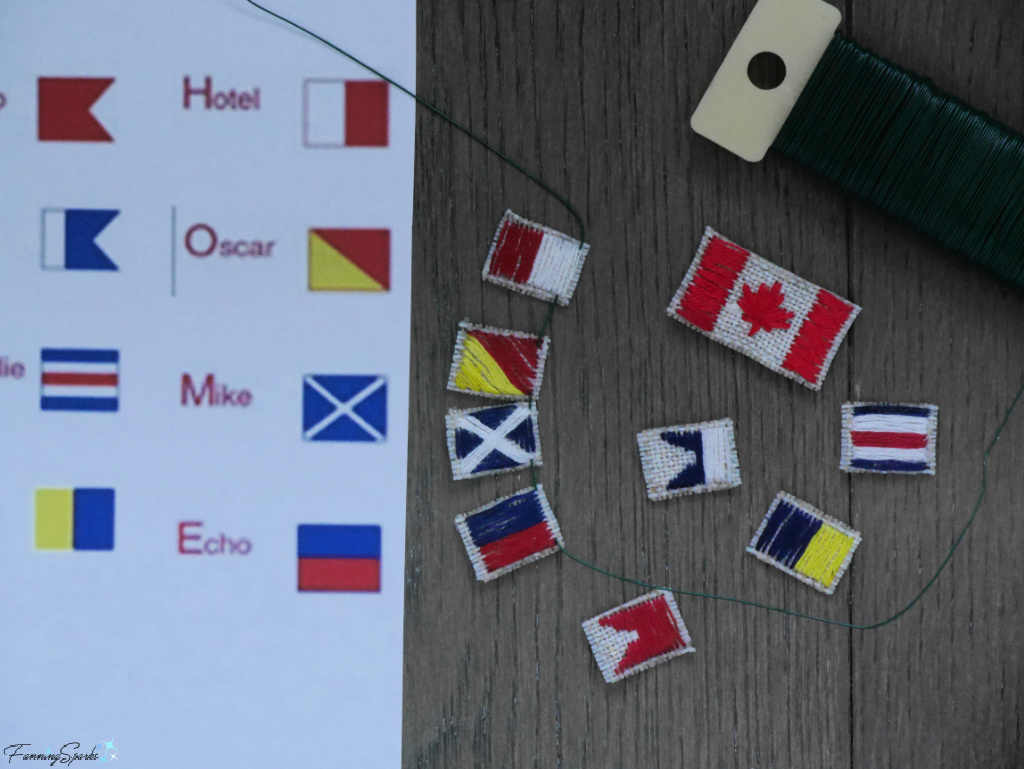
Next, I attached the sails to the sailboat’s mast with regular sewing thread. I took a few stitches in the top point of the sail and then wrapped the thread around the mast a few times before locking it in with a few more stitches in the sail. 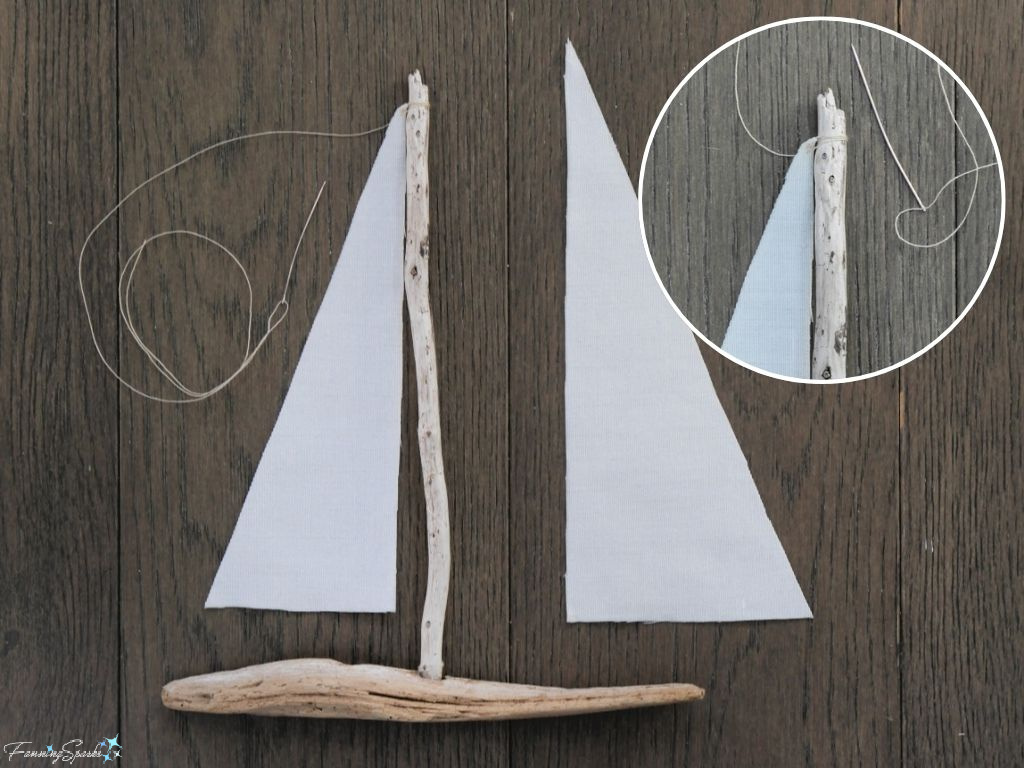
The same technique was used to attach the bottom point of the sail and the second sail. Small dabs of glue on the back of the mast locked the threads in place. Alternatively, the sails could simply be glued to the mast.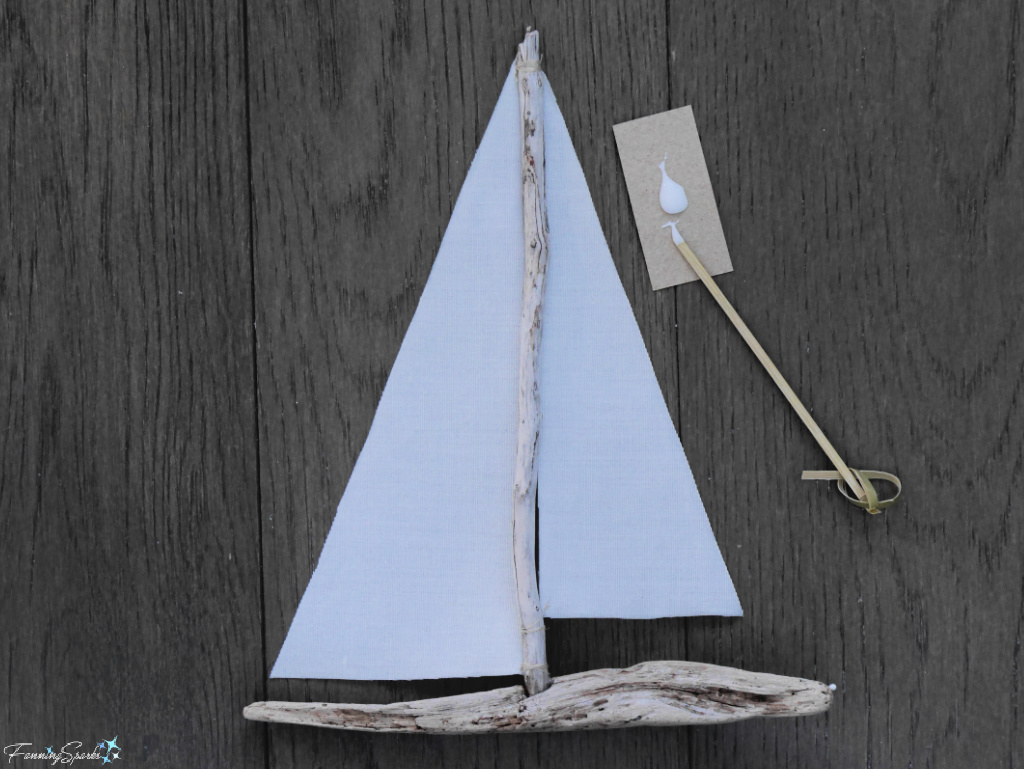
The crowning glory of this project is the hoist of signal flags. The top end of the wire was easily wrapped around the top of the mast but the bottom end was a little more challenging. Luckily, I was able to use a sewing pin to anchor the bottom. I shortened an applique sewing pin with wire cutting pliers and then pushed it into the “stern end” of the driftwood. 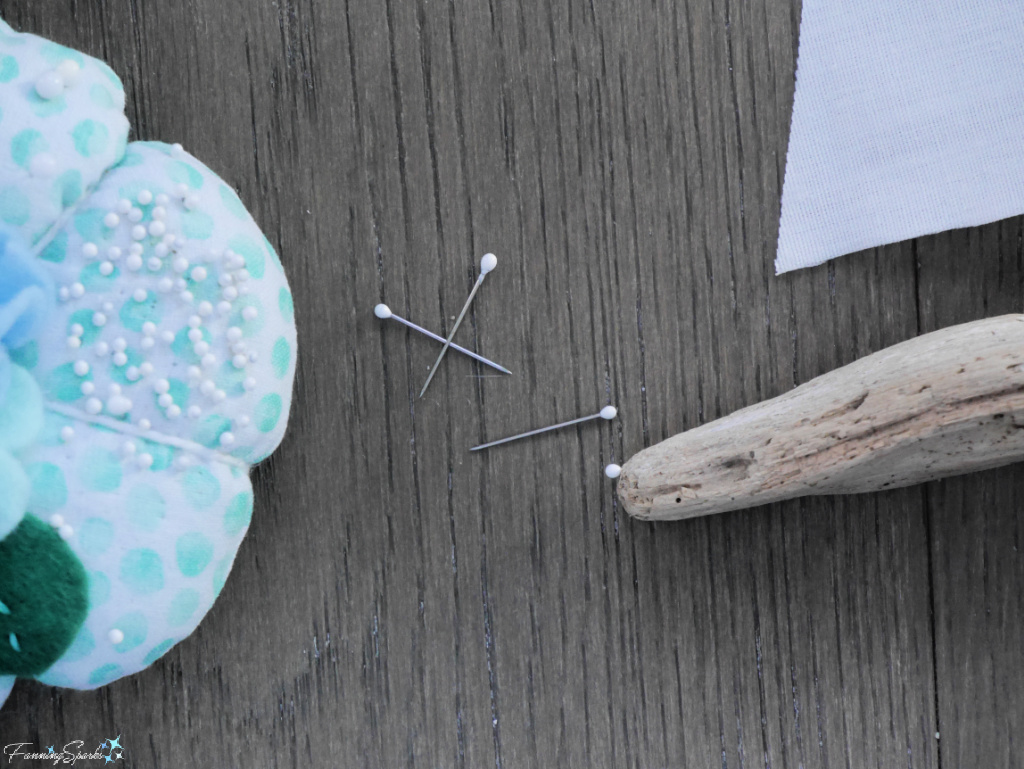
Et voilà! Here’s my driftwood sailboat complete with my signal flag message. 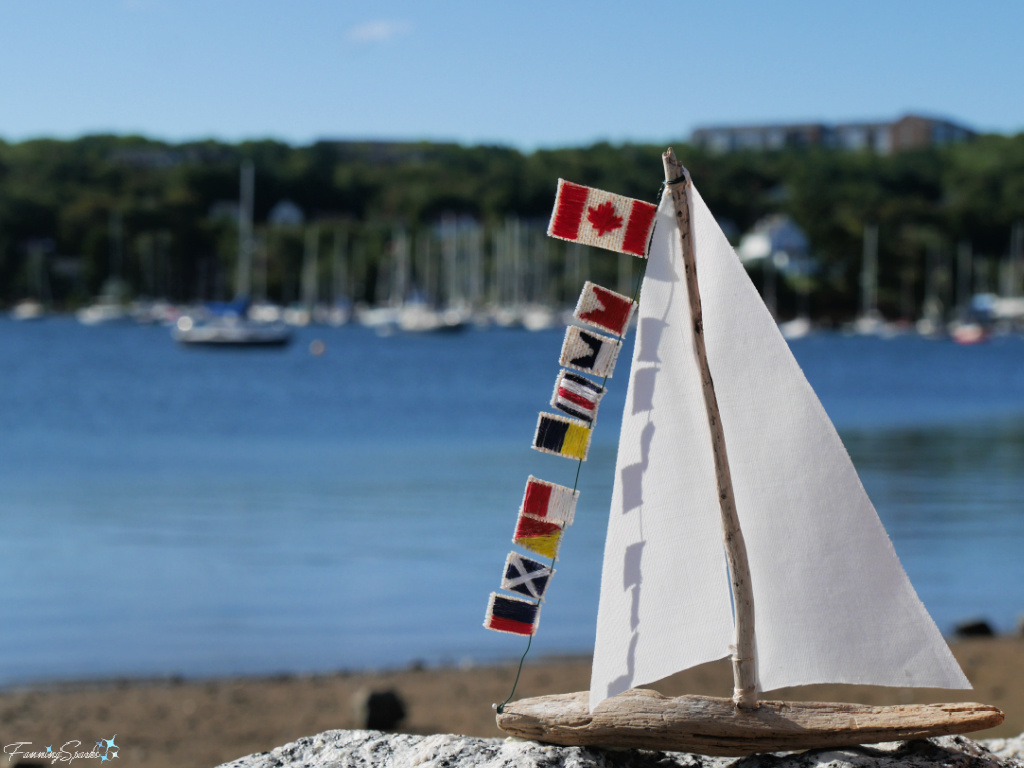 Flying under the flag of Canada, is the message “BACK HOME”. And, yes, my husband and I have moved back to our home country after 27 years abroad. We are thrilled to be back home!
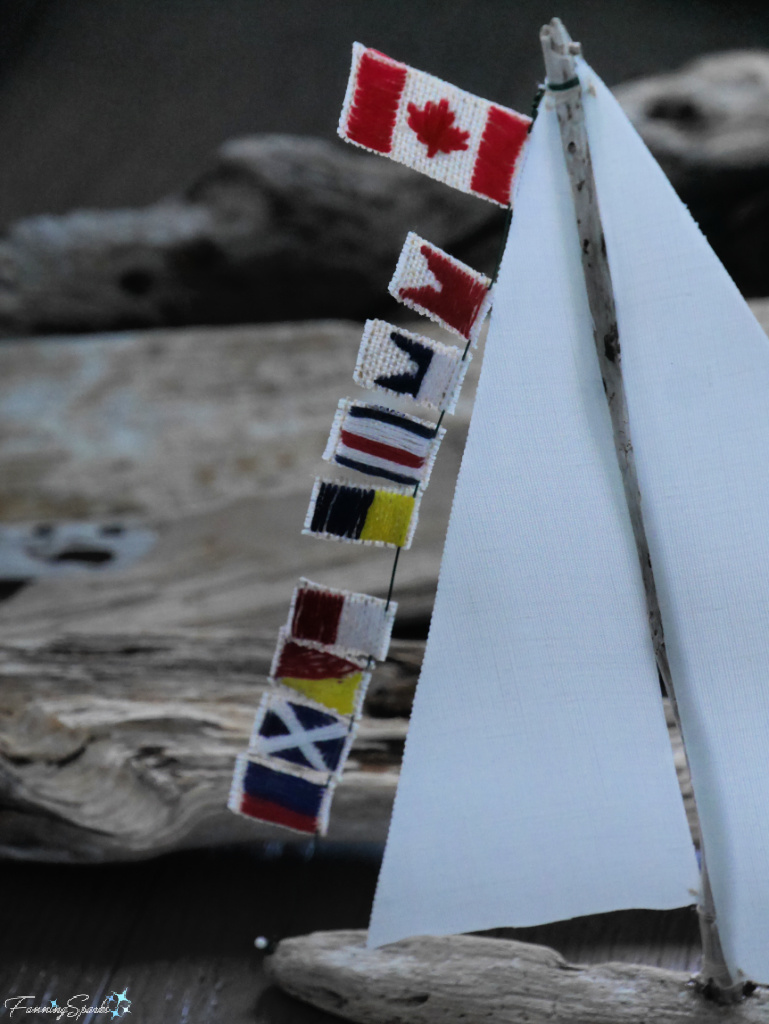
More Info
Previous blog posts mentioned in this blog post include:
. Catch My Drift
. Driftwood Art Roundup
. Cracking the Code.
The following books, articles and websites were consulted in the writing of this blog post:
. International Code of Signals for Visual, Sound, and Radio Communications United States Edition 1969 Edition (Revised 2020)
. Sea Signalling Simplified: A Manual of Instructions for the New International Code of Signals book by Captain PJ Russell; Published 1976 and available here on Internet Archives
. Flashes and Flags: The Story of Signaling book by Jack Coggins; Published 1963 and available here on Internet Archives
. Various Wikipedia entries.
Today’s Takeaways
1. Creative inspiration can come from a variety of sources including, for instance, pleasing sights, interesting details, novel approaches, uncommon materials and intriguing stories.
2. Some creative ideas take time to percolate.
3. Consider making your own one-of-a-kind project to commemorate a life changing event or special occasion. 

1 Comment
I LOVE this!