Embellishing a printed photo with hand stitching can enhance the image with texture and depth. Paper stitching and photo embroidery has been trending on blogs and Pinterest. I’ve been on a roll lately embroidering messages on my own favorite shots. It’s a fun way to add punch and impact.
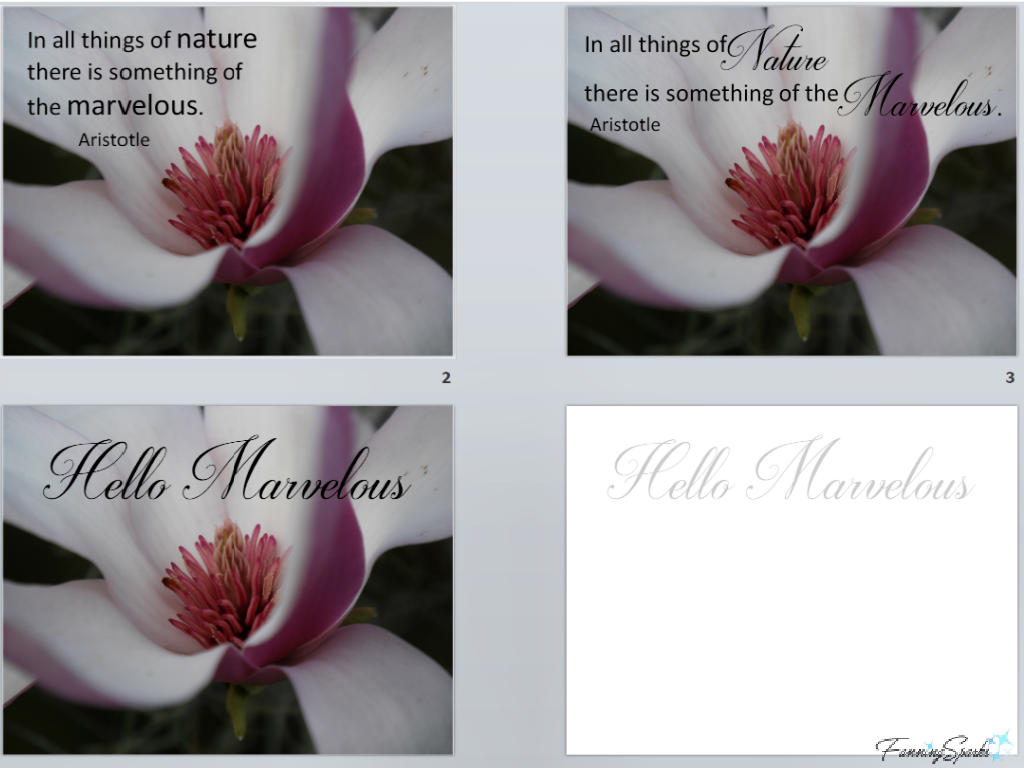
My latest piece is a photo of a beautiful magnolia blossom. I was inspired to embroider the words “Hello Marvelous” after coming across this quote by Aristotle “In all things of nature there is something of the marvelous.”
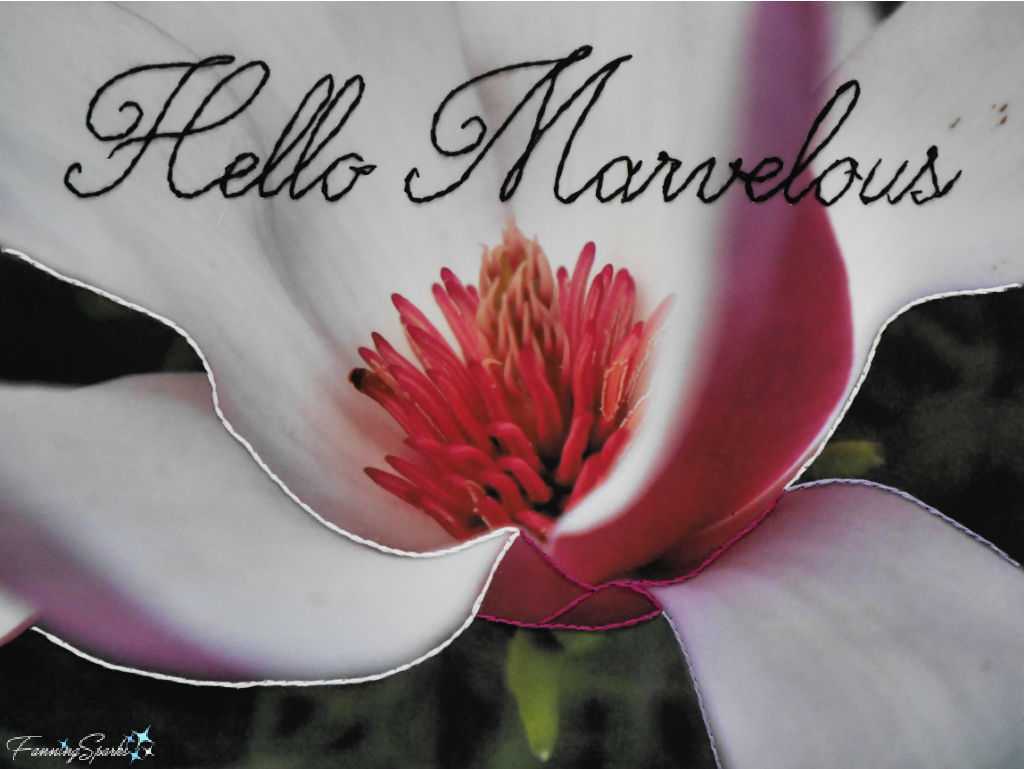
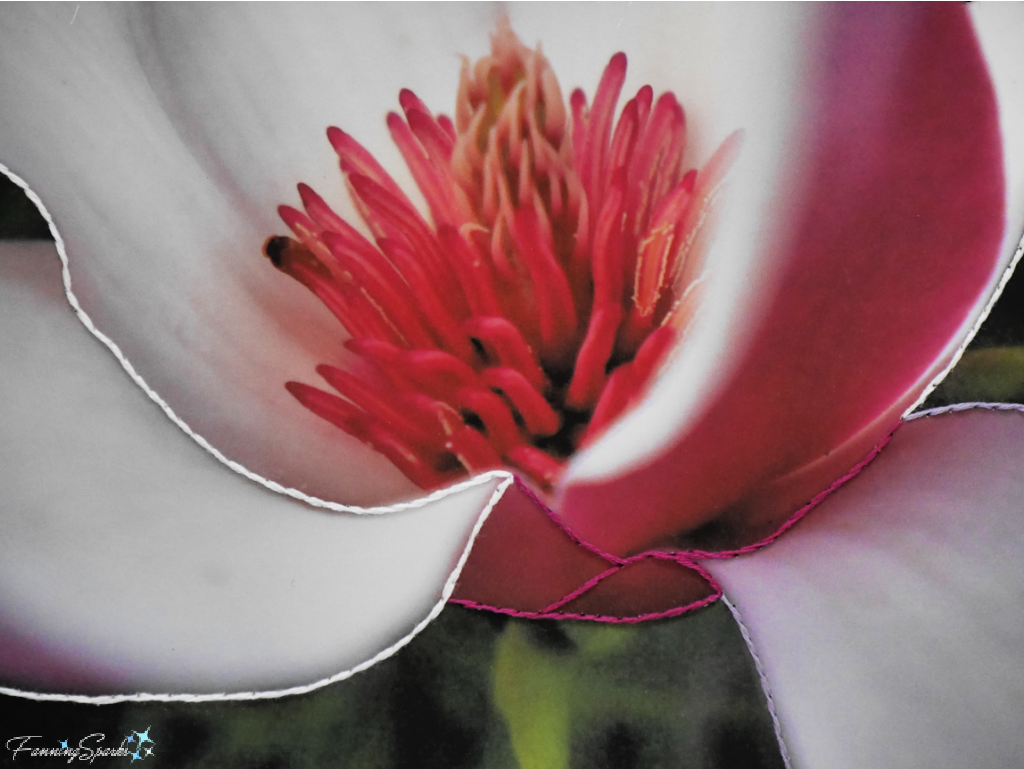
The photo is further enhanced with stitching along the flowing lines of the petals.
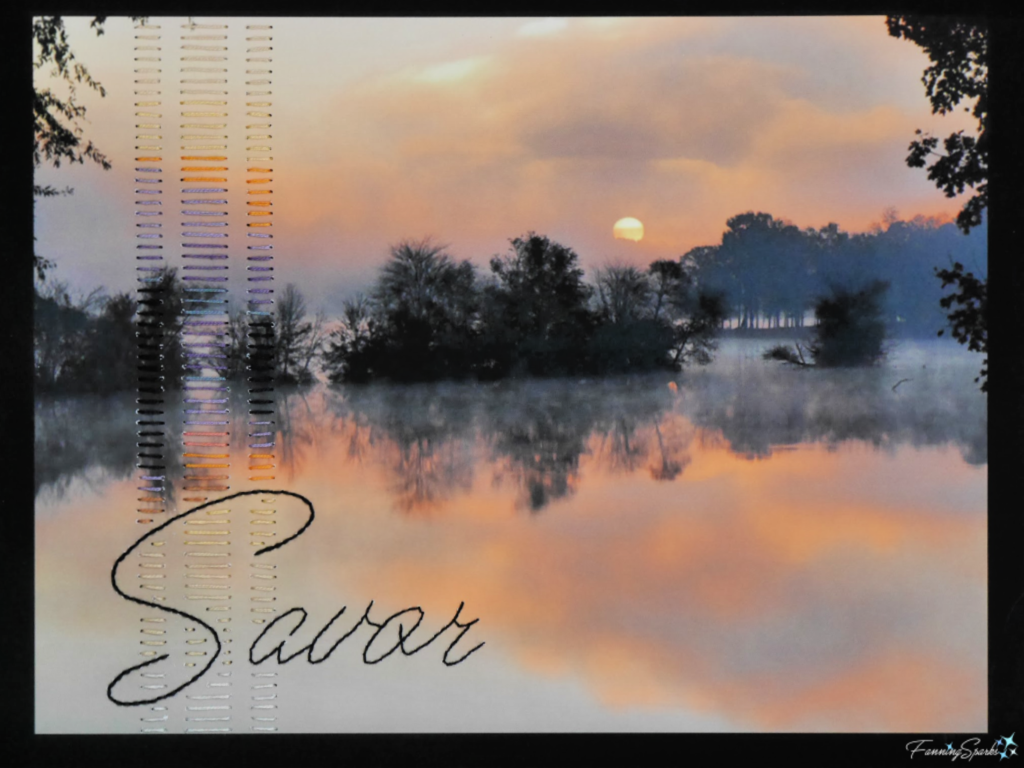
The possibilities for embroidering photos are endless. Regular readers may recognize this technique from my previous holiday greetings and “word for the year” posts. In the example below, I chose to embellish a stunning morning sunrise with the word “Savor” and 3 narrow columns of color-matched stripes.
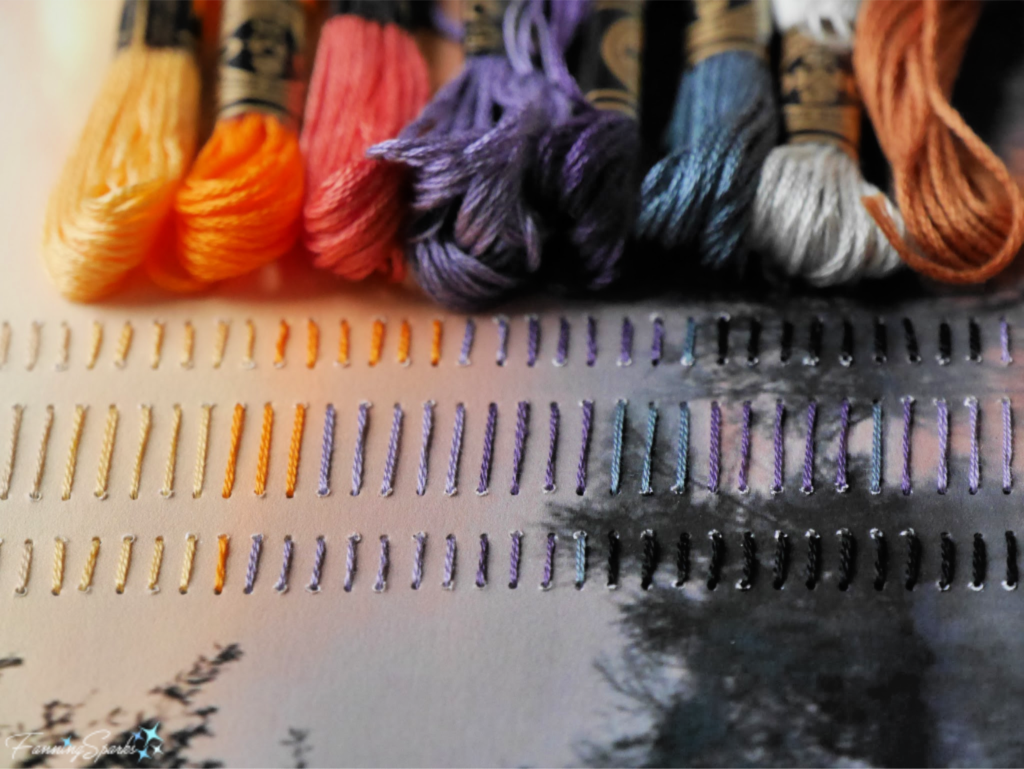
The columns started as carefully positioned vertical lines on a template. After transferring the design to the photo, I stitched each stripe in embroidery floss to match the surrounding color. Here’s a closer look.
This next example shows a pretty photo of a camellia covered in snow. The photo is embroidered with the words “Joyous Greetings” and further embellished with beading and lines of stitching.
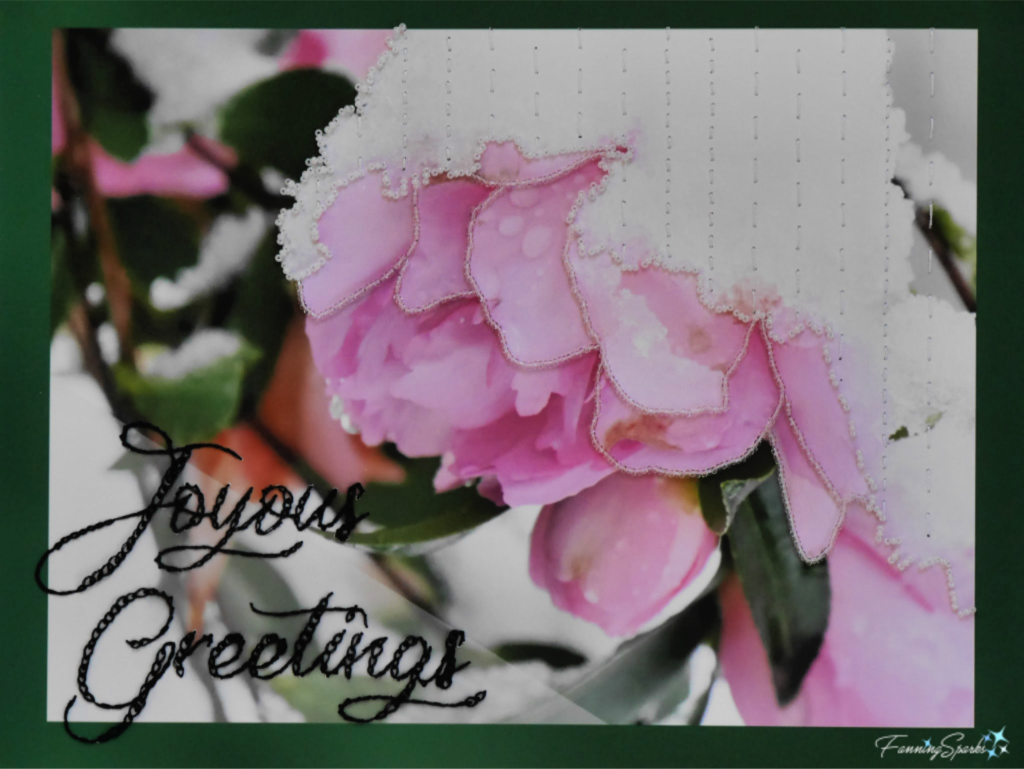
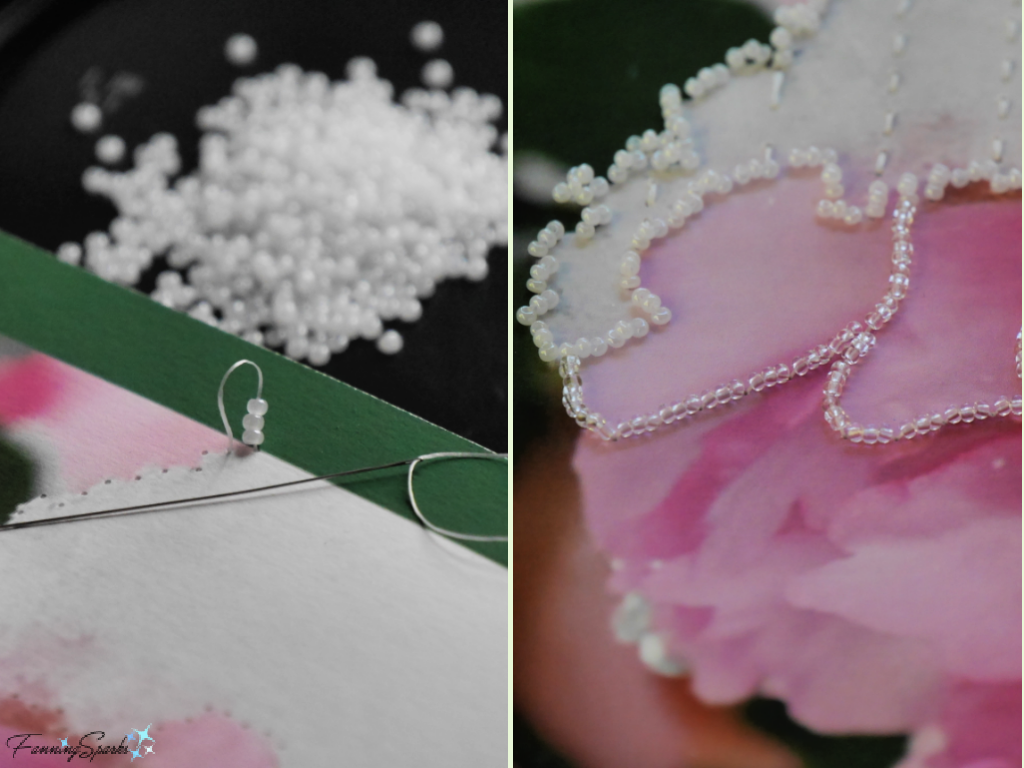
Small seed beads add a surprising amount of texture and interest. I used clear seed beads to outline the flower petals and white seed beads to call attention to the edge of the snow.
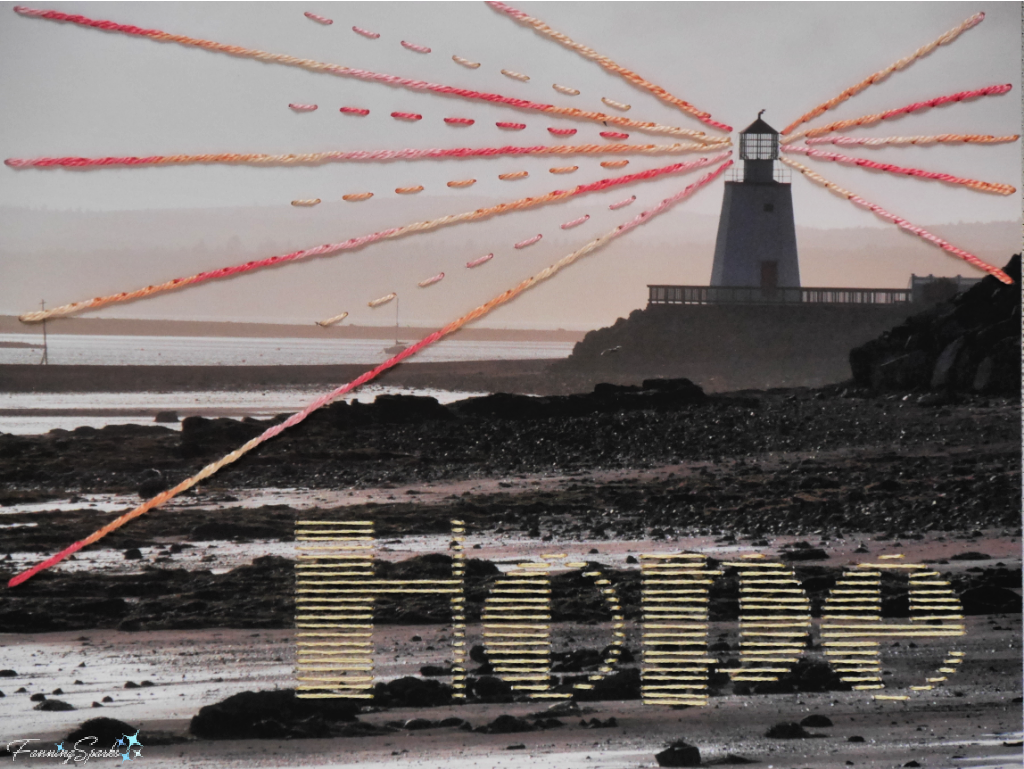
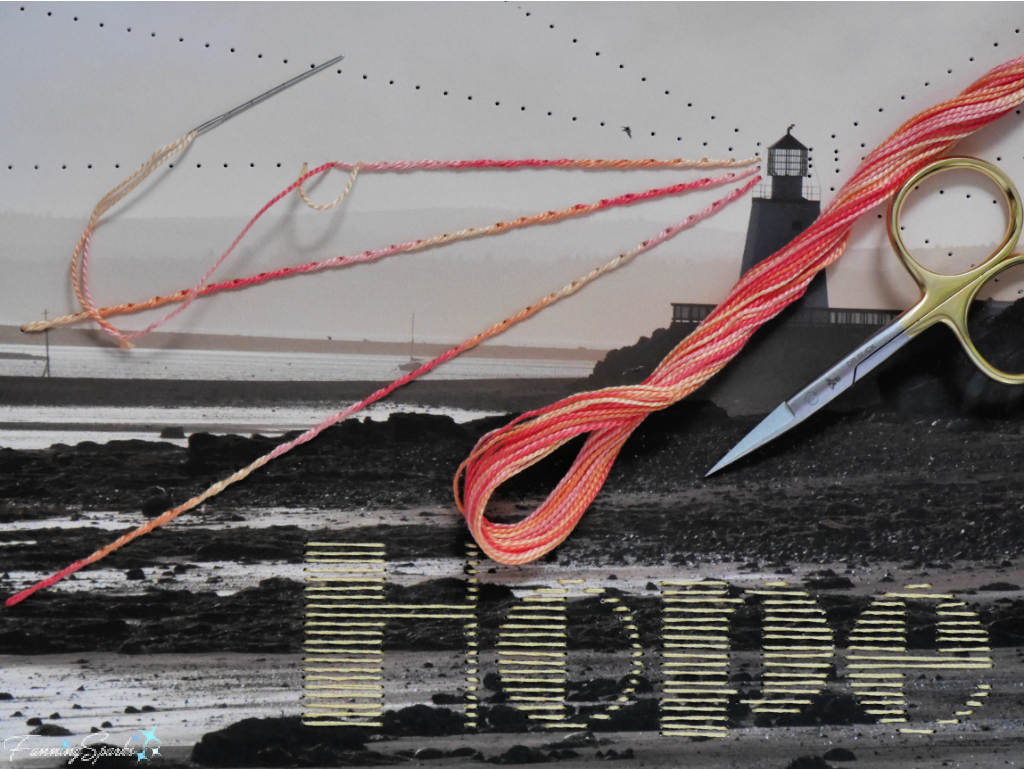
The beacons of light emitting from the lighthouse, in the photo below, were embroidered with variegated pearl cotton thread. The stitching adds depth and drama.
![]()
While these examples have a similar style, there are as many different ways to apply this technique as there are artists. Check out my Paper Stitching inspiration board on Pinterest for over 300 ideas.
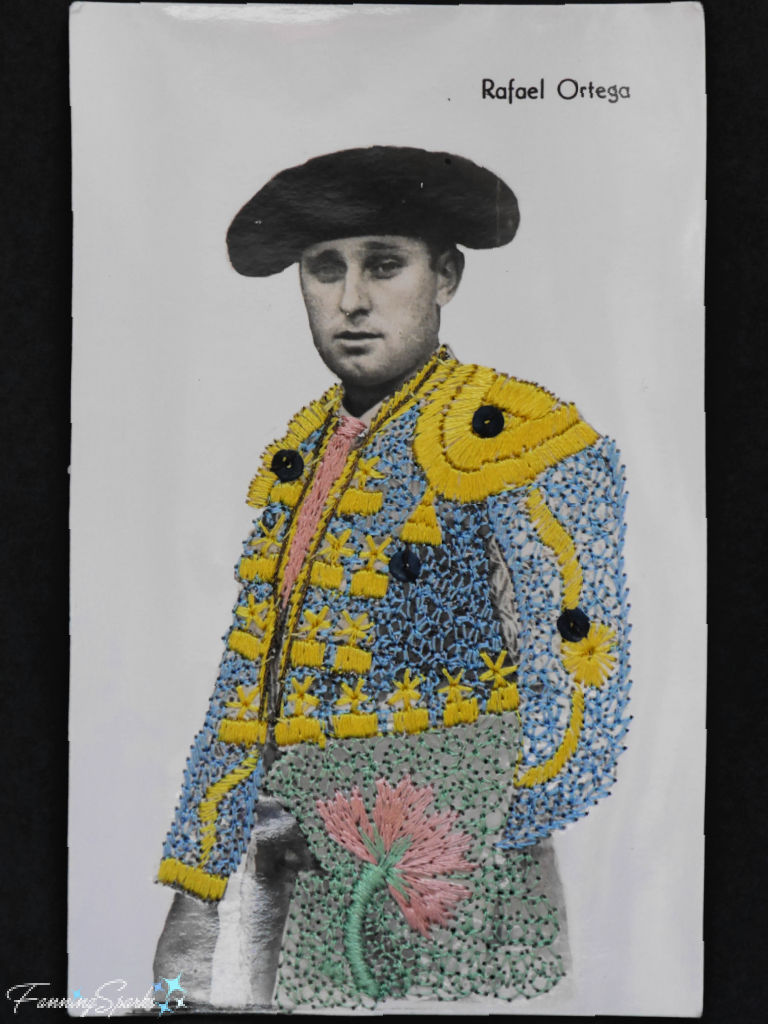
Here’s another idea from a cool vintage post card that I scored at a flea market in Madrid, Spain. The bullfighter’s costume has been completely covered with spectacular embroidery. The stitches are tiny and appear to be executed with single strands of thread.
Whether you’d like to stitch a word or embellish a bullfighter’s costume, the following tutorial will walk you through the steps for embroidering a photo.
Hello Marvelous Embroidered Photo – DIY Tutorial
Very few supplies and tools are needed for a photo embroidery project. Basic design and hand sewing skills are involved. This project can be completed in a few hours but the actual working time will depend on the complexity of your design. You may also need to factor in wait time for procuring a printed photo.
Supplies Needed
. Printed Photograph 8” x 10” photo on heavy matte paper. See Step 1 for tips on selecting an image and Step 2 for tips on ordering a print.
. Thread There are many options including Embroidery Floss and Pearl Cotton. I chose DMC embroidery floss, in 3 different colors, for the stitching on the Hello Marvelous piece. The stitches are done with only 2 (of the standard 6) strands.
. Accents (Optional) Beads, sequins and other accents can be added. I did not add accents on the Hello Marvelous piece.
. Cardstock 2-3 sheets in white.
. Printer Paper
. Cardboard Guide A small strip (2 ½” x 2mm) of thin cardboard such as a manila folder.
. Piercing Mat Make a padded mat from two layers of craft foam sheets. Mine is ¼“ thick and measures 5 ½“ x 8“.
. Scotch Tape
Tools and Equipment Needed
. Photo Editing Software or App Any software that allows you to import a photo and overlay text in different fonts and sizes will suffice. I simply use Microsoft Powerpoint.
. Printer
. Marker/Pen Fine tip marker or pen with colored ink. I prefer red ink.
. Piercing Tool Specialty tools are available for this purpose. Search for “embroidery on paper tool”, “perforating tool” or “paper piercing”. Alternatively, you could use a sharp-tipped needle for piercing the paper.
. Needle Choose the slimmest needle that will hold your chosen thread.
. Scissors
. Soft Cloth A piece of felt, or other soft cloth, slightly larger in size than the photo to lay on your working surface.
Step-by-Step Instructions
Step 1 Select Image Choose the photo you wish to embellish. I’ve found images with interesting, but simple, lines work best. Ensure there is sufficient blank space to add any text. You may wish to test a few ideas with your photo editing software or app. Here’s a peek at my experimentation for the Hello Marvelous piece. I started with the full quote but then realized it would be too small to embroider. In the final design, the photo is 8” x 10” and the letters are about 1½“ high.
Step 2 Order Print(s) This technique can be applied to any size print but I prefer 8”x10” enlargements. I recommend having your selected image professionally printed on heavy matte paper. I’ve had great results with SnapBox professional printing services (see More Info section below). Their prints are high quality with sharp images and rich colors. Their matte photo prints “feature a soft textured surface similar to traditional watercolor and etching paper”. This thickness is ideal for stitching. I’ve tried standard glossy prints from my local drugstore but found the paper tears and creases easily. The heavier matte paper provides a better base for the stitching and results in a more polished and professional result.
Tip: Keep an eye out for special prices on SnapBox. I recently caught a 50% off sale that made my order very affordable.
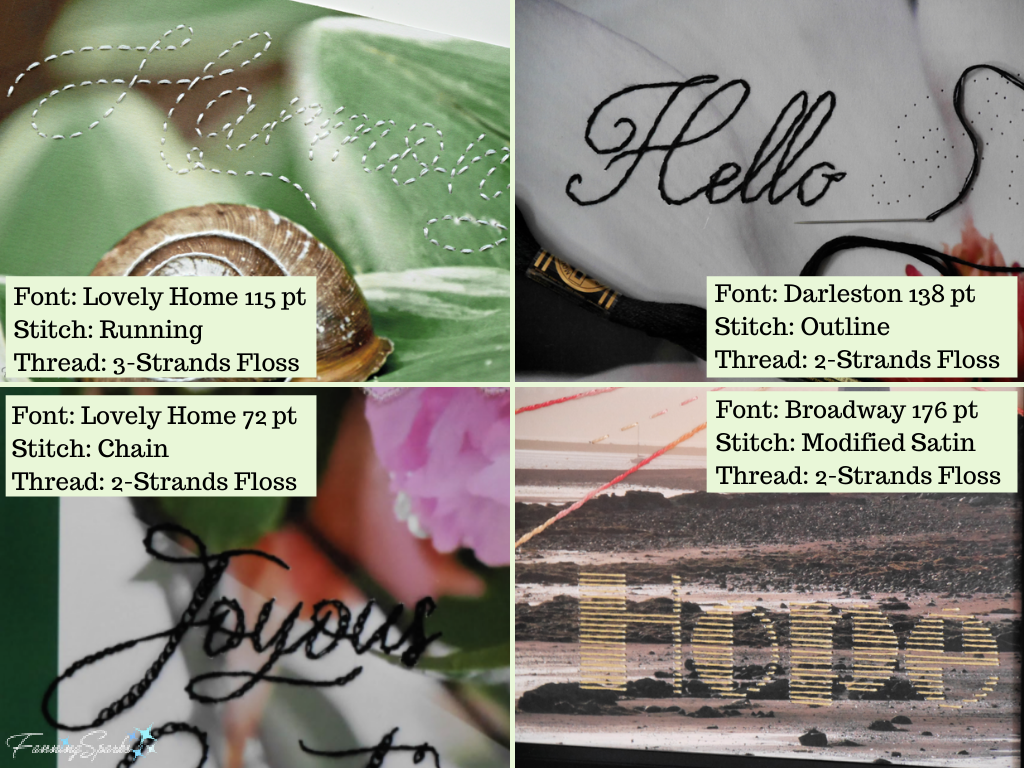
Step 3 Create Design Finalize the design for your piece. As noted above, you can find over 300 ideas on my Paper Stitching inspiration board on Pinterest. Your design can be as simple or as complex as you like. I chose to stitch the words “Hello Marvelous”, using Darleston text font in 138 point size, in an outline stitch. I also emphasized some of the curved flower petals with an outline stitch.
Choose a font style for any lettering you wish to add. If this is your first photo embroidery project, I recommend choosing a large, simple font with few flourishes. Another factor to consider is how the font will translate into stitching. It’s difficult to vary the thickness of a stroke when stitching on paper so the letters will become a single thin line of stitching. You’ll also need to determine the font size and overall placement on the photo.
Select embroidery stitches and threads for your design. Pictured below are a few examples calling out the font, font size, embroidery stitch and threads used in each.
Design any additional lines or elements to be stitched. Stitching that follows lines of the photo, such as the edges of the magnolia petals, do not need to be shown on your template. But all elements you wish to add, such as the beacons on the lighthouse photo shown earlier, should be included.
Print your photo and design on cardstock paper. Try different stitches. Try different threads—varying the colors and the number of strands. Refine your design accordingly.
After you’ve finalized the design, use your photo editing software or app to create the template. Copy your design and then remove the photo. Set the color of lettering and design elements to light grey. You can see how my template looked at this stage in the photo shown in Step 1 above.
Print template on plain white printer paper. It should match the size of the photo you will embroider.
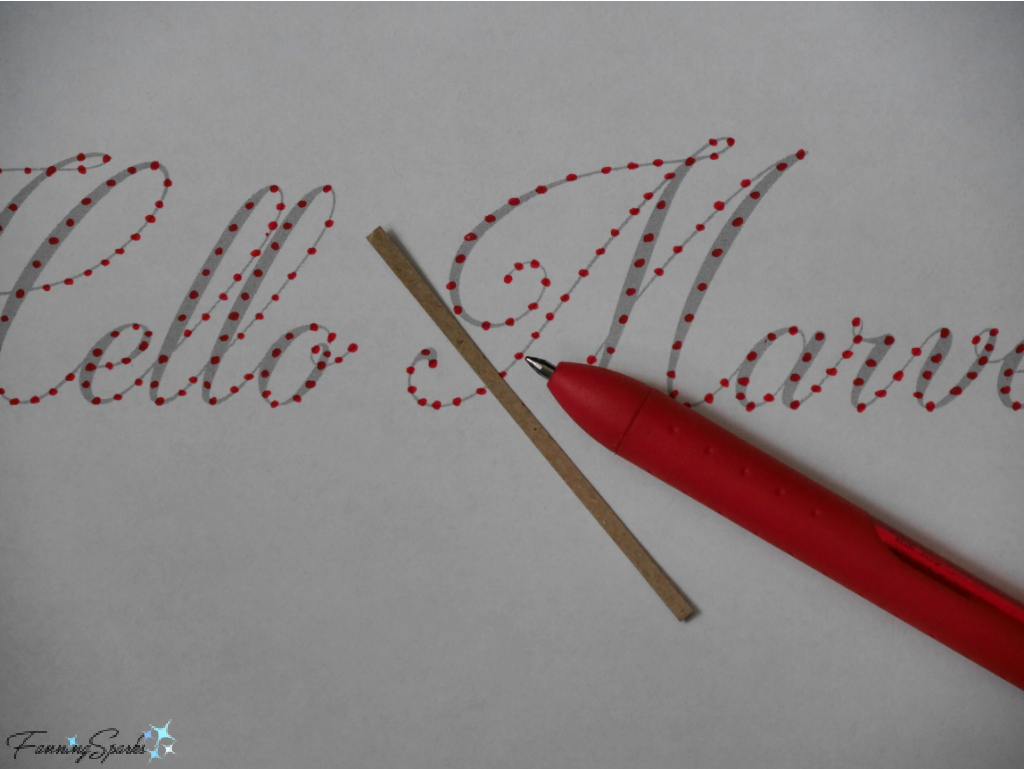
Step 4 Prepare Template The next step is to mark where the holes will be placed. Use a fine tip marker or pen with colored ink—red works well. Make a small dot for every hole following these steps:
… Mark dots at the ends of every line.
… Mark dots at all intersections where lines cross.
… For curved lines, mark dots at the apex (or mid-point) of every curve. Do this on both concave curves (aka valleys) and convex curves (aka mountains).
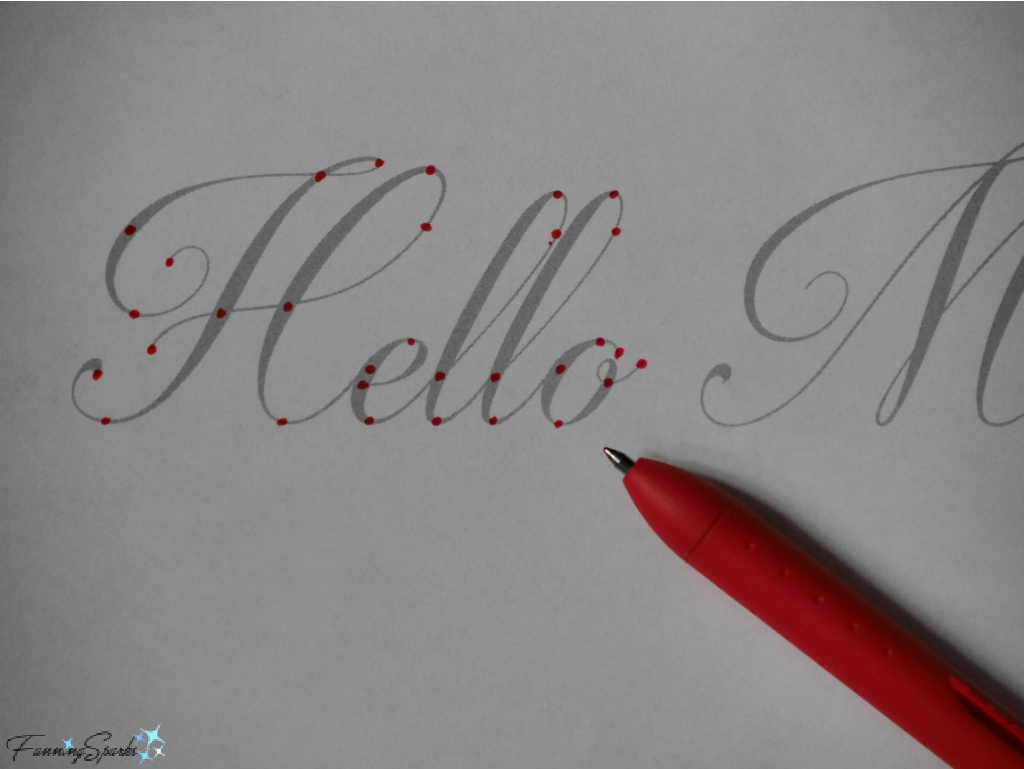
… Mark dots, evenly spaced, along all remaining lines. Space dots about 2mm apart. I cut a 2 ½” strip of 2mm-wide thin cardboard to use as a guide. Don’t mark dots too close together as the paper will tear when stitched.
Step 5 Pierce Photo Prepare to pierce your printed photo. Cover your working surface with a piece of soft cloth to protect the surface of your photo.
Lay your printed photo on the soft cloth. Carefully position the template over the photo ensuring the design is placed correctly. Hold the photo and template in place by wrapping a few small pieces of tape over the edges.
Insert a piercing mat under the photo. As noted earlier in the Supplies Needed section, you can make a piercing mat from two layers of craft foam sheets. Mine is ¼“ thick and measures 5 ½“ x 8“.
Use a piercing tool, or sharp-tipped needle, to pierce the printed photo at every red dot. Hold the piercing tool at a right angle to the surface of the paper. Ensure the tip of the piercing tool is centered on the design line and positioned on the red dot. Push through each dot firmly.
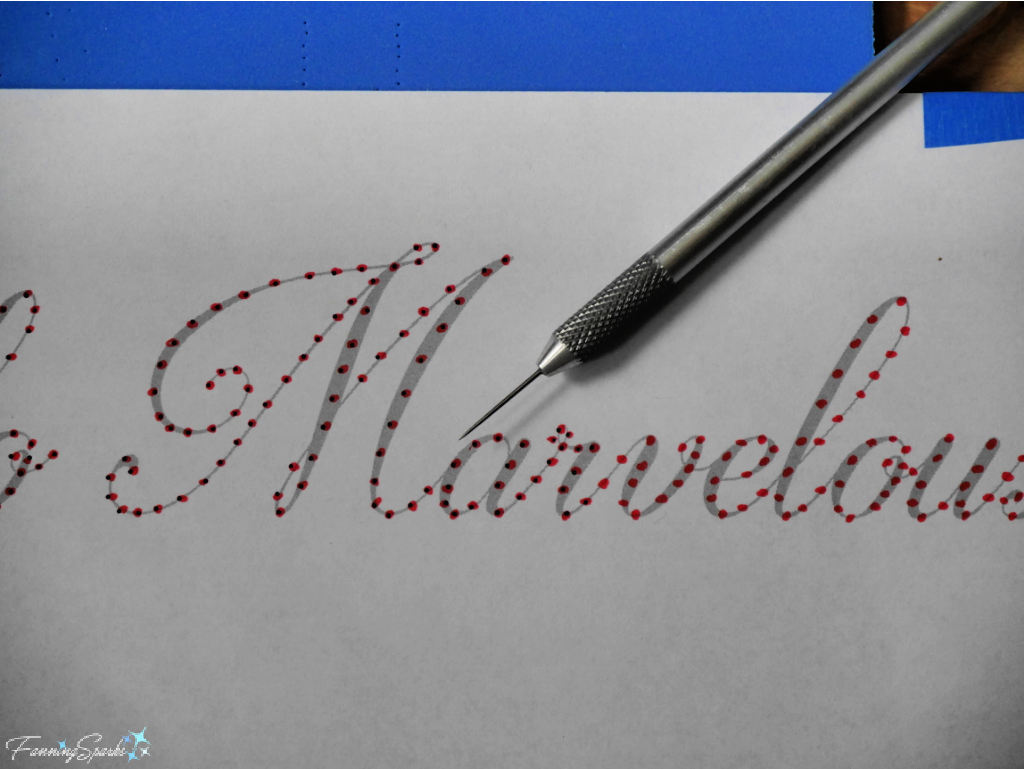
After piercing all the holes, carefully pick up the template and photo. Hold up to the light to verify that all holes have been punched.
TIP: Ensure your needle, threaded with the fiber you plan to use, will glide smoothly through the pierced holes. If you have to force the threaded needle through or pulling it through makes the holes bigger, the holes are too small. Correct this situation by pulling the threaded needle through all the holes before you start stitching.
Remove the template.
Carefully pierce any lines of the photo which you plan to stitch such as the edges of the flower petals on my Hello Marvelous piece. Follow the same sequence as you did in Step 4 when preparing the template—start with the ends of lines, then pierce intersection points and curve apexes, and finish with evenly spaced holes on the remaining lines.
Step 6 Stitch Photo Prepare to embroider the first line. If using 6-strand embroidery floss, remember to pull out the desired number of strands. I’ve found 2 strands works best for intricate designs. Instead of knotting the end of your thread as you would when working with fabric, tape the end of the thread to the back of the photo with a small piece of scotch tape. Do the same with all other thread ends.
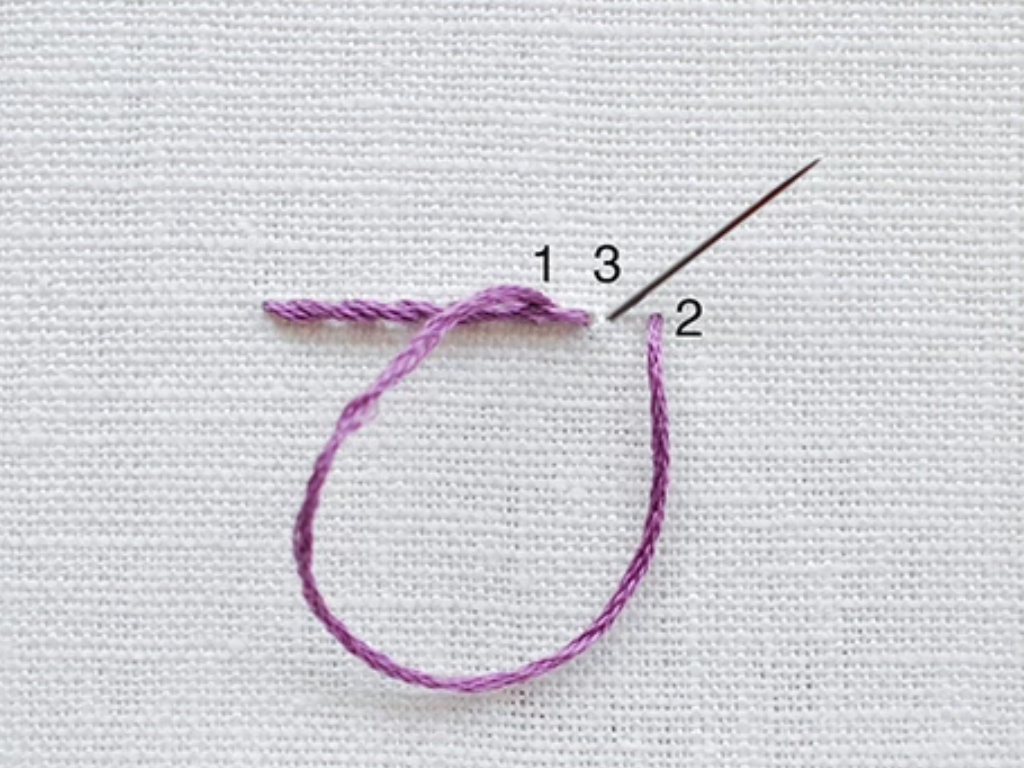
As noted earlier, I chose to use an outline stitch (aka stem stitch) for the words and lines in the Hello Marvelous piece. Here are instructions for the stem stitch from the Gathered.How website (see More Info section below).
“Come up from the back at point 1, then go down at point 2. Before pulling the stitch close to the fabric, come up at point 3 with the loose thread below the needle. Pull the thread taut, then repeat.”
Here are a few additional pointers for working with printed photos:
… Be gentle. It’s easy to rip the photo paper by pulling too hard. When pulling the thread taut, gently pull it through the paper and snuggle it up to surface.
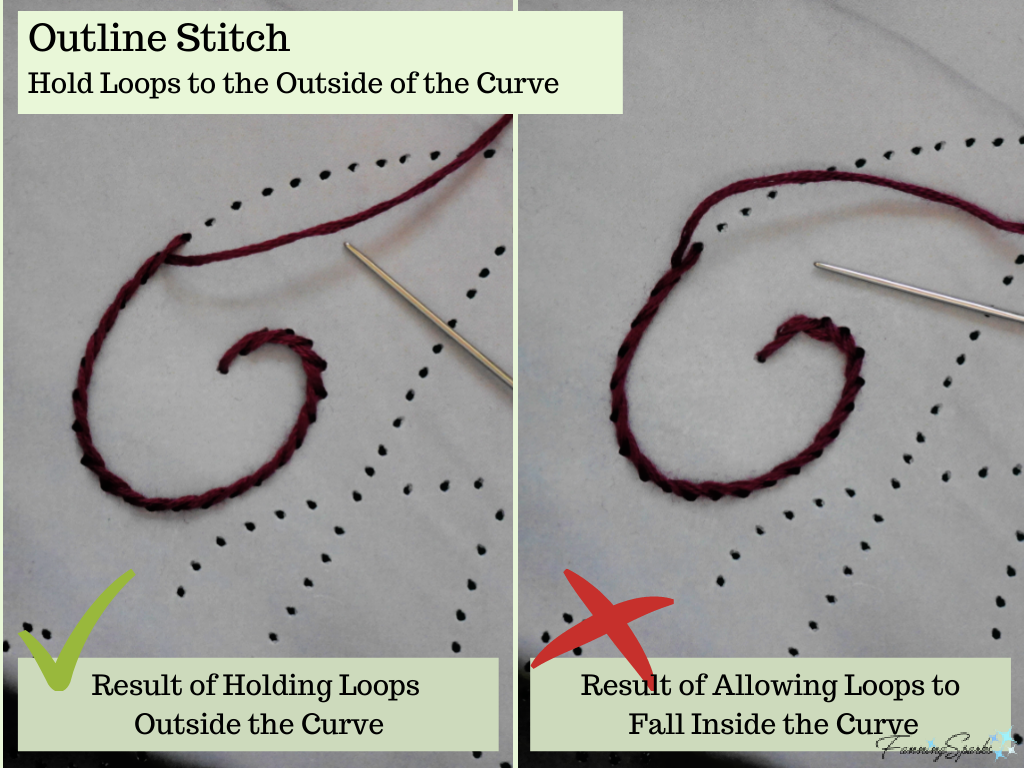
… As noted in the Gathered.How instructions, “Before pulling the stitch close to the fabric, come up at point 3 with the loose thread below the needle.” Holding the loose thread BELOW the needle works great for straight lines and concave curves (aka valleys). But for convex curves (aka mountains), I find it’s better to hold the loose thread ABOVE the needle before pulling the stitch close.
I think of the loose thread as a loop and remind myself to “hold the loop outside the curve”. This helps keep the stitching line aligned with the design line. It may be necessary to switch the loop from side to side within a single stretch especially on letters.
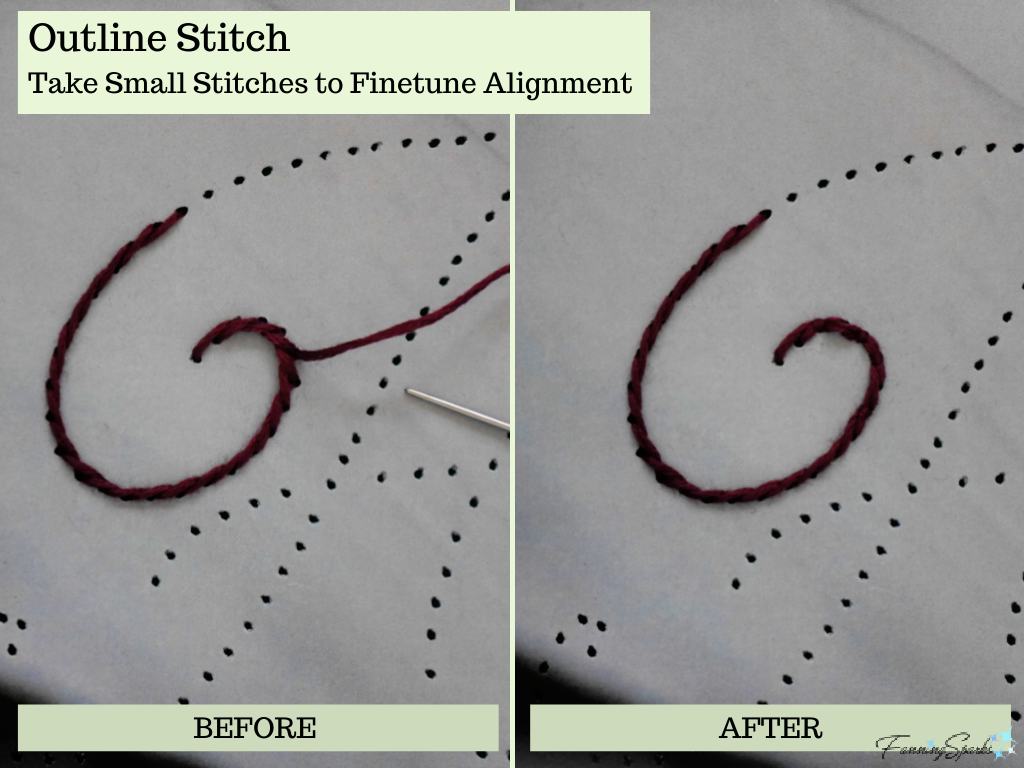
… Check the stitching of each line when you reach the end. If there any spots where the stitching doesn’t align with the design line (as shown on the left of the photo below), go back and correct by taking a small stitch over the stitching line. This is often necessary at corners and sharp curves. Find the hole at the center of the misalignment. Bring the needle, from the back to the front, through the selected hole along one side of the stitched line. Gently pull the thread to the front and snug to the paper. Push the needle, from the front to the back, through the SAME hole on the other side of the stitched line. Gently pull the thread to the back of the paper forcing the stitched line into alignment.
… If you accidentally tear the paper between holes, remove the stitch and repair the rip with a small piece of tape on the back of the photo. Re-stitch pulling the needle through the tape.
Continue to embroider your printed photo until all the design lines have been stitched. Tidy up any areas that need it. Then step back and admire your embroidered photo!
More Info
Check out my Paper Stitching inspiration board on Pinterest for over 300 ideas.
SnapBox offers a suite of professional photo products. Check out the SnapBox website.
Gathered.How, “the digital hub for your favourite craft magazine brands”, provides helpful hand-sewing instructions in their article 23 Embroidery Stitches that will Transform your Projects and How to do Them.
Previous FanningSparks’ posts featuring embroidered photos include:
Season’s Greetings 2018
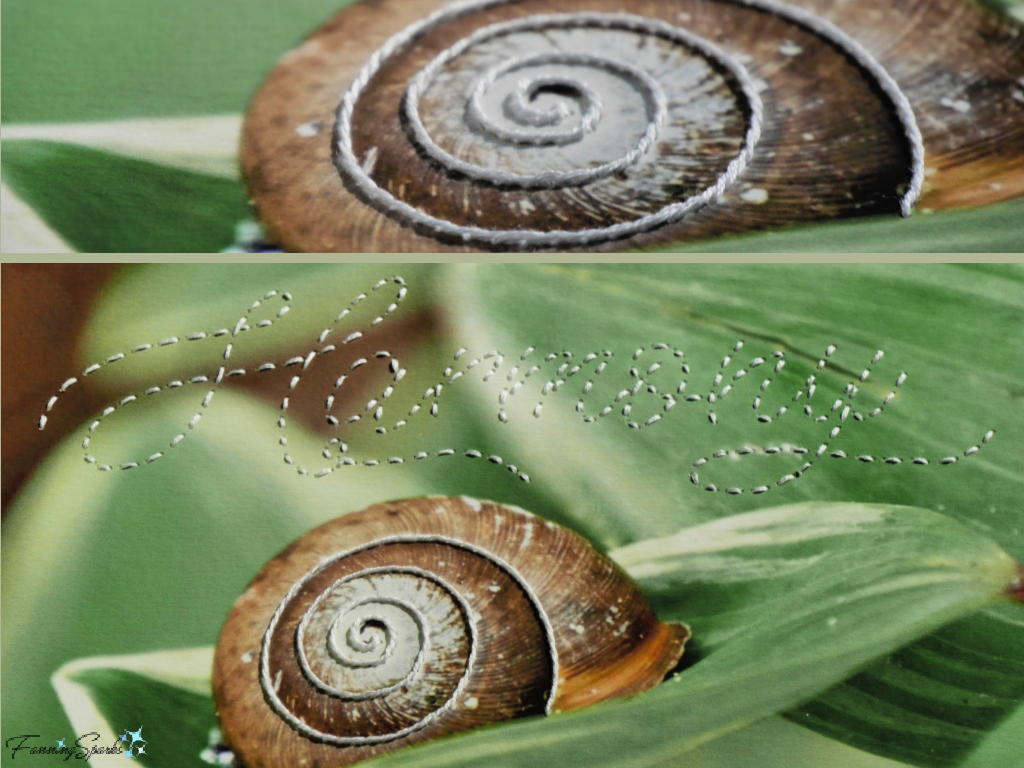
Harmony: My Word for 2019
Joyous Greetings 2019
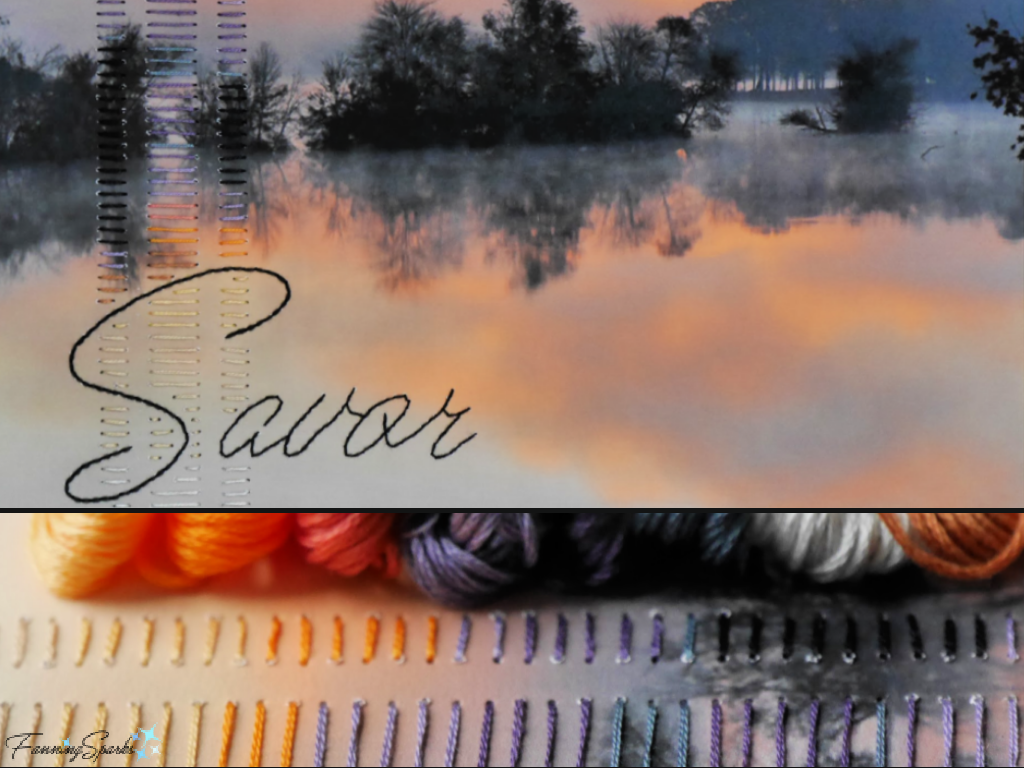
Savor: My Word for 2020
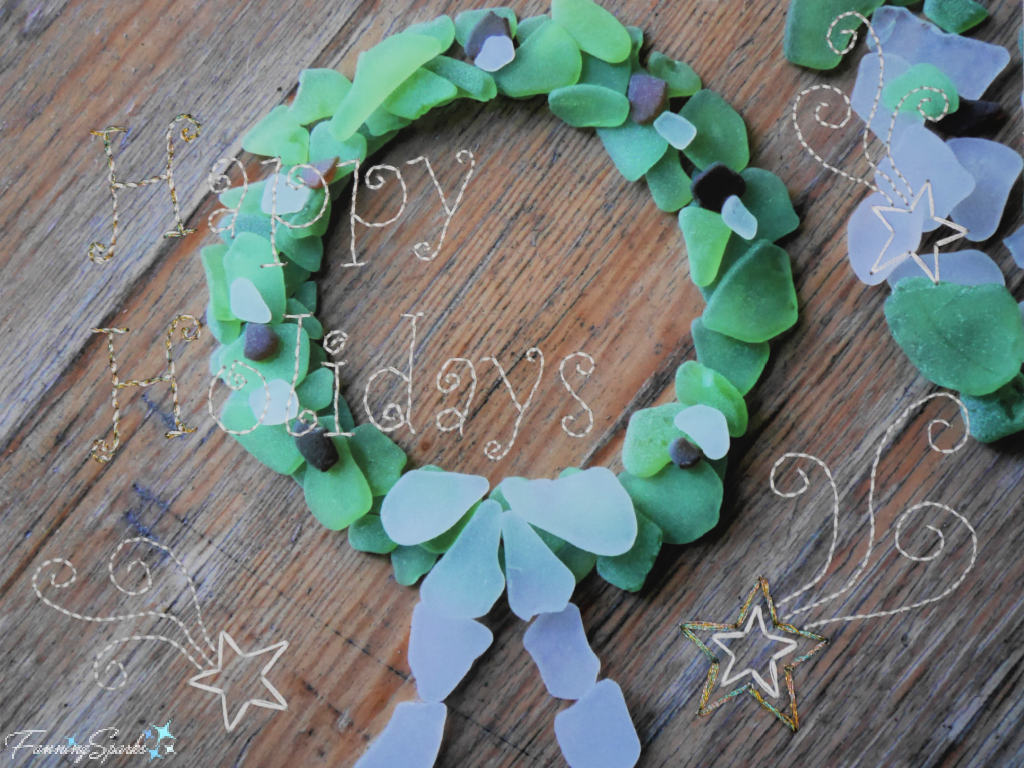
Happy Holidays 2020
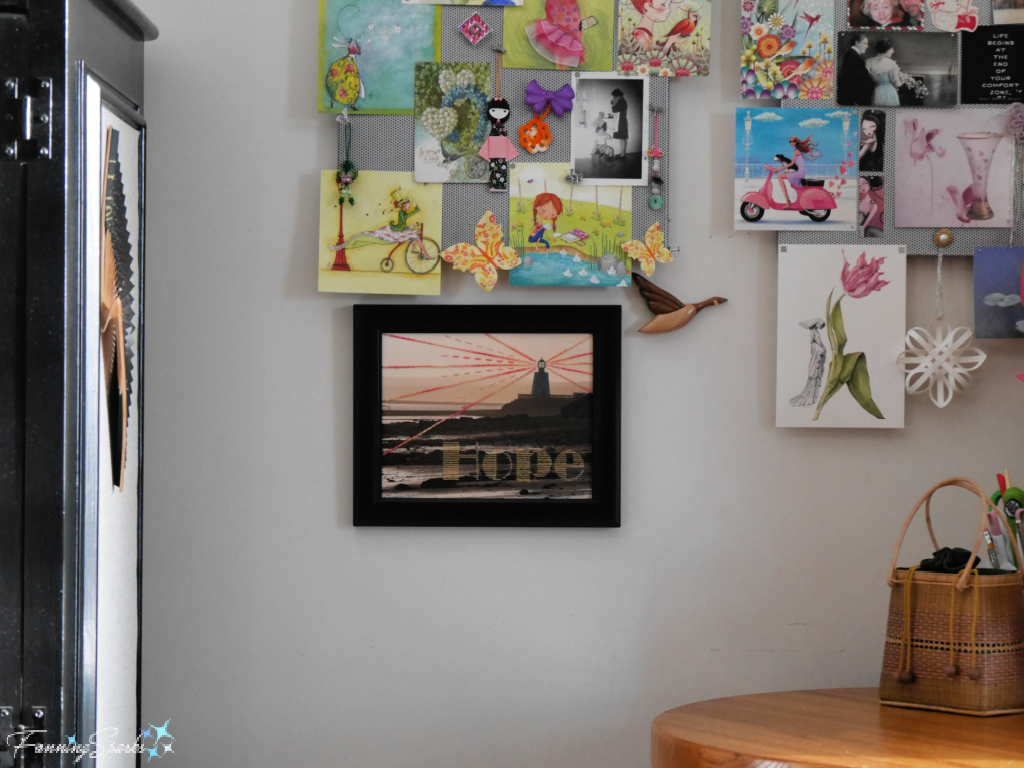
Hope: My Word for 2021
Today’s Takeaways
1. “In all things of nature there is something of the marvelous.” Aristotle
2. Consider embroidering your favorite photos to add depth and texture.
3. Paper stitching and photo embroidery are growing in popularity.


 Timing, as they say, is everything. I couldn’t have asked for better timing when I spotted this rooster leaving the hen house.
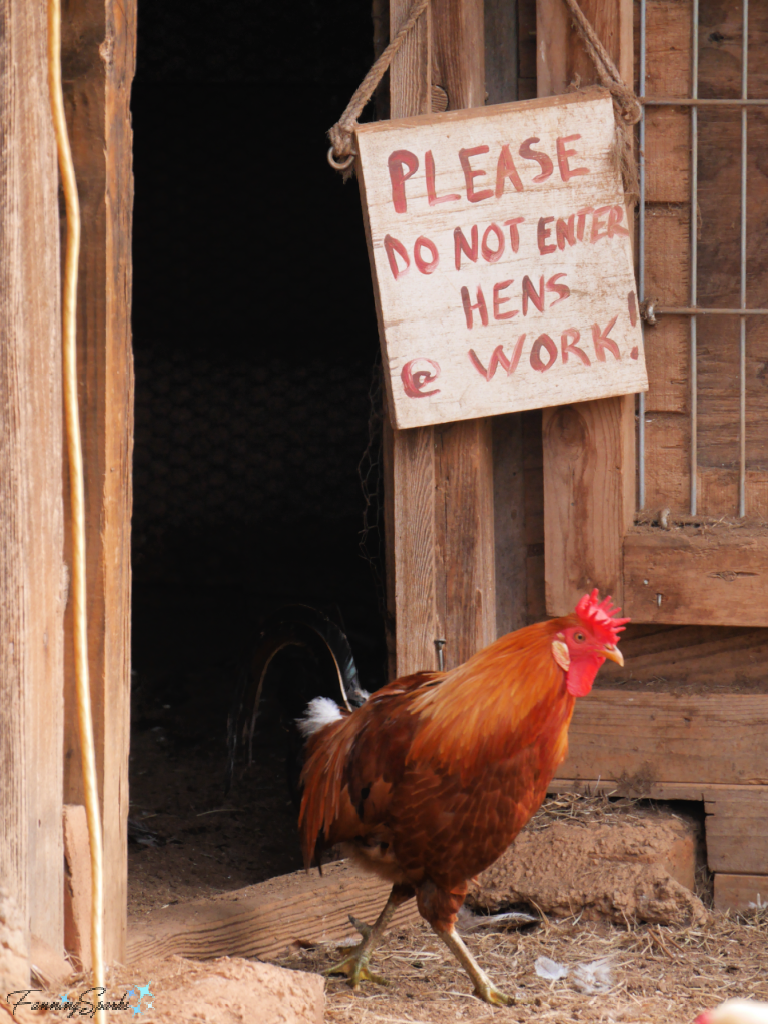 Timing was also an important factor in this next photo. The rainbow is beautiful but, for me, it’s the magical lighting on the clouds that makes this shot.
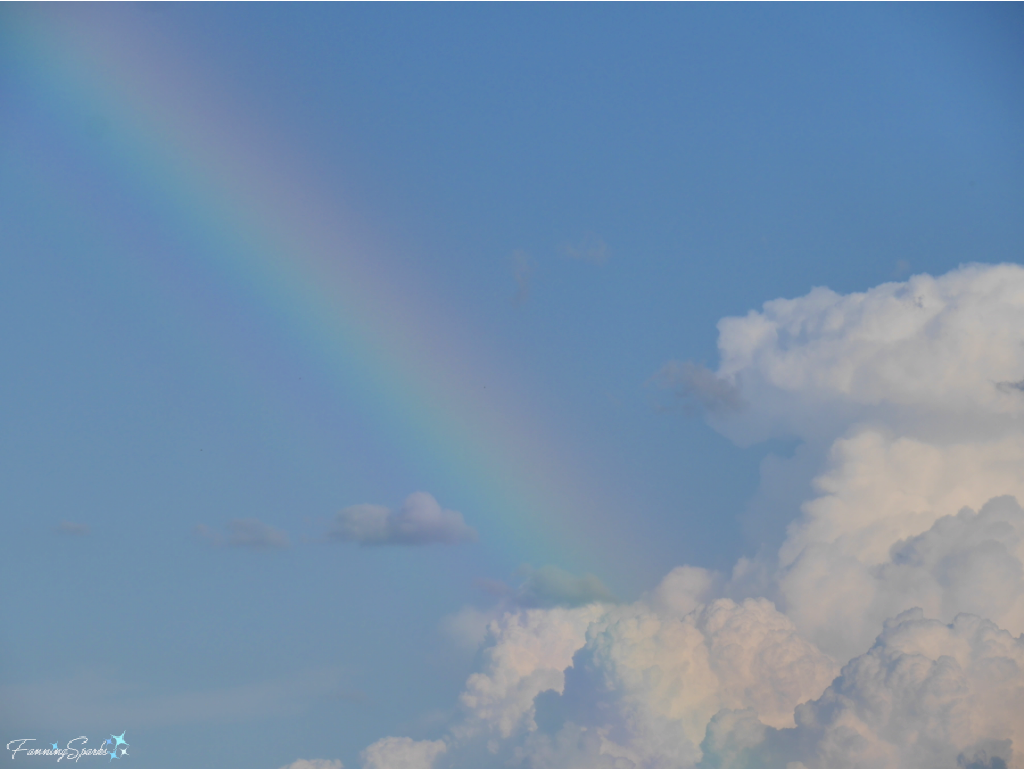
 I made the below trio of sailboats for the post,
 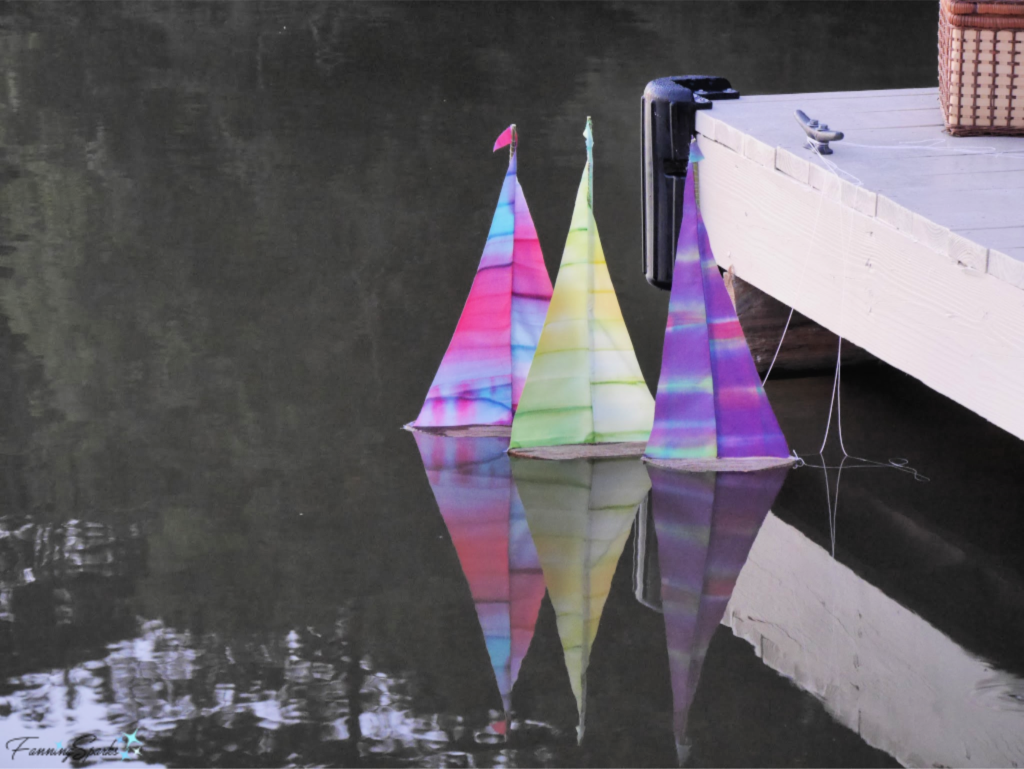 The boating fun continued with the post
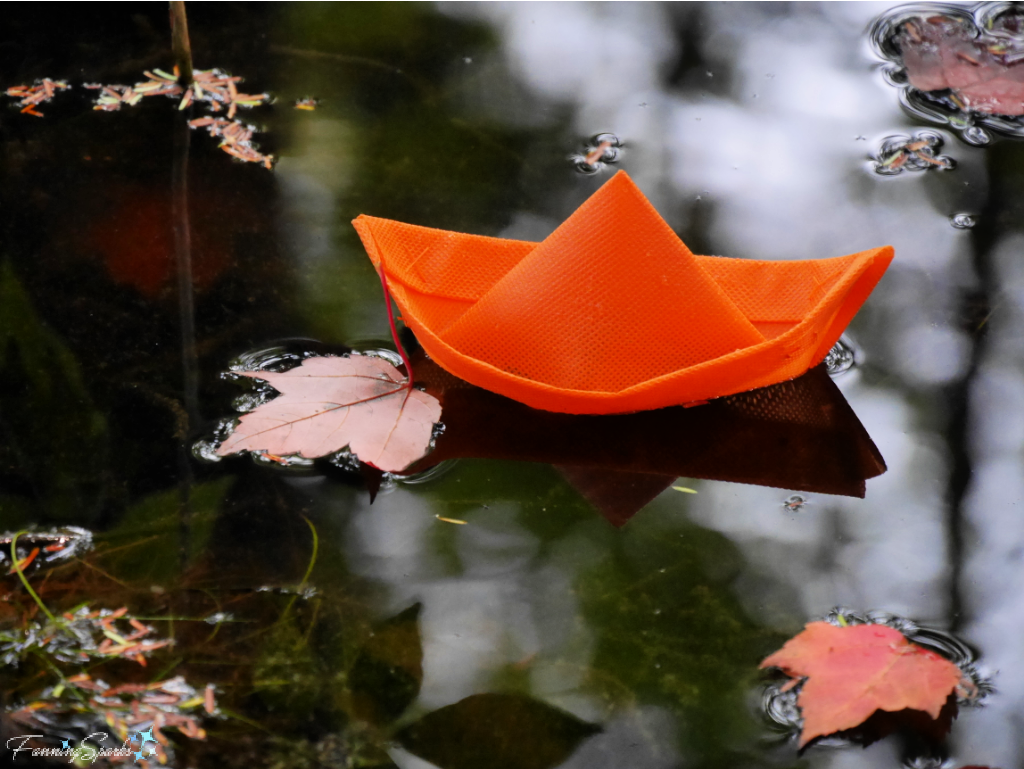
 A post of favorite photos wouldn’t be complete without a sunrise or sunset—so I have one of each. This is first light at Crowbush Cove on Prince Edward Island.
 This is the St Andrews North Point Lighthouse at sunset in St Andrews New Brunswick.