In last week’s post I introduced the idea of turning a mundane wall hook into a piece of wall art.  Wall hooks, coat hooks, robe hooks, back-of-door hooks—when you start noticing them—hooks show up in a surprising number of scenarios. This gives us a surprising number of opportunities to turn something functional into something beautiful and interesting.
The Bee in Cosmos OOAK Wall Hook I shared in my last post now holds a hand towel in our Half Bathroom.  This week, I’d like to share my Sassy Lady Robe Hooks.
Green Sassy Lady Robe Hook   @FanningSparksThree of these charismatic faces now inject a jolt of personality inside my clothes closet.  They could, of course, be installed in any number of places and be used for a variety of purposes…in a bedroom to hold belts, bags, hats or jewelry…in a bathroom to hold robes or towels…or by the front door to hold bags, keys and face masks.  Why not scan today’s DIY tutorial while you think about the perfect spot for your own Sassy Lady Robe Hook?
Sassy Lady Robe Hook DIY Tutorial
Today’s project is completely customizable.  You could modify the hat type or the hair style. You could switch out the colors, finishes and embellishments.  You could personalize it with a name or quote.  This project is made of wood and paper finished with epoxy resin.  It measures about 7½“ tall x 6” wide and is attached to a wall/door with 2 screws.  Basic woodworking and paper crafting is involved.
Please Note:  This tutorial, including the supplies listed and the instructions provided, account for only one Sassy Lady Robe Hook.  I chose to make 3 concurrently so the photos will vary and may show multiples.
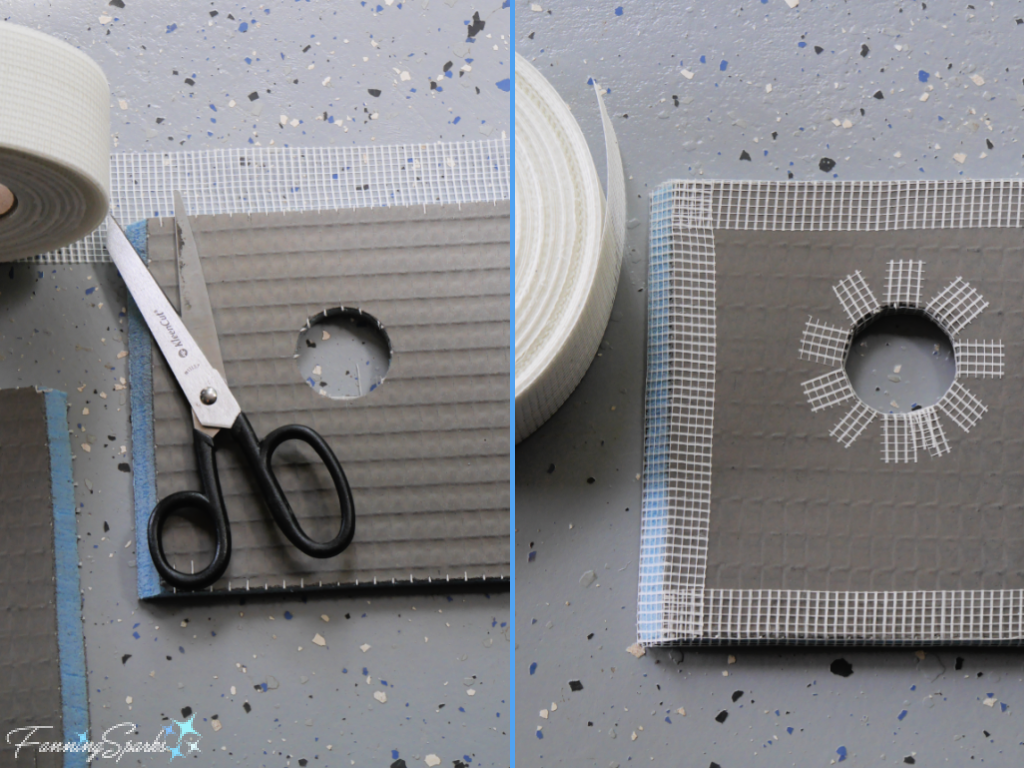
Supplies Needed
The following supplies are needed to make ONE Sassy Lady Robe Hook:
. Template:  Download Sassy Lady Robe Hook – Complimentary Download to print the template.
. Paper:  A few sheets of white paper for printing template.
. Wood Board: Piece of ¾“ pine or poplar slightly larger than 7½” x 6”.
. Painter’s Tape
. Spray Adhesive:  I used Aleene’s Tacky Spray.
. Sandpaper: Fine grit sandpaper.
. Knob: A decorative knob or hook which can be made to look like part of the bead necklace and is suitable for the intended purpose.  I chose a crystal sphere knob from Hobby Lobby.  It is about 4” around and extends about 1½”.
. Paper: ONE piece of 3”x5” paper for the hair and ONE piece of 4”x6” paper for the hat.  You may also need ONE piece of 4″x6″ white cardstock to line the hat.  I used black cardstock for the hair and custom-dyed, handmade paper for the hat.  See my previous post Experimenting with Fabric Dye to learn more about dyeing paper.
. Waterbase Sealer/Glue:   I used Mod Podge Matte from PLAID.
. Wax Paper
. Acrylic Gemstones: TWO 16mm; TWO 20mm; and ONE 25mm.  I found the Bead Design Co premium acrylic gemstones shown in the photo below in the jewelry-making section at Hobby Lobby.
Selecting Gemstones for Bead Necklace   @FanningSparks
. ArtResin Epoxy Resin: 2 oz of ArtResin (ie 1 oz of resin and 1 oz of hardener).
. Nails: THREE 2-3″ nails to plug holes.
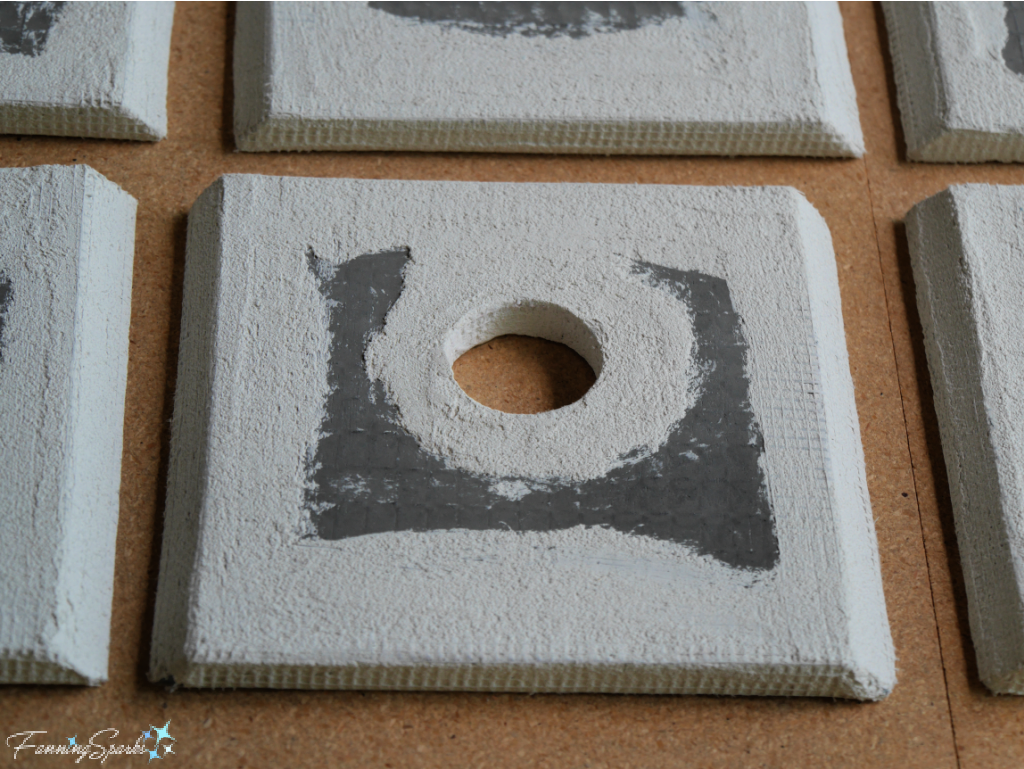
. Beacon Gem Tac Glue: Used to glue on the acrylic gemstones.  This glue is specifically designed to attach crystals, rhinestones and glitter to various surfaces.  It doesn’t interfere with the shiny backing of the gemstone and dries crystal clear.  In contrast, when I tested E6000 Industrial Strength Adhesive on cured ArtResin little bubbles distorted the shiny backing of the gemstone.

. Felt and Button (Optional): 4” x 8” piece of felt and a shiny button to embellish the hat.  See my previous post Teacup Pincushion – DIY Tutorial for the pattern and detailed instructions to make an Open Rose Form rolled spiral flower from felt.
. Screws and Anchors: TWO flathead screws and anchors suitable for attaching the piece to your wall or door.  I used #6 1¼“ wood screws along with E-Z Ancor Hollow Door & Drywall Anchors.
Equipment and Tools Needed
. Printer: To print template.
. Scissors
. Jigsaw
. Clamps
. Sharp-Pointed Tool or Nail: To indent the wood before drilling.
. Drill with TWO bits including 11/64” with countersink and 7/64”.  You may need different sized bits to match the screws and decorative knob you selected.  You may also need a 1/16″ bit and 5/64″ bit to drill the epoxy resin (as explained in Step 8).
. Pencil
. Bolt Cutters (or tool of your choice):  To shorten the decorative knob screw.
. Tapered Round File:  To sand the drilled holes.  I used a diamond and titanium-coated steel file designed for jewelry-making.
. Ball Stylus Tool or Pencil:  To trace design onto wood.
. Black Markers:  It’s helpful to have both a fine and medium-tipped marker.   I used Sakura Pigma Micron 03 and Brush markers.
. Brush: To apply the glue/sealer.  I used a disposable foam brush.
. Short-Bladed Scissors: To trim tape along the wooden edges.
. Screwdriver(s)
The following equipment and tools will be needed in Step 8 Apply Finish Coat and are pulled from the instructions provided by ArtResin:
. Cover:  To protect your piece from dust while it cures.
. Spreader:
. Plastic Drop Cloth:  To protect your work table.
. Mixing Cups and Containers
. Artist’s Torch: To run a flame over your resin surface for a bubble-free, flawless finish.  I used a BernzOmatic Butane Micro Torch purchased at Home Depot.
. Art Tape: To tape off the underside of your piece to collect drips.  I used painter’s tape for this purpose.
. Disposable Gloves
. Stir Stick
. Resin Stands: To prop your piece so it doesn’t get stuck to the table.  I used overturned, plastic containers.
. Level: ArtResin is self-leveling so you will want to make sure your work is also level before you pour.  www.artresin.com/level
Step 1. Print Pattern   Download the Sassy Lady Robe Hook – Complimentary Download and print the template. Take care to ensure the scale is accurate on your printed version.  See specifics in the download document.  Print TWO copies.  Cut out one of the paper patterns leaving a border outside the cutting line. Set aside the second copy for Step 5.
Step 2. Cut Wood  Prepare a rectangle of wood at least 7 ½ “ tall x 6” wide.  Cover surface of wood with painter’s tape.  The tape makes it easier to remove the patterns from the wood.  Spray the back of the paper pattern with adhesive.  I used Aleene’s Tacky Spray.  Position paper pattern, sticky side down, over the taped wood.  Press into place.
Adhering Pattern to Wood   @FanningSparks
Clamp the wood to a sturdy surface and use the jigsaw to cut out the shape.
Cutting Head Shape from Wood   @FanningSparksStep 3. Drill Wood Head  Mark the 3 spots—1 in the hat and 2 in the bead necklace—to be drilled by indenting them with a sharp-pointed tool.  Remove the paper pattern and the painter’s tape.  Use a pencil to label the back.
Prepare to drill the wood head by selecting the appropriate sized bits for the screws and decorative knob you’ve chosen.  I used an 11/64” bit with countersink for the decorative knob and a 7/64” bit for the two screws.  Clamp your wood head on top of a piece of scrap wood to prevent tear out on the bottom.  Drill pilot holes in the hat and the left necklace bead for the screws.  Drill a hole for the decorative knob in the right necklace bead.  Turn the wood shape over to counterbore the hole for the decorative knob.  This will allow the nut to sit flush against the back.  You may also need to shorten the decorative knob’s screw.  I used bolt cutters to shorten mine.
Drilling for Decorative Knob   @FanningSparks
Step 4. Sand Wood Head  Use fine grit sandpaper to smooth the front and side edges of the cut wood.  Take extra care with the cross grain sections on the side edges since the epoxy resin can emphasize any roughness.  Sand the edges of the drilled holes.  A round tapered file is helpful for this step.
Step 5.  Paint Face   Using the paper pattern you set aside in Step 1, cut out the shape along the cutting line.  Tape the paper pattern to the front of the wood head aligning edges.  Use a ball stylus tool or dull pencil to trace over the lady’s eye and mouth indenting the wood beneath.  Check that elements are visible before removing the pattern.  Use a fine tip black marker to trace along the indentations.  Use a medium tip black marker to fill in the lips. I used Sakura Pigma Micron 03 and Brush markers.
Tracing and Painting Face   @FanningSparks
Step 6.  Add Hair and Hat   Cut out the hair and hat shapes from the paper pattern.  Make a note along the top of the hair to add ⅜” along the hat brim—this will allow the hat to sit on top of the hair.  Cut the hair from the paper of your choice using the hair pattern with the extra ⅜”.  I used simple, black cardstock for the hair.  Cut the hat from the paper of your choice using the hat pattern.  I chose to use handmade paper for the hat.
Cutting Out Hair and Hat   @FanningSparks
Place the hair and the hat on the wood shape to ensure all edges align.  Adjust if necessary.  Glue the hair in place using Matte Mod Podge or glue of your choice.  Monitor the paper to ensure it doesn’t warp or buckle.  If it does, cover it with wax paper and weigh it down with something heavy.
Gluing Hair and Hat   @FanningSparks
Glue the hat in place using Matte Mod Podge.  Depending on the paper you’ve chosen, you may wish to first glue a layer of plain white cardstock underneath the hat.  I used handmade paper which is quite thin and found that the black hair showed through.  A layer of white cardstock followed by another layer of handmade paper solved the problem.
Correcting Paper Showing Through   @FanningSparks
Use a sharp-pointed tool, nail or needle to pierce the paper and open the drilled hole in the hat.
Step 7.  Seal  Use Matte Mod Podge, or sealer of your choice, to seal all the surfaces and wooden edges.  Don’t be concerned about brush strokes or unevenness at this point—these will be hidden by the final epoxy resin coat.  Let your first coat dry and add a second coat to ensure a complete seal especially along the side edges.  A good seal is needed to prevent the epoxy resin from seeping in and discoloring the paper or wood.
Sealing the Piece with Mod Podge Matte   @FanningSparks
Step 8.  Apply Finish Coat  The process to prepare and apply an ArtResin epoxy resin finish coat is clearly documented by ArtResin.  They provide lots of great guidance on how to use their epoxy resin product both in hard copy with their product and in a variety of formats online.  They carefully walk you through the steps to 1 Prep, 2 Measure, 3 Mix, 4 Pour & Spread, 5 Finish, 6 Wait and 7 Clean Up.  You’ll want to preview these instructions so you are prepared.  For instance, Step 5 Finish involves using a butane- or propane-powered, handheld torch to eliminate air bubbles from the ArtResin surface.  You’ll want to be familiar with its use prior to this step.
To prepare your Sassy Lady for the ArtResin coat, cover the bottom edges with painter’s tape.  Use short-bladed scissors to trim the tape along the wooden edges.  The tape will catch drips and provide a clean, even finish along the bottom edge.
Block the holes drilled for the screws and the decorative knob.  By design, ArtResin epoxy resin adheres to nearly all surfaces so it’s important to plug the holes with a suitable material.  I’ve learned that blocking the drilled holes with a small piece of wax paper rolled around a nail can work if the plug is removed before the epoxy resin sets.
Word of Caution:  Take care to keep your torch away from the wax paper if you use one to remove air bubbles from your poured resin.
Plugging Drilled Holes with Wax Paper and Nails   @FanningSparks
On my last project, I carefully removed the wax paper/nail plug about 2.5 hours after mixing the ArtResin and had great results.  But with this project, 2.5 hours wasn’t enough time and the epoxy resin flowed into the holes when I removed the plugs.  The trick is to remove the plugs after the epoxy resin has set enough to keep its shape.  However, if you miscalculate as I did, the holes can be re-drilled later.
After waiting about 24 hours, remove the painter’s tape from the bottom of your piece.  The ArtResin should be hard to the touch at this point although it won’t be fully cured until 72 hours have passed.
Removing Painters Tape from Bottom   @FanningSparks
If necessary, re-drill the holes.  The trick is to start with your smallest bit and gradually increase bit sizes to the desired size.  For instance, I re-drilled my holes in three steps—1/16“, 5/64”, and 7/64”.
Step 9.  Add Embellishments  The embellishments can be added after the ArtResin is cured.  Install the decorative knob in the right necklace bead.  Using the pattern as a guide, carefully position the acrylic gemstones to simulate a bead necklace.  Leave the left necklace bead with the drilled hole uncovered until the next step.  Follow the manufacturer’s instructions to adhere the acrylic gemstones with Beacon Gem Tac Glue.
Gluing Gemstones in Place   @FanningSparks
If you wish to embellish the hat with a felt flower like the one shown, check my previous post Teacup Pincushion – DIY Tutorial for the pattern and detailed instructions to make an Open Rose Form rolled spiral flower from felt.  Set your completed felt flower aside for the next step.
Step 10. Install Completed Robe Hook  The final step is to install your Sassy Lady Robe Hook.  Attach it with screws through the pre-drilled holes in the hat and bead necklace.  Use anchors and screws appropriate for your situation.  I used TWO #6 1¼“ wood screws along with E-Z Ancor Hollow Door & Drywall Anchors.  Hide the screw heads with the final acrylic gemstone and the felt flower.  I simply dabbed a bit of glue to their backs and stuck them in place.
However, if you’re concerned about eventually uninstalling the piece, you may choose to insert a “C-shaped” washer between the resined wood and the felt flower/acrylic gemstone.  Then carefully glue the item to the washer and slip it over the screw head.
♦ TIP: A nifty way to create the “C-shaped” washer mentioned above is to make it from epoxy resin.  Some of the ArtResin epoxy resin you poured onto your piece is likely to have dripped off and puddled on your plastic-covered work surface.  After about 24 hours, peel off the “puddles” and cut them to the desired shape with ordinary scissors.
TIP: Cut C-Shaped Washers from Dripped Epoxy Resin   @FanningSparks
Voilà!  Your new Sassy Lady Robe Hook is at your service!
Sassy Lady Robe Hook At Your Service   @FanningSparks

More Info

You can download the project template here: Sassy Lady Robe Hook – Complimentary Download .
Please pin this image to share or save for future reference.
Sassy Lady Robe Hook DIY Tutorial   @FanningSparks
The felt flower used to embellish the Sassy Lady’s hat is described in a previous post.  See Teacup Pincushion – DIY Tutorial for the pattern and detailed instructions to make an Open Rose Form rolled spiral flower from felt.
The handmade paper used for the Sassy Lady hats was custom-dyed.  See Experimenting with Fabric Dye to learn more about dyeing various materials including paper.
There are three posts in this series about turning the mundane wall hook into interesting and beautiful wall art:
Bee in Cosmos OOAK Wall Hook
. Sassy Lady Robe Hook – DIY Tutorial (this post)
. A Flutter of Butterflies in the Closet.
The first project, Bee in Cosmos OOAK Wall Hook, was my response to an ArtResin artistic challenge.  I also used ArtResin in my Fern & Flower Press – DIY Tutorial and Thrifted Frame to Small Tray projects.
Bee in Cosmos OOAK Wall Hook pin @FanningSparks
Visit the ArtResin website to learn more about or shop for ArtResin epoxy resin.  Check out ArtResin’s Instagram account where they actively share and promote the work of artists using their products.

Today’s Takeaways

1. Consider the possibilities of recasting an everyday, functional item (like a wall hook) as a piece of wall art.
2. Simple materials and techniques can have beautiful and interesting results.
3. Turn the mundane into the extraordinary.
Peg - FanningSparks Author

This project has been in the works for a while so I’m pleased to share it with you today.  The Bee in Cosmos OOAK (One Of A Kind) Wall Hook is special for a few reasons.  Most notably, it’s my first time participating in an artistic challenge.  The fine folks at ArtResin (Thank you Rebecca!) invited me to use their product in a project and I was only too happy to accept!  I’ve used ArtResin epoxy resin in a couple of other projects (see More Info below) and was eager to take it to the next level and share my findings.
Secondly, this project combines a very functional purpose with a decorative opportunity.  This wall hook will be used to hold a hand towel next to the sink in our Half Bathroom.  But it could be used to hold a variety of items such as scarves, hats, handbags, necklaces or keys.  This project combines photography, woodworking and embroidery into a truly unique, mixed media piece of wall art.  So without further ado, let’s take a closer look at my new Bee in Cosmos OOAK Wall Hook.
Pink Scarf on Bee in Cosmos OOAK Wall Hook   @FanningSparks
The star of the show is this Eastern Carpenter Bee (Xylocopa virginica) nestled inside a pink cosmos bloom.
Eastern Carpenter Bee in Pink Cosmos Bloom   @FanningSparks
To tie it back to the steps of the creative process which I shared in a previous post From Idea to I Made It! in 10 Steps, this bee photo sparked Step 1 Ideate.  The photo was the springboard for the entire design including the honeycomb and hexagon shapes and the abundance of flowers.  The rich green and vibrant pink colors are the perfect complement to the mandala-inspired mosaic mirror frame I’d made for our Half Bath.  The notion of adding a meandering flight path tied it all together.  Here’s a sketch of the idea from that early stage.
Sketching Bee Flight for Bee in Cosmos OOAK Wall Hook   @FanningSparks
Regular readers know I like paper stitching and often embellish my photographs with hand embroidery.  It seemed like the perfect way to add the bee’s flight path.  If you’re new to this technique check out the step-by-step instructions in my previous post Hello Marvelous Photo Embroidery – DIY Tutorial.
I decided to use three 8”x 8” square photos.  Omni Calculator’s handy online hexagon calculator (see More Info) helped me determine the size of the hexagons and the honeycomb base.  A simple overlay helped me see how the photos would look in the proposed shape.
White Cosmos with Sketched Hexagon for Bee in Cosmos OOAK Wall Hook   @FanningSparks
At some point, I decided to add depth and dimension by raising one of the hexagons with a second tier.  Three major components emerged as my design plan solidified: the wooden base, the embroidered photos and the resin finish.  Each required its own source, setup, preparation and assembly.
The Wooden Base
I made the honeycomb base with some 1” x 8” poplar boards I had on hand.  Two 16” boards were glued together to make a 14” x 16” rectangle.  Then I cut out the triple-hexagon shape with a jigsaw.
Cut Triple Hexagon Base from Wood for Bee in Pink Cosmos Bloom   @FanningSparks
A single wooden hexagon was also cut from wood and then glued to the top left spot on the wooden honeycomb base.
Glue Single Hexagon Over the Honeycomb Base for Bee in Cosmos OOAK Wall Hook   @FanningSparks
After a quick test for stability, I chose a pair of keyhole hangers to hold the piece on the wall.  Here’s how the back was prepared for these hangers.
Preparing for Keyhole Hangers for Bee in Cosmos OOAK Wall Hook   @FanningSparks
Finding the right hook was a bit of a challenge but when I came across a crystal sphere knob at Hobby Lobby I knew I’d found the perfect one.  I pre-drilled a hole in the wooden honeycomb base for the knob and, to ensure it would sit flush against the back of the wooden base, I drilled a counterbore on the back and shortened the knob’s screw.
Drill Hole for Crystal Knob for Bee in Cosmos OOAK Wall Hook   @FanningSparks
Here’s how the decorative crystal knob looks on the final piece.
Decorative Crystal Knob on Bee in Cosmos OOAK Wall Hook   @FanningSparks
The Embroidered Photos
The 8” x 8” matte photo prints were ordered from SnapBox (see More Info).  I’ve always had great results with their prints—the quality is excellent and the heavy matte paper is ideal for hand stitching.  I used black and white photocopies along with a thick white marker to map out the bee’s flight path.  Then I traced the design onto parchment paper.  By laying the parchment paper design over the photos, I was able to use a piercing tool to puncture the photos for the stitching lines.
Mark and Pierce Bee Flight Plan   @FanningSparks
A long running stitch, done in white pearl cotton thread, created a nice, bold line for the bee’s flight path.
Stitch Bee Flight Path with White Running Stitch
The photos had to be cut into hexagon shapes for the wooden base.  To ensure the photos fit as accurately as possible, I made and used a specific template for each hexagon by tracing around the outside edges of the wood.
Cut Photo in Hexagon Shape for Bee in Cosmos OOAK Wall Hook   @FanningSparks
I used Mod Podge Matte to glue the photos to the wooden base.  But I quickly discovered a water-based sealer is not ideal for heavy matte watercolor paper.  The photos started to warp and buckle!  I scrambled to cover them with wax paper and stacked a pile of heavy books on top.  Luckily, that solved the problem!
Glue Photos to Wooden Hexagons for Bee in Cosmos OOAK Wall Hook   @FanningSparks
I also used Mod Podge Matte and more heavy books to seal all the surfaces and wooden edges.   The below photo shows how the piece looked after sealing.  The brush strokes and unevenness of the sealer, which are quite visible viewed from this angle, would disappear in the next step.
Seal Photos and Hexagons for Bee in Cosmos OOAK Wall Hook   @FanningSparks
Resin Finish
At last, the piece was ready for the finish coat.  I knew from using ArtResin epoxy resin on my Fern & Flower Press project that it would provide a lovely smooth, shiny finish.
ArtResin provides lots of great guidance, both in hard copy with their product and in a variety of formats online, on how to use their epoxy resin product.  They carefully walk you through the steps to 1 Prep, 2 Measure, 3 Mix, 4 Pour & Spread, 5 Finish, 6 Wait and 7 Clean Up.  Instead of repeating their instructions, I’ll just add a few key things I learned about using ArtResin’s epoxy resin.
. Take time to prepare your working area in advance.  Cover the work surface with plastic.  You will be pouring the liquid resin onto the piece and letting it drip over the sides so be sure to elevate your piece.  I used 3 identical, overturned plastic containers to prop up my piece.  Ensure the surface is level—the resin is self-leveling so a level surface ensures your piece will have an even coat.  I used an old school box level but you could also use ArtResin’s app.
Prepare Working Area for ArtResin Project   @FanningSparks
. Prepare the piece to be resined.  Cover the bottom edges with painter’s tape to catch drips and give a clean finish.  You’ll also need to temporarily block any holes such as the one I pre-drilled for the decorative knob. This is trickier than it sounds because, by design, ArtResin epoxy resin adheres to nearly all surfaces.  I knew from my experience with the Fern & Flower Press that blocking a drilled hole with painter’s tape and scrap paper does not work—the paper actually drew the epoxy resin into the hole and I had to re-drill it—oops!
So I ran a little test to find a better solution.  I learned that blocking the hole with a plastic straw, roll of wax paper or blob of silicon caulking would not work especially when left in place too long.  However, blocking the hole with a small piece of wax paper rolled around a nail AND carefully removing the plug about 1.5 hours later by slowing turning it upward worked perfectly.
Word of Caution:  Take care to keep your torch away from the wax paper if you use one to remove air bubbles from your poured resin.
Blocking Hole with a Nail Wrapped in Wax Paper   @FanningSparks
. Plan your approach.  Deciding how to finish the side edges of the wooden hexagons required some advance planning.  I decided to finish the edges with ArtResin so the wood sides would remain visible.  I planned to follow ArtResin’s advice to “mask off the underside of the piece and allow the resin to drip over the sides, then spread it with a gloved hand.”  But I was worried about disturbing the resin on the top of the hexagons when I spread the interior edges (ie the 2 sides of the single hexagon which sits on the base honeycomb).  To avoid this situation, I used my gloved hand to spread resin onto the 2 interior side edges BEFORE pouring the resin on the main surfaces.  Then I poured the resin over the top of the photos and let it drip over the sides.  Finally, I used my gloved hand to spread the resin onto the exterior side edges.
I’m really pleased with how the ArtResin coat turned out.  The surface is clear, smooth and glossy.  The edges of the photos are nicely domed.  Even the wooden side edges look good.
Cured ArtResin Finish on Bee in Cosmos OOAK Wall Hook   @FanningSparks
One thing I would do differently next time is apply a second coat of Mod Podge to better seal my piece.  The epoxy resin seeped into a few spots along the cotton thread stitching and on the cross-grain wood edges causing some mild discoloration.  It’s not a big deal but it is something worth pointing out.
And here it is—in all its glory—my Bee in Cosmos OOAK Wall Hook.  Many thanks to the folks at ArtResin for including me in the artistic challenge!
Bee in Cosmos OOAK Wall Hook pin   @FanningSparks
I admit I got a little carried away with this project and made several different wall hooks.  I’ll share those, along with a full DIY Tutorial, in my upcoming posts.
UPDATE May 11, 2021: Check out these Sassy Lady Robe Hooks in my next post.  Full step-by-step instructions are included.
Sassy Lady Robe Hook DIY Tutorial @FanningSparks

More Info

There are three posts in this series about turning the mundane wall hook into interesting and beautiful wall art:
. Bee in Cosmos OOAK Wall Hook (this post)
. Sassy Lady Robe Hook – DIY Tutorial
. A Flutter of Butterflies in the Closet.
Visit the ArtResin website to learn more about or shop for ArtResin epoxy resin.  Check out ArtResin’s Instagram account where they actively share and promote the work of artists using their products.
I used ArtResin epoxy resin in two other projects.  Check out the posts Fern & Flower Press – DIY Tutorial and Thrifted Frame to Small Tray.
To learn more about paper stitching and photo embroidery, check out my previous post Hello Marvelous Photo Embroidery – DIY Tutorial.
SnapBox offers a suite of professional photo products including matte photo prints which are ideal for stitching.  Check out the SnapBox website.
Omni Calculator offers over 1750 online calculators across a dozen different categories such as Conversion, Everyday Life, Food, Finance and Math.  I used their Math Hexagon calculator for this project.

Today’s Takeaways

1. Look for items that are both functional and decorative.
2. Consider making a mixed media project.
3. Never miss an opportunity to experiment with new materials and techniques.
Peg - FanningSparks Author

There’s a full-blown beauty pageant underway in our flower garden these days!
Spring Flower Beauty Pageant   @FanningSparks
The leading contestants, Clematis ‘Ramona Blue’, purple bearded iris and Allium ‘Purple Sensation’, are trying their best to outdo each other.  They’re colorful, flashy and glamorous!
Allium, Clematis and Iris Bloom Collage   @FanningSparks
Meanwhile, the Spanish Lavender is more like Miss Congeniality with its gentle, low-key ways.  It plays a strong supporting role with its small purple blooms and silvery-grey foliage.
Spanish Lavender with Allium and Iris in Garden   @FanningSparks
The Spanish Lavender (Lavandula stoechas ‘Otto Quast’) may not be as flamboyant as the others but it has something they don’t—staying power!  Lavender is well-known for its sweet, floral scent.  Author Tessa Evelegh, puts it this way: “As well as for its unmistakable perfume, lavender has been recognized since Roman times for its healing and antiseptic qualities, its ability to deter insects, and for washing.” (from Lavender Practical Inspirations for Natural Gifts, Country Crafts and Decorative Displays).
Spanish Lavender Blooms (Lavandula stoechas ‘Otto Quast’)   @FanningSparks
Fortunately, there are a number of ways to preserve the treasured aroma of lavender.  Lavender stalks can simply be hung upside down to dry.  The dried bouquets can be displayed as is or the blooms can be removed and used in a variety of ways such as sachets and pillows.
English Lavender Hanging to Dry   @FanningSparks
Another option for extending the life of this classic flower is to make lavender wands.  These charming drawer and closet scenters are also known as “lavender bottles” and according to Tessa Evelegh “Young ladies in Victorian times used to while away afternoons making lavender bottles by encasing lavender heads in their own stalks, then weaving them with ribbon.”
The lavender flowers are hidden inside a small “cage” of interwoven stalks and ribbon.  Dried blossoms will be held neatly inside the woven cage as they dry and shrink.  Thus, the lavender wand can be placed inside a drawer or hung in a closet without strewing bits of dried lavender.
Finished Lavender Wand with Cluster of Lavender Blooms   @FanningSparks
Lavender wands aren’t difficult to make once you know how.   The first step is to gather the lavender stalks.  It’s best to cut the lavender in the early morning before the heat of the sun can cause the lavender to release its scent.
Spanish Lavender Stalks in Trug   @FanningSparks
Cut an odd number of stems, at least SEVEN, about 12-18” long.  One lesson I learned the hard way is the stems should be as straight as possible with at least 4” of new growth.  The new growth is supple and easy to manipulate.  In contrast, the old growth is woody and brittle making it near impossible to bend the stalks and tricky to weave the ribbon around them.
Spanish Lavender Stalks in Trug Closeup   @FanningSparks
The only other supply you’ll need for this project is ribbon.  I purchased a few different options in ⅜” and ¼” widths.  The amount of ribbon needed will depend on the length of the lavender stalks and the size of bow you choose to make.  I used about 4’ of ribbon to weave my lavender wand.
The steps to weave the lavender wand, as illustrated below, are:
Step 1. Remove the leaves from the lavender stalks.
Step 2. Align the base of the lavender flowers and tie the ribbon just below this point.  Leave a ribbon tail of about 6”.  Tie the ribbon in a firm knot but not so tight it will break the stems.
Step 3. Hold the bundle of lavender flowers in your nondominant hand.  Then use your dominant hand to carefully bend a stalk at the base bringing it up and over the lavender flowers.  Pass the bent stalk over to your nondominant hand.  Slowly turn the bundle, bending one stalk at a time, so the stalks surround the lavender flowers.  Tuck the ribbon tail inside the bundle.  Begin to weave the long end of the ribbon between the stalks.  Pull the ribbon over one stalk, then under the next stalk, over, under, over, under…
Step 4. Weave round and round the bundle taking care to keep the stalks in the same order and the ribbon smooth and flat.  When you reach the bottom of the bundle, pull out the ribbon tail and tie a tight bow.
Steps to Make a Lavender Wand   @FanningSparks
Wind the remaining ribbon around the stems and tie off.  You may choose to add a loop or an additional bow in coordinating ribbon.  There you have it!  A lavender wand just like the Victorians used to make!
Lavender Wand Completed with Lavender Blooms    @FanningSparks
Yet another way to preserve lavender is to make a lavender basket (shown on the right below).  The woven stalks and ribbon look similar to a lavender wand but, notably, the lavender heads are not enclosed.
Lavender Wand and Lavender Basket   @FanningSparks
When making a lavender basket, instead of bending the stalks at the base of the flower heads, bend them about 5-7” below the base of the flowers and weave the ribbon around the stalks to made a handle of sorts.  Trim the stalks after tying off the ribbon.  It’s also possible to join a few long stalks above the basket to weave a loop handle.
Finished Lavender Basket   @FanningSparks
Whether you choose to weave lavender wands or lavender baskets, it’s a fun way to make something pretty and preserve that unmistakable lavender scent.

More Info

I’ve only used Spanish Lavender (Lavandula stoechas ‘Otto Quast’) to make lavender wands and baskets.  I suspect using the long, upright stems of English Lavender, as shown below in my sister Marian’s garden, would be easier.  She’s an accomplished gardener in addition to being a wonderful sister!
English Lavender in Bloom  @FanningSparks
The book, Lavender Practical Inspirations for Natural Gifts, Country Crafts and Decorative Displays by Tessa Evelegh, contains a wealth of information about lavender.  It is available online, at no charge, via Archive.org.

Today’s Takeaways

1. “As well as for its unmistakable perfume, lavender has been recognized since Roman times for its healing and antiseptic qualities, its ability to deter insects, and for washing.” Tessa Evelegh
2. Making lavender wands, with lavender blooms held in a cage of interwoven stalks and ribbons, dates back to Victorian times.
3. Consider weaving lavender with ribbon to preserve the blooms and scent of lavender.
Peg - FanningSparks Author

With our flower gardens in full bloom, it’s the perfect time to identify the superstars and make plans to clone them.  Well… more accurately… to propagate the flowering shrubs.  And it’s much easier to do than you might expect.  All it takes is a little planning and a lot of patience.
My first attempt at propagating shrubs resulted in about 40 promising starts including 6 favorites—Spirea Limemound, Hydrangea (various) European Snowball Bush, Star Jasmine, Rose of Sharon and Camellia (various).  I started them last year in early July.  Here’s how they look today.
First Batch of Cuttings in Nursery Bed   @FanningSparks
It’s a little difficult to appreciate without the full context so let’s look at an example.  Here’s our Star Jasmine (Trachelospermum jasminoides) in full bloom in June of last year.  This southern charmer is a vigorous grower, smells divine and blooms like crazy for nearly a full month.  Definitely a superstar in my books!
Star Jasmine in Bloom    @FanningSparks
Last summer, I took a few cuttings from this shrub following the instructions I found online and hoped for the best.  Here’s how those cuttings look now—about 9 months later.  I plan to keep them in my “nursery bed” until this fall when I’ll transplant them into a permanent location.
Star Jasmine First Batch of Cuttings   @FanningSparks
My hydrangea cuttings also look promising.  Here’s a lovely variegated hydrangea blossom from last spring along with the last year’s cutting as it looks today.
Blue Variegated Hydrangea with New Start   @FanningSparks
Our Spirea ‘Limemound’ (Spiraea japonica ‘Limemound’), which is a lush mound of bright green freshness right now, will be covered in pretty pink blossoms later in the season.  I took several cuttings from this shrub and they absolutely thrived!  I have 8 promising new starts.  That’s a great example of One to Many!
Spirea Limemound in Bloom with First Batch of Cuttings   @FanningSparks
Granted not all the shrubs I tried to propagate were this successful.  Cuttings from our Lady Banks Rose (Rosa banksiae ‘Lutea’) simply wilted and died.  This shrub has been putting on such a spectacular show this spring that I’ll just have to give it another try!
Lady Banks Rose in Full Bloom   @FanningSparks
After targeting which shrubs to propagate this year, there are a few other steps to get ready for this year’s window of opportunity.
Plan Timing
Timing is the most important element.  If you are too early, the cuttings aren’t hardy enough to survive.  Summer is the recommended time.  But summer varies greatly from one gardening zone to another.  I took my cuttings in July last year because, according to the calendar, summer starts in late June.  But I garden in the US Southeast where summer is brutal on plants and gardens.  I wondered if this is really the best time to take cuttings.
There’s a fair bit of advice online about when to take cuttings.  There are explanations of readiness checking; descriptions of greenwood, softwood and hardwood; definitions of ripeness; recommended bending tests and so on.  Then I discovered “The Six Week Rule” from Mike’s Backyard Nursery (see More Info below).  He recommends taking note of when your plants start producing leaves in the spring and counting forward 6 weeks from there.  The resulting date is the earliest date to start cuttings.
Looking back at my photos, I was able to see our shrubs started leafing out around March 15.  So 6 weeks takes me to April 26 which means I can start 2 months earlier than last year.  Hooray!
Add 6 Weeks From Leafing Out Date   @FanningSparks
Prepare Rooting Baskets
The question of which containers and soil to use for cuttings garners a great deal of advice online.  Last year, I filled plastic baskets with sand and covered them with a trash bag to make a mini-greenhouse.  This worked so well I will do the same this year.   Once again, I have Mike’s Backyard Nursery (See More Info below) to thank for this technique.  I’ve tweaked the process a little and prepare my rooting baskets as follows.
Gather these supplies:
. Plastic Basket – with holes in the sides.  Mine are inexpensive plastic from a local dollar store—they are 13½“ long x 9” wide x 6” high.
. Play Sand
. White Trash Bag – Big enough for the basket to fit inside.
. Sticks – FOUR about 13” long dowels or plant stakes.
. Cable Ties – FOUR
. Water
. Labels
You’ll also need Rooting Hormone when it’s time to take the cuttings.  There are several products available—just look for “rooting hormone”, “rooting compound” or “rooting powder”.  I used Schultz Rootone Rooting Hormone which doesn’t appear to be sold any longer.
Supplies and Tools Needed for Rooting Baskets   @FanningSparks
To prepare the Rooting Basket, attach the 4 sticks to the corners of the basket with the cable ties.  The sticks will elevate the plastic trash bag over the basket creating a tent of sorts.
Attach Sticks to Side of Rooting Basket   @FanningSparks
Next open a trash bag and set the basket inside.  Fill the basket about 1/3 full with play sand.  I’ve found it’s much easier to set the basket inside the bag before adding the sand.  Shower the sand with water to soak it thoroughly.
Fill Rooting Basket 1/3 with Sand    @FanningSparks
♦ TIP: It’s also helpful to prepare a few labels in advance.  The slats from an inexpensive vinyl mini blind make great plant labels.  Simply cut the cords to remove a slat.  Then use scissors to cut the slat into labels.   I make mine about 3½“ long and make a hole with a punch.  Then I use a regular pencil to write on it.  You can hang the labels or stick them in the ground.  Believe it or not, these simple labels last and last.   Cheap and easy!
TIP: Make Labels from Old Mini Blind Slats   @FanningSparks
Take Cuttings
When it comes to taking the actual cuttings, the online advice is pretty consistent.  Here are the steps:
1. Cut a 3-6” stem from the tip of a branch with healthy new growth but no buds or blooms.
2. Strip all leaves except the top couple sets.
3. Cut stem just below a spot from which you removed a set of leaves.
4. Dip end of stem in water.
5. Roll wet stem in Rooting Hormone.  Tap to remove excess.
6. Make a hole in the sand with a stick and insert stem into the sand.
How to Prepare a Cutting   @FanningSparks
Wait
After filling the rooting basket with cuttings, drench the sand.  Then pull the trash bag up around the sticks and close with a twist tie.
Closed Rooting Basket   @FanningSparks
Place the covered rooting basket in the shade and wait.
The idea is to give the cuttings lots of moisture.  Once a week, open the bag for a few hours to let in some fresh air and gently spray your cuttings with water.  I also check the bag after it has rained to shake off puddles or water that has collected in the folds of the bag.  Keep the rooting basket out of the direct sun to prevent it from overheating and/or drying out.
Typically, cuttings will form roots in about 4-8 weeks.   Once rooted, gently remove the cuttings from the sand and transplant into individual pots or into the garden.  It’s really that simple!

More Info

I’ve found the advice offered on Mike’s Backyard Nursery website, especially in the Propagation section, to be very helpful.
You may also enjoy the FanningSparks’ post, Our Garden Prepares to Leap, to see the progress we’ve made with our flower gardens.  Or the post, Zinnias Rock! And More Cutting Garden Tips, to learn about my cutting flower garden.

Today’s Takeaways

1. All it takes to propagate your favorite flowering shrubs is a little planning and a lot of patience.
2. A simple rule of thumb is to start cuttings 6 weeks after your plants start producing leaves.
3. Consider starting cuttings from your own garden.
Peg - FanningSparks Author

Some time ago, I had the pleasure of visiting Kingsbrae Garden in beautiful St. Andrews by-the-Sea, New Brunswick.  Kingsbrae Garden (see More Info below) is 27 acres of award-winning art and natural beauty.  While admiring the sculpture sprinkled throughout the garden, an unusual planter caught my eye. The pyramid-shaped tower was planted with strawberries.  It seemed like the perfect combination of practical purpose and visual interest.  I took a few photos and filed the idea away for future reference.
Strawberry Tower at Kingsbrae Garden in St Andrews NB   @FanningSparks
Meanwhile, back home in Georgia, we decided to try growing our own berries.  We added a new garden bed and planted several fruit plants including blackberries, raspberries, blueberries and strawberries.  That was last spring.  This spring, when the strawberries were threatening to take over the entire bed, I remembered the Kingsbrae Garden strawberry tower.
After looking for plans online and not finding any to my liking, I decided to incorporate the best aspects of the various options and design my own.  I started with a few sketches, kluged together a paper prototype and researched the materials available.  Cedar fence pickets, in 6 foot lengths of 1” x 6”, seemed like a good option because of their convenient size and availability at the local home improvement store.  Plus cedar is reported to be a good, long-lasting alternative to treated lumber.  Eventually my plan came together and my new Strawberry Tower Planter was in place.  Here’s how it looked a few days after transplanting the strawberry plants.
Strawberry Tower Planter in Early Morning   @FanningSparks
This Strawberry Tower Planter has 6 tiers, each made of a rectangular frame.  The rectangular frames have trapezoid shaped ends and long sloped sides.  The sides form a series of troughs of sorts.  The rectangular frames are staggered in size such that each one can sit neatly on the one below.  The structure can sit directly on the ground or on concrete blocks as shown.  My overall structure, including the concrete blocks around the base, measures 47” wide x 63” long x 41” tall.  The planter provides approximately 13½ square feet of growing surface.
Strawberry Tower Planter Viewed from Above   @FanningSparks
I consider this to be a beginner woodworking project.  No special tools, only a jigsaw and a drill, are needed.  The construction could be a little tricky but I’ve provided detailed step-by-step instructions in the tutorial that follows.  Why not give it a try?  It’s the perfect opportunity to start your own strawberry “patch” and just think—strawberries!   Sweet, juicy strawberries fresh from your own garden!
Strawberry Tower Planter DIY Tutorial
I’ve adopted a few terms to make the instructions as clear as possible—they are illustrated in the graphic below.  I’ll refer to the end support pieces as the “Trapezoid End Pieces” and the long slanted sides as the “Sloped Side Pieces”.  Please note the orientation of the Trapezoid End Pieces—the long edge is at the bottom with 60⁰ angles at each end.  The sizes of the Trapezoid End Pieces and the Sloped Side Pieces for each of the 6 tiers are also shown.
Strawberry Tower Planter Design and Measurements   @FanningSparks
Supplies Needed
. Template:  Download the Strawberry Tower Planter – Complimentary Download to print the templates.
. Paper to print the templates.
. Cedar Dog Ear Fence Pickets: TWELVE 1” x 6” x 6’ (actual size is 19/32” x 5½” x 6’).  I recommend buying 12 pickets, which strictly speaking is 2 more than needed, to allow for working around flaws.  As noted earlier, I selected cedar fence pickets because they are a convenient size, are readily available at the local home improvement store, and offer a great alternative to treated lumber.
. Painter’s Tape
. Screws: 64  #6 1 ¼“ wood screws
. Nails: 80  1″ nails
. Screw Eyes: TWO 1” long with eye slightly larger than ½”
. Rebar: TWO  ½” x 4’ pieces
Please Note:  The completed Strawberry Tower Planter is quite stable when filled with soil but it is not designed as a play structure.  You may wish to install additional screw eyes and insert additional rebar for increased stability.
. Soil and Strawberry Plants (of your choice).
Equipment and Tools Needed
. Printer
. Tape Measure
. Jigsaw (or saw of your choice)
. Clamps
. Hammer
. Pencil
. Drill with 3/32“ bit  and 3/16“ bit
. Screwdriver
. Level
. Sledge Hammer (or heavy hammer of your choice)
. Shovel and Equipment (of your choice) to add Soil to the planter and to plant the Strawberry Plants.
Step 1. Print Templates   Download the Strawberry Tower Planter – Complimentary Download to print the templates. Take care to ensure the scale is accurate on your printed version.  See specifics in the download document.
Step 2.  Cut Straight Parts   Cut parts from the cedar fence pickets.  Please note fence pickets are rough lumber and will likely have warping, knots or other flaws that you’ll want to work around.  I found it easiest to start by cutting the longest parts from the best fence pickets and then working my way down to the shortest parts.
Use jigsaw (or saw of your choice) to cut off the dog ear tips from the fence pickets.  Then cut the following:
… For the TWELVE Trapezoid End Pieces, cut: TWO 15”, TWO 19”, TWO 23”, TWO 27”, TWO 31”, TWO 35”.
… Cut TWELVE Sloped Side Pieces: TWO 11½“, TWO 17½“, TWO 23½“, TWO 29½“, TWO 35½“, TWO 41½“.
♦ TIP: Use painter’s tape to label each part with the cut length.
TIP: Label Cut Parts with Painter’s Tape   @FanningSparks
Step 3 Cut Angled Ends   Use Template A to mark 60⁰ angles on both ends of all Trapezoid End Pieces.  Ensure the angles are placed so only the top edge of the Trapezoid End Piece is trimmed.  The top edge will become 6⅓” shorter than the bottom edge.  Use jigsaw (or saw of your choice) to cut the angled ends.
Cut Trapezoid End Pieces for Strawberry Tower Planter   @FanningSparks
♦ TIP: Since my jigsaw cannot be set for angled cuts, I created a jig to help me cut all the angles consistently.  The trick to making this jig is to allow for the distance between the jigsaw’s edge and the jigsaw’s cutting blade.  To use the jig, I simply slid each fence picket under the jig and guided the jigsaw along the precut angled edge.
TIP: Make a Jig to Cut Angles with a Jigsaw   @FanningSparks
Set aside the angled corners you remove from the Trapezoid End Pieces.
Step 4. Add Supports   The triangular pieces, cut from the Trapezoid End Pieces in the previous step, will be nailed to the Trapezoid End Pieces and used as supports for the Sloped Side Pieces.  Use Template B to determine where the supports should be placed.  Align the template with the bottom edge and angled edge of a Trapezoid End Piece.  Then mark along the third side.  Flip over Template B and mark the other end of the Trapezoid End Piece.
Placement of Template B and Supports on Trapezoid End Pieces   @FanningSparks
Place the triangular support piece on top of the Trapezoid End Piece with the point at the bottom and the angled edge aligned with the marks (as shown in photo above).  Nail in place.  Repeat at other end of Trapezoid End Piece.  Repeat for all Trapezoid End Pieces.
Step 5.  Construct Tiers   The Strawberry Tower Planter has 6 tiers each made of a rectangular frame with trapezoid-shaped ends and long sloped sides.  Every tier is made in the same way but to different dimensions.  The below photo shows how the Tower Planter will look after the tiers are constructed and stacked.
Strawberry Tower Planter with Constructed Tiers Stacked   @FanningSparks
Begin with Tier 6 which is the smallest rectangular frame.  Select the TWO 15” Trapezoid End Pieces and the TWO 11 ½“ Sloped Side Pieces.  The Sloped Sides will be screwed into the Trapezoid End Pieces.  Position one of the 15” Trapezoid End Pieces on your work surface with the supports facing up.  Use Template B to determine where the screws should be placed.  Position Template B in the same way as in Step 4 (ie aligned with the bottom and angled edges).  Mark the locations for the two screws on the Trapezoid End Piece.  Flip over Template B and mark the other end of the Trapezoid End Piece.  Drill pilot holes with 3/32” bit at the 4 spots as marked.
Trapezoid End Piece Showing Screw Placement   @FanningSparks
Repeat these steps, marking and drilling 4 holes, in the second 15” Trapezoid End Piece.
Select one of the 11½” Sloped Side Pieces.  Hold it vertically at a 90⁰ angle.  It can be helpful to prop and/or clamp the piece against a work bench or other vertical surface.  Select one of the 15” Trapezoid End Pieces and hold it over the standing Sloped Side Piece with the bottom edge closest to you.  Push the Sloped Side Piece snuggly against the angled support under the Trapezoid End Piece.  Align the top edge of the Trapezoid End Piece with the top edge of the Sloped Side Piece.  Hold firmly with one hand while drilling through one of the pilot holes to extend it into the end grain of Sloped Side Piece.  Screw the two pieces together with a #6 1¼” wood screw.  Repeat for the other pilot hole and screw.
Hold Trapezoid End Piece On Top of Sloped Side Piece   @FanningSparks
Insert the second 11½” Sloped Side Piece vertically under the Trapezoid End Piece.  Repeat the process of aligning the parts, extending the pilot holes and screwing the pieces together.  With one end attached, the rectangular frame should look like this.
Trapezoid End Piece with Side Sloping Pieces Attached   @FanningSparks
Flip the frame over so the attached Trapezoid End Piece is sitting on the work surface.  Place the second 15” Trapezoid End Piece on top of the structure.  Repeat the process for this end.
Repeat for each tier.  For good measure, you may wish to add a third screw on the larger tiers.
Step 6  – Add Screw Eyes  To add stability to the structure, a set of screw eyes will be added to Tier 3 and a piece of 4’ rebar will be slipped into these screw eyes when the planter is set up.
Cut FOUR 6” pieces from the cedar fence picket scraps.    Select two of the 6” pieces.  Lay one on top of the other and align the edges.  Attach the two pieces with nails.  Repeat with the two remaining 6″ pieces.
Place Tier 3 on your work surface.  Find and mark the center on the inside face of the Trapezoid End Piece.  Align the double-layered support with the center mark of the Trapezoid End Piece.  On the outside face of the Trapezoid End Piece, drill 4 pilot holes and then screw the parts together.  Repeat on the other Trapezoid End Piece.
To insert the screw eye on the inside face, measure and mark about 1” down from the top edge at the center of the Trapezoid End Piece.  Drill pilot hole with 3/16” bit.  Screw in screw eye.  Repeat at other end with the second screw eye.  It should look like this.
Tier 3 With Screw Eye Attached   @FanningSparks
Step 7  Setup the Planter  After the 6 tiers are constructed, it’s time to setup the Strawberry Tower Planter in your garden.  It can be set directly on the ground or on a built-up bed.  I chose to place mine on a raised bed which I’d built from concrete blocks.  In either case, prepare the foundation appropriately and ensure the surface is level.
Level the Base and Position Tier 1 for Strawberry Tower Planter   @FanningSparks
Put Tier 1, the largest one, in place and fill with soil.  There’s no shortage of online advice about what type of soil is best for raised beds.  I chose to use amended soil, called “Morgan Mix”, which we purchase from our local garden center in bulk (Thank you Morgan Outdoors!).  It’s the same soil we used last year to get the strawberries established and we’re very pleased with the results.  After filling your first tier, place the second tier on top centering it carefully.  Fill Tier 2 with soil.
2 Tiers of Strawberry Tower Planter Filled with Soil   @FanningSparks
Place Tier 3, the one with the screw eyes, on top of Tier 2 and center it carefully.  Partially fill this tier with soil.  Insert the 4’ pieces of rebar through the screw eyes.
Strawberry Tower Planter Tier 3 Reinforced with Rebar   @FanningSparks
Use a sledge hammer (or heavy hammer of your choice) to pound the rebar into the ground.  Finish adding soil to Tier 3.  Then add and fill the other three tiers.
Strawberry Tower Planter Ready for Planting   @FanningSparks
Step 8  Plant Strawberries  Now, it’s time to plant your strawberries!  Start at the top and carefully set strawberry plants into the soil.  Be sure to plant on all four sides of each tier.  Take care to plant your strawberries at the correct depth—see More Info for a suggested online reference on this point.
Set Strawberry Plants into the Soil of New Tower Planter   @FanningSparks
And there you have it!  An attractive new structure in your garden…
Strawberry Tower Planter Newly Planted   @FanningSparks
… ready to house and nurture your very own strawberry crop!
Strawberry Plants in Bloom in New Tower Planter   @FanningSparks

More Info

You can download the Strawberry Tower Planter – Complimentary Download to print the templates.
Please share this image or pin for future reference.
Strawberry Tower Planter DIY Tutorial   @FanningSparks
To get specifics on how to plant your strawberries or to learn more about growing strawberries, check out the Bonnie Plants > Growing Strawberries resource.   Our strawberry plants, including a Quinalt, Allstar and Ozark Beauty variety, are all from Bonnie Plants.
Check out the Kingsbrae Garden website to learn more about these beautiful gardens in St. Andrews by-the-Sea, New Brunswick, Canada.
If you’re located near Madison, Georgia, USA you may want to check out Morgan Outdoors. We’ve been very pleased with their products and service.
You may also like these FanningSparks’ DIY projects for your garden and yard:
. Pyramid Trellis
. Bluebird-Approved Birdhouse
. AirBee-n-Bee House
. Zinnias Rock! And More Cutting Garden Tips.

Today’s Takeaways

1. Botanical and display gardens are a great source of inspiration.
2. A Strawberry Tower Planter can be made with inexpensive materials, common tools and basic woodworking skills.
3. Consider making a Strawberry Tower Planter for your own garden.
Peg - FanningSparks Author

It may seem counterintuitive to suggest that creative endeavors follow a formula.  But, it seems to me, they actually do.  Creating handmade works of art typically involves a series of steps.  The steps follow a logical sequence but are rarely executed in rigid, exact order.  The creative process is a twisty, winding road.  That’s the beauty of creating—you’re dreaming, mulling, experimenting, considering, refining, learning, discovering and a hundred other activities that are circular and fluid.
Today, I’d like to share my take on the steps to create something uniquely handmade.  Here are FanningSparks’ 10 steps From Idea to I Made It!
From Idea to I Made It! In 10 Steps Graphic   @FanningSparks
Before I dive in, however, I’d like to point out that you don’t necessarily have to complete all the steps yourself.  Many of the DIY tutorials available online, including those I share here on this blog, jumpstart the process by doing some of the upfront steps for you.  And there’s nothing wrong with that—in fact, I encourage you to take advantage of these resources because the more you make, the more you can make!  The more you experience for yourself, the more you can imagine, create and make on your own.  At least, that’s been my experience.
STEP 1 – Ideate
It all starts with an idea.  Inspiration can come from anywhere.  There are countless sources online.  But real life inspiration is richer and deeper.  Nature is widely recognized as the ultimate source of inspiration.  Travelling and visiting unfamiliar destinations is another rich source of inspiration.  Scouting for ideas in museums, art galleries and design shops is one of my favorite activities.
Recording all these creative possibilities is the trick to being able to draw upon them later.  Gather samples, take photos, jot notes, save references and create pins to help you remember all these lovely ideas.  When it comes to original works of art, please respect the work of others and view it to inspire not replicate.
Organize your ideas for future reference.  This could be via online photo albums, folders, Pinterest boards, or saved favorites.  It could be a real life bulletin board or display.  Don’t forget about the projects you have in flight or have already completed.  The goal is to surround yourself with inspiration.  This is a peek at the inspirational items I have displayed in a corner of my studio.
Inspiration Board in Corner of my Studio   @FanningSparks
With inspiration in your line of sight and at your fingertips, give yourself time to mull over the possibilities.  Let your imagination roam.  Pick out favorites.  Match ideas to needs, functions, events and interests.  Give your ideas time to percolate.
STEP 2 – Envision
As you start to narrow down the options and zero in on a specific direction, flesh out the concept.  Imagine the possibilities.  Consider the materials that could be used.  Think about the techniques that could be applied.  Create sketches, build models, mockup samples and take photos.  Play with physical materials and/or experiment digitally.  Conduct research.  Go back to your inspiration resources.  Add depth and enrich your vision.  This is definitely an iterative step.  Enjoy the experience of imagining and reimagining how this creative endeavor could unfold.
The below photo shows the envisioning stage of a mandala-inspired oval mirror frame I designed and made in mosaic glass.  You can see the results in the post My Mandala-Inspired Oval Design.
Making Pattern - Designing Elements. @FanningSparks
STEP 3 – Design
At some point, your concept will become more concrete and it’s time to design the desired outcome.  The level of design detail can vary greatly.  Someone experienced with the targeted materials and techniques might proceed with only a rough sketch in their head.  While someone with less experience might prepare a life-size mockup.  Either way, give yourself time to experiment and play with options.
It’s not unusual to go back to the Ideate or Envision Steps.  As ideas mature, they may need to be reworked or reconsidered.  Feel free to bounce around between steps.
I like to gather together inspiration items, photos, sample materials and color options to inform and inspire my design.  I was working on the design for a Diamonds and Beads Wooden Wreath in the photo below.
Designing the Wreath for Diamonds and Beads Wooden Wreath @FanningSparks
STEP 4 – Plan
The next step is to plan how you will achieve the desired outcome.  What materials and supplies will you use?  Will you need wood, paper, fabric, yarn, glass, paint, dye, etc?  In what format and type?  In what color(s)?  In what size and quantity?
What equipment or tools will you use?  What steps and actions will be needed to execute your design?  It’s not necessary to build a detailed workplan with task dependencies but it’s helpful to define enough detail to support the next steps.
Some research may be needed at this stage to determine what’s even possible.  There’s no point in planning an elaborate set of hand-thrown clay dinnerware without figuring out how to get access to a pottery kiln.  Nor would you want to plan an outdoor structure with materials that can’t withstand the weather.  Research might also reveal some new materials or techniques that you could leverage.
Once again, the process is not linear and you could find yourself going back to the previous steps or jumping ahead to subsequent steps from here.  For instance, checking the materials you already have on hand might influence the plan.  This was my experience when I was planning a Pair of Mosaic Mirrors for our master bathroom.
Stacked Glass Mosaic Tiles    @FanningSparks
STEP 5 – Source
Using the details compiled during the previous Plan Step, find, gather, borrow, order, buy and/or rent what you need to complete the project.  You may want to start by shopping at home.  Do you have anything already available that can be used?  Do you have anything that can be reused or repurposed?  Could you adjust your design and/or plan to incorporate materials you already have on hand?  You might also consider sourcing materials from thrift stores or vintage shops.
One of my favorite projects started with an old entertainment center I sourced from a thrift store.  I was able to repurpose it into the Ultimate Maker’s Cabinet.
Ultimate Maker’s Cabinet Before and After    @FanningSparks
Don’t forget to source equipment and tools as well as supplies and materials.  Ensure you have the appropriate type and size of accessories such as sewing needles, paint brushes, modelling tools, glass cutters, drill bits, saw blades, sandpaper, and so on.
If you decide to purchase in person or order online, take time to research your options.  You may discover specialty suppliers or new products along the way.
The below photo shows the supplies and materials needed to create a Personalized Fabric-Covered Journal.
Supplies Needed to Make DIY Personalized Fabric-Covered Journal. @FanningSparks
STEP 6 – Setup
Take a little time to plan for and setup your work environment.  Do you need to protect surfaces with drop cloths?  Do you need additional task lighting?  Do you need a large flat surface to work on?  Do you need to plug in and set up equipment?  Do you need ventilation and fresh air?  It’s impossible to outline all the various working environments that might be needed.  But some things will be common to all—safety and comfort.  Please be sure to take appropriate safety precautions such as wearing safety glasses, hearing protection, respiratory masks, gloves and so on.  You’ll also want to ensure your working surface is at a convenient height and any seating is comfortable.
Another factor to consider is how long you’ll need the setup.  Is it a one-time activity?  Will the working area be temporary?  Or will the activity stretch over time requiring the working area for an extended period of time?  In the below photo, I setup a temporary area in my kitchen to Experiment with Fabric Dyes.
Prepare to Test Several Fabric Dye Samples @FanningSparks
STEP 7 – Prepare Components
After you’ve finalized your design, mapped out your plan, gathered your materials, supplies, equipment and tools, and setup your work area, it’s finally time to actually start making.  Hurray!
Often the first step is to prepare the parts needed for the project.  This will likely involve measuring and marking your materials.  It may involve cutting.  It may involve tracing patterns or designs.  It could be dyeing materials.  Or it could even be pressing flowers to be used later. There are an endless number of ways this step could play out.  I’m cutting diamond shapes from stained glass in preparation for making Turkish Mosaic Candle Holders in the photo below.
Turkish Mosaic Candle Holder Tutorial - Cutting Glass Diamonds. @FanningSparks
STEP 8 – Assemble
In this step, you start to pull components together.  Sometimes, there’s experimentation involved as you seek the most pleasing arrangement or you make final selections for embellishments.  The 3 steps—Prepare Components, Assemble and Construct—are closely related.  It’s not unusual to bounce back and forth between the steps, skip a step, or to iterate through the steps multiple times.
In the below photo, I’m assembling pressed flowers into a pleasing arrangement for my Pressed Flower Girls Wall Art.
Arranging Pressed Flowers for Pressed Flower Girls Wall Art   @FanningSparks
STEP 9 – Construct
At this stage the arranged components become permanent.  A variety of techniques can be used to construct or build the final product.  Fabric can be sewn.  Yarn can be knit.  Wood can be nailed.  Clay can be molded.  Mosaic tiles can be glued.  And so on.
It’s a good idea to “dry fit” some projects meaning fit all the pieces together to check for fit before attaching permanently.  I’m dry fitting my Bluebird-Approved Birdhouse in the photo below.
Test Fit the Parts for DIY Bluebird-Approved Birdhouse. Tutorial at FanningSparks. @FanningSparks
If something doesn’t fit or isn’t as expected, it may be necessary to go back to the previous steps to adjust the components or modify the assembly.  It’s also possible to go all the way back to the Envision or Design steps at this stage—remember the creative process is a twisty, winding road!
STEP 10 – Finish
After your work of art is constructed, it’s time for finishing touches.  This could involve sanding and smoothing.  It could involve grouting.  It could involve painting.  It could involve sealing or protecting the work.  It could involve glazing and final firing.  It could involve adding final embellishments such as beads and accents.  It could involve pressing.  Regardless of the materials or techniques, it’s important to take your time with finishing.  Attention to detail at this stage can make the difference between handmade and homemade!
Finishing could also involve installing your work of art.  For instance, hanging art on the wall or mounting a birdhouse.  It could be wrapping your work of art to give as a gift.  Or it could be putting it into service as I did below with my new Kindred Spirits Tote Bag.
Finished Kindred Spirits Tote Bag Hanging on Chair @FanningSparks
I Made It!
This brings us to the final stage in the process—enjoying the fruits of your labor!  Hopefully, you’re pleased and satisfied with the results, you’ve learned something new and, most importantly, you’ve enjoyed the creative process itself.  I trust the 10 steps I’ve outlined will give you the confidence to take on more and different creative endeavors.  Enjoy the wonder of creating and the art of making!

More Info

Please pin this image to share or save for future reference.
From Idea to I Made It! In 10 Steps Graphic @FanningSparks
For a variety of ideas and inspiration, check out the DIY Tutorials and How To posts available here on the FanningSparks’ blog  or the inspiration boards on the FanningSparks’ Pinterest site.

Today’s Takeaways

1. The creative process is a twisty, winding road.
2. The more you make, the more you can make.
3. Consider following today’s 10 steps From Idea to I Made It! for your next creative endeavor.
Peg - FanningSparks Author