If you like home renovation shows, this post is for you! It has all the key ingredients… an outdated house, a complete gut job, extensive renovations, structural challenges and a total transformation!
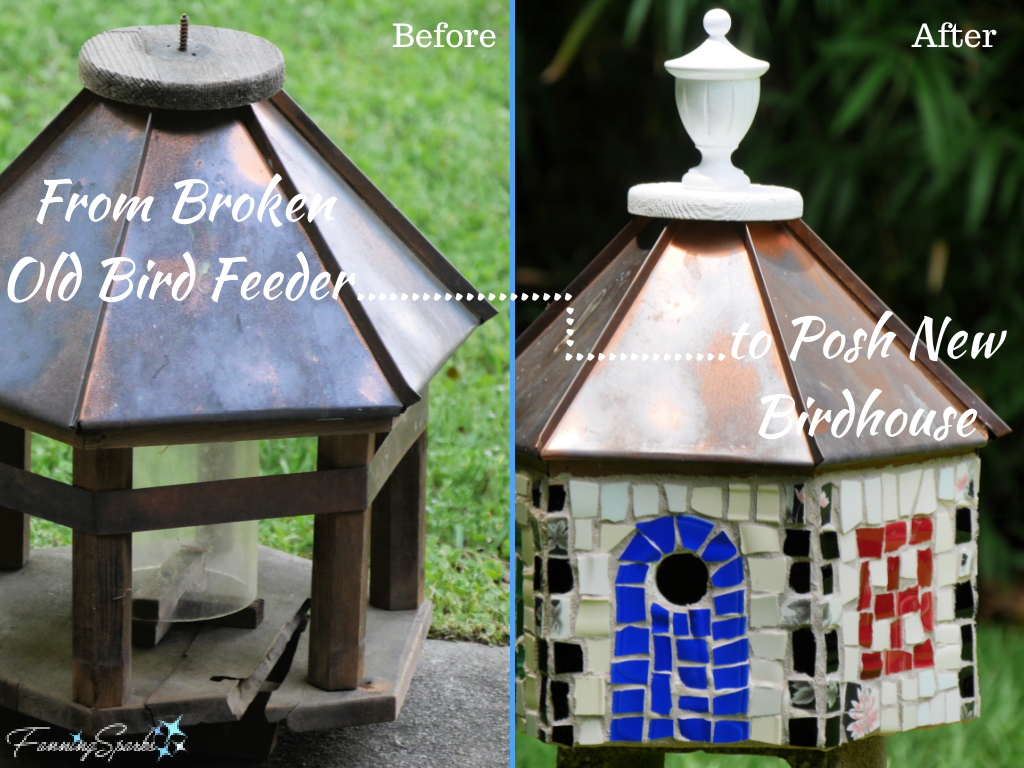
It all started with this neglected bird feeder which I’d stuffed in amongst the old flower pots.
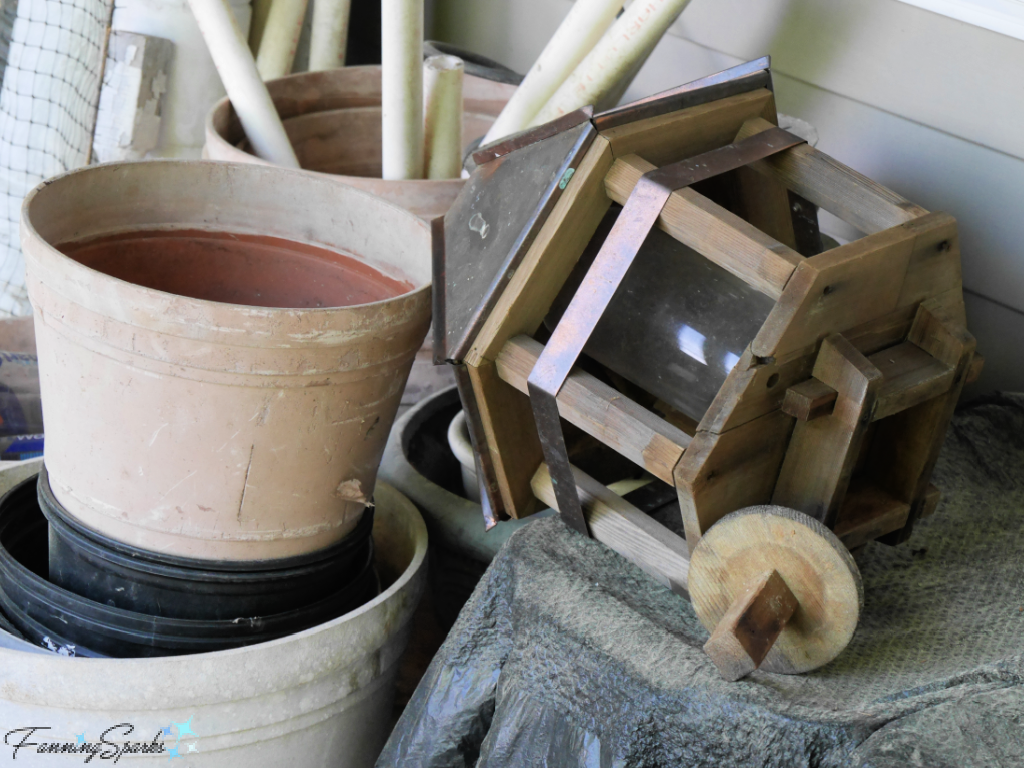
Upon closer inspection, I determined it wasn’t a complete teardown—this old bird feeder could be converted into a modern, triplex birdhouse. The overall structure was sound and it had good bones. Plus that weathered copper roof was an architectural feature worth saving.
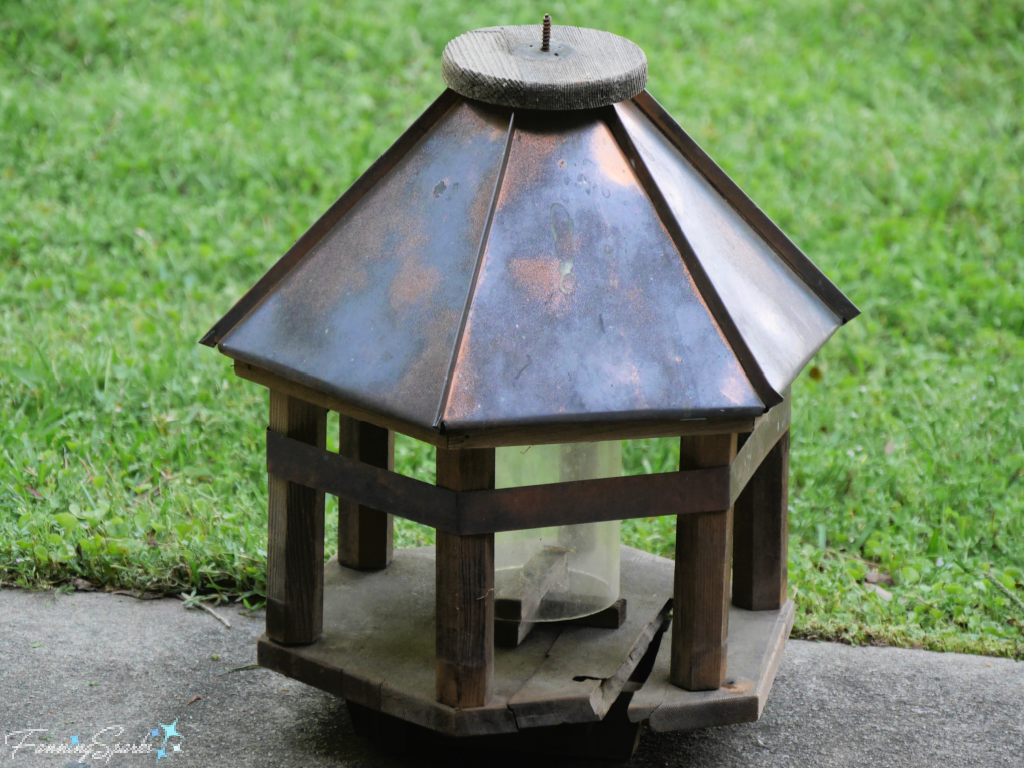
It was, however, a real fixer-upper! The existing interior had to be demolished. It needed some major structural work including new exterior walls, new doors (well… round openings), new flooring, and a new ceiling. It also needed a new interior design to convert it from one large, open floor plan into 3 individual units. The exterior needed some attention to give it curb appeal. This was a major renovation! (Yes, I may be watching too much HGTV! I am, in fact, hooked on Home Town with Ben and Erin Napier.)
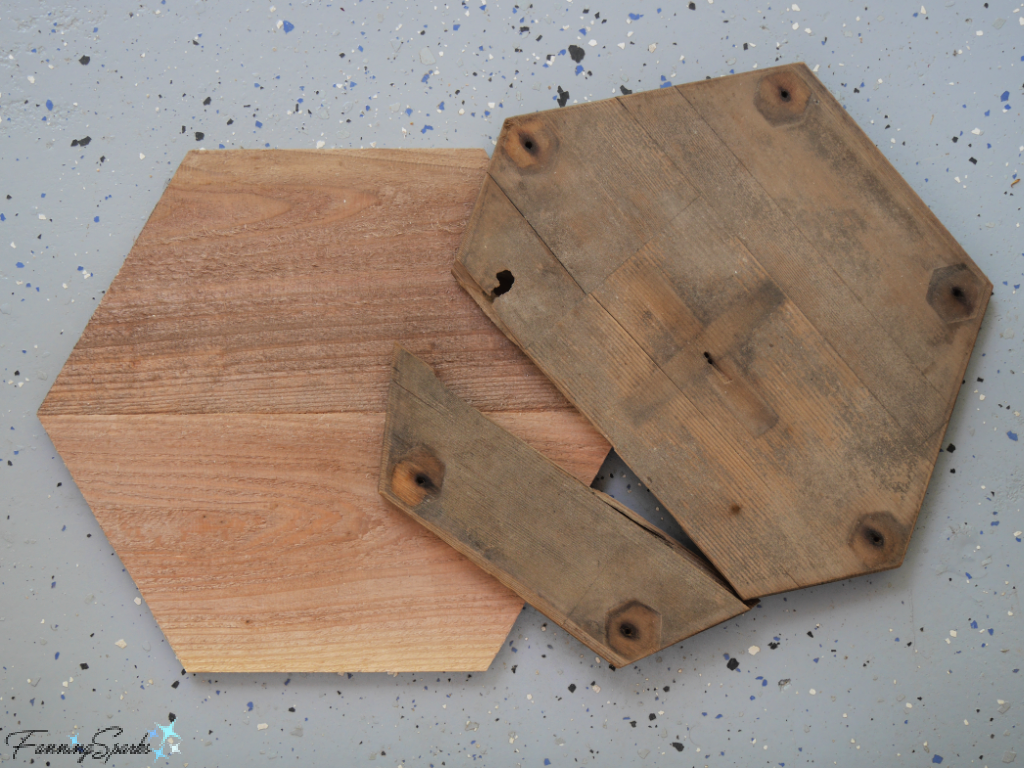
Let’s get started. I eliminated the interior seed tube and holder, the outside pillars and the exterior copper band. With all these elements out of the way, it was time to start rebuilding. Here’s a look at the beautiful, new wood floor. In true Home Town fashion, I used lumber left over from another project. The new floor is made out of cedar fence picket scraps from the Strawberry Tower Planter I made earlier this year.
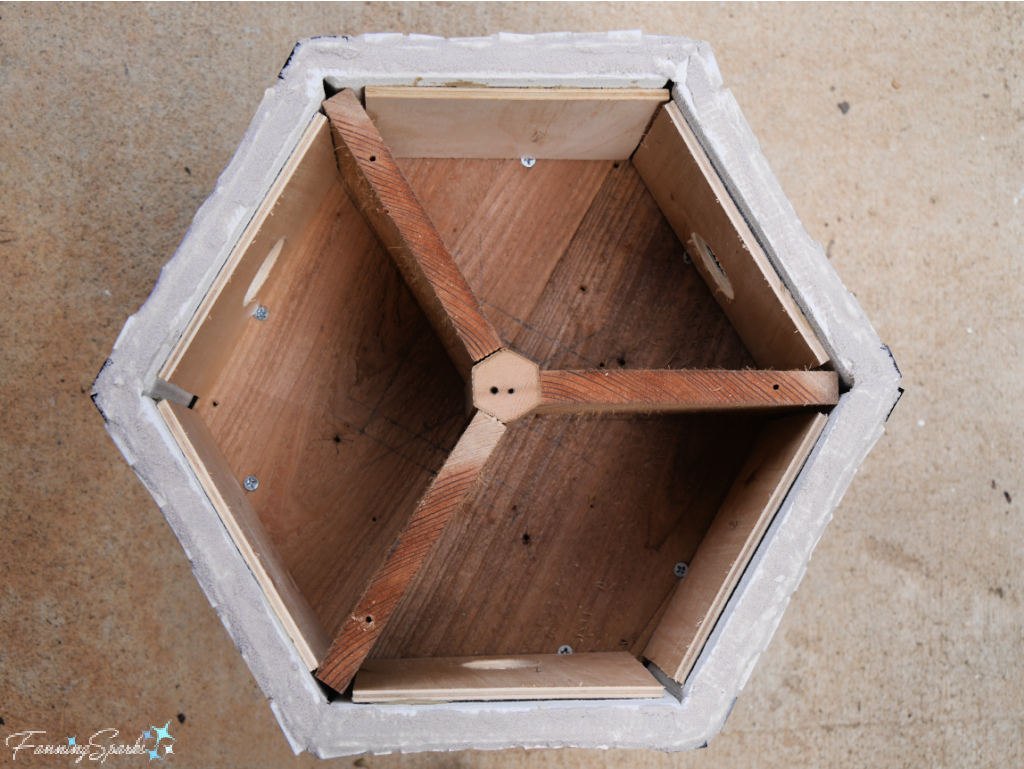
This next photo, taken from underneath the house, shows the new walls. The outside has 6 sides—3 with round openings. The inside has new interior walls as well as a new ceiling. One of the exterior wall pillars was repurposed as a center column to anchor the interior walls.
The plan was to cover the exterior in trencadis mosaic. I’ve wanted to try this technique ever since visiting Park Güell in Barcelona. Regular readers may recall, this mosaicist’s dream of a Park and the trencadis technique from a previous post Gaudí’s Trencadis Mosaics. Trencadis, which is also called pique assiette (or picassiette), crazy paving, or simply “broken china mosaic”, is a style of mosaic made with broken china and tiles.
The biggest question was how to construct the exterior walls so they could be covered with a broken china mosaic and survive out-of-doors. It was tempting to simply make the walls from plywood but I knew the mosaic would be short-lived if I did. The extremes of water and temperature cause wood to expand and contract but mosaics, which are set in mortar and sealed with grout, have no give. The resulting tension would likely cause the structure to crack or the mosaic pieces to pop off.
After some online research, I decided to construct the exterior walls from wedi® building board. This product is actually designed for building bathrooms (see More Info below for the details). Working with wedi board isn’t difficult. It can easily be cut with a jigsaw or box cutters although it will quickly blunt the blades. Proper safety precautions, including wearing a respirator and safety glasses, are necessary due to the harmful particles in the wedi coating.
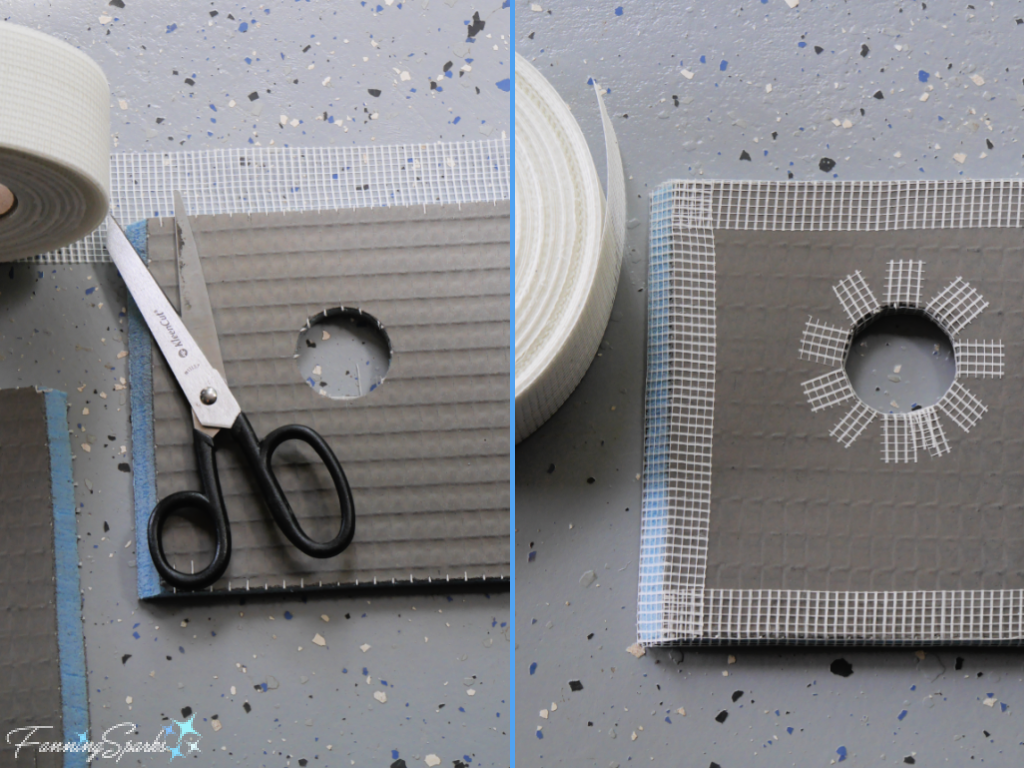
After cutting the wedi board to size, the cut edges need to be sealed. It’s a two-step process. Start by wrapping the cut edges with an alkaline resistant mesh tape such as Fibatape which is typically used for dry wall repair.
Next apply a thin layer of thinset mortar over the tape to seal the edges.
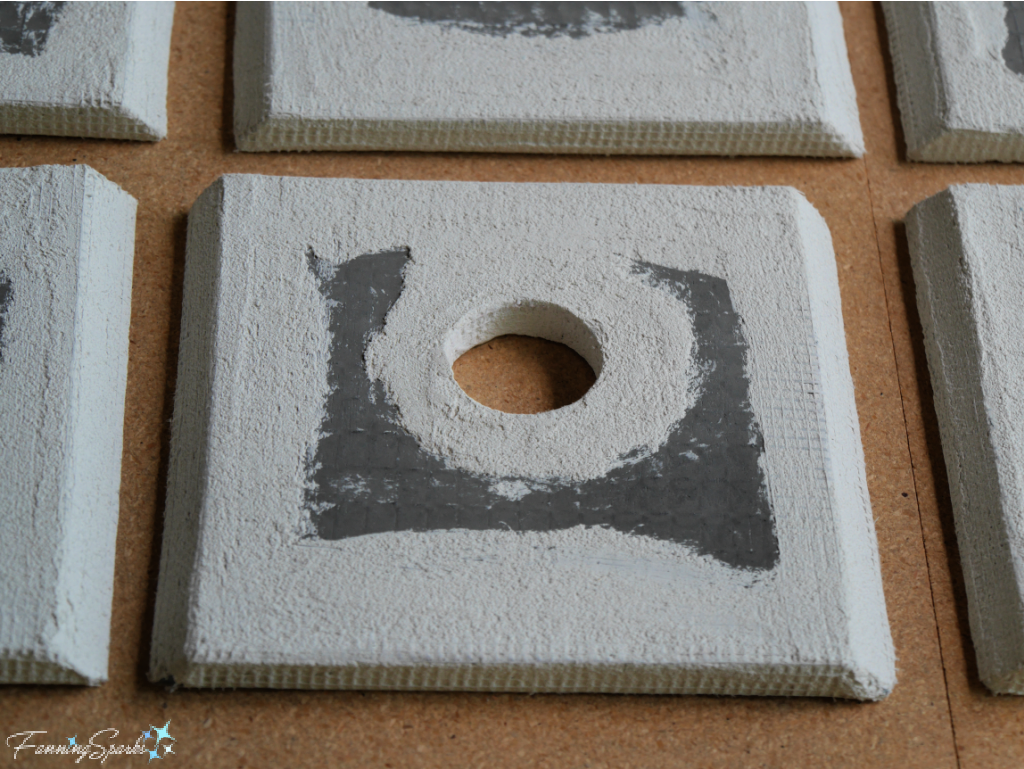
After the exterior wall sections dried, I donned my respirator again and gave them a light sanding. I used construction adhesive (exterior grade Liquid Nails) along the top edge to secure the wall sections to the outside frame. Then I taped the edges between the sections and covered the seams with thinset mortar. Finally all the new structural elements were in place. It was almost time to “bring in the pretty” as my hero Erin Napier would say. But first, a little more demolition was required.
There was china to break! After trying a few different methods, I settled on the technique described below. Here are my top tips for breaking china for mosaics:
Take Safety Precautions Wear gloves and safety glasses.
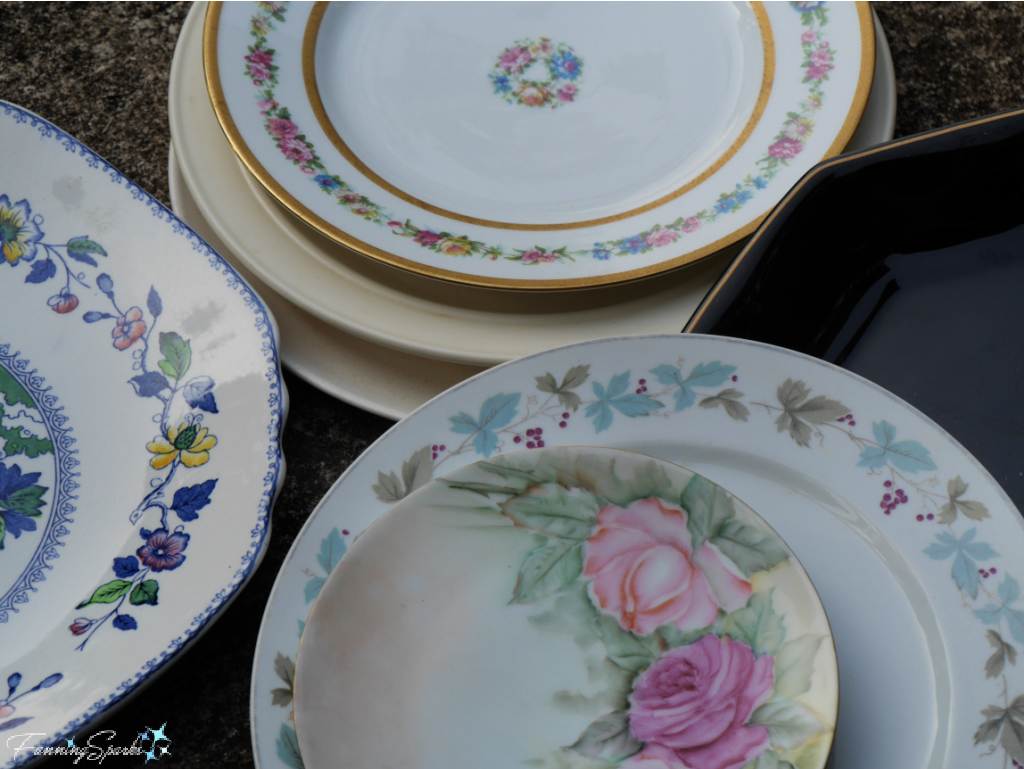
Use China Dinner Plates Collect inexpensive, colorful plates from thrift stores and flea markets. Dinner plates, as opposed to saucers, mugs or other vessels, provide the most flat pieces. It isn’t an exact science but, as a rule of thumb, a 10” dinner plate yields about 12” x 11” coverage. China plates were easier to break than stoneware. Select different colors and patterns to provide some design options.
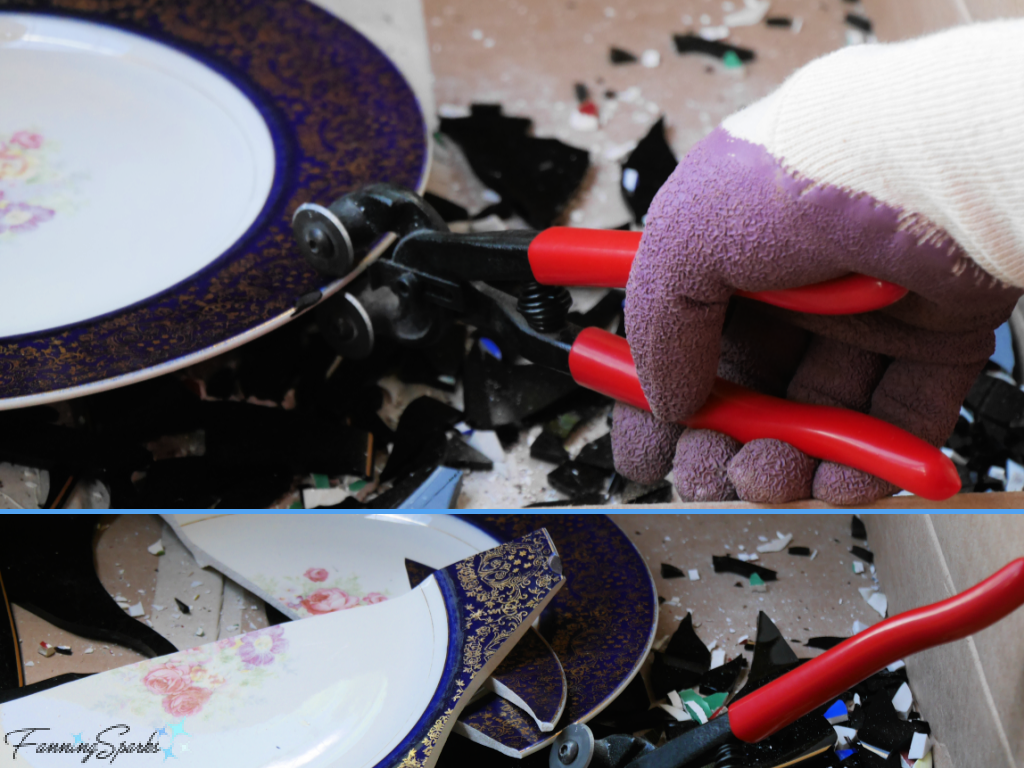
Work in a Box Use a flat cardboard box about twice the size of a dinner plate. Tape up the box flaps on 3 sides to create a small, 3-sided booth. Place the plate inside the box working over the unbound box flap. The cardboard walls prevent shards from flying around and the bottom of the box collects the bits and pieces.
Use Tile Nippers The ideal tool for this task is a pair of two-wheeled tile nippers. To use them, place the nippers at the very edge of the plate where the break should start. Then squeeze the nippers—hard. The nippers will nick the plate’s surface and cause it to crack across the entire surface. With any luck, it will break as planned. But be prepared—cuts don’t always go as planned—there are many unpredictable factors that impact the break such as the thickness of the plate, the pottery material, and the structure of the plate’s foot ring.
Tape Designs China plates may have designs or motifs that would look nice reassembled on the finished piece. To keep these pieces intact, cover the section with clear packing tape before breaking that section.
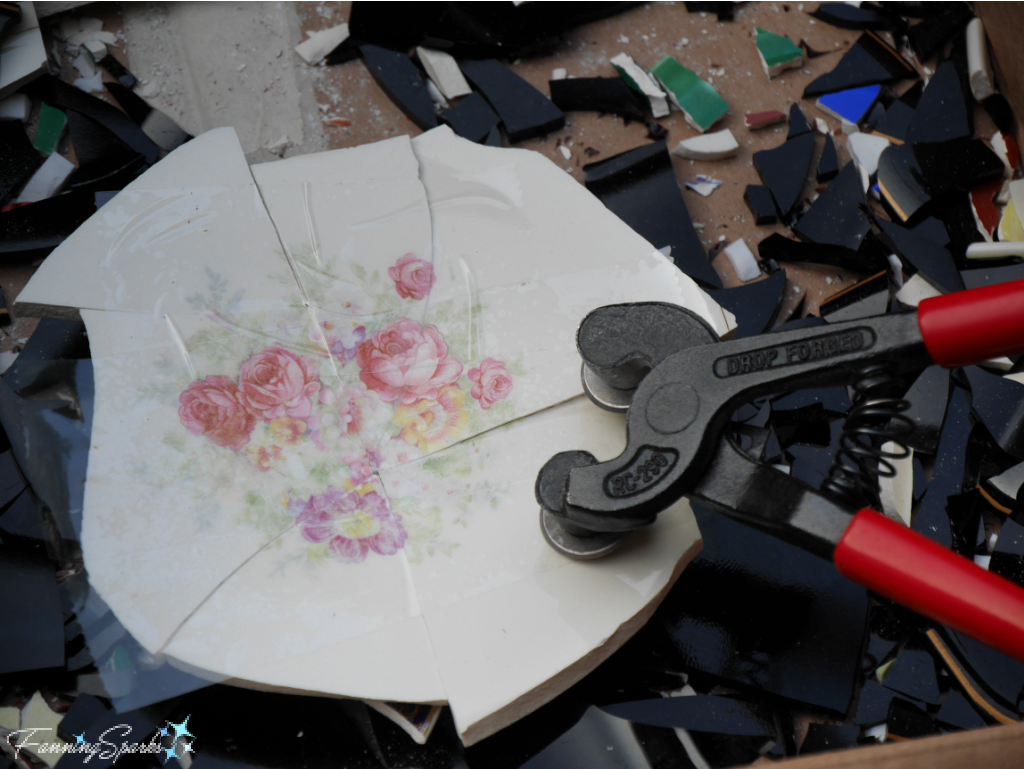
Cut Down To date, most of my mosaics have been made with 3/4” or 5/16” square glass tiles or custom-cut stained glass (See Pair of Mosaic Mirrors Completed, DIY Turkish Mosaic Candle Holder Tutorial, My Mandala-Inspired Oval Design, and Serving Up My OOAK Mosaic Tray). But it’s simply not possible to break china plates into nice, neat ¾” squares. The china pieces will vary in size and shape. Continue to break down the china plate with the two-wheeled tile nippers until they’re about 1½ – 2” in size. I found it best to do my final cutting when I laid out the design.
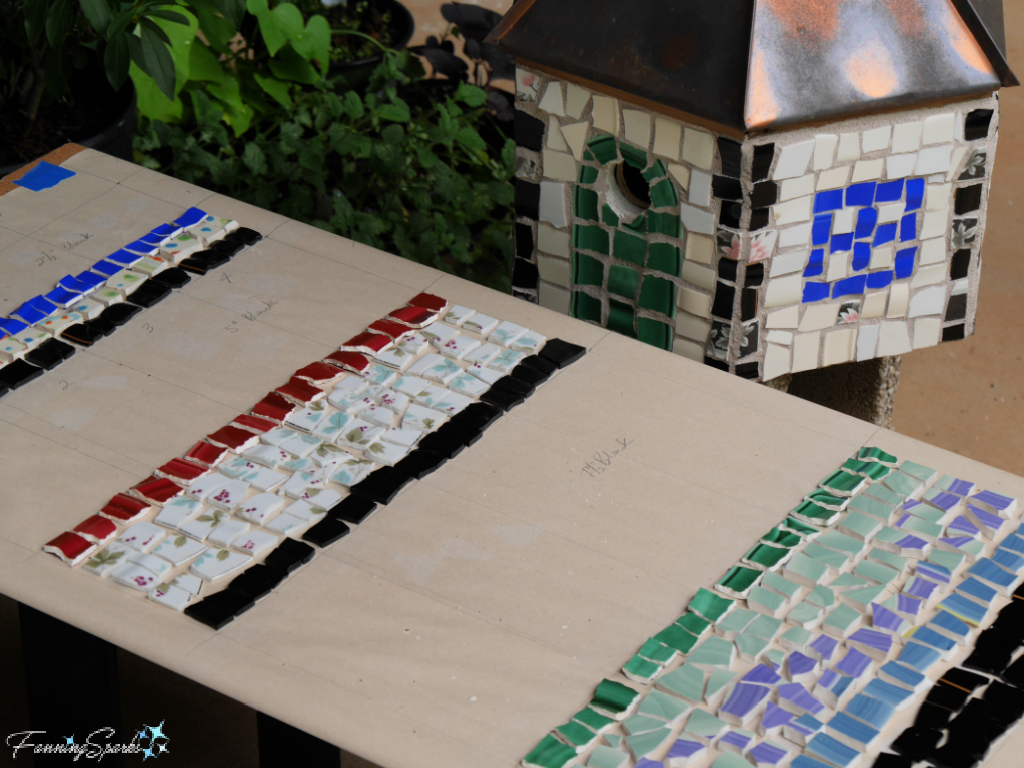
Spread Out Tesserae It’s most efficient to spread out all the tesserae (ie the small pieces used in mosaic work) on a flat surface. This is the same idea as laying out all the pieces for a jigsaw puzzle—it’s easier to fit everything together when all the pieces are visible. The flat lids from plastic storage tubs worked well for this setup.
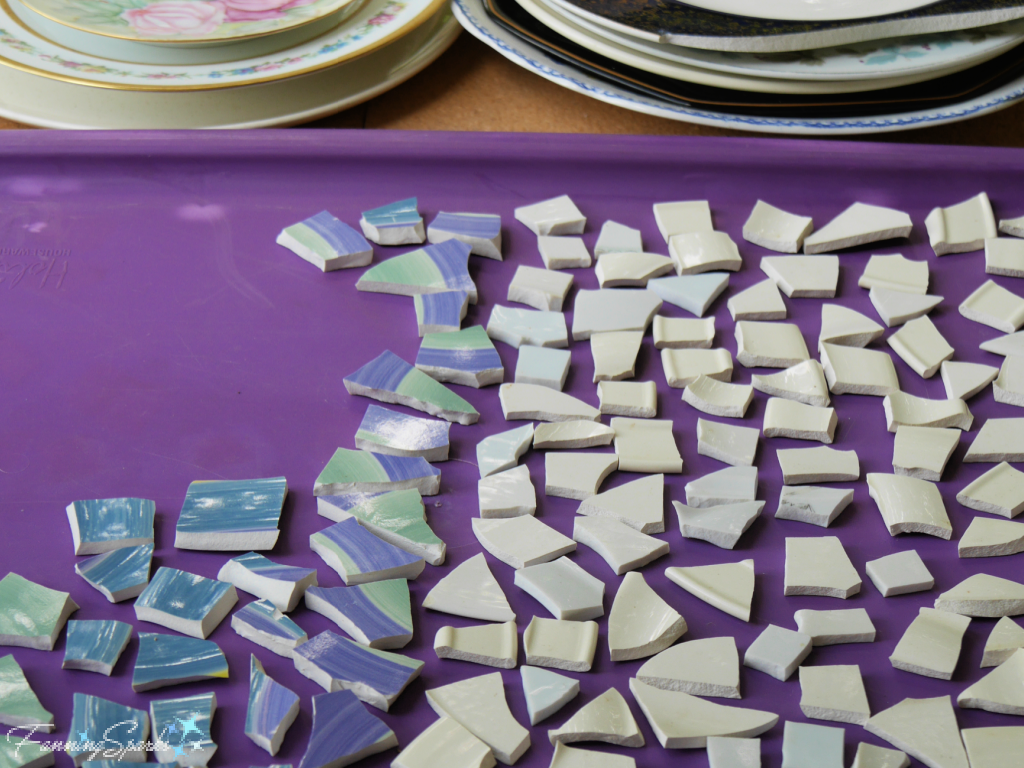
Create Design Draw a paper template of the surfaces to be covered and place on the working surface. Then just like putting together a jigsaw puzzle, select tesserae to fill the spaces. Unlike a jigsaw puzzle, though, the pieces can be adjusted to fit with the two-wheeled tile nippers.
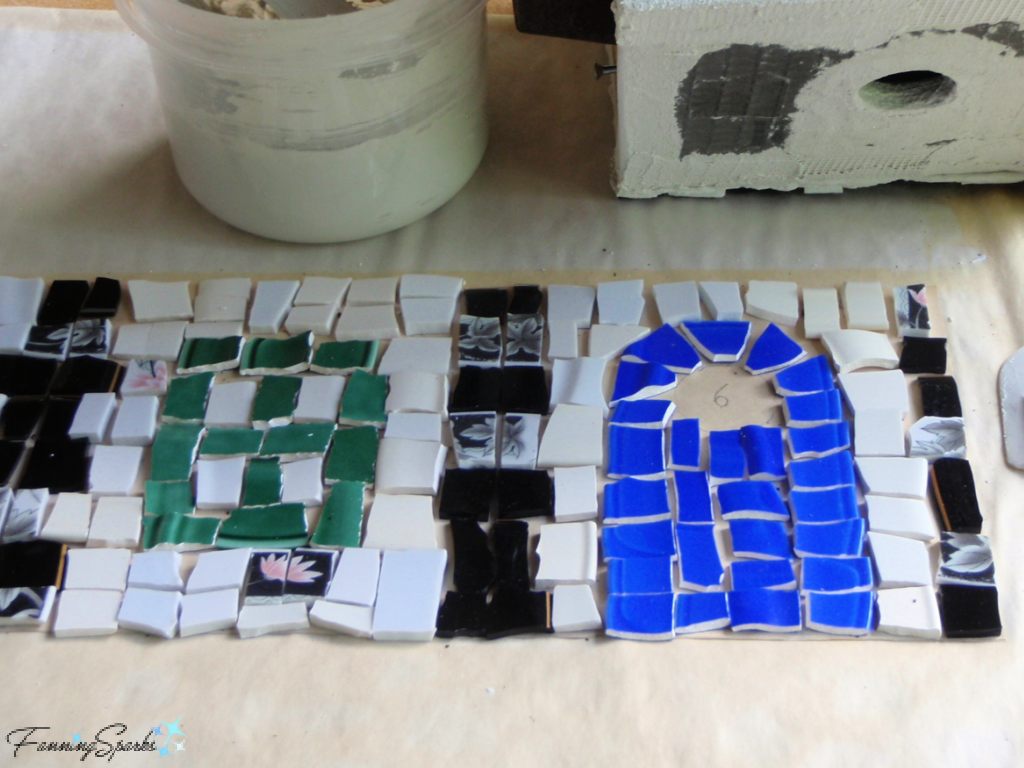
Embrace Irregularity This is probably a good time to point out that the tesserae won’t, and shouldn’t, fit together perfectly. The irregularity ensures a good grout gap and makes the overall piece visually interesting. The imperfect perfection of broken china mosaic is what makes it beautiful. I readily admit that it’s a challenge for me to deliberately make something imperfect!
The next steps are the same as for most mosaic projects. Thinset mortar is used to attach the mosaic pieces to the surface. Then grout is used to fill in the gaps.
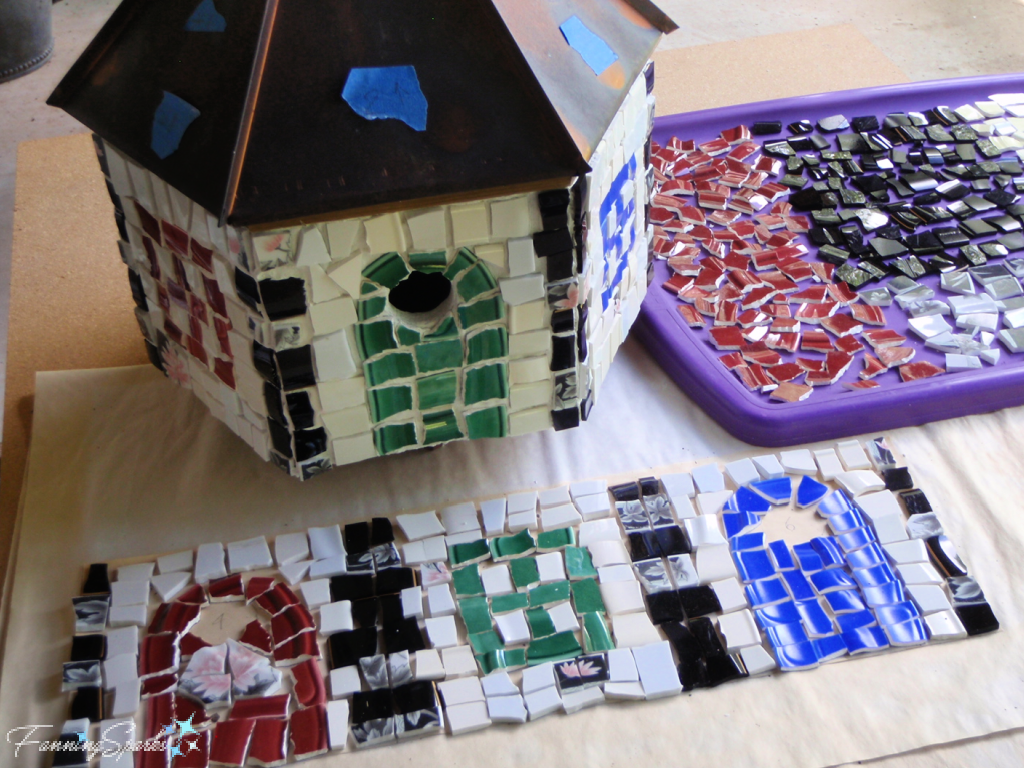
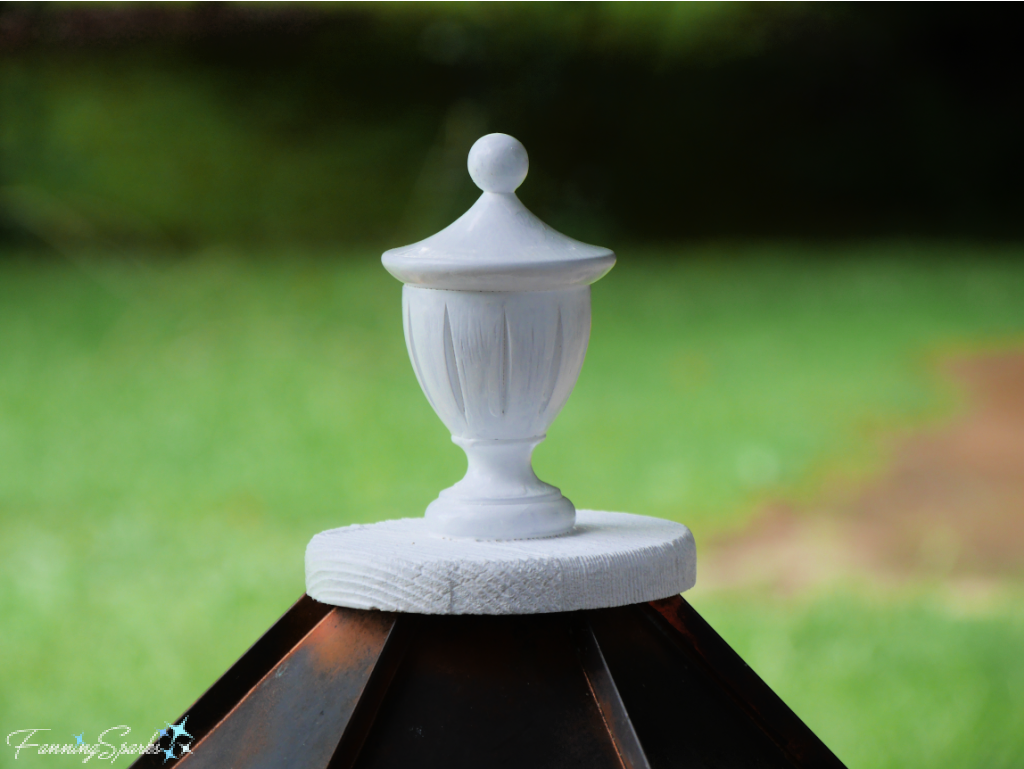
There was one more architectural detail to address before the new birdhouse was finished. This curtain rod finial, painted white, was the perfect topper for the copper roof.
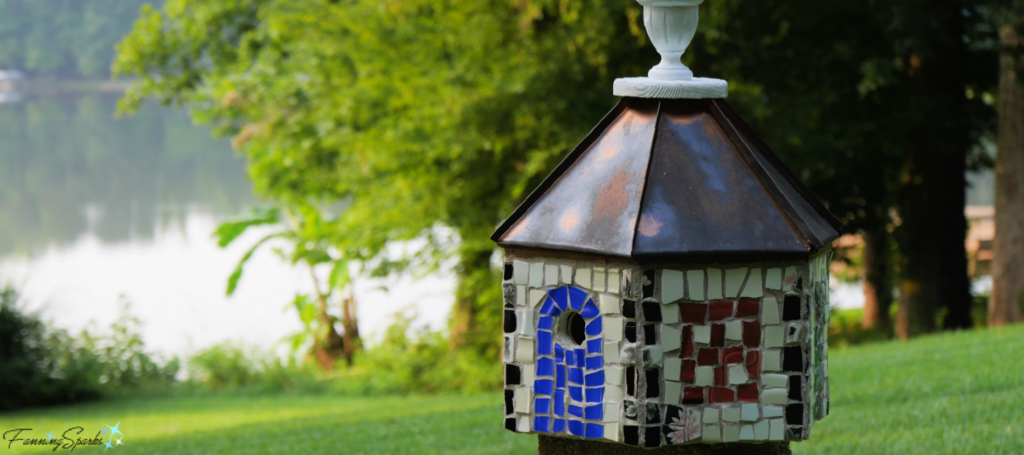
And now for the big reveal! Here’s the new, modern triplex birdhouse in all its glory!
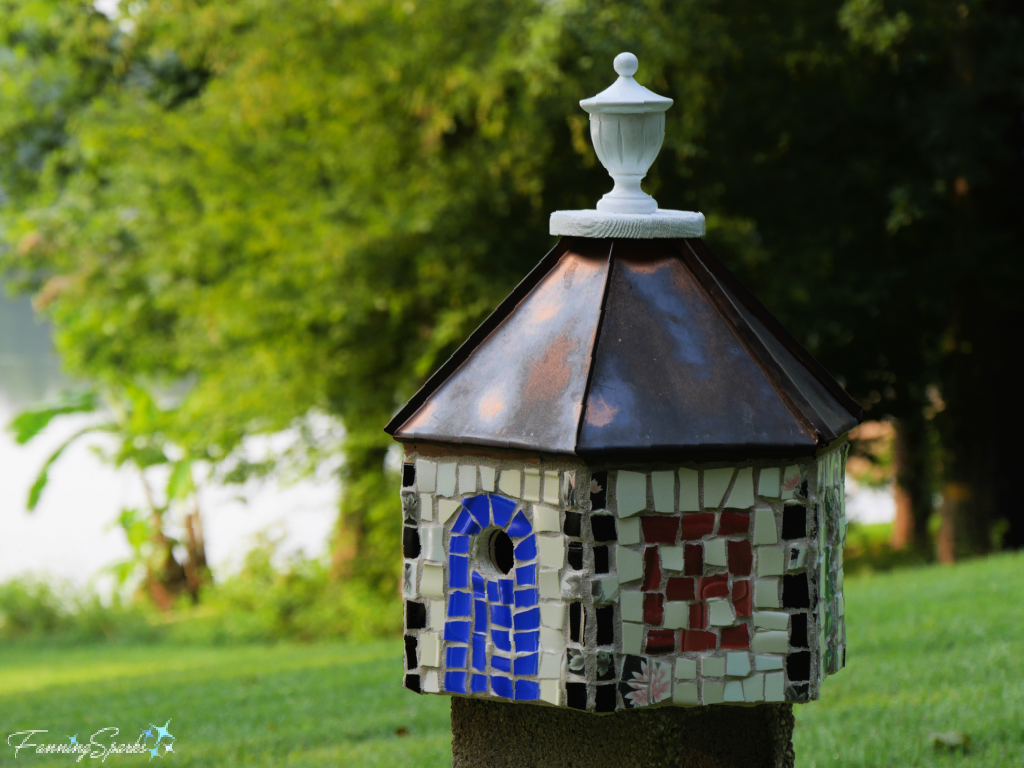
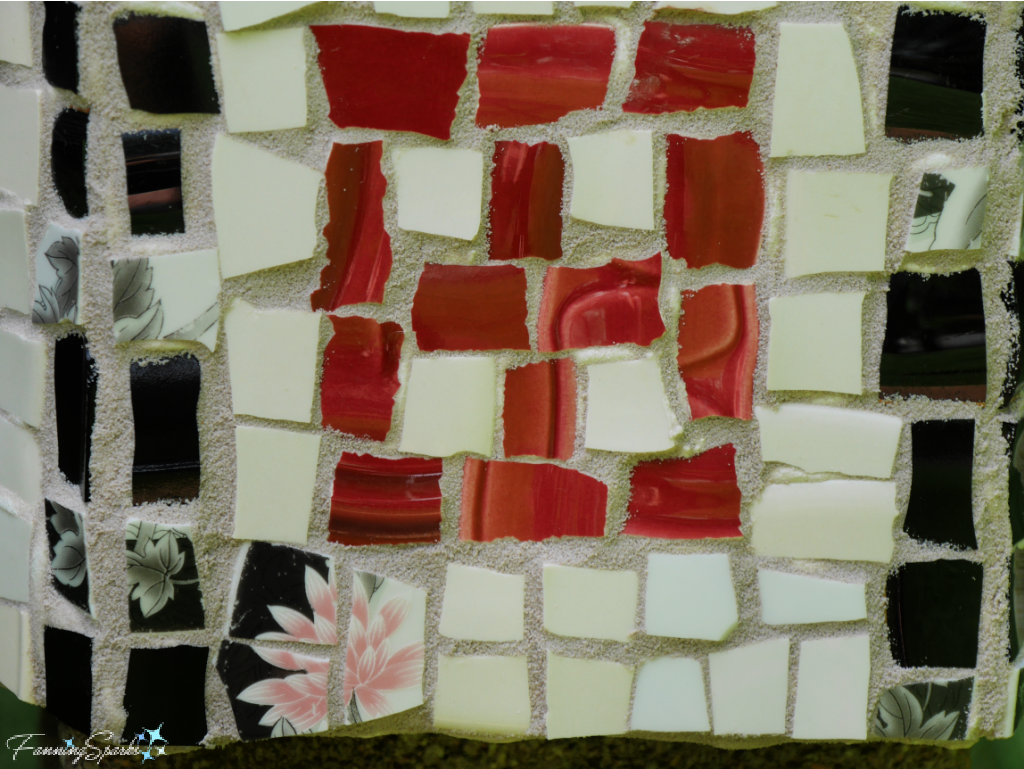
Three colorful doors and windows, in red, green and blue broken china, enhance the exterior.
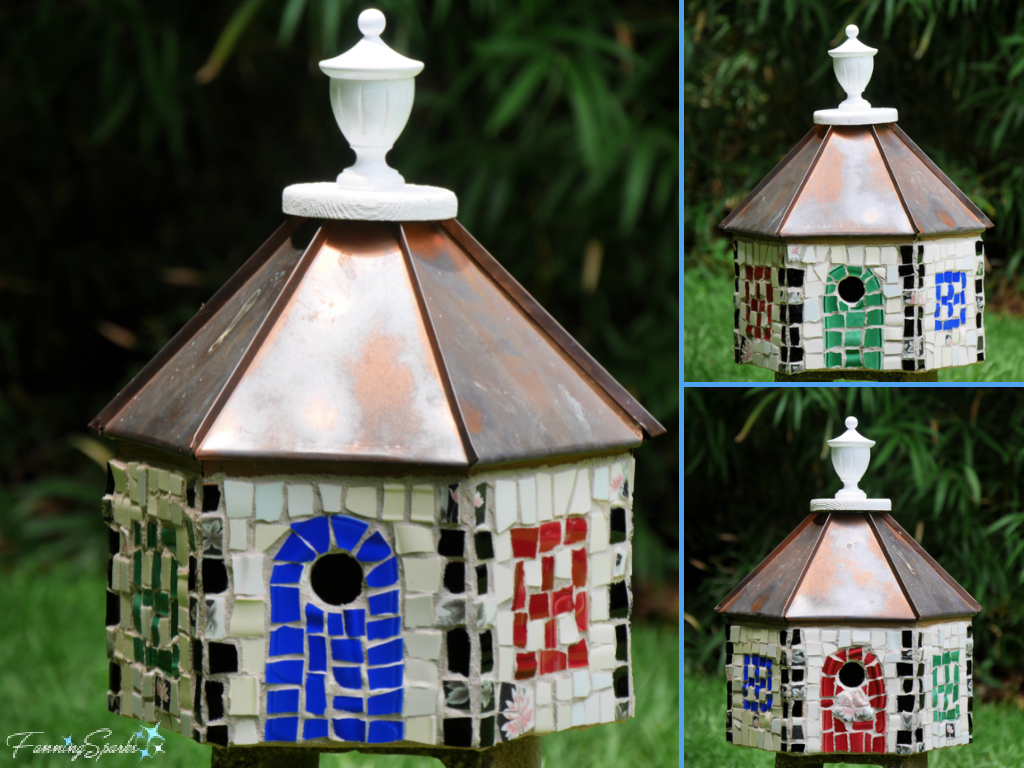
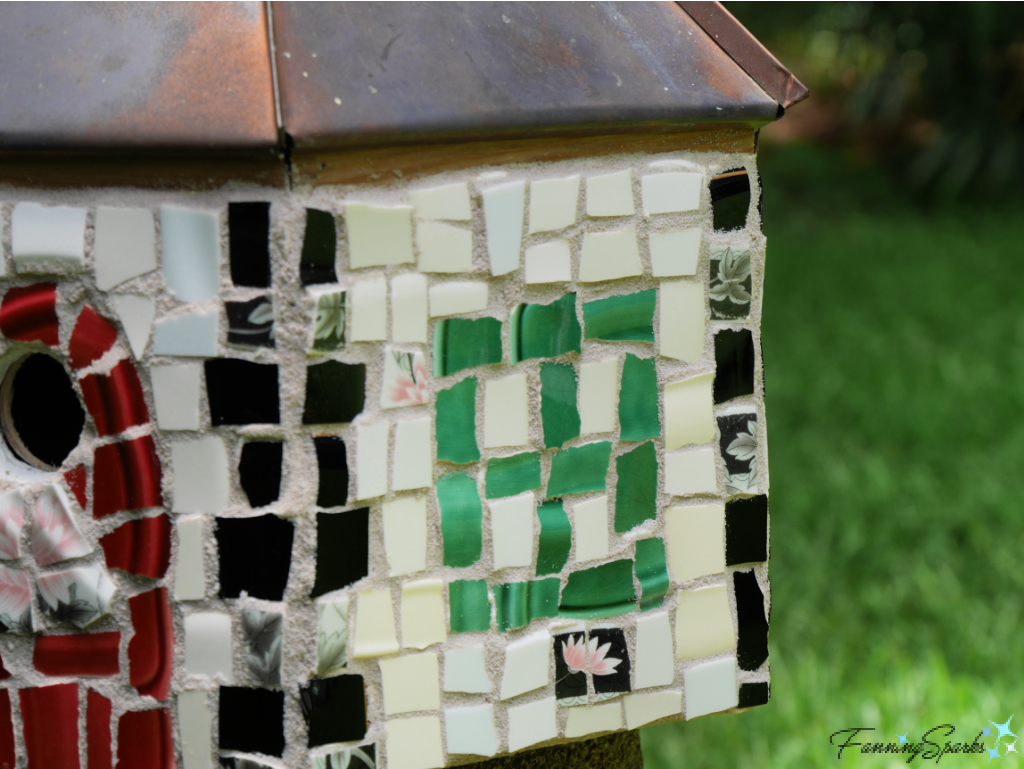
Here’s a closer look at a few of the details.
This new birdhouse will be installed in our front yard. I had the mounting post ready but then, at the last minute, decided to enhance the post with a few bands of broken china. So the new homeowners will have to wait a little longer!
More Info
Please share this image or pin for future reference.
Making mosaics is one of my favorite crafts. Check out these FanningSparks’ posts for other mosaic projects Pair of Mosaic Mirrors Completed, DIY Turkish Mosaic Candle Holder Tutorial, My Mandala-Inspired Oval Design, and Serving Up My OOAK Mosaic Tray. You may also like the post Learning from the Ancient Masters and Gaudí’s Trencadis Mosaics.
Check out my Pinterest board, Mosaic Artwork – FanningSparks Favs, for over 235 inspiring pins.
If you’re not yet a Ben and Erin fan, check out HGTV Home Town on their website.
The wedi® building board I used in this project is made by a German company of the same name. You can learn more on the wedi® website. As mentioned above this product is designed for bathrooms. It was a bit of a challenge to actually find wedi® building board—it’s sold in large sheets so it’s not a simple, online purchase. I found it at The Tile Shop in Buford, Georgia.
Today’s Takeaways
1. Find beauty in existing structures and objects.
2. Consider re-purposing or re-using materials for your next project.
3. Add personality and fun with broken china mosaics.




Comments are closed.