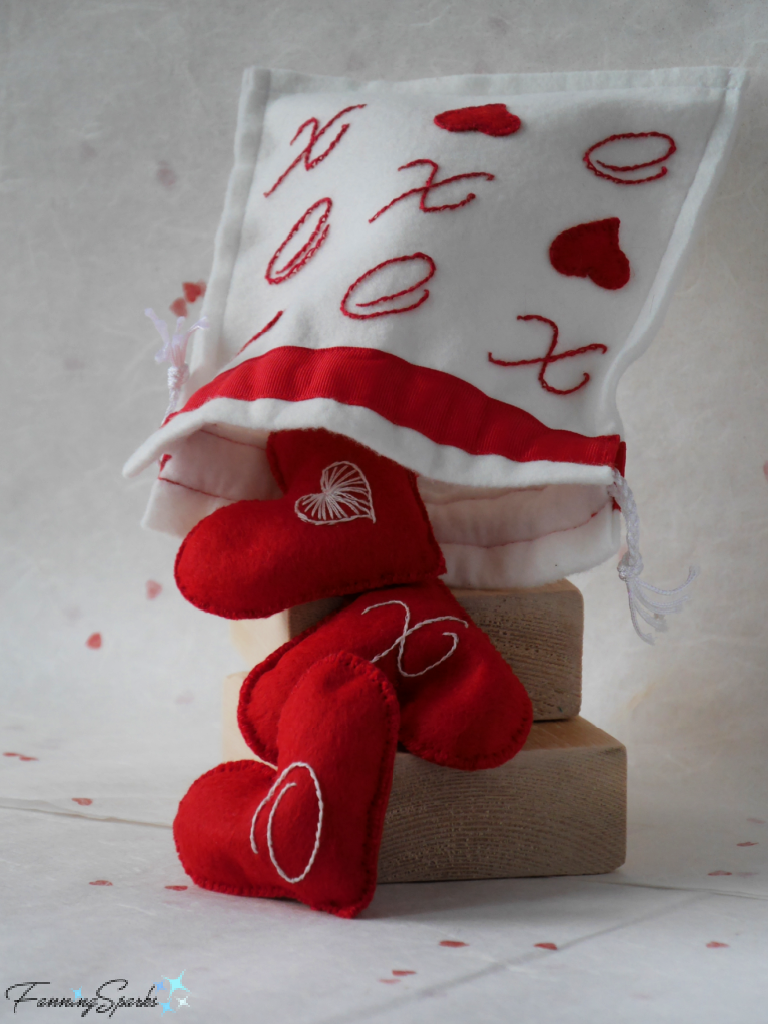
Share a little love this Valentine’s Day with a small, handmade gift—juggling hearts adorned with hugs, kisses and sweet wishes. The set of three cheerful red felt hearts are made to juggle. The snazzy, drawstring pouch is made of white felt and provides convenient storage. It’s a happy Valentine’s theme in red and white sprinkled with embroidered X’s, O’s and hearts.
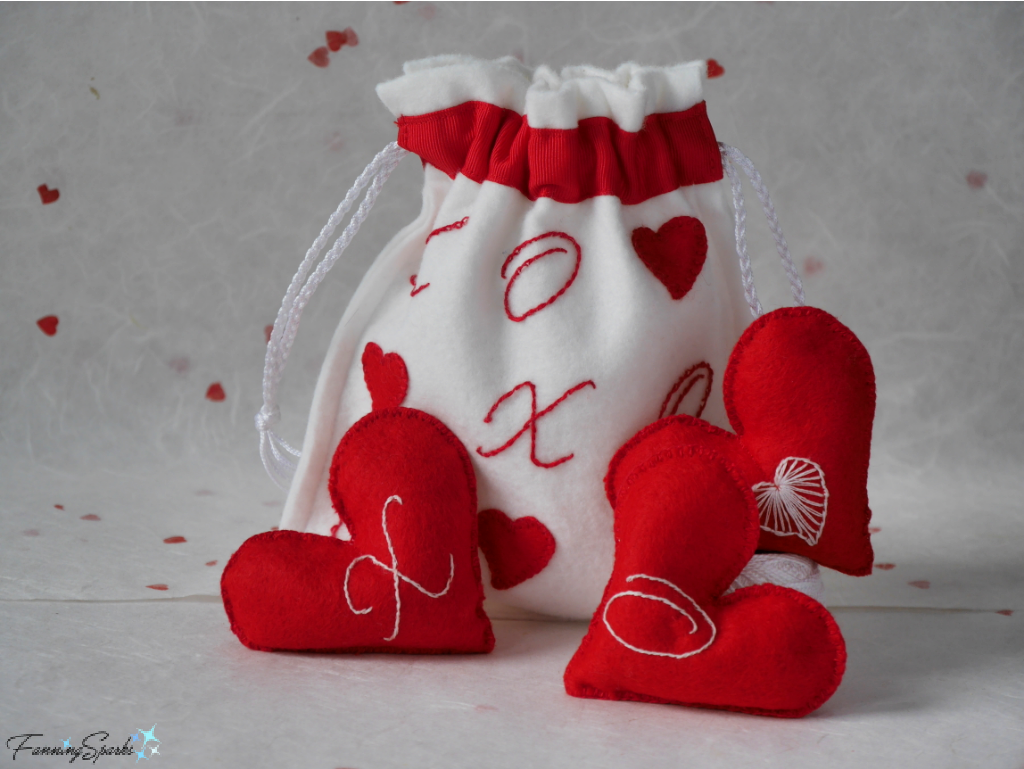
This is a fun, uncomplicated project which requires basic sewing—embroidery and hand stitching for the hearts and simple machine stitching for the pouch. The design features XOXOs and mini hearts but can easily be customized. The felt hearts are a good size and weight for juggling—they are about 3½“ across and weigh about 45 grams/ 1.6oz. In comparison, balls measuring 2.5” and weighing 130 grams/ 4.6oz are typically recommended for serious beginner jugglers (watch for my next post for more on this subject). Today’s post includes step-by-step instructions to make your own Valentine’s Juggling Hearts and drawstring pouch. Let’s get started.
Supplies Needed
. Template – Download Valentines Juggling Hearts – Complimentary Download to print the template for the hearts and the embroidery.
. Paper – For printing template.
. Tissue or Parchment Paper
. Felt – Wool Blend Felt 12” x 8” in red and 10” x 13 in white. See *TIP Regarding Felt below.
. Thread – In red and white to match the felt.
. Embroidery Floss – In red and white.
. Millet – Approximately 150g (5oz). I found Hulled Millet at the grocery store for about $2.40 USD per pound. Alternatively, you could use small grained rice. These small grains are, of course, NOT suitable for small children.
. Ribbon – 15” of 1” grosgrain ribbon to decorate the top of the drawstring pouch. Alternatively, pieces of red felt could be used.
. Cord – TWO 16-24” lengths of cord, ribbon or string to use as the drawstring.
*TIP: Regarding Felt: Felt is available in different levels of quality. Simply put, the higher the wool content, the better the felt.
. 100% Wool Felt Experts recommend 100% Merino wool felt for special, heirloom projects. They report that 100% wool felt is easier to work with, lasts longer, keeps its shape better, stays strong, is less likely to pill, and has a natural resistance to staining, water and mildew. It is pricey, though, and is only available from specialty sellers (several have Etsy shops).
. Wool Blend Felt Next on the quality scale would be wool blend felt. Typically wool is blended with rayon such as 35% wool/65% rayon or 20% wool/80% rayon. These two fibers work well together making a strong durable felt. It is available in a rainbow of colors and highly recommended for handmade felt projects. Wool blend felt is ideal for this juggling heart project.
. Eco-fi Polyester Felt The next two grades do not contain wool. Eco-fi polyester felt (“Kunin Eco-fi” seems to be a prominent brand) is made from post-consumer recycled plastic bottles.
. Craft Felt Craft felt is 100% polyester or acrylic. It is thin and prone to pilling and stretching. It’s inexpensive making it ideal for children’s crafts or temporary, large-scale decorations, such as banners, photo booths and event backdrops.
Tools and Equipment Needed
. Printer – For printing template and patterns.
. Sewing Machine
. Iron
. Scissors – Scissors with short, sharp blades such as embroidery or applique scissors.
. Needles – 1 for hand sewing with thread and 1 for embroidering with floss.
. Pins – Sewing pins preferably with flat heads.
. Container – A bowl, dish or plastic container to hold the millet while filling the heart.
. Funnel – Small funnel for filling the hearts with millet.
. Spoon
. Chopstick – Or similar thin stick to settle millet when filling the heart. Alternatively, use the handle of the spoon if it fits in the heart opening.
. Ruler
. Safety Pin or Bodkin – For pulling cord through casing.
Instructions to Make Valentine’s Juggling Hearts and Drawstring Pouch
Step 1 Prepare Template Download Valentines Juggling Hearts – Complimentary Download to print the template for the hearts and the embroidery pattern. Take care to ensure the scale is accurate on your printed version. See specifics in the download document.
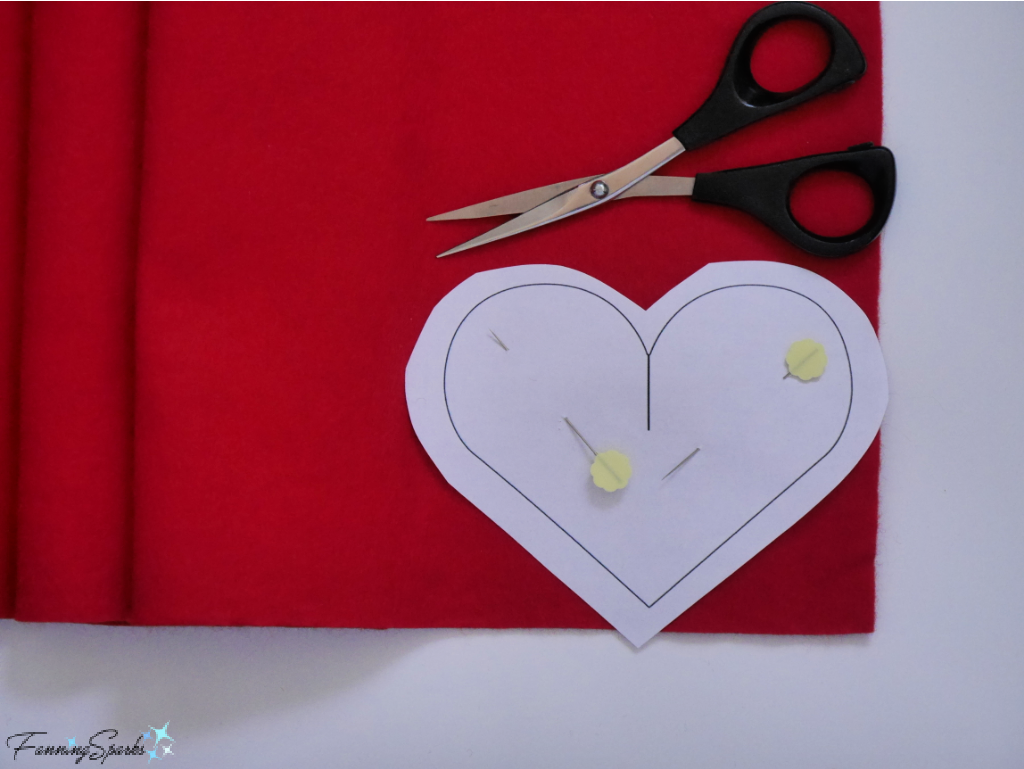
Step 2 Cut Hearts Trim excess paper from the pattern leaving a narrow border around the outside of the heart. Pin pattern to the felt using flat-headed pins. Cut out the heart (paper and felt) using scissors with short, sharp blades. Be sure to snip along the slit at center of heart. A pair of matching felt hearts are needed for each juggling heart.
TIP: Instead of cutting the second heart with another paper template, cut it using the first felt heart as a template. This provides a more accurate match. Mark the wrong side of both hearts in the pair.
Cut a total of 6 felt hearts—3 pairs of 2 matching hearts.
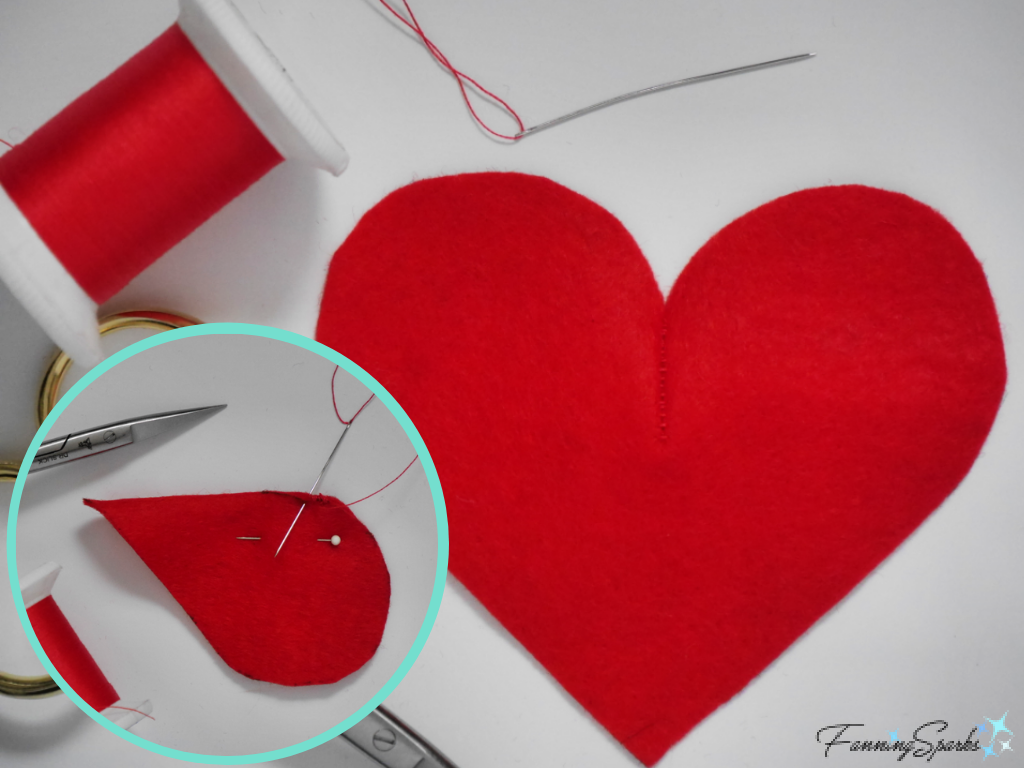
 Step 3 Sew Heart Slit Fold a felt heart vertically along the cut slit with right sides together. Use a whipstitch/overcast stitch to sew the two sides of the slit together with tiny, tight stitches. The sewn slit adds shape and dimension to the heart. Repeat on the other five felt hearts.
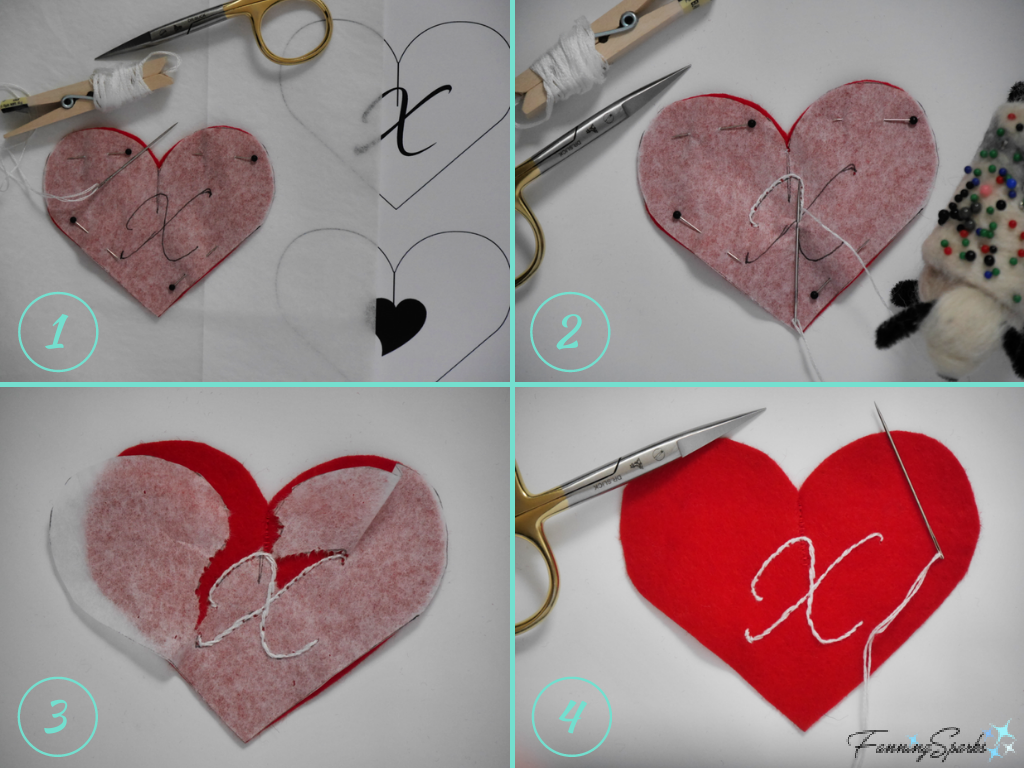
 Step 4 Embroider Heart Lay a piece of tissue or parchment paper over one of the heart design patterns. Trace the outline of the heart as well as the inside design (X, O and heart). Trim the outside edge of the tissue paper heart. Align the tissue paper heart with a felt heart and pin in place. Use an outline/stem stitch (or your stitch of choice) to embroider the design onto the felt heart with 2 strands of white embroidery floss. If you’re new to embroidery or need a refresher, check out the More Info section at the end of the post. Stitch through the tissue paper. After stitching is completed, carefully tear away the tissue paper. Repeat on the other five felt hearts embroidering 2 X’s, 2 O’s, and 2 hearts.
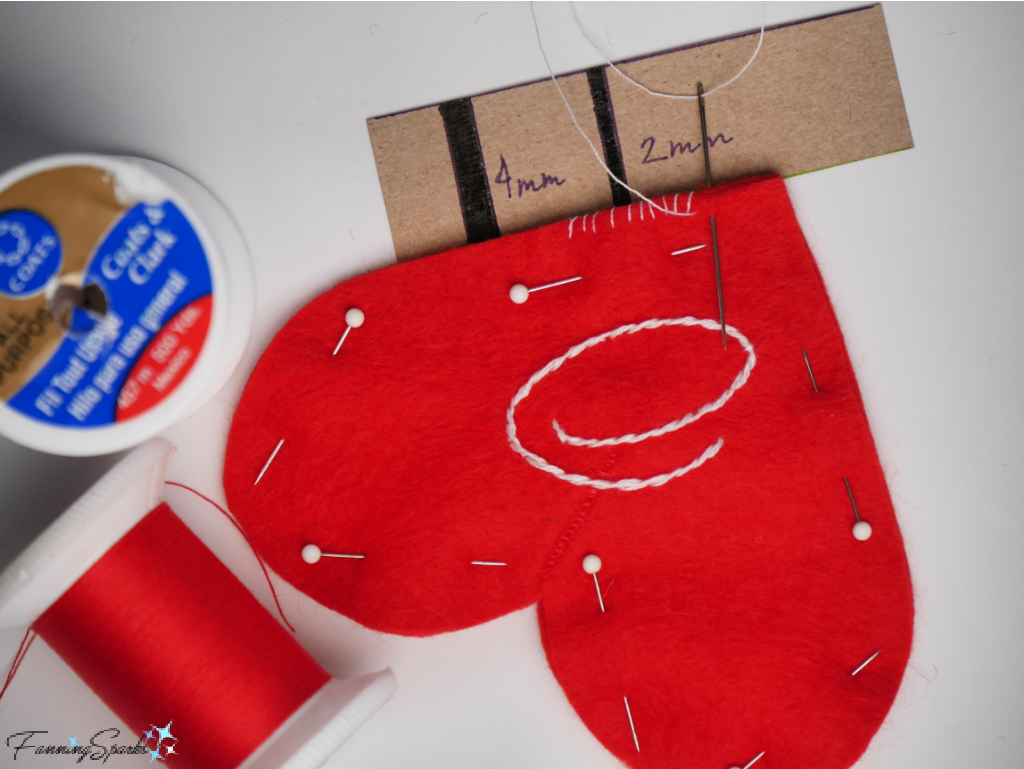
 Step 5 Sew Hearts Together Align a pair of matching hearts with WRONG sides together. Pin. Use a single strand of matching sewing thread. (Note: I’m using white thread for visibility in the photo below.) Use a whipstitch/ overcast stitch (or your stitch of choice) to sew the hearts together. Leave a small 1” opening along one of the long sides. Take your time to firmly secure the hearts with small, strong even stitches, spaced close together, catching both edges in each stitch. You don’t want the filling to come out when the juggling begins!
TIP: I like to make my whipstitches about 2mm (⅛”) from the edge and about 2mm (⅛”) apart. A small template, cut from thin cardboard, with a 2mm mark is helpful for checking along the way. It’s quicker than using a ruler because you don’t waste time orienting yourself to the ruler scale and markings.
 Step 6 Fill Heart Working over a container or bowl, insert a small funnel into the unsewn opening in the heart. Use a spoon to slowly scoop the millet into the funnel. Carefully tamp down the millet so it runs into the heart. Remove funnel. Spoon small amounts of millet directly into the heart. Use the spoon handle, or a thin stick such as a chopstick, to gently push the millet into all the sections of the heart.
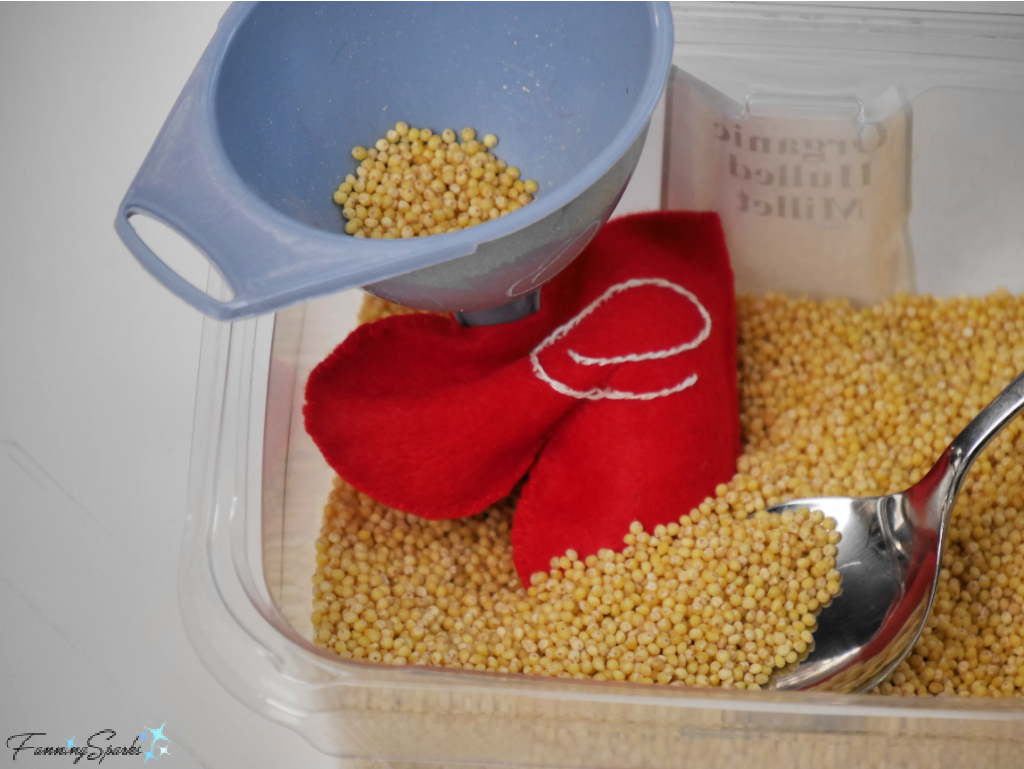 Fill the heart as full as possible while ensuring you can still grasp the edges of the opening. Pin the opening. Sew the opening closed with a whipstitch/ overcast stitch. Repeat on 2 remaining hearts.
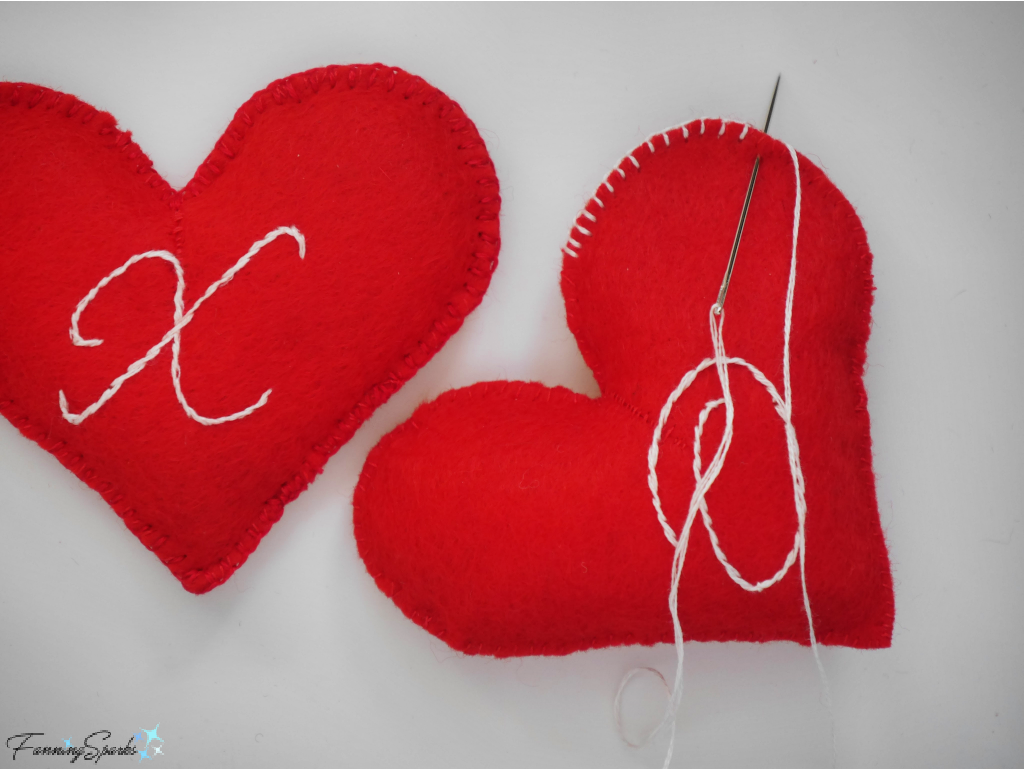
Step 7 Finish Outside Edge Use 2 strands of red embroidery floss and a blanket stitch (or your stitch of choice) to embroider around the outside edges of the heart. Note: I used white floss for visibility in the photo below but it’s a pretty option. This final round of stitching reinforces the seams and adds a nice, finished look.
 Step 8 Cut Pouch Parts Cut TWO 10” x 6 ½ “ rectangles from white felt. Cut TWO 7 ½“ lengths of 1” red grosgrain ribbon. Cut THREE small applique hearts from red felt using the method described above in Step 2.
Step 9 Embroider Pouch Front The embroidery pattern for the pouch is available in the Valentines Juggling Hearts – Complimentary Download. Print the pattern taking care to check the scale as explained in the download document. Lay a piece of tissue or parchment paper over the pouch design pattern. Trace the 9 design elements and the centering lines. Align the tissue paper pattern with one of the felt pouch panels. Position pattern with the horizontal center line 3½“ up from the bottom edge and the vertical center line at the middle of the panel. Pin in place. Use an outline/stem stitch (or your stitch of choice) to embroider the X’s and O’s onto the felt panel with 2 strands of red embroidery floss. Stitch through the tissue paper. Position a small felt heart on the panel according to the tissue paper pattern. Pin in place while removing that section of tissue paper. Use a blanket stitch (or your stitch of choice) to attach the small felt heart.
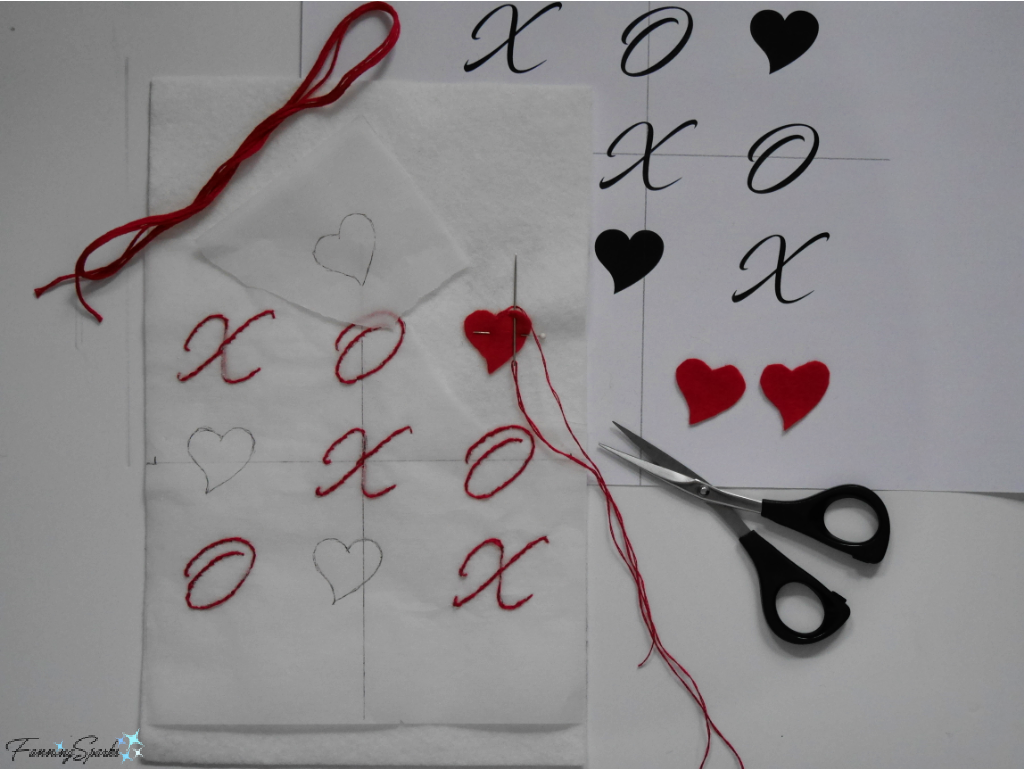 Repeat for the remaining 2 small hearts. After stitching is completed, carefully tear away the remaining tissue paper. It’s best to press down on the embroidery stitches with the fingers of one hand while tearing the tissue paper with the other hand.
Step 10 Sew Pouch The drawstring pouch opens at the top. A casing, made by folding and stitching down the top edge of the felt panels, holds the drawstring cord. Decorative grosgrain ribbon hides the casing. Unlike the juggling hearts which are hand-stitched, the pouch is sewn by machine.
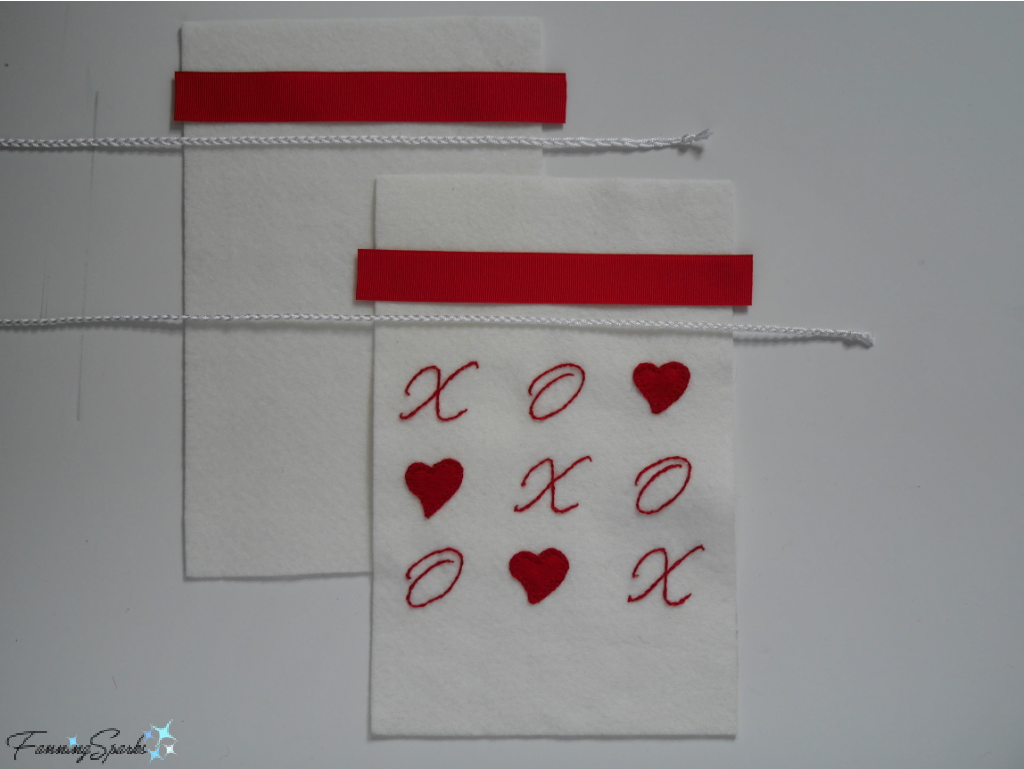 Start by making the casing. Place front pouch panel on working surface with the wrong side facing up. Fold down 1½“ from the top edge. Press. Unfold top edge. Place front pouch panel on working surface with right side facing up. Measure down ½” from pressed fold edge and align top edge of grosgrain ribbon with this line—top edge of ribbon is 2” from top edge of panel. Pin ribbon in place. Ends of ribbon should extend over side edges by ½“. Fold ribbon ends to the back side of the panel. Pin and stitch ribbon ends at the side edges of the front pouch panel. Repeat with back pouch panel.
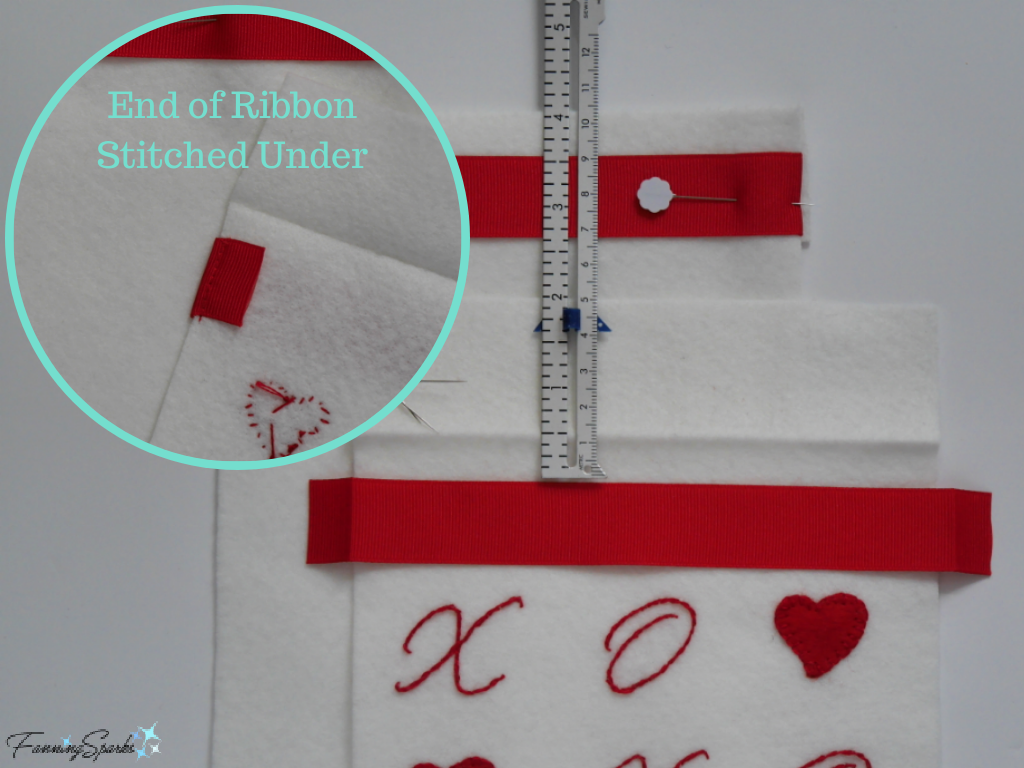 Place front pouch panel on working surface with the right side facing up. Refold the top edge to the back at the pressed fold which is 1½” from top edge. Ensure ribbon is placed straight and level at ½” from folded edge. Pin ribbon in place. Stitch across the panel along the top and bottom edges of the ribbon. Repeat with back pouch panel.
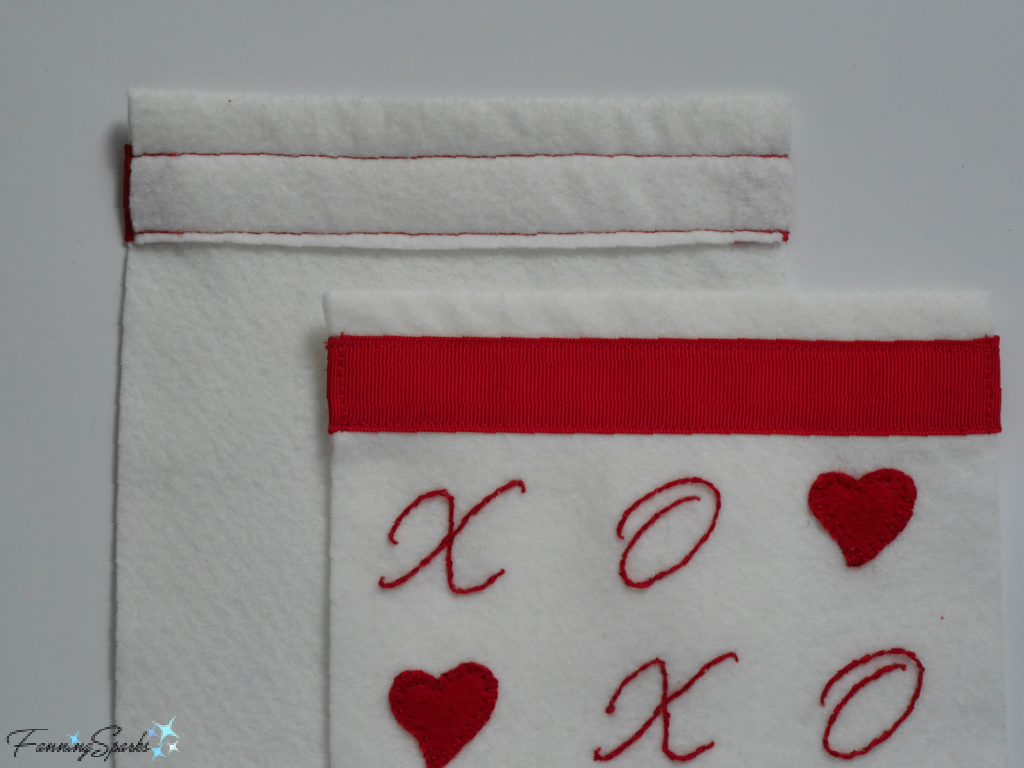 Prepare to sew front and back pouch panels together. Place back pouch panel on working surface with wrong side facing up. Place front pouch panel on back panel with right side facing up. The two panels should match and the ribbon ends should align. Pin in place. Stitch ¼” seam along the sides and bottom—beginning and ending at the bottom edge of the ribbon.
Use a safety pin or bodkin to pull the cord through the casing. Knot the ends of the cord. One cord will enter and exit on the right side of the pouch. The other cord will enter and exit on the left side of the pouch. Close the pouch by pulling the knotted cord ends in opposite directions. Open the pouch by pulling the panels apart.
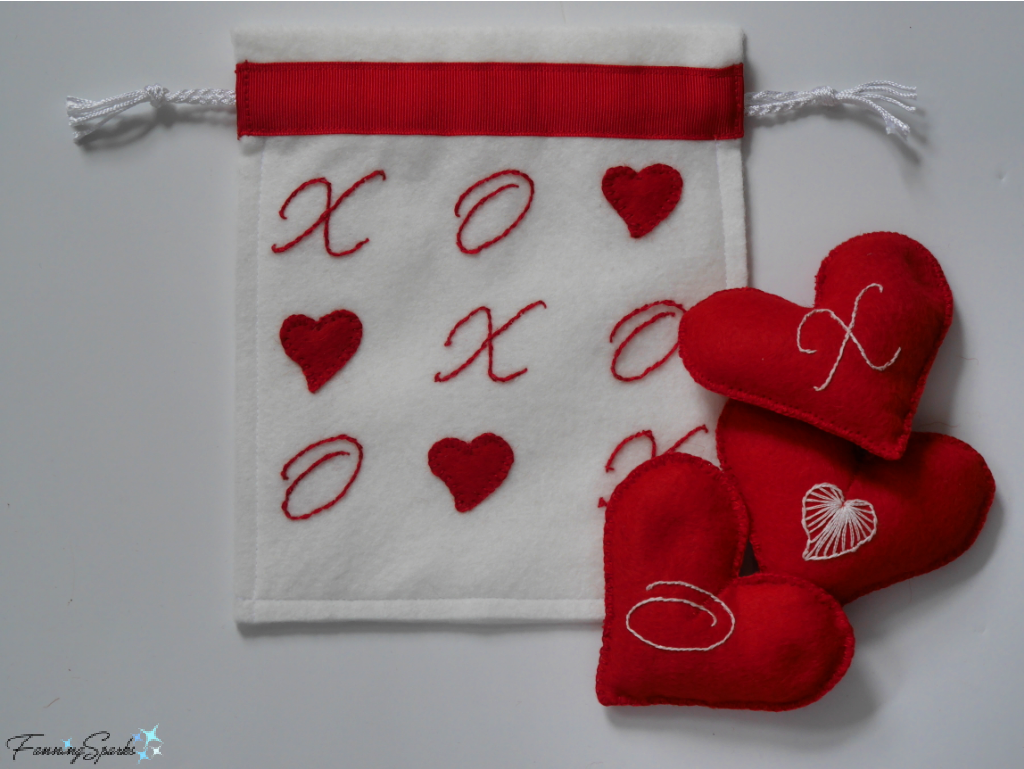 Your Valentine’s Juggling Hearts are ready to share with a fun-loving person in your life. Happy Valentine’s Day!
More Info
You can download the project template here: Valentines Juggling Hearts – Complimentary Download
Please pin this image to share or save for future reference.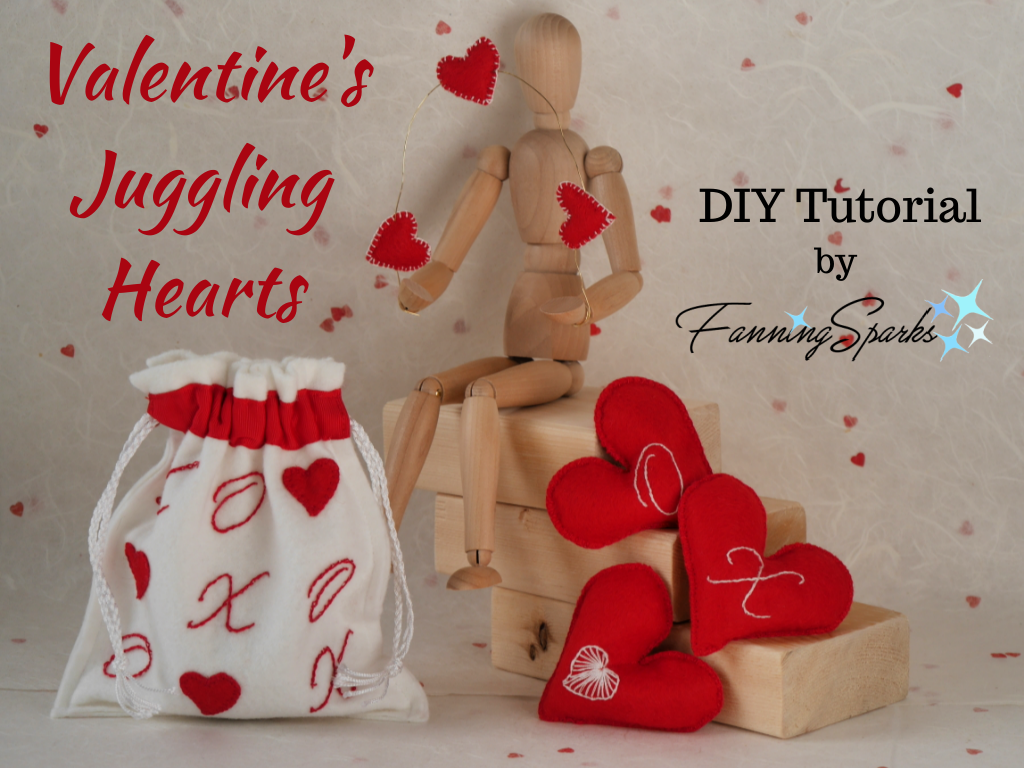
If you or the recipient of your Valentine’s Juggling Hearts would like to take juggling to the next level, watch for my next post where I’ll cover how to make and use juggling balls.
Gathered.How, publishers of Mollie Makes and other fine craft magazines, provides helpful instructions in their Library of Embroidery Stitches for Beginners.
Today’s Takeaways
1. Share a little love this Valentine’s Day with a small, handmade gift.
2. Juggling hearts are a novel way to mark Valentine’s Day.
3. Consider making Valentine’s Juggling Hearts for a special, fun-loving person in your life.




2 Comments
@Marian – It is a fun project… hearts and XOs… cheery red and white… and juggling! I keep a running list of ideas and there’s no end in sight yet :-). Peg
What a fun craft!
Is there no end to your ideas?