
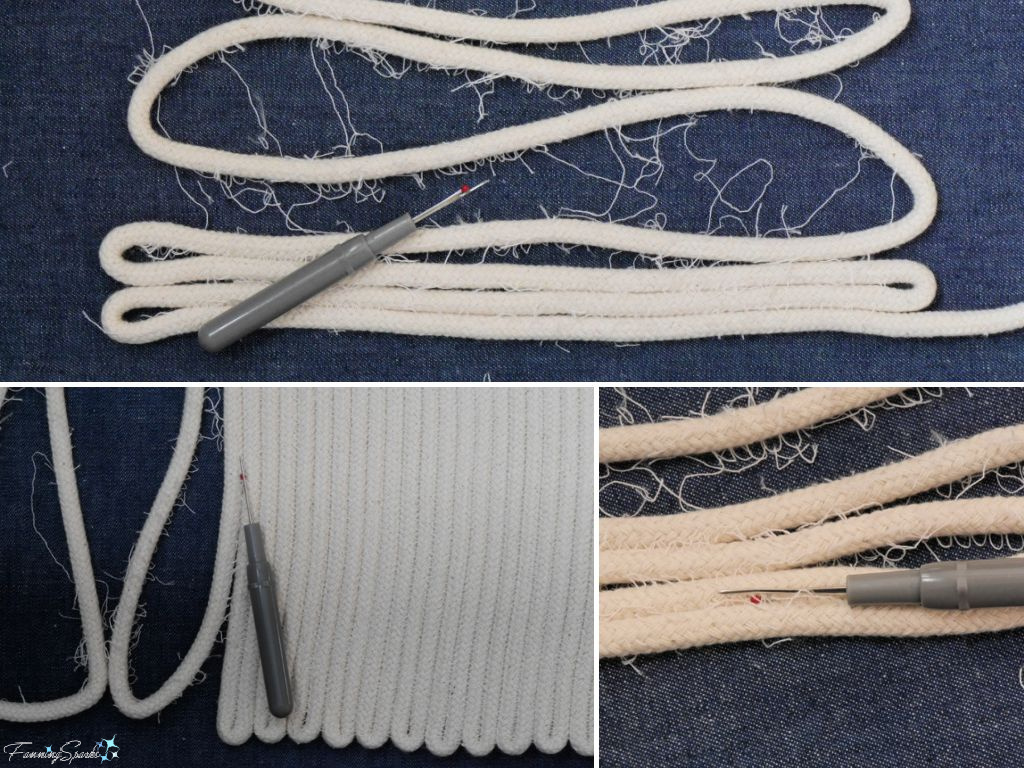
Remember a few blog posts ago I admitted to restarting one of my new coiled rope projects four times? And I shared that all those false starts forced me to finetune my seam ripping skills?
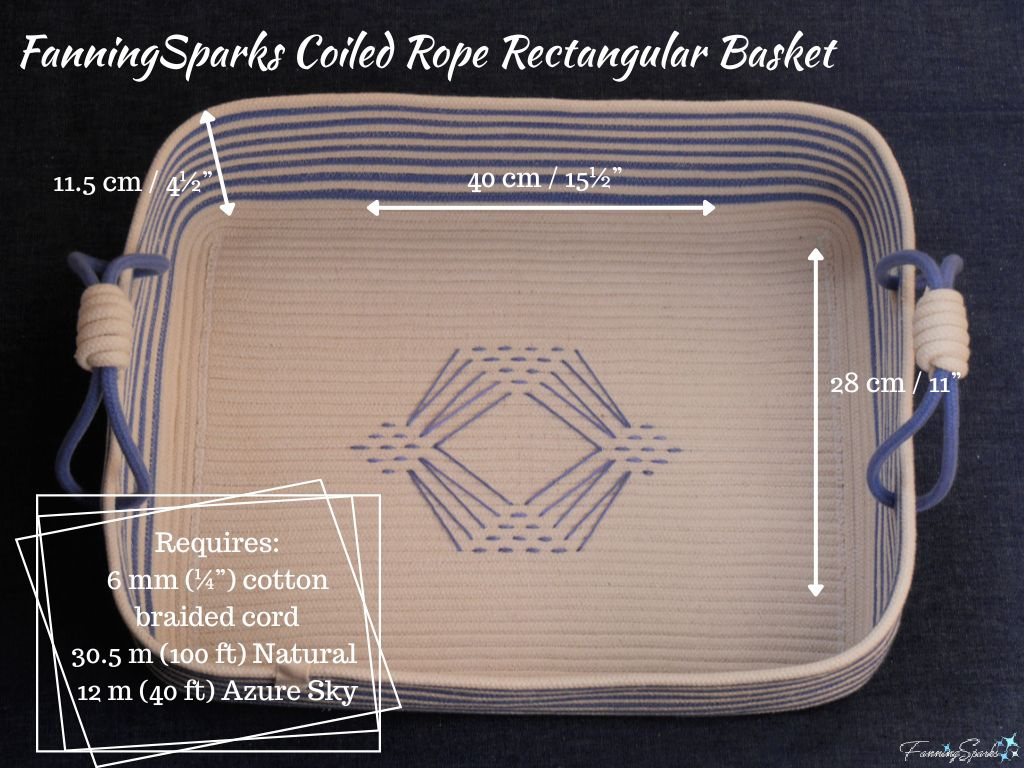
 Well, my sewing machine has been zigzagging for days and that difficult project is finally finished. I’d like to share my new Coiled Rope Rectangular Basket in today’s blog post. It’s a generous size measuring about 40cm long x 28cm wide x 11.5cm deep (15½” long x 11” wide x 4½” deep).
This project taught me several new techniques including how to shape a rectangular basket with perpendicular (or near-perpendicular) sides. I also learned how to sew coiled rope in two-color stripes. And I figured out that huck embroidery is perfectly suited to a coiled rope surface. I’m noting and sharing the lessons learned in today’s blog.
Prepare Sewing Machine
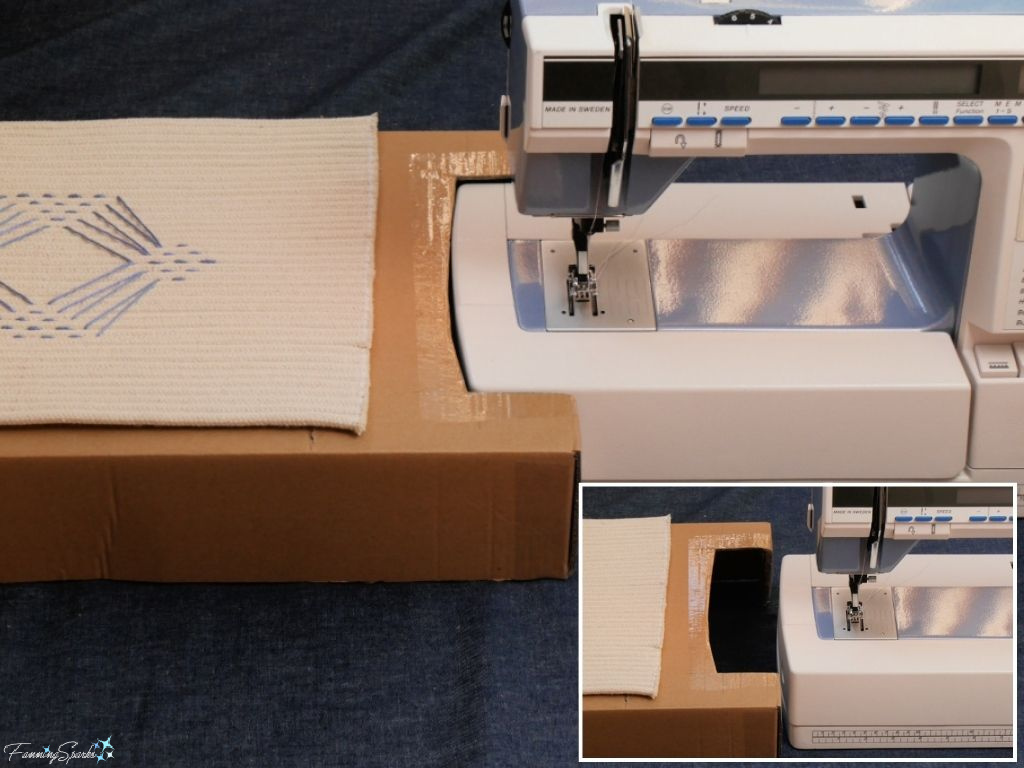
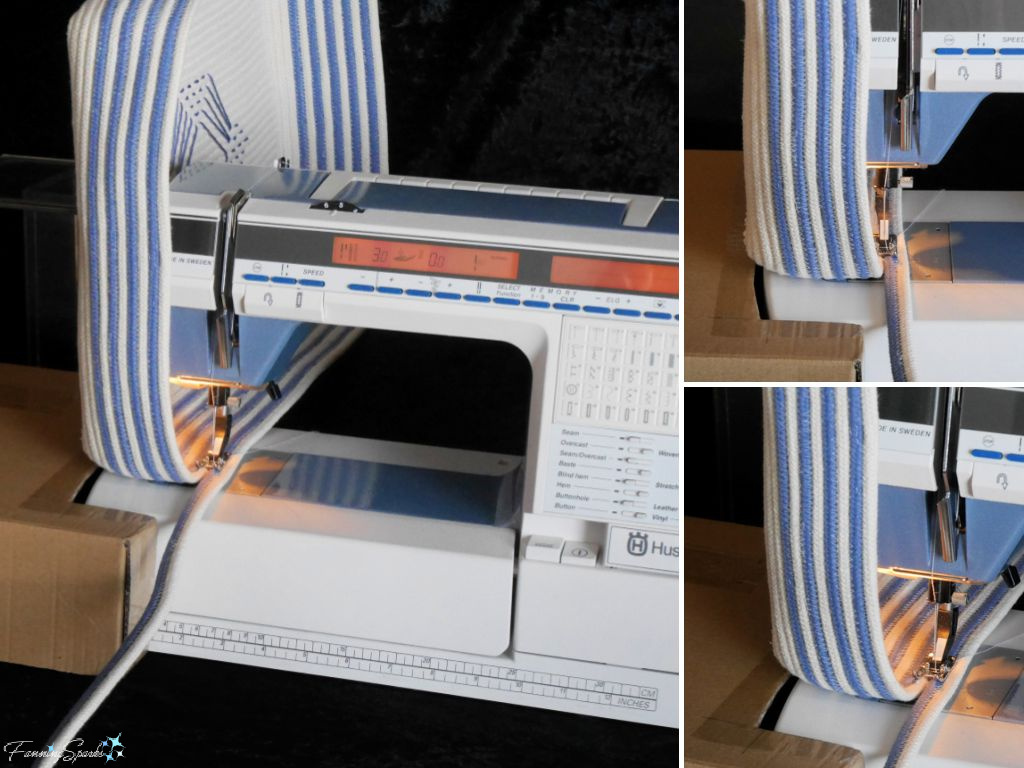
Several online experts point out it’s easier to manage large coiled rope projects on a sewing machine with an extended bed. Extension tables ― used to convert a sewing machine’s free arm into an extended flat bed ― can be purchased for most sewing machines. But, it’s also possible, to extend a sewing machine’s flat bed for free. Simply extend the flat bed with a cardboard box or a stack of books.
Here’s my new cardboard extension table. Nothing fancy! But it works like a charm!
Make a Rectangular Base
The vast majority of coiled rope projects, including those I’ve made previously, are based on spirals and have a round or oval form.
The Coiled Rope Rectangular Basket is significantly different from my previous projects because it starts with a rectangle, not a spiral. Coiling rope into a spiral is a smooth, almost effortless, process ― simply sewing round and round. The form evolves naturally as more rope is added.
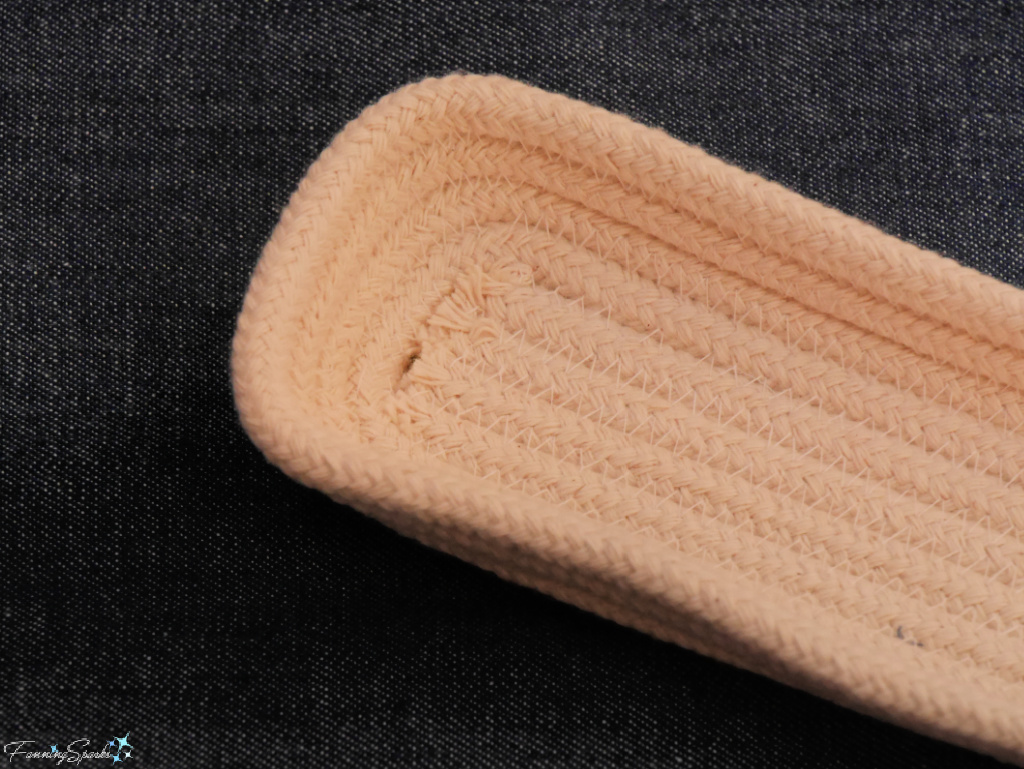
But making a rectangular form is more challenging. Obviously, the starting point ― the flat base ― is a rectangle not a circle. My first inclination was to make this base by “snaking” the rope back and forth.
This technique worked OK for the first few rows but, despite my best efforts, I wasn’t able to keep the sides parallel and equal for the entire section. Even stopping to check and adjust the length at every turn did not solve the problem.
Then I discovered a great resource ― Nüket Kutlu, of Double Knot Design ― on YouTube. Her videos are quite basic ― there’s no voice over or scripted instructions ― but the visual demonstrations are great. Her video, titled “Making a square basket from cord… with sewing machine… jute rope…”, was immensely helpful. Many thanks to Double Knot Design for generously sharing their expertise online!
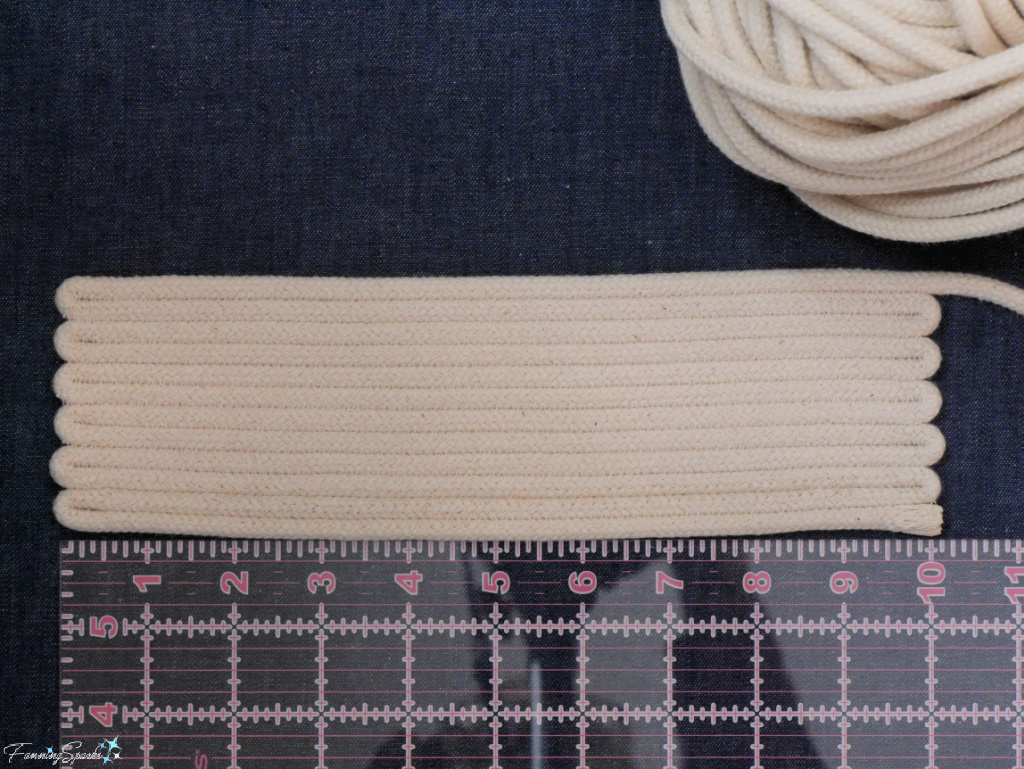
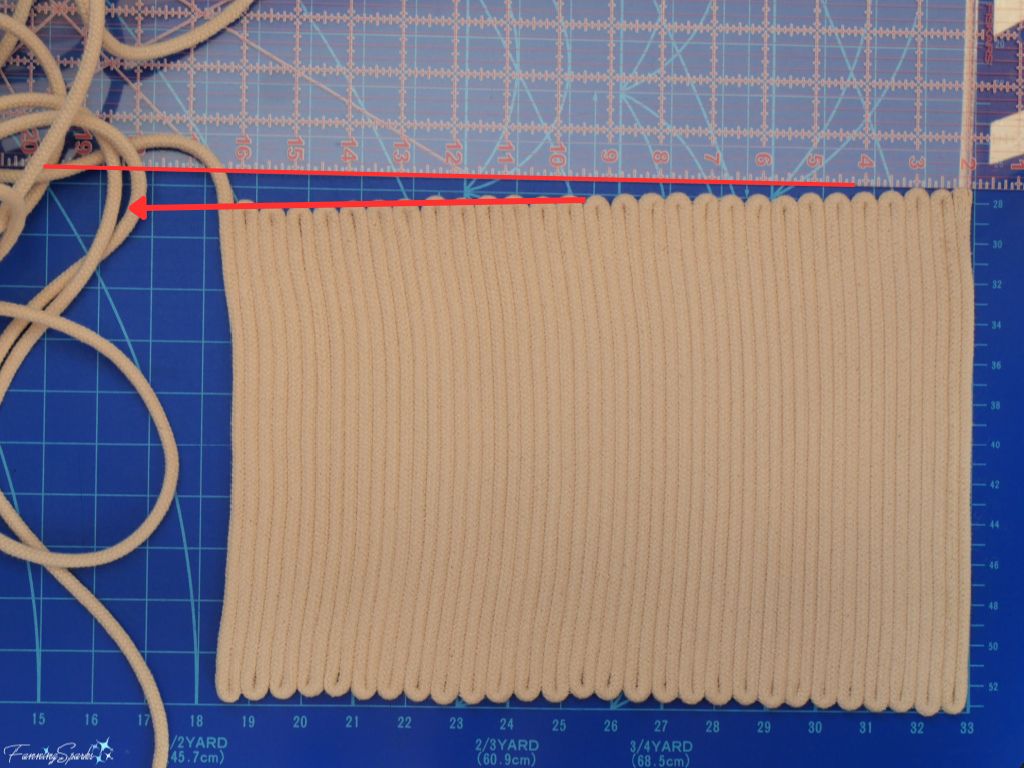
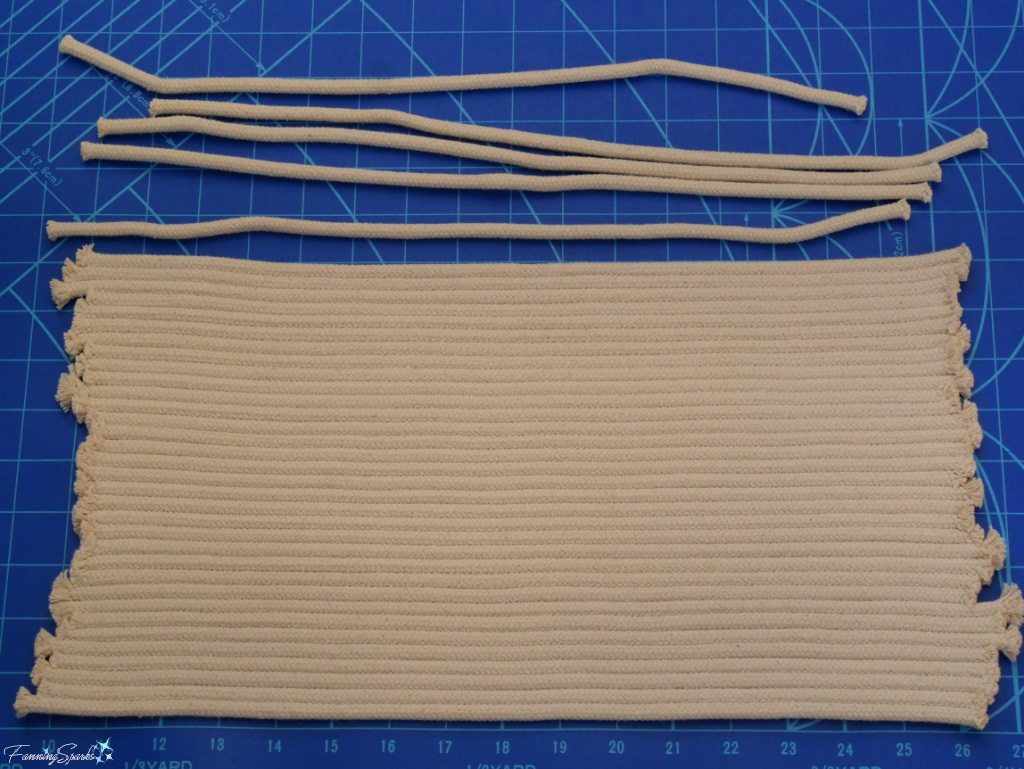
In hindsight, her technique for making a rectangular base seems rather obvious. But it never occurred to me to simply pre-cut a batch of ropes, sew them together side-by-side, finish the ends with tightly-sewn satin stitching, and then cut it to size. Duh!
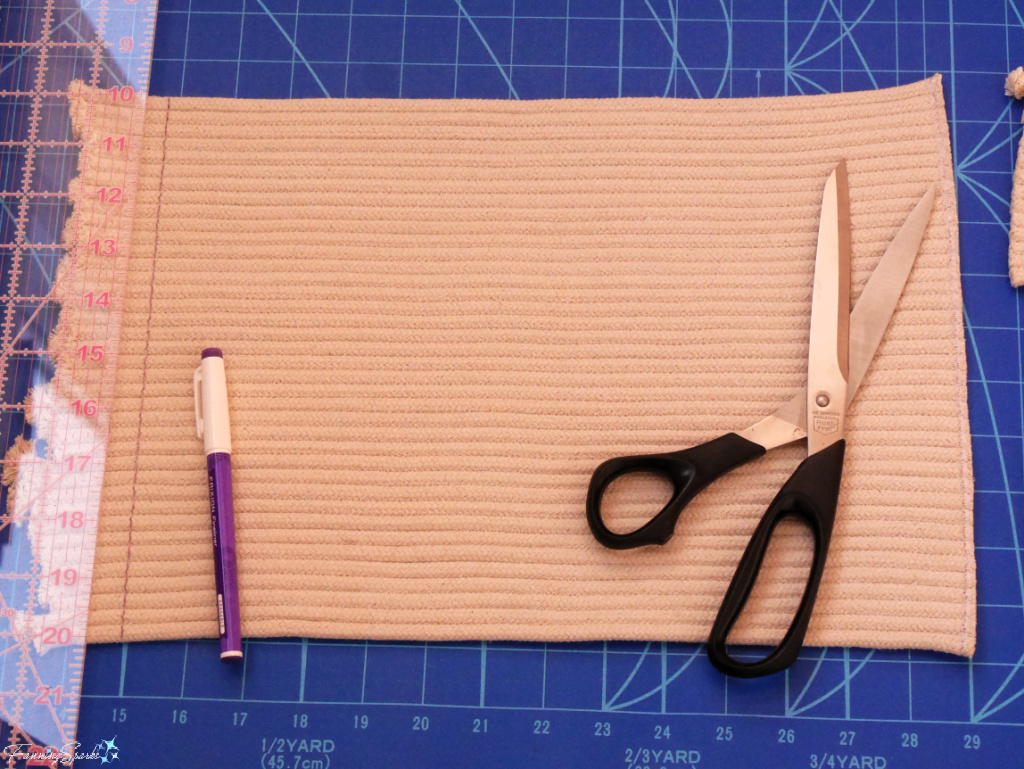
Embellish the Base
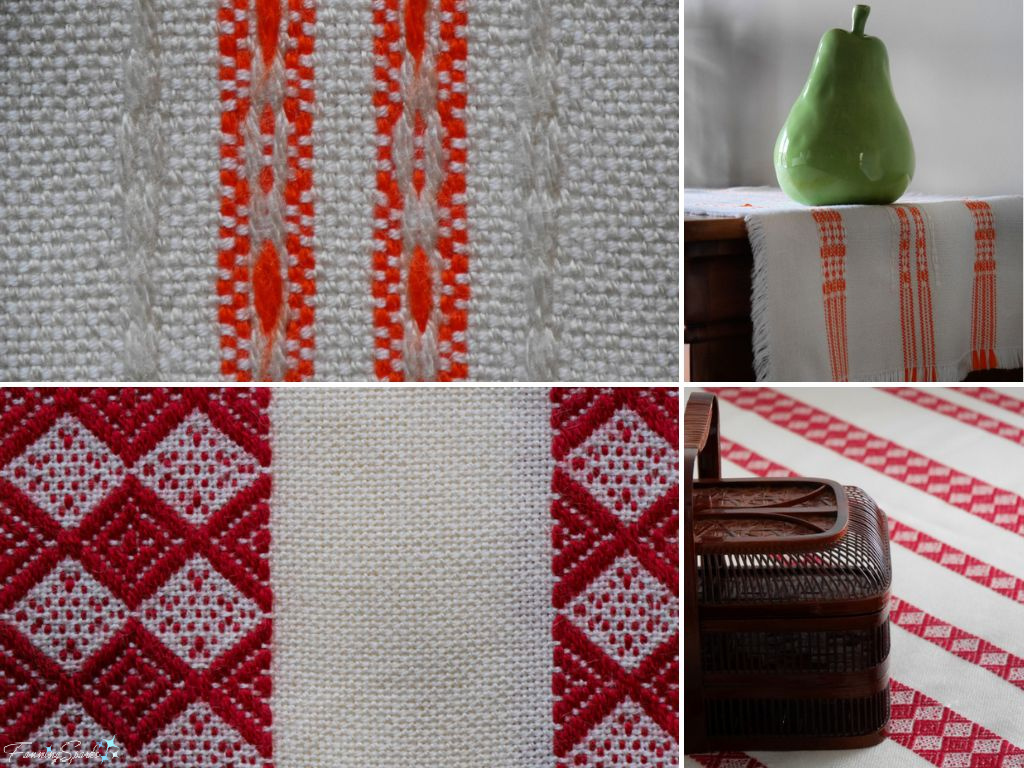
After I finally created an acceptable rectangular base with parallel and equal sides, I couldn’t resist the temptation to embellish the surface. It was just too plain! All those horizontal lines reminded me of a pair of vintage table runners I purchased at a thrift shop in Berlin Germany several years ago.
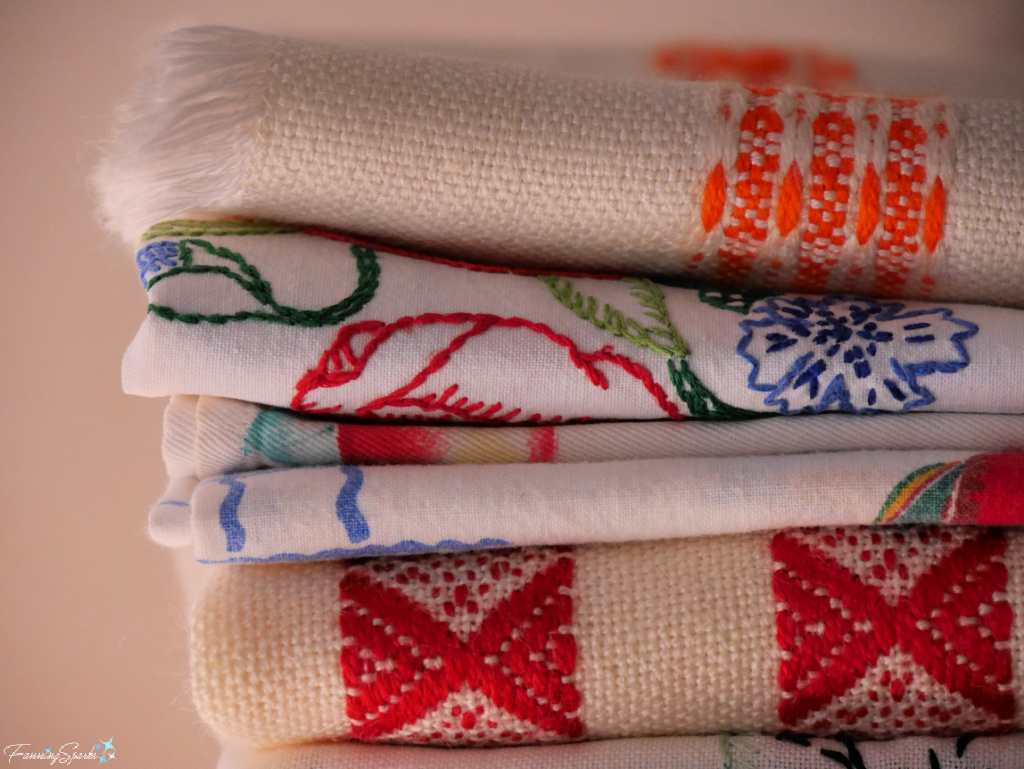
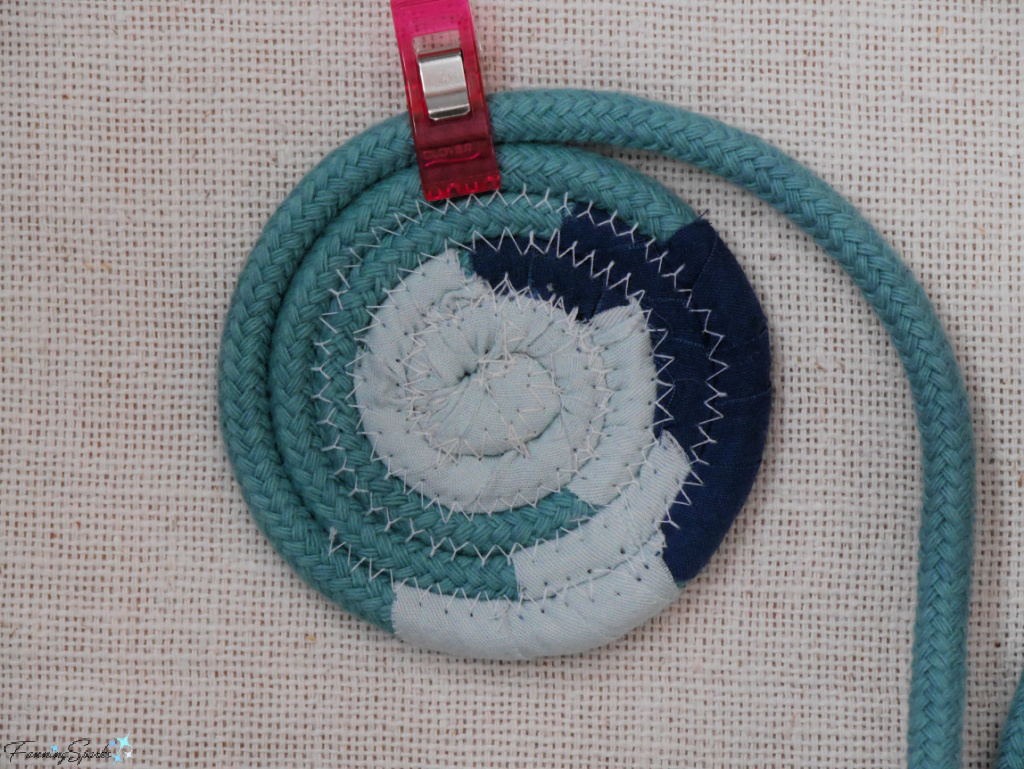
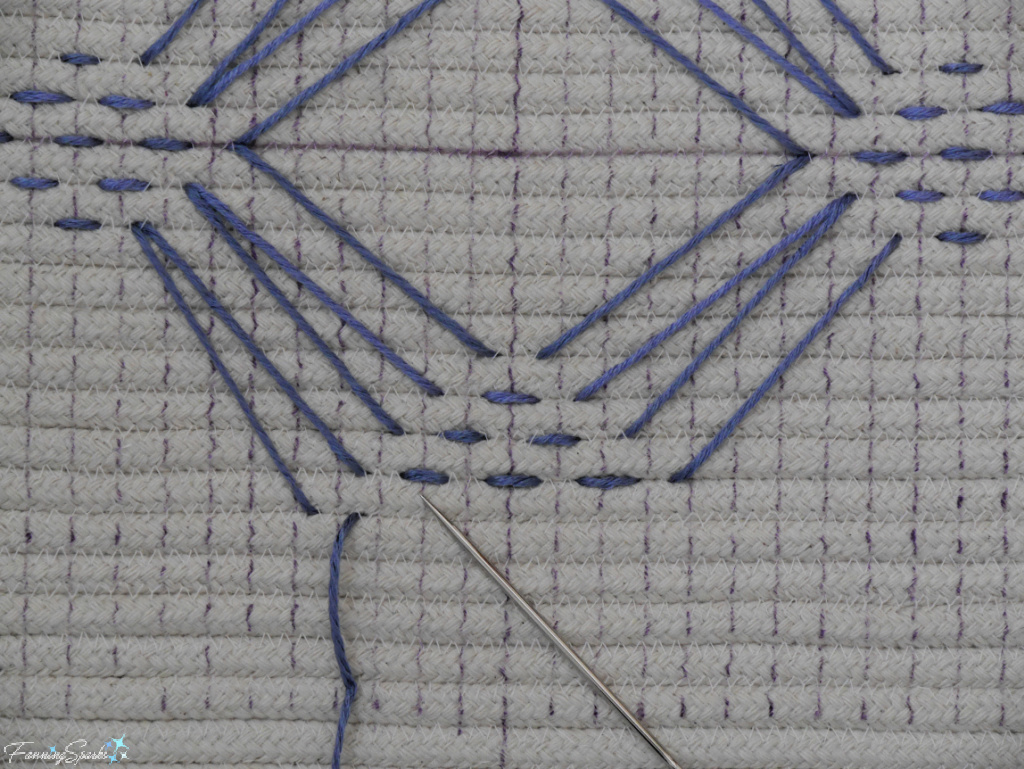
A little online research identified this technique as “huck embroidery” or “Swedish weaving”. I won’t get into the specifics of huck embroidery except to point out that it uses only simple running stitches to create beautiful geometric designs. Here’s a closer look.
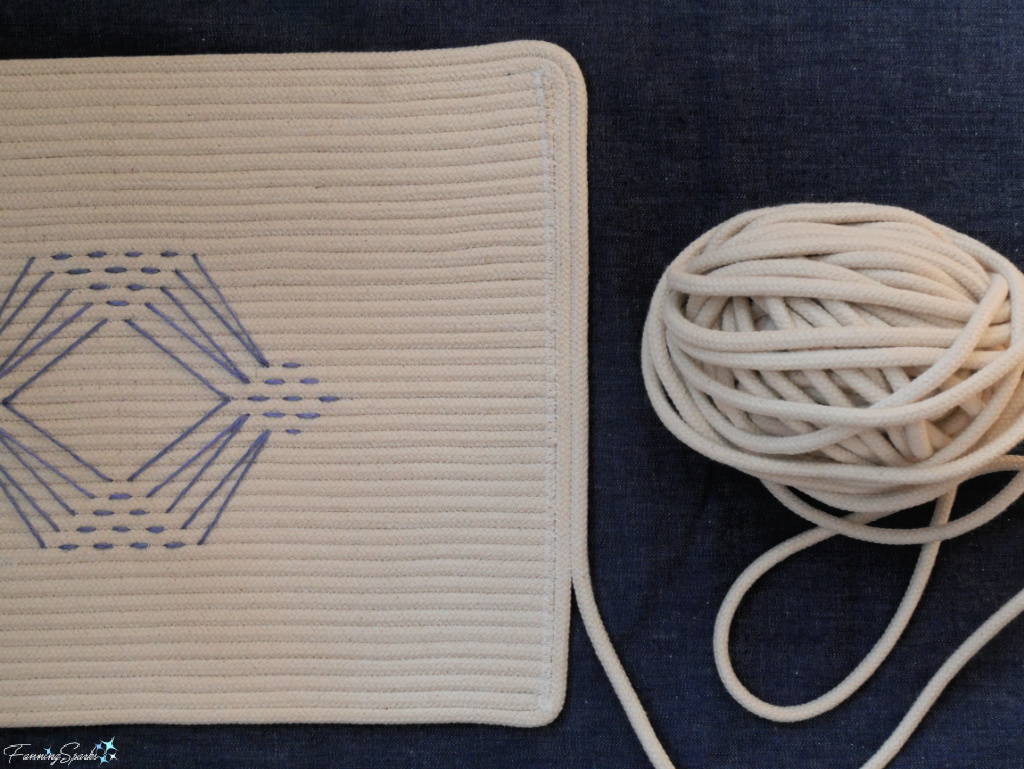
I found a goldmine of repeat and motif patterns in a vintage book titled Huck Embroidery on Internet Archives. A simple motif, extracted from one of the border patterns in the book, wasn’t difficult to embroider on the rectangular base of my basket.
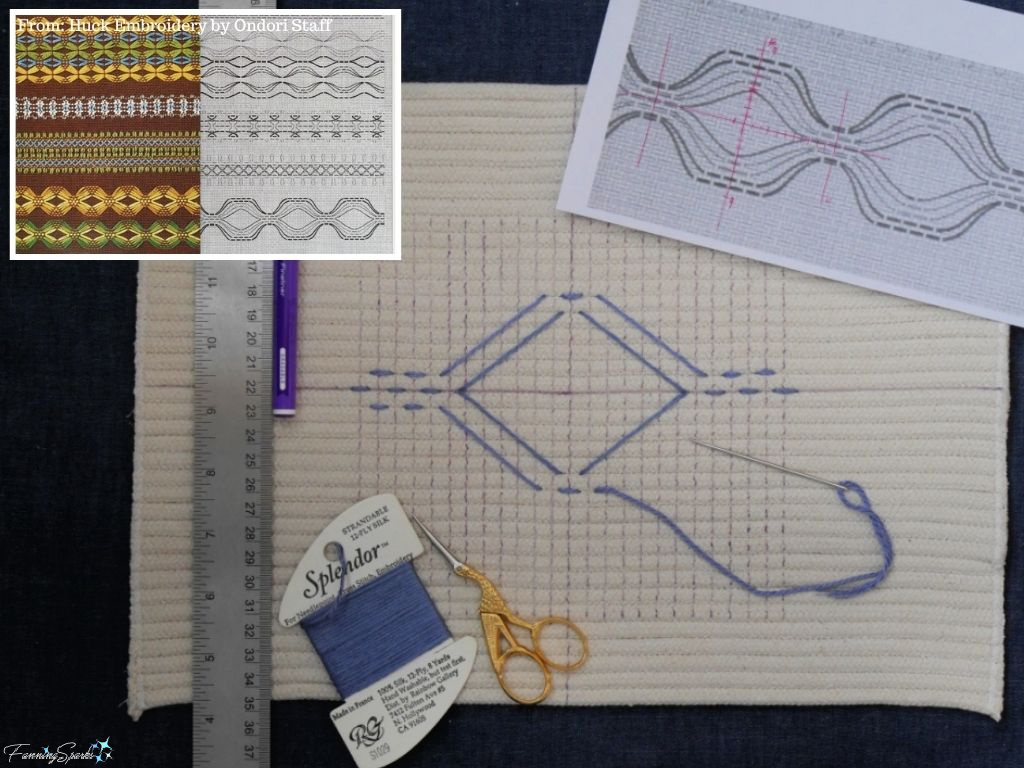
Here’s the embroidery in progress. Note the vertical lines are temporary ― they were drawn with a Pilot Frixion erasable marker pen.
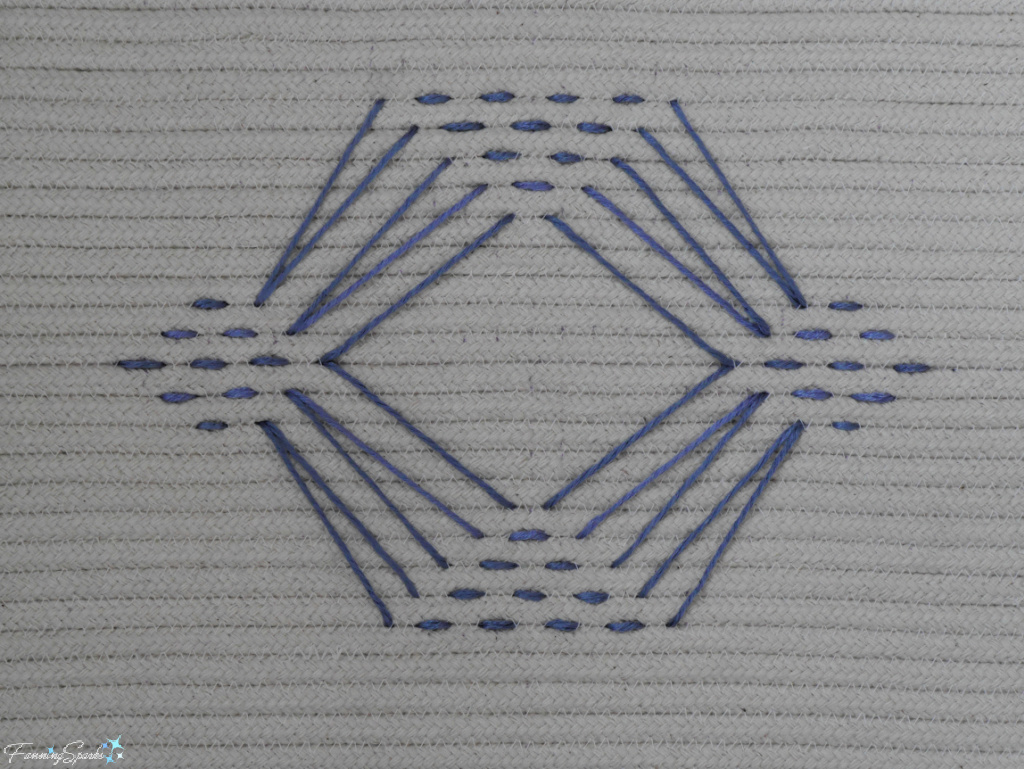
This is the completed huck embroidery-inspired design on the base of my Coiled Rope Rectangular Basket.
Add the Sides
The next step was to add vertical sides to the rectangular base. The goal was to create perpendicular sides which were straight up and down at a neat 90° angle to the base. It never hurts to test a new technique on a sample first. I quickly realized the sides weren’t straight enough on my little test basket. So, I went back to the Double Knot Design video to study their technique.
Here’s what I learned. Start adding rope at one of the corners with the end of the working rope aligned with the edge. While adding the first round of rope, keep the piece flat and stop at each corner to reposition the piece. Then add one or two more rounds of rope, sewing continuously and keeping the piece flat.
Then it’s time to make the sides. The trick is to completely reposition the basket. Instead of keeping the piece flat, lift it up so the base of the basket is perpendicular to the sewing machine bed. Maintain this angle for all subsequent rounds. The folks at The Mountain Thread Company have a great tip for basket shapes: “The angle of the sides will mimic the angle of the base as you lift it off the table to sew the sides. 45° LIFT = 45° SIDES”. Or in my case, 90° lift for 90° sides.
I didn’t take a photo of the first round but these photos, taken after several rounds of rope were added, illustrate the technique.
Add Stripes
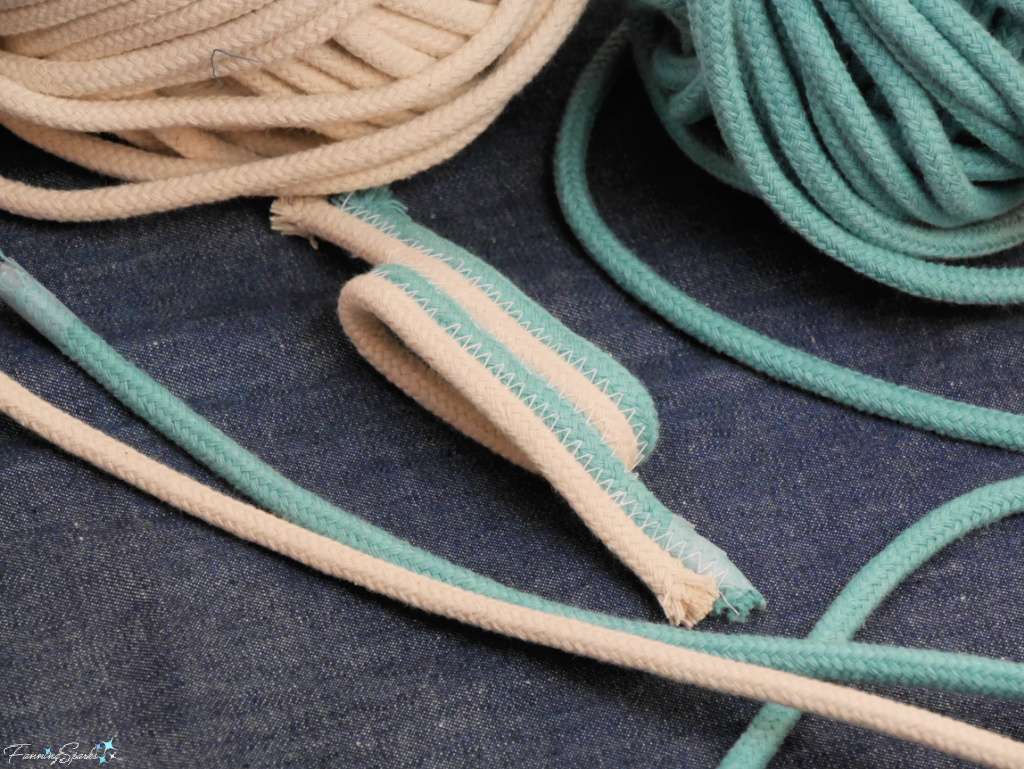
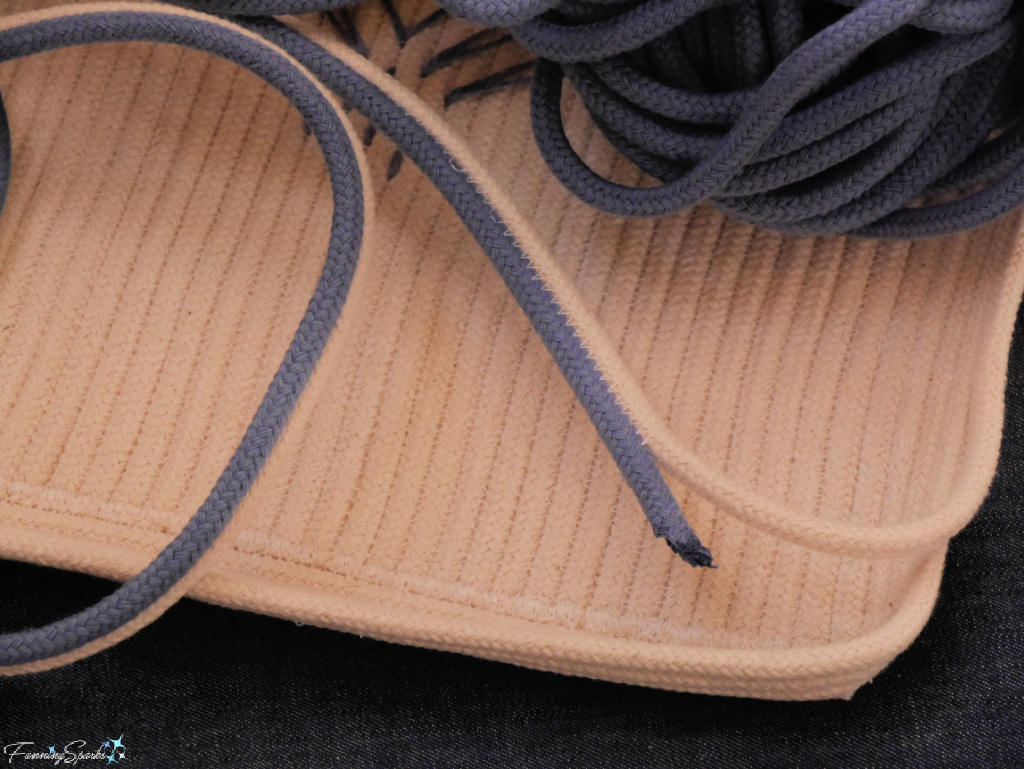
Somewhere along the way during my internet research, I came across a trick to make striped rope baskets. Predictably two colors of rope are needed. I had assumed it would be necessary to switch from one color to the other at every round meaning there would be a lot of messy joins. But the trick is to pre-sew the two colors of rope together and then coil and sew the double-rope onto the piece. Here’s my little test piece ― it was surprisingly easy!
I decided to start adding my second color, the blue rope, at a corner. So, I stopped sewing prior to the corner and removed the piece from the sewing machine. Then I started pre-sewing the blue rope onto the already attached natural-colored rope. After I had a good long section of doubled rope, I resumed coiling and sewing the now-double rope onto the basket.
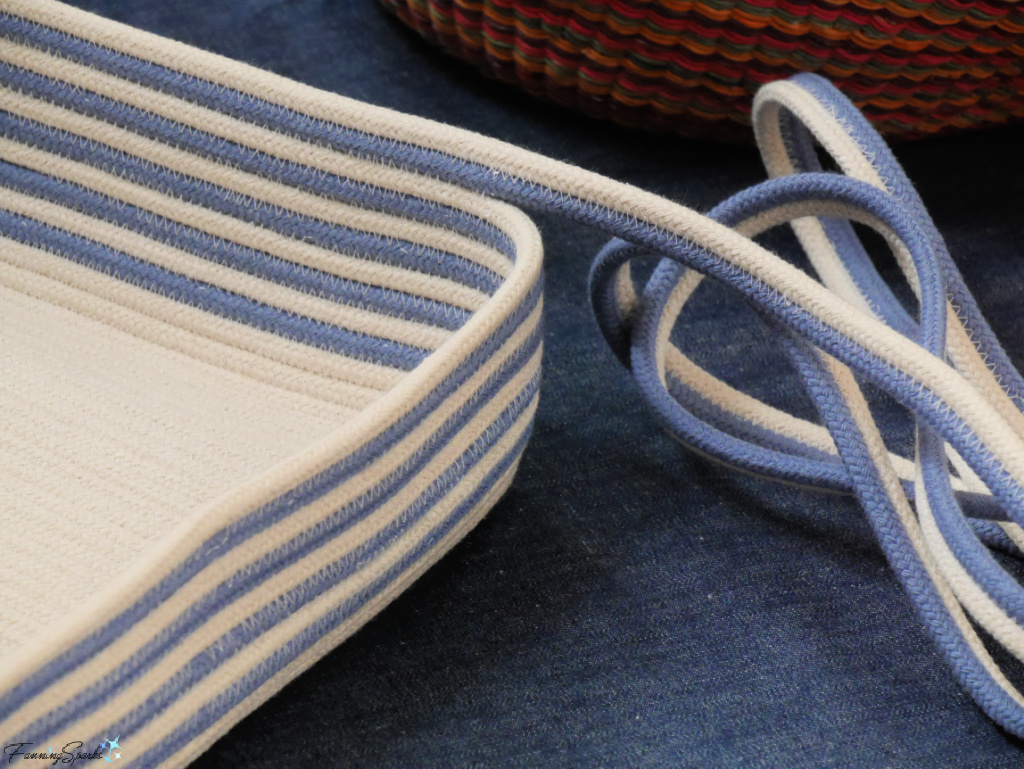
Here’s a closer look after the sides have been built up.
Finish the Details
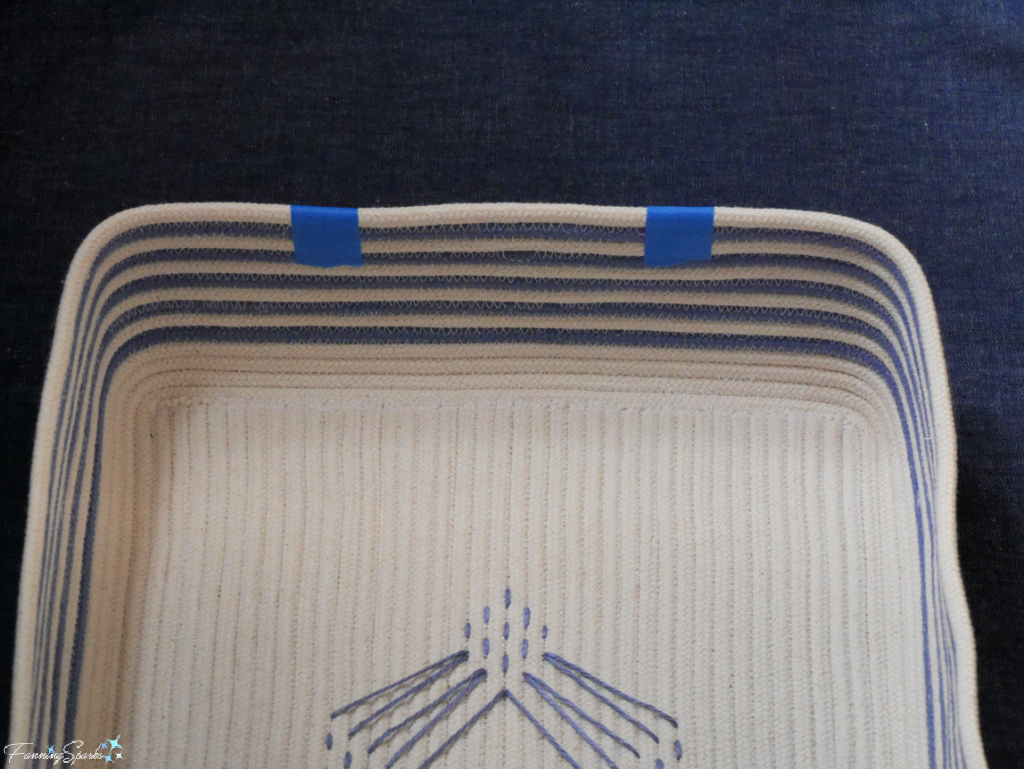
The final steps to complete this project were to add handles and finish the rope tail end. The handles were made by passing a loop of rope through slits in the basket. This requires a little advance planning as the handle positions have to be determined in the midst of sewing the sides. Mine are placed two rounds (ie 4 rows of rope) down from the top edge. Mark the slit positions with tape to indicate where not to stitch.
Insert a 56cm (22”) piece of rope through the slits. Then hand-sew the ends together to form a loop.

Next, wrap a 76cm (30”) piece of rope six times around the top of the loops. Pulling the ends of the rope through the wraps and tightening them securely will keep them in place.
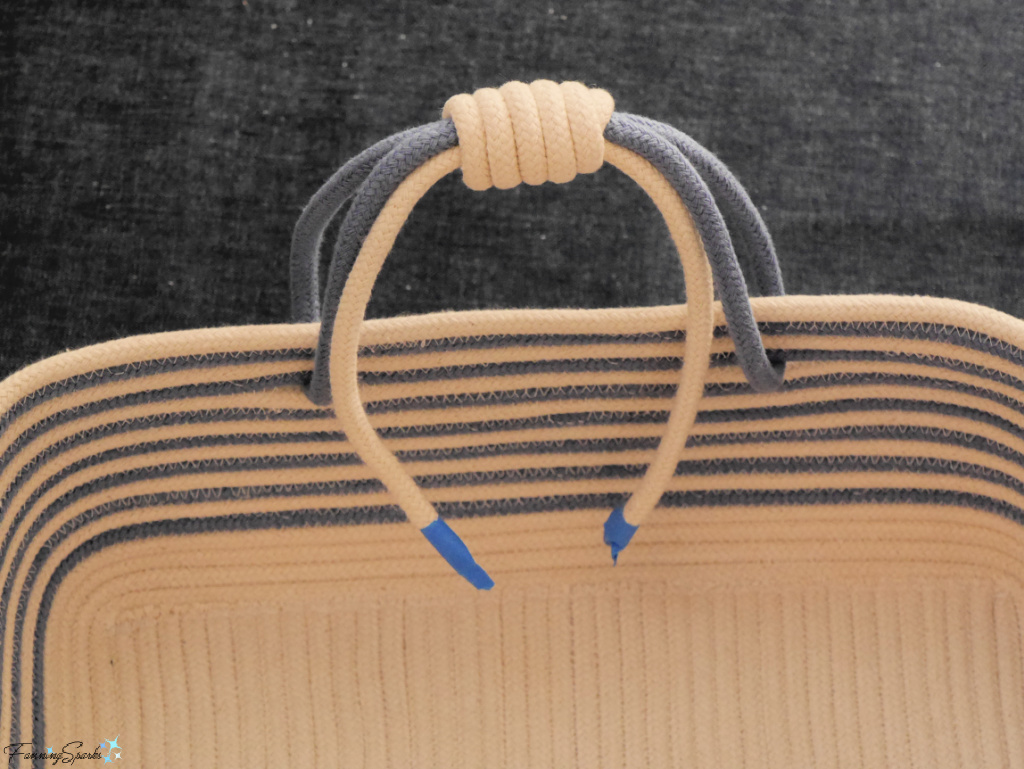
After trimming the ends, I sealed them with Fray Stop to prevent them from fraying.
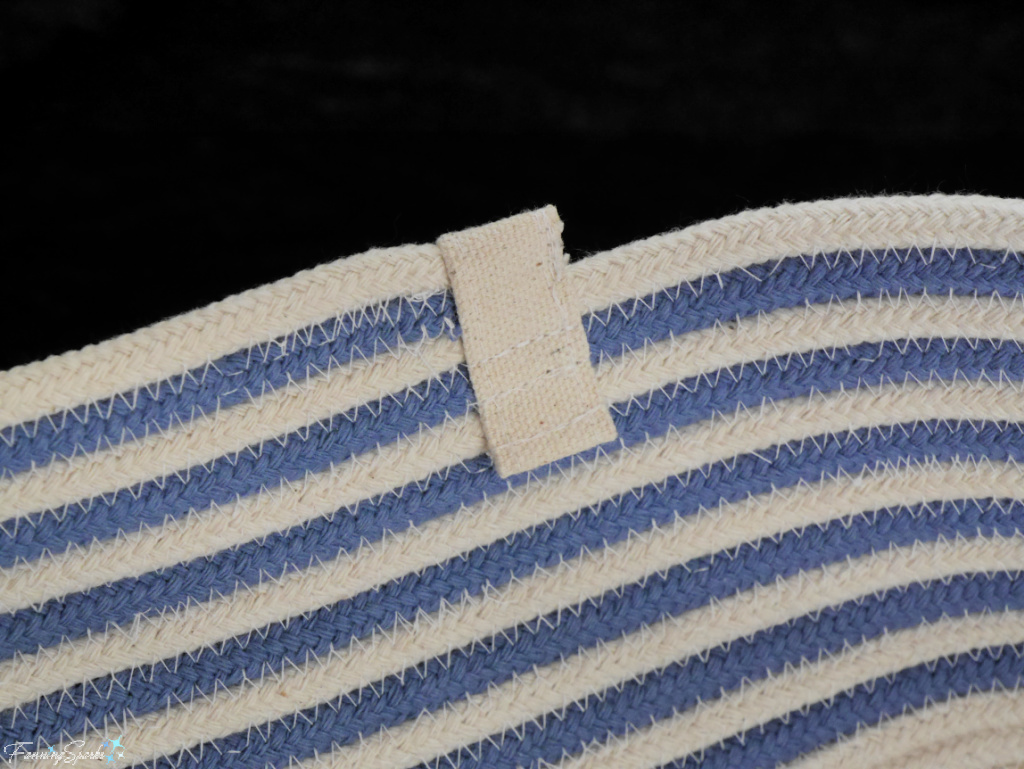
There are many options for finishing the tail end of the working rope. It can be turned into an eye-catching accent or it can be hidden and kept low-key. I chose the latter and covered the end with a small tab made from a scrap of matching fabric.
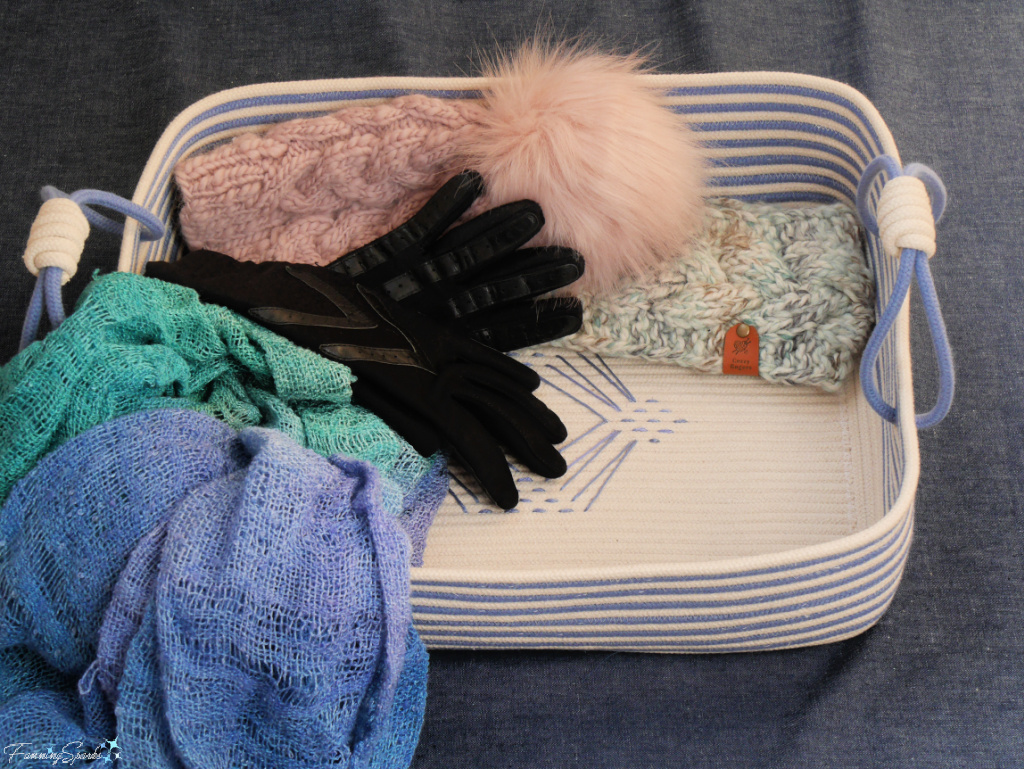
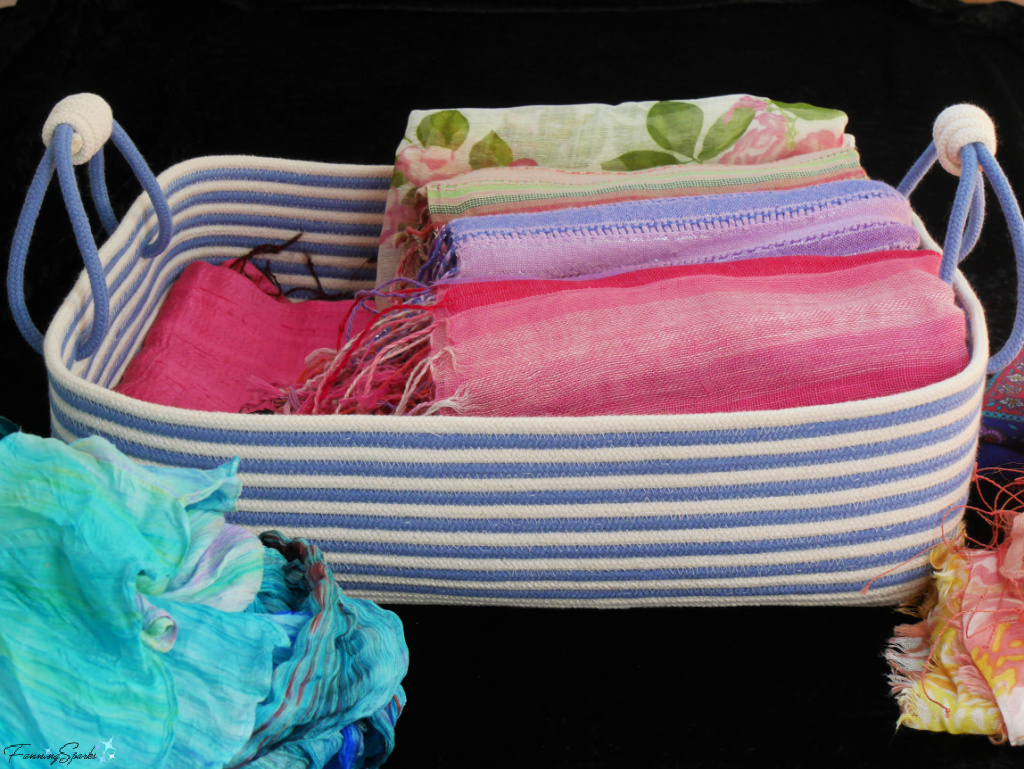
With that final detail completed, my new Coiled Rope Rectangular Basket was ready to be put to use. It’s suitable for storing a variety of things including, as pictured in this blog post, winter gear or pretty scarves.
I’ll wrap up with a few notes about the rope I’ve been using for my coiled rope baskets.
Many of the early references for coiled rope basketry recommend using clothesline rope. But, nowadays, high quality, 100% natural cotton rope is readily available. The best rope for these projects is “solid braid” meaning it does not have a polyester core and the fibers are braided not twisted. The rope needs to be dense enough to hold its shape when stitched but pliable enough to manipulate and sew.
Here in Canada, I’ve had excellent results with 6mm (¼”) cotton braided cord from the Rope Shop in Hamilton, Ontario. Their rope is top quality and sews beautifully.
As noted at the top of this post, my new Coiled Rope Rectangular Basket measures about 40cm long x 28cm wide x 11.5cm deep (15½” long x 11” wide x 4½” deep). It required about 30.5m (100 ft) of 6mm (¼”) Natural-color cotton braided cord and 12m (40 ft) of 6mm (¼”) Azure Sky-color dip dyed braided cotton cord.
The Rope Shop offers an array of rope types, sizes and colors to a variety of industries. And since we’re all hyper-aware of supporting our local economies these days, I appreciate that their website states ― “RopeShop.ca believes in supporting the Canadian economy. For this reason, almost our entire product line is purchased from Canadian manufacturers.”
Local alternatives exist in the USA, as well. While living in Georgia, I discovered that The Mountain Thread Company in Blowing Rock, North Carolina sells cotton rope manufactured in North Carolina. As stated on The Mountain Thread Company website, they “specialize in coiled rope basketry, a technique that brings together artists and appreciators of all skill levels!”. The founder and owner, Katherine Lile, is also the author of the book Zigzag Rope Sewing Projects which is available on their website along with rope and other supplies.
The Mountain Thread Company also offers helpful tips as free PDF downloads. Look for the following on The Mountain Thread Company > Shop > Patterns page:
. A Basketeer’s Guide to ⁵⁄₁₆” Rope – a 4-page guide of “helpful content to get you stitching up ⁵⁄₁₆” rope with confidence”.
. Paper Sewing Templates – contains practice “templates for both oval and round rope projects”.
. Tips from a Basketeer – a one-pager showing “all the helpful things to know about coiled rope basketry”.
More Info
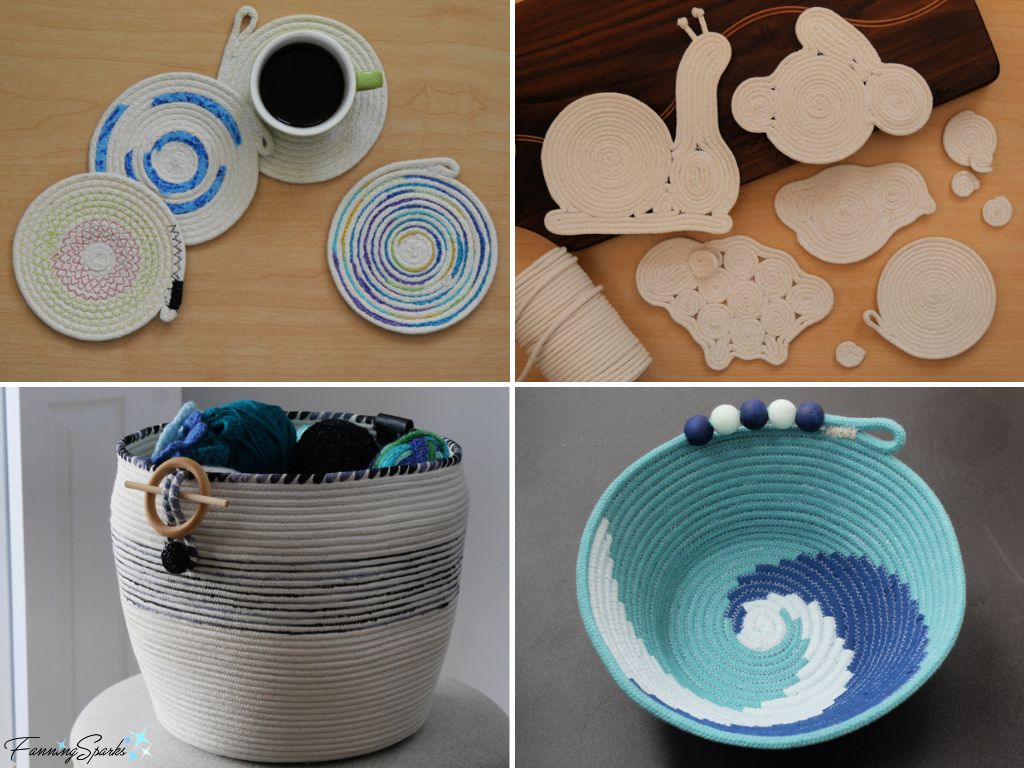
Several previous blog posts mention coiled rope basketry including:
. Getting Roped Into Coiled Rope Basketry
. Coiled Rope Animal Coasters – DIY Tutorial
. Learning the Ropes of Coiled Rope Baskets
. Three-Color Swirl Coiled Rope Basket.
As mentioned, I found the YouTube videos created by Nüket Kutlu of Double Knot Design very helpful. Thanks again to Double Knot Design for freely sharing their expertise.
The following book was consulted in the writing of this blog post:
. Huck Embroidery by Ondori Staff which is available here on Internet Archives.
Today’s Takeaways
1. Consider tackling a maker project that forces you out of your comfort zone as a means to learn new skills and techniques.
2. Seek out and leverage the expertise of others. Then pass it on.
3. Never miss an opportunity to embellish!


Comments are closed.