
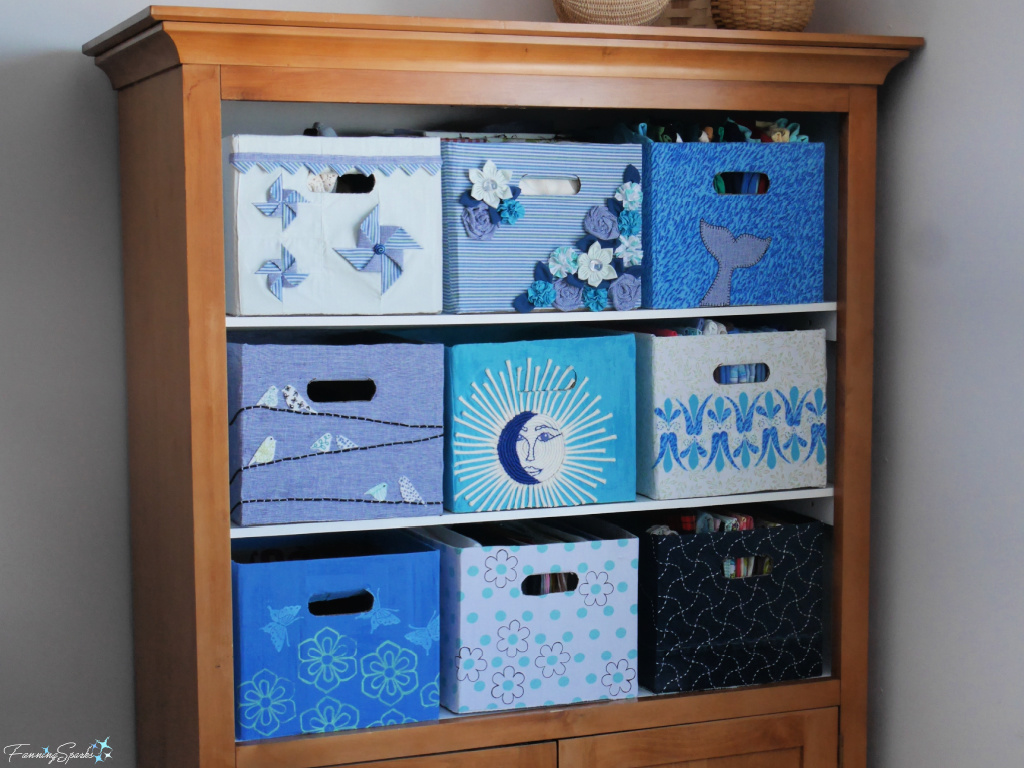
Hooray! The new fabric storage system in my studio is done and dusted! The wooden media cabinet has been repurposed, used cardboard moving boxes have been made into nine storage bins and a mini gallery, showcasing nine unique textile art panels, has been created.
This is the final installment in what started as a series of blog posts about repurposing cardboard. The first post, Making Art Out of the Box, explored how cardboard can be used to create art. The second post, Repurposed Cardboard Storage Bins, took a more utilitarian approach and explained how to make custom storage bins from repurposed cardboard. These blog posts were followed by Zhuzhing Up My New Storage Bins and The Zhuzhing Continues with Fabric Flowers.
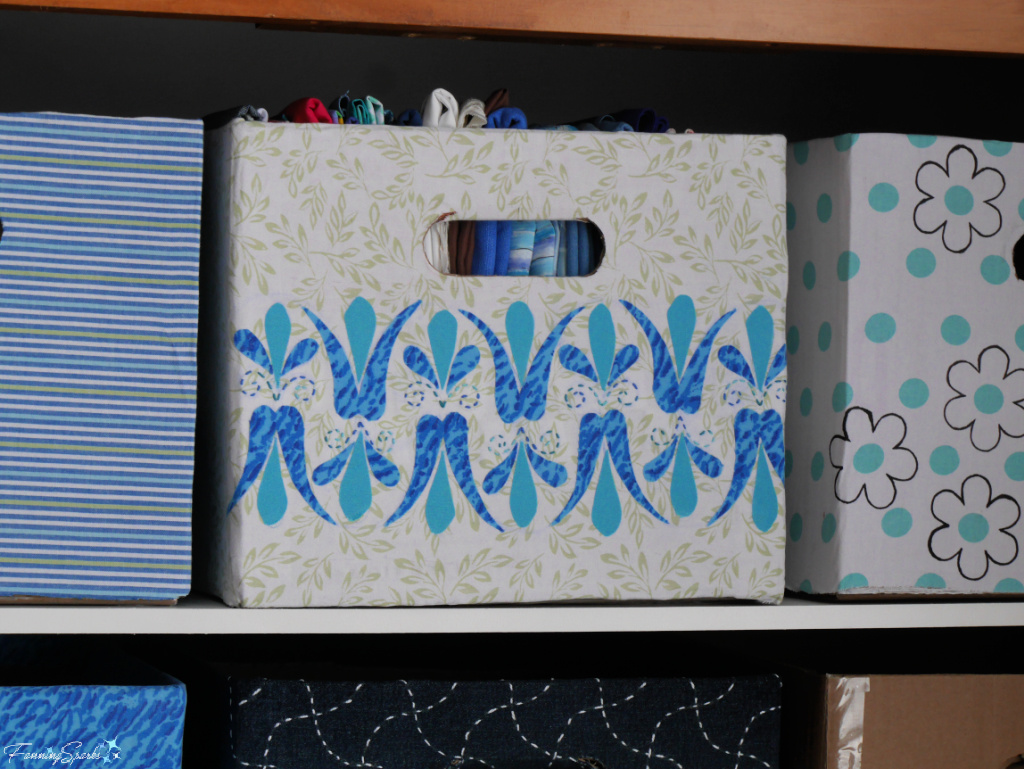
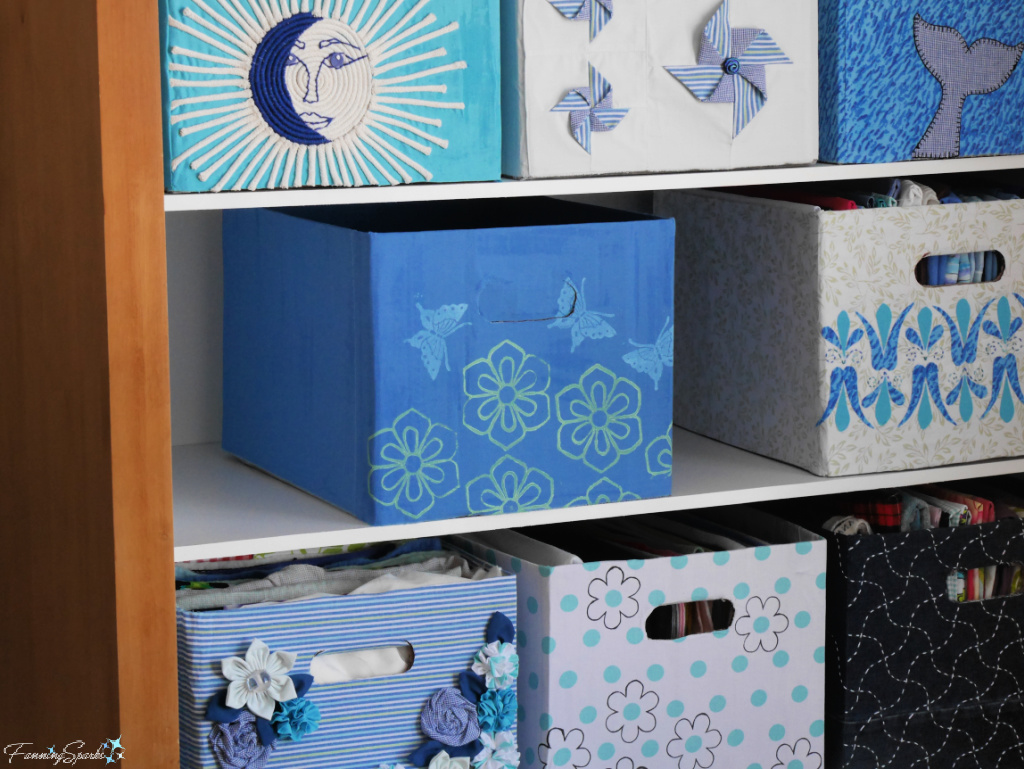
Here’s the last photo I shared of this project.
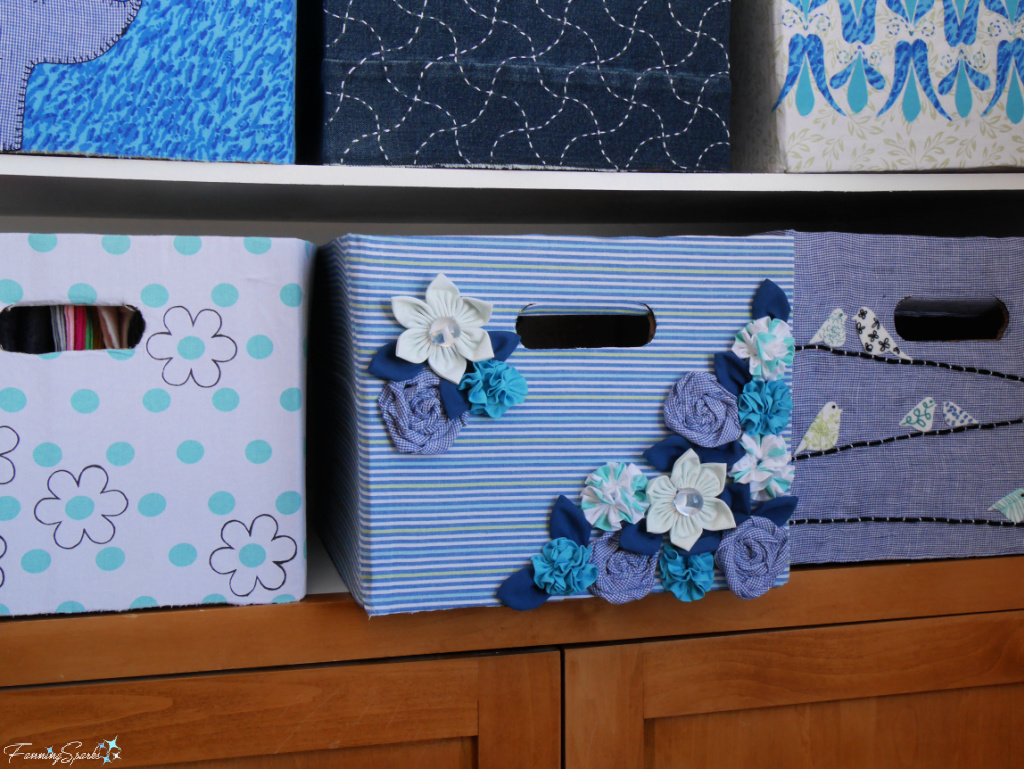
My goal was to cover the storage bins in an array of fabrics. Then to use a variety of textile art techniques to embellish each one with a different design. I’ll share a brief recap of the five designs I’ve already shared before diving into the four new designs.
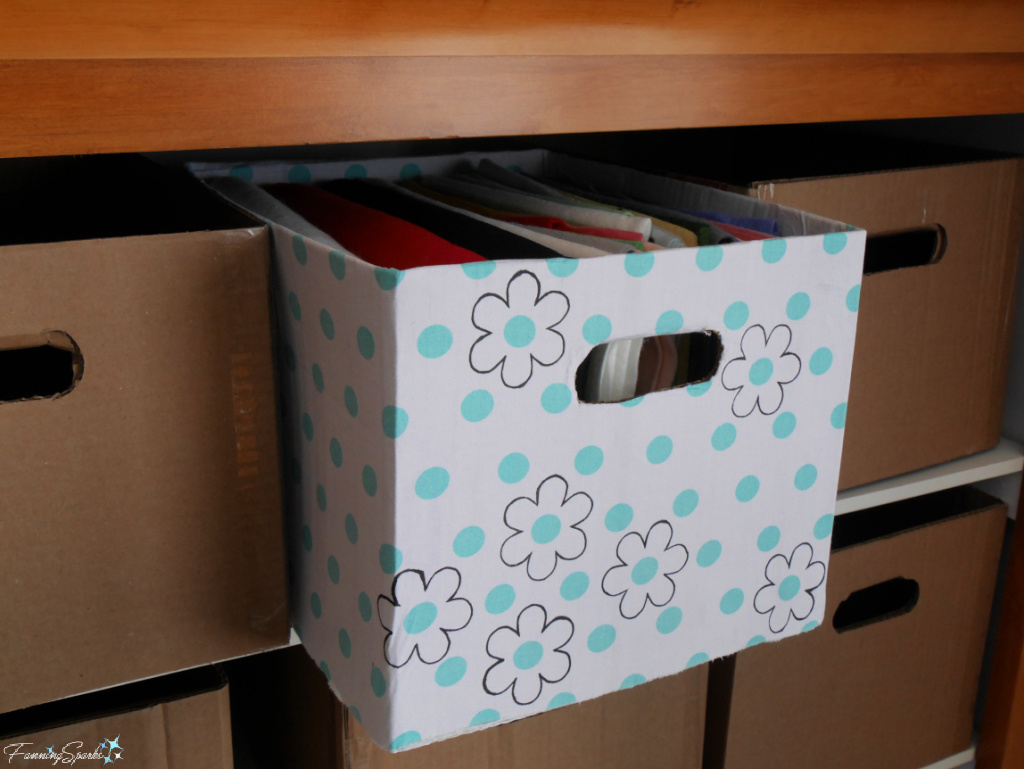
1. Simple Mark-Making
The first storage bin I embellished was covered in a simple white cotton fabric printed with aqua dots. I simply used a fabric marker to draw petals around a few of the dots. It’s a super simple technique and the results aren’t particularly noteworthy but this first effort convinced me to proceed with the plan.
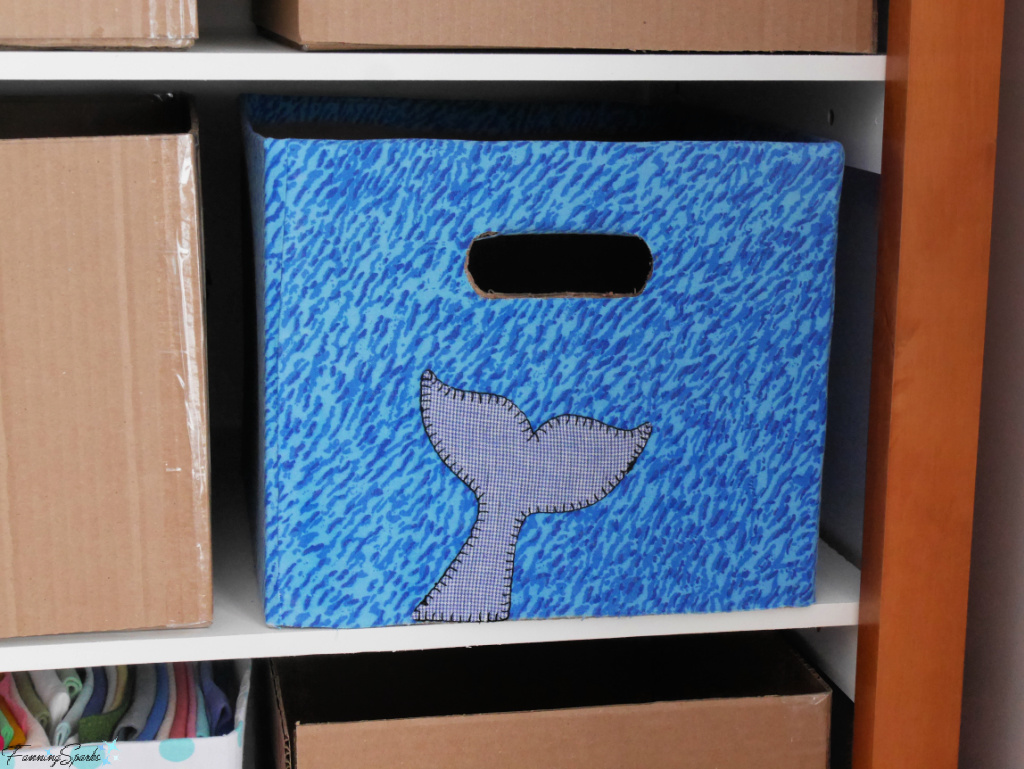
2. Fabric Appliquéing
The second storage bin was covered in a cotton fabric printed in a water-like abstract of blues and grays. Using a fabric appliqué technique, I added a whale tail embellishment in blue/gray cotton fabric. I was really pleased with this outcome.
3. Raw-Edge Appliquéing
This next storage bin was embellished with another type of appliqué. Raw-edge appliqué, also known as snippet art, scrappy appliqué or fabric scrap appliqué, entails using small pieces of fabric to create a picture or design. I first introduced this technique in my previous blog post, A Barrage of Textile Collage, while exploring the world of creating artistic compositions from fabric, thread and other fibers.
I shared this raw-edge appliqué project, along with some tips to simplify the technique, in Zhuzhing Up My New Storage Bins.
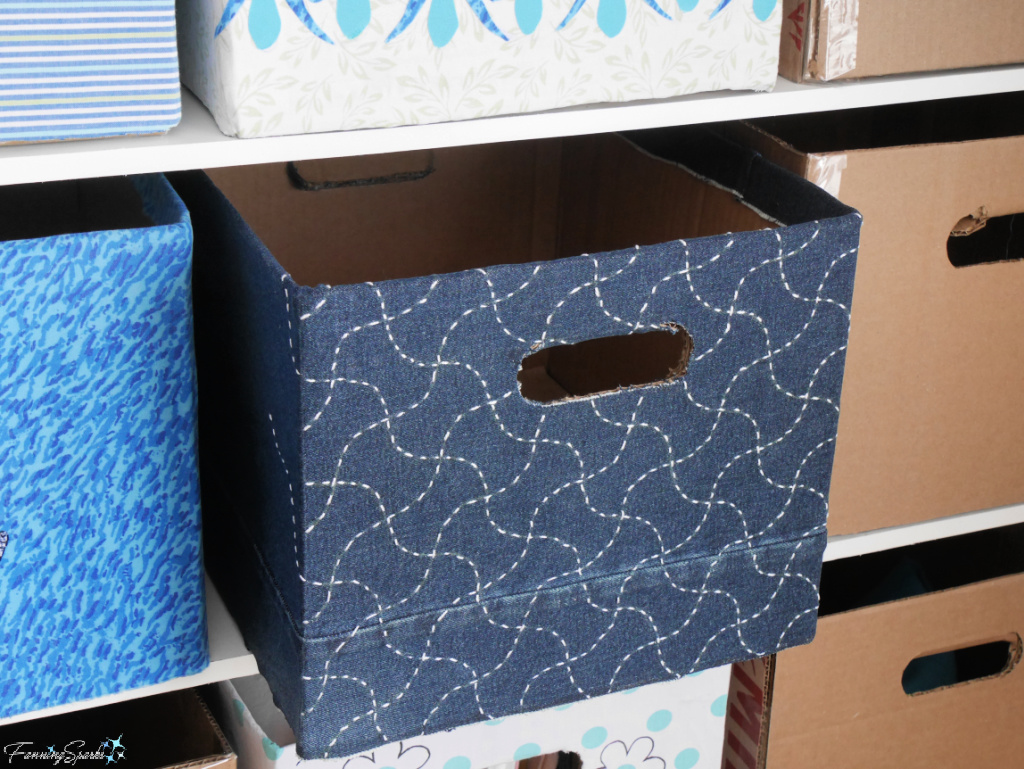
4. Sashiko Stitching
Sashiko is a very popular Japanese hand-stitching technique which has appeared on the FanningSparks blog more than once. See previous blog posts, My Little Stab at Sashiko, A Denim Jacket with Sashiko Flair and My Japan Travel Memories Mini Tin.
In this latest appearance, I chose to embellish a storage bin with sashiko embroidery. I stitched the Chidori Tsunagi (Linked Plovers) pattern in white Pearl Cotton on a plain denim background.
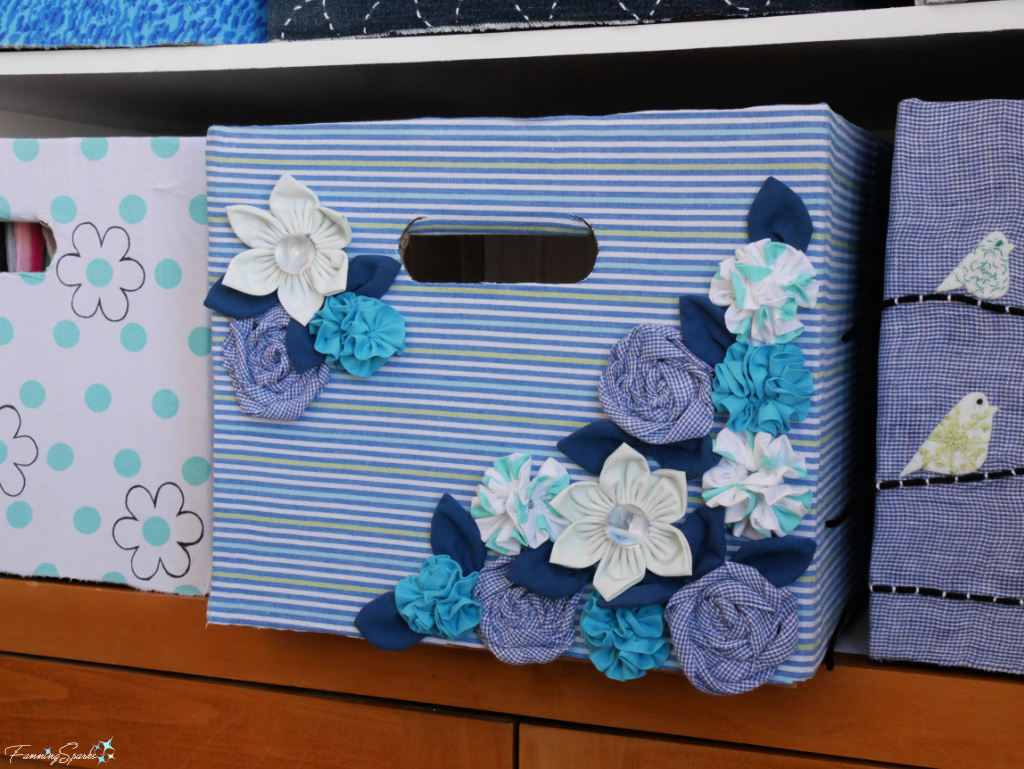
5. Adding Fabric Flowers
This next storage bin features a cluster of three-dimensional fabric flowers. The flowers ― made from the same fabrics used to cover the other storage bins ― were made in three different designs including a Rose Form Twisted Strip Flower, Peony Form Gathered Strip Flower and Daylily Form 6-Pointed Petal Flower. See The Zhuzhing Continues with Fabric Flowers for detailed instructions on how to create each of these blooms. I really like the depth, texture and interest the fabric flowers bring to my mini gallery.
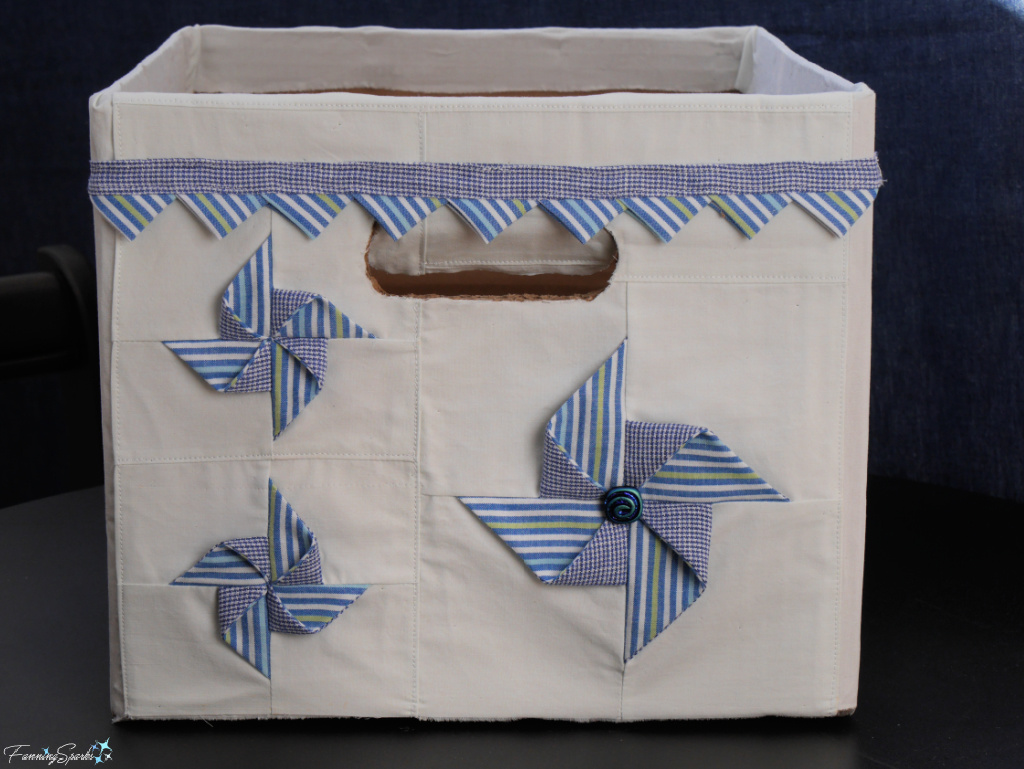
 6. Prairie Point Quilting
Another great technique for adding depth and interest is 3-dimensional quilting. Although the majority of quilting patterns are 2-dimensional, some do move beyond a flat plane to incorporate a third dimension. Prairie points, especially when folded into a pinwheel, are a case in point.
Here’s a closeup look at the 3-dimensional prairie point pinwheels I created for one of the storage bins.
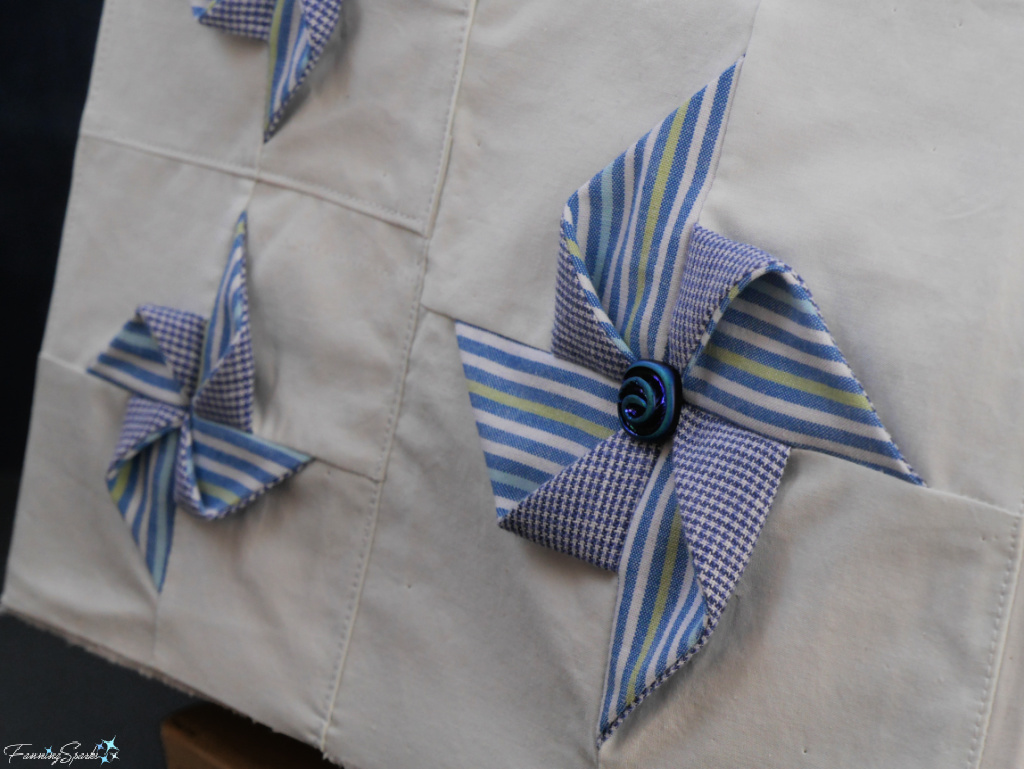
There are a number of prairie points on this storage bin including a border of prairie points across the top edge and three prairie point pinwheels on the main body.
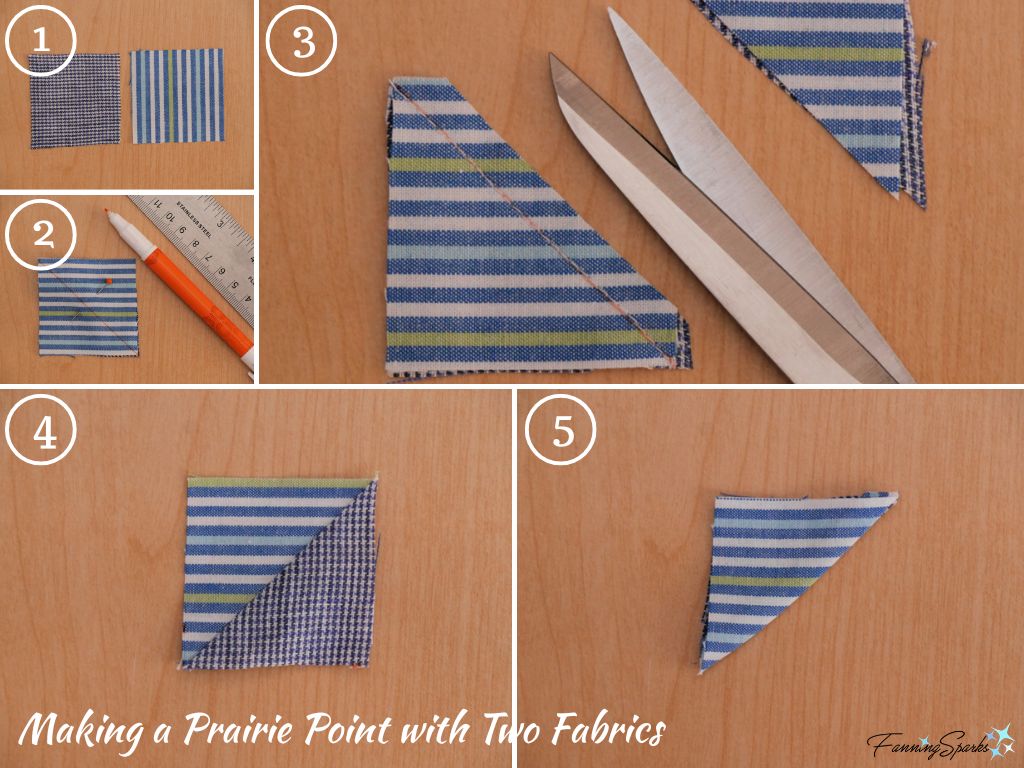
Since this was my first time making prairie points, I’ve noted the steps for future reference.
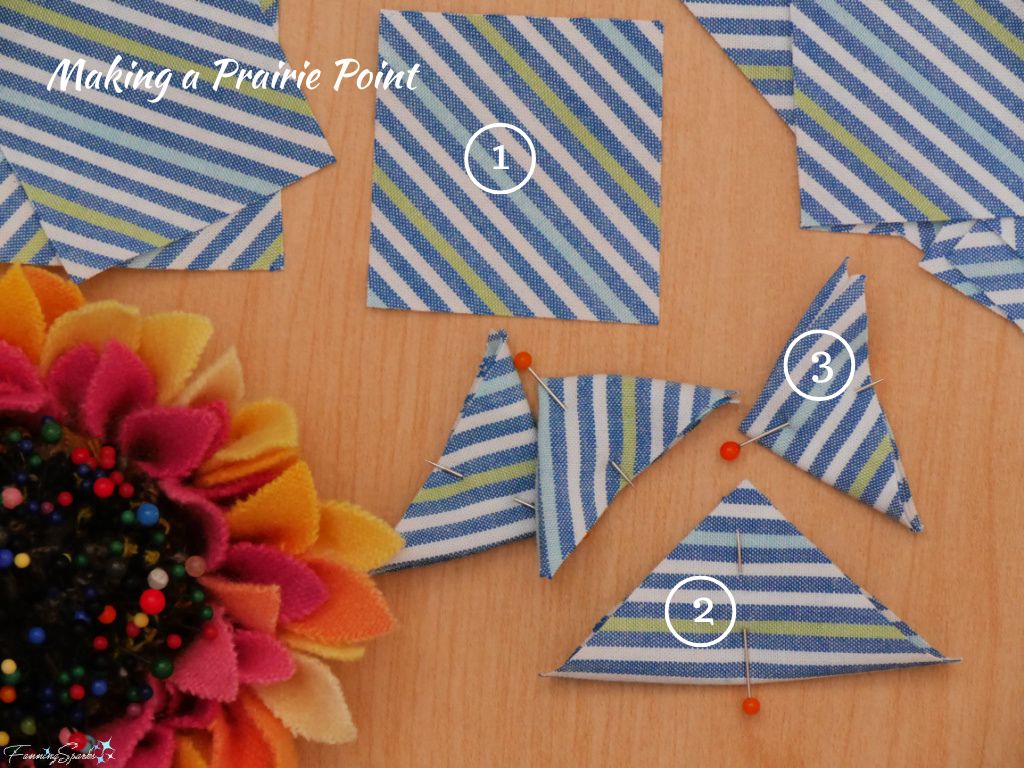
Prairie points are made from squares of fabric – these are 5 centimeters (2 inches). Any fabric pattern or design can be used but large-scale prints would be lost in this technique. I was very pleased with how well the simple, narrow stripes of my fabric emphasized the lines of the design.
To create a prairie point, simply fold and press a fabric square in half along the diagonal and then fold and press it into quarters. The result is a four-layered, triangular shape.
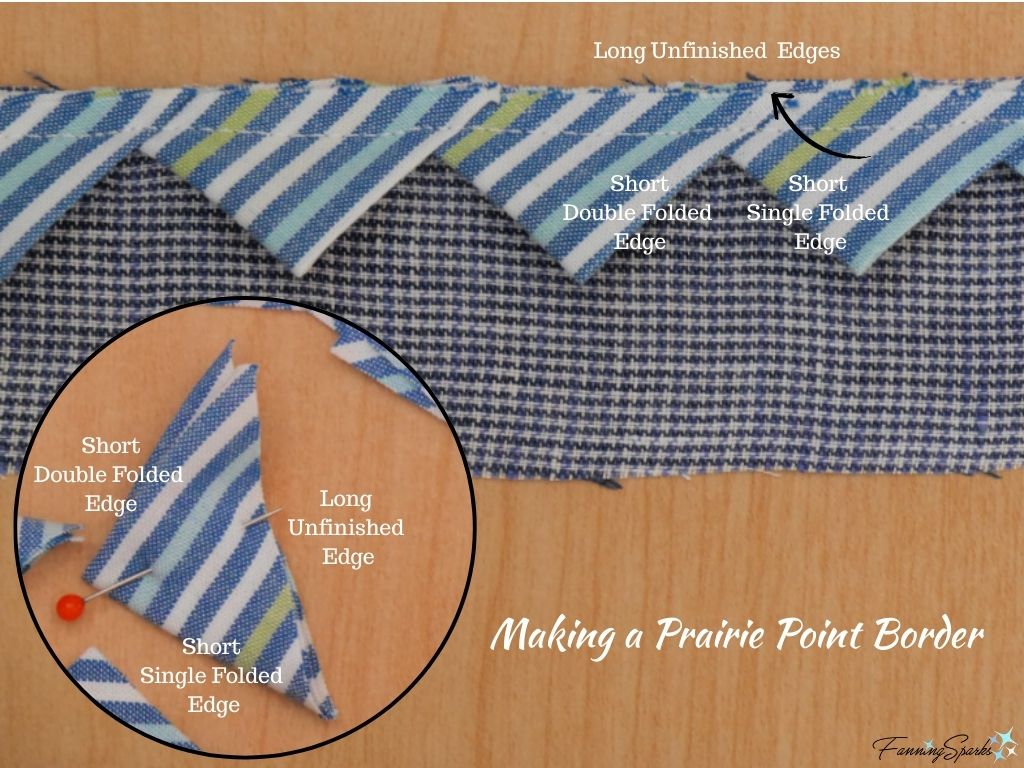
An interesting border can be created by sewing a series of prairie points onto a rectangular piece of fabric. The process is quite straightforward. As shown in the below image, a prairie point has three edges ― one long unfinished edge, one short edge with a single fold and one short edge with two folds.
Place the prairie points so the long unfinished edge aligns with the edge of the border fabric where it will be sewn into the seam. The trick is to position the prairie points so they overlap slightly with their short-folded edges tucked into each other. Working left to right, place a prairie point with the single folded edge towards the left. Then add a second prairie point, to its right, slipping the tip of the single folded edge between the two folded edges. Secure the prairie points with clips or pins to hold them in place. Sew along the raw edge.
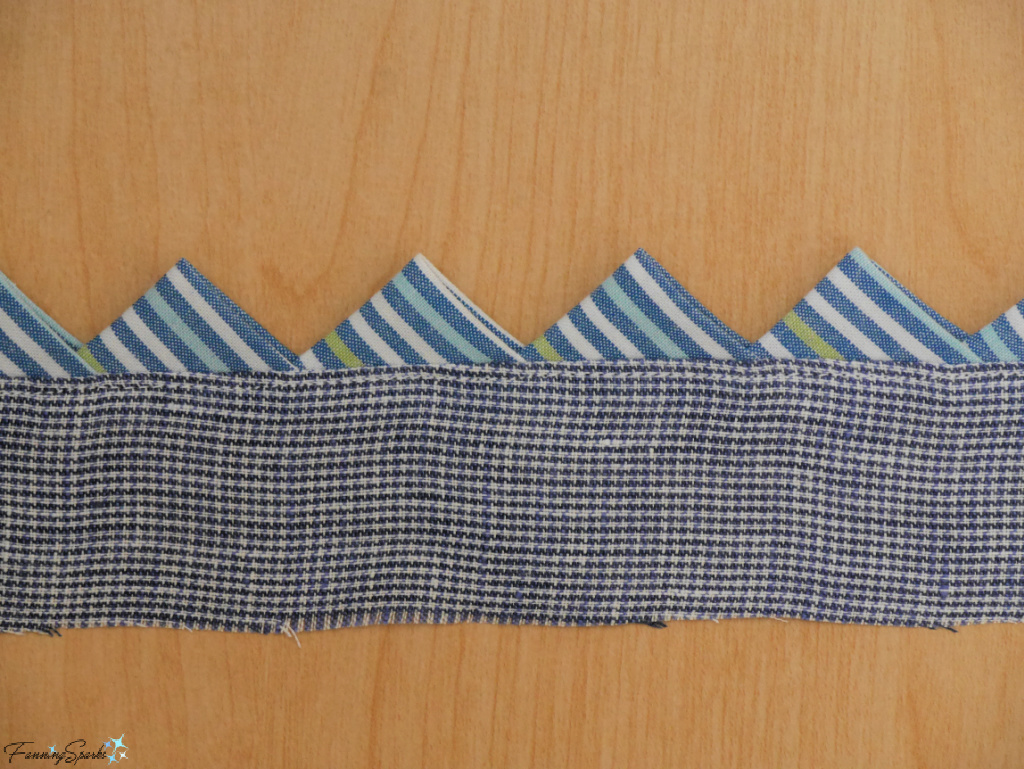
Here’s how the border looks after being turned and pressed.
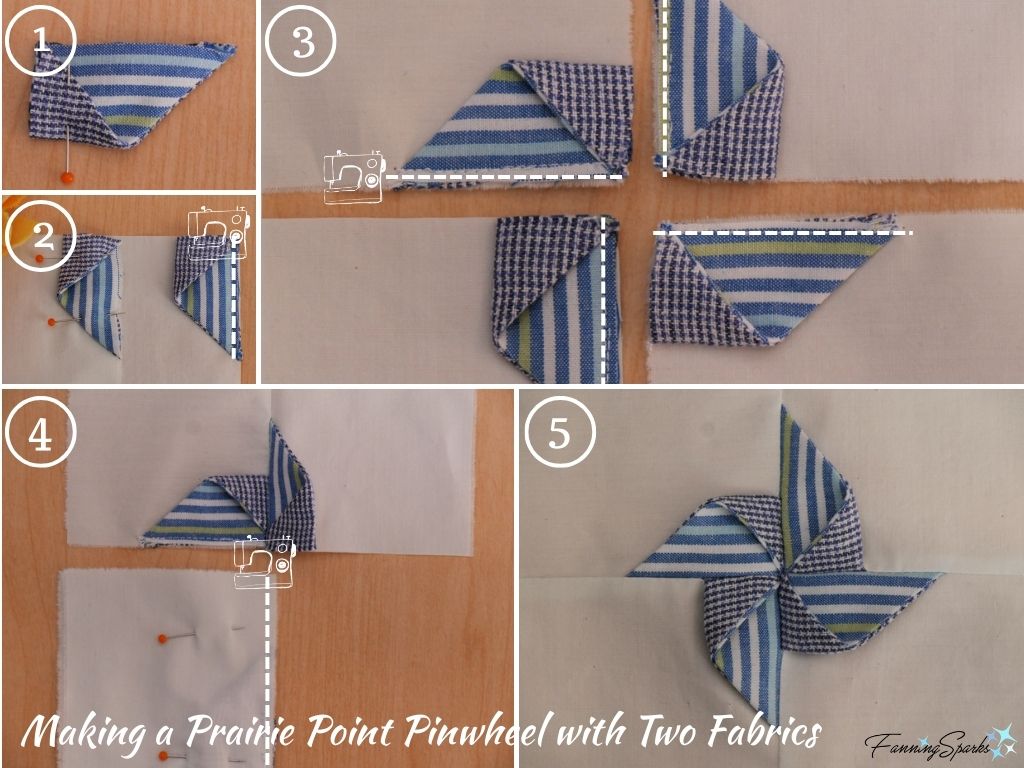
Pinwheels are made with four identical prairie points and four squares of background fabric.
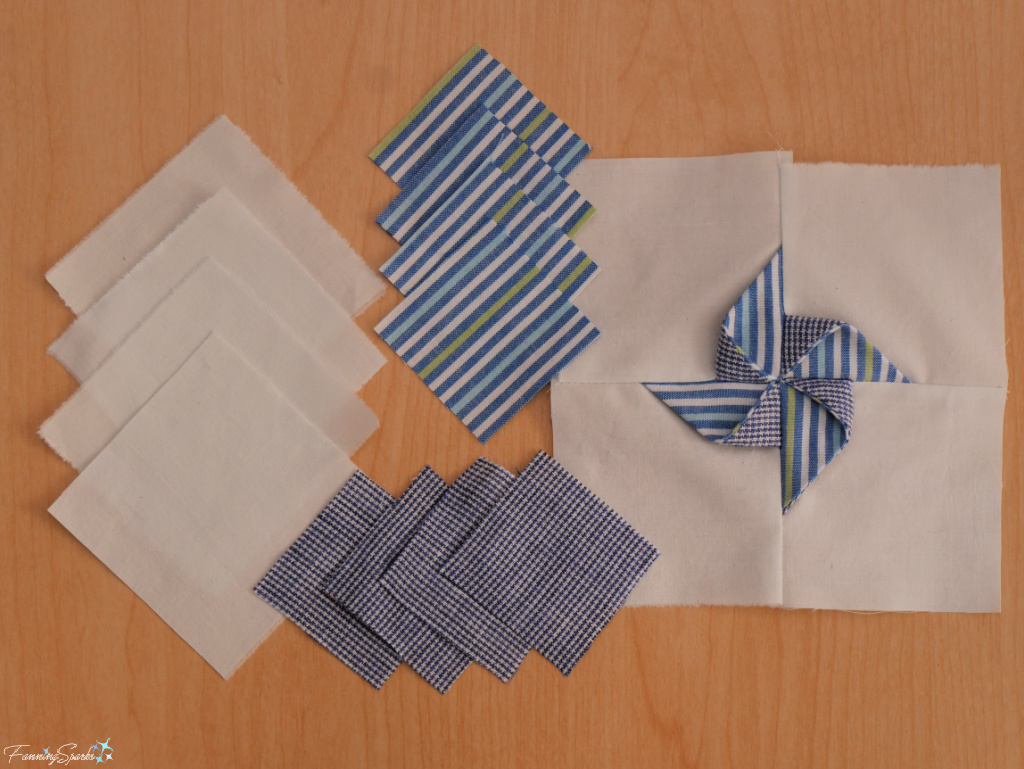
I chose to add contrast and visual depth to the pinwheel’s blades by combining two different fabrics. As shown below, I cut two 5cm (2”) squares of fabric and sewed them together diagonally. Next, I trimmed the seam and pressed it open. Then folded and pressed the newly-created fabric square in half along the diagonal.
Next the fabric squares are folded and attached to the background fabric squares as illustrated below.
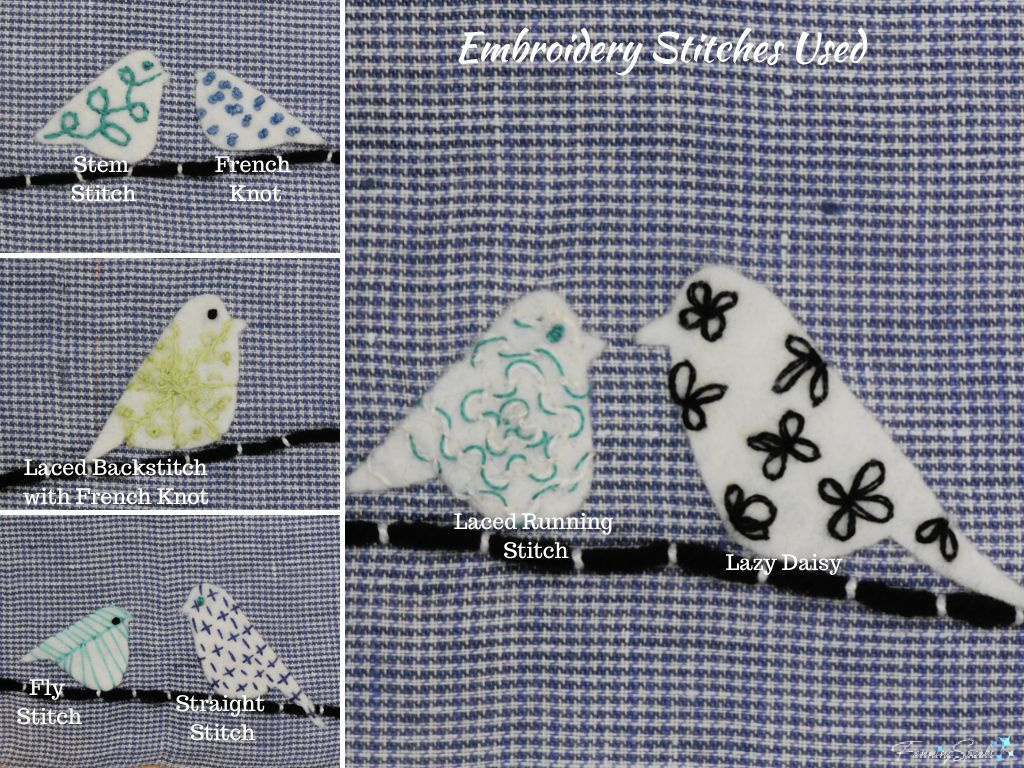
7. Embroidering
This next storage bin embellishment features a flock of birds sitting on a trio of wires.

Strands of black yarn are couched to the background fabric to represent the wires. The wires had to be substantial enough to ground the composition without overwhelming the small birds. So, I tried a few options ― shown below is my test version comparing a wire made with three strands (top line), two strands (middle line) and one strand of yarn (bottom line). I chose to go with a single strand of yarn.
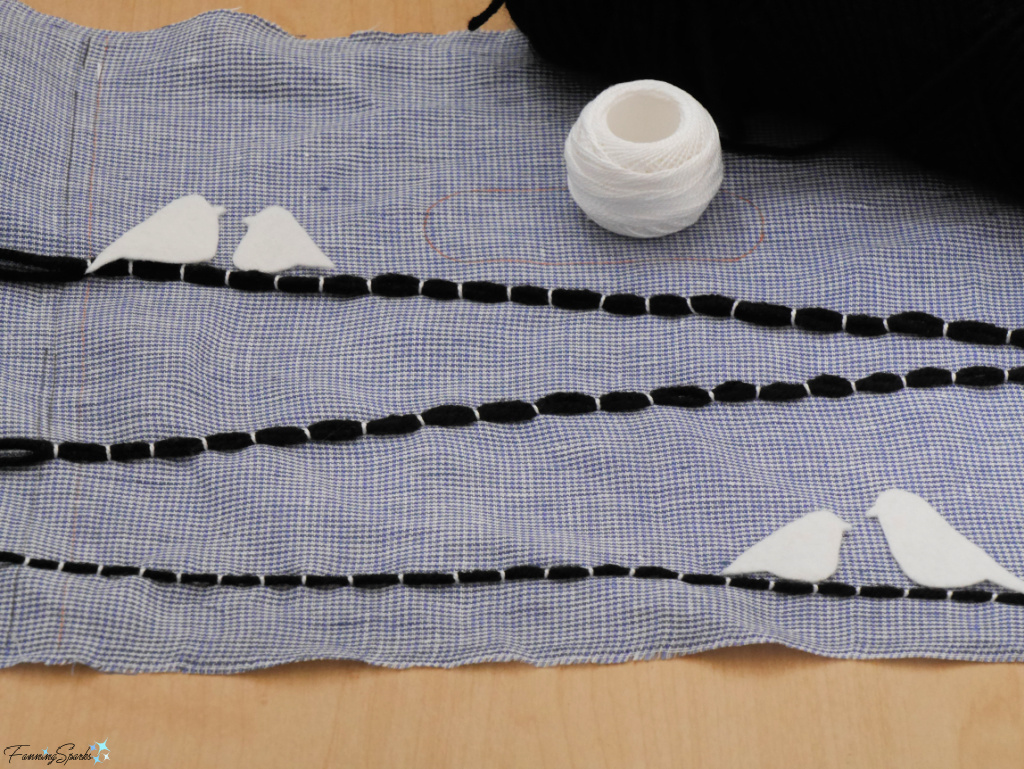
The birds are cut from white felt and hand-sewn with a variety of embroidery stitches.
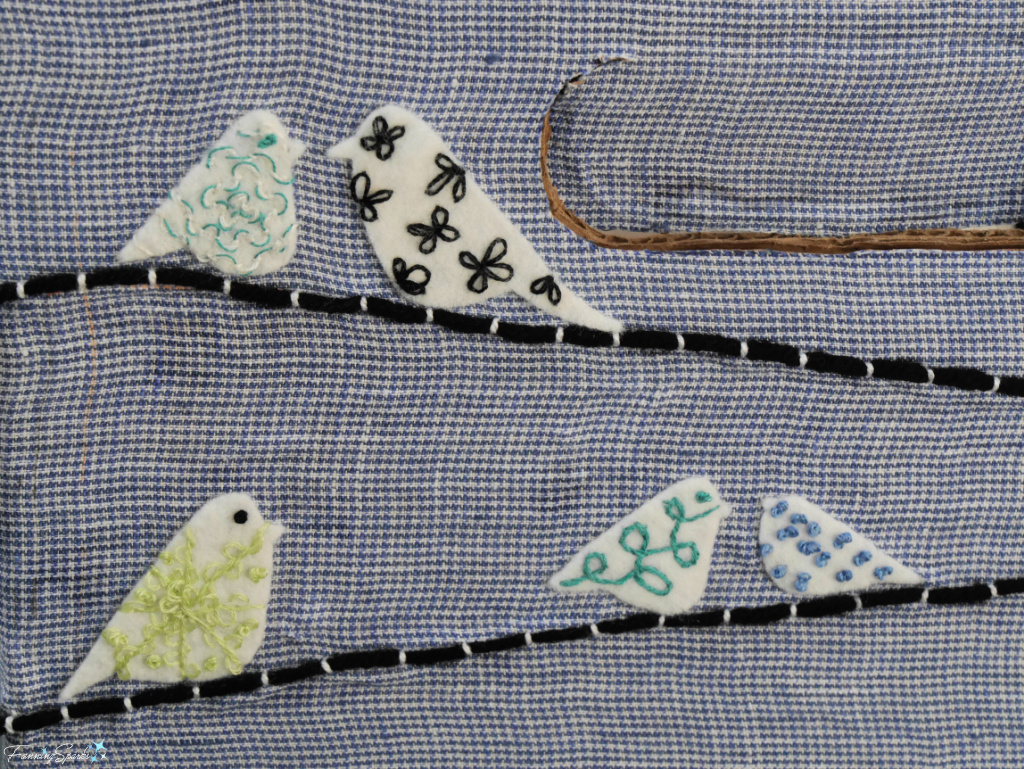
This image calls out the specific embroidery stitches that were used.
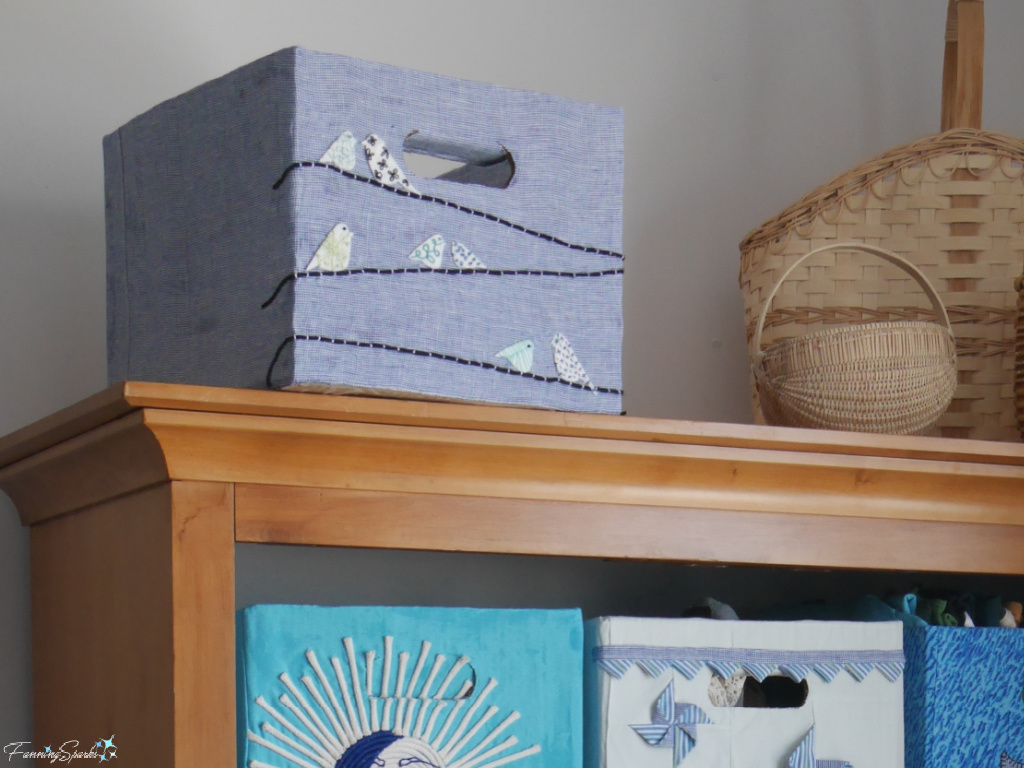
Shown below is the completed embroidered storage bin sitting on the cabinet.
8. Couching Rope
The next embellishment technique is a cross-over from the coiled rope basketry projects I’ve been creating (see Getting Roped into Coiled Rope Basketry, Coiled Rope Animal Coasters – DIY Tutorial, Learning the Ropes of Coiled Rope Baskets and Three-Color Swirl Coiled Rope Basket).
Technically, I suppose this technique would be considered “couching”, not coiling, because the rope is laid on the surface and over-stitched to secure it to the fabric. It’s essentially the same technique I used for the wires in the embroidered birds design above.
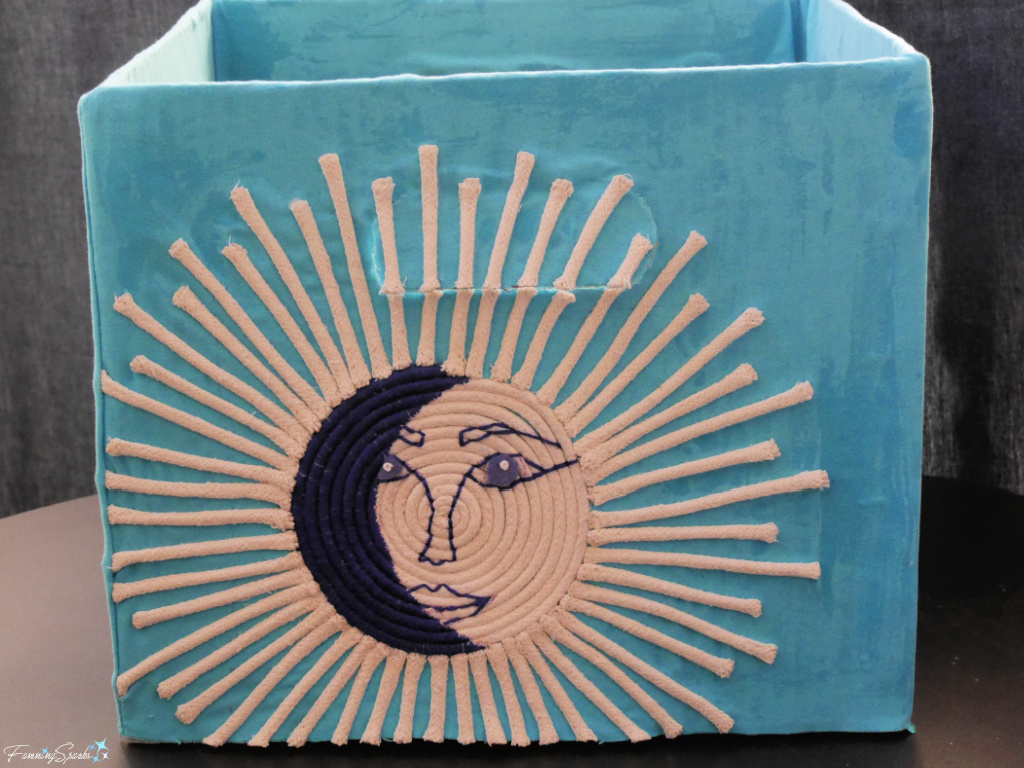
The idea was to sew coiled rope sections onto the background fabric meaning a simple design with a circle or circles was needed. The moon-sun face design, shown below, seemed to fit the bill.
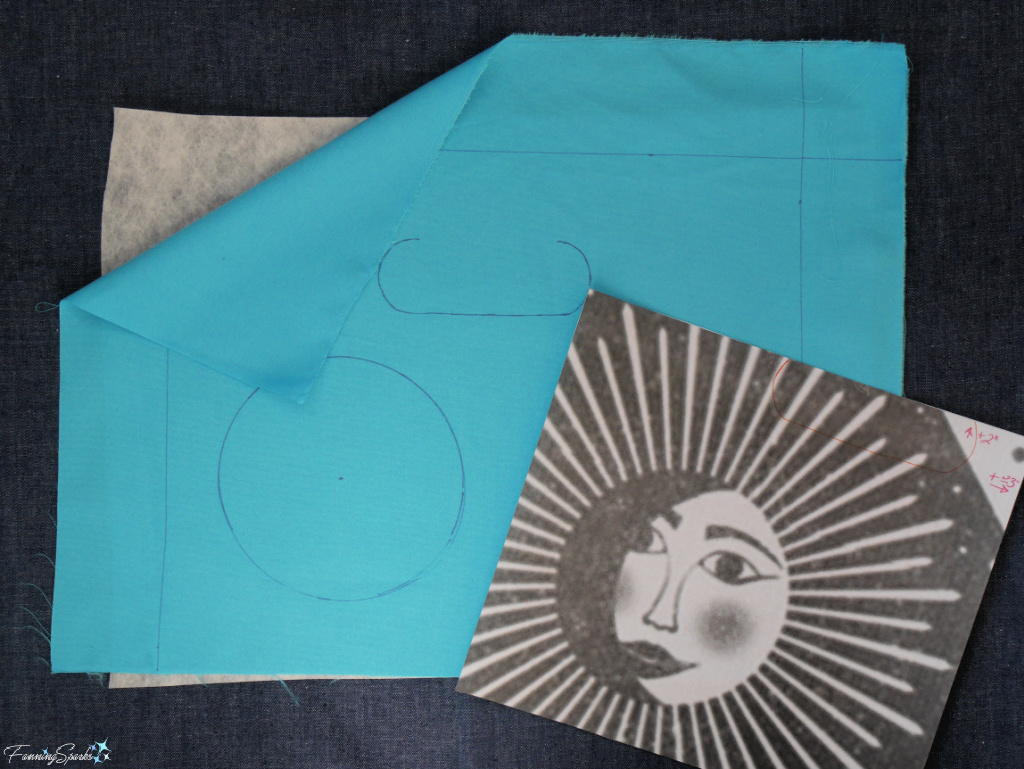
The first step was to stabilize the background fabric by basting a piece of tear-away stabilizer (Stitch-N-Tear from Pellon) under it. Then, I traced the sun’s circle onto the fabric and started coiling and sewing the rope. Next, I cut short pieces of rope for the sun’s rays and sealed the ends with white glue. The rays were also sewn directly onto the fabric.
Here’s the project in progress ― paper pattern pieces are used to show the sun’s face at this stage.
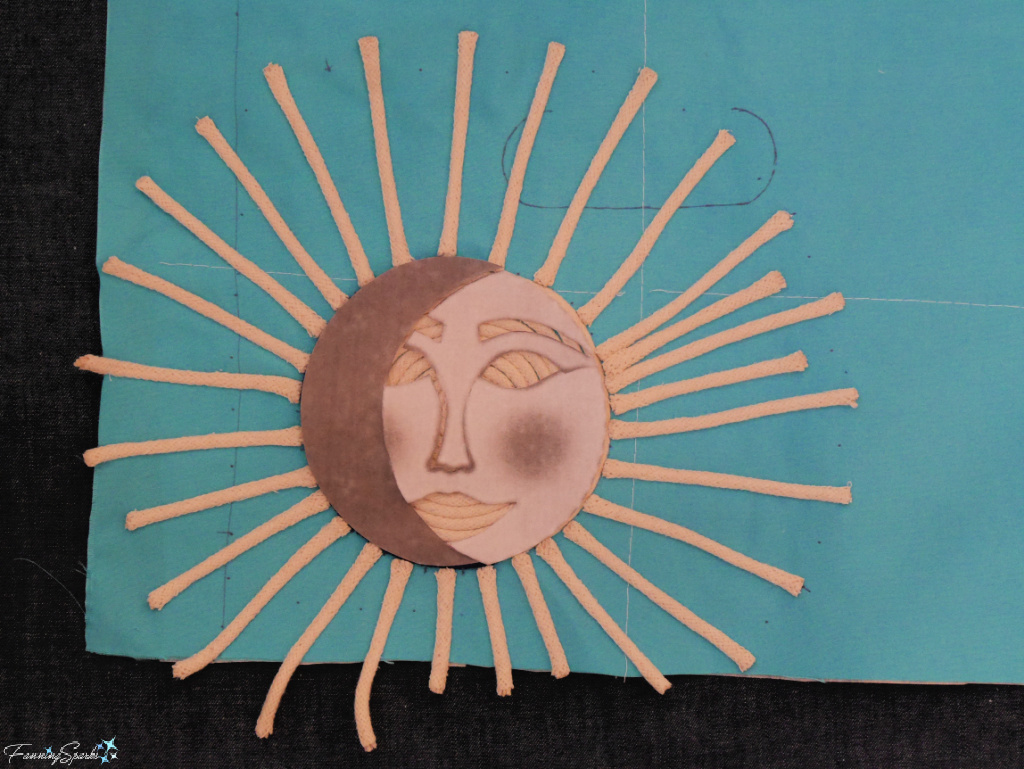 After the rope was sewn into place, I embroidered the crescent moon and the sun’s facial features on the coiled rope circle.
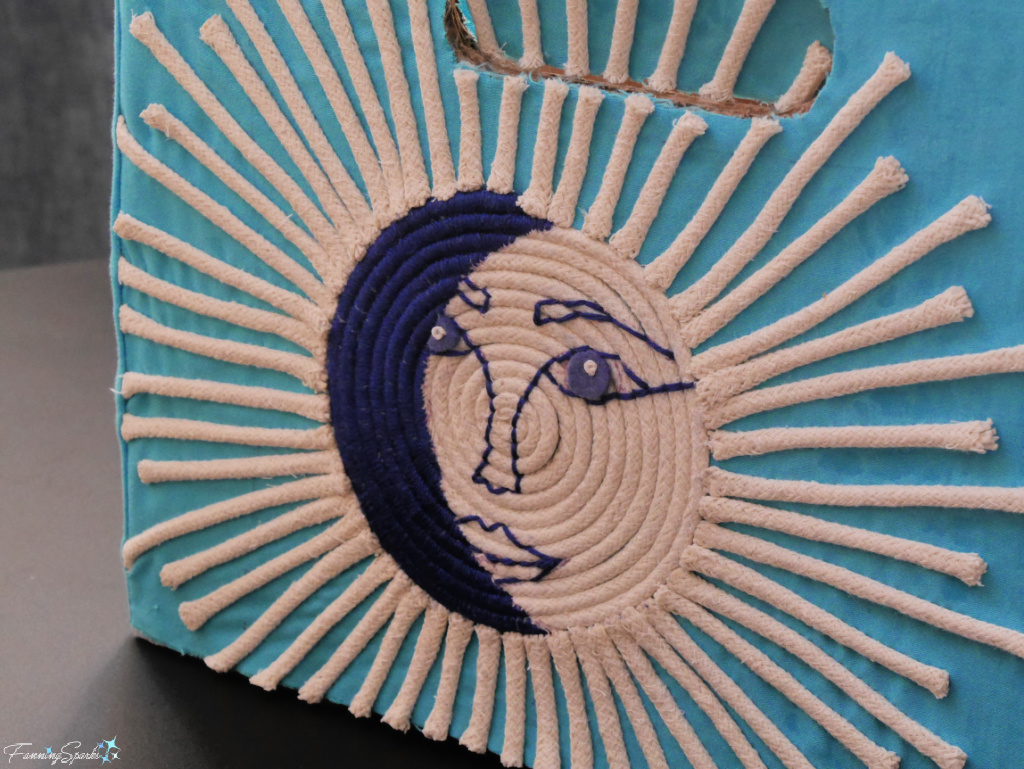
Here’s the completed couched rope sun face storage bin.
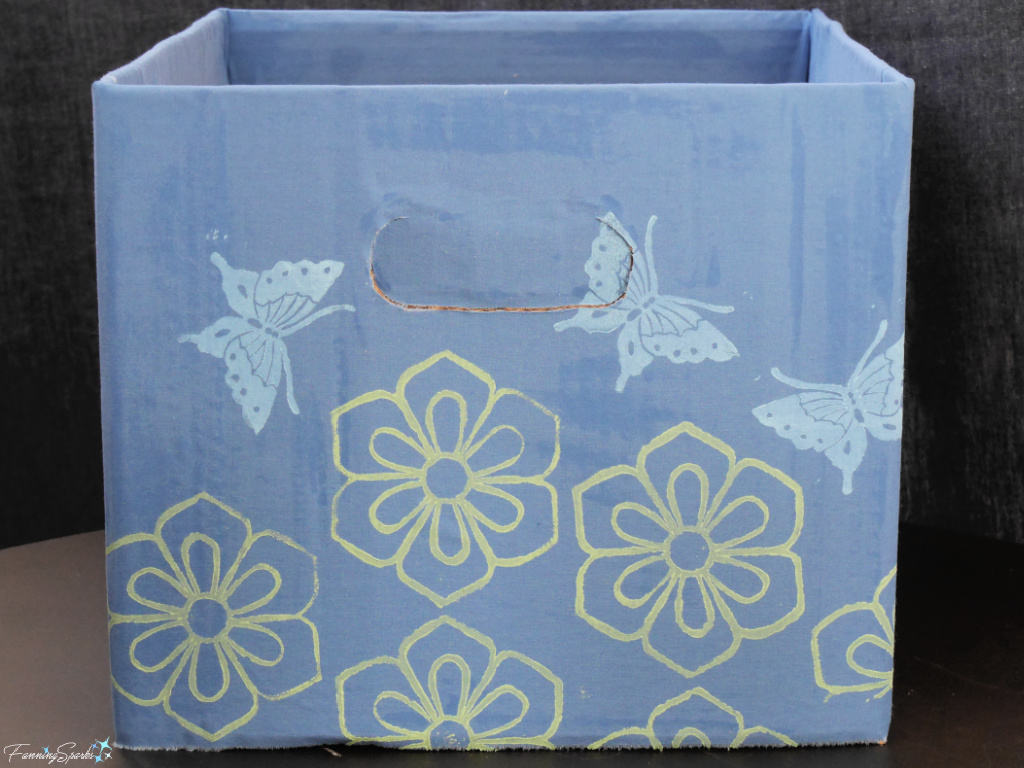
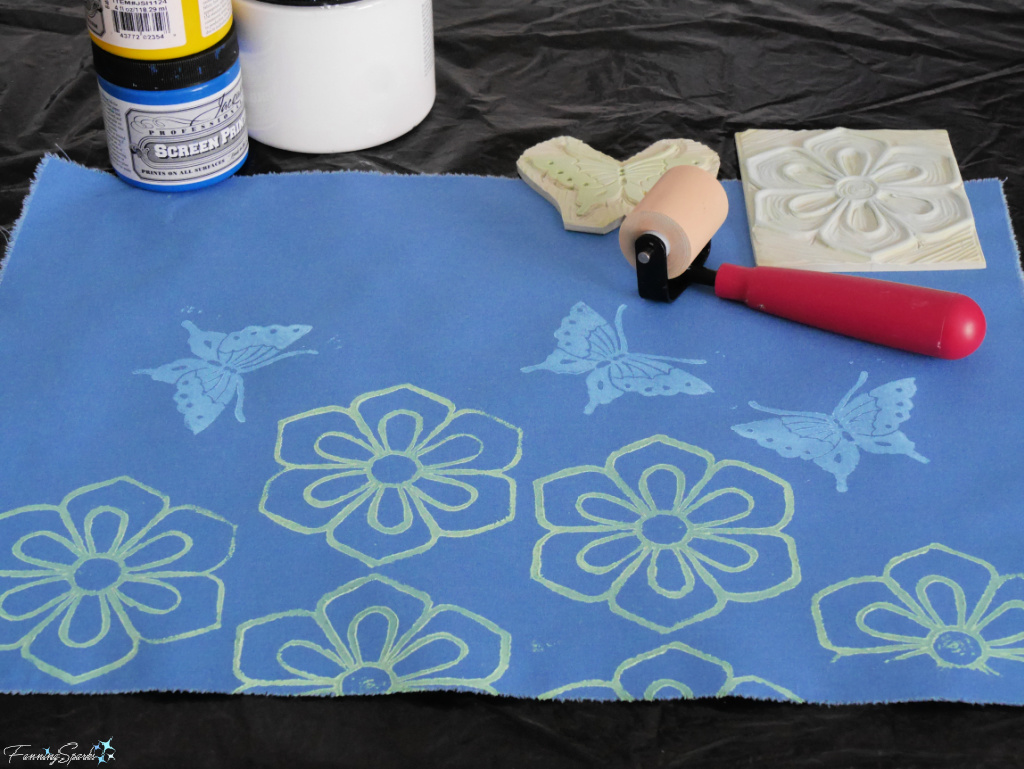
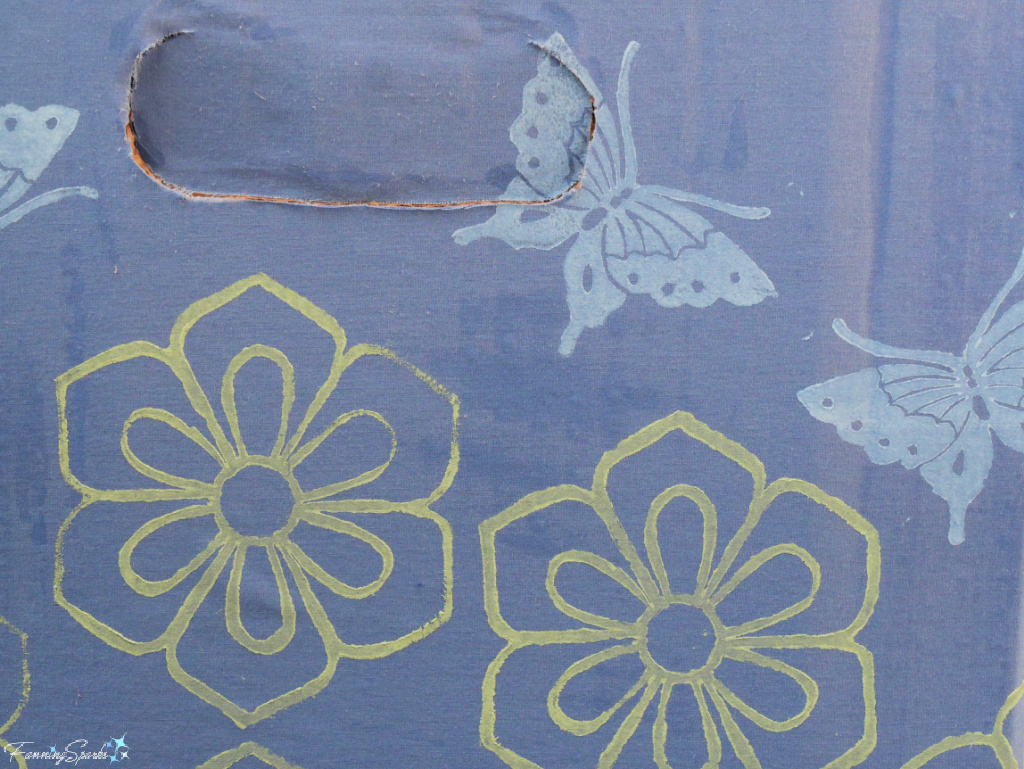
9. Linocut Printing
The final textile art technique I chose for my storage bins was linocut printing. I first tried carving linocut blocks and printing on fabric in Atlanta, Georgia. See Linocut Printing at the Atlanta Printmakers Studio and More Carving and Printing. In fact, this storage bin is printed with the flower and butterfly linocut blocks I carved during my previous printing endeavors.
Sometimes I wonder if it’s worth the effort to document my projects and the lessons I’ve learned. But then I encounter a situation where I want to revisit a project, reuse a technique or expand upon a previous effort, and I’m grateful for the reminders. My previous blog posts save me time and effort ― I hope they do the same for other makers.
Here’s a closer look at my latest linocut printing project.
This photo shows my final embellished storage bin being put into service. Hooray!
There you have it ― my new fabric storage system is done and dusted! If I ever get stuck for an idea or technique, my new mini textile art gallery will be there to inspire me!
More Info
Previous blog posts mentioned in this blog post include:
. Making Art Out of the Box
. Repurposed Cardboard Storage Bins
. Zhuzhing Up My New Storage Bins
. The Zhuzhing Continues with Fabric Flowers
. A Barrage of Textile Collage
. My Little Stab at Sashiko
. A Denim Jacket with Sashiko Flair
. My Japan Travel Memories Mini Tin
. Getting Roped into Coiled Rope Basketry
. Coiled Rope Animal Coasters – DIY Tutorial
. Learning the Ropes of Coiled Rope Baskets
. Three-Color Swirl Coiled Rope Basket
. Linocut Printing at the Atlanta Printmakers Studio
. More Carving and Printing.
The following resources were consulted in writing this blog post:
. 23 Embroidery Stitches that will Transform your Projects and How to do Them article on the Gathered.How website.
. Patchwork Posse website which is a great source for “simple quilt tutorials, stash-friendly projects, helpful printables”.
Today’s Takeaways
1. Be on the lookout for furniture and materials, such as cardboard and fabric, which can be repurposed.
2. Find ways to incorporate artwork into your creative space.
3. Consider small, low-risk projects as an opportunity to experiment with materials and techniques.


Comments are closed.