
It was tempting to title this post “An After Action Review of my First Cutting Garden” but I suspect only those who spend their working hours conducting such analyses would see the humor in that headline. So instead, I’ll share what went well and what could be improved with our first cutting garden and just call them “tips”. The idea to build and plant a cutting garden was triggered by a very simple goal—to enjoy fresh cut flowers in our home.
I’m a long-standing, avid flower gardener with a strong preference for perennials and shrubs. Over the years, I’ve started more than my fair share of flower beds and gardens as we moved from house to house (even country to country). The challenge has always been waiting for the plants to get established and the flowers to start blooming. Every bloom is eagerly awaited and I can’t bear to snip them off to display in vases. So that’s why the idea of a cutting garden is appealing. Flowers in a cutting garden, typically annuals, are grown to be cut for arrangements and displays.
Things came together this past spring when I built and planted our first cutting garden. We’re nearing the end of the season so it seemed timely to take some notes for next year. The notes are organized into 5 categories: Location, Construction, Plant Selection, Seeding, Maintenance, Harvesting & Enjoying. Here are my top tips by category.
Location
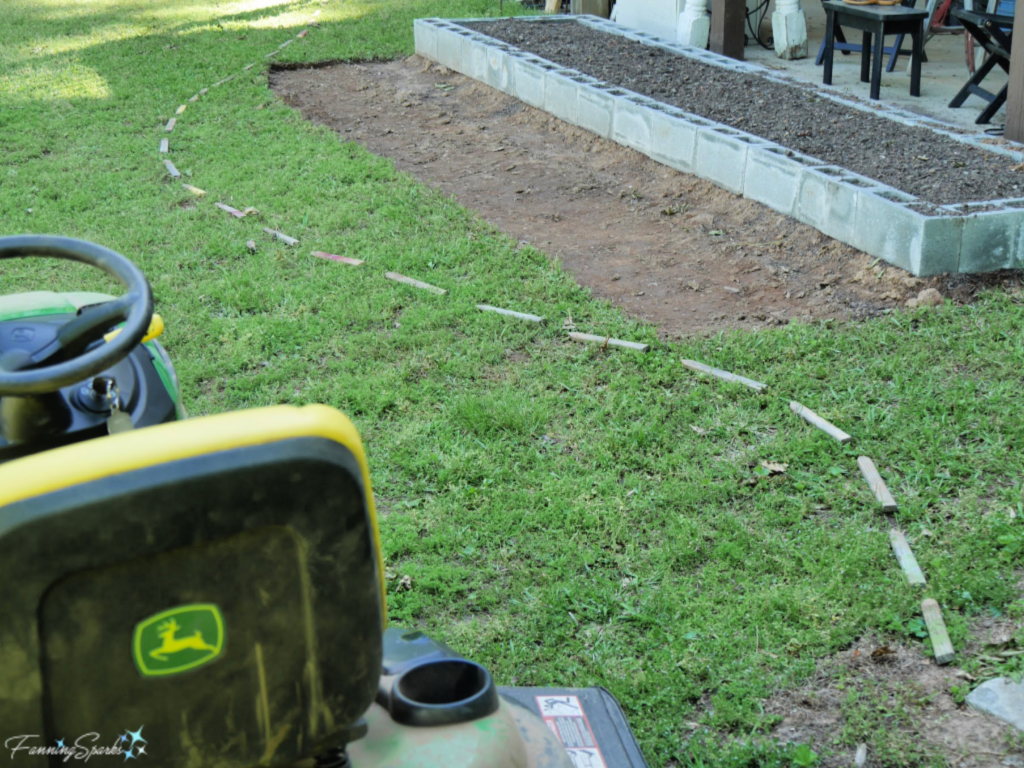
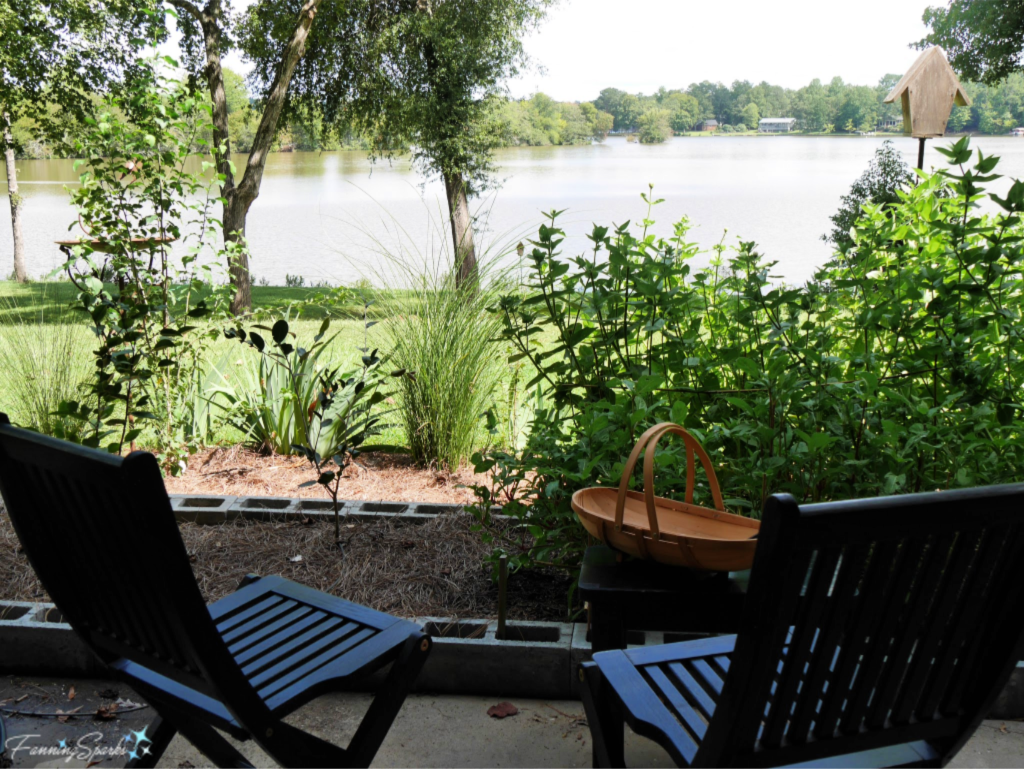
A new gardening bed was needed for our cutting garden. Our home sits on a sizable lot so there were many options for locating this new bed. We chose an east-facing location which gets full sun in the morning and slightly shaded sun in the afternoon. The new bed was positioned along our lower patio so it’s convenient and easy to access. It’s also close to an outdoor water faucet. Another advantage of this location is the ample space surrounding the bed; it allows for additional perennial beds to surround the cutting bed and help it blend in. The location worked well. This is how the design evolved.
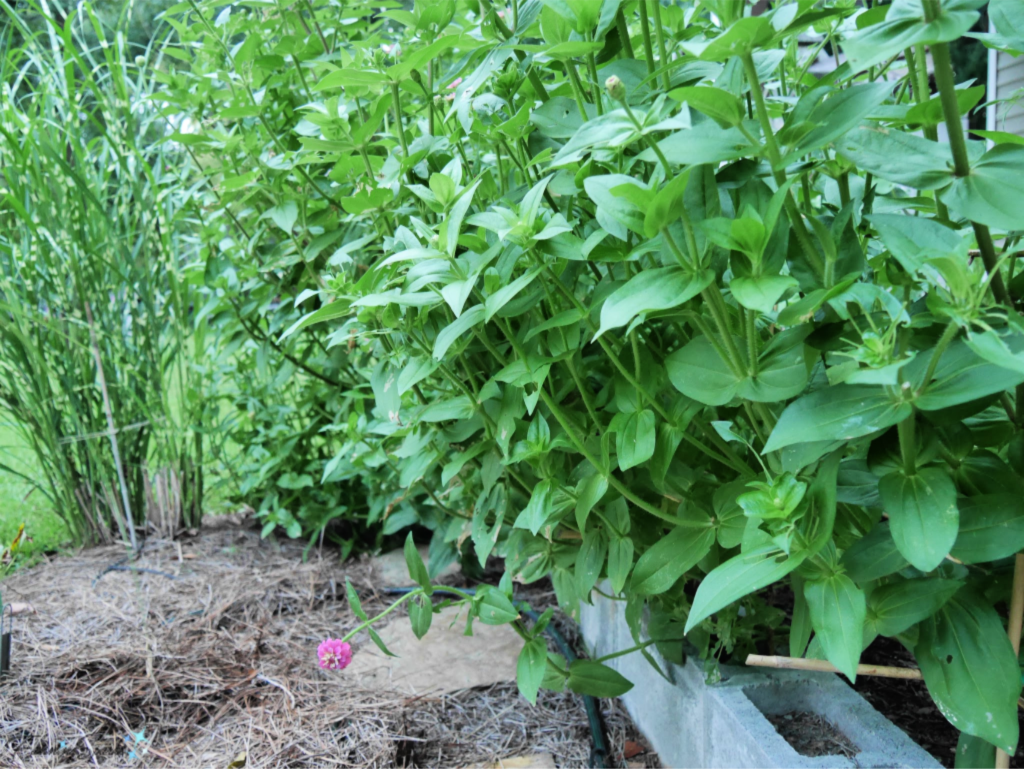
Here’s the current view from the lower patio looking out over the cutting garden (on the right).
Construction
After clearing the location of grass and weeds, the soil was broken up and prepared for the new bed. We built a simple rectangle of concrete blocks (13 blocks length x 2 blocks width) to create a raised bed.
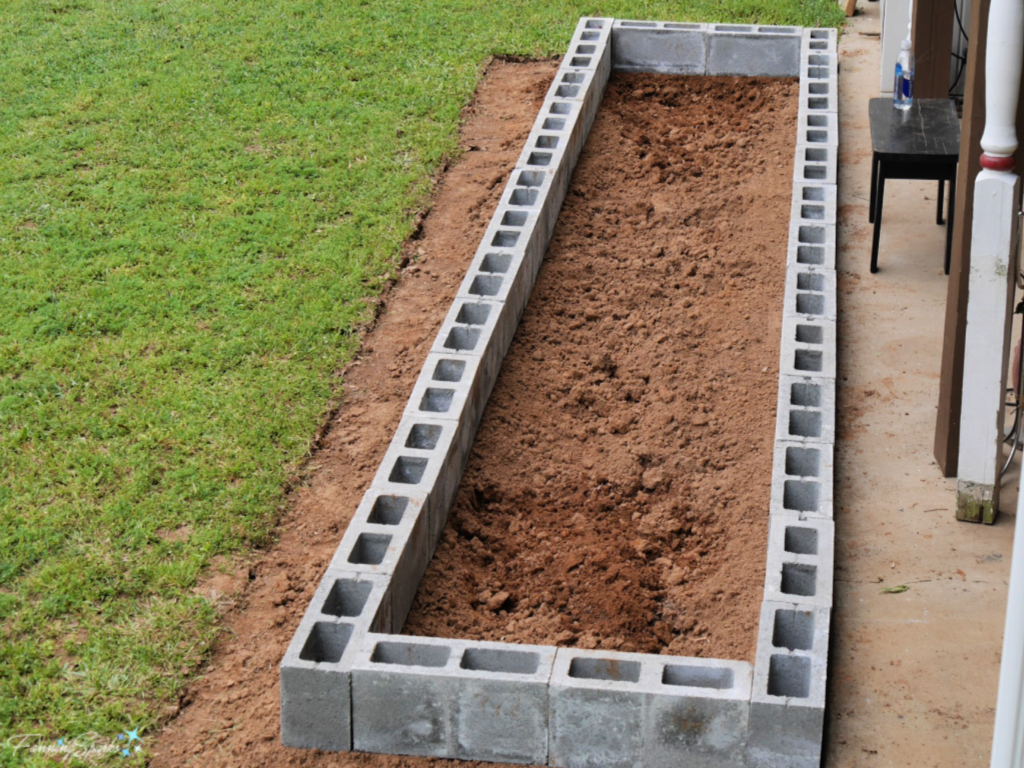
It took some effort to get everything level and even but it was quite straightforward. A few rebar posts were inserted to keep the blocks in place. The outside dimensions of this raised bed are 3’ 7” x 16’ 10”. We filled it with garden soil from a local garden center.

The bed construction has proven to be solid and stable. As it turned out, I only planted half the bed with cutting flowers so it appeared to be bigger than required. But as the plants started to grow, I realized I should have used that extra area to allow more space between the plants (more on that in a minute).
Plant Selection
There are endless varieties of flowering plants from which to choose. Based on a little research and my personal preferences, I chose 4 annuals:
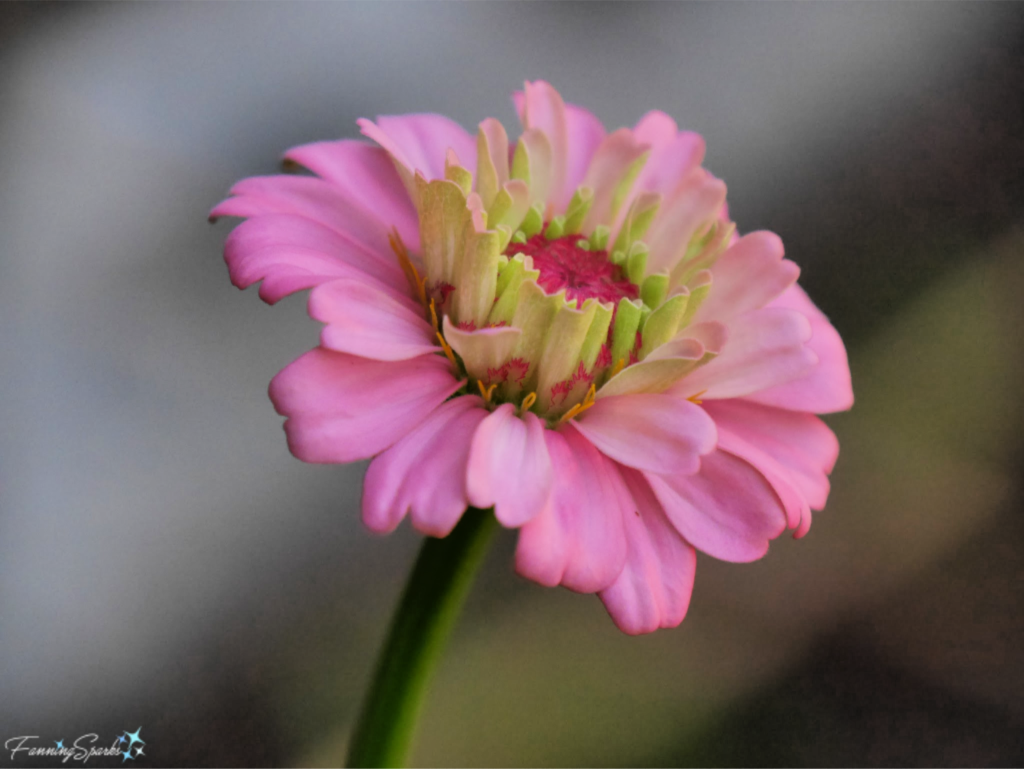
. Zinnia elegans, OKLAHOMA PINK
. Cosmos bipinnatus, SENSATION MIX
. Nigella damascena LOVE-IN-A-MIST
. Gomphrena globosa, QIS™ FORMULA MIX (aka Globe Amaranth)
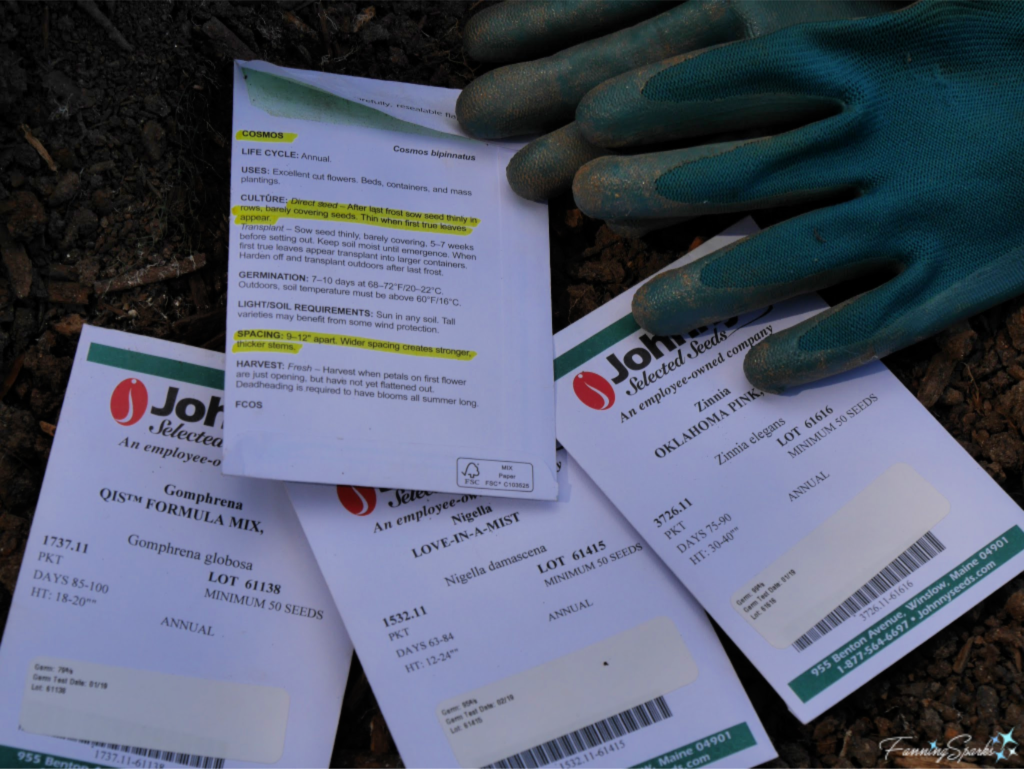
I ordered the seeds online from Johnny’s Selected Seeds. Their seed packets provided clear seeding and maintenance instructions.
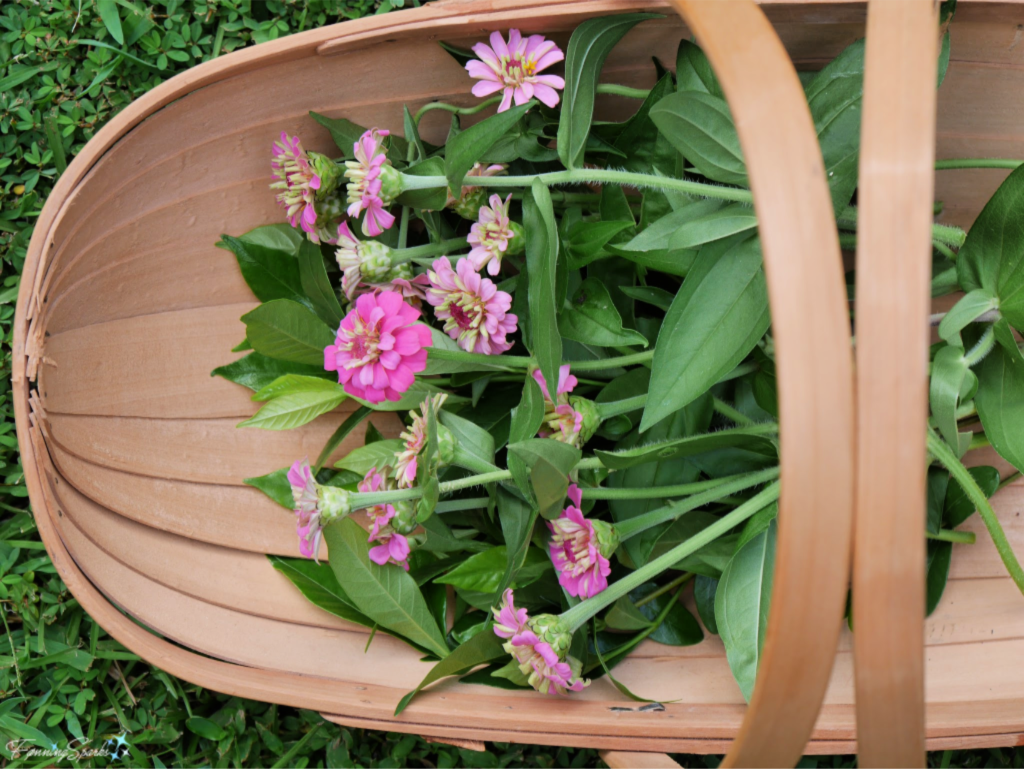
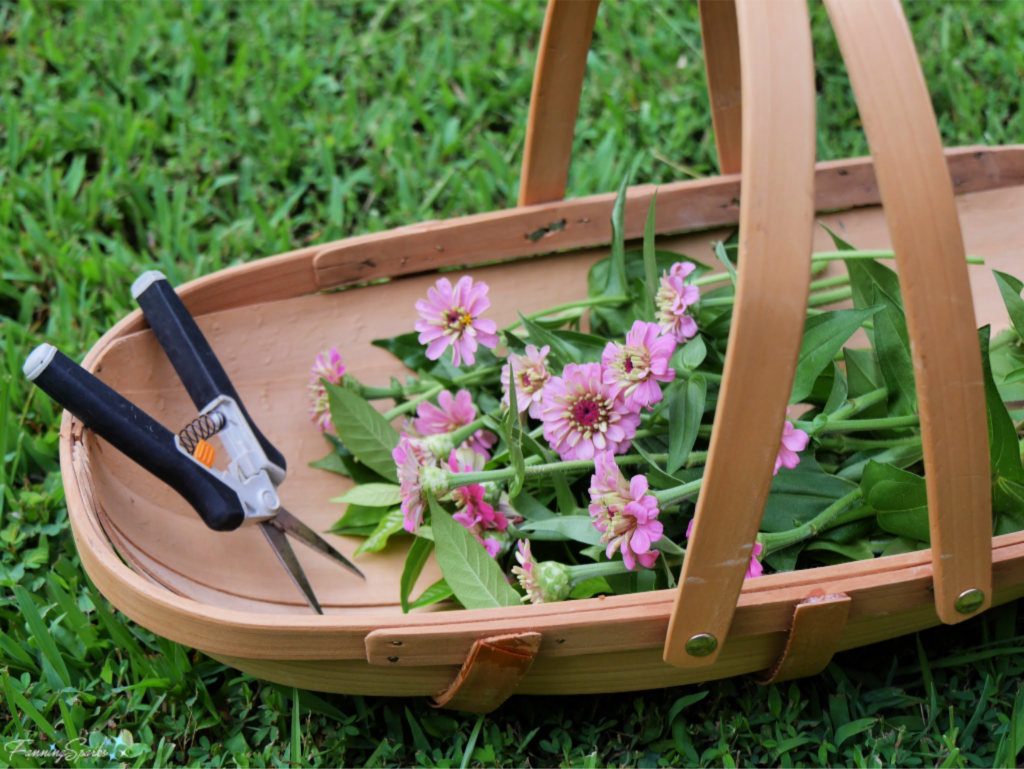
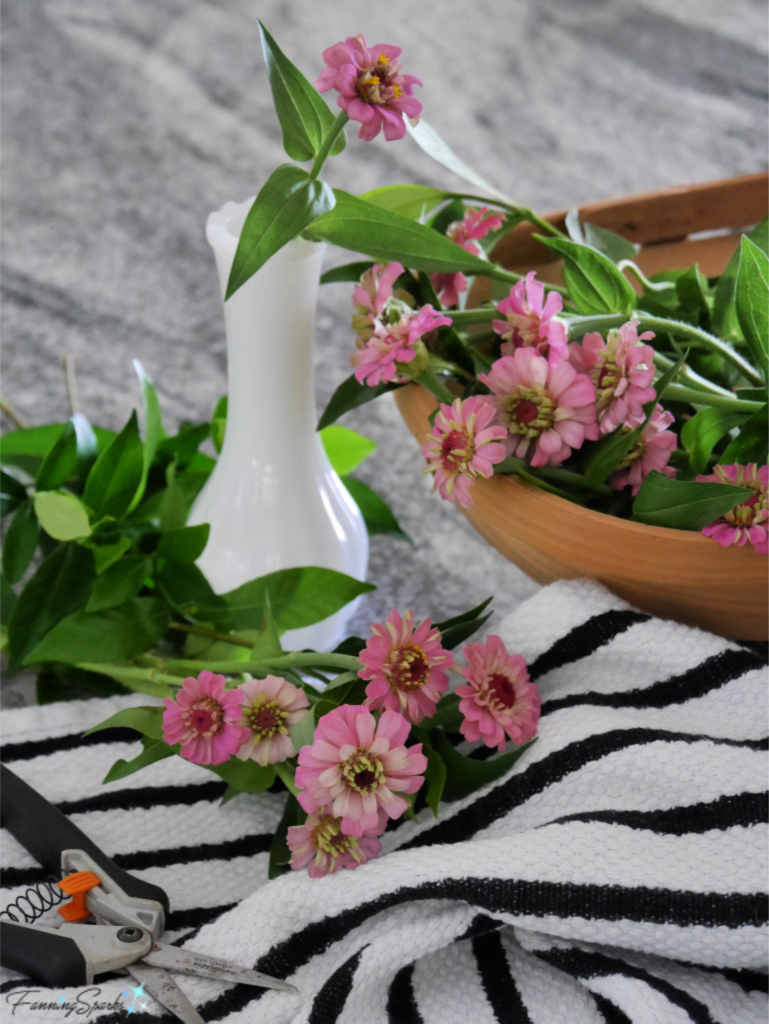
Obviously, based on the title of this post, zinnias have been my favorite. I am convinced zinnias rock! The zinnias sprouted incredibly fast (in only a few days) with nearly all the seeds germinating. The plants are solid and sturdy. They started blooming after only 5 weeks and have provided a steady supply of fresh flowers every day since. I think the blooms are beautiful.
The cosmos weren’t quite as successful. Perhaps if I’d given them more space and better support they would have put on a better show. The few plants that thrived and bloomed are lovely, though.
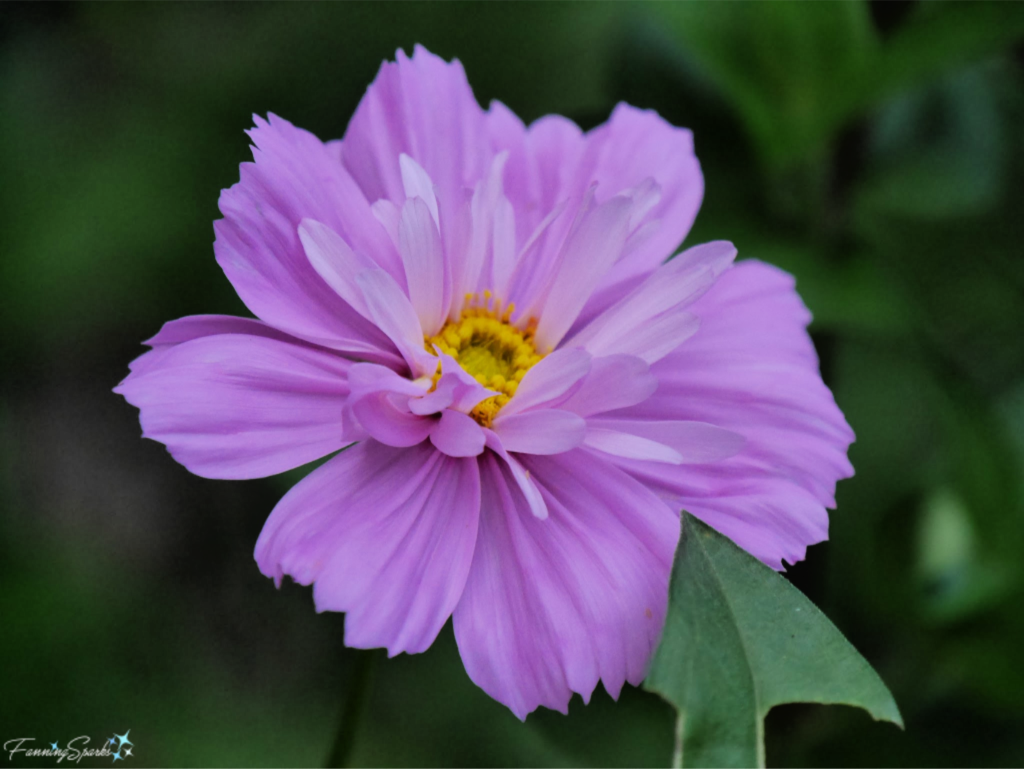
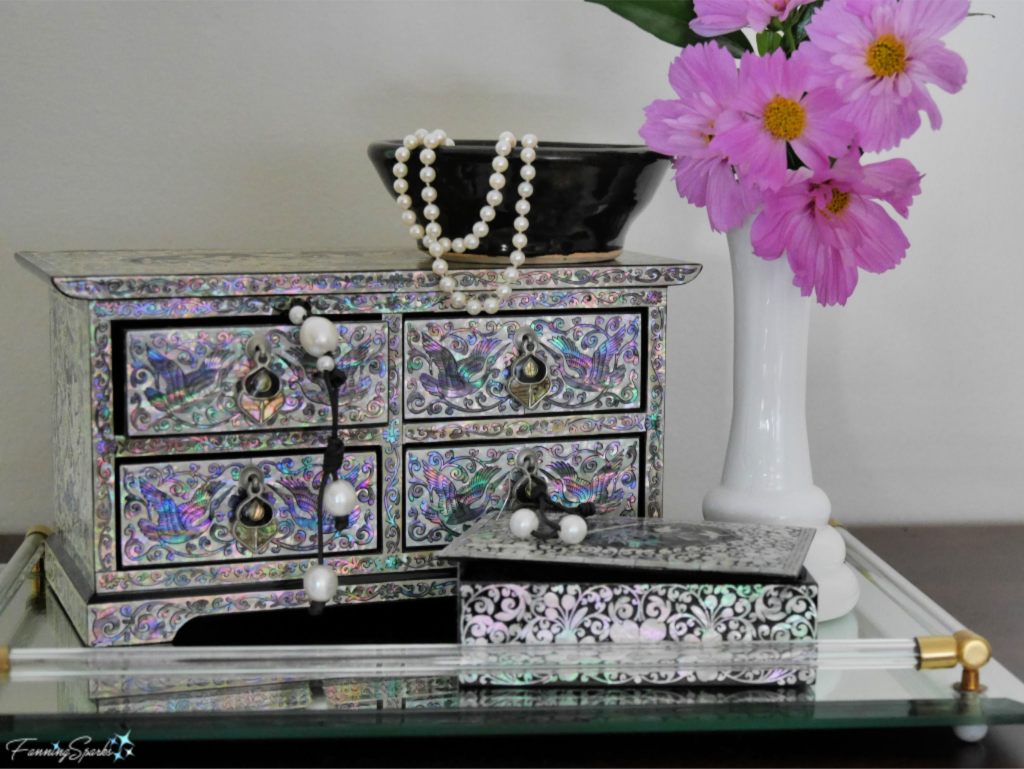
There were just enough cosmos blooms to make a few small bouquets like this one which I placed on the top of my dresser. Aren’t they pretty with the mother-of-pearl jewelry boxes?
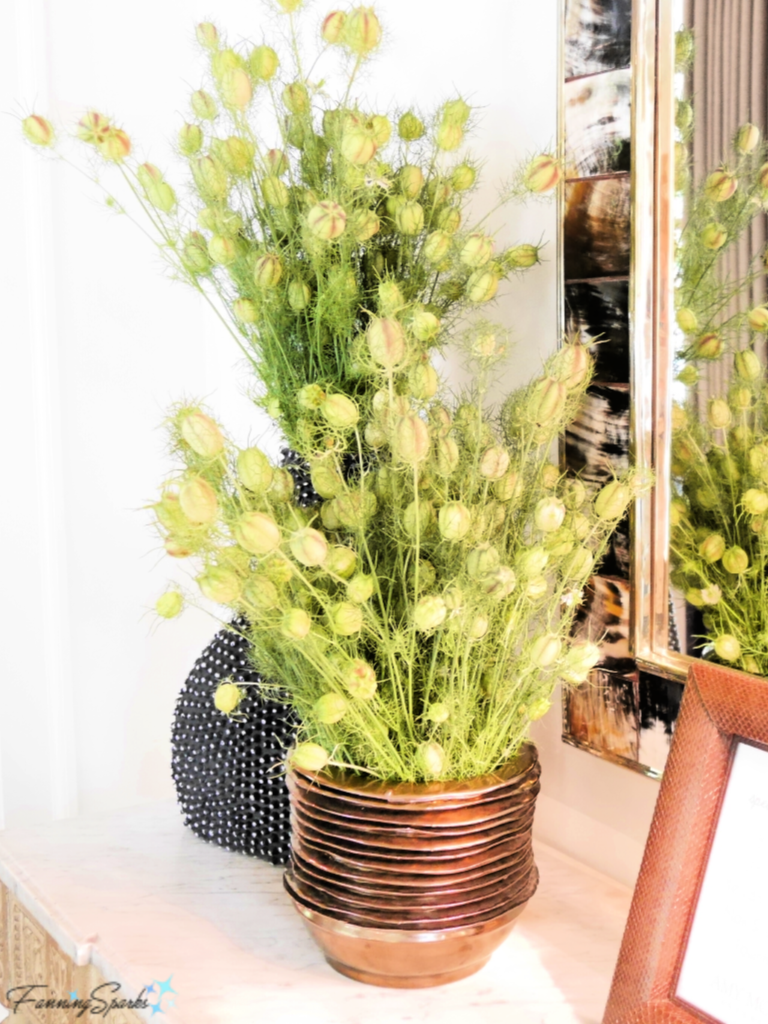
The nigella was a disappointment. Nigella, or Love-in-a-Mist as it’s commonly called, should look like the below when mature and dried. I first shared this photo from a Southern Living Idea House in the post, Decorating with Texture , because of the amazing texture the Love-in-a-Mist seed heads provide.
The globe amaranth is just now starting to bloom and looks promising. It may still produce blooms that I could use to decorate wreaths like this one I saw at Biltmore Estate. See the post Holiday Wreath Inspiration from Biltmore for more ideas using dried flowers and natural objects.
Update Jan 14, 2020: When I originally wrote this post in September, I was disappointed with the globe amaranth. But it rallied later in the season and I was able to harvest a significant quantity of magenta, mauve and cream blooms. I recently used the dried flowers to decorate a sweetgrass wreath I made. You can see the results in the post My Sweet Sweetgrass Wreath.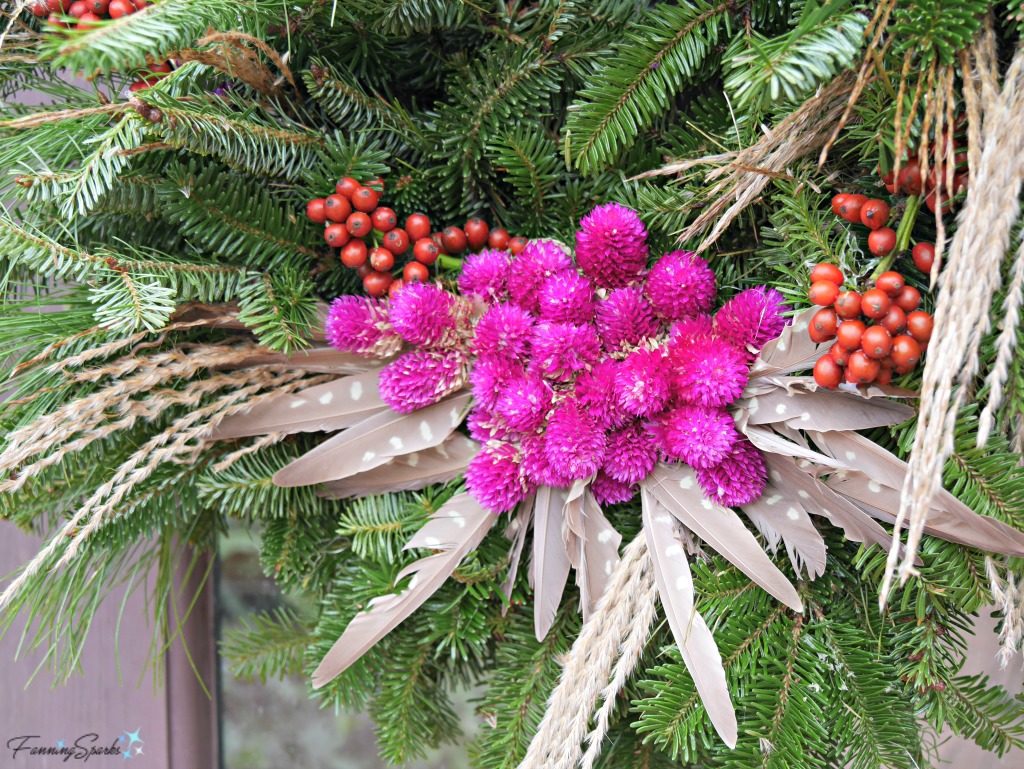
Next year, I will plant more zinnias and cosmos and skip the nigella and globe amaranth.
Seeding
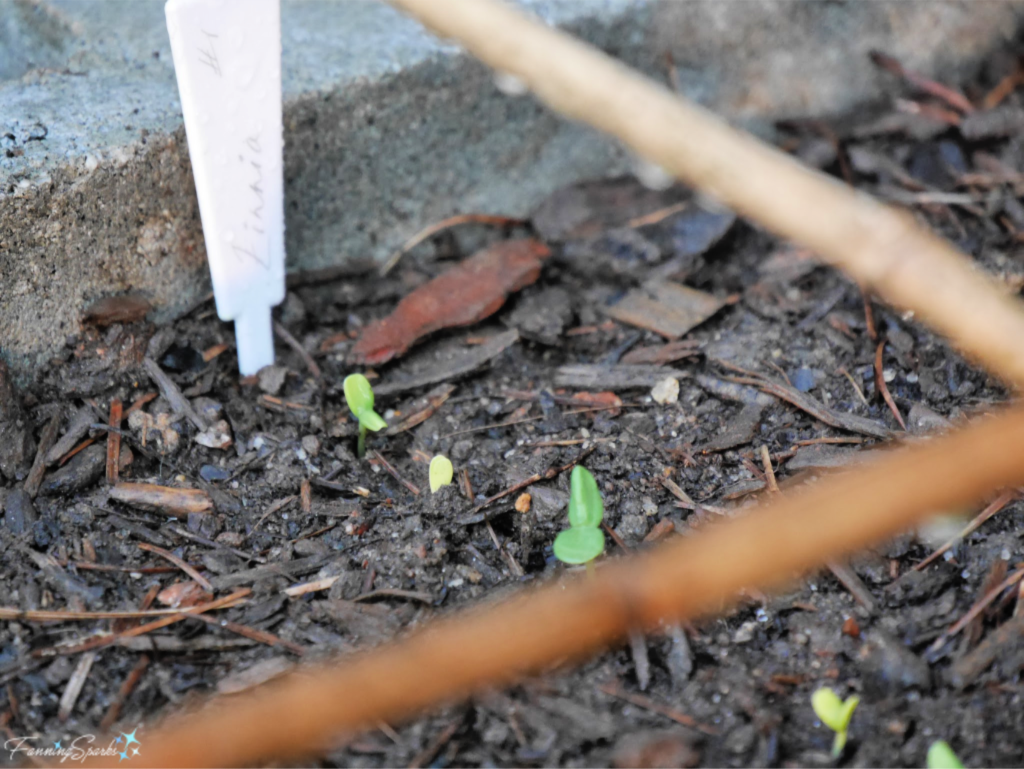
We were out of town during the ideal planting window so my seeds were planted a little late. I planted in two rounds—first on June 12 and then again on June 29—to extend the blooming season by a few weeks. Johnny’s Selected Seeds seed packet for the zinnias stated “Spacing: 9-12” apart. No support is necessary.” I admit I ignored that spacing instruction and tucked my seeds into the ground only a ½” apart. Everything looked promising about a month after seeding.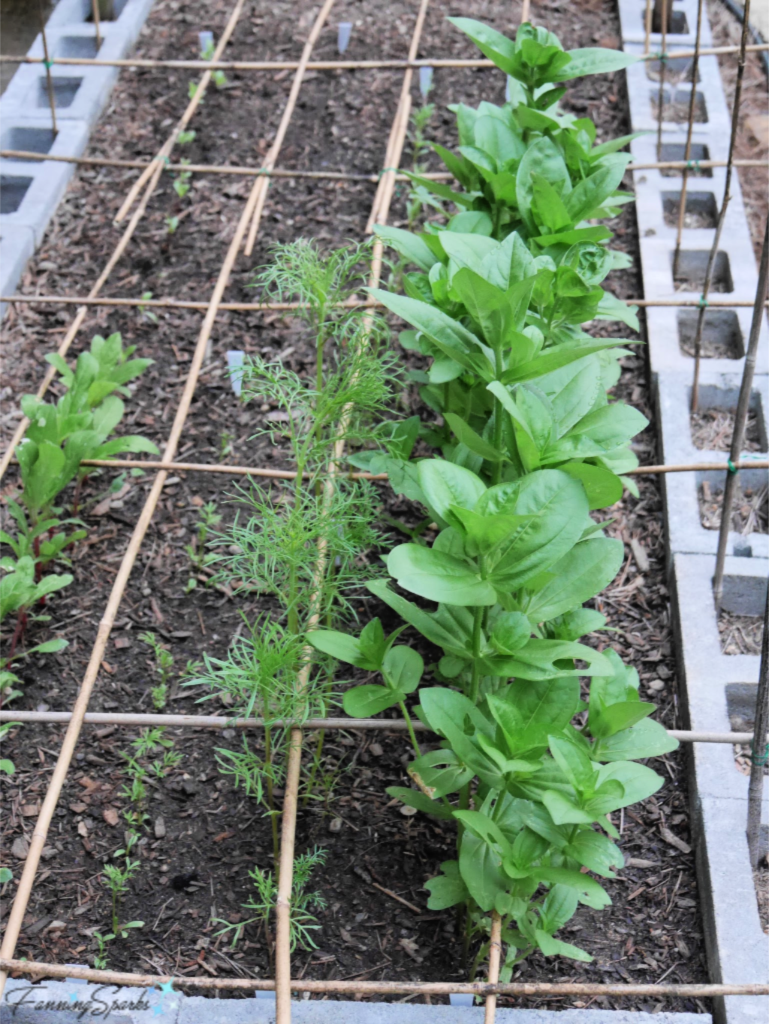
But then the zinnias took off and grew to be over 4’ tall. They quickly crowded out the other flowers and started tumbling over the sides of the bed.
Next year, I will get an earlier start and space the zinnia seeds further apart (as instructed!).
Maintenance
These plants don’t require much maintenance but they do need regular watering. I watered with a hose almost every morning. Extending the drip irrigation from the perennial beds into the cutting garden would be an improvement.
Ideally, the zinnias and cosmos would be staked for support. As noted above, these plants grew taller than expected and the bamboo support grid was too low. Next year, I need to build a higher support structure.
For weeks, I was able to ignore the occasional chewed up leaf. But then some kind of inspect invaded and started to cause serious damage. As much as I wanted to avoid spraying anything on my cutting garden, I had to relent and break out the insecticidal soap. I’ll try to be better prepared and address insects more promptly next year.
Update July 31, 2020: We’ve had a large number of butterflies visiting our cutting garden this year. As a result, I am not using insecticides of any kind.
Harvesting and Enjoying
The standard advice for picking flowers is to cut in the early morning, strip the bottom leaves off the stems and put them in water right away.
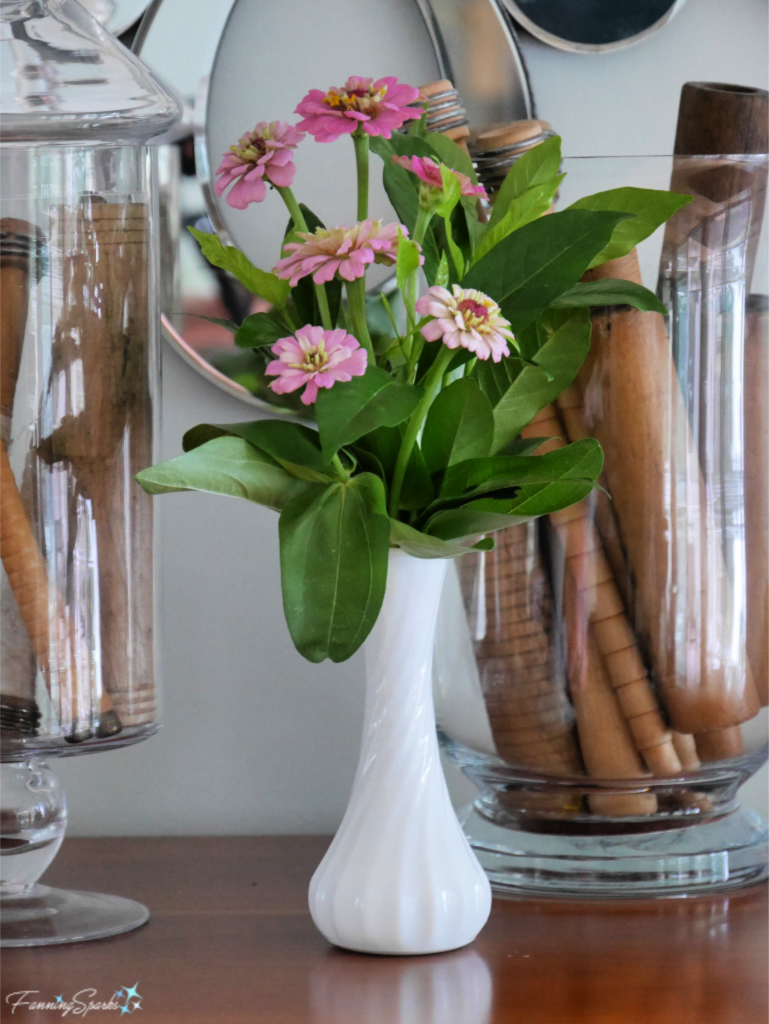
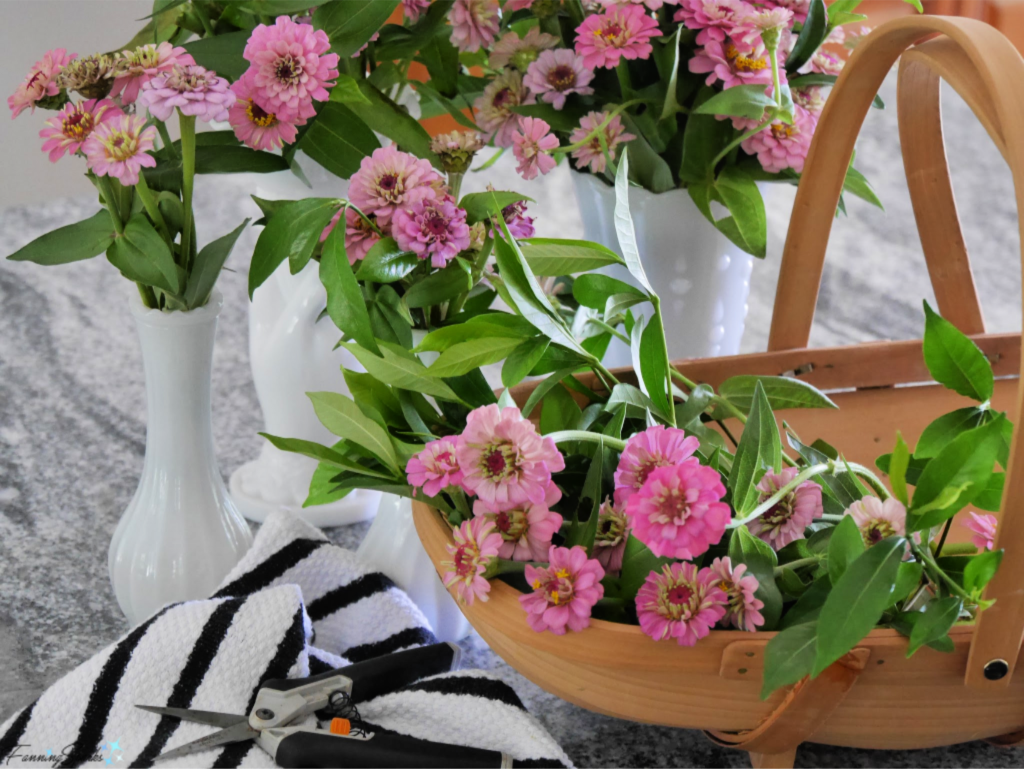
A steady supply of fresh flowers provides the perfect opportunity to display some pretty vases. If you have a weakness for milk glass (like I do), you’re in luck. A simple bouquet of cheerful, pink/magenta zinnias in a shiny, pure white milk glass vase is a thing of beauty.
And if you happen to have more than one milk glass vase… well, that’s even better!
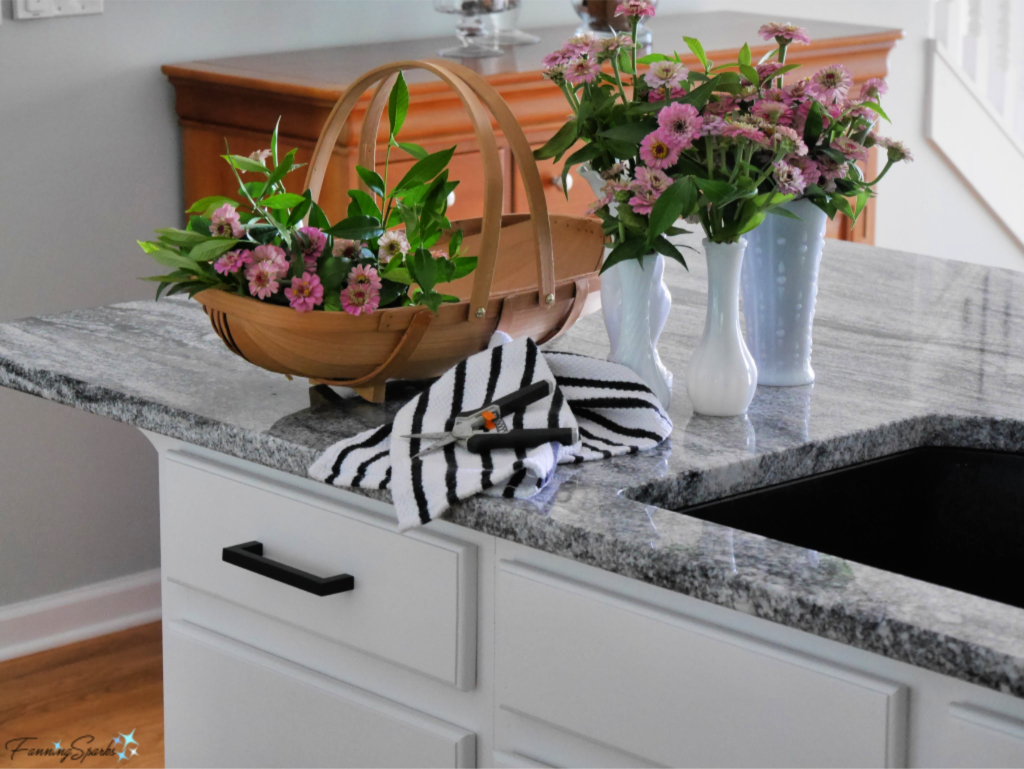
I simply pull out the spent blooms and replace them with fresh ones every morning. A sprig or two from my gardenia shrub adds some greenery. Every other day, I replace the water and snip off the tips of the stems for a fresh cut.
This keeps the bouquets in top form and has allowed us to enjoy these same bouquets for weeks. Which is, of course, the whole reason I planted a cutting garden in the first place!
More Info
You can learn about Johnny’s Selected Seeds on their website.
For reference, I garden in Georgia in the southeast US, in a plant hardiness zone of 8A.
Today’s Takeaways
1. Consider creating a cutting garden for a steady supply of fresh cut flowers.
2. Evaluate a few different flower varieties to see which will perform the best in your location.
3. As with any new endeavor, you may want to assess your first cutting garden to note what went well and what could be improved.


2 Comments
@Marian, Herbs as greenery… great suggestion!! Thanks 🙂
Love the post and the concept of a cutting garden.
I agree the zinnias are beautiful.
May I suggest that greens from your herb garden would be excellent additions to your arrangements.
They add depth of fragrance and interest, as well as color and texture.