
While prepping for an upcoming plane trip, I discovered an ingenious, new travel accessory. It’s an infinity scarf with a secret zipped pocket—perfect for keeping travel documents close at hand while hiding them out of sight. But these nifty scarves aren’t limited to a passport and vaccination card, they can also stash a smart phone, lipstick, car key or cash! In addition to hiding valuables, these scarves function like regular scarves—they add a pretty pop to an outfit while also fighting off the chill of air conditioning or cold weather.
But, wait, it gets even better! You can easily add a secret zipped pocket to your favorite rectangular scarf and convert it into an infinity scarf for your next travel adventure! Read on for detailed step-by-step instructions.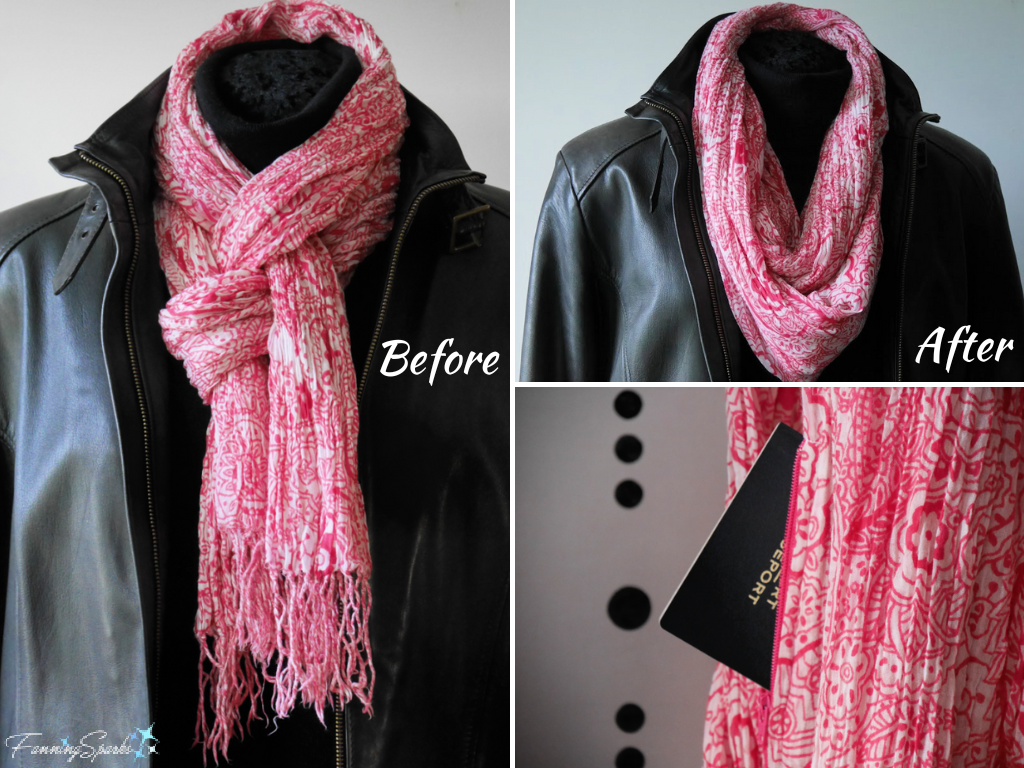
Start by selecting a rectangular scarf that’s at least 65” long and 18” wide. I admit I have quite a stash of scarves and many of them were just the right shape and size for this project! I decided to convert three scarves—one in light cotton for the summer, one as a gift and one in a heavier rayon fabric for the winter. 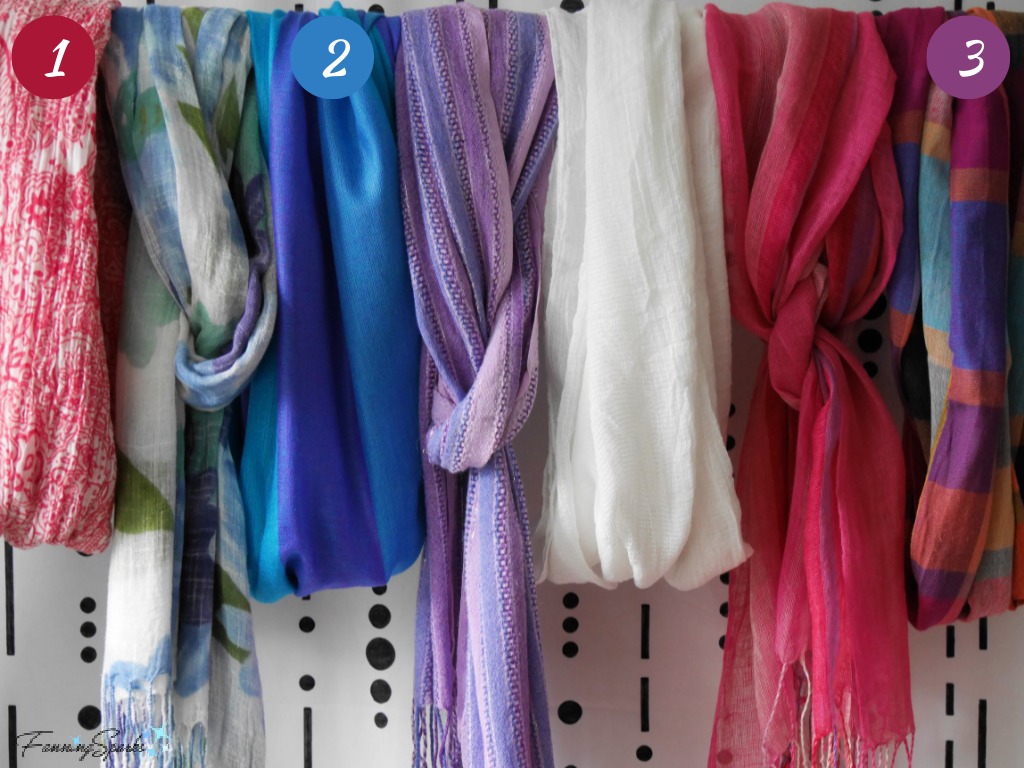
It’s worth taking a few moments to consider the scarf’s fabric. Scarves made of lightweight, close-weave cotton are ideal for this project because they are easy to sew and will effectively hide the zipped pocket. On the other hand, scarves made of thin, transparent silk, gauzy, open-weave cotton or thin, stretchy knit are less than ideal for this project. Alternatively, you could purchase suitable fabric off the yard for this project.
This project involves basic hand and machine sewing. If you’re new to sewing or your skills are a little rusty, you may find inserting the zipper a little challenging. You may, therefore, want to start by practicing with a few zippers and some scrap fabric before attempting it on your scarf. See More Info section below for a recommended resource.
Supplies Needed
. Scarf: Choose a long, narrow, flat scarf at least 65” long and 18” wide in a woven fabric with some body. Avoid whisper-thin silks and gauzy cottons because they won’t hide the secret zipped pocket and they’re difficult to sew. Alternatively, you could purchase suitable fabric off the yard for this project.
. Pocket Fabric: Select cotton fabric in a matching color for the zipped pocket. I chose to buy a fat quarter which is a quarter yard of fabric pre-cut into an 18” x 21” rectangle. The specific amount of fabric needed for the pocket will depend on the width of your scarf. See Step 2 (below) for the calculations.
. Zipper: 7” all-purpose zipper suitable for centered application. Alternatively, a longer zipper can be shortened to 7”.
. Sewing Thread: In a color which blends with the scarf.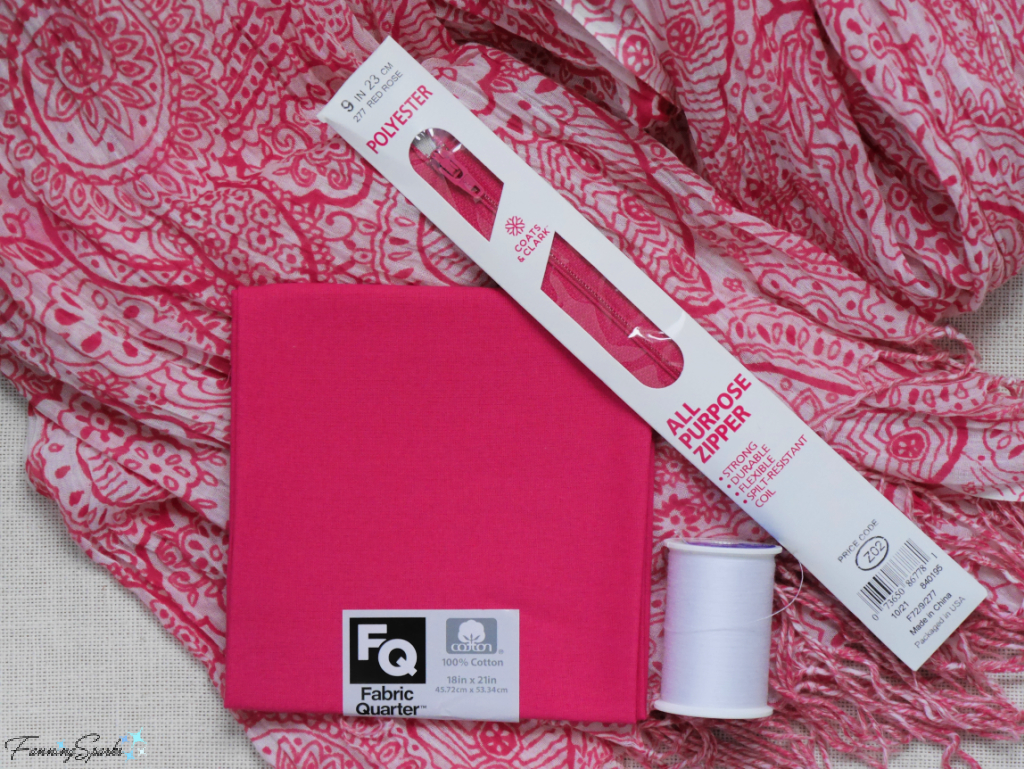
Equipment and Tools Needed
. Iron
. Sewing Machine with Standard Presser Foot and Zipper Foot
. Sewing Scissors
. Tape Measure
. Ruler
. White Chalk Pencil and/or Dark Fabric Marker I love the Pilot FriXion marker.
. Square or Rectangle Ruler These rulers, typically used for quilting, are ideal for ensuring markings are square.
. Straight Pins
. Seam Ripper
. Hand-Sewing Needle
Step 1 Prepare Scarf Determine the fabric content of the scarf. Press on appropriate setting. Select a marker, pen or chalk which is suitable for the type of fabric and can be removed easily. Alternatively if the scarf fabric is too delicate for a marker, you can use thread tacks in a contrasting color.
Overcast the fringe ends of the scarf by sewing a row of zigzag stitches along the raw edge keeping clear of the fringe. Then cut off the fringe close to the stitching. There’s no need to worry about perfecting these edges because they will be hidden inside the finished scarf.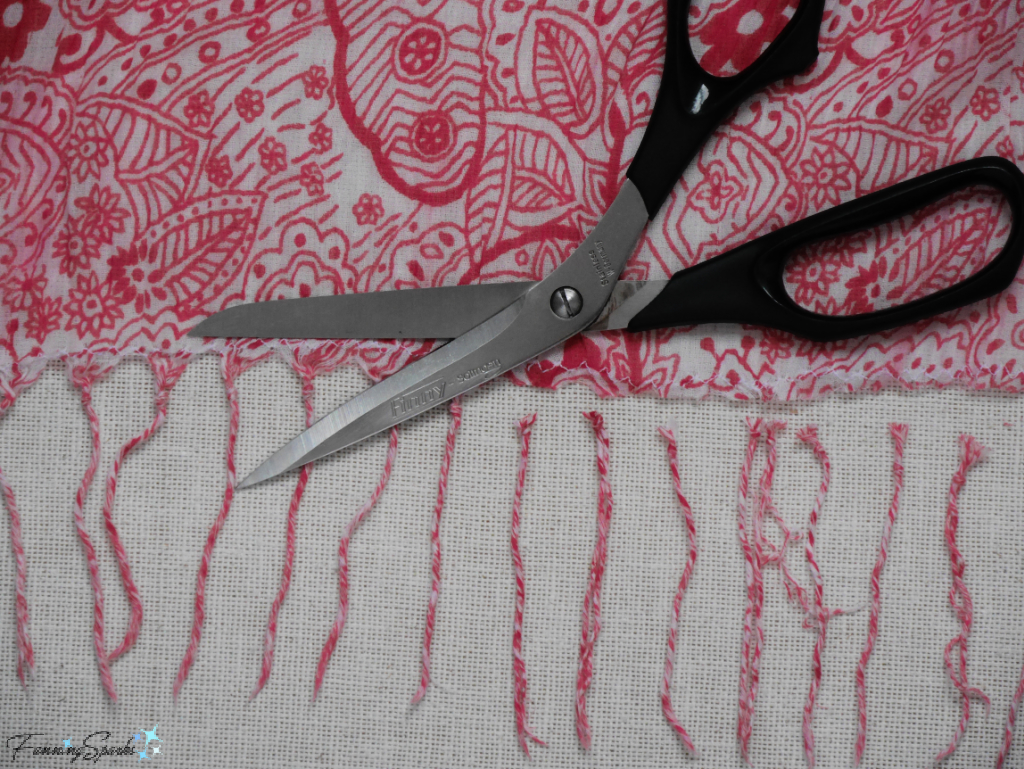
Step 2 – Prepare Pocket and Zipper Measure the scarf and calculate the size of the pocket. The width of the pocket will be equal to half the width of the scarf (Scarf Width / 2). I made my pocket 9″ in length because that is half the length of a fat quarter of fabric. Alternatively, you could make the pocket a different length by adjusting the other measurements in this tutorial accordingly. For instance, a longer pocket length would require a longer zipper.
Cut TWO rectangles of fabric for the pocket. For clarity, mark L (length) and W (width) along the edges of the pocket sections. If it’s not obvious, mark the right side (vs wrong side) of the fabric. Overcast all edges on both pocket sections.
Test the zipper to ensure it opens and closes smoothly. If the zipper was folded in the package, press it flat with an iron taking care to not melt the zipper teeth. If the zipper needs to be shortened, close the zipper and hand-sew across the zipper teeth at the desired length. Ensure the stitches are sturdy enough to serve as the new zipper stop. Cut the zipper about ½” below the newly stitched zipper stop. 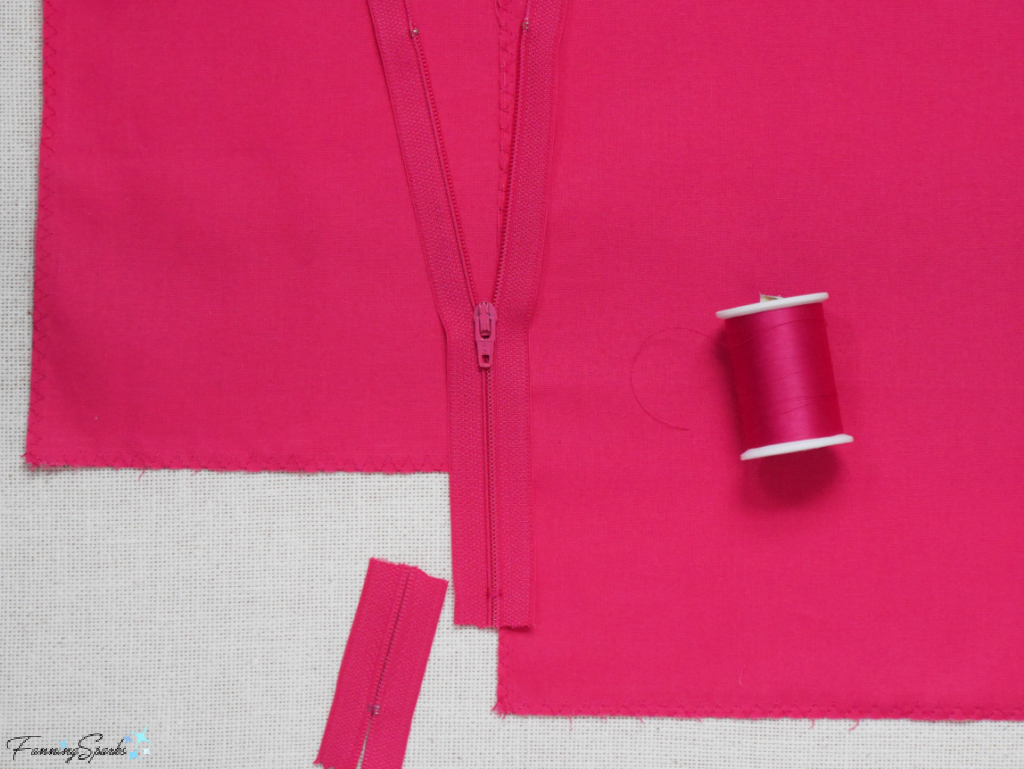
Step 3 – Attach Pocket Sections to Scarf Lay scarf on work surface with right side facing up. Choose one short end of scarf as the “reference edge”. Measure 6” from the reference edge along the outside edge of one of the scarf’s long edges. Mark. Repeat on the opposite long edge. Mark. Fold scarf in half lengthwise. Measure 6” from the reference edge along the fold and mark a 9-inch line along the fold. 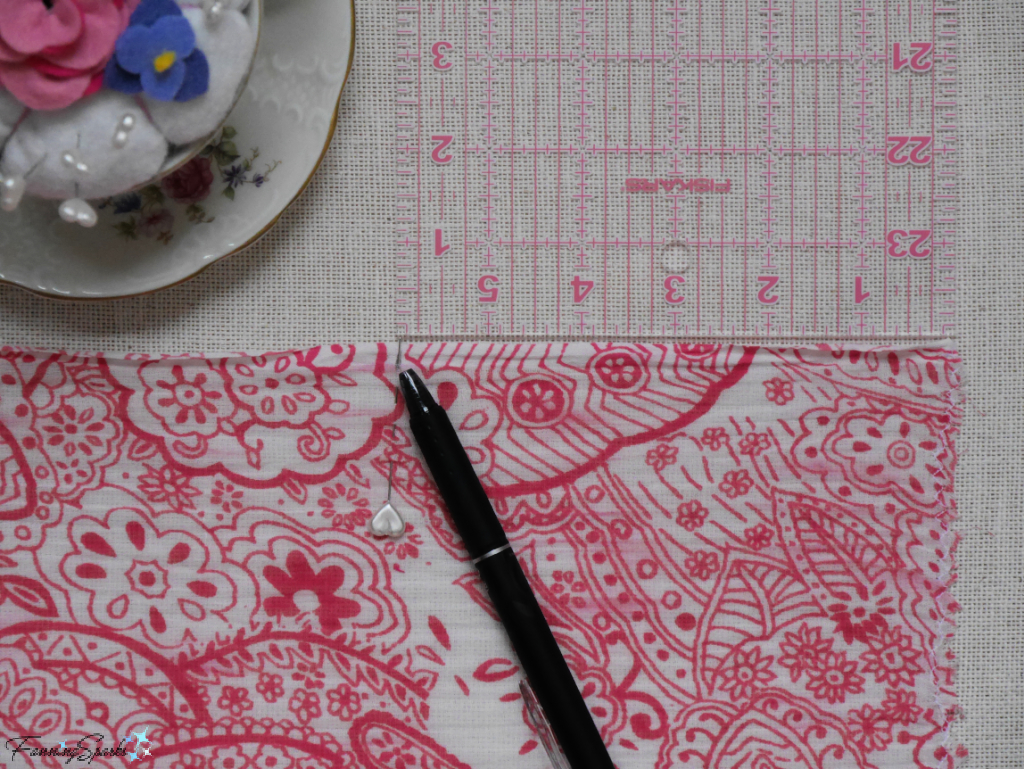
With the right side still facing up, lay the scarf on the work surface. Pick up a pocket section with the wrong side of the fabric facing up. Lay the lengthwise edge of the pocket section along the lengthwise edge of the scarf aligning horizontally with the 6” mark. Pin in place. Repeat with the other pocket section on the opposite side of the scarf.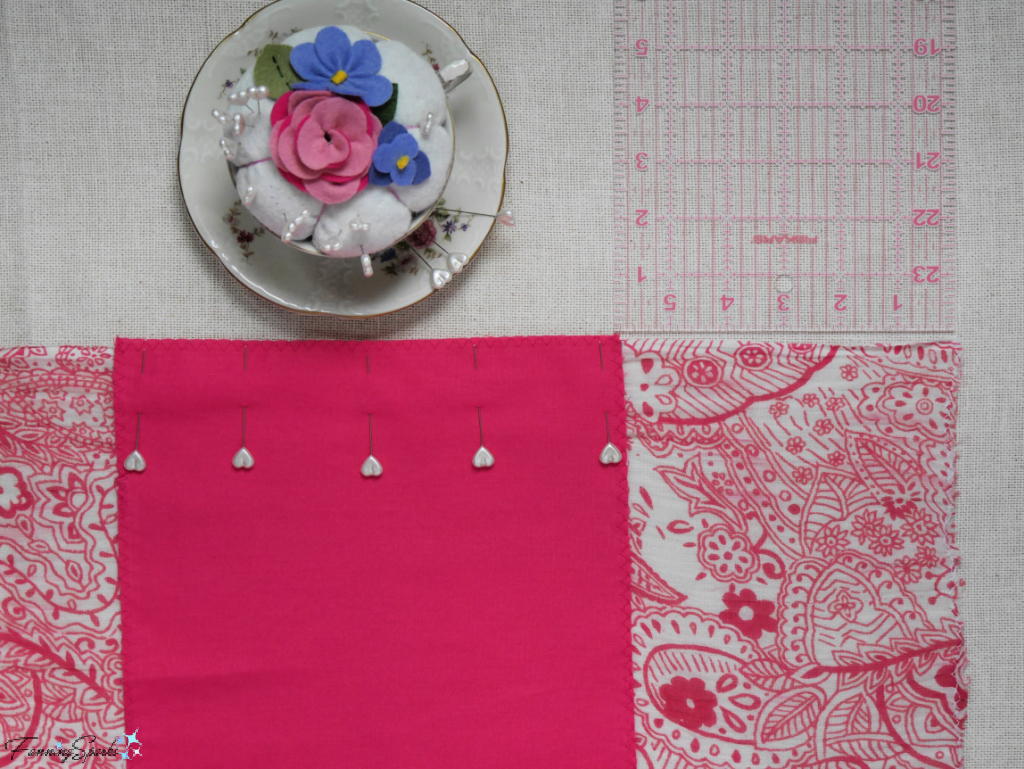
Prepare to sew the pocket section to the scarf. Use a ¼” seam allowance and begin sewing at the 6” mark. Repeat with the other pocket section.
Pull pocket sections away from the scarf. Press seams toward pocket sections.
Step 4 – Sew Scarf into Partial Tube Lay scarf on work surface with right side facing up. Fold scarf in half lengthwise. Pull pocket sections up and away from scarf. Align two long edges of scarf from the reference edge to the pocket sections, along the pocket sections and for another 7”. Pin in place. Measure and mark 7” from the reference edge, 14” from the reference edge, and 21” from the reference edge.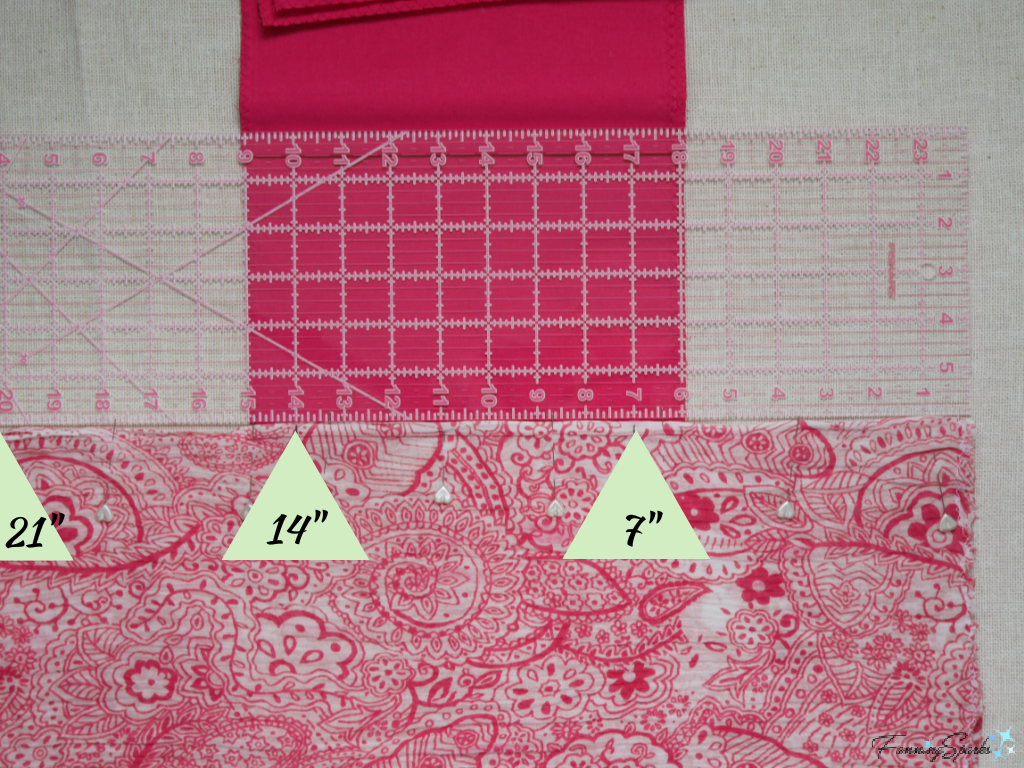
Prepare to sew the long edges of the scarf together. Use a ½” seam allowance and sew from the reference edge to the 7” mark. Move to the 14” mark and sew to the 21” mark. Change to a basting stitch and sew from the 7” mark to the 14” mark. Open the seam, pull pockets away from the scarf, and press the seam.
Step 5 – Sew In Zipper As noted above, if you’re new to sewing or your skills are a little rusty, you may want to start by practicing with a few zippers and scrap fabric before attempting to sew a zipper into your scarf. See More Info section below for a recommended resource on How to Install a Conventional Zipper.
Lay scarf on work surface with seam facing up. Pull pocket sections away from the seam smoothing them flat as shown below.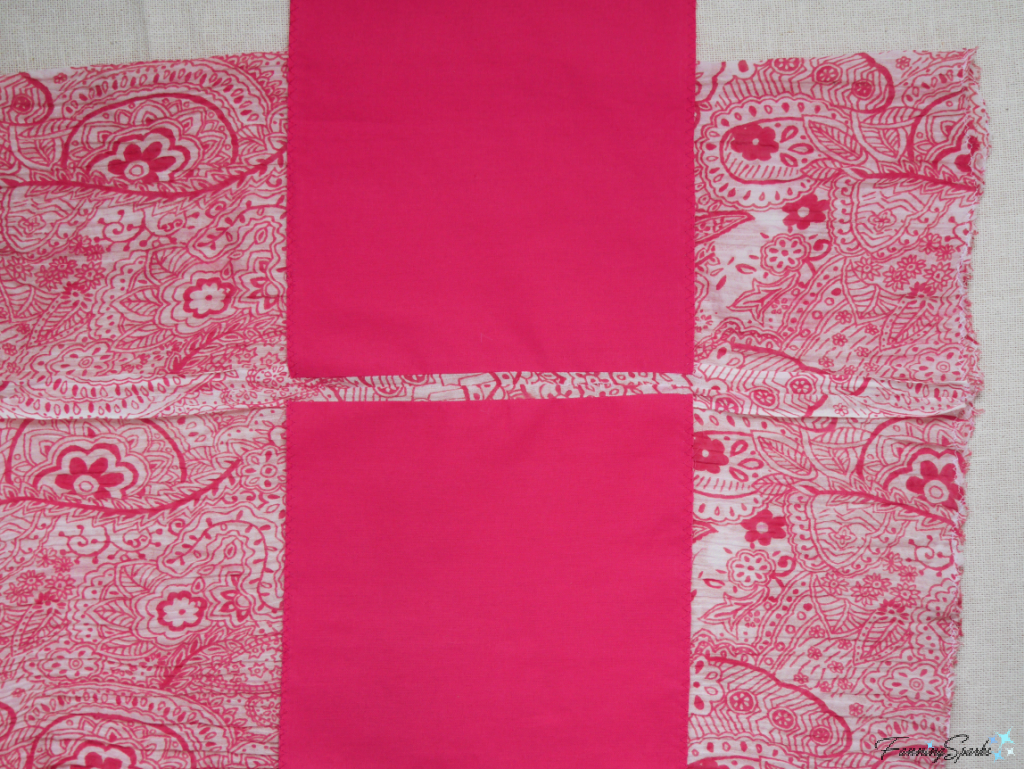
Position the closed zipper, facing down, along the seam with the top of the zipper toward the reference edge. Ensure zipper teeth are centered over the seam stitching. Position the zipper tab up away from the teeth. Use pins to mark the zipper stops at the top and bottom of the zipper; they should align with the start and end of the basting stitches at the 7” and 14” marks. Secure zipper in place with a few pins. 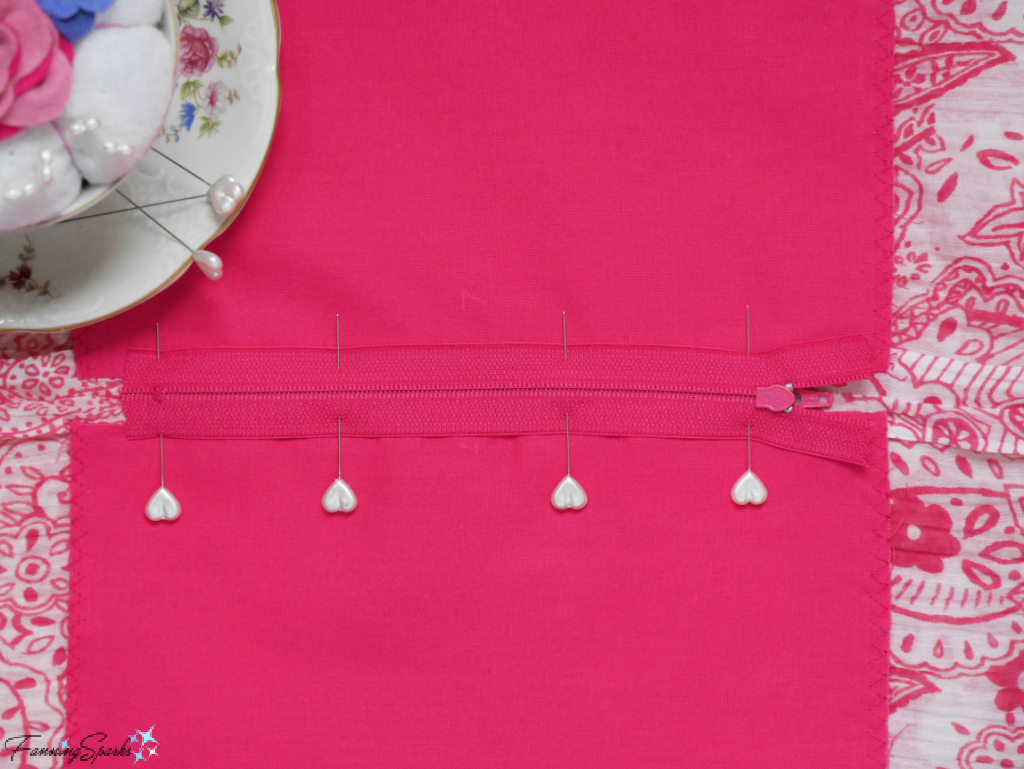
Prepare to hand-sew the zipper in place temporarily with a basting stitch. Reach inside the scarf tube to keep the opposite side of the scarf and the pocket sections clear of the basting. Baste close to the outside edge of the zipper tape. Remove all pins.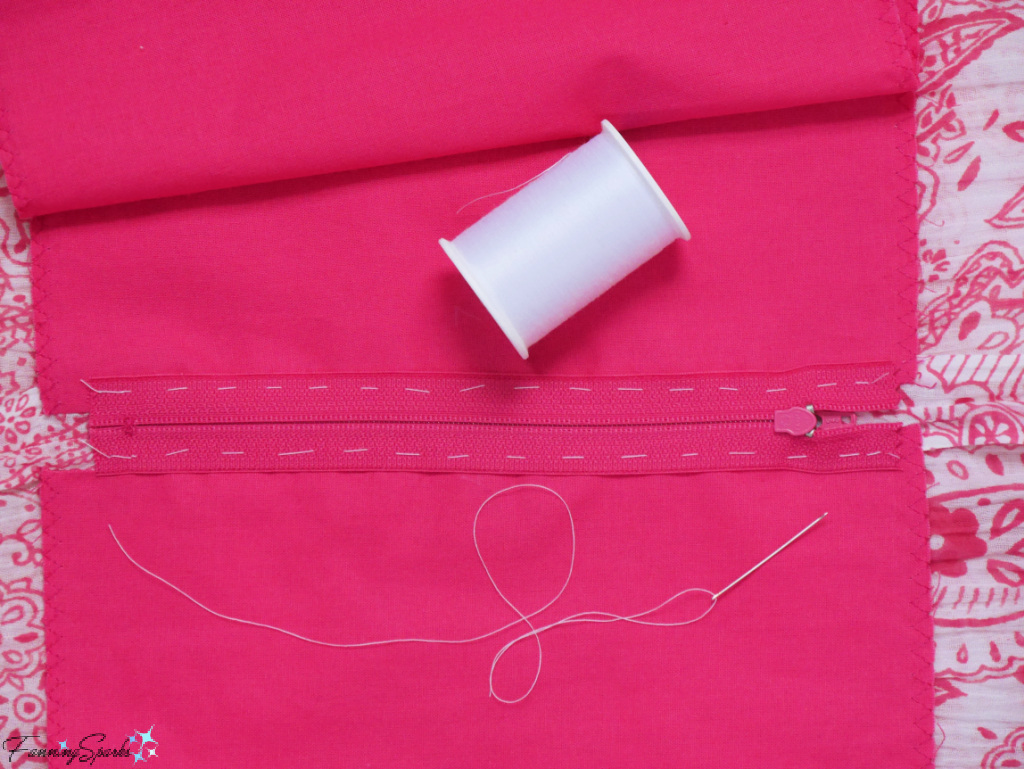
Turn scarf right side out. Use marker/chalk to draw sewing guide lines ¼” to the right and to the left of the existing seam. Draw perpendicular lines, just below the zipper stop and just above the zipper tab, to connect the sewing guidelines creating a long, thin rectangle.
Install the zipper foot on your sewing machine. Prepare to start sewing the zipper across the bottom. Reach inside the scarf tube to pull the opposite side of the scarf and the pocket sections clear of the sewing needle. Following the markings, stitch across the bottom of the zipper, then turn and stitch up along one side. As you near the top of the zipper, prepare to move the zipper tab out of the way. Leave the needle in the fabric, lift the zipper foot, and slide the zipper tab down the zipper past the needle. Drop the zipper foot and finish sewing the seam. Slide the zipper tab up again. Adjust the zipper foot to sew in the opposite direction. Following the markings, stitch across the bottom of the zipper, then turn and stitch up along the remaining side. Stop to adjust the zipper tab as before. Finish sewing the seam and then sew across the top.
Remove the basting stitches from the seam in the scarf. Test zipper to ensure it slides freely. Adjust, if necessary. Remove the basting stitches from along the sides of the zipper.
Pat yourself on the back—the most difficult step is done!
Step 6 – Sew Pocket Close zipper. Turn scarf inside out. Position pocket sections, one on top of the other, aligning all edges with the right sides together. Pin in place.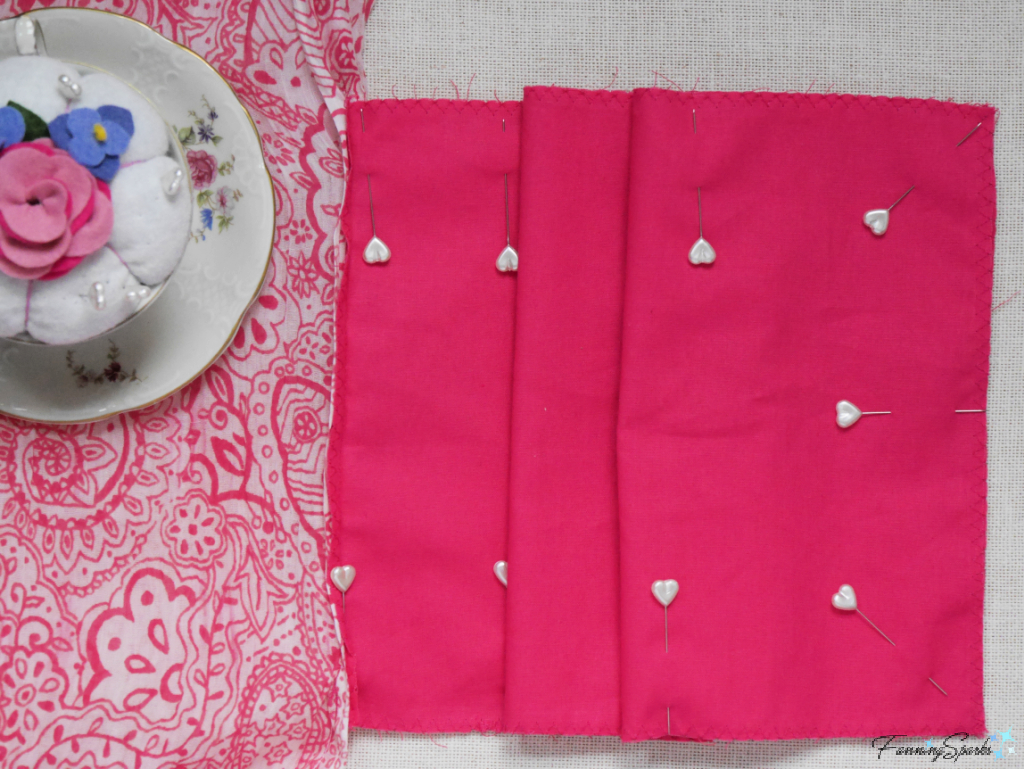
Sew with ½” seam allowance. Press seam.
Prepare to attach the pocket to the inside edge of the scarf. Turn the scarf right side out. Lay scarf flat on the work surface folded on the centerline. Smooth out bottom layer of scarf, pocket and top layer of scarf. Align the inside edge of the pocket (opposite the zipper side) with the folded edge of the scarf—it should align with the 9-inch line marked in Step 3. Pin in place. 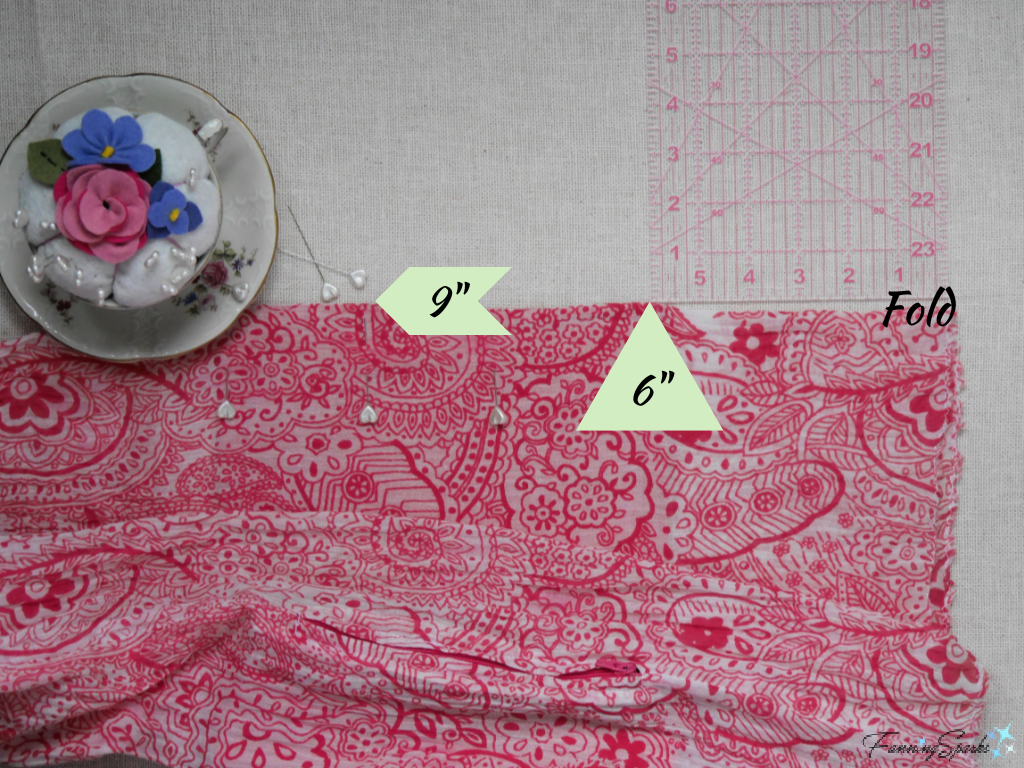
Sew through all layers close to the fold.
Step 7 – Finish Sewing Scarf into Tube Turn scarf inside out with right sides together. Fold in half lengthwise. Align pocket sections. Align the unsewn sections of the long edges of the scarf. Pin in place. 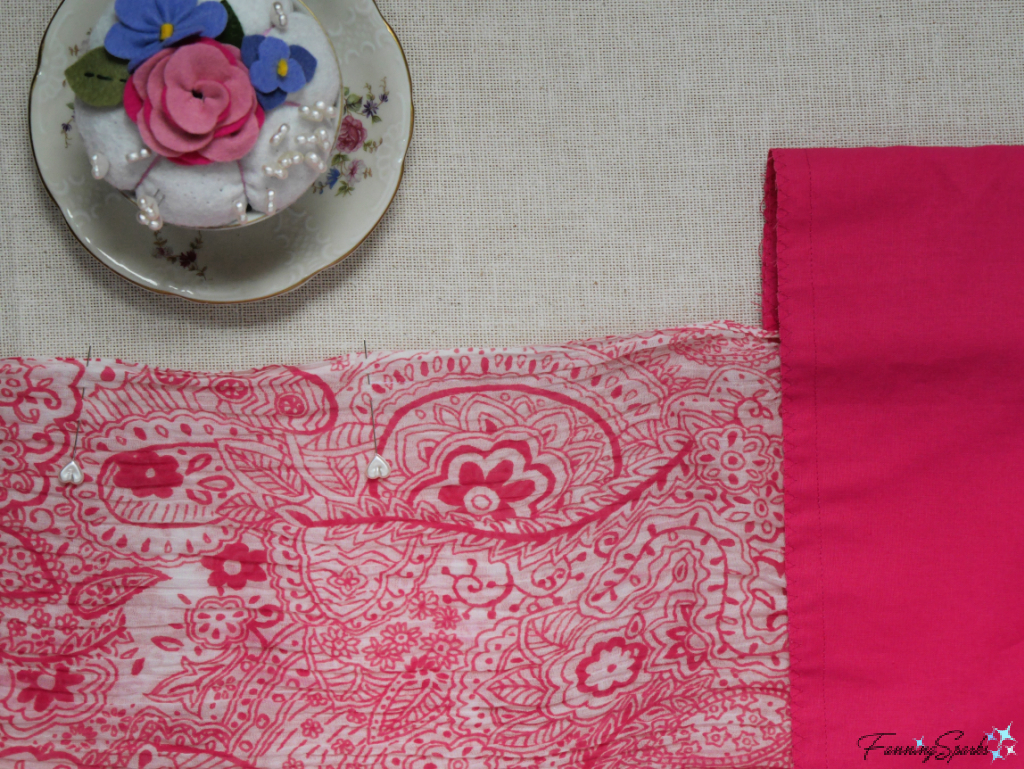
Stitch the long edges of the scarf with a ½” seam allowance. Press seam.
Step 8 – Sew Scarf Ends to Make Loop Turn scarf right side out. Working on the short ends of the scarf, bring the right sides of the two ends together. Align the seam lines. Pin in place. Sew all around the short end of the scarf with a ½” seam allowance stopping about 3-4” from the start. Hand-sew the opening closed.
Voilá! Your new secret pocket travel scarf is ready for action! Simply wrap it around your neck in a loop or two, adjust to position the secret zipped pocket, and tuck away your valuables!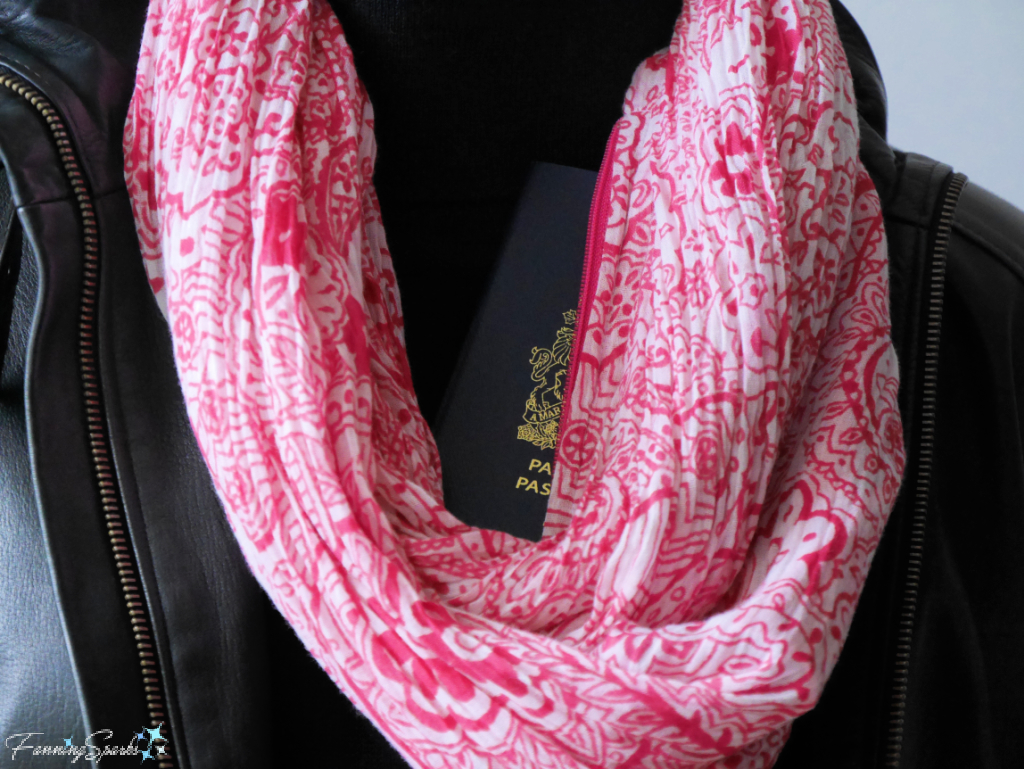
More Info
Please pin this image to share or save for future reference.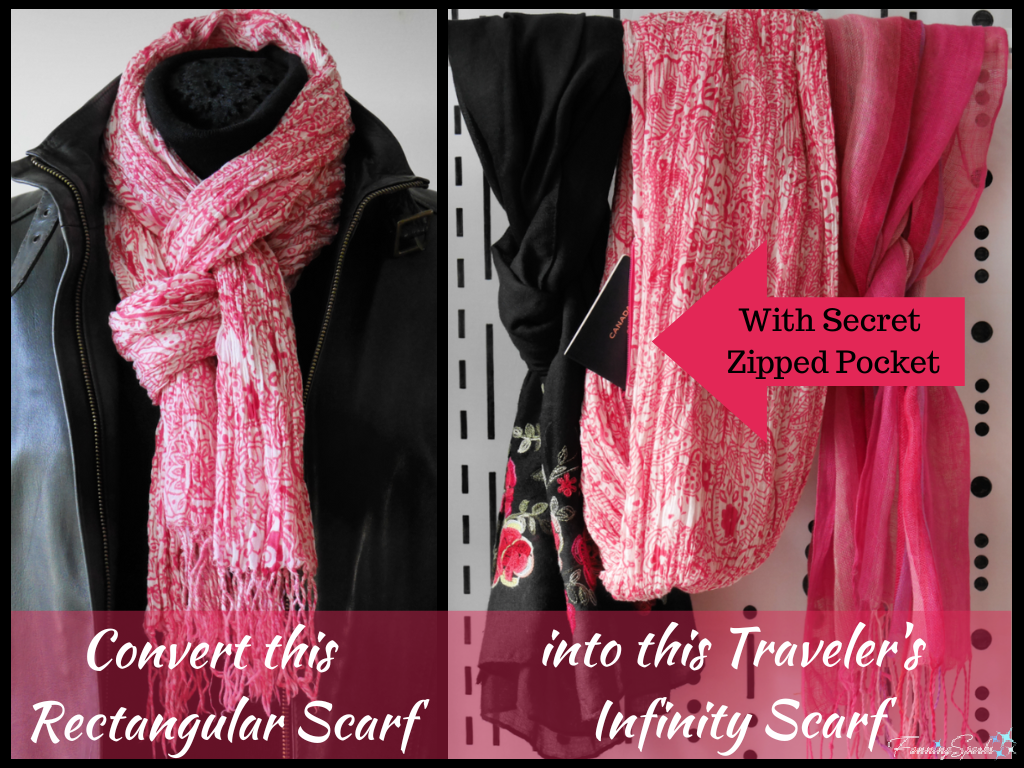
See the Sew4Home blog for a detailed tutorial on How to Install a Conventional Zipper.
Today’s Takeaways
1. An infinity scarf with a secret zipped pocket can keep travel documents close at hand while hiding them out of sight.
2. A rectangular scarf can easily be converted into an infinity scarf with a secret zipped pocket.
3. Consider repurposing a rectangular scarf as a traveler’s infinity scarf.


Comments are closed.