
Turning a discarded T-shirt into a tote bag isn’t a new idea but it’s a good one. It’s a great way to repurpose an unwanted garment into something useful to extend its life.
The shape of a T-shirt is surprisingly similar to the shape of a tote bag. So, with only a few modifications—closing the bottom, removing the sleeves and adjusting the neckline—a T-shirt can be transformed into a rectangular tote bag with two handles. The best T-shirts for this project are made of medium to heavy-weight cotton. Women’s small to medium sizes or children’s medium to large sizes are ideal—tote bags made with larger T-shirts won’t hang smoothly and will be rather cumbersome.
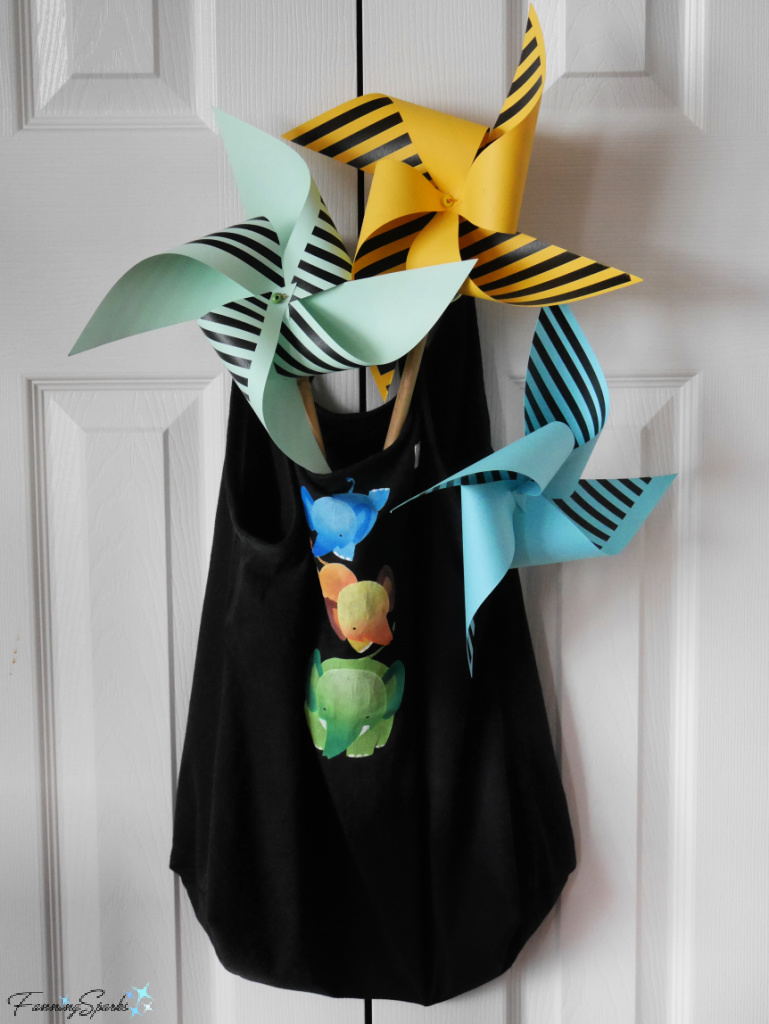
You can see the T-shirt tote bag made from this small women’s T-shirt in the photo below.
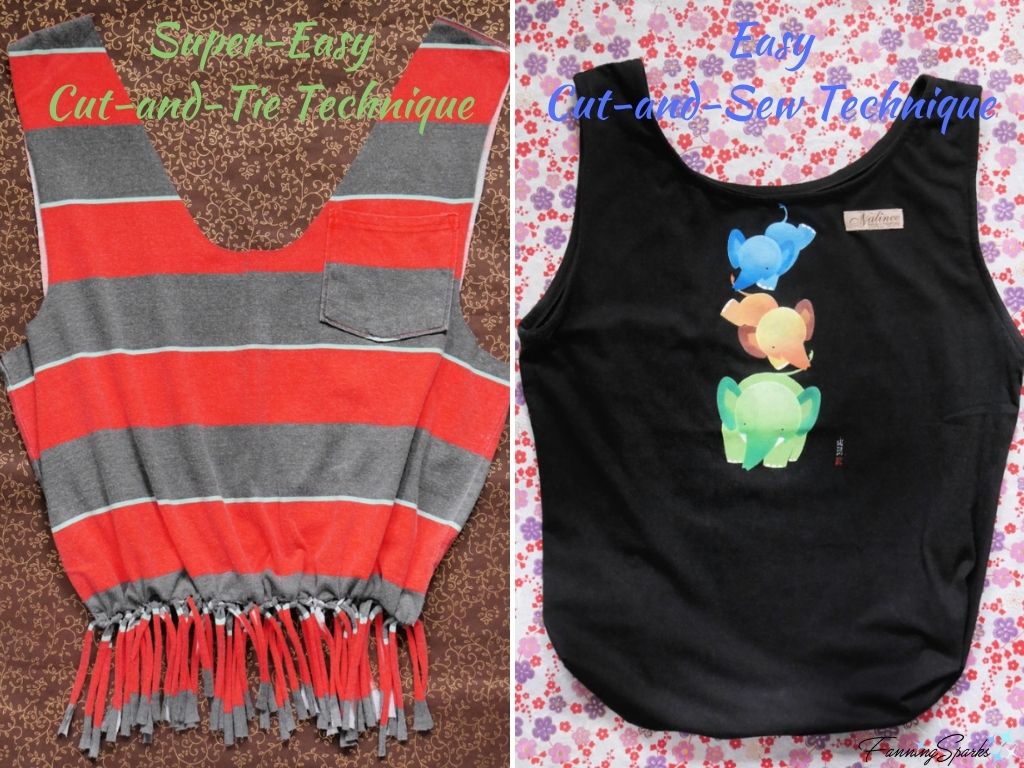
 Exactly how you accomplish this transformation depends on how much effort you wish to invest and the quality of the tote bag you want to make.
Super Easy Cut-and-Tie Technique
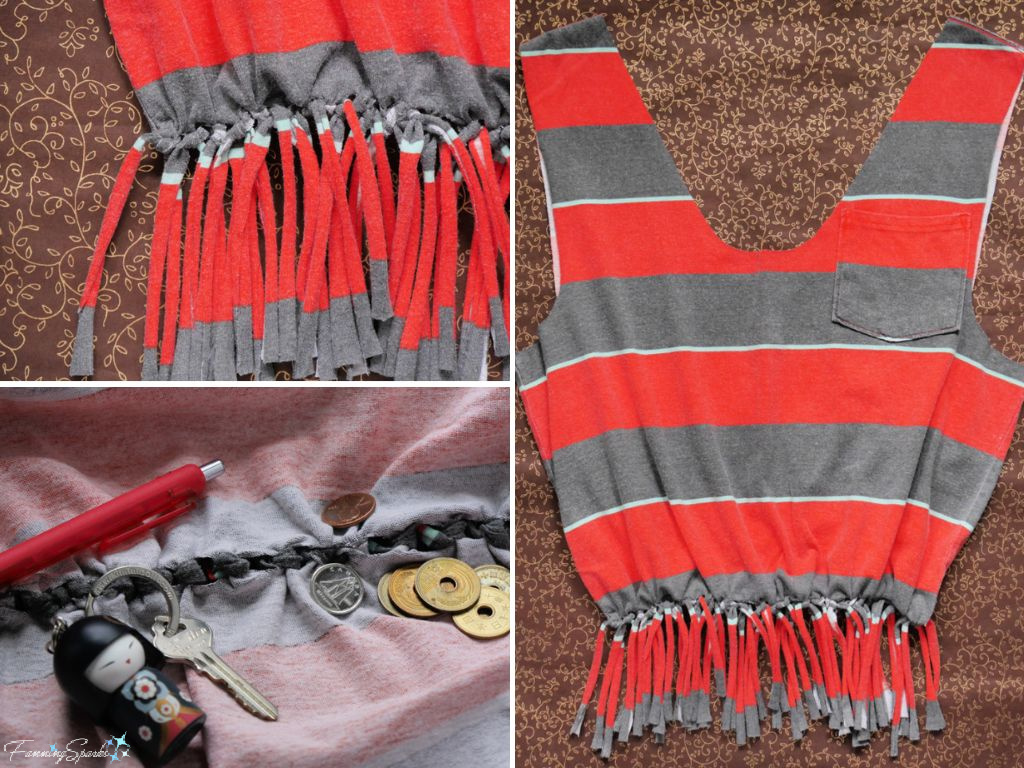
A popular option is to cut and tie the T-shirt tote bag. A few online tutorials even promote this as a 10-minute, no sewing project. Typically, these bags are made with only a pair of scissors. I had to give it a try. It took me longer than 10 minutes, but it is a very clever technique—quick and easy!
First, the sleeves are cut off and the neckline is trimmed. The cut edges are simply left unfinished. Here’s a closer look at how I modified the top of my T-shirt to create two carrying straps.
 I wanted the straps to be long enough to wear over my shoulder so the U-shaped cutout at the neckline is quite deep—nearly as deep as the armholes.
 Next, narrow strips are cut into the bottom few inches of the T-shirt and tied together to close the bottom of the bag. I cut off the hem and then measured and marked a line 5” from the bottom edge. Then, I cut ¾” vertical strips up to the 5” line.
 To close the bottom of the bag, the strips are tied together in pairs—each strip on the front of the T-shirt is tied to its counterpart on the back of the T-shirt. The resulting ties can be hidden inside the bag or left visible hanging along the bottom of the bag. I tried it both ways.
In the first approach, the T-shirt is turned inside out to tie the strips and then turned right side out. The ties stay hidden inside the bag along the bottom.
 In the second approach, the T-shirt remains right side out to tie the strips. Then each strip is stretched to make it curl into a slim cord. The ties are left hanging along the bottom of the bag creating a fringe. It’s a fun decorative element if boho casual is your style.
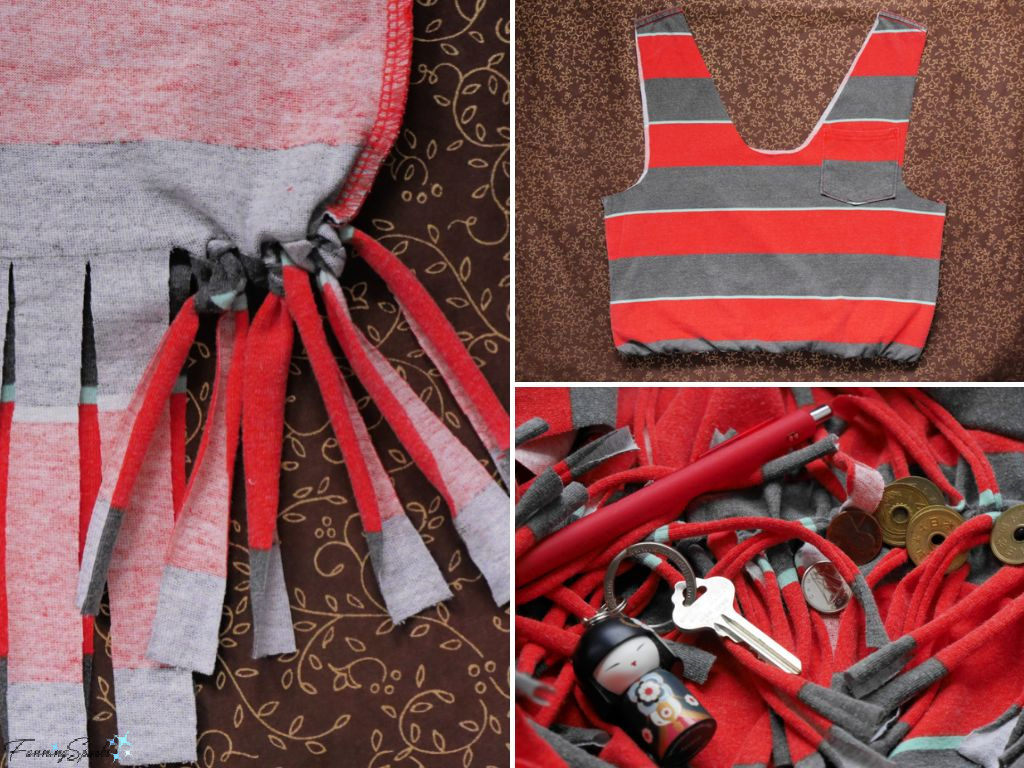
 As with all things, there are pros and cons to this Super-Easy Cut-and-Tie technique. The obvious pro is the speed and ease of completing the project. The cons may not be so obvious and their significance depends on how you plan to use the bag. For instance, although the ties close the bottom of the bag quite effectively, small holes do remain between the ties. Some makers recommend tying the strips with a second set of knots in an alternating pattern. I tried this, but, found the small holes remained and they’re big enough that small items, such as coins, could fall out of the bag.
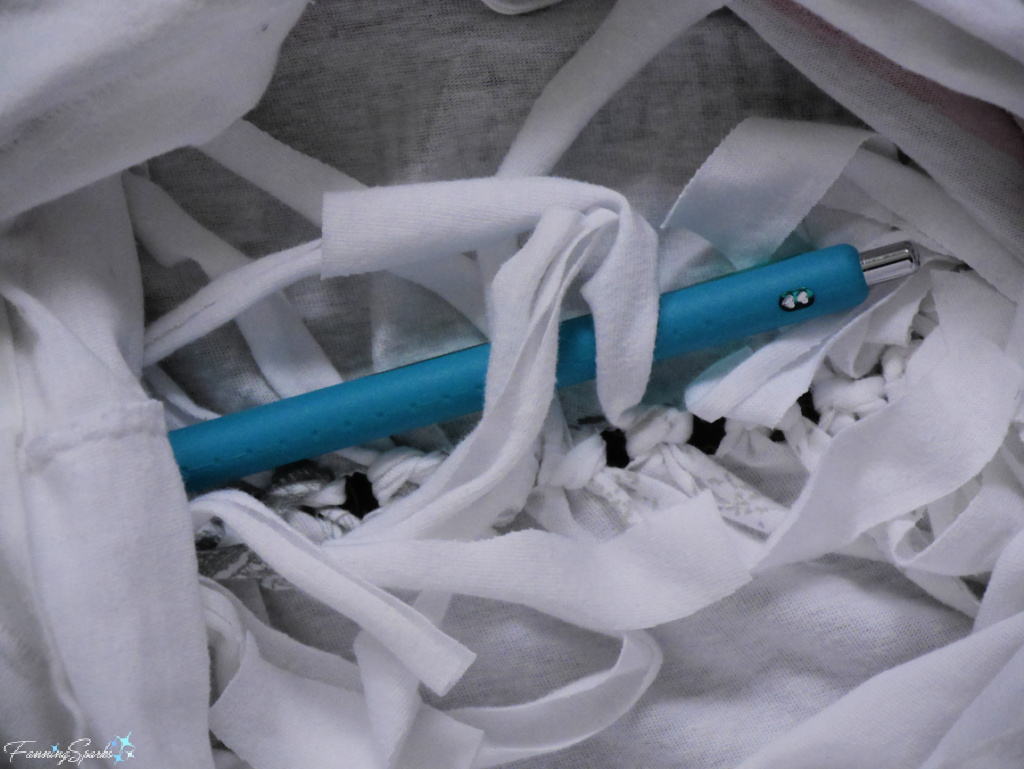
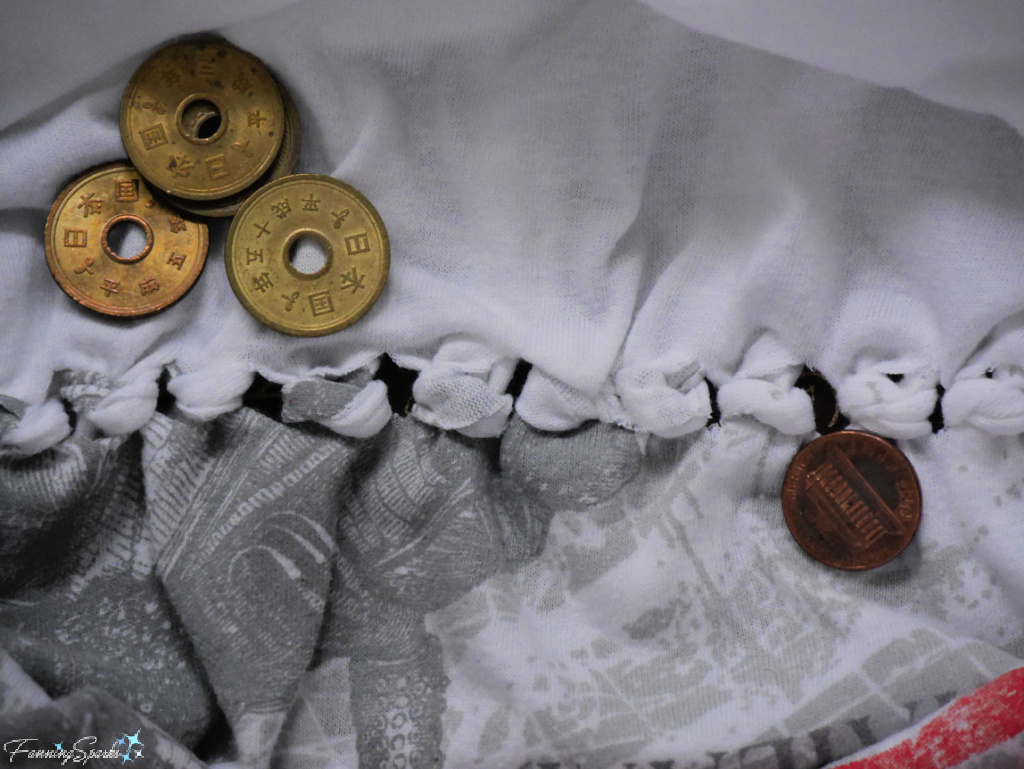 If you choose to hide the ties inside the bag (instead of creating a fringe), all the knots and fabric ties will be left nestled in the bottom of the bag. Items could get tangled, caught or lost in the ties.
Easy Cut-and-Sew Technique
As you might imagine, there are many ways to make a tote bag from a discarded T-shirt. After a little research, and some great tips from Marian, my sister and fellow maker (Thank you!), I made a T-shirt tote bag with this Easy Cut-and-Sew technique. This technique does require a little machine sewing but it’s very straightforward and only basic sewing skills are needed.
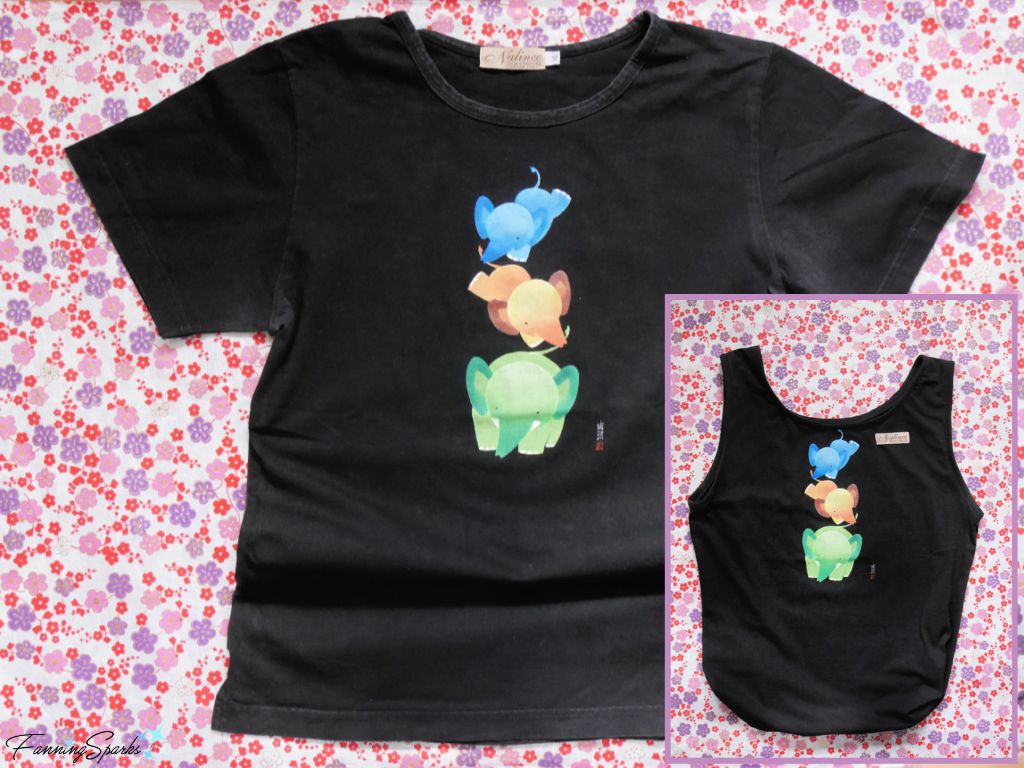
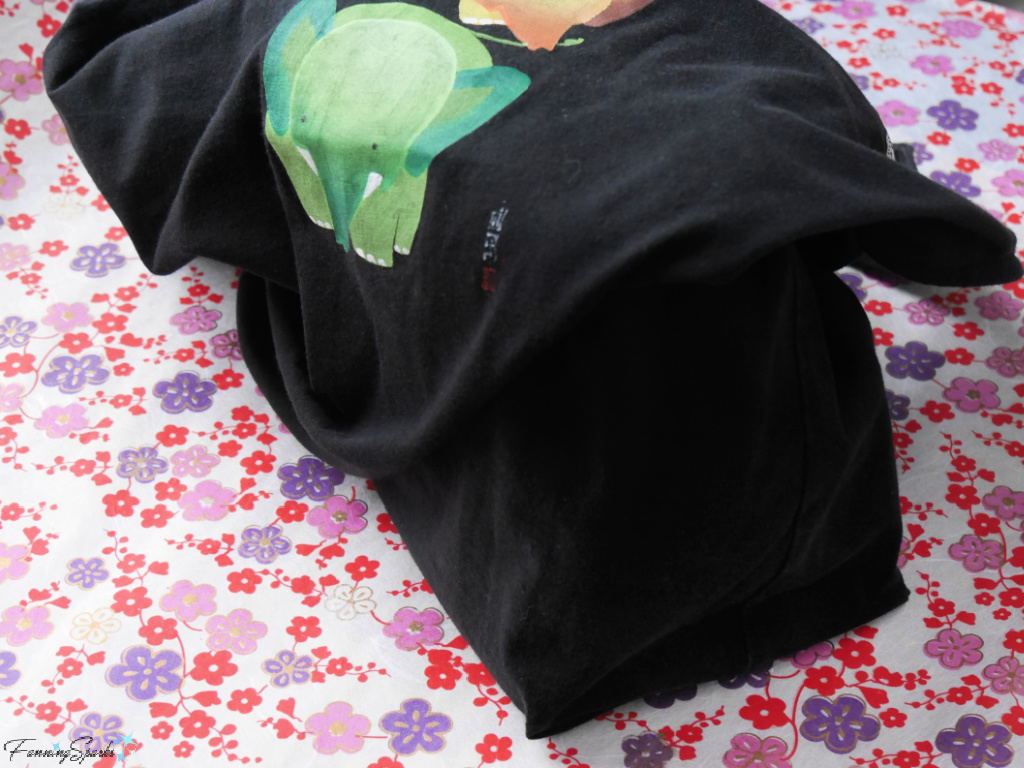
The T-shirt I chose for this project has been relegated to the back of my closet for some time. It’s obviously seen better days but I haven’t been able to part with it because of its story. I bought the T-shirt from the original artist in Southeast Asia (Thailand, I think) who hand-painted the design. It was some time ago and, unfortunately, I don’t recall the artist’s name but the tag clearly reads “Nalinee Batik & Painting”.
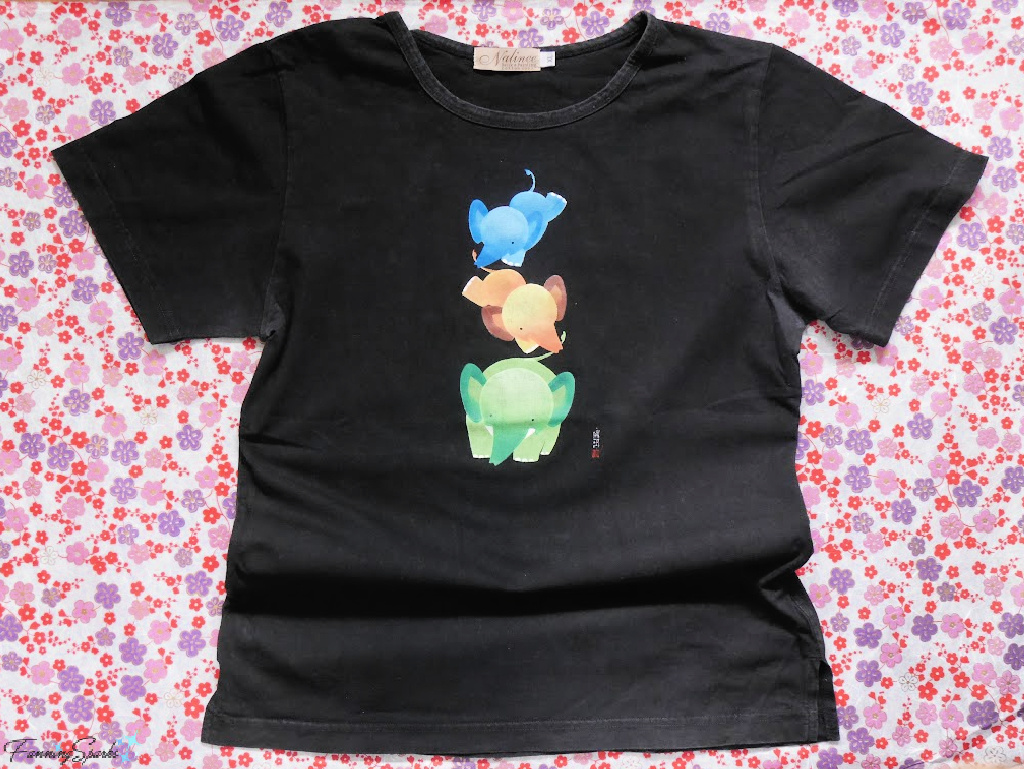 I have always loved this little tower of playful elephants.
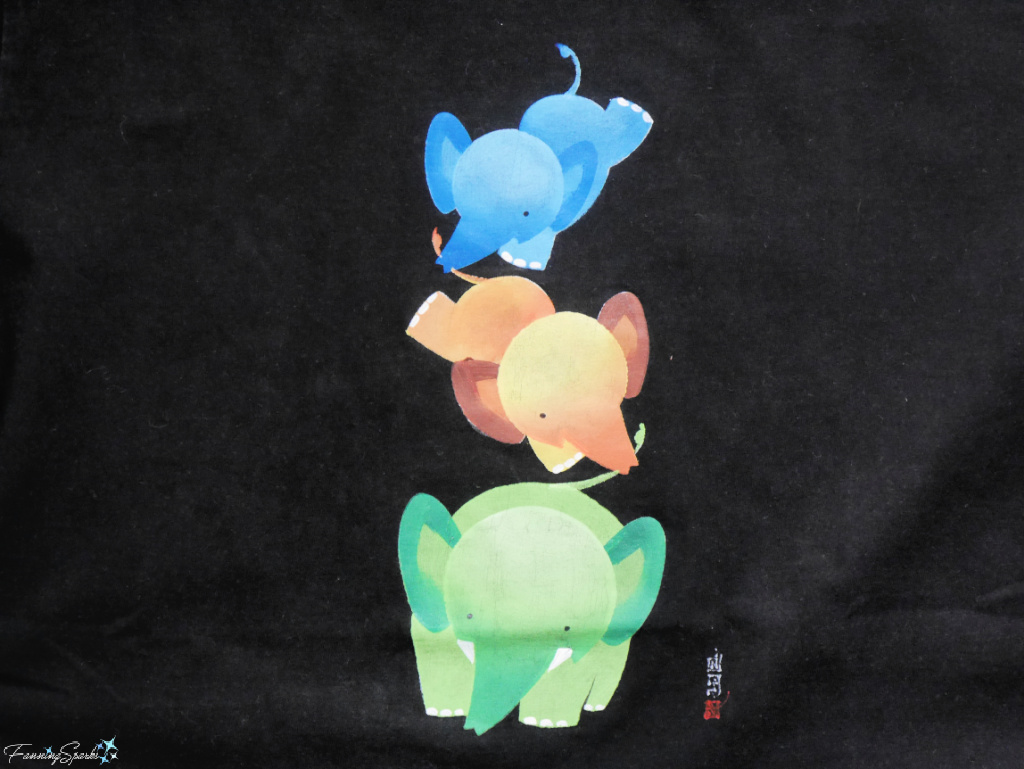 It’s the perfect T-shirt for this project so I took a big gulp and started cutting.
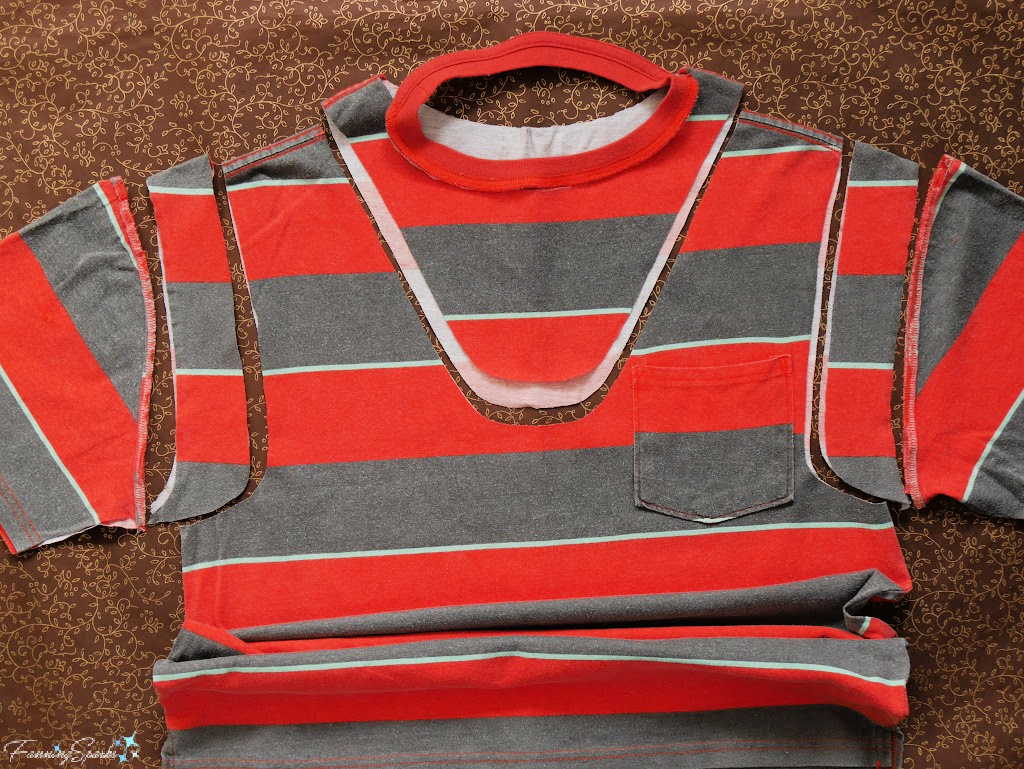
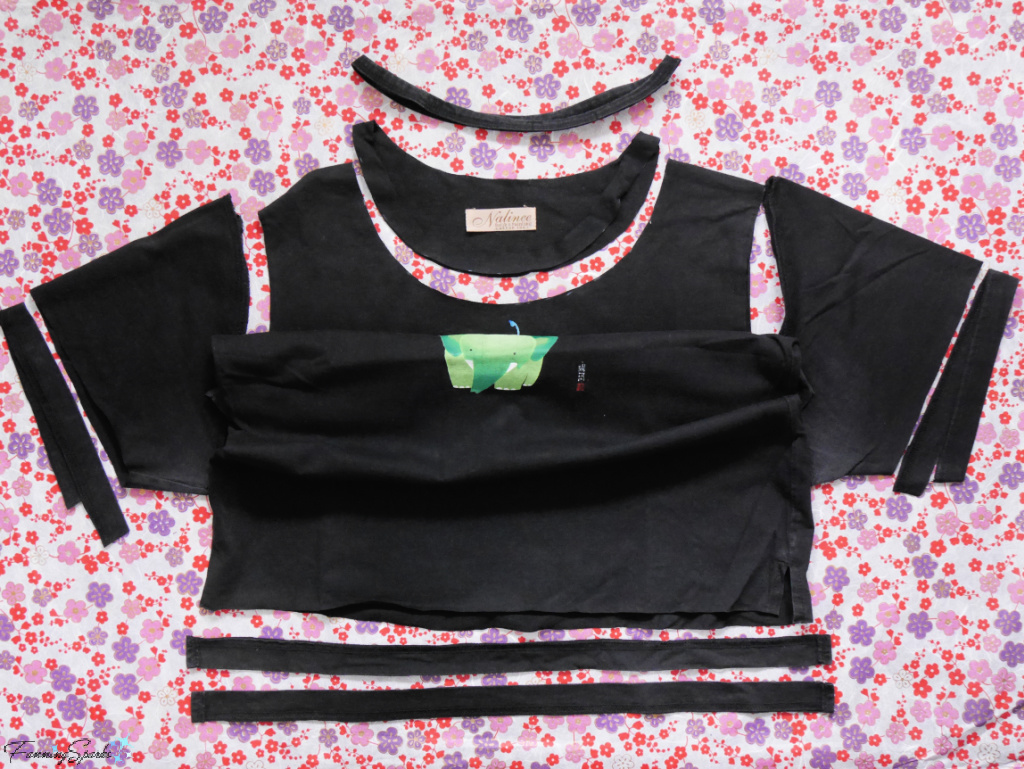
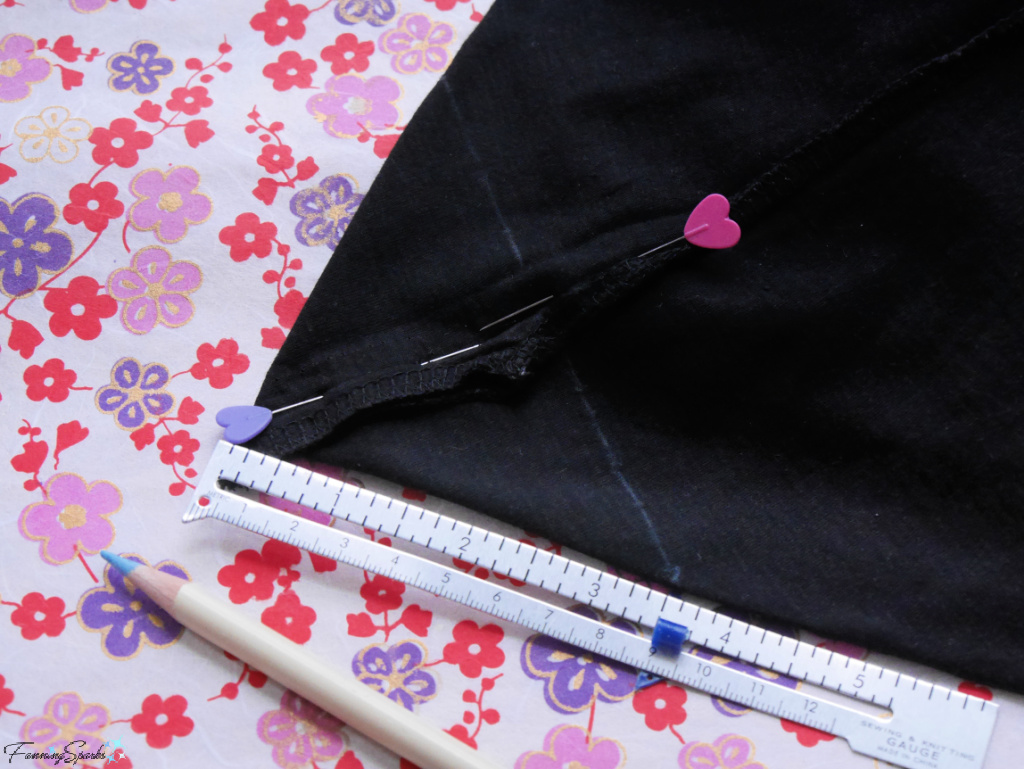
Here’s how. First, cut off the hems—from the bottom of the shirt and from both sleeves—taking care to trim close to, but not into, the stitching. Set the hem sections aside as they will be reused to finish other edges. Remove the sleeves including the sleeve seams. Remove the bias trim, if any, from around the neckline. Then scoop out the front and back neckline. I lowered the front neckline to be a little closer to the elephant artwork and then cut the back to match. This T-shirt bag will have two straps but, unlike the first T-shirt bag I made, these straps are designed to be carried by hand—they’re a little too short to be worn over my shoulder comfortably.
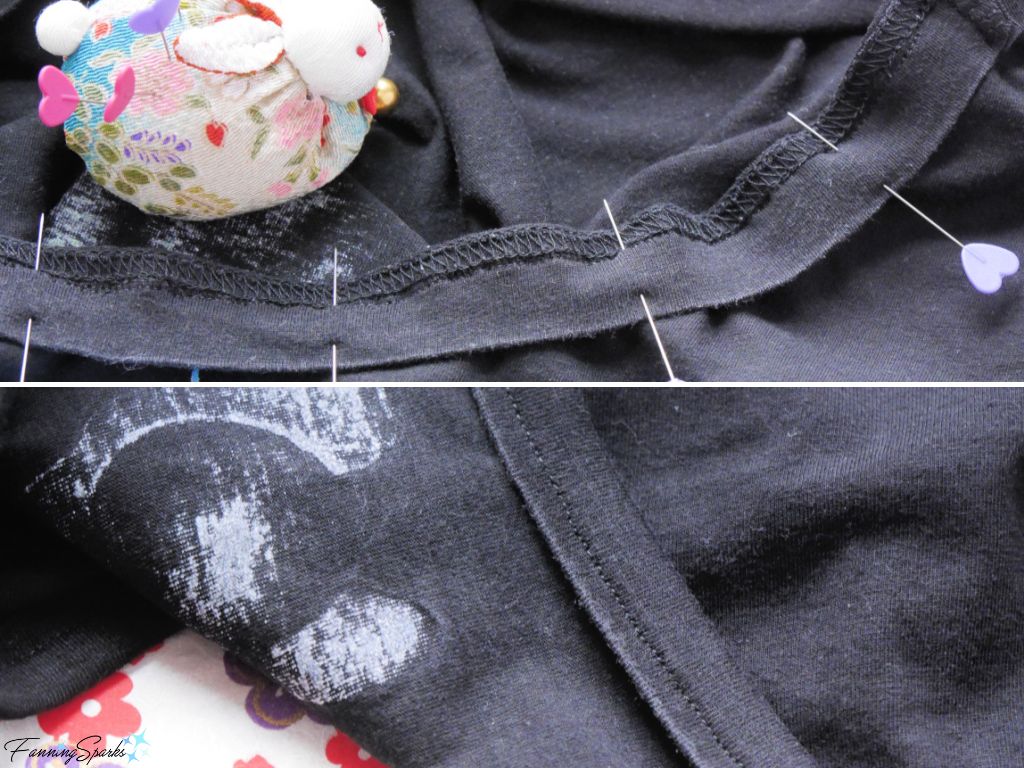
 Next, use the saved hem sections to finish the raw edges around the modified neckline and armholes. T-shirts will vary, but in my case, I joined the two sleeve hem sections and they fit around the neckline. Each hem section from the T-shirt body was just long enough to finish one of the armholes. Pin the hem section, right sides together with raw edges aligned, along the cut edge. For a clean finish, stretch the hem section slightly as you pin and sew. Sew together with a straight stitch. Then fold the hem section over the edges and sew again. The result is a nice, strong, clean finished edge.
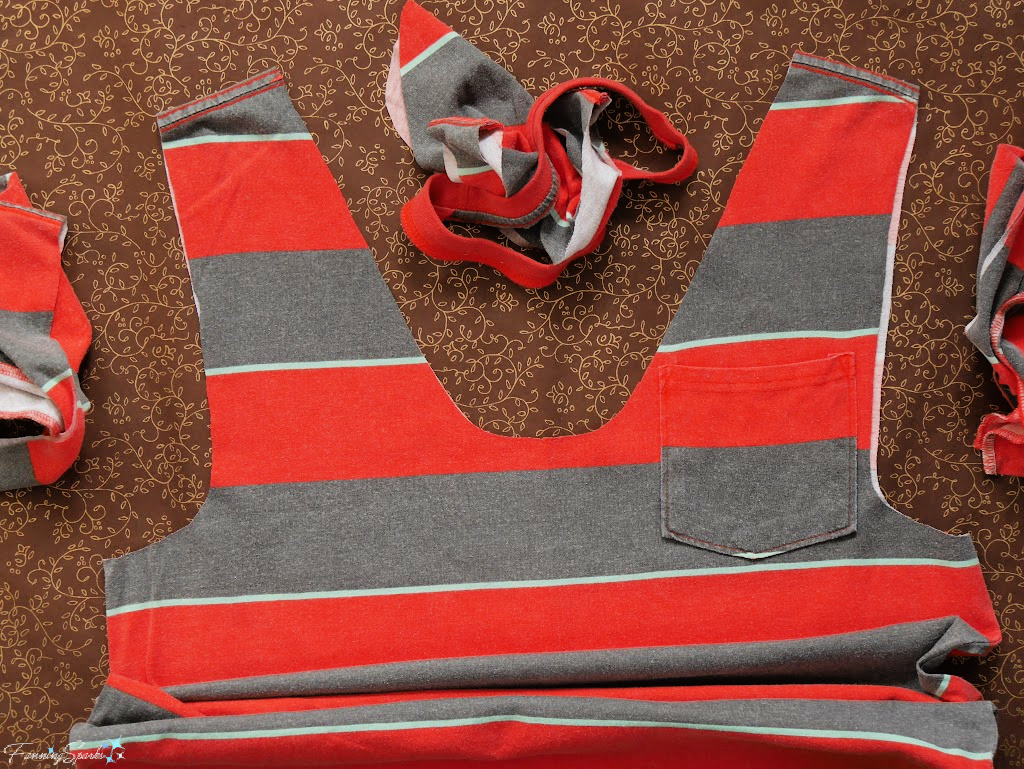
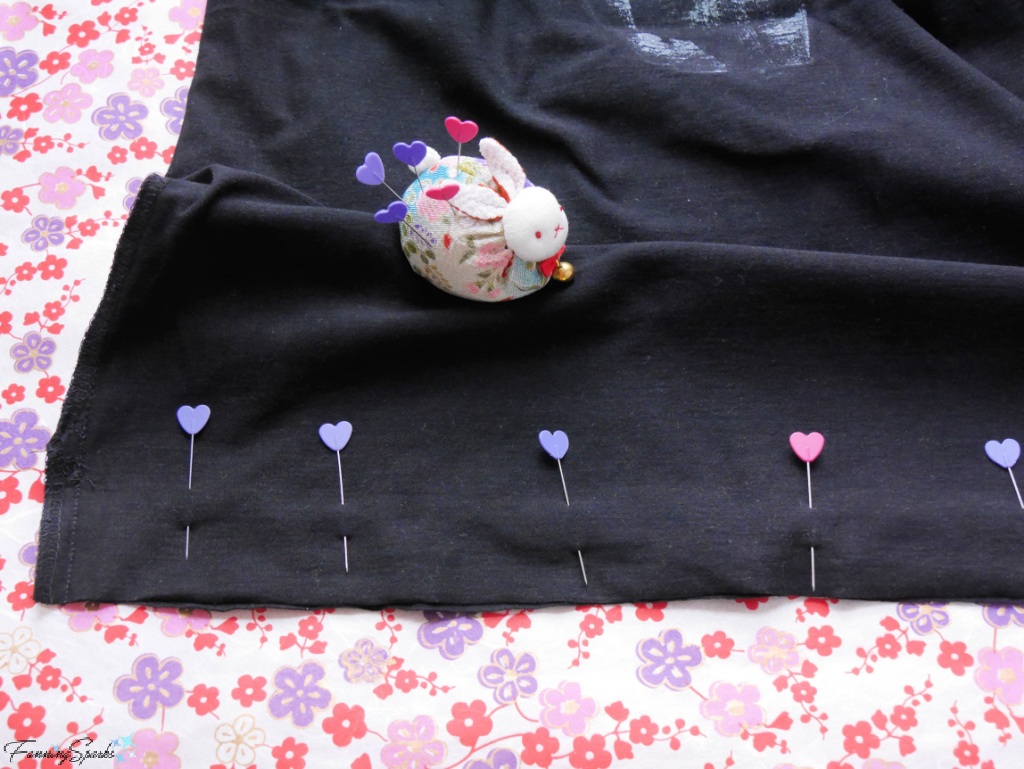
 To close the bottom of the T-shirt, align the bottom edges, with right sides together, and pin. Then simply sew straight across the bottom edge.
The final step is to add some structure to the bottom with box corners. To turn a regular flat corner into a box corner, use both hands to pinch and pull apart the sewn corner. As you pull the fabric apart, the seam lines will meet and a little triangle will form with the tip of the corner at the peak. Hand-press the new folds to reform the corner. Ensure the seams are aligned and pin. Measure an equal distance along both sides of the new corner, I used 3½”, and draw a line to connect the points. Sew along this line. This resulted in a 5″ side edge on the box corner. Repeat on the other bottom corner. You may wish to trim off the tip of the box corners.
 Then turn your new T-shirt tote bag right side out. Here’s how the box corner looks with an object inside the bag.
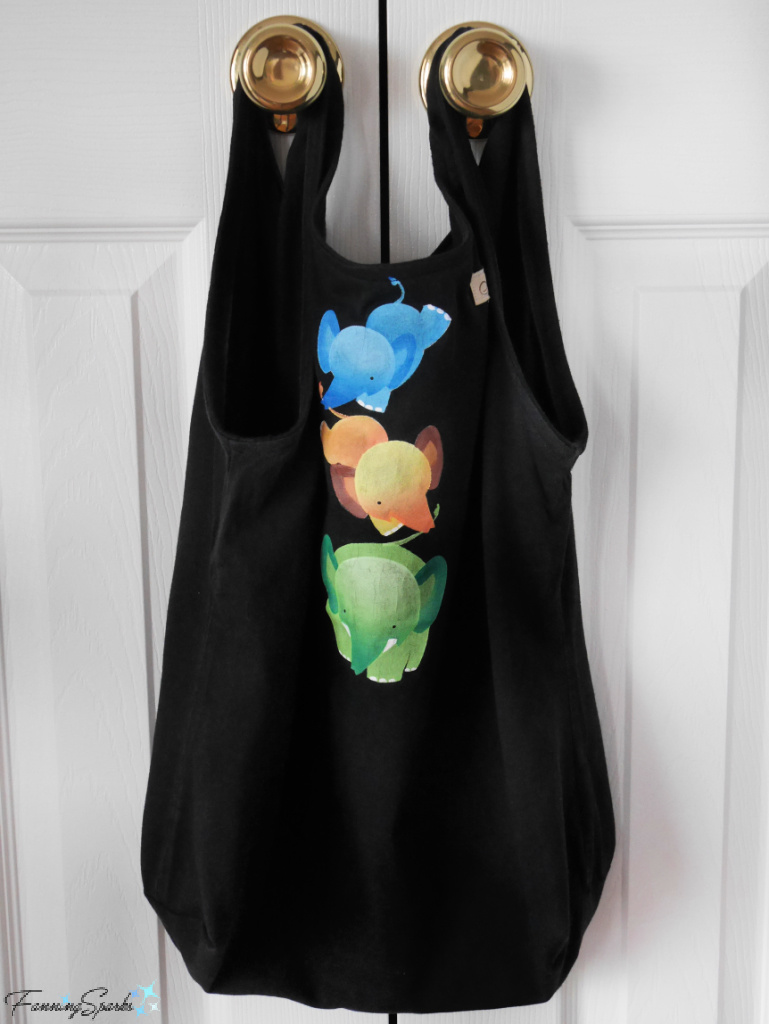
 And that’s it! Here’s the finished T-shirt tote bag made with the Easy Cut-and-Sew technique.
 It doesn’t take much effort to turn a discarded T-shirt into a tote bag giving it a new purpose and a second chance at life. Before I compare and contrast the two techniques I’ve shared in this blog post, I’d like to emphasize that both techniques are manageable, straightforward options. You can easily make a T-shirt tote bag with either the Super-Easy Cut-and-Tie technique or the Easy Cut-and-Sew technique.
In comparison, the Super-Easy Cut-and-Tie technique is simpler and requires a little less effort. The Super-Easy Cut-and-Tie technique requires no sewing while the Easy Cut-and-Sew technique requires a sewing machine with basic sewing skills.
In terms of maximizing the original T-shirt, I’d say the Easy Cut-and-Sew technique creates less waste by reusing the body and sleeve hems. Both techniques can effectively reuse T-shirt artwork if it’s located on the front of the T-shirt just below the neckline.
 The biggest difference, in my opinion, is the strength and durability of the resulting tote bags. The Super-Easy Cut-and-Tie T-shirt tote bag is weaker and less durable because of the unfinished edges of the straps. Typically, T-shirt fabric does not ravel but raw edges will stretch and wear out. The raw edges may be fine for occasional, light use but they would surely deteriorate with frequent use especially if the bag is used to carry heavy items. Another consideration is the small holes that remain along the bottom of the Super-Easy Cut-and-Tie bag.
On the other hand, the Easy Cut-and-Sew T-shirt tote bag has clean, finished edges and solid seams making it stronger and more durable. Of course, the degree to which strength and durability matters is totally dependent on how you plan to use your T-shirt tote bag. Both techniques—Super-Easy Cut-and-Tie and Easy Cut-and-Sew—can be used with success.
I’ll wrap up with one more look at my Easy Cut-and-Sew T-shirt tote bag—glammed up a bit for the final shot!
More Info
The FanningSparks January Maker Challenge for Earth-friendly projects has overflowed into February. Here’s an explanation of the series:
. See the blog post, Earth-Friendly Project Roundup, which kicked off the challenge with a roundup of previous Earth-friendly maker projects and initiatives from the blog.
. The blog post, Getting Roped Into Coiled Rope Basketry, is my first response to the challenge. It features using natural materials like cotton rope for maker projects.
. My second response to the challenge, the blog post Coiled Rope Animal Coasters – DIY Tutorial, includes step-by-step instructions to make a sheep-shaped coiled rope coaster.
. The blog post, Extending the Life of the Common T-Shirt, is my third response to the challenge. It explores options for repurposing T-shirts in light of the global overabundance of fast fashion garments like T-shirts.
. My fourth response to the challenge, leveraged the T-shirt yarn I learned to make from discarded T-shirts to make a trio of handy, crocheted baskets. Check out the blog post, T-Shirt Yarn Basket – DIY Tutorial, for step-by-step instructions.
. This blog post is my fifth response to the challenge.
Today’s Takeaways
1. It doesn’t take much effort to turn a discarded T-shirt into a tote bag giving it a new purpose and a second chance at life.
2. The shape of a T-shirt is surprisingly similar to the shape of a tote bag.
3. There are many ways to transform a T-shirt into a tote bag—the best technique depends on how much effort you wish to invest and the quality of the tote bag you want to make.


2 Comments
@Marian, Thanks! Peg
Nice!
It’s great that even a tote bag can have a story.
I love the reinforced edges.