
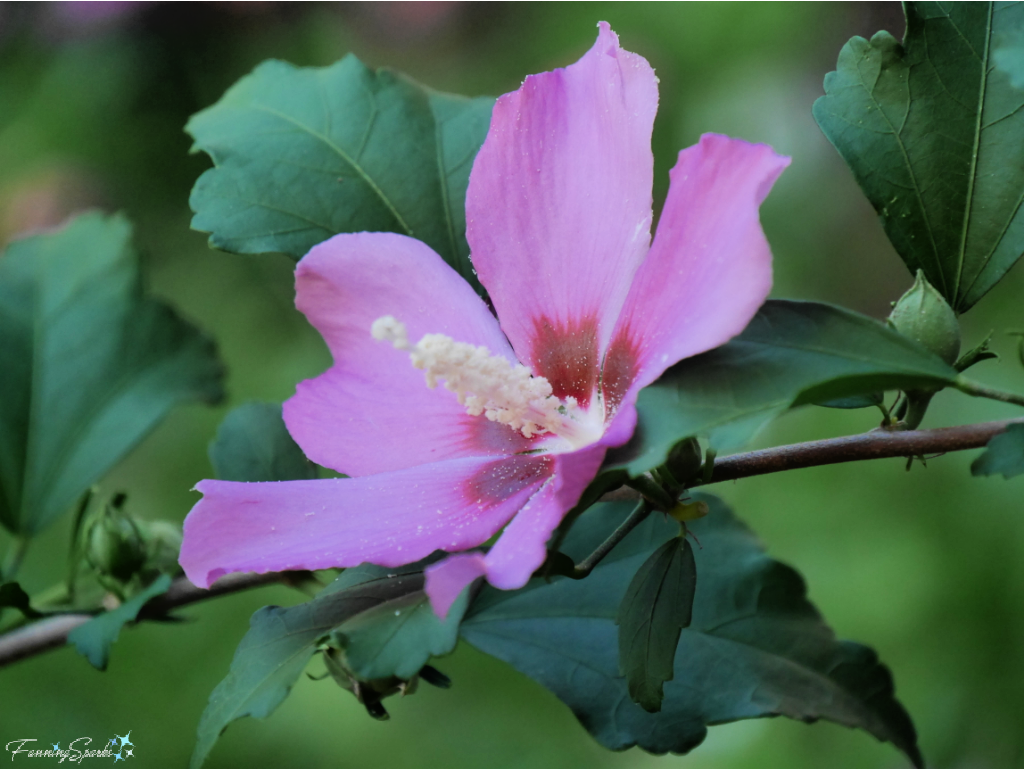
The star of this week’s post is the Rose of Sharon. This flowering shrub, officially Hibiscus syriacus, is also known as Althea or Hardy Hibiscus. It’s a prolific bloomer and has big, showy, pink blossoms.
 I tried drying and pressing some Rose of Sharon flowers in my new Fern & Flower Press and couldn’t be more pleased with the results. In this week’s post, I’ll share the wall art I made using these pressed flowers.
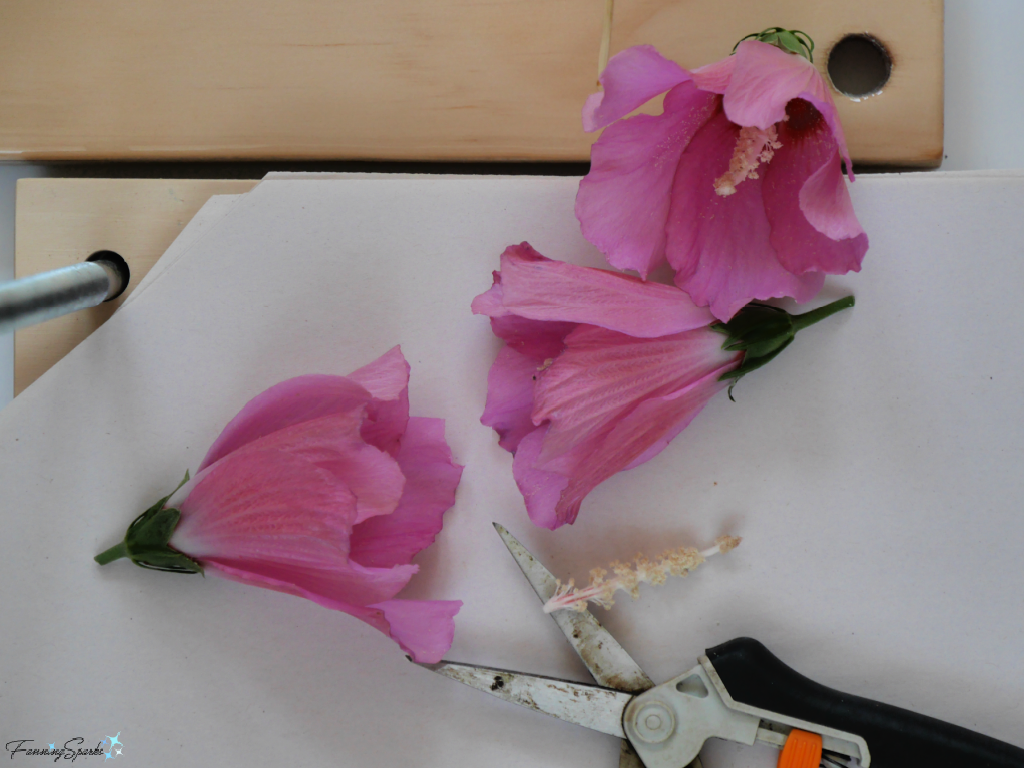
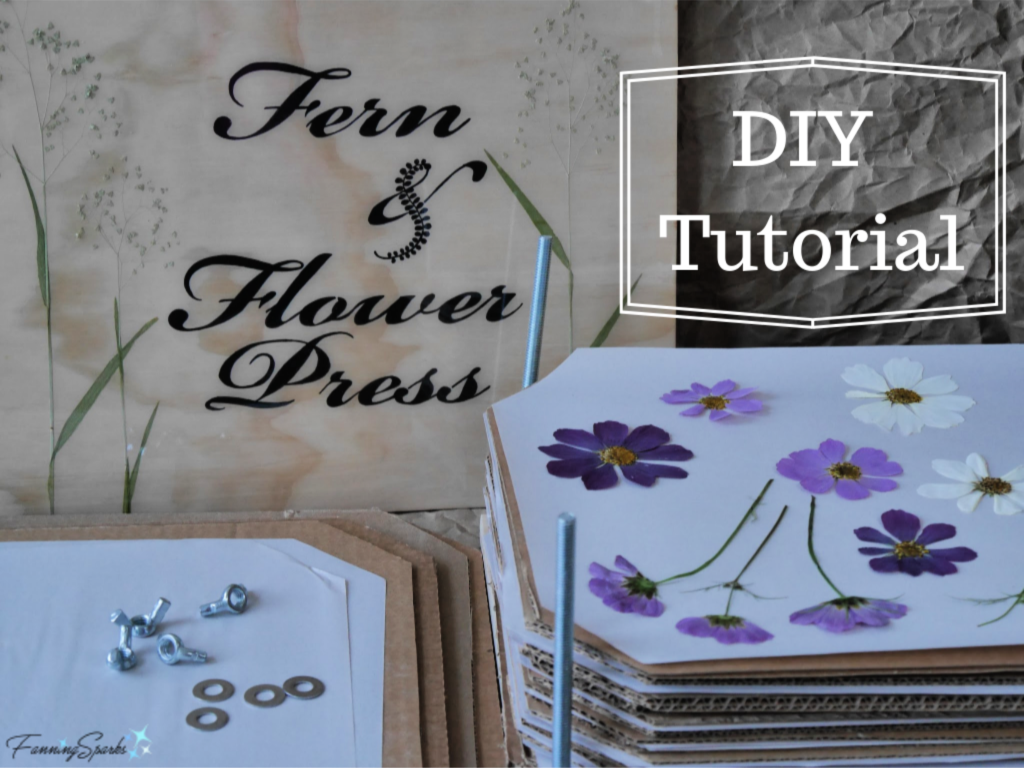
 It’s best to cut the Rose of Sharon flowers when they are partially open and to remove the stamens before putting them in the flower press. Check out my previous post Fern & Flower Press – DIY Tutorial for details on pressing flowers and making your own super-sized flower press.
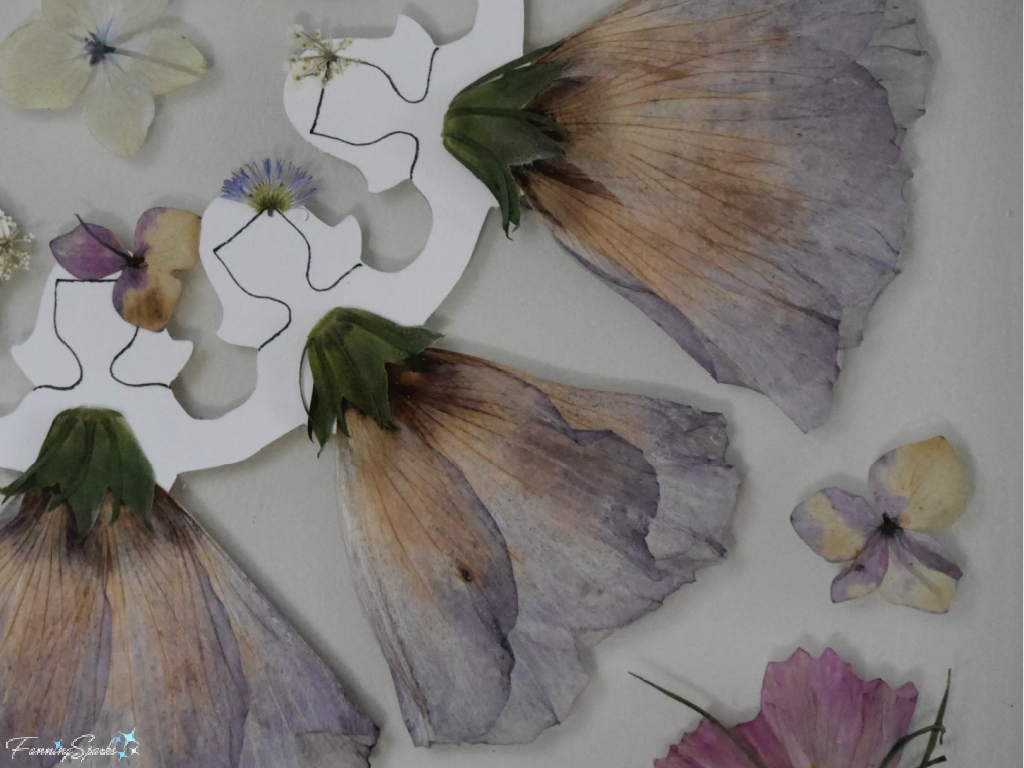
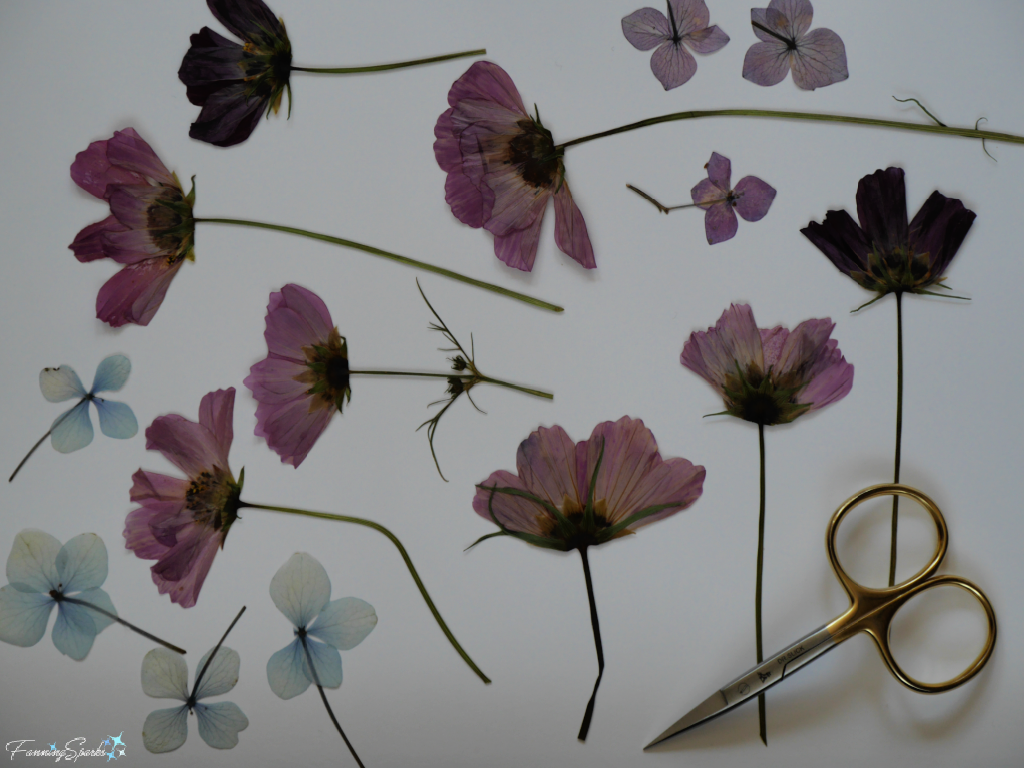
 Cosmos and hydrangea also have thin, delicate flower petals which dry beautifully. The flowers pictured below took about 2 weeks to dry.
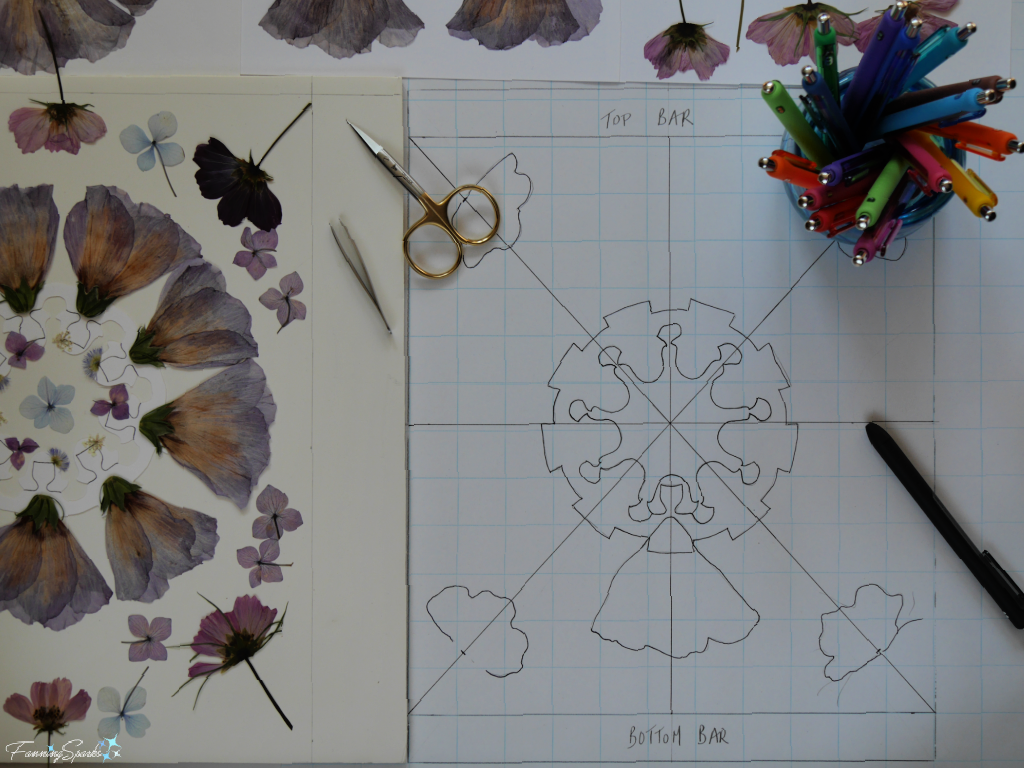
Next came the fun part—creating a pleasing arrangement with the pressed flowers! At one point, it struck me that the Rose of Sharon blooms looked like long, flowing dresses. This triggered an idea to include little dancing girls in the form of folded paper cutouts. The unadorned, simplicity of the cutout dolls counterbalances the fragile delicacy of the dried flowers.

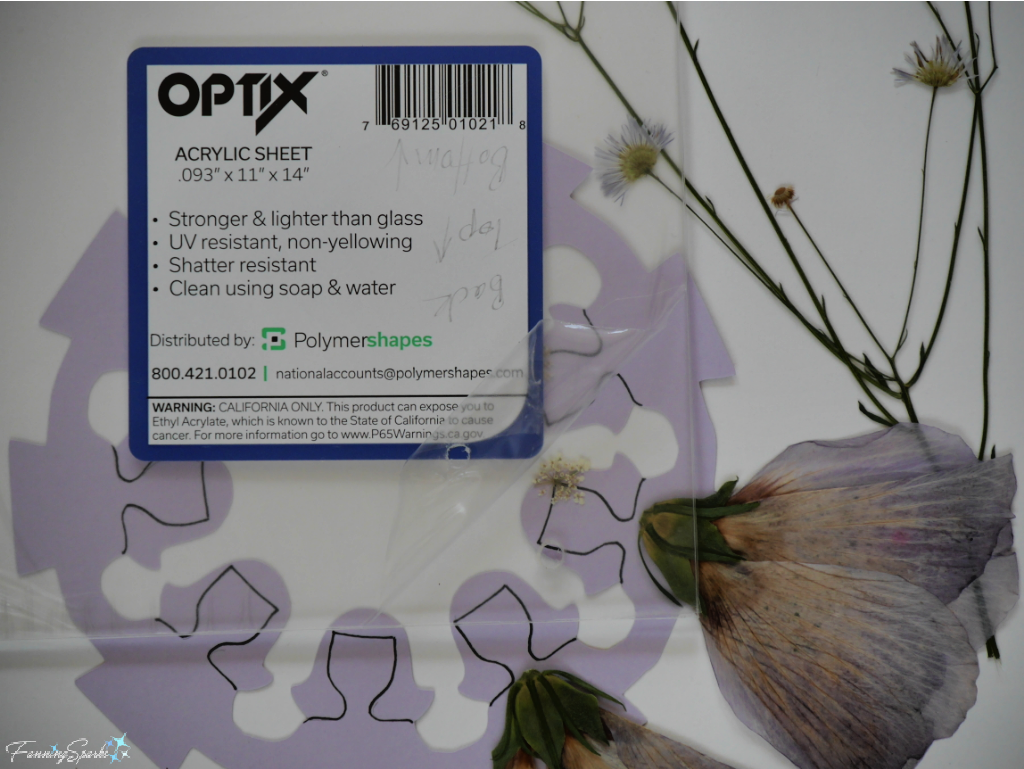
With the design well underway, it was time to finalize how the piece would be hung. I wanted a frame that would be modern and minimalist—something with floating glass and hidden support. So I decided to make one from strips of wood and 11″ x 14″ sheets of acrylic.
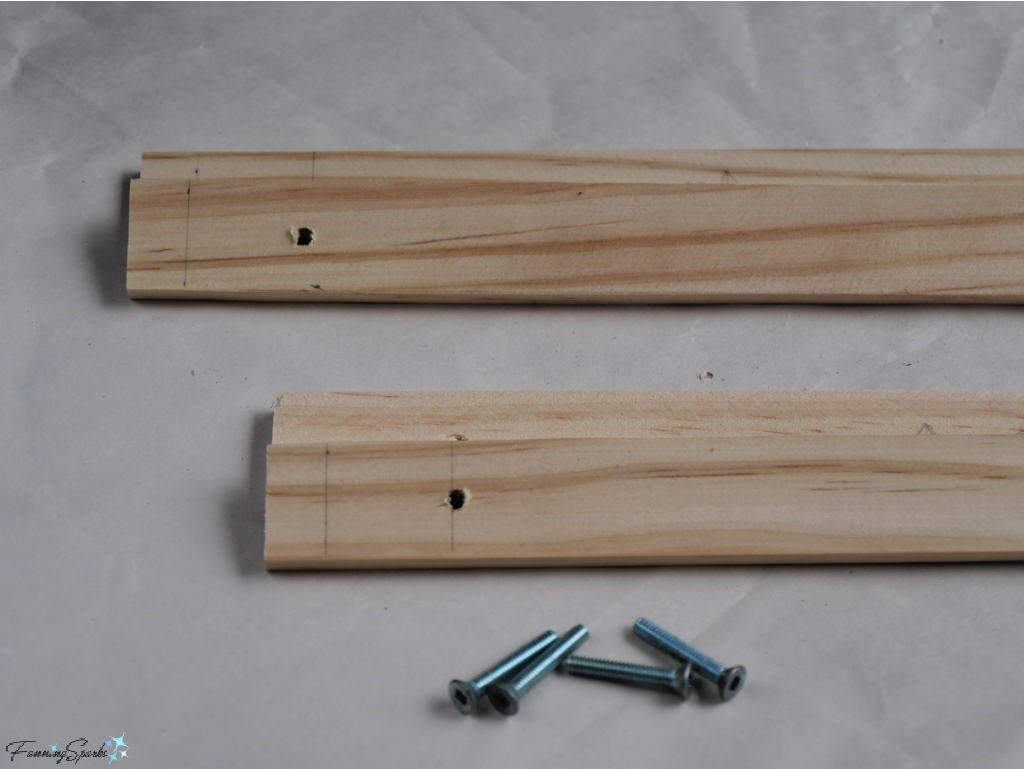
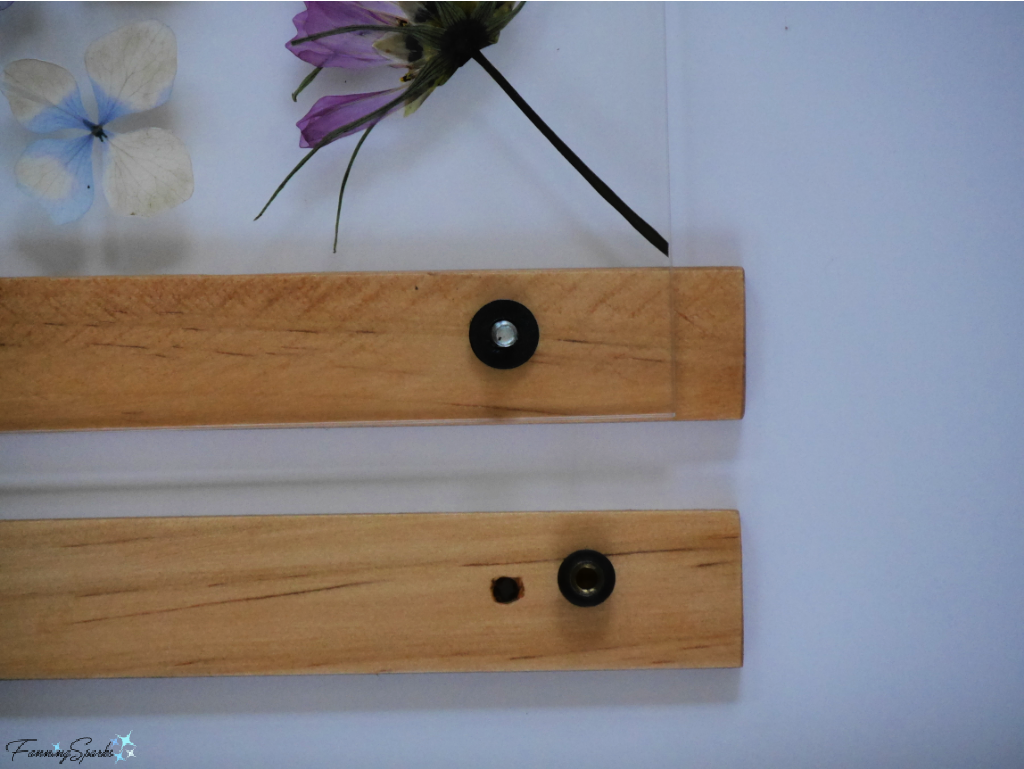
Simple ¼ ” pine lattice molding, cut to 4 – 12″ x 1″ strips, formed the top and bottom wooden bars. The wooden bars and acrylic sheets are held together with 4 – 1″ screws, one in each corner, finished with brass cap nuts. Note the cap nuts are intended for lighting fixtures and can be found in the electrical section at the hardware store. I spray painted the hardware components black.
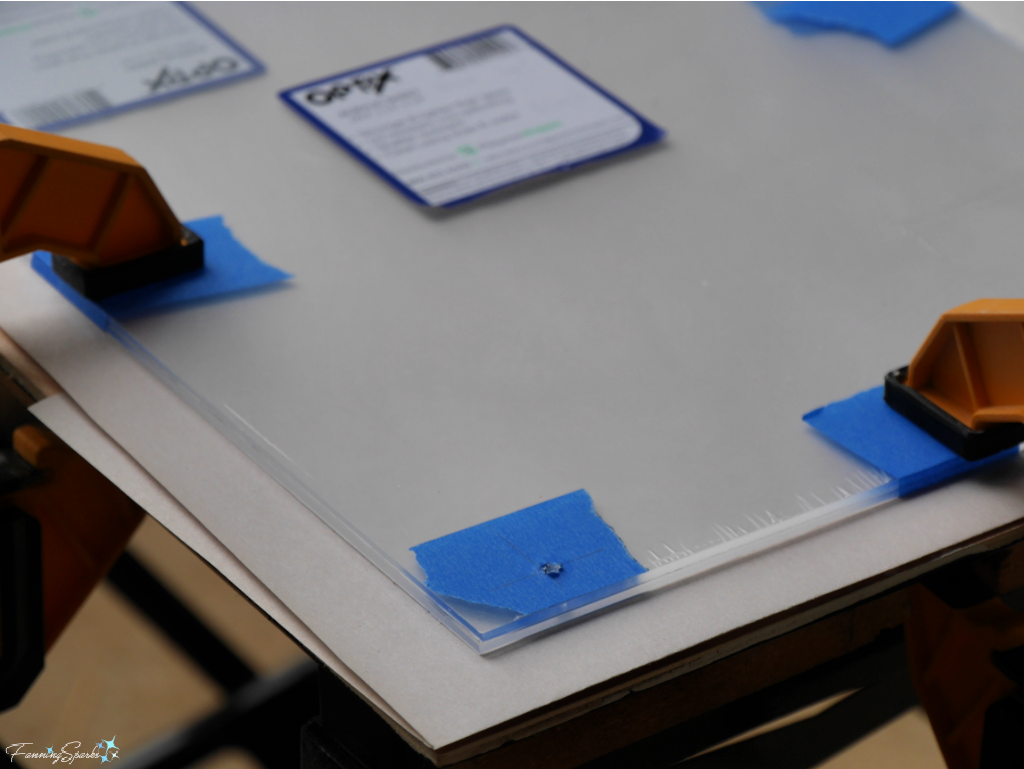
 The trick to drilling acrylic, as I learned online, is to drill slowly and work in gradual increments. Starting with a 1/16″ bit and gradually working my way up to a 11/64″ bit resulted in neat and clean holes. Note the holes in the acrylic are slightly bigger than the holes in the wood so the screws can slip through without resistance.
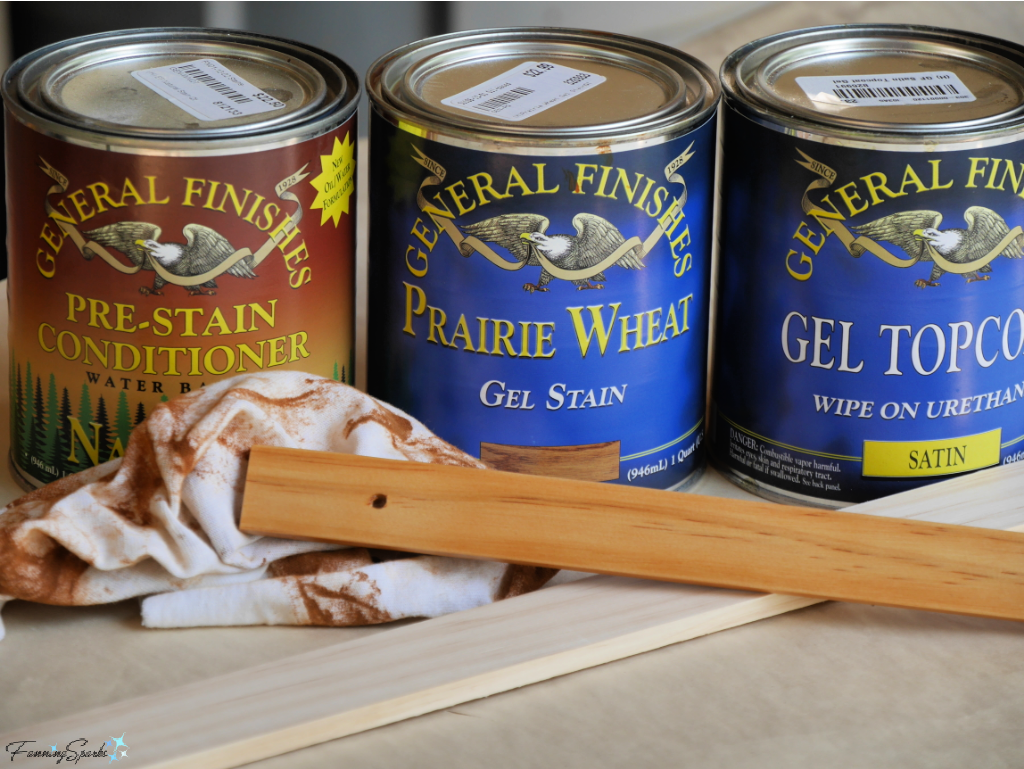
 To finish the wooden bars, I sanded them smooth and then stained them with some General Finishes Gel Stain left over from another project. This product produces great results but does require a few steps and a little patience.
While the wooden bars dried, I finished laying out the pressed flowers and copied the design onto a template.
 The next step was to glue the cut paper dolls and the dried flowers to the back sheet of acrylic. Using a small paintbrush, I carefully covered the back of each element with Matte Mod Podge. Tweezers were helpful for lifting and placing the tiny delicate pieces. After drying the piece overnight, I used wet cotton swabs to remove smudges and smears.
The final step was to assemble the piece by layering the parts—back wooden bars, back acrylic sheet, thin washers, front acrylic sheet, front wooden bars—and screwing them together through the holes.
A piece of black silk cord, strung with 8 wooden beads stained to match the wooden bars, made an attractive hanger. I simply knotted the cord and slipped it between the front and back wooden bars.
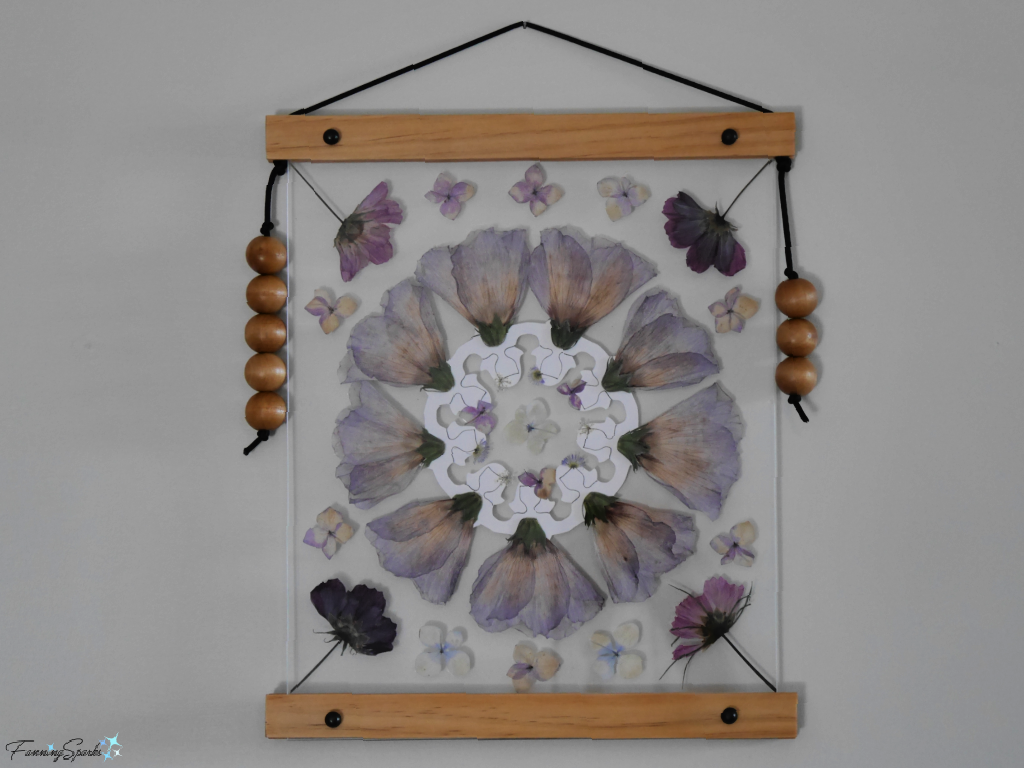
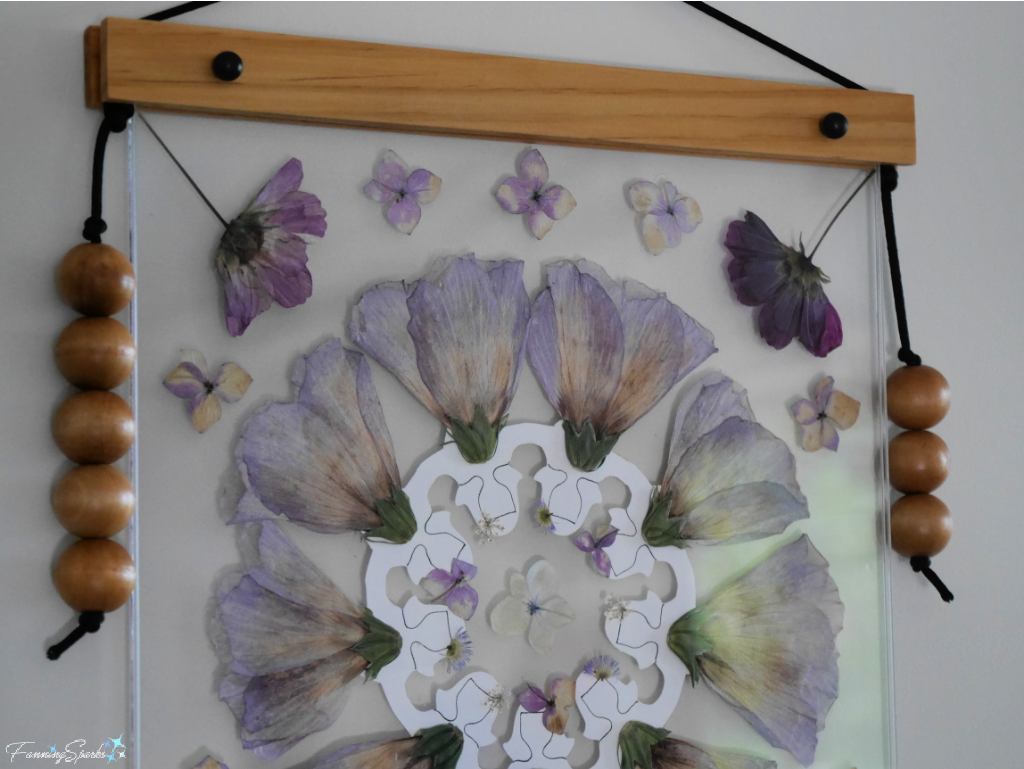 Here’s the completed piece. Now the lovely Rose of Sharon flowers can live on as pretty Pressed Flower Girls!
More Info
For more pressed flower inspiration, check out my newest Pinterest board: Pressed Flowers – FanningSparks Favs.
You can learn more about pressing flowers and making a flower press in the post: Fern & Flower Press – DIY Tutorial.
Today’s Takeaways
1. Consider pressing flowers to preserve their beauty.
2. Pressed flowers can be incorporated into a variety of artwork.
3. Natural elements, such as pressed flowers, can help bring the outdoors into your home.

Comments are closed.