Please bring a smile and wear comfortable clothing you don’t mind getting paint on.” wrote Mary Reed in her introductory email.  With this one sentence, Mary deftly set the tone for her recent Quilt Block Painting workshop.  The one-day workshop was part of the popular Festival of LearnShops held in Berea, Kentucky.
An enthusiastic group of eight students gathered on a Wednesday morning at Berea’s Russel Acton Folk Center.  Several students had painted quilt blocks before and were adding to their collections.  Others, like me, were new to the activity.  Mary made everyone feel welcome.  Then she explained the materials and tools we would be using.
We used 2-foot square panels of aluminum composite material to make our quilt squares.  This is the same material used by professional sign makers.  It is specifically designed to withstand harsh weather and is lightweight, bend-resistant, durable and moisture-resistant.  Commercial brands include DIBOND® by 3A Composites and PolyMetal™ by Nudo Products.  Mary had already primed our metal sign boards with Zinsser Bulls Eye 1-2-3 Primer so we were able to start marking our patterns right away.
Most barn quilts (see my previous post Have Barn Quilts Made a Comeback?) feature traditional patchwork quilt patterns with repeating, geometric shapes in a carefully-defined color scheme.  This barn quilt, spotted on a dairy barn in Wisconsin, is a case in point.
Barn Quilt at Cedar Bend Farm in Wisconsin   @FanningSparks
As reported in the 1935 book, The Romance of The Patchwork Quilt in America, “The pieced quilt (made of pieces of fabric cut after patterns and sewed together to form a block or repeat) was familiar to most households where economy was a necessity, as it was created of scraps of material not otherwise of use.  The pieced quilt in pioneer days provided means of turning to good account the precious scraps of printed cottons, at that period so rare and costly.  The use of so many tiny pieces in one quilt and the pride with which the number-often in the thousands-was announced, gave evidence of their patience and frugality.
The below quilt, in a Courthouse Square pattern, illustrates the beauty of a patchwork pieced pattern.  It was made in northern Illinois and given to Mary Catherine McCool as a wedding gift in 1849.
Courthouse Square Quilt Given to Mary Catherine McCool   @FanningSparks
We were able to choose from various quilt block patterns. Mary provided a variety of options for anyone who had not brought one from home.  Mary patiently guided us through the steps of drawing our patterns and then taping and painting our designs.  It’s not a difficult process although it does require patience and careful attention to detail.  In today’s post, I’d like to share some of the lessons I learned while painting my first barn quilt block.
Lesson #1 – Simplify the Design
I looked at a variety of patchwork quilt blocks and painted barn quilts online before deciding on a pattern.  The many hummingbirds visiting our feeders lately inspired me to seek a pattern featuring one of these flying jewels.
Hummingbird Hovering   @FanningSparks
Hummingbird Perched on Feeder   @FanningSparks
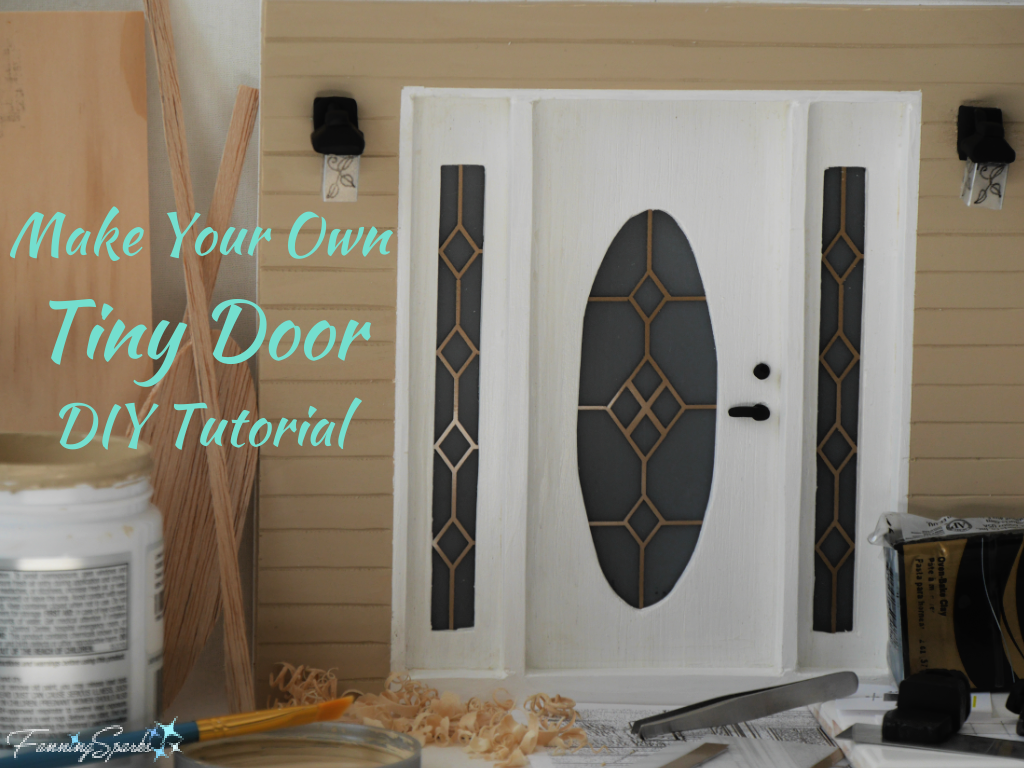
Elements from a few different patterns were merged into a single design.  Then using special software, called Rapid Resizer, I created a line drawing of the design, resized it to the desired 24” x 24” square format, and printed it.  This is the same software I used in a previous project to make a tiny door (see Make Your Own Tiny Door – DIY Tutorial Part 1).  It worked very well for this project.  Shown below are the printed pattern elements I brought to the workshop.
First Design for My Lilies & Hummingbird Barn Quilt Block   @FanningSparks
In hindsight, this design was a little too ambitious for a one-day workshop—especially for a beginner.  I did manage to get a good start at the workshop but wasn’t able to finish the project.  I drew the pattern, painted the background, and painted the first dozen or so parts.  Most importantly, I learned the process and gained the confidence to finish it on my own.  Here’s how my barn quilt block looked at the end of the workshop.
My Lilies & Hummingbird Barn Quilt Block After Workshop   @FanningSparks
I took my partially-complete barn quilt block home and set about finishing it.  The first thing I did was rework the design.  After seeing the pattern laid out, I decided the original design was too busy and complex with too many small, fiddly pieces.  So, I enlarged the flowers and the hummingbird, removed the rows of diamonds, shrunk the border and simplified the center element.  The revised pattern is bolder and more streamlined.  The below photo shows the main elements of the revised pattern.
Pattern Elements Version 2 for My Lilies & Hummingbird Barn Quilt Block   @FanningSparks
Lesson #2 – Plan Color Scheme
The Quilter’s Recipe Book offers this advice about color selection. “In any pieced block, the variations you can create by changing and rearranging colors and tones are almost infinite.  It is useful at this stage to make a quick sketch of your block and photocopy it several times.  Use colored pencils or fiber-tipped pens to try out different color schemes.”  Alternatively, you can use colored paper to test color combinations as Mary helped me do at the workshop.
Testing Color Scheme for My Lilies & Hummingbird Barn Quilt Block   @FanningSparks
At home, I spent a little more time planning my color scheme and mixing paints.  I selected three analogous colors, blue, violet and red, for the three large flowers.  Then added white paint to create a tint for each and black paint to create a shade for each.
Mixing Paints for Three Colors of Blue   @FanningSparks
To add a little drama and sparkle, I selected yellow and orange as accent colors for the small flower in the center.
Center Flower and Hummingbird in My Lilies & Hummingbird Barn Quilt Block   @FanningSparks
Lesson #3 – Tape Precisely
Every element of the barn quilt block design is painted independently.  Painter’s tape is placed around the outside edges of each part to ensure neat, clean painted lines.  There are a few tricks to avoid bleeding (as seen on the top black edge shown below) and get perfect edges (as seen on the bottom black edge shown below).
Taping for Painting – Comparison   @FanningSparks
One trick is to use a sharp X-Acto knife with a metal ruler to cut the painter’s tape.
Taping for Painting - Cover Edges with Painter’s Tape   @FanningSparks
Another trick is to use a bone folder (credit card or similar tool) to burnish the edges of the tape.  But the best trick is one Mary shared with us—seal the edges of the tape with a small amount of Acrylic Matte Medium.  Simply paint over the medium.  It’s important to apply the medium sparingly, though, to avoid ridges and bumps under the paint.
Taping for Painting - Burnish and Seal Tape Edges   @FanningSparks
The final trick is to remove the painter’s tape, before the paint dries, by pulling it away from the painted area at an angle.
Taping for Painting – Remove Tape   @FanningSparks
Lesson #4 – Paint Carefully
Mary recommends exterior latex semi-gloss paint for barn quilt blocks.  Small foam rollers work well for large sections and foam brushes work well for small sections.  I like to line my roller tray with foil to ease cleanup.
Painting with Foam Roller   @FanningSparks
Start with the lightest color, taping and painting all the elements in this color at once.  Allow the paint to dry before adding a second coat.  Then remove the tape, allow the paint to dry and move on to the next paint color—working from light to dark.
Painting My Lilies & Hummingbird Barn Quilt Block   @FanningSparks
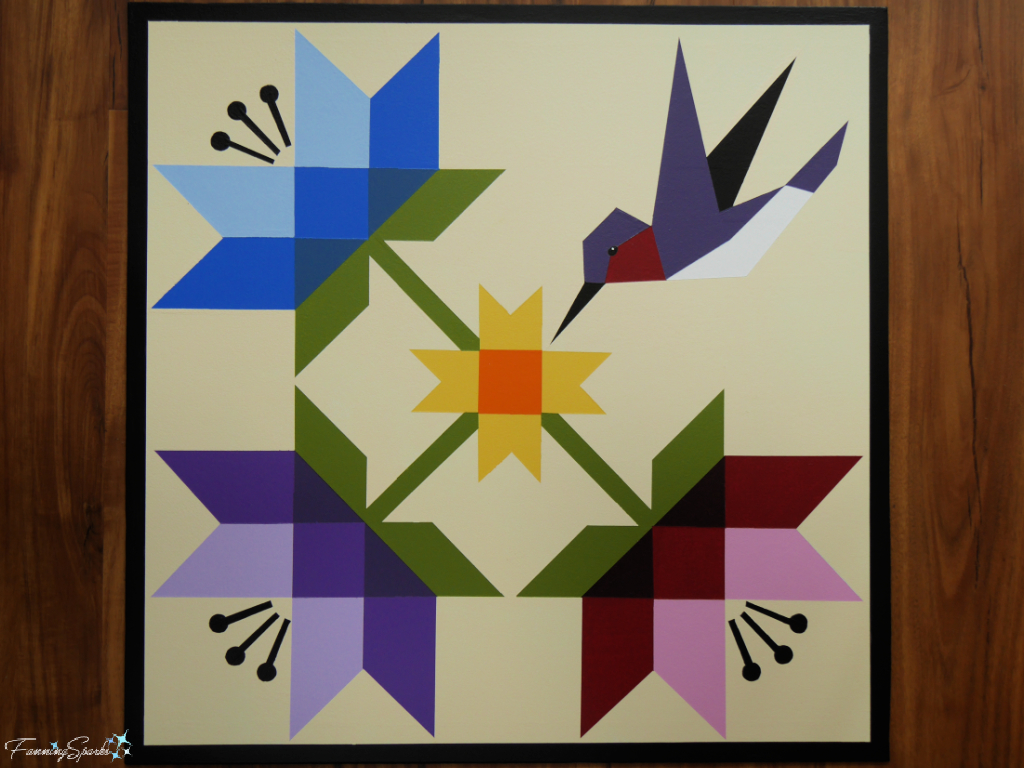
After lots of taping and painting, I finally finished my first 2-foot square barn quilt block.  Here’s how my personalized Lilies & Hummingbird design turned out.
My Finished Lilies & Hummingbird Barn Quilt Block   @FanningSparks
And here it is beside the peppy orange bench I plan to hang it above.  I’m really glad I took the time to rework the design and super pleased with the results!  I’m also grateful to have attended Mary Reed’s Quilt Block Painting workshop.  Many thanks to Mary and the other participants for a great workshop and a fun day!
My Finished Lilies & Hummingbird Barn Quilt Block with Bench   @FanningSparks

More Info

To learn more about barn quilts and see several examples from Kentucky, check out Have Barn Quilts Made a Comeback?
The charismatic town of Berea Kentucky hosts the Festival of LearnShops every summer.  The LearnShops are short workshops on a wide variety of subjects such as sustainable living, Appalachian crafts, fiber arts, jewelry making and quilt block painting.  To learn more about Berea, the Folk Arts & Crafts Capital of Kentucky, check out the Visit Berea website.  Information about the annual Festival of LearnShops is also available there.
The quilting reference books mentioned in this blog post are available for free on Archive.org:
. The Romance of the Patchwork Quilt in America by Carrie A. Hall and Rose G. Kretsinger
. The Quilter’s Recipe Book by Celia Eddy
To learn more about the Rapid Resizer software used in this project, see my previous post Make Your Own Tiny Door – DIY Tutorial Part 1 and/or the Rapid Resizer website.

Today’s Takeaways

1. Painted barn quilt blocks typically feature traditional patchwork pieced quilt patterns.
2. Simplify the design and plan the color scheme for a painted barn quilt block.
3. Take time to tape precisely and paint carefully when painting a barn quilt block.
Peg - FanningSparks Author

Barn quilts were all the rage about 20 years ago.  Artists and enthusiasts across the country were painting large quilt blocks and hanging them on their barn walls.  Community members joined forces to organize quilt trails.  Local visitor centers created barn quilt maps and encouraged people to come visit.  Curious visitors travelled scenic back roads in search of barn quilts and found local culture along the way.  Discoveries were shared.  Guide books were written.  More barn quilts were created and the cycle continued.  The Barn Quilt Movement was in full swing.
All of this came to mind, when I spotted these pretty, scaled-down barn quilts on a recent visit to the Red Oak Lavender Farm (see my Stop and Smell the Lavender blog post).
Barn Quilt Squares at Red Oak Lavender Farm   @FanningSparks
It made me wonder… what ever became of barn quilts?  Are they still a thing?  My quest for answers led me to the beautiful state of Kentucky.  In addition to stunning horse farms, …
Stables at Claiborne Farm in Paris Kentucky  @FanningSparks
…endless miles of plank board fences, …
Plank Board Fences in Paris Kentucky   @FanningSparks
…spectacular, award-winning thoroughbred mares, …
Thoroughbred Mares in Kentucky Horse Country   @FanningSparks
…and their adorable foals, …
Thoroughbred Foal in Kentucky Horse Country   @FanningSparks
…I found an amazing variety of gorgeous barn quilts sprinkled around the state.
Barn Quilt – Carpenters Square - Ravenna Kentucky   @FanningSparks
This pretty blue barn quilt, in a Carpenter’s Square pattern, was spotted in Ravenna Kentucky.  It is part of the Madison County Kentucky Quilt Trail.  Wikipedia describes a quilt trail as “a series of painted wood or metal hung or freestanding quilt squares installed along a route emphasizing significant architecture and/or aesthetic landscapes”.
Barn Quilt – Carpenters Square - Ravenna Kentucky – Close   @FanningSparks
The first barn quilt trail was started by Donna Sue Groves.  She came up with the idea while working for the Ohio Arts Council in the 1990s.  Donna Sue shared her story in Following the Barn Quilt Trail:  “I learned the value of using the arts to build a sense of community, particularly through creating large public murals. … I also realized that the majority of communities held annual quilt shows and everyone seemed to have a quilt story. …Most rural communities did not have large, blank, store walls or a floodwall for murals, but they did have barns. …  Why not make use of those barn walls specifically for a community project decorating them with quilt squares?”  Adams County Ohio, where Donna Sue lived, launched their trail and dedicated their first quilt square in October 2001.  The idea caught on and soon interested parties were reaching out for more information.  The Ohio team generously shared their how-to information and encouraged the recipients to pass along what they learned.  Since then, barn quilt trails were established in nearly every American state as well as many Canadian provinces.
This barn quilt was spotted near Richmond, Kentucky.
Barn Quilt - The Star Within - Richmond Kentucky   @FanningSparks
The pattern is called The Star Within.  It is typical of traditional, patchwork quilt patterns with regularly, repeating shapes and a planned, repetitious color scheme in a symmetrical design.
Barn Quilt - The Star Within - Richmond Kentucky – Close   @FanningSparks
Many of the barns, called tobacco barns because they were once used to air-cure tobacco, are no longer in use.
Old Tobacco Barn in Richmond Kentucky   @FanningSparksIronically, some of the barn quilts appear as if they will outlive the barns on which they are displayed.
Barn Quilt – Nine Patch Star – Richmond Kentucky   @FanningSparks
This pattern is a Nine Patch Star.
Barn Quilt – Nine Patch Star – Richmond Kentucky – Close   @FanningSparks
The residents of Estill County in Kentucky also embraced the Barn Quilt Movement during its heyday.  As explained on their website, “The Estill County Quilt Trail is a project of the Estill Arts Council that became a true community wide effort.  Citizens from all walks of life, both women and men and, young and old, came together to help in the selection of quilt patterns and barn sites.  Mondays became known as the “quilting bee” night as volunteers showed up to draw and paint, for close to two years, in order to complete and install over 50 quilt squares.  Through this project many new friendships were made and a sense of pride in the rich cultural heritage of the community’s historic, agricultural, and folk art roots was realized.”  I recently had the opportunity to travel sections of the Estill County Quilt Trail and admire several of the barn quilts created by this talented group.
As I entered the town of Irvine, it quickly became obvious barn quilts are no longer just for barns.  For instance, visitors to this quiet, pleasant town are greeted by this colorful barn quilt on the local optometrist’s office.
Barn Quilt – Main Street Irvine Kentucky   @FanningSparks
Many quilt patterns have a fascinating backstory.  For instance, the Log Cabin pattern, shown below, “is one of the most well-known and popular of all patchwork patterns … it symbolized home, warmth, love and security.”   As explained on the Homestead Quilt Discovery Experience website, “The center square of the block was done in red to represent the hearth, the focal point of life in a cabin or home.  The name, Log Cabin, comes from the narrow strips of fabric, or logs arranged around the center square. Each fabric strip or log was added to the pattern in much the same way logs were stacked to build a cabin … Many Log Cabin patterns were worked in two color schemes, lights and darks, divided diagonally in the middle.  This represented the sun’s east to west movement in the sky.  As the sun rose, its light shown on the cabin, creating the light side of the block.  As the sun traveled west, part of the cabin was left in the shadow, creating the dark side of the block.”
This Log Cabin quilt square is prominently displayed at the Estill County Historical and Genealogical Museum and Research Center.
Quilt Square – Log Cabin - Estill County Historical Society Kentucky   @FanningSparks
The local florist shop also got into the quilt square action with this aptly chosen pattern, known as Flower Basket, painted on the shop’s wall.
Quilt Square - Flower Basket – Ravenna Kentucky   @FanningSparks
The charismatic town of Berea Kentucky also features several outstanding barn quilts.  Berea, considered the Folk Arts and Crafts Capital of Kentucky, hosts the Festival of LearnShops every summer.  The LearnShops are short workshops on a wide variety of subjects such as sustainable living, Appalachian crafts, fiber arts, jewelry making and, you guessed it, painting barn quilts!  Berea boasts a number of artisan studios, art galleries, and unique boutiques.  Many of these businesses are located in the Artisan Village area of town.  The Honeysuckle Vine Gallery & Studio proudly displays a Grandmother’s Fan barn quilt.
Barn Quilt – Grandmothers Fan - Berea Kentucky   @FanningSparks
Barn Quilt – Grandmothers Fan - Berea Kentucky – Close   @FanningSparks
Traditionally, barn quilts were large–typically 8-feet square—but, today, talented artists and enthusiasts are creating barn quilt squares in a variety of sizes and configurations.  Groupings of three quilt squares, like those shown below, are sprinkled throughout Berea.  These were spotted in front of the Berea College Farm.
Triple Quilt Squares on Fence – Berea College Farm Kentucky   @FanningSparks
Triple Quilt Squares with Robin – Berea College Farm Kentucky   @FanningSparks
A little online research reveals interest in barn quilts remains strong.  The original Barn Quilt Movement may have slowed but scores of people, as evidenced by the 38,000+ members of the Barn Quilt Addicts Facebook Group, are still painting quilt squares to decorate their homes, garages, sheds and surroundings.  The quilt squares may be smaller—typically 4 feet square or less—but the beautiful patterns and joyful colors are the same.  Barn quilts, it seems, don’t need a comeback—they never went away!

More Info

Check out my previous post, Stop and Smell the Lavender, for a visit to the Red Oak Lavender Farm & Shop in Dahlonga, Georgia, USA.
The Kentucky Tourism website provides information about visiting Kentucky’s famed horse farms.  “Centered around Lexington but found all around the state, these farms are responsible for breeding, raising and training the magnificent horses that dominate the racetrack. Many farms offer set hours for visitors, and several companies lead guided tours.
Check out the the Madison County Kentucky Quilt Trail or the Estill County Kentucky Quilt Trail website for more information.
Special thanks to Mary Reed for pointing me in the right direction!
To learn more about Berea, the Folk Arts & Crafts Capital of Kentucky, check out the Visit Berea website.  Information about the annual Festival of LearnShops can be found there.  Stay tuned here, to the FanningSparks blog, for an accounting of my experiences attending the Berea LearnShops!
After a wonderful visit to the beautiful state of Kentucky, I was deeply saddened to hear about the Central Appalachia floods which recently devastated eastern Kentucky.  My thoughts are with all the talented and charming Kentuckians I met during this trip.
Suzi Parron is the author of two books: Barn Quilts and the American Quilt Trail Movement, written in cooperation with Donna Sue Groves in 2012, and Following the Barn Quilt Trail in 2016.
You can learn more about the Quilt Discovery Experience at the Homestead National Historical Park in Beatrice, Nebraska on their website.
Check out the Barn Quilt Addicts public group on Facebook for “pictures of Barn Quilts of all sizes from anywhere and everywhere, barns, quilts. …  creations, … ideas, tips.

Today’s Takeaways

1. A barn quilt is a painted replica of a quilt square.  Traditionally, barn quilts were 8 feet square and mounted on barn walls.  Today, barn quilts are painted in a variety of sizes and displayed in a myriad of places.
2. A barn quilt trail is a series of barn quilts installed along a route designed to encourage visitors.
3. Consider seeking out a barn quilt trail near you.
Peg - FanningSparks Author

Earlier this month, I shared my plans to build a nest box from a gourd.  Nest boxes are typically customized to meet the nesting needs of specific birds.  In this case, I chose to target chickadees—those delightful, little black-capped songbirds.  This is a Carolina Chickadee (Poecile carolinensis) holding a berry.
Carolina Chickadee (Poecile carolinensis) With Berry   @FanningSparks
My new chickadee gourd nest box looks quite promising.  However, the real test—whether breeding chickadees actually move in—won’t take place until the next nesting season.  In the meantime, I’d like to share how I made this gourd nest box.
Chickadee Gourd Nest Box in Tall Grasses   @FanningSparksThe Cornell Lab of Ornithology’s NestWatch website provides specifications for various wooden nest boxes including those intended for chickadees.  They specify, for instance, how big the interior of a nest box should be for the chickadee’s nest and hatchlings.  They also specify the size of the entrance hole—it should be just big enough for a chickadee to enter and exit while keeping out predators and undesired birds.  Check out my previous post, Are Gourds for the Birds?, for the full rundown on these specifications. Most of the NestWatch specs were easy to apply but I did have to find a few workarounds to compensate for the differences between gourds and wood.
Chickadee Gourd Nest Box Amongst Gourds   @FanningSparks
My project started with a visit to a nearby gourd farm.  Bug’s Gourd Farm is a small, family business in the beautiful countryside of Eastern Georgia.  They had tons of dried, raw gourds to choose from.
Bugs Gourd Farm in Keysville GA   @FanningSparks
The folks at Bugs Gourd Farm were very helpful—answering my questions and helping me find just the right gourds (Thank you Ann!).  They even gave me a few cracked gourds for practicing.  The challenge was to find two gourds that would fit together—one for the main body and the other for a roof.  Ideally, a nest box has a sloped roof with a 2-4” overhang on the front and a 2” overhang on the sides.  I selected a martin gourd for the body (shown below left) and a kettle gourd (aka pear or teardrop gourd) for the roof (shown below right).
Martin and Kettle Gourds for Chickadee Gourd Nest Box   @FanningSparks
I decided to cut the roof section with a scalloped edge to add some interest.  Paper templates were taped to the gourd to draw a cutting line.
Scalloped Roofline on Kettle Gourd for Chickadee Gourd Nest Box   @FanningSparks
It was easier to cut the scalloped roofline in two passes.  In the first pass, I cut a straight line all the way around the gourd.   In the second pass, I cut the indents for the scallops.  Then with my safety respirator firmly in place, I used my Dremel sanding drum to shape the scallops and smooth the edges.
Cut and Sand Roofline on Kettle Gourd for Chickadee Gourd Nest Box   @FanningSparksSince this was my first time cutting gourds, I had to try a few different tools and techniques to find a method that worked for me.  The most popular method, according to my online research, is to use a miniature jigsaw specifically designed for cutting gourds.  Two examples are The Caning Shop’s Gourd Saw and Welburn Gourd Farm’s Super Jigsaw Proxxon STS/E.  Since I’m not quite ready to make this kind of investment, I decided to try using my Dremel with a cutting wheel.  I was able to cut the gourd but it was awkward to use and resulted in a rough cut.  I had better results with a scrolling saw blade in my regular DeWalt jigsaw.  However, it was rather tricky to keep the jigsaw’s base plate snug against the gourd’s round surface.
The gourd’s shape also presents a challenge when securing the gourd for the cut.  I used a combination of wood blocks and clamps to keep my gourd locked in place.  This is where the scaled-down size of a gourd saw has a definite advantage—it is small and light enough to be used one-handed.  It seems to be common practice to hold a gourd with one hand while using the other hand to cut with the gourd saw.  Obviously, no matter which cutting tool is used, it’s critical to use it safely.
My next step was to remove the top, stem-end from the body of the main gourd to allow the roof to sit snuggly on top.
Roof and Body for Chickadee Gourd Nest Box   @FanningSparks
It can take a few tries to get the fit right.  Here’s how mine looked with the roof sitting on the body.
Test Fit Roof and Body for Chickadee Gourd Nest Box   @FanningSparks
My next step was to make an access door for future cleaning and monitoring.  After deciding which side would be the front of the nest box, I marked a long, narrow loop on the backside.  It’s easier to start and end the cut at the top rim than to cut a free-standing hole.   I cut carefully since the cutout section will be used to close the opening.
Mark Access Door for Chickadee Gourd Nest Box   @FanningSparks
Here’s how I clamped the gourd into place so I could cut the door with my jigsaw.
Cut Access Door for Chickadee Gourd Nest Box   @FanningSparks
The door also provides easy access to remove dried seeds and fibers from the inside of the gourd.  A round scoop or metal spoon can be used to scrap along the sides.  It’s not necessary to remove every piece of fiber.  In fact, it’s preferable to leave the inside of the gourd a little rough to help future nestlings climb out of the nest box.
The top edge of the door will slip neatly under the roof section.  Therefore, all that’s needed to keep the door in place is a closure at the bottom.  I made a closure with two pieces of wire, two beads and two 1” metal washers.  The steps are illustrated below.
1. Drill a hole in the door and the wall.  Cut a length of wire and bend it in half.
2. Slide a plastic bead onto the wire.  Insert the ends of the wire through the hole in the door—from front to back—leaving about 1” of wire on the front.
3. Twist the wires between the bead and the door.
4. On the inside of the door, slip a 1” flat washer onto the wires, crisscrossing the wires through the hole in the center.  Twist the ends of the wires to tighten and bend them out of way.
5. Repeat for the corresponding hole in the wall of the gourd.
6. To close the door, simply twist the two beaded wires together.
Make Twisted Wire Closure for Chickadee Gourd Nest Box   @FanningSparks
The roof was attached with a similar approach.  I set the roof in place and carefully drilled through both the roof and body gourds.  Working from the inside of the main gourd, I pulled a piece of wire through both holes to the outside, slipped a bead onto the wire, and pushed the wire back inside the gourd.  Then I threaded the ends of the wire through a washer and twisted the wires to tighten them.  All the mechanics are nicely hidden inside the gourd with only 3 small beads visible on the roof.
Attach Roof on Chickadee Gourd Nest Box   @FanningSparks
The final construction step was to bore holes for the entrance, drainage and ventilation.  The NestWatch specifications called for an entrance hole with a diameter of 1⅛”.  After trying a few test holes, I settled on using a 1” hole saw drill bit to bore the initial hole and then sanding the edges out to the desired 1⅛”.  A round wood file worked well for this step.  Alternatively, a Dremel sanding drum could be used.
Four ⅜” drainage holes were drilled around the bottom of the body gourd.  Four ⅝” ventilation holes were drilled up under the roof towards the top edge of the body gourd.  In hindsight, it would have been easier to drill the ventilation holes before attaching the roof.
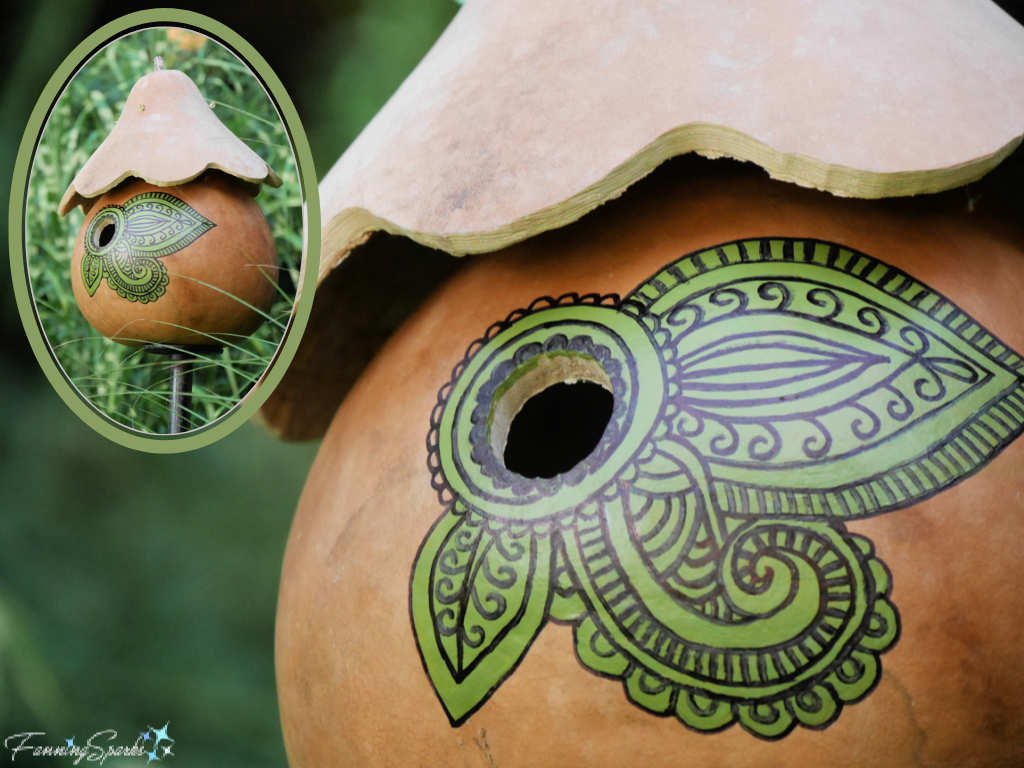
The NestWatch specifications state nest boxes should be made with untreated and unpainted wood.  Thus, I left the gourds untreated.  I could not, however, resist the temptation to embellish the front with a painted design.  I chose exterior paints because the gourd house will be exposed to rain, sun and changing temperatures.  The base is simply interior/exterior paint from Behr custom mixed in my favorite shade of moss green.  The black outlines are done with a Sharpie Extreme Permanent Marker—markers designed to withstand UV rays and the other rigors of weather.
Decorate Chickadee Gourd Nest Box   @FanningSparks
Transferring patterns to the gourd can be difficult due to its curved surface.  I found cutting my paper pattern into small, manageable sections and taping them to the surface individually made it easier.  A regular lead pencil and a white plastic eraser worked well for this step.
Transfer Design to Chickadee Gourd Nest Box   @FanningSparks
Finished Decoration on Chickadee Gourd Nest Box   @FanningSparks
Here’s how the decoration turned out.
Closeup Finished Chickadee Gourd Nest Box   @FanningSparks
As recommended by the NestWatch website, I used a metal pole to mount my nest box.  It is a 5-foot length of ½” black steel with a threaded end.  After finding the bottom center of the nest box, I used wood screws to attach a 3” metal floor flange to the nest box.  Then the metal floor flange was attached to the pole.  These components were found in the plumbing department at my local Home Depot store.  A predator guard, such as a metal collar or section of stovepipe, can be added to the metal pole.
The final step is to select a site the chickadees will like.  Chickadees nest in dense natural habitat, such as thickets of small trees, so the recommended placement is 4-8’ high in a stand of small trees.  I plan to install my nest box in a shaded area to help keep it cool.
After selecting my final site, I will use a 2-foot piece of steel rebar to secure the metal pole in place.  I’ll push the rebar into the ground ensuring it is plumb and slip the metal pole over the rebar.
Chickadee Gourd Nest Box Mounted on Pole   @FanningSparksAnd then I must wait!  While chickadees may check out my new gourd nest box over the next months, I won’t know until next nesting season if any chickadees will take up residence and start a family!

More Info

See my previous post, Are Gourds for the Birds?, to learn more about cavity-nesting birds and NestWatch recommendations for birdhouses and nest boxes.
The NestWatch website, by The Cornell Lab of Ornithology, has many great resources for bird enthusiasts.
Bug’s Gourd Farm is located in Keysville, Georgia, USA.  You can learn more on their website.
More information about the gourd saws mentioned in this post can be found on The Caning Shop website (see Gourd Crafting > Supplies & Tools) or the Welburn Gourd Farm website (see Tools & Supplies > Jigsaws and Jigsaw Blades).

Today’s Takeaways

1. Consider using a gourd to make a nest box.
2. Customize your nest box to the size and preferences of the birds you wish to target.
3. Advance planning and patience are needed to attract nesting birds to your surroundings.
Peg - FanningSparks Author

Fun Fact #1: The name LEGO® is derived from two Danish words “Leg Godt” which mean “Play Well”.
Fun Fact #2: Judging from his award-winning LEGO art exhibitions, artist Sean Kenney knows how to play well!
LEGO enthusiasts in the USA Southeast are fortunate to have had access to two of Sean Kenney’s exhibitions recently:
. Sean Kenney’s Nature Connects® was on display at the Atlanta Botanical Garden in Gainesville this past spring.  The exhibition featured 15 amazing sculptures constructed entirely of LEGO bricks.
. Sean Kenney’s Nature POP®! is on display at Zoo Atlanta until early August.  The exhibition features 40 LEGO sculptures with an unexpected twist.
Both exhibitions draw upon the way LEGO bricks connect to emphasize the interconnectivity of nature.  They “challenge guests to consider: just as LEGO bricks interconnect, how is everything in nature interconnected?”
I had the pleasure of visiting both of these exhibitions and I’d like to share a few highlights in today’s blog post.
One of the first LEGO sculptures to greet visitors to the Nature Connects exhibition was a stunning, larger-than-life peacock.  With its striking pose and vibrant colors, it was one of my favorite pieces.  Viewing the sculpture from a few steps away, one would never guess it was constructed from LEGO bricks.
Peacock of LEGO Bricks by Sean Kenney   @FanningSparks
A closer look, however, reveals the familiar LEGO pieces and their blocky surfaces.
Closeup Peacock of LEGO Bricks by Sean Kenney   @FanningSparks
There are, as reported on the accompanying exhibit card, 68,827 bricks in this structure which took 625 hours to build.  The Number of LEGO Bricks and Total Hours to Build were reported for all the LEGO sculptures on display.  I overheard quite a few visitors discussing these data points and marveling at the effort involved.
Nature Connects Exhibit Sign for Peacock   @FanningSparks
This hummingbird sculpture, considered the centerpiece of the exhibition, is awe-inspiring.  It is amazingly realistic with the hummingbird appearing to hover over the orange trumpet flower.  The sculpture stands over eight feet tall!
Hummingbird of LEGO Bricks by Sean Kenney   @FanningSparks
Anyone who has ever played with LEGO is bound to wonder how this sculpture was made.  I found an explanation in an Imagine Exhibitions’ interview with Sean Kenney.  When asked about going from inspiration to creation, he replied “Each sculpture can have a different process.  For example, the design of my “Hummingbird and Trumpet Flower” sculpture in [the] Nature Connects show just “popped” in my head the minute someone said “hummingbird.”  I immediately had this vision of something that you could actually walk under, suspended as if by magic.  Creating a spindly little nose and paper-thin wings built out of chunky LEGO pieces seemed like a wonderful challenge and, if done right, something that would look amazing.  I spent about 4 weeks designing and planning this specific piece; researching images of hummingbirds in nature, choosing the perfect colors and designing the internal steel reinforcements, then about 5+ weeks building it.
Closeup Hummingbird of LEGO Bricks by Sean Kenney   @FanningSparks
The below gigantic dragonfly sculpture was sensational.  It is a Roseate Skimmer, “one of North America’s most beautiful large dragonflies … only the male is rosy-purple with dark red eyes, a purple thorax, and rosy pink-red abdomen.”
Dragonfly of LEGO Bricks by Sean Kenney   @FanningSparks
This dragonfly, along with all the other LEGO sculptures, was built in the artist’s New York City studio and shipped to the exhibition location.  When asked “How are you able to make your sculptures structurally sound enough to withstand shipping, weather, and other unpredictable events involved with traveling exhibitions?”, Kenney answered “I work with a staff of artists in my studio who help me with my creations. Each sculpture is fully glued, steel reinforced, custom-crated, and designed to tour and last for the ages.
Even before a single LEGO brick is placed, my team and I do a lot of design work to figure out what the sculpture is going to look like and how it can physically work. We scrawl drawings on scraps of paper, gesture wildly, wield tape measures, hold metal bars with LEGO pieces glued to them pretending to be gravity, and all kinds of other crazy things that you do when you’re planning such a large endeavor.
It’s a lot of hard work for us to build the sculptures as sturdy and efficiently as possible, working around metal that’s welded slightly imperfectly, dealing with things getting too heavy or large horizontal things that want to crack in half, interlocking bricks as tightly as possible, building support beams inside, and all kinds of other physical hurdles.
But, working on large projects is my favorite thing to do! They’re the most fun of all, because they require a lot of creative planning, a lot of building, and they always end up creating a big “wow” for both parents and kids.”
Knowing these sculptures are reinforced with steel, I examined the dragonfly very carefully for evidence of internal supports and was able to spot a small section of metal between the body and wing.
Closeup Dragonfly of LEGO Bricks by Sean Kenney   @FanningSparks
This spectacular monarch butterfly is sitting on a milkweed bloom.  As explained on the exhibit card “The monarch butterfly (Danaus plexippus) depends on milkweed (Asclepias sp.) as a food source for its larvae, known as caterpillars.  Monarch numbers are in decline due to a number of factors, including the decline of milkweed throughout the range.  You can help conserve monarchs by planting native milkweed species and limiting pesticide use in your garden.”  This is a great example of how, as a Smithsonian Magazine article puts it, “Sean Kenney’s works of art often call attention to endangered species and advocate for conservation”.
Monarch Butterfly of LEGO Bricks by Sean Kenney   @FanningSparks
That same article goes on to discuss how lifelike Kenney’s sculptures appear to be.  “One of the biggest challenges is trying to get the softness of [an animal’s] features and the expressiveness of the face right while using what is otherwise a very blocky, low-resolution medium,” he says. “To me, that’s one of the most fun things to overcome. When you’ve done it, you’ve really done it. You step back and are proud of it.”  This deer doe and fawn are a case in point.
Deer Doe and Fawn of LEGO Bricks by Sean Kenney   @FanningSparks
A gardening scene, complete with a grandfather planting, granddaughter watering (shown below) and wheelbarrow, drove home the message about the need to connect with nature.  The exhibit card explained “Digging in the soil, watching plants grow from seeds, caring for plants and harvesting food from plants are fun, healthy and rewarding activities.  Gardening is a great way to experience nature in an up close and personal way.  Studies have long documented the powers of gardening when it comes to physical and mental health.  Horticulture therapy often is used as a way to heal the body and soul. Did You Know? Gardening reduces the chance of heart attack and stroke.”
Gardening Granddaughter of LEGO Bricks by Sean Kenney   @FanningSparks
These Nature Connects’ sculptures were amazingly lifelike.  Obviously, a great deal of attention was paid to the sculptural details including the use of color.  As a result, seeing the second exhibition, Sean Kenney’s Nature Pop!, was a delightful surprise—the sculptures have the same realistic details but the colors are bold and deliberately unrealistic.
This Galápogos tortoise, for instance, is “typically colored to match its mud-colored surroundings” but rendering the sculpture “in bright red draws attention to its domed shape and massive size.”
Galápogos Tortoise of LEGO Bricks by Sean Kenney   @FanningSparks
In the midst of Covid-19, according to Smithsonian Magazine, Kenney was “dreaming up a ‘colorful, punchy and playful’ exhibition called ‘Nature POP’ that gives the natural world a new spin.”  At the time, he shared his vision, “Imagine a lawn full of giant bunny rabbits in polka dots and stripes, or a neon-blue woodpecker on a lava-lamp tree trunk.”  The woodpecker is just as amazing as Kenney promised.  “The swirls of red, yellow and orange contrast with the monochromatic cyan woodpecker and transforms the tree bark into a lava lamp.” says the exhibit sign.
Woodpecker of LEGO Bricks by Sean Kenney   @FanningSparks
Zoo Atlanta announced “Art meets science meets engineering in the eye-popping work of artist Sean Kenney – inviting you to reimagine the amazing complexities and interconnections of the wild world in fresh, fun, and unexpected ways.  Expect to find startling bursts of color and boundary-blurring feats of innovation as you encounter works of sculptural art throughout the Zoo.”
The Nature Pop! exhibition illustrates the wide spectrum of color in which LEGO pieces are made.  Interestingly, the LEGO palette has evolved over time—new colors are introduced while old colors are discontinued.  From what I could find, LEGO pieces are currently available in 67 different colors.  I wonder how many of those colors are used in this sculpture of a Dodo Bird.
Dodo Bird of LEGO Bricks by Sean Kenney   @FanningSparks
The signs for this exhibition invite visitors to “Think Like an Artist” and to “Think Like a Scientist”.   This sign reads:
“Think Like an Artist: The colored striping on this dodo bird evokes a sunset … projected onto the dodo’s body—a visual metaphor for the extinction of the species.  Think Like a Scientist: Though often portrayed as clumsy and awkward, dodos were aptly evolved for their habitat in Mauritius.  Strong legs enabled them to maneuver quickly.  Long, hooked beaks allowed them to defend themselves.”
Nature POP Exhibit Sign for Dodo Bird   @FanningSparks
A majestic polar bear sculpture, depicting a mother bear with three cubs, is constructed of 112,450 bricks and took 389 hours to build.  “The blue striping of the polar bear evokes the strata of a core of ice, as if the bear itself were forged from a glacier.  This symbolizes the loss of the polar bears’ habitats and the receding glaciers of the Arctic.
Polar Bear of LEGO Bricks by Sean Kenney   @FanningSparks
Polar Bear Cub of LEGO Bricks by Sean Kenney   @FanningSparks
A delightful collection of LEGO rabbit sculptures, executed in a variety of poses and unexpected colors and patterns, is on display throughout Zoo Atlanta.
Two Striped Rabbits of LEGO Bricks by Sean Kenney   @FanningSparks
Think Like an Artist: This whimsical and quirky collection displays many differently colored and patterned rabbits.  In nature, rabbits’ colors and patterns vary, but not quite this dramatically.  Think Like a Scientist:  Naturally occurring colors and patterns of rabbits include lilac, opal agouti, orange, frosted pearl, black, blue tortoiseshell, silver fox and sandy.
Rabbits of LEGO Bricks by Sean Kenney   @FanningSparks
Kenney takes pride in the fact he uses only standard LEGO pieces that are available to everyone.  “None of my sculptures are made with special Lego bricks,” he says. “I use the same ones that children play with.”  One Nature Connects announcement put it this way “Kenney uses only standard, off-the-shelf, commercially available LEGO® pieces for his sculptures – no special colors or shapes. Each piece is connected to another, and the sculptures are built within the rules of the LEGO system.”
The golden dragonfly sculpture shown below may look familiar—it’s similar to the Roseate Skimmer from the Nature Connects exhibition—but the fanciful colors give it an entirely different appearance.  The exhibit card notes “This dragonfly is composed of five sculptures: each wing is its own sculpture attached with a piece of metal on the diagonal.  The artist used a photograph of a dragonfly where light shone through the wings to make the veins visible; this was replicated through texturing with LEGO bricks and highlights the connection between the veins and the body.
Dragonfly of LEGO Bricks by Sean Kenney Nature POP  @FanningSparks
Kenney’s website describes him as “a renowned, award-winning artist and ‘professional kid’ who uses LEGO pieces to design and create contemporary sculpture”.  It seems to me, the professional kid is most apparent in this black-and-white zebra with an orange bow tie and playful horizontal stripes instead of realistic vertical ones.
Closeup Zebra of LEGO Bricks by Sean Kenney Nature POP   @FanningSparks
Zebra of LEGO Bricks by Sean Kenney Nature POP    @FanningSparks
When asked how long he’s been building with LEGO bricks, Kenney, the professional kid, replied “I’ve been building and playing with LEGO toys my whole life, but I’ve been building LEGO models professionally since 2005. I was a total ‘LEGO maniac’ when I was a kid, and LEGO toys were usually the only toys I ever asked for when my birthday would come around each year. I kept building LEGO models all through childhood and even into my teenage and adult years.  What I love about LEGO toys is that they’re just so intrinsically fun and whimsical… I don’t know that I’ve ever seen someone look at my work and frown.”  I have to agree—his LEGO sculptures make everyone smile!

More Info

You can learn more about Sean Kenney via the below links:
. Sean Kenney website which includes behind-the-scenes videos and an exhibition schedule
. This Artist Uses Thousands of LEGO® Bricks to Make Lifelike Sculptures of Animals – Smithsonian Magazine article
.
An Interview with Sean Kenney, Artist Who Works With LEGO® Bricks – Imagine Exhibitions Blog post
Sean Kenney’s Nature Connects® was on display at the Atlanta Botanical Garden Gainesville location from March 4 to May 30, 2022.
Sean Kenney’s Nature POP®! is on display at Zoo Atlanta from May 13 to August 8, 2022.   You can learn more on the Zoo Atlanta website.
Check out the LEGO website to see the latest and greatest developments in the world of LEGO Group including news on their upcoming 90-year anniversary celebrations.

Today’s Takeaways

1. LEGO bricks are a surprisingly effective art medium.
2. Larger-than-life replicas of birds and insects add wonder and charm.
3. Rendering recognizable forms in unexpected colors can make artwork pop.
Peg - FanningSparks Author

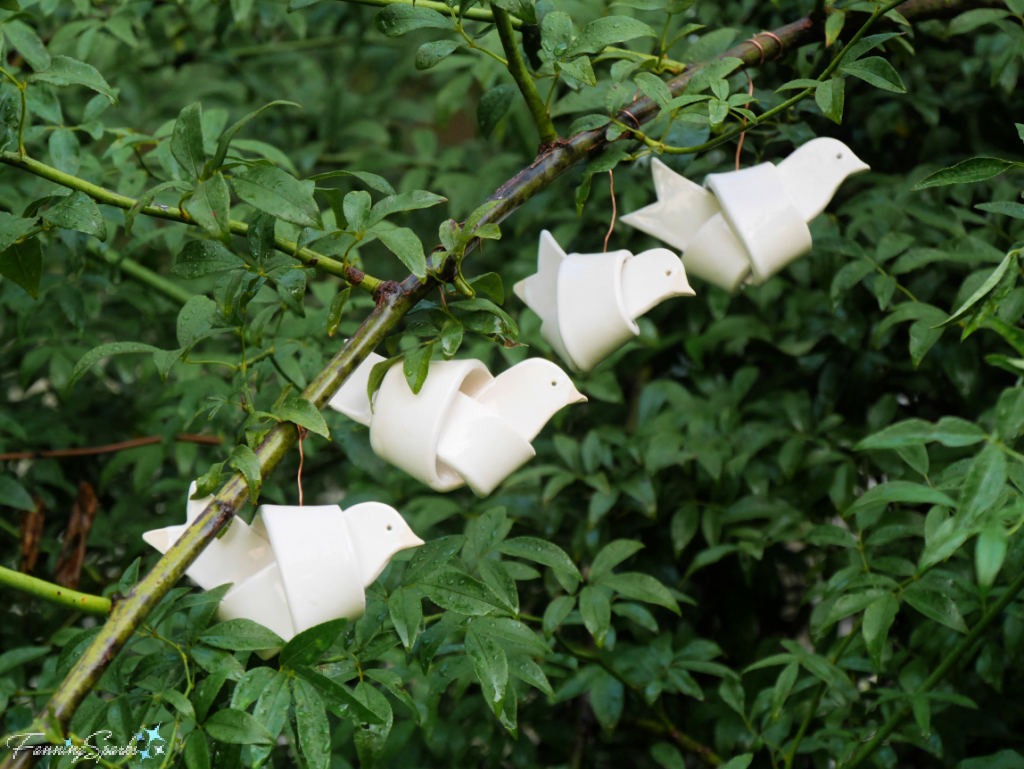
I spy, with my little eye, something that is white!  A small flock of ornament-like, ceramic birds landed in my flower gardens this week.
Four Knotted Ceramic Birds   @FanningSparks
I’ve been sprinkling the 4-5” birds amongst the shrubs and garden accessories.
Knotted Ceramic Bird with Raindrops   @FanningSparks
Knotted Ceramic Bird on Rustic Ladder   @FanningSparks
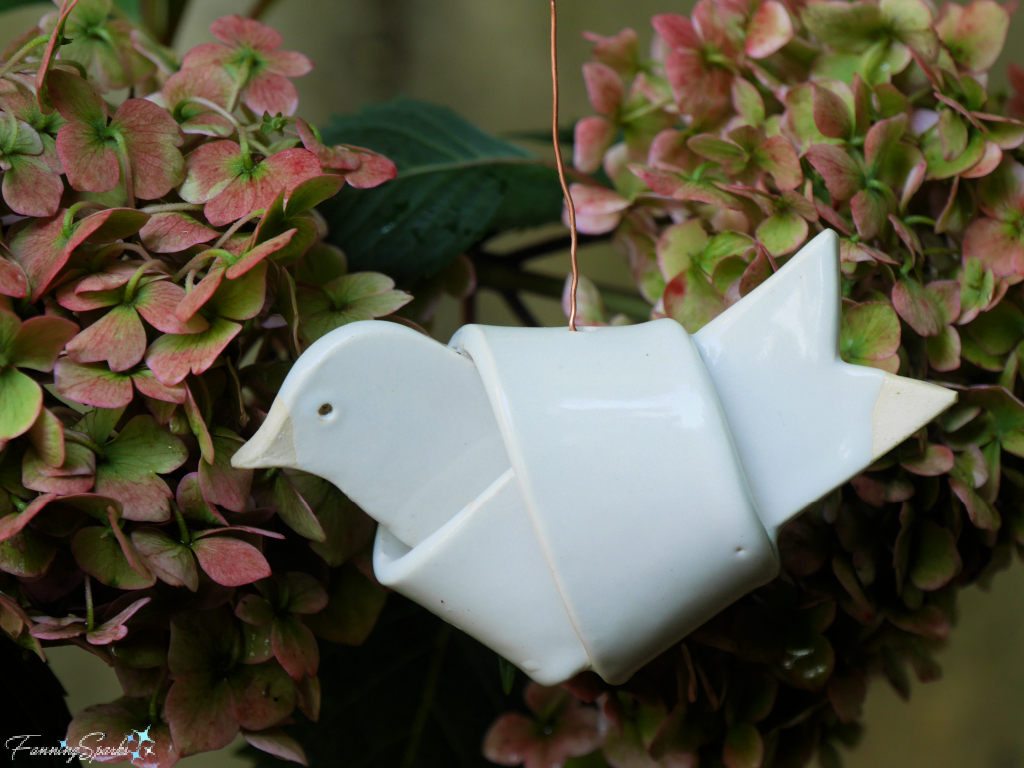
Knotted Ceramic Bird with Hydrangea   @FanningSparks
Knotted Ceramic Bird on Birdhouse   @FanningSparks
Knotted Ceramic Bird with Rose of Sharon   @FanningSparks
Shooting the photos for this blog post was a fun photography challenge.  I planned several shots in advance but I never imagined these bees (I think they’re Eastern Carpenter Bees) would make a cameo appearance!
Knotted Ceramic Bird with Bees   @FanningSparks
Nor was I expecting this Green Anole (Anolis carolinensis) to steal the show.
Green Anole Crawls Along Rose of Sharon Branch   @FanningSparks
Anoles are tree-dwelling lizards native to the USA Southeast.  We often see them around our porch and garden and, because they eat a wide variety of insects and spiders, we’re glad to have them.  They’re fun to watch especially when the males extend their throat fans, called dewlaps, in a bold display of territorial ownership.
Green Anole Expands and Contracts Dewlap   @FanningSparks
Two Knotted Birds on Pyramid Trellis   @FanningSparks
The idea to scatter a collection of birds throughout the garden originated from an exhibit at the Annapolis Royal Historic Gardens in Nova Scotia.  The exhibit was created by artist Shauna MacLeod of Black Crow Pottery.   As explained by the artist “For this exhibit entitled “Bird Watching” in 2013, I produced 32 ceramic birds to commemorate the 32 years the Annapolis Royal Historic Gardens have been open.  They have been placed in the Gardens on the branches and stems of the trees and shrubs along a pathway for visitors to search for and enjoy.  Every year we add one more bird to commemorate another year passing.  I pose the question: are you watching the birds or are these birds watching you?”Bird Watching by Shauna MacLeod  @FanningSparks
I chose to make my collection of ceramic birds all the same.  They’re made from a slab of clay in a half-knot design and glazed with a glossy white finish.   The knotted ceramic birds are surprisingly easy to make—here’s how it’s done.
The first step is to prepare a paper template.  I’m sharing my template in this linked download file: Knotted Ceramic Bird – Complimentary Download.  Simply print directly or download to print.
You’ll need a slab of clay, about ¼” thick, big enough for the printed template.  I use the slab roller at the OCAF School Street Pottery Studio where I participate in open studio days but you can create slabs by hand or with a rolling pin.
Roll Out Slab of Clay for Knotted Ceramic Bird   @FanningSparks
Simply lay the paper template on your clay slab and cut out the bird.  I usually compress the clay with a plastic rib.
Cut Out Bird Using Template for Knotted Ceramic Bird     @FanningSparks
Cut out a small hole for the eye with a hole cutter or other suitable tool.  Smooth the cut edges.  Keep the clay moist by covering it with plastic while you’re working.
Cut Out Bird Eye Hole for Knotted Ceramic Bird      @FanningSparks
The next step is to form the knot.  I’ve learned that covering the clay with damp paper towels prior to this step makes it more pliable and prevents the clay from cracking as it’s twisted into shape.  Work slowly and follow the three steps described on the template to tie the clay bird into a half knot.  It will look like this.
Tie Clay Bird into Knot for Knotted Ceramic Bird      @FanningSparks
Allow the knotted bird to dry for an hour or two.  Then cut a hole on the top of the bird’s back—this is where the hanger will be attached.  Carefully smooth any rough areas.  Let the knotted bird dry for the bisque firing.
Allow Knotted Bird to Dry   @FanningSparks
The knotted bird can be finished in a variety of ways.  I chose to dip mine in a glossy white glaze.  After some trial and error, I learned the trick to getting an even coat is to hang the bird from some wire.  Insert a piece of wire through the eye hole and bend it into a ‘U”.  Then holding the top end of the wire, quickly dip the bird into the glaze.  Hook the top end of the wire around something sturdy and let the bird hang to dry.
Another factor to consider is how to position the birds for the glaze firing.  The standard rule in a pottery studio is any part of a piece that makes contact with a kiln shelf must be completely free of glaze.  This is normally accomplished by leaving the bottom of a piece unglazed.  These birds, however, have an irregular, non-flat bottom and won’t sit on a shelf.  Typically, pieces like this are placed on stilts in the kiln.  The kiln stilts worked OK but they left noticeable marks on the bird’s side.
I decided to try a different approach by building a simple bisqueware rack for the final firing.  As shown below, the bird is suspended in the rack by its beak and the tip of its tail.  The beak and tail must be left unglazed to prevent the bird from becoming permanently attached to the rack.  I used a pencil to mark exactly where the bird touches the rack and then waxed those areas before glazing.  With either approach, these birds require a little extra care when being loaded into the kiln. (Special thanks to Louise, Cameron and the other folks who load the kilns at the OCAF School Street Pottery Studio!)
Knotted Bird in Rack for Firing   @FanningSparks
To hang the knotted ceramic bird, insert a short piece of wire through the hole in the bird’s back.  Use pliers to twist a small spiral knot into the bottom end and pull into place.  Have fun finding the perfect spot for your new knotted ceramic bird and let the I Spy games begin!
Knotted Ceramic Bird Facing Right   @FanningSparks

More Info

You can download the project template here: Knotted Ceramic Bird – Complimentary Download.
Check out the Black Crow Pottery website to learn more about the talented Shauna MacLeod and her gorgeous artwork.
The Annapolis Royal Historic Gardens are located in Annapolis Royal, Nova Scotia, Canada.  “In a beautiful setting overlooking a tidal river valley, the Historic Gardens is a premiere Nova Scotia attraction showcasing gardening methods, designs and materials representing more than four hundred years of local history.”  I’ve visited these stunning gardens a few times over the years and welcome any opportunity to stroll through the 17 acres of natural and historic beauty.
You can learn more about the Oconee Cultural Arts Foundation (OCAF) on their website.  Classes and workshops offered at the Watkinsville, Georgia, USA location are also listed.  OCAF’s School Street Pottery Studio hosts open studio hours for those with clay experience.

Today’s Takeaways

1. Display small art objects in multiples for impact.
2. A knotted ceramic bird is a great project for learning to work with clay.
3. Consider tucking away little surprises in your garden to add a sense of discovery.
Peg - FanningSparks Author

Nesting season is wrapping up for another year here in the US Southeast.  It was a highly entertaining season for bird landlords.  We had several repeat tenants and a few newcomers.  Our favorite tenant has to be the Eastern Bluebird (Sialia sialis).  These charming little fellows moved in early and set about the business of raising their families without any fuss.
Eastern Bluebird with Juicy Worm   @FanningSparks
We counted at least four broods scattered amongst the various housing options.  The most popular choices were the wooden birdhouses I built a few years ago.  I shared detailed step-by-step instructions for this birdhouse in the blog post DIY Bluebird-Approved Birdhouse Tutorial.
DIY Bluebird-Approved Birdhouse Tutorial by FanningSparks. @FanningSparks
The bluebirds also tried some of our other rental properties including this fancy one purchased from a talented, local woodworker.
Eastern Bluebird on White Birdhouse  @FanningSparks
It’s fun to see the youngsters leave the nest and gain their independence.  Here’s a juvenile bluebird checking out the birdbath.
Juvenile Eastern Bluebird on Edge of Birdbath  @FanningSparks
This was the first year we had nesting Brown Thrashers (Toxostoma rufum).  We had at least two pairs build nests in the flowering shrubs around the house.  This is a Brown Thrasher sitting on their nest in our Lady Banks Rose.
Brown Thrasher Sitting on Nest   @FanningSparks
I managed to get this photo of the Brown Thrasher’s eggs but it was a death-defying act!  These parents are hypervigilant and quick to dive bomb anything that gets too close.
Brown Thrasher Eggs in Nest   @FanningSparks
The juvenile Brown Thrashers also seemed to appreciate the nearby birdbath.  Here one wades in, makes a few waves and then ducks under.
Juvenile Brown Trasher in Birdbath   @FanningSparks
This rustic wooden birdhouse, which we call the Condo Birdhouse, was popular in previous years but didn’t see much action this year.
Rustic Wooden Condo Birdhouse   @FanningSparks
Here’s a Carolina Chickadee (Poecile carolinensis) feeding the family in the Condo Birdhouse last year.
Carolina Chickadee Perched on Birdhouse   @FanningSparks
This is my all-time favorite tenant from the Condo Birdhouse—the Prothonotary Warbler (Protonotaria citrea).  This bright, handsome songbird set up house two years ago but made only a few brief appearances this year.
Prothonotary Warbler Making a Nest   @FanningSparks
Several Carolina Wrens (Thryothorus ludovicianus) visited this season.  These energetic little birds really know how to belt out a song!
Carolina Wren on PVC Pipe   @FanningSparks
The Carolina Wrens are not, however, easy tenants.  They’ve shown zero interest in this wooden nest box despite the fact it was specifically sold as a wren house.
Vacant Wren Birdhouse   @FanningSparks
Instead, the Carolina Wrens have taken up residence in the most inconvenient places—one year it was in a decorative pot (shown below) and the next year it was in the outlet of our exhaust fan.
Carolina Wren Feeding Babies   @FanningSparks
The Tufted Titmouse (Baeolophus bicolor) is a timid little songbird.  It makes regular appearances but has yet to move into one of our properties.
Tufted Titmouse in Shrub   @FanningSparks
This blog post would never end if I tried to list every bird we’ve seen.  Instead, I’d like to consider what changes, if any, should be made for next year.  Do we need to add some new properties?  Upgrade or relocate any of our rental units?  What building materials should we use?  What features are most sought after?
It’s helpful to consider where these birds nest in their natural habitat.  Most of them fall into the category of cavity nesters.  In North America, there are about 85 different species of cavity nesters divided into three significant groups:
1) primary cavity nesters/ strong excavators
2) primary cavity nesters/ weak excavators
3) secondary cavity nesters.
Primary cavity nesters/ strong excavators, woodpeckers for instance, use their strong beaks to excavate their own homes from hard or soft woods.  Primary cavity nesters/ weak excavators, chickadees and wrens for instance, can excavate their own homes but only from snags.  Snags are dead trees that are left upright to decompose naturally.
Natural Cavity in Snag   @FanningSparks
The third group, secondary cavity nesters, swallows and bluebirds for instance, cannot excavate their own cavities and instead adopt those already made by the primary cavity nesters.
Further online research reveals how to best meet the needs of cavity nesters.  The Cornell Lab of Ornithology’s NestWatch website offers a comprehensive infographic explaining the Features of a Good Birdhouse along with various nest plans.  Here’s a partial screenshot of the infographic.
NestWatch - Features of a Good Birdhouse – Screenshot   @FanningSparks
The infographic contains great advice for wooden birdhouses.  But ever since my recent introduction to gourds (see A Gourd Gathering… Wait, What?), I’ve been wondering about the possibility of using gourds for birdhouses.  There are numerous online references for using gourds to house Purple Martins (Progne subis).  The Purple Martin Conservation Association explains the appeal, “Purple Martins are native songbirds in the swallow family.  East of the Rocky Mountains, Purple Martins nest almost exclusively in human-supplied housing. They are dependent on us for their survival. They are one of America’s most well-loved songbirds for many reasons; their chattering song, aerial acrobatics, insect-eating habits and their tolerance of humans.”  Purple Martins like to nest in colonies and experts recommend starting with at least 6 to 8 birdhouses or compartments.  Shown below are typical purple martin colonies with what appear to be PVC plastic gourds.
Purple Martin Houses   @FanningSparks
Aside from Purple Martins, I couldn’t find much online evidence that birds will actually nest in gourds.  A detailed evaluation of NestWatch’s characteristics of a Good Birdhouse suggests a gourd could meet most of the criteria.
NestWatch Good Birdhouse Comparison   @FanningSparks
Additionally, different birds have specific requirements.  NestWatch provides a wealth of information as well as nest box plans for nearly 60 species.  Shown below, for instance, is the entry for the Carolina Chickadee.
NestWatch - Carolina Chickadee Nest Box – Screenshot   @FanningSparks
I did the same evaluation for the Carolina Chickadee nest box requirements and it appears, that by selecting the right size gourd, these criteria could also be met.
NestWatch Carolina Chickadee Nest Box Comparison   @FanningSparks
My next step will be to build a few gourd nest boxes while exploring options to meet the NestWatch specifications as closely as possible.  They should be ready for the next nesting season.  Then we’ll see if gourds really are for the birds!
More Info

See the previous FanningSparks blog post, DIY Bluebird-Approved Birdhouse Tutorial, for step-by-step instructions to build a birdhouse for bluebirds.
In the blog post, A Gourd Gathering… Wait, What?, I share my experience attending my first Gourd Gathering and delve into the world of gourds.
NestWatch, by The Cornell Lab of Ornithology, “is a nationwide monitoring program designed to track status and trends in the reproductive biology of birds, including when nesting occurs, number of eggs laid, how many eggs hatch, and how many hatchlings survive. Our database is intended to be used to study the current condition of breeding bird populations and how they may be changing over time as a result of climate change, habitat degradation and loss, expansion of urban areas, and the introduction of non-native plants and animals.”  The NestWatch website has many great resources including:
. Features of a Good Birdhouse Infographic
. Right Bird, Right House Interactive
The Purple Martin Conservation Association (PMCA) “is the world leader in research, education and conservation of Purple Martins, North America’s largest swallow.The PMCA serves as a centralized data-gathering and information source on the species, serving both the scientist and Purple Martin enthusiast.”  See their website for more information.
Today’s Takeaways

1. Find out which birds you can build a nest box for in your region and habitat with the NestWatch Right Bird, Right House tool.
2. Learn how to build good birdhouses with NestWatch reference materials.
3. Leverage NestWatch resources to learn more about birds and nest monitoring.
Peg - FanningSparks Author