Richard Cadbury holds the Guinness World Record for the earliest box of Valentine’s Day chocolates.  “Richard Cadbury, the eldest son of John Cadbury, founder of the world-famous company, created the first known heart-shaped box of chocolates for Valentine’s Day 1868.  He was a pioneer in chocolate box design and often used his own paintings to make the lids of the boxes more appealing.” states the record.
Over 150 years ago, Cadbury, the British chocolate company, faced a number of serious challenges.  They had invested heavily in new machinery to improve their primary product, drinking chocolate, which left them with large quantities of cocoa butter by-product.  Other chocolatiers, such as their competitors Fry, had successfully sold cocoa butter as eating chocolate.  But, as Deborah Cadbury explains in her book The Chocolate Wars, “the Cadbury brothers [younger brother George focused on purchasing, policy and development while older brother Richard tackled sales] were after something altogether more luxurious.  They found that when the cocoa butter was mixed with sugar and then cocoa liquor was folded back into the mix, it produced a superior dark chocolate bar.  Then they went one step further.  They wanted to launch a new concept that would bring the exotic qualities of the French chocolatier to the popular market.  Richard called it the Fancy Box.
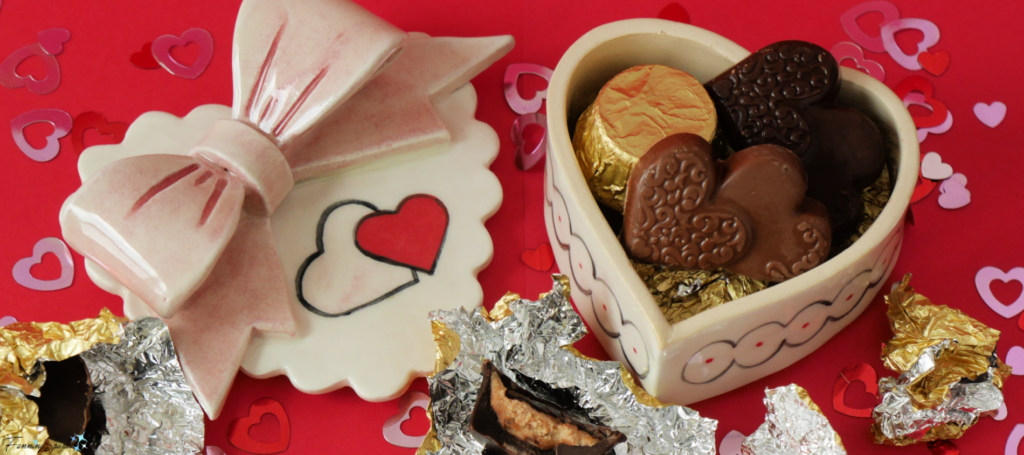
Today’s blog post features my own version of a Fancy Box—just in time for Valentine’s Day!  It doesn’t contain exotic chocolates from my own secret recipe but it does hold some delicious treats I purchased for the occasion.
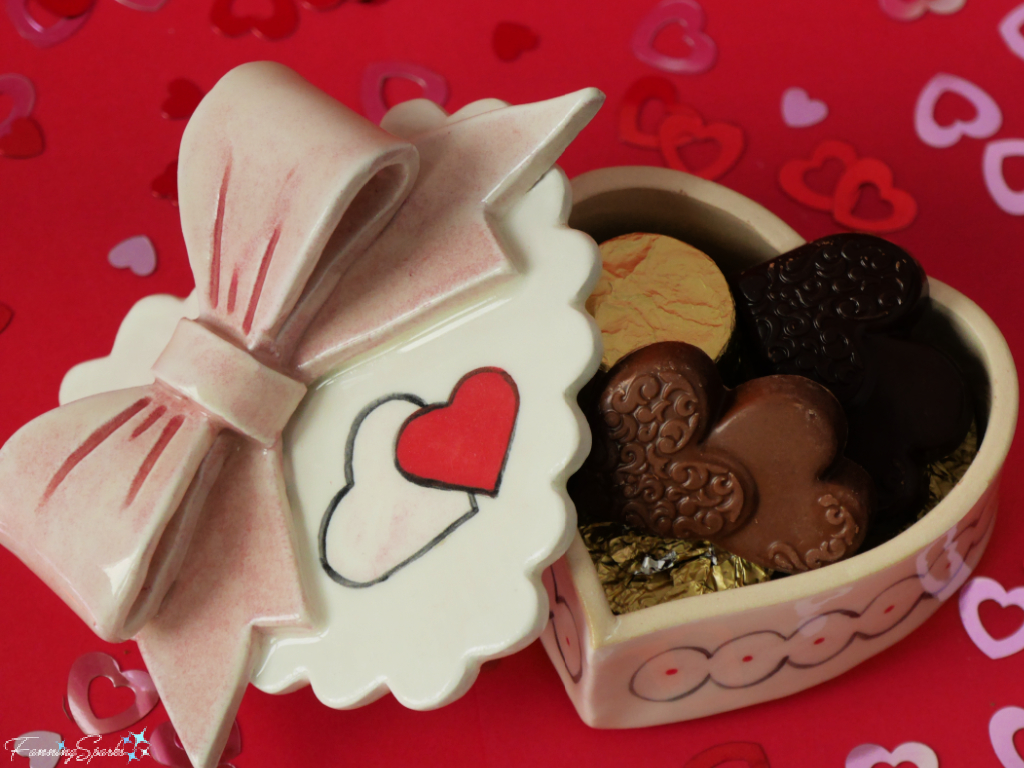
Ceramic Valentines Heart Box Filled with Chocolates   @FanningSparks
Richard Cadbury painted the designs to decorate the lids of the original Fancy Box himself.  His efforts did not go unnoticed—a January 1869 newspaper article in the Birmingham Gazette reports “Among the pictorial novelties introduced to the trade this season, few if any excel the illustration on Messres Cadburys’ four-ounce box of chocolate cremes …  It is chaste yet simple, and consists of a blue eyed maiden some six summers old, neatly dressed in a muslin frock, trimmed with lace, nursing a cat.
My Fancy Box doesn’t showcase a Victorian girl or a cat but it does sport a big pink bow and a simple heart motif.
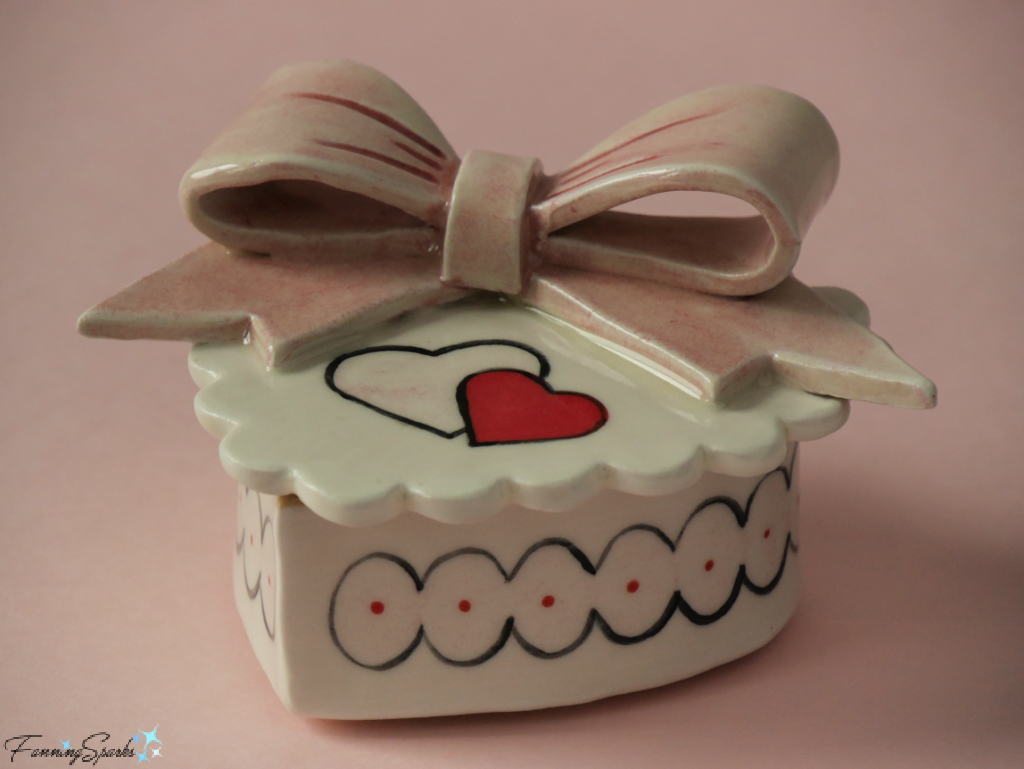
Finished Ceramic Valentines Heart Box    @FanningSparks
My heart-shaped box for Valentine’s Day chocolates is ceramic.  I actually made two of them—a small one, pictured above, which measures 3¼” across and a slightly larger one, pictured below, that’s 4½”.
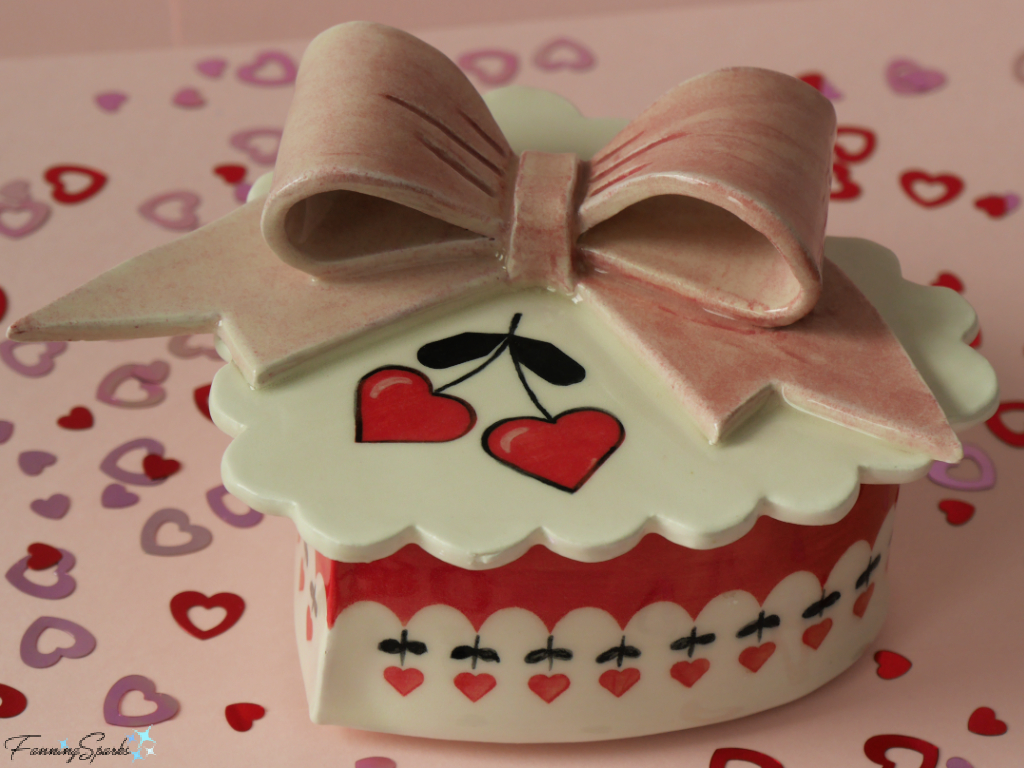
Ceramic Valentines Heart Box Larger Model   @FanningSparks
I started by making a paper prototype and then designing the template.  I’m sharing a complimentary download containing the templates for my ceramic Valentine’s heart box here.
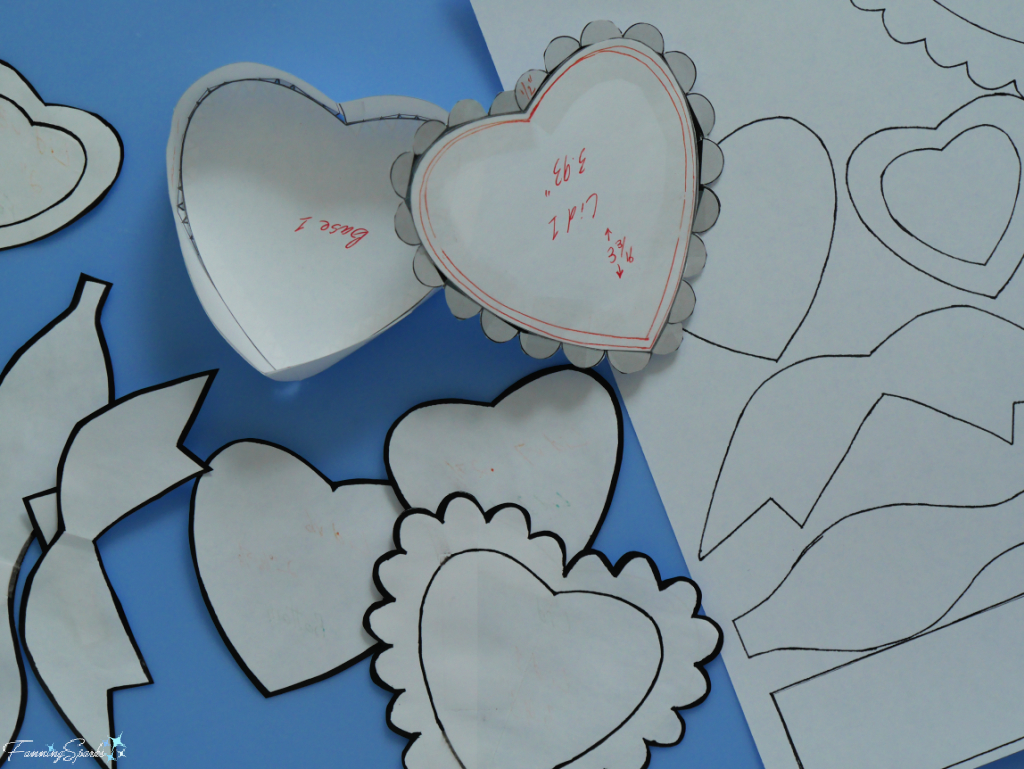
Preparing Templates for Ceramic Valentines Heart Box   @FanningSparks
Once the design was set, I rolled out some clay and cut out the various parts.
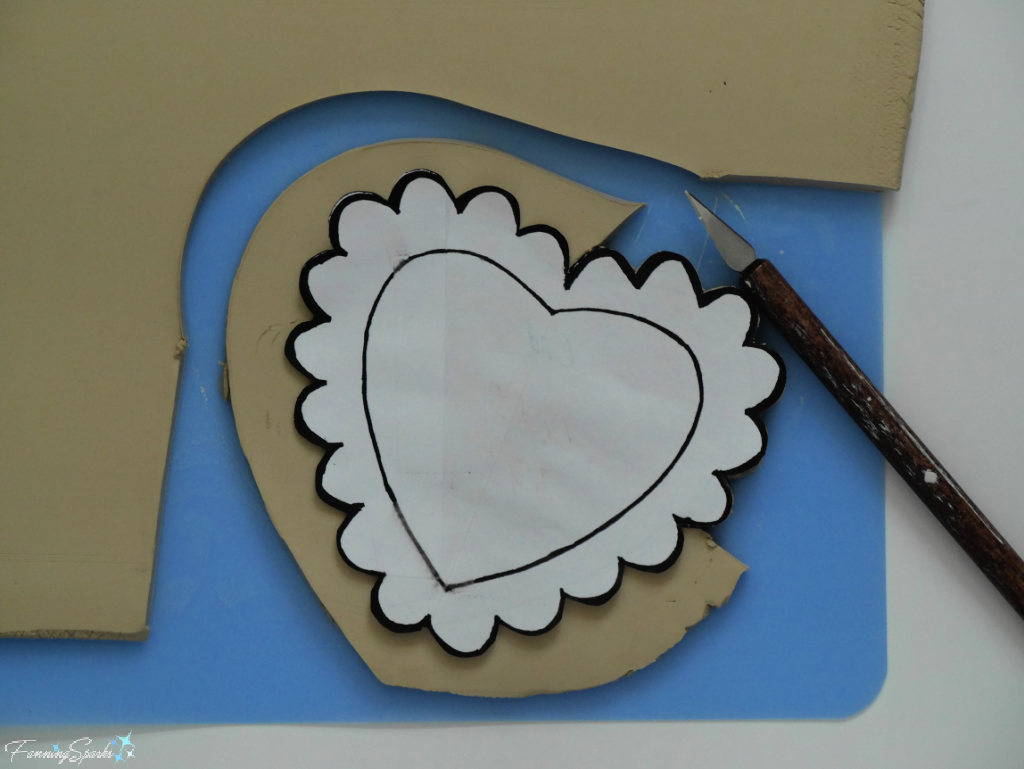
Cutting Out Heart Lid for Ceramic Valentines Heart Box   @FanningSparks
I covered the parts with damp paper towel to prevent them from drying out while I worked.
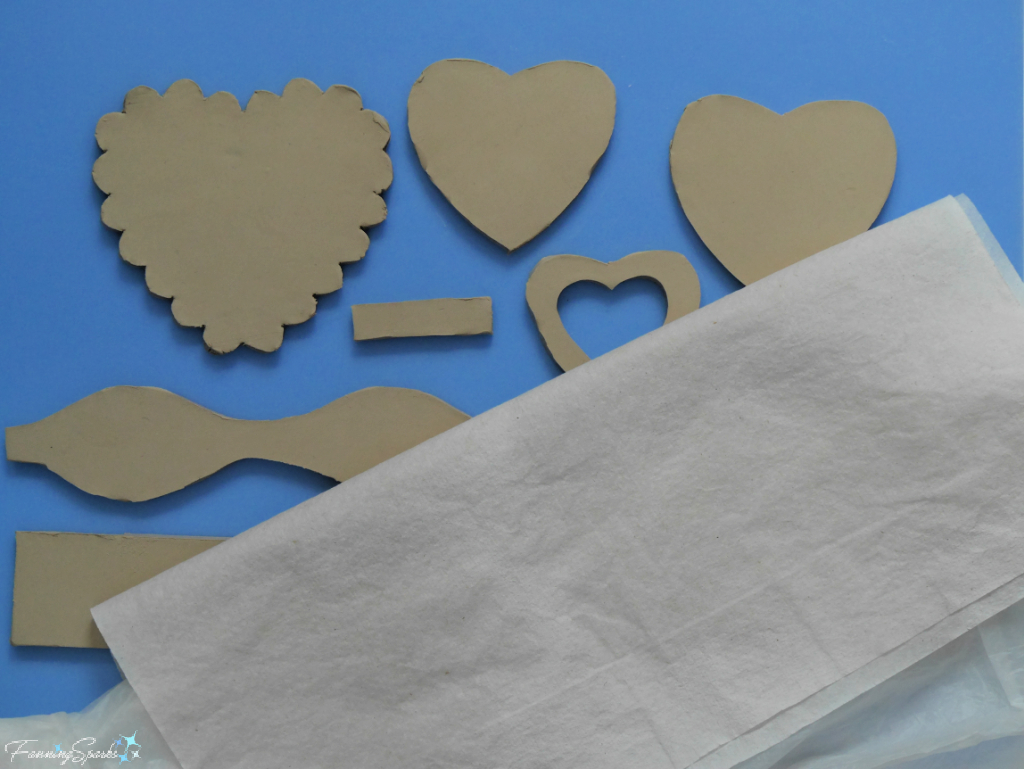
Keeping Pieces of Ceramic Valentines Heart Box Damp   @FanningSparks
The bow is made with three parts: loops, tie and ribbon ends.  The bow’s loops and tie are shaped to give the appearance of a tied ribbon.  This is done by gradually bringing the two ends of the bow’s loops together at the back and by rounding the tie into a U shape.  I’ve learned to be patient with these steps because bending the clay too quickly will make it crack.  After the parts were shaped, I scored, slipped and sealed the parts to assemble the bow.
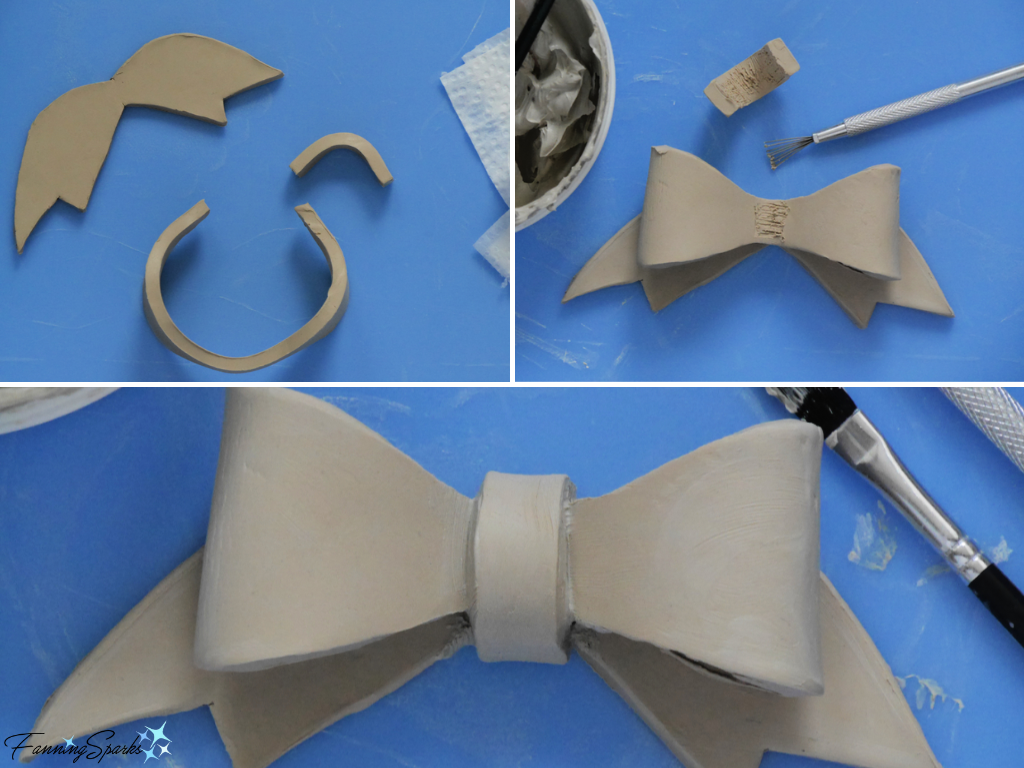
Assembling Bow for Ceramic Valentines Heart Box   @FanningSparks
Next, I built the heart-shaped box.  The first step was to shape the sides around the heart-shaped bottom.  Once again, it was important to work slowly and give the clay time to adjust to the modified form.
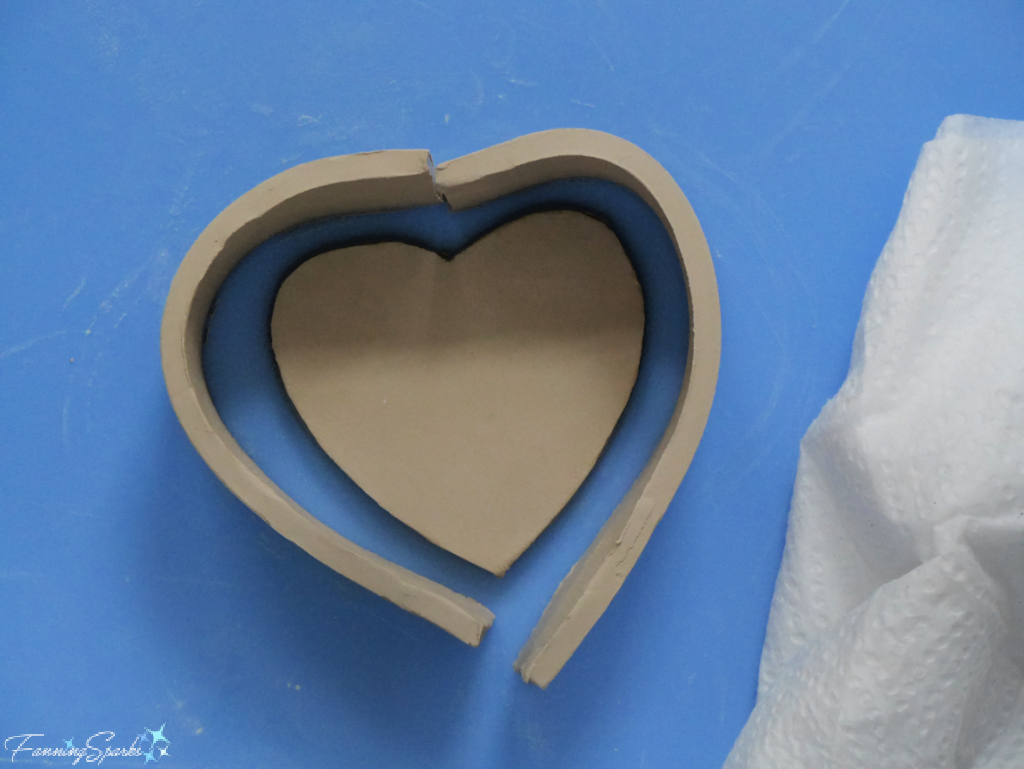
Attaching Sides to Ceramic Valentines Heart Box Step 1   @FanningSparks
After the sides were shaped, I trimmed the first one to fit in place and attached it to the bottom by scoring, slipping and sealing.  I repeated the process for the second side.
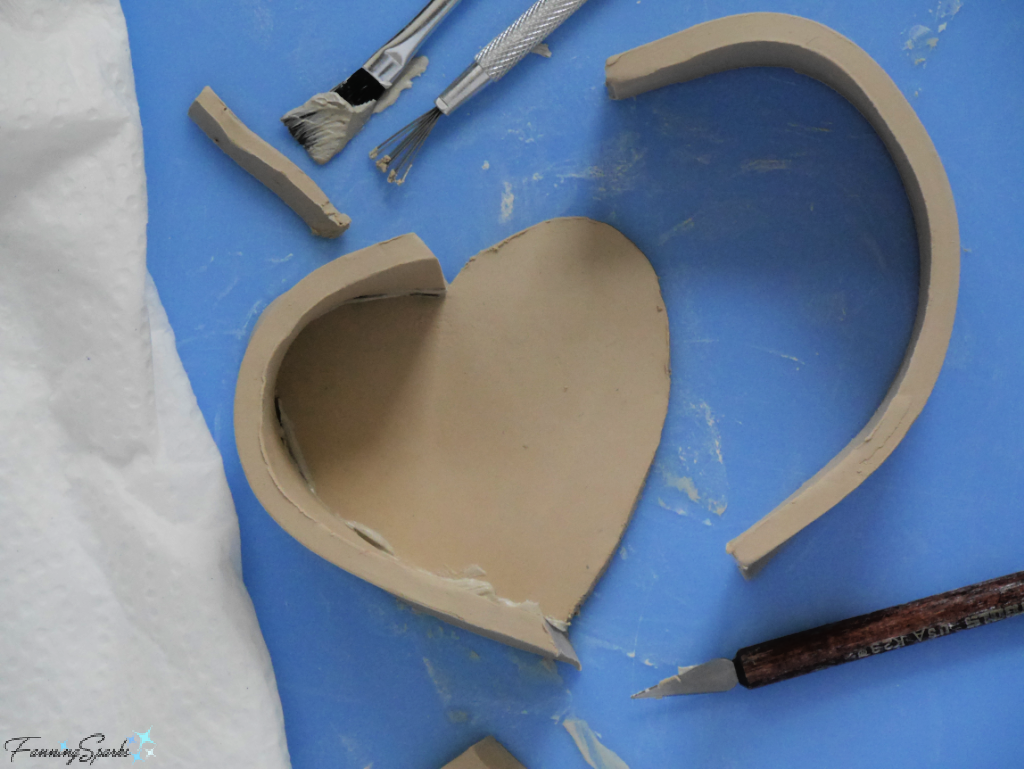
Attaching Sides to Ceramic Valentines Heart Box Step 2   @FanningSparks
Here’s the assembled heart-shaped box.
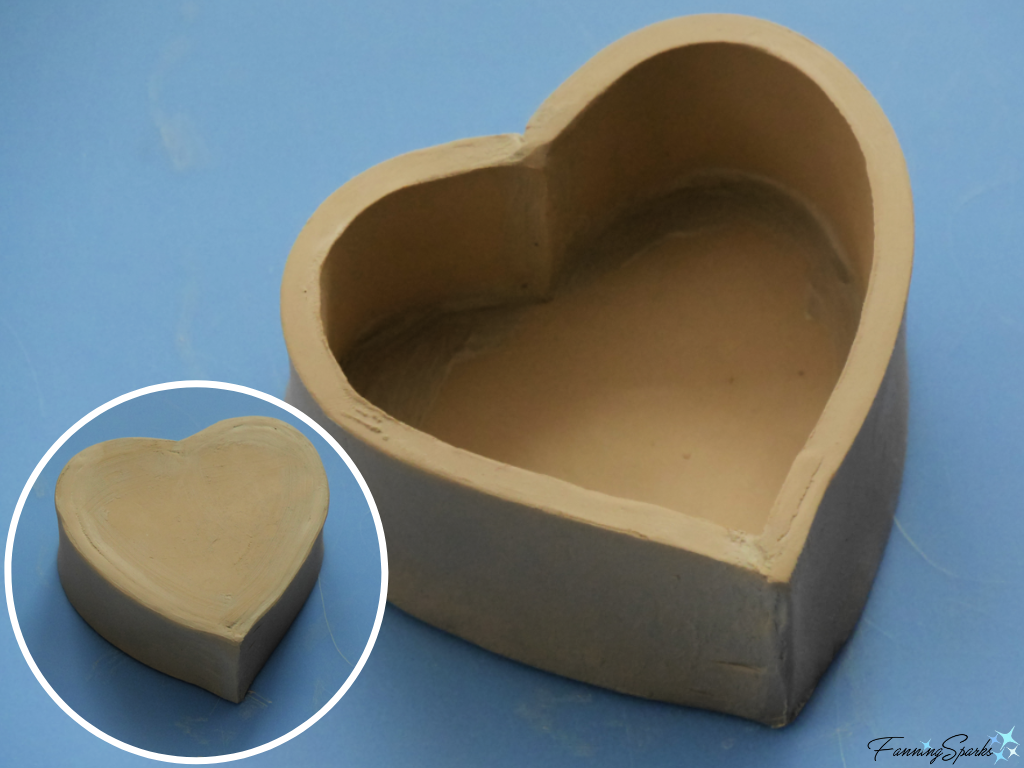
Body of Ceramic Valentines Heart Box   @FanningSparks
Next, I attached a heart-shaped foot to the bottom of the box and a heart-shaped flange to the bottom of the lid.
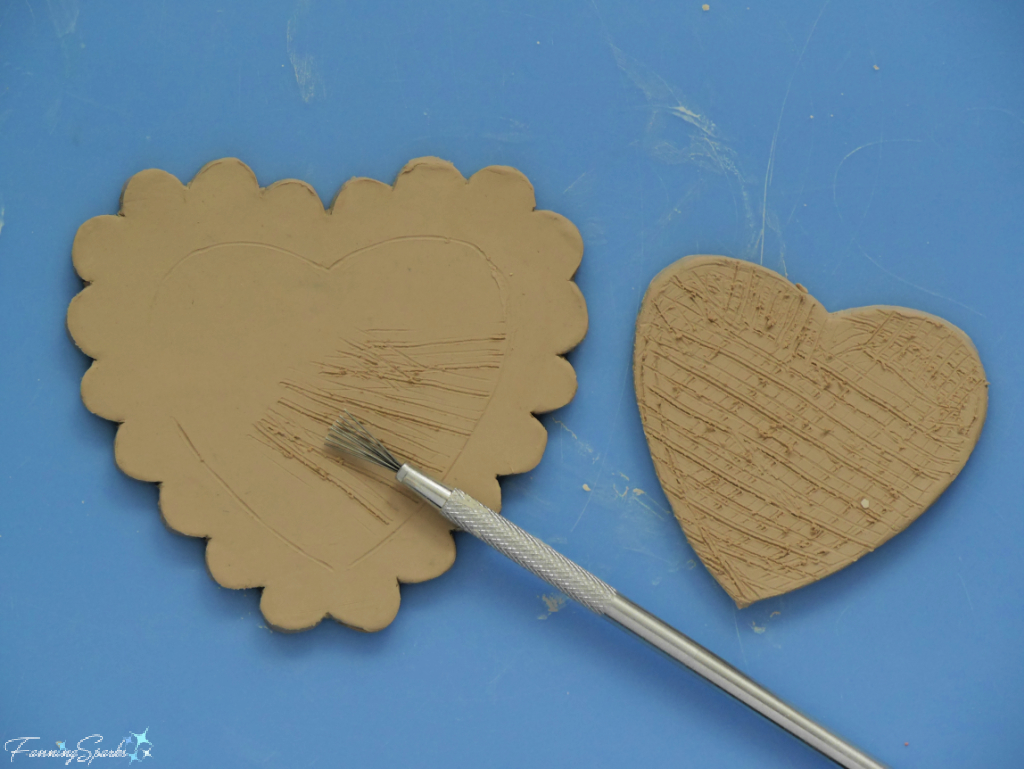
Attaching Flange to Heart Lid for Ceramic Valentines Heart Box   @FanningSparks
Here are the three major components for the heart-shaped Valentine’s box.
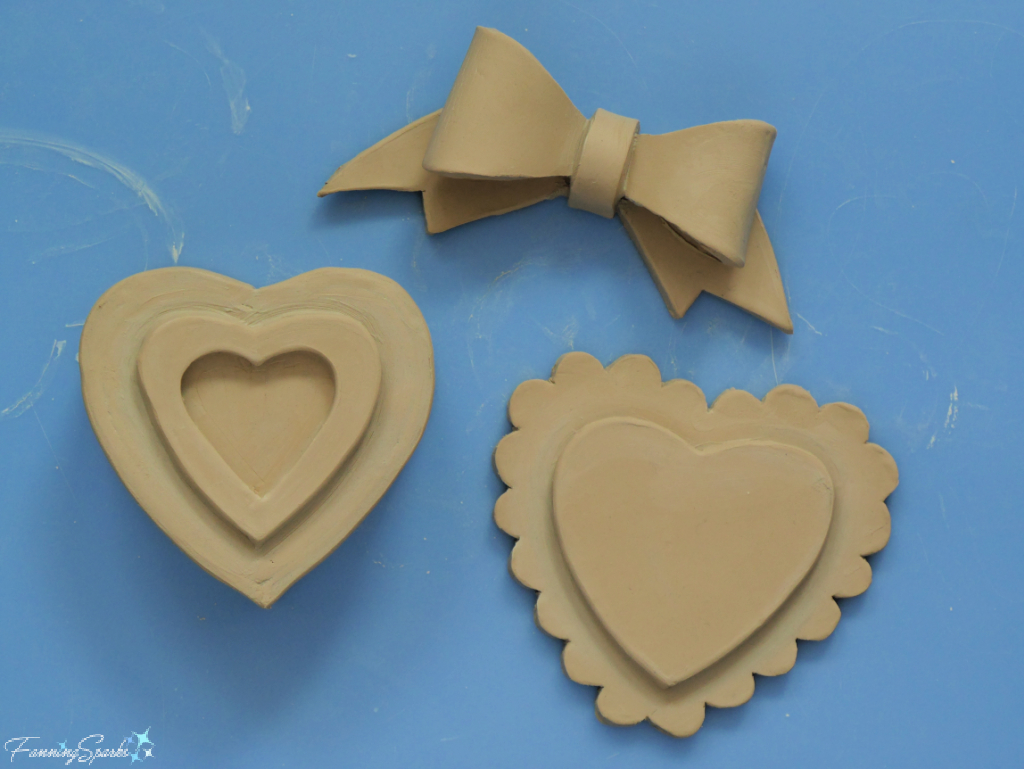
3 Parts for Ceramic Valentines Heart Box   @FanningSparks
The final step in the assembly is to attach the bow to the lid.  I positioned the bow and marked around the outside edge so I would know where to score the clay.
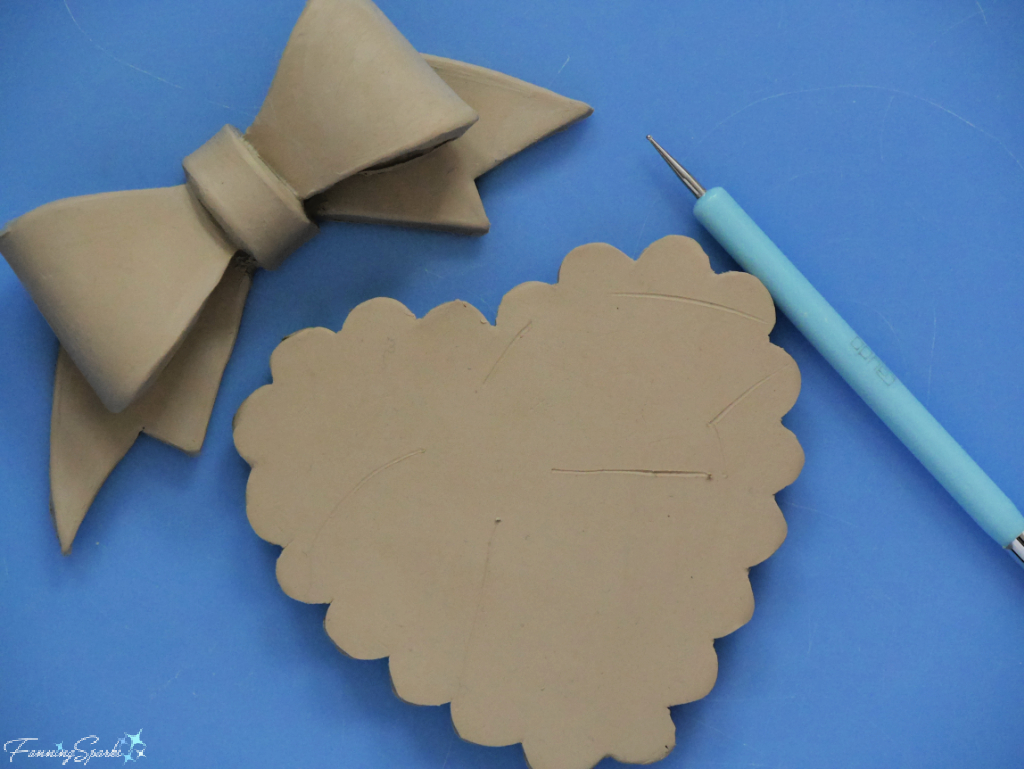
Preparing to Attach Bow to Lid of Ceramic Valentines Heart Box   @FanningSparksNext the piece was covered with plastic and set aside to dry.  It’s best to place the lid on the box while it’s drying so the dried parts will fit properly.
In the meantime, I turned my attention to designing the decorative elements and selecting a glaze treatment.  I tested Amaco Velvet Underglazes in white, rose, bright red and black on a couple of test tiles.  The fine-detail brushes, “Something Blue” by Winstonia, which are designed for fingernail art were perfect for this detailed work.  (Special thanks to Little Street Pottery for this excellent recommendation!)
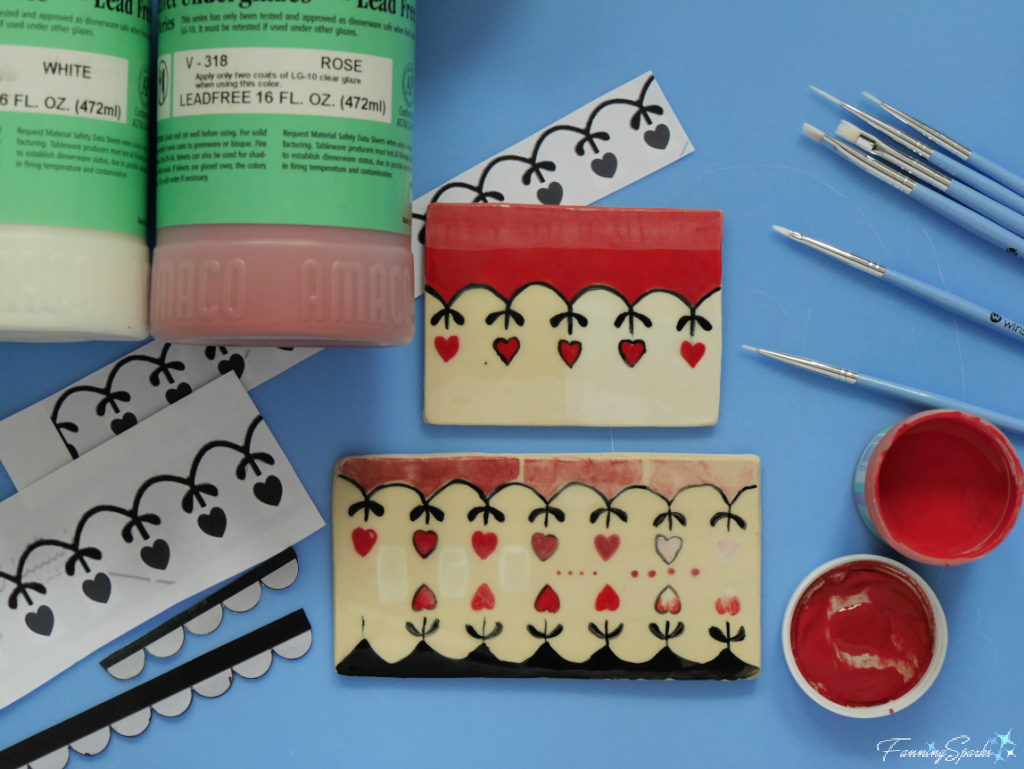
Testing Underglaze Colors for Ceramic Valentines Heart Box   @FanningSparks
After settling on the decorative treatment, I used my Cricut electronic cutting machine to cut stencils from adhesive vinyl.  The vinyl sticks amazingly well to dried clay although curved sections require a little fussing.
I started by applying three coats of white underglaze to the sides and lids and three coats of rose underglaze to the bows.  Once the underglaze was completely dry, I stuck the stencils over the sections that were to remain white and applied the other colors.  The stencils were removed as soon as the underglaze was dry.  The leaves, stems and outlines were added in black underglaze with the fine-detail brushes.
After the pieces were bisque fired, I dipped them in clear glaze for the final finish.  The pieces were fired with the lids in place which means there could be no glaze where the pieces touched.  I learned this the hard way because there was a spot of glaze on one of the rims causing the lid and body to bond together.  Luckily, with the help of a fellow Pottery Studio potter who knew just how to tap the pieces apart (Thank you Aurora!) , the lid was removed without damage.
These ceramic Valentine’s heart boxes are the grand finale to my self-proclaimed Heart Maker Challenge.  The challenge, which I announced in my previous blog post Setting My Heart on a Maker Challenge, is an effort to create at least three different projects featuring hearts before Valentine’s Day.  This is actually the fourth project I managed to complete so I consider it a bonus.  Another bonus was the chocolates used in the photos—I don’t often get to eat my props after a shoot!
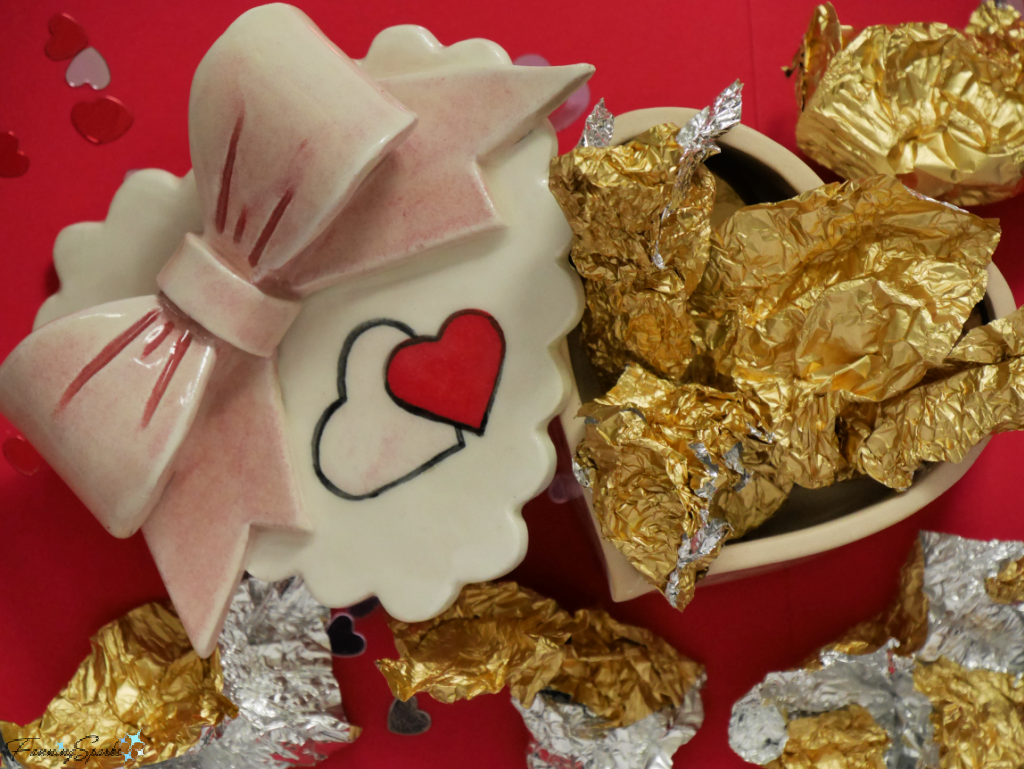
Ceramic Valentines Heart Box with Empty Chocolate Wrappers   @FanningSparks

More Info

You can download my project template here: Ceramic Valentines Heart Box – Complimentary Download.
Check out the FanningSparks Maker Challenge to create at least three different projects featuring hearts before Valentine’s Day:
. See the blog post, Setting My Heart on a Maker Challenge, to learn how this maker challenge came about.
. See the blog post, Maker Heart Challenge #1: Hearty File Storage Boxes, for my first response to the challenge.
. See the blog post, Maker Heart Challenge #2: Broken Heart Trivet, for my second response to the challenge.
. See the blog post, Maker Heart Challenge #3: Froufrou Sachet – DIY Tutorial, for my third response to the challenge.
To learn more about the history of Cadbury and the other major chocolate firms of the early nineteenth century, check out Deborah Cadbury’s book Chocolate Wars: The 150-Year Rivalry Between the World’s Greatest Chocolate Makers which can be found here on Archives.org.
As noted above, I learned about using nail art brushes for detailed glazing from Little Street Pottery.  They have an active YouTube channel where the talented Ann Ruel shares her outstanding pottery projects.  Check out Little Street Pottery on YouTube for lots of ideas, techniques, tips and workshops.  Thank you Ann and Little Street Pottery for generously making these great resources available to all!
I’m fortunate to have easy access to the Oconee Cultural Arts Foundation (OCAF) School Street Pottery Studio for my pottery fun.  The studio is located in Watkinsville, Georgia, USA.  You can learn more on the OCAF website.

Today’s Takeaways

1. The first known heart-shaped box of chocolates for Valentine’s Day was created by Richard Cadbury over 150 years ago.
2. Beautiful, specialty product packaging can be inspiring.
3. Clay is an ideal medium to create functional vessels which are also decorative.
Peg - FanningSparks Author

There aren’t many situations where froufrou would be considered a desirable attribute.  Galentine’s Day, the variant of Valentine’s Day devoted to celebrating the women in our lives, may be one of those rare situations.  The fancier and fussier, the better!
Interestingly, the word “froufrou” originated as an imitation of a sound.  The French word was coined to replicate the rustling sound of women moving about in dresses of draped satin and silk.  Nowadays, froufrou is defined as “very showy or fancy”.
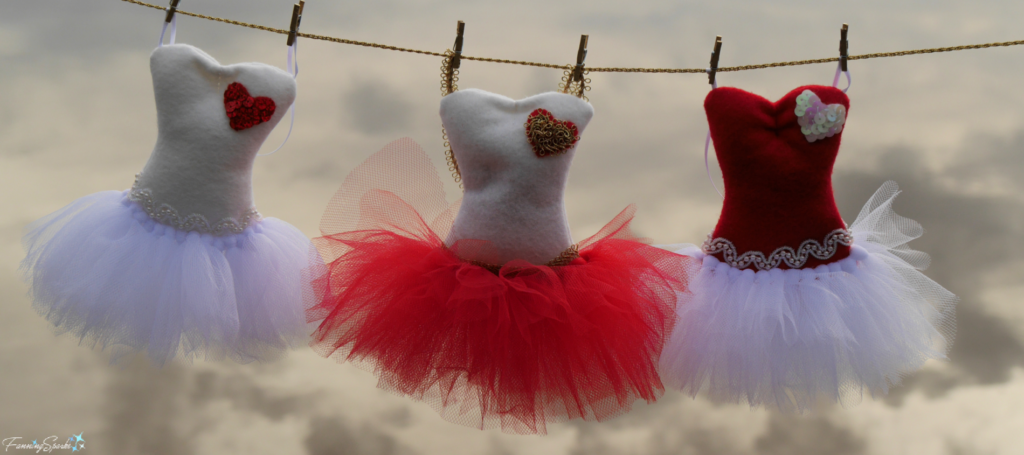
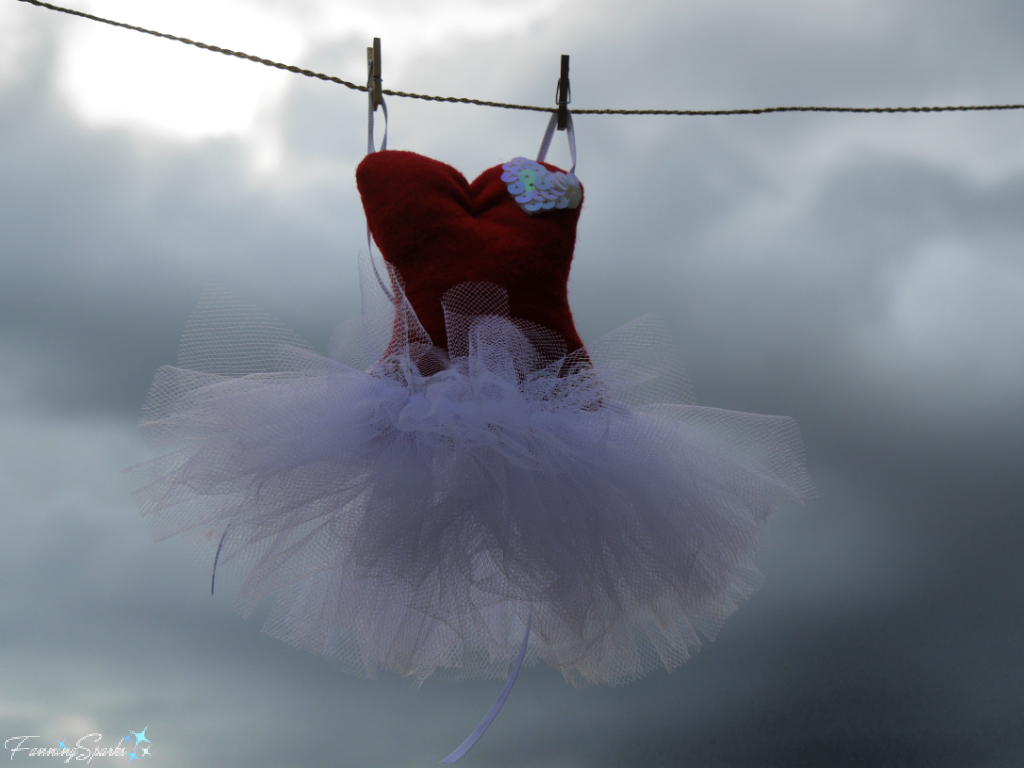
Today’s blog post features a lavender sachet designed to look like a frilly, little dress.  I’m not sure it would make a froufrou sound but I do think it’s showy and fancy enough to be froufrou.
The sachet is embellished with a small heart which qualifies it as the third response to my self-proclaimed Heart Maker Challenge.  The challenge, which I announced in my previous blog post Setting My Heart on a Maker Challenge, is an effort to create at least three different projects featuring hearts before Valentine’s Day.
Froufrou Sachet on Clothesline with Cloudy Sky   @FanningSparks
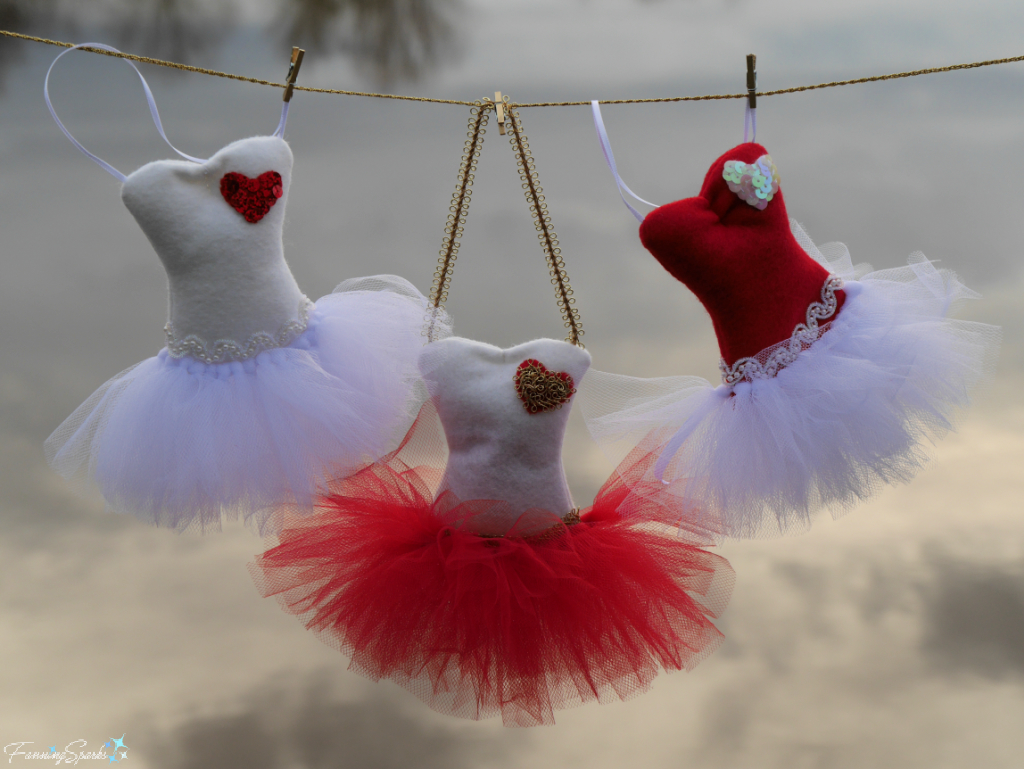
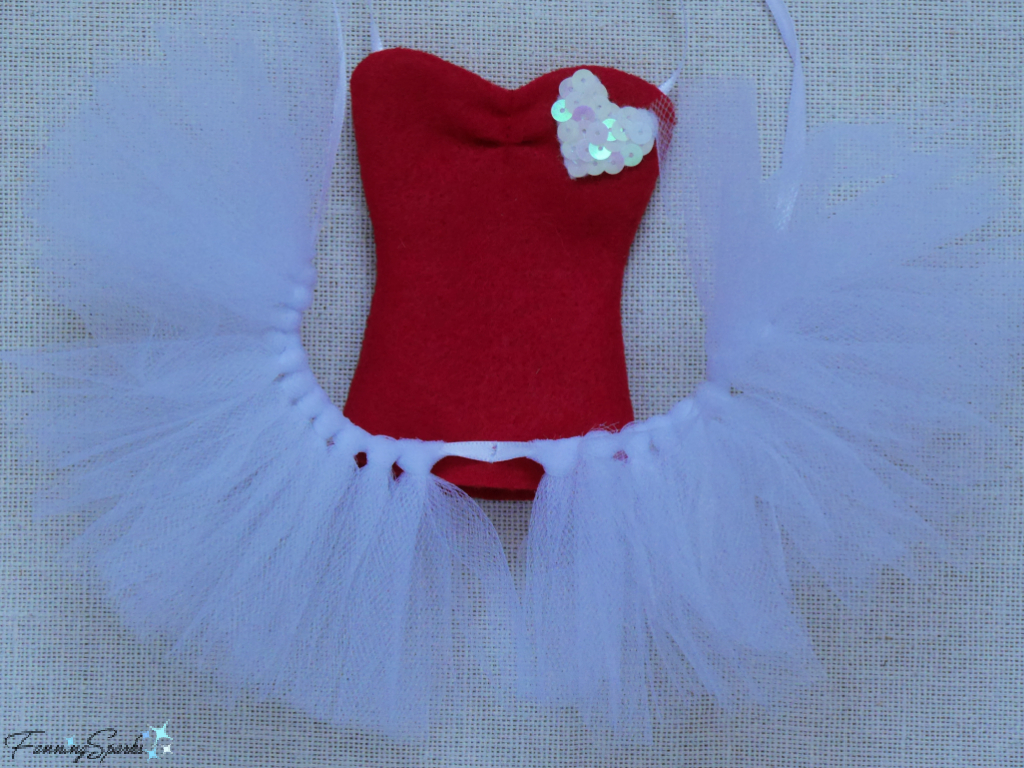
The froufrou, miniature-dress sachet is a fun little project you can make with a few, inexpensive supplies.  Only basic crafting skills are needed—some simple sewing is involved but it could be glued instead.  The best part is the sachet can be personalized with your own choice of colors and embellishments.  Follow the step-by-step instructions to make froufrou sachets for your Galentine’s pals and/or yourself.  The sachet with the red bodice and white skirt (on the right in the below photo) is used to illustrate the tutorial.
Three Options for Froufrou Sachet   @FanningSparks
Supplies Needed
. Template:  Download Froufrou Sachet – Complimentary Download  to print the template.
. Paper:  A few sheets of white paper to print template.
. Felt:  8” x 10” piece of felt for the dress bodice.
. Thread: To match the color of the felt and any trim.
. Fabric Glue (optional): To assemble the sachet by gluing instead of sewing.
. Tulle: About 5 yards of 6” wide ribbon for the dress skirt.  Alternatively, about 1 yard of 54” wide tulle mesh would be needed.
. Ribbon: 22” of ¼” fabric ribbon (such as satin or grosgrain) for the dress skirt in the same color as the tulle.
. Ribbon: 11” narrow (⅛” or ¼” wide) fabric ribbon (such as satin or grosgrain) for the hanger.
. Decorative Elements: Small hearts, sequins, lace, trims or other embellishments.  It takes about 8 inches of trim to go around the bottom edge of the bodice.
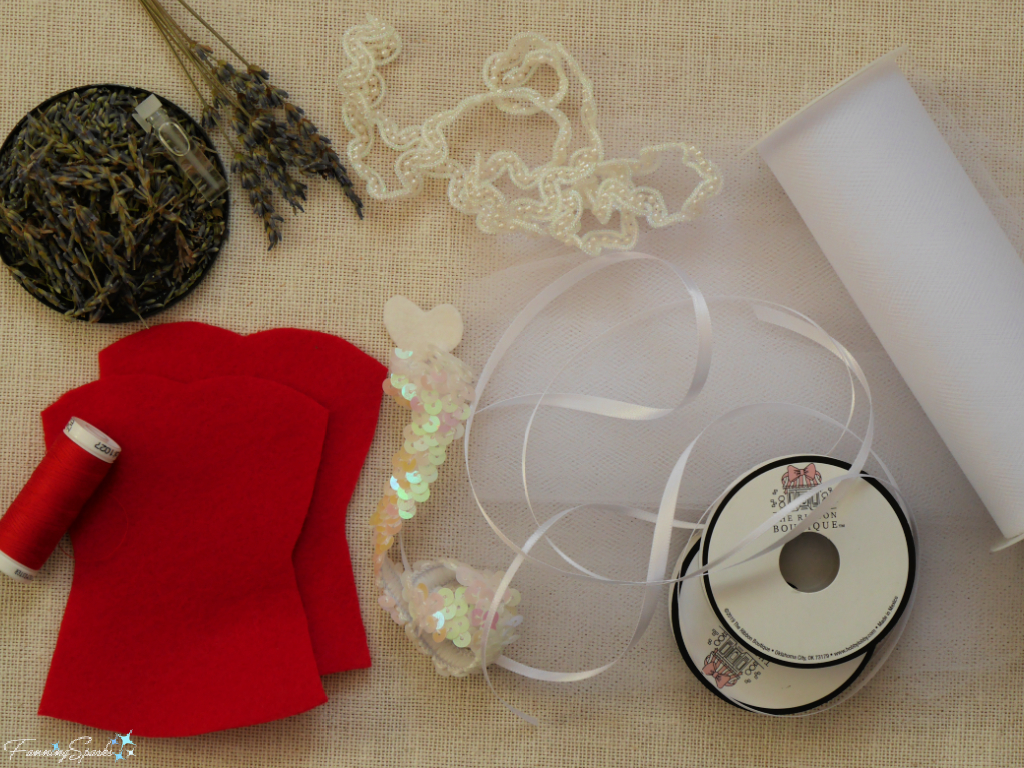
. Scented Filling: Approximately ½ cup of scented filling.  There are a variety of options including dried florals or herbs (such as lavender buds or rose petals), rice or Epsom salts scented with essential oils, cedar shavings or fragrance beads.  I chose to use a combination of polyester batting and dried lavender buds enhanced with a few drops of lavender essential oil.
Supplies Needed for Froufrou Sachet   @FanningSparks
Equipment and Tools Needed
. Computer and Printer: To print template.
. Scissors
. Ruler or tape measure
. Pins
. Needle: For hand sewing.
. Sewing Machine: Alternatively, this project could be glued.
. Tape: To temporarily secure ribbon to the work surface.
. Fabric Pen or Chalk: I prefer the Pilot FriXion marker.
. Spoon: To move scented filling into sachet.
Step 1  Prepare Template  Download the Froufrou Sachet – Complimentary Download and print the template. Take care to ensure the scale is accurate on your printed version.  See specifics in the download document.
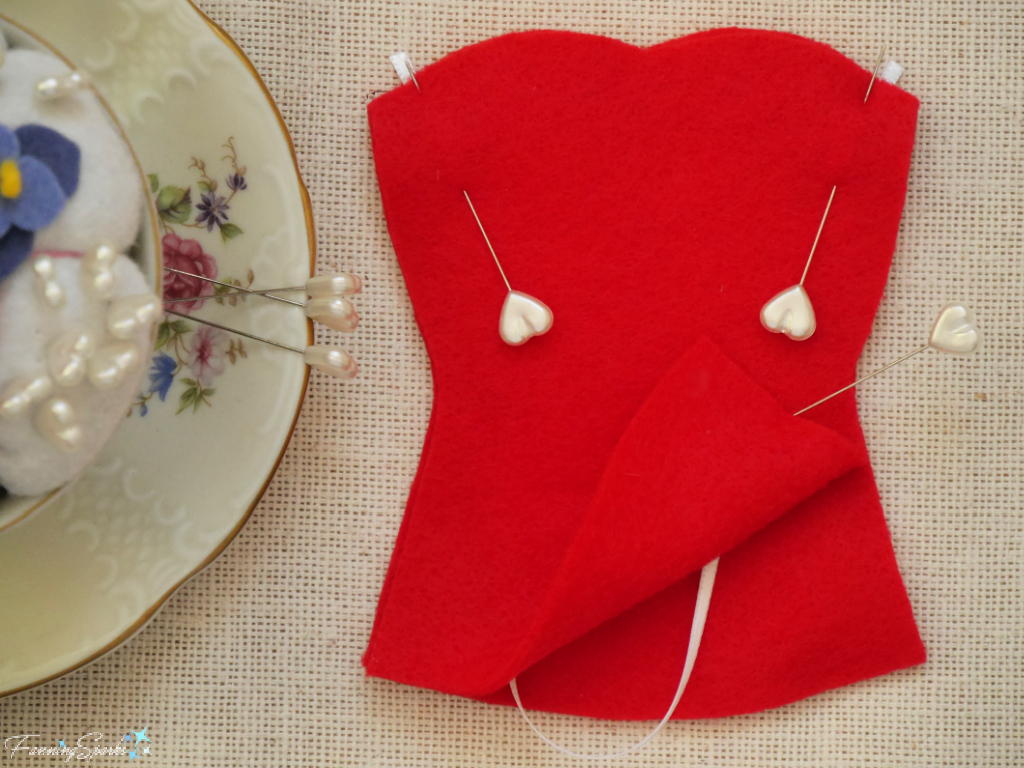
Step 2  Make Felt Dress Bodice  Cut TWO bodice pieces from felt using the downloaded template.  Align edges and pin in place.  Slip the 11” ribbon hanger between the two pieces of felt and bring the ends of the ribbon up between the neckline edges.  Position the ends of the ribbons about ¼” from the side edges.  Pin in place.
Preparing to Sew Felt Dress Bodice for Froufrou Sachet   @FanningSparks
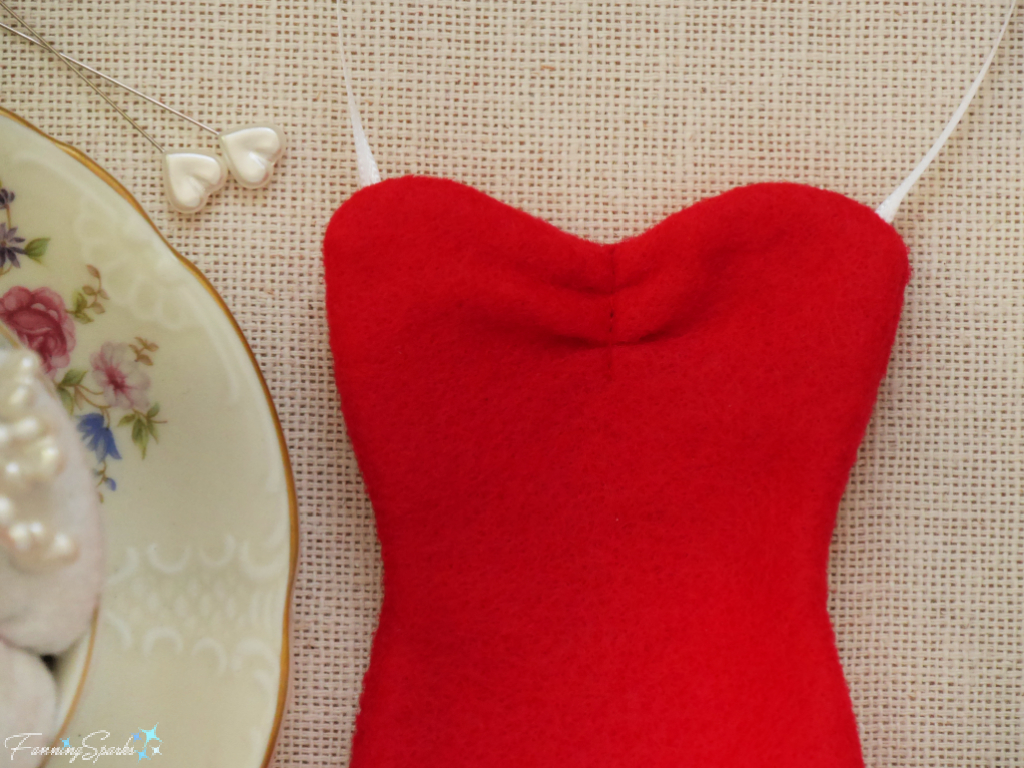
Sew the two pieces of felt together along the two sides and across the top neckline.  I chose to use an overcast stitch so the sachet filling won’t leak.  Alternatively, the felt could be glued.  Leave the bottom hem edge open at this time.  Turn the piece right side out pushing out the seams to form a smooth edge.  The ribbon hanger should become a loop at the top of the bodice.
The next step is to gather the top of the bodice.  Using a straight stitch on the sewing machine, lock in the beginning of the seam at the top center of the bodice.  Bunch up the felt under the sewing machine foot and stitch to form gentle gathers.  Sew for about ¾” and lock in the end of the seam.  Alternatively, hand-sew this short seam by gathering the felt by hand and locking it in place with a simple running stitch.
Felt Dress Bodice Sewn for Froufrou Sachet   @FanningSparks
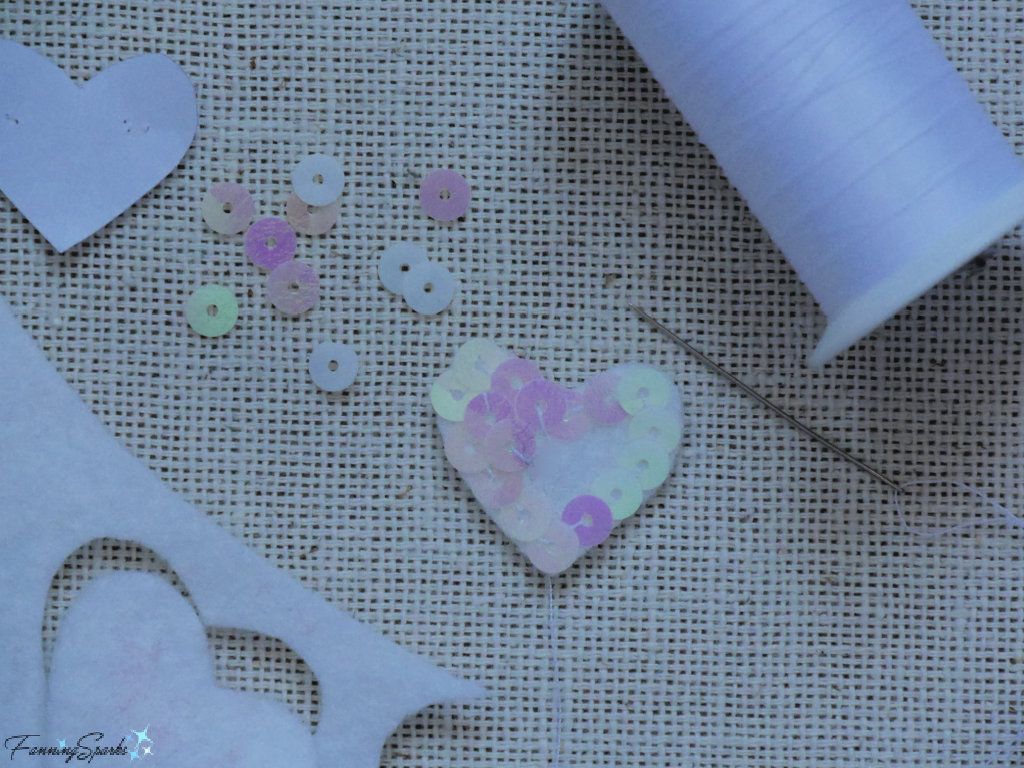
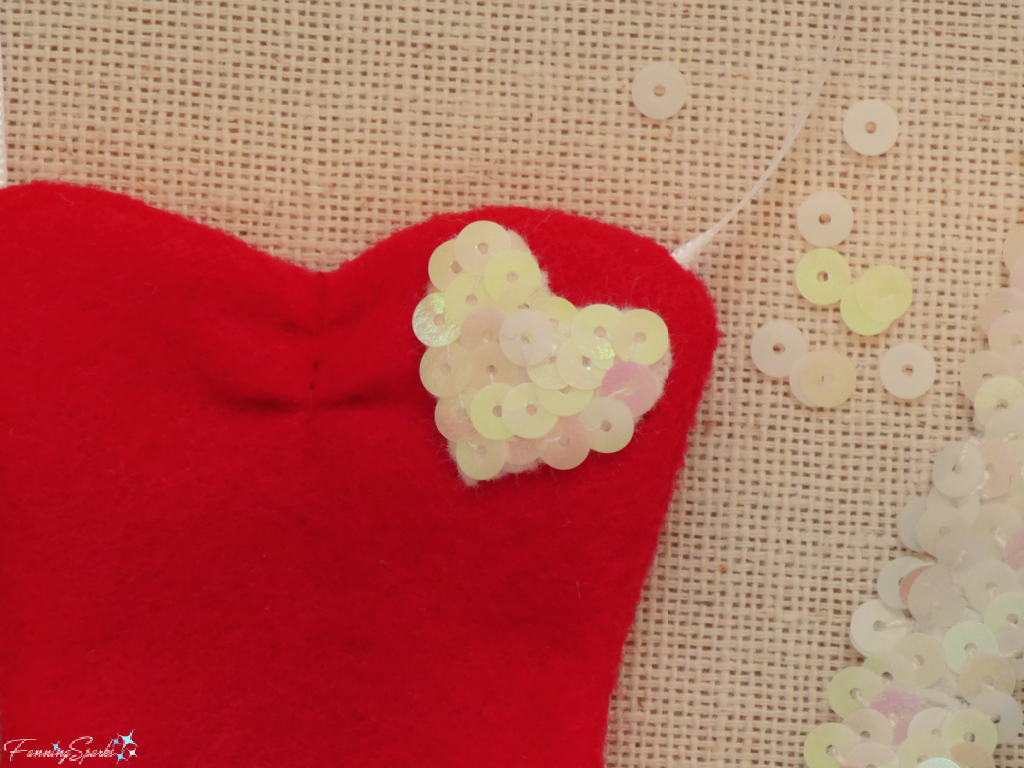
Step 3  Embellish Felt Dress Bodice  Determine how you wish to embellish the bodice of the dress.  A small heart template is included in the complimentary download.  Hand-sew, or alternatively glue, any embellishments to the top of the bodice at this point.  Embellishments for the bottom of the bodice, ie along the waist or hem lines, will be addressed after the tulle skirt is attached.  I chose to make a small heart from white felt and cover it with sparkly pearl-white sequins.
Adding Sequins to Heart Embellishment for Froufrou Sachet   @FanningSparks
I hand-stitched the sequined heart into place.
Attaching Heart Embellishment to Froufrou Sachet   @FanningSparks
Step 4  Make Tulle Dress Skirt  The dress skirt is made by tying short, wide pieces of tulle ribbon onto a 22” strip of narrow ribbon.  Cut 24 pieces of tulle measuring 6” x 7”.  If you are using 6” wide tulle ribbon, simply unroll the ribbon and cut into 7” sections.  Alternatively, if you are using tulle mesh yardage, measure and cut 6” x 7” rectangles.  Stack your cut pieces carefully so it’s easy to differentiate the 6” edges from the 7” edges.
Prepare to tie the tulle pieces to the ribbon by securing one end of the 22” piece of ribbon to your work surface.  I simply taped mine to the edge of my table.
A lark’s head knot is used to attach the tulle sections to the ribbon.  This simple knot is commonly used in macrame and there are numerous online resources describing it in great detail.  I’ve explained the steps below but, if you need a better explanation, just search online for “macrame larks head knot”.
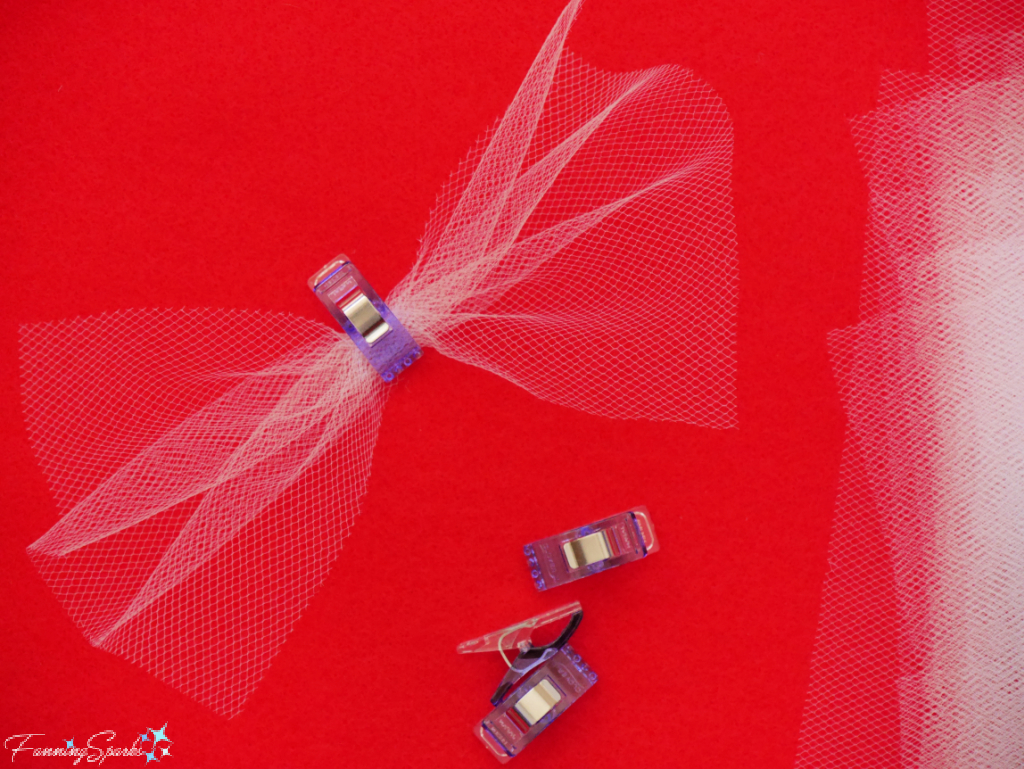
Pick up a tulle section and hold it with the 6” edges to the top and bottom.  Use your fingers (instead of the clip I used for the photo) to gather the center into a tight bundle.
Gathering Tulle for Dress Skirt for Froufrou Sachet   @FanningSparks
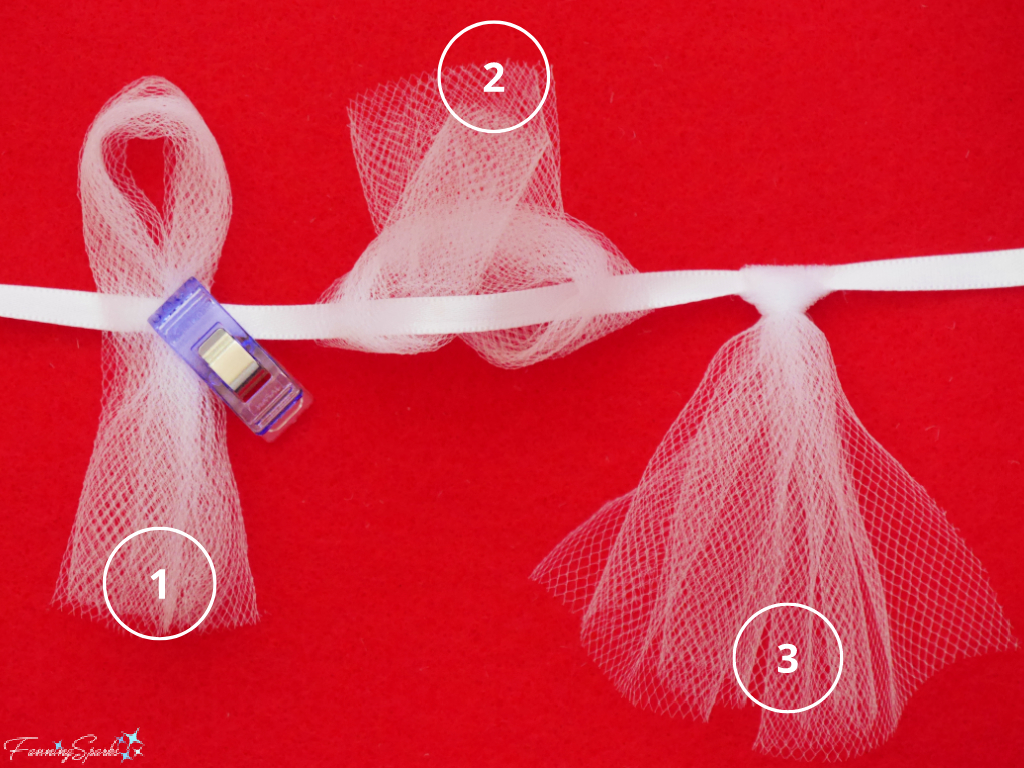
Fold the tulle section in half bringing the two 6” edges together.  Use your fingers to maintain the gathers and form a small opening at the fold.  Place this opening over the secured ribbon with the tulle ends positioned towards you (#1 in the photo).  Swing the tulle ends down under the ribbon and up through the opening (#2 in the photo).  Pull to tighten.  Arrange the tulle knot on the ribbon so the ends are aligned below the ribbon (#3 in the photo).  Pull the knot snug—loose enough to lie flat but tight enough to keep the knot in place.
Tying Tulle to Ribbon for Dress Skirt for Froufrou Sachet in 3 Steps   @FanningSparks
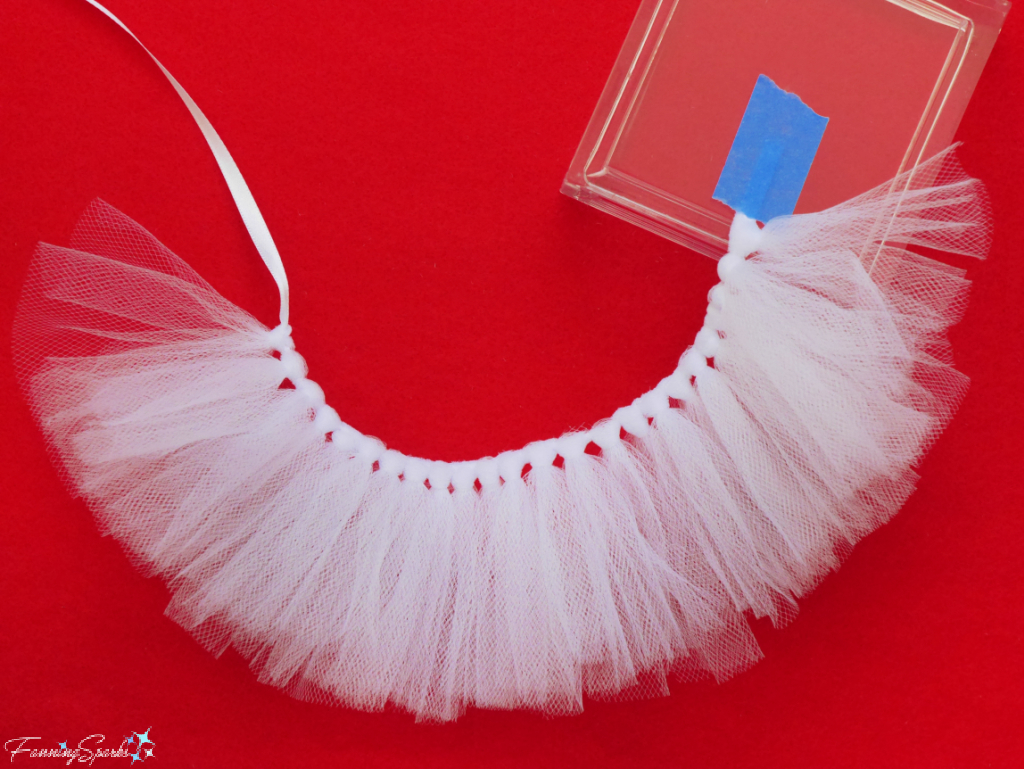
Repeat for the remaining 23 pieces of tulle pushing each knotted section snuggly against the previous one.  Try not to twist the ribbon.
Tulle Tied to Ribbon for Dress Skirt for Froufrou Sachet   @FanningSparks
Step 5 Attach Tulle Skirt to Felt Bodice  Find the center of the ribbon by folding it in half.  Mark lightly with fabric pen.  Gently slide 12 of the knots to either side of this center mark.  Find the center front of the felt bodice by folding it in half.  Mark with a pin.  Repeat for the center back of the bodice.
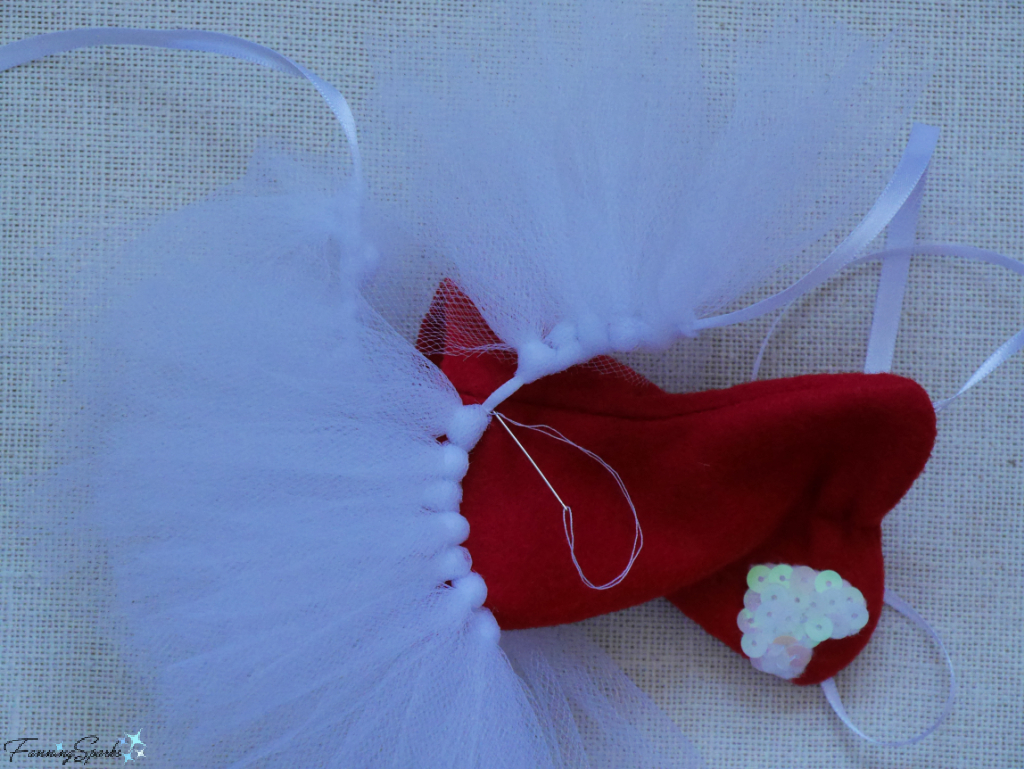
Align the center mark on the ribbon with the center mark on the bodice front.  Pin together about ⅜” from the bottom edge.  Tack ribbon to bodice with a few hand-sewn stitches.  Alternatively, glue the ribbon in place.
Tacking Ribbon of Tulle Skirt to Dress Bodice at Center Front   @FanningSparks
Prepare to tack the ribbon to the bodice at one of the side seams.  Gently slide 6 knots towards the center front ensuring a snug fit.  Grasp ribbon directly after the sixth knot and pin to the bodice at the side seam.  Tack the ribbon to the bodice.  Repeat on the opposite side.
Tacking Ribbon of Tulle Skirt to Dress Bodice at Side Seam   @FanningSparks
Prepare to tack the ribbon to the bodice at the center back.  On one of the sides, gently slide the remaining 6 knots towards the side seam.  Grasp ribbon directly after the sixth knot and pin it to the bodice at the center back.  Tack the ribbon to the bodice.  Repeat on the opposite side.
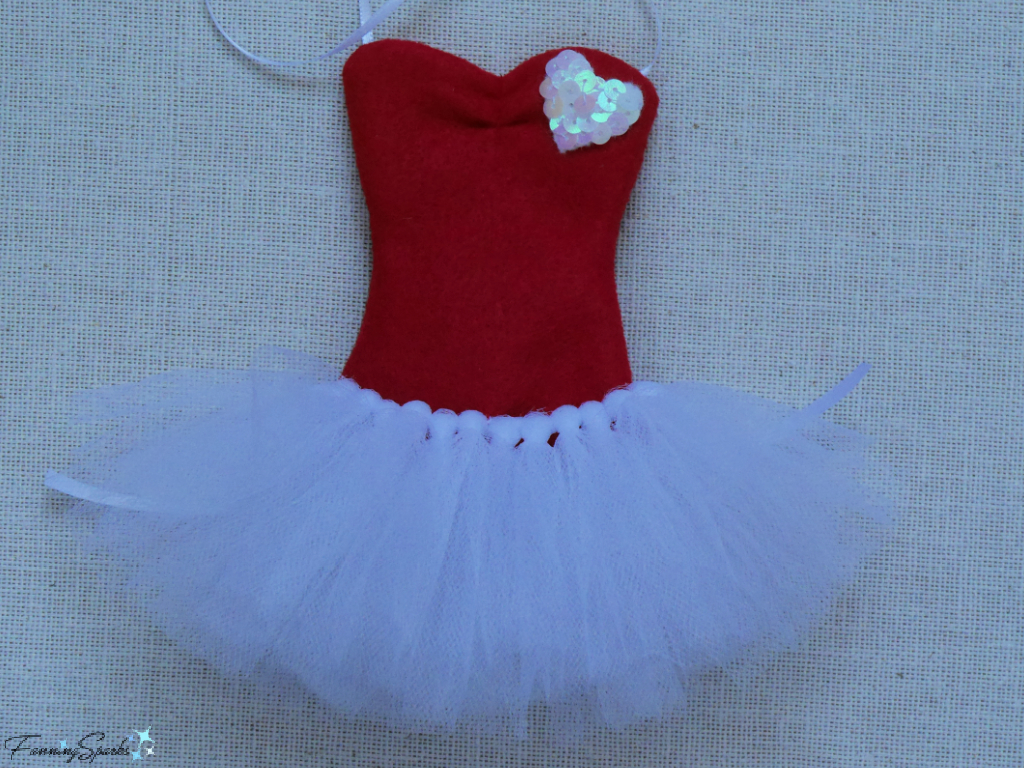
The tulle skirt is now attached to the bodice at 4 points.  Finish off the narrow ribbon by tying a small bow or by knotting and trimming off the ends.
Tulle Tied to Ribbon for Dress Skirt for Froufrou Sachet   @FanningSparksStep 6  Embellish Waistline  Determine how you wish to embellish the waistline where the skirt is attached to the bodice.  Hand-sew, or alternatively glue, any embellishments.  I chose to attach a pretty, beaded trim just above the tulle skirt.
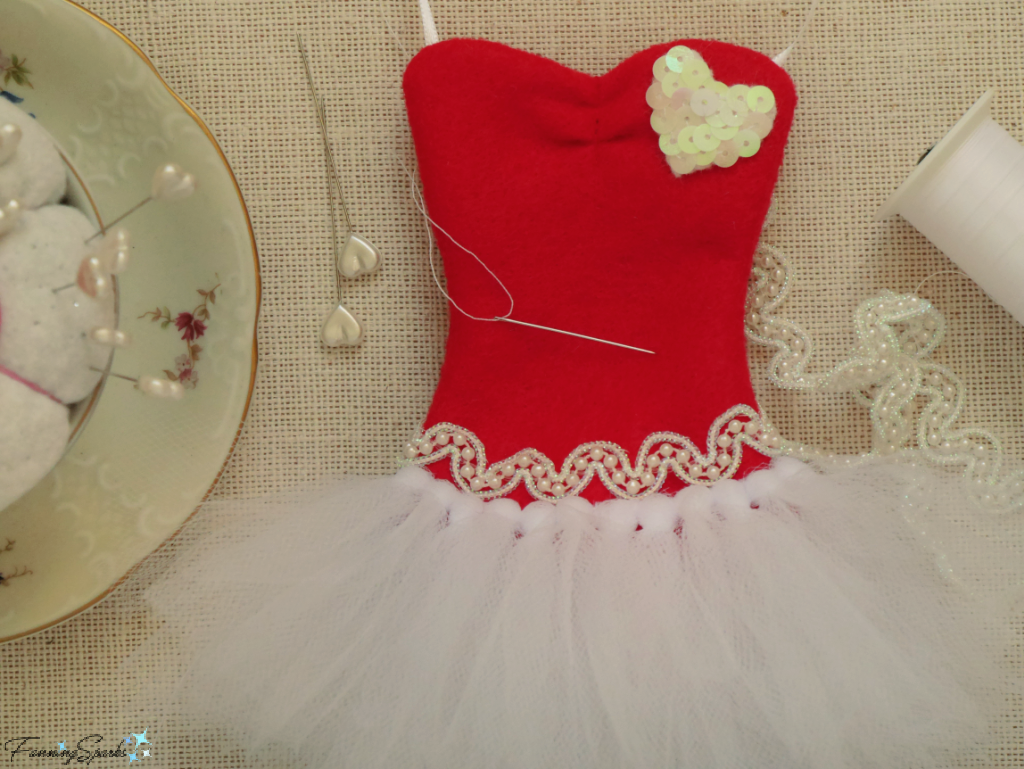
Attaching Waistline Embellishment to Froufrou Sachet   @FanningSparks
Step 7  Fill Sachet  The final step is to stuff the dress body with the scented filling.
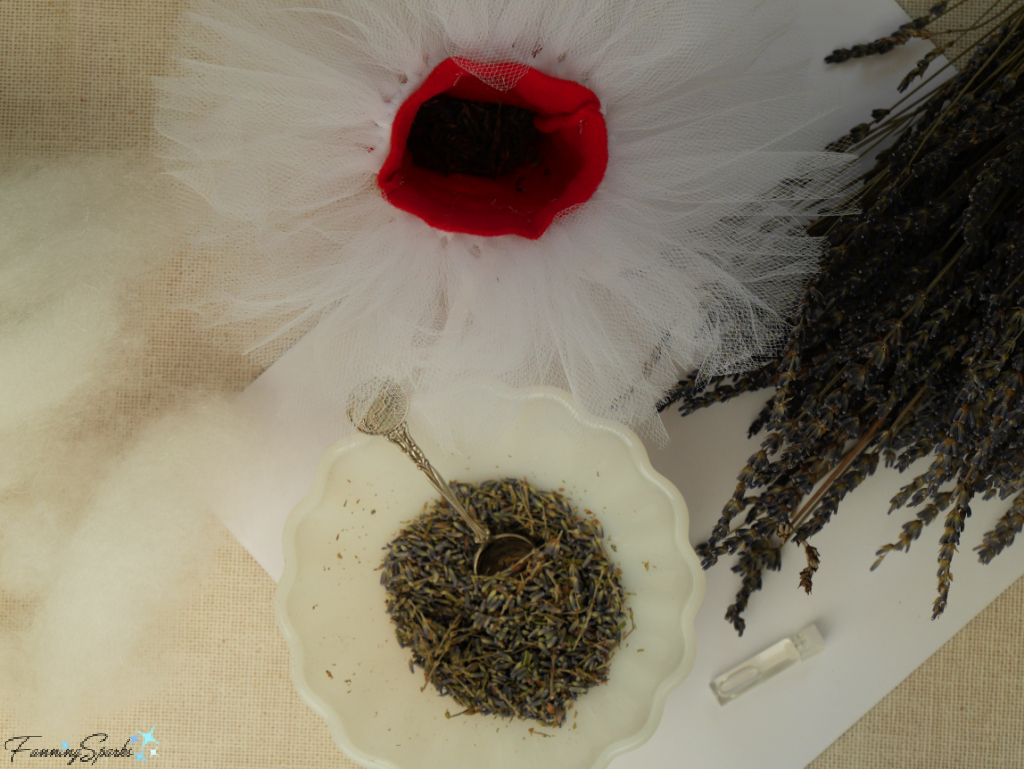
As noted under the Supplies Needed section, I chose to use a combination of polyester batting and dried lavender.  I enhanced the dried lavender buds with a few drops of lavender essential oil purchased at the Red Oak Lavender Farm & Shop in Northern Georgia (see previous post Stop and Smell the Lavender).  Lavender has a lovely sweet scent, deters moths and removes mustiness.  When the scent starts to fade, gently squeeze the lavender to release more oils and revive the fragrance.  The fragrance is said to last for a couple of years.
Fill the dress body through the bottom opening.  I used a small amount of polyester batting to fill out the curves of the dress.  I spooned dried lavender buds into the mid-section and then finished off with a little more batting.
Filling the Dress Body for Froufrou Sachet   @FanningSparksClose the opening with a hand-sewn whipstitch.  Alternatively, the opening can be closed with glue.
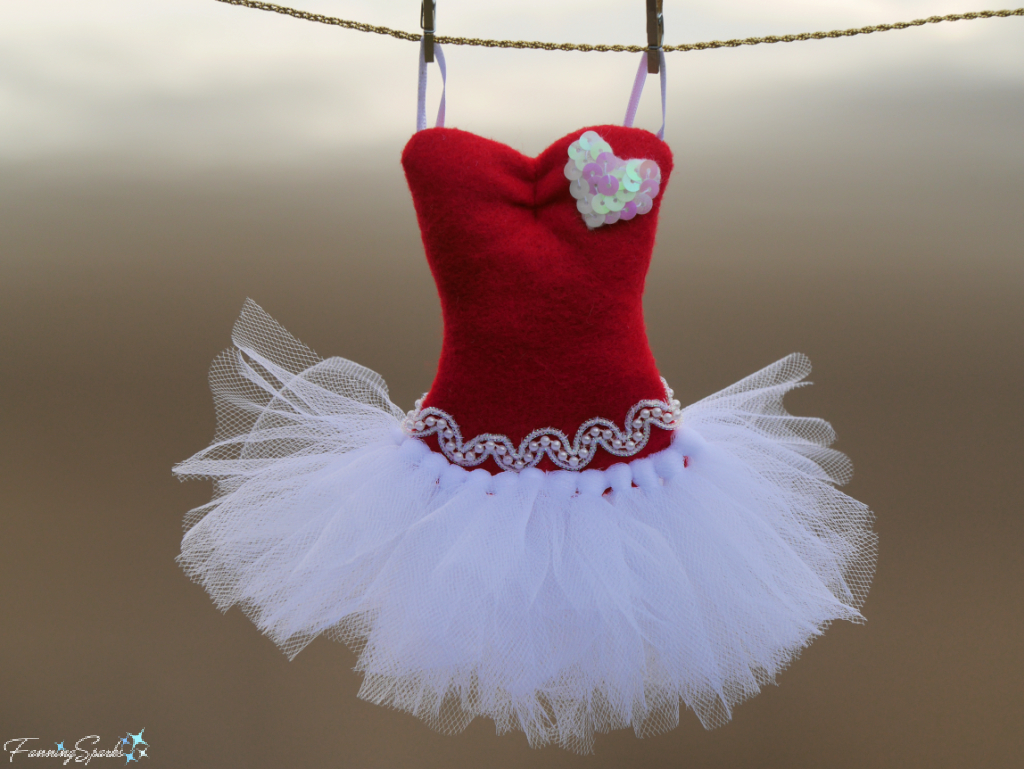
Your froufrou miniature-dress sachet is finished—ready to be hung in a closet or tucked into a drawer!  Whether you choose to give it to someone special on Galentine’s Day or keep it for yourself, it will be a fun, fragrant surprise every time the closet or drawer is opened.
Completed Froufrou Sachet   @FanningSparks

More Info

You can download the project template here: Froufrou Sachet – Complimentary Download.
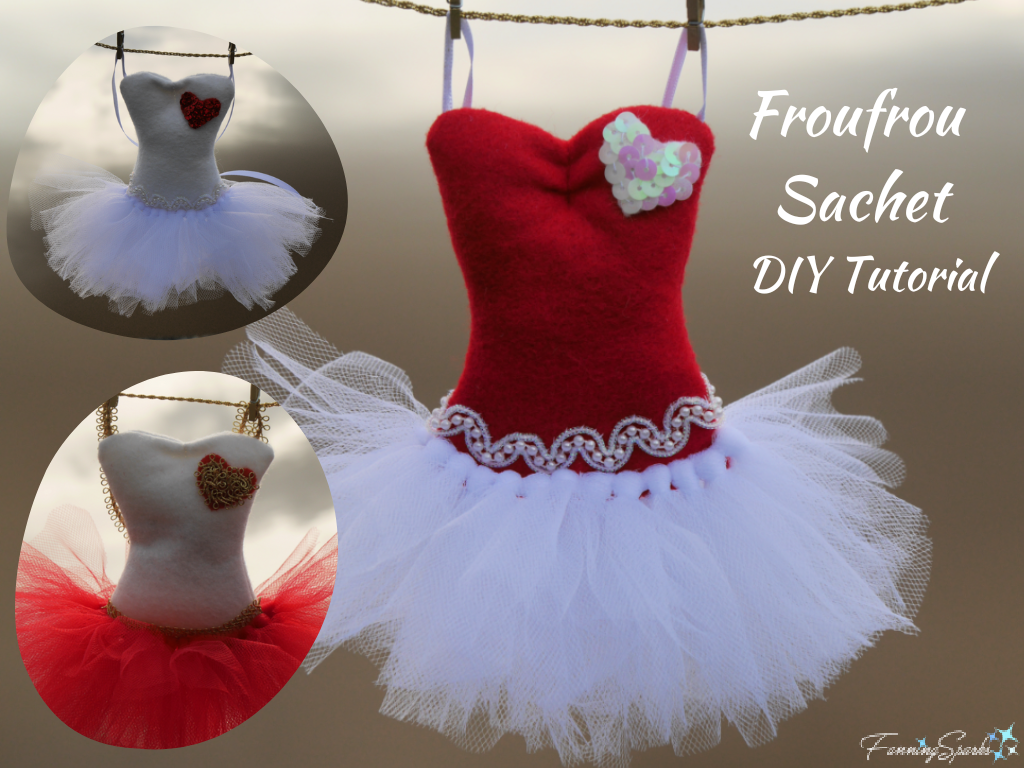
Please pin this image to share or save for future reference.
Froufrou Sachet DIY Tutorial pin   @FanningSparks
Check out the FanningSparks Maker Challenge to create at least three different projects featuring hearts before Valentine’s Day.
. See the blog post, Setting My Heart on a Maker Challenge, to learn how this maker challenge came about.
. See the blog post, Maker Heart Challenge #1: Hearty File Storage Boxes, for my first response to the challenge.
. See the blog post, Maker Heart Challenge #2: Broken Heart Trivet, for my second response to the challenge.
The froufrou miniature-dress sachets featured in this post are my third response to the challenge.
UPDATE Feb 19, 2023:  See the blog post, Maker Heart Challenge Bonus: Ceramic Valentine’s Heart Box, for my fourth, and bonus, response to the challenge.
I’m a big fan of lavender.  Check out these FanningSparks blog posts to learn more:
. Weaving Lavender
. Stop and Smell the Lavender

Today’s Takeaways

1. Sometimes fussy, showy and fancy are the way to go.
2. Lavender has a lovely sweet scent, deters moths and removes mustiness.
3. Consider making a fun, froufrou, miniature-dress sachet.
Peg - FanningSparks Author

Some projects flop!  It’s not something I like to admit but not every maker project is a success.  Occasionally, a project will turn out exactly as envisioned.  More often, a project shifts and evolves during its creation.  From time to time, a project just fails and the whole effort has to be scrapped.  Every failure is, of course, an opportunity to learn and improve.
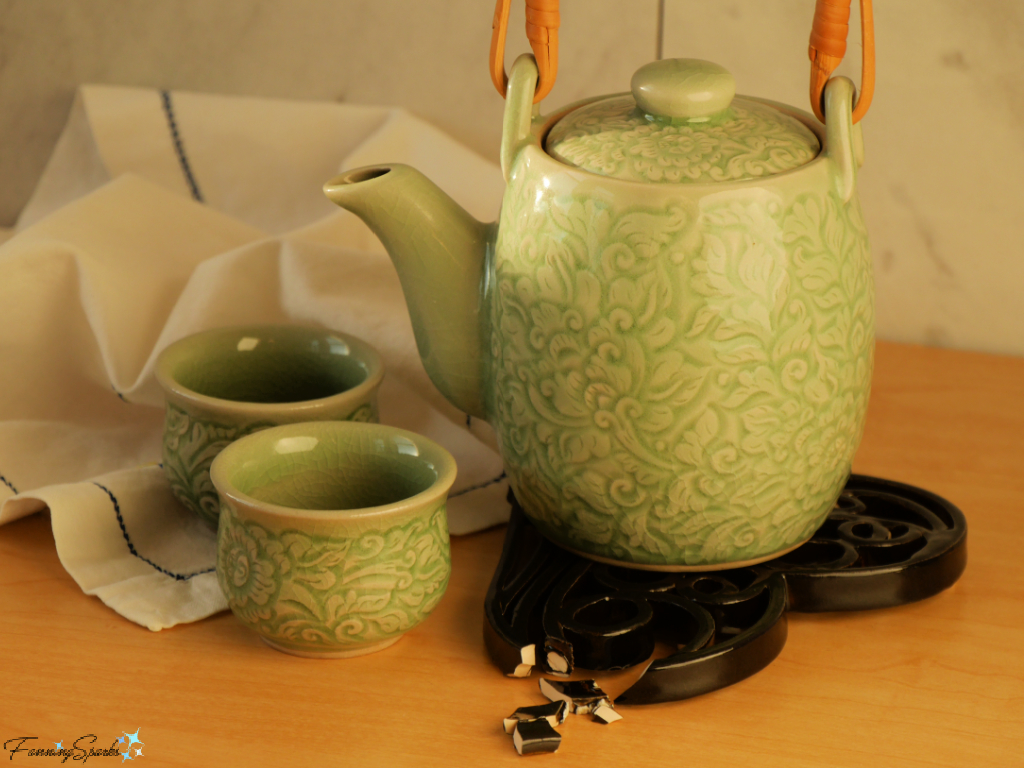
The heart-shaped ceramic trivet I tried to make recently is a case in point.  Here it is my broken heart!
Broken Heart-Shaped Ceramic Trivet with Thai Celadon Teapot and Cups  @FanningSparks
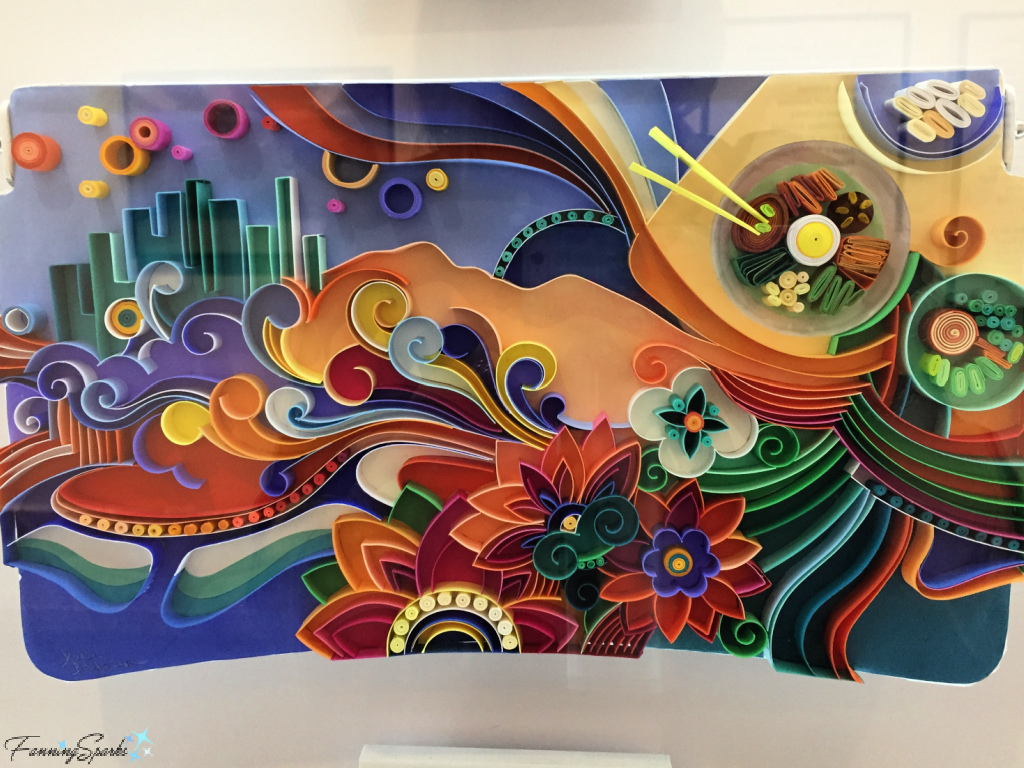
This project started with a crossover idea to try quilling with clay.  Quilling is a form of paper arts which involves rolling narrow strips of paper into intricate designs.  It is known by a few different names including paper rolling, paper filigree and paper scroll work.  The history of quilling is uncertain but it is believed to originate from Ancient Egypt.  Interestingly, the term “quilling” comes from a time when the paper strips were rolled around birds’ feathers.  Nowadays, specialized tools such as slotted quilling tools and tweezers are used instead of quills.  Here’s a stunning example representing the city of Seoul created by Yulia Brodskaya.
Quilling Artwork by Yulia Brodskaya   @FanningSparks
Interesting Side Note: This artwork was created as part of a 2017 joint marketing campaign between Delta and Coca-Cola to create a flying art gallery.  Twelve artists from around the world were engaged to transform Delta’s 767 aircraft tray tables into one-of-a-kind works of art.  I took the photo when the originals were displayed at the Coca-Cola Global Headquarters where I worked at the time.
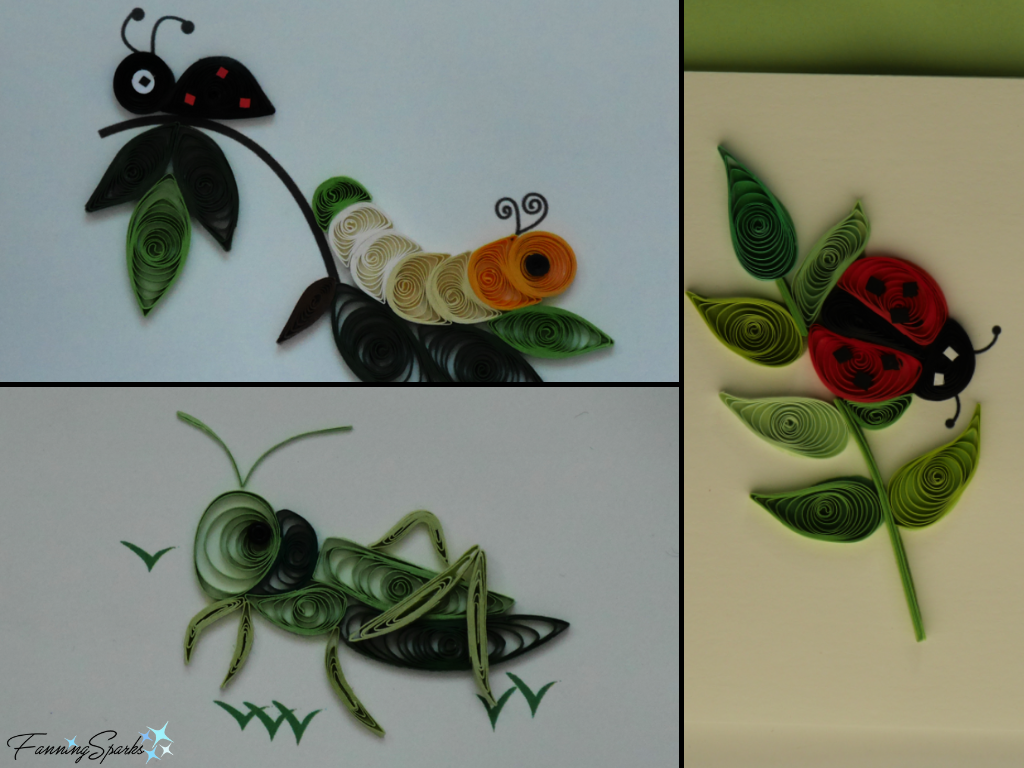
Obviously, not all quilling is this elaborate.  Here are a few simpler examples from note cards I’ve purchased.
Quilled Insects on Greeting Cards by Quilling Card   @FanningSparks
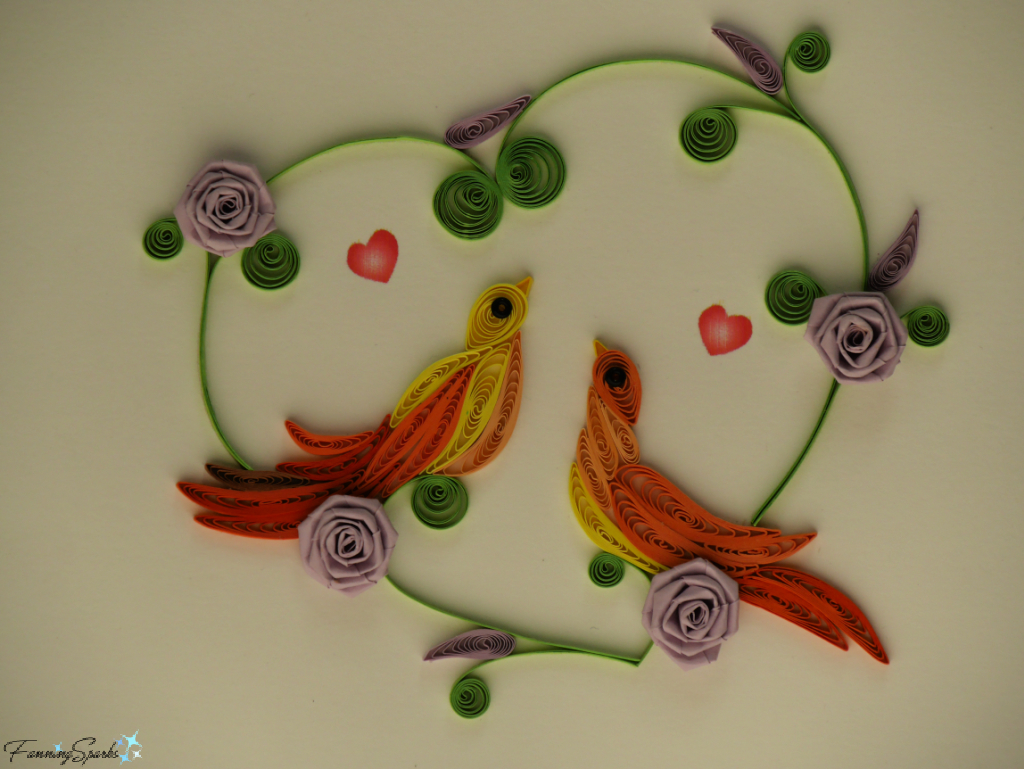
The detail in this pair of lovebirds, from a specialty greeting card by Quilling Card, is amazing.
Pair of Quilled Birds in a Heart on Greeting Card by Quilling Card   @FanningSparks
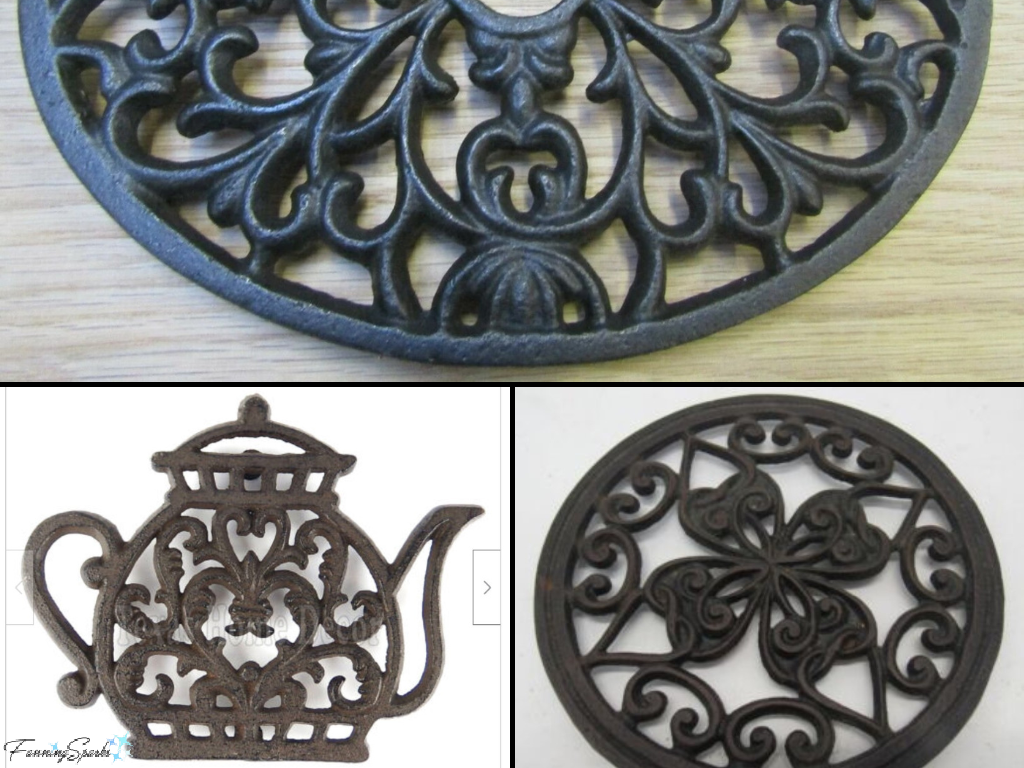
It’s the dramatic flourishes—the sweeping curves, graceful spirals, gentle loops and intricate rolls—that appeal to me.  It seemed likely the decorative flourishes could be replicated in clay but I couldn’t figure out how to incorporate them into a functional item.  The idea came together when I stumbled upon these vintage cast iron trivets on eBay and Etsy.
Vintage Cast Iron Trivets   @FanningSparks
Trivets, sometimes called hot pot holders, are typically used to protect the surface of a dining table from a hot serving dish or bowl.  They are simple, but functional, objects with a decorative surface.  Thus, the ideas came together and I formulated a plan to create a ceramic trivet with a filigree design.
The first hurdle was to create a streamlined design.  Theoretically, clay could be rolled to paper thinness but ¼” is the thinnest I’ve used.  The increased thickness of the clay meant the circles and curves in my trivet design had to be looser than for paper quilling.  In addition, the overall design had to be adjusted to the size of a typical trivet which is usually 6 to 9 inches in diameter.  I selected three designs including a heart, snowflake and teapot.
The heart design originated from a paper quilling design—a heart-shaped outline filled with sweeps, swirls and circles.  Since it features a heart, it will count as the second response to my self-proclaimed Heart Maker Challenge.  The challenge, which I announced in my previous blog post Setting My Heart on a Maker Challenge, is an effort to create at least three different projects featuring hearts before Valentine’s Day.
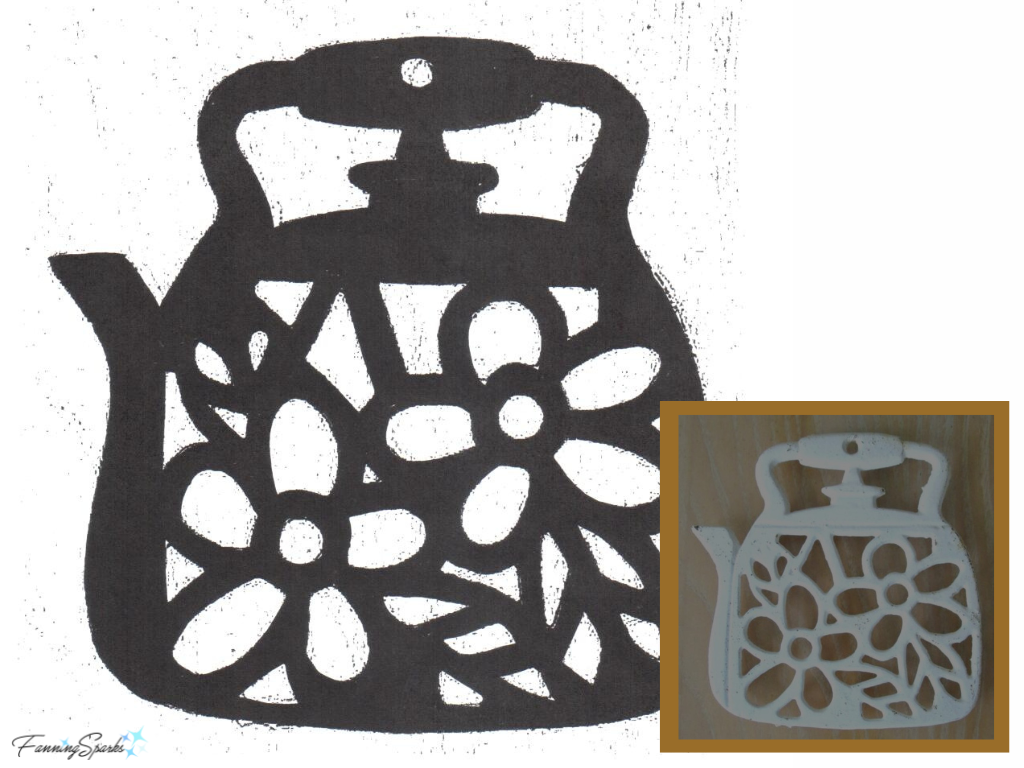
The teapot design came from a vintage cast iron trivet I found online.
Initial Design for Teapot Trivet   @FanningSparks
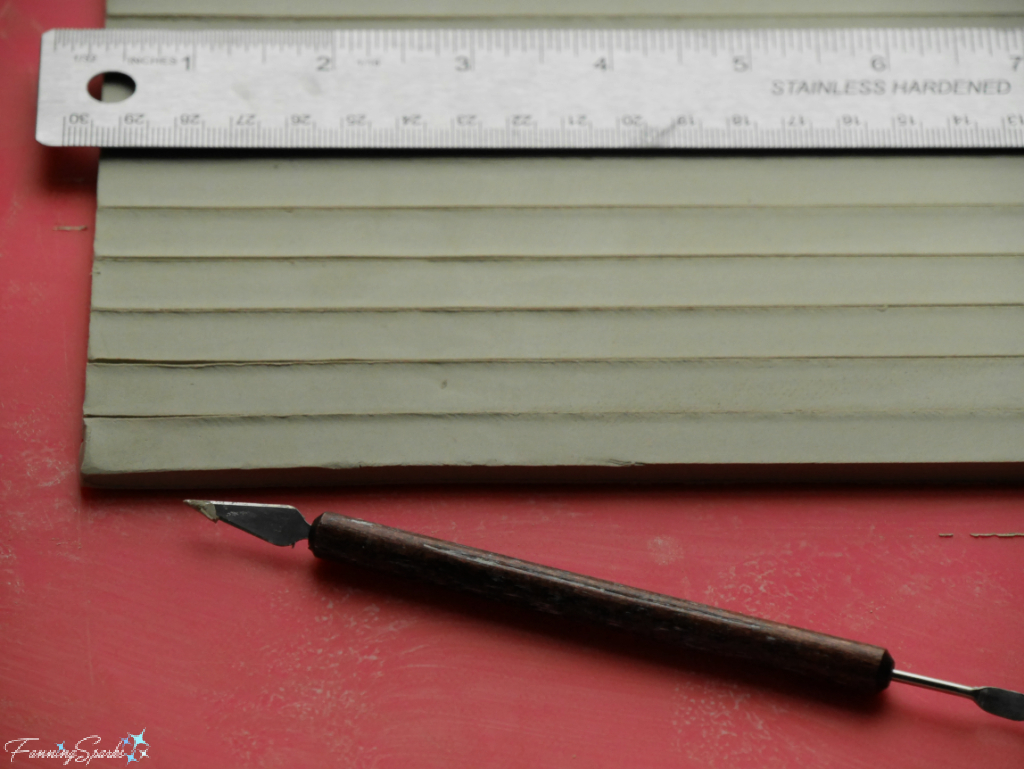
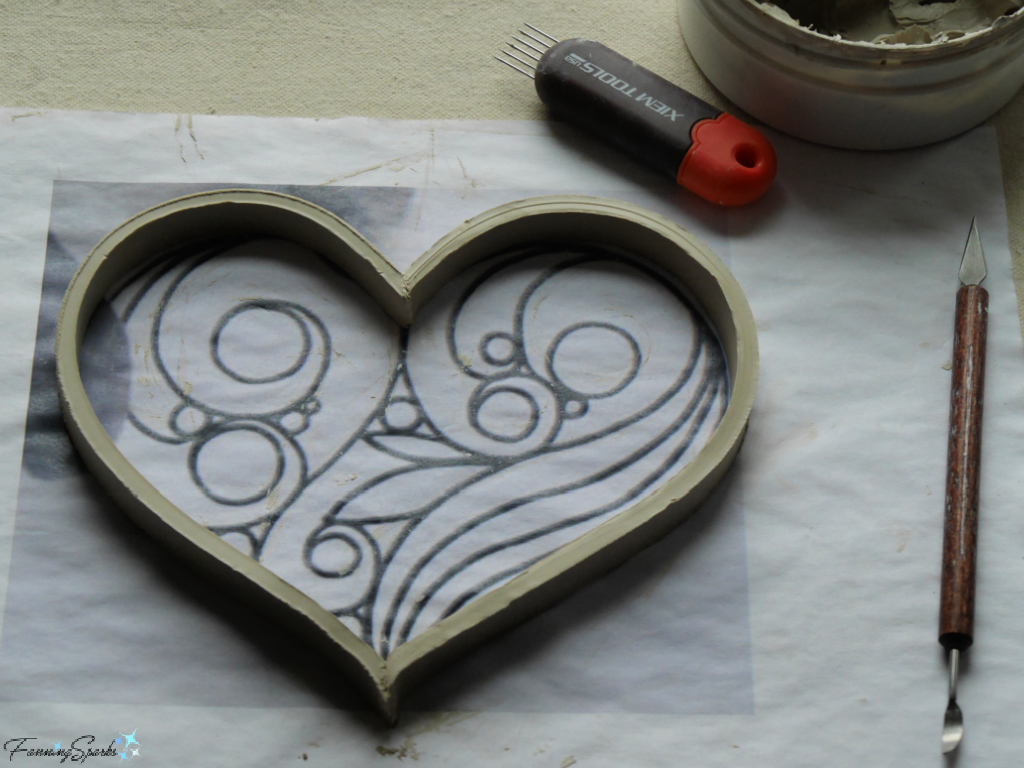
After printing my designs on paper, I rolled out a slab of clay to ¼” thickness and carefully cut it into ½” strips.
Cutting Clay Strips for Heart-Shaped Trivet   @FanningSparks
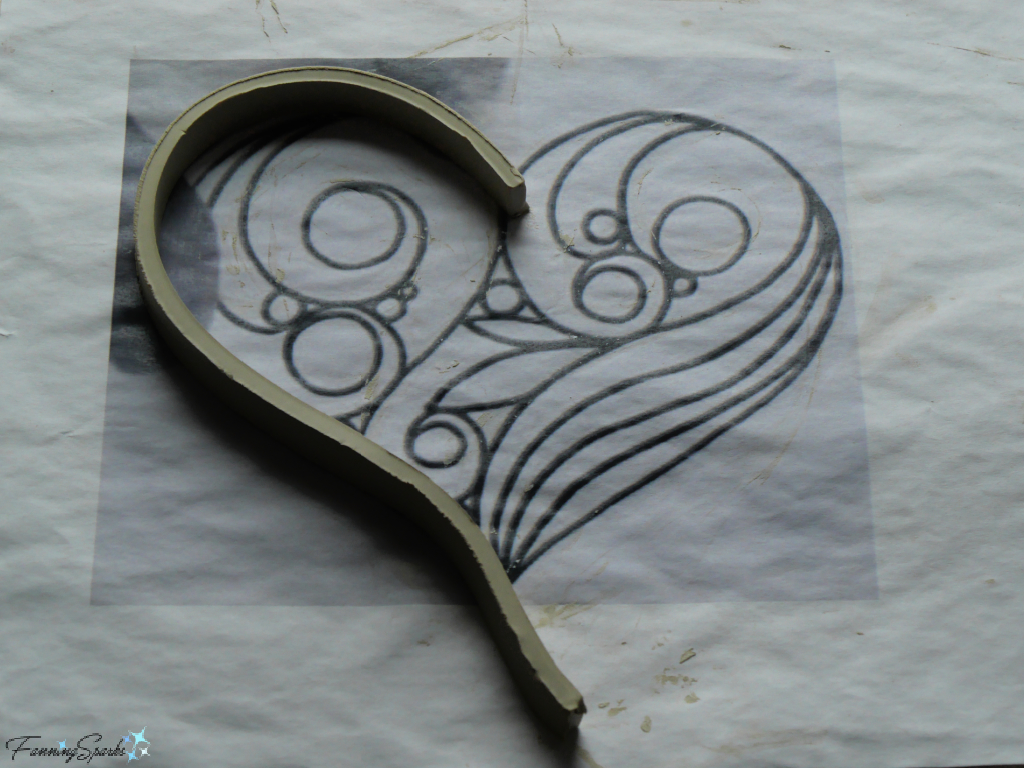
The strips were turned on edge and laid over the paper pattern.
Starting to Form the Heart-Shaped Trivet   @FanningSparks
Each strip of clay was cut to size.  Then scored and attached with slip to the adjacent pieces.
Forming the Outline for the Heart-Shaped Trivet   @FanningSparks
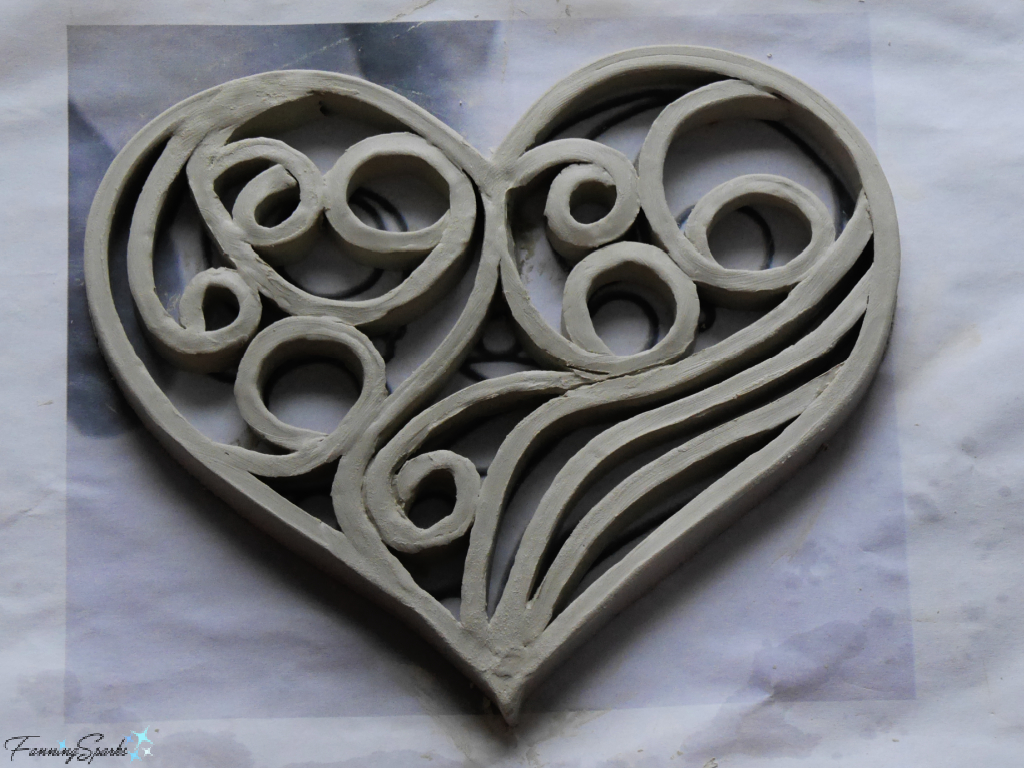
I found several of the curves were too tight for my clay strips so I refined the design as I worked.  A few elements had to be shifted so they could be attached in more than one spot and others had to be removed because there wasn’t enough space for all of them.  Here’s how the heart looked with the clay filigree in place.
Heart-Shaped Trivet Formed from Clay Strips    @FanningSparks
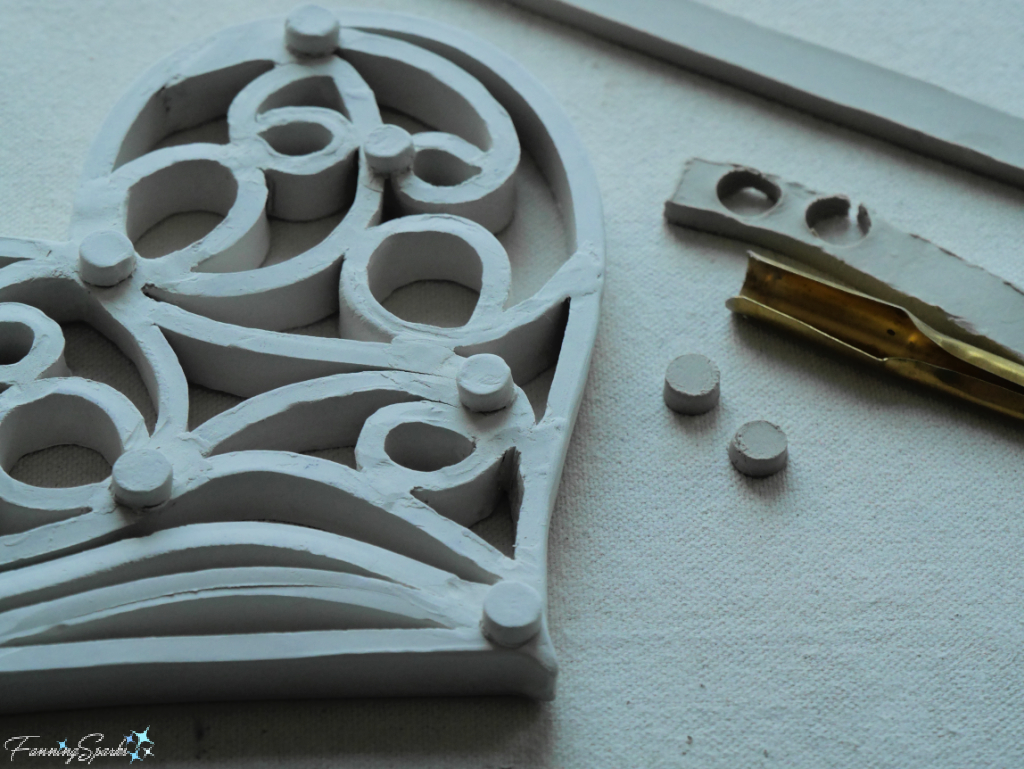
The next step was to clean up the connection points and smooth all the edges.  Then I added small, round feet to the bottom and let the piece dry facedown.
Attaching Feet to Heart-Shaped Trivet   @FanningSparks
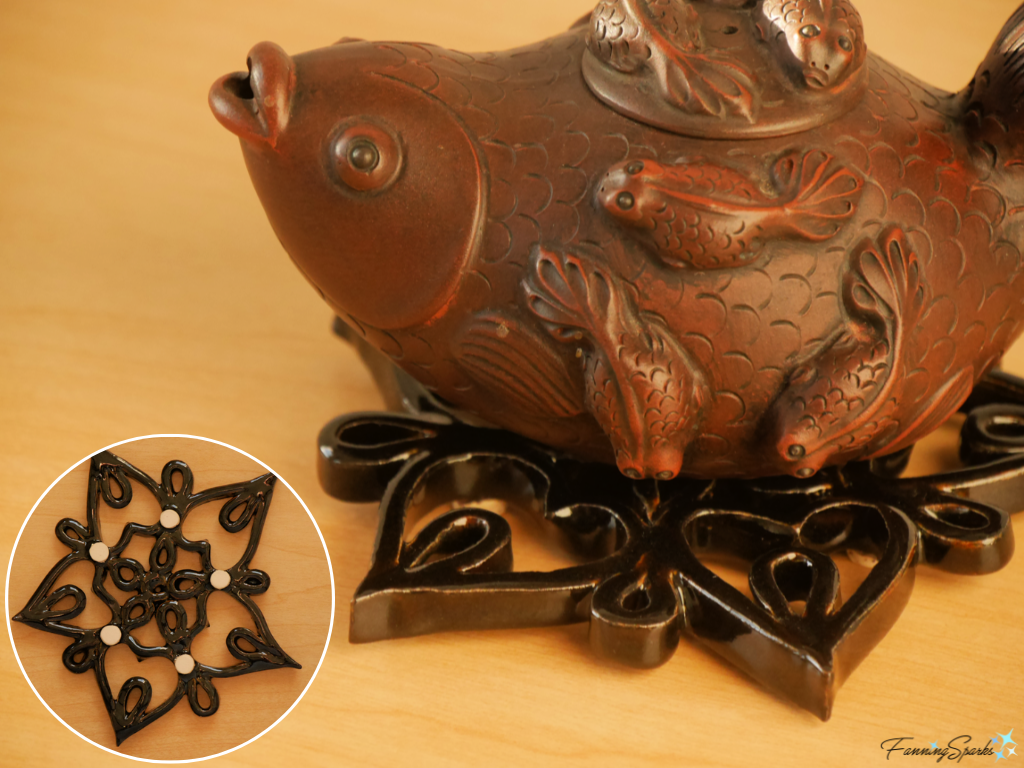
The feet will elevate the trivet from the dining table, or other surface, when it’s in use.  They also elevate the trivet from the kiln shelf during firing.  This means the entire piece, except the feet, can be glazed giving both the top and bottom a nice, glass-like finish.  Here’s the finished snowflake trivet holding a delightful pottery teapot from Hong Kong.  The inset shows the underside of the trivet.
Snowflake Ceramic Trivet with Fish Teapot   @FanningSparks
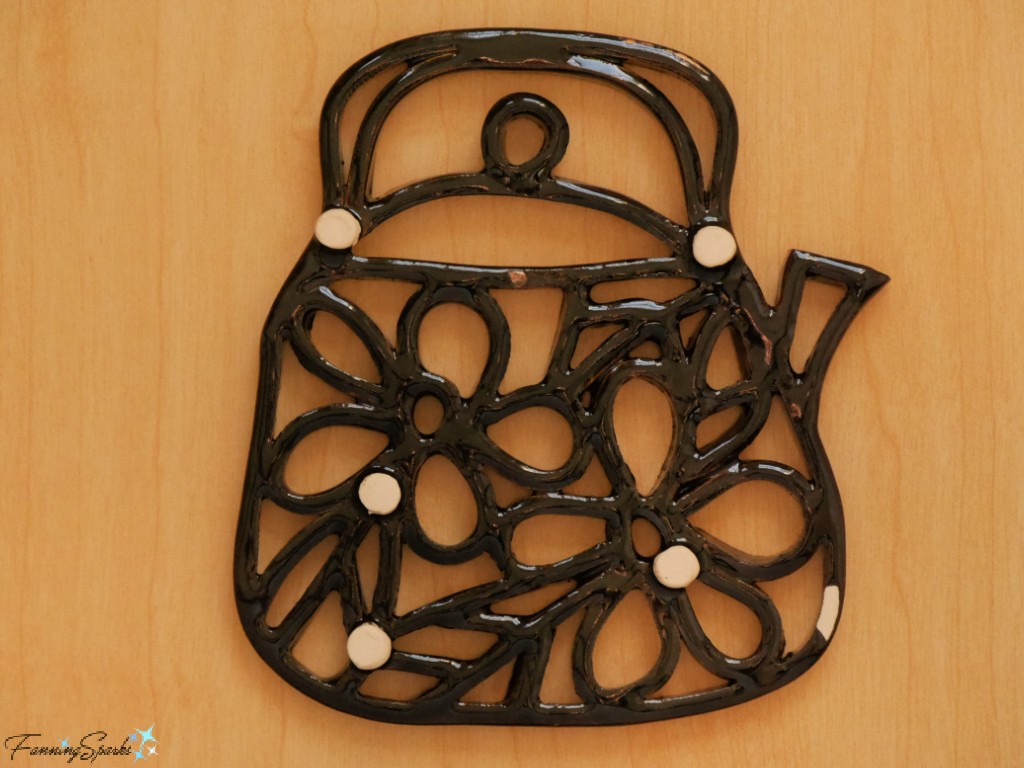
Unfortunately, I had no idea how critical the placement of the feet would be.  I simply added feet to a few connection points to ensure the trivet would be level—an approach that worked fine with the snowflake and teapot trivets.  Here’s the bottom of the teapot trivet.
Bottom of Teapot Ceramic Trivet   @FanningSparks
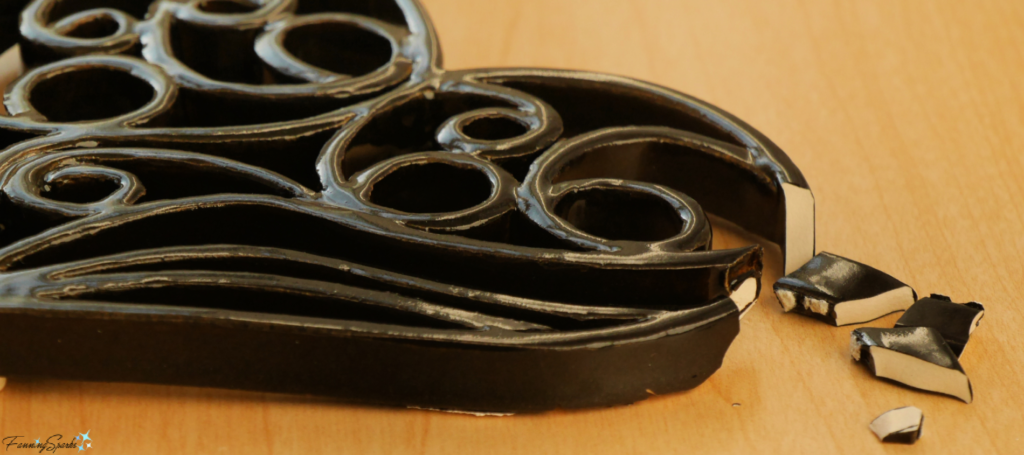
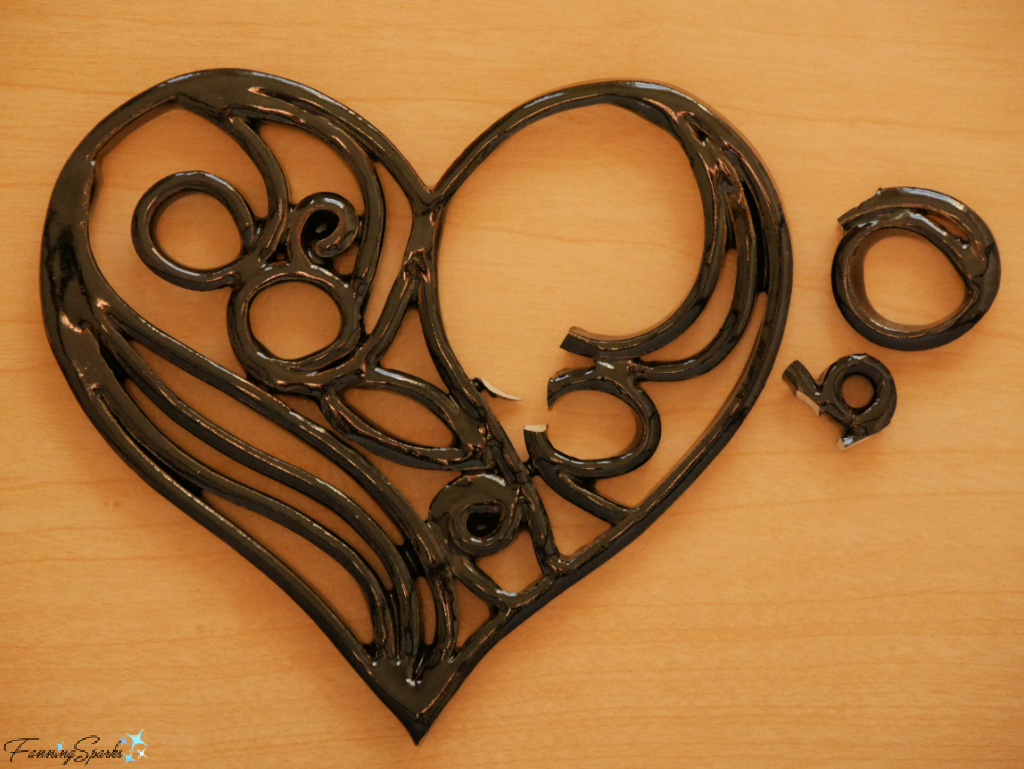
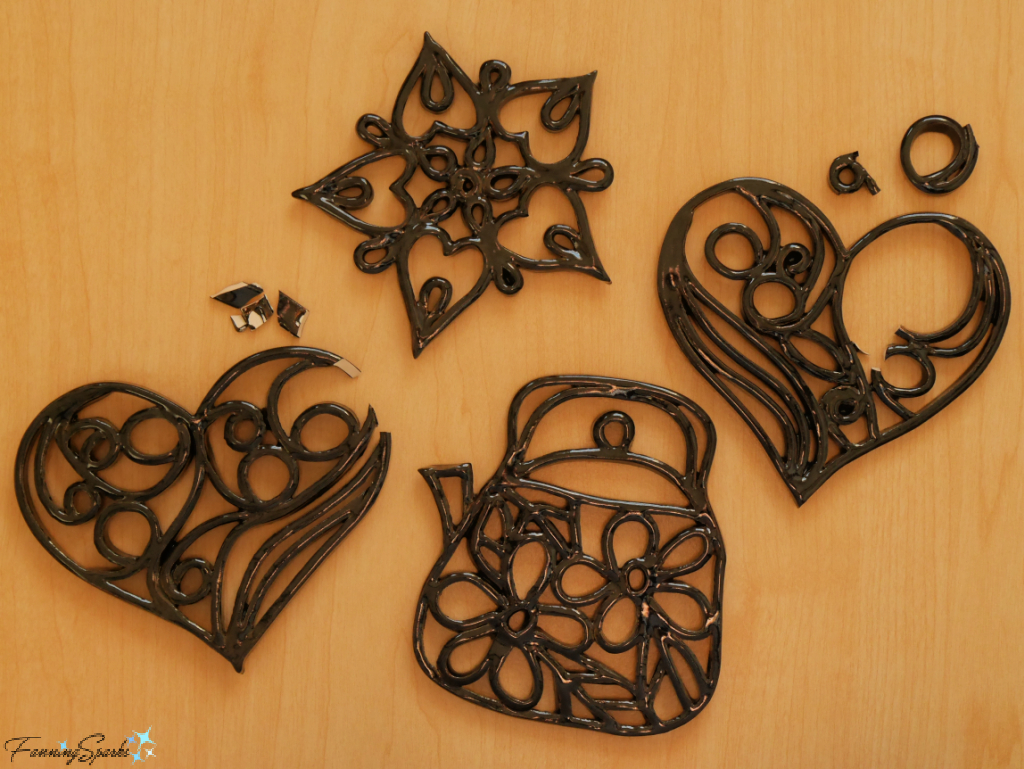
Unfortunately, my simplistic approach to placing the feet was not at all successful with the heart-shaped trivet.  It seems the feet also need to support the various lines of the trivet during firing.  The trivet was fine during the original bisque firing but, during the final glaze firing, sections of the trivet sagged onto the kiln shelf.  Perhaps the section wasn’t attached well enough or perhaps the the feet couldn’t support the added weight of the glaze.  Regardless of the cause, it was not a good situation—glaze should never touch a kiln shelf—and my trivet broke.  Yep, I had a broken heart!
Heart-Shaped Ceramic Trivet – First Attempt   @FanningSparks
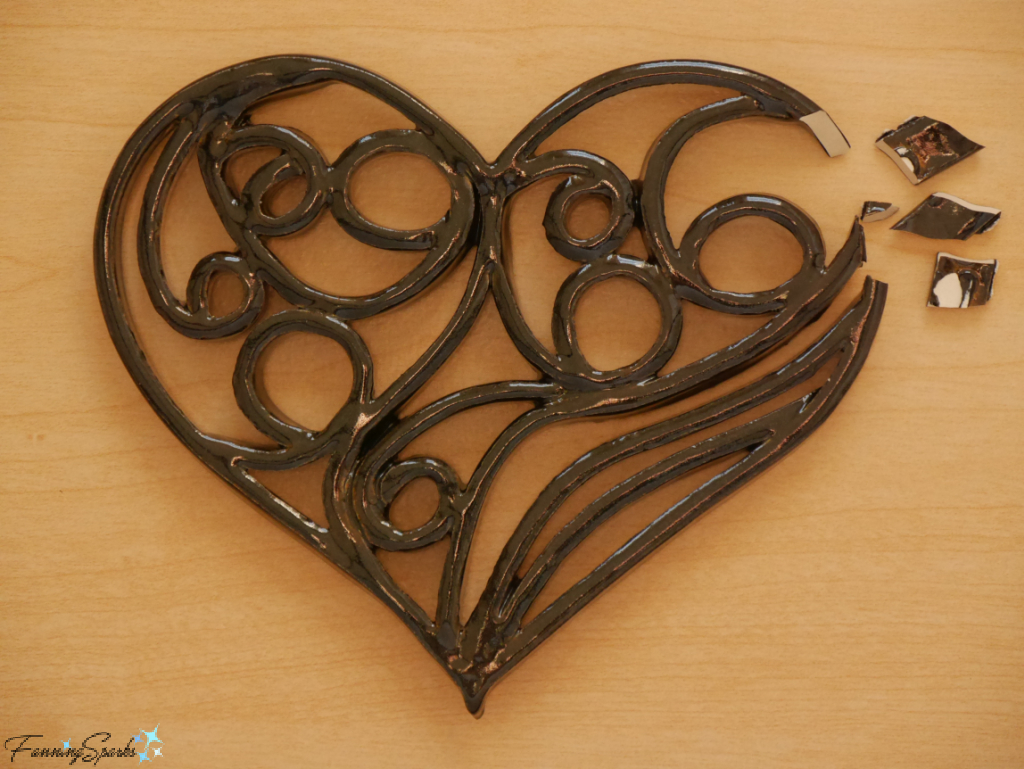
In the spirit of learning from my mistakes, I decided to try again.  I followed the same assembly process taking extra care to ensure all the elements were securely attached to the adjacent elements.  I also took extra care when attaching the feet, adding three more feet to ensure there was adequate support in all areas.  But it happened again!  Not in the exact same spot, but with the exact same outcome—another broken heart!
Heart-Shaped Ceramic Trivet – Second Attempt   @FanningSparks
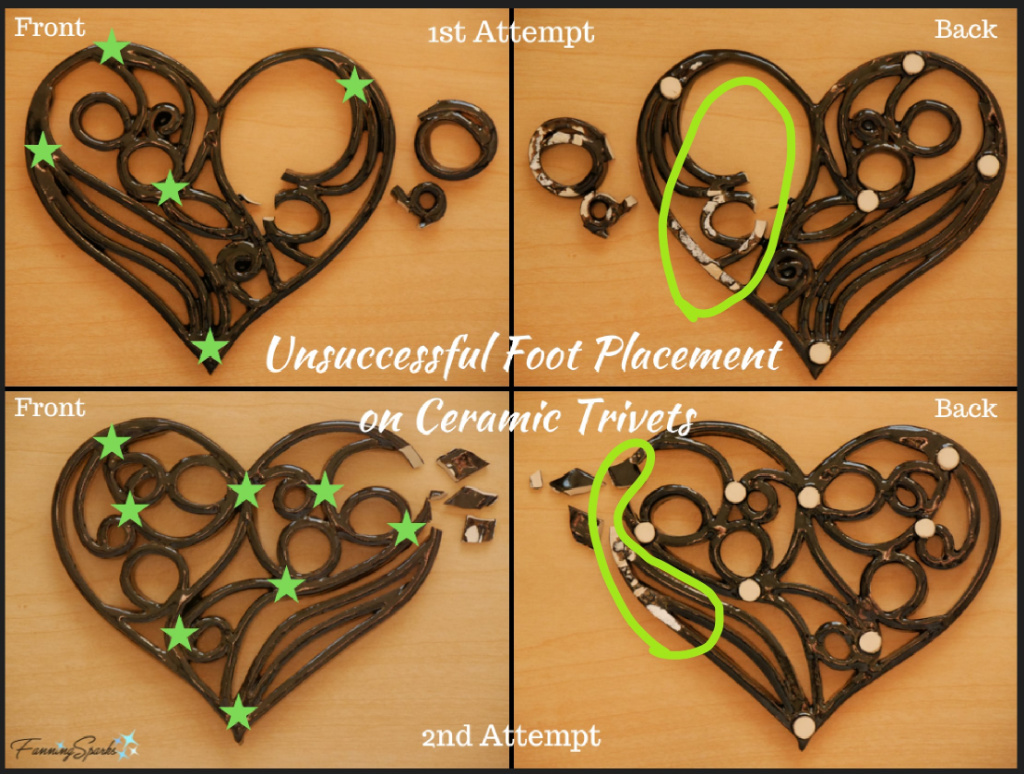
I’ve been studying the two trivets to fully understand what went wrong.  The below side-by-side comparison, showing the front and back of my first and second attempts, helps pinpoint the trouble.  In both trivets, the problem area was on the right side of the heart (when viewed from the front).  In the first trivet, the entire interior section had insufficient support.  In the second trivet, the problem area may have been smaller but the outer edge, especially where several elements converged, obviously did not have adequate support.
Study of Foot Placement on Ceramic Trivets   @FanningSparks
So, in the final outcome, I’ve learned a little more and I have two nice ceramic trivets and two broken hearts for my efforts!
My 4 Ceramic Trivets – Teapot Snowflake and 2 Broken Hearts   @FanningSparks

More Info

To see more beautiful quilling artwork, check out artists: Yulia Brodskaya (website and Instagram), Sabeena Karnik (Sabeenu on Instagram) or Gergana Penchevaa (PaperliciousBG on Instagram).  Greeting cards, handmade by quilling artists in Vietnam, can be found at QuillingCard.com.
To learn more about the Delta and Coca-Cola flying art gallery check out this 2017 Delta news article.
As noted in my previous blog post, Clay Play Days, I’m still new to working with clay.  My projects involve a lot of experimentation and a fair bit of persistence.  Every project teaches me something new.
UPDATE Feb 7, 2023:  The heart-shaped trivet featured in this blog post is the second response to my FanningSparks Heart Maker Challenge in which I’m challenging myself to create at least three different projects featuring hearts before Valentine’s Day.
. See the blog post, Setting My Heart on a Maker Challenge, to learn how this maker challenge came about.
. See the blog post, Maker Heart Challenge #1: Hearty File Storage Boxes, for my first response to the challenge.
. See the blog post, Maker Heart Challenge #3: Froufrou Sachet – DIY Tutorial, for my third response the challenge.
. See the blog post, Maker Heart Challenge Bonus: Ceramic Valentine’s Heart Box, for my fourth, and bonus, response to the challenge.

Today’s Takeaways

1. Don’t expect every maker project to be a success.
2. Take time to learn from each maker project.
3. Crossover projects, using materials or applying techniques from one medium in another, can lead to interesting results.
Peg - FanningSparks Author

Pieces of paper seem to appear out of nowhere in my studio!  Old project templates, exhibition programs, travel brochures, design sketches, project ideas, magazines, artist cards and reminder notes just turn up.  They start out neatly arranged, ostensibly, to serve as visual reminders.  But then they multiply until they cover every flat surface.  And before long, they’ve grown into meaningless piles of paper.  Admittedly, I put off dealing with the paper clutter as long as possible.  But when the stacks fall over, it’s time to sort, purge and organize!
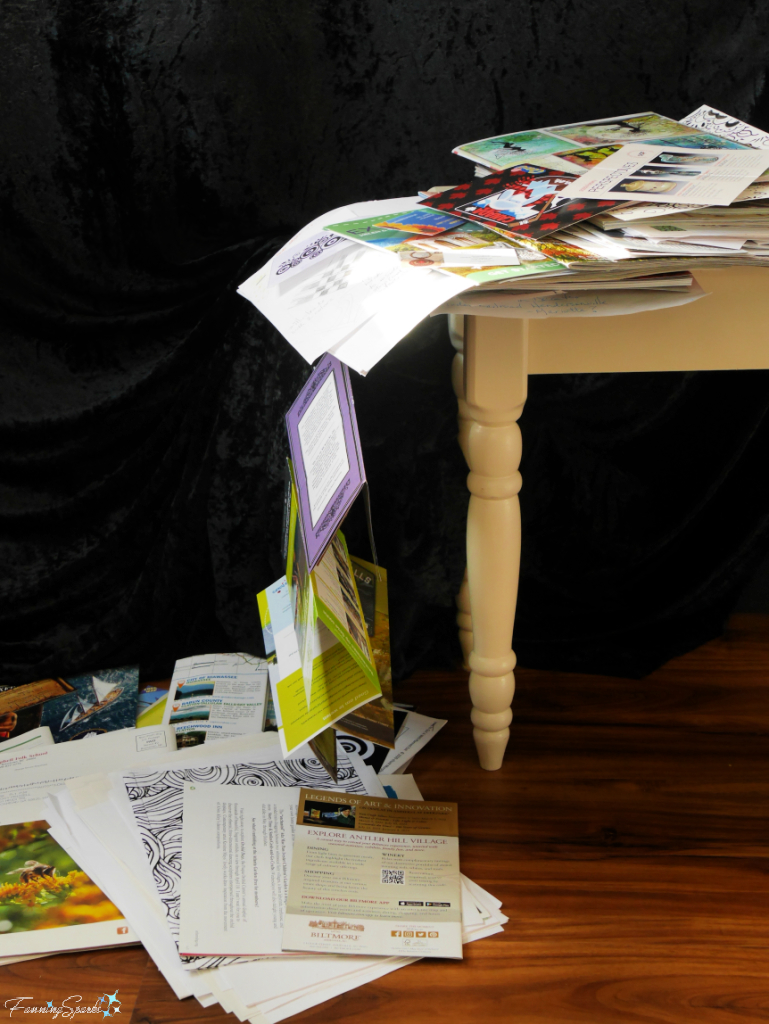
Tumble of Craft-Related Paper Clutter   @FanningSparks
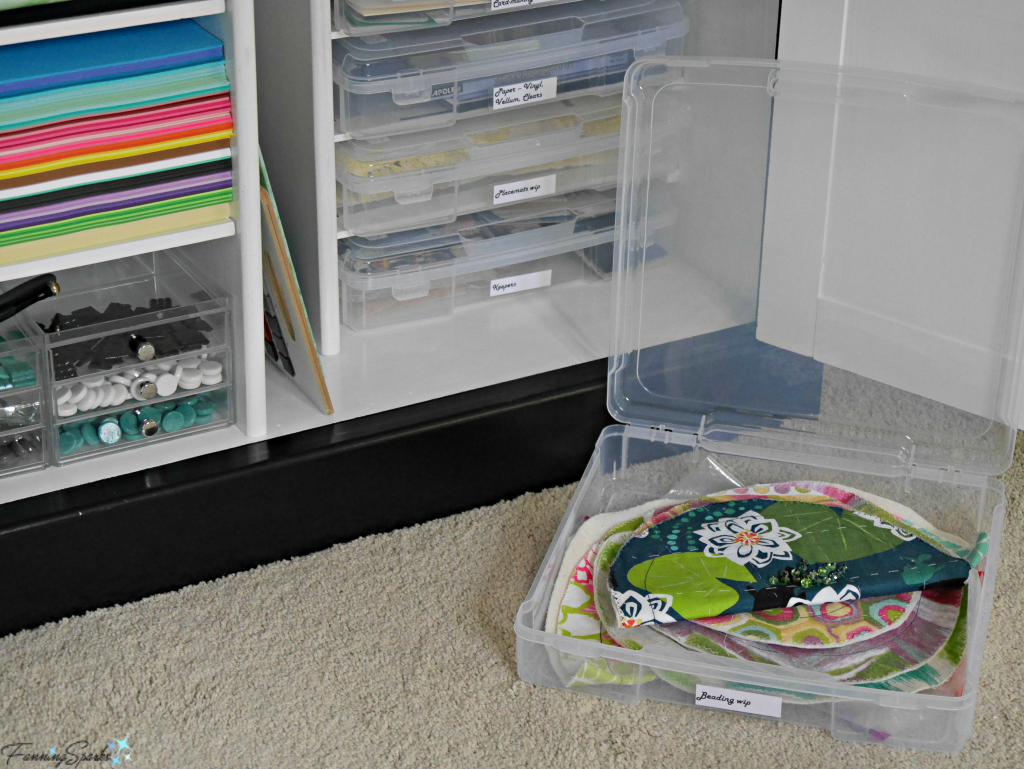
With the exception of this paper clutter, my studio is pretty well organized.  A growing collection of project trays is the key to keeping order.  The 12” x 12”, clear, plastic bins are ideal for storing project supplies and tools as well as works-in-process.  See my blog post The Ultimate Maker’s Cabinet for the full scoop.
Plastic trays provide easy access to craft supplies and projects. @FanningSparks
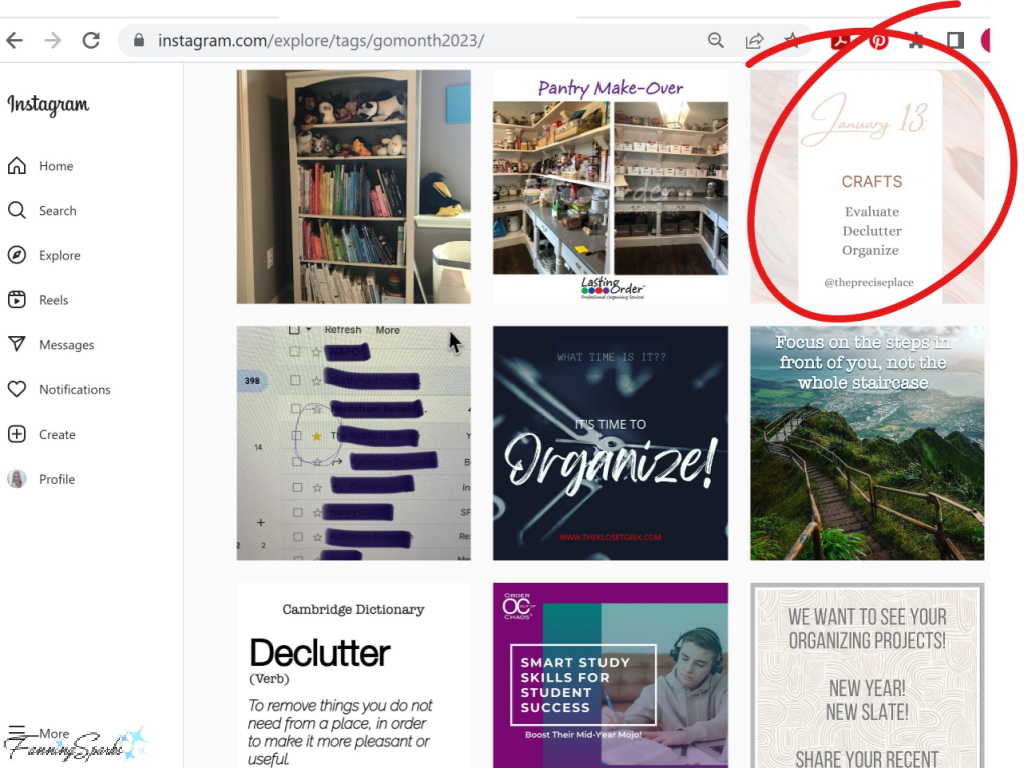
These project trays and other storage aids are typically on sale in January so it’s an ideal time to stock up.  Plus, there’s a lot of attention on decluttering, cleaning and organizing.  January is designated “Get Organized (GO) Month” by the National Association of Productivity & Organizing Professionals (NAPO).  There are lots of catchy slogans like “New Year, New Slate” to promote the effort.  Each day, a different area of focus, such as the linen closet, garage, books or children’s toys, is called out by NAPO members.  By happy coincidence, January 13th was deemed as the day to deal with “Crafts”.  As shown on the below Instagram screenshot from the #GoMonth2023 campaign, there are three important steps to complete: Evaluate, Declutter and Organize.  So not only is dealing with my craft-related paper clutter necessary, it’s also on trend!
Screenshot of Instagram Hashtag GoMonth2023   @FanningSparks
I’ve decided to try a different approach for my papers this time—filing.  Groundbreaking, I know!   It’s not that I’ve never filed—I’ve certainly filed my fair share of work papers and home/life administration papers—it’s just that I’ve never found a filing system that actually worked for the papers related to my hobbies and travels.
Luckily, I found three wooden file storage boxes in the basement that I could repurpose for this project.  The best part is the storage boxes were unfinished.  I could simply have painted them.  But, in my world, that would be a huge missed opportunity—especially since I’m in the midst of my self-proclaimed maker challenge.  See my previous blog post, Setting My Heart on a Maker Challenge, where I challenge myself to create at least three different projects featuring hearts before Valentine’s Day.
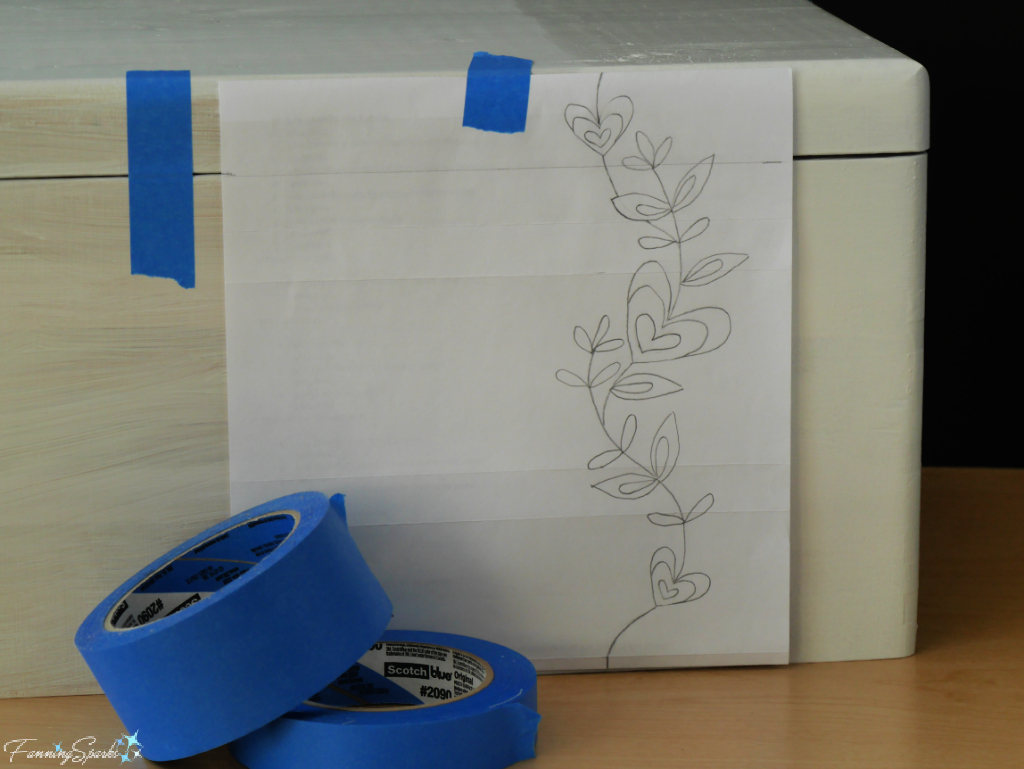
After some experimentation, a curvy border of hearts and leaves emerged.  I’ve created this downloadable version for your convenience: Heart and Leaf Border – Complimentary Download.  Simply scale the drawing to meet your own specific requirements.
Positioning my Hearts and Leaves Border Design   @FanningSparks
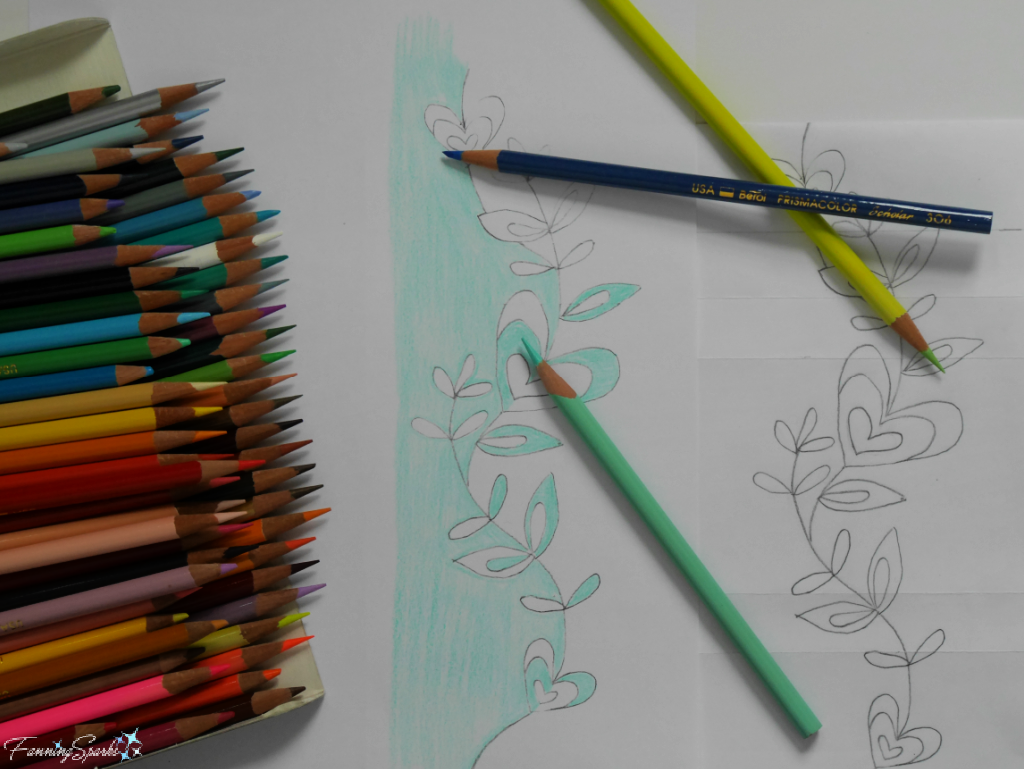
The plan was to apply the same design to all three wooden boxes so the border would flow from one box to the next.  I didn’t want to stack the boxes in a specific order so I adjusted the design to align at the top and the bottom.  Then I divided the design into positive and negative spaces to add some interest.
Coloring Hearts and Leaves Border Design   @FanningSparks
Once the design was set, I looked for an easy way to apply it to the boxes.  I thought a stencil might be the way to go since the design had to be applied three times.  My best option for accurately cutting a stencil is with my Cricut Explorer electronic cutting machine.  But that meant converting my pencil-and-paper design into an SVG file—a task which is much more difficult than it sounds.  After some effort, I realized my plan to cut a stencil for the positive/negative treatment was going to take far more effort than it was worth.
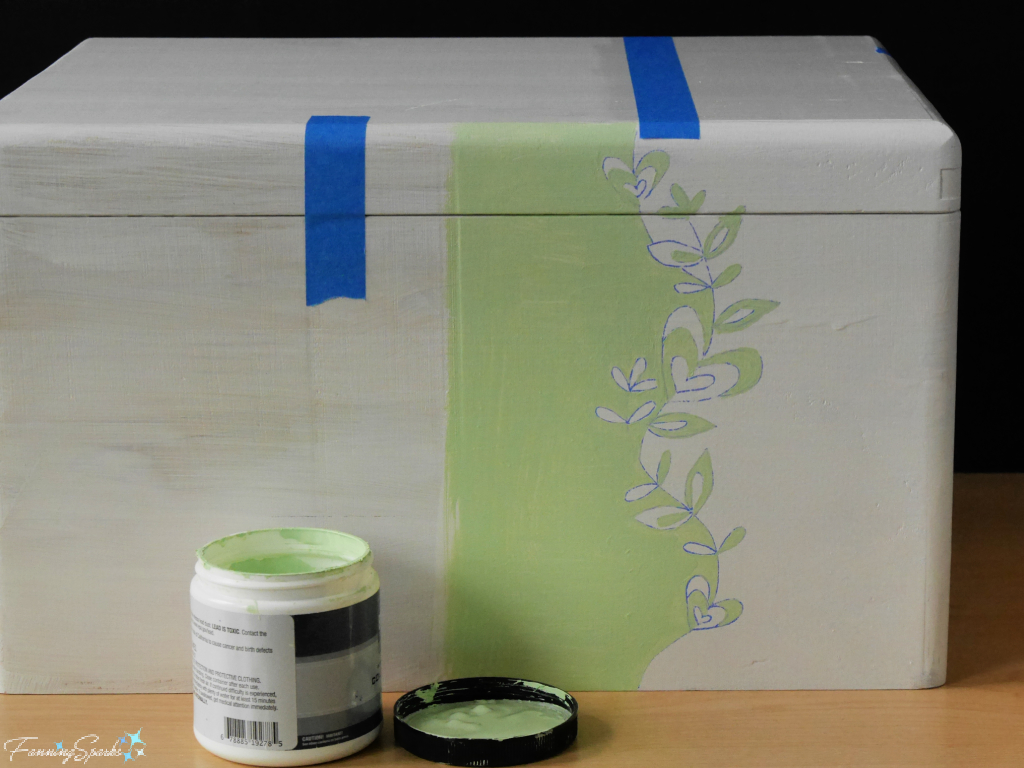
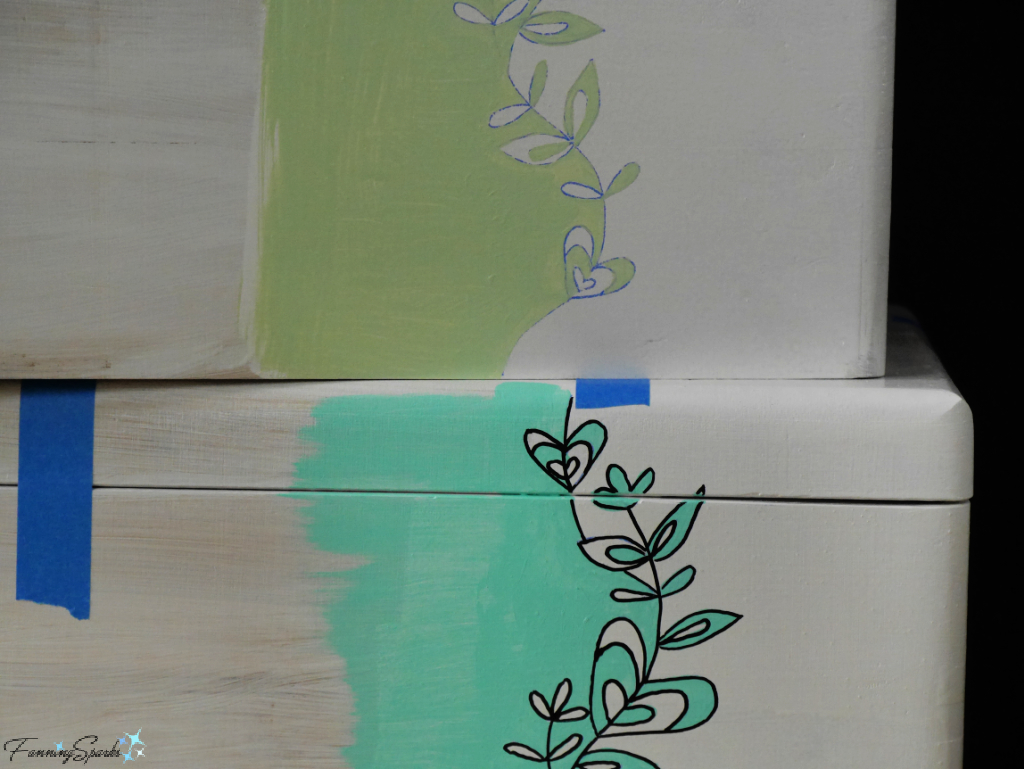
In the end, I went old school and simply traced the design onto the surfaces and painted the relevant areas with a small artist brush.  I used interior/exterior satin enamel paint in Spring Glow (shown below), Green Parakeet and Indigo Batik.
Painting the Hearts and Leaves Border on File Storage Box   @FanningSparks
Outlining the design with a black, fine-point paint marker really brought it to life.
Outlining Hearts and Leaves Border on File Storage Box   @FanningSparks
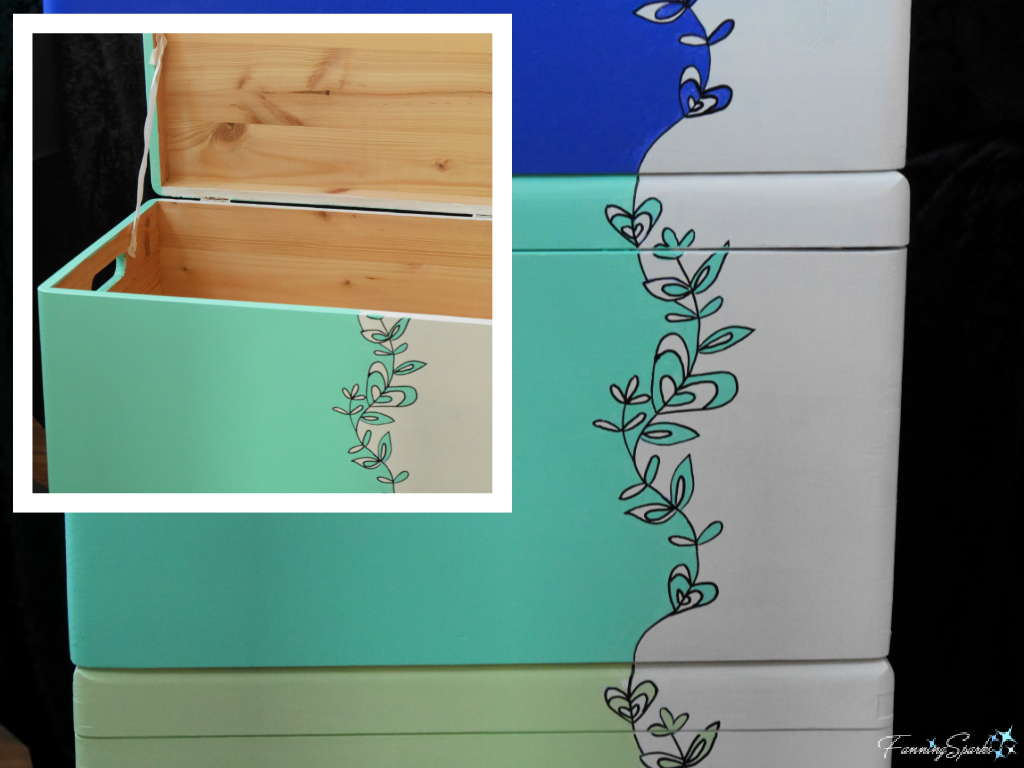
Next, I painted the left sides of the boxes to finish the positive space treatment.  Here are the finished boxes.
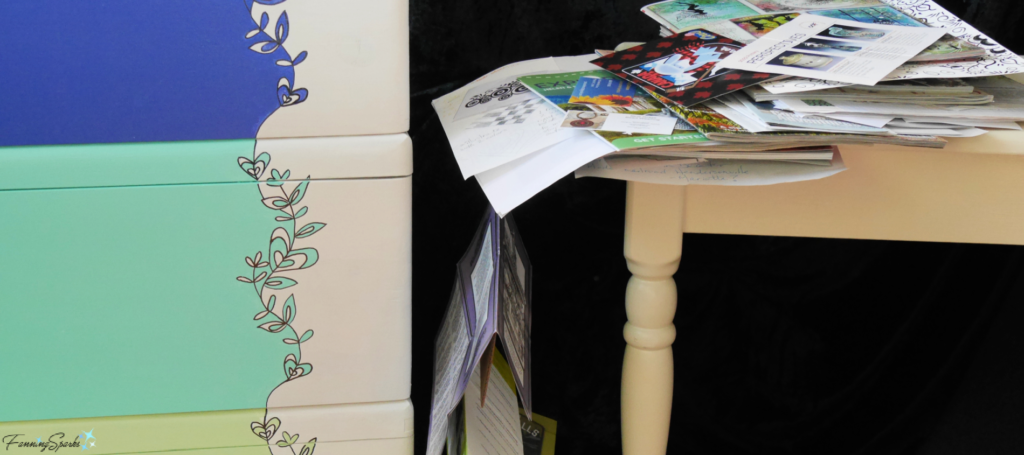
Painted File Storage Boxes – Stacked and Opened   @FanningSparks
The final step was simply to clean up missed areas and sharpen the lines.  I’m really pleased with how these wooden file storage boxes turned out.
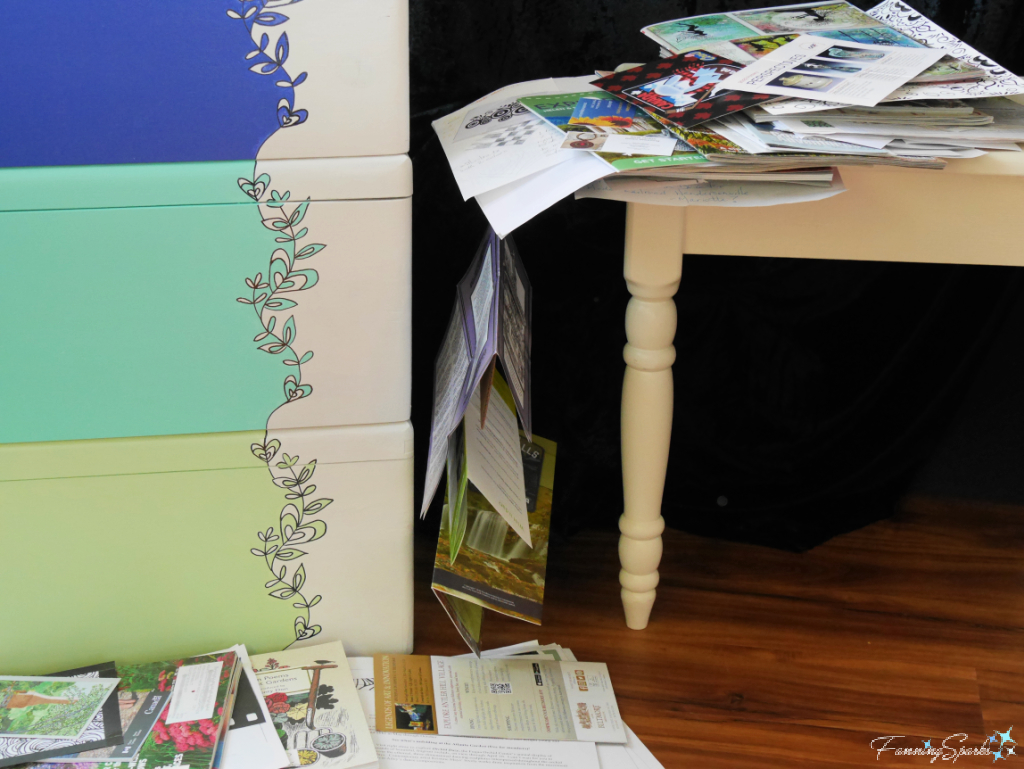
But, now, I can’t procrastinate any longer… I simply MUST deal with that paper avalanche.
Finished File Storage Boxes Beside Tumble of Craft-Related Paper Clutter   @FanningSparks

More Info

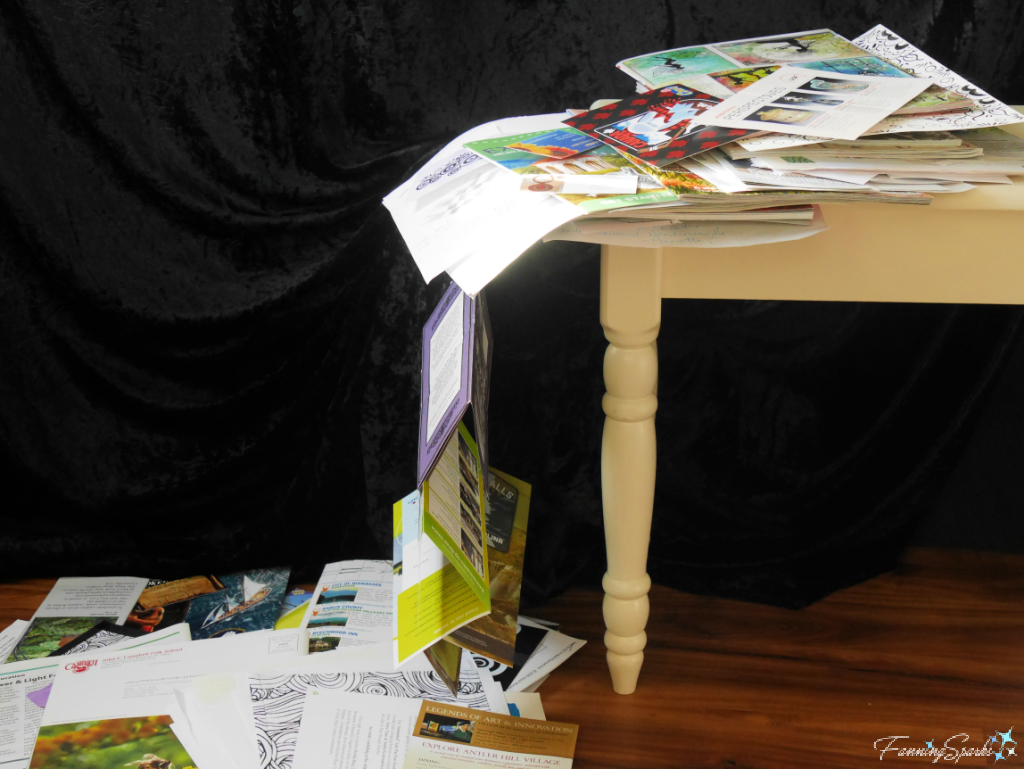
Some time ago, I came across a tutorial on creating the illusion of suspended, tumbling and falling items in photos.  I always wanted to give it a try and this blog post provided the perfect opportunity.  Notice how this photo appears to have captured the exact moment the papers were falling from the surface?
Tumble of Craft-Related Paper Clutter   @FanningSparks
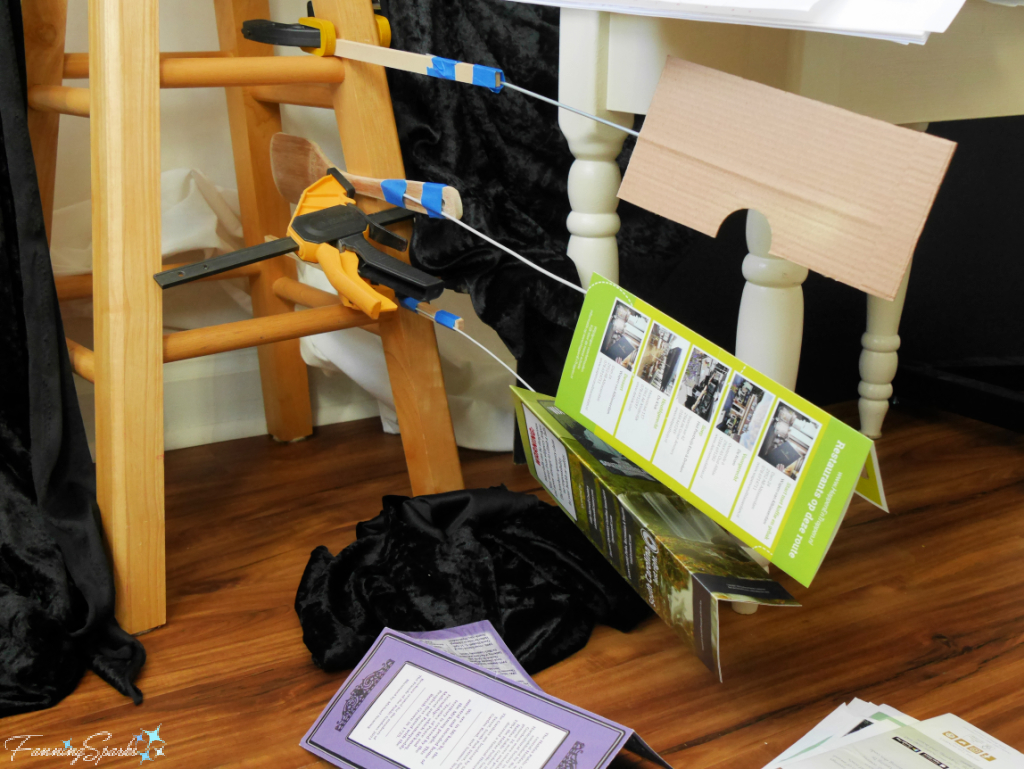
Well, it’s not quite as it seems.  Here’s a peek behind the scenes where a kludgy support structure made from a stool, clamps, sticks, tape, knitting needles and scrap cardboard was carefully hidden behind a black fabric curtain.  Impressive, eh?
Behind the Scenes - Tumble of Craft-Related Paper Clutter   @FanningSparks
See the FanningSparks blog post, The Ultimate Maker’s Cabinet, to see how an old entertainment center can be transformed into a one-of-a-kind Maker’s Cabinet.
Check out the National Association of Productivity & Organizing Professionals (NAPO) website or their #GoMonth2023 hashtag on Instagram for more information on this organization.
UPDATE Feb 7, 2023: Check out my progress on the  FanningSparks Maker Challenge to create at least three different projects featuring hearts before Valentine’s Day.
. See the blog post, Setting My Heart on a Maker Challenge, to learn how this maker challenge came about.
. The file storage boxes featured in this blog post are my first response to the challenge.  You can download the design used on the file storage boxes here: Heart and Leaf Border – Complimentary Download.
. See the blog post, Maker Heart Challenge #2: Broken Heart Trivet, for my second response to the challenge.
. See the blog post, Maker Heart Challenge #3: Froufrou Sachet – DIY Tutorial, for my third response the challenge.
. See the blog post, Maker Heart Challenge Bonus: Ceramic Valentine’s Heart Box, for my fourth, and bonus, response to the challenge.

Today’s Takeaways

1. January is designated “Get Organized (GO) Month” by the National Association of Productivity & Organizing Professionals (NAPO).
2. Consider following the three steps—Evaluate, Declutter and Organize—to deal with clutter.
3. File storage boxes may be one way to get craft-related papers organized.
Peg - FanningSparks Author

It’s nearly impossible to visit a store or browse an online shop without being bombarded by hearts these days.  Obviously, it is the annual run-up to Valentine’s Day.  While the merits of the actual day may be debatable, I’m a sucker for a heart motif.  It’s a simple shape which can be executed in thousands of fun and interesting ways.
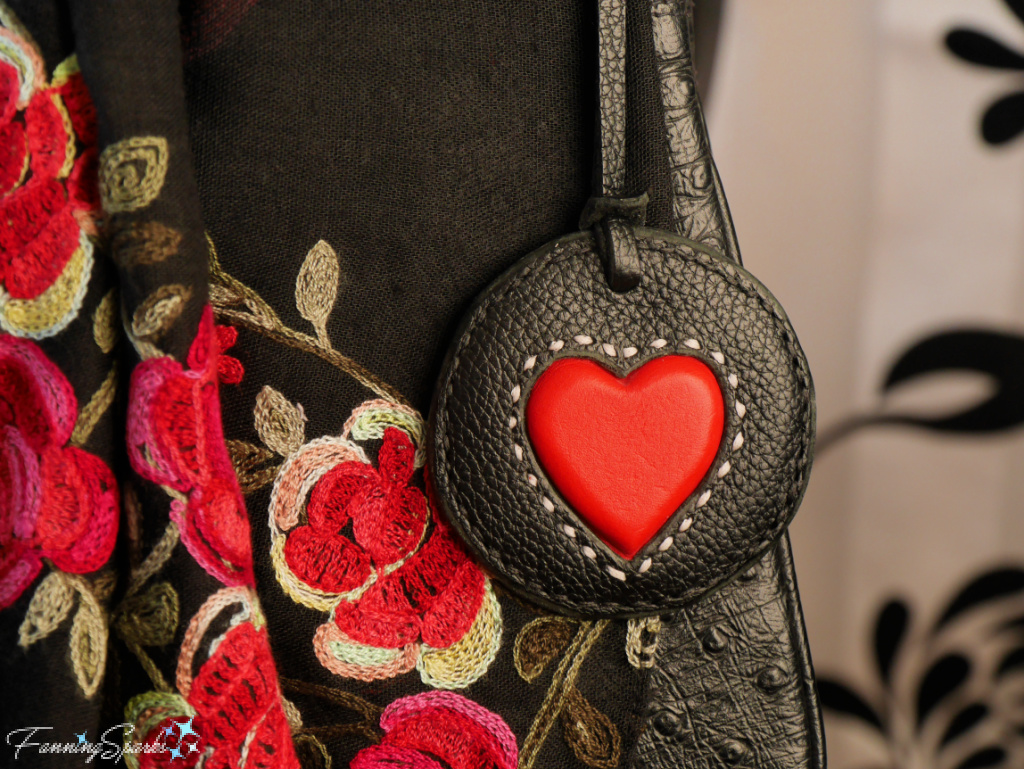
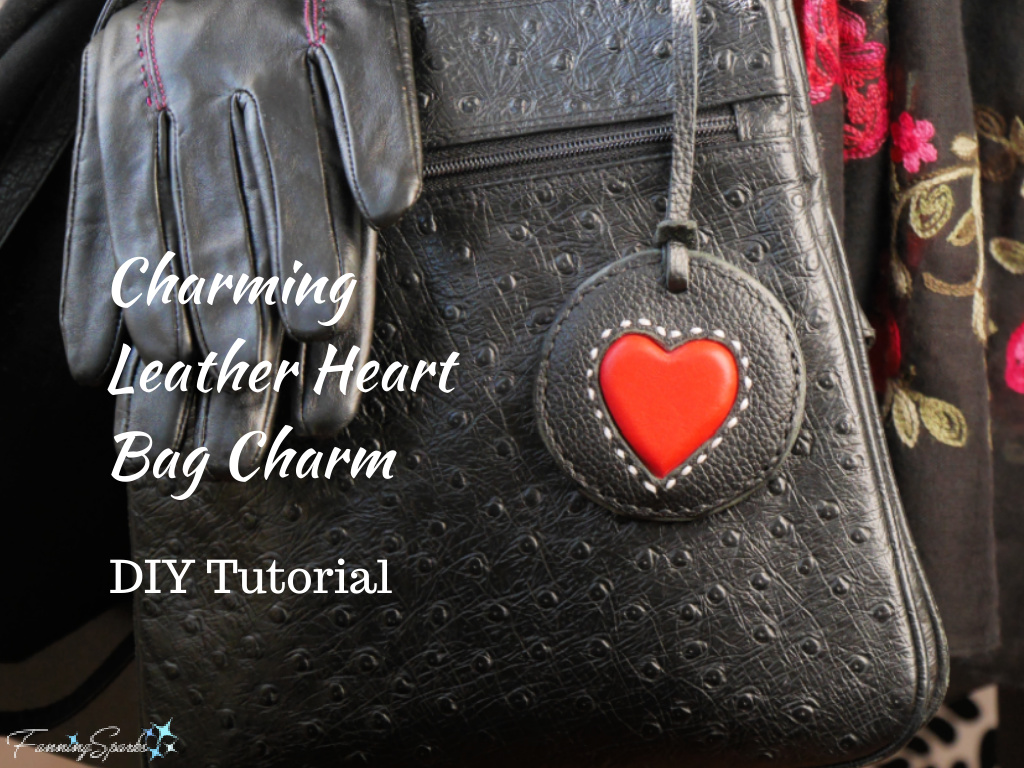
For instance, last year, I made a one-of-a-kind, leather bag accessory featuring a charming red heart.
Charming Leather Heart Bag Charm with Scarf  @FanningSparks
I shared the step-by-step instructions for this project in the blog post Charming Leather Heart Bag Charm – DIY Tutorial.
Charming Leather Heart Bag Charm DIY Tutorial  @FanningSparks
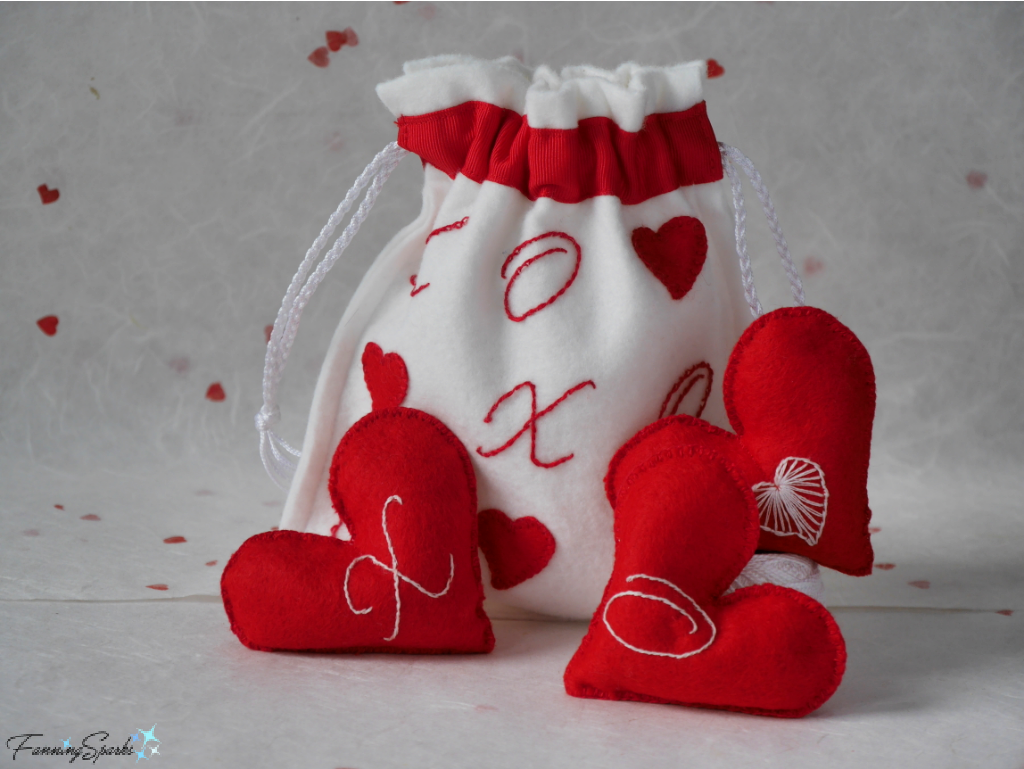
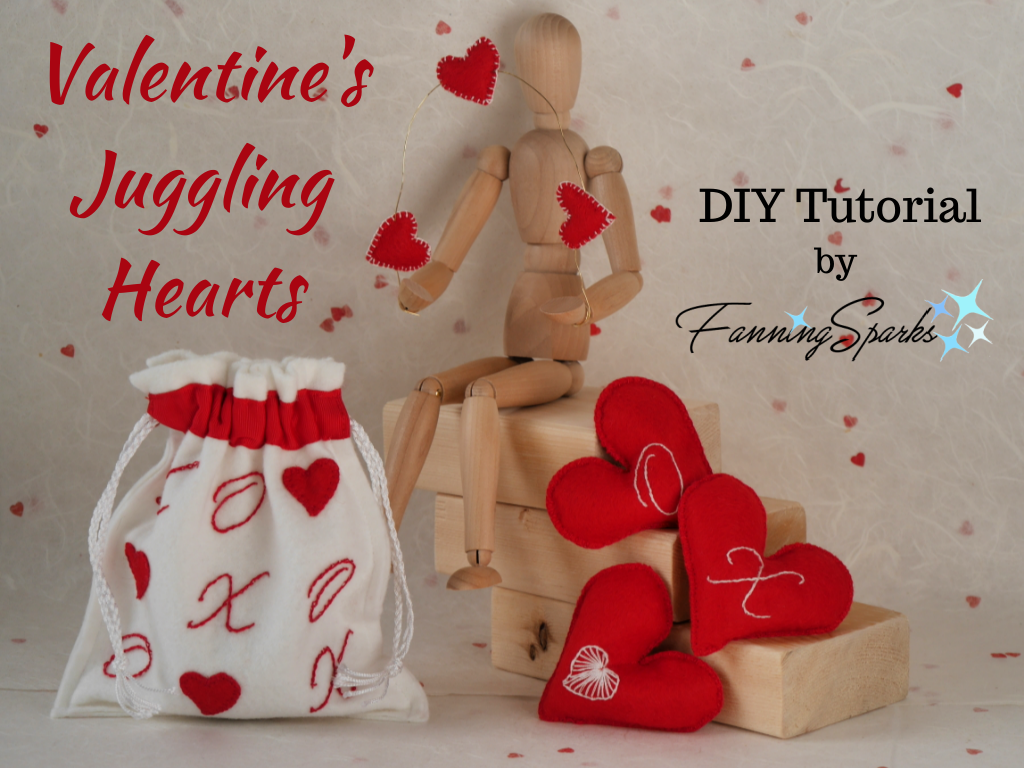
Two years ago, I made a set of felt hearts designed for juggling.
Valentine’s Juggling Hearts with Pouch @FanningSparks
Step-by-step instructions for the hearts, along with a cute drawstring storage bag, were shared in the post Valentine’s Juggling Hearts – DIY Tutorial.
Valentine’s Juggling Hearts with Drawstring Pouch DIY Tutorial Pin @FanningSparks
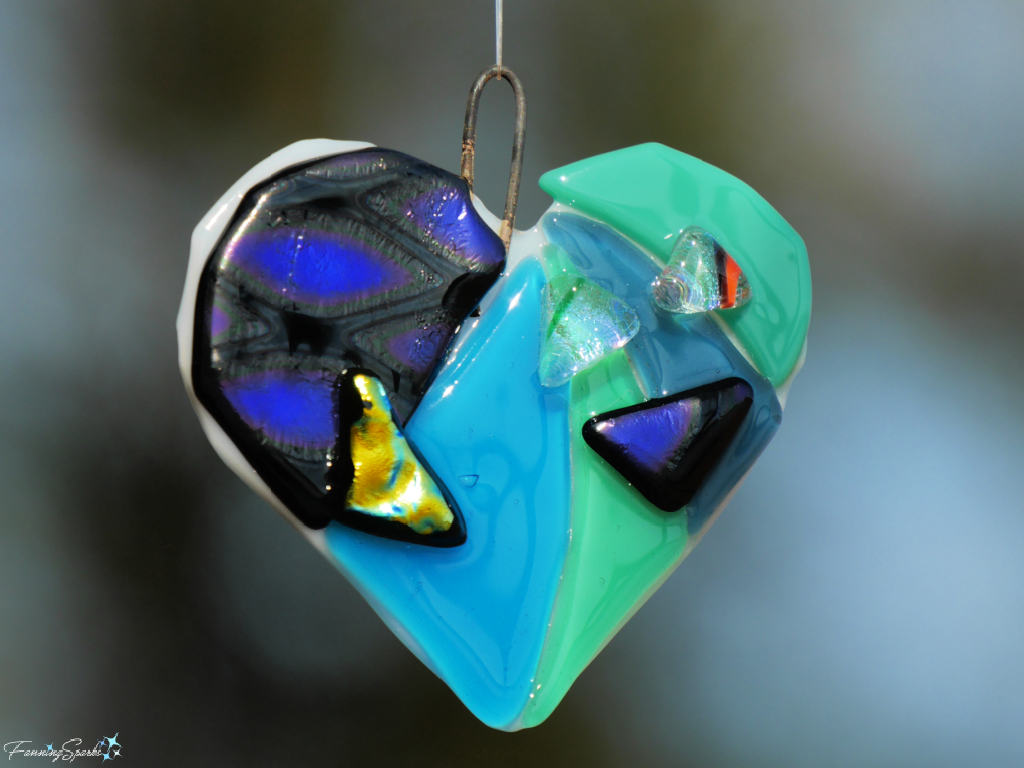
In my last post, Fused Glass: From Fan to Maker, I shared my experience learning about fused glass.  My first project was a small heart ornament.
My Finished Fused Glass Heart in Morning Light @FanningSparks
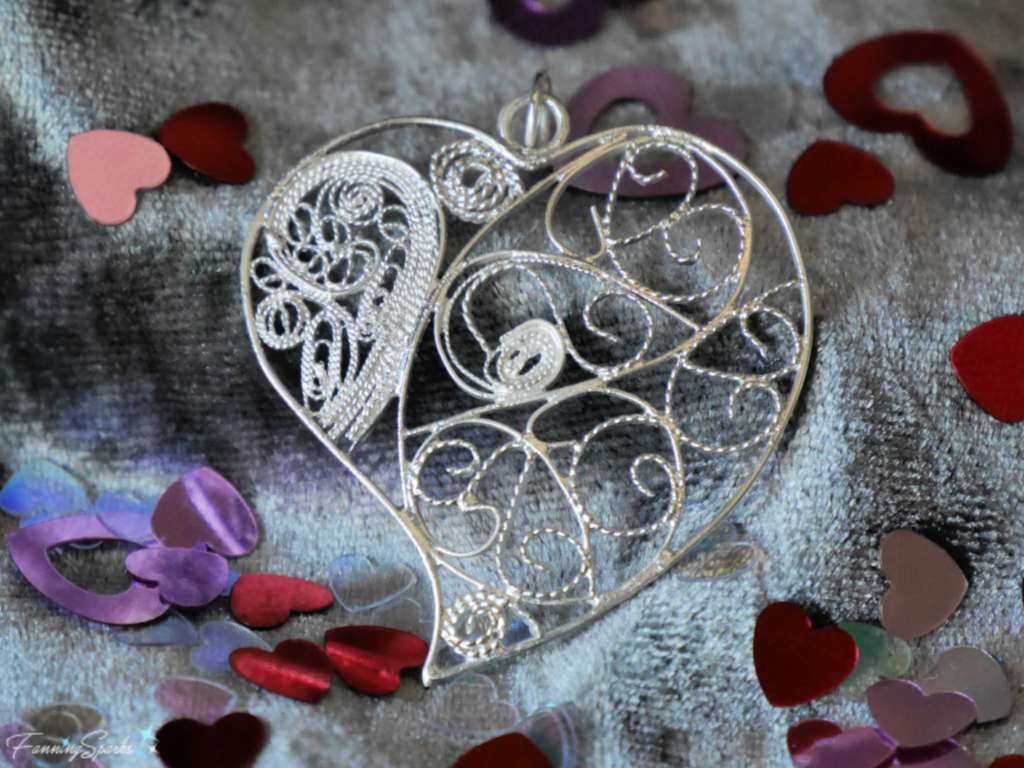
When I looked back through my FanningSparks’ blog posts, I was surprised by the number of hearts that have appeared.  One of my all-time favorite projects is this silver filigree heart pendant which I made under the guidance of a master filigree artist in Gondomar, Portugal.
Silver Filigree Heart I Made with António Cardoso in Gondomar Portugal. @FanningSparks
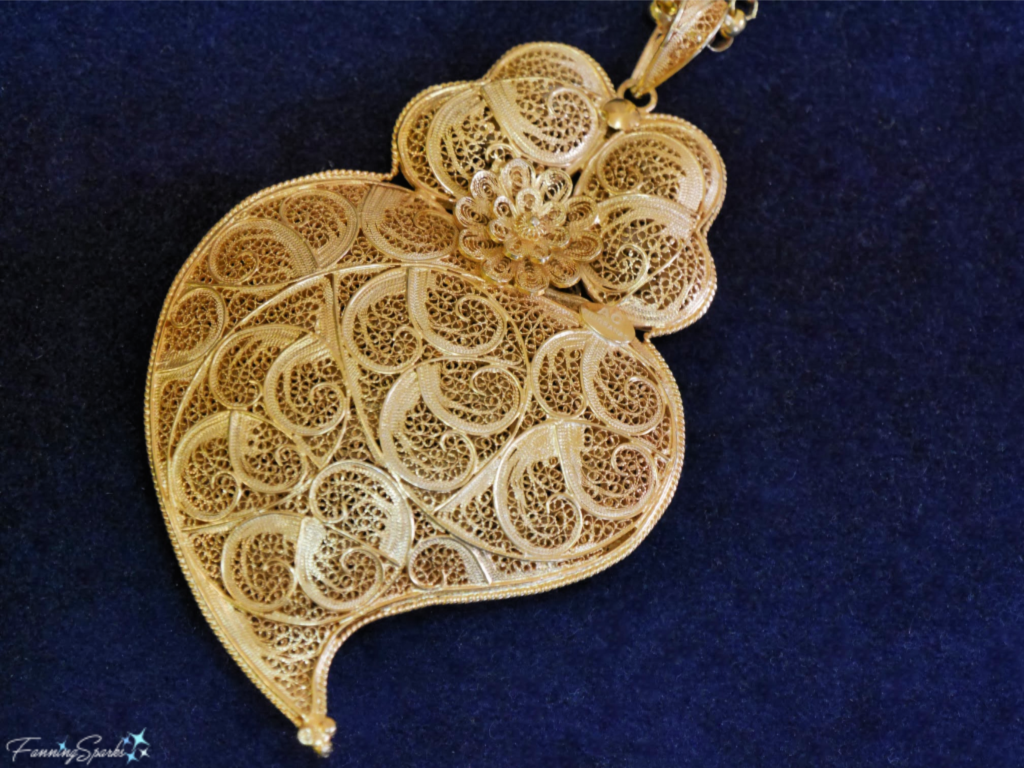
António and Rosa Cardoso make and sell beautiful filigree jewelry in silver and gold under the brand of AC Filigranas.  Shown below is one of their spectacular filigree necklaces featuring a traditional Portuguese design called the Viana heart.  The Viana heart is a stylized heart shape, with the flame at the top of the heart symbolizing passion and the sweep of the heart’s tip pointing towards the wearer’s own heart.  Check out the blog post, Making Curls and Swirls with a Filigree Master, for the full story.
Beautiful Viana Filigree Heart by ACFiligranas. @FanningSparks
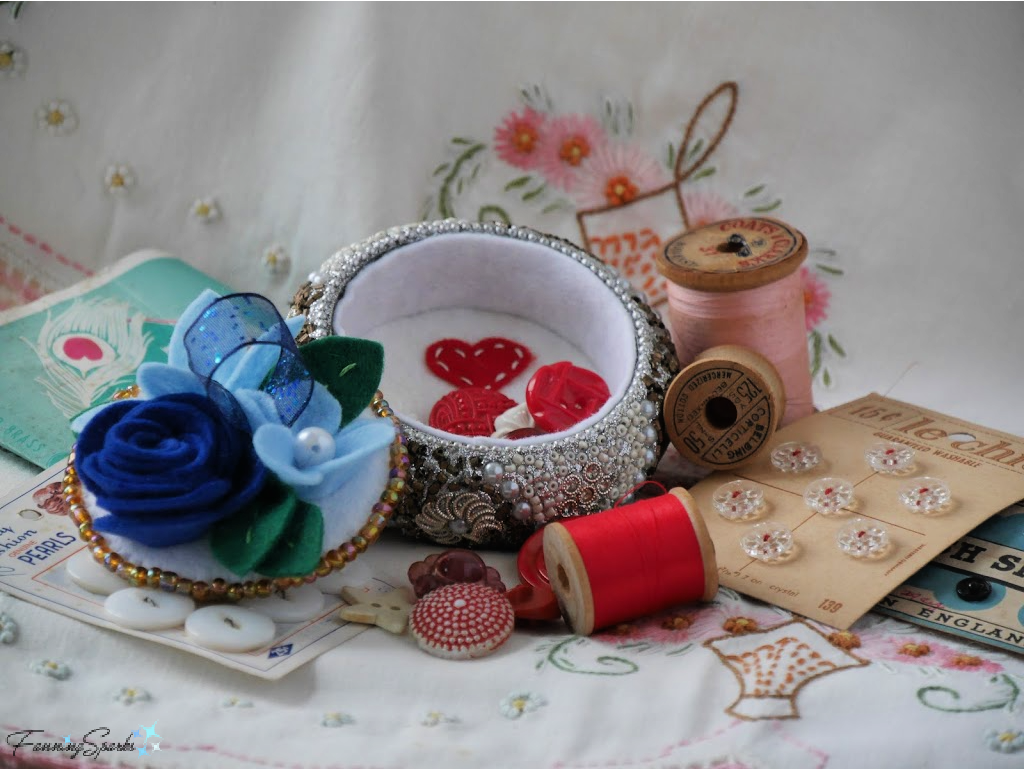
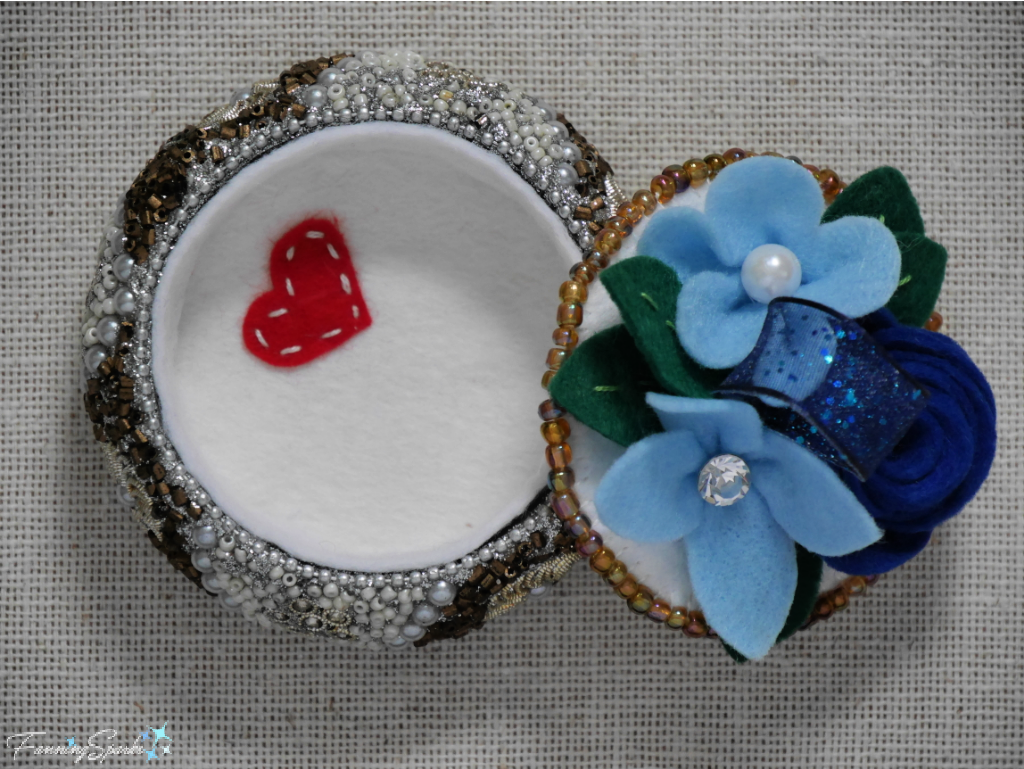
Hearts pop up in a few of the other projects I’ve shared.  There’s a tiny heart hidden inside a trinket box I made from a repurposed vintage bangle.  See the blog post, Vintage Bangle to Keepsake Box – DIY Tutorial, for step-by-step instructions to transform any bangle bracelet into a small box for your treasures.
Bangle Keepsake Box Holding Vintage Buttons @FanningSparks
Finished Bangle Keepsake Box @FanningSparks
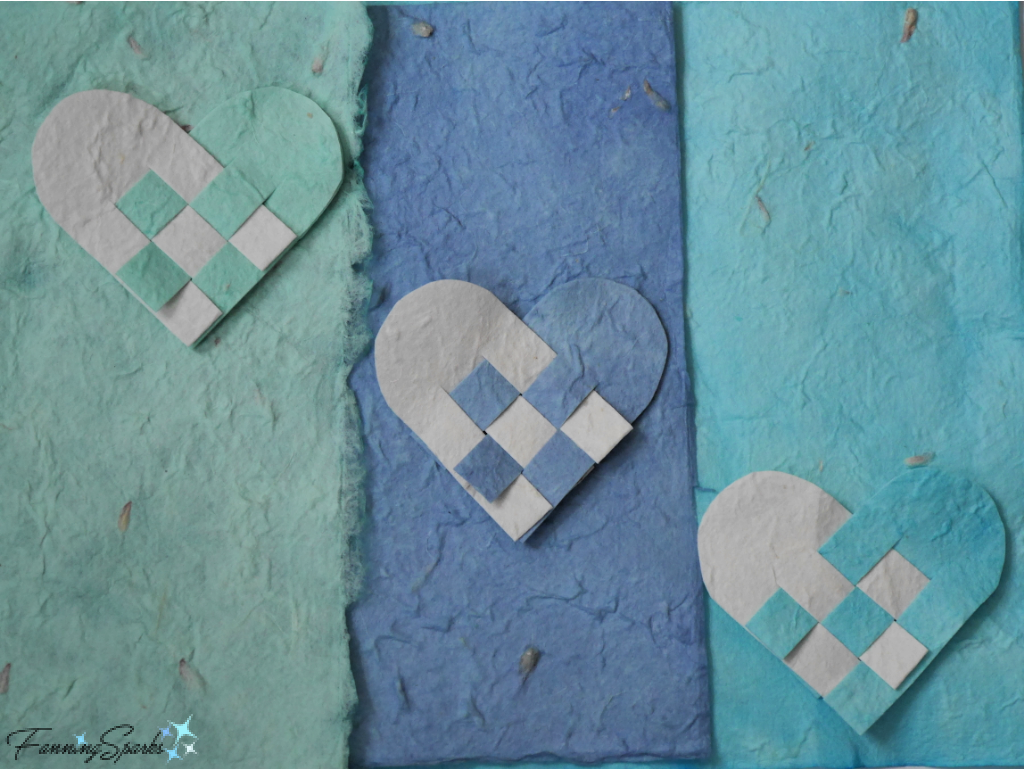
An experiment with fabric dyes led to the set of woven paper hearts shown below.  The simple hearts were a fun way to illustrate the effects of dyeing handmade paper.  See the blog post, Experimenting with Fabric Dye, for more information.
Dyed Handmade Paper with Folded Hearts @FanningSparks
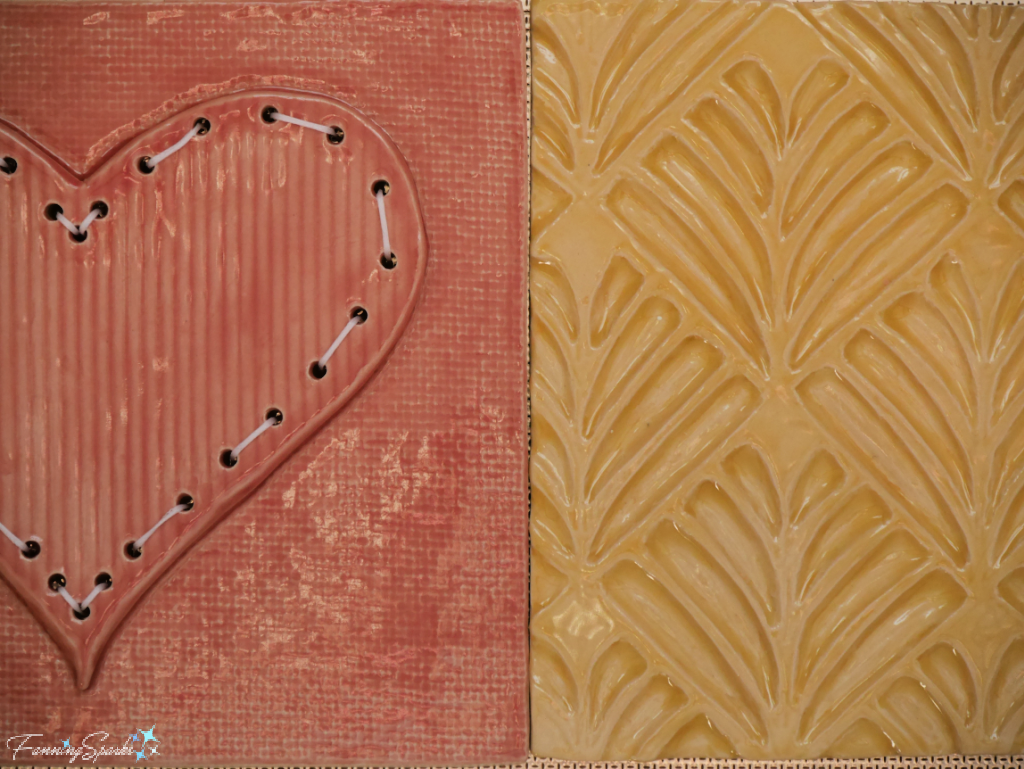
One of my most ambitious projects was a collection of handmade ceramic tiles.  My objective was to create a dozen tiles using different decorative techniques and designs.  It was inevitable that one of the tiles would feature a heart!  The heart tile hangs in the middle of the bottom row.
OOAK Ceramic Tile Collection in Entryway @FanningSparks
The heart tile can be seen more clearly in this close-up photo comparing carving methods.  See Still Talking About Tiles! for the full story on how I made these decorative tiles.
Additive and Subtractive Carving Side by Side Comparison @FanningSparks
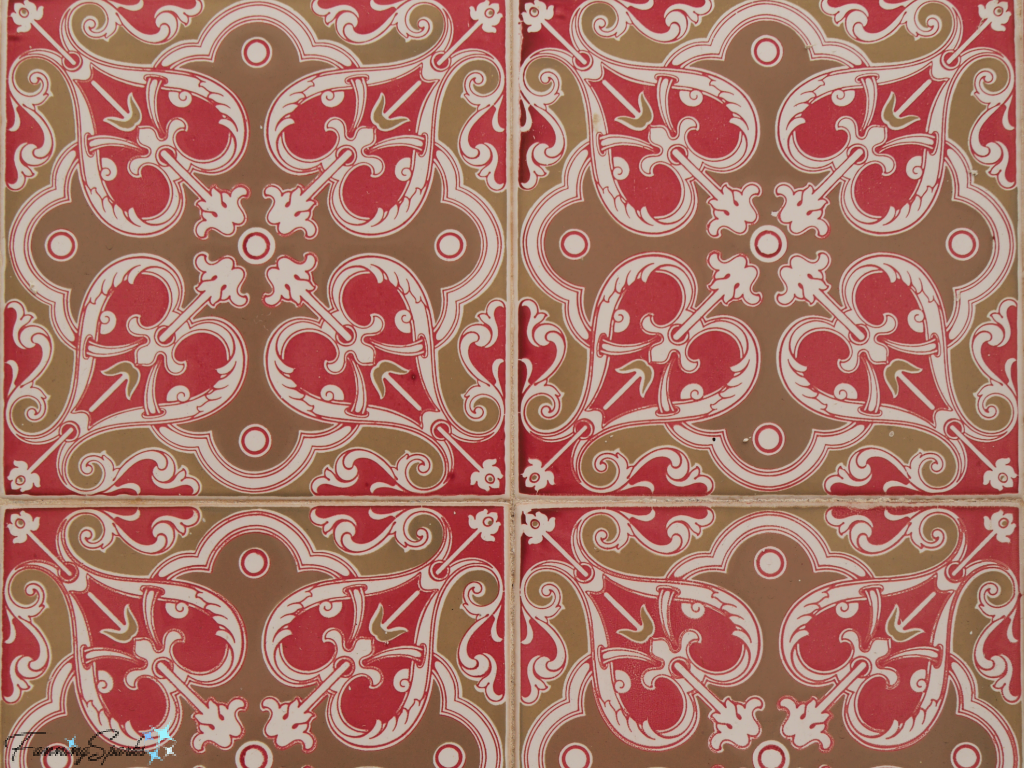
My project was inspired by the beautiful tiles, called azulejos in Portuguese, which I saw in Portugal.  Azulejos, typically designed in repeating patterns, cover the facades of churches, shops, businesses, homes and other buildings.  The designs and colors are spectacular.  Shown below is just one example—an intricate pattern incorporating the heart motif.  See my blog post, Talk About Tiles!, for the full story along with lots of photos.
Portuguese Tiles - Red Hearts on Beige   @FanningSparks
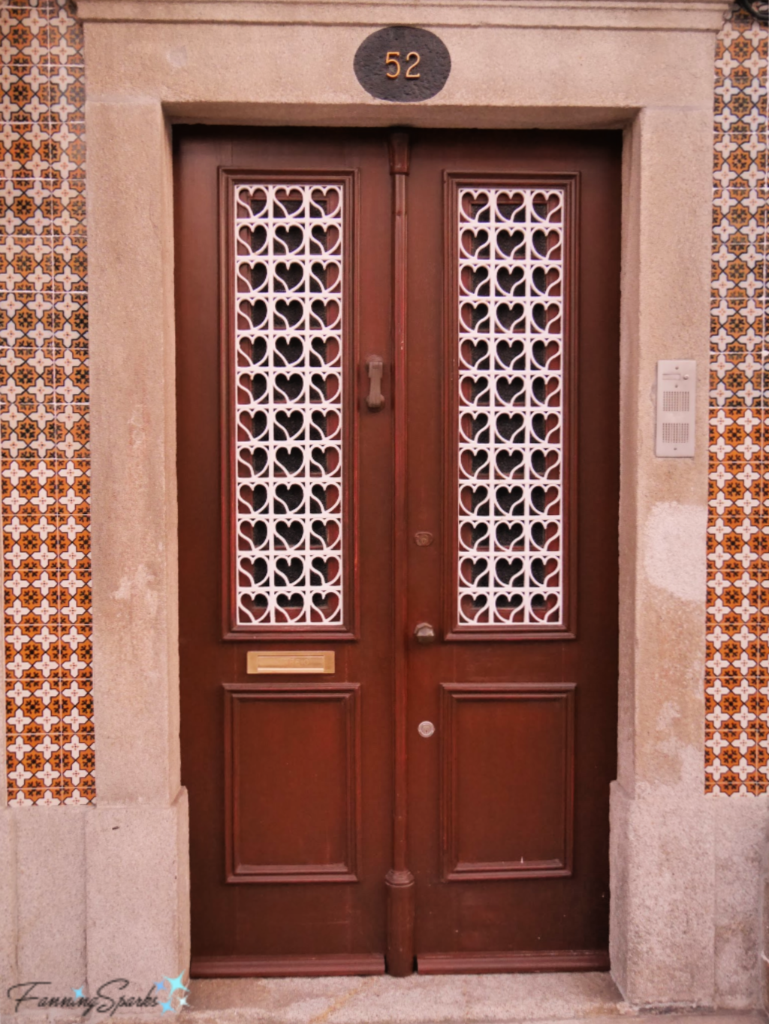
I also spotted a heart motif in these amazing wrought iron door inserts in Caminha, Portugal.  Check out Lines and Patterns in Wrought Iron for lots of wrought iron gorgeousness.
Sweet Heart Design Wrought Iron Door Grilles in Caminha Portugal. @FanningSparks
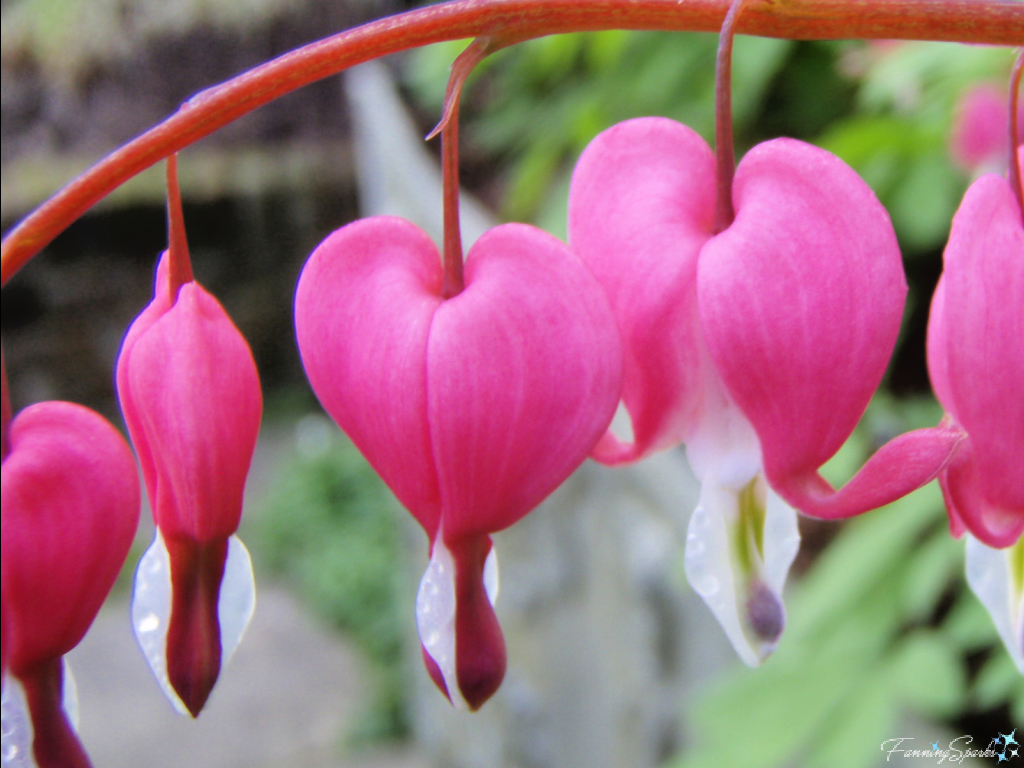
Interestingly, heart shapes are not limited to handmade items—they also appear in the natural world.  A well-known example is the bloom of the Bleeding Heart perennial flower.  There are a few different varieties but, I believe, the one shown below is an Old-Fashioned Bleeding Heart (Dicentra spectabilis).  When the Bleeding Heart blooms, a row of puffy, little, pink hearts dangles below the main stem.  So pretty!
Old-Fashioned Bleeding Heart (Dicentra spectabilis) in Bloom   @FanningSparks
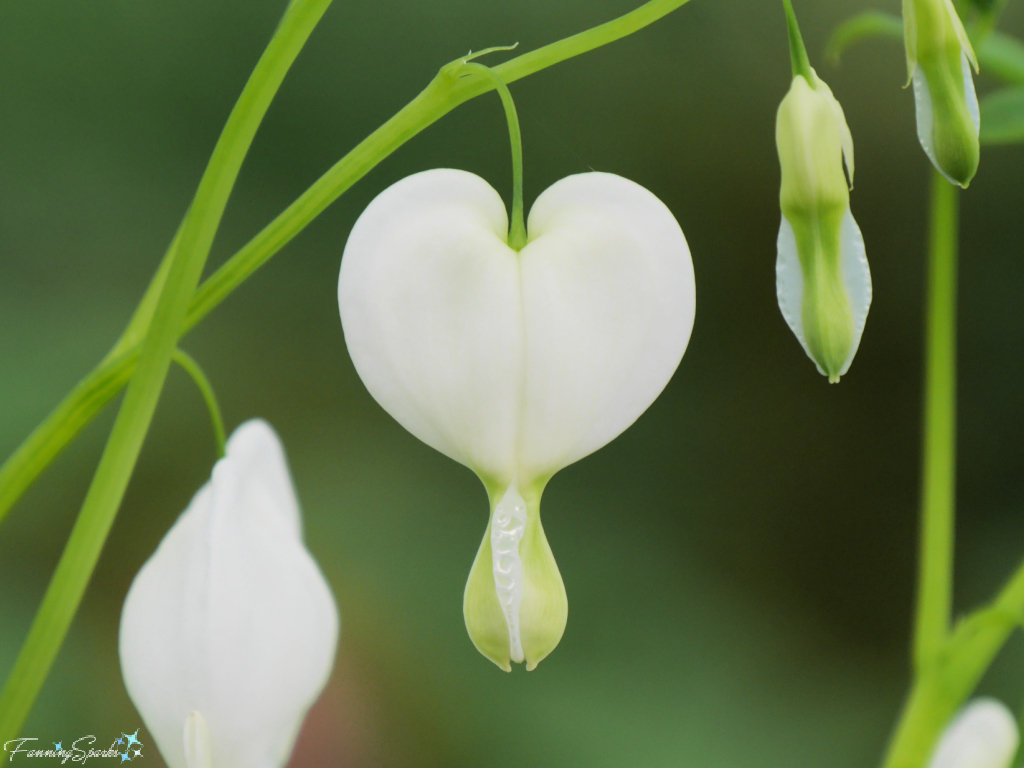
The all-white version, Dicentra spectabilis ‘Alba‘, is equally stunning.
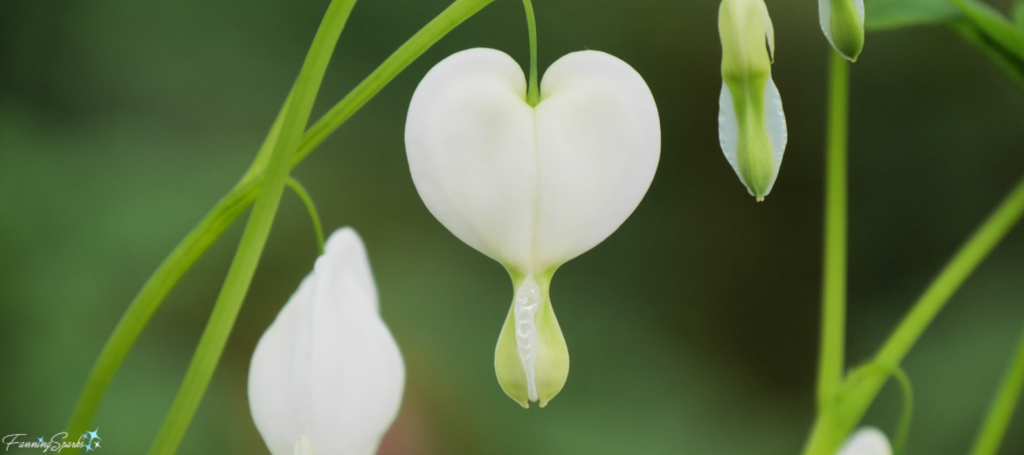
White Old-Fashioned Bleeding Heart (Dicentra spectabilis 'Alba') in Bloom   @FanningSparks
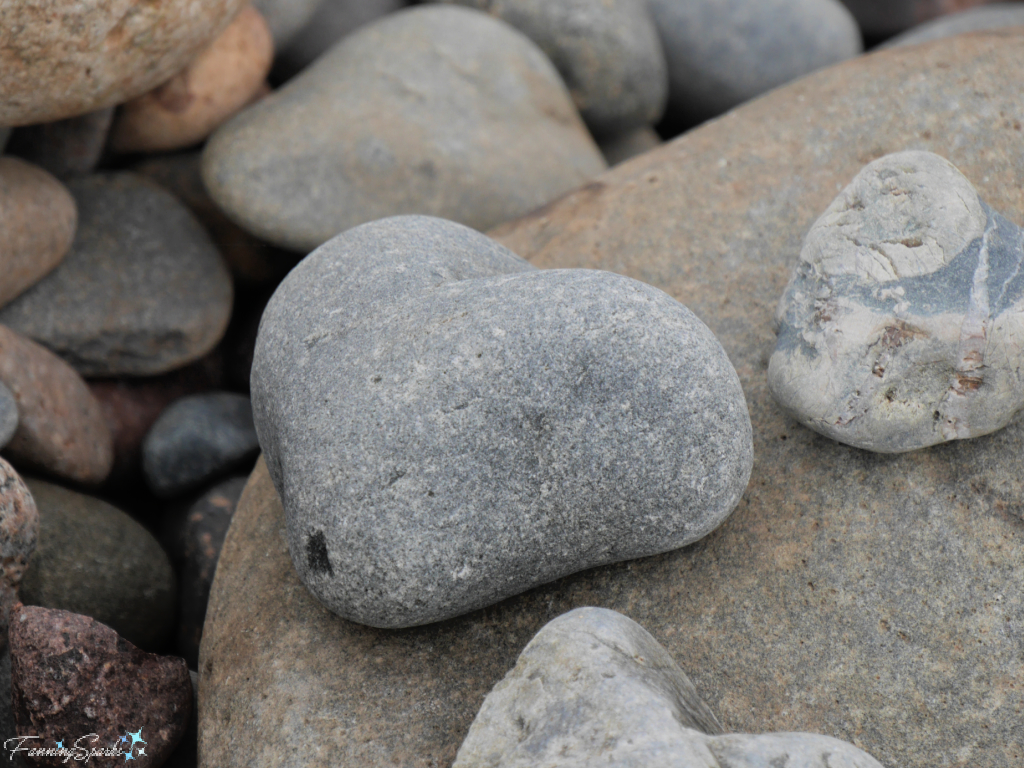
With a sharp eye, it’s possible to find heart shapes in other natural elements.  My mother-in-law, who amongst her many talents is particularly skilled at spotting heart-shaped stones, got me hooked.  I’m always on the lookout for hearts along shores and riverbanks.  This plump, grey heart was spotted on Lawrencetown Beach in Nova Scotia.
Heart-Shaped Stone on Lawrencetown Beach in Nova Scotia   @FanningSparks
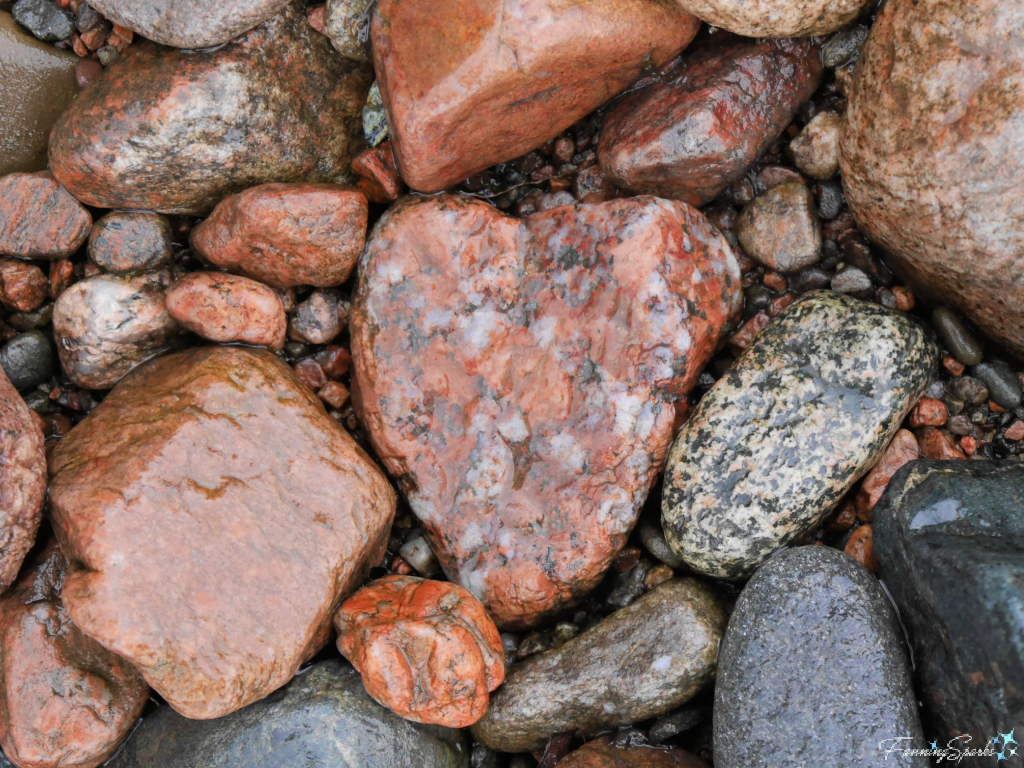
Admittedly, sometimes it takes a little imagination to actually see a heart.  This thin, multi-colored heart, spotted along the Margaree River in Nova Scotia, is a case in point.
Wet Heart-Shaped Stone Along Margaree River in Nova Scotia   @FanningSparks
No imagination was needed, however, to spot this next heart shape.  The unusual rock was propped up near the Brier Island Lighthouse in Nova Scotia.  Check out the blog post Solid as a Rock to learn about the geological heritage of Nova Scotia,
Heart-Shaped Rock at Brier Island Lighthouse Nova Scotia @FanningSparks
All these hearts—handmade and organic, standalone and repeated, shapes and forms, simple and complex—are inspiring me to discover new ways to incorporate hearts into my next projects.  To add a little incentive, I’ve set a maker challenge for myself—create at least 3 different projects featuring hearts before Valentine’s Day.  You could say I’ve set my heart on it!

More Info

The following FanningSparks’ blog posts are mentioned in this post:
. Charming Leather Heart Bag Charm – DIY Tutorial
. Valentine’s Juggling Hearts – DIY Tutorial
. Fused Glass: From Fan to Maker
. Making Curls and Swirls with a Filigree Master
. Vintage Bangle to Keepsake Box – DIY Tutorial
. Still Talking About Tiles!
. Experimenting with Fabric Dye
. Lines and Patterns in Wrought Iron
. Talk About Tiles!
. Solid as a Rock.
UPDATE Feb 7, 2023: Check out my progress on the  FanningSparks Maker Challenge to create at least three different projects featuring hearts before Valentine’s Day.
. See the blog post, Maker Heart Challenge #1: Hearty File Storage Boxes, for my first response to the challenge.
. See the blog post, Maker Heart Challenge #2: Broken Heart Trivet, for my second response to the challenge.
. See the blog post, Maker Heart Challenge #3: Froufrou Sachet – DIY Tutorial, for my third response the challenge.
. See the blog post, Maker Heart Challenge Bonus: Ceramic Valentine’s Heart Box, for my fourth, and bonus, response to the challenge.

Today’s Takeaways

1. The heart motif is a simple shape which can be executed in thousands of fun and interesting ways.
2. Heart shapes and forms can be handmade, organic, standalone, repeated, simple or complex.
3. Consider incorporating a heart motif into your next maker project.
Peg - FanningSparks Author

Admiring the work of other artists is a great way to spark joy and foster inspiration.  Often the seed of an idea will be sown without conscious thought.  The idea may take root immediately or it may go dormant waiting for the right growing conditions to sprout.  I’ve found as ideas grow, they rarely, if ever, mimic the original—instead they evolve into something different and new.  My experience with fused glass is a case in point.
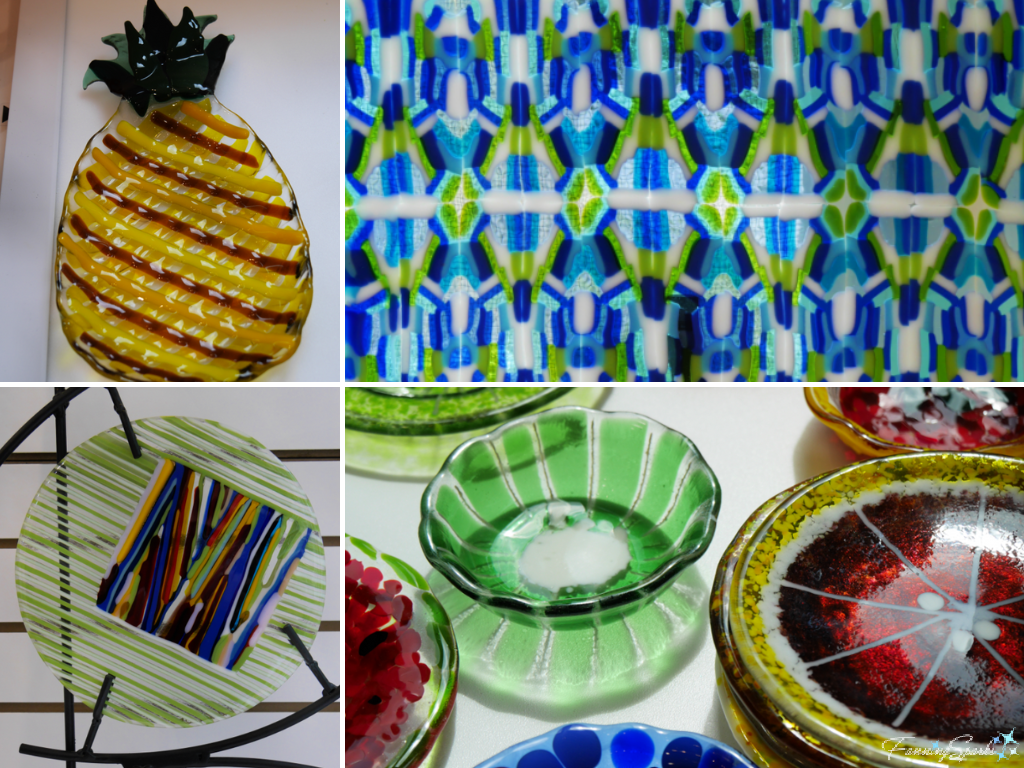
I’ve been aware of fused glass for some time but didn’t fully appreciate its beauty and versatility until I visited Cat Martin’s Glass Studio a few years ago.  Her studio was part of the Henderson County Open Studio Tour in North Carolina (see Peeking Behind the Studio Curtain and Add a Little Sparkle).  The vibrant colors and intricate patterns in Cat’s fused glass art are amazing.  Here are some examples.
Cat Martin Fused Glass @FanningSparks
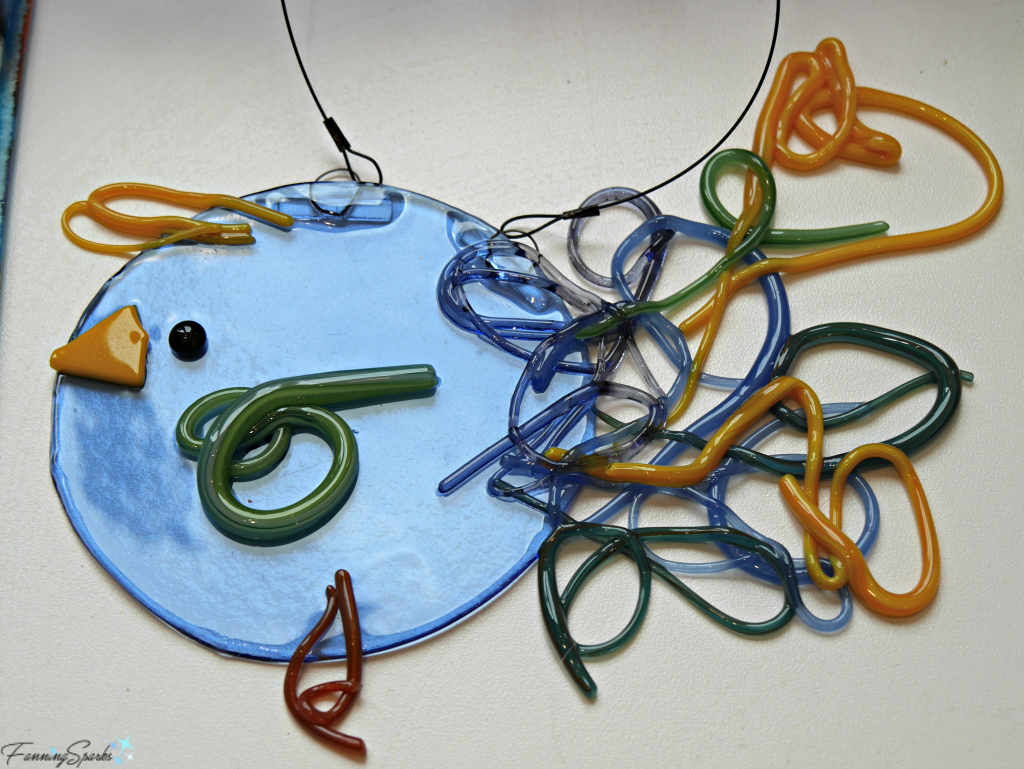
I love this quirky bluebird!
Fused Glass Bird by Cat Martin. @FanningSparks
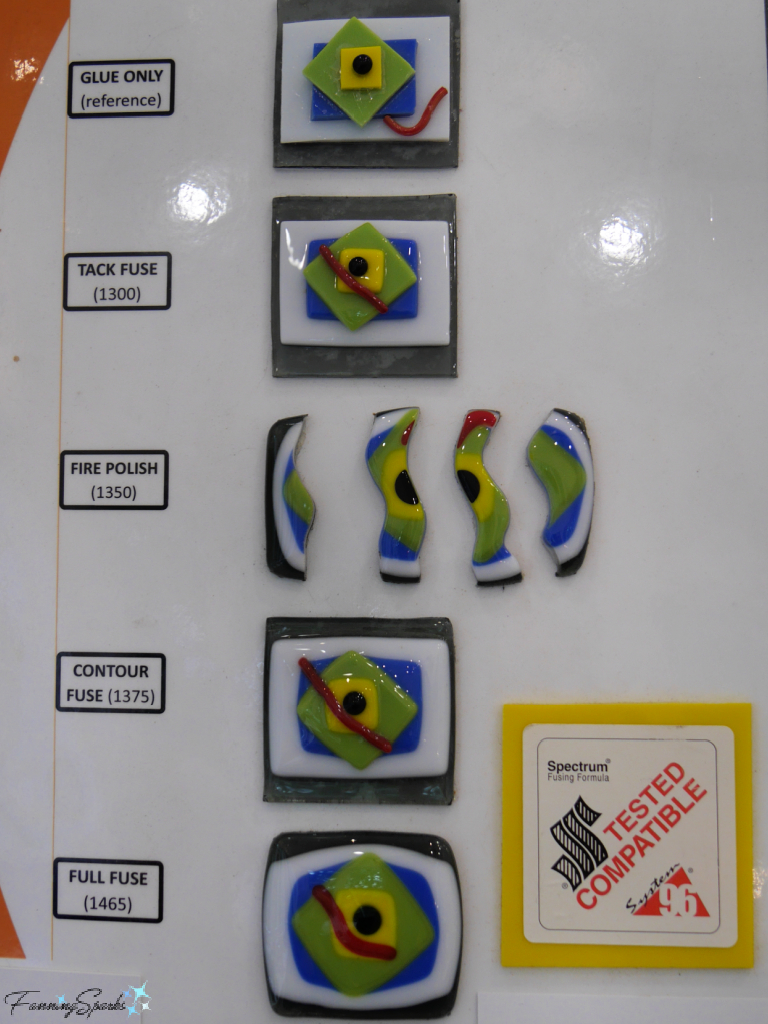
In her book Creative Glass Techniques: Fusing, Painting, Lampwork, author Bettina Eberle describes glass fusing as: “the process of joining pieces of glass by melting them together… in an electric kiln at temperatures ranging from 1470⁰F to 1650⁰F (800⁰C to 900⁰C). … The goal of fusing itself is to produce a solid glass sheet from individual pieces of glass that are arranged beside or on top of one another and then melted together.  This first step is called ‘full-fuse firing’.”  The below teaching aid illustrates the various steps.
Glass Fusing Teaching Aid  @FanningSparks
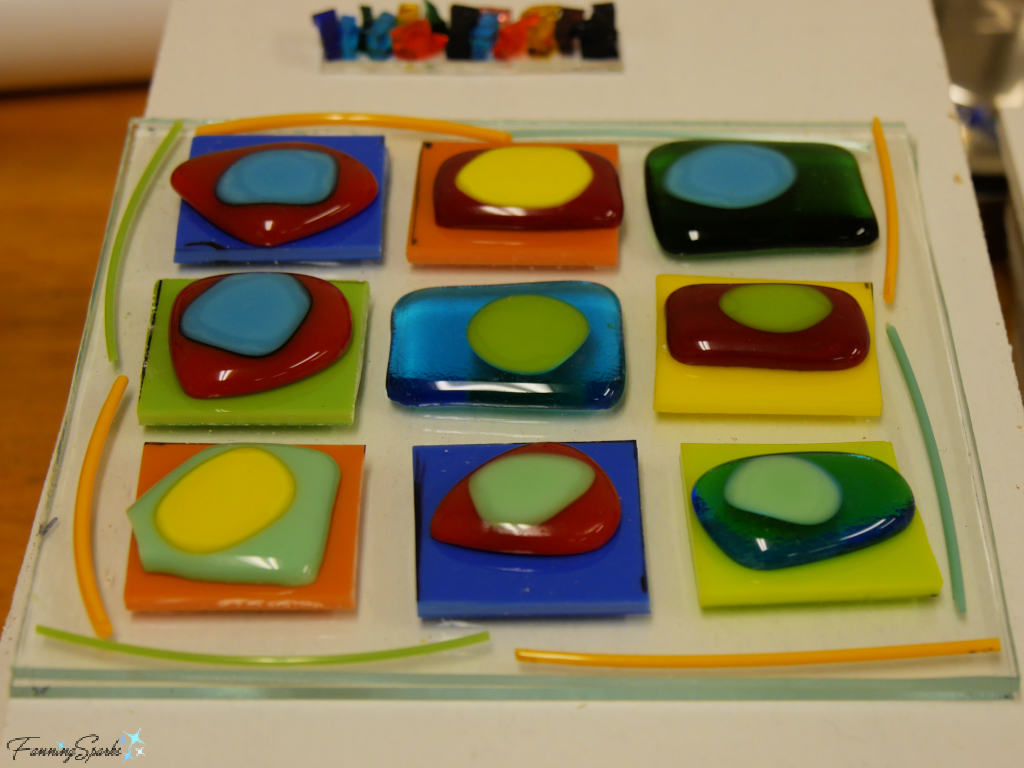
Different stages of glass fusing are also visible in this work-in-process which I spotted at Gilbert Glassworks in Santa Rosa Beach, Florida where I participated in a Glassblowing Fundamentals workshop (see A True Hot Glass Experience).
Colorful Plaque Fused Glass Project in Process at Gilbert Glassworks   @FanningSparks
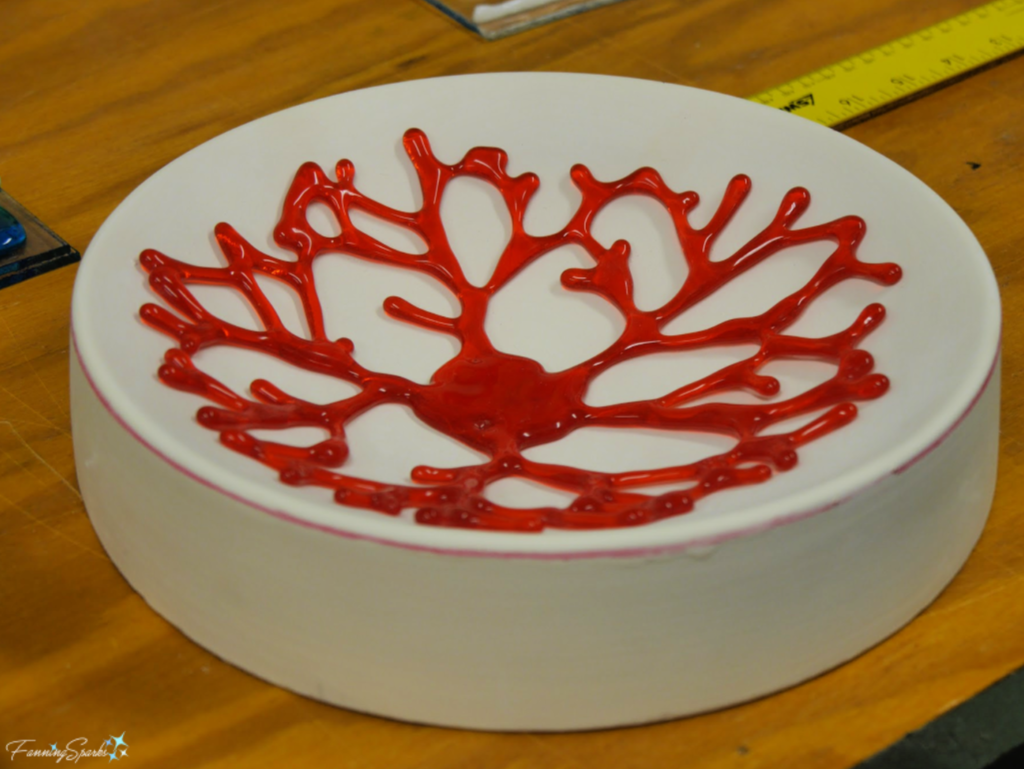
Bettina Eberle goes on to explain, “These days, the term ‘glass fusing’ often refers to an additional step, that of shaping the fused pieces.In a second step, the fused piece is then shaped, again in a kiln, to make an object such as a bowl.  For shaping glass, a variety of molds, into which the glass pieces can be ‘slumped’ or over which they can be ‘sagged’ are required.”
Here’s an example of slumping in a bowl mold.
Slumping a Red Coral-Patterned Bowl at Gilbert Glassworks. @FanningSparks
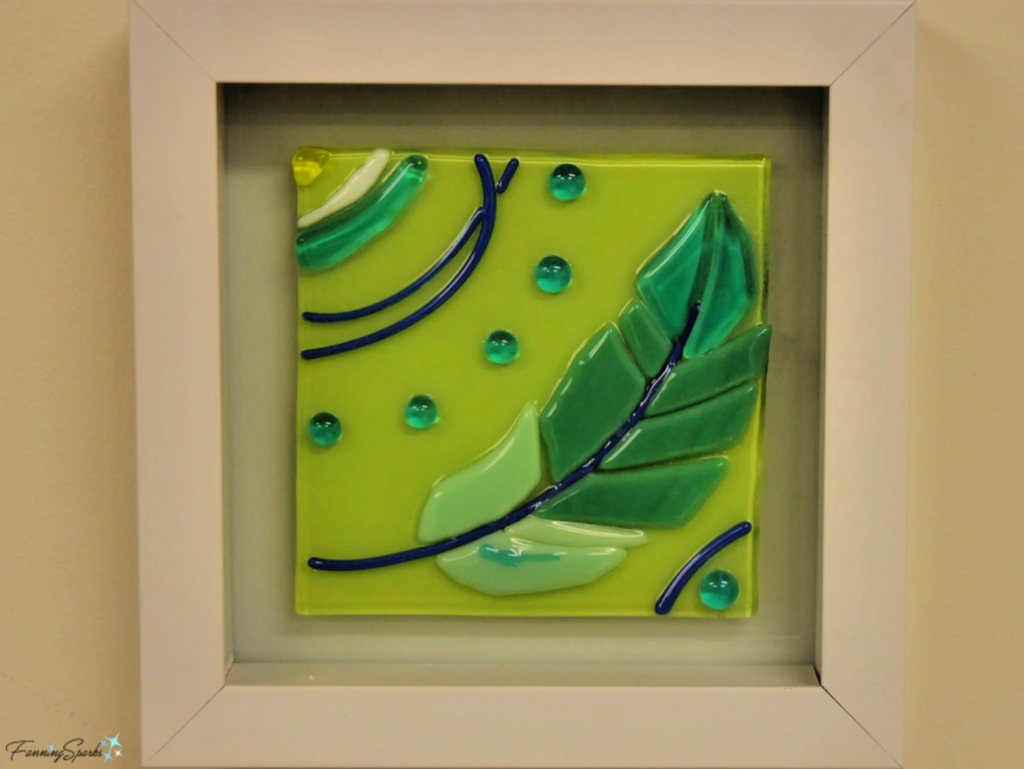
Here’s a gorgeous example of fused glass from Gilbert Glassworks.
Fused Glass Feather Plaque at Gilbert Glassworks. @FanningSparks
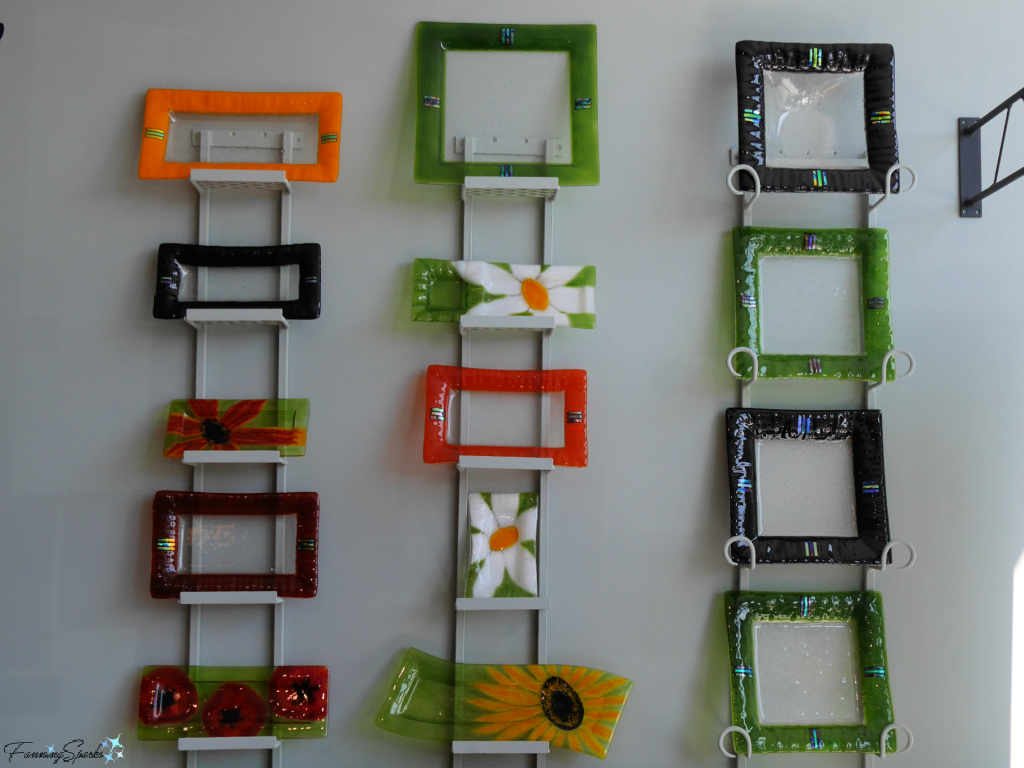
My initiation to the world of fused glass continued with a visit to Chez Glass Lass in Chester, Nova Scotia.  This dynamic gallery showcases the stunning fused glass art of Sharon McNamara and Paul Palango of KilnArt.
Display of KilnArt Fused Glass Plates and Platters   @FanningSparks
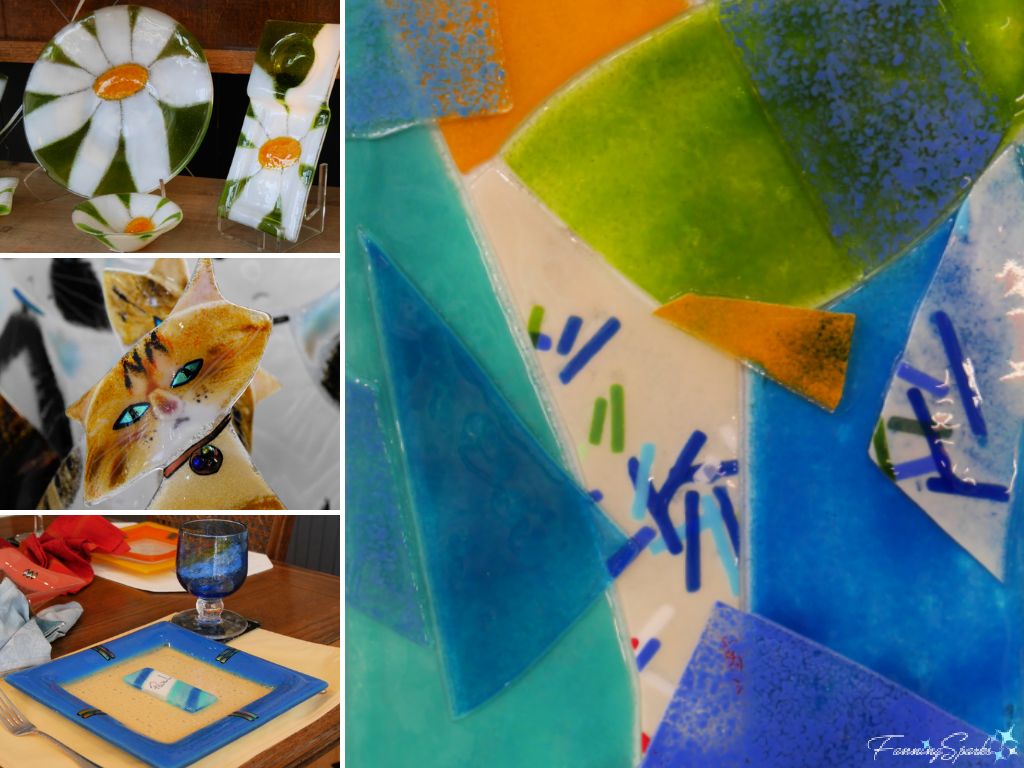
Here are some examples from Chez Glass Lass.
KilnArt Fused Glass   @FanningSparks
Chez Glass Lass also offers a variety of small decorative pieces like these Christmas tree ornaments.
KilnArt Fused Glass Christmas Tree Ornaments   @FanningSparks
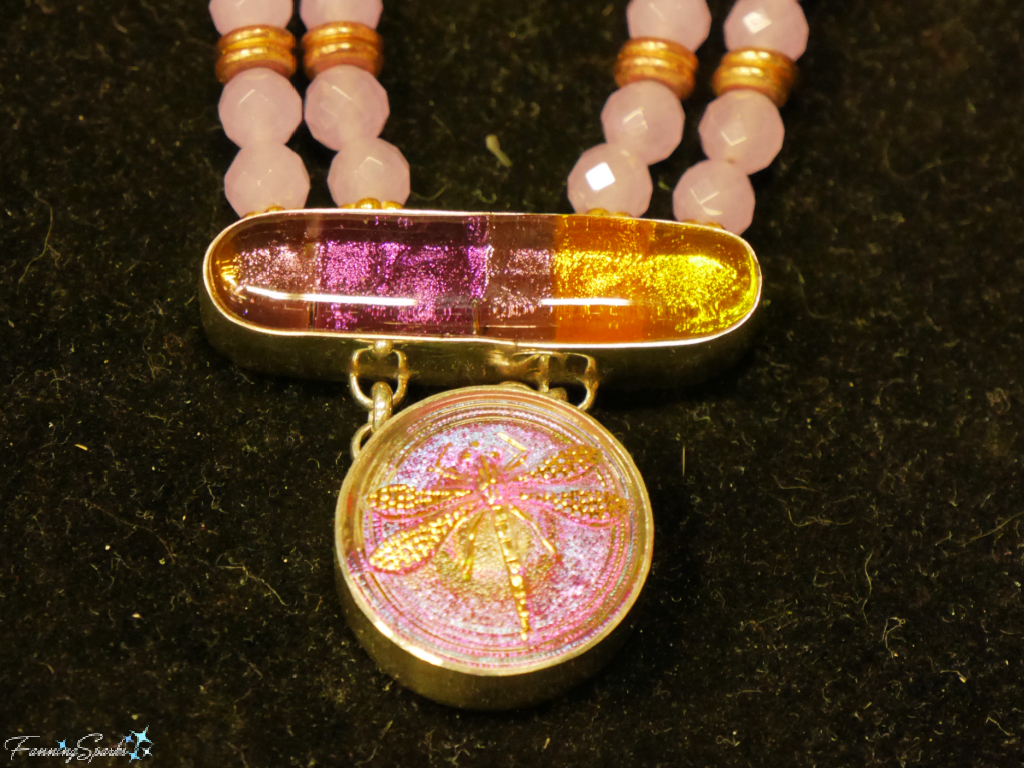
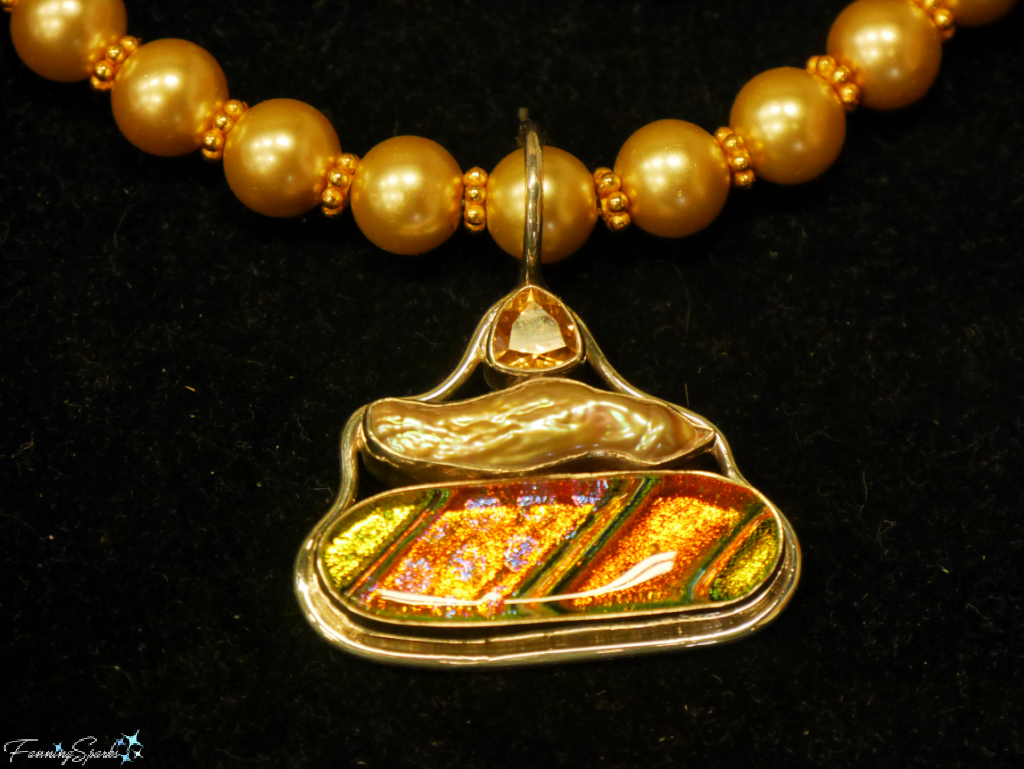
The more beautiful fused glass I saw, the more I wanted to try it for myself.  I had my opportunity a few weeks ago when the Oconee Cultural Arts Foundation (OCAF) hosted a Fused Glass Ornament / Suncatcher Workshop.  The workshop was taught by Patti Quinn, the award-winning glass artist behind Aurora Jewelry Studio.  Patti brought some of her gorgeous jewelry to show the class.  Of course, we didn’t make pieces this beautiful!
Dragonfly Pendant by Aurora Jewelry Studio   @FanningSparks
Baroque Pearl Pendant by Aurora Jewelry Studio   @FanningSparks
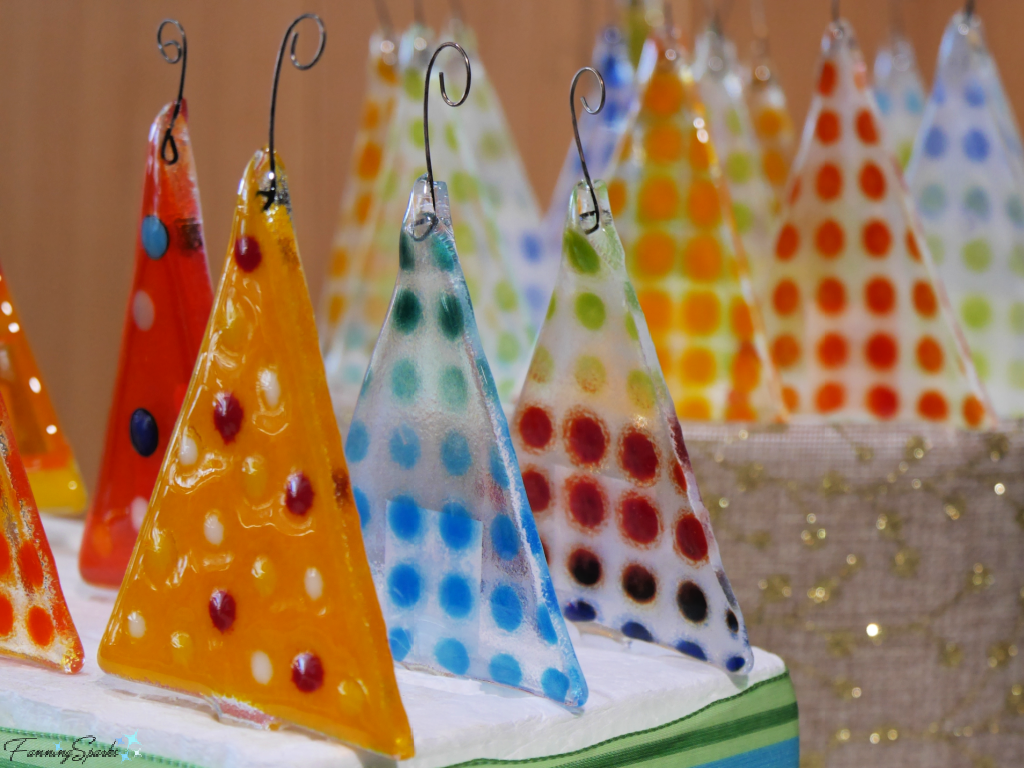
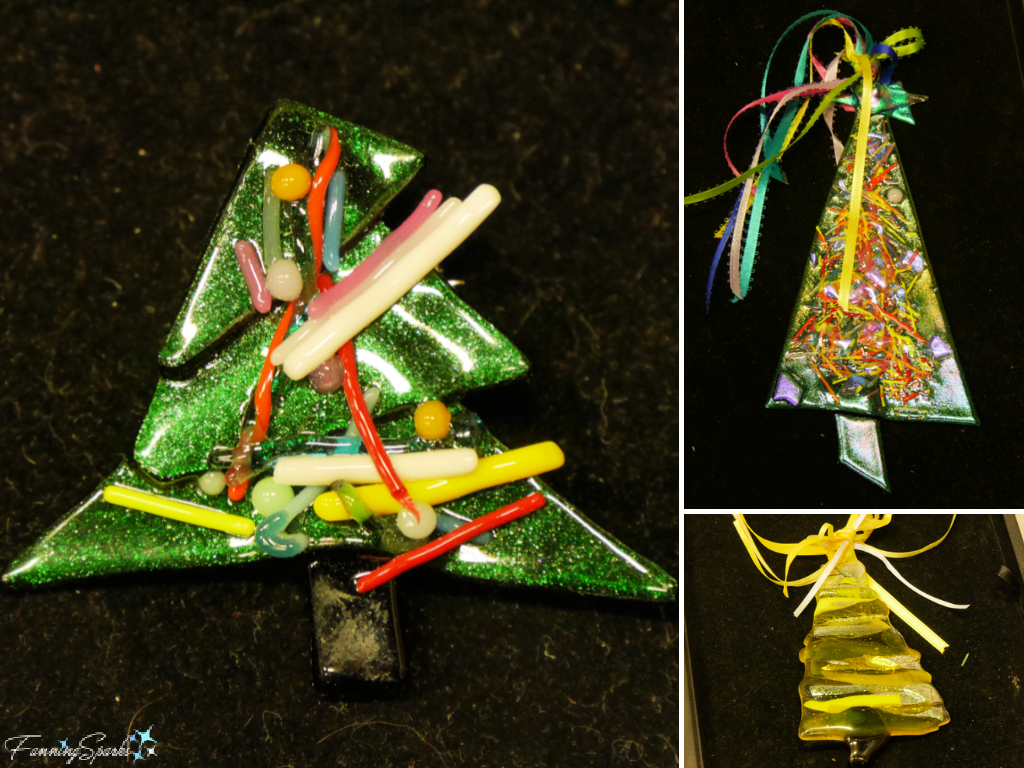
We did, however, make small ornaments and suncatchers.  The workshop was held in December so holiday-themed ornaments were popular choices.  Here are a few of Patti’s sample Christmas trees.
Patti Quinn Fused Glass Christmas Trees   @FanningSparks
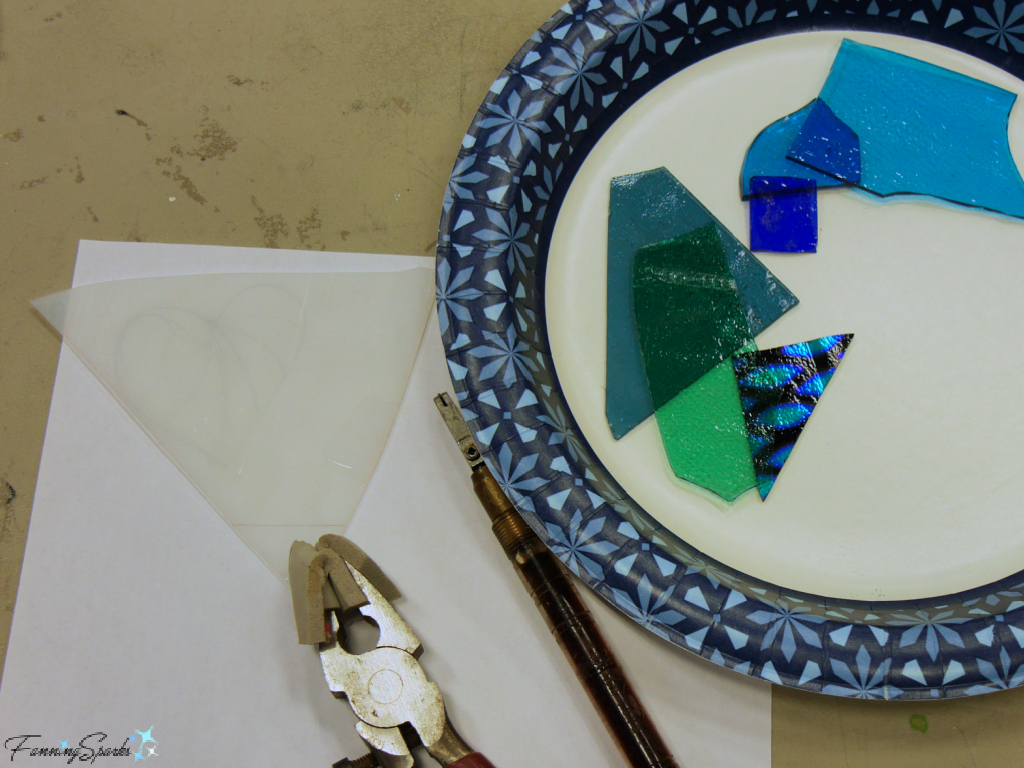
After selecting our designs, Patti explained how to make our fused glass pieces.  The first step was to select the glass we would use.  I chose a palette of blue, green and turquoise to make a simple heart-shaped ornament.
Colored Glass for my First Fused Glass Project   @FanningSparks
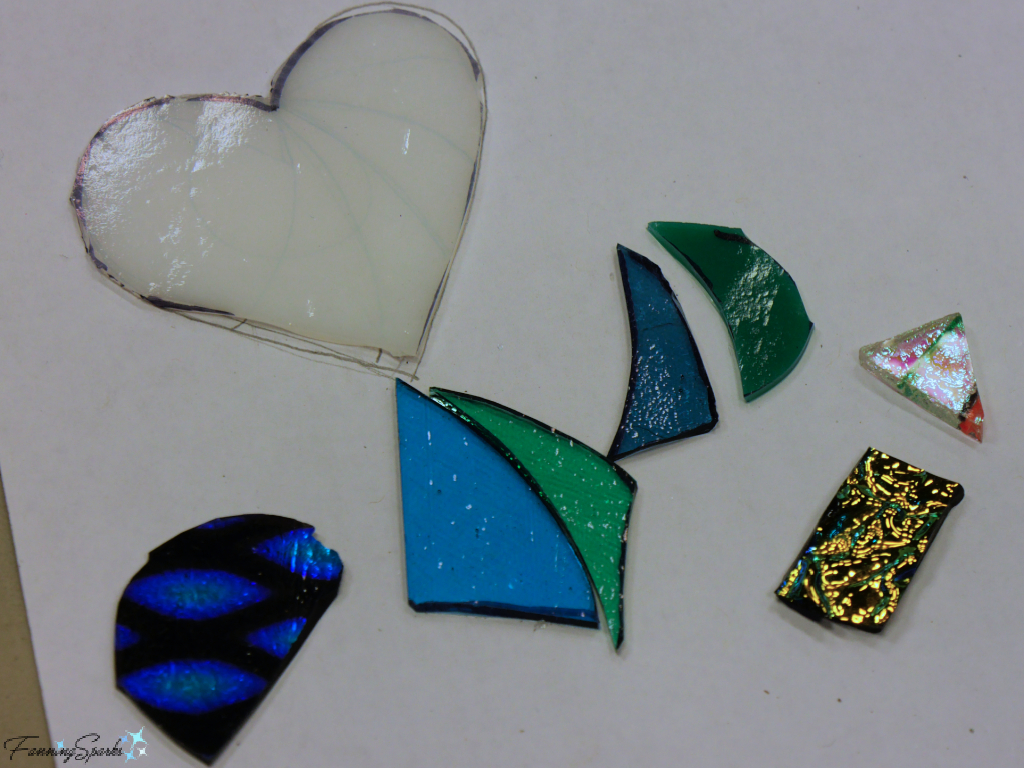
Next, we cut the glass to fit our designs.
Colored Glass Pieces Cut for my First Fused Glass Project   @FanningSparks
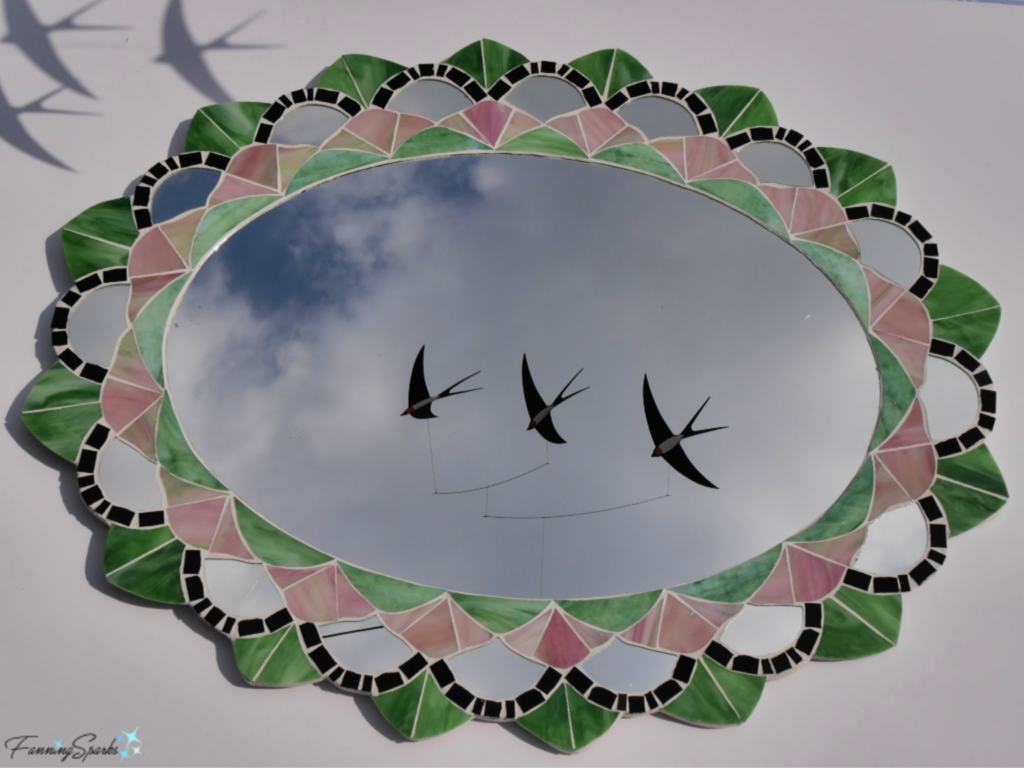
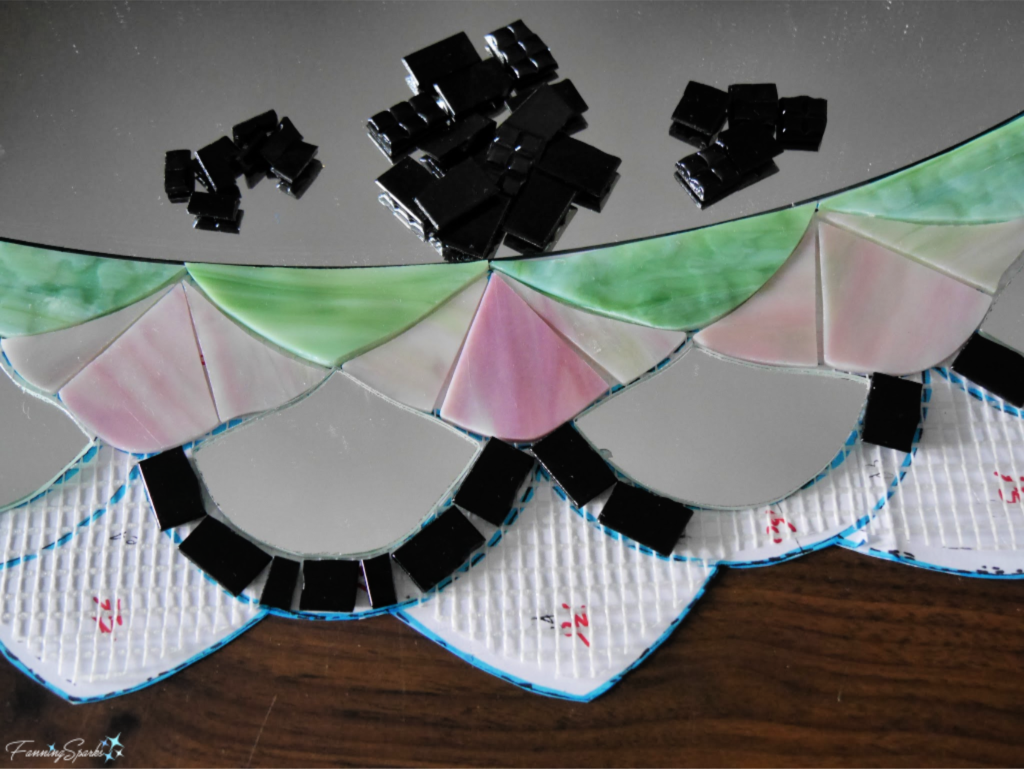
Lucky for me, I’ve had lots of practice cutting glass for my various glass mosaic projects.  This mandala-inspired oval mirror frame, for instance, involved cutting stained glass, glass mosaic tiles and pieces of mirror.  See My Mandala-Inspired Oval Design.
Mandala-Inspired Mosaic Mirror Frame. @FanningSparks
Building Up the Design with Cut Glass. @FanningSparks
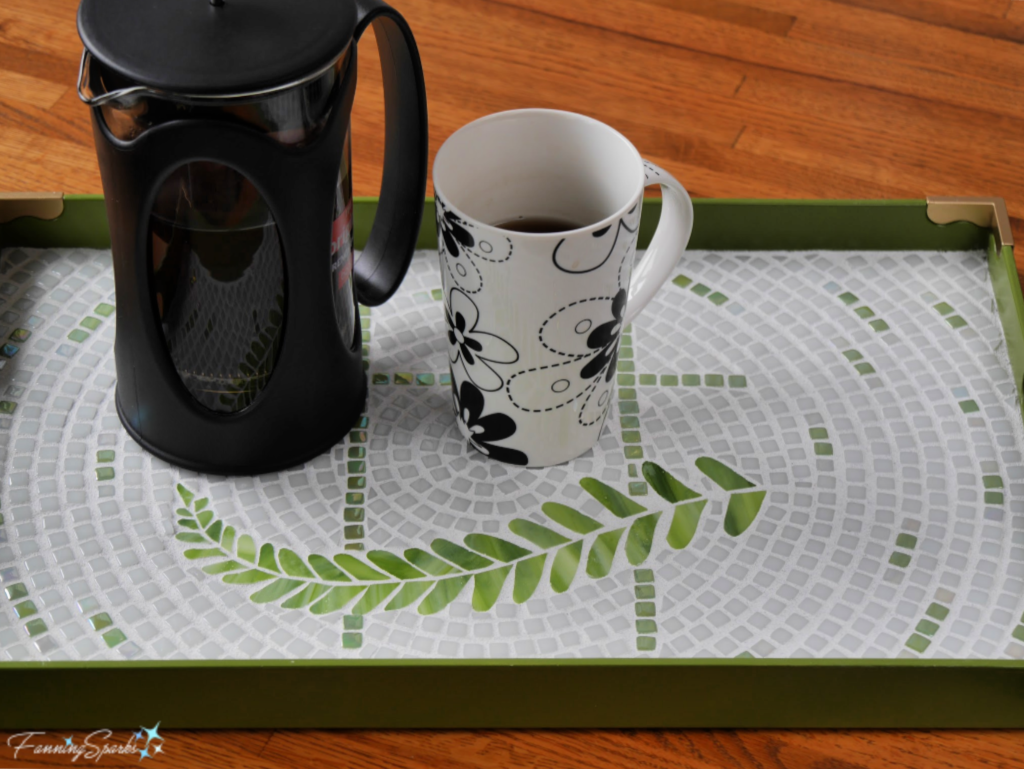
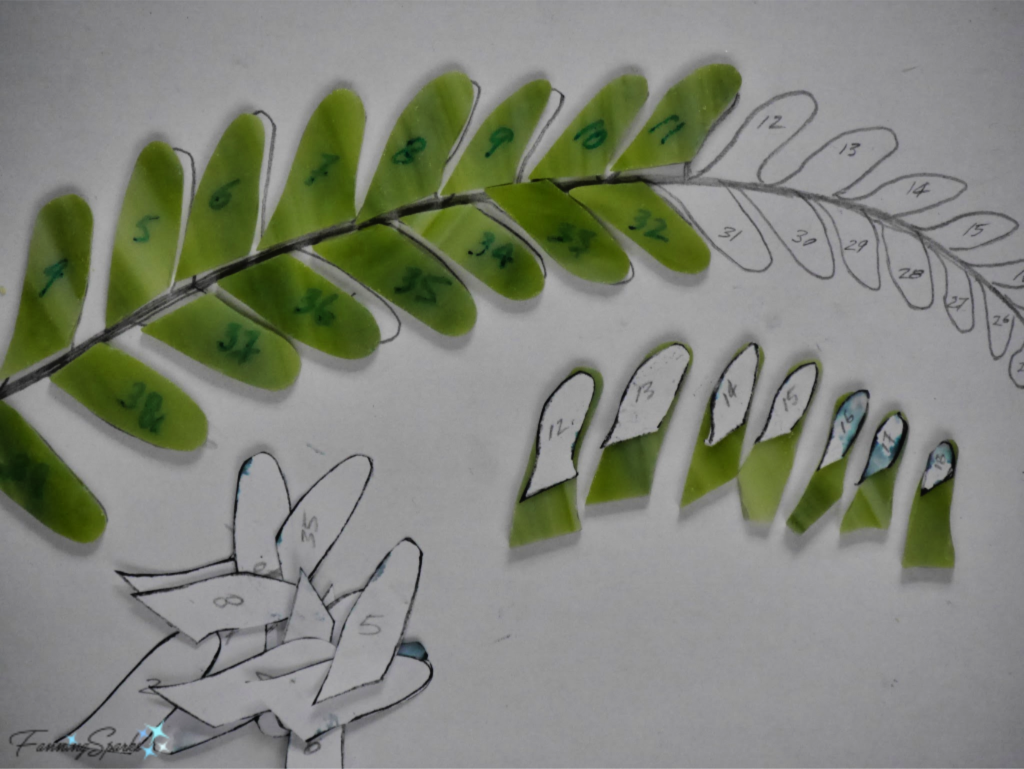
My one-of-a-kind mosaic serving tray was covered in glass mosaic tiles and embellished with a stained glass fern frond.  The trick to accurately cutting tiny pieces is to smooth off the edges with an electric grinder.   See Serving Up My OOAK Mosaic Tray.
Coffee Served on OOAK Mosaic Tray @FanningSparks
Cut Pieces of Stained Glass for Fern Frond. @FanningSparks
Unfortunately, I didn’t have my grinder at the workshop so my edges weren’t as precise as I would have liked.  Regardless, the pieces fit together and the rough edges add a little character.  When fusing glass, a separate piece of glass is typically used as the foundation.  Then other pieces are stacked to be fused together by the heat of the kiln.  We secured our glass pieces with tiny dabs of glue.
Positioning Pieces for my First Fused Glass Project   @FanningSparks
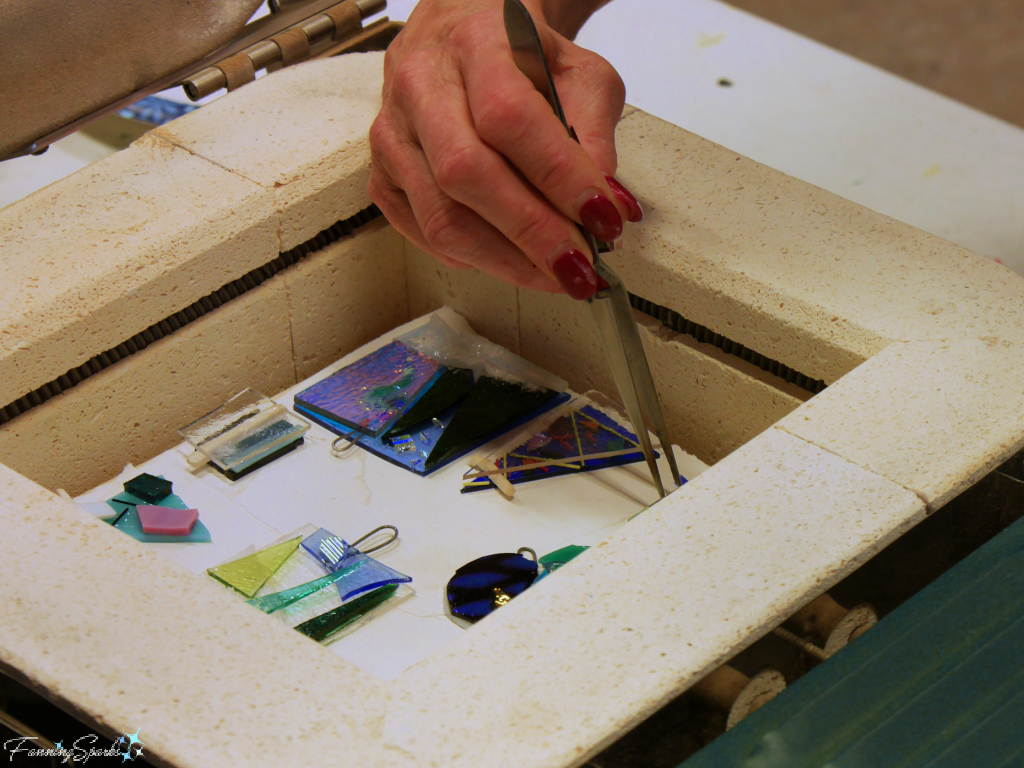
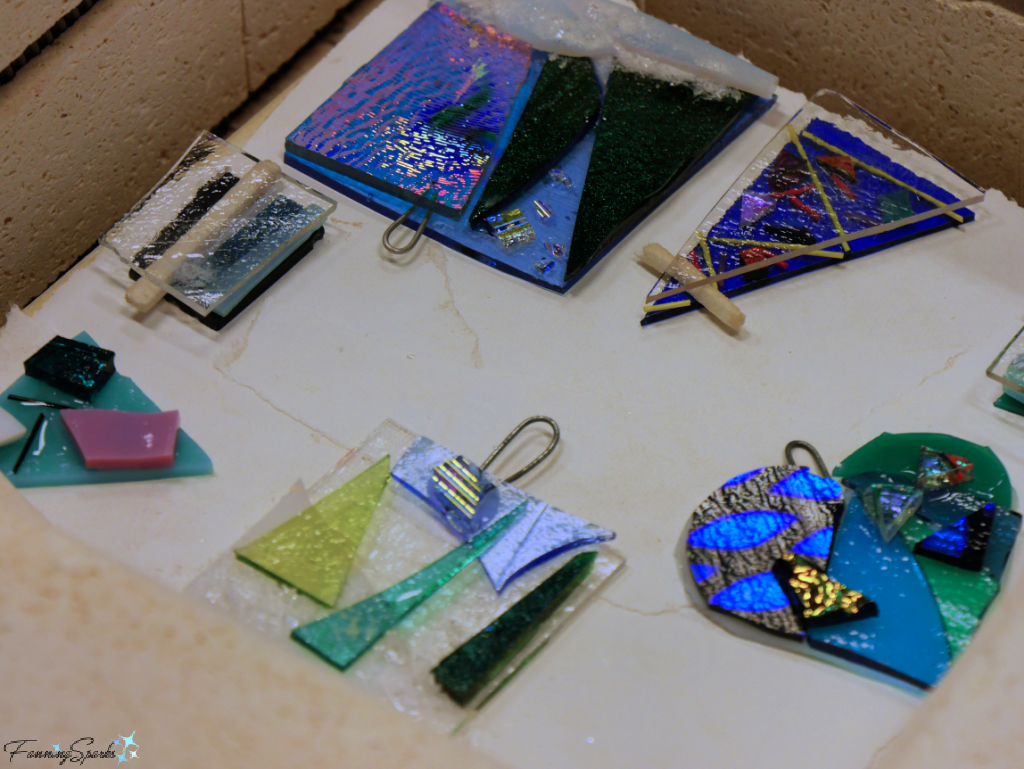
Our assembled pieces were placed in a small, tabletop kiln for firing.
Placing Fused Glass Pieces in Kiln   @FanningSparks
Student Projects in Kiln Ready for Firing   @FanningSparks
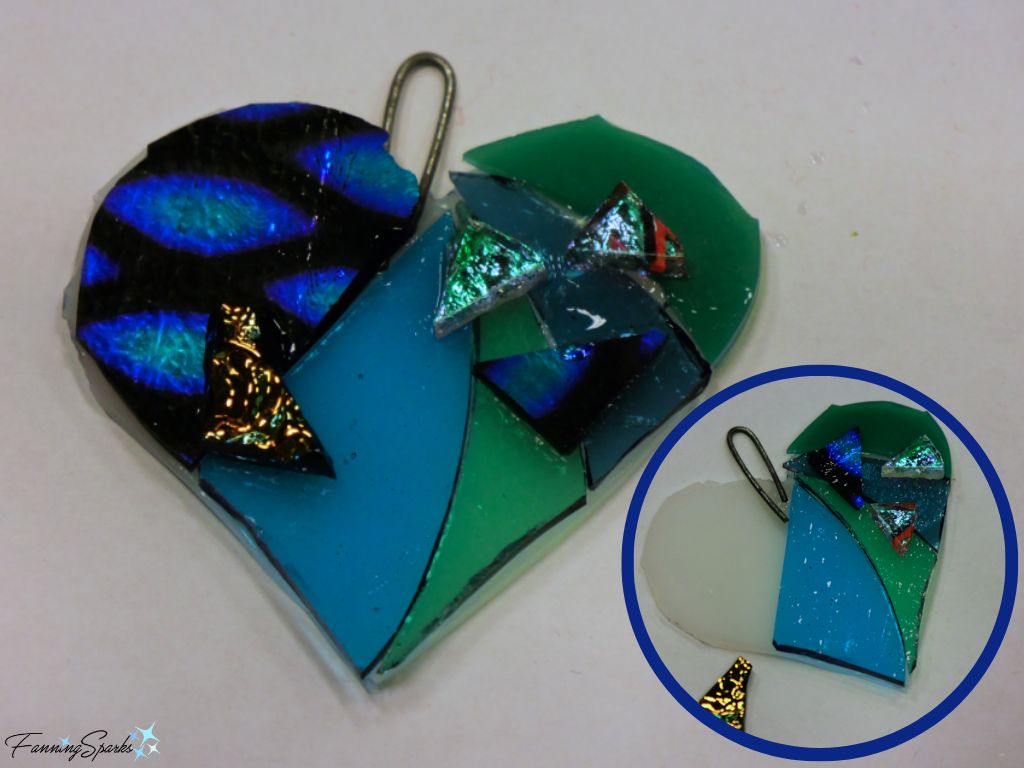
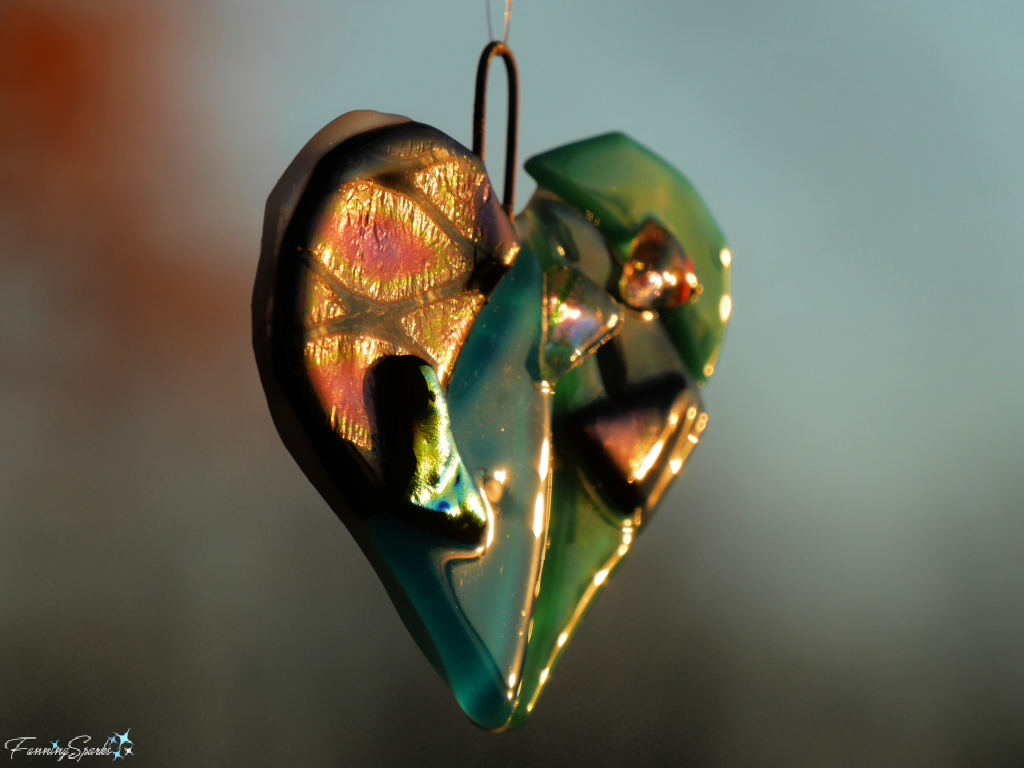
There wasn’t enough time to finish the firing onsite but it took only a few days to get our finished projects back.  They were definitely worth the wait!  Here’s my first fused glass project.
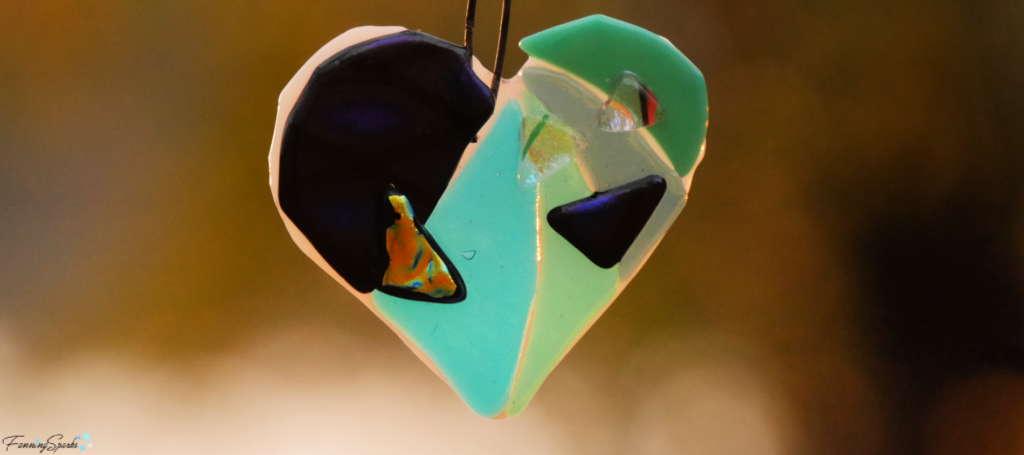
My Finished Fused Glass Heart in Morning Light   @FanningSparks
It’s not perfect but it sure is pretty in the sunlight!
My Fused Glass Heart in Sunlight   @FanningSparks

More Info

Check out my newest Pinterest board, Fused Glass – FanningSparks Favs, with over 175 examples of fused glass from small ornaments to fine art sculptures.
The following fused glass artists are mentioned in this blog post:
. Cat Martin  For more information about Cat and her beautiful fused glass, see the posts Peeking Behind the Studio Curtain or Add a Little Sparkle.  Contact Cat at CatMartinGlassArt@hotmail.com
. Russ Gilbert  For more information about Gilbert Glassworks, see the post A True Hot Glass Experience, the Gilbert Glassworks  and the Fusion Art Glass websites.
. Sharon McNamara and Paul Palango of KilnArt  For more information about KilnArt and Chez Glass Lass, see the Kilnart website.
The book, Creative Glass Techniques: Fusing, Painting, Lampwork, by Bettina Eberle is available here on the Internet Archive.
The Oconee Cultural Arts Foundation (OCAF), located in Watkinsville, Georgia, offers a variety of workshops.  You can learn more on the OCAF website.  Keep an eye out for more fused glass workshops by Patti Quinn.  She generously shares her knowledge and talent in a fun, relaxed setting.  Many thanks, Patti, for a great workshop experience!

Today’s Takeaways

1. Admiring the work of other artists is a great way to spark joy and foster inspiration.
2. Project ideas may take root immediately or may take time to sprout.
3. Consider seeking out fused glass art near you.
Peg - FanningSparks Author