
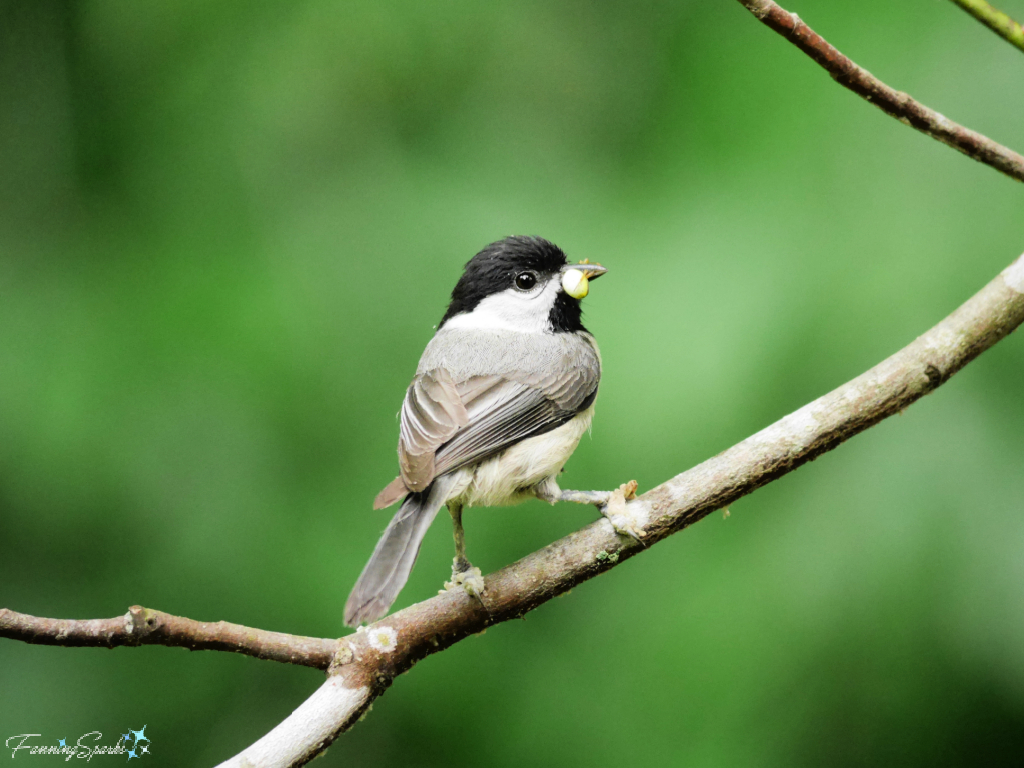
Earlier this month, I shared my plans to build a nest box from a gourd. Nest boxes are typically customized to meet the nesting needs of specific birds. In this case, I chose to target chickadees—those delightful, little black-capped songbirds. This is a Carolina Chickadee (Poecile carolinensis) holding a berry.
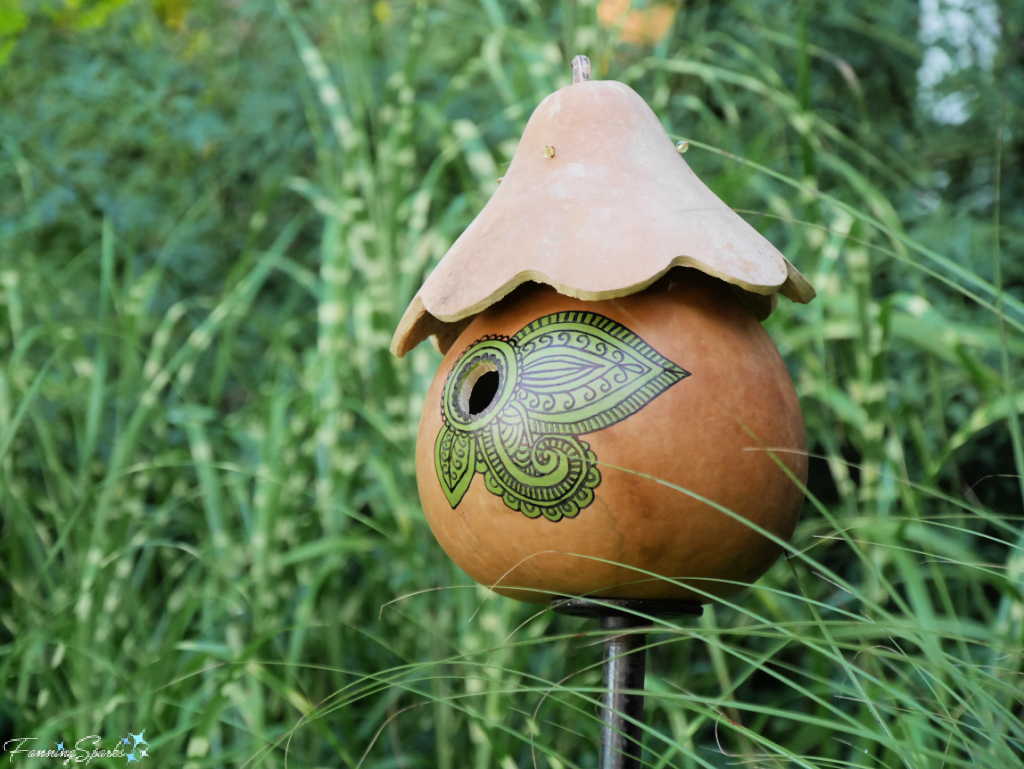
My new chickadee gourd nest box looks quite promising. However, the real test—whether breeding chickadees actually move in—won’t take place until the next nesting season. In the meantime, I’d like to share how I made this gourd nest box.
 The Cornell Lab of Ornithology’s NestWatch website provides specifications for various wooden nest boxes including those intended for chickadees. They specify, for instance, how big the interior of a nest box should be for the chickadee’s nest and hatchlings. They also specify the size of the entrance hole—it should be just big enough for a chickadee to enter and exit while keeping out predators and undesired birds. Check out my previous post, Are Gourds for the Birds?, for the full rundown on these specifications. Most of the NestWatch specs were easy to apply but I did have to find a few workarounds to compensate for the differences between gourds and wood.
My project started with a visit to a nearby gourd farm. Bug’s Gourd Farm is a small, family business in the beautiful countryside of Eastern Georgia. They had tons of dried, raw gourds to choose from.
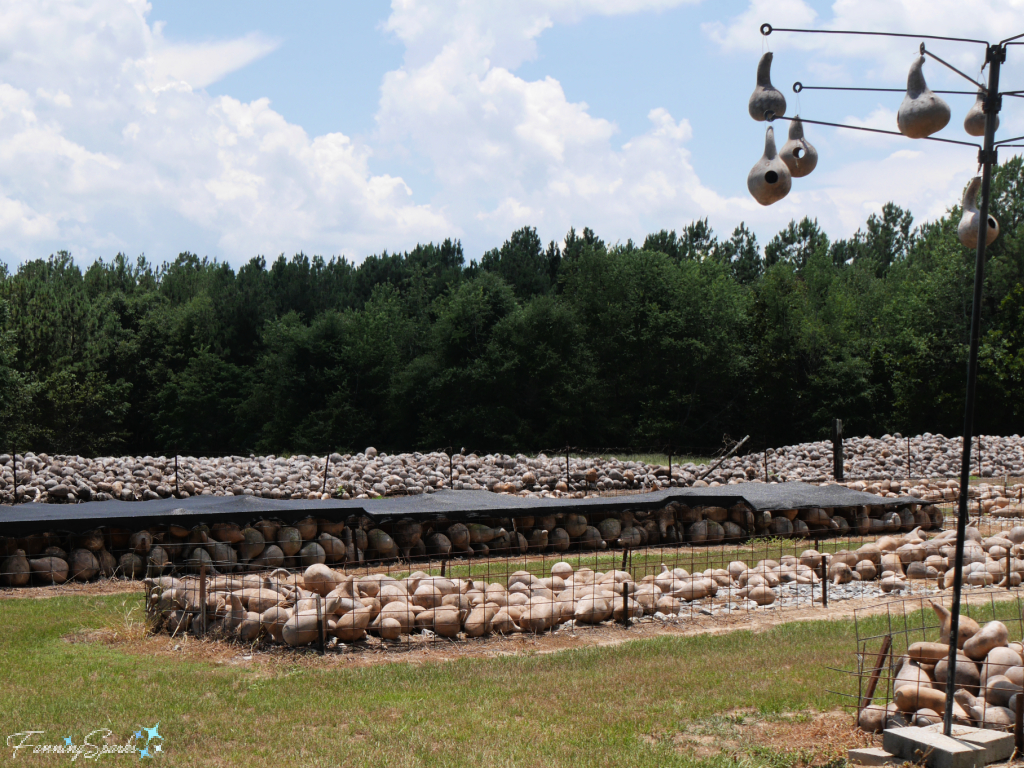
The folks at Bugs Gourd Farm were very helpful—answering my questions and helping me find just the right gourds (Thank you Ann!). They even gave me a few cracked gourds for practicing. The challenge was to find two gourds that would fit together—one for the main body and the other for a roof. Ideally, a nest box has a sloped roof with a 2-4” overhang on the front and a 2” overhang on the sides. I selected a martin gourd for the body (shown below left) and a kettle gourd (aka pear or teardrop gourd) for the roof (shown below right).

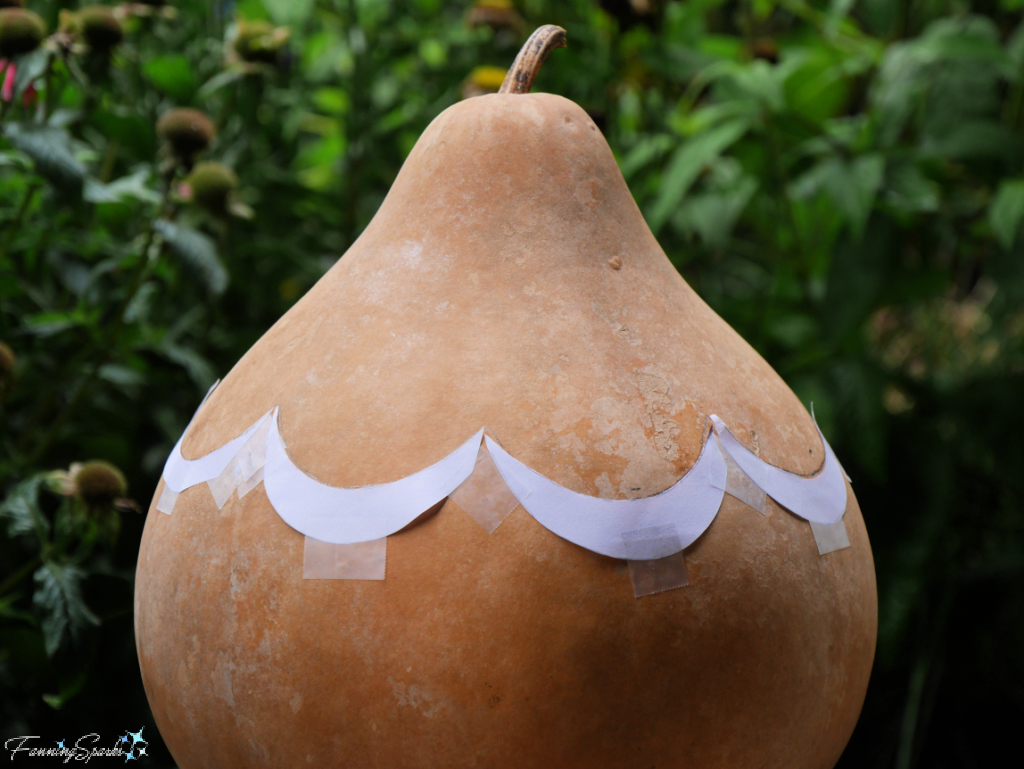
I decided to cut the roof section with a scalloped edge to add some interest. Paper templates were taped to the gourd to draw a cutting line.
It was easier to cut the scalloped roofline in two passes. In the first pass, I cut a straight line all the way around the gourd. In the second pass, I cut the indents for the scallops. Then with my safety respirator firmly in place, I used my Dremel sanding drum to shape the scallops and smooth the edges.
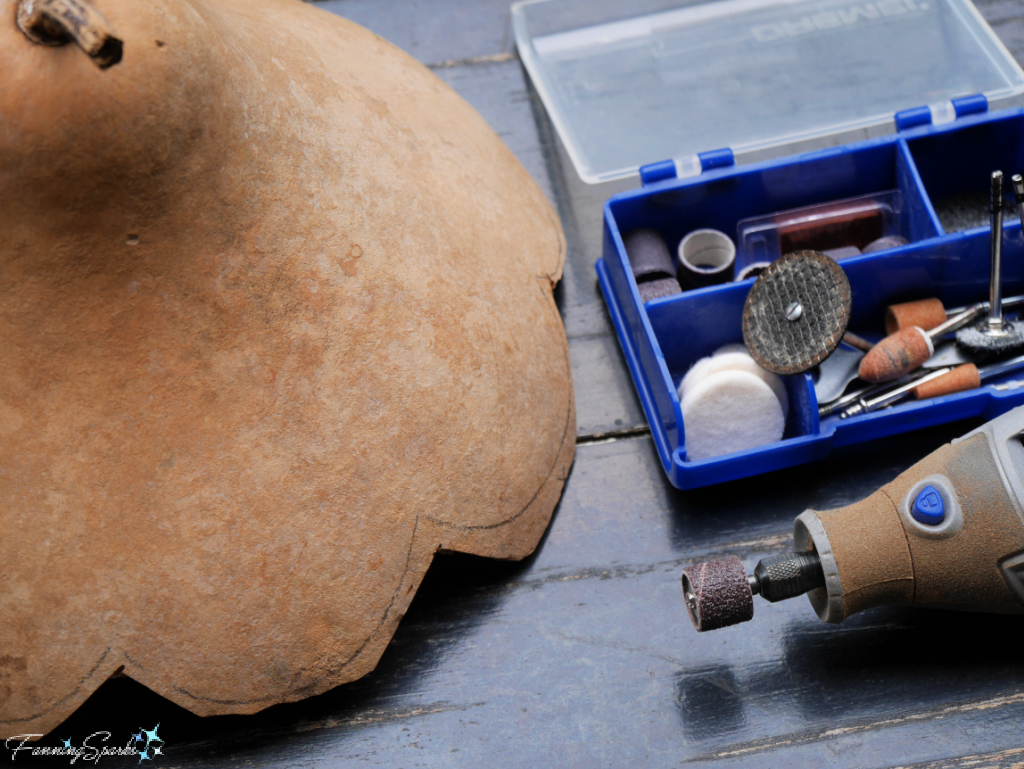 Since this was my first time cutting gourds, I had to try a few different tools and techniques to find a method that worked for me. The most popular method, according to my online research, is to use a miniature jigsaw specifically designed for cutting gourds. Two examples are The Caning Shop’s Gourd Saw and Welburn Gourd Farm’s Super Jigsaw Proxxon STS/E. Since I’m not quite ready to make this kind of investment, I decided to try using my Dremel with a cutting wheel. I was able to cut the gourd but it was awkward to use and resulted in a rough cut. I had better results with a scrolling saw blade in my regular DeWalt jigsaw. However, it was rather tricky to keep the jigsaw’s base plate snug against the gourd’s round surface.
The gourd’s shape also presents a challenge when securing the gourd for the cut. I used a combination of wood blocks and clamps to keep my gourd locked in place. This is where the scaled-down size of a gourd saw has a definite advantage—it is small and light enough to be used one-handed. It seems to be common practice to hold a gourd with one hand while using the other hand to cut with the gourd saw. Obviously, no matter which cutting tool is used, it’s critical to use it safely.
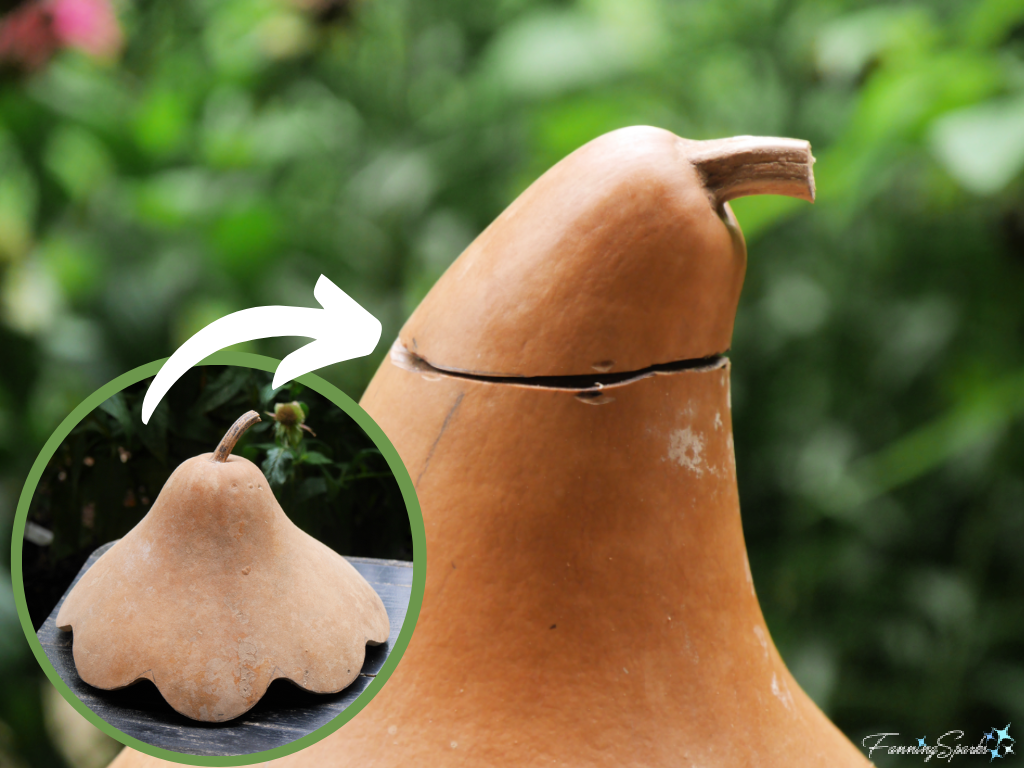
My next step was to remove the top, stem-end from the body of the main gourd to allow the roof to sit snuggly on top.
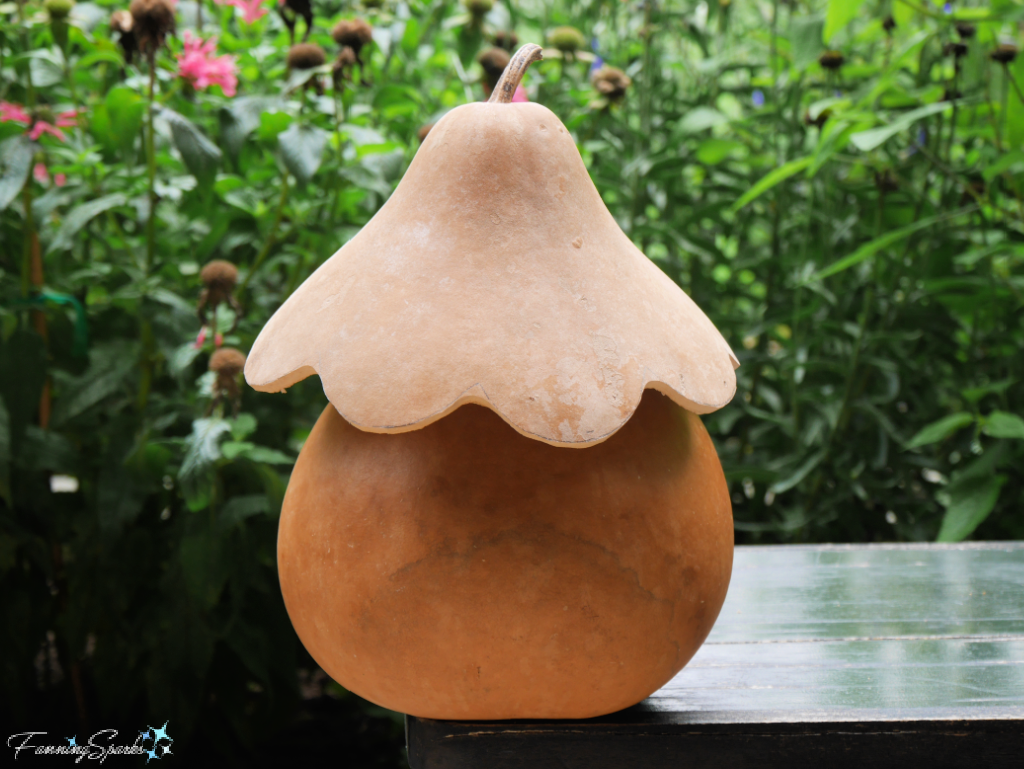
It can take a few tries to get the fit right. Here’s how mine looked with the roof sitting on the body.
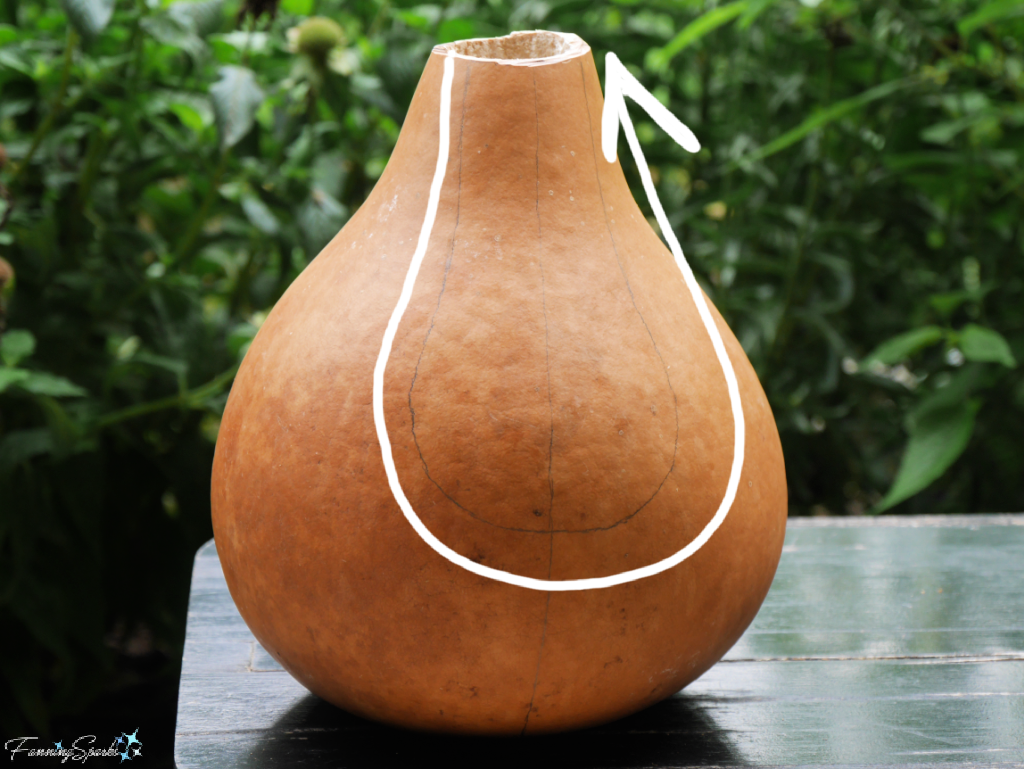
My next step was to make an access door for future cleaning and monitoring. After deciding which side would be the front of the nest box, I marked a long, narrow loop on the backside. It’s easier to start and end the cut at the top rim than to cut a free-standing hole. I cut carefully since the cutout section will be used to close the opening.
Here’s how I clamped the gourd into place so I could cut the door with my jigsaw.
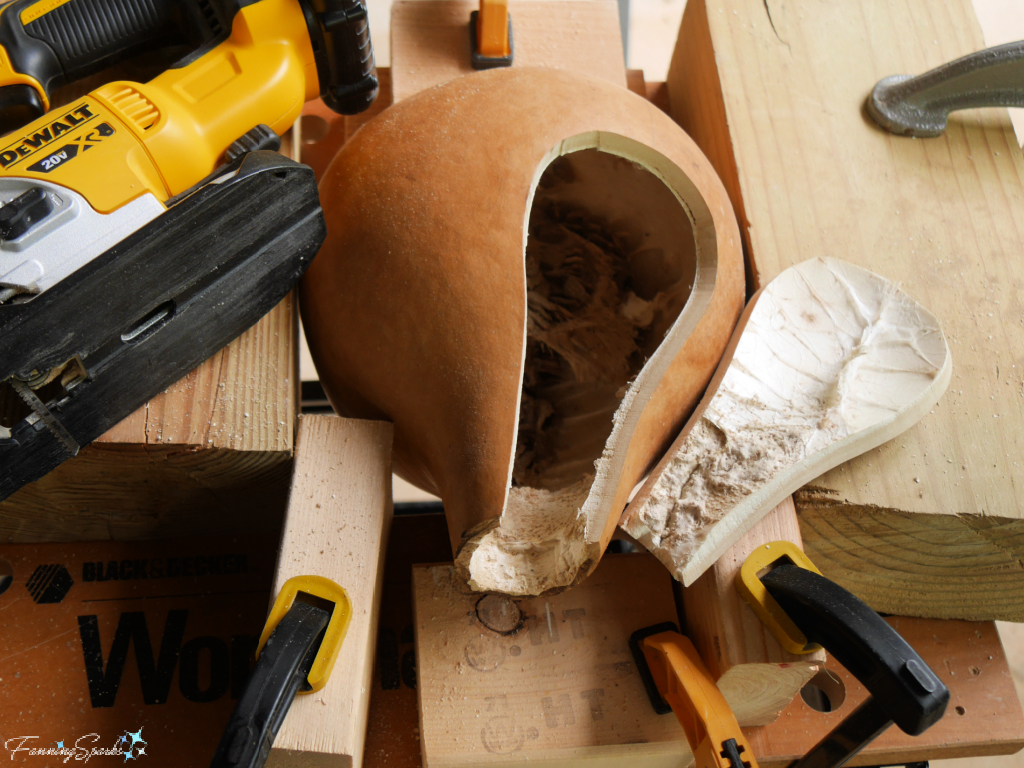
The door also provides easy access to remove dried seeds and fibers from the inside of the gourd. A round scoop or metal spoon can be used to scrap along the sides. It’s not necessary to remove every piece of fiber. In fact, it’s preferable to leave the inside of the gourd a little rough to help future nestlings climb out of the nest box.
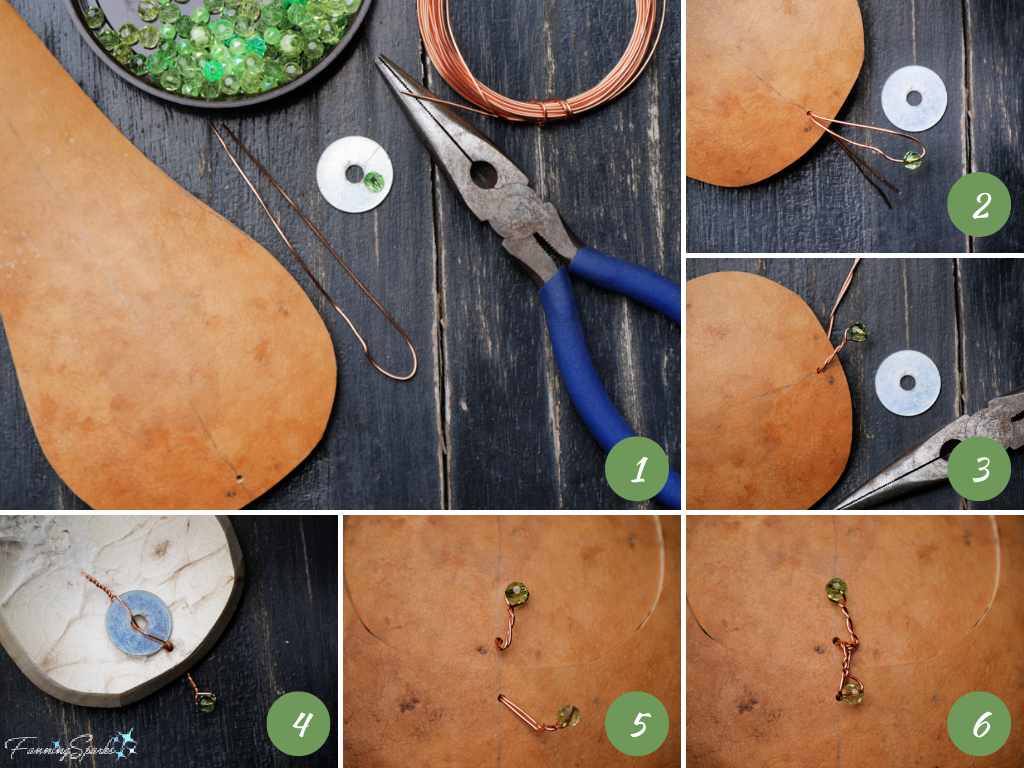
The top edge of the door will slip neatly under the roof section. Therefore, all that’s needed to keep the door in place is a closure at the bottom. I made a closure with two pieces of wire, two beads and two 1” metal washers. The steps are illustrated below.
1. Drill a hole in the door and the wall. Cut a length of wire and bend it in half.
2. Slide a plastic bead onto the wire. Insert the ends of the wire through the hole in the door—from front to back—leaving about 1” of wire on the front.
3. Twist the wires between the bead and the door.
4. On the inside of the door, slip a 1” flat washer onto the wires, crisscrossing the wires through the hole in the center. Twist the ends of the wires to tighten and bend them out of way.
5. Repeat for the corresponding hole in the wall of the gourd.
6. To close the door, simply twist the two beaded wires together.
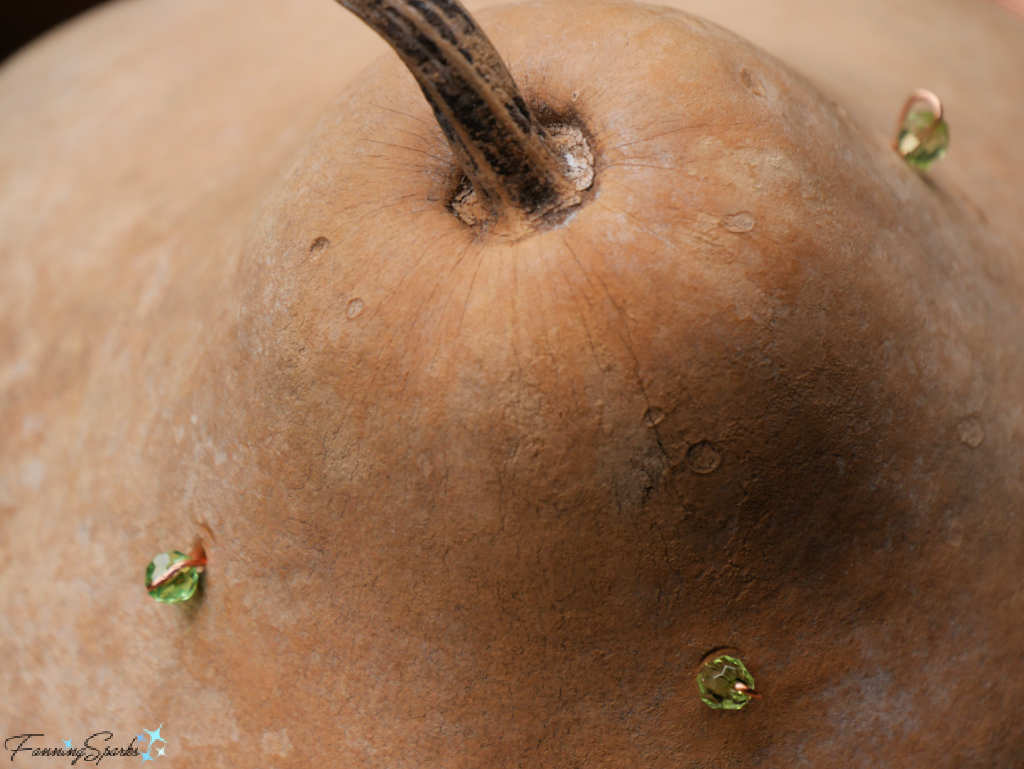
The roof was attached with a similar approach. I set the roof in place and carefully drilled through both the roof and body gourds. Working from the inside of the main gourd, I pulled a piece of wire through both holes to the outside, slipped a bead onto the wire, and pushed the wire back inside the gourd. Then I threaded the ends of the wire through a washer and twisted the wires to tighten them. All the mechanics are nicely hidden inside the gourd with only 3 small beads visible on the roof.
The final construction step was to bore holes for the entrance, drainage and ventilation. The NestWatch specifications called for an entrance hole with a diameter of 1⅛”. After trying a few test holes, I settled on using a 1” hole saw drill bit to bore the initial hole and then sanding the edges out to the desired 1⅛”. A round wood file worked well for this step. Alternatively, a Dremel sanding drum could be used.
Four ⅜” drainage holes were drilled around the bottom of the body gourd. Four ⅝” ventilation holes were drilled up under the roof towards the top edge of the body gourd. In hindsight, it would have been easier to drill the ventilation holes before attaching the roof.
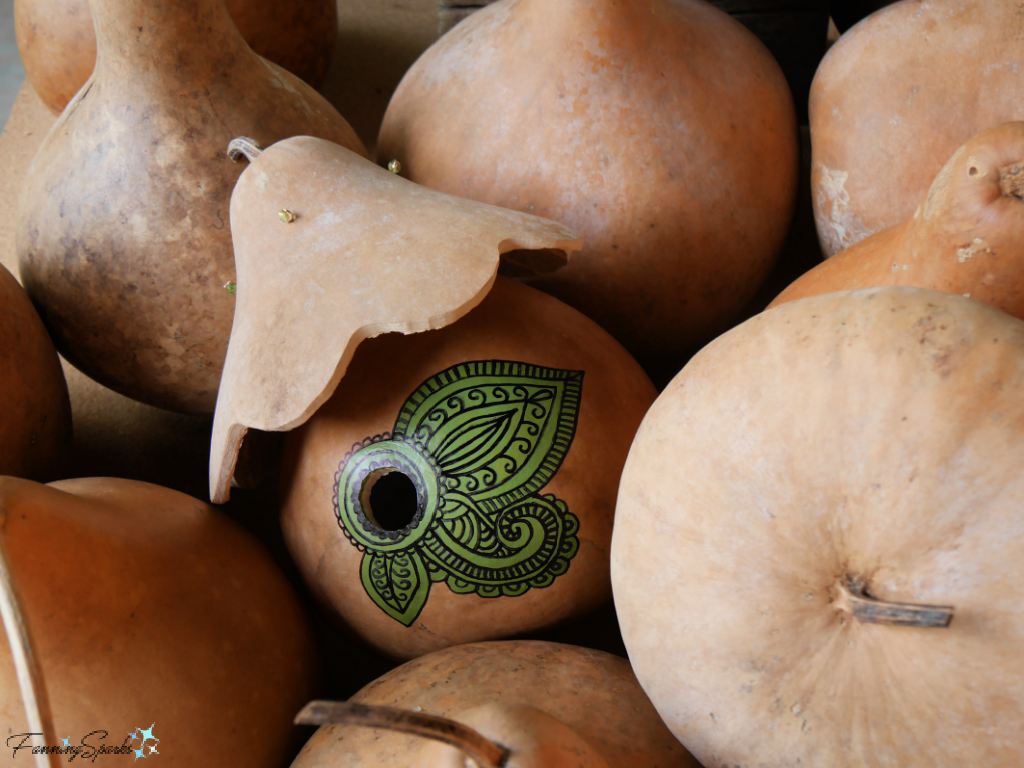
The NestWatch specifications state nest boxes should be made with untreated and unpainted wood. Thus, I left the gourds untreated. I could not, however, resist the temptation to embellish the front with a painted design. I chose exterior paints because the gourd house will be exposed to rain, sun and changing temperatures. The base is simply interior/exterior paint from Behr custom mixed in my favorite shade of moss green. The black outlines are done with a Sharpie Extreme Permanent Marker—markers designed to withstand UV rays and the other rigors of weather.
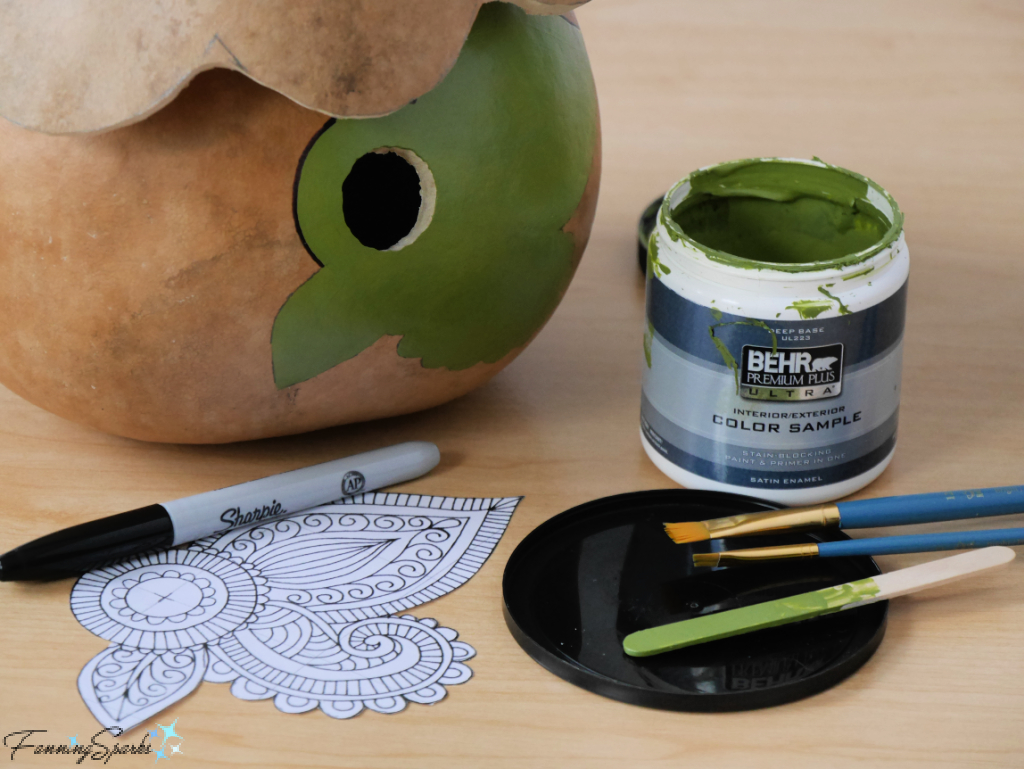
Transferring patterns to the gourd can be difficult due to its curved surface. I found cutting my paper pattern into small, manageable sections and taping them to the surface individually made it easier. A regular lead pencil and a white plastic eraser worked well for this step.


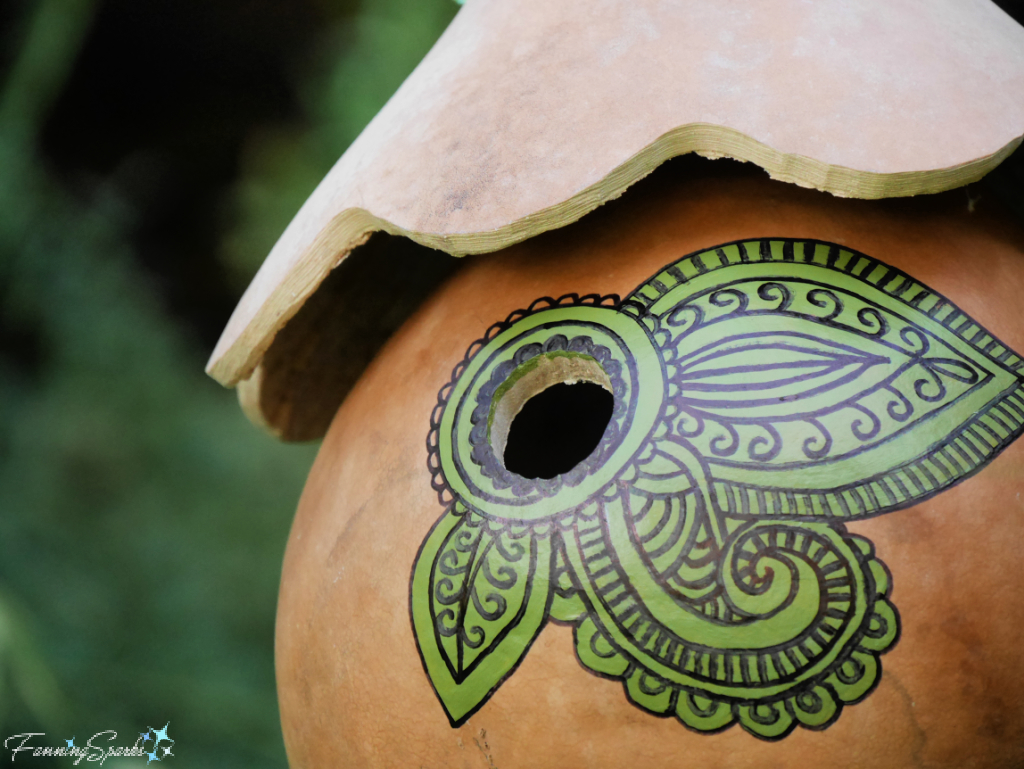
Here’s how the decoration turned out.
As recommended by the NestWatch website, I used a metal pole to mount my nest box. It is a 5-foot length of ½” black steel with a threaded end. After finding the bottom center of the nest box, I used wood screws to attach a 3” metal floor flange to the nest box. Then the metal floor flange was attached to the pole. These components were found in the plumbing department at my local Home Depot store. A predator guard, such as a metal collar or section of stovepipe, can be added to the metal pole.
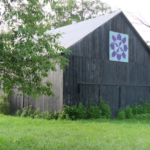
The final step is to select a site the chickadees will like. Chickadees nest in dense natural habitat, such as thickets of small trees, so the recommended placement is 4-8’ high in a stand of small trees. I plan to install my nest box in a shaded area to help keep it cool.
After selecting my final site, I will use a 2-foot piece of steel rebar to secure the metal pole in place. I’ll push the rebar into the ground ensuring it is plumb and slip the metal pole over the rebar.
 And then I must wait! While chickadees may check out my new gourd nest box over the next months, I won’t know until next nesting season if any chickadees will take up residence and start a family!
More Info
See my previous post, Are Gourds for the Birds?, to learn more about cavity-nesting birds and NestWatch recommendations for birdhouses and nest boxes.
The NestWatch website, by The Cornell Lab of Ornithology, has many great resources for bird enthusiasts.
Bug’s Gourd Farm is located in Keysville, Georgia, USA. You can learn more on their website.
More information about the gourd saws mentioned in this post can be found on The Caning Shop website (see Gourd Crafting > Supplies & Tools) or the Welburn Gourd Farm website (see Tools & Supplies > Jigsaws and Jigsaw Blades).
Today’s Takeaways
1. Consider using a gourd to make a nest box.
2. Customize your nest box to the size and preferences of the birds you wish to target.
3. Advance planning and patience are needed to attract nesting birds to your surroundings.


Comments are closed.