
Instagram may just be the best way to discover outstanding artists and their work. Over the last few weeks, I’ve found dozens of talented linocut printing artists and so much inspiration!
Let’s take a look at a few of the artists I’ve been admiring. They all specialize in linocut printing but they have a variety of styles and areas of focus. For instance, some carve linocut blocks to create fine art prints and illustrations.
Andrea Wisnewski and Running Rabbit Press, in New England USA, specialize in hand-colored linocut prints, greeting cards and custom work. This delightful illustration is called Charley.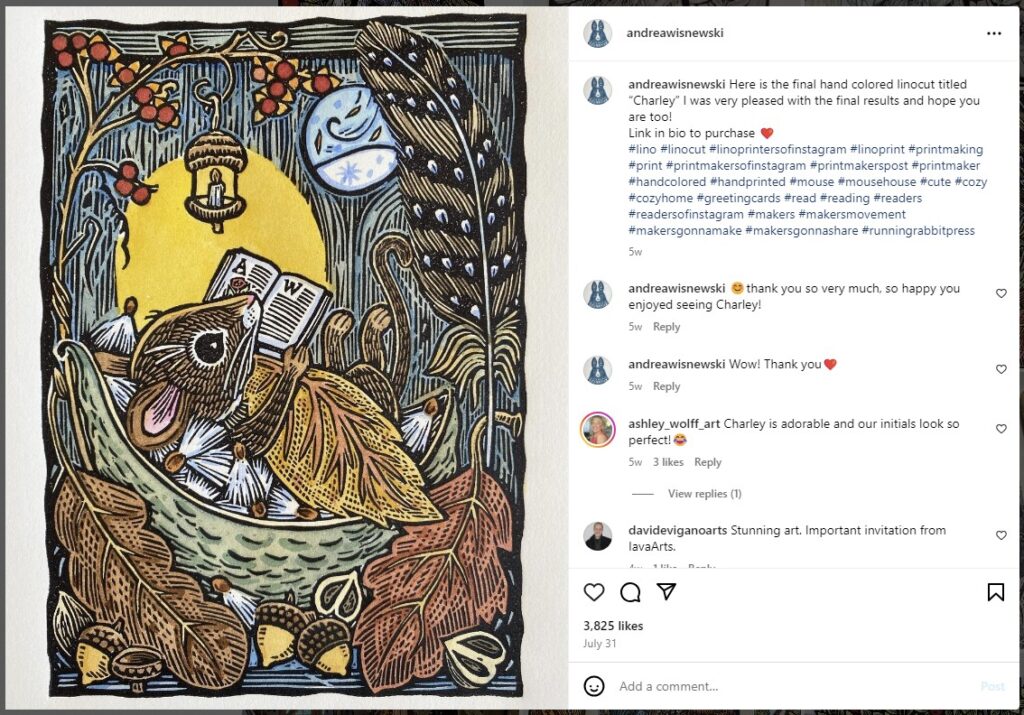
Anna Hermsdorf, from Herne Germany, creates handmade linocut prints in vibrant colors. I love her Gardener Girl Rosemary print.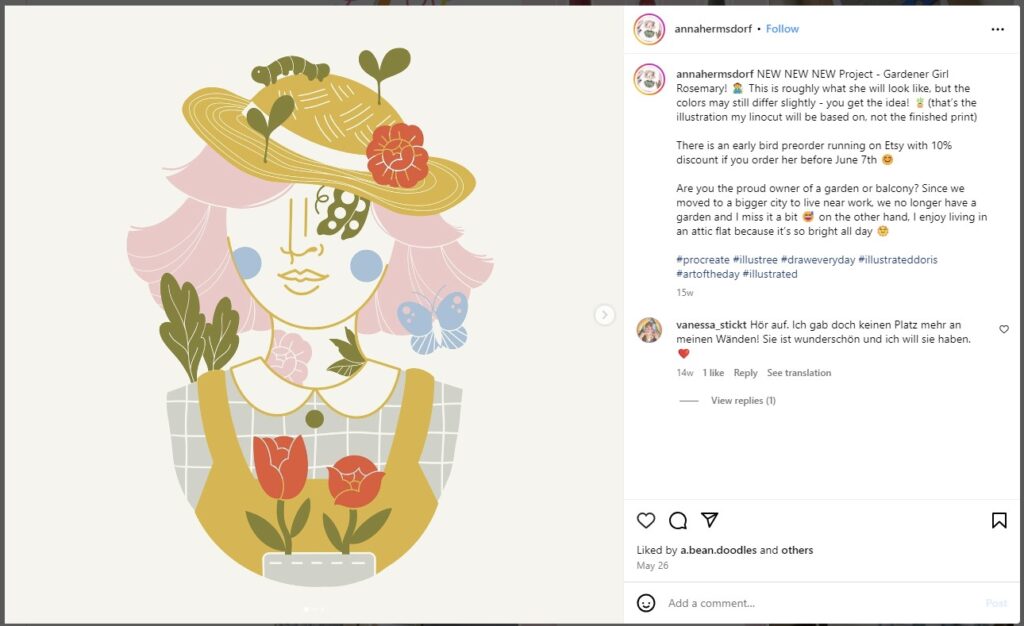
Angela Harding is a printmaker and illustrator from Rutland UK who draws her inspiration from the flora and fauna of the British countryside. On her website, she says “In particular I love familiar garden birds, like the gaggle of sparrows that live in the ivy at the front of the house or the blackbirds that seem to feel they own the garden”. This piece is called Whippet Wonderland.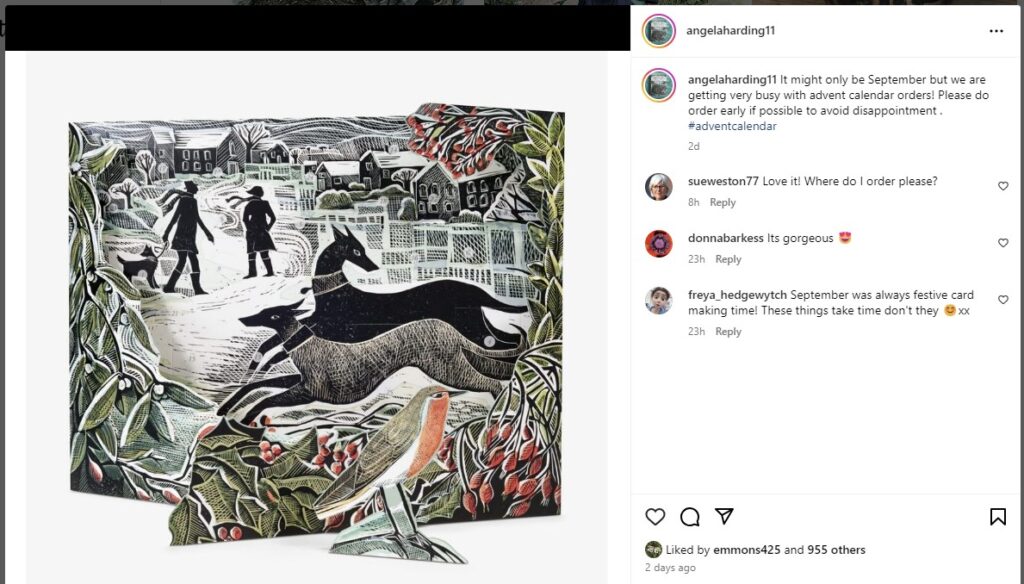
Some linocut artists focus on repeating patterns and create works of art on paper and fabric. Here are a few of my favorites.
SRM Prints, Sarah Reed McNamara, creates linoleum block prints and textiles. She is a “printmaker, stitcher and art historian living and dreaming in Rockford, Illinois!” says her Etsy shop.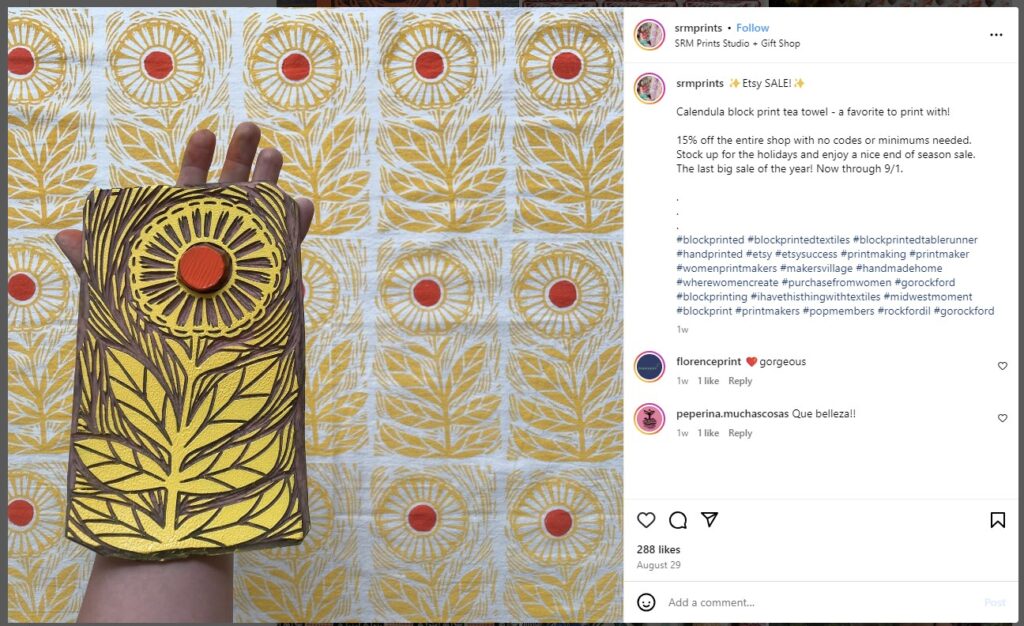
Margarts, Margaret Molinari, is a surface designer from New York/ Maryland USA whose “art combines [her] love of drawing, sewing & printmaking”. She never fails to amaze with the patterns she creates with fruit, vegetables and ordinary, found objects.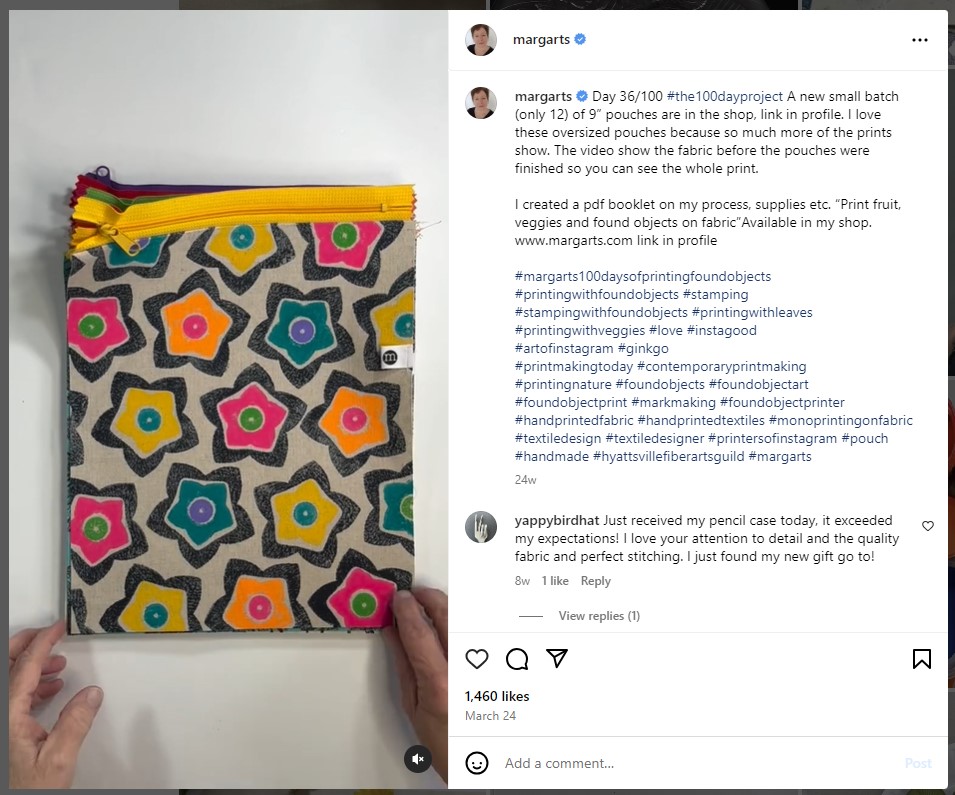
Annamay Handprinted, Julia Maetzl, is a textile artist from Vienna, Austria. They specialize in hand-printed fabrics and elegant home accessories made from sustainable materials and environmentally friendly textile dyes. This pattern is called Tiki Fish.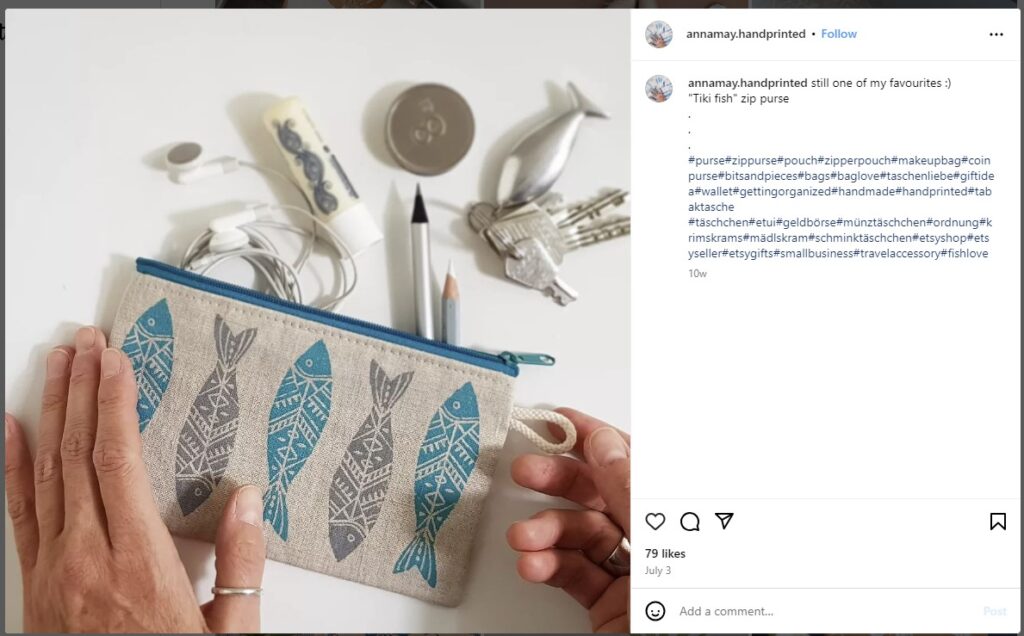
Check the More Info section below for links to these artists as well as a long list of additional linocut printing artists to admire.
Inspired by all this stellar work, I’ve been experimenting on my own. The challenge of printing fabric with linocut blocks can be a little overwhelming for someone just starting out. There are so many aspects to consider―from the creation of the design motif, to the repetition of that motif into an interesting pattern, to the carving of the linoleum, to the selection of the fabric and ink, to the mechanics of the actual printing. Thanks to the Atlanta Printmaking Studio workshop I attended recently, I’m getting more comfortable with the basics.
I’d like to share a few of the designs and techniques I’ve tried as well as document some of the things I’ve learned for future reference. My findings are grouped into three categories: Repeating Patterns, Carving Techniques and Multi-Color Printing.
Repeating Patterns
A design pattern is a discernible regularity where motifs or elements repeat in a predictable manner. It’s not difficult to create a simple, one-directional motif and then repeat it in a square grid pattern (aka full drop or block pattern) with the motif neatly stacked in rows and columns. But that may not result in the most interesting design pattern. See my previous blog post, Surface Design Inspiration, for a deeper dive into some of the layouts surface designers use to create patterns.
A diamond pattern repeat, for instance, is created with a diamond-shaped motif which is arranged in diagonal rows. I was quite pleased with the pattern repetition created with this simple six-petaled floral motif. 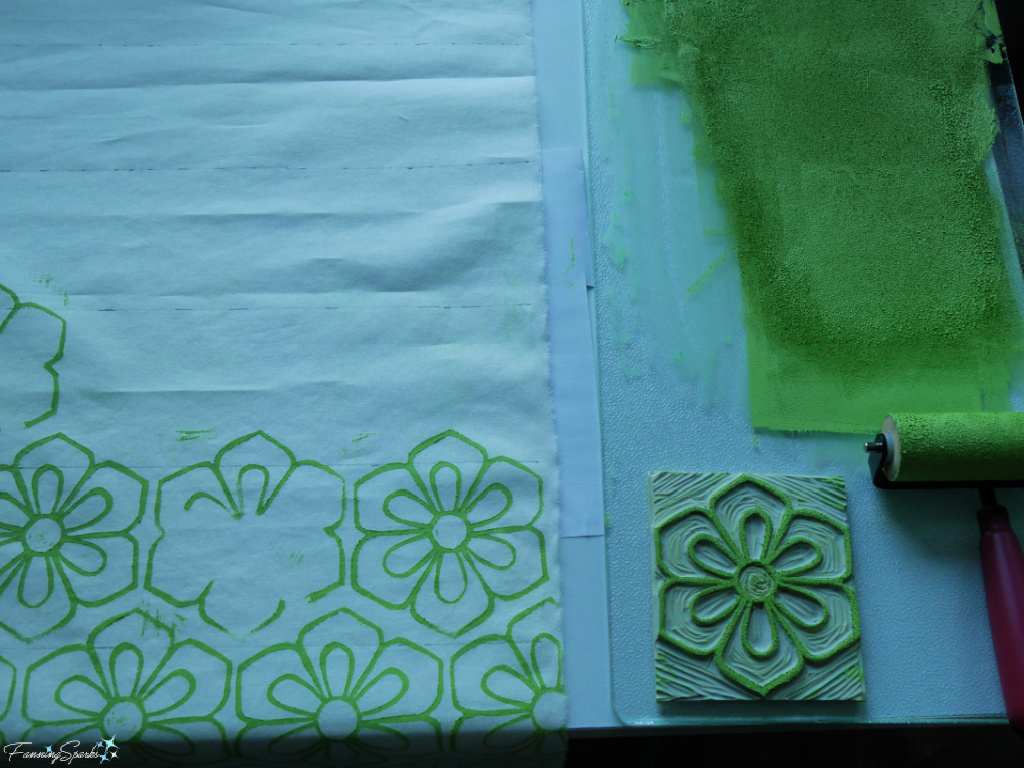
One lesson I learned was to test my designs with paper cutouts before carving them in linoleum. The first block I carved, a 5” square, was too big and unwieldly. So, I redid it on a 3½” x 4” block―which worked much better. This is the revised design.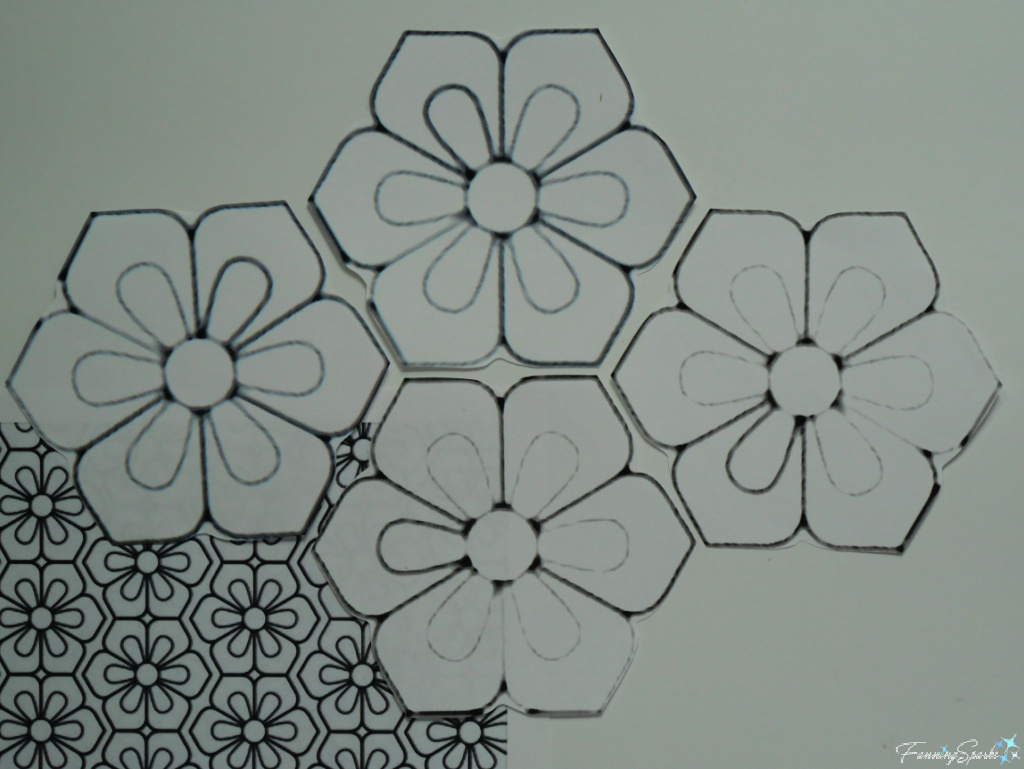
The next lesson I learned was to measure and mark for more precise printing. I used my favorite Pilot Frixion Erasable Marker Pen to draw horizontal lines on my fabric. Then I aligned the bottom edge of the linocut block with this line before each print. 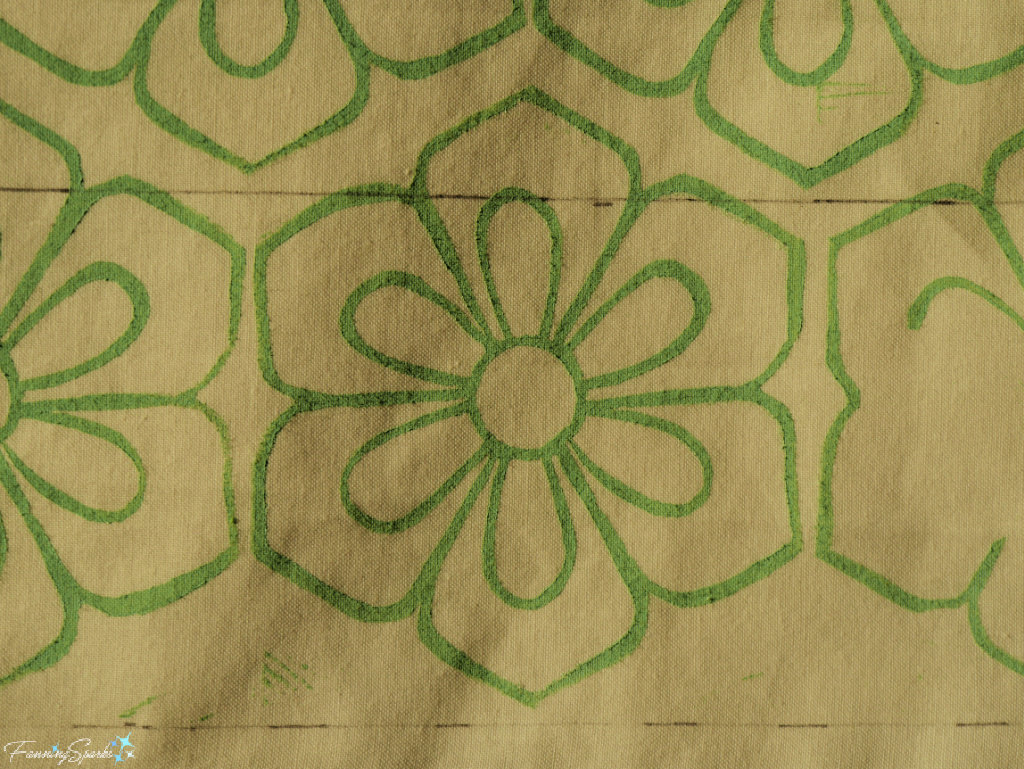
Ironically, despite my careful planning, I messed up my pattern in the third line on this piece. I overlooked my guidelines and placed the block in the wrong spot―throwing off the repeat. So, the real lesson here, is to mark and pay attention!
Talented surface designers turn design motifs into seamless repeated patterns. Nowadays, this is done digitally with design software. But it can also be done the old-fashioned way by sketching and folding on paper.
Step 1. Start by folding your paper into 16 even sections―simply fold in half horizontally, fold in quarters horizontally, smooth out, fold in half vertically, and finally fold in quarters vertically.
Step 2. Smooth out your paper and sketch your design in the center keeping away from the edges.
Step 3. Fold the outside edges of the paper horizontally, and working on the back folded sections, extend the sketch across the outside edges. Repeat, with the paper folded horizontally.
Step 4. When you smooth out the paper again, you’ll see incomplete sections of your sketch along the edges. 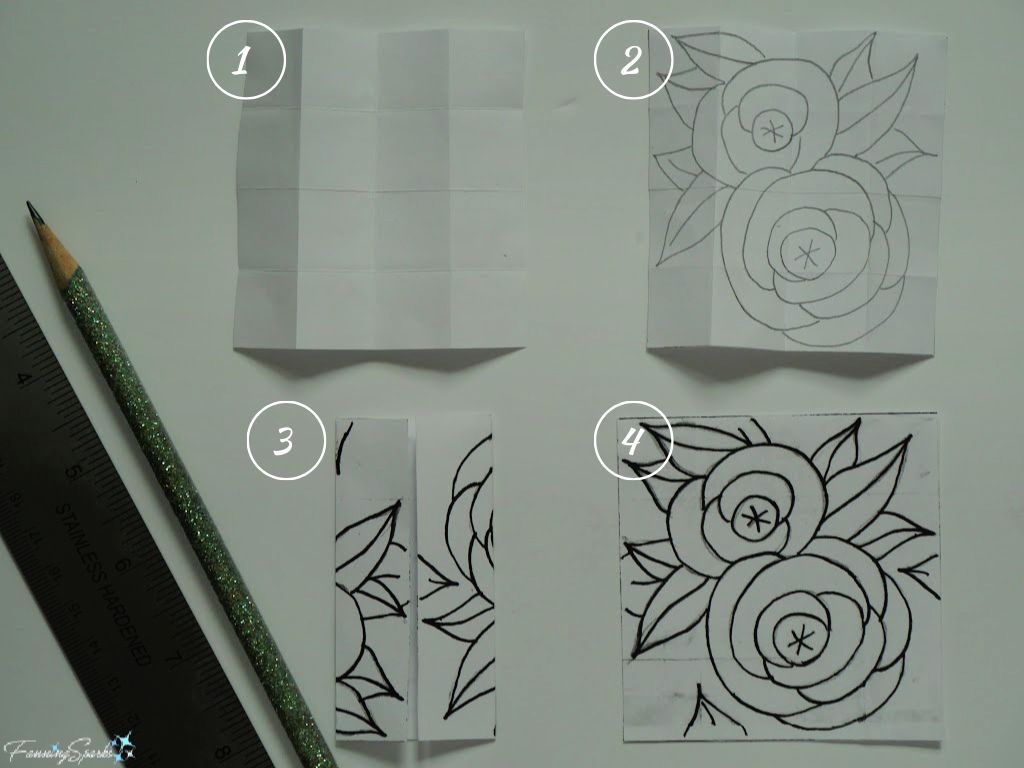
While this technique creates a nice repeating pattern, it’s not ideal for linocut block printing (at least, not for a beginner like me) because it requires very precise placement during the printing process. Here’s how my peonies turned out―the leaf tips (called out with the white circles) didn’t quite match the way I intended. 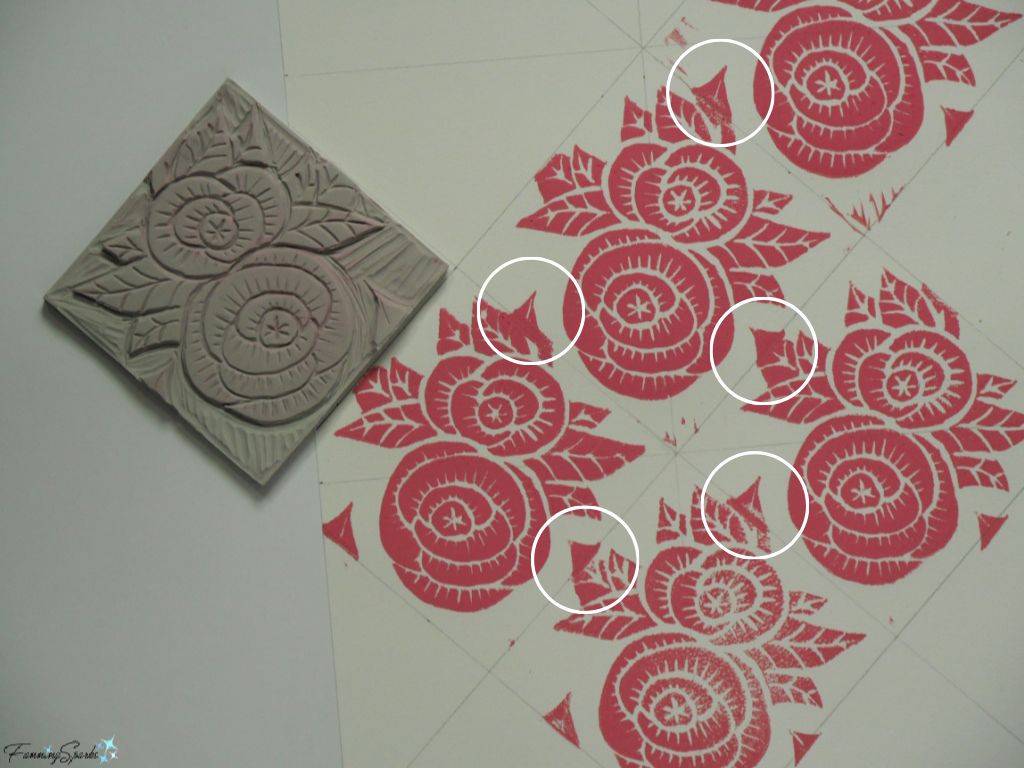
My second attempt with the peony motif turned out much better. I removed the leaves on the edges and simplified the peony petal treatment. To my eye, this version is much better―crisper and cleaner.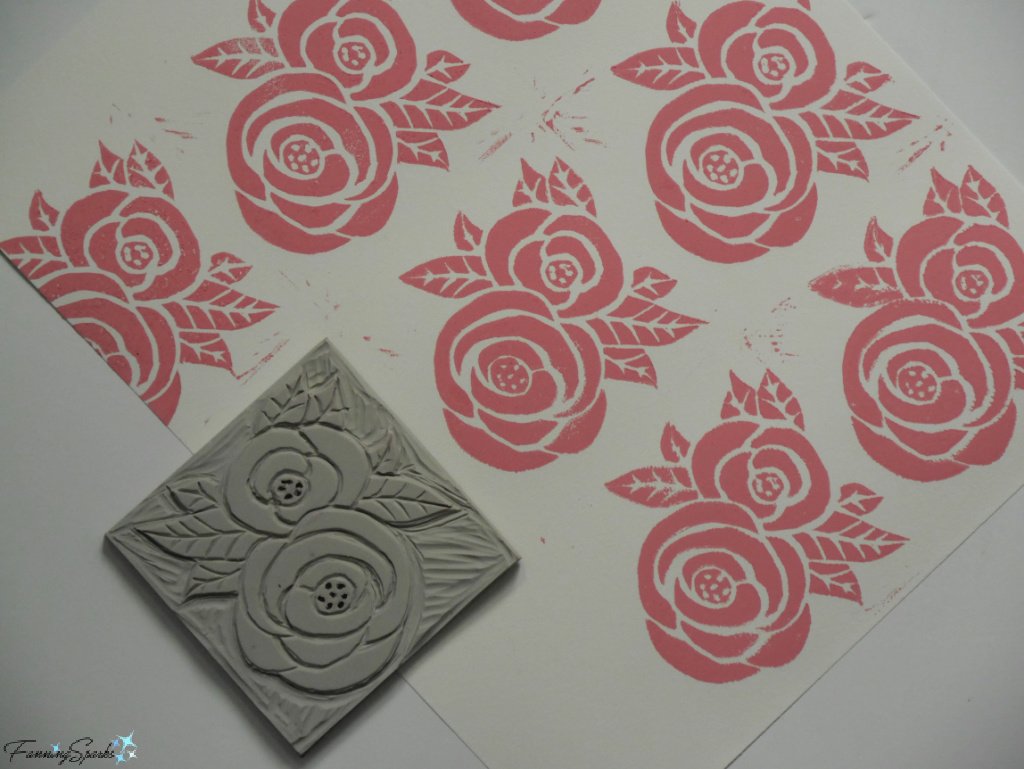
One of the many things I learned at the Atlanta Printmaking Studio workshop was to arrange a design motif diagonally on the linocut block. This allows you to maximize the design space and create a dynamic repeating pattern. The idea is to print your block in groups of four, turning the block 90° for every imprint. Here’s my first attempt using this technique―I’m thrilled with the results!
Carving Techniques
This next point may seem obvious but it took me a few tries to realize it’s an important design decision that should be made upfront. Before you start carving, consider if you want your motif, or elements within your motif, to be outlined or solid. The outcome can differ significantly as illustrated with these two versions of a butterfly. 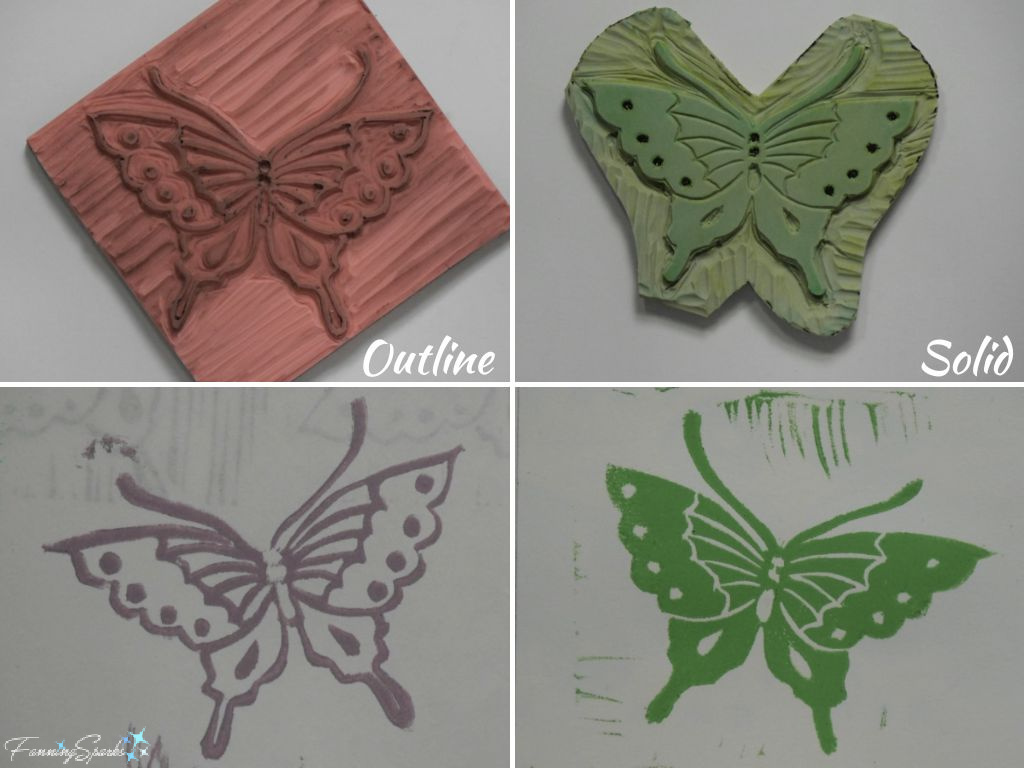
Another design decision that should be made upfront is line thickness―do you want light or heavy lines? Shown below are two examples. Notice how the interior lines on the butterfly’s wings are thin and light while the interior lines on the rose petals are thick and heavy. 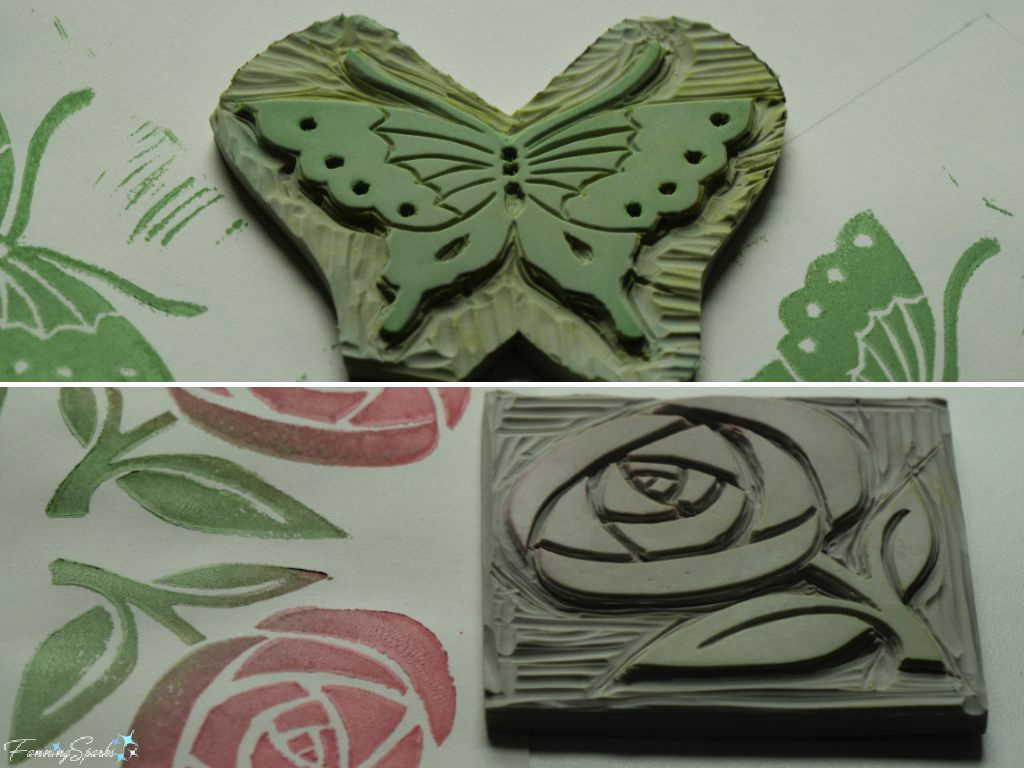
Sometimes, the right tool can make all the difference. For instance, I struggled to cut the tiny circles in my butterfly wings (see previous photo) using my Speedball Lino Cutter Set carving tools. Then I remembered the brass round hole cutters (a 3-piece set from Chinese Clay Art) which I used when working with clay. The clay hole cutter worked perfectly on the linoleum and produced neat, clean round holes.
Multi-Color Printing
Color is an important consideration for linocut printing because, typically, every color requires an additional impress. Careful planning and precise execution are needed to ensure everything aligns as intended. That’s probably why most beginner projects are printed in only one color. But, if you’re anything like me, it won’t take long before you’ll start thinking about how to incorporate more color.
Before I get into options for adding color, I’d like to offer a suggestion to stock up on white ink. I’ve been using Jacquard Screen Printing Inks in red, yellow, blue, white and black. My plan was to mix any additional colors needed. It wasn’t a bad plan but, because every ink preparation starts with white ink, I drastically underestimated the amount of white ink required.
One technique for adding color to a linocut print is color blending. I described this technique in my previous blog post, Linocut Printing at the Atlanta Printmakers Studio, so I won’t repeat it here.
Color blending, with green and pink ink, worked well on this rose motif. 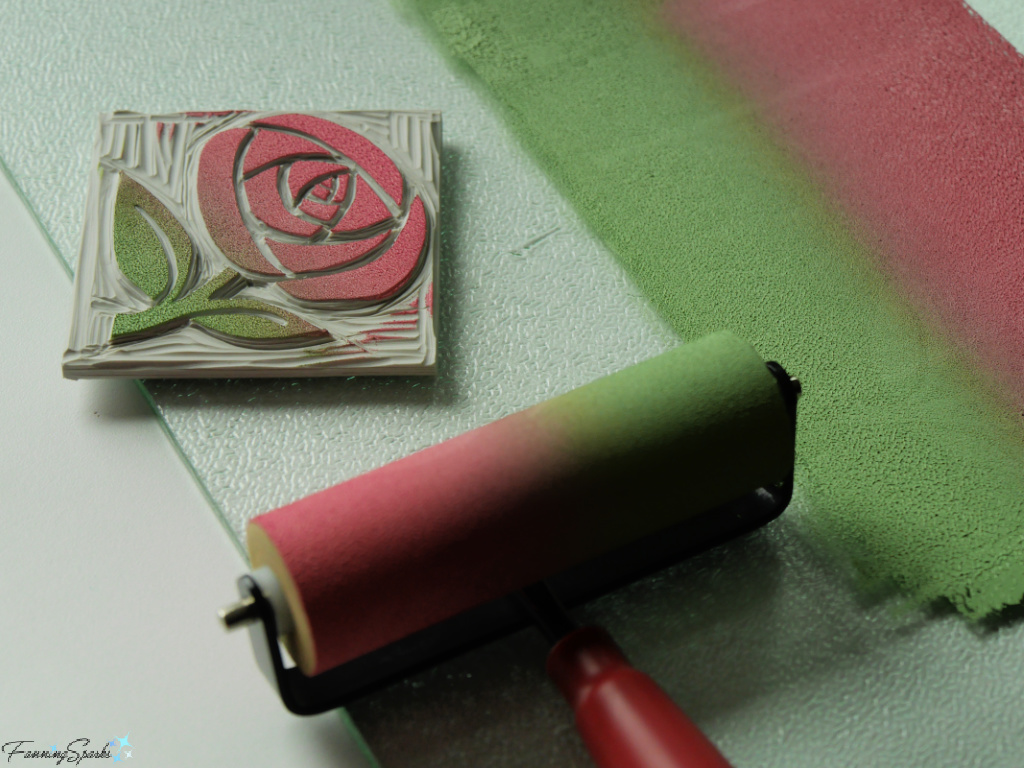
Other techniques for adding color to linocut block prints involve using multiple blocks. In reduction printing, for instance, the original block is printed multiple times with the block gradually being cut away between each printing. It takes careful planning to ensure the overlapping colors create the desired effect. Reduction printing works well for limited edition paper prints.
Another option is to use multiple, separate blocks to make a single image. Each block can be inked and printed in a different color. One method of doing this is to ink all the pieces and reassemble then into a single block, like a jigsaw, before printing the multi-colored image in a single go. Another method, one more suited to repeating patterns on fabric, is to print multiple pieces independently. I had a lot of fun playing with this technique.
In my first attempt, I created three separate blocks―two versions of a simple six-petaled floral motif and one butterfly. I removed the center lines from one of the floral motifs so the butterfly could be printed inside that space.
The results were mixed because placing the butterfly in exactly the right spot proved difficult. In my second attempt, I redid the butterfly block with a solid body instead of an outlined body. I also trimmed the outside edges of the block so it would be easier to position. And I chose a darker color for the butterfly so any missteps would be less noticeable. These changes led to improved results.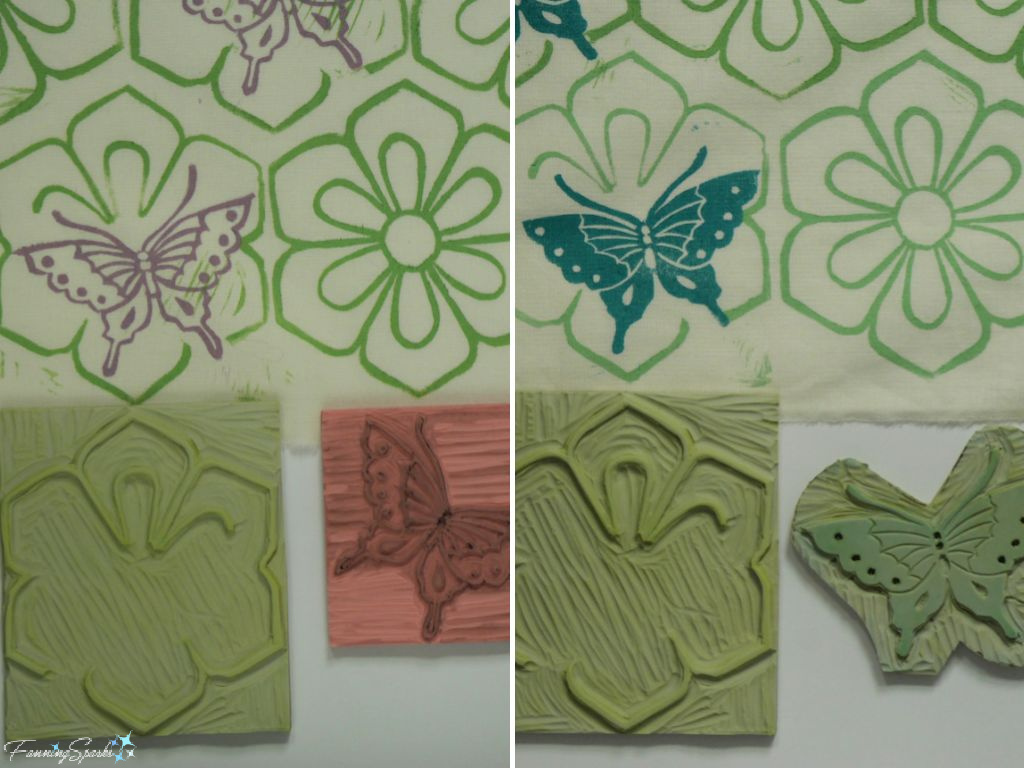
Printing the butterfly in a darker color made it possible to simply overprint the floral background. This was definitely the easiest method.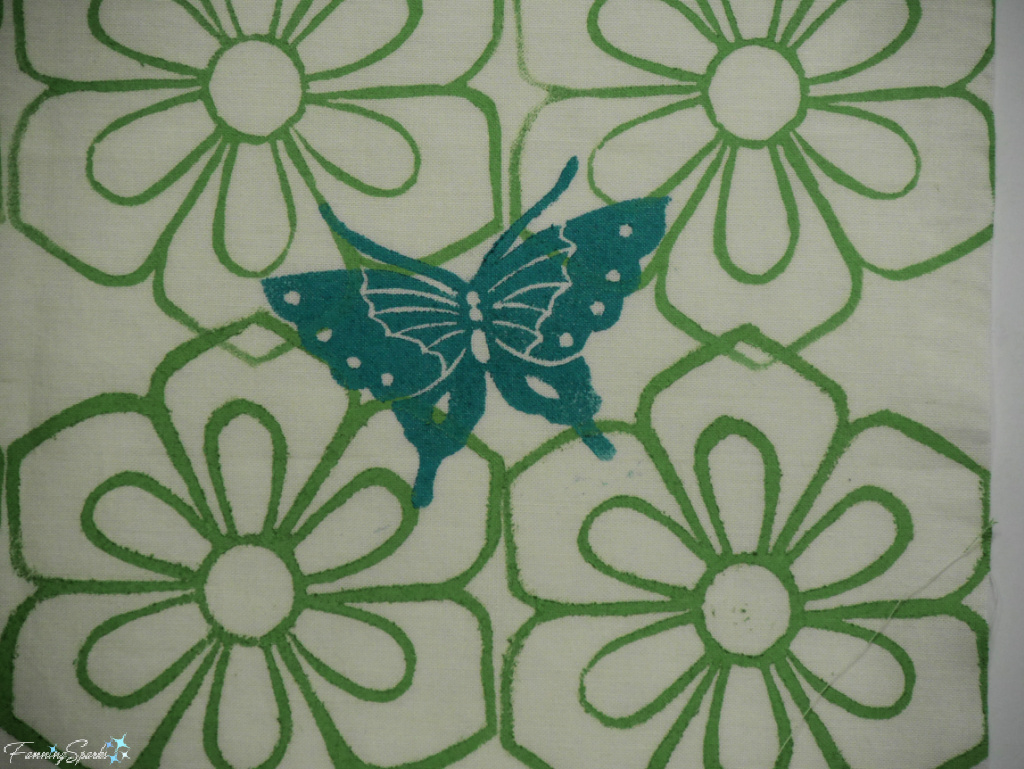 Another way to add color is to use a type of resist method whereby specific areas are covered and protected from ink during the first printing.
Here’s the process that worked for me: Cut pieces of removable vinyl (ie Cricut Premium Vinyl in Removable Matte) in the desired shape and size. Mine were butterflies. Stick the vinyl shapes on the fabric―scattering them randomly over the entire surface. With a Pilot Frixion Erasable Marker Pen, mark around the outline of each vinyl shape. Then print the entire background with the first block in the first color―simply printing over the vinyl shapes. I printed my background with orange six-petaled flowers.
After the ink dries, remove the vinyl shapes to reveal the blank, unprinted areas. Next, ink the second block in the second color and carefully place it inside the penned outlines to print. I printed butterflies in yellow.
This was, by far, my favorite technique. I especially like the freedom of being able to place the butterflies in any position, in any location, and being able to print them in any color. 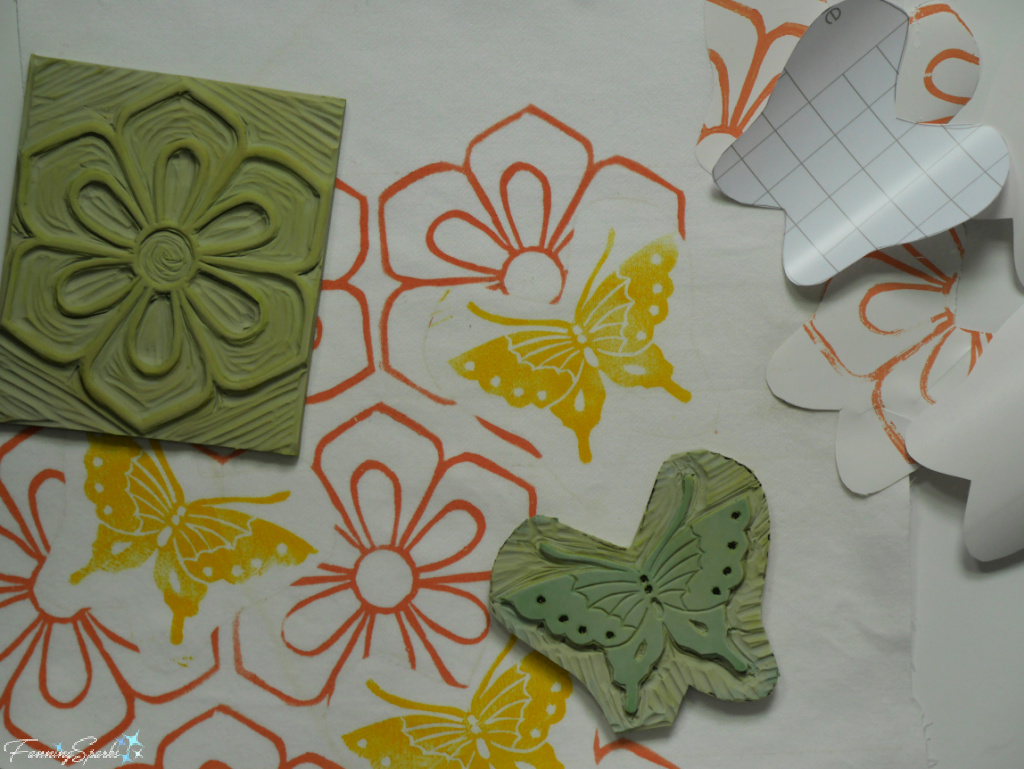
With a little more practice, I think the unprinted margin around the butterflies could be reduced to create an even better, tighter design. 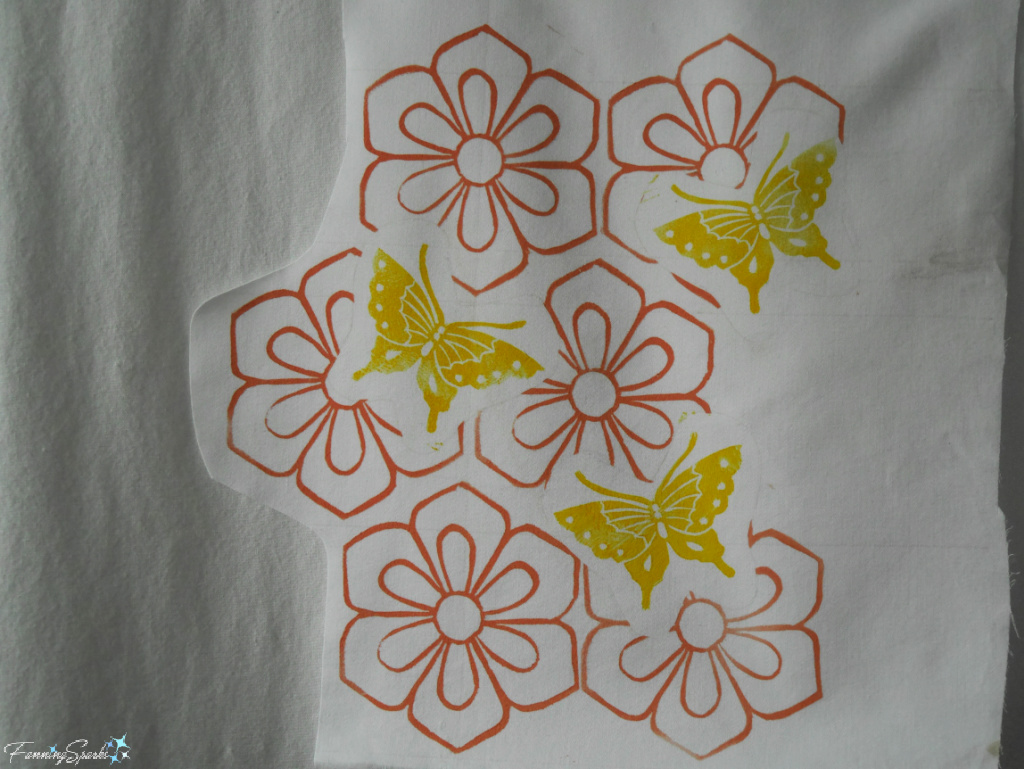
Speaking of printing the butterflies in any color, I tried a few different color combinations inspired by real butterflies. This version with the vibrant orange flowers and brilliant yellow butterfly is meant to mimic this Eastern Tiger Swallowtail butterfly on this orange bloom. 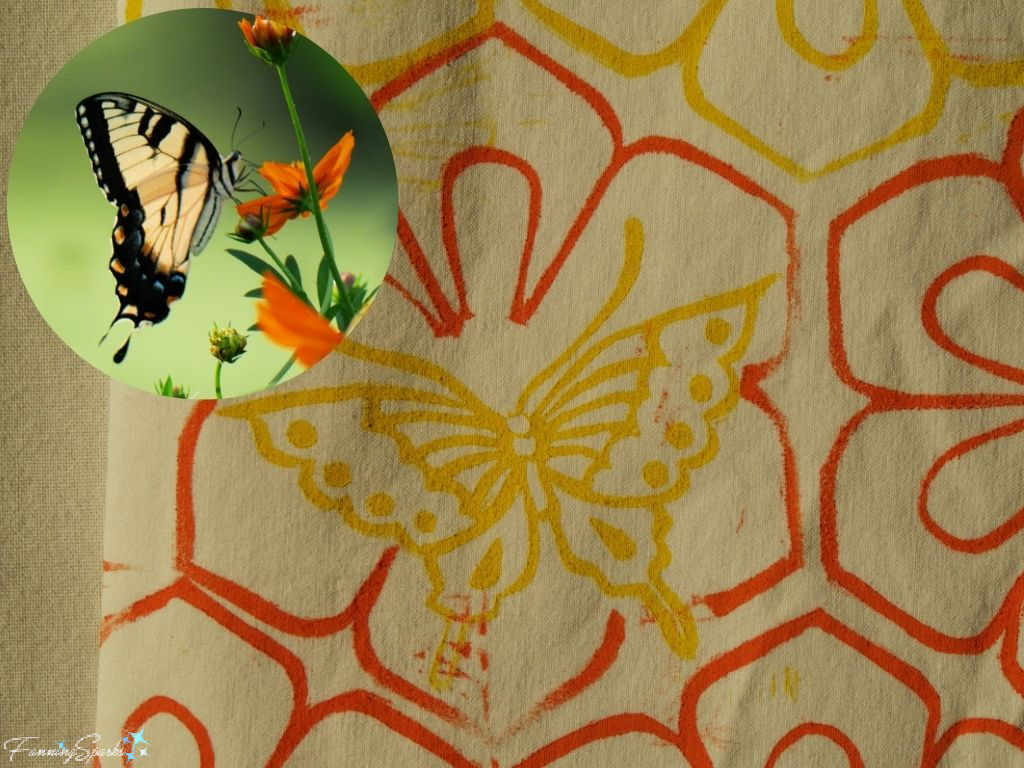
In this next sample, the deep orange butterfly was inspired by the Gulf Fritillary butterfly. 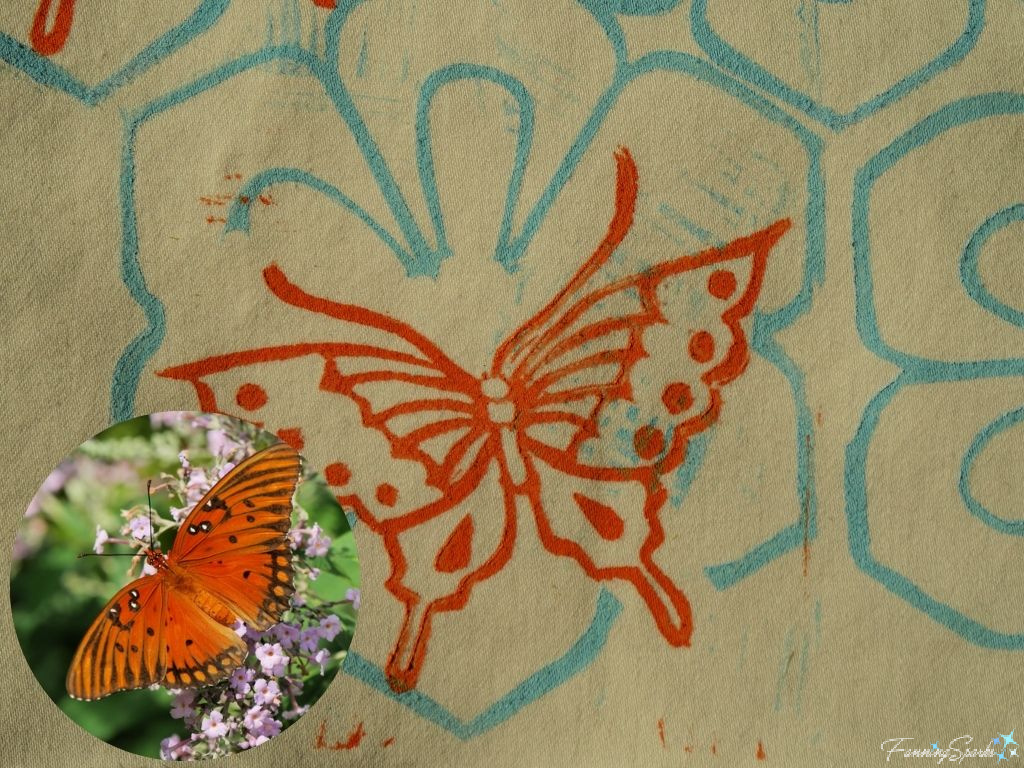
I was disappointed with these color combinations so I tried a few others.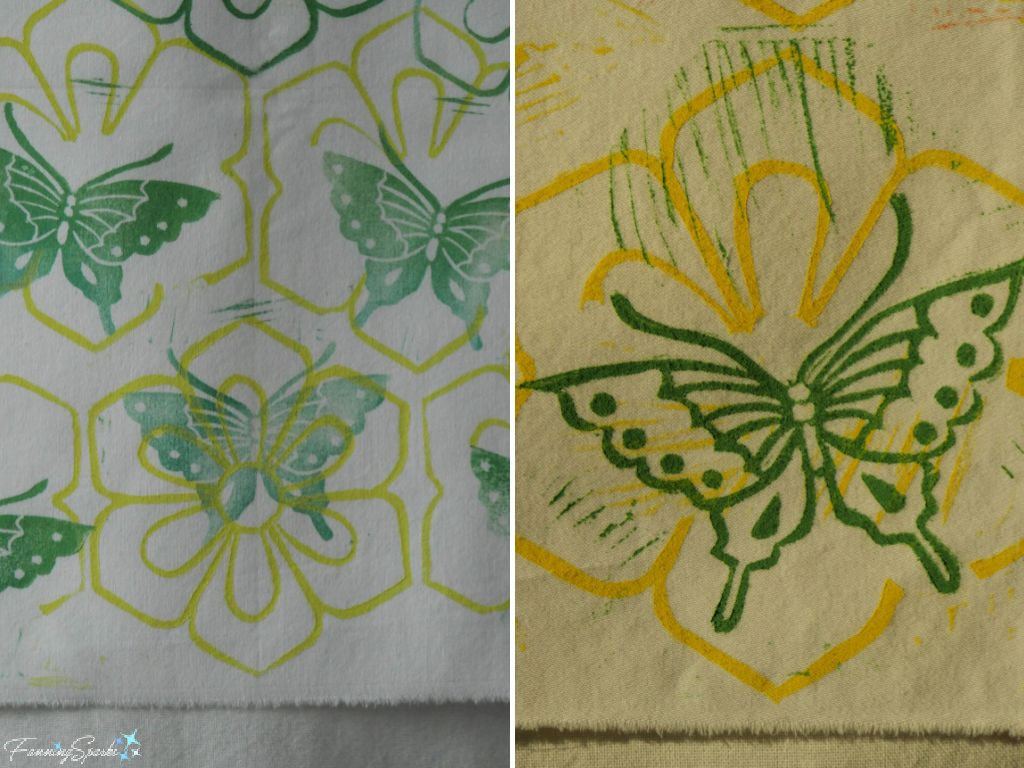 As you might expect, all the standard color theory principles apply and a little experimentation can lead to colorful and harmonious choices.
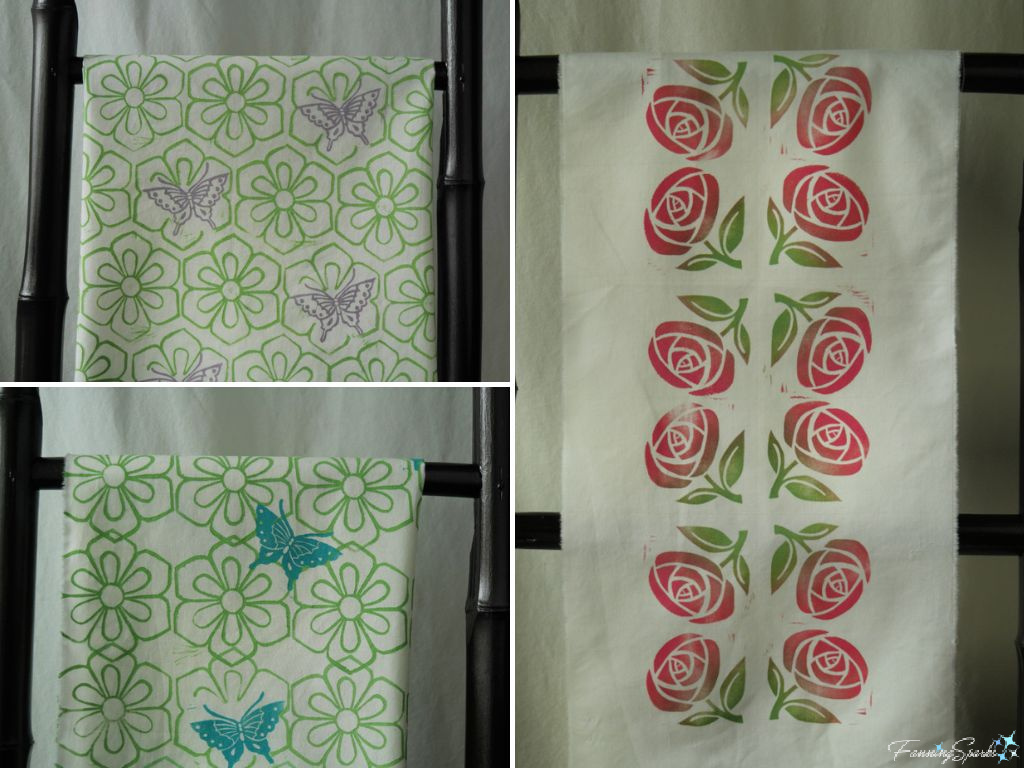
More Info
Previous blog posts mentioned in today’s blog post include:
. Linocut Printing at the Atlanta Printmakers Studio
. Surface Design Inspiration.
This blog post would have been much too long if I’d included every linocut printing artist I’ve been following and admiring. These are the artists I’ve featured:
. Andrea Wisnewski, Running Rabbit Press, specializes in hand-colored linocut prints. Find them on Instagram or their website.
. Anna Hermsdorf is a colorful linoleum printmaker. Find them on Instagram or Etsy.
. Angela Harding is a printmaker and illustrator. Find them on Instagram or their website.
. SRM Prints, Sarah Reed McNamara, creates linoleum block prints and textiles. Find them on Instagram or Etsy.
. Margarts, Margaret Molinari, is a surface designer and print maker. Find them on Instagram or their website.
. Annamay Handprinted, Julia Maetzl, is a textile artist specializing in hand-printed fabrics. Find them on Instagram or their website.
. Gwen Frostic, who I featured in the blog post, Gwen Frostic – Unconquerable Spirit, is a favorite for her naturalist block print artwork. Find her work on the Gwen Frostic website.
. Andrea Emmons whose work I shared in last week’s post, Linocut Printing at the Atlanta Printmakers Studio, is an artist/ printmaker. Find her work on Instagram.
Here are several more talented linocut artists, linked to their Instagram accounts, to inspire you:
. Agi.Art – Agnieszka Koscisz
. Catherine Stonehouse
. Kat Lendacka
. Katharine Watson
. Kit Boyd
. Maarit Hänninen Linocuts
. Marie Amelie Giamarchi
. Raina Atelier – Raina Gulija Lilliard
. River Bird Studio – Jill Dunn
. Saunter & Ink
. Skyline Printworks – Sarah Finger
. Tatianasta Prints – Tatiana Svistunova
. 365 Block Prints – Stefano Stoppani
Today’s Takeaways
1. Instagram may just be the best way to discover outstanding artists and their work.
2. When learning a new skill, make time to experiment and take note of your findings.
3. Celebrate your successes while learning from less-than-ideal outcomes.

Comments are closed.