
Some projects flop! It’s not something I like to admit but not every maker project is a success. Occasionally, a project will turn out exactly as envisioned. More often, a project shifts and evolves during its creation. From time to time, a project just fails and the whole effort has to be scrapped. Every failure is, of course, an opportunity to learn and improve.
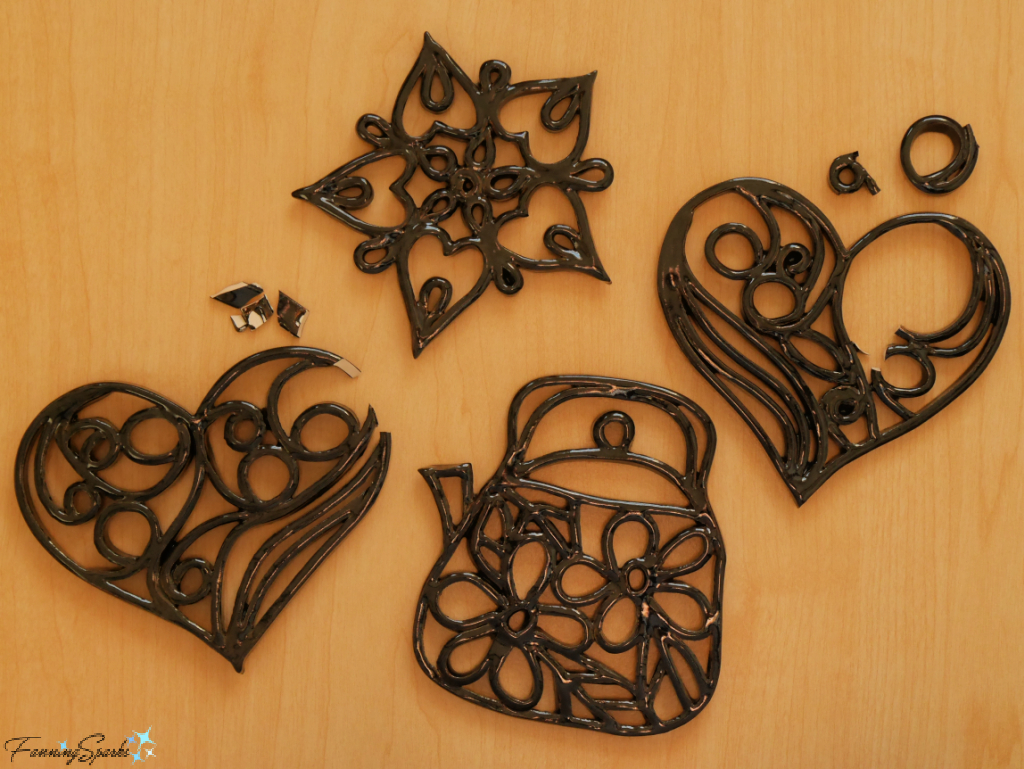
The heart-shaped ceramic trivet I tried to make recently is a case in point. Here it is my broken heart!
This project started with a crossover idea to try quilling with clay. Quilling is a form of paper arts which involves rolling narrow strips of paper into intricate designs. It is known by a few different names including paper rolling, paper filigree and paper scroll work. The history of quilling is uncertain but it is believed to originate from Ancient Egypt. Interestingly, the term “quilling” comes from a time when the paper strips were rolled around birds’ feathers. Nowadays, specialized tools such as slotted quilling tools and tweezers are used instead of quills. Here’s a stunning example representing the city of Seoul created by Yulia Brodskaya.
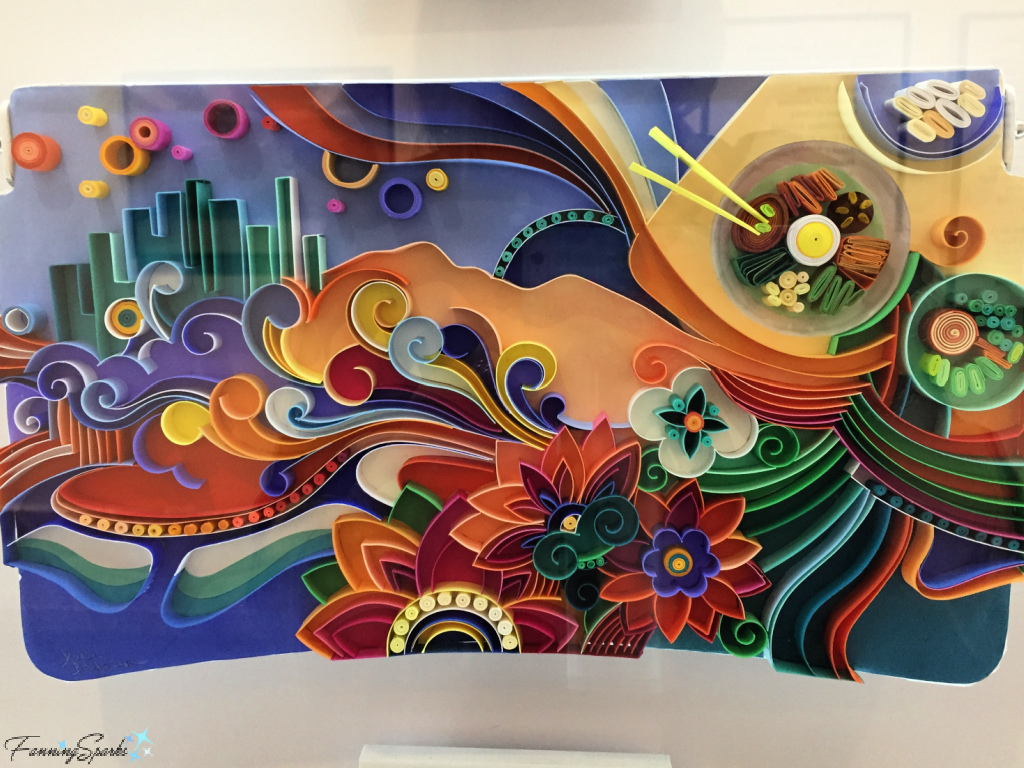
Interesting Side Note: This artwork was created as part of a 2017 joint marketing campaign between Delta and Coca-Cola to create a flying art gallery. Twelve artists from around the world were engaged to transform Delta’s 767 aircraft tray tables into one-of-a-kind works of art. I took the photo when the originals were displayed at the Coca-Cola Global Headquarters where I worked at the time.
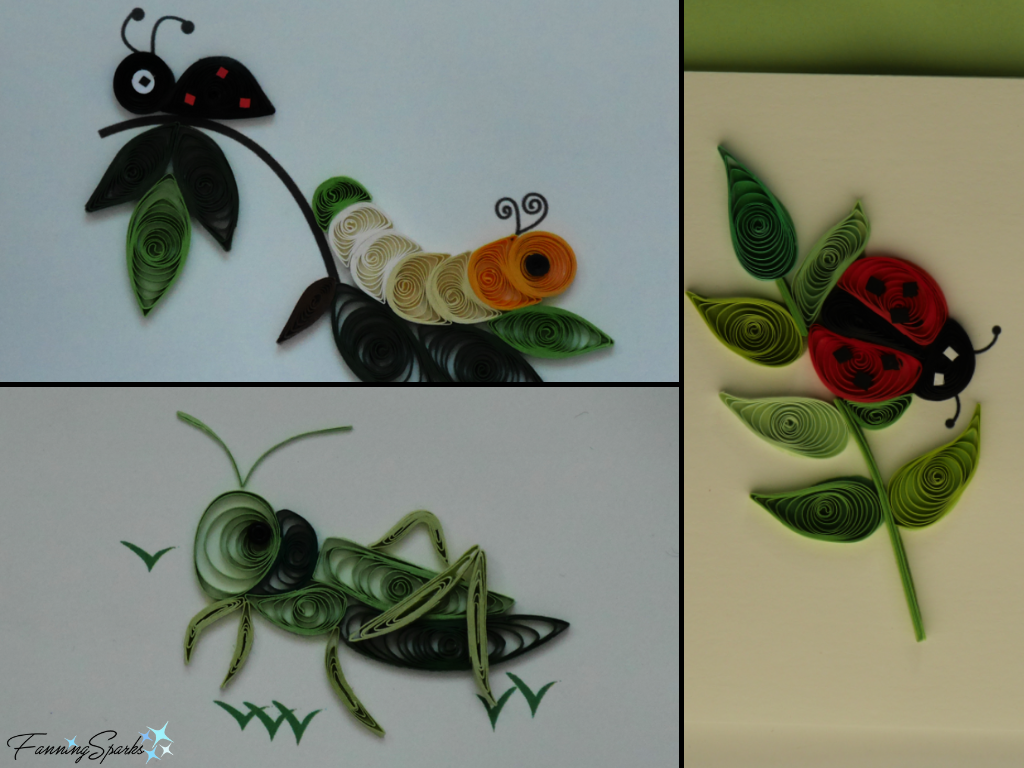
Obviously, not all quilling is this elaborate. Here are a few simpler examples from note cards I’ve purchased.
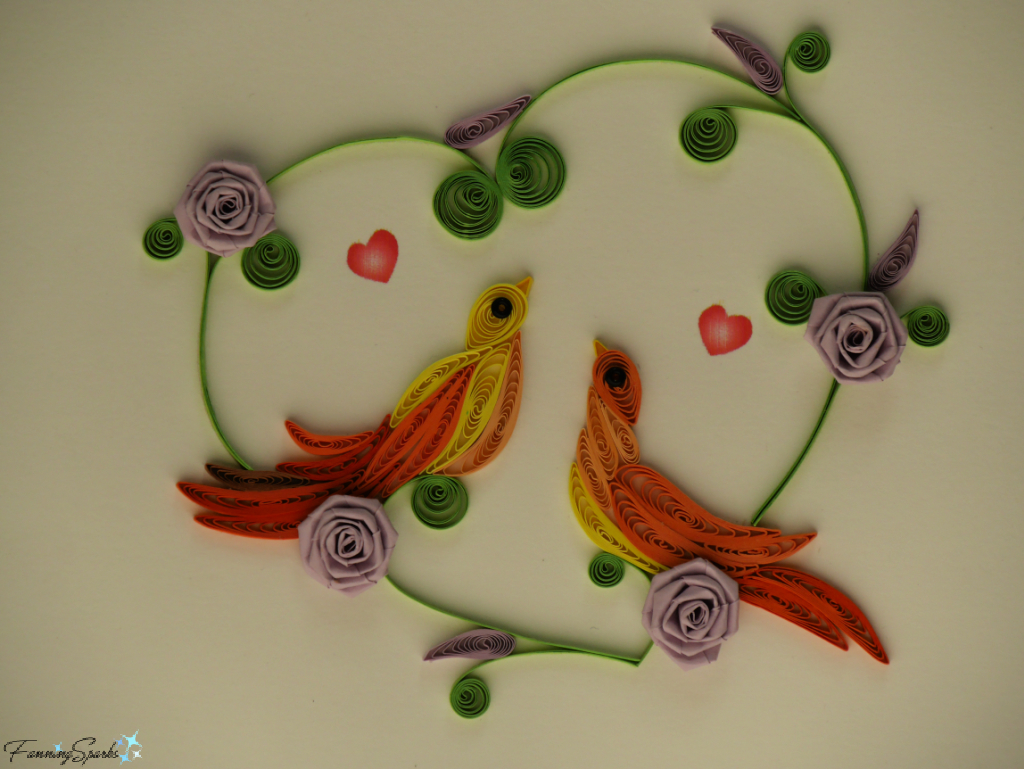
The detail in this pair of lovebirds, from a specialty greeting card by Quilling Card, is amazing.
It’s the dramatic flourishes—the sweeping curves, graceful spirals, gentle loops and intricate rolls—that appeal to me. It seemed likely the decorative flourishes could be replicated in clay but I couldn’t figure out how to incorporate them into a functional item. The idea came together when I stumbled upon these vintage cast iron trivets on eBay and Etsy.
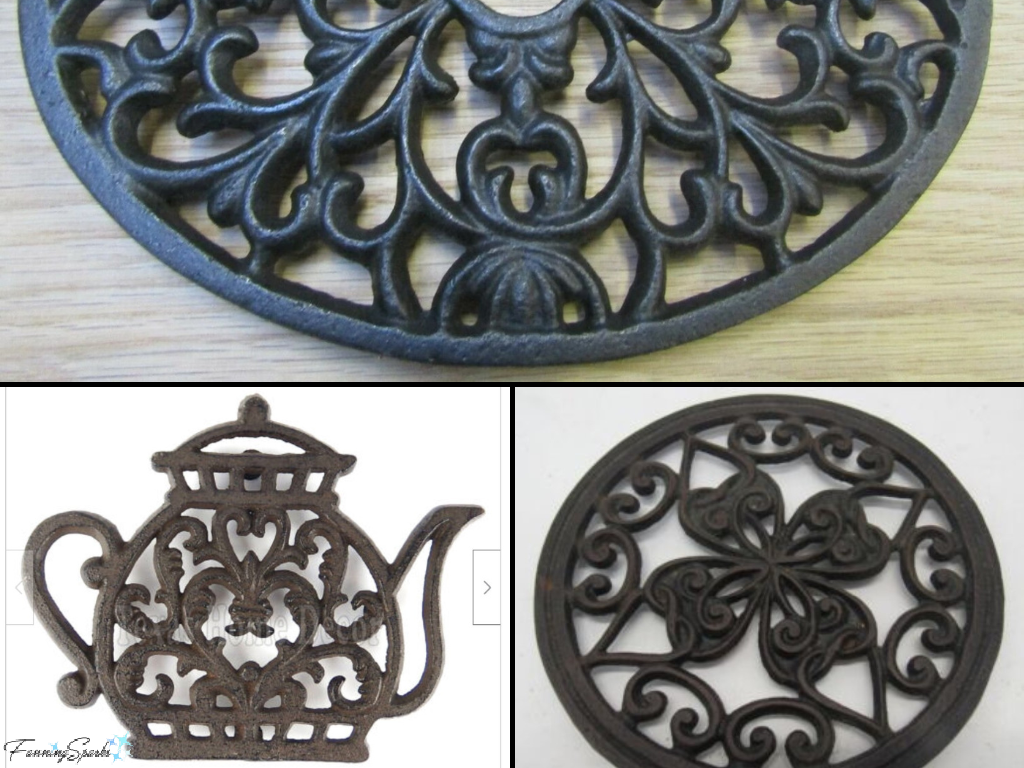
Trivets, sometimes called hot pot holders, are typically used to protect the surface of a dining table from a hot serving dish or bowl. They are simple, but functional, objects with a decorative surface. Thus, the ideas came together and I formulated a plan to create a ceramic trivet with a filigree design.
The first hurdle was to create a streamlined design. Theoretically, clay could be rolled to paper thinness but ¼” is the thinnest I’ve used. The increased thickness of the clay meant the circles and curves in my trivet design had to be looser than for paper quilling. In addition, the overall design had to be adjusted to the size of a typical trivet which is usually 6 to 9 inches in diameter. I selected three designs including a heart, snowflake and teapot.
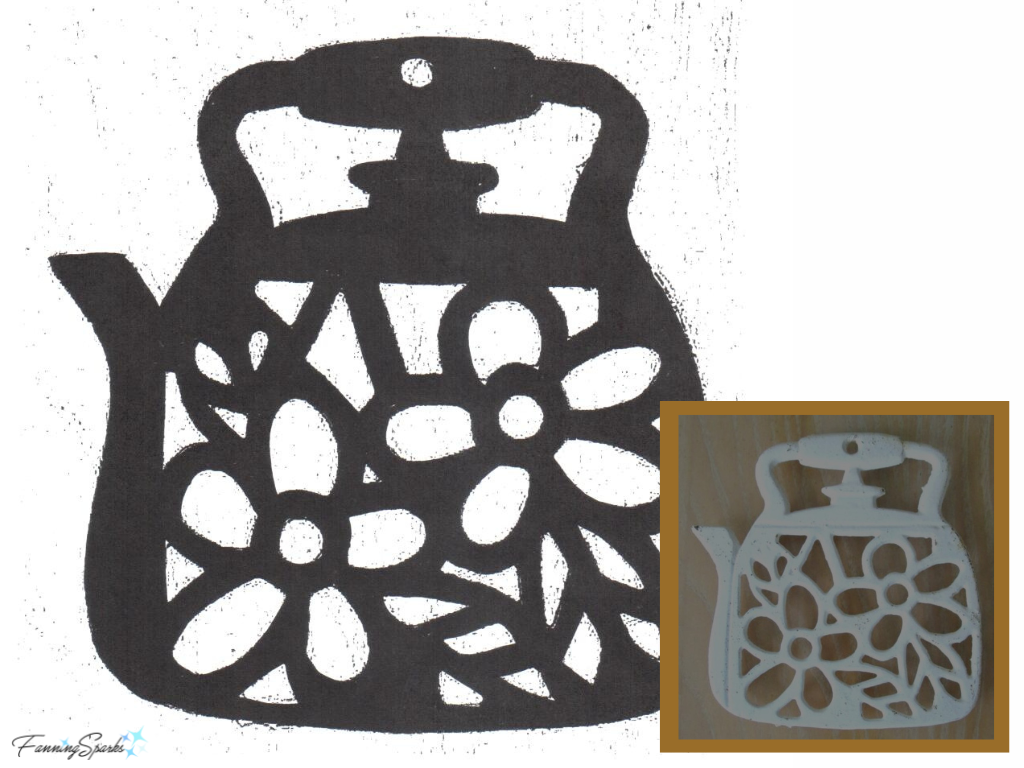
The heart design originated from a paper quilling design—a heart-shaped outline filled with sweeps, swirls and circles. Since it features a heart, it will count as the second response to my self-proclaimed Heart Maker Challenge. The challenge, which I announced in my previous blog post Setting My Heart on a Maker Challenge, is an effort to create at least three different projects featuring hearts before Valentine’s Day.
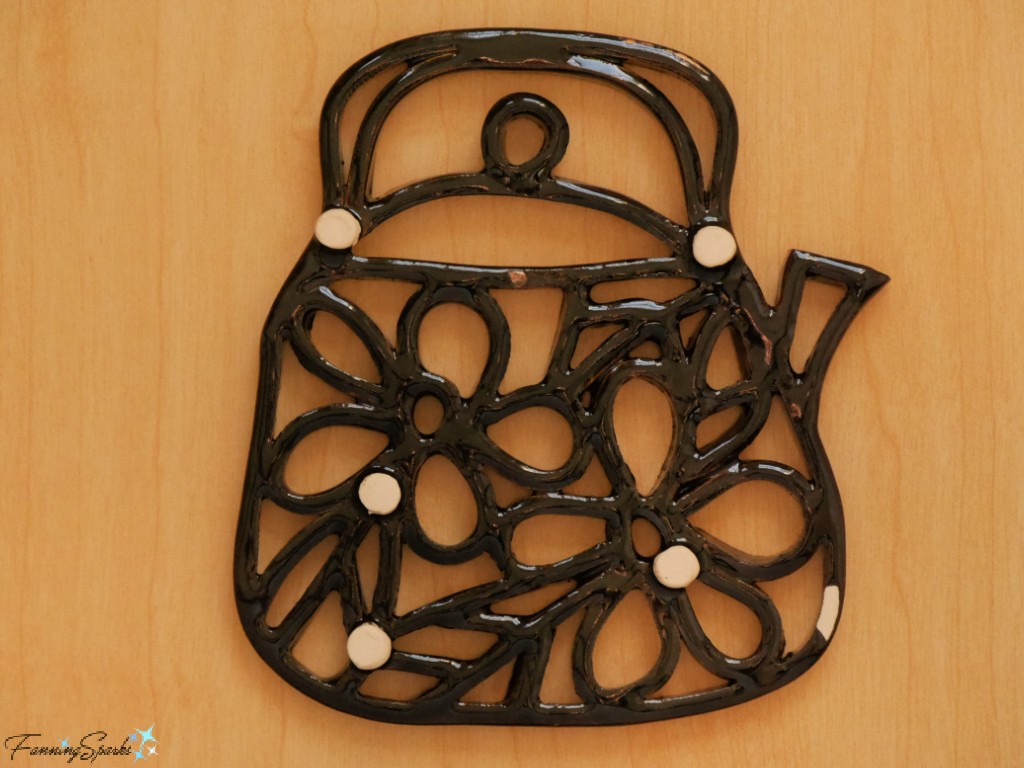
The teapot design came from a vintage cast iron trivet I found online.
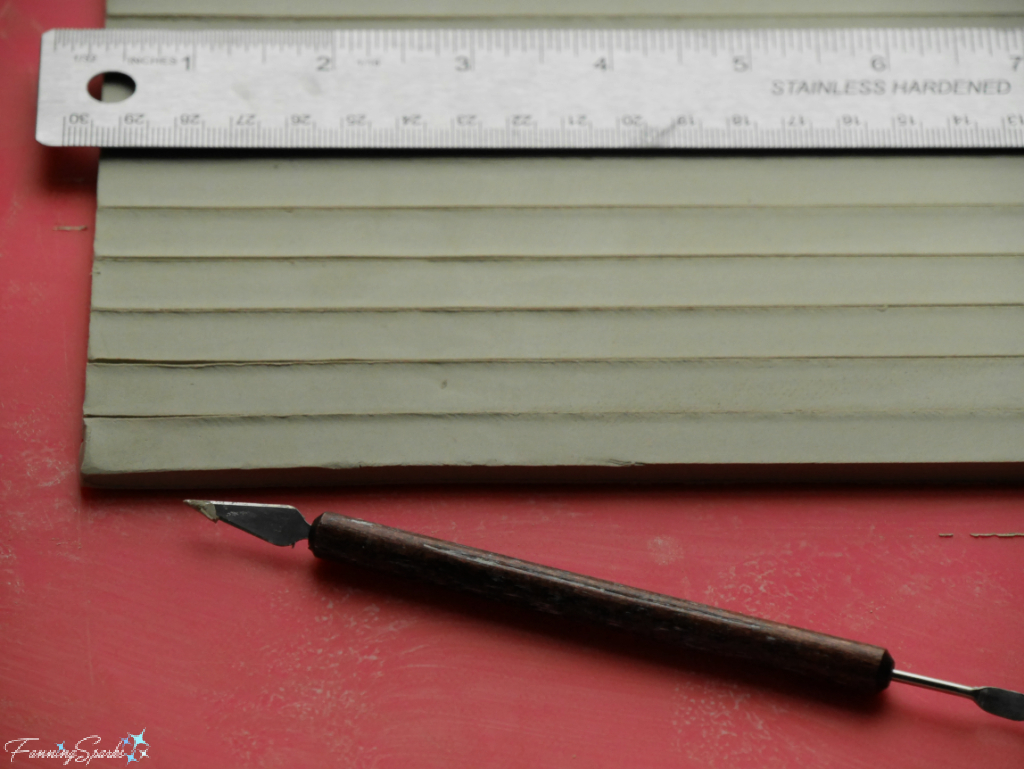
After printing my designs on paper, I rolled out a slab of clay to ¼” thickness and carefully cut it into ½” strips.
The strips were turned on edge and laid over the paper pattern.
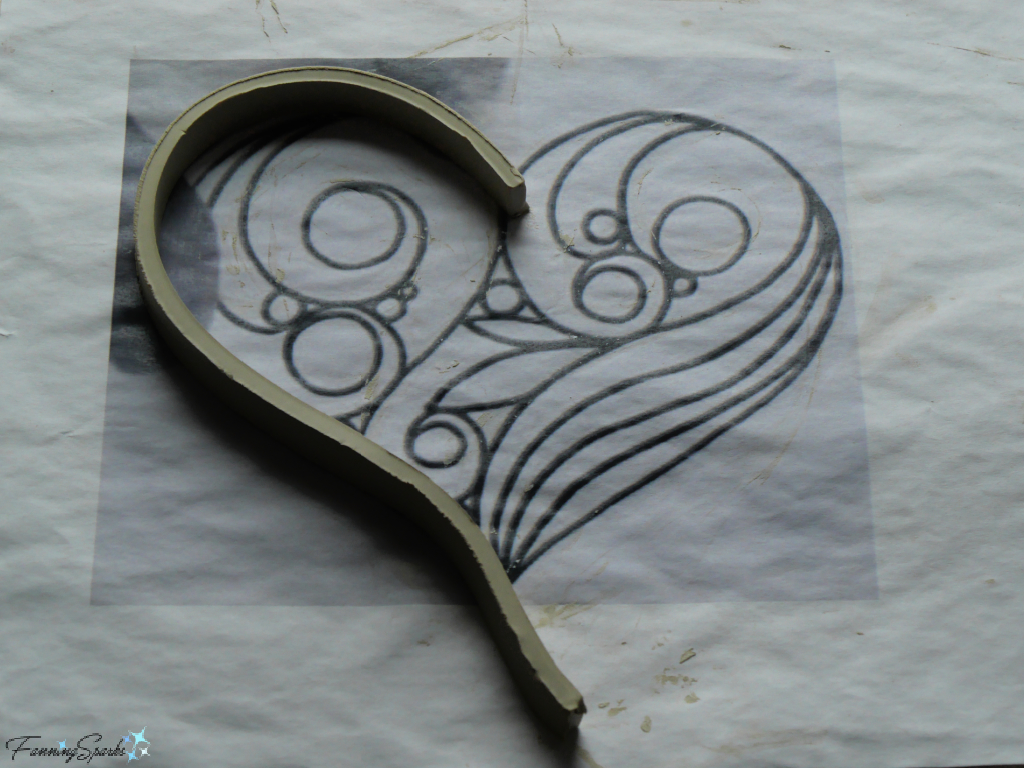
Each strip of clay was cut to size. Then scored and attached with slip to the adjacent pieces.
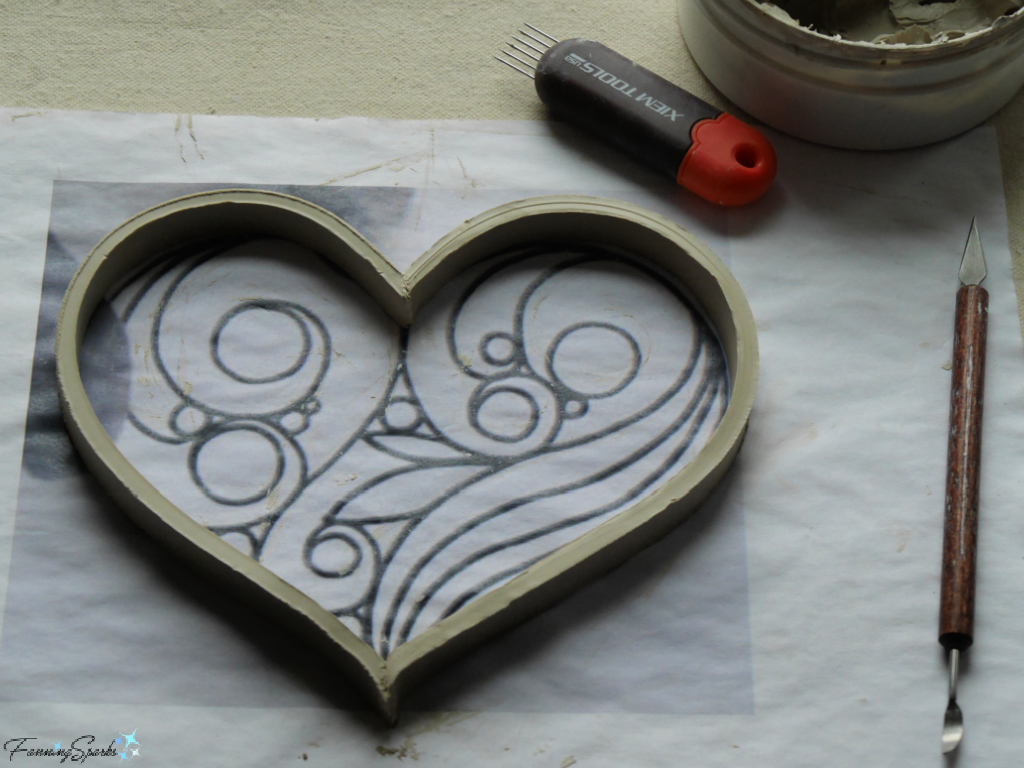
I found several of the curves were too tight for my clay strips so I refined the design as I worked. A few elements had to be shifted so they could be attached in more than one spot and others had to be removed because there wasn’t enough space for all of them. Here’s how the heart looked with the clay filigree in place.
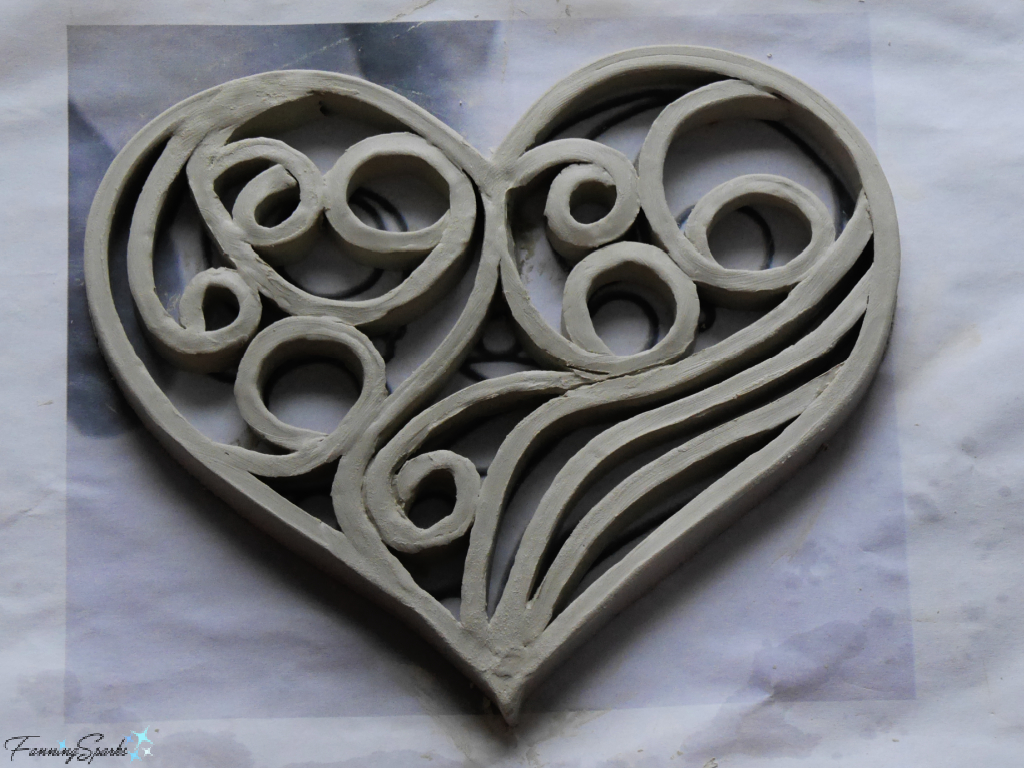
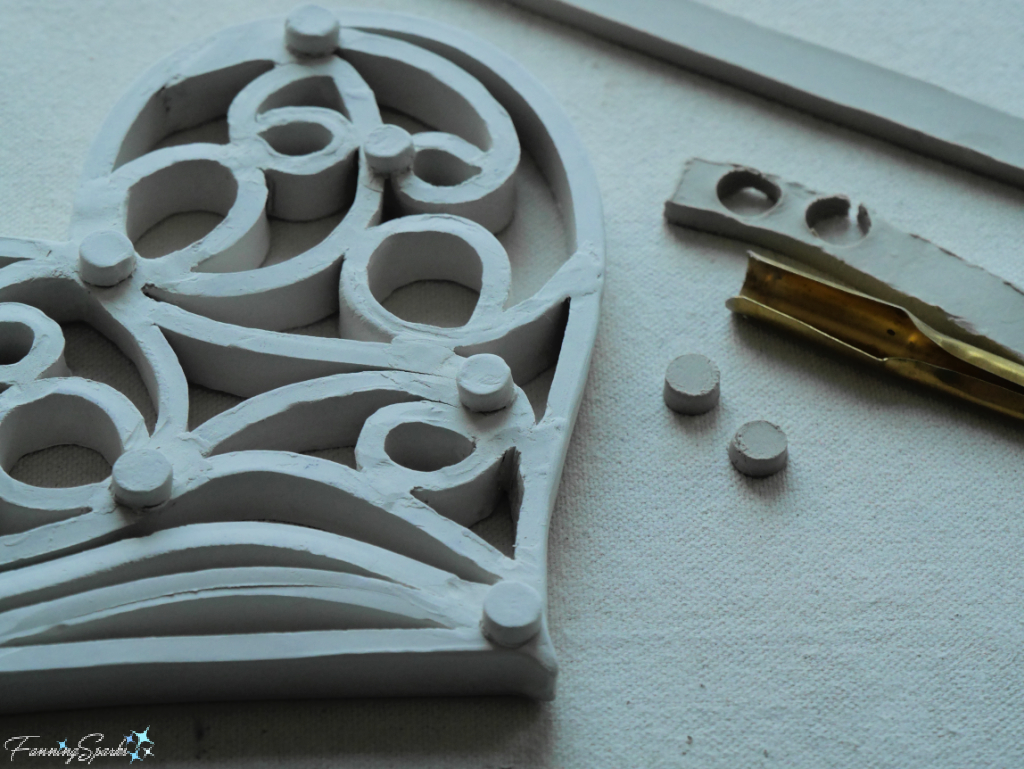
The next step was to clean up the connection points and smooth all the edges. Then I added small, round feet to the bottom and let the piece dry facedown.
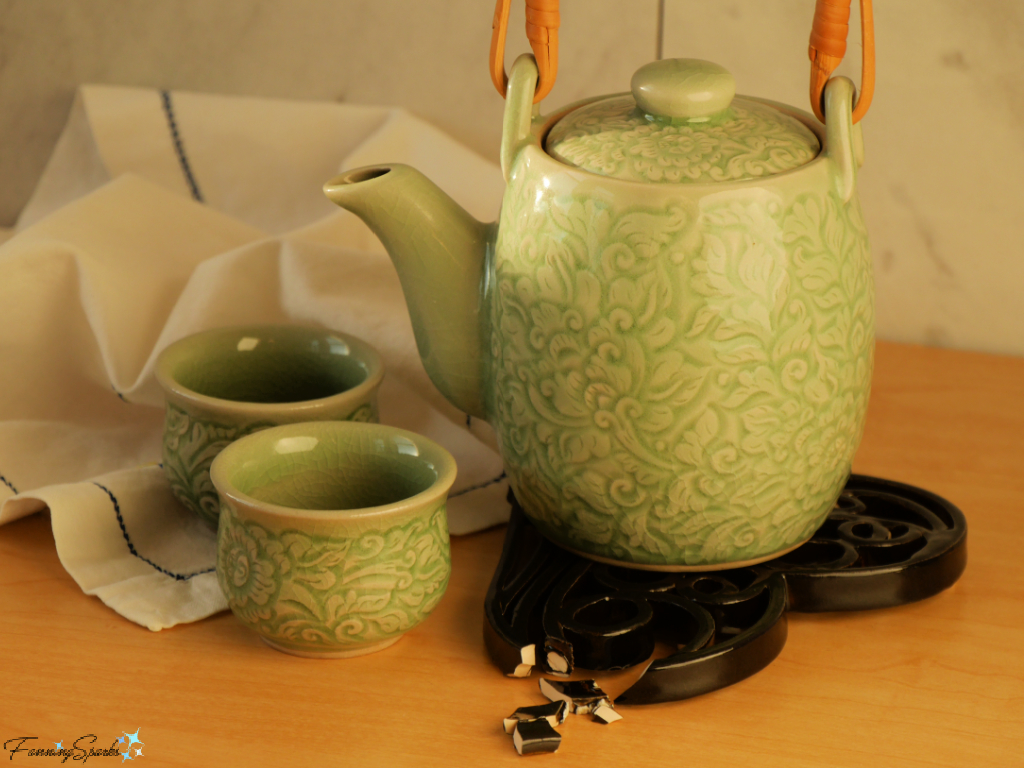
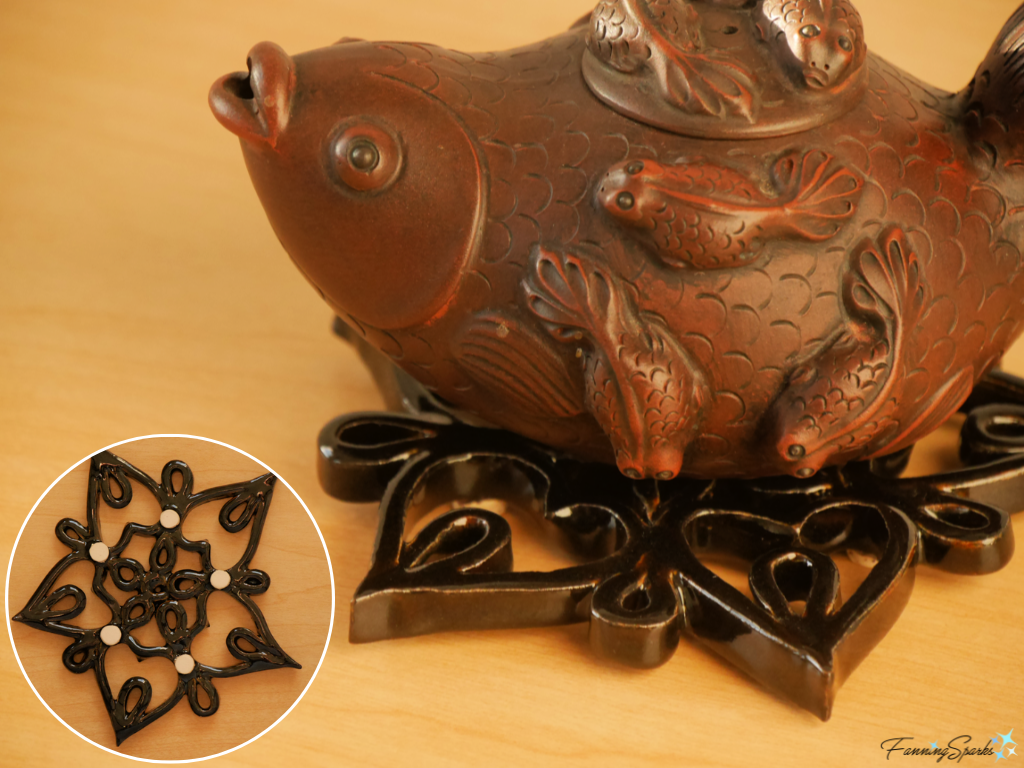
The feet will elevate the trivet from the dining table, or other surface, when it’s in use. They also elevate the trivet from the kiln shelf during firing. This means the entire piece, except the feet, can be glazed giving both the top and bottom a nice, glass-like finish. Here’s the finished snowflake trivet holding a delightful pottery teapot from Hong Kong. The inset shows the underside of the trivet.
Unfortunately, I had no idea how critical the placement of the feet would be. I simply added feet to a few connection points to ensure the trivet would be level—an approach that worked fine with the snowflake and teapot trivets. Here’s the bottom of the teapot trivet.
Unfortunately, my simplistic approach to placing the feet was not at all successful with the heart-shaped trivet. It seems the feet also need to support the various lines of the trivet during firing. The trivet was fine during the original bisque firing but, during the final glaze firing, sections of the trivet sagged onto the kiln shelf. Perhaps the section wasn’t attached well enough or perhaps the the feet couldn’t support the added weight of the glaze. Regardless of the cause, it was not a good situation—glaze should never touch a kiln shelf—and my trivet broke. Yep, I had a broken heart!
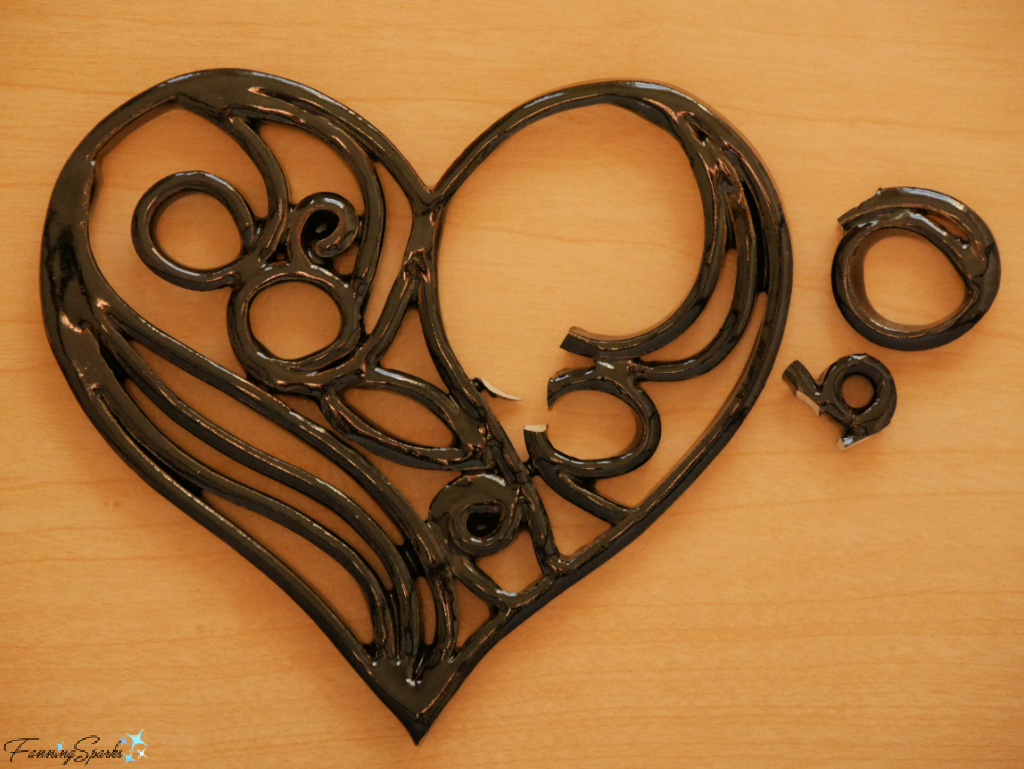
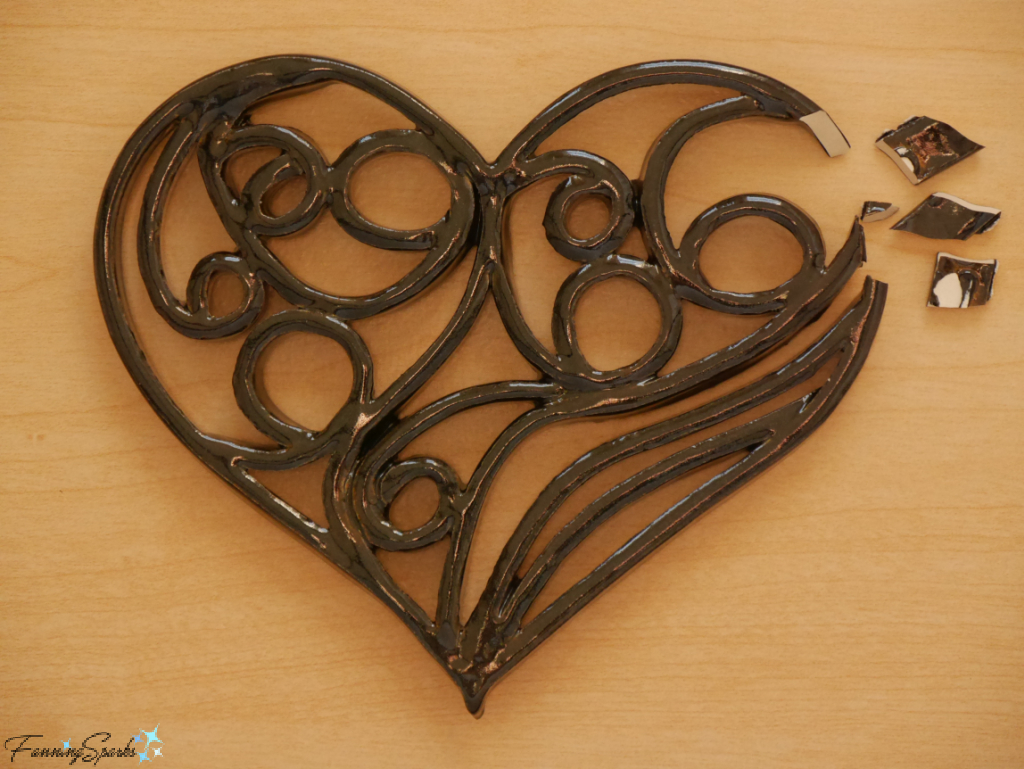
In the spirit of learning from my mistakes, I decided to try again. I followed the same assembly process taking extra care to ensure all the elements were securely attached to the adjacent elements. I also took extra care when attaching the feet, adding three more feet to ensure there was adequate support in all areas. But it happened again! Not in the exact same spot, but with the exact same outcome—another broken heart!
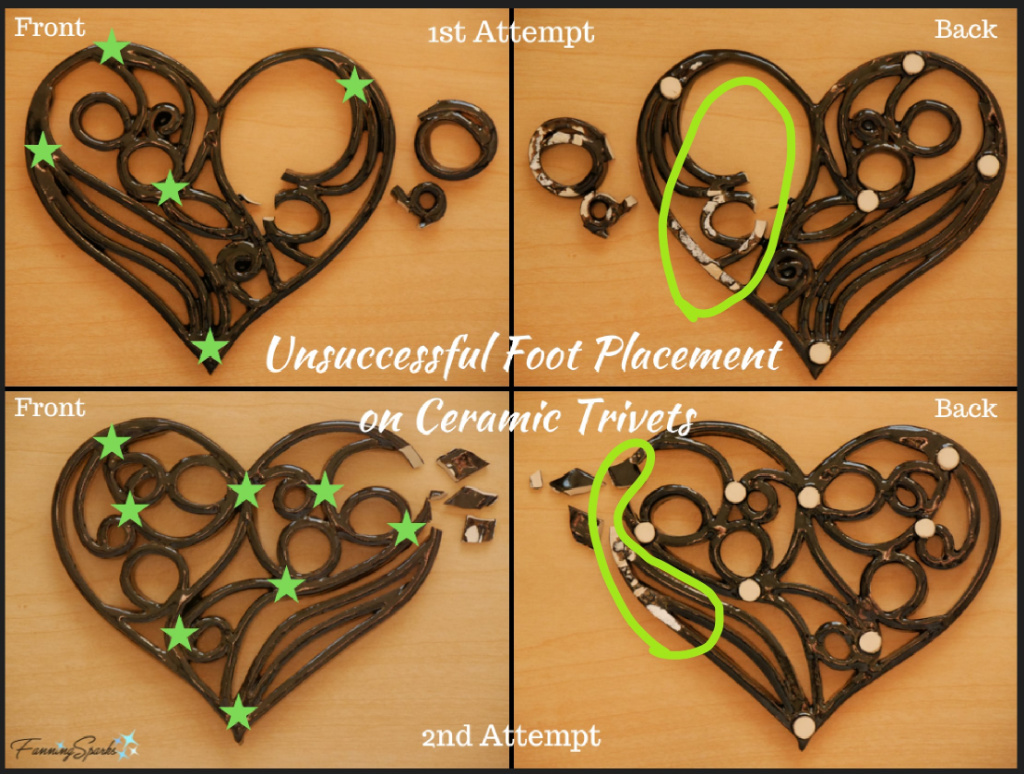
I’ve been studying the two trivets to fully understand what went wrong. The below side-by-side comparison, showing the front and back of my first and second attempts, helps pinpoint the trouble. In both trivets, the problem area was on the right side of the heart (when viewed from the front). In the first trivet, the entire interior section had insufficient support. In the second trivet, the problem area may have been smaller but the outer edge, especially where several elements converged, obviously did not have adequate support.
So, in the final outcome, I’ve learned a little more and I have two nice ceramic trivets and two broken hearts for my efforts!
More Info
To see more beautiful quilling artwork, check out artists: Yulia Brodskaya (website and Instagram), Sabeena Karnik (Sabeenu on Instagram) or Gergana Penchevaa (PaperliciousBG on Instagram). Greeting cards, handmade by quilling artists in Vietnam, can be found at QuillingCard.com.
To learn more about the Delta and Coca-Cola flying art gallery check out this 2017 Delta news article.
As noted in my previous blog post, Clay Play Days, I’m still new to working with clay. My projects involve a lot of experimentation and a fair bit of persistence. Every project teaches me something new.
UPDATE Feb 7, 2023: The heart-shaped trivet featured in this blog post is the second response to my FanningSparks Heart Maker Challenge in which I’m challenging myself to create at least three different projects featuring hearts before Valentine’s Day.
. See the blog post, Setting My Heart on a Maker Challenge, to learn how this maker challenge came about.
. See the blog post, Maker Heart Challenge #1: Hearty File Storage Boxes, for my first response to the challenge.
. See the blog post, Maker Heart Challenge #3: Froufrou Sachet – DIY Tutorial, for my third response the challenge.
. See the blog post, Maker Heart Challenge Bonus: Ceramic Valentine’s Heart Box, for my fourth, and bonus, response to the challenge.
Today’s Takeaways
1. Don’t expect every maker project to be a success.
2. Take time to learn from each maker project.
3. Crossover projects, using materials or applying techniques from one medium in another, can lead to interesting results.


2 Comments
@Marian, Thanks! Peg
I love how you wrote this story. And surprised to hear that everything you make doesn’t turn out perfectly 😛
Great angle, and an enjoyable read.