
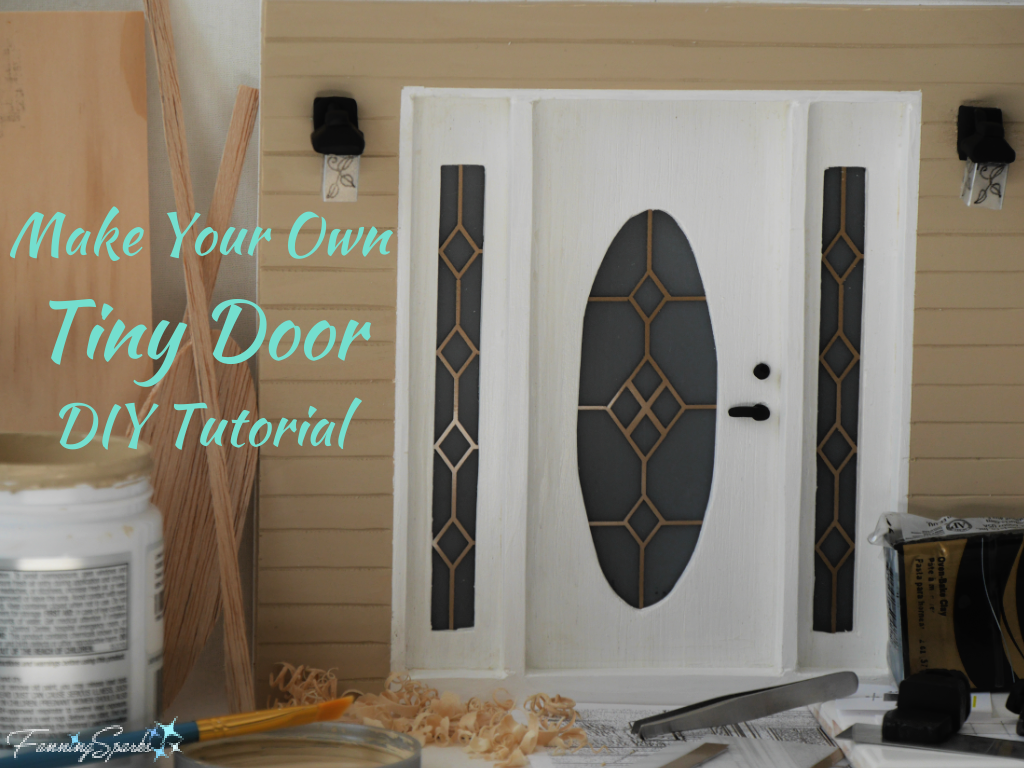
In my last post, I introduced the idea of making your own tiny door and shared a tutorial to create the design (Part 1 of this DIY Tutorial). In this blog post, we’ll finish the project with a tutorial to construct the actual tiny door. Get out your tweezers—we’re going to work in miniature!
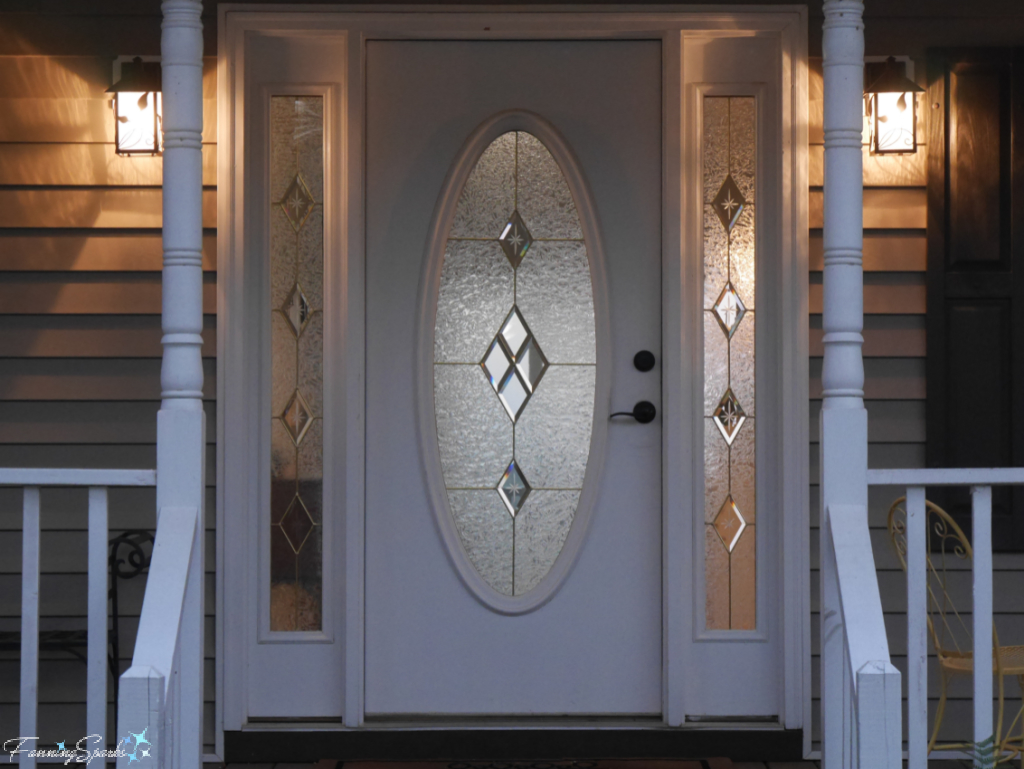
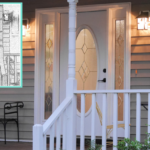
Although all doors can be described as “a swinging or sliding barrier by which an entry is closed and opened”, the specifics of a door vary greatly. Doors have different sizes, materials, configurations, designs, colors and accessories. The following instructions will describe building a replica of my own front door (shown below) which has a standard-size door with an oval glass window, two sidelights with glass windows and two light fixtures. I chose not to include the porch, porch posts or railings.
It would be impossible to write instructions for all variations of doors so please adapt this tutorial to meet your specific situation.
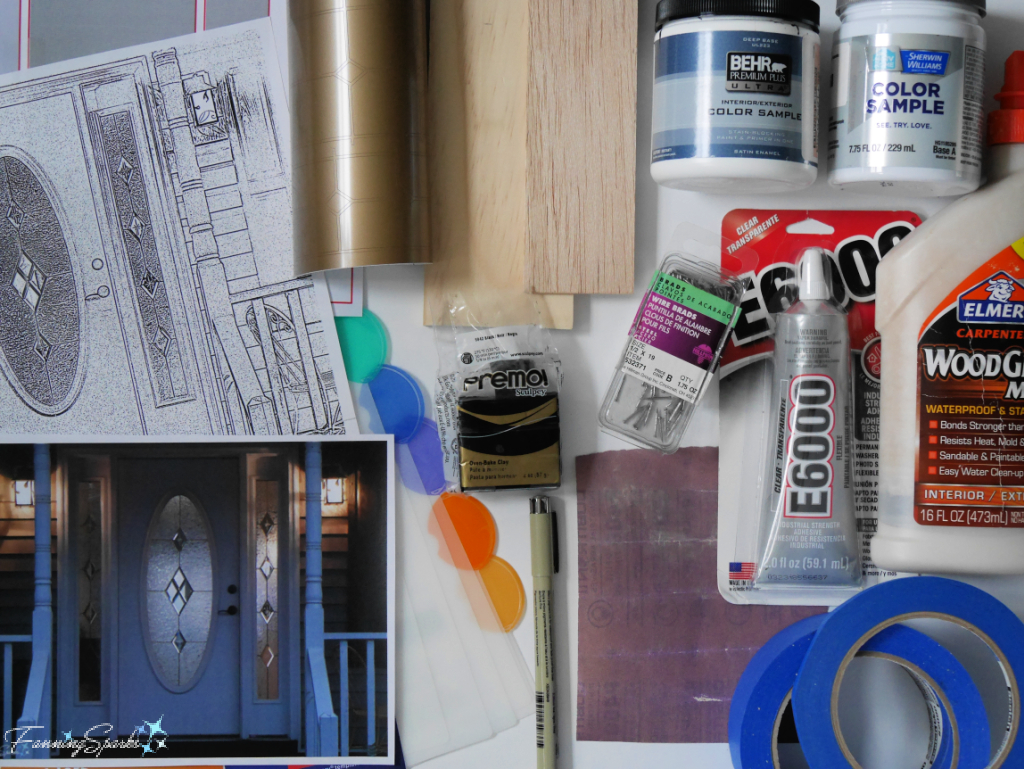
Supplies Needed
Before selecting your materials, you’ll want to determine where your finished tiny door will be placed. If you decide to place your tiny door outside, for instance, you’ll want to select exterior grade materials and finishes.
. Photo(s): As described in Part 1 of this DIY Tutorial
. Line Drawing: As described in Part 1 of this DIY Tutorial
. Basic Shapes Diagram: As described in Part 1 of this DIY Tutorial
. TWO ⅜” thick x 5 ½” wide x 4’ long Pine Project Boards
. ⅛” thick x 3” wide x 3’ long Balsa Board
. Wood Glue
. Sandpaper in fine grit
. E6000 Glue or similar adhesive
. Sheet of Frosted Plastic (optional): Use for any window “glass”. I used a plastic divider intended to separate sections in a 3-ring binder.
. Sheet of Adhesive Vinyl (optional): Use for any designs in window glass.
. Polymer Clay: In relevant colors for any accessories such as door knobs, light fixtures, house numbers, planters, etc. I used a small amount of Premo Sculpey in black. If you’re unfamiliar with polymer clay, please reference my previous post, I Only Have Eyes For You with DIY Tutorial, for a rundown of the materials, tools and process.
. Marker: A fine tip marker with permanent black ink.
. Paint: In relevant colors. Select interior or exterior grade paint depending on where you plan to place your tiny door. Include black paint if your tiny door has any window glass.
. Wire Brads in ½“ x 19 size
. Tape: Use to paint straight edges and hold paper patterns in place. I used blue painter’s tape in two widths: 1” and ¼“.
. Paper
 Equipment and Tools Needed
. Bar Clamps (optional): To glue wood boards edge-to-edge for a wider panel, if needed for your tiny door.
. Jigsaw (or saw of your choice)
. Drill with drill bit large enough for jigsaw blade
. X-Acto Knife
. Self-Healing Mat
. Ruler
. Electronic Cutting Machine (optional): To cut designs for window “glass”. I used a Cricut Explorer electronic cutting machine but you could use an X-Acto knife instead.
. Polymer Clay Tools (optional): To make accessories such as door knobs, light fixtures, house numbers and planters. I used a polymer clay slicing knife, a small ceramic tile, a round hole cutter and my Amaco polymer clay/craft oven. If you’re unfamiliar with polymer clay, please reference my previous post, I Only Have Eyes For You with DIY Tutorial, for a rundown of the materials, tools and process.
. Computer with Rapid Resizer Software (see Part 1 of this DIY Tutorial for an explanation)
. V Groove Chisel (optional): To carve design lines in the wood for siding, bricks, and other exterior wall treatments.
. Clamps: To hold glued wood parts.
. Small Hammer
. Pencil
. Scissors
. Tweezers
Instructions
Step 1 – DIY Tutorial Part 1 Please begin with Part 1 of this DIY Tutorial which explains the scale for this project. Our tiny door will be 1/12 the size of an actual door which means 1 foot equals 1 inch. My actual front door is a standard size of 80 inches high by 36 inches wide—my tiny replica is about 6⅝” high x 3” wide. Part 1 also explains how to take a photo of your door and transform that photo into a line drawing and basic shapes diagram using Rapid Resizer software.

Step 2 – Cut Wood Base This project uses multiple layers of materials to replicate the depth of the actual door and its frame. The layers are built up from the bottom to the top and include: ⅜” thick wood base layer, plastic glass in door and sidelights, ⅛” thick balsa wood door and sidelights, ⅜” thick wood top layer, and accessories. The below photo illustrates the depth and dimensionality gained from layering.
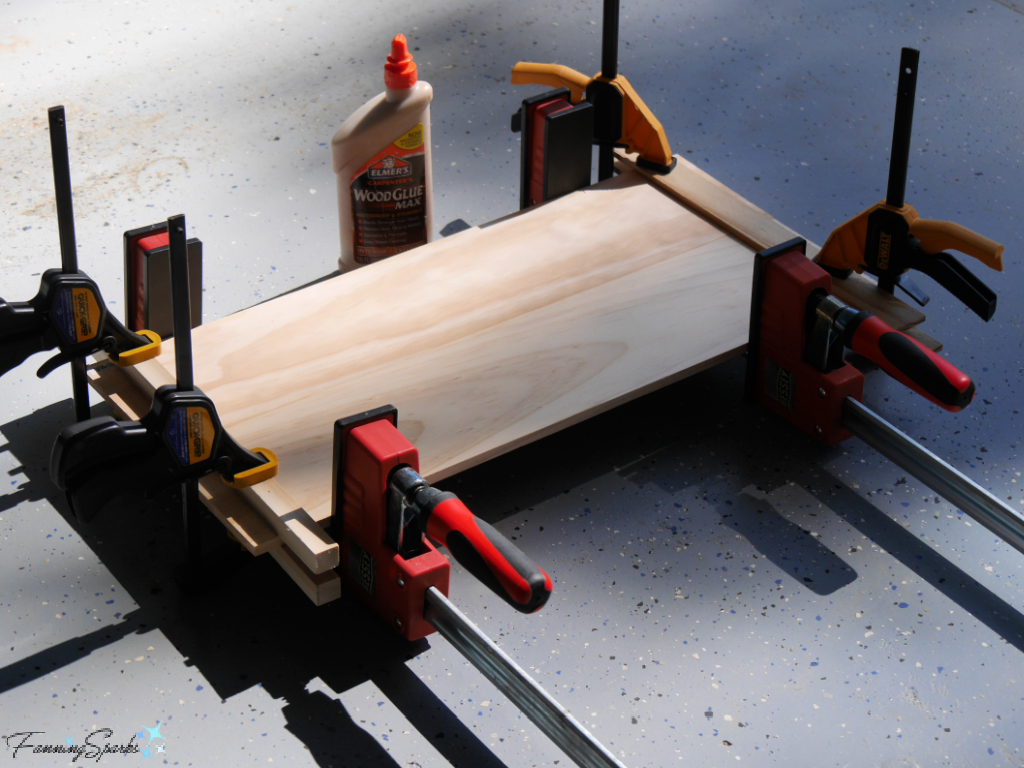
 Start by preparing 2 rectangles of wood for the base and top layers. I used ⅜” thick x 5 ½” wide pine project boards. Since the overall size of my piece was to be 7.9” high x 8.7” wide, I first had to glue the 2 pieces of wood together edge to edge.
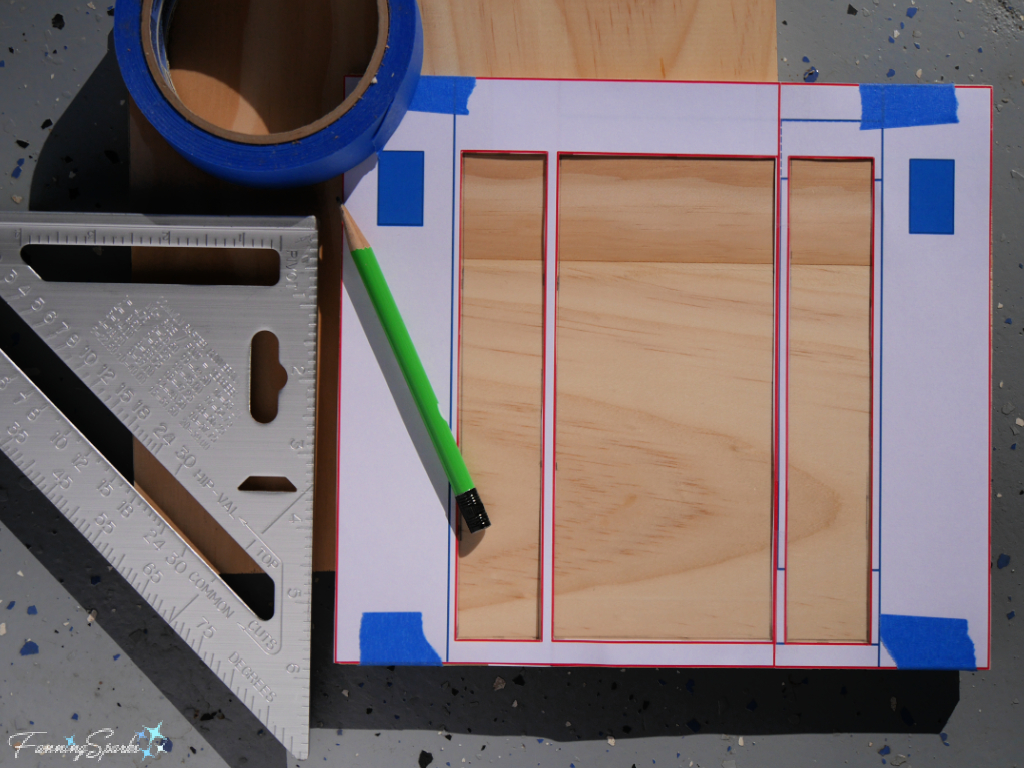
Step 3 – Cut Rectangles for Base and Top Layers Measure and mark the outside dimensions of your rectangles. Use a jigsaw (or your saw of choice) to cut out 2 identical rectangles. One of these rectangles will remain intact and serve as the base layer. The other rectangle will have windows and sidelights removed and serve as the top layer.
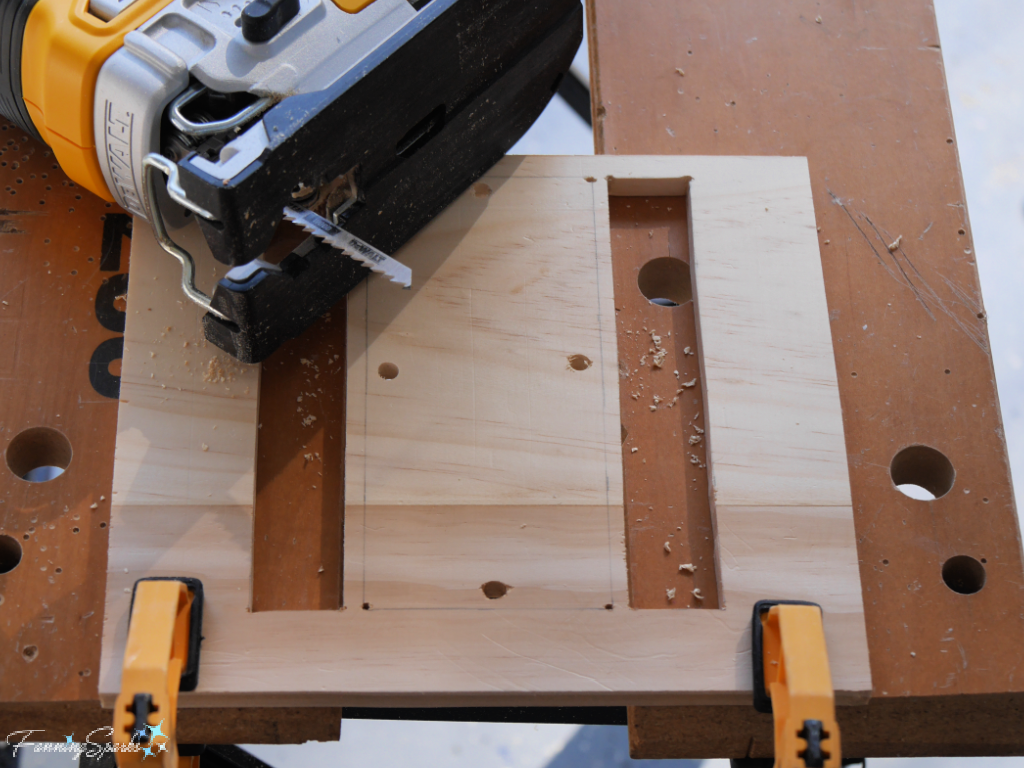
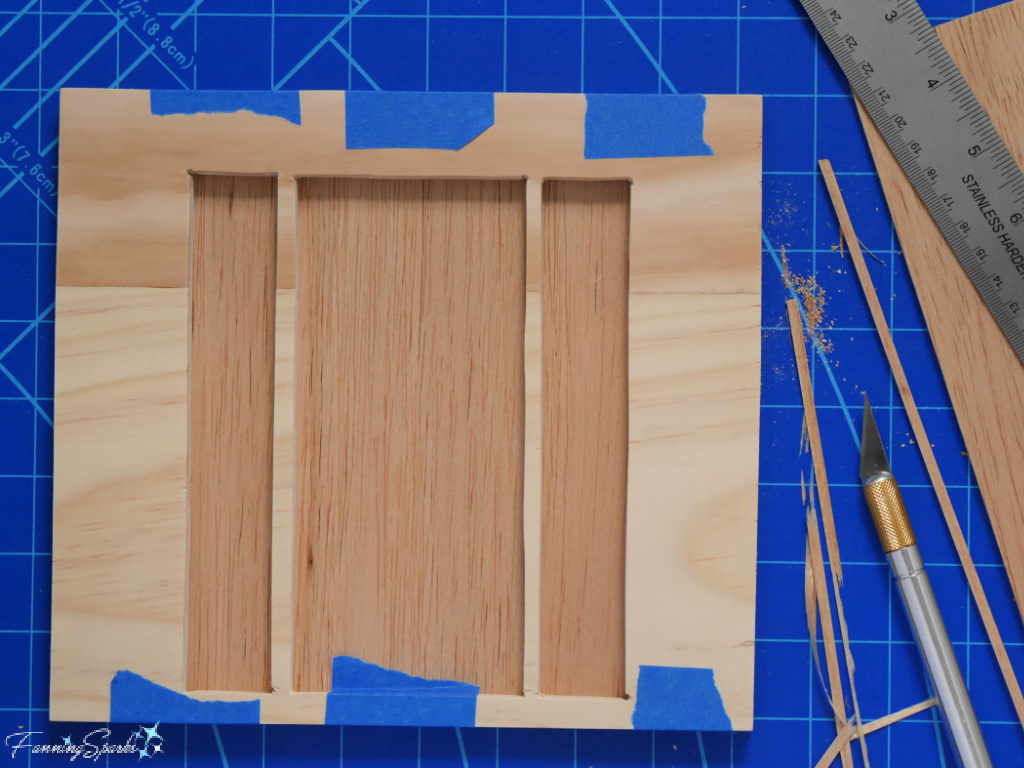
Step 4 – Cut Window and Sidelights into Top Layer Use your basic shapes diagram to mark the areas to be cut out for the door and sidelight frames from the top layer rectangle.
It’s helpful to start by boring holes inside the cutout areas. Then insert the jigsaw blade into these holes to carefully cut out the openings.
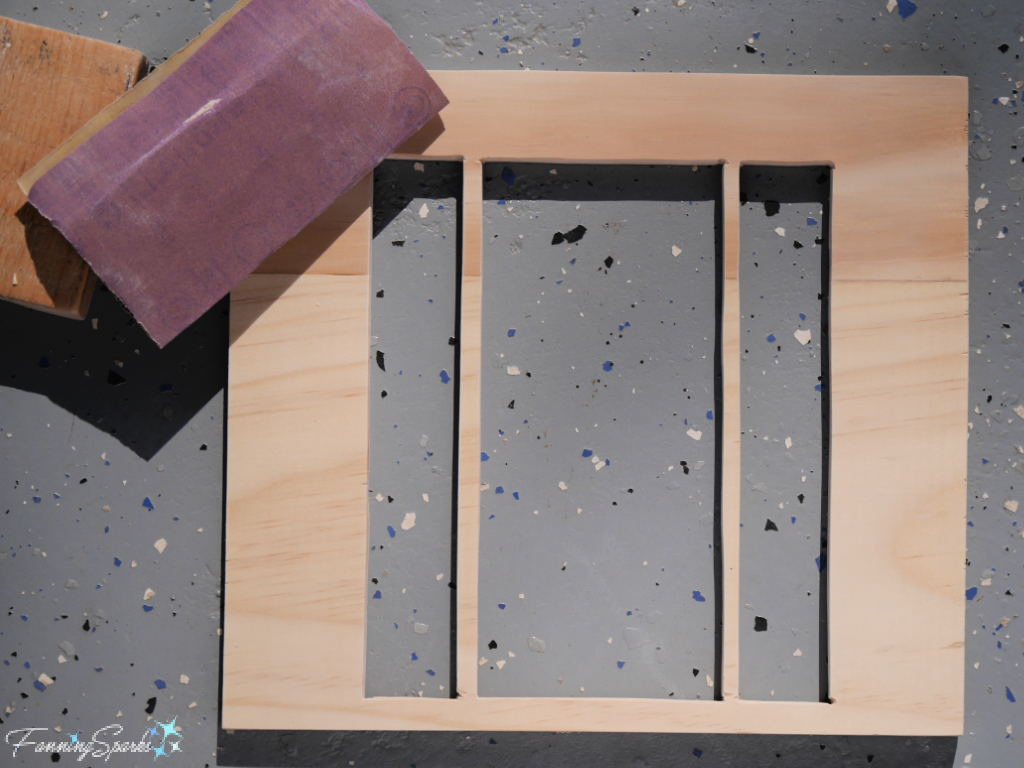
Step 5 – Sand Use sandpaper to sand and smooth the cut edges as needed.
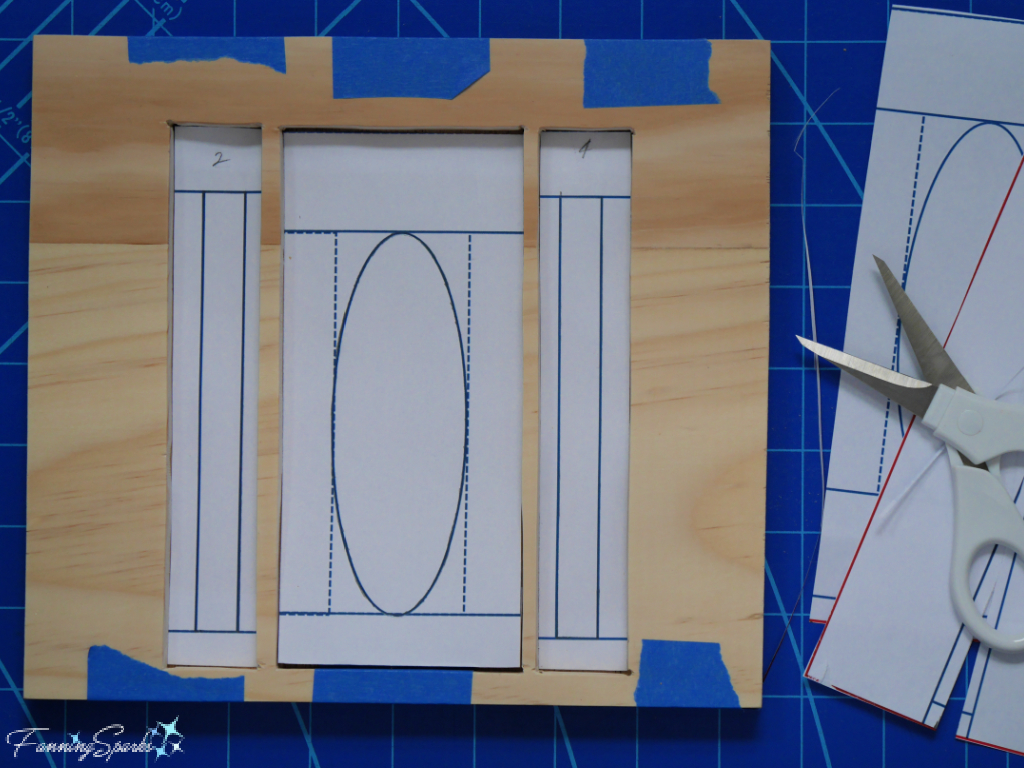
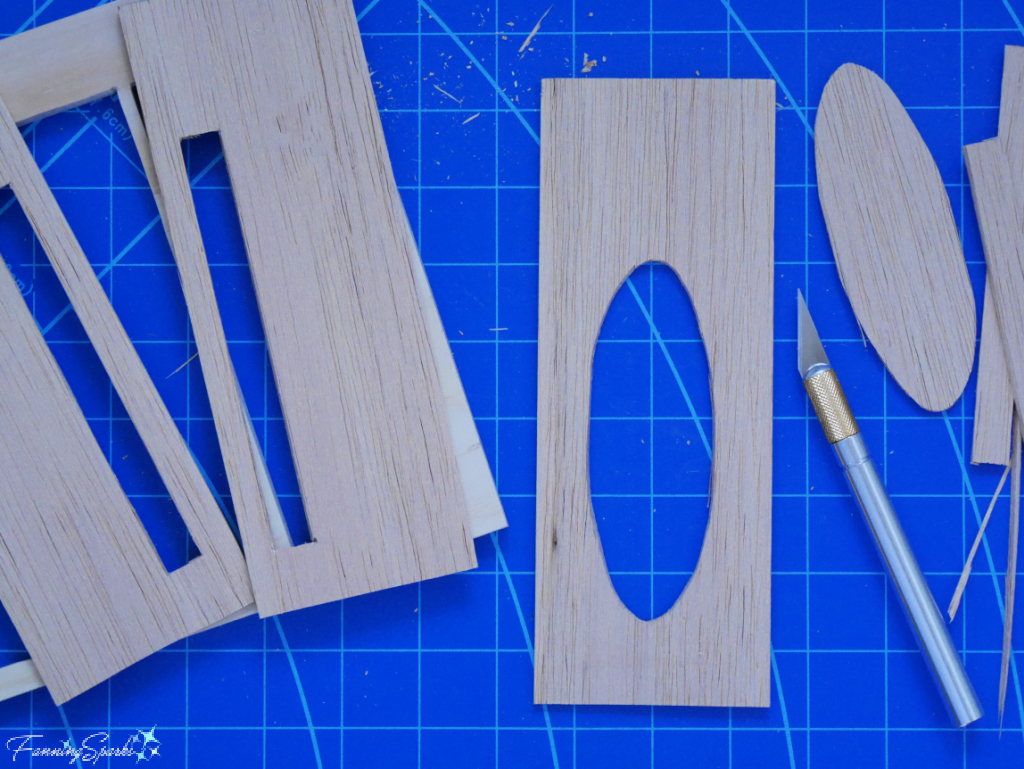
Step 6 – Make Door and Sidelights Using the basic shapes diagram, prepare paper pattern pieces for the door and sidelights. Check that the paper pattern pieces slip easily inside the cutout areas of the top layer. Make any necessary adjustments. I prepared an oval for the door and 2 rectangles for the sidelight sections of my tiny door.
The door and sidelights will be made from thin balsa wood. I used a ⅛” thick x 3” wide x 3’ long board which I cut into three sections to cover the entire base layer. Use a sharp X-Acto knife with a ruler to cut the balsa wood. Take care to hide any seams under the top layer. In my case, the seams fell under the vertical bars of the door frame.
Use the paper pattern pieces to make the door and sidelights. Cut out the openings with an X-Acto knife and ruler.
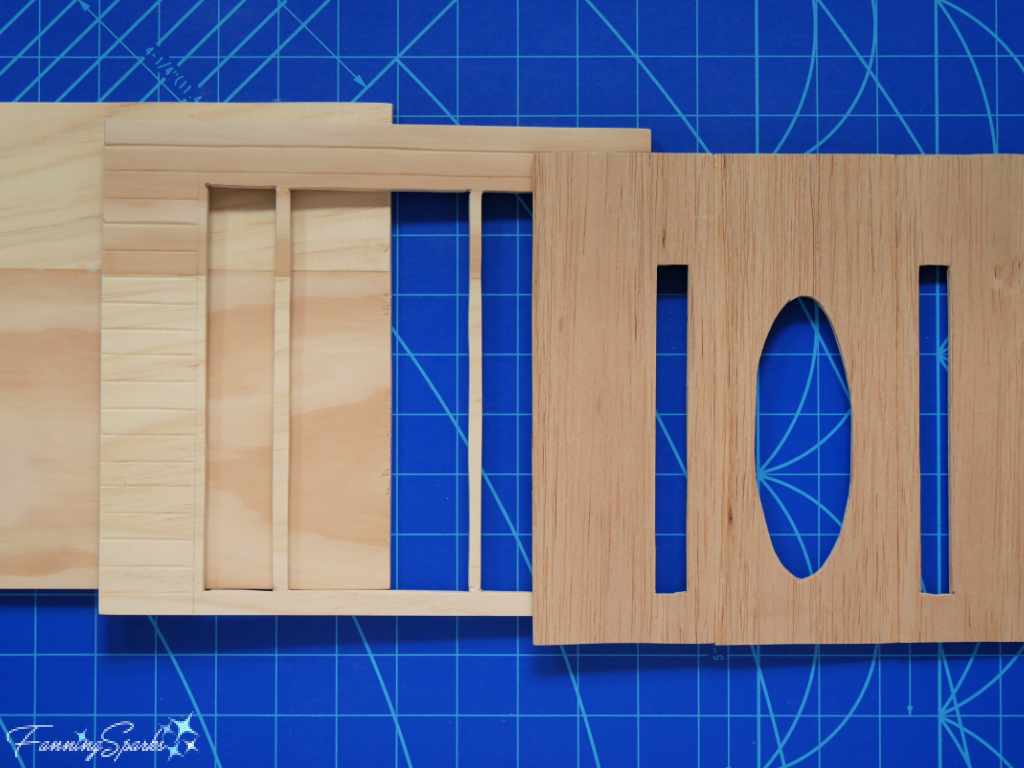
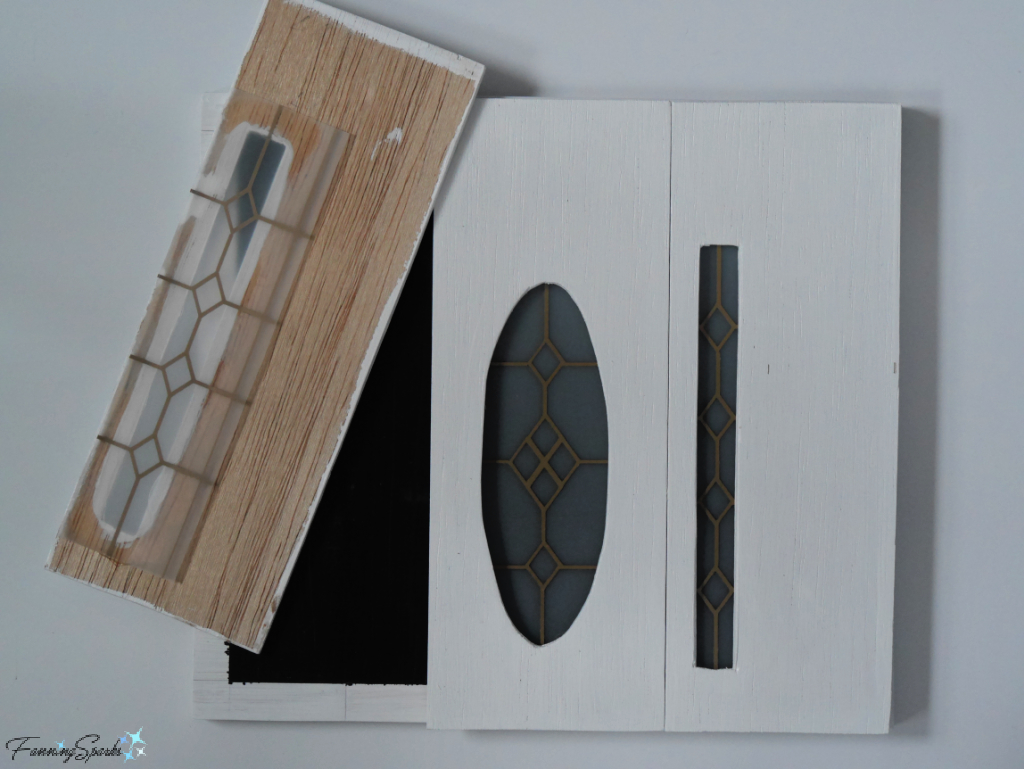
At this stage, you should have prepared 3 layers: the base layer, the top layer with cutouts, and the door and sidelights (as shown below).
Step 7 – Prepare Window Glass The next step is to make the “glass” windows for the door and sidelights. I considered a number of options for this layer including glass and plastic. In the end, I settled on a thin sheet of frosted plastic. It is actually a plastic divider—the kind used to separate sections in a 3-ring binder. With a solid black surface behind it, the plastic is a reasonable imitation of the glass in our front door.
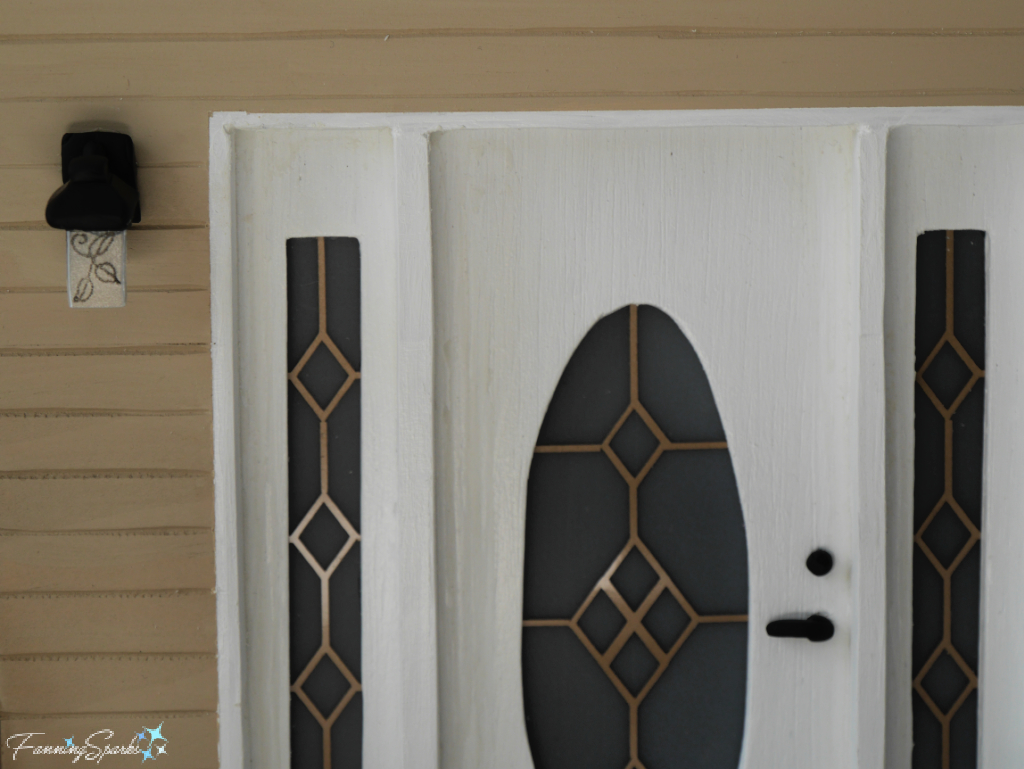
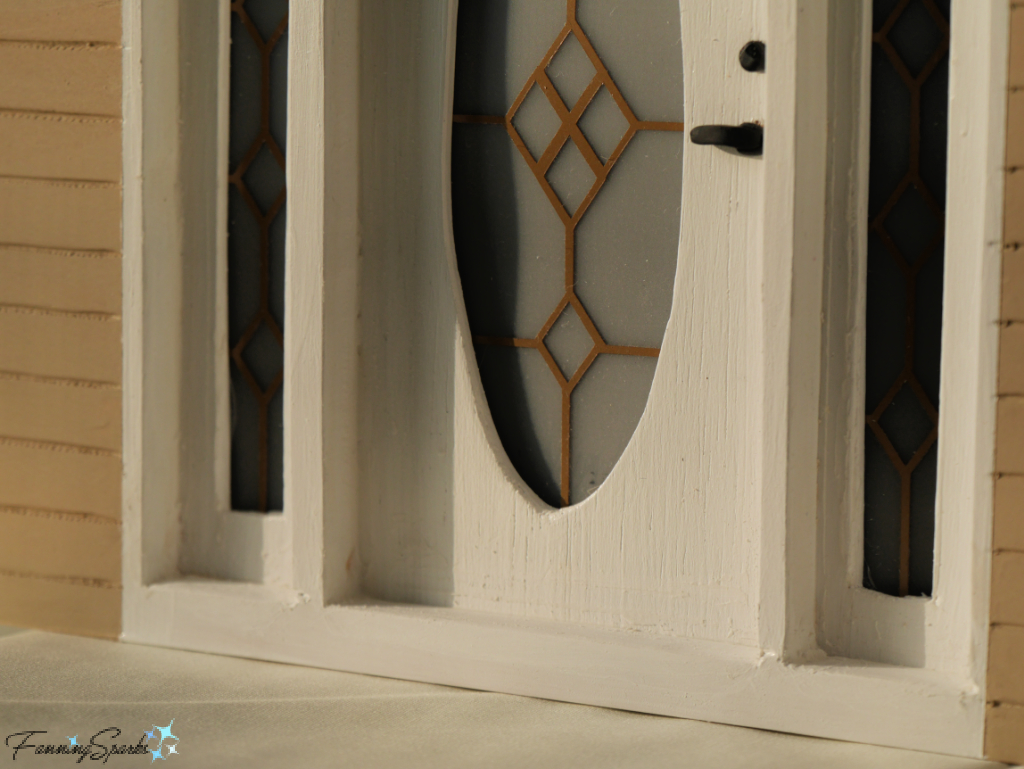
After selecting the glass for your window and sidelights, prepare to transfer any design markings using your line drawing. Our front door has a pretty diamond design in the window glass. I used a black marker in my first attempt to replicate this design element but wasn’t satisfied with the results… perhaps I should have used a marker with a finer tip.
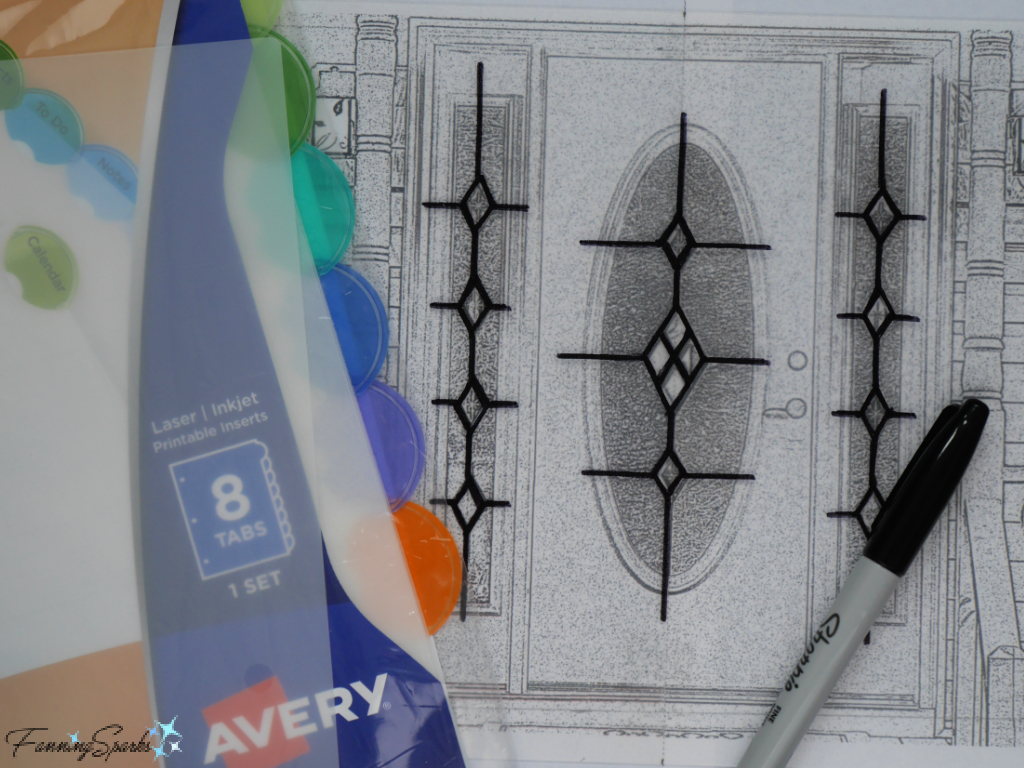
In my second attempt, I used my Cricut electronic cutting machine to cut the design elements from adhesive vinyl. It was a considerable amount of work to build the pattern as a Cricut cutting pattern, but I’m very pleased with the results. Alternatively, you could cut adhesive vinyl with an X-Acto knife.

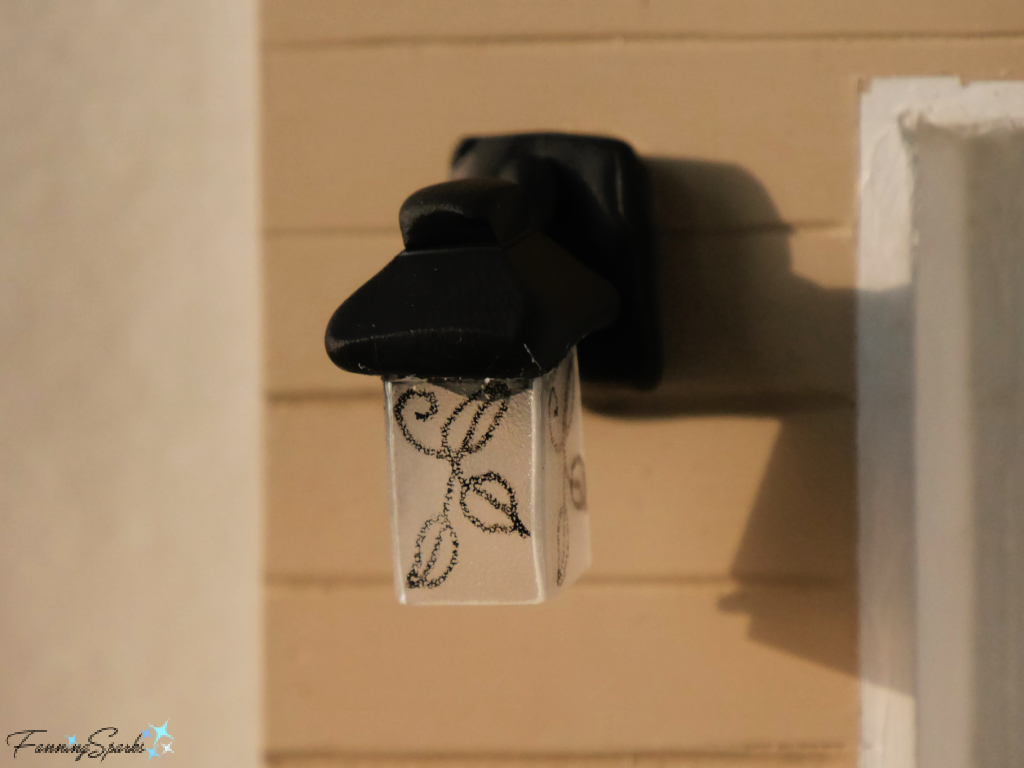
Step 8 – Make Accessories Elements such as door knobs, locks, light fixtures, planters and house numbers can be made in miniature from materials such as polymer clay. Premo Sculpey polymer clay was ideal for making my light fixtures. If you’re new to polymer clay, check out my previous blog post, I Only Have Eyes For You with DIY Tutorial, for a rundown of the materials, tools and process.
I cut a small piece of frosted plastic, scored it, decorated it a with marker, and folded it into a cylinder to replicate the glass on my light fixtures.
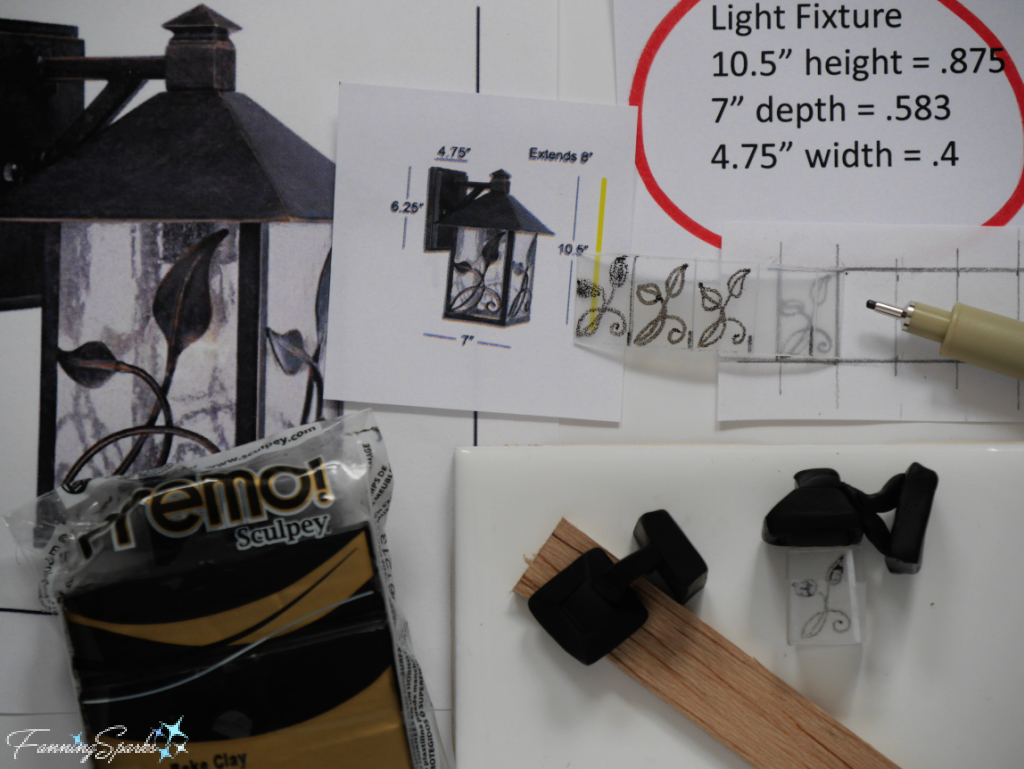
The key to making these accessories is to keep them in proportion to the rest of the piece. Use the same 12:1 scale used for the door design to calculate the size of these elements. I found it easiest to make a line drawing to the correct scale using a photo of the light fixture and the Rapid Resizer software (see Part 1 of this Tutorial for details).
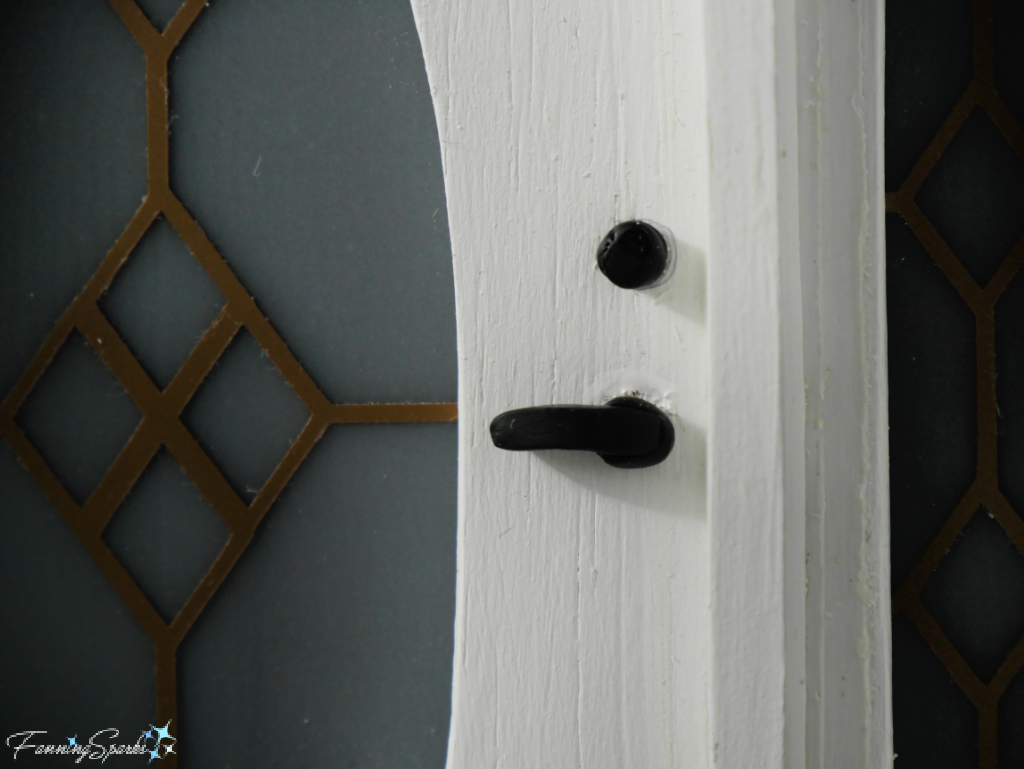
I used the same approach to make a miniature door handle and lock.
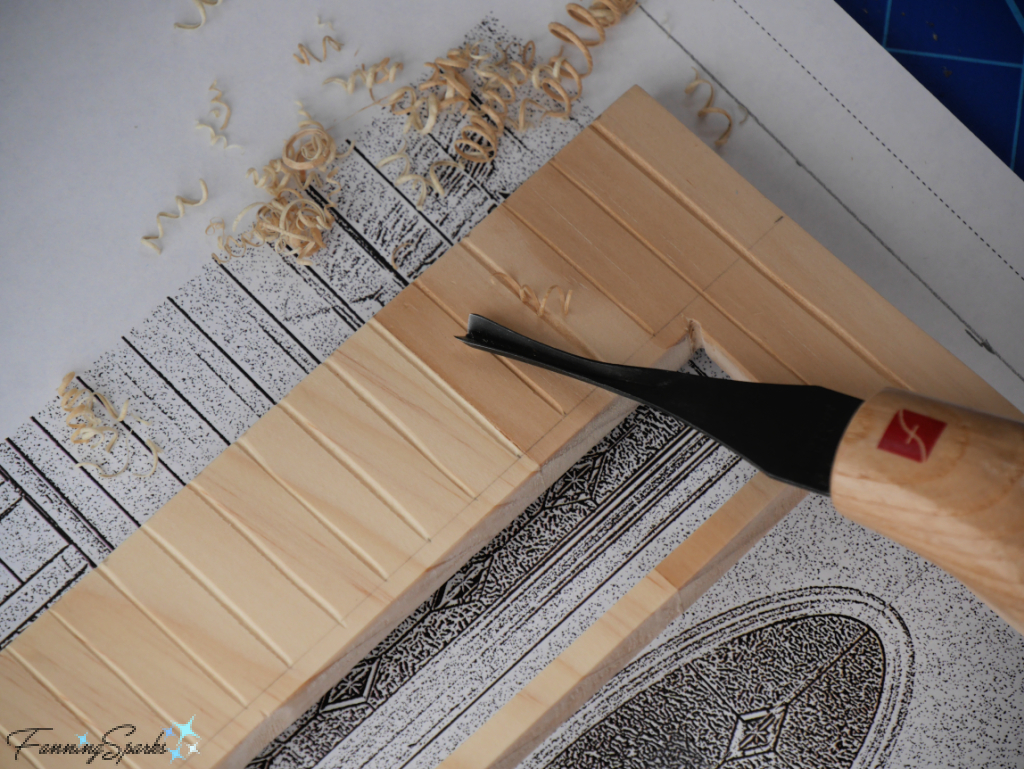
Step 9 – Add Details to Top Layer Add any additional details to your top layer, door frame, door and sidelights. Our exterior house walls, for instance, are vinyl siding. I replicated the horizontal lines of the siding with a V groove chisel.
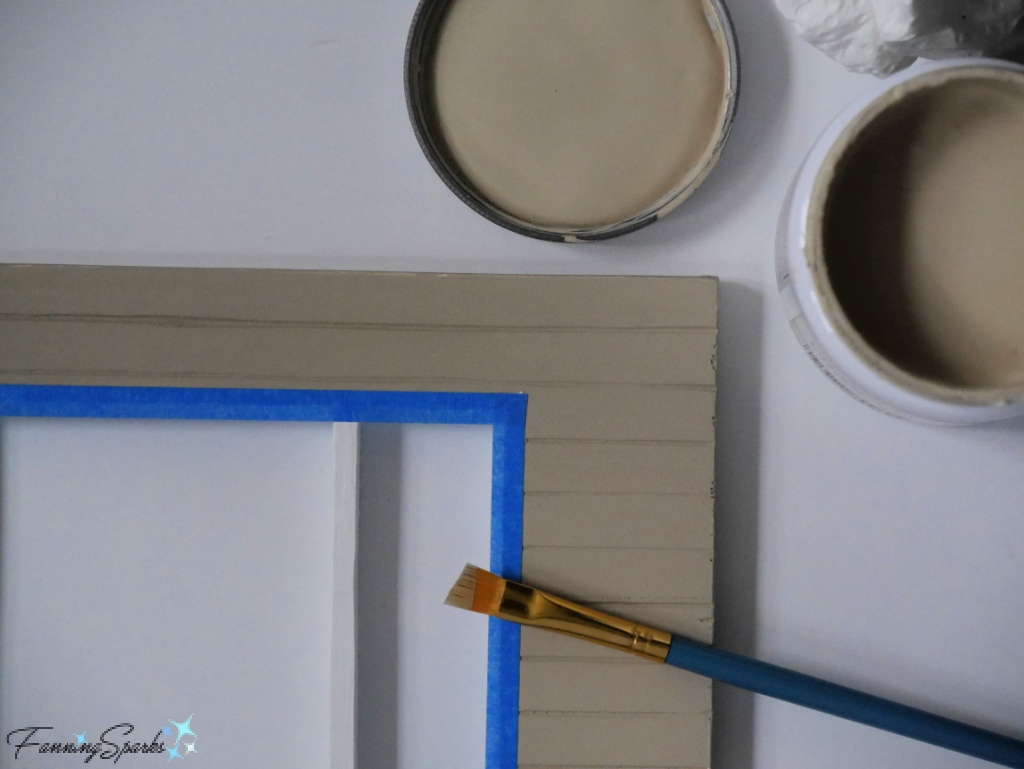
Step 10 – Paint Parts Paint the various parts of your tiny door to match your actual door. If your tiny door includes plastic glass, paint the sections behind the glass black.
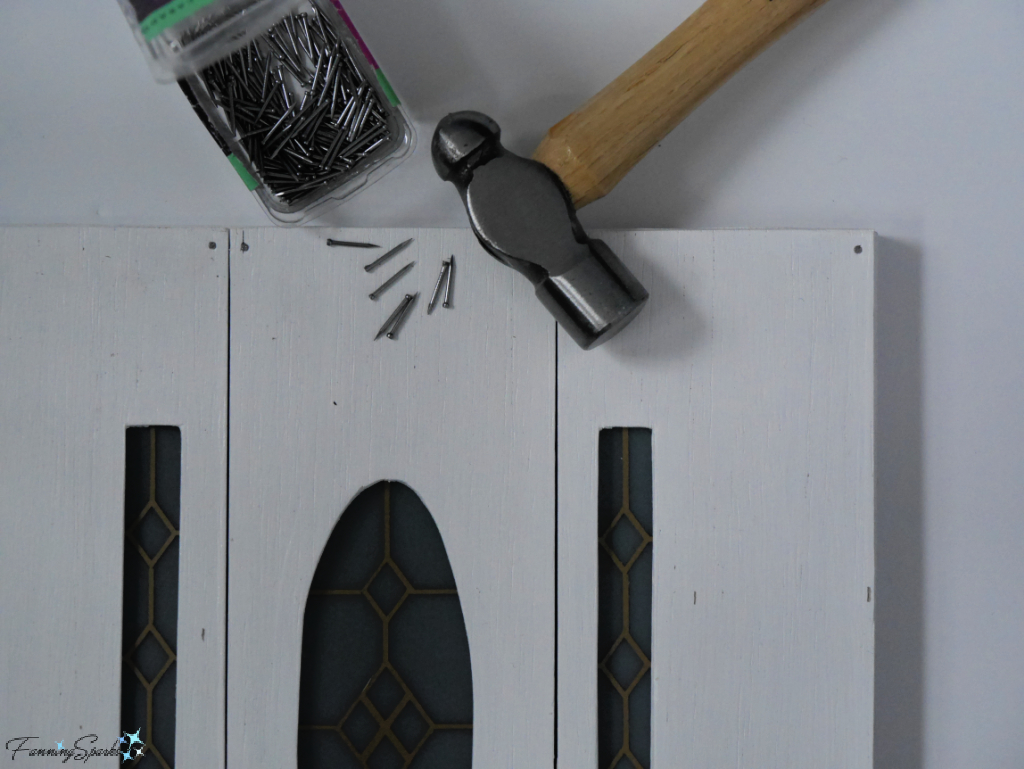
Step 11 – Assemble Tiny Door As described in Step 2, this project uses multiple layers of materials to replicate the depth of the actual door and its frame. In this step, we use glue and small wire brads to attach the layers. The layers are built up from the bottom and include: ⅜” thick wood base layer, plastic glass in door and sidelights, ⅛” thick balsa wood door and sidelights, ⅜” thick wood top layer, and accessories.
Start by gluing the plastic glass to the back of the balsa wood door and sidelights.
Then glue and nail the balsa wood door and sidelights to the base layer.
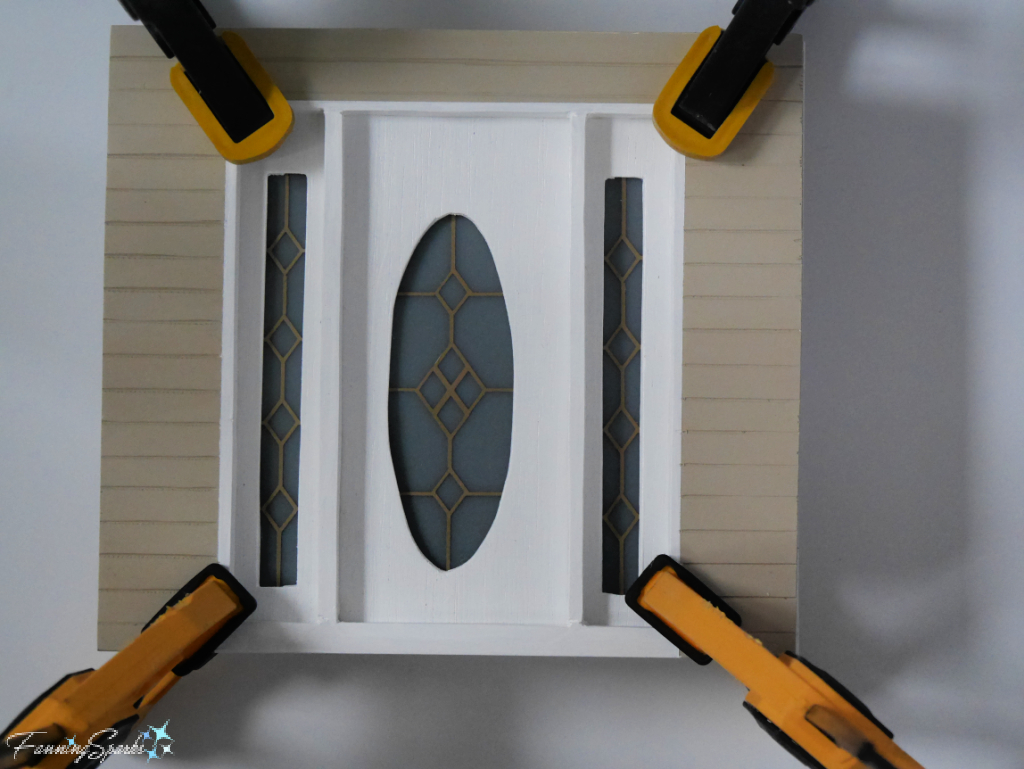
 Next, glue on the top layer and clamp it in place to dry.
Finally, glue polymer clay accessories, such as light fixtures, door handle and lock, into place with E6000 glue.
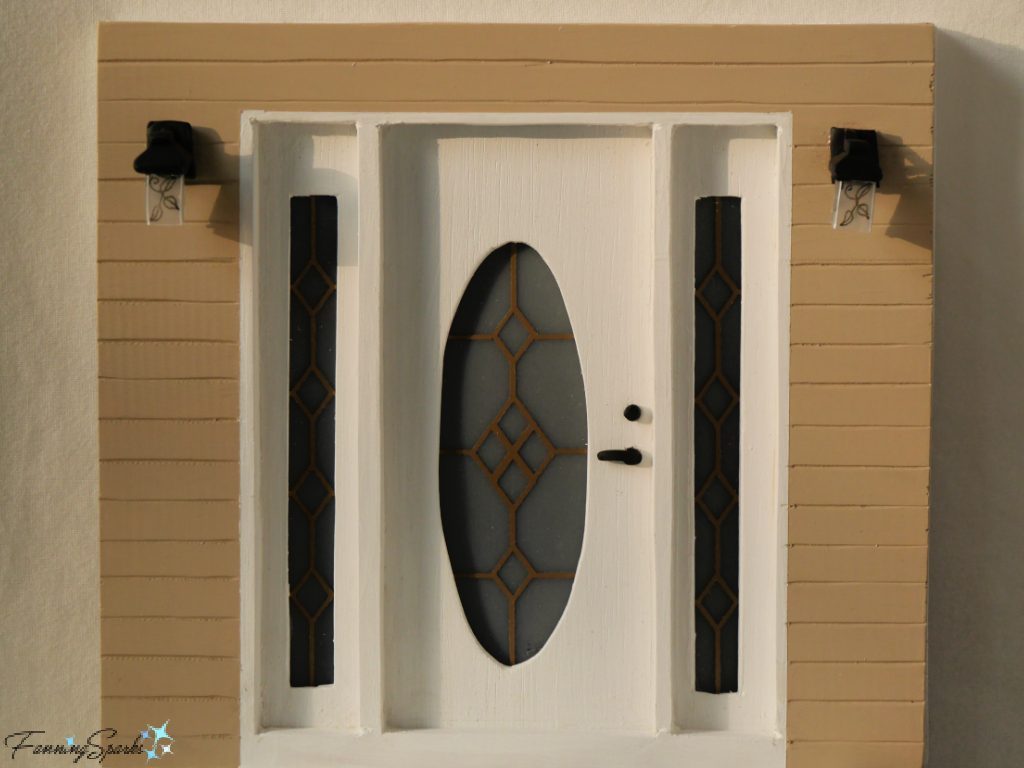
Voilà! Your tiny door is ready to be placed in its new home!
More Info
The first part of this tutorial, Make Your Own Tiny Door – DIY Tutorial Part 1 explains the scale for this project as well as how to create the design for your own tiny door.
Check out my previous blog post, Tiny Adventure in the Big City, to see art installations by Karen Anderson Singer, aka Tiny Doors ATL, which inspired this tiny door project.
Please pin the below image to share or save for future reference.
This tutorial references a previous post, I Only Have Eyes For You with DIY Tutorial, for a rundown of the materials, tools and process of using polymer clay.
Today’s Takeaways
1. Successful miniatures start with a good design and a specific scale.
2. A variety of materials and techniques can be used to create miniatures.
3. Making miniatures is a great creative challenge.


Comments are closed.