
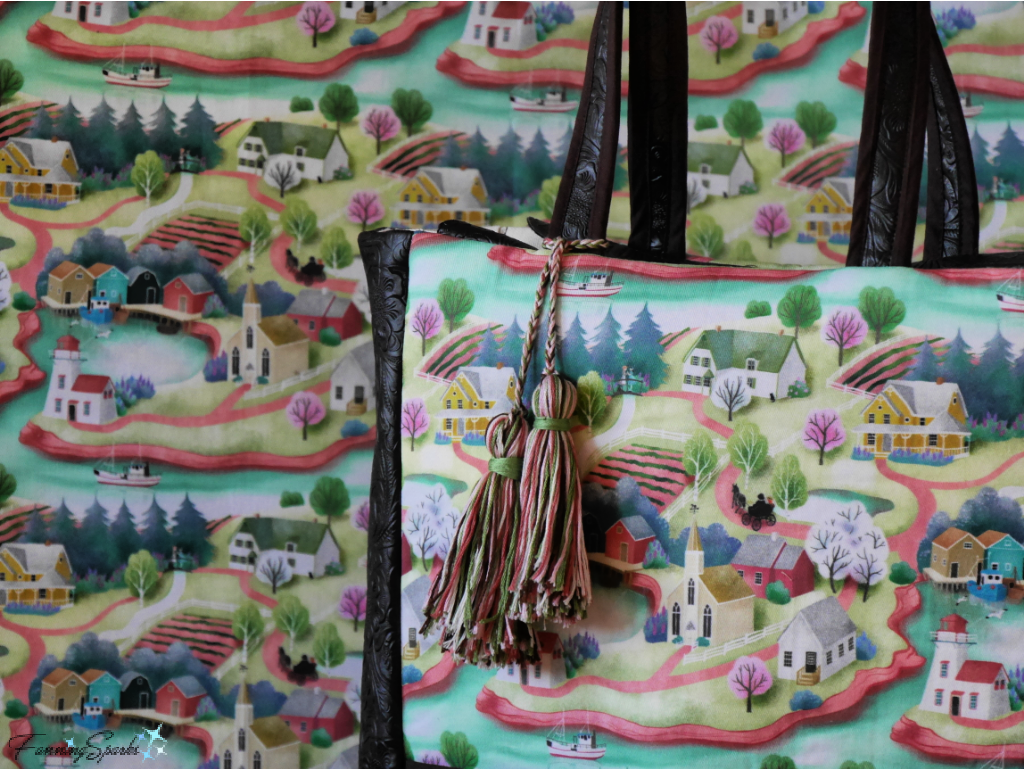
After noodling it over, I decided to use my new Kindred Spirits fabric to make a tote bag. I shared this fabric, designed by the talented Gaia Marfurt, in my last post The Perfect Reminder of Green Gables. Now I can carry my memories of Prince Edward Island with me whenever I head to the store or take a road trip.
I took my time to design this new tote bag—considering several options and trying some new ideas. I learned a few things along the way that I’d like to share today.
Storage Needs
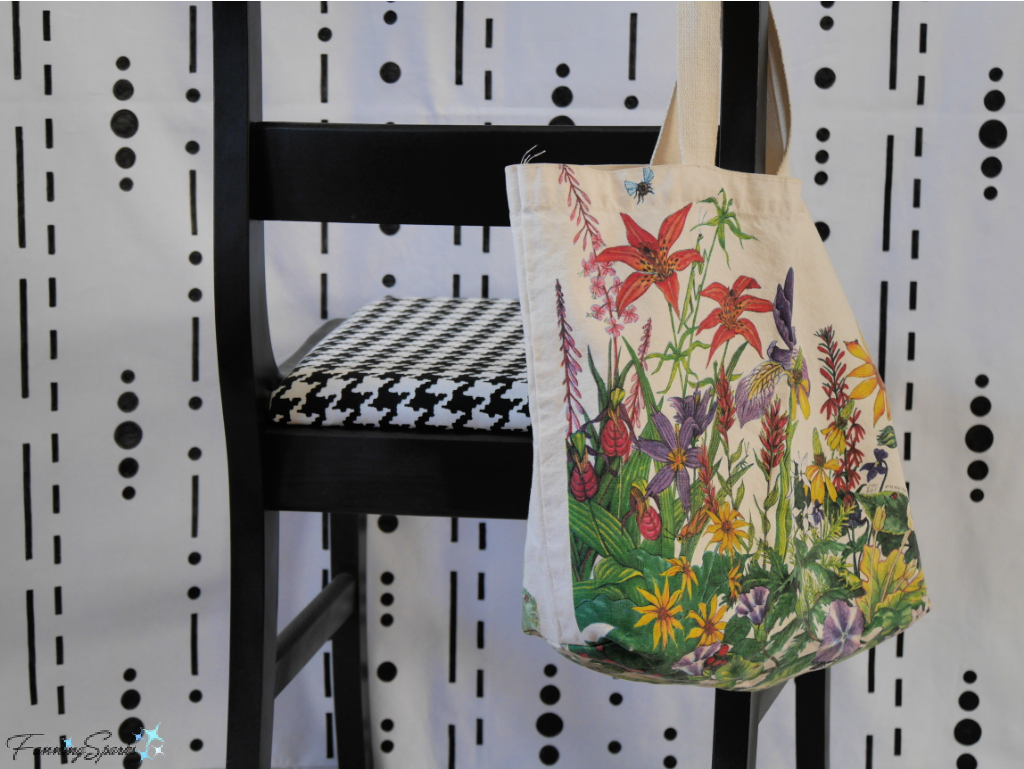
It might sound like overkill but I started by analyzing my needs. After all, if I’m going to make my own tote bag, it might as well be tailored to my needs and preferences. It was helpful to compare to other tote bags. For instance, pictured below is my old go-to tote bag. I purchased it in Singapore many years ago and have been using it ever since.
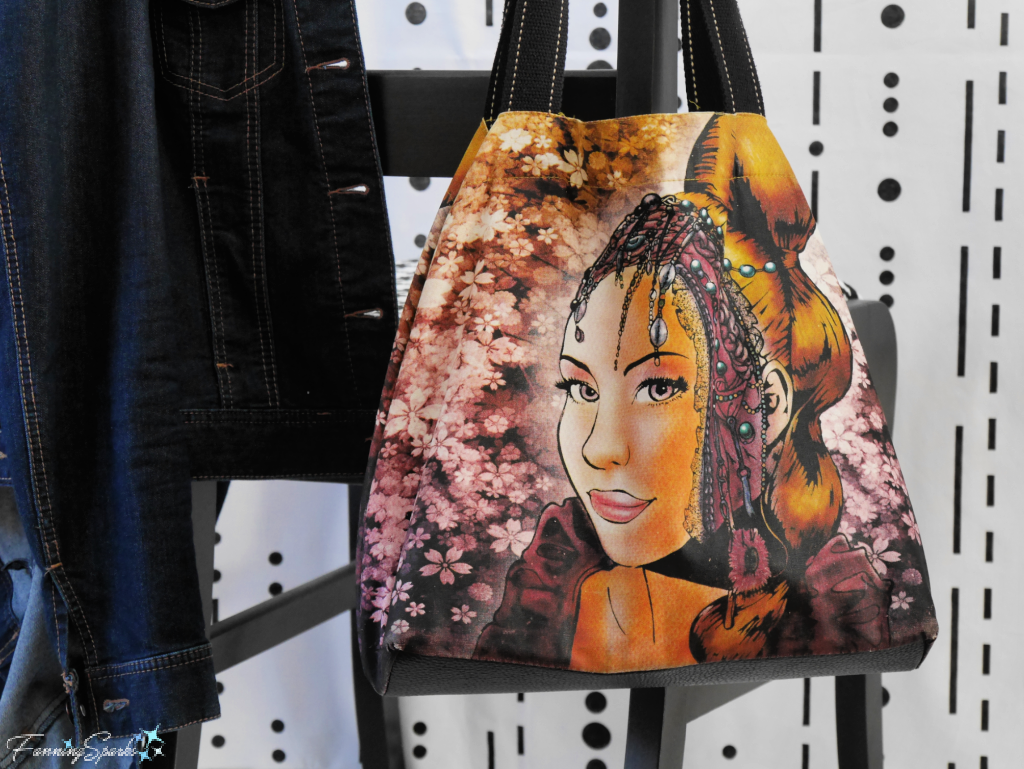
There are several things I like about my old tote bag—the unusual design and color, the format and size, and the sturdiness. But there are a few aspects that could be better. This bag is 13” tall x 12 ½“ wide x 7” deep. It holds everything I want to put in it including my laptop and camera. But the generous size has become a problem because there’s no way to organize my stuff—everything gets jumbled up into one big mess. There’s also no protection for my laptop and camera.
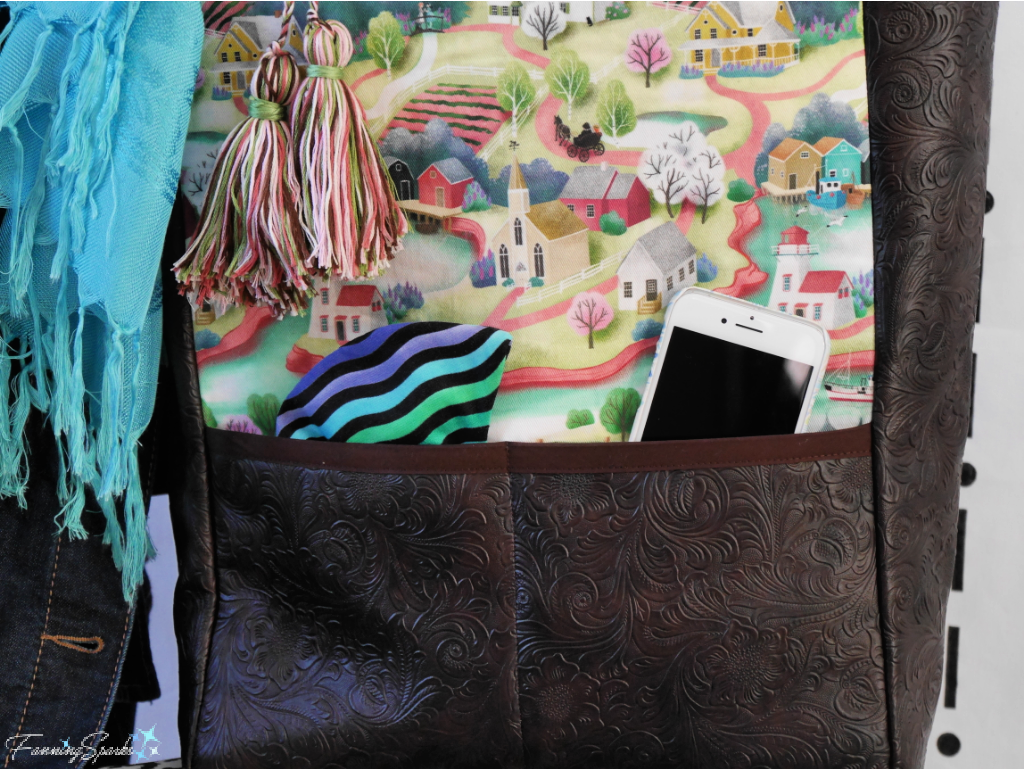
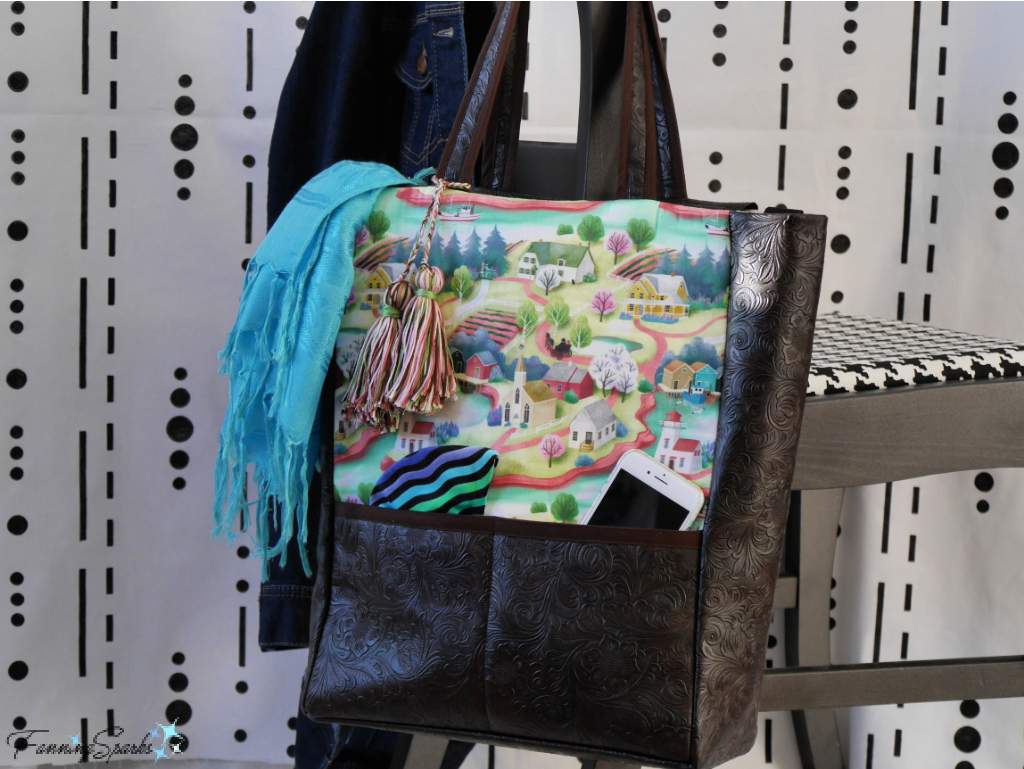
As a result, my new Kindred Spirits Tote Bag has lots of pockets and dividers. It is 17” tall x 13” wide x 6 ½“ deep. There are 4 small outside pockets to hold things I access frequently such as my phone and face mask.
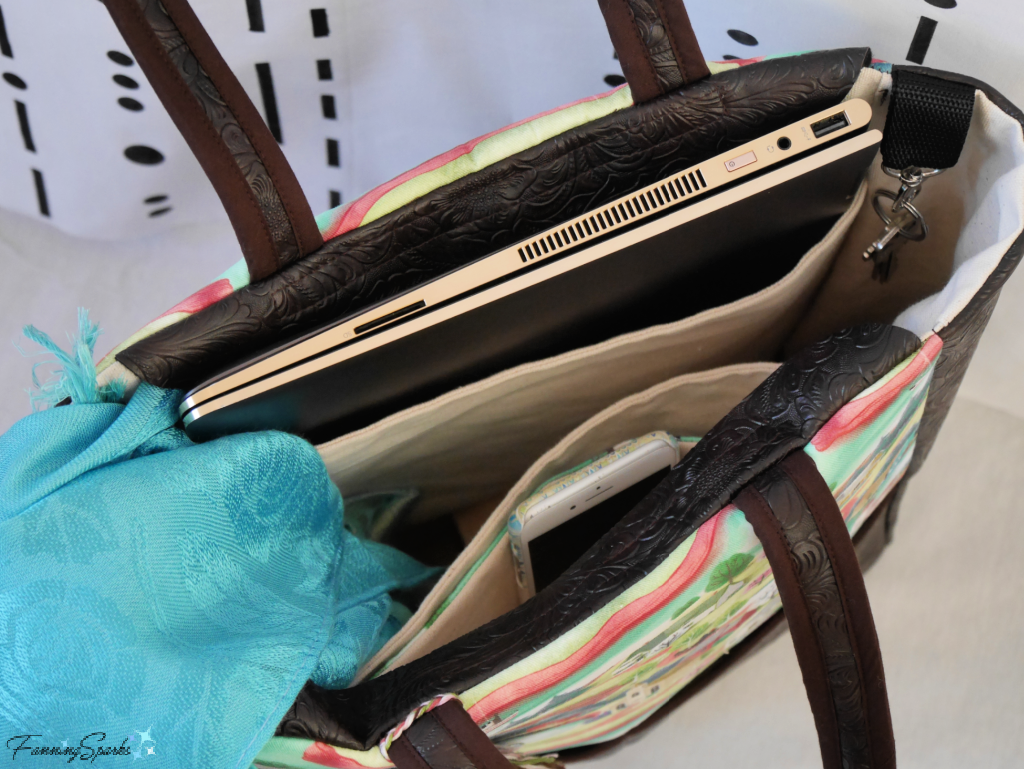
On the inside, there are 2 dividing panels to secure things like my laptop. There are 2 small pockets on the inside of the front and back panels. There’s a strap designed to hold a water bottle and a clip to hold keys or a small bottle of hand sanitizer.
Sturdy Structure
Making a tote bag isn’t difficult. There are several online tutorials available from excellent resources such as Spoonflower and Sew4Home (see More Info below). Most simple tote bags, like the one pictured below, are made by stitching together 2 flat panels with box corners to create the bottom.
For the Kindred Spirits Tote Bag, I cut the sides and bottom as separate pieces to form a distinct box-like shape. This design, along with some special products I’ll describe below, makes the tote bag sturdy enough to stand up independently. It’s so much easier to store and remove items when the tote bag doesn’t collapse or flop over.
The handles are also sturdier than most and easy to grasp. I like the versatility of carrying my bag down in my hand or up over my shoulder. This means the handles have to be just the right length—long enough to slip over my shoulder comfortably but short enough to keep the bag off the ground when carried at my side. In this case, that meant making the straps 20 ½” from one connection point to the other. 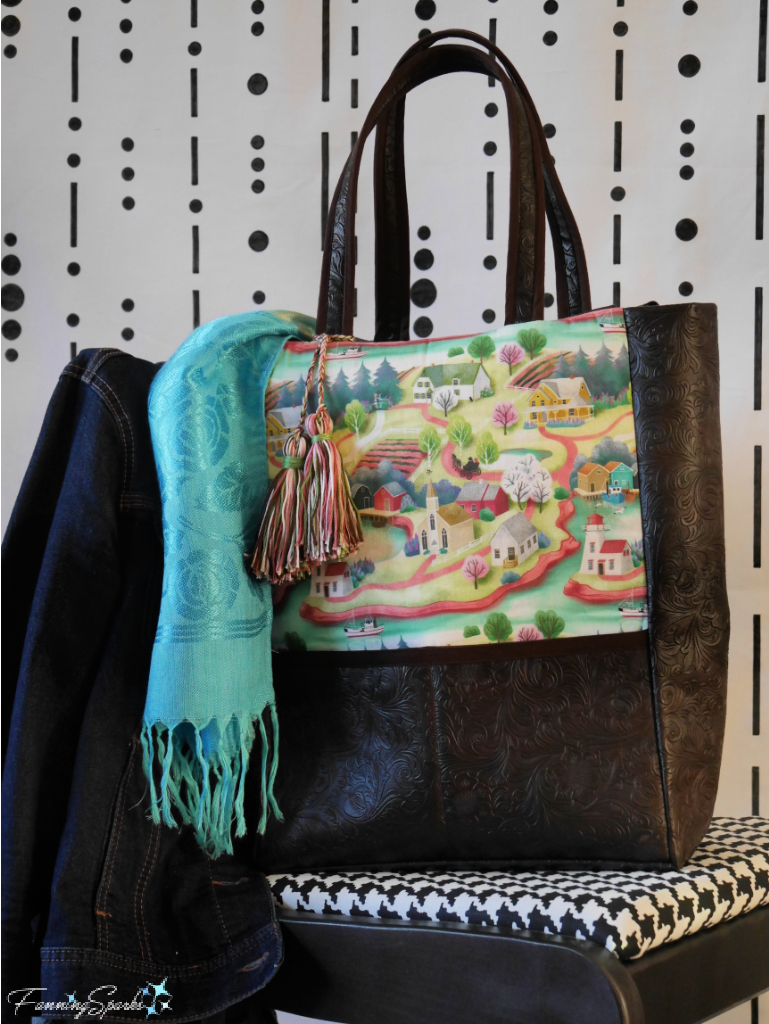
Materials Used
Knowing I wanted to feature Gaia Marfurt’s Kindred Spirits fabric on this tote bag, I ordered extra yardage. The extra fabric allowed me to position the pattern with a full repeat at the center of both the front and back panels.
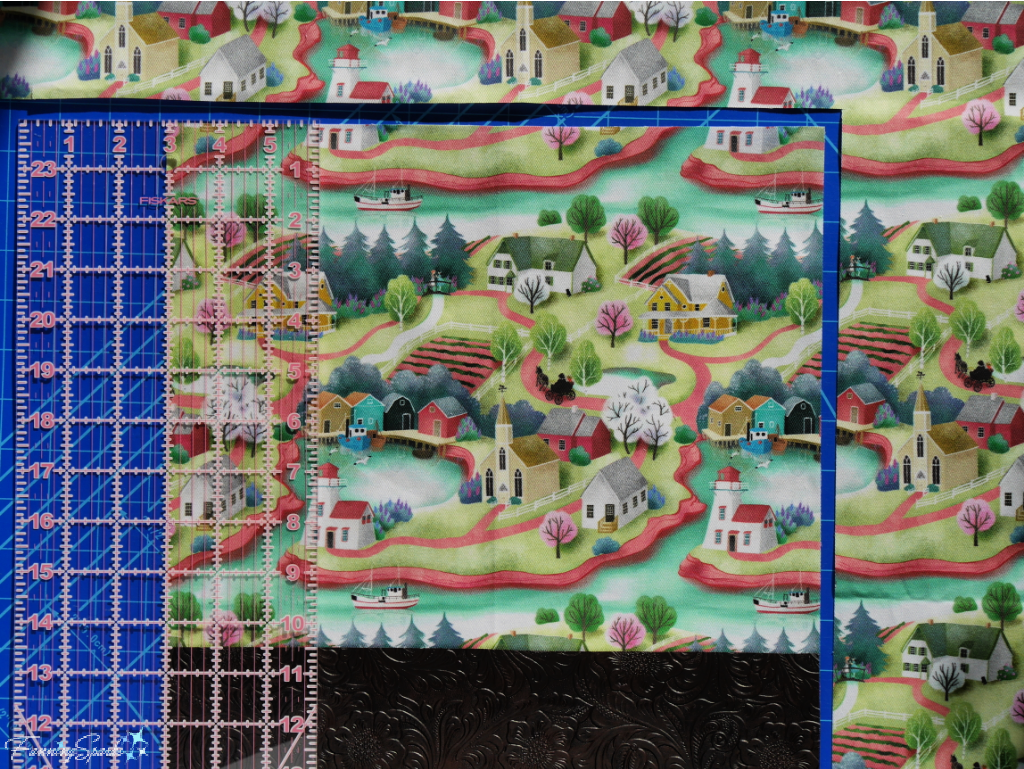
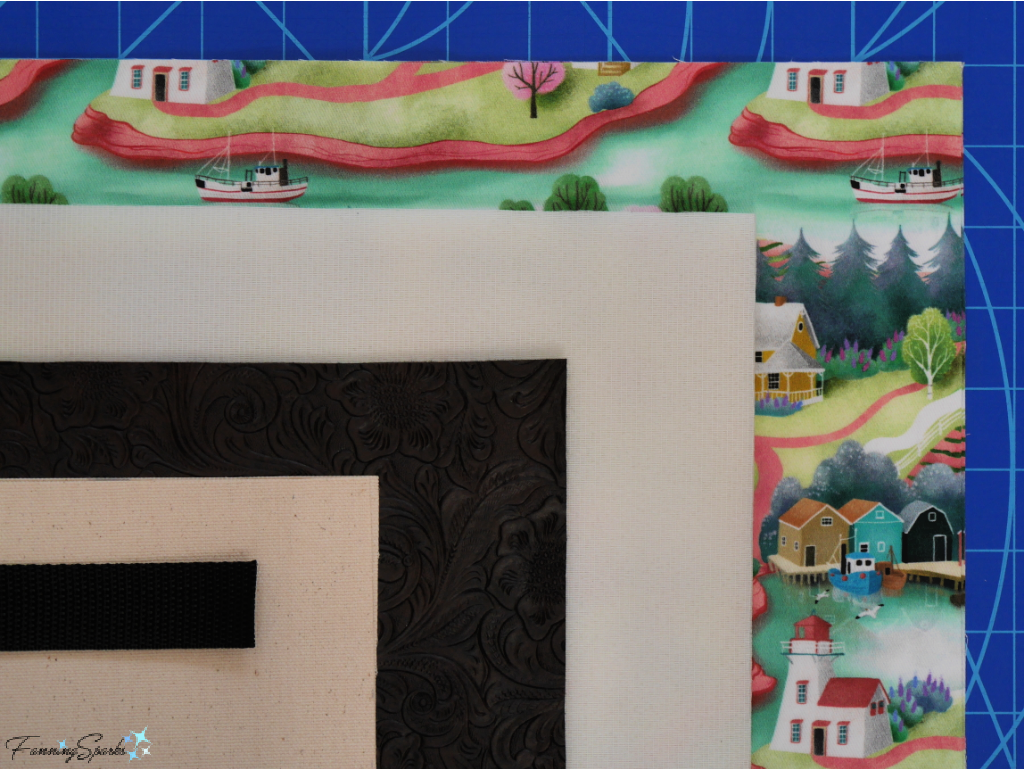
The fabric, ordered from Spoonflower, is a lightweight cotton twill. It is a good sturdy fabric but I decided to add some vinyl for increased durability. The vinyl is dark brown and embossed with a pretty floral design. The lining is made with a beige duck canvas fabric, a heavyweight woven 100% cotton utility fabric. The handles are made with webbing covered with vinyl.
Here’s a list of the pieces I cut for this project (½“ seam allowances are included):
Main Fabric – Kindred Spirits Cotton Twill:
. Body Front and Back: TWO 17” tall x 13” wide
. Inside Pockets: TWO 7” tall x 9” wide
Trim Fabric – Brown Embossed Vinyl:
. Outside Pockets: TWO 7” tall x 13” wide
. Sides: TWO 17” tall x 6½ ” deep
. Bottom: ONE 13” wide x 6½ ” deep
. Handles: FOUR 25” long x 1” wide
Lining Fabric – Beige Duck Canvas Fabric:
. Body Front and Back: TWO 17” tall x 13” wide
. Sides and Bottom: ONE 47” long x 6½” deep
. Divider Panels: FOUR 13” tall x 13½” wide
. Inside Pockets: TWO 7 tall x 9” wide
. Water Bottle Strap: 8½” long x 4” wide
Fusible Foam
. Body Front and Back: TWO 16” tall x 12” wide
Webbing – 1” Wide
. Handles: TWO 25” long
Plastic Canvas
. Bottom: ONE 13” wide by 6½” deep
Fusible Foam and Plastic Canvas
I’d never heard of fusible foam before making this project. It’s very helpful for reinforcing fabric without making it stiff and hard. The specific product I used is Flex-Foam 1-Sided Fusible Stabilizer from Pellon. The foam is a mere 5mm thick and is available off the roll. A hot iron is used to fuse the thin layer of foam to the fabric. Of course, the fusible foam can’t be used on vinyl. I tried a test and the heat of the iron definitely ruined the vinyl.
The fusible foam is pictured below. It’s difficult to see the thickness so I rolled up a scrap piece to show it from the side.
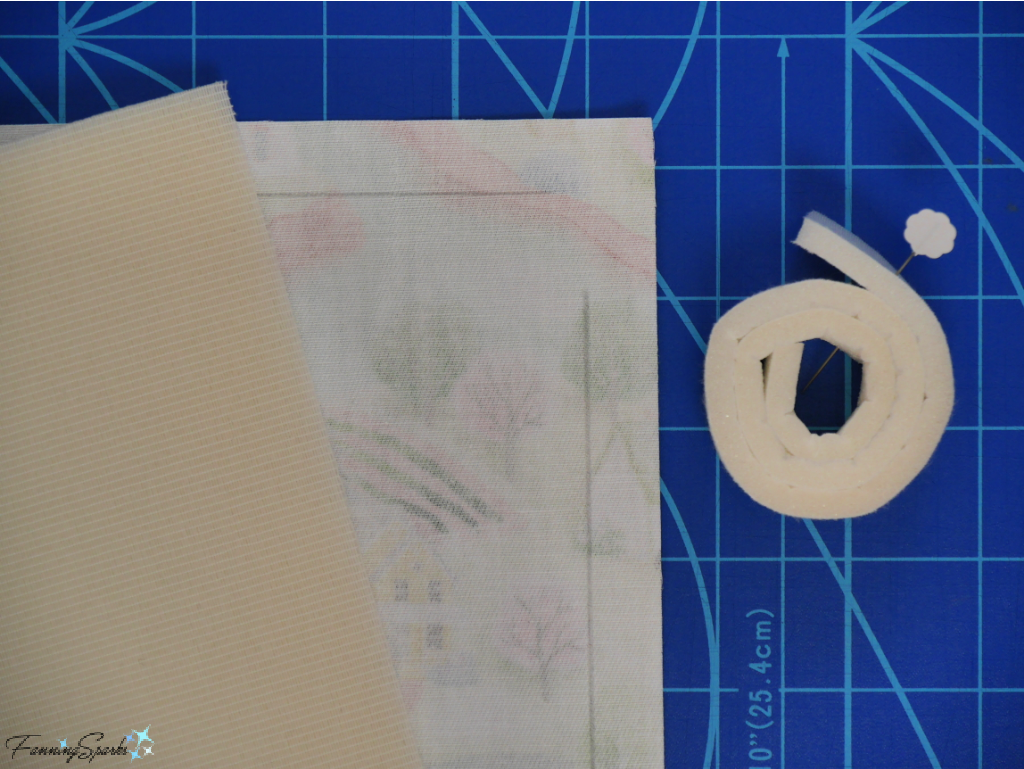
The foam is light but bulky so it’s best to keep it out of the seams. Here are a couple of tricks I learned for working with fusible foam:
a) Cut the foam so it fits inside the seam allowance of the fabric to be fused. For instance, my side panels are 17” x 13” including ½“ seam allowances. I cut my foam 16” x 12” and centered it on the fabric. I should have been a little more precise with this trimming because a sliver of foam ended up inside the seam around the top edge. It wasn’t much but it made that seam bulkier than it needed to be.
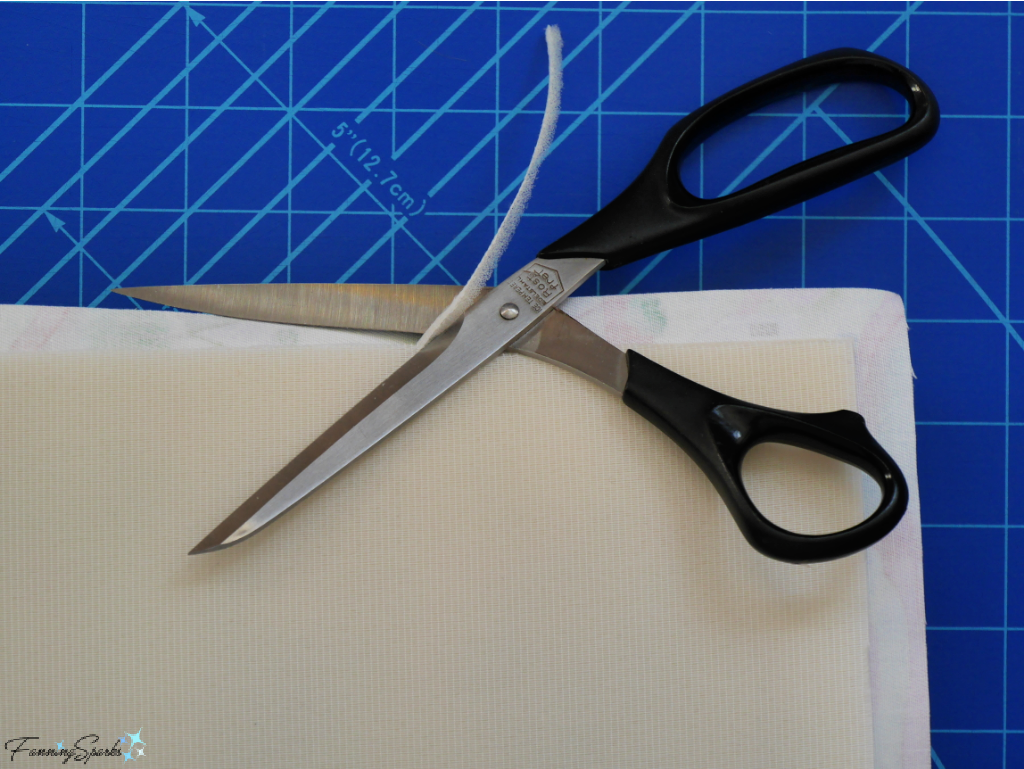
b) After fusing the foam to the fabric, use scissors, cutting at an angle, to carefully trim off the top edges of the foam. This smooths out the transition between the flat fabric and the fused-foam fabric.
There is one downside to this fusible foam. Using a hot iron and damp press cloth to fuse the foam to the fabric resulted in a nice, smooth finish. But then I discovered the smooth finish can easily be compromised if you manipulate the fused fabric. At least, that was my experience when turning my tote bag right side out. Next time, I’ll take more care and handle the fused fabric gently.
The other product I learned about during the course of this project is plastic canvas. Plastic canvas, which is a flat sheet of gridded mesh, has been around for some time. It is often used with yarn to make small decorative items such as coasters and ornaments. Turns out, it’s also great for adding structure to fabric. I cut a piece to fit the bottom of the tote bag and inserted it between the lining and featured fabric. The plastic canvas is light and, just like the fusible foam, it adds structure without making it too rigid.
Versatile Closure
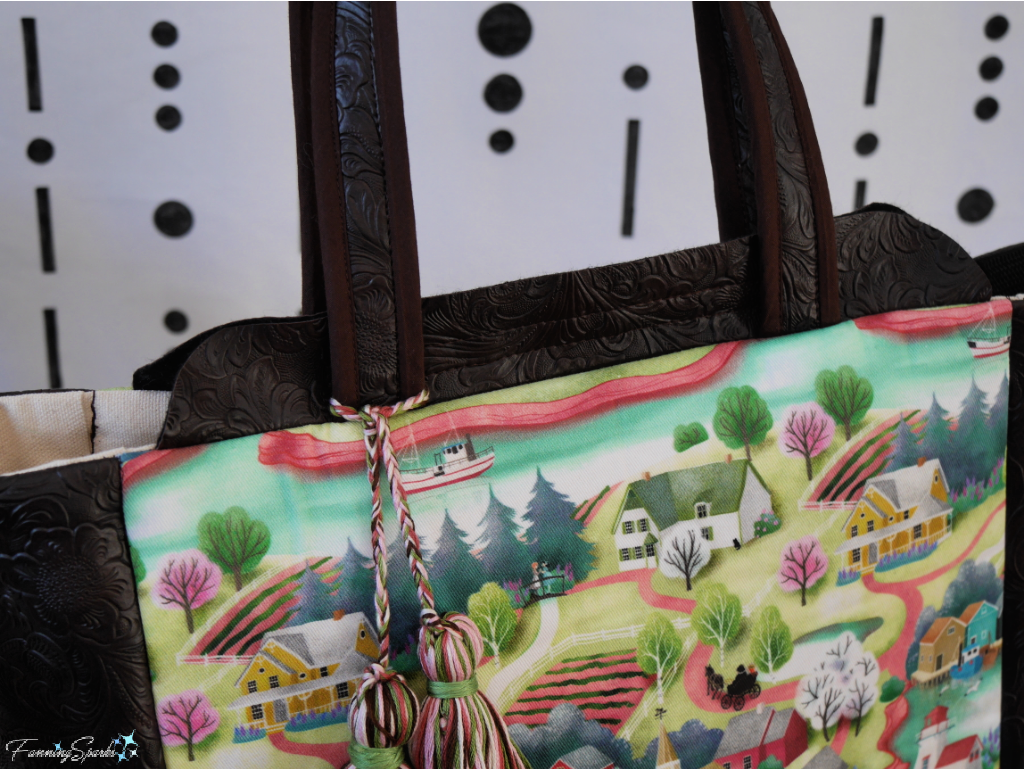
Typically, I leave the top of my tote bag open. There are times, however, when I’d like the option to close it securely. I tried solving this concern on my old tote bag by sewing short strips of hook-and-loop tape (aka Velcro) to the top edges. But that didn’t work because things caught on the hook tape. So this time, I added hook-and-loop tape to the top edges and covered the tape with little flaps. Here’s how it looks with the hook-and-loop tape closing the tote bag.
Sewing the Top Edge
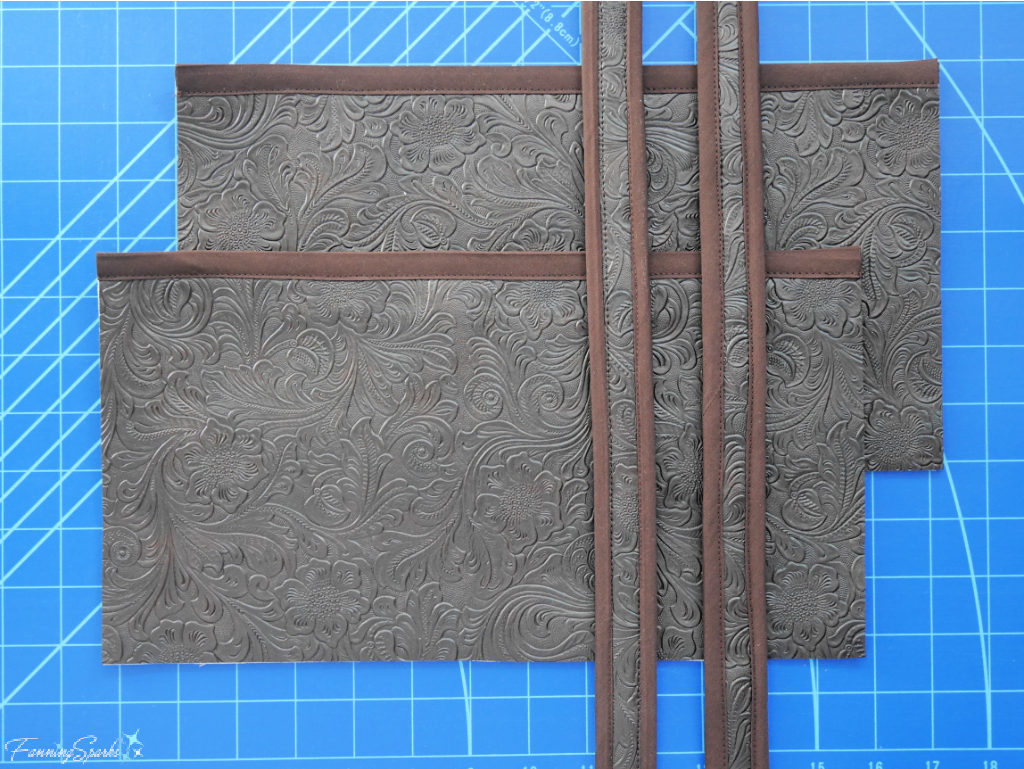
I started by making two sections: the main body and the lining. These sections are joined, along the top edge, around the opening of the tote bag. Originally, I planned to sew that seam using bias tape—in the same way as the vinyl straps and outside pockets (as shown below).
Unfortunately, my plan didn’t take the handles into account. The handles were already sewn in place along the top edge of the lining. I quickly discovered there was no way to get a smooth, professional finish with the handles interrupting the bias tape. My plan to cover the top edge with bias tape was a fail! So I had to get out my seam ripper and rework the plan.
After removing the stitching, I was back to two separate sections—the main body and the lining. Plan B was to turn the two sections inside out before stitching them together. I ripped out one of the seams along the bottom edge of the lining for turning. The handles also had to be reworked. I removed the handles and re-positioned then for this new approach. It took a while to figure out the straps should be placed as shown below.
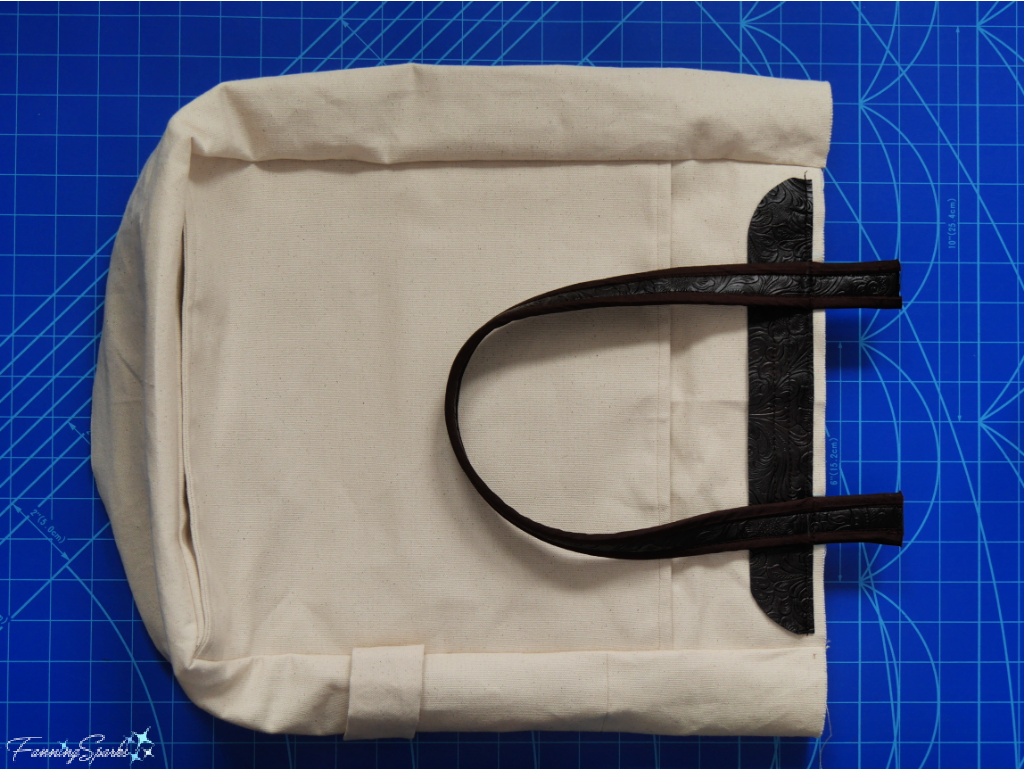
Then I turned the main body and the lining sections inside out. I tucked one inside the other and sewed them together along the top edge. Finally, I turned it all right side out by pulling everything through the opening at the bottom of the lining. Thankfully, this worked much better.
Here’s how my Kindred Spirits Tote Bag turned out.
More Info
Check out the FanningSparks’ post, The Perfect Reminder of Green Gables, to learn more about the Kindred Spirits design and designer Gaia Marfurt.
Spoonflower offers on-demand digital printing of fabric and wallpaper. They’ve created an impressive, online, global marketplace to connect makers with artists worldwide. You can find instructions for Spoonflower’s Perfect Everyday Tote Bag here.
The Sew4Home blog has a wealth of sewing projects and information. See the Projects > Bags > Totes section for lots of inspiration.
You can learn more about Pellon’s Flex-Foam 1-Sided Fusible Stabilizer on their website.
Today’s Takeaways
1. Handmade items can be tailored to your specific needs and preferences.
2. Check out new products, or re-consider known products, for use on your next project.
3. Sometimes trial and error produces the best results!


Comments are closed.