
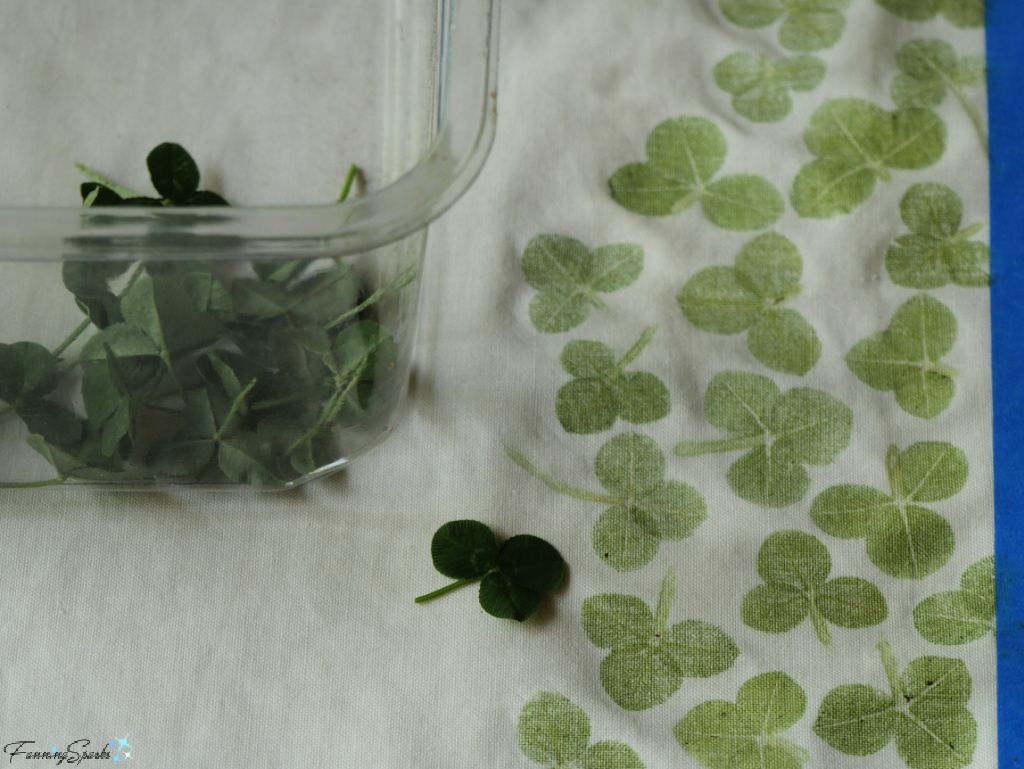
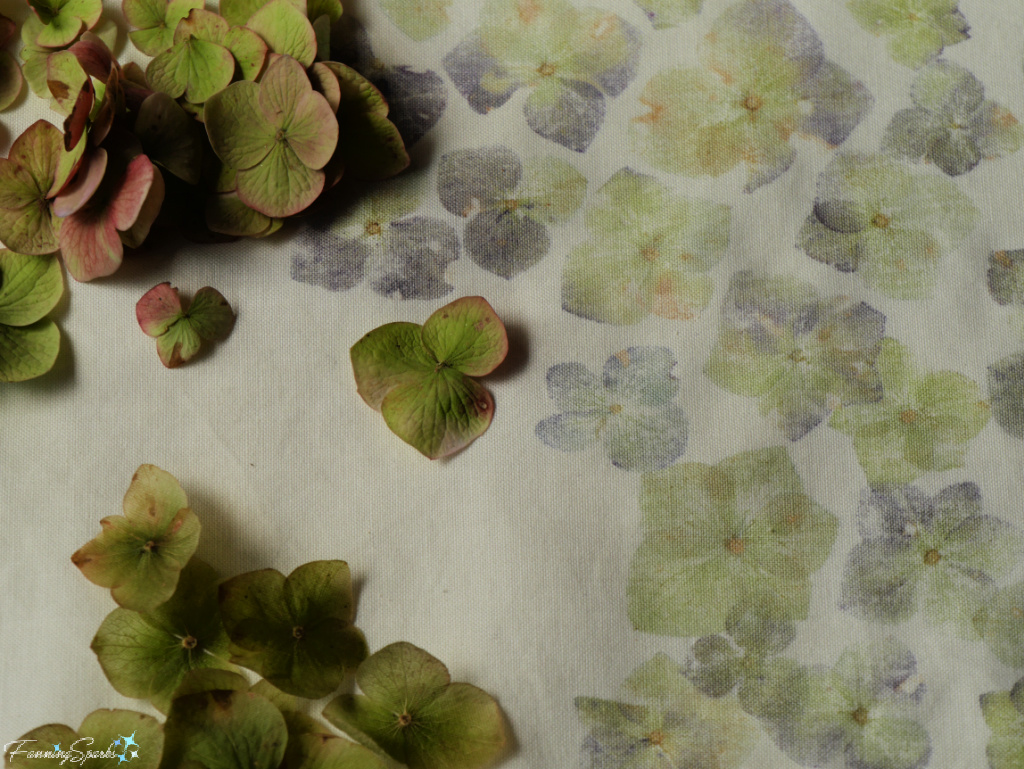
Tap, tap, taptap, tap! The flower hammering continues. This week hundreds of clover leaves, hydrangea florets and maple leaves felt the hammer’s blow.
My objective was to dye a few cotton fabric squares for wrapping gifts in the Japanese style of furoshiki.
 It can be a little confusing because the term, furoshiki, is commonly used to describe the wrapping cloth as well as the wrapping technique.
Wrapping in the furoshiki style is all about wrapping and tying. This means the edges and corners of the wrapping clothes become very visible. In fact, the fabric knots become decorative elements on the final package.
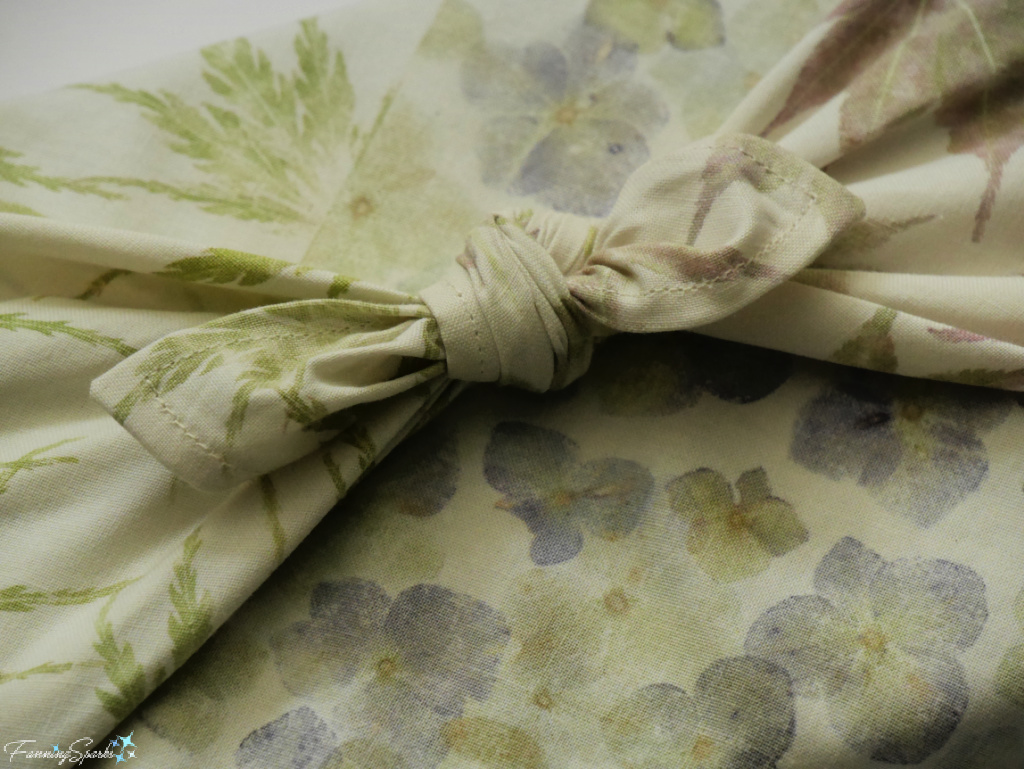 As a result, it’s worth taking the time to finish the edges of your fabric with a neat, narrow ¼” hem and professional mitered corners. Mitering the corners isn’t nearly as difficult as you might think.
Start by making two templates from light cardboard―one for pressing the corners and the other for pressing the hem. It takes only a minute or two to make the templates and they will save you at least that much time on every edge you hem and every corner you miter.
I made my corner template by cutting two corners off a 2½” square of manila file folder. The specifics are shown in the below image.
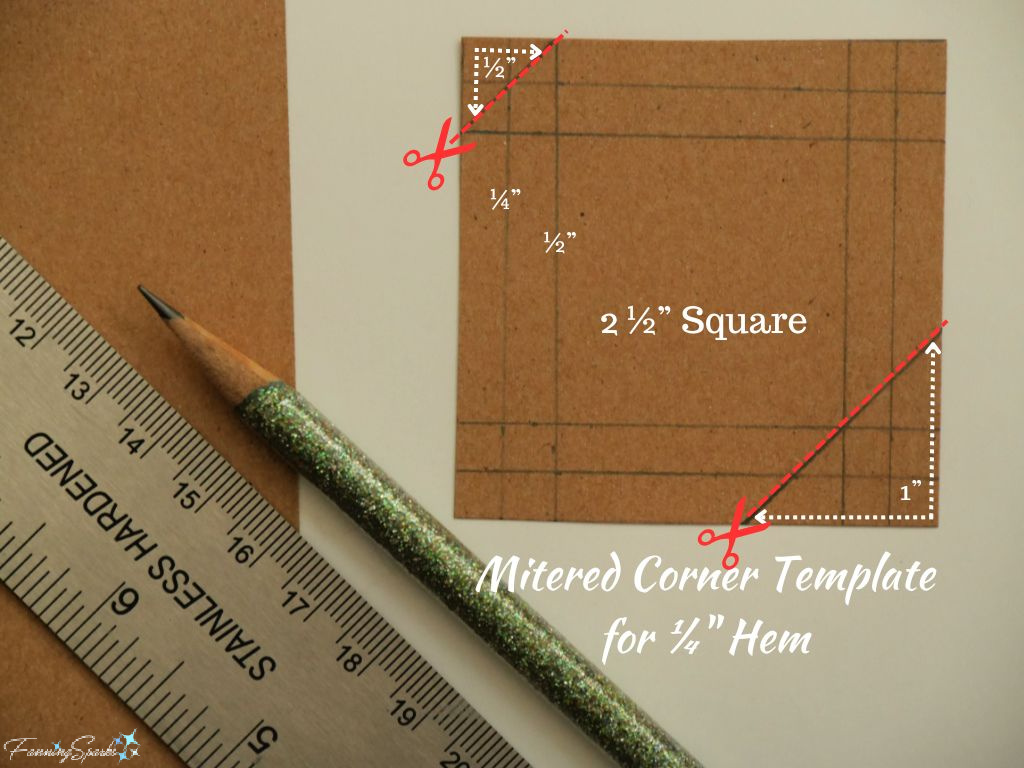
Using the corner template is easy.
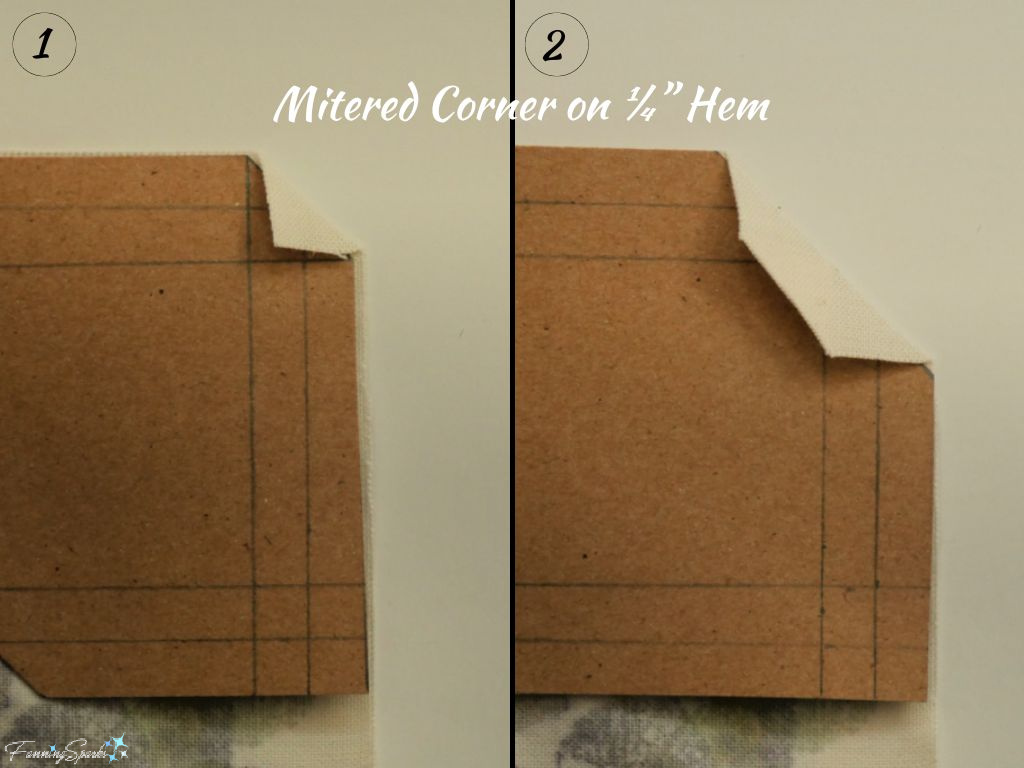
Step 1: Start with the short diagonal edge. Simply line up the template with the corner of the fabric, fold the fabric over and press.
Step 2: Then flip the template around and repeat the process with the long diagonal edge.
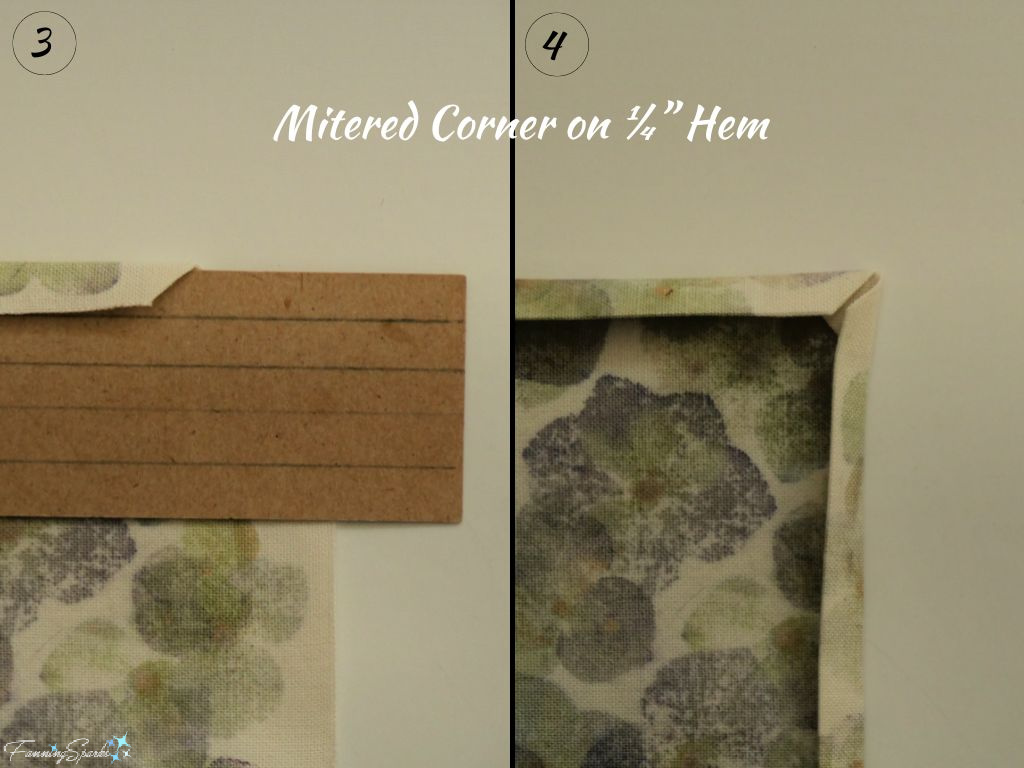
The second template is even easier. Simply cut a long rectangle from a manila file folder (or similar light cardboard)―mine is 11” x 1 ¼”. Then draw a line ¼” from one of the long edges.
Step 3: After pressing the corner, place the hem template along the edge of your fabric and gently pull the fabric over the template to align with the ¼” line. Press.
Here’s my hem template in action shown with the final pressed edge ready to sew.
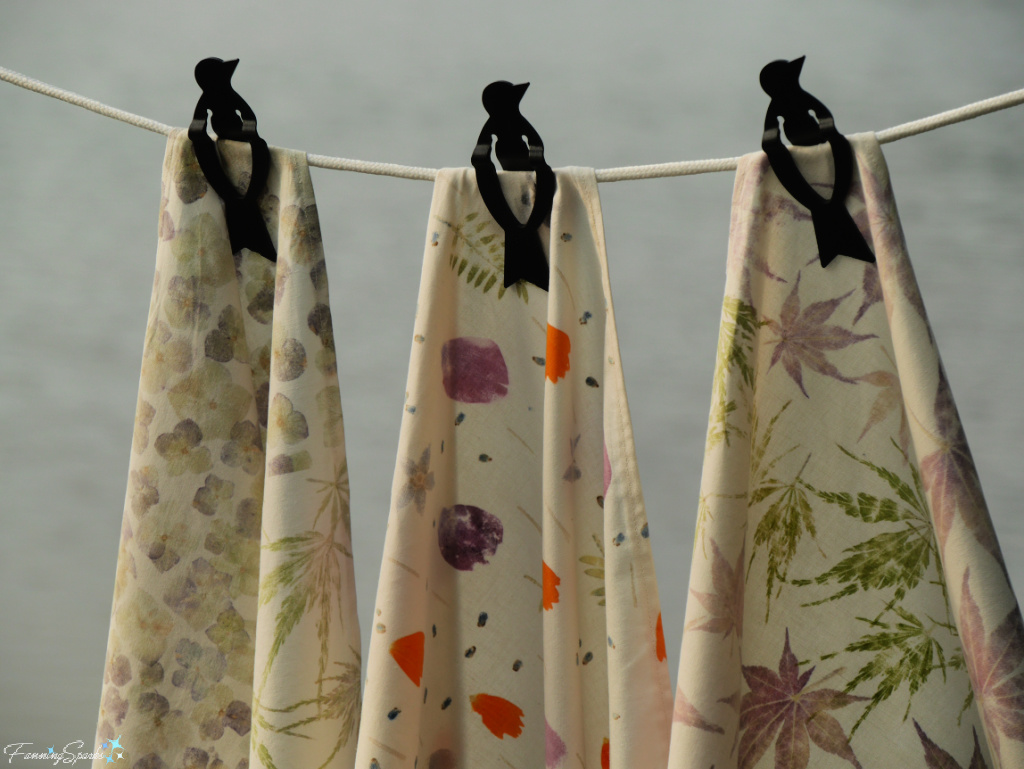
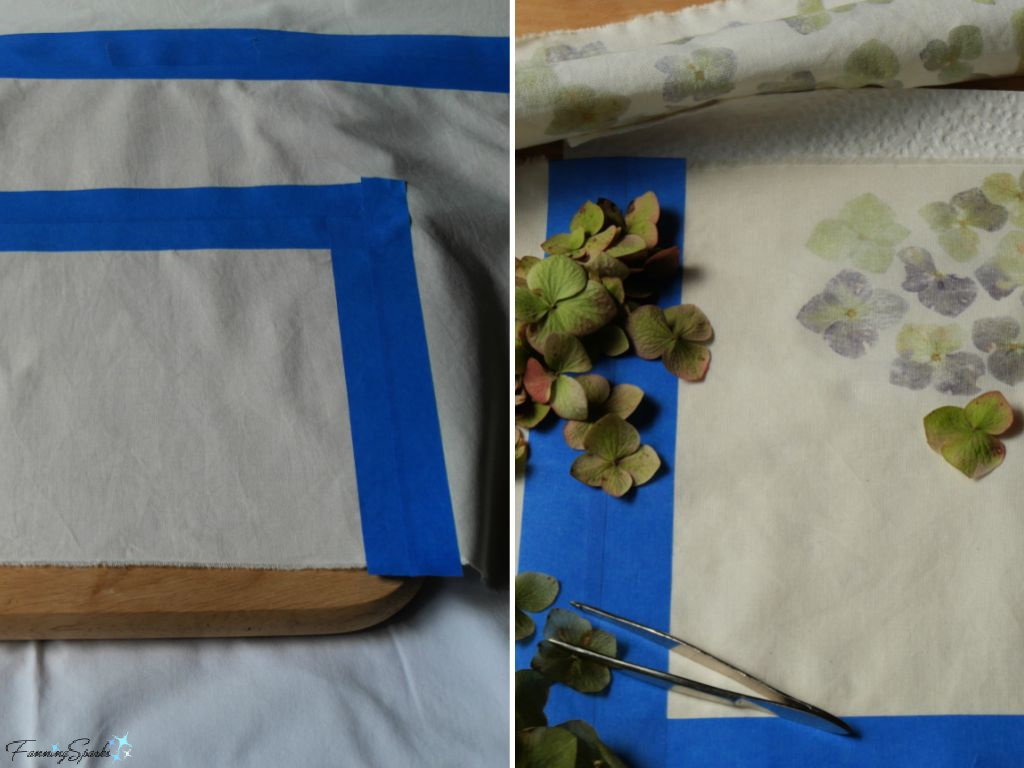
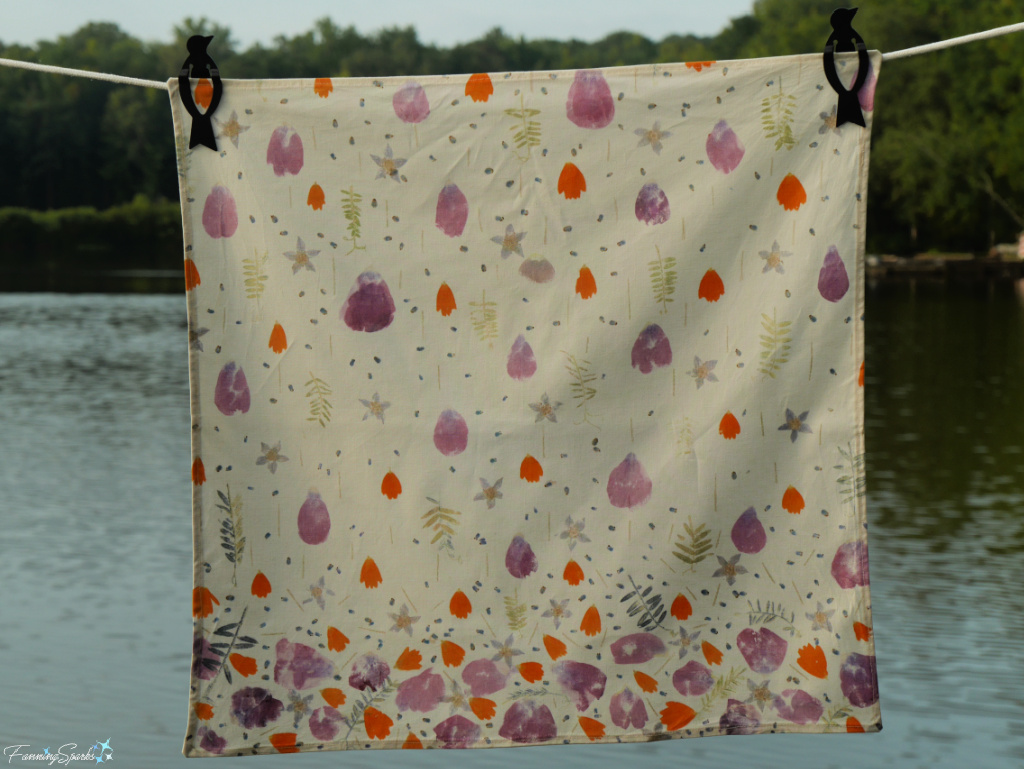
My latest hammered flower fabric square was designed specifically for furoshiki wrapping. It features a plain center block surrounded by four blocks of different botanical elements including two varieties of Japanese maple leaves, clover leaves and hydrangea florets.
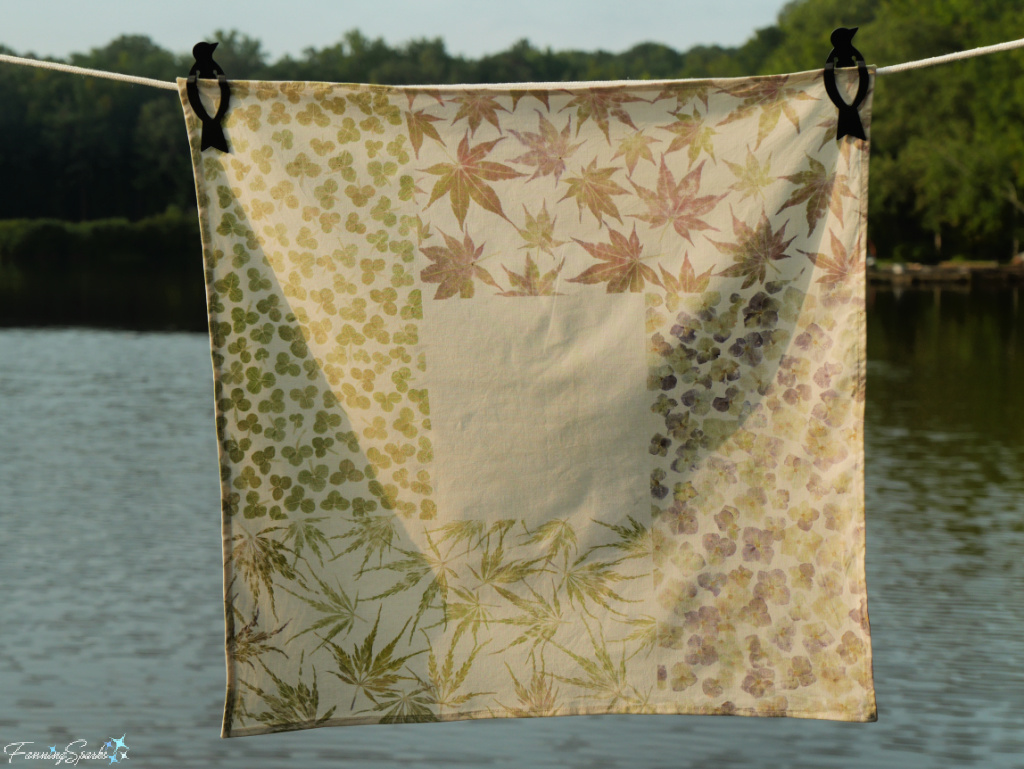
The secret to this design is crisp, straight lines. I used painter’s tape to frame the sections to be dyed. It worked perfectly!
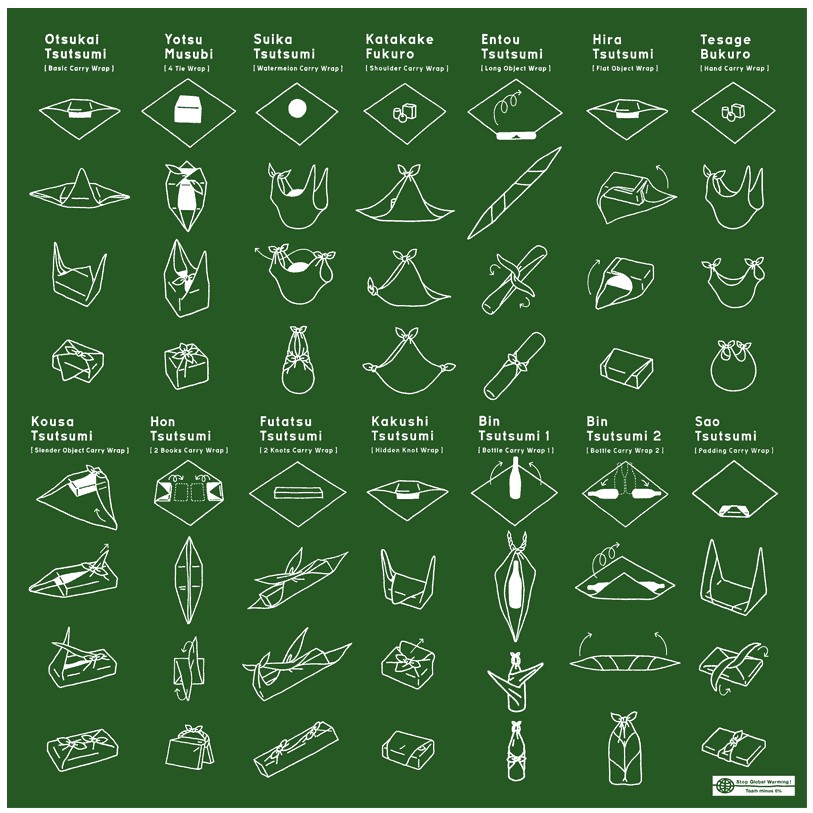
Furoshiki offers a variety of wrapping patterns ranging from a “basic carry wrap” to a knot-shaped simple carry bag. Some items, such as books, wine bottles and watermelons, have wrapping patterns tailored to their unique shapes.
There are numerous references available online but the one I found most helpful is a one-page chart issued by The Ministry of the Environment of Japan. The chart, titled How to Use Furoshiki includes graphical instructions for 14 different wrapping patterns. It was initially shared about 20 years ago under the auspices of Japan’s “Team Minus 6” initiative, a national movement to prevent global warming.
Interestingly, Yuriko Koike, who was Japan’s Minister of the Environment at the time, “called for efforts to tackle environmental issues through everyday ingenuity, such as reducing waste by using ‘furoshiki’”.
In a newsletter column from late 2005, then Environment Minister Koike wrote “The culture of wrapping things in cloth has existed since the Nara period. Furoshiki is a wonderful item because, unlike wrapping paper or plastic bags, it can be reused over and over again, is hard to tear, doesn’t take up much space when stored, and you can choose your favorite color and pattern depending on the person you’re giving it to and the season. It can also be used to wrap apples, sake bottles, and other items of any size or shape. This is a part of the Japanese culture of treasuring things.”
Fabric squares used for furoshiki are available in different sizes. Strictly speaking, the fabric is not square―it is actually slightly longer (only about 2-3%) than it is wide. The most common sizes seem to be small (45cm / 17.7” wide), medium (68cm / 26.8” wide) and large (90cm / 35.4” wide). As it turns out, my fabric wrapping squares actually are square ― they’re about 53cm / 21” square.
I’ve learned the actual size of the fabric square isn’t that important―it’s the size of the fabric square in comparison to the item to be wrapped that’s important. Most furoshiki wrapping patterns recommend the wrapping fabric, measured on the diagonal, be about 3 times the longest side of the object to be wrapped. The paper journal, shown below, is actually a little too long for this fabric square.
 After selecting an appropriately-sized fabric wrap, place your fabric face down (ie wrong side up) on your working surface. The fabric should be positioned on the diagonal with one of the corners pointing towards you.
The first wrapping pattern I’d like to share is a great all-purpose wrap. It is known by a few different names including the “basic carry wrap” and the “basic box wrap”. Place the item to be wrapped in the center of the fabric square and follow the step-by-step instructions illustrated below.
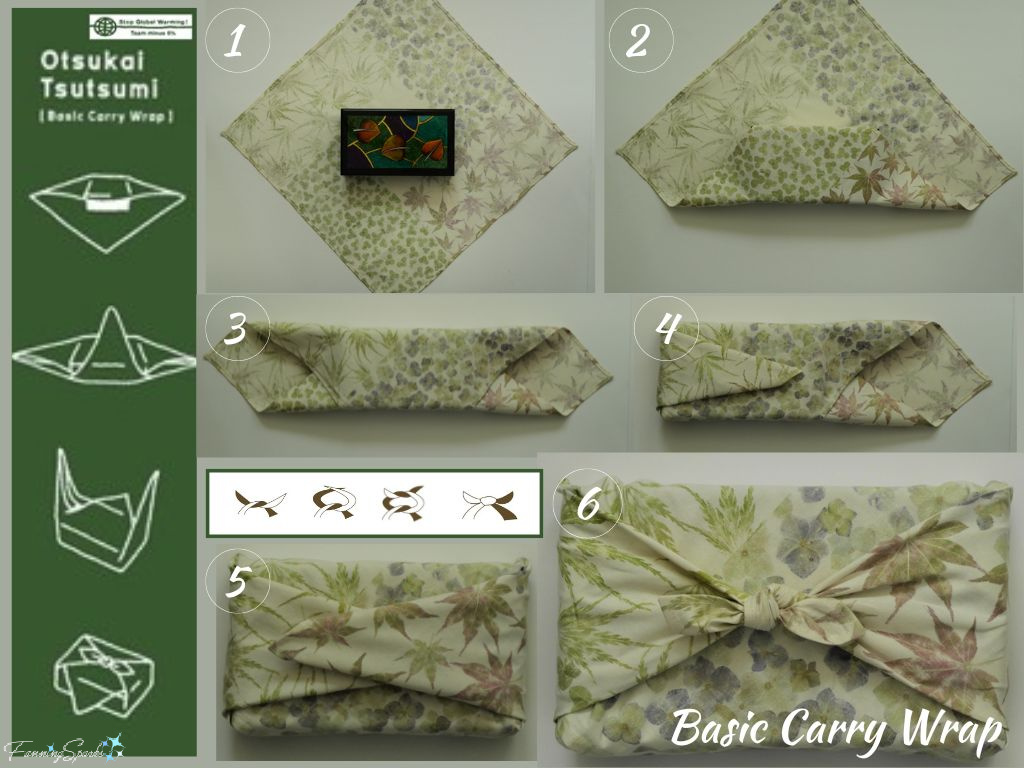
The simplicity of this wrapping technique lets the beauty of the fabric show through. Here’s another example of the basic carry wrap.
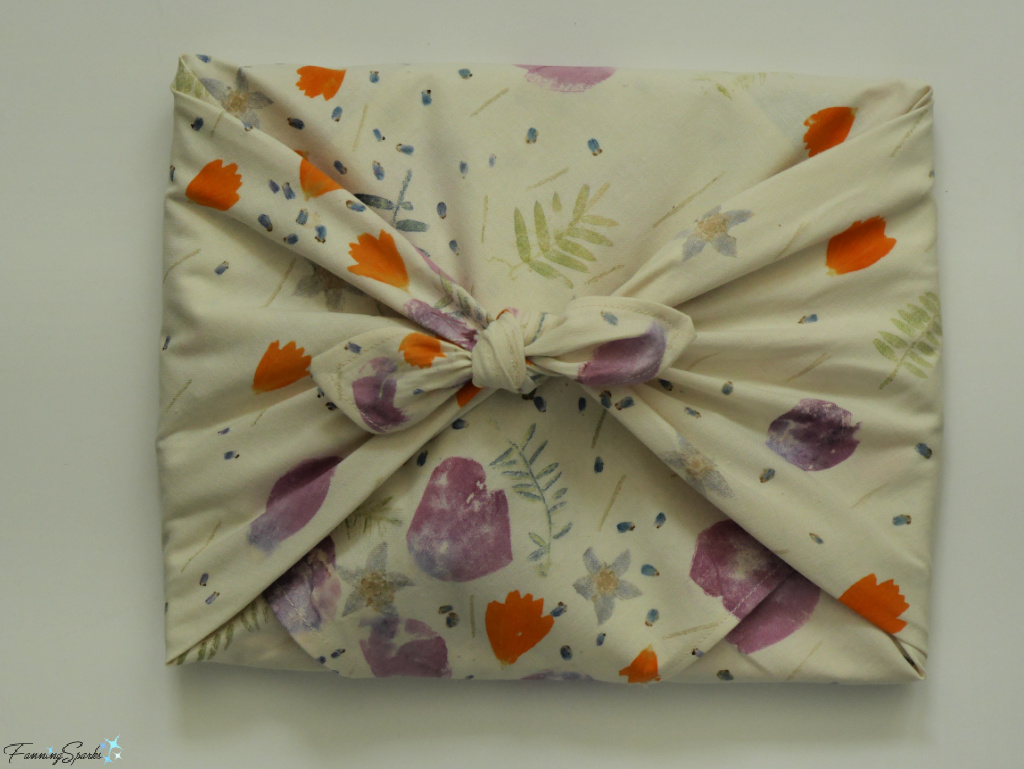 The fabric square shown above, and below, is the first hammered flower fabric I made. As explained in my previous blog post, Flowers and a Hammer, a variety of botanical elements including wild shrub roses, false sunflowers, borage, tufted vetch, lavender and pine needles were hammered onto the cotton fabric.
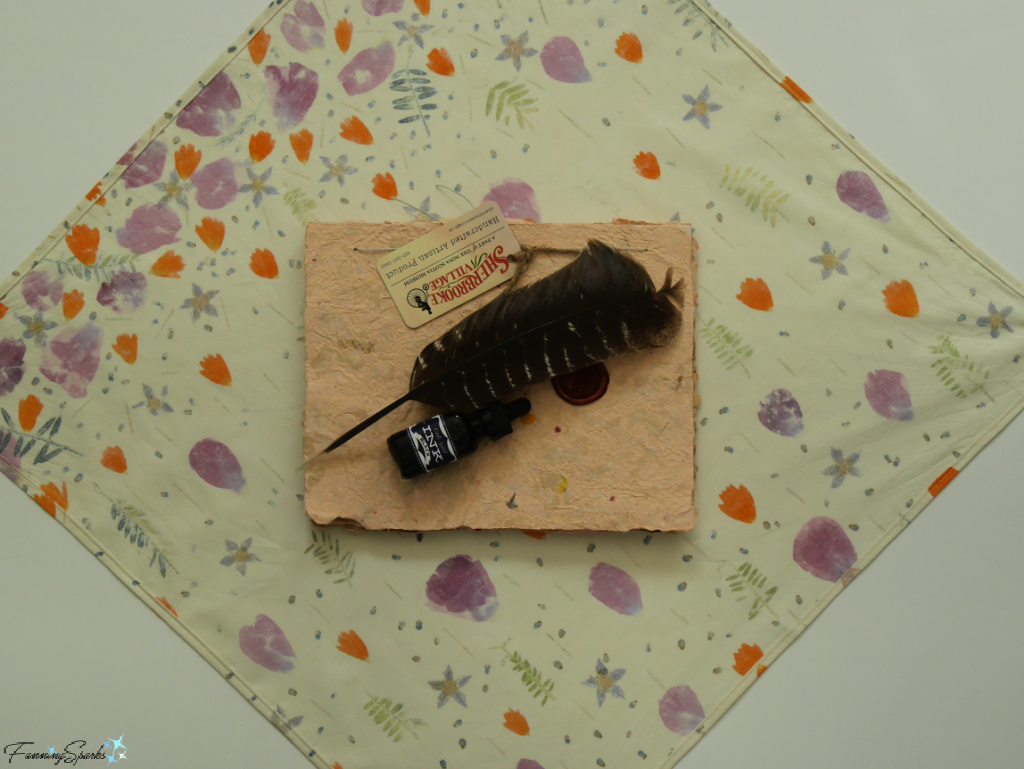
 The next wrapping pattern features a convenient pocket which can be used to hold a gift card, gift topper or decorative botanical element. There doesn’t seem to be a standard name for this technique so I’ve dubbed it the “front pouch wrap”. It starts the same as the previous technique by placing the item to be wrapped in the center of the fabric square.

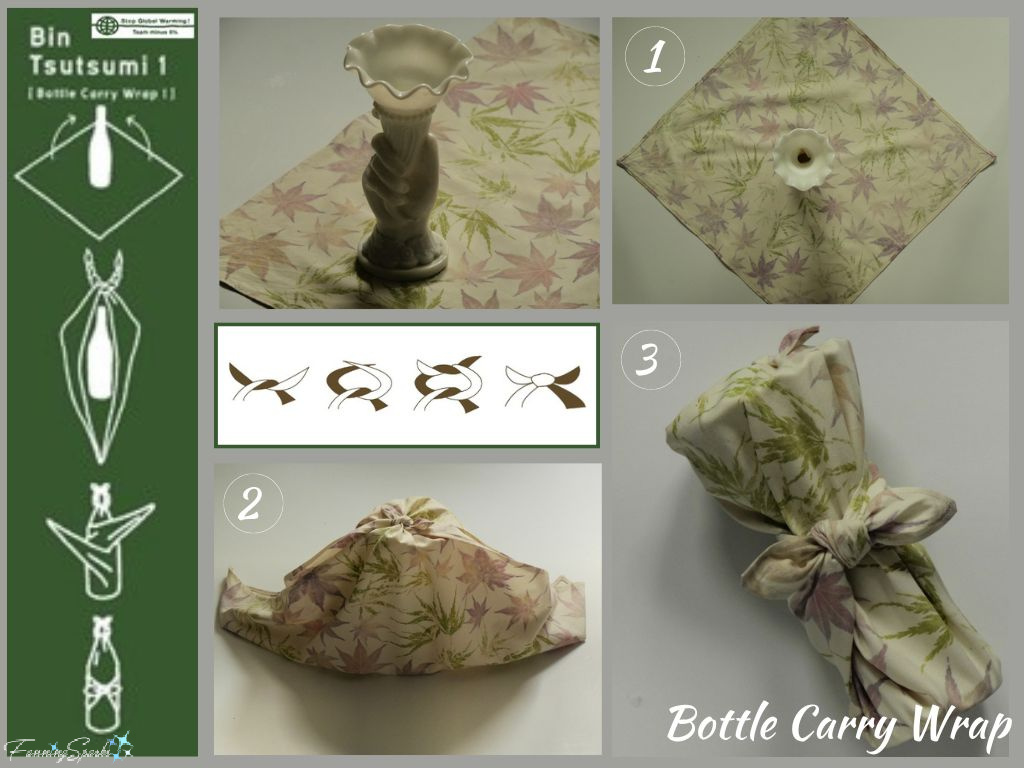
The final wrapping pattern I’d like to share is called the “bottle carry wrap”. It is, as the name indicates, a great technique for wrapping bottles of wine or other liquids.
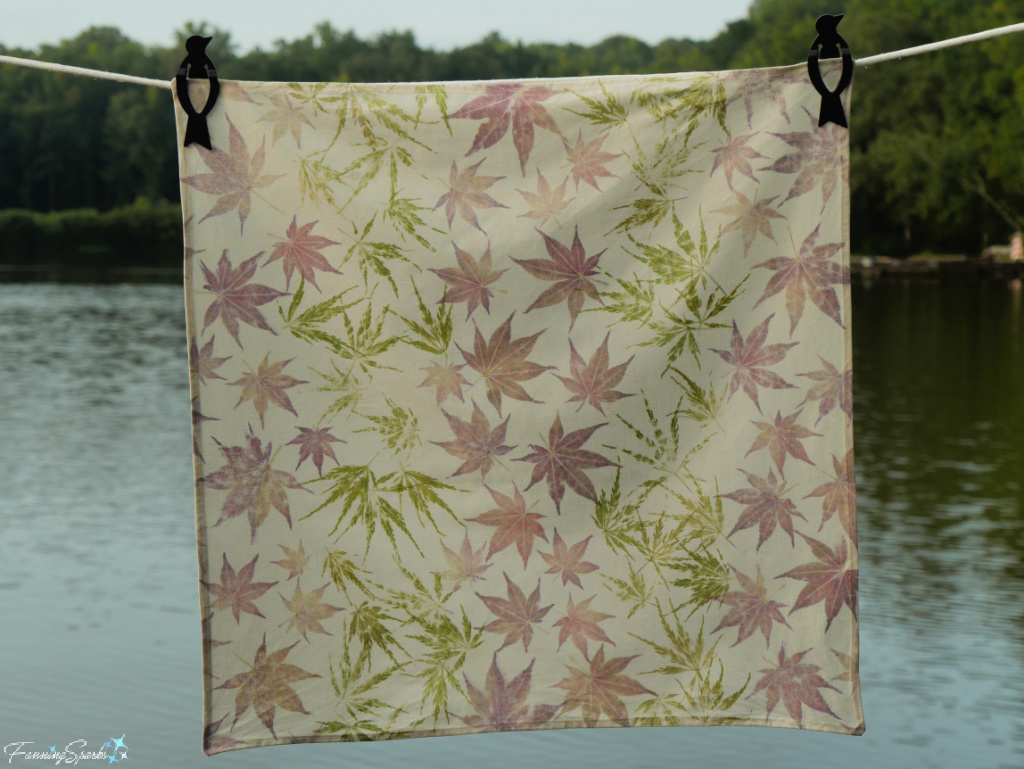
I used my furoshiki decorated with Japanese maple leaves for this wrap. You may recognize this fabric square from my previous blog post when it looked like this.
 I was really pleased with this design but was disappointed when I used it for wrapping. The printed and unprinted sections seem nicely balanced when viewed as a whole but were less than stellar when wrapped around an object―too much plain white was visible. So, I modified the design―here’s the updated version.
 Instead of demonstrating the “bottle carry wrap” with a bottle of wine, I decided to try something a little different―a vintage vase. It’s an irregularly shaped cylinder made of milk glass. This is a great example of how it’s much easier to wrap an unusually-shaped item with fabric than paper. In fact, if I were wrapping this vase with paper, I would start by putting the vase in a box and stuffing the box with tissue paper. It is much more convenient to simply wrap the vase with a fabric square. Plus, avoiding the use of a box, tissue paper and wrapping paper significantly reduces the amount of waste.
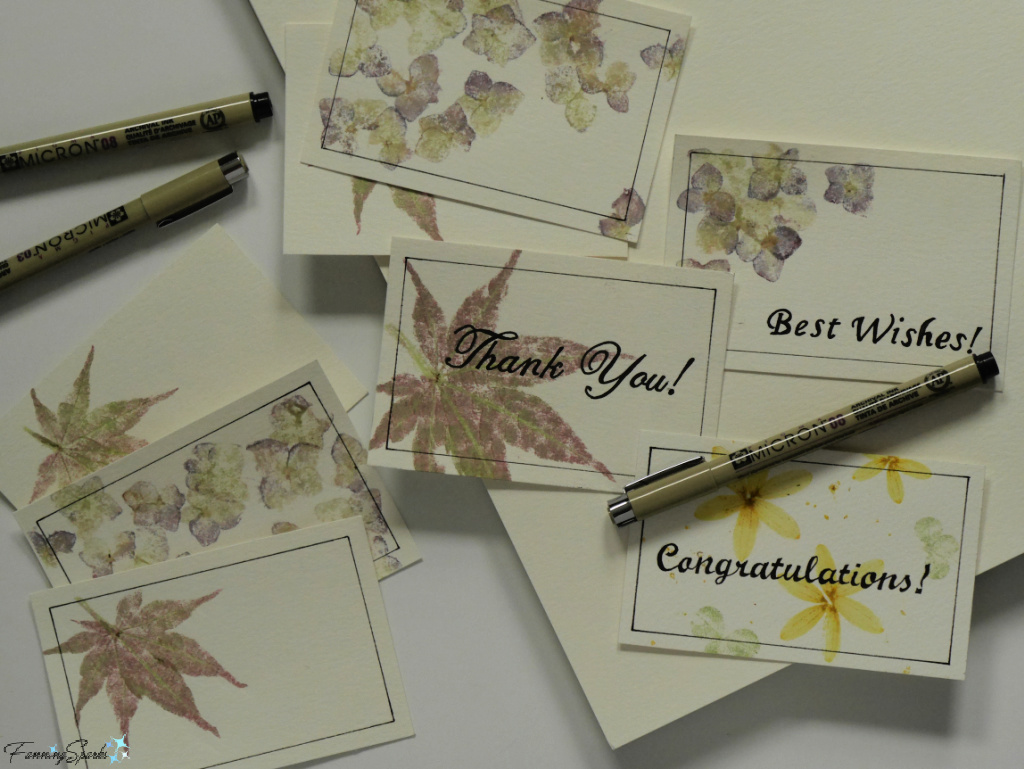
A small, pretty gift card can provide the perfect finishing touch for a fabric-wrapped gift. Especially if you decorate the gift card with the same hammered flowers and leaves used on the fabric. I found watercolor paper, with a little texture on the surface, gives the best results. Here are a few examples.
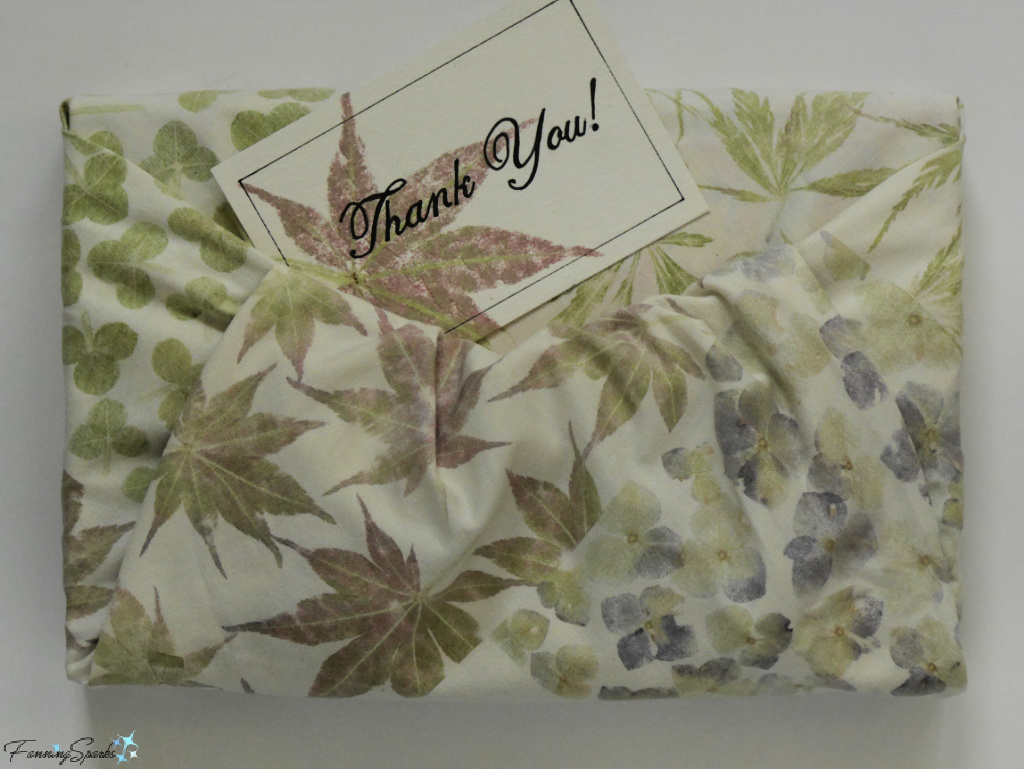
 This gift card showcases the same Japanese maple leaves as the fabric wrap. It easily slides into the pocket of the front pouch wrapped gift.
More Info
Previous blog posts mentioned in today’s blog post include:
. Flowers and a Hammer about hammering flowers, aka flower pounding, plant bashing, or tataki-zome, which involves using the force of a hammer to transfer the natural dyes from flowers and foliage to fabric or paper.
The following books and articles were consulted in the writing of this blog post:
. How to Use Furoshiki by the Ministry of the Environment Government of Japan. This chart is available here.
. Japan Koizumi Cabinet Newsletter article, from December 2005, by then Japan Minister of the Environment Yuriko Koike.
. The Furoshiki: A Comprehensive Guide by the Japanese Furoshiki Association.
. Wrapagami: The Art of Fabric Gift Wraps book by Jennifer Playford published in 2009 which is available here on Internet Archives.
Today’s Takeaways
1. “Furoshiki is a wonderful item because, unlike wrapping paper or plastic bags, it can be reused over and over again.” Yuriko Koike
2. It’s easier to wrap irregularly shaped objects with fabric than with paper.
3. Fabric squares decorated with hammered flowers are ideally suited for wrapping.


Comments are closed.