
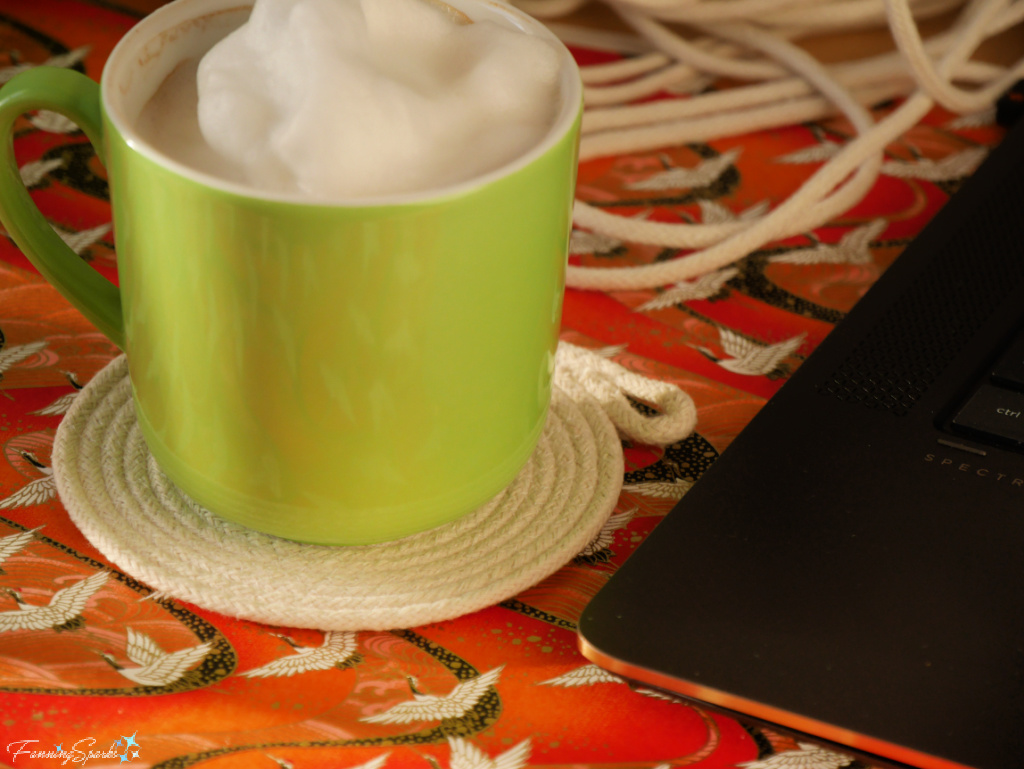
It’s early morning as I sit down to write this week’s blog post. The winter sun is rising in a splendid display of orange and yellow over Lake Oconee. It’s chilly by Georgia standards but I’m nice and warm in my studio—at my desk with a cup of coffee at my side. The coffee cup brings me to the point of this blog post—it sits on a nice, new, coiled rope coaster. It’s nothing fancy—just a flat, coiled rope disk. It’s most noteworthy for being my first attempt at coiled rope basketry and for being my first response to this month’s Earth-friendly maker challenge.
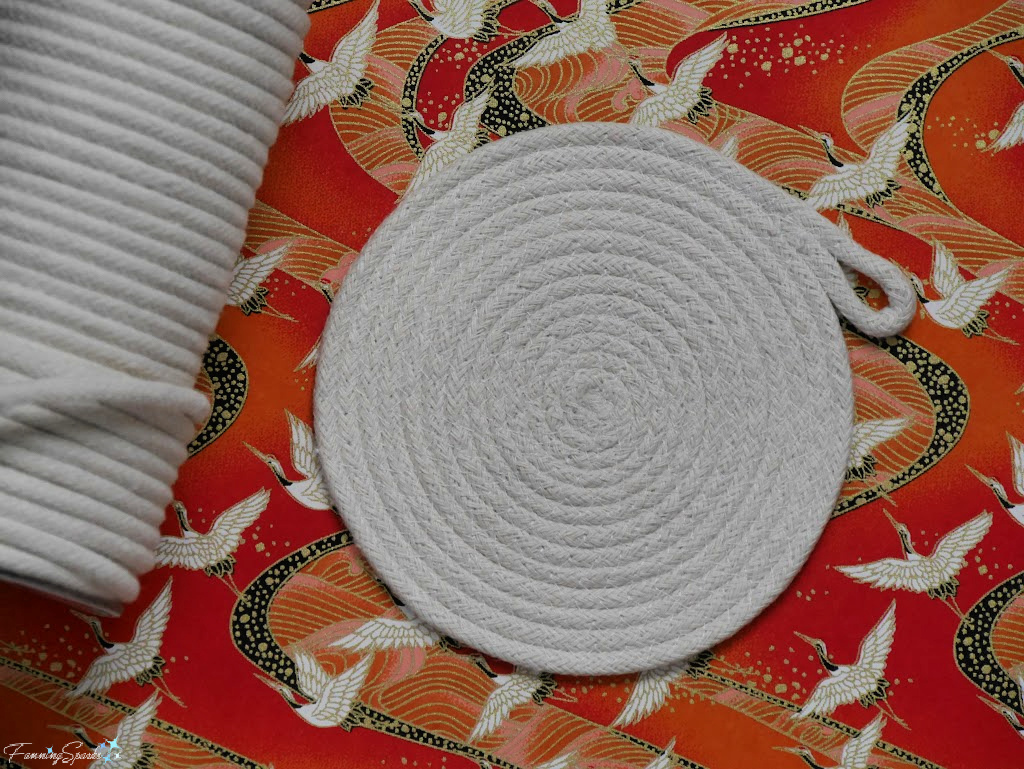
 Makers have been blogging about rope baskets and bowls for several years. I found an April 2016 article proclaiming rope baskets were a trend to watch. Yet, the craft remains popular today. After giving it a try, I can see why. The basic technique is really quite straightforward—you coil rope into the desired shape while sewing it into place with a zigzag stitch on your sewing machine. Round objects, such as baskets, bowls, placemats and coasters, emerge quickly—almost like magic! It’s a great low investment/ high reward craft.
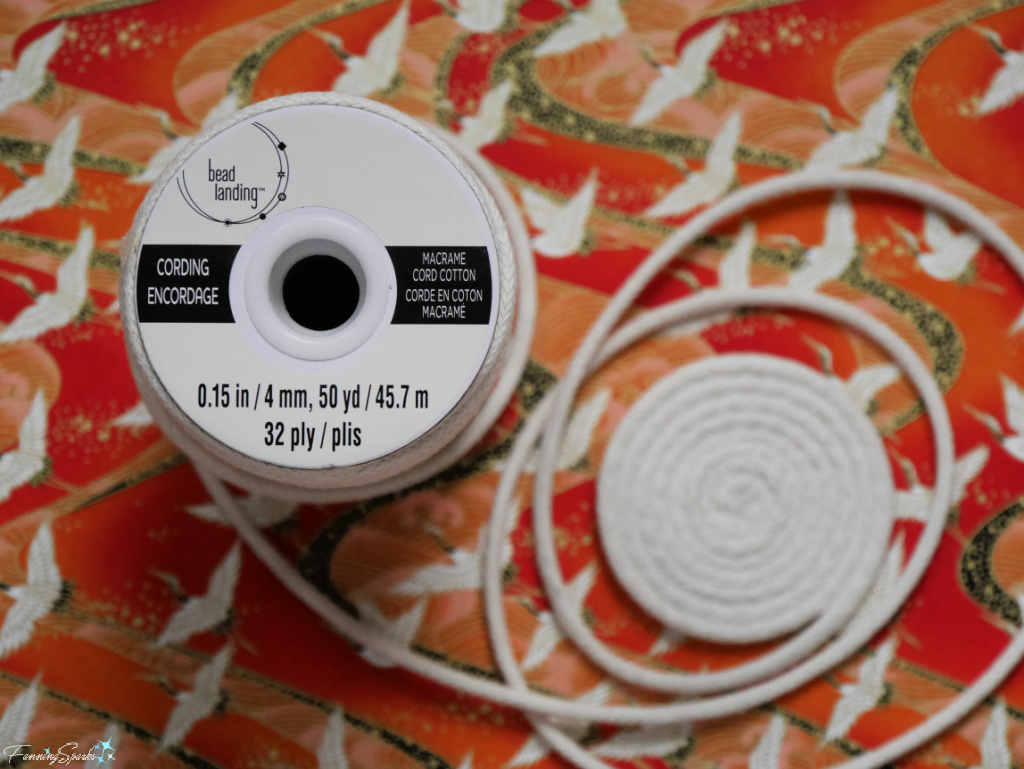
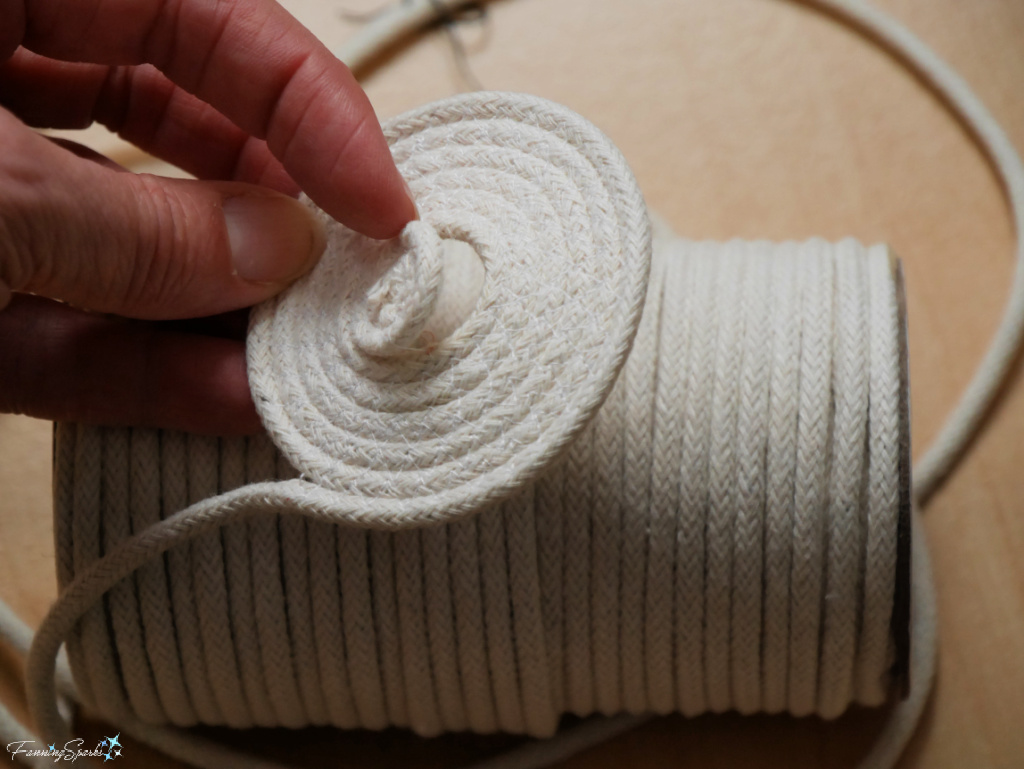
Only rope, thread and a sewing machine are needed. It’s possible to use a variety of ropes or cords but experts highly recommend 100% cotton rope in 3/16” size. The rope should be a “solid braid” meaning it does not have a polyester core and the fibers are braided not twisted. I used “macrame cord cotton” by Bead Landing in .15 in/4mm 32-ply. I’m happy with the results but, I now realize, there are better, more local alternatives available. I wish I’d been aware of the cotton rope manufactured in North Carolina (and available through The Mountain Thread Company (See More Info below)) before making my purchase.
Cotton rope, or cord, is typically sold in natural cotton color which is a soft beigy white. It is also available in a selection of colors.
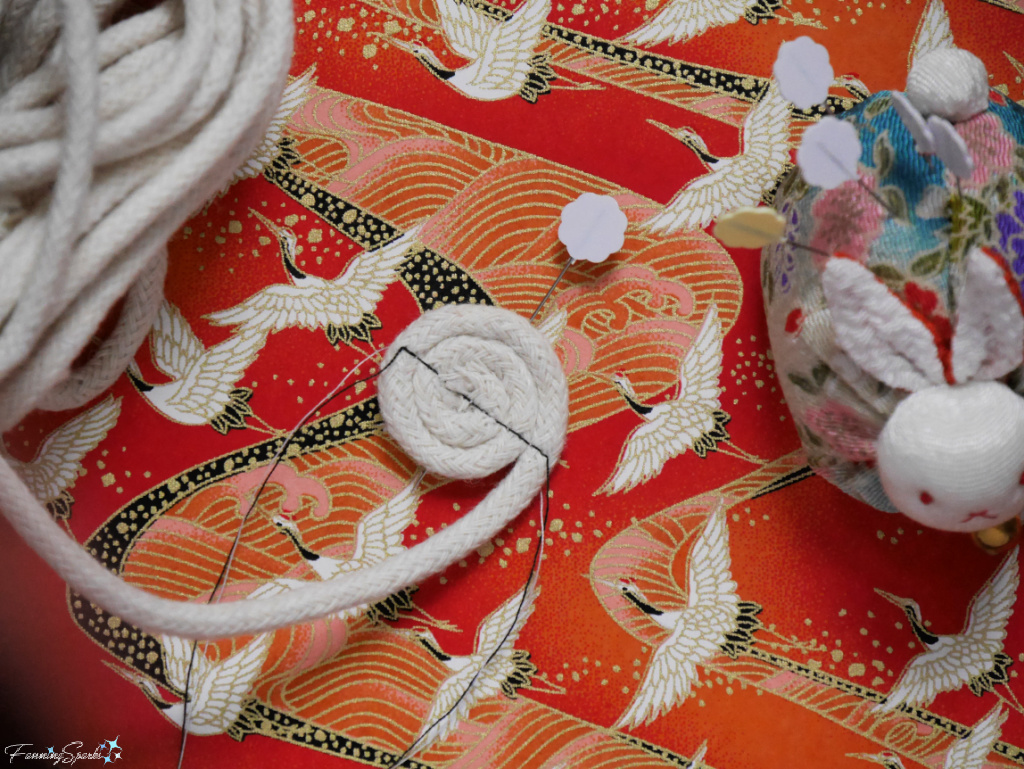
 The most difficult part of sewing coiled rope is getting started. It can be tricky to hold the small inner coil tight while simultaneously guiding it under the sewing machine needle. Experts offer a number of different tips to accomplish this feat but I had the most success with a long pin and some straight stitching.
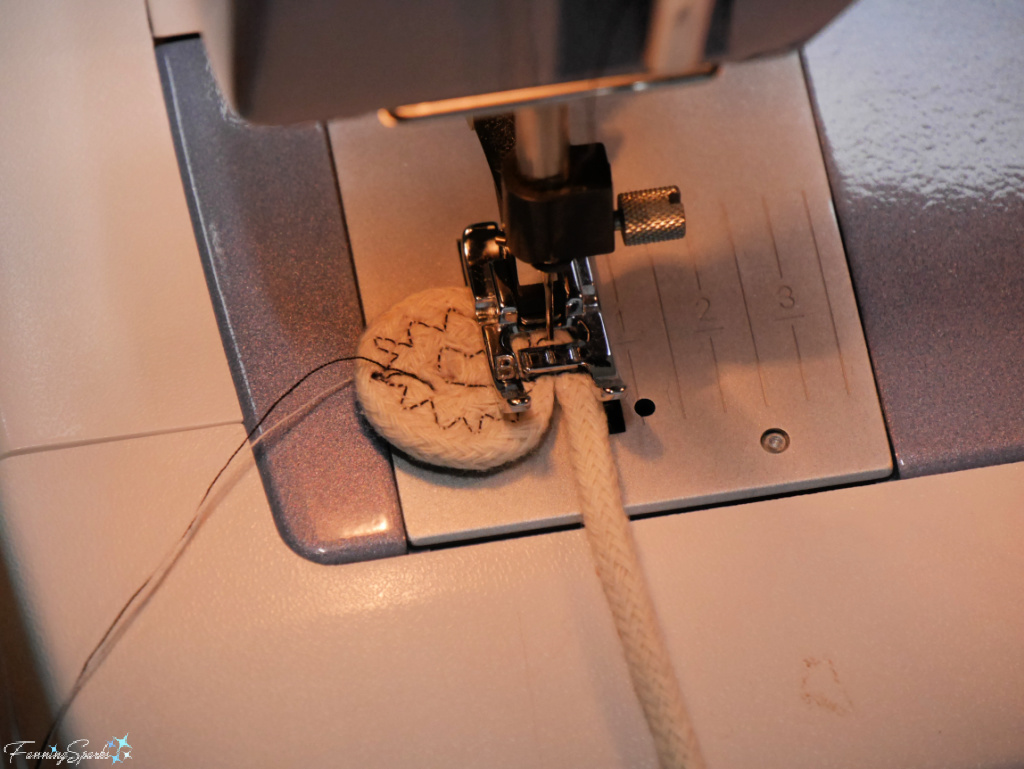
Here’s how. Set up your sewing machine with a heavy-duty sewing needle (eg size 16 for denim), matching thread (I used contrasting thread so it would be visible here) and a simple, straight stitch for this first step. Start with a clean-cut end on the rope. Then coil 3 or so rows of rope around the end and hold it tightly. Stick an extra-long straight pin through the sides of the coil, preferably from one side to the other. Keep the coil flat and tight. Carefully insert the coil under your sewing machine presser foot and sew across the middle of the entire coil. Take care not to strike the pin with your sewing needle. The result will look something like this.
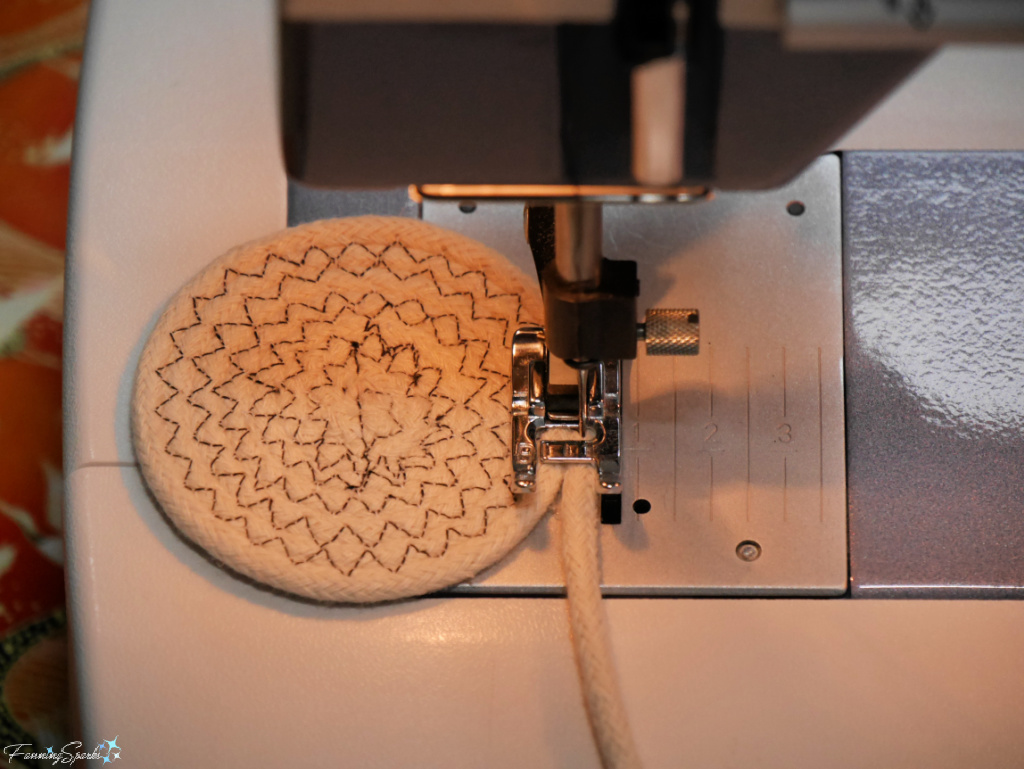
 The single row of straight stitching will anchor the center of the coil enough to start zigzagging. Change your sewing machine to a zigzag (aka overcast) stitch about 5-7mm wide and 2mm long. Position the coiled center under the pressure foot with the free end of the cord coming in from the right. Stitch around the coil centering the needle over the point where the two rows of rope touch—sometimes referred to as the “ditch”. The idea is to catch both sides of the ditch with the zigzag stitch—catch the left rope with the zig and the right rope with the zag. You will likely have to lift your pressure foot every few stitches to move the coil around the tight turns. Here’s my coil at this stage.
 Slowly add more rope with your right hand, spin the coil around with your left hand and continue to zigzag across the ditch. As the coiled circle gets bigger, it gets easier to manipulate the coil and sew uninterrupted. At least until your bobbin runs out of thread—which its bound to do since this project uses a lot of thread!
Here’s my coil after about 8 rows of rope have been added.
 Sewing coiled rope is surprisingly forgiving. If your coil doesn’t lie flat or you’re not happy with a design, you can remove the stitches and start over. It takes a bit of work, mind you, to rip out zigzag stitches but it’s doable. Or if you missed sewing a section, you can simply go back later and re-stitch it. You can see a section where I missed catching both sides of the ditch in the photo below.
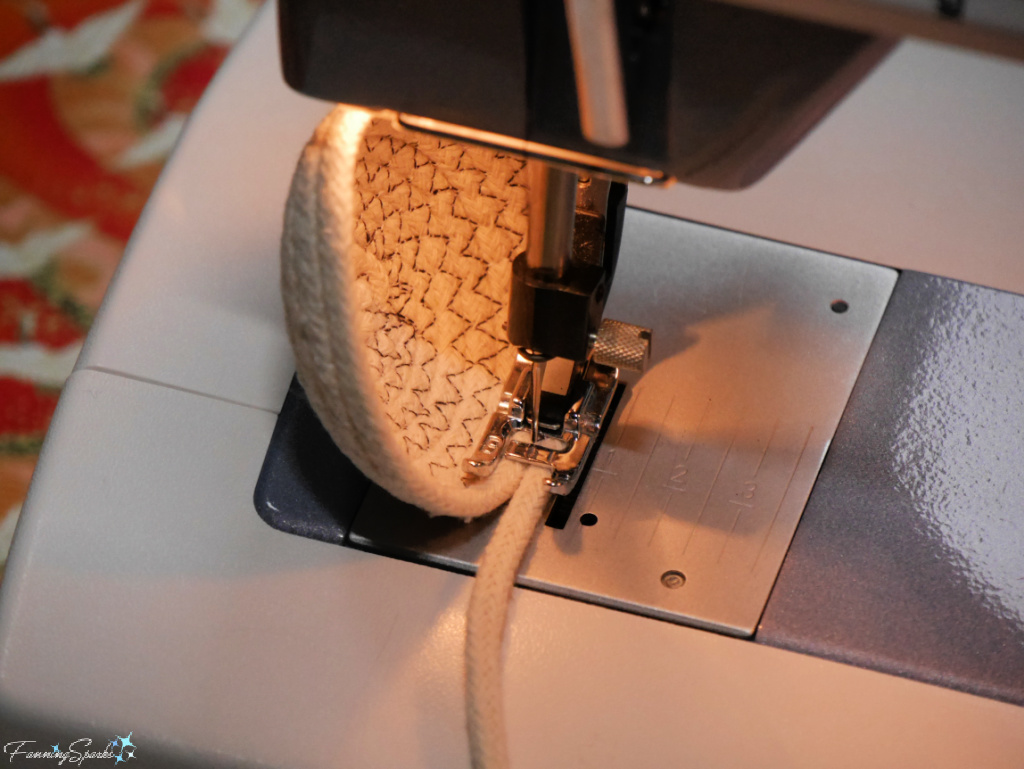
 Once you’re comfortable with these basic techniques, things start to get really interesting! You can shape your piece into a bowl or basket by tilting the base as you add more rope. As you can see from the very small bowl shown below, a small base will result in a small bowl. You would extend the base before shaping the sides to make a larger piece.
 Another factor to consider is color, design and embellishment—there are a host of possibilities. For instance, you can use colored rope to make your project—either purchase the rope already dyed or dye your own. It’s most common to dye the rope before sewing your project but I suspect you could also dye the finished piece.
Alternatively, you can sew the zigzag stitches with colored thread. I tried a few different colors and techniques on the coaster shown below. The center coil is sewn with white thread on the top (in the spool) and the bottom (in the bobbin). The first ring from the center is sewn with magenta thread on the top and white thread on the bottom. The next ring, second from the center, is sewn with lime green thread on the top and bottom. The next ring, third from the center, is sewn with yellow silk thread on the top and bottom. The final few inches are sewn in black thread on the top and the bottom. A black satin stitch is used to finish off the loop and the tail end of the rope. In conclusion, it seems 1) using a high contrast color achieves better results—the black is most noticeable while the yellow is barely visible 2) using colored thread on the top and the bottom achieves more vibrant results and 3) using a satin stitch in a contrasting color creates a striking finish.
 Another popular option is to cover the rope with strips of cotton fabric. This is a great way to use fabric scraps or repurpose old garments. I cut 1” wide strips of printed cotton fabric reclaimed from an unused cotton top. I chose to leave the edges of the fabric strips unfinished because it’s much easier than folding under the edges or creating fabric tubes as some makers do. The downside to unfinished edges is that some of the raw edges may be visible on the finished surface. I found that trimming the corners of the fabric strips (as shown below) makes it easier to wrap them around the rope and results in neater sewn ends.
 Using fabric to cover the rope opens up a number of interesting design options. You can cover random sections (as I did), cover sections to create strips, or cover all of the rope so only fabric is visible in the final piece. You could use one fabric or a variety of fabrics. You could use solid colors, simple prints or bold patterns. I’ve noticed some makers achieve stunning results with striped fabric. Check out my latest Pinterest board, Coiled Rope Basketry – FanningSparks Favs, for some ideas.
Yet, another option is to insert yarn between the rows of rope—essentially feeding yarn into the ditch as you zigzag stitch the rows of rope. This technique emphasizes the spiral pattern of the coiled rope.
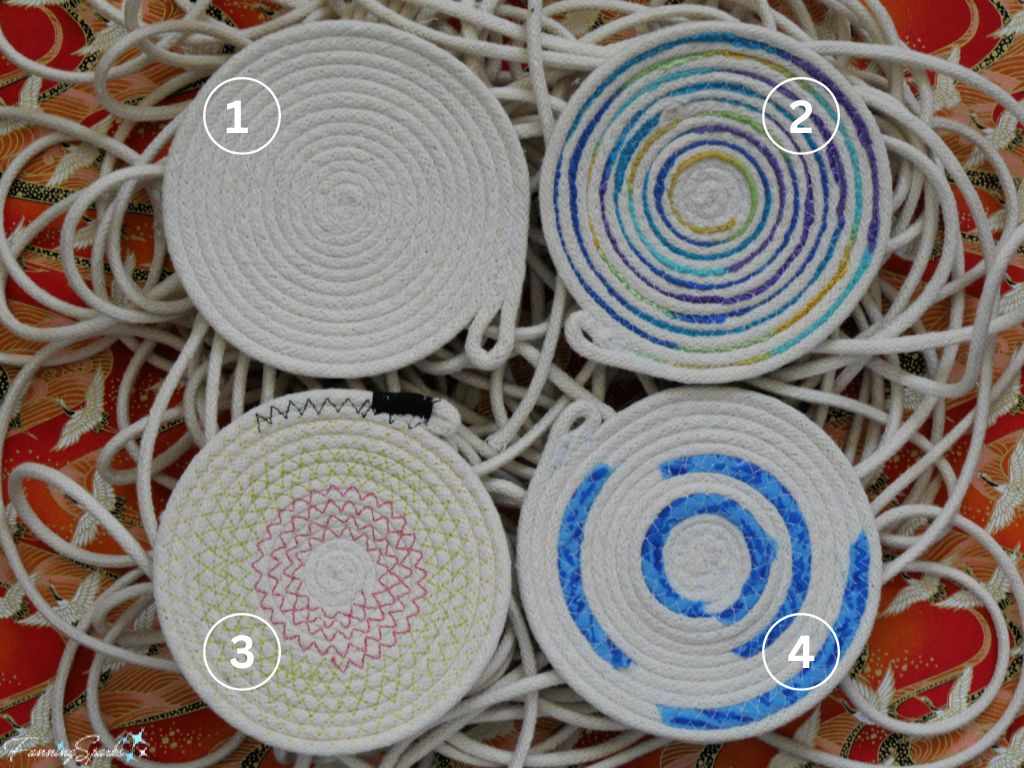
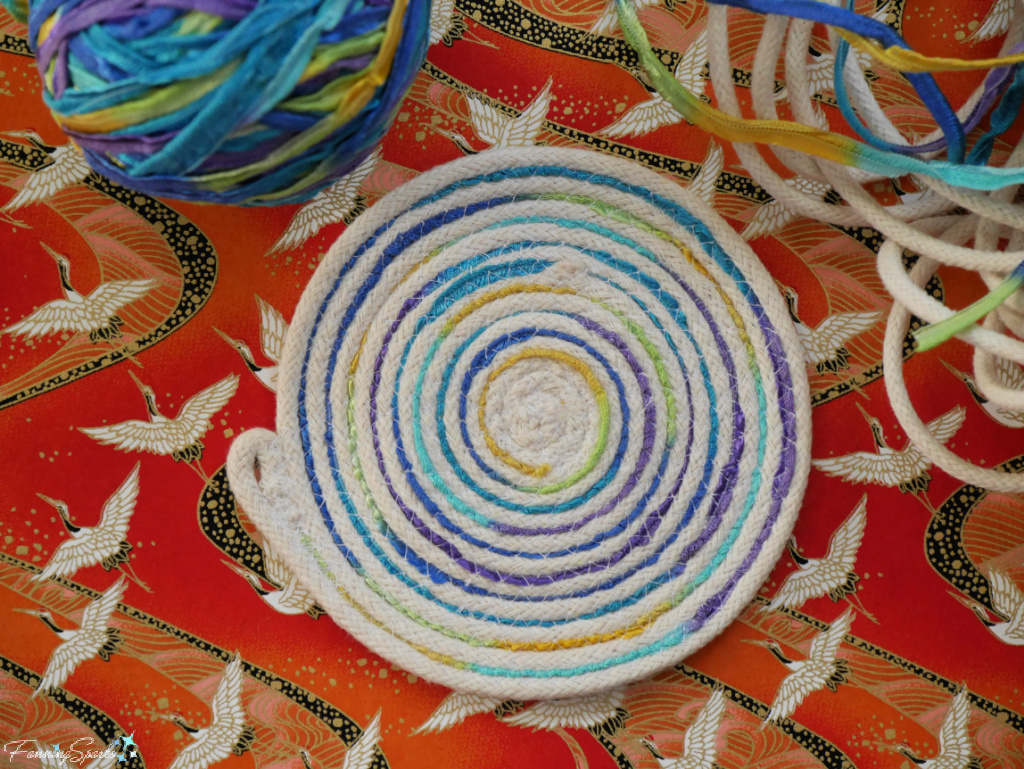 Here are the finished coiled rope coasters showcasing the four techniques I’ve tried: #1 is the simple, unadorned version #2 is the version with yarn stitched into the ditch #3 is the version stitched with colored threads and #4 is the version with fabric strips randomly wrapped around the rope.
 As noted at the top of this blog post, I made these coiled rope coasters in response to my personal January challenge to focus on Earth-friendly maker projects. Last week’s post, Earth-Friendly Project Roundup, kicked off the process with a roundup of previous Earth-friendly maker projects and initiatives from the blog.
I’m not an expert on sustainable art so this is a learning process for me. I do know there are several very doable actions I can take to make my projects more Earth-friendly including repurposing discarded items, focusing on natural materials, reducing plastic and other engineering materials, and sourcing locally.
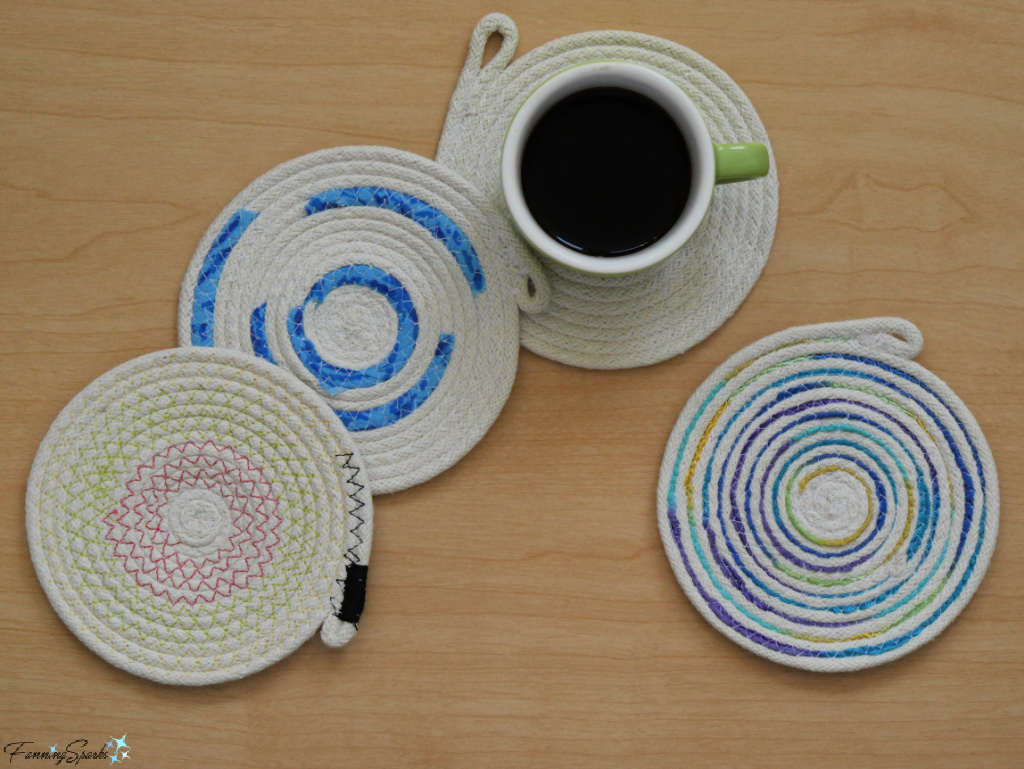
It’s also helpful to consider the purpose of the object being made. Not all my maker projects result in functional objects, but many of them do serve some useful purpose. And if that useful purpose replaces a less sustainable alternative, as is the case with these new coiled rope coasters replacing the paper towel I was using as coasters, that’s even better!
More Info
Check out my newest Pinterest board, Coiled Rope Basketry – FanningSparks Favs, with over 125 examples of coiled rope basketry from bowls to baskets to laundry hampers to tote bags to coasters to (rather unexpectedly) lamps.
To learn more about coiled rope basketry, you may want to check out the following resources:
. Online class, Stitched Rope Basket, taught by Nicole Blum on CreativeBug
. Book, Rope Bowl Tutorials, by Jacqui Spoor (Special thanks to Marian for gifting me this book!)
Based in North Carolina, The Mountain Thread Company specializes in coiled rope baskets and high-quality quilting cottons. Owner Katherine Lile has authored the book Zigzag Rope Sewing Projects which is available on The Mountain Thread Company website along with rope and other supplies.
Today’s Takeaways
1. Coiled rope baskets and bowls have an enduring popularity.
2. There are many options for personalizing coiled ropework.
3. Coiled rope basketry is a low investment/ high reward craft.


Comments are closed.