
With our flower gardens in full bloom, it’s the perfect time to identify the superstars and make plans to clone them. Well… more accurately… to propagate the flowering shrubs. And it’s much easier to do than you might expect. All it takes is a little planning and a lot of patience.
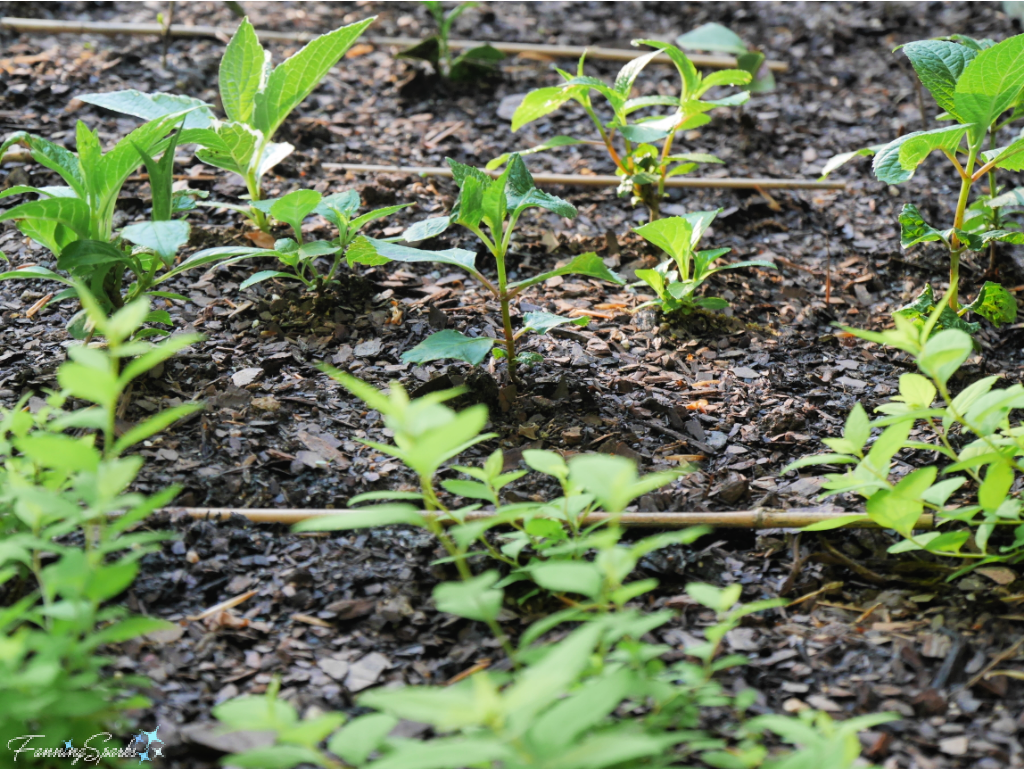
My first attempt at propagating shrubs resulted in about 40 promising starts including 6 favorites—Spirea Limemound, Hydrangea (various), European Snowball Bush, Star Jasmine, Rose of Sharon and Camellia (various). I started them last year in early July. Here’s how they look today.
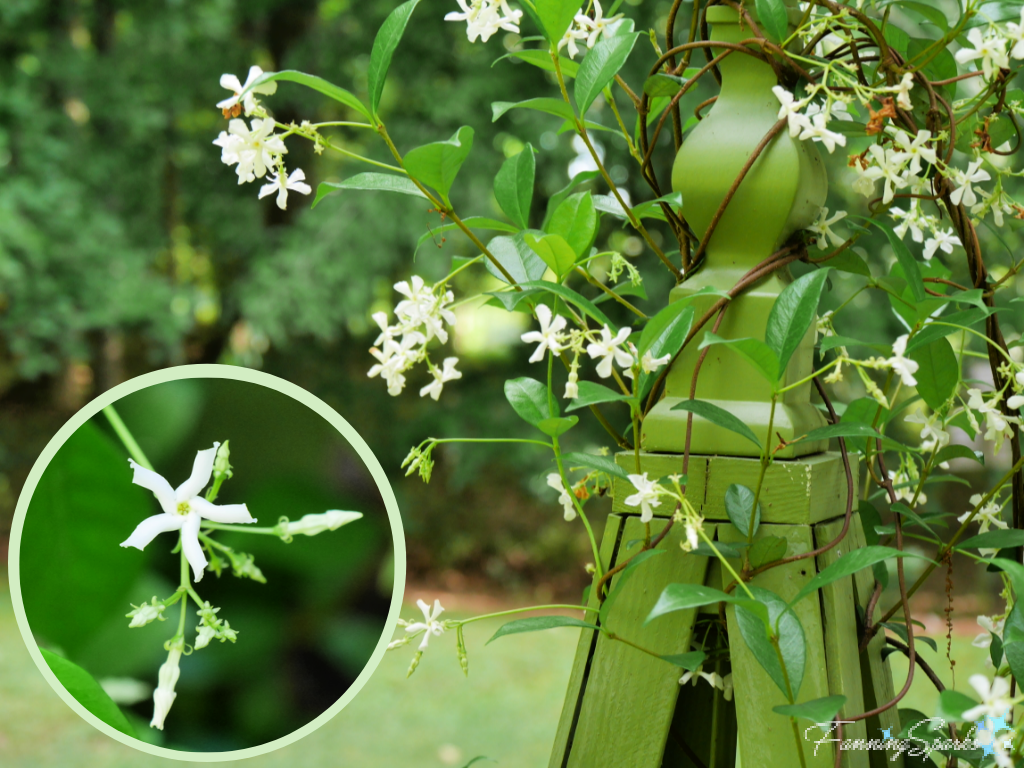
It’s a little difficult to appreciate without the full context so let’s look at an example. Here’s our Star Jasmine (Trachelospermum jasminoides) in full bloom in June of last year. This southern charmer is a vigorous grower, smells divine and blooms like crazy for nearly a full month. Definitely a superstar in my books!
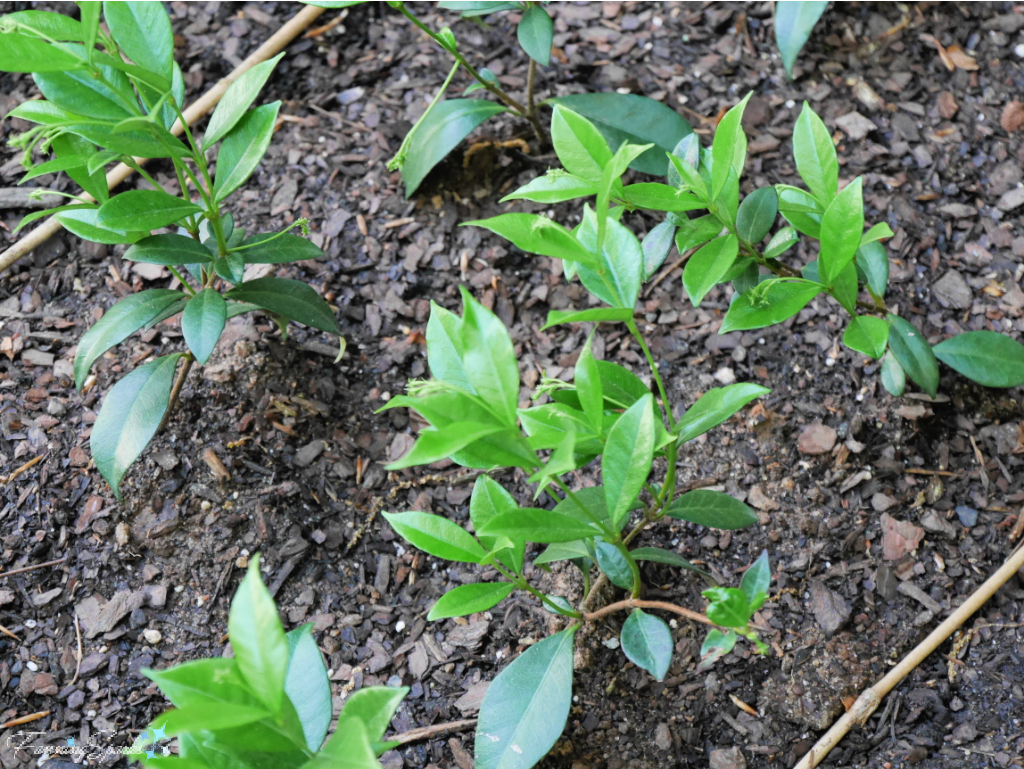
Last summer, I took a few cuttings from this shrub following the instructions I found online and hoped for the best. Here’s how those cuttings look now—about 9 months later. I plan to keep them in my “nursery bed” until this fall when I’ll transplant them into a permanent location.
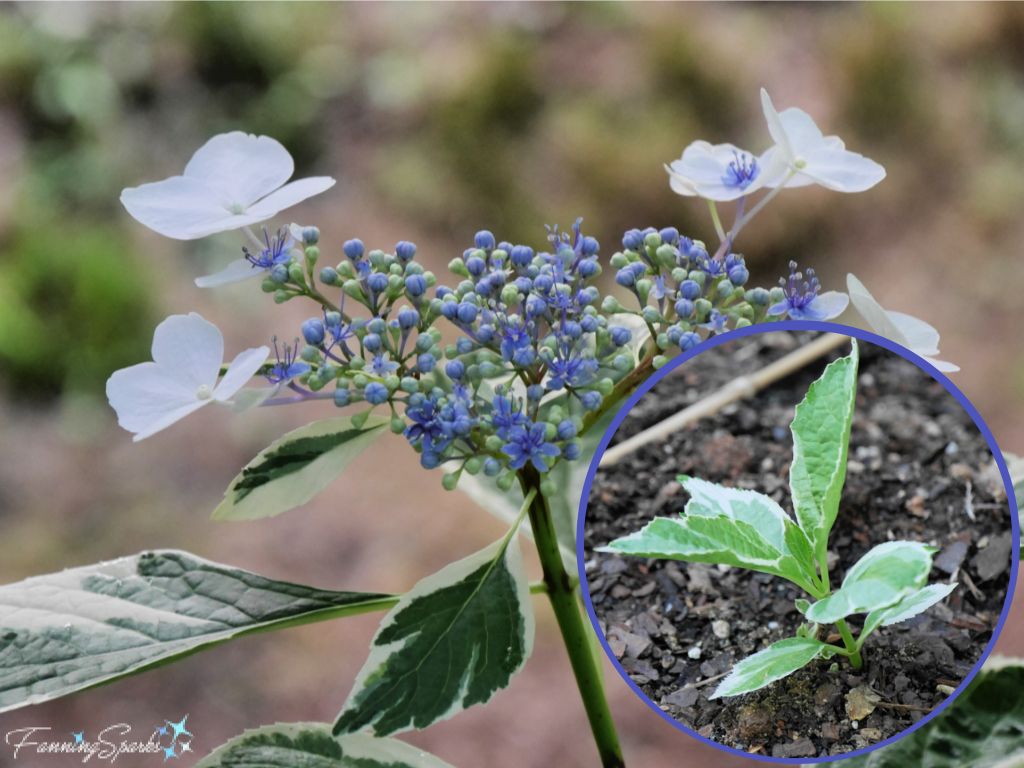
My hydrangea cuttings also look promising. Here’s a lovely variegated hydrangea blossom from last spring along with the last year’s cutting as it looks today.
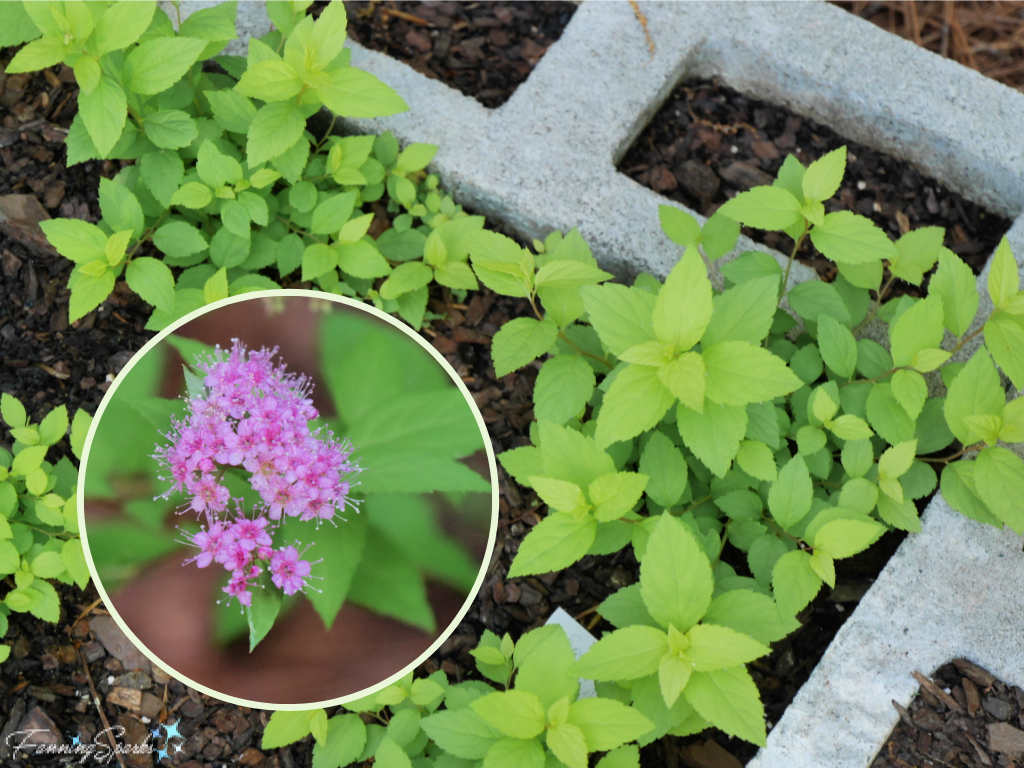
Our Spirea ‘Limemound’ (Spiraea japonica ‘Limemound’), which is a lush mound of bright green freshness right now, will be covered in pretty pink blossoms later in the season. I took several cuttings from this shrub and they absolutely thrived! I have 8 promising new starts. That’s a great example of One to Many!
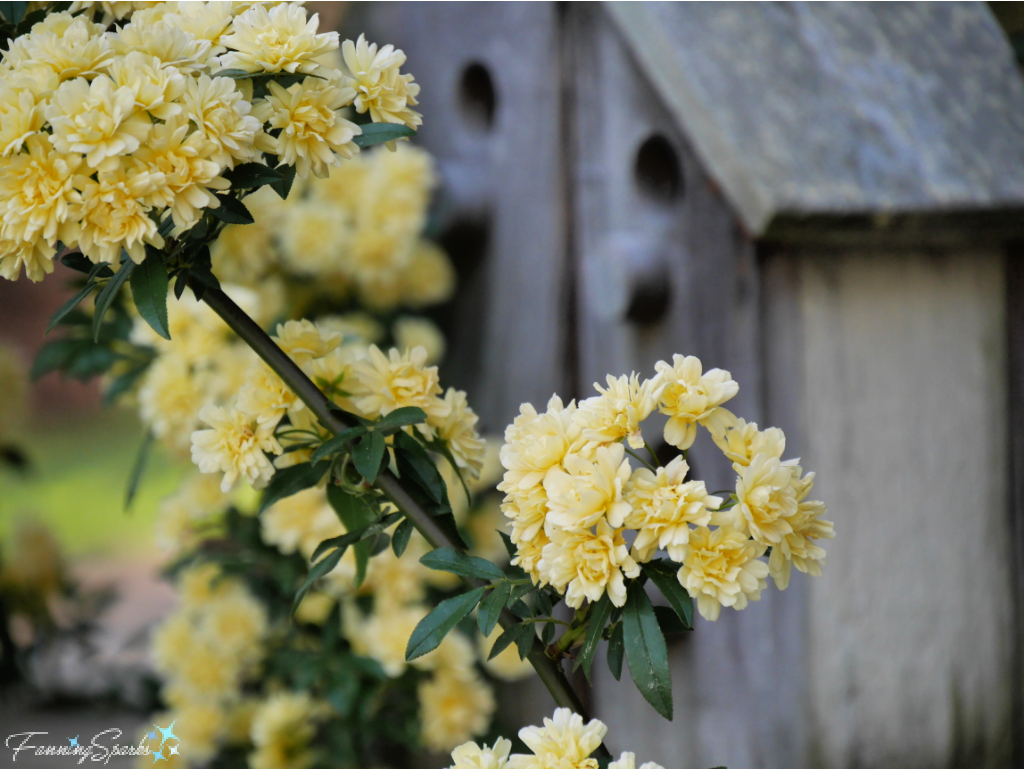
Granted not all the shrubs I tried to propagate were this successful. Cuttings from our Lady Banks Rose (Rosa banksiae ‘Lutea’) simply wilted and died. This shrub has been putting on such a spectacular show this spring that I’ll just have to give it another try!
After targeting which shrubs to propagate this year, there are a few other steps to get ready for this year’s window of opportunity.
Plan Timing
Timing is the most important element. If you are too early, the cuttings aren’t hardy enough to survive. Summer is the recommended time. But summer varies greatly from one gardening zone to another. I took my cuttings in July last year because, according to the calendar, summer starts in late June. But I garden in the US Southeast where summer is brutal on plants and gardens. I wondered if this is really the best time to take cuttings.
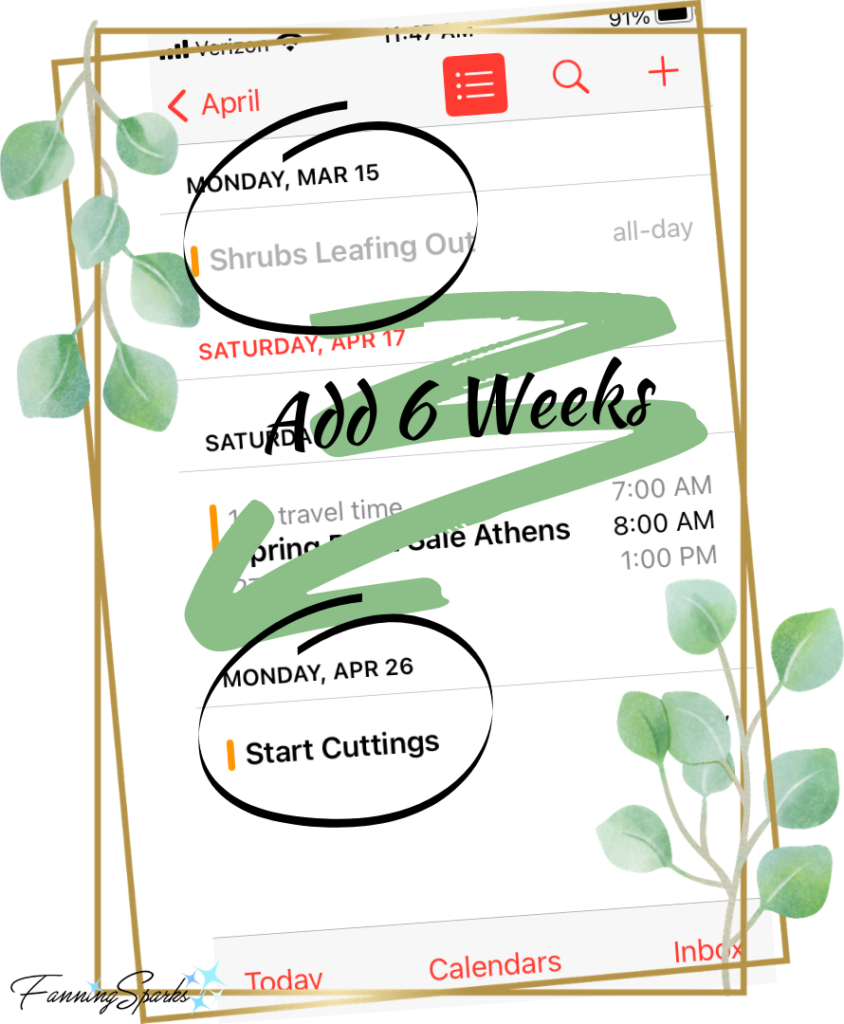
There’s a fair bit of advice online about when to take cuttings. There are explanations of readiness checking; descriptions of greenwood, softwood and hardwood; definitions of ripeness; recommended bending tests and so on. Then I discovered “The Six Week Rule” from Mike’s Backyard Nursery (see More Info below). He recommends taking note of when your plants start producing leaves in the spring and counting forward 6 weeks from there. The resulting date is the earliest date to start cuttings.
Looking back at my photos, I was able to see our shrubs started leafing out around March 15. So 6 weeks takes me to April 26 which means I can start 2 months earlier than last year. Hooray!
Prepare Rooting Baskets
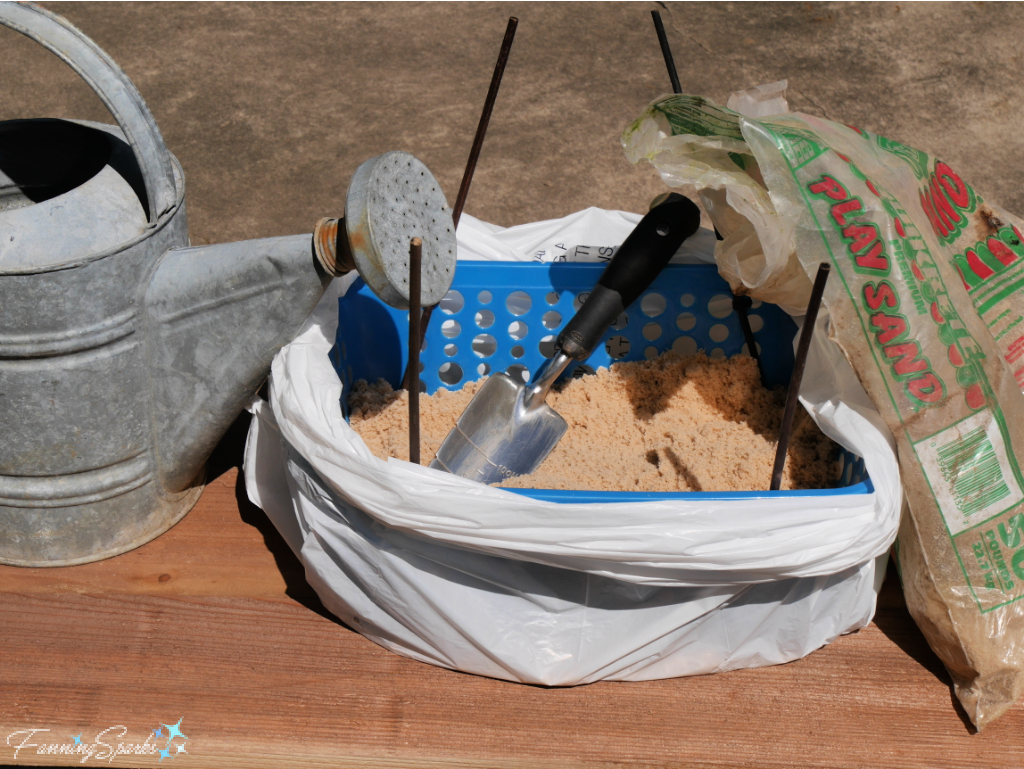
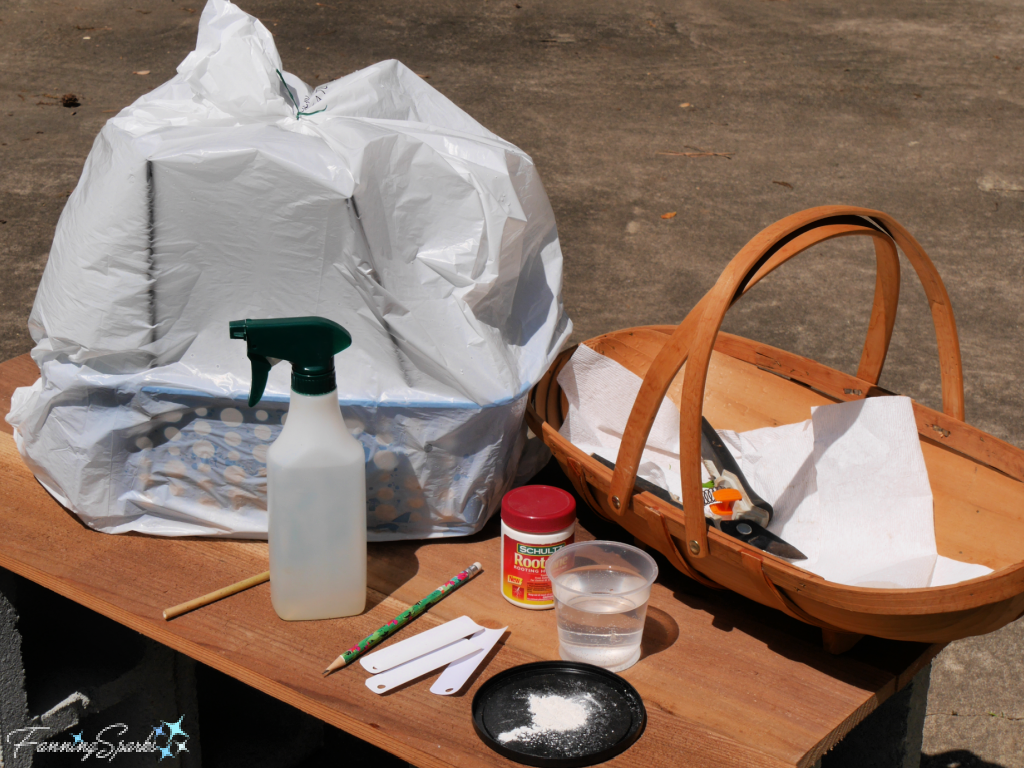
The question of which containers and soil to use for cuttings garners a great deal of advice online. Last year, I filled plastic baskets with sand and covered them with a trash bag to make a mini-greenhouse. This worked so well I will do the same this year. Once again, I have Mike’s Backyard Nursery (See More Info below) to thank for this technique. I’ve tweaked the process a little and prepare my rooting baskets as follows.
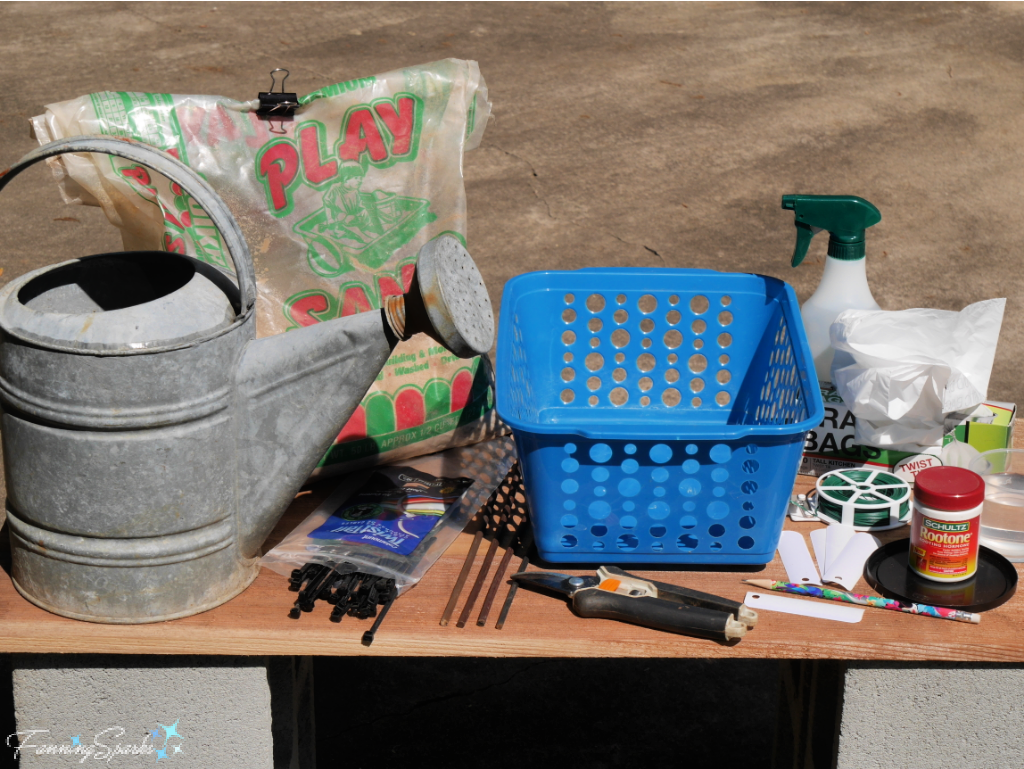
Gather these supplies:
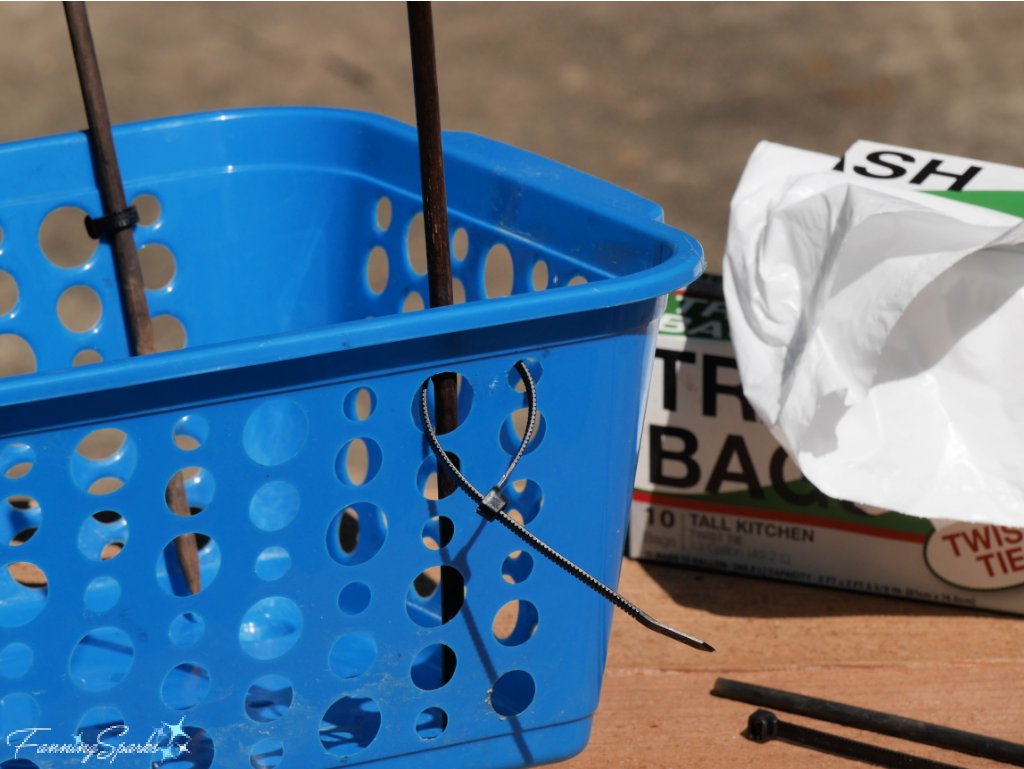
. Plastic Basket – with holes in the sides. Mine are inexpensive plastic from a local dollar store—they are 13½“ long x 9” wide x 6” high.
. Play Sand
. White Trash Bag – Big enough for the basket to fit inside.
. Sticks – FOUR about 13” long dowels or plant stakes.
. Cable Ties – FOUR
. Water
. Labels
You’ll also need Rooting Hormone when it’s time to take the cuttings. There are several products available—just look for “rooting hormone”, “rooting compound” or “rooting powder”. I used Schultz Rootone Rooting Hormone which doesn’t appear to be sold any longer.
To prepare the Rooting Basket, attach the 4 sticks to the corners of the basket with the cable ties. The sticks will elevate the plastic trash bag over the basket creating a tent of sorts.
Next open a trash bag and set the basket inside. Fill the basket about 1/3 full with play sand. I’ve found it’s much easier to set the basket inside the bag before adding the sand. Shower the sand with water to soak it thoroughly.
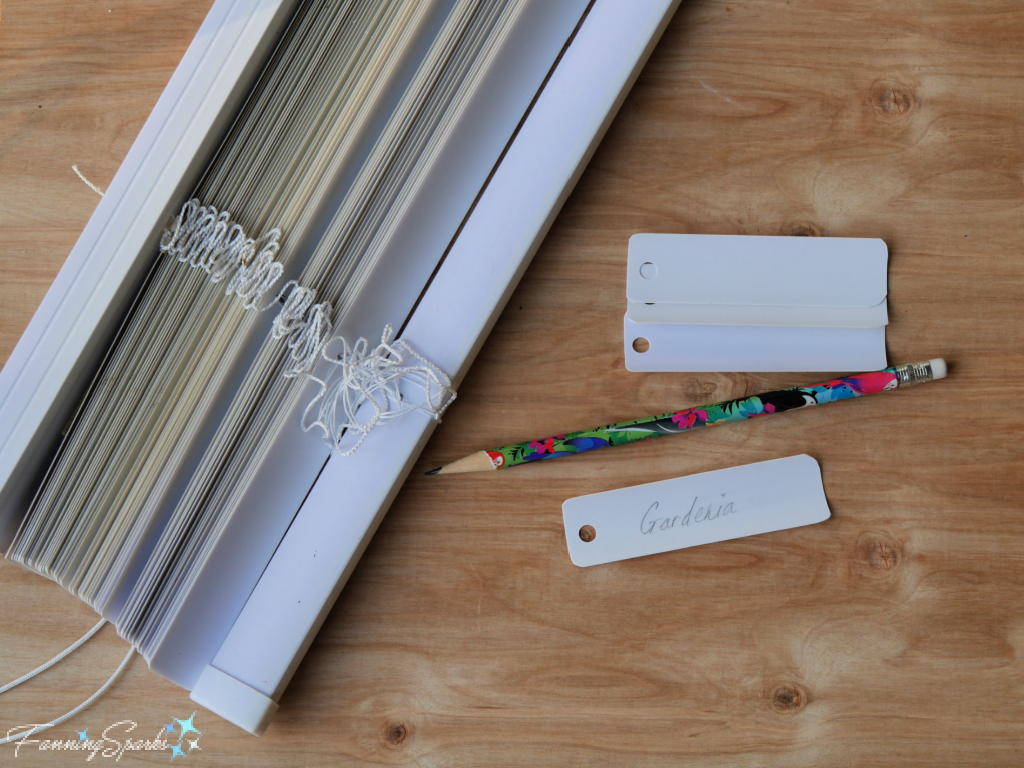
♦ TIP: It’s also helpful to prepare a few labels in advance. The slats from an inexpensive vinyl mini blind make great plant labels. Simply cut the cords to remove a slat. Then use scissors to cut the slat into labels. I make mine about 3½“ long and make a hole with a punch. Then I use a regular pencil to write on it. You can hang the labels or stick them in the ground. Believe it or not, these simple labels last and last. Cheap and easy!
Take Cuttings
When it comes to taking the actual cuttings, the online advice is pretty consistent. Here are the steps:
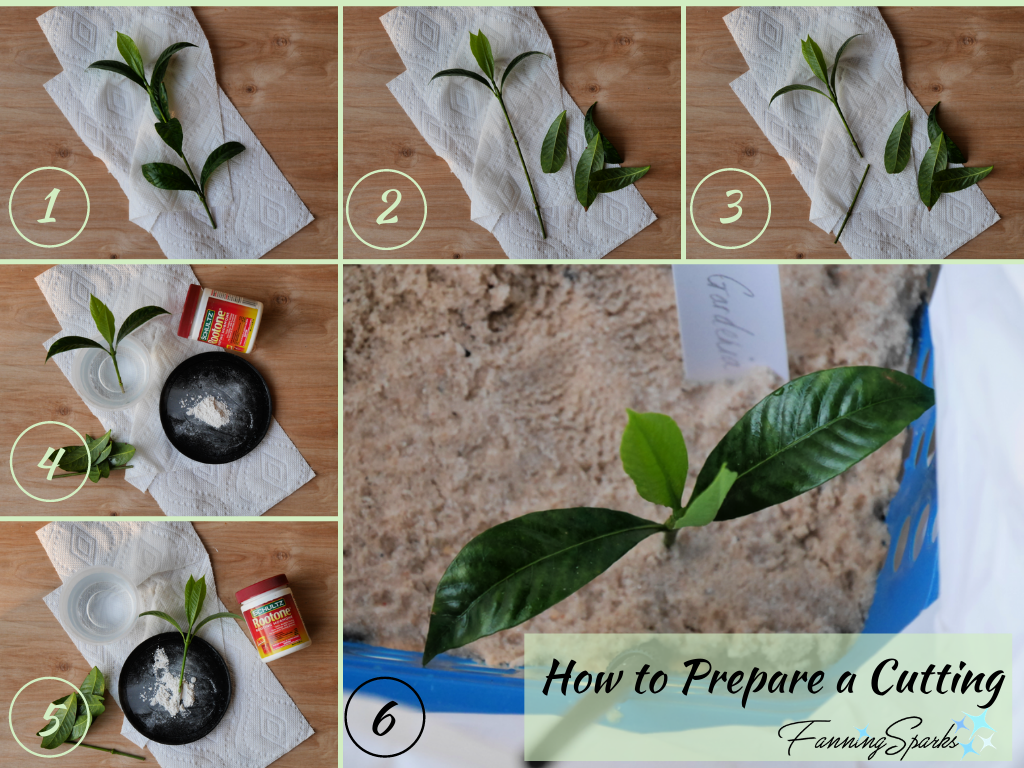
1. Cut a 3-6” stem from the tip of a branch with healthy new growth but no buds or blooms.
2. Strip all leaves except the top couple sets.
3. Cut stem just below a spot from which you removed a set of leaves.
4. Dip end of stem in water.
5. Roll wet stem in Rooting Hormone. Tap to remove excess.
6. Make a hole in the sand with a stick and insert stem into the sand.
Wait
After filling the rooting basket with cuttings, drench the sand. Then pull the trash bag up around the sticks and close with a twist tie.
Place the covered rooting basket in the shade and wait.
The idea is to give the cuttings lots of moisture. Once a week, open the bag for a few hours to let in some fresh air and gently spray your cuttings with water. I also check the bag after it has rained to shake off puddles or water that has collected in the folds of the bag. Keep the rooting basket out of the direct sun to prevent it from overheating and/or drying out.
Typically, cuttings will form roots in about 4-8 weeks. Once rooted, gently remove the cuttings from the sand and transplant into individual pots or into the garden. It’s really that simple!
More Info
I’ve found the advice offered on Mike’s Backyard Nursery website, especially in the Propagation section, to be very helpful.
You may also enjoy the FanningSparks’ post, Our Garden Prepares to Leap, to see the progress we’ve made with our flower gardens. Or the post, Zinnias Rock! And More Cutting Garden Tips, to learn about my cutting flower garden.
Today’s Takeaways
1. All it takes to propagate your favorite flowering shrubs is a little planning and a lot of patience.
2. A simple rule of thumb is to start cuttings 6 weeks after your plants start producing leaves.
3. Consider starting cuttings from your own garden.

Comments are closed.