
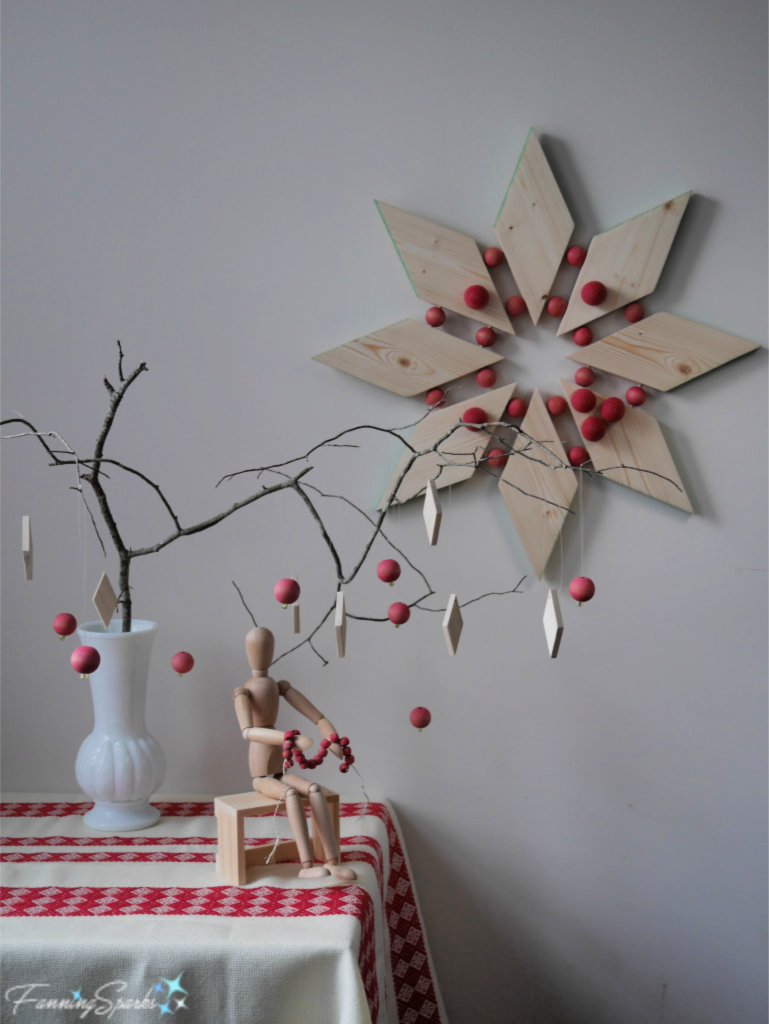
Wreaths are a sign of welcome. Hung on the front door, above the mantel or elsewhere, a wreath invites guests to enter and get comfortable. Some folks have different wreaths for every season and major holiday. I haven’t reached that level of wreath mastery but I do like to hang wreaths during the Christmas holidays. This year I decided to try something a little different and make a wreath out of wood. The wreath is in the shape of an 8-point star. It showcases the natural grain of unfinished wood with subtle color-washed red wooden beads. The diamonds resemble leaves and the beads look like berries. All of which, gives it a nice Scandinavian, minimalist vibe.
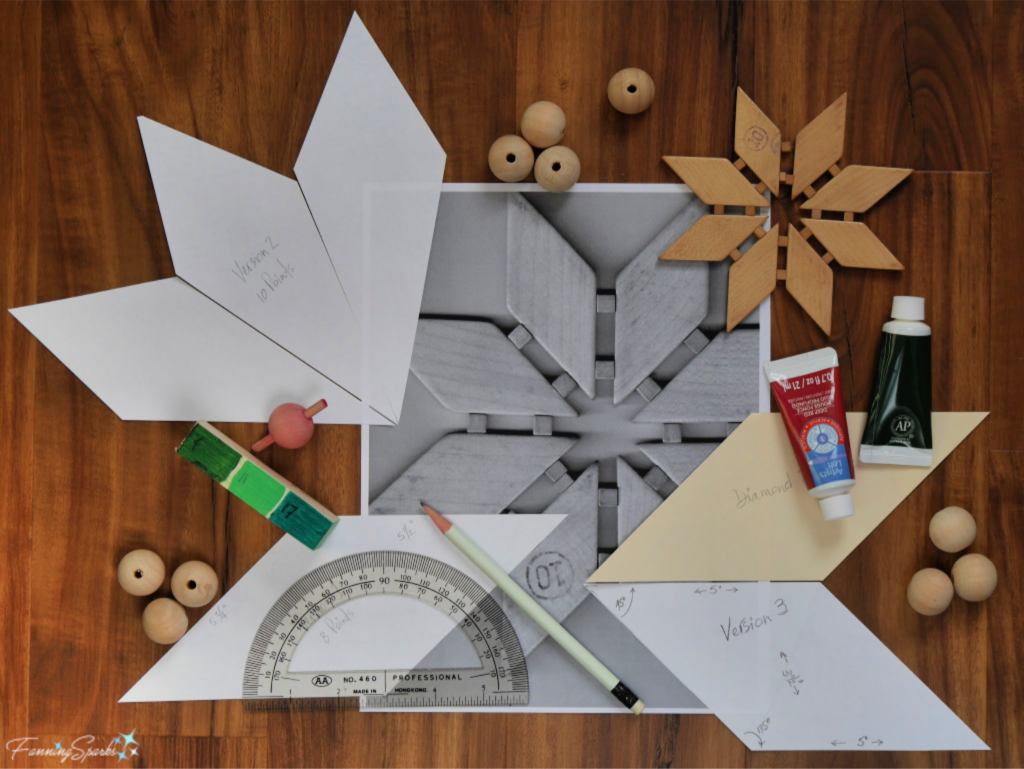
It’s always fun to let an idea evolve and unfold. In this case, a wooden trivet found at a thrift store sparked the idea for a wooden wreath. I have a vague recollection of trivets like this (shown top right) being made during craft period at summer camp. The wreath design came together as I tried different shapes and sizes of paper diamonds.
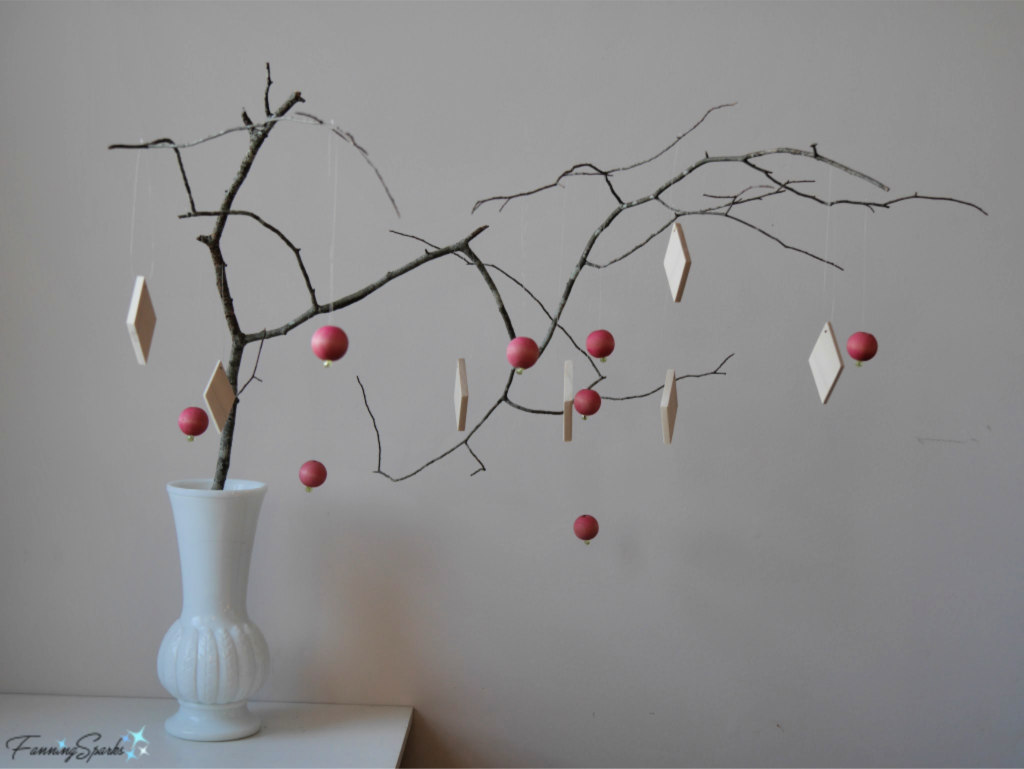
There are many ways to finish this wreath. You could choose to paint it, add more or less berries, add ribbon, or insert greenery. I decided to keep it clean and simple. In keeping with the natural theme, I found a curly branch in the yard and propped it in a simple white vase. Then I cut a few miniature wooden diamonds and stained a few more wooden beads. These were hung with fishing line from the branch. A red striped tablecloth, a little wood figure and this lovely holiday tablescape came together.
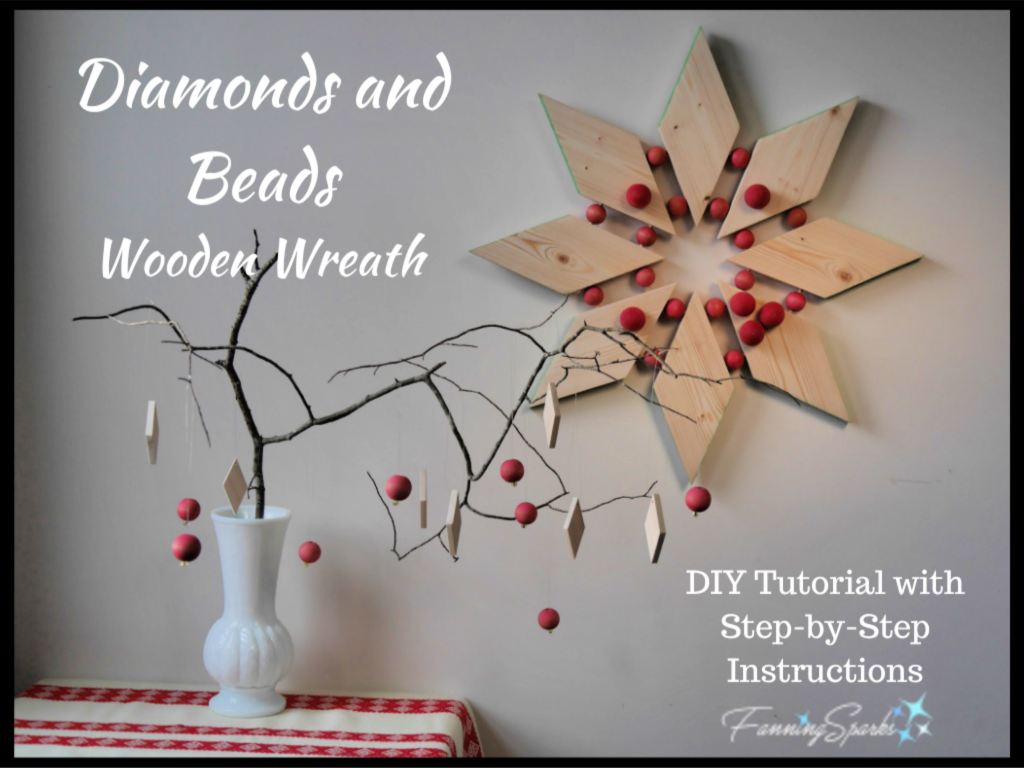
Today’s post provides easy, step-by-step instructions to make your very own Diamonds and Beads Wooden Wreath.
Supplies Needed
The following supplies are needed for this project:
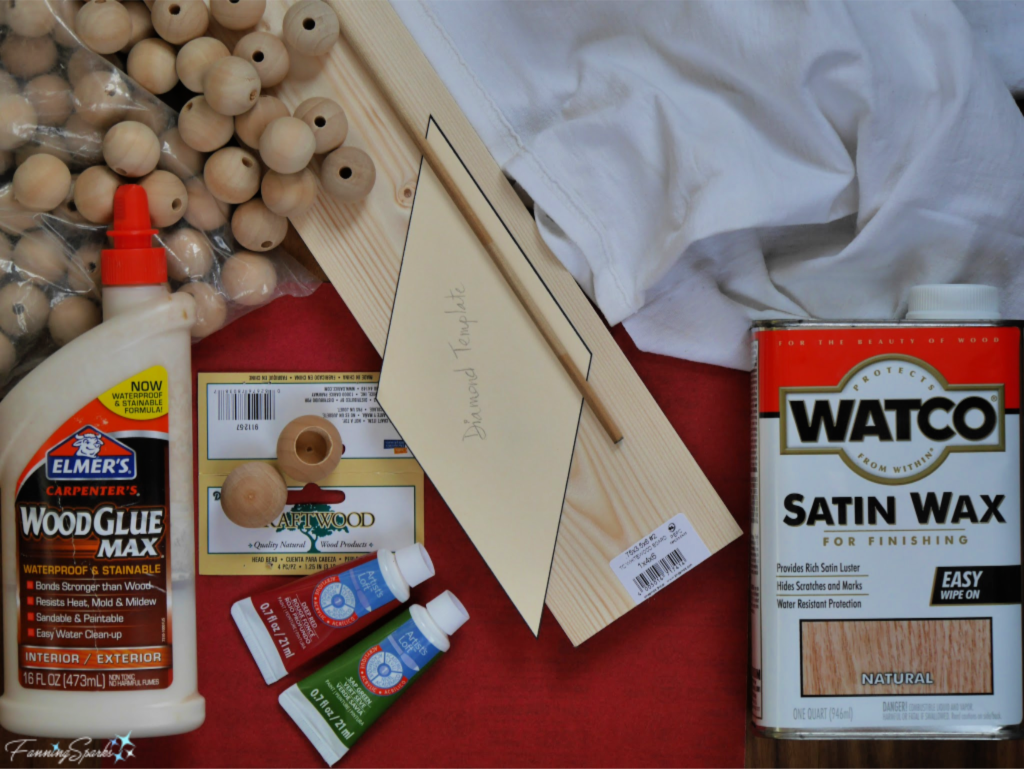 Pine Board: 1″ x 4″ x 6’ to cut the diamonds. Note the actual size of the wood will be only ¾” x 3 ½”.
Wood Beads: 16 – 1″ unfinished wooden beads with 1/5 ” hole. I purchased a bag of 100 by JUNKE on Amazon.
Wood Dowel: 1 – 3/16″ x 48″ poplar dowel for connecting the diamonds.
Wood Glue
Heavy Paper: 8 ½” x 11″ sheet of heavy paper, such as a manila folder, to cut a template.
Tape: To mark wood diamonds and drill bit. I used painter’s tape because it’s easy to remove.
Sandpaper. Fine 220 grit sandpaper for finishing.
Acrylic Paint: Water-based acrylic paint to stain the beads and diamond edges. Very little paint is needed since it is diluted with water to create a color wash affect. I used Artist’s Loft in Deep Red for the berries and Sap Green for the leaf edges.
Water
Finishing Wax: WATCO Satin Wax for Finishing in Natural color.
Rags: Lint-free rags for removing finishing wax. I used an old t shirt.
Hanger: Small triangle ring hanger, or similar hanger, to hang wreath.
Head Beads: 6 – 1¼” unfinished wooden head beads (beads are solid on top with an opening on the bottom). These are optional depending on how you choose to finish the wreath. See step 12 below.
Tools Needed
The following tools are needed for this project:
Tape Measure
Pencil
Jigsaw (or whatever type of saw you prefer to cut the wood)
Clamps: To hold pine board while cutting and drilling. I used a Workmate to hold the wood for drilling.
Nail: Nail or other sharply pointed tool to indent marks for drilling.
Drill with 3/16″ drill bit: To cut holes for the dowels.
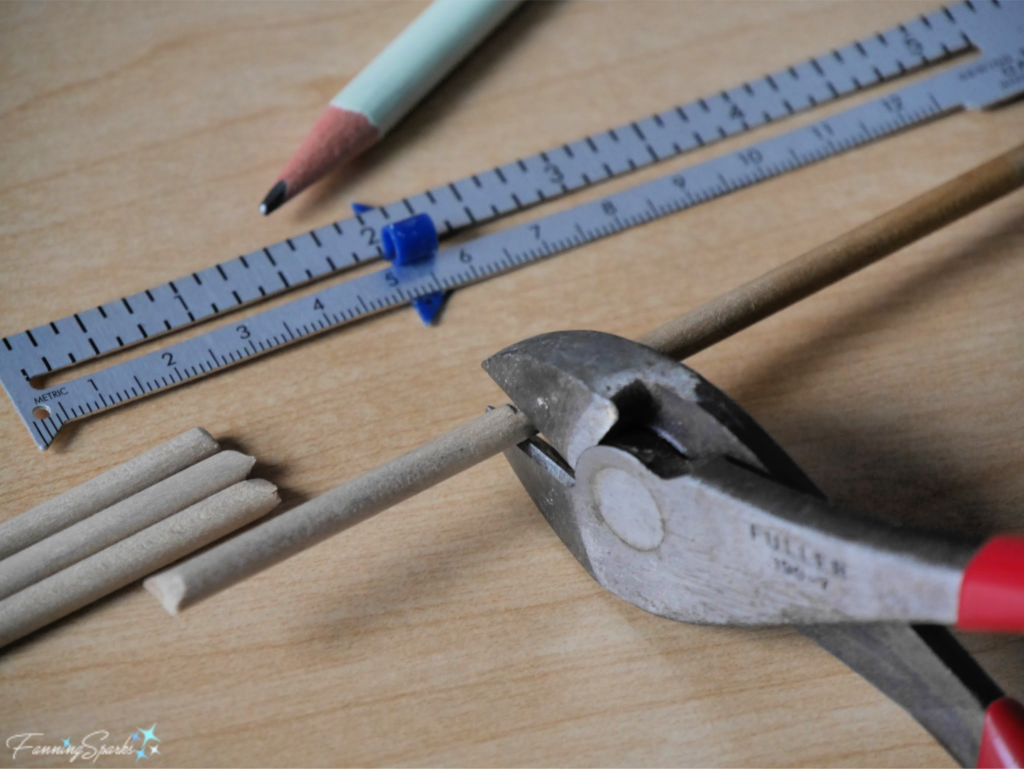
Plier Cutters: To cut the dowel. Alternatively, you could saw the dowels but I’ve found simply snipping them is faster and easier.
Container: Small, shallow cup or similar container for mixing the paint. I re-purposed a refrigerator egg tray.
Paint Brush: Small artist’s paint brush.
Foam Brush: Disposable foam brush.
Styrofoam or a cardboard box: A piece of scrap styrofoam or an empty cardboard box about 12″ by 8″ to insert the dowels into so the beads can dry.
Gloves: Disposable gloves for painting and waxing.
Container: Small container, such as a plastic glass or glass jar, to hold finishing wax.
Instructions
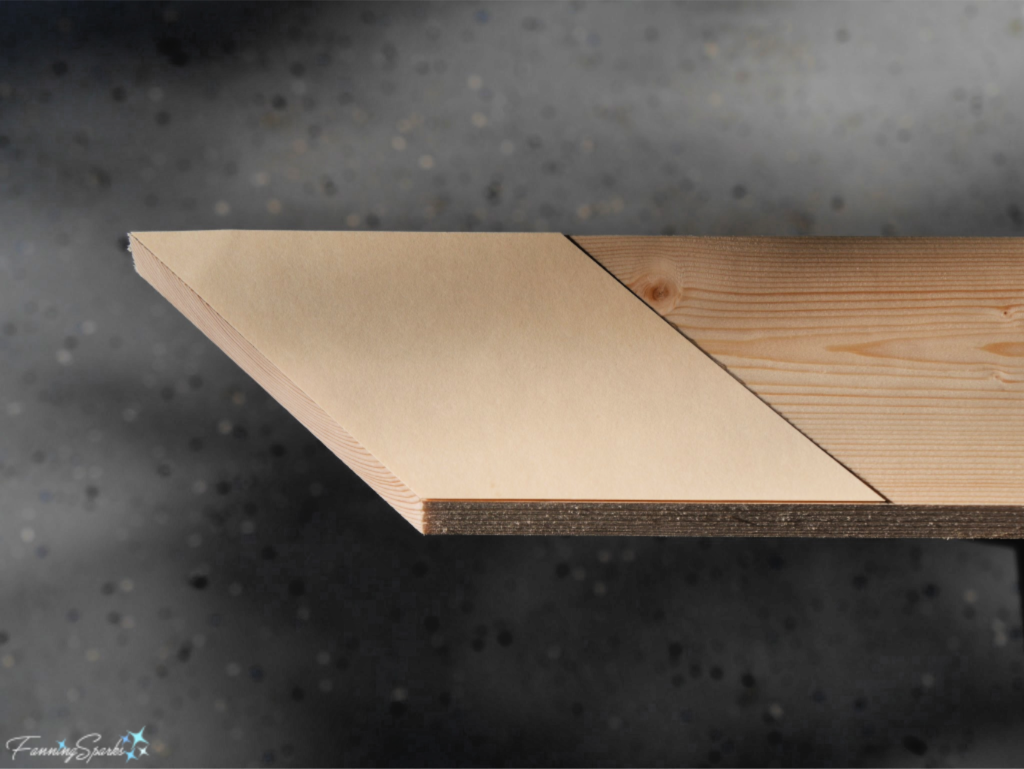
Step 1 Prepare Template Use heavy paper, such as a manila folder, to create a template for the diamond. Draw two parallel lines about 9″ long and 3.5″ apart. Measure 5″ from the start of the top line and mark. Measure 3 ½” and at 8 ½” from the start of the bottom line and mark both. Connect the start of the top line with the 3½” mark on the bottom line. Connect the 5″ mark on the top line with the 8 ½” mark on the bottom line. This should result in a diamond with 45⁰ and 135⁰ angles.
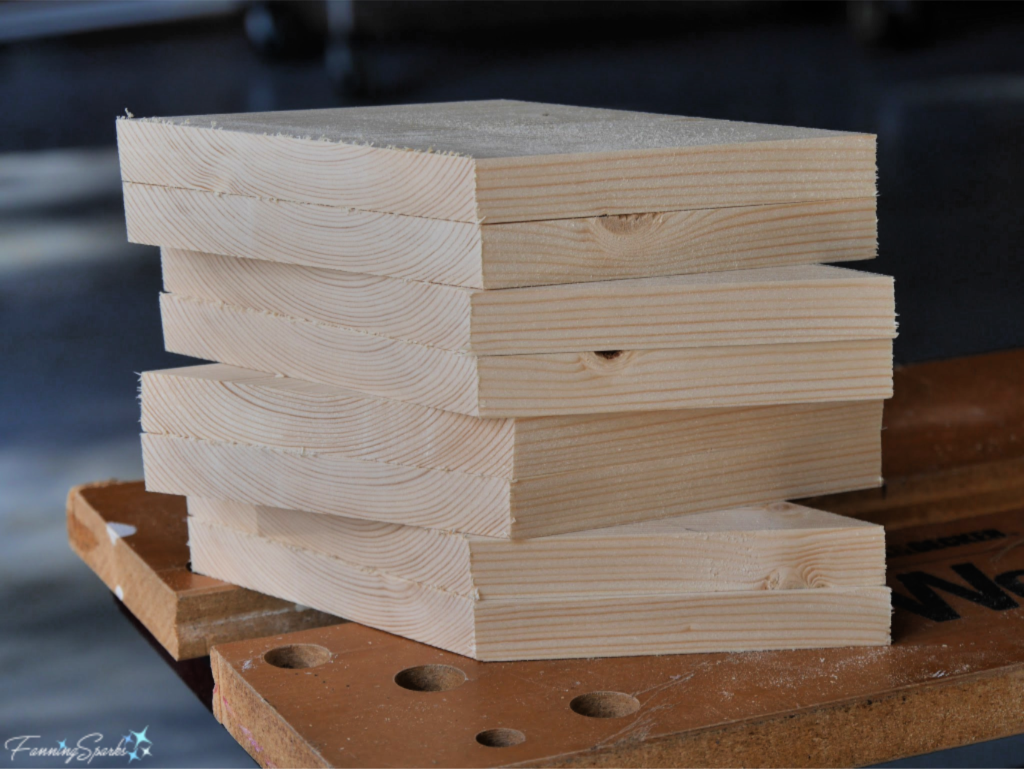
Step 2 Cut and Sand Wood Parts Cut the 1″ x 4″ x 6’ pine board into 8 diamonds using the template.
TIP: Approximately 2′ of the pine board will remain. Keep this scrap to set up for drilling the holes later.
Lightly sand all cut parts to ensure a smooth, unblemished finish.
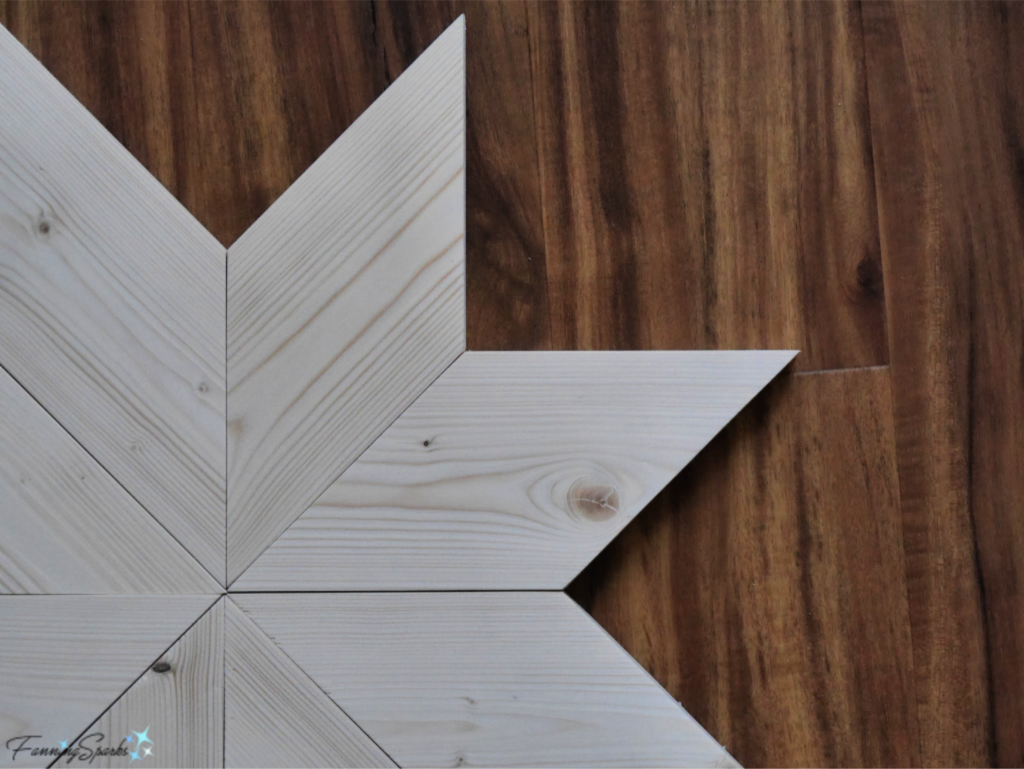
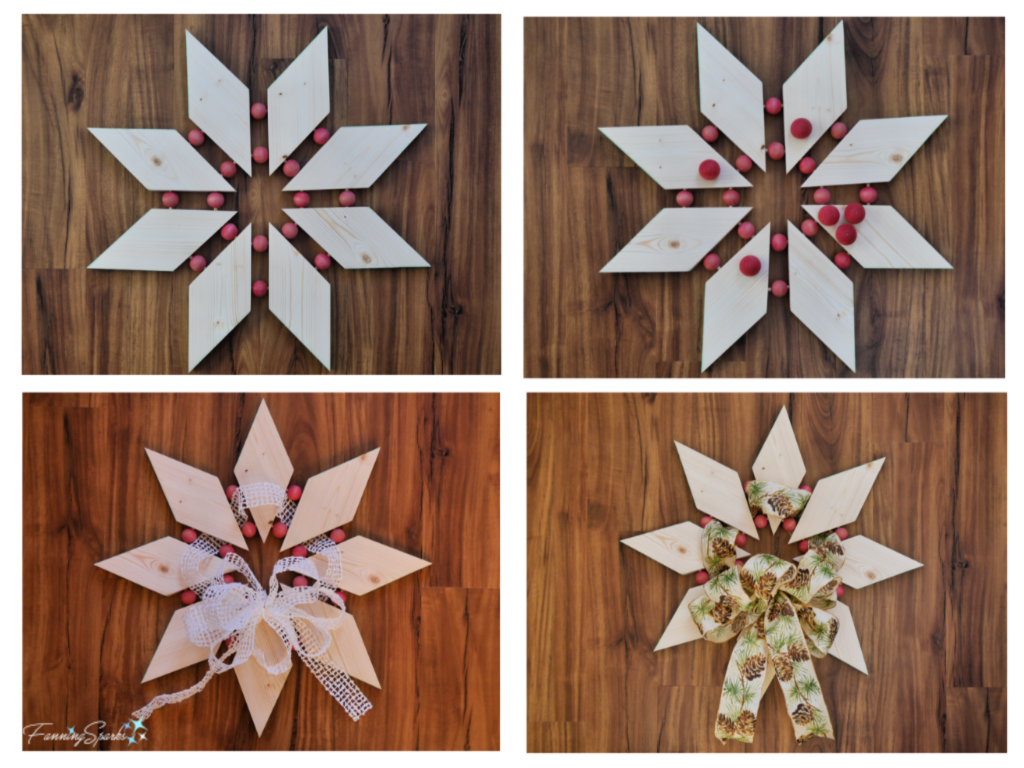
Step 3 Check Diamonds Lay the wood diamonds on a flat working surface. Check that inside edges match as shown below. Flip and reverse diamonds to find best fit. Adjust as necessary. Using small pieces of tape on the front inside tips, number the diamonds from 1 to 8 for reassembly.
Step 4 Drill the Holes for Dowels Using the template, mark 4 points on the inside tips of every diamond. These points are equally spaced at 1¼” from each end. Transfer these points to the ¾” side edges of the diamonds taking care to find the exact center and mark accurately. Indent the mark with a nail or other sharply pointed tool. This makes it easier to position the drill bit.
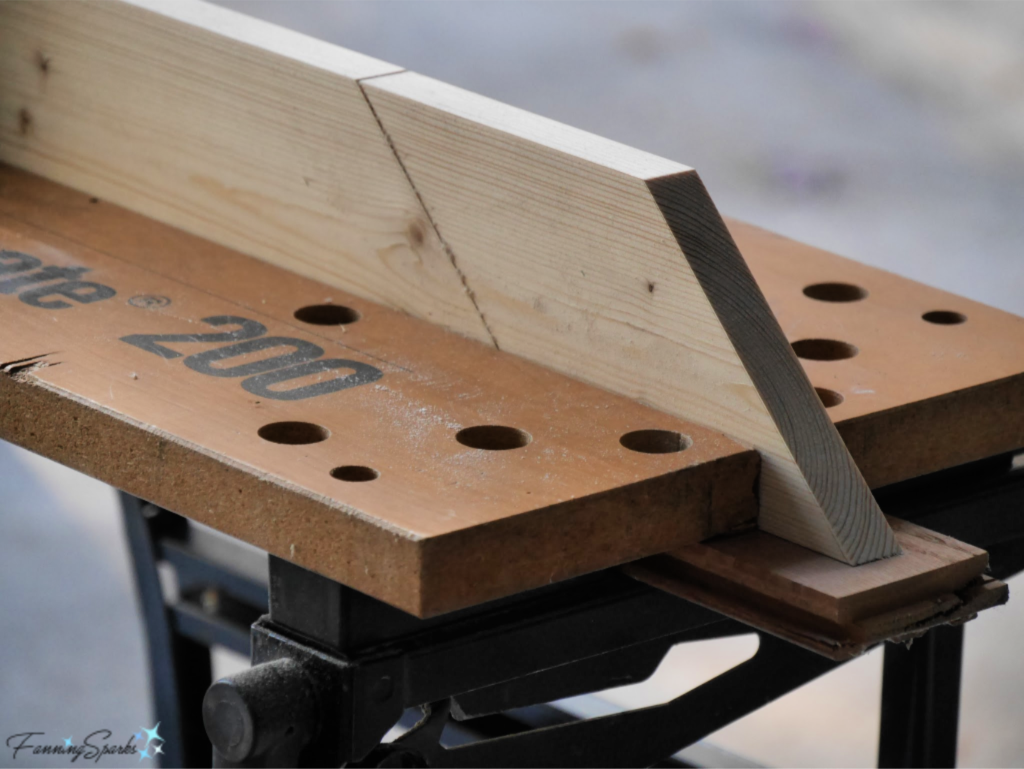
Set up for drilling the holes by clamping a diamond vertically. Use the board end set aside in step 2 with scrap wood and clamps to hold the wood diamond securely. I used the clamping jaws of my Workmate to secure my setup as shown below.
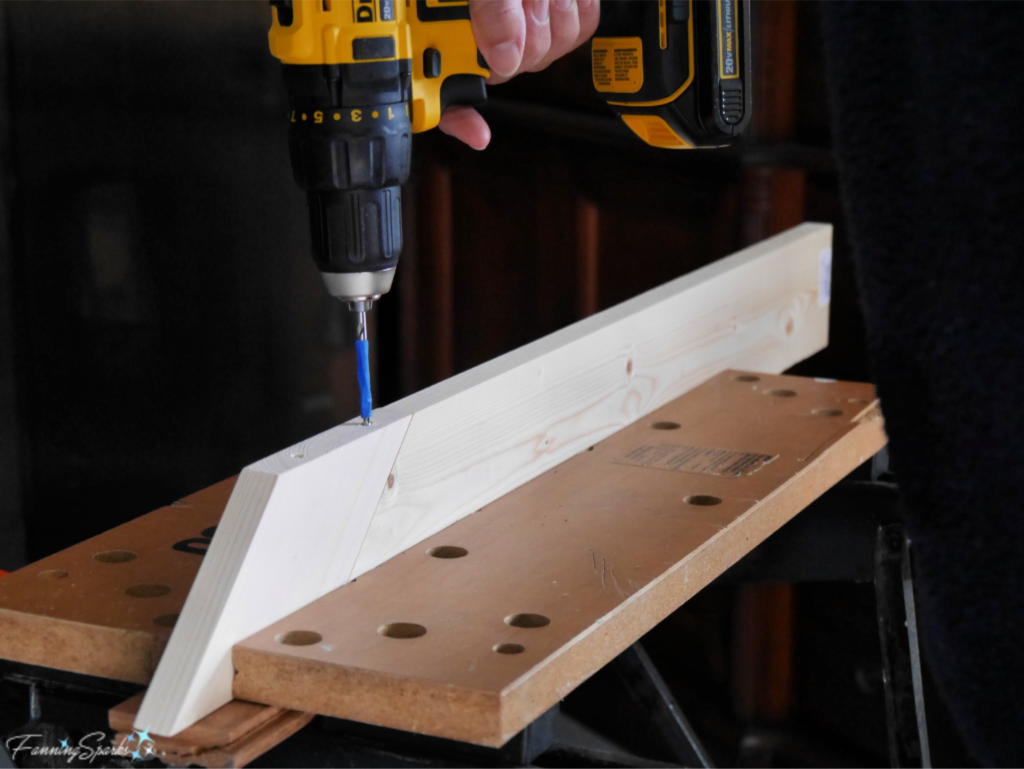
Insert 3/16″ bit into drill. Prepare to drill holes 5/8″ deep.
TIP: Mark drill bit at 5/8″ by wrapping a piece of tape around the bit above the 5/8″ mark. Use this as your visual cue when drilling. Be sure to check the tape periodically to ensure it hasn’t slipped or worn away.
Drill 4 holes in each wood diamond. Ensure holes are drilled as accurately as possible so diamonds will align correctly.
Step 5 Cut Dowels Measure and mark 16 sections of the 3/16″ dowel at 2″ increments. Use the plier cutters to cut the dowel. The ends will not be visible so it’s not necessary to sand them.
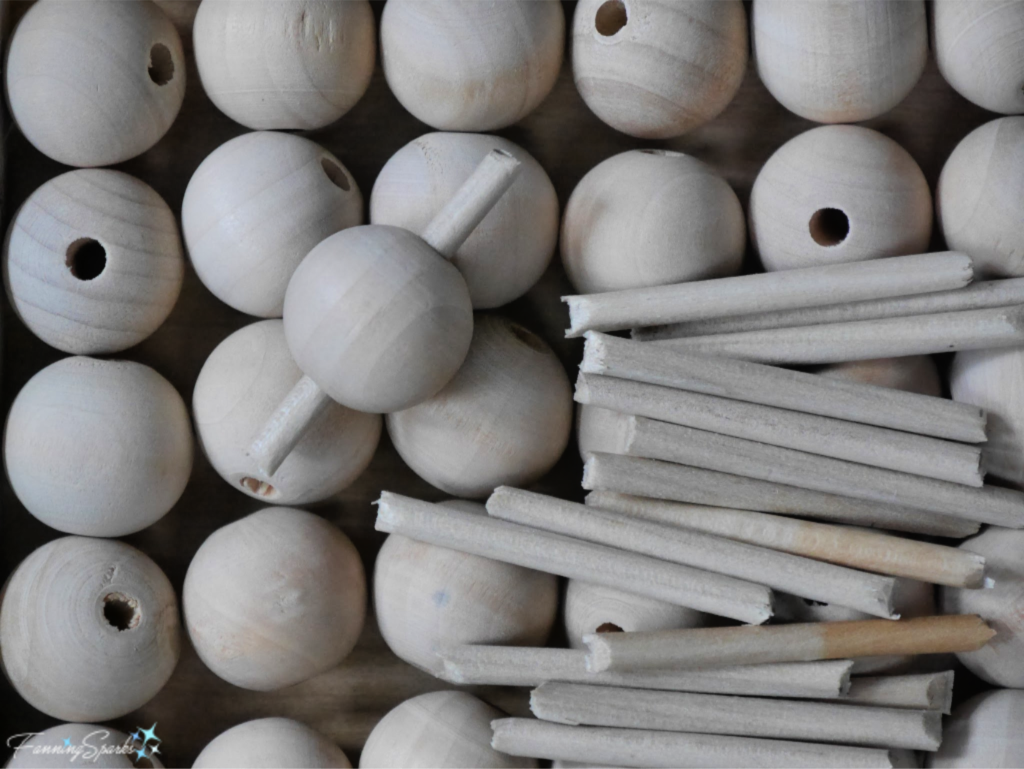
Step 6 Insert Dowels Insert a piece of dowel in each wooden bead. Some may be a little snug and need some gentle force.
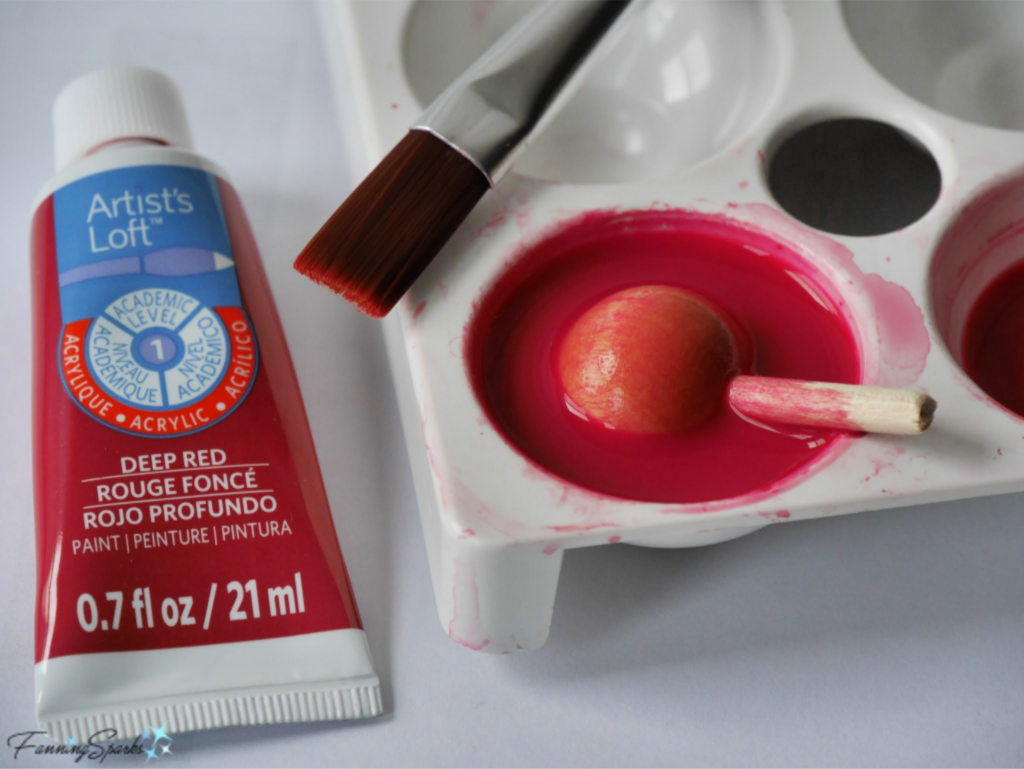
Step 7 Stain Wood Beads Squeeze a small amount of the red acrylic paint into a small, shallow container. Carefully add water and mix thoroughly. I used an old refrigerator egg tray because only a small amount of paint and water are needed. The idea is to create a color wash that will add color without hiding the wood.
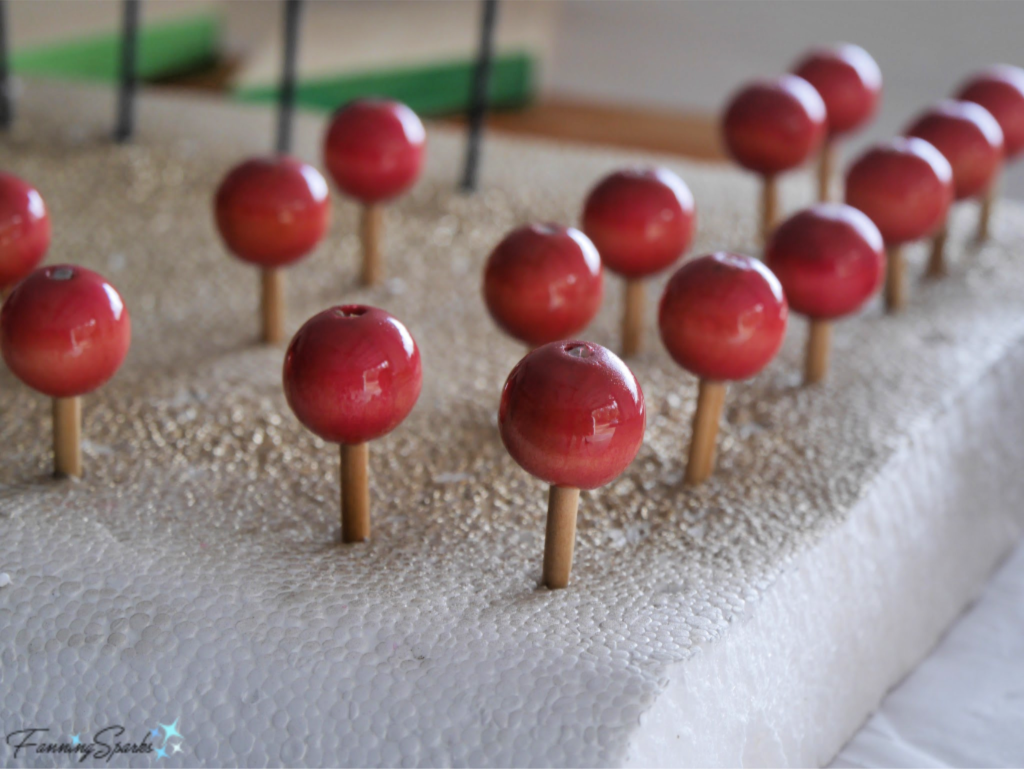
Slide the bead to the end of a dowel. Dunk the bead into the color wash. Let it soak for a few minutes. The beads can soak up a surprising amount of liquid. Remove the bead from the color wash and insert the dowel into a piece of styrofoam or a cardboard box to let the bead dry. Repeat for the remaining 15 beads.
Allow the beads to dry. Assess if enough color has been absorbed for your liking. If not, repeat this step a second time. I applied 2 coats of red color wash to my beads.
Step 8 Stain Diamond Edges Squeeze a small amount of the green acrylic paint into a small, shallow container. Carefully add water and mix thoroughly. As described in the previous step for the wood beads, only a small amount of paint and water are needed. Use a paint brush to apply the color wash to the outside edges of the wooden diamonds. Alternatively, you could choose to stain all or none of the edges. Take care not to put stain on the front of the diamonds. Allow to dry. Apply a second coat if desired.
After the wood diamonds are completely dry, use sandpaper to remove any stain from the fronts or unstained edges. The objective is to have sharp clean edges as shown below.
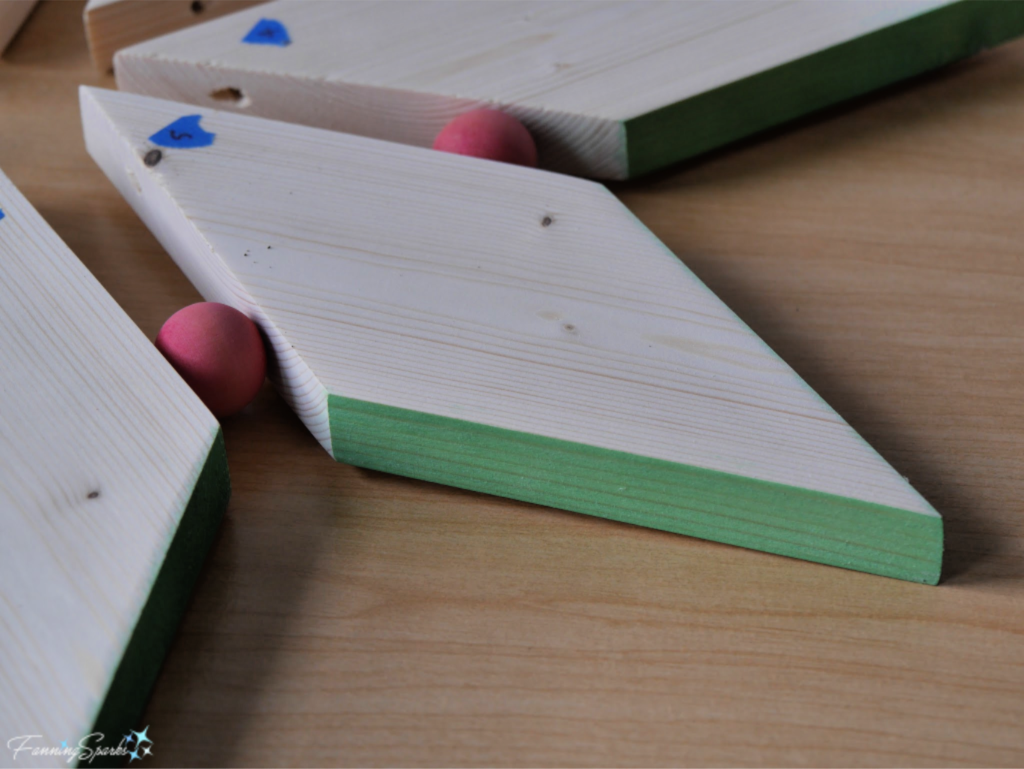
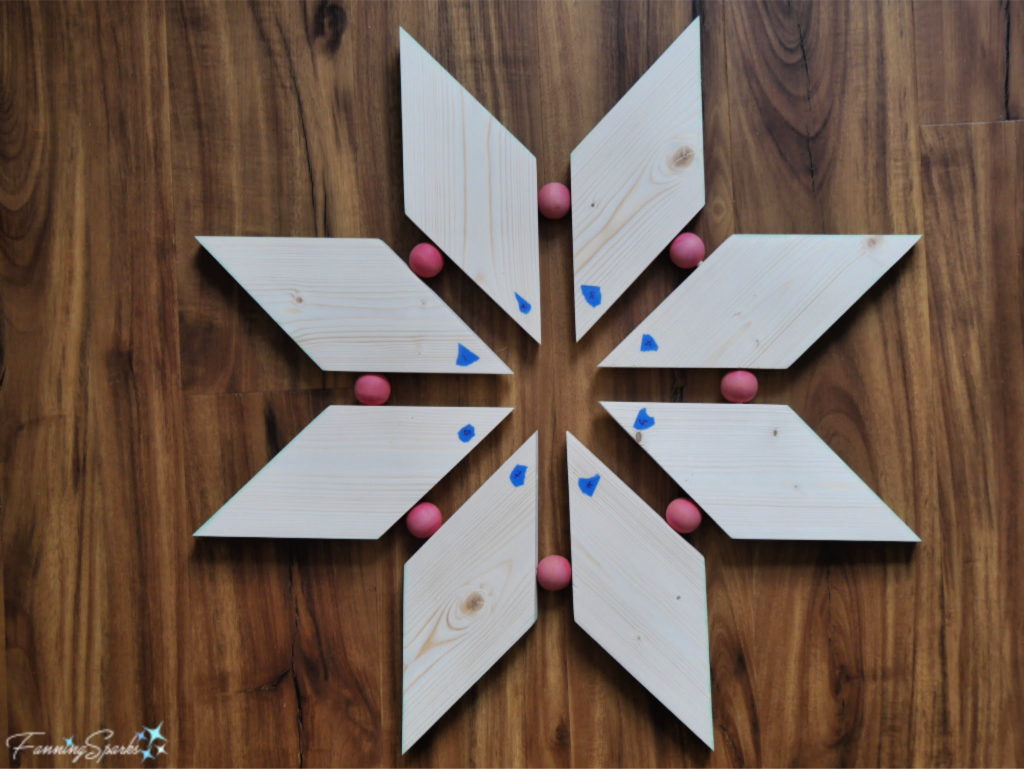
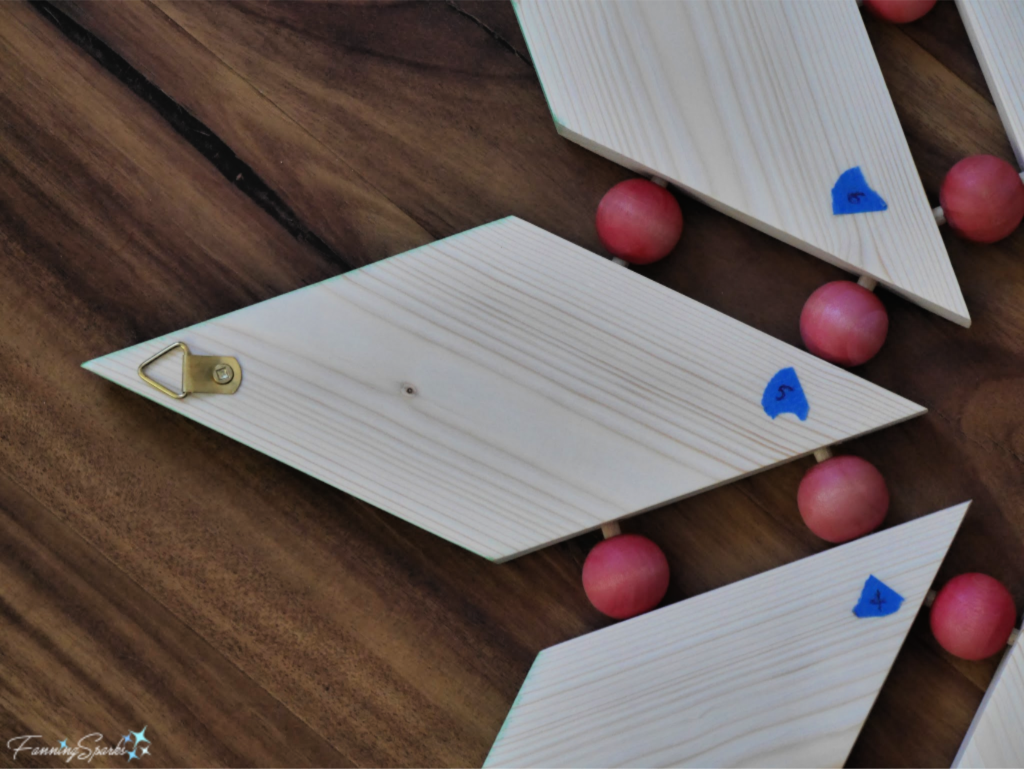
Step 9 Dry Fit Wreath After the beads and diamond edges are stained and dry, assemble the wreath to check the fit. Here’s how my wreath looked at this point. Note the blue tape indicates the number of each diamond (as discussed in step 3). Adjust as necessary.
Step 10 Wax Wreath Prepare to wax the wreath by disassembling the pieces and moving the tape to the back of the diamonds. Follow the manufacturer’s instructions for applying the wax. I used Watco Satin Wax for Finishing in Natural. Apply a generous coating to the diamonds (front and edges) and the wood beads.
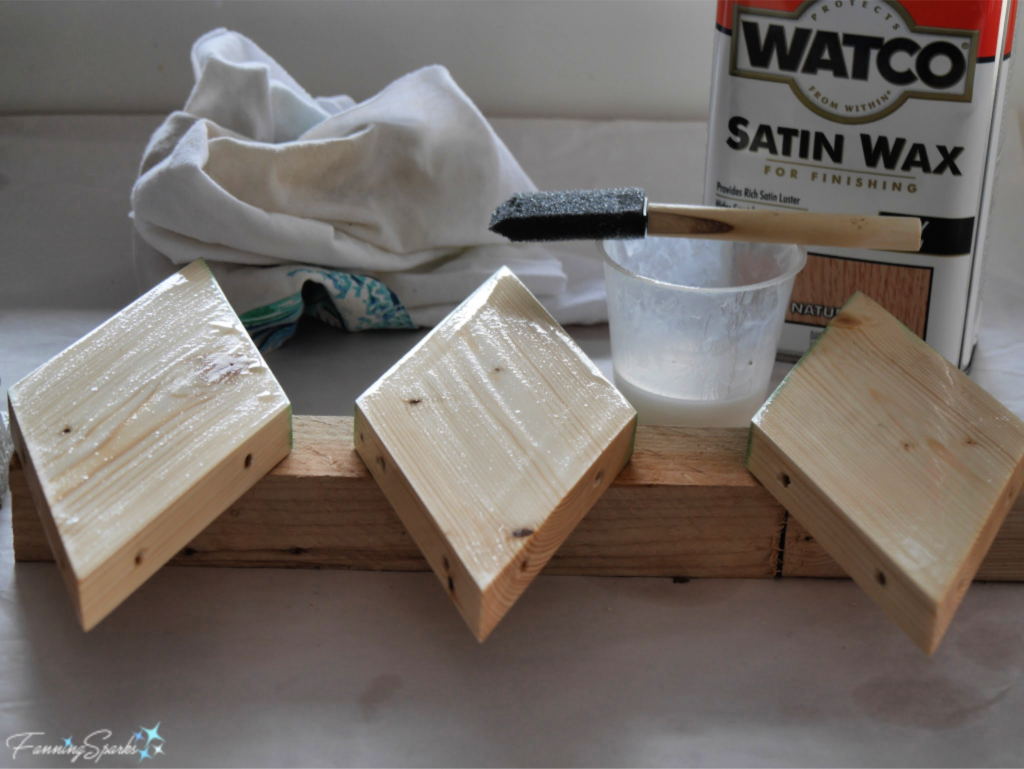
Let it soak in for about 15 minutes and reapply to any areas that dry out.
Then wipe off the excess with lint-free rags. Buff and let dry.
Please note: this product has a very strong odor so be sure to use it in a well ventilated area and allow plenty of time for the wax to dry and the smell to dissipate. I waited 4 days.
Step 11 Assemble Wreath Assemble the wreath by sliding the beads to the center of the dowels. Start with one diamond. Insert a dowel (with bead) into the 2 holes on one side of the diamond. Slide the next diamond onto the end of these same dowels. Repeat this process, working around the wreath, until all diamonds are connected. This can be a little fussy because not all diamonds and dowels are likely to fit perfectly right away. It may be necessary to re-drill a hole for a little extra room. Or it may be necessary to shorten a dowel to provide a tighter connection. Work around the wreath adjusting and fine-tuning until all diamonds are firmly in place. Use wood glue to permanently attach the pieces.
Determine which diamond will be at the top of the wreath. Attach a small triangle ring hanger, or similar hanger, to the back of that diamond.
Step 12 Decorate Wreath There are many options for finishing the wreath. You could choose to leave the wreath as it is. I glued on 6 wooden head beads which I stained red to resemble berries on the wreath. Or you could choose to embellish with ribbon.
Your wreath is ready to showcase in your holiday decor! Consider adding other elements, such as this branch hung with mini-diamonds and beads, to build on the theme.
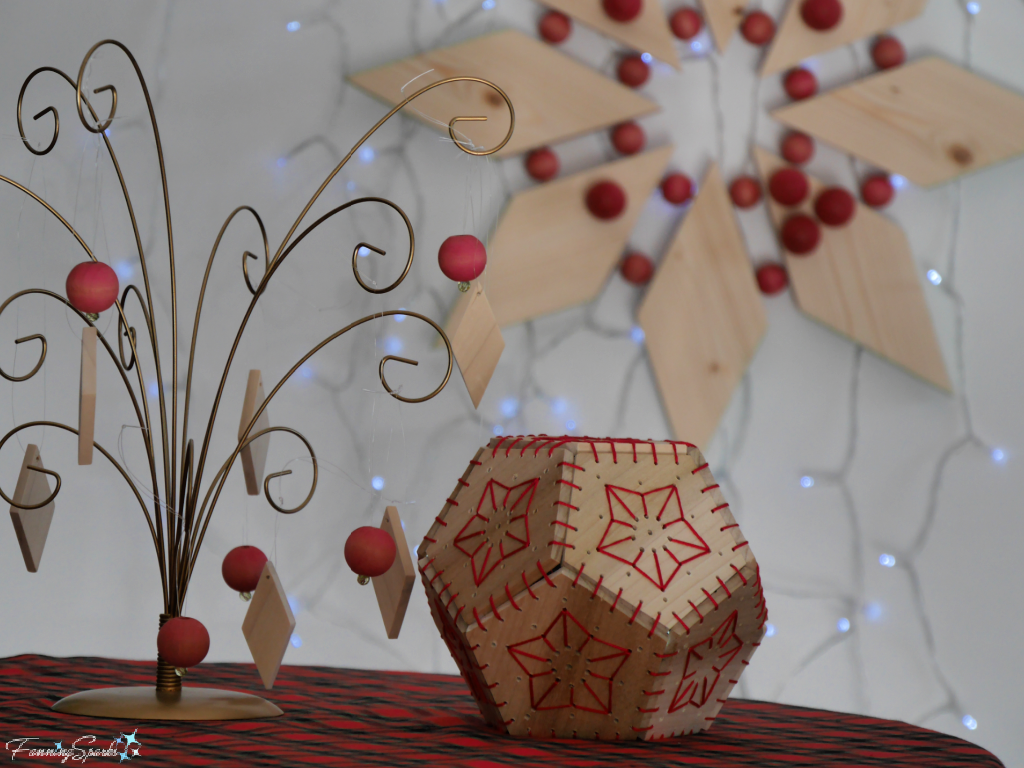
UPDATE Nov 24, 2020: You may also like the Starry Stitched Sphere pictured below. This decorative wooden sphere has a similar style to the Diamonds and Beads Wooden Wreath. Check out the Starry Stitched Sphere – DIY Tutorial for step-by-step instructions.
More Info
You may wish to save this DIY Tutorial for future reference. Please pin this image.
Today’s Takeaways
1. Hang wreaths throughout your home to welcome guests.
2. Consider making this Diamonds and Beads Wooden Wreath in the Scandinavian, minimalist style.
3. Embellish your wreath and decorate the surrounding area with your own personal touch.


4 Comments
@Patty – Thanks so much! You know first hand how much I love staging and styling photos. I’ll never forget your help (and kind patience) with shooting those wood carvings at the Folk School… thanks again.
@Bertha Thank you! That put a smile on my face especially coming from a person that never ceases to amaze me!
Love the photo set up including the wooden figure with the beads too! Awesome photography
Hey Peg
You never cease to amaze me.
Bertha