
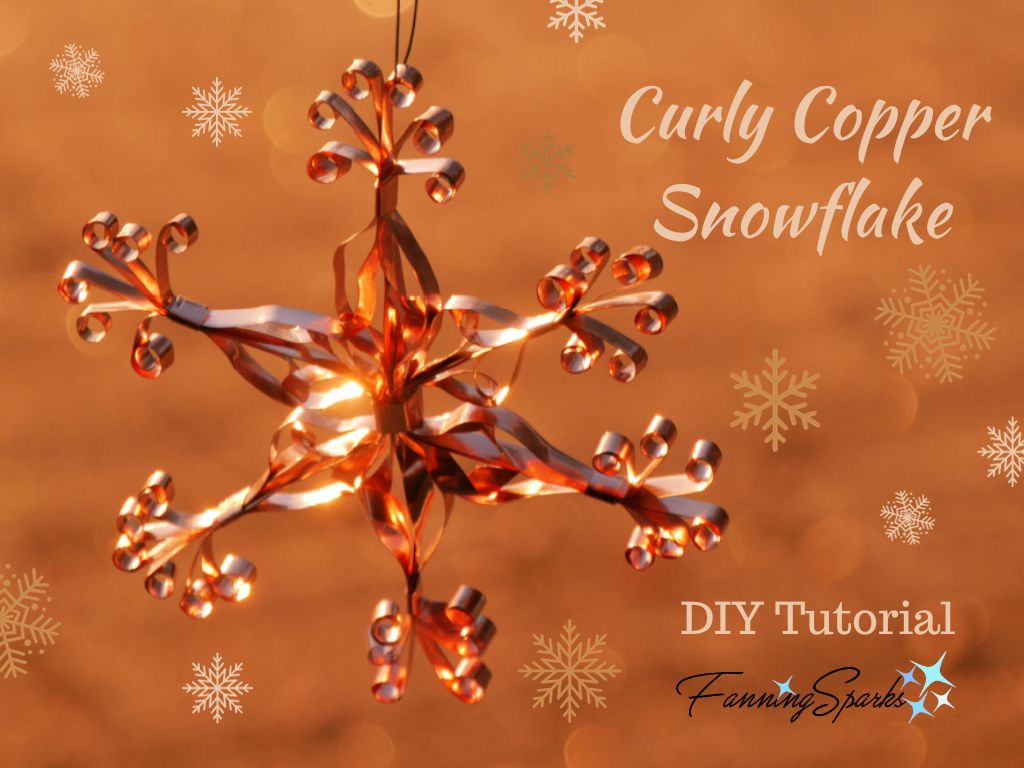
Looking for a fresh idea to add sparkle and shine to your holiday décor? How about a little old-world charm in rich, warm copper tones? The copper snowflakes featured here have twists and turns reminiscent of the wrought iron of southern Europe. Hang them to catch the light and surround yourself with twinkling stars!
You need only some copper foil, a few tools, basic crafting skills and the following step-by-step instructions to make one of these curly copper snowflakes. Make one or a whole flurry to hang on a tree, dress up a gift, sprinkle across a dining table, showcase on a wreath, feature in a holiday tablescape, hang in a window or string on a garland.
Let’s get started!
Supplies Needed
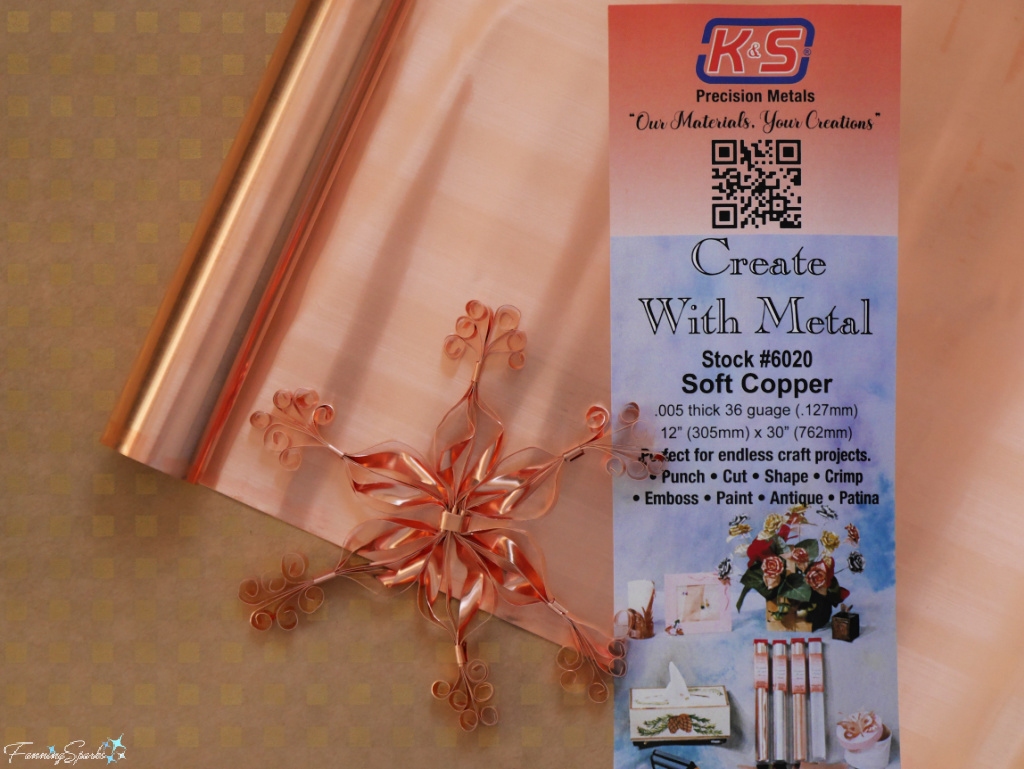
. Copper Tooling Foil. ONE 12” x 30” roll of 36-gauge (5 mil / .005” thick). This copper foil is about 8 times thicker than the aluminum foil typically used in the kitchen. It can’t be torn but it can easily be cut with scissors. It is pliable but holds its shape. Each snowflake requires about 2” x 30” of foil so a full roll should yield about 15-17 snowflakes.
. Manila File Folder
. Lacquer Spray (Optional) such as Rust-Oleum lacquer spray in gloss clear.
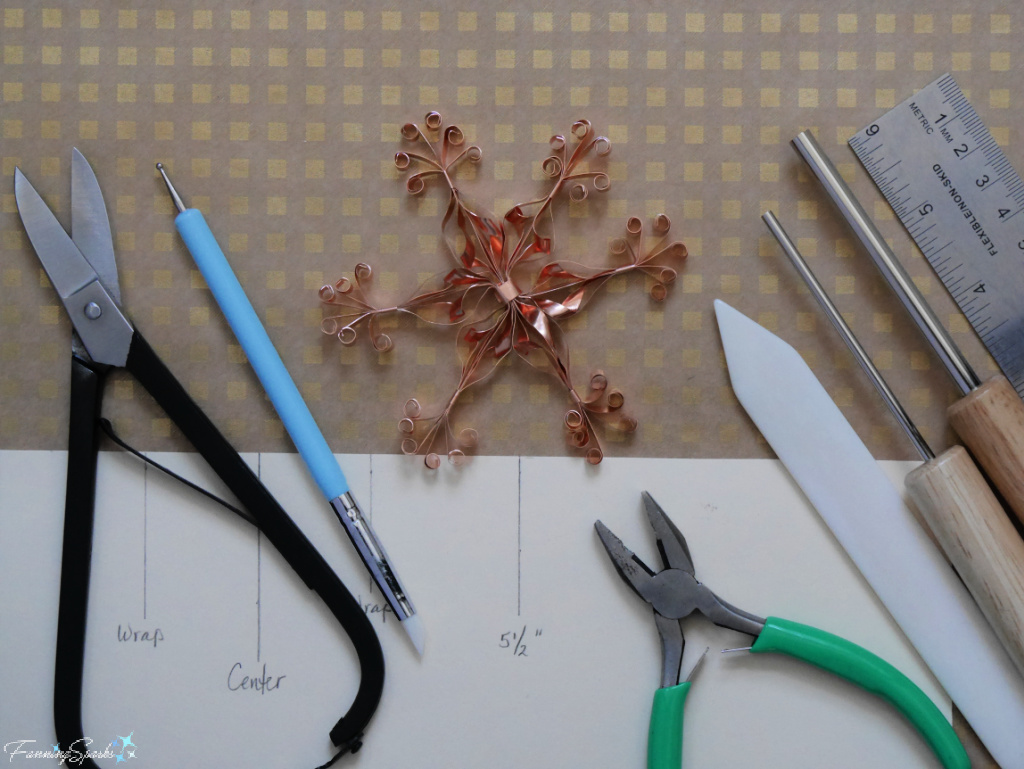
Tools Needed
. Metal shears. Alternatively, a pair of sturdy scissors can be dedicated to cutting metal.
. Ball Stylus for marking the copper foil. Alternatively, a pencil or ballpoint pen can be used.
. Flat Nose Pliers
. Bone Folder. Alternatively, the back of an old spoon can be used.
. Wire-curling Mandrel. One with a small width rod (I used 3mm) to create curls. One with a medium width rod (I used 6.5 mm) to create spirals. I purchased a set with 4 rod widths, in 3mm, 6.5mm, 8mm and 10mm, from Fire Mountain Gems. Alternatively, a dowel, skewer or other slim, round rod can be used.
. Ruler
. Gloves
Instructions
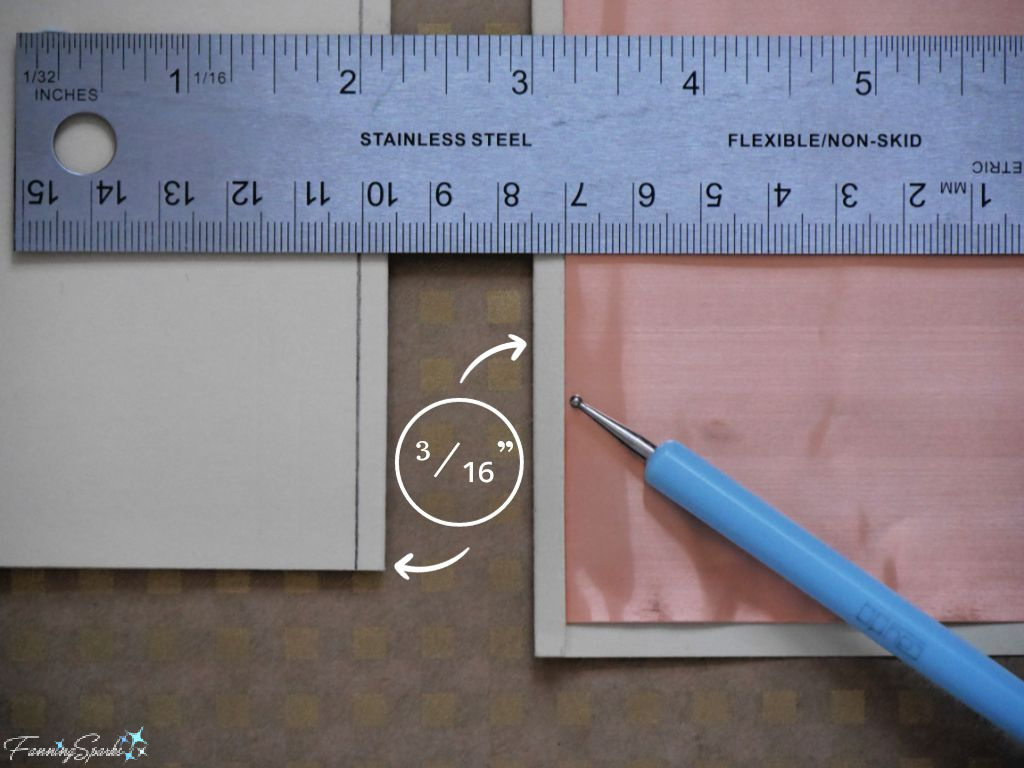
Step 1 Prepare Cutting Template Create a cutting template from a manila file folder to assist with cutting strips from the roll of copper foil. Press firmly along the fold in the center of the folder. Measure and mark ³⁄₁₆” from the fold. Cut the folder along this line leaving a long, slim ³⁄₁₆” overlap.
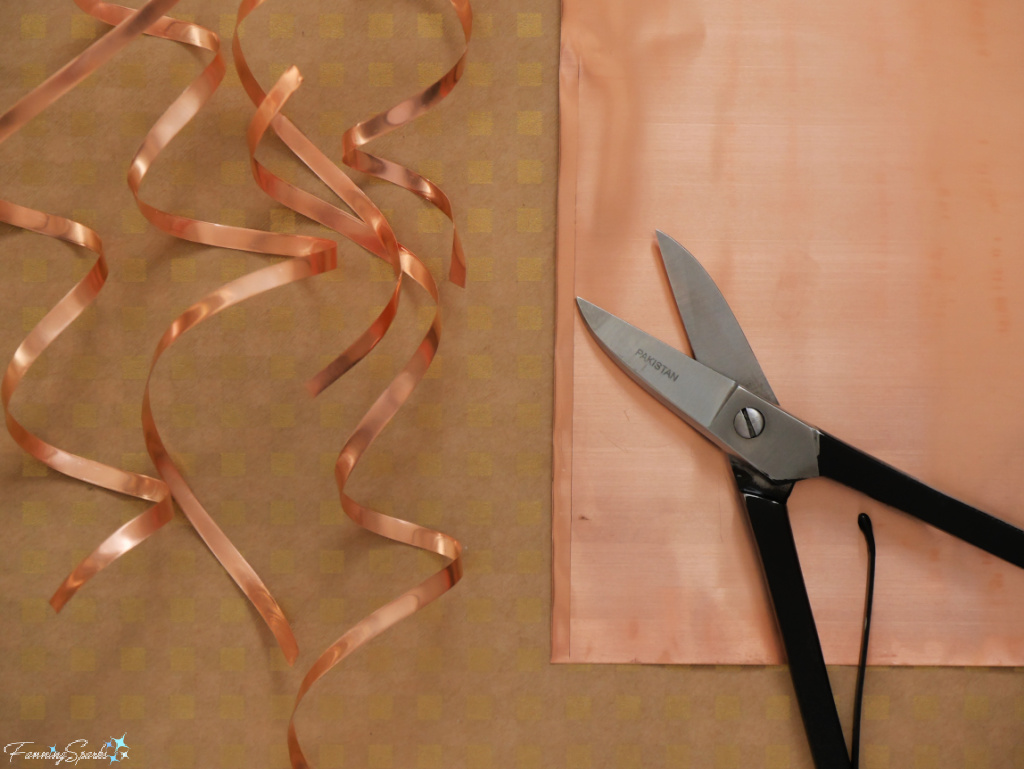
Step 2 Cut Strips Tuck the 12” edge of the copper foil under the overlap of the cutting template ensuring the entire edge is aligned with the inside edge of the fold. Slide the ball stylus along the edge of the overlap pressing down into the copper foil.
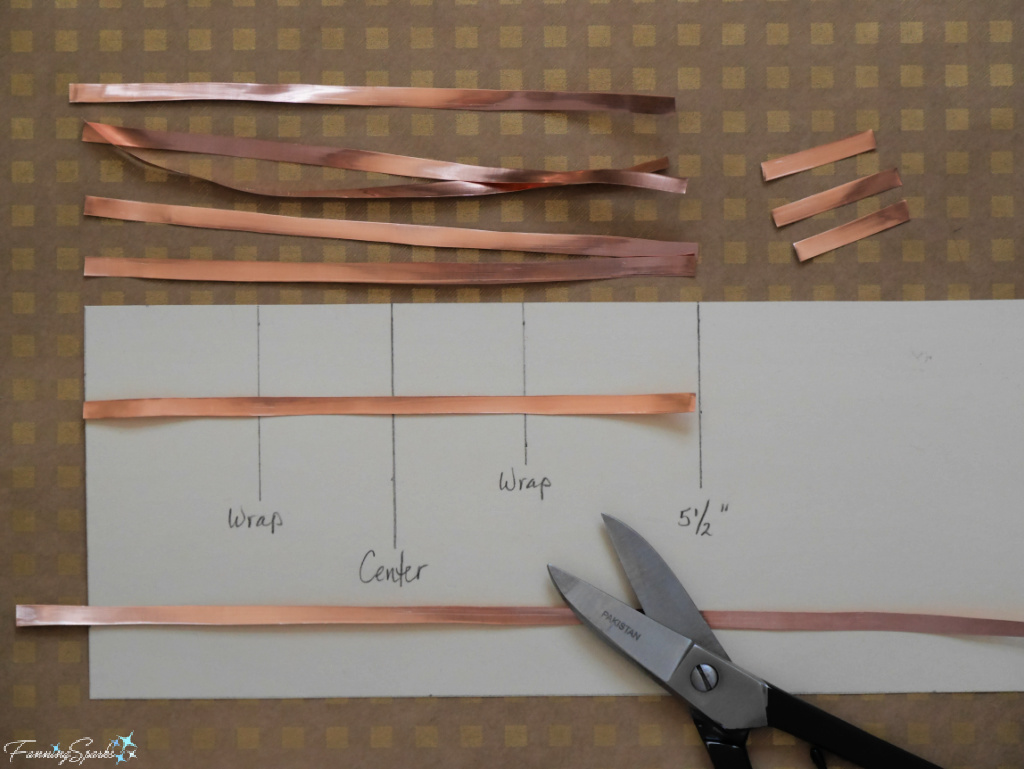
Use metal shears, or alternatively scissors, to cut along the embossed line. This will result in a long narrow strip—12 inches long by ³⁄₁₆” wide. Cut a total of NINE strips.
Step 3 Smooth Edges Use a bone folder, or alternatively the back of a spoon, to smooth each strip and remove any sharp and rough edges. It’s best to wear gloves for this step since the freshly-cut metal edges can be sharp.

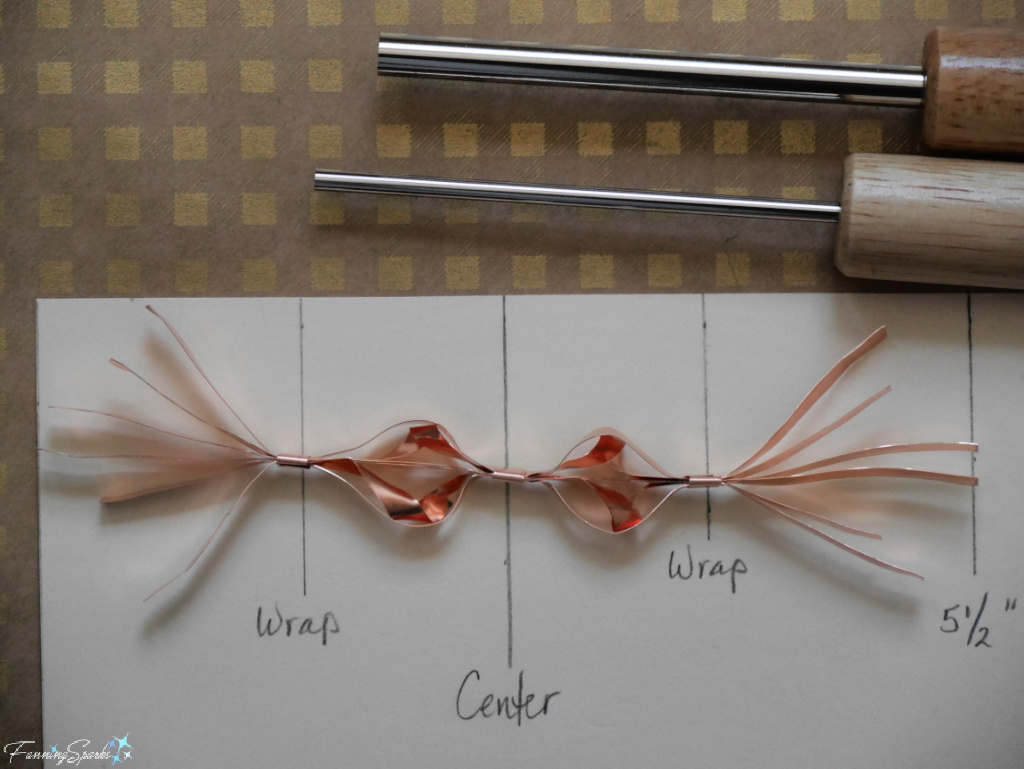
Step 4 Prepare Measuring Template Prepare a measuring template from a rectangular piece of manila file folder or paper to guide your measurements in the next few steps. Measure 5½” from the top left corner and make a mark. Find the center, at 2¾” from the left edge, and make a mark. Measure 1³⁄₁₆” to the left and to the right of the center line and mark. These marks are labeled “Wrap” in the template shown below.
Step 5 Cut Strips Use the measuring template to cut each of the 12” strips into TWO 5½“ pieces. Set the remaining short 1” pieces aside. You should have EIGHTEEN 5½” pieces and NINE 1” pieces.
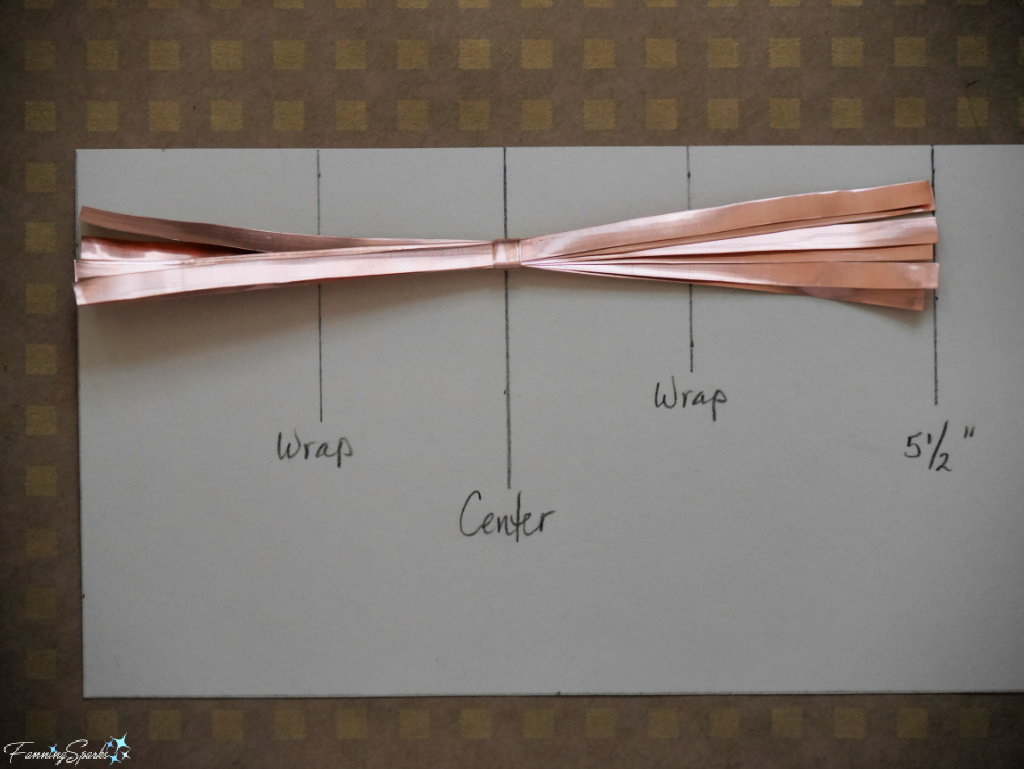
Step 6 Bundle Pieces Stack SIX of the 5½” pieces one on top of the other. Align the edges. Use the measuring template to find the center of the bundle and wrap one of the short 1” pieces around the middle of the bundle.
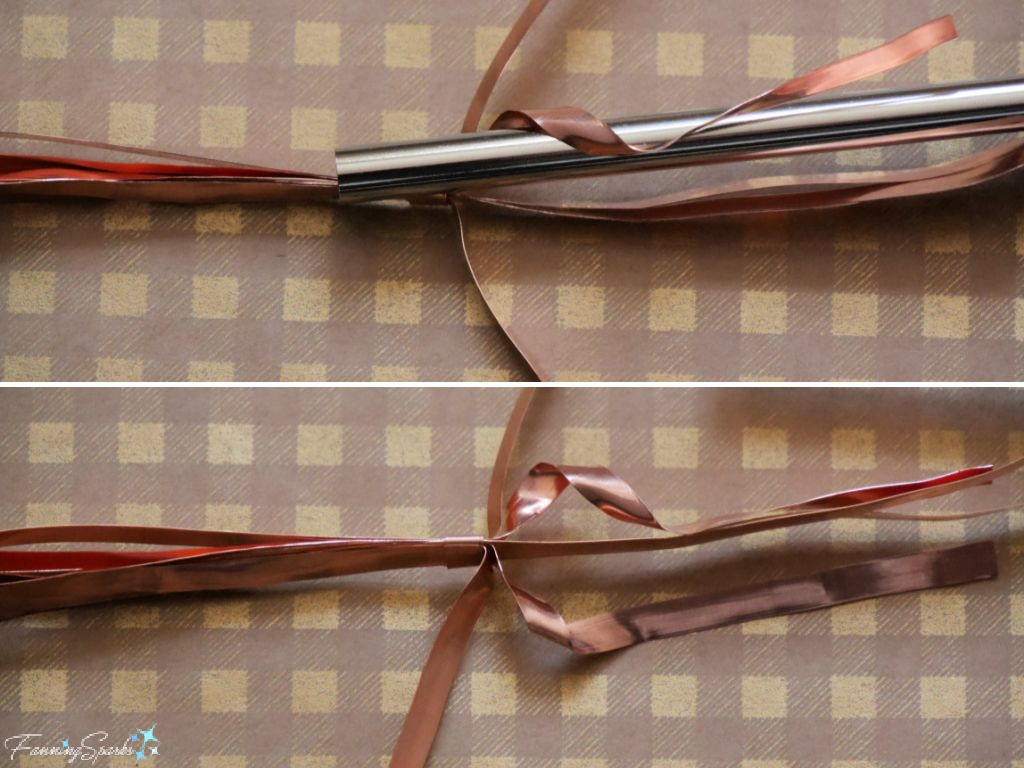
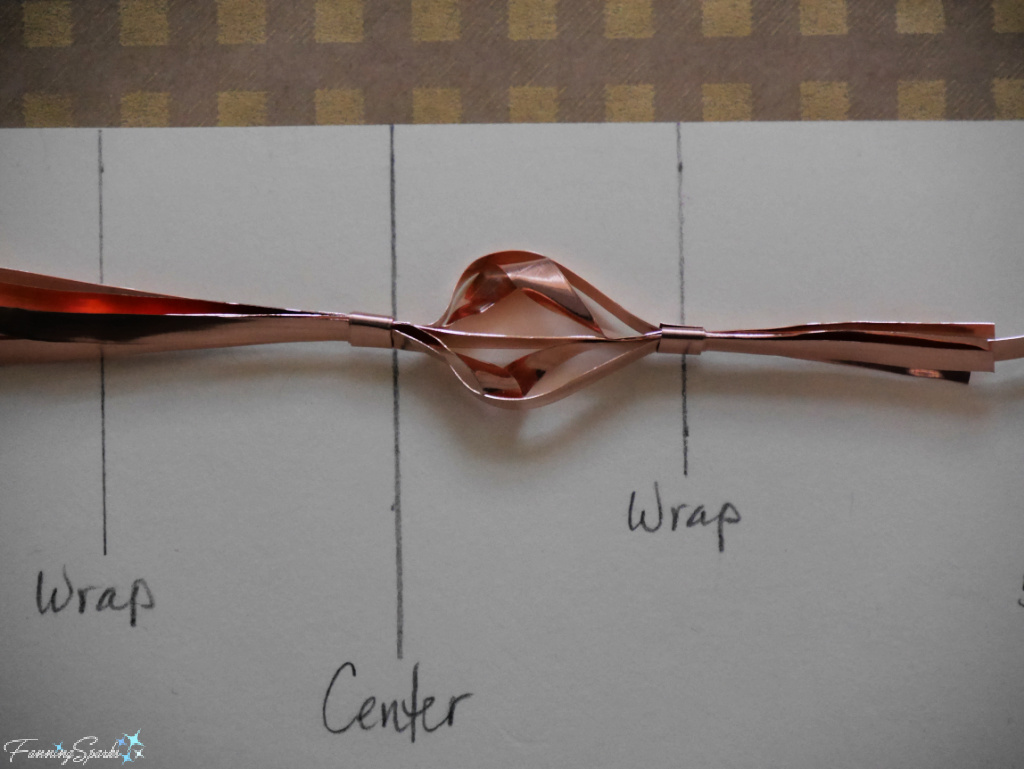
Step 7 Twirl Spirals Prepare to make spirals in the middle of the bundle. Starting on one end of the bundle, pull the first and sixth strips up and away from the bundle. Select the medium, 6.5 mm wire-curling mandrel. Pick up the second strip and use the mandrel to create a horizontal spiral, starting close to the center, and twisting for one rotation. Repeat the process with the fifth strip twisting in the opposite direction.
Step 8 Secure Ends of Bundle Pull all of the strips back together. Hold the bundle over the measuring template. Wrap one of the short 1” pieces around the bundle at the marked point.
Repeat this same process at the other end of the bundle. Fan out the ends of the strips in preparation for curling.
Step 9 Curl Ends Select the small, 3mm wire-curling mandrel. Insert the end of the first strip into the notch in the mandrel. Turn the mandrel’s handle and twirl towards the outside edge. Wrap the strip tightly around the mandrel. Then remove the curl by slipping it off the end of the mandrel.
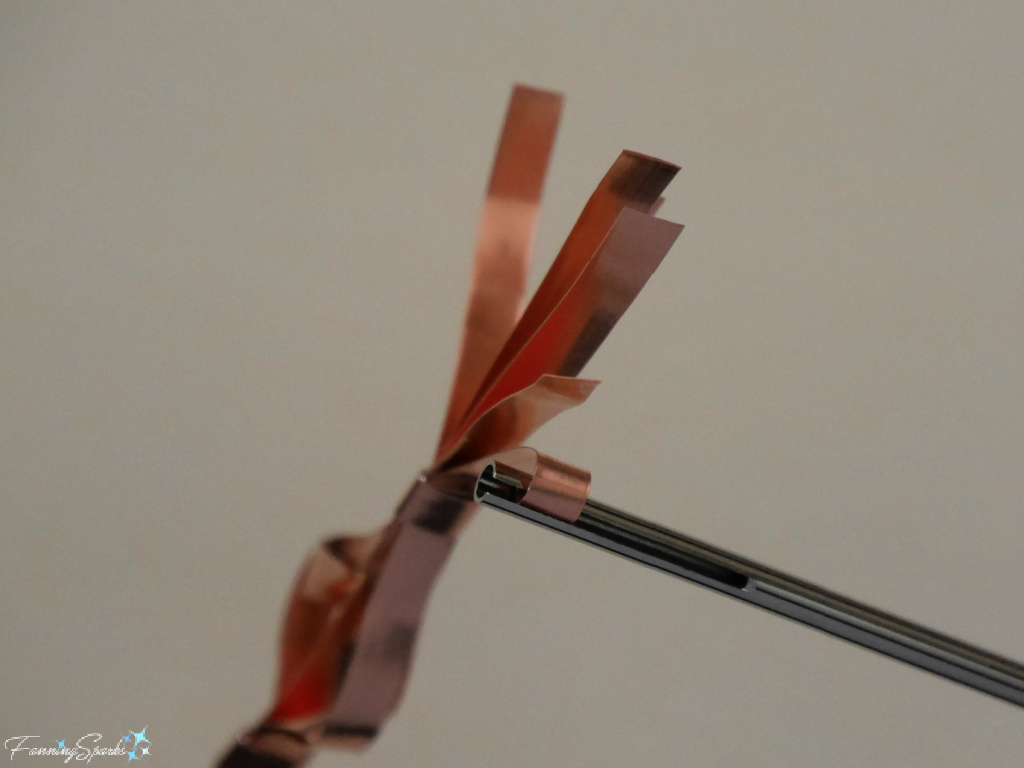
Repeat with the remaining strips twirling in the directions shown below.
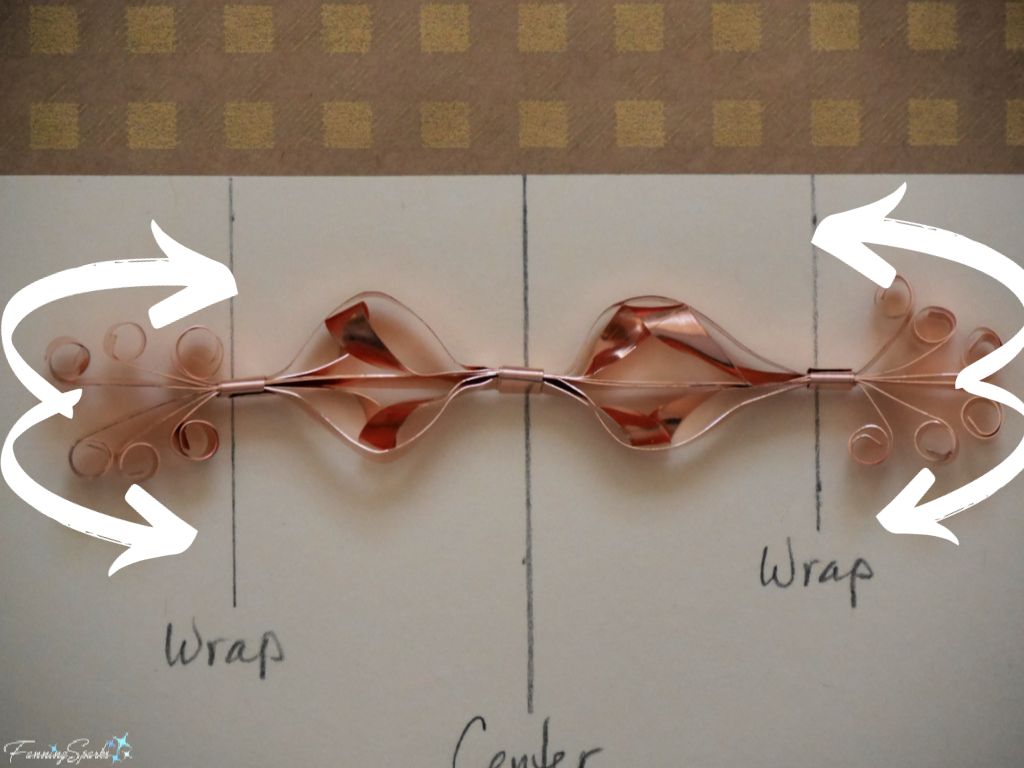
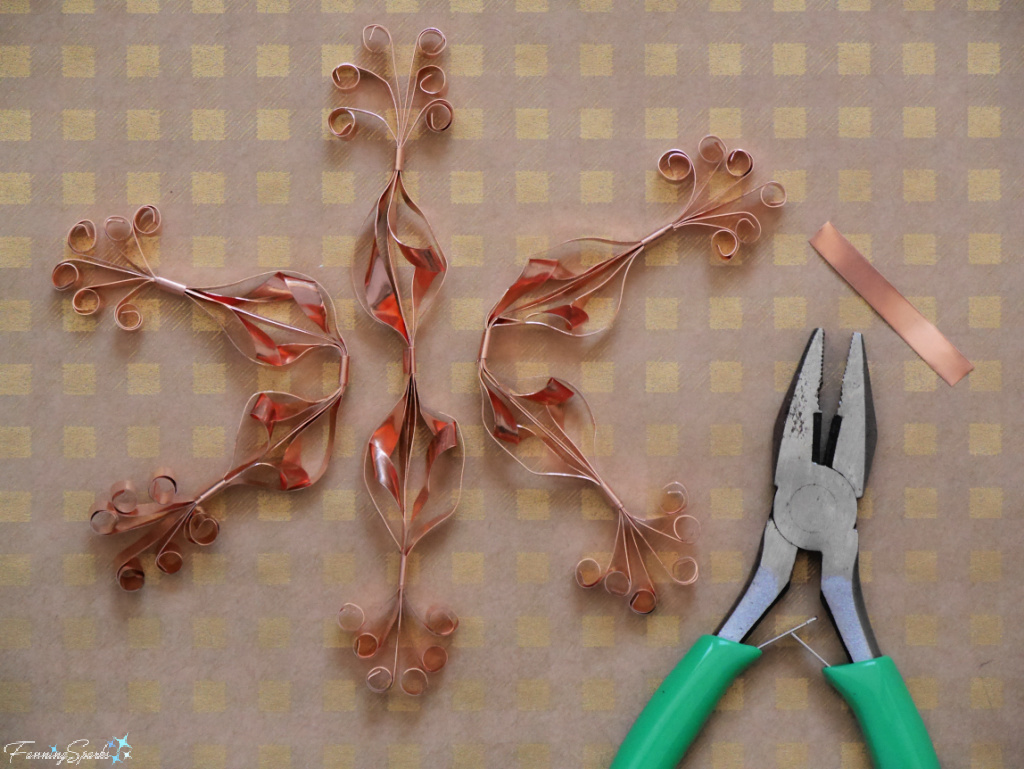
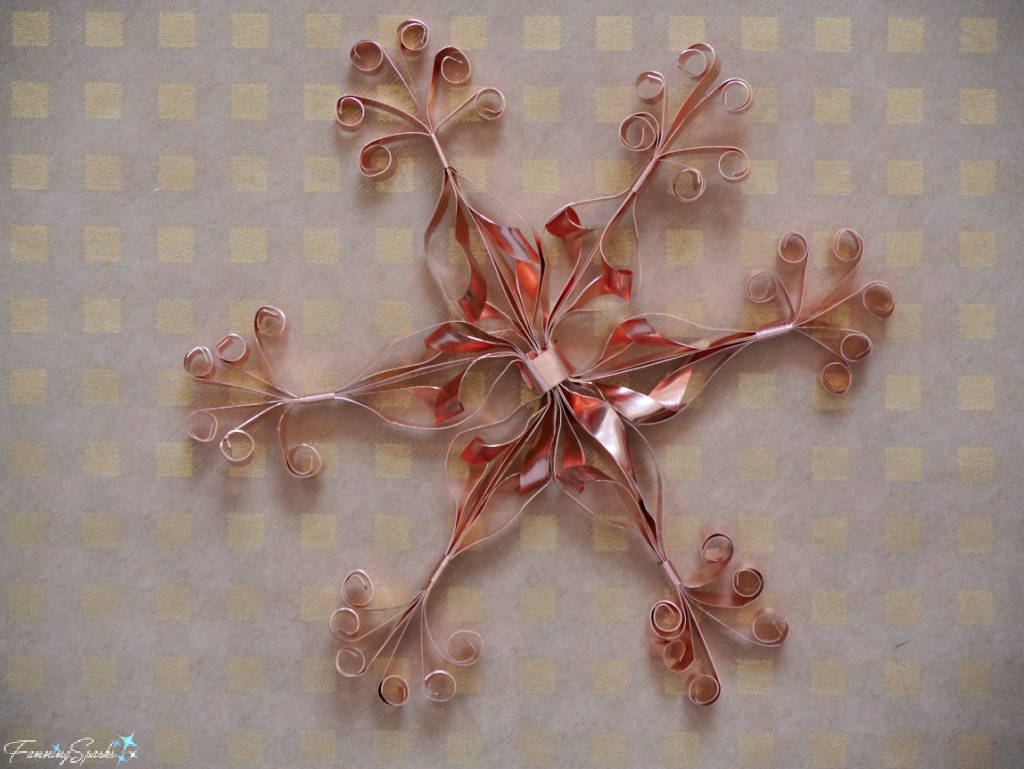
Step 10 Attach 3 Bundles Create 2 more bundles of strips repeating steps 6 to 9. Cut a short 2-inch piece of ³⁄₁₆” wide copper foil. Use a pair of flat nose pliers to bend one bundle towards the left and one bundle towards the right as shown below. Wrap the centers of all three bundles with the short piece of copper foil. Secure the connection with flat nose pliers.
Step 11 Hang Snowflake Finetune the curled ends with your fingers to make them even and full.
I chose to leave my copper snowflake untreated and plan to store it with desiccant silica gel packets to prevent oxidation. Alternatively, you could choose to protect your snowflake with a clear lacquer spray or you could choose to let it oxidize for a natural patina.
Add a piece of string or an ornament wire to hang your completed snowflake.
Position your new curly copper snowflake near a light source to let it sparkle!

More Info
Please pin this image to share or save for future reference.
 It’s been a while since I visited Portugal and became enamored with their beautiful wrought iron. I shared a series of photos in the blog post Lines and Patterns in Wrought Iron and wrote about being inspired by all the lovely lines and patterns. It always amazes me to look back and see how an idea was born and then, slowly without conscious effort, evolved into something new.

You may also like these previous blog posts featuring other handmade holiday ornament ideas:
. Handmade Ornaments for the Holidays (for a trio of paper ornaments)
. Red Leather Snowflake Ornament – DIY Tutorial.
Today’s Takeaways
1. The holidays offer a great opportunity to try making something new.
2. Rich, warm copper tones can add old-world charm.
3. Be on the lookout for creative inspiration.


Comments are closed.