
Ready for a new spin on the ordinary standing picture frame? Instead of holding the ubiquitous family photo, this picture frame holds a single flower. The lowly picture frame has a new calling as a flower frame!
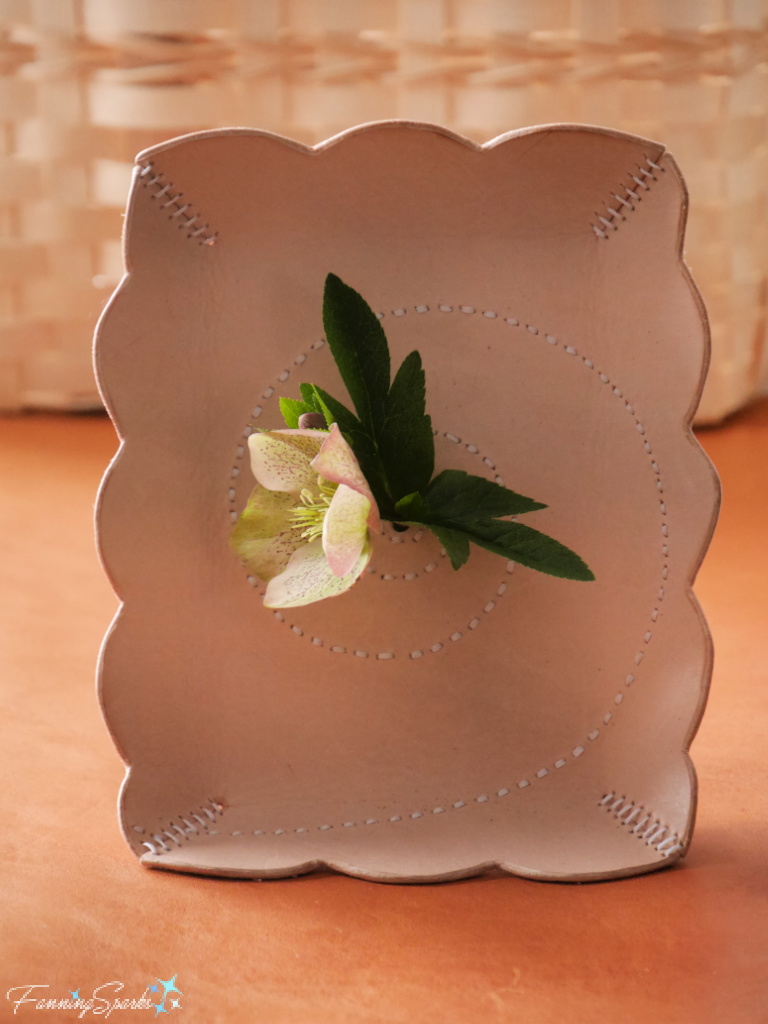
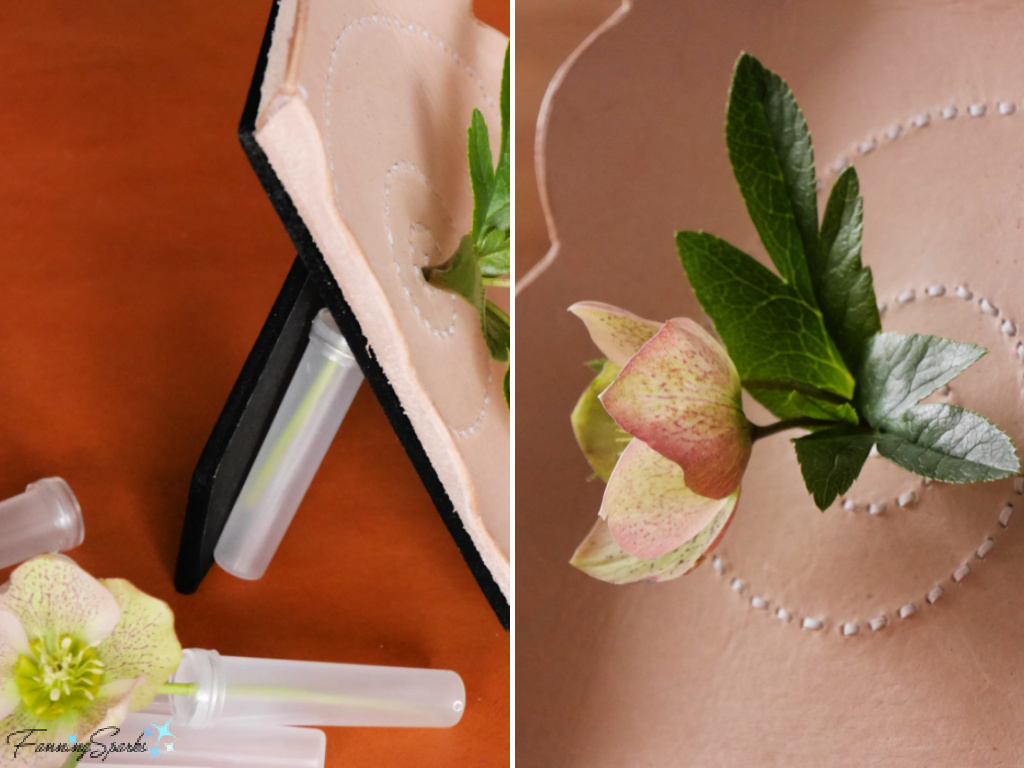
This flower frame is an interesting and unusual way to show off a single flower blossom. Its simple background, surrounded by the frame’s rectangular border, calls attention to the featured blossom at the center. It’s a striking alternative to the predictable bud vase—perfect for an early spring bloom plucked from the garden or a single flower purchased from the florist. The beautiful blossom shown in this photo is a Hellebore (Helleborus orientalis), commonly known as Lenten Rose, picked from our flower garden in Georgia.

I chose natural-colored veg-tan leather to make this flower frame. The neutral color and smooth texture of the leather give the frame a pleasing, organic look. The frame’s simplicity ensures the flower blossom will be the star of the show.
Regular readers may recall I’ve been learning to work with leather. My previous post, All-in on Leathercraft, sets the stage for today’s project. This leather flower frame was a great beginner project. It required all the basic leatherworking skills from template building to accurate cutting to precise stitching to edge finishing. I also managed to squeeze in some embellishment—an attractive spiral element embroidered in running stitch. At the center of the spiral is a small hole designed to hold a single flower stem.
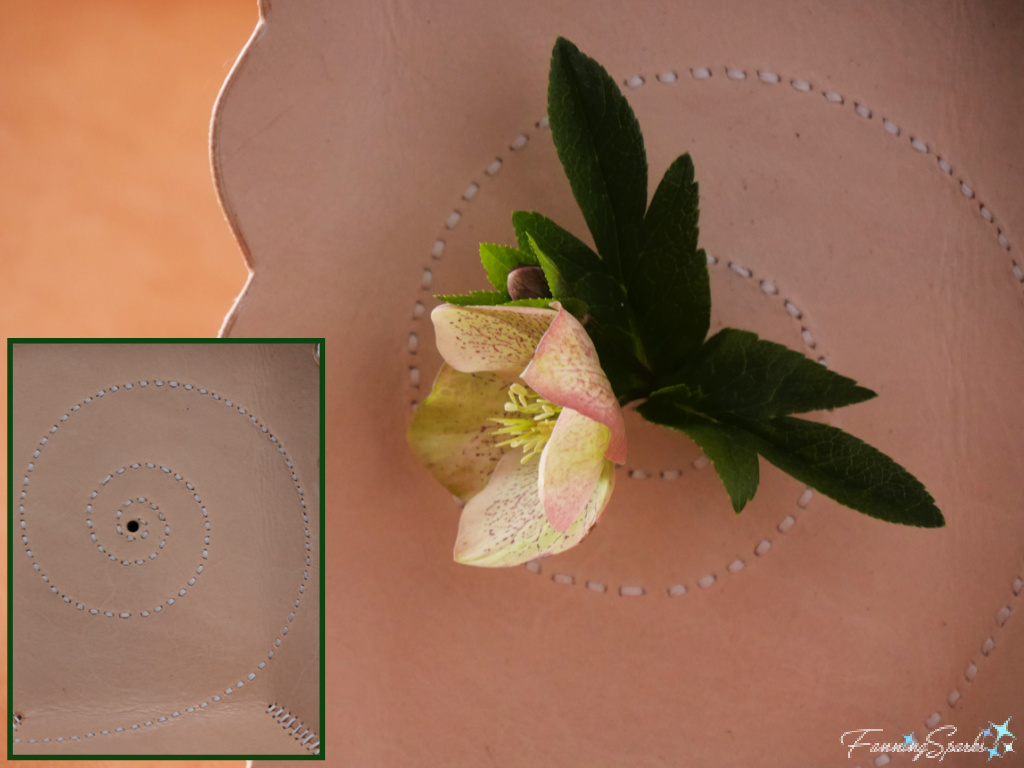
A standard 4” x 6” frame served as the starting point for this flower frame. There is a 1½” scalloped border which makes the finished frame 7” wide by 9” high. A prototype, made from paper and light cardboard, was used to arrive at this design.
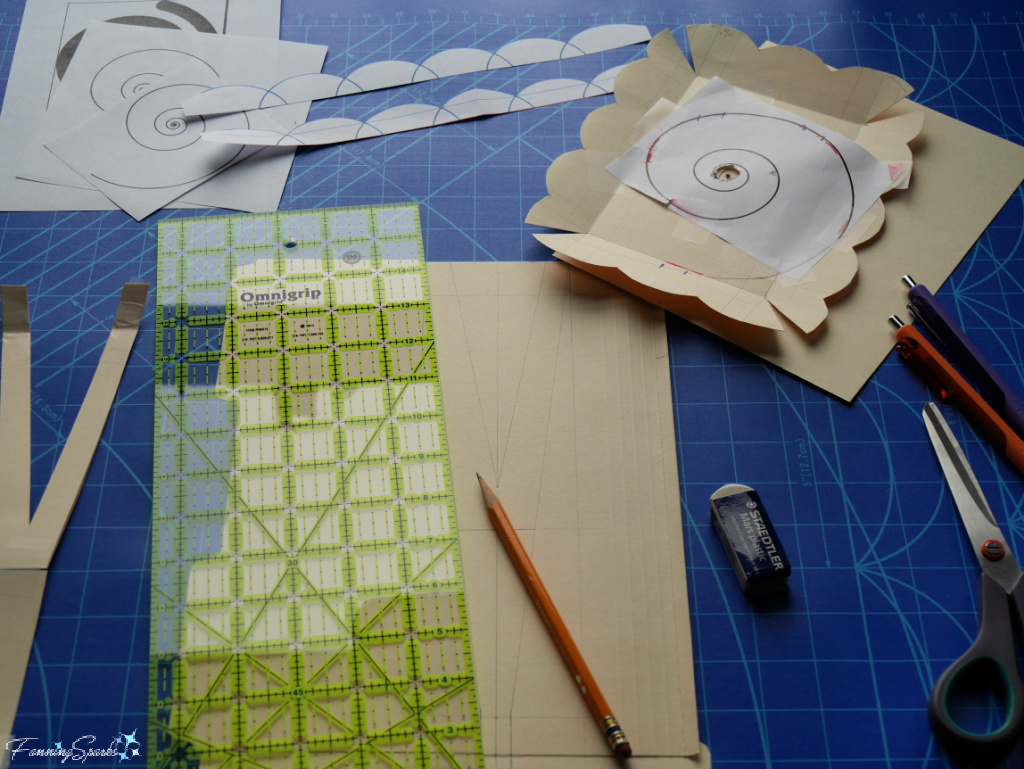
The biggest challenge of this design was figuring out how to make the frame stand up.
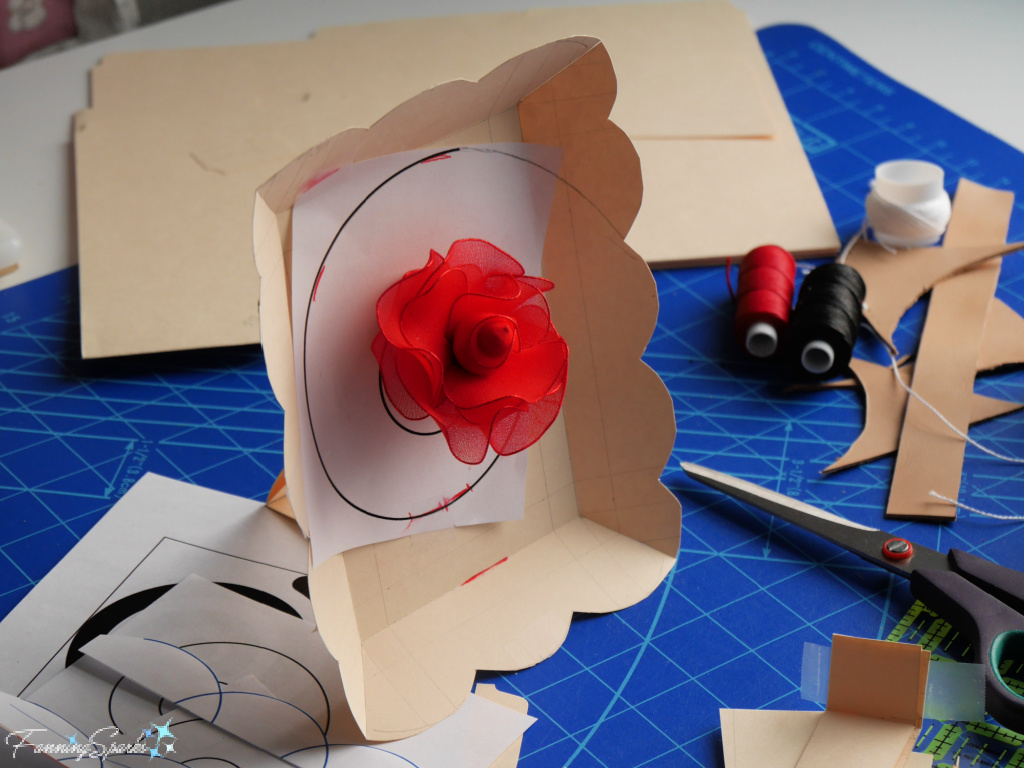
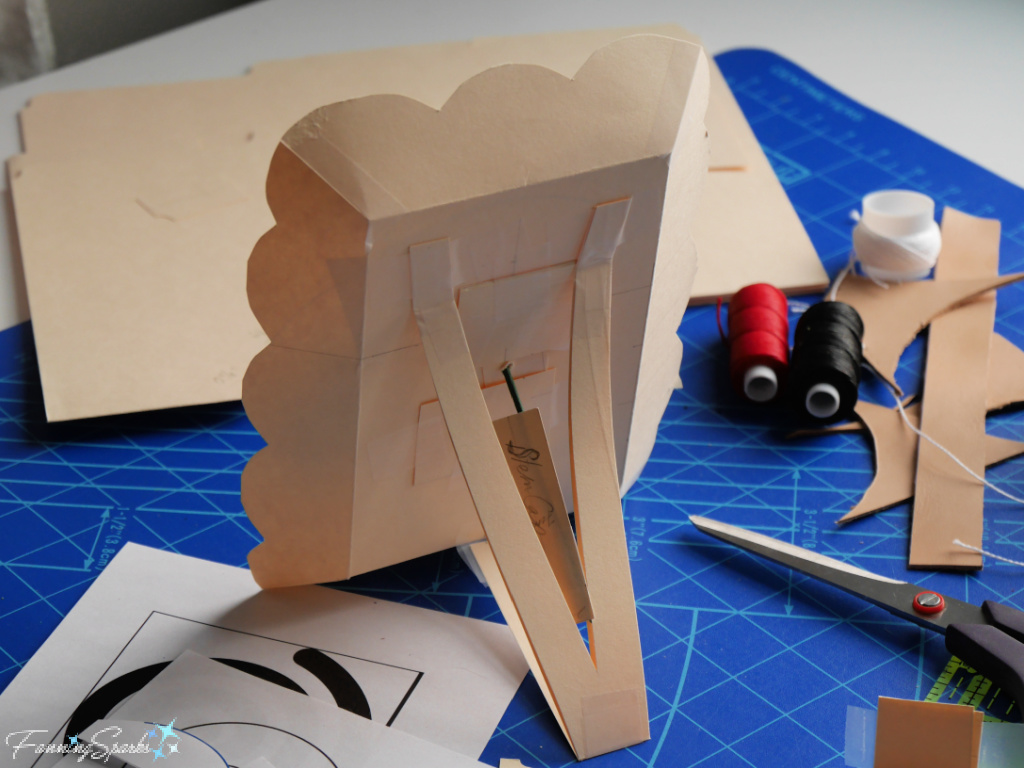
After several tries, I settled on a sleek, V-shaped support stand which worked well on the prototype.
With the prototype finalized, I was ready to start cutting the leather. The natural-colored, vegetable-tanned leather is a 6-7oz (2.4-2.8mm) thickness.
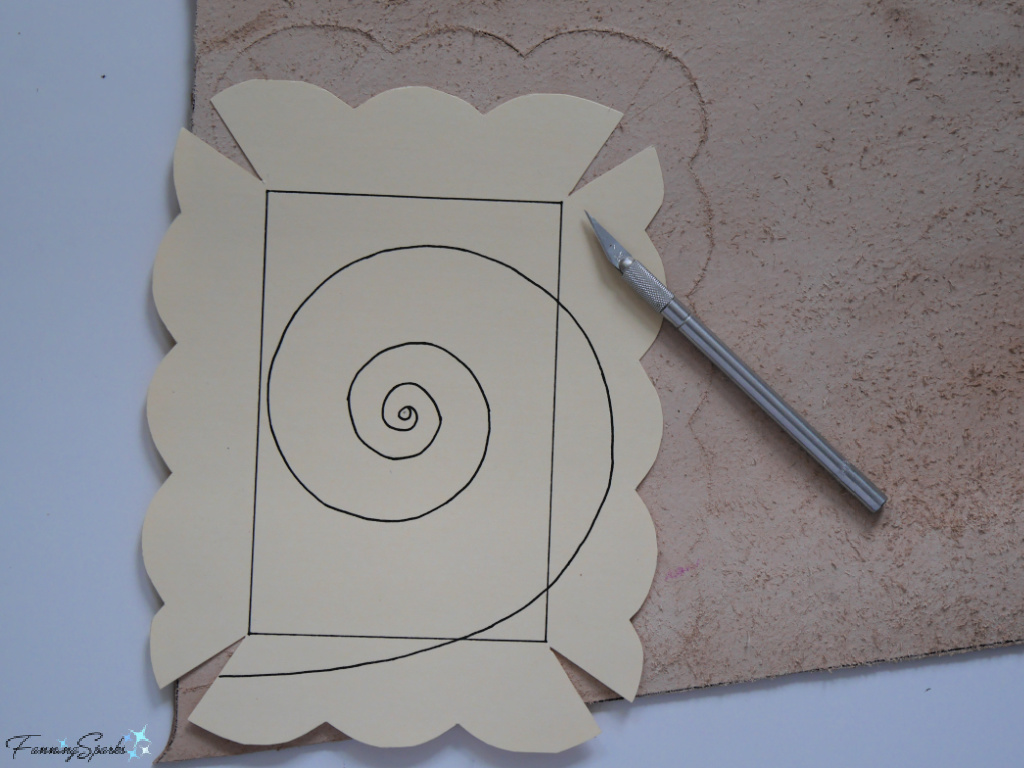
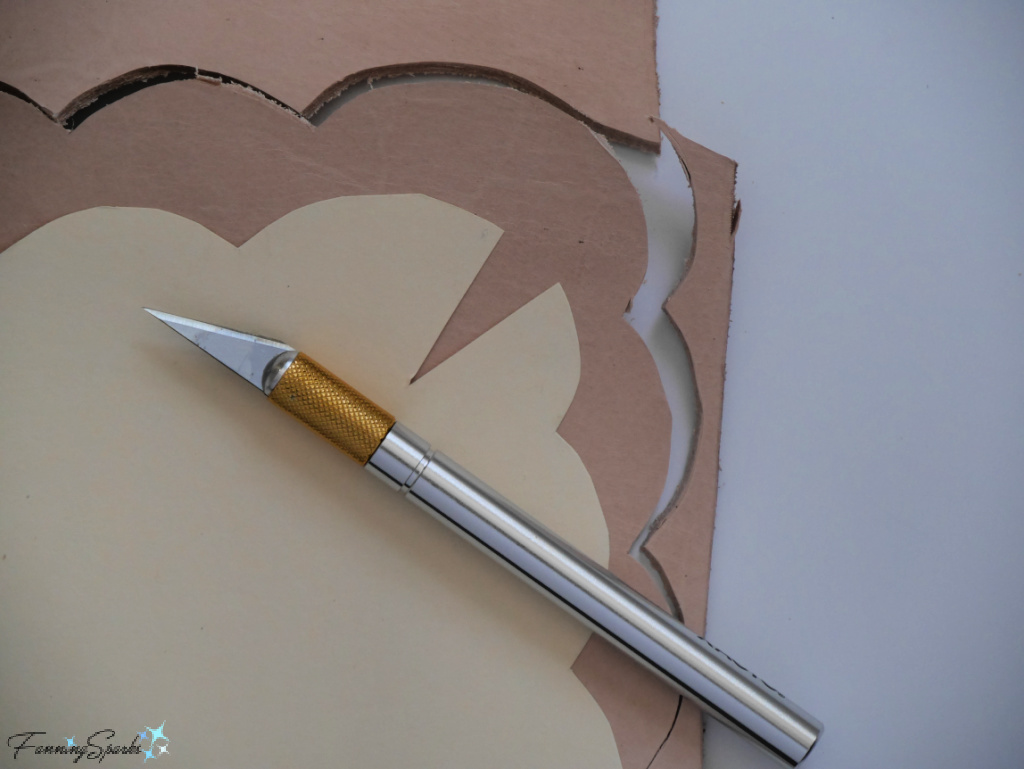
I started by marking my cutting lines on the flesh side (rough back side) of the leather. I thought this would eliminate the need to mark on the front of the leather. But I quickly discovered cutting from the back resulted in a rough, ragged edge on the grain side (smooth front side). So I redid the cutting lines and cut from the front of the leather instead. Lesson learned!
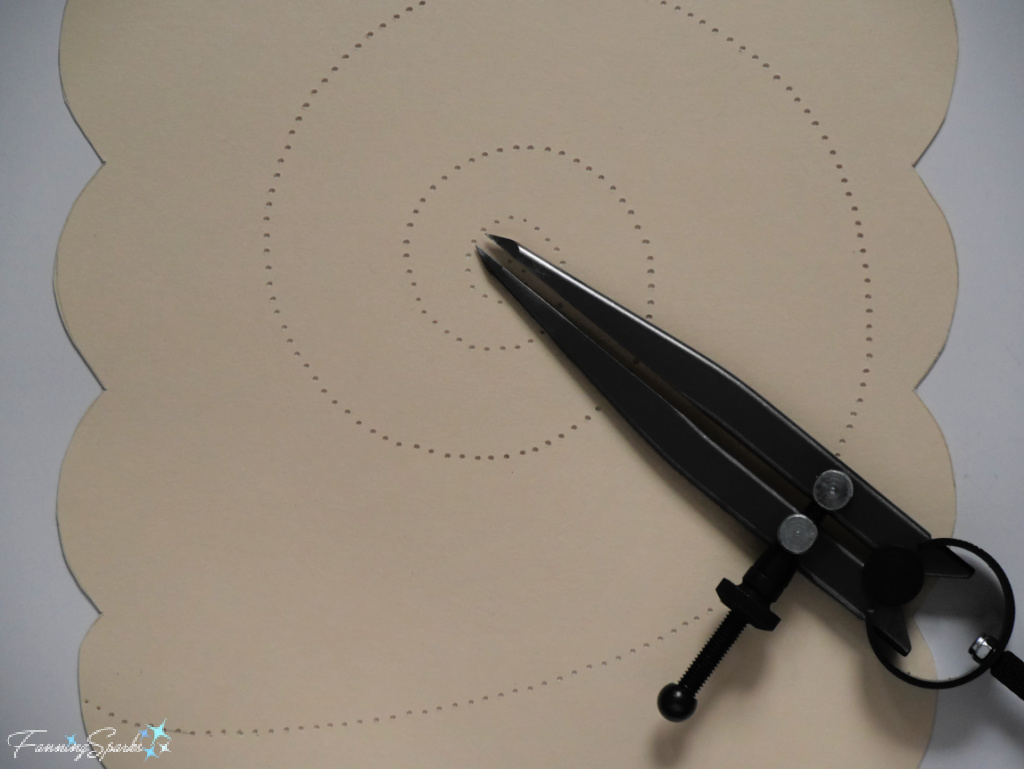
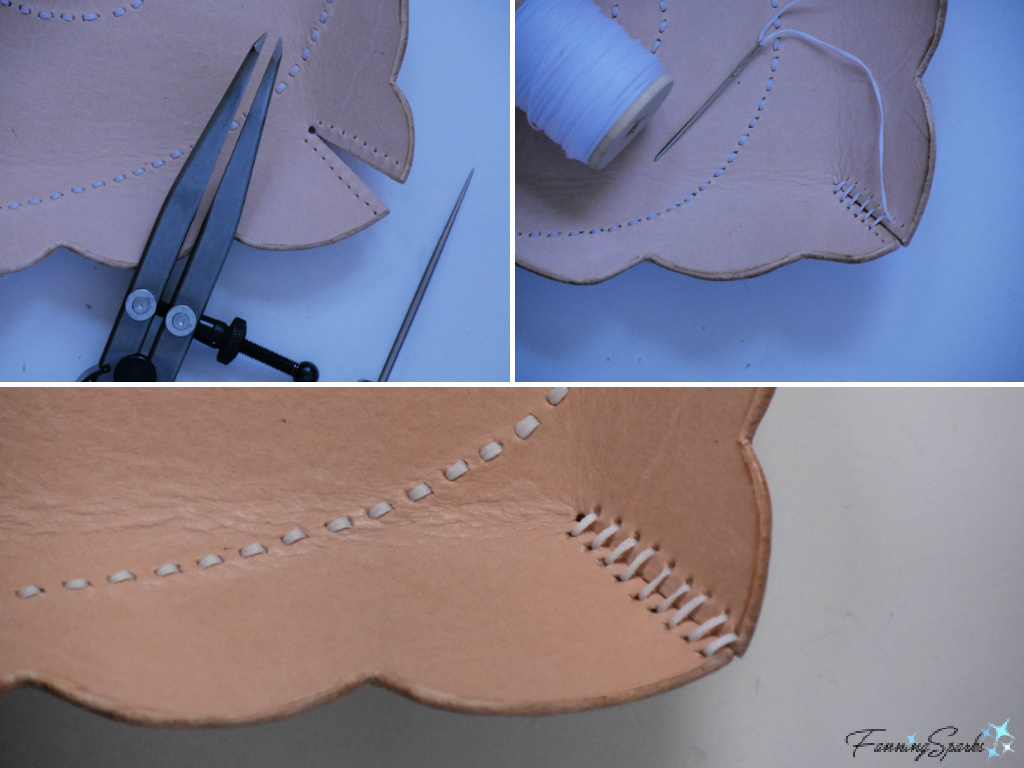
The next step was to embroider the spiral design. I prepared the template in the same way I would for paper stitching (see Hello Marvelous Photo Embroidery – DIY Tutorial) by carefully measuring and piercing holes along the design line. In the past, I would have measured out the spaces with a ruler or template and marked them with a pen. But this time, I was able to use my new wing dividers to measure and pierce in one step. Wing dividers are commonly used in leatherwork to scratch stitch lines around the outside edges of a piece of leather. I learned they also work well for measuring and piercing embroidery stitching lines into a template. This is a technique I can carry over to other embroidery and paper stitching projects.
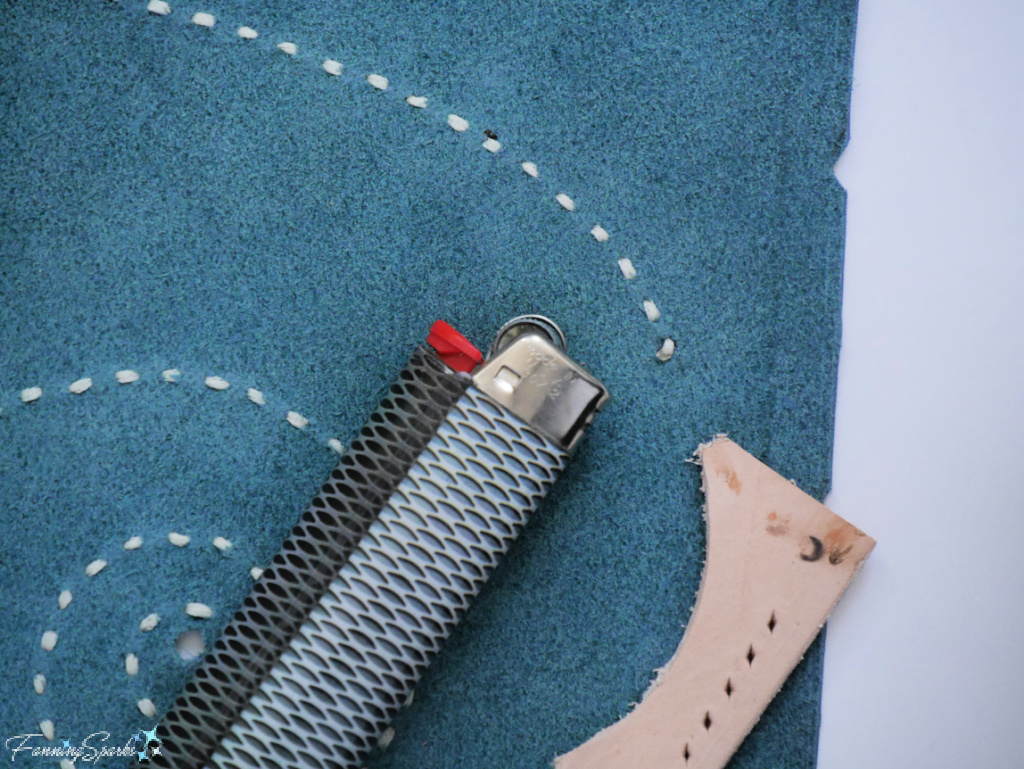
After the embroidery template was ready, I used a scratch awl to transfer the holes to the leather. The spiral was embroidered with a running stitch using 0.8mm, white Ritza 25 Tiger thread.
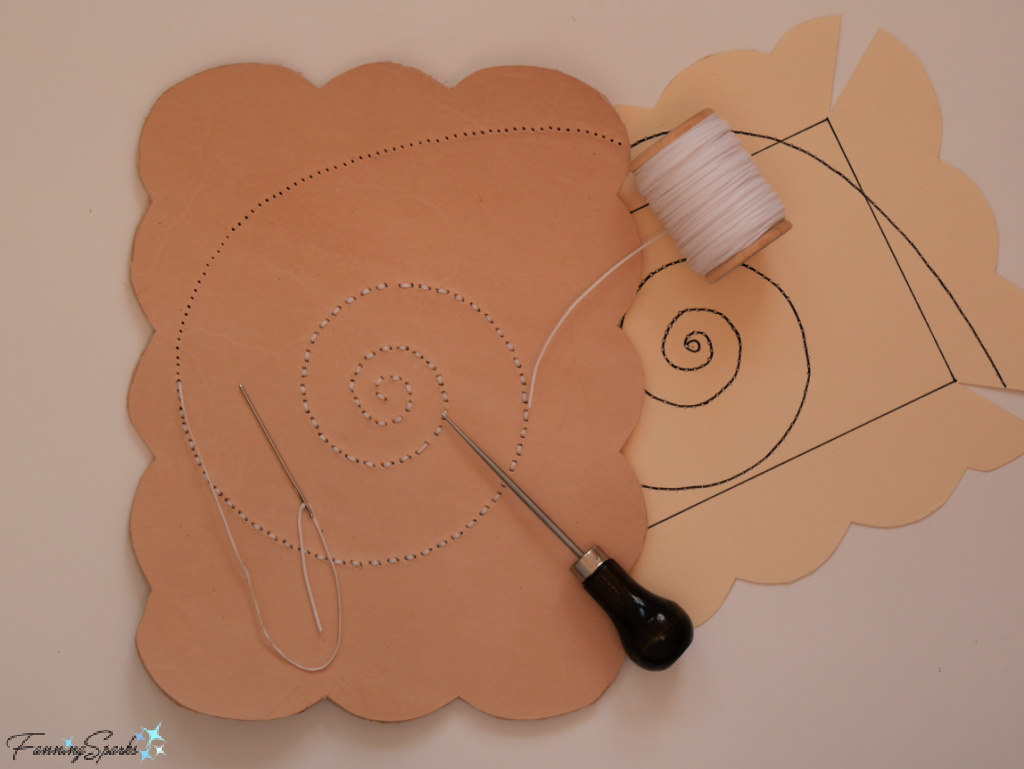
This was my first time using Ritza 25 Tiger thread. I’d read leatherworkers consider this lightly waxed, 100% polyester, braided thread to be superior for its durability and strength. It is indeed superior to the other brands I’ve used—it pulls through smoothly, doesn’t twist while sewing and lies flat on the surface. The ends of the thread can be finished neatly and securely by carefully melting them with a flame and flattening them with a scrap of leather. This is a trick I learned from Corter Leather’s videos (see More Info below). Here’s a photo of how the finished end of Ritza Tiger thread looks on a piece of dark leather.
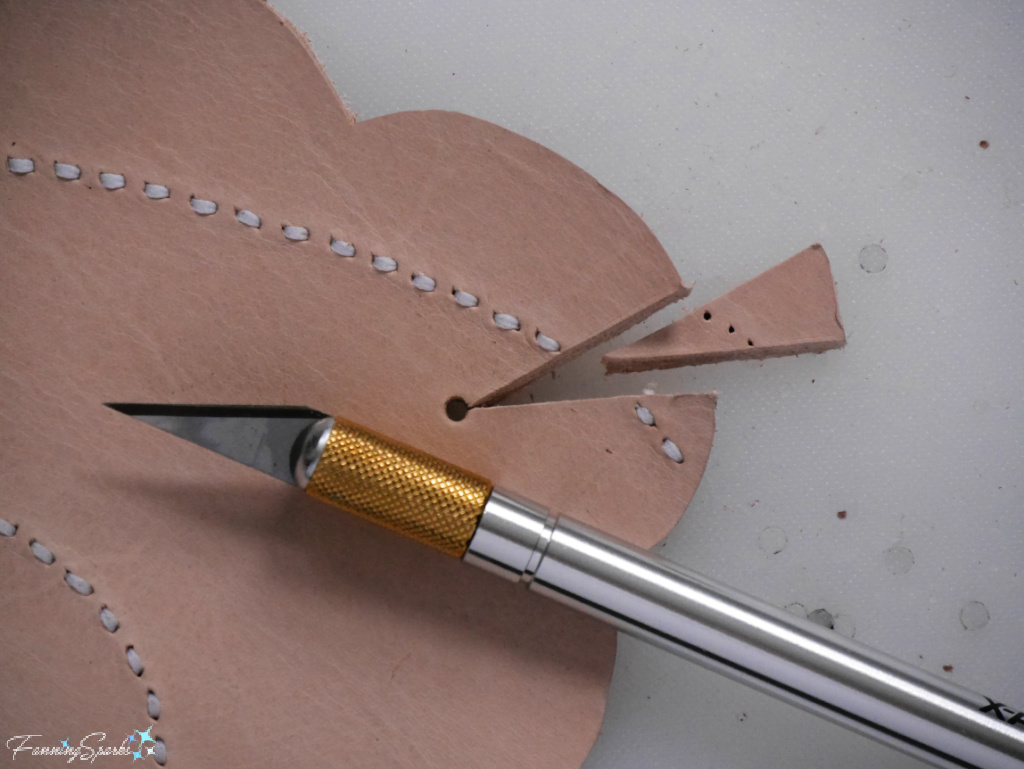
The next step was to construct the frame. I carefully cut out small triangles from each of the four corners to prepare for angling the frame’s border. Punching a hole at the tip of the triangle ensures a crisp point—another trick I learned from Corter Leather. In hindsight, a smaller punch would probably have been better.
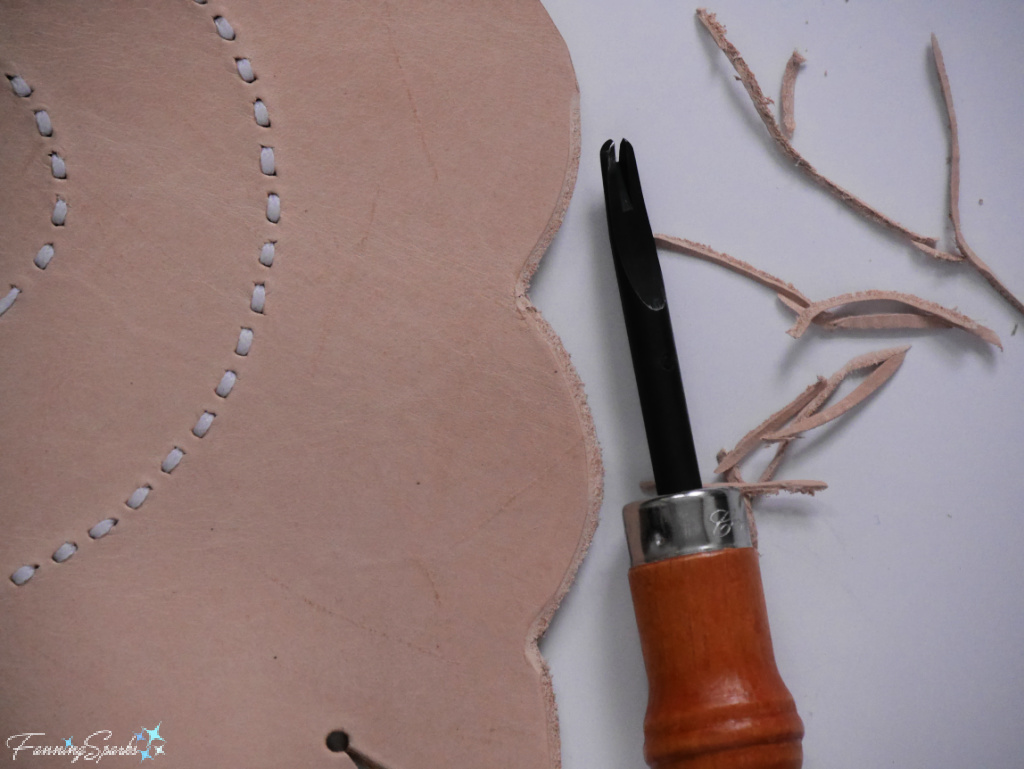
With all the cutting completed, I turned my attention to finishing the edges. First I beveled the cut edges with my new size 3 edge beveler from Tandy Leather. It worked like a charm!
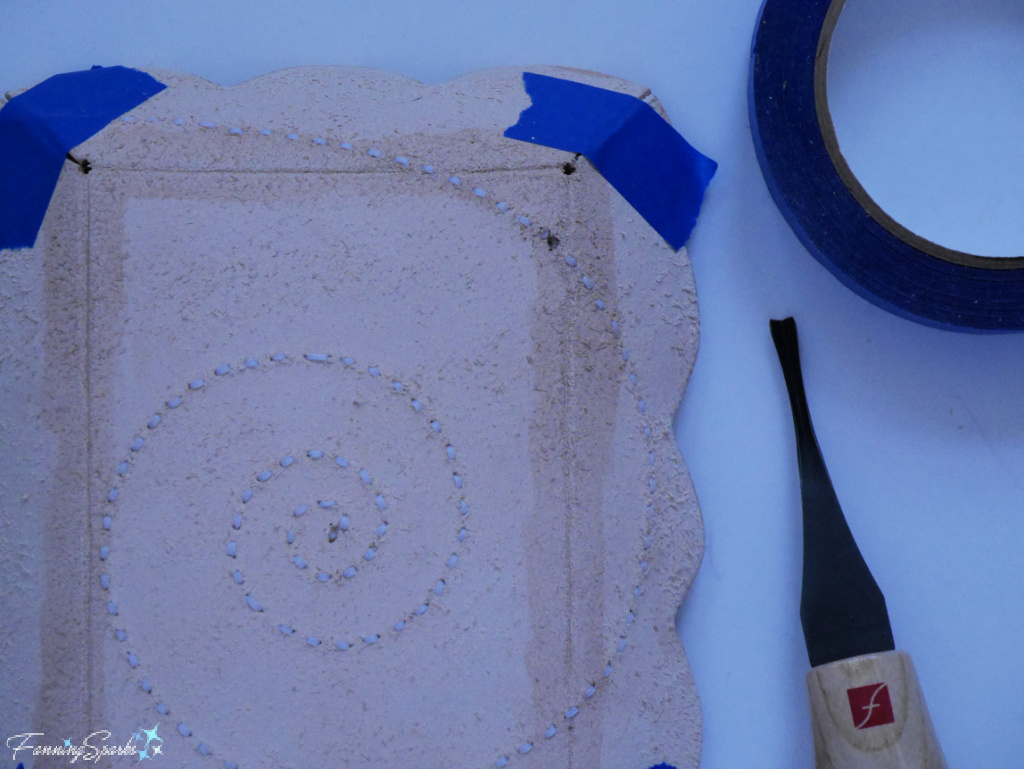
I sanded the edges with 220 grit and 400 grit sandpaper. Then I used Seiwa Tokonole burnishing gum with a piece of canvas to seal and polish the edges. The next step was to angle the frame’s borders. I used a V groove chisel to gouge the backside of the leather along the fold lines. Then I wet the fold lines with water and molded them over a similarly-shaped wooden tray. Taping the corners helped hold the shape while the leather dried.
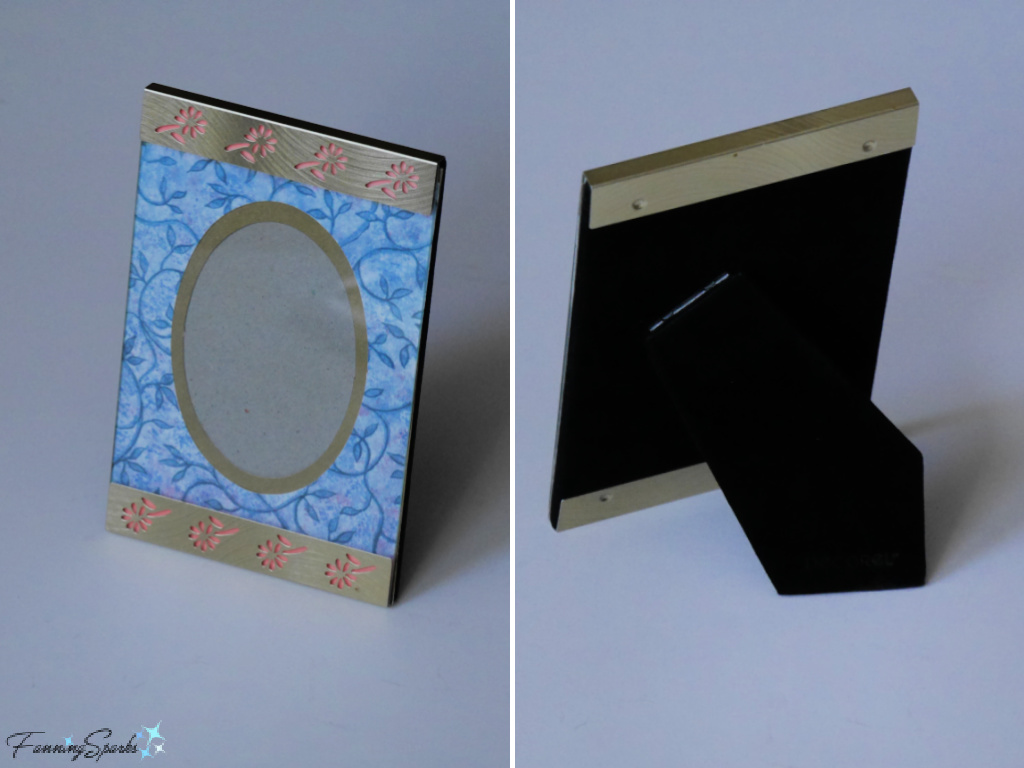
At this point in the project, I discovered a problem with my design for the support stand. The sleek, V-shaped support stand which had worked so well on the paper prototype was not going to work on the leather frame. It simply wasn’t sturdy enough to hold up the leather frame. Another lesson learned! So I switched my approach—instead of building the support stand from leather I would repurpose one from a ready-made frame. I found an inexpensive frame at the local thrift shop in the perfect size and configuration.
Having solved this problem, I was able to move on to the final stitching. The corners were stitched with a butt joint meaning the edges butt up against each other with the stitches angled through the leather. I used wing dividers to mark the holes and pierced them with the scratch awl. Then I stitched the butt joint with straight stitches.
I punched a small hole in the center of the embroidered spiral for the flower stem. The next step was to glue the support stand from the ready-made frame onto the back of my leather frame.
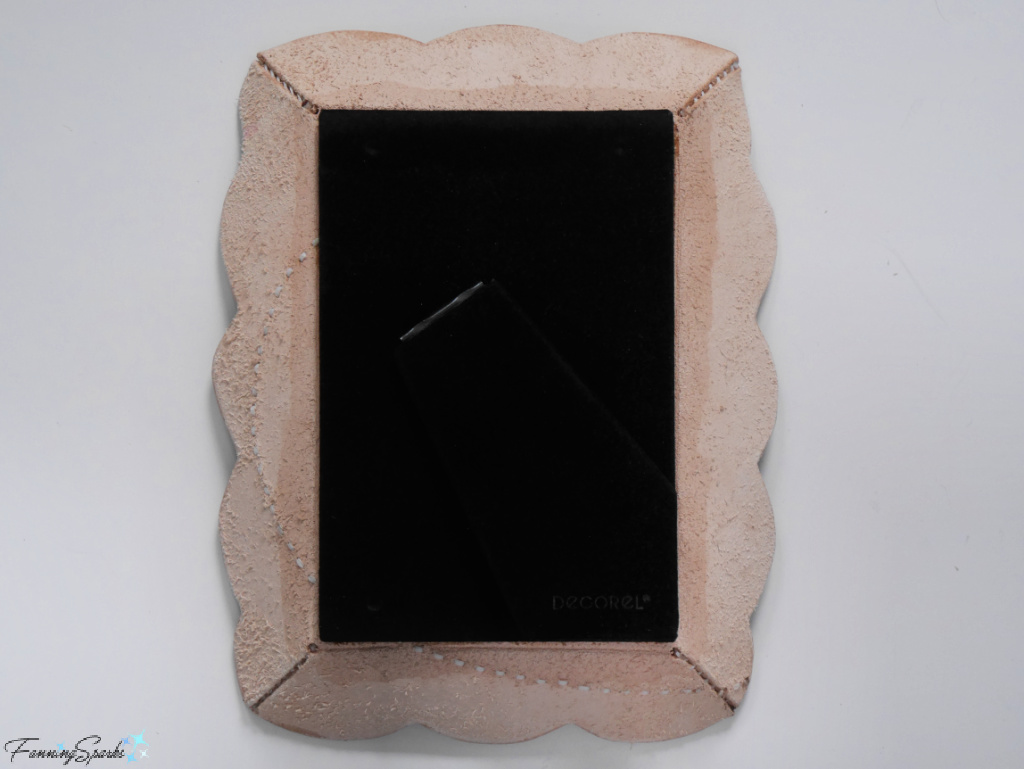
After the glue dried, I used an electric drill to bore through the support stand and complete the hole for the flower stem.
Finally, my new leather flower frame was ready to try! I gathered a few blooms, leaves and dried flowers from the flower garden. The leather flower frame provides the perfect stage for this swanky hellebore blossom!
Behind the scenes, I slipped a floral water tube onto the flower stem.
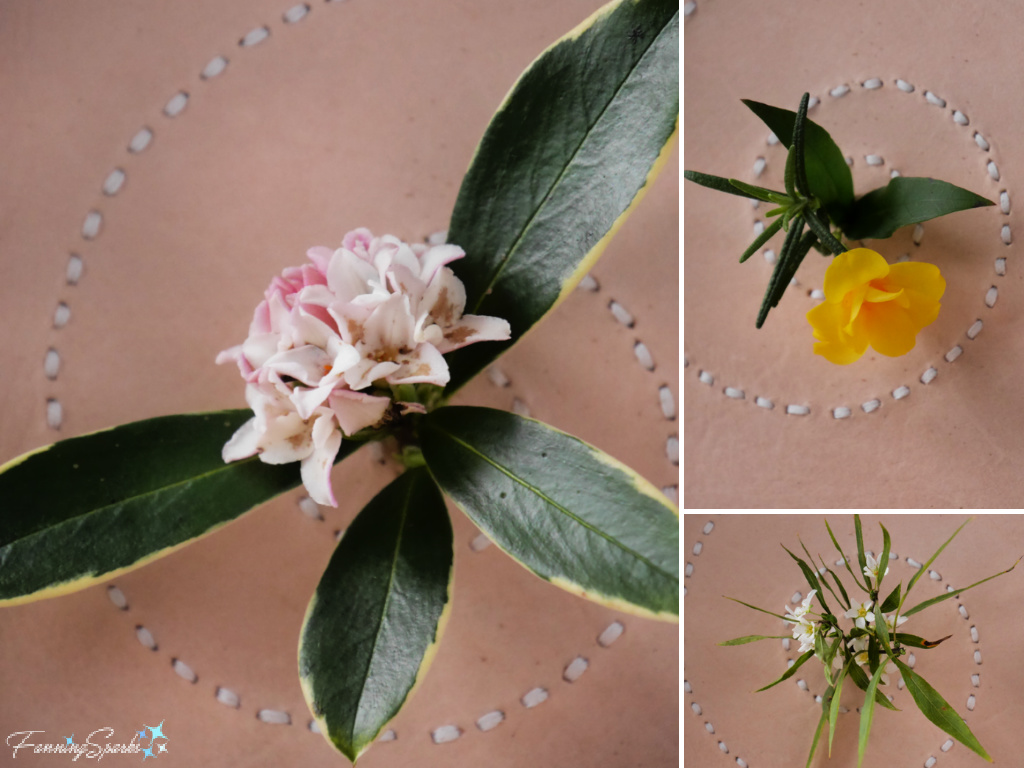
The hellebore blossom may threaten to steal the show but this leather flower frame also sets the stage for lesser winter blooms. Shown below is a collage of some early bloomers from my flower garden: Winter Daphne (Daphne odora), Carolina Jessamine (Gelsemium sempervirens) with a sprig of Rosemary, and Bridal Wreath Spirea (Spiraea thunbergii Ogon).
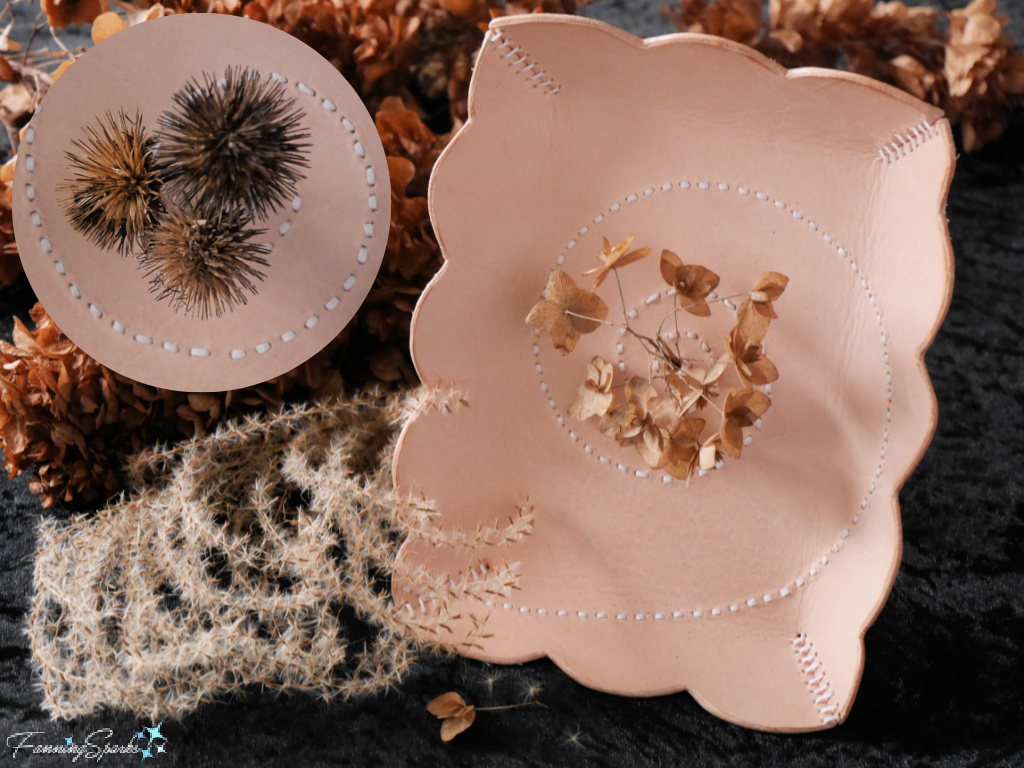
Although I hadn’t planned it this way, the leather flower frame is equally effective at displaying dried flowers. Bonus! Here it is shown with dried lacecap hydrangea flowers and (as shown in the circle inset) coneflower seed heads.
More Info
I’ve embarked on a creative journey to learn all I can about working with leather. It started with a week-long leathercraft class at the John C Campbell Folk School and it has progressed one project at a time. I’ve been sharing my journey here on the blog.
. My First Leathercrafting Project
. Red Leather Snowflake Ornament – DIY Tutorial
. All-in on Leathercraft
I’ve been leveraging online resources such as Corter Leather’s video series on YouTube.
My latest Pinterest board, Leather – FanningSparks Favs, contains a collection of inspiring ideas featuring leather. I’ve been adding ideas and the collection has grown to over 250 pins.
Today’s Takeaways
1. Reimagine everyday objects for interesting new possibilities.
2. The sky’s the limit when you can make things yourself.
3. Consider using leather to set the stage for a floral display.

2 Comments
Just thanks!
Just WOW!