
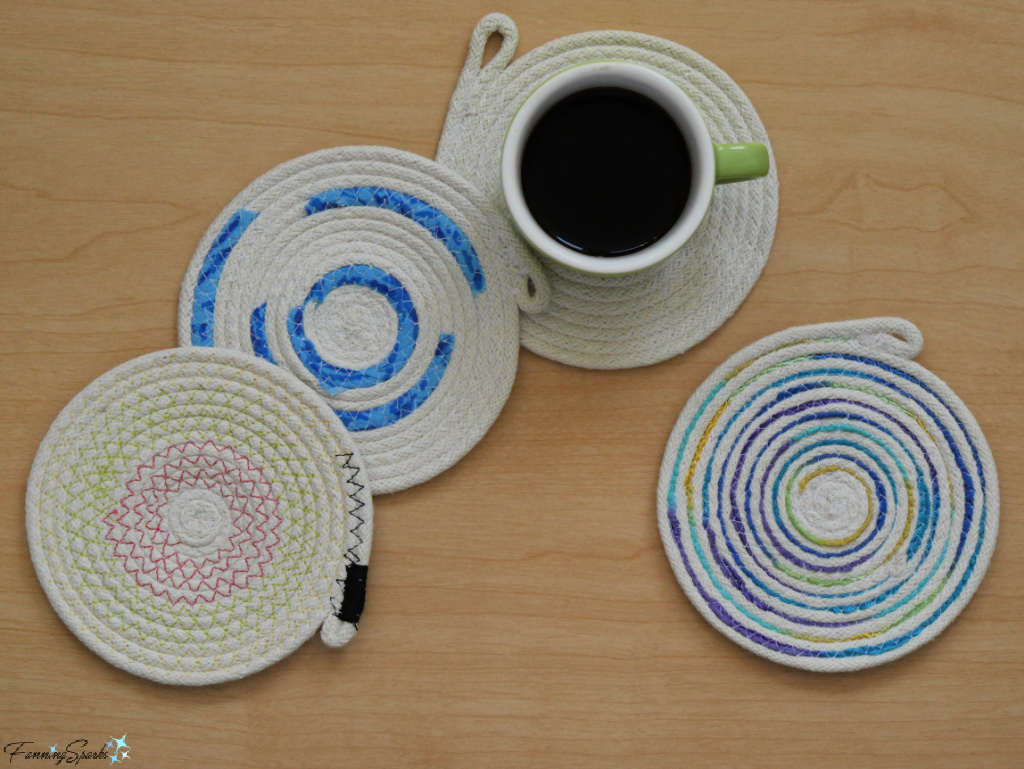
Just because it’s Earth-friendly doesn’t mean it has to be boring! The coiled cotton rope coasters I introduced in my last blog post are an example. The basic coaster, which is simply a flat disk, meets my Earth-friendly objectives and is very serviceable. But it doesn’t have much… well… personality!
The embellished versions are more interesting but they’re still rather predictable.
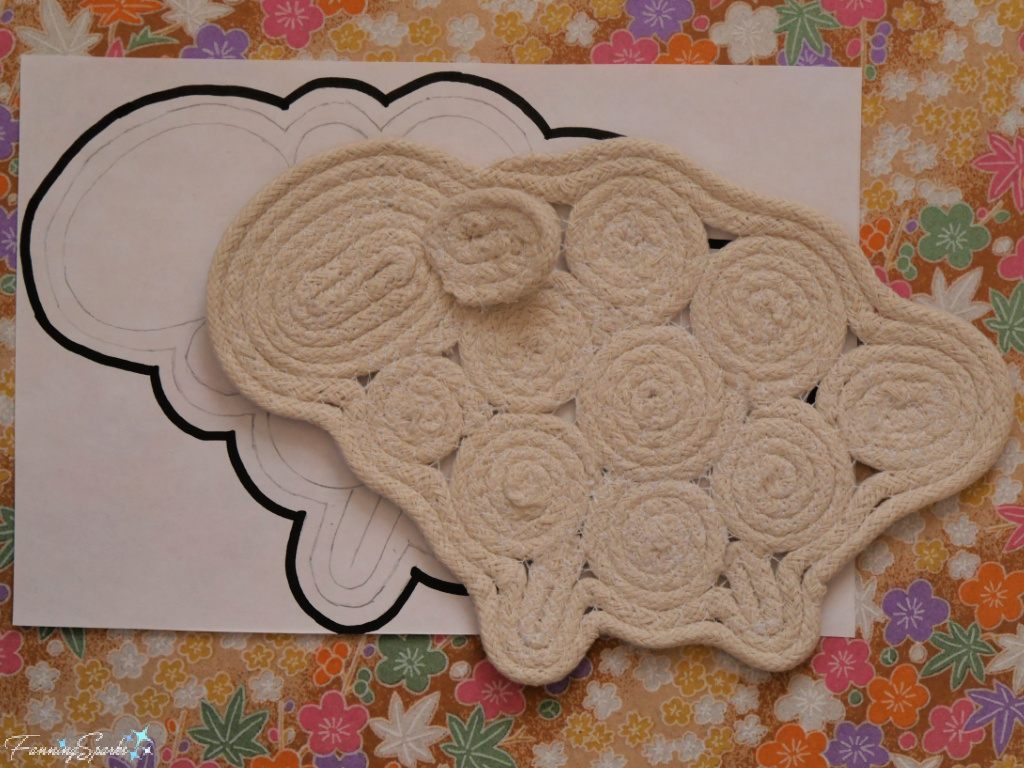
 They made me wonder… is it possible to transform the basic, tight spiral into a different shape? Into something more interesting? Something with a little personality? That’s how my Coiled Rope Animal Coasters were born. After a fair bit of experimentation, first on paper and then with actual rope, I came up with four designs including a natty snail, bunny rabbit, simple bird and wooly sheep. All of the designs are based on a 4½” diameter core circle.
 In today’s blog post, I’d like to share step-by-step instructions to make a sheep-shaped coiled rope coaster.
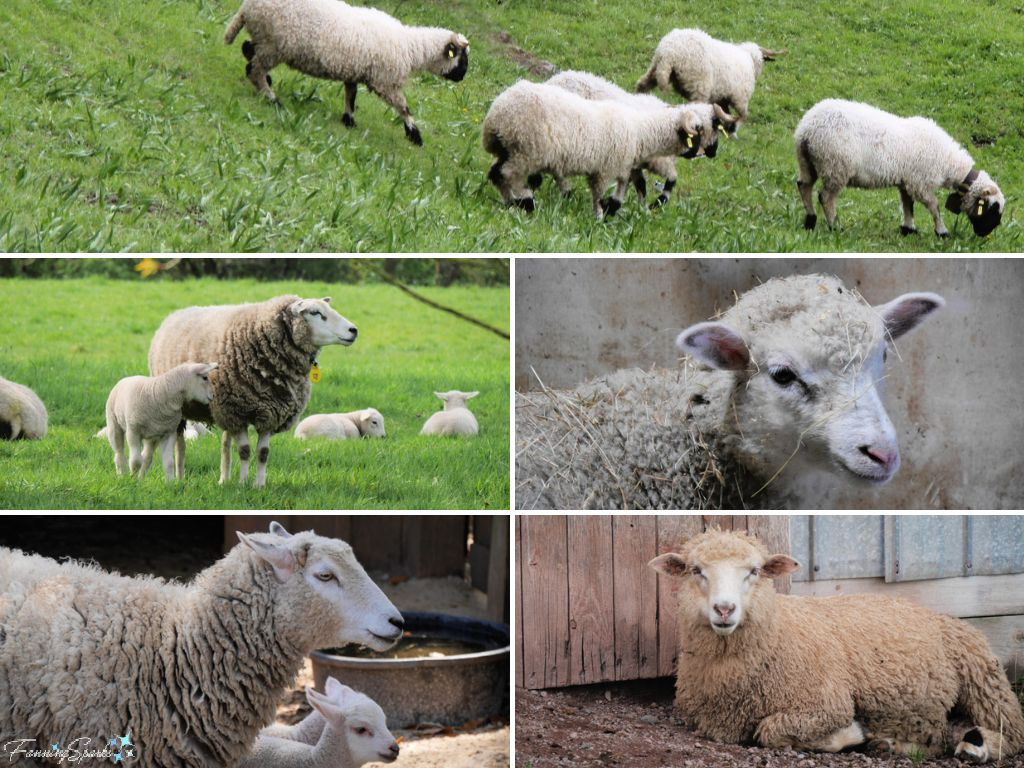
Here are a few photos I used for inspiration.
This is a low investment/ high reward project. Only a few supplies along with basic machine sewing skills are needed. Why not give it a try?
Supplies Needed
The following supplies are needed to make ONE sheep-shaped coiled rope coaster which measures 7” wide by 5” tall.
. Template: Download Coiled Rope Sheep Coaster – Complimentary Download to print the template.
. Paper: A few sheets of paper for printing template.
. Cotton Cord: Approximately 13 feet of 100% cotton rope solid braid in ³⁄₁₆” size. I used “macrame cord cotton” by Bead Landing in .15 in/4mm 32-ply. I’m happy with the results but the cotton rope manufactured in North Carolina and sold by The Mountain Thread Company might be a better alternative.
. Thread: In same color as the rope.
Equipment and Tools Needed
. Computer and Printer: To print templates.
. Sewing Machine: With zigzag/overcast stitch and heavy-duty sewing needle (eg size 16 for denim).
. Scissors
. Wooden chopstick: Or similar tool to help guide the rope under the pressure foot.
. Ruler
. Straight Pins
. Fabric Pen
Step 1 Prepare Template Download the Coiled Rope Sheep Coaster – Complimentary Download and print the template. Take care to ensure the scale is accurate on your printed version. See specifics in the download document.
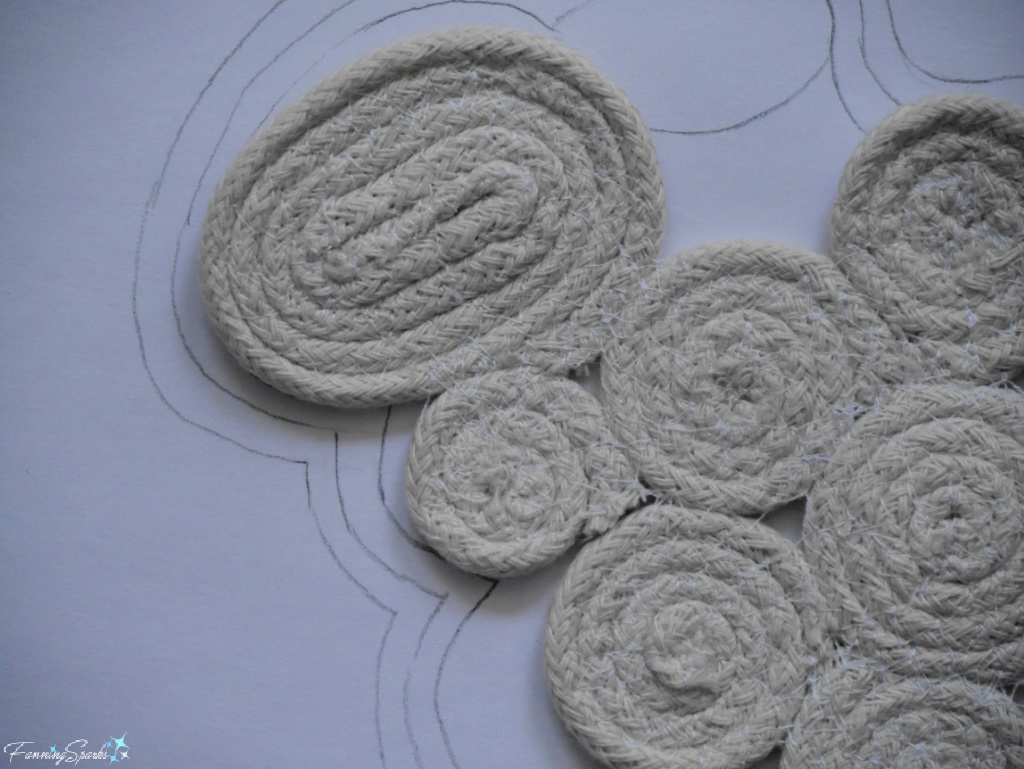
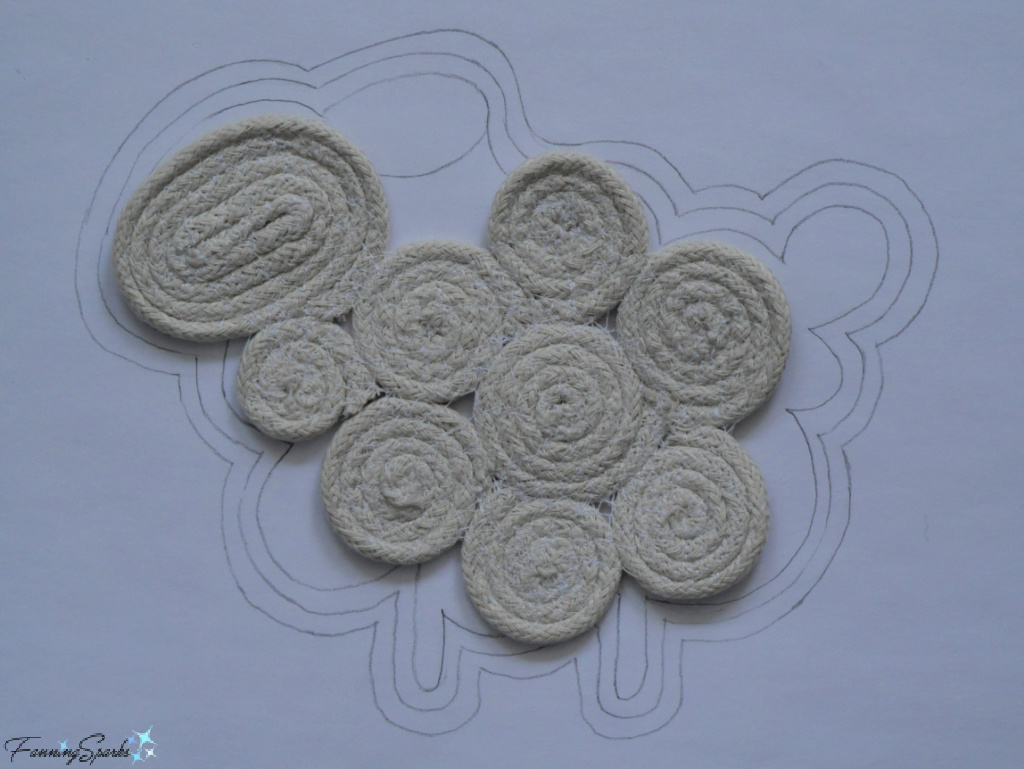
You’ll notice the sheep template is comprised of FOURTEEN small shapes:
. NINE spiral circles including SEVEN 1¼” circles, ONE 1” circle, and ONE ¾” circle
. THREE spiral ovals including ONE 2⅛” x 1½” oval for the head, ONE 1½” x 1⅛” oval for the tail, and ONE 1¼” x 1” oval for the ear
. TWO rectangles including ONE 1” x ⅜” rectangle for the front leg, and ONE ¾” x ⅜” rectangle for the hind leg.
Step 2 Make Spiral Circle The most difficult part of sewing coiled rope is getting started. It can be tricky to hold the small inner coil tight while simultaneously guiding it under the sewing machine needle. There are a number of different ways to accomplish this but I’ve had the most success with the following technique.
Step 2a Set up your sewing machine with a heavy-duty sewing needle (eg size 16 for denim), matching thread (I used contrasting thread so it would be visible here) and a zigzag (aka overcast) stitch about 5-7mm wide and 2mm long.
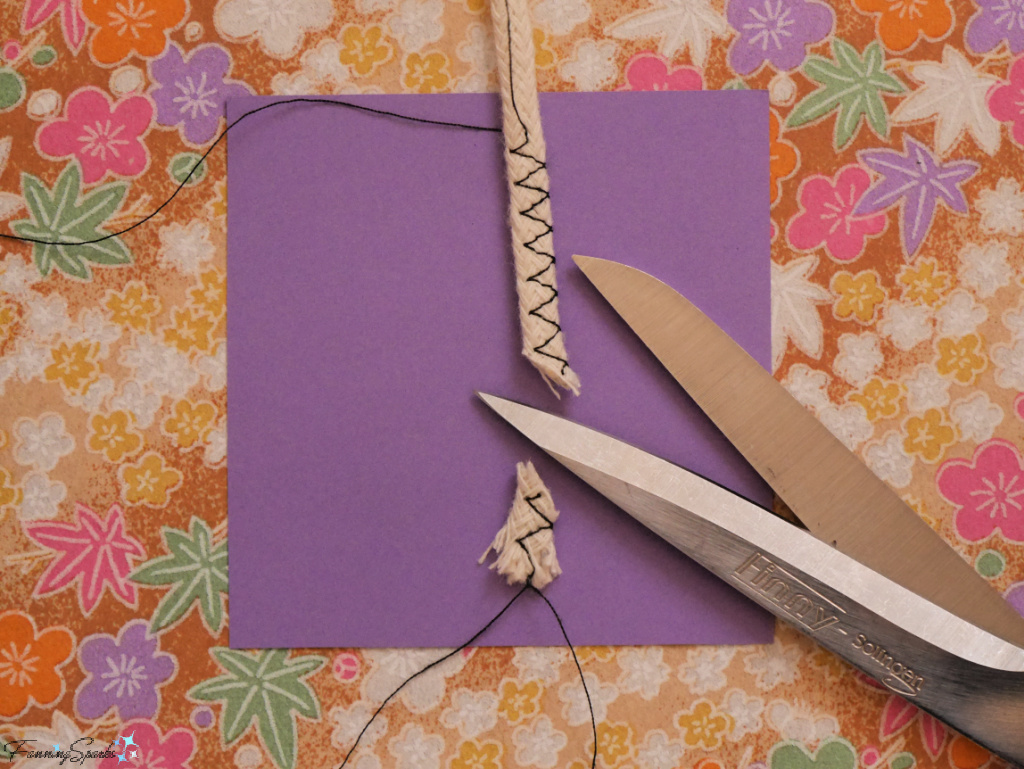
Step 2b These instructions will result in a 1″ spiral circle. Overcast the end of the rope starting about 1-2” from the uncut end and sewing towards the cut end.
Step 2c Cut the end of the rope at an angle for a fresh, clean edge. Trim the thread tails.
Step 2d Measure 6½“ from the cut end of the rope and mark with a fabric pen.
Step 2e Coil 3 or so rows of rope around the cut end of the rope to create a neat spiral. Keep the coil flat and tight. Insert a straight pin through the spiral from one side to the other.
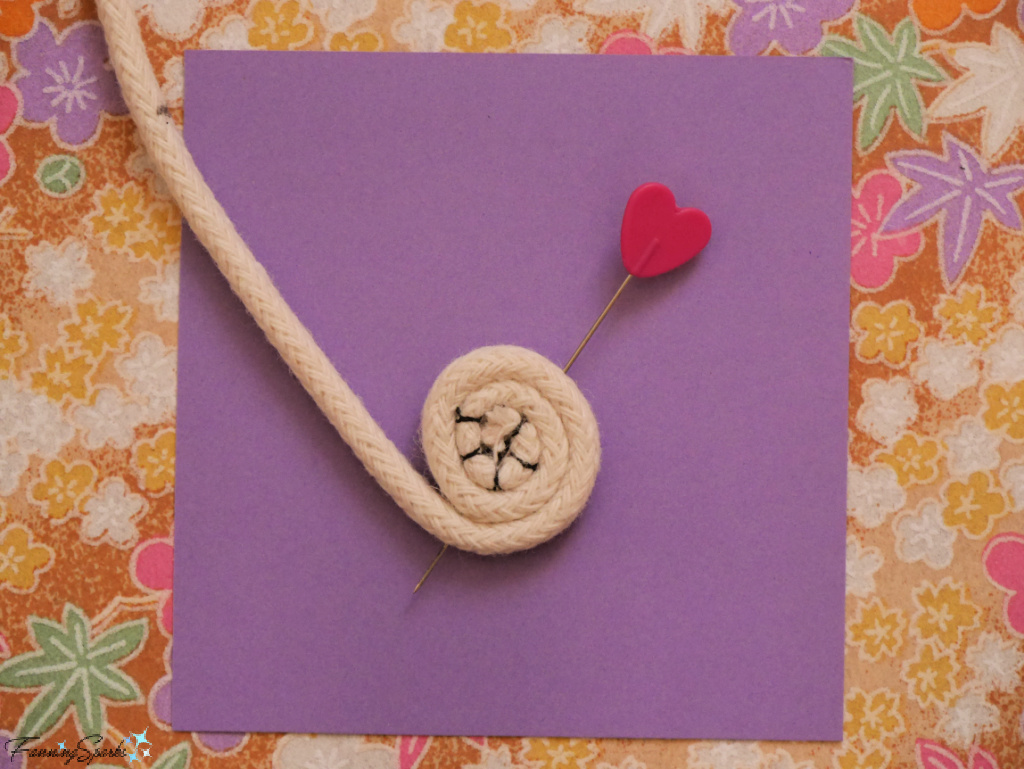
Step 2f Change your sewing machine to a straight stitch. Carefully insert the coil under your sewing machine presser foot and sew across the middle of the entire coil. Take care not to strike the pin with your sewing needle. Remove pin. Trim the thread tails.
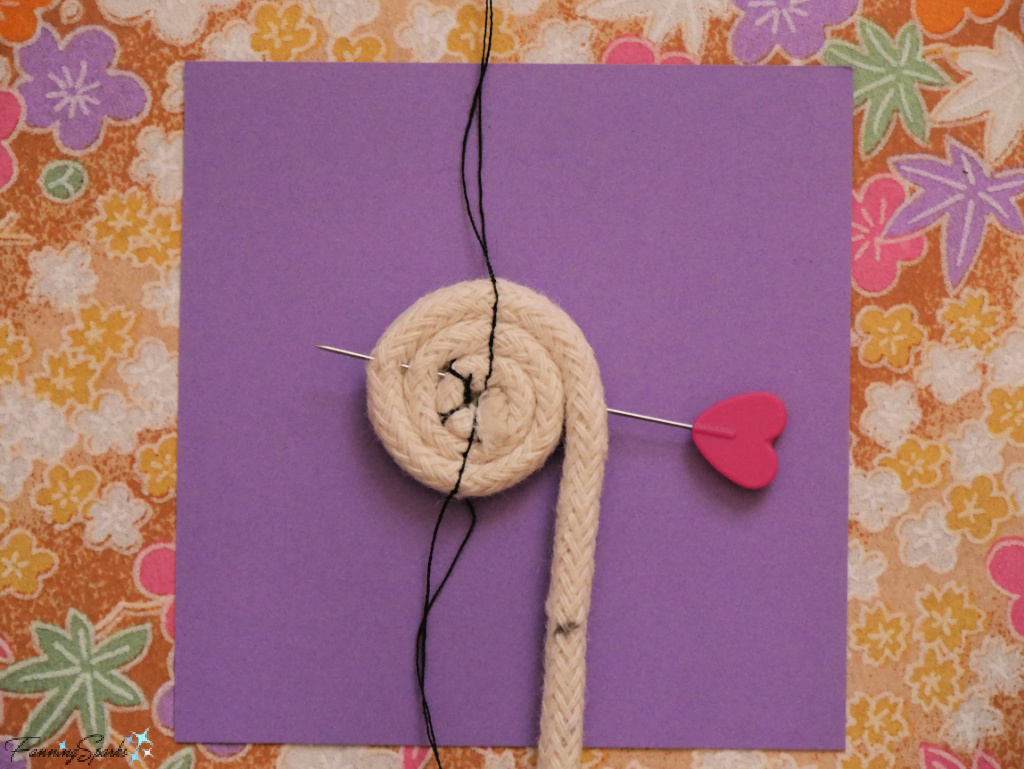
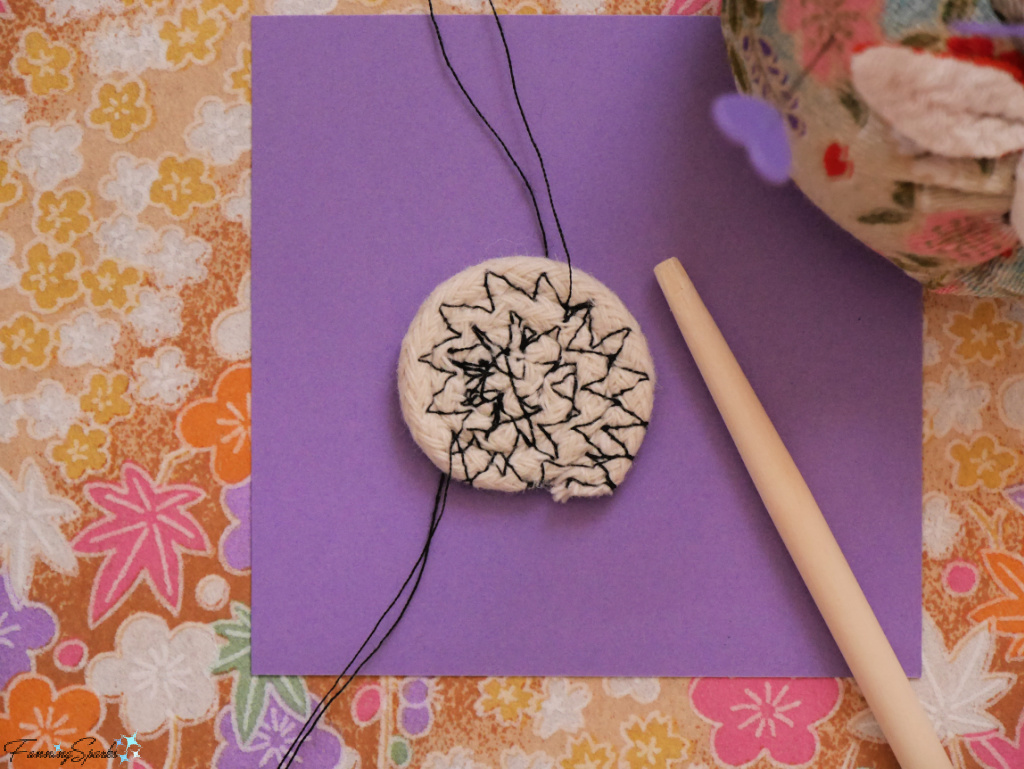
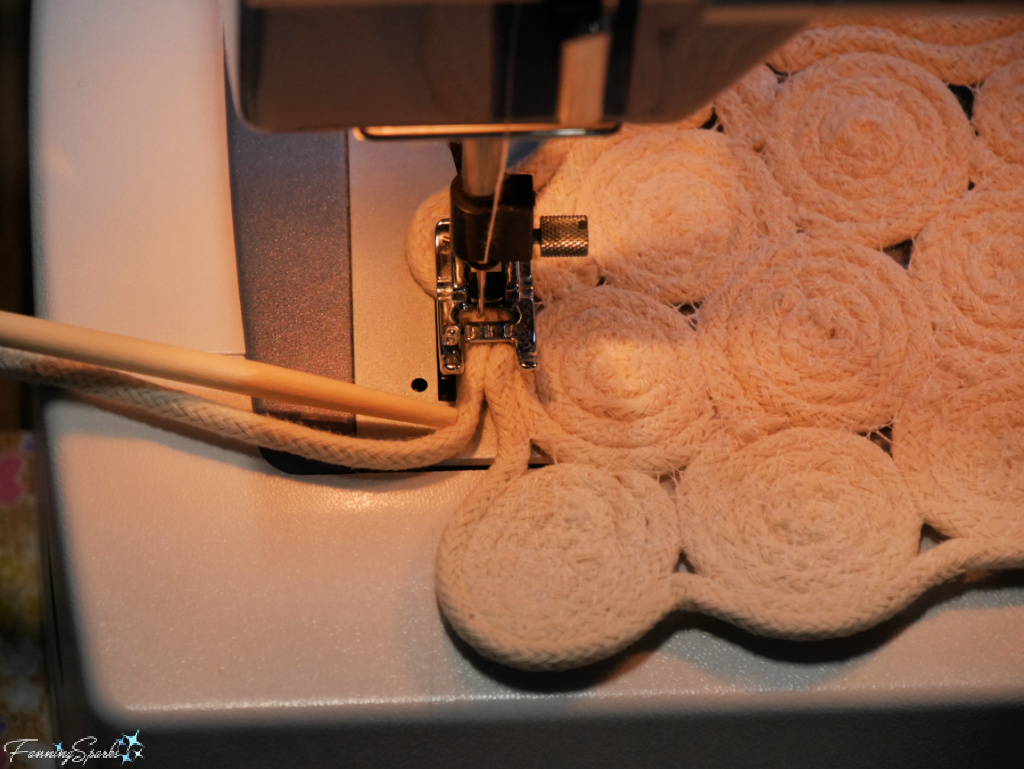
Step 2g Change your sewing machine back to the zigzag stitch. Position the coiled center under the pressure foot with the free end of the cord coming in from the right. Slowly, take a stitch or two across the ditch (ie over the point where the two rows of rope touch) in the center of the spiral. The idea is to catch both sides of the ditch with the zigzag stitch—catch the left rope with the zig and the right rope with the zag. Stop sewing with the needle down and at the center of the zigzag (versus at the far right or far left of the stitch). Leave the needle down in the coiled rope and lift the pressure foot. Spin the rope spiral slightly to move the next section of the ditch in front of the needle. Lower the pressure foot and take another stitch or two. Continue to stitch, lift, move, lower, and stitch until you see the marked point.
TIP: Use the end of a wooden chopstick to carefully push the rope under the needle and keep your fingers out of danger!
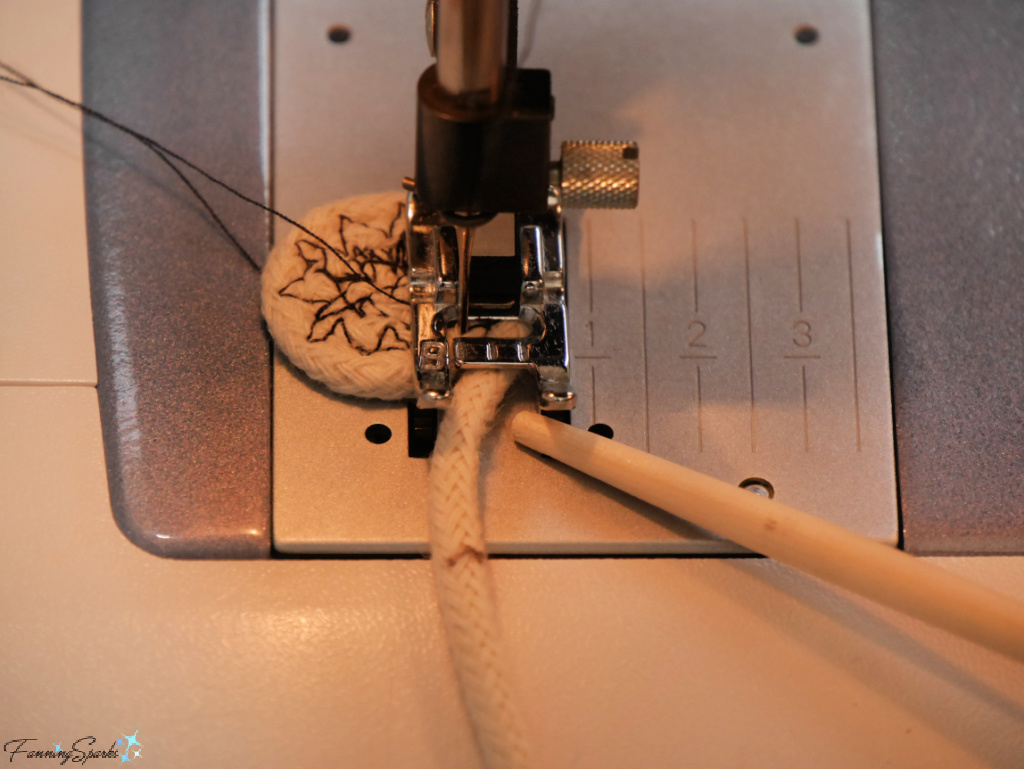 Step 2h Stop sewing when you’re about 1” from the mark you made previously. Leave the needle lowered in the coiled rope and lift the pressure foot. Move the spiral away from the needle so that only the final section of the rope is under the needle. Lower the pressure foot and overcast to the end of the rope. Trim all thread tails.
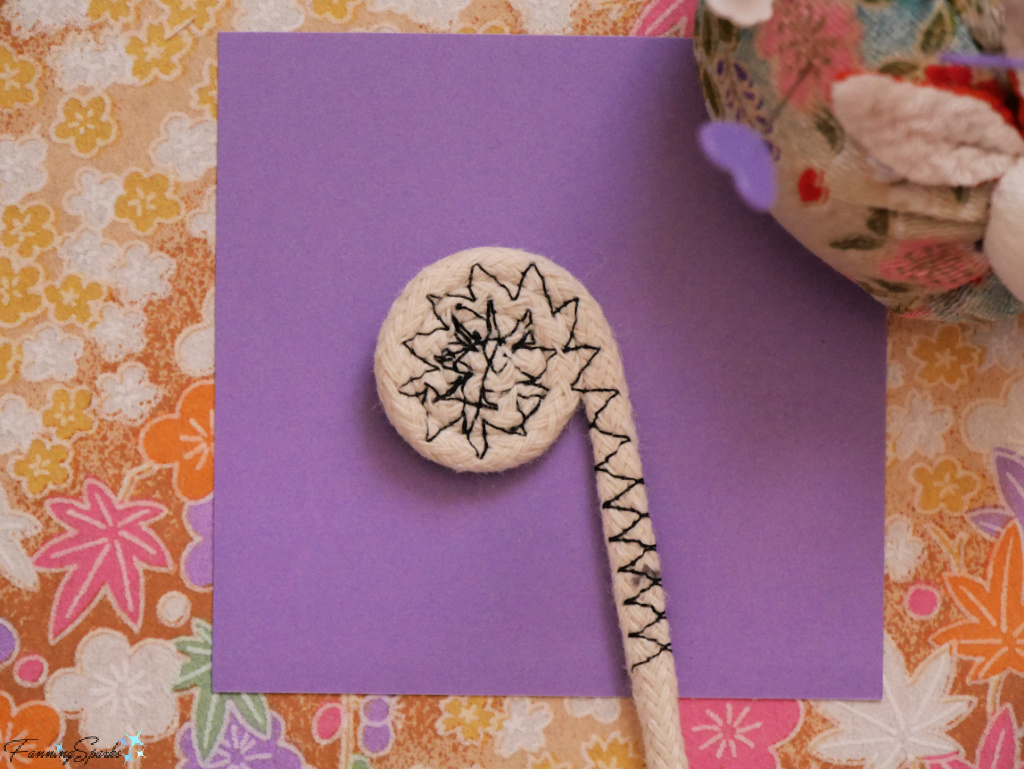
Step 2i Coil the last section of the rope (up to the marked point) and use a ruler to check the size of your spiral. It should be about 1” in diameter. The size of your spiral circle may vary depending on how tightly you wound your spiral. If the diameter of your spiral circle is more or less than 1”, make a new mark to indicate the adjusted end point. Cut the rope at an angle at the marked end point.
Step 2j Sew the final section of the rope onto the spiral. Trim all thread tails.
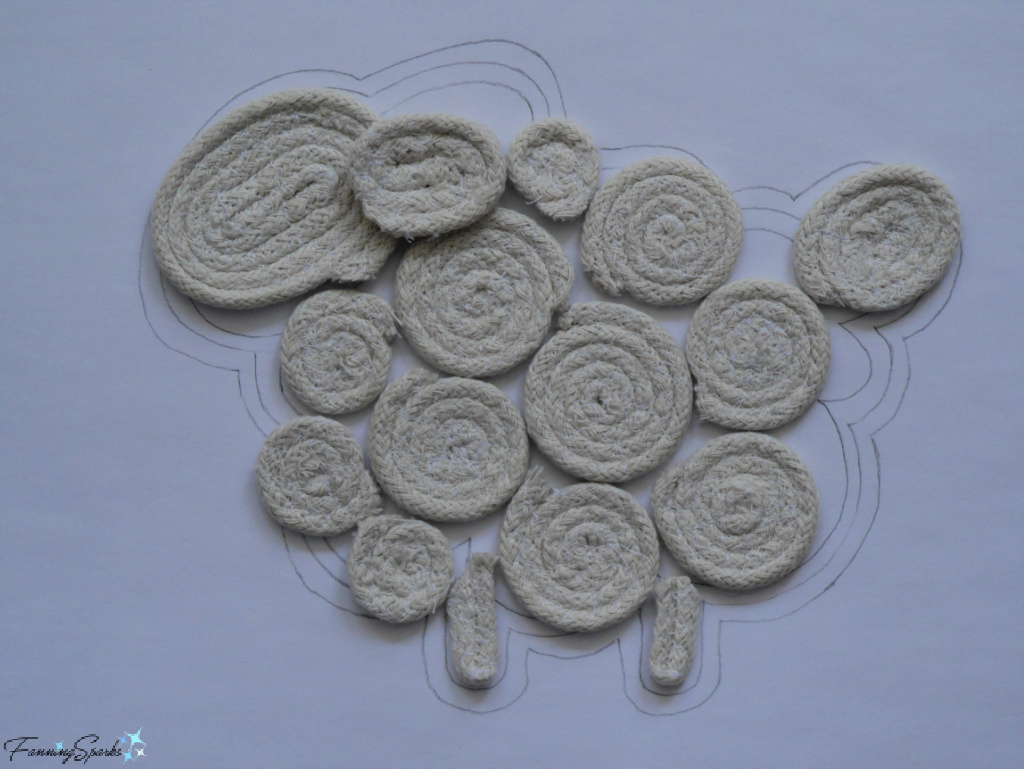
Step 3 Make All Parts Refer to the template and the summary of parts listed in Step 1 to make all the necessary parts. Use the technique outlined in Step 2 for the various sized spiral circles—just adjust the length of the rope in Step 2d as noted below.
. ¾” spiral circle requires 3½” of rope.
. 1” spiral circle requires 6½” rope.
. 1¼” spiral circle requires 8½” of rope.
. 1¾” spiral circle requires 10½” of rope.
This isn’t an exact science so you’ll want to check the size of your sewn coils and make any necessary adjustments before cutting the rope as described in Step 2i.
The other shapes, such as the spiral ovals and rectangles, start with a slightly different shape but are made with the same technique as the spiral circles. The spiral oval used for the sheep’s head, for instance, starts with a ¾” straight section before being coiled into an oval-shaped spiral.
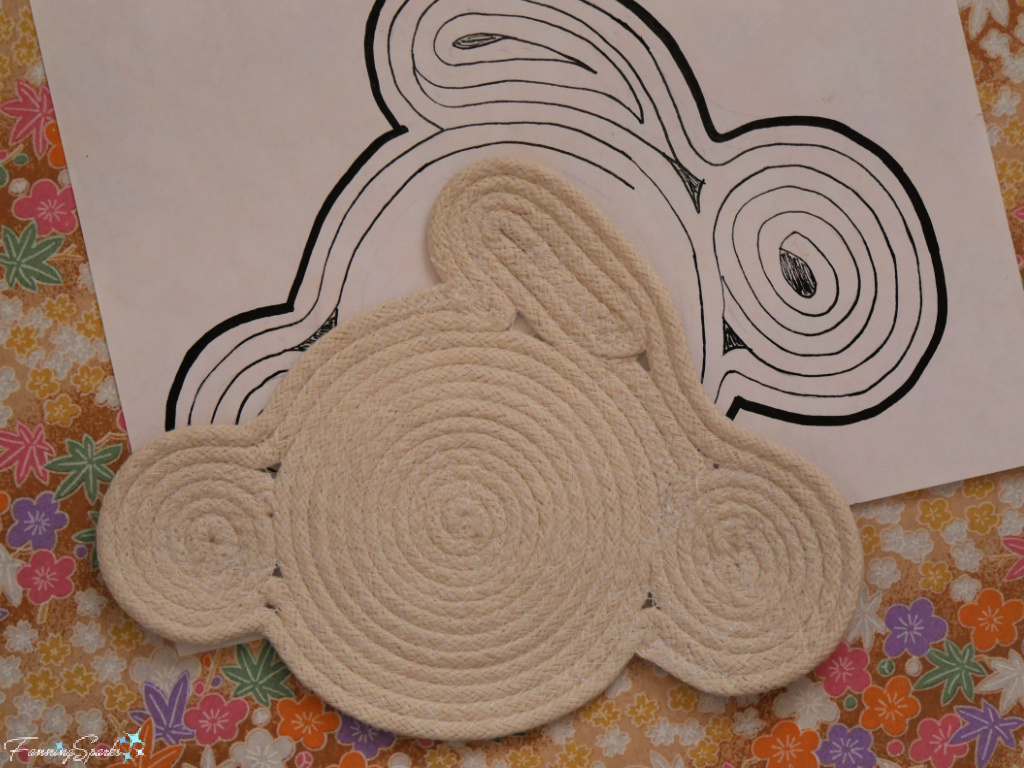
 Lay each completed part on the template as you go. This will help you determine if any adjustments are needed. You may, for instance, have a spiral circle that is slightly larger or smaller than intended. If that happens, you could adjust the size of the neighboring parts to compensate or you could simply adjust the design. Notice how the parts shown below vary from my original template.
Step 4 Attach Parts Finalize the placement of all the parts on the template. Secure the middle spiral circle and the six surrounding spiral circles in place with straight pins.
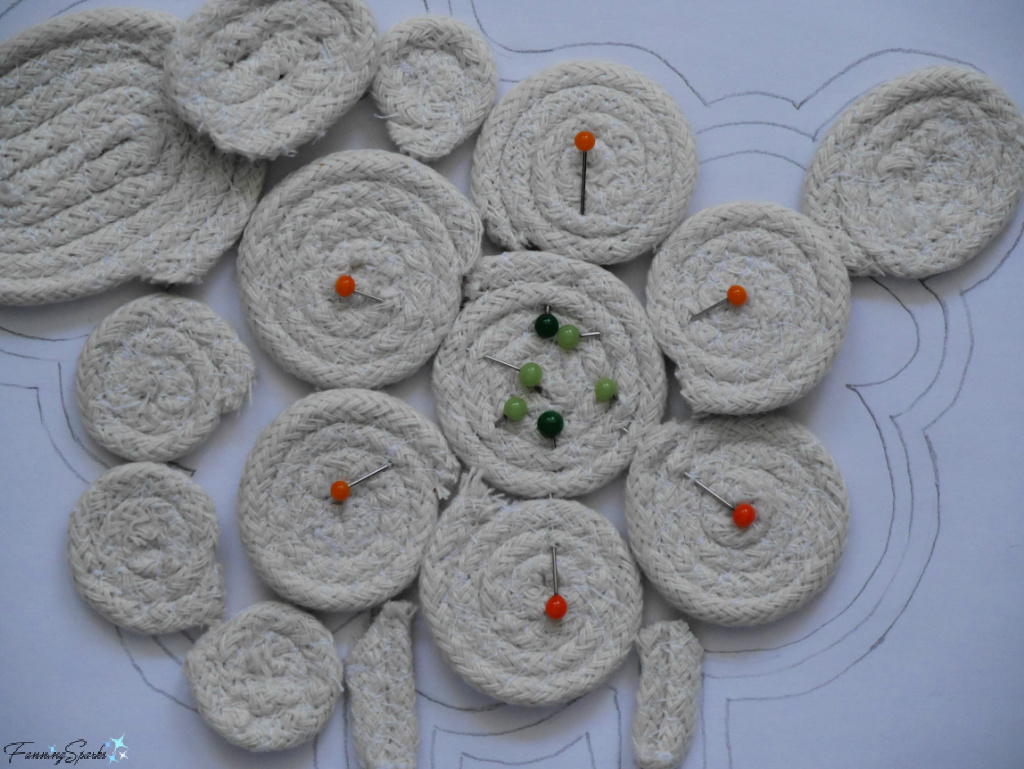 Prepare to join the spiral circles by zigzagging across every section where they touch. Set the sewing machine to the zigzag stitch. Carefully move the pinned circle spirals onto the sewing machine. Position two spiral circles under the pressure foot with the sewing machine needle centered over the ditch. Slowly lower the pressure foot and remove the pins in that section. Gently push the two spiral circles together so they fit snuggly while slowly sewing across the ditch. Move to the next set of touching edges and repeat the process. Continue until all adjoining spiral circles are secured.
Use the same technique to position and sew the other parts in place including the spiral oval for the head, the small spiral circles for the neck, the spiral oval for the tail and the two rectangles for the legs.
 Step 5 Coil Rope Around Outside After all the parts are stitched together, coil more rope around the outside of the entire piece securing it into place with a zigzag stitch. A wooden chopstick comes in handy for the indents and curves. I used two rounds of rope around the sheep—starting and finishing around the sheep’s shoulder.
 Step 6 Attach Ear The final step is to attach the spiral oval for the ear. I simply pinned it in place over the other spiral pieces. Then sewed it in place by zigzagging along the front edge—leaving the main part of the ear free.
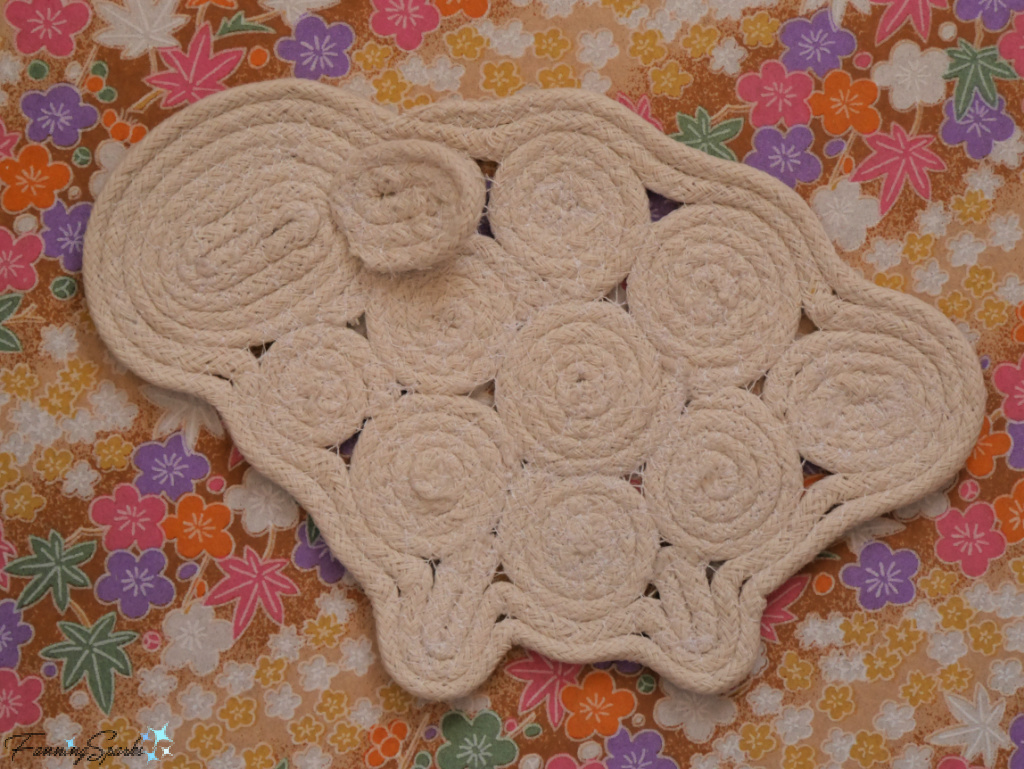
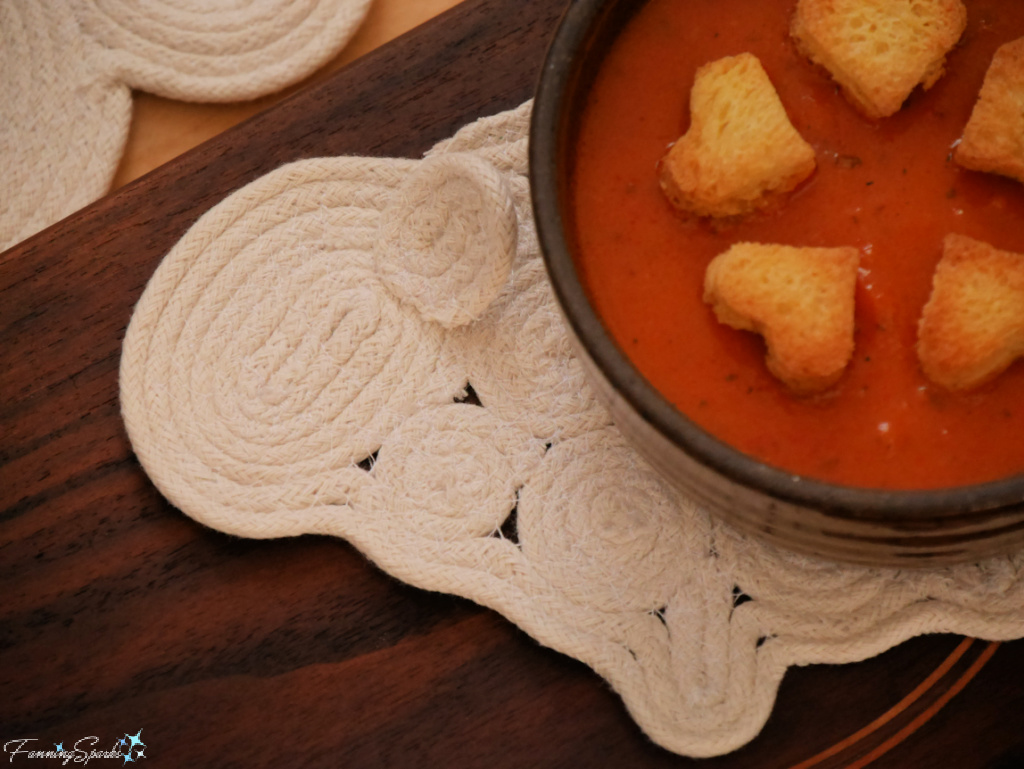
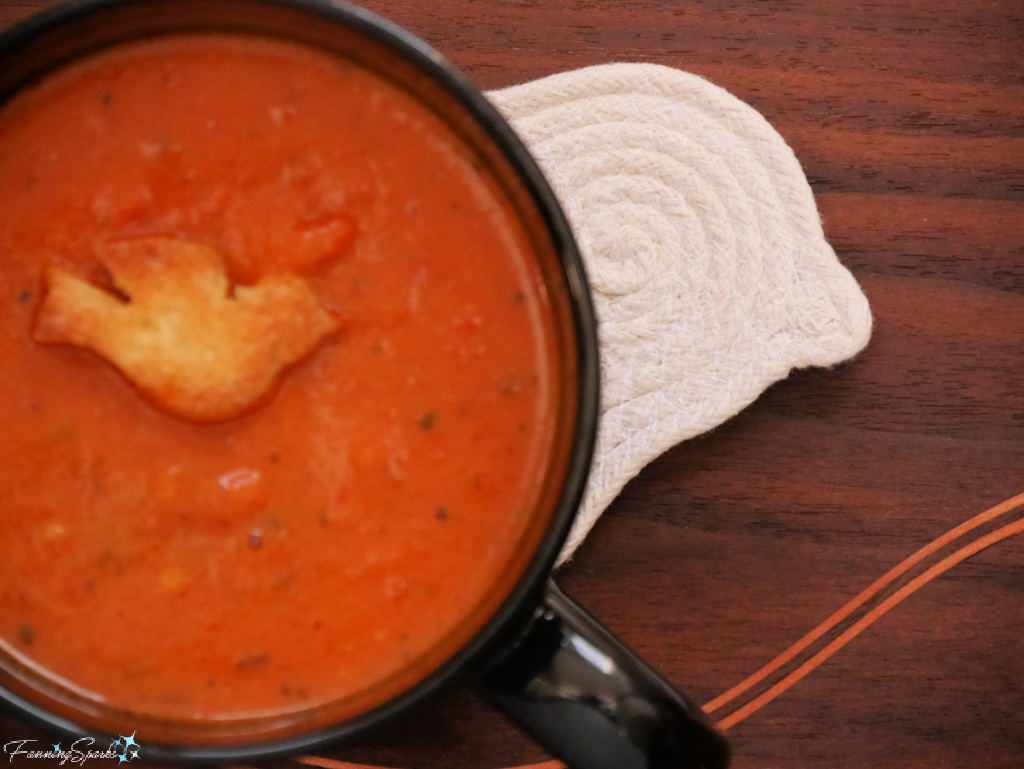
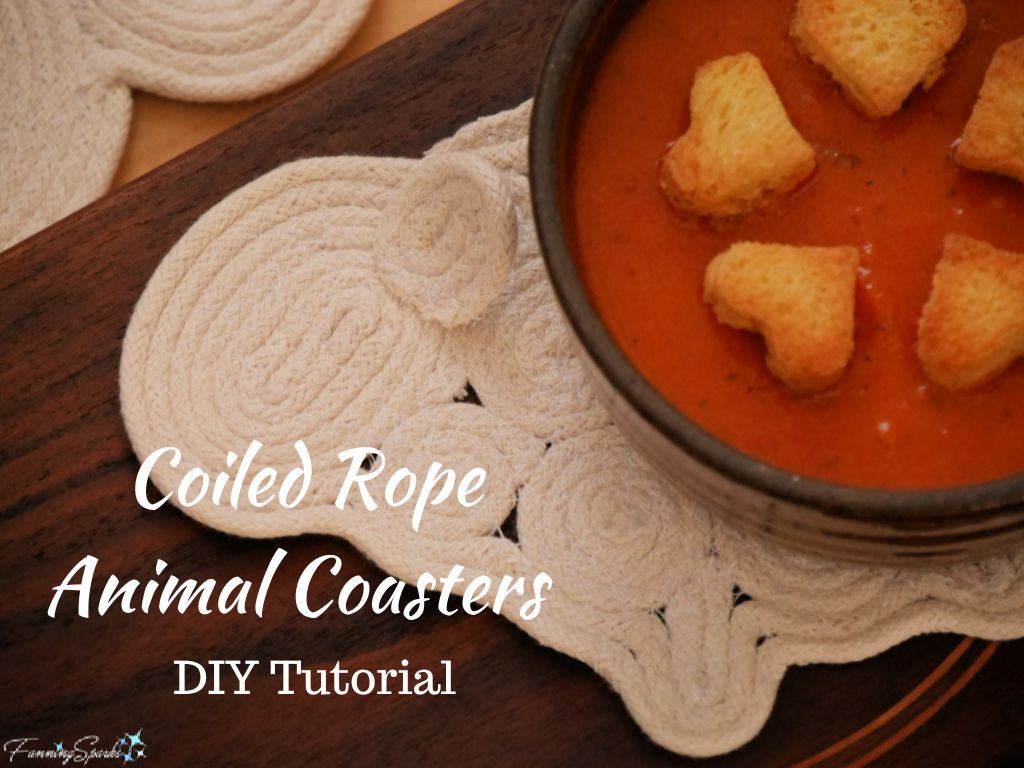
Voilà! Your sheep-shaped coiled rope coaster is ready to use!
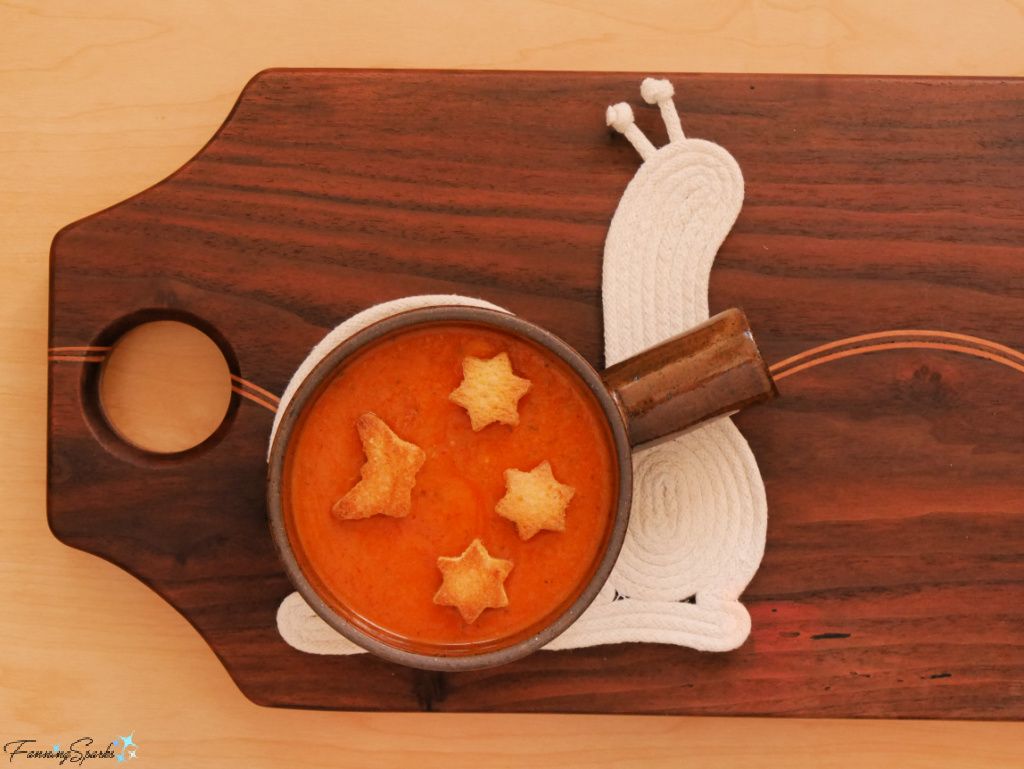
 As noted above, I made three more animal-shaped coiled rope coasters. Here’s the snail-shaped version.
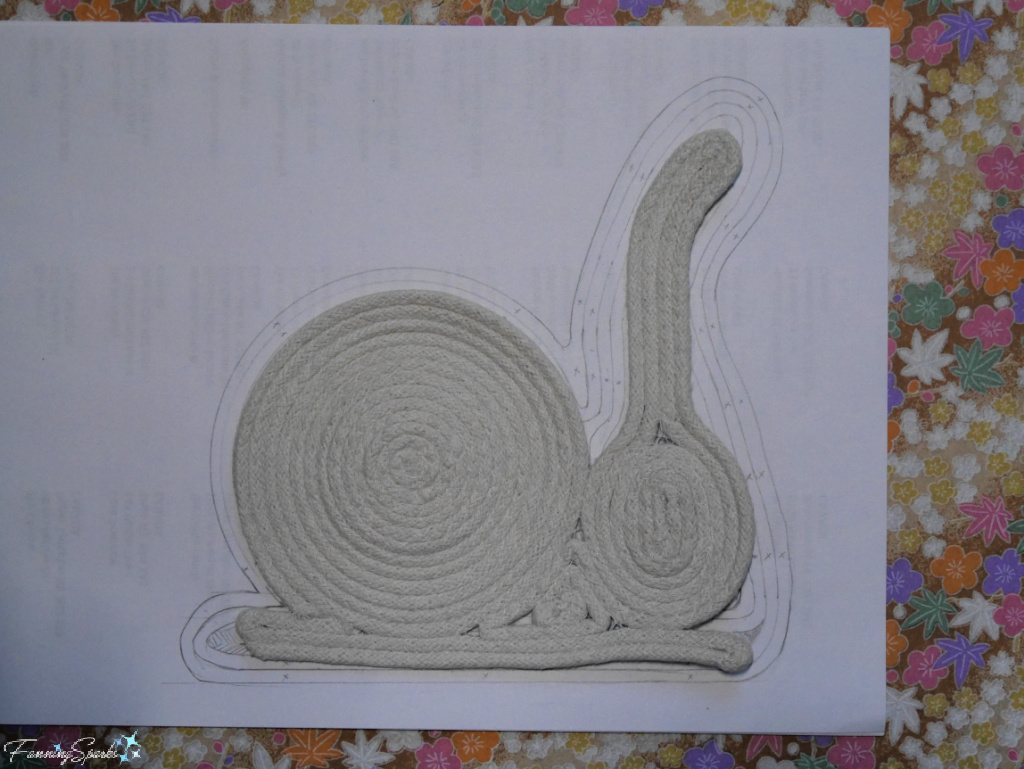
 The snail coaster is made in much the same way as the sheep coaster except the odd shapes require a little more finagling. Here’s a look at the work in process.
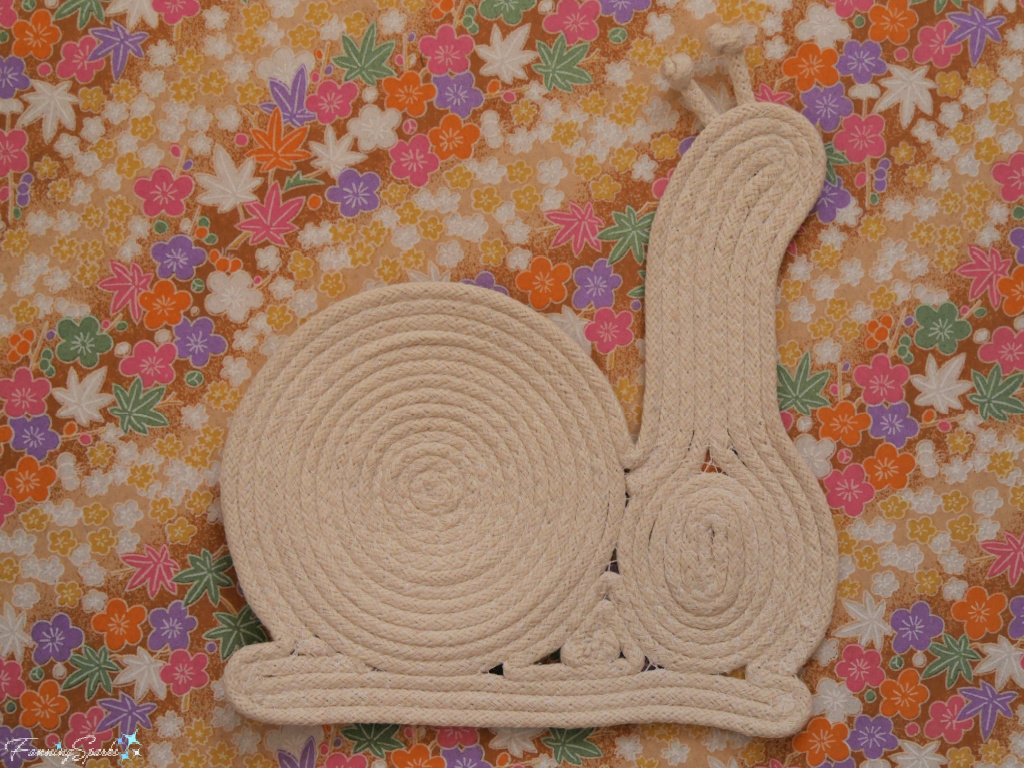
 Here’s the finished snail-shaped coiled rope coaster.
 The rabbit-shaped coiled rope coaster also took a little effort. If you compare the finished coaster to the template, you may notice the design morphed during the actual construction.
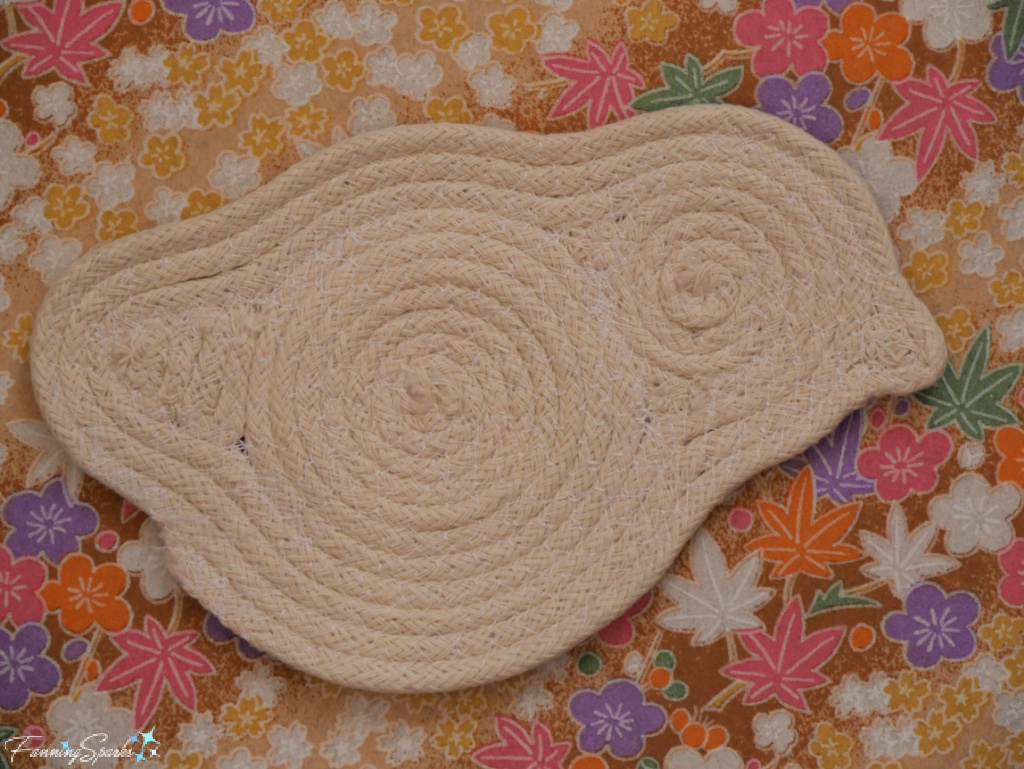
 Finally, here is the bird-shaped coiled rope coaster.
More Info
You can download the project template here: Coiled Rope Sheep Coaster – Complimentary Download.
Please pin this image to share or save for future reference.
 Check out the FanningSparks January Maker Challenge for Earth-friendly projects.
. See the blog post, Earth-Friendly Project Roundup, which kicked off the Challenge with a roundup of previous Earth-friendly maker projects and initiatives from the blog.
. See the blog post, Getting Roped Into Coiled Rope Basketry, for my first response to the challenge.
The Coiled Rope Animal Coasters featured in this blog post are my second response to the challenge.
Today’s Takeaways
1. Just because it’s Earth-friendly doesn’t mean it has to be boring.
2. A little imagination and experimentation can transform an ordinary project.
3. Simple, natural materials, such as cotton rope and thread, can be used to make interesting, useful objects.


Comments are closed.