
A cardboard box full of old enameling supplies, spotted at a thrift sale and bought for a song, was the impetus for my most recent maker experience. And what a fun, freewheeling experience it was!
The class, Cooking with Enamel with instructor Steve Artz, focused on enameling on copper. Steve set an intriguing objective for the class by challenging us to simply experiment with texture and color. We began to make random pieces with the vague intention of incorporating them into a series of collages. He provided us with blank albums to hold our eventual collections.
 Here are a few examples of Steve’s stunning copper enamel work.
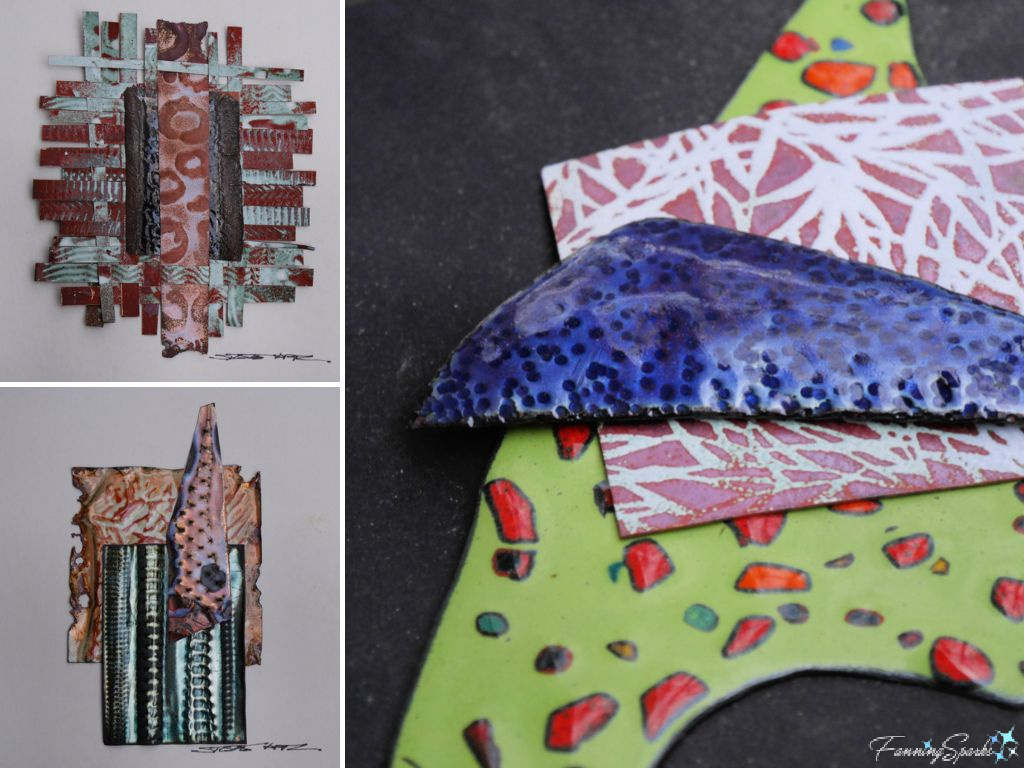 Steve applies the same texturing and enameling techniques to make copper birdhouses like this stunner!
 Enameling, we learned, “is a process by which powdered glass is fused to a metal substrate at high heat. Enamels can be applied to glass, ceramics, and most commonly, metals… such as copper, silver, and gold. The powdered glass can be applied either wet or dry to a surface. The enamel melts, flows, and fuses to the surface in a smooth coating when heat is applied. Firing temperatures using a torch or a kiln generally range between 1400 and 1650 degrees Fahrenheit.” explains author Kristin Arzt in her article The Art of Enameling: Learn Different Types & Techniques for Enameling.
A major revelation for me was how quickly enamel is fired—each firing takes only 1-3 minutes. So instead of waiting days to see the results of your work, as you do with clay or fused glass, you get near-instant results.
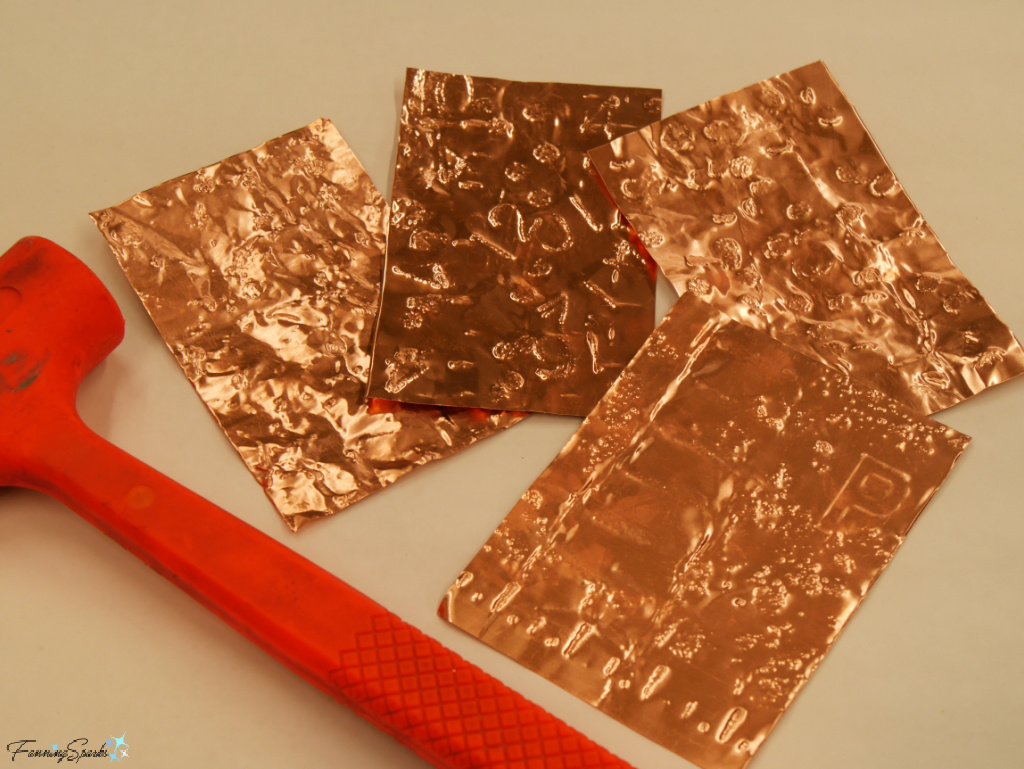
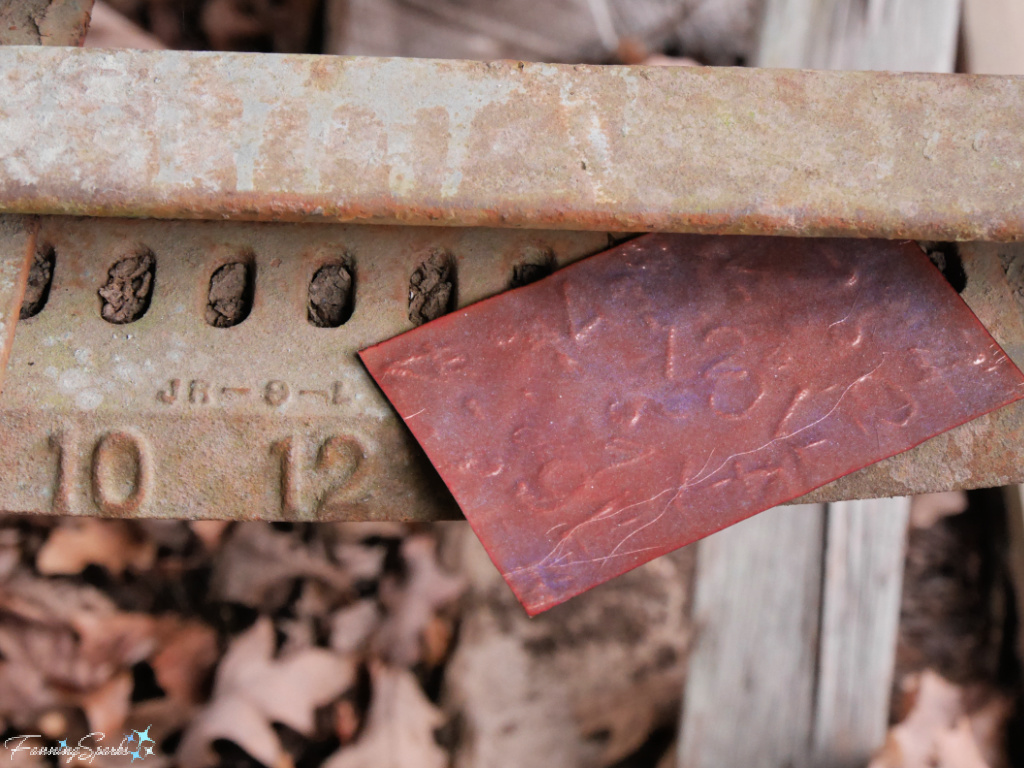
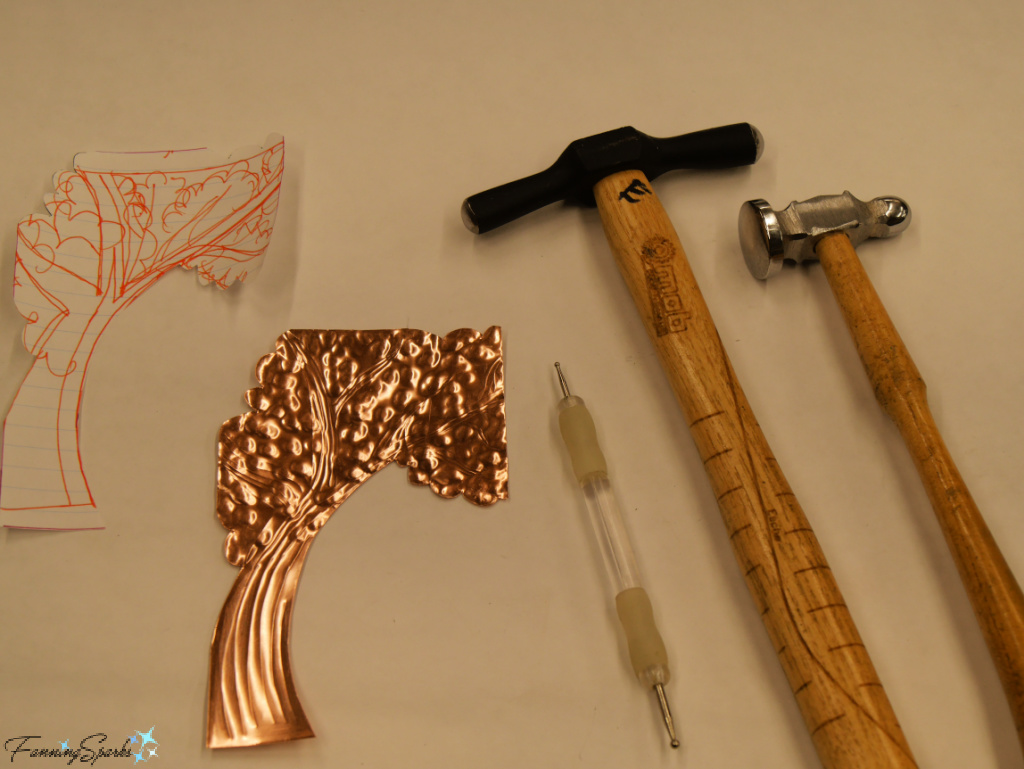
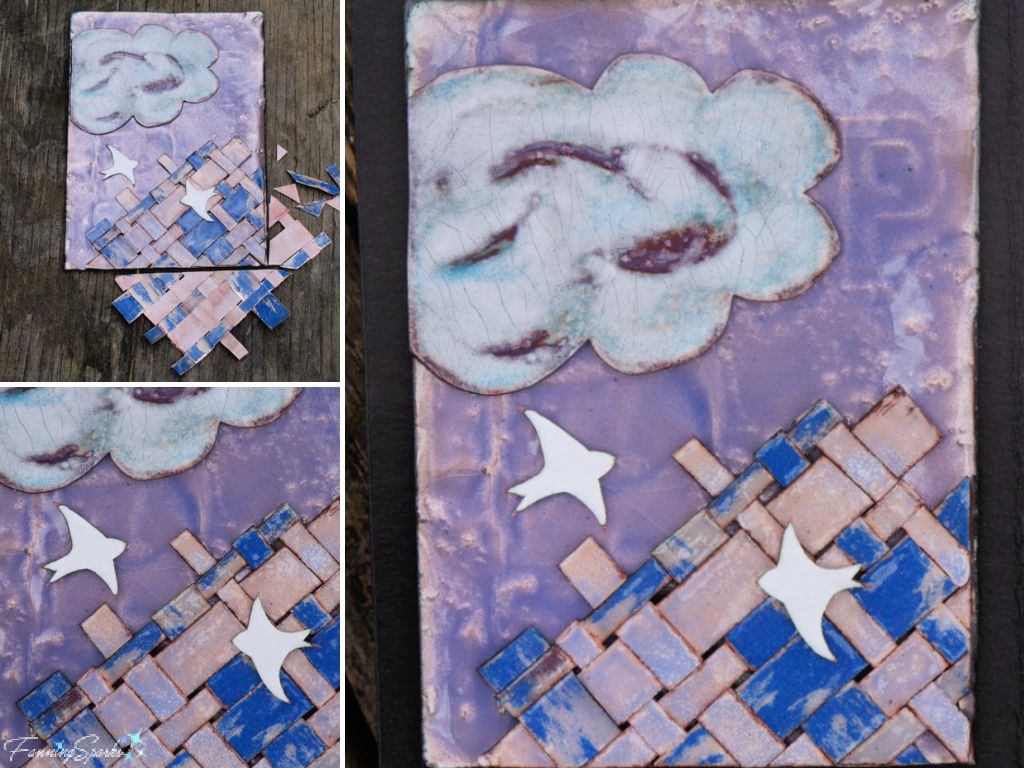
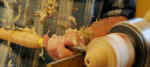
With only three students in the class, we were able to cover a lot of ground—learning multiple new techniques, processes and materials every day and then trying them out. For instance, early on as we were learning about texturing copper foil, Steve sent us outside the studio to look for textures in our surroundings. We used dead blow hammers to transfer various elements such as nail heads, tree trunks, machined numbers and rough concrete to our copper sheets.
 Just for fun, I went back later and took a photo of one of my enameled copper panels beside the original machinery.
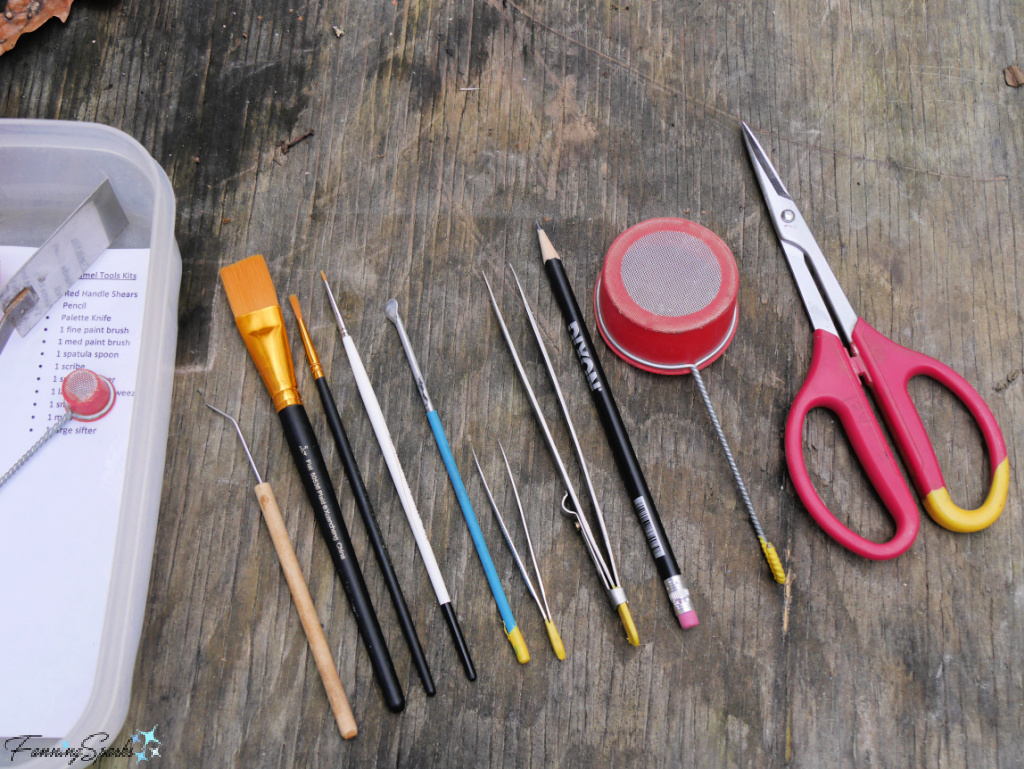
 But I’m jumping ahead, let’s get back to the basics. In the photo below you can see the various tools provided to each student. The tools I used the most often are on the right and include the metal shears, large sifter (with a less-than 80 size mesh), pencil and tweezers.
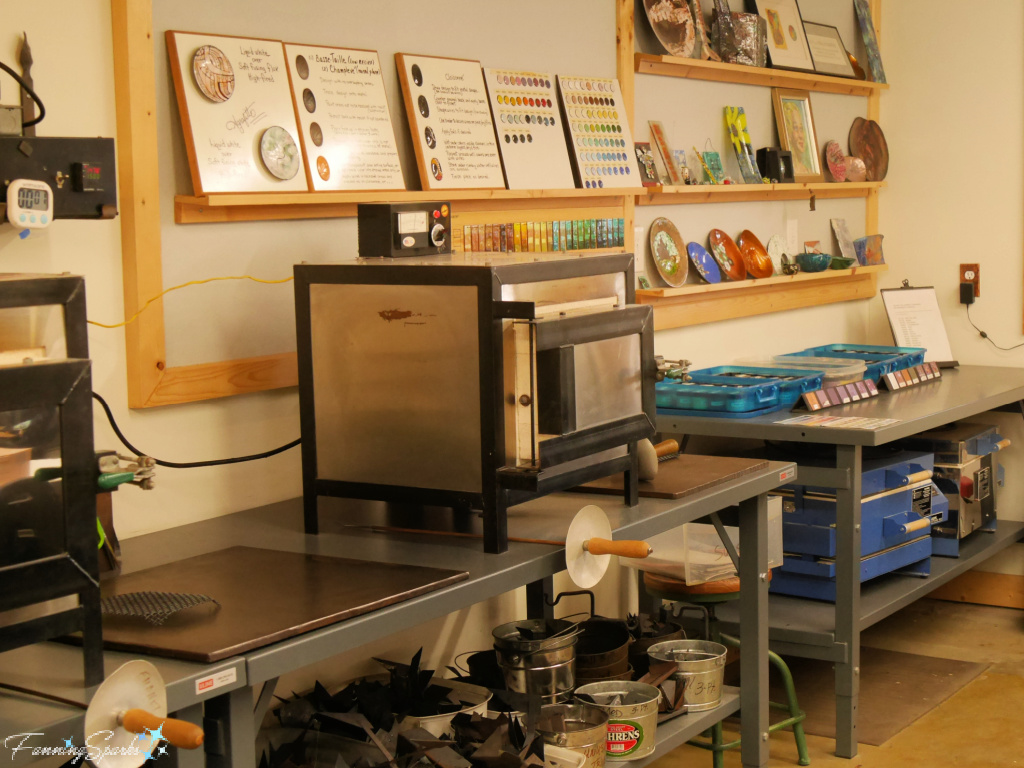
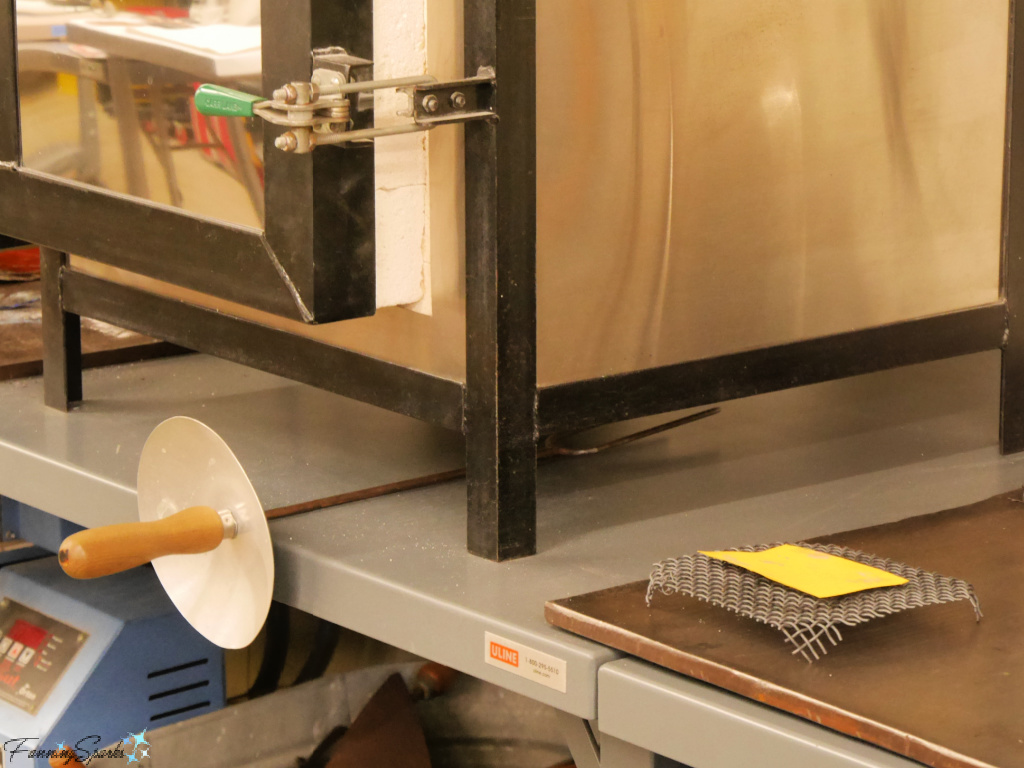
 In addition, the Gus and Maggie Masters Enameling Studio at the John C Campbell Folk School, has a variety of tools, equipment and materials for students to use. There are, for example, a half dozen electric kilns similar to the one shown below.
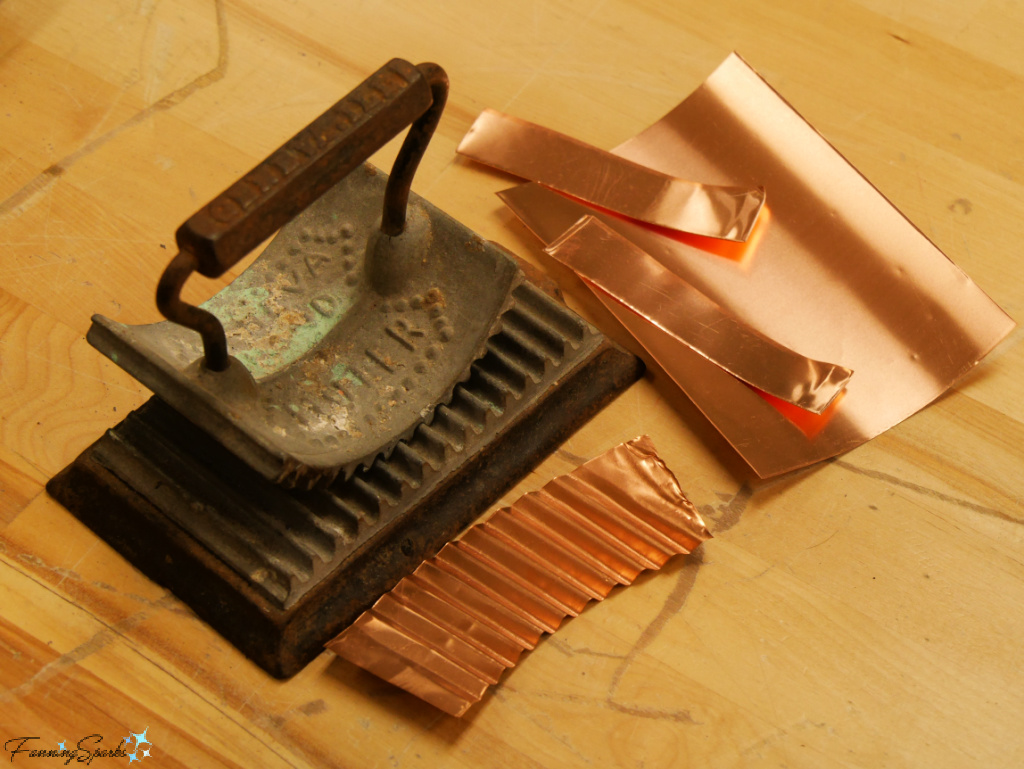
 Steve, also, brought some of his personal tools to share with us. I particularly liked the vintage ruffle iron. We didn’t press any fabric ruffles (of course!) but this gadget created some great copper textures.
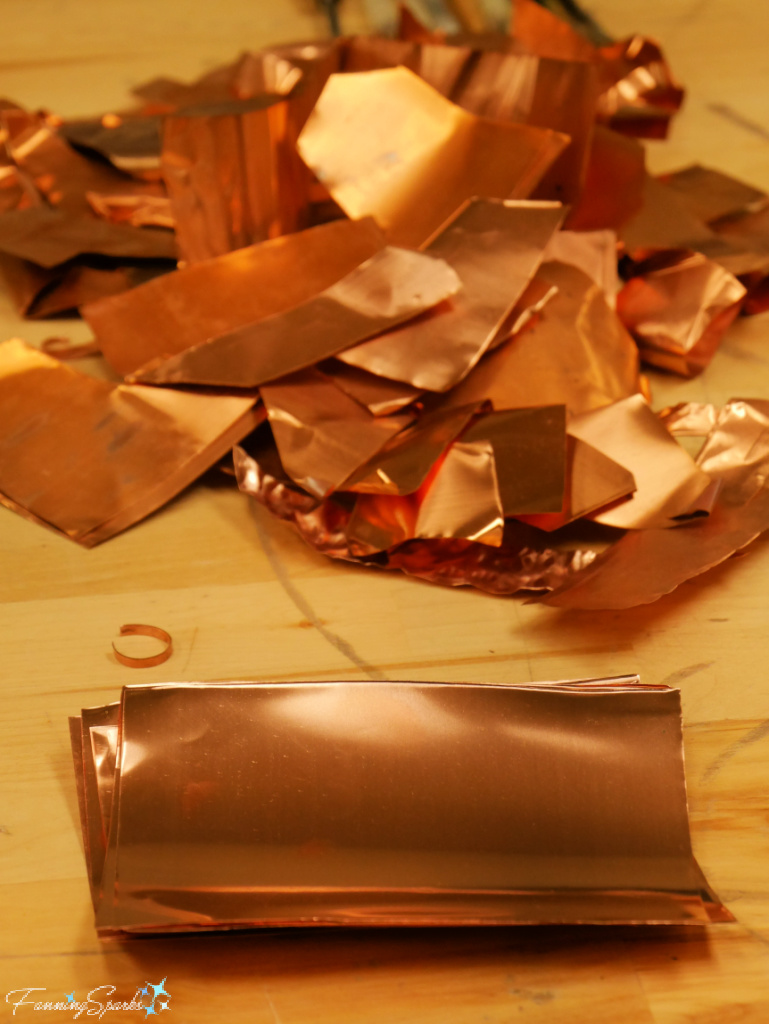
 We had a good supply of copper, primarily 36-gauge copper tooling foil, available. 36-gauge copper, or 5 mil (.005 inches thick) copper, “is approximately 7-8 times thicker than typical household aluminum foil. … It does not tear by hand, but can be easily cut with scissors. It is extremely pliable and will dent with a light touch. … The 5 mil is often used for embossing, repousse, tags, die-cuts and other craft projects as well as for various home improvement projects…” as described on the Basic Copper shopping website.
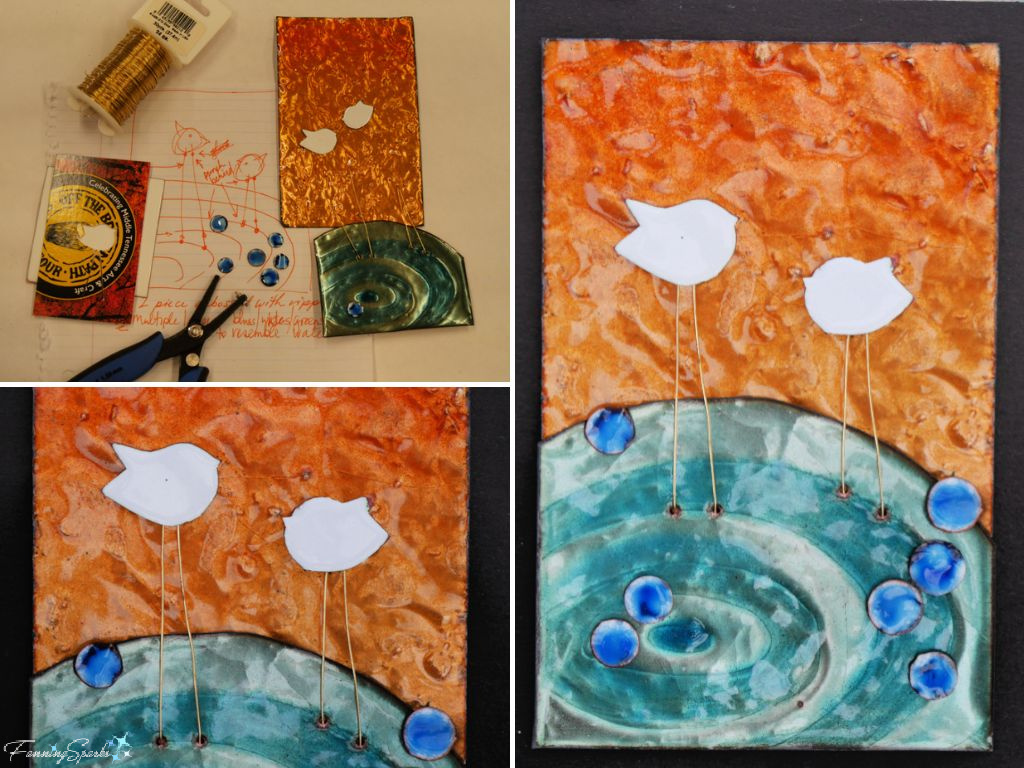
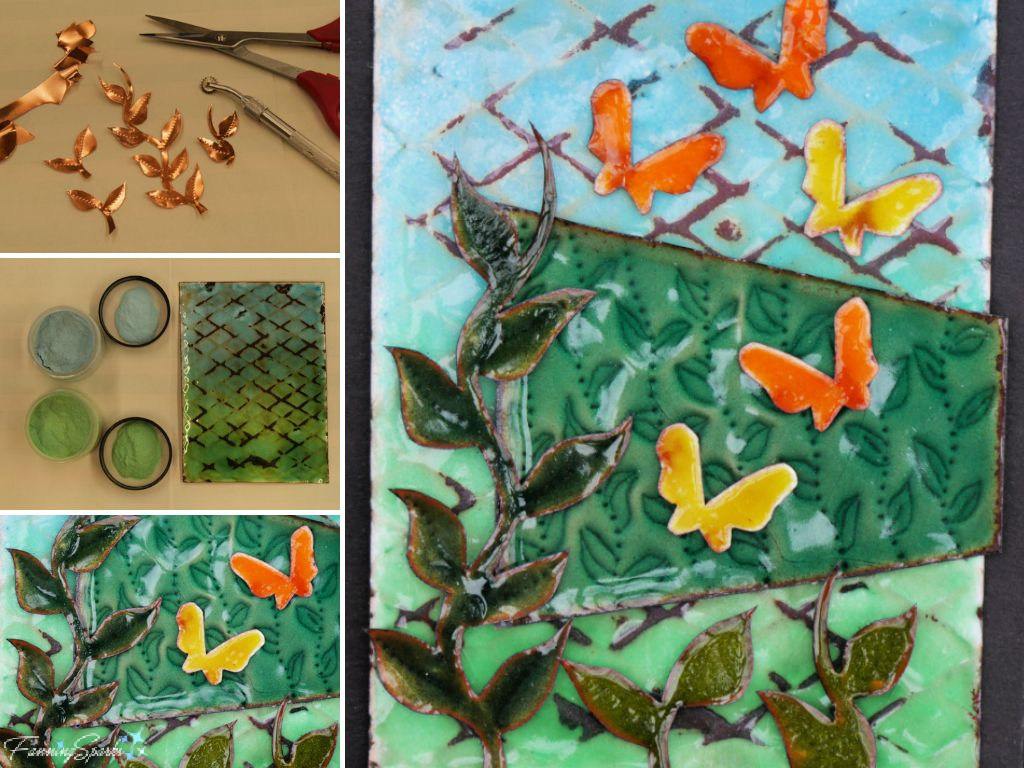
 After gathering our textures, we learned how to apply enamel to the copper. We cleaned our pieces, sprayed them with Klry-Fire holding agent and then sifted powdered enamel onto them. We used primarily transparent enamels to highlight our textures and let our designs show through.
Here’s a photo of my classmate Laura sifting, also called sieving, enamel powder onto one of her pieces.
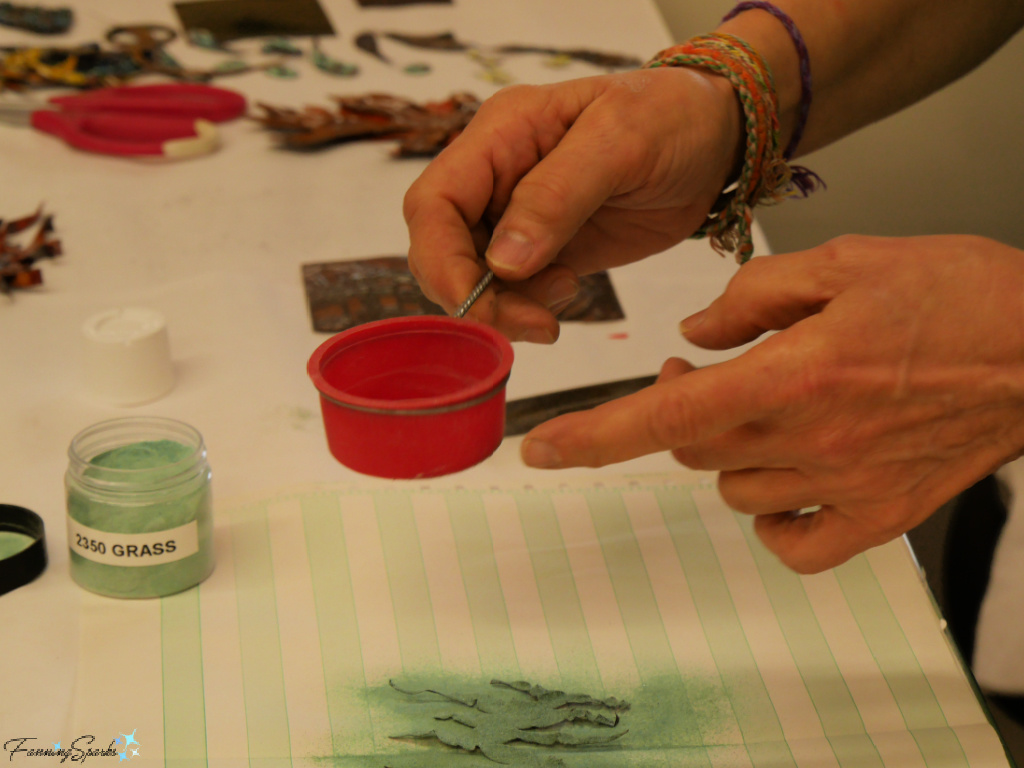
“The enamel that is used by the enamelist is primarily glass, technically called silica. To provide special properties such as luster, fusability, opacity, and elasticity, small quantities of [chemical compounds such as] potash,… borax… and soda… are added.” explains author Louie Taylor in his book Copper Enameling. “Each individual color is created by the addition of a certain oxide of metal.” For instance, “green and turquoise colors are produced by adding oxide of copper”.
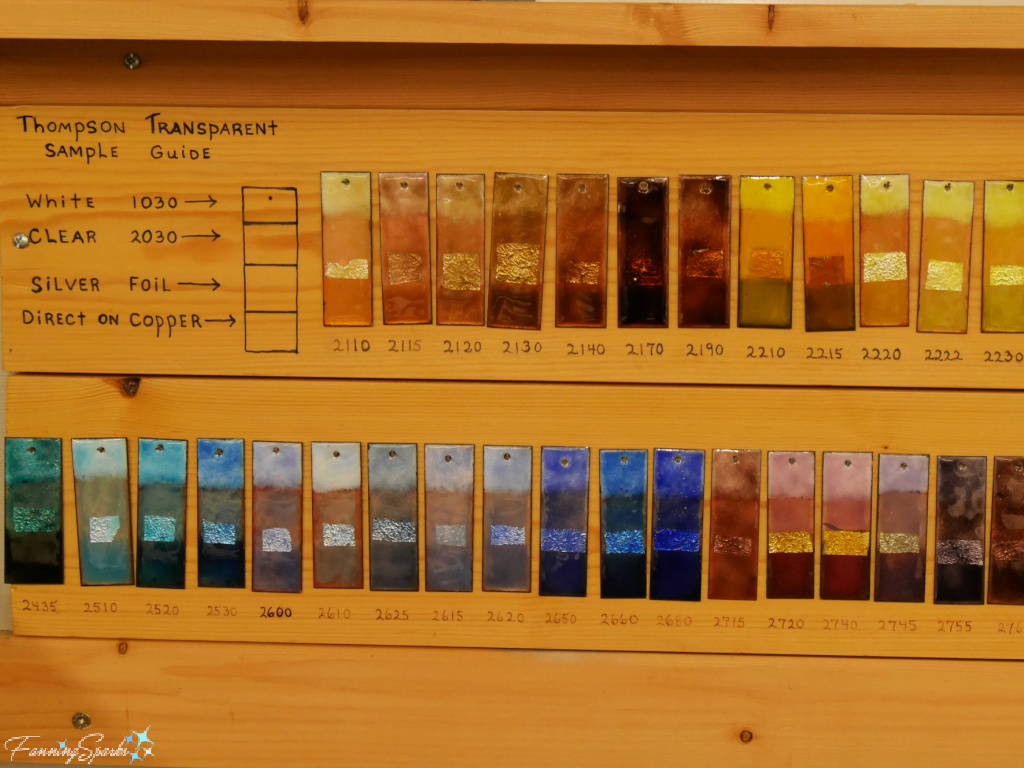
Enamel powders are available in an array of colors as shown in this display board at the studio.
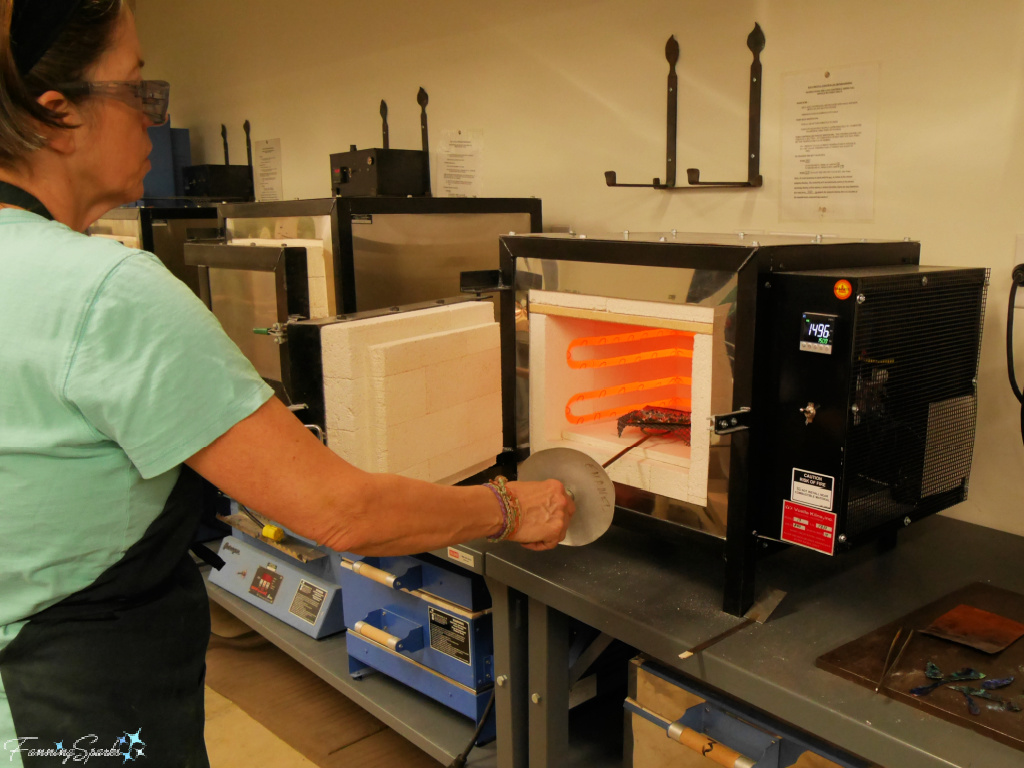
 After sifting the powdered enamel onto the piece, you carefully move it to the firing area and place it on a firing screen or trivet. Here’s one of my pieces ready to be loaded into the kiln. The long fork you can see under the kiln is called a “firing fork”. It is used to transfer items in and out of the kiln.
“For kiln firing, an average firing temperature is between 1450 to 1500 degrees Fahrenheit. … An average firing time for most enameled pieces is two to three minutes. Unlike other kiln firing media such as ceramics or glass where the pieces are put into a kiln cold and taken out cold after firing, an enameled piece is put in the kiln hot and taken out hot.” explains author Kristin Arzt. Obviously, extreme caution is used to load and remove items from the kiln. Here’s Laura transferring her piece into the kiln for firing.
 It’s astonishing how dramatically, and quickly, a piece can change from raw copper to colorful, textured beauty. For instance, shown below is a tree I cut from copper foil with a pair of metal shears. A ball stylus was used to emboss lines on the tree trunk and a ball-peen hammer made the indents for the leaves.
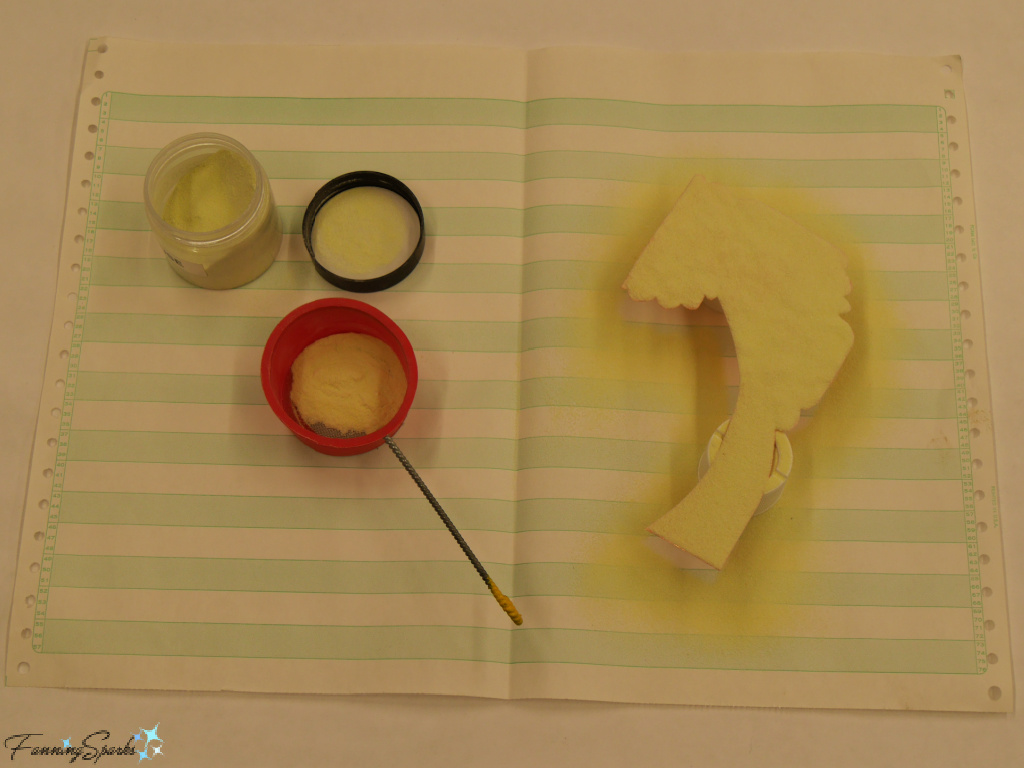
 The next photo shows the tree after being sifted with Chartreuse transparent enamel powder.
Eagle-eyed readers might notice the paper under my project—yes, indeed, it is a sheet of pin feed computer paper. Back in the day when I was using this kind of paper to code and run COBOL programs, I never imagined I’d someday be using it as a work surface for my enameling projects!
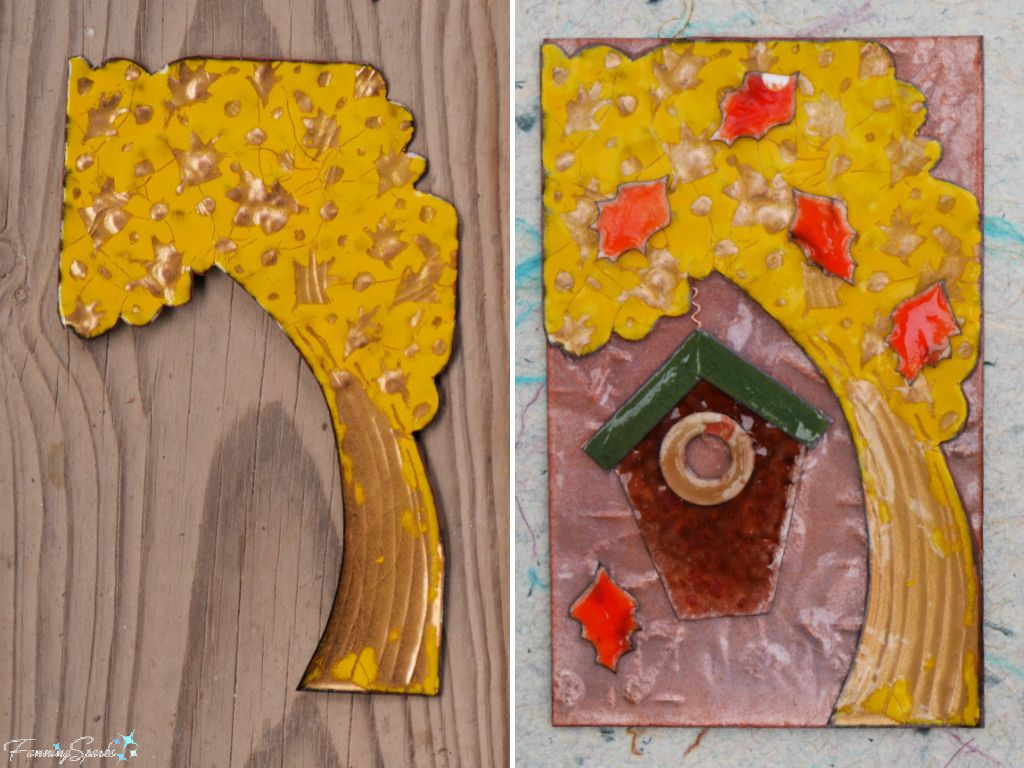
 Eventually, after several additional manipulations, the tree turned out to look like this.
 “The technique you choose to use when enameling depends on the final desired result. There are at least 200 different techniques to choose from when you start enameling.” explains author Kristin Artz. “Certain methods emphasize broad-spectrum applications like sieving powder to create a one-color coat on a piece of copper, and others are much more detail and labor-oriented.”
In cloisonné enameling, for instance, “the enamelist fills small wire enclosures with wetted enamel particles, then fires. It is one of the earliest enameling techniques and is derived from the French word meaning “cell.” Early cloisonné enameling examples go as far back as 600 B.C.”
I had the opportunity to view several outstanding examples of Chinese cloisonné during a recent visit to the George Walter Vincent Smith Art Museum in Springfield Massachusetts. Here’s a close look a 14th-17th century Chinese cloisonné vase.
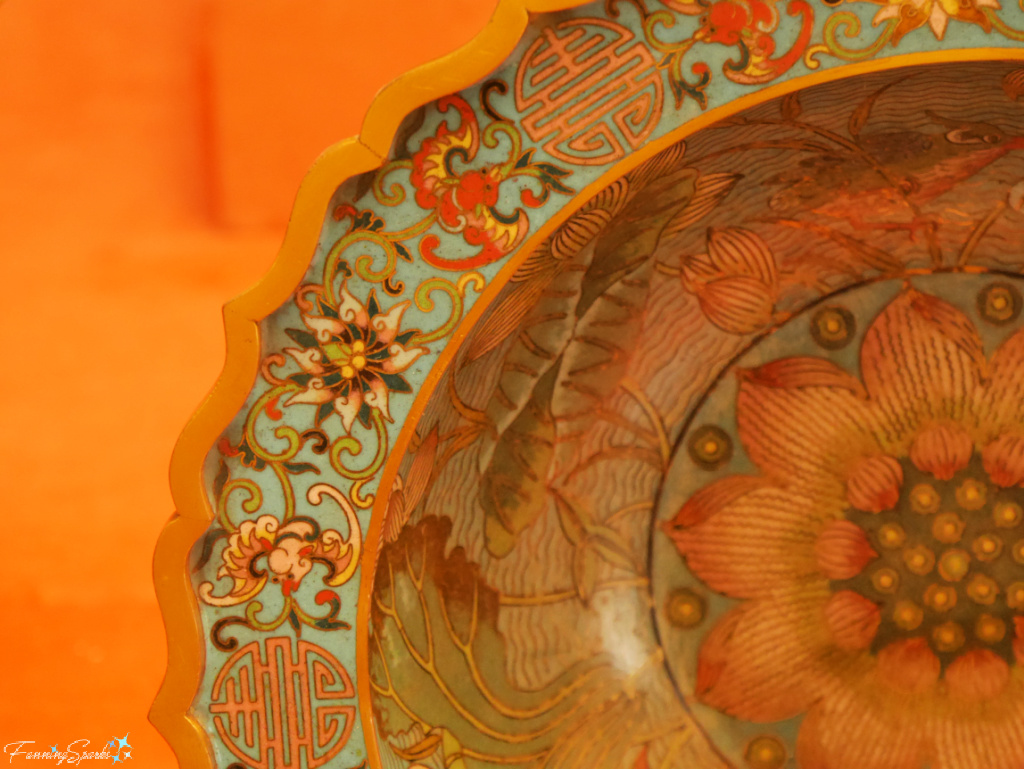
 This cloisonné deep plate with rim from the 18th century is equally stunning.
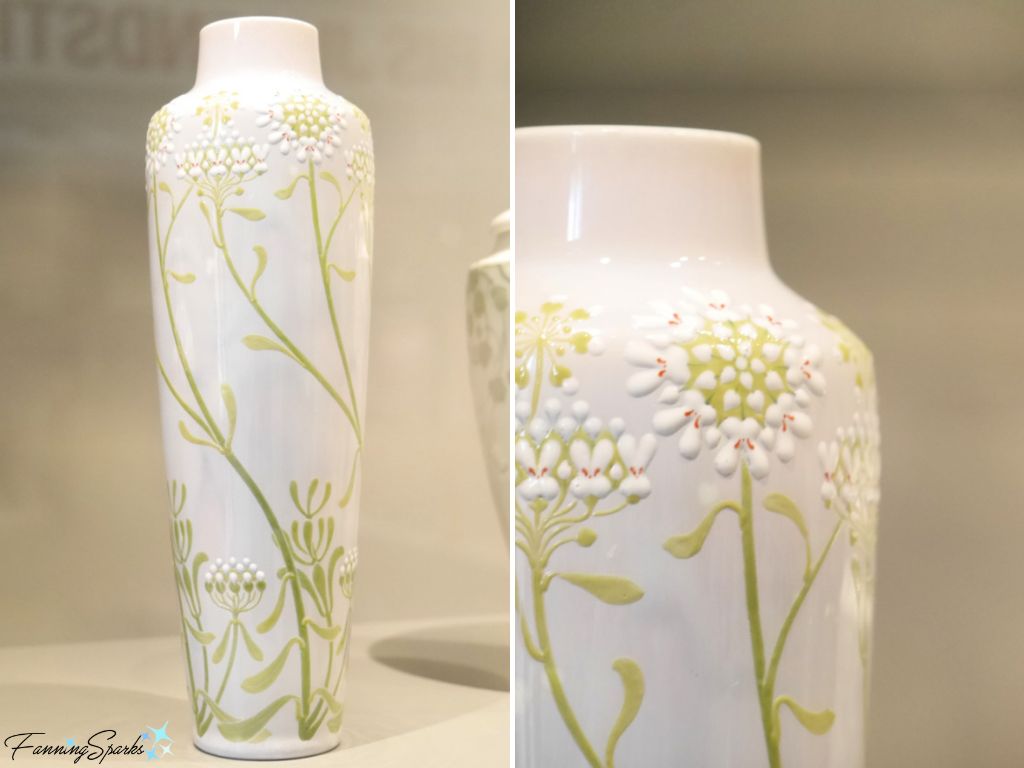
 Enameling was also popular during the Art Nouveau movement from about 1890 and 1914. This lovely porcelain vase, titled “Vase with Flower Stalks”, was spotted at the Bröhan-museum in Berlin Germany. It was designed by Alexandre Sandier in 1897 and is made of glazed porcelain, relief painting and enameling.
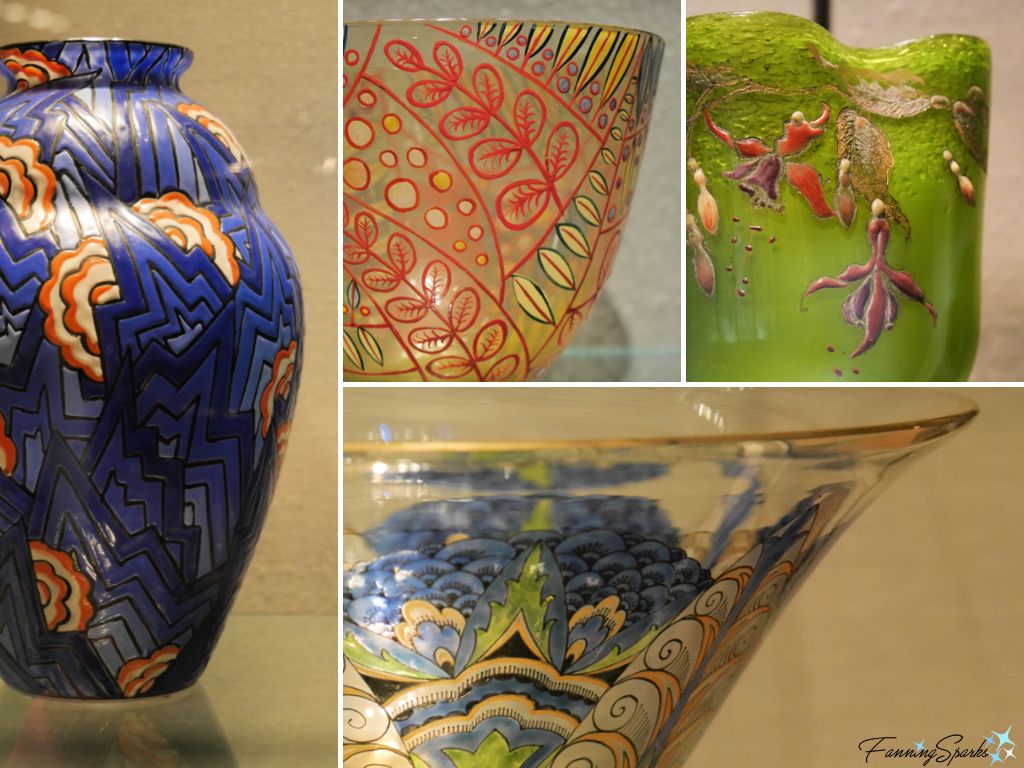
 Several glass objects featuring enamel are featured at the Corning Museum of Glass in Corning, New York. Shown below are:
. “Vase with Abstract Clouds and Geometric Decoration” by Auguste-Claude Heiligenstein from Paris, France. It was made around 1923-1926 and is enameled blown glass.
. “Bowl Depicting Leaves” by Vittorio Zecchin from Murano, Italy. It was made about 1938 and is enameled blown glass.
. “Vase with Fuchsias” made with blown glass and engraved and enameled.
. Enameled vase from the Bohemia or Czechoslovakia area about 1915-1930. It is mold-blown, gilded and enameled.
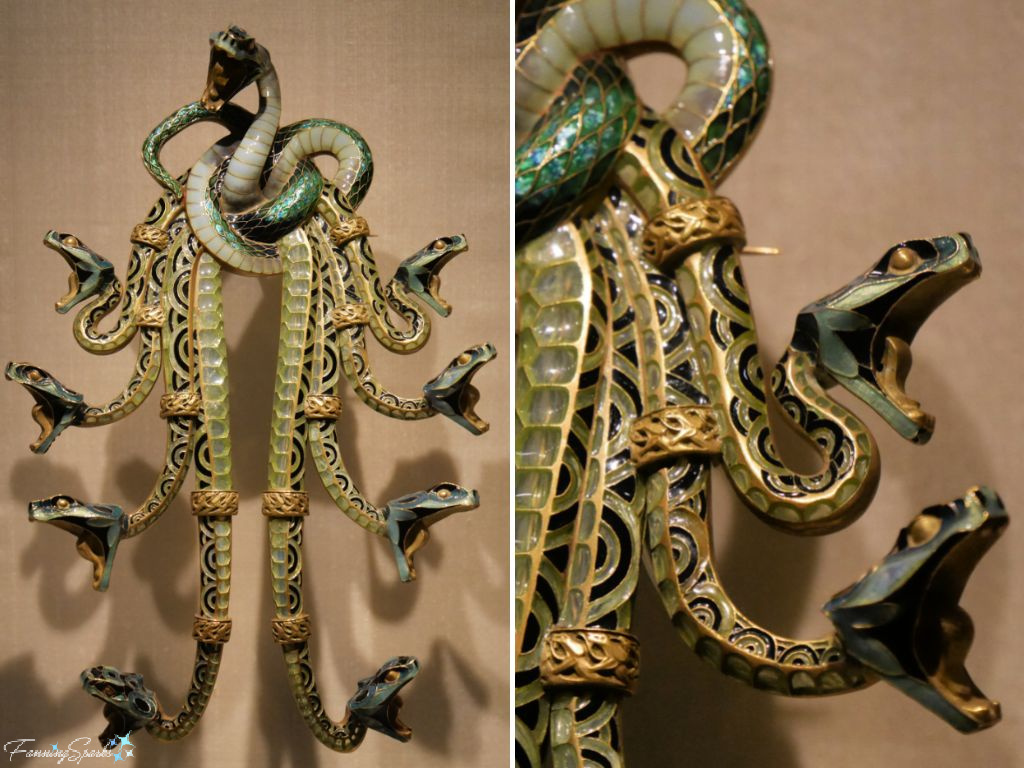
 As beautiful as these enameled works of art are, my all-time favorite enamelwork is found on the spectacular jewelry of René Lalique. I shared examples of his work in a previous blog post after visiting the Calouste Gulbenkian Museum in Lisbon (see Lavish Lalique in Lisbon and How Nature Inspired Art Nouveau). Here’s a splendid example of his enamelwork—enamel in a broad range of gorgeous blues and greens is featured on the “Serpents” pectoral.
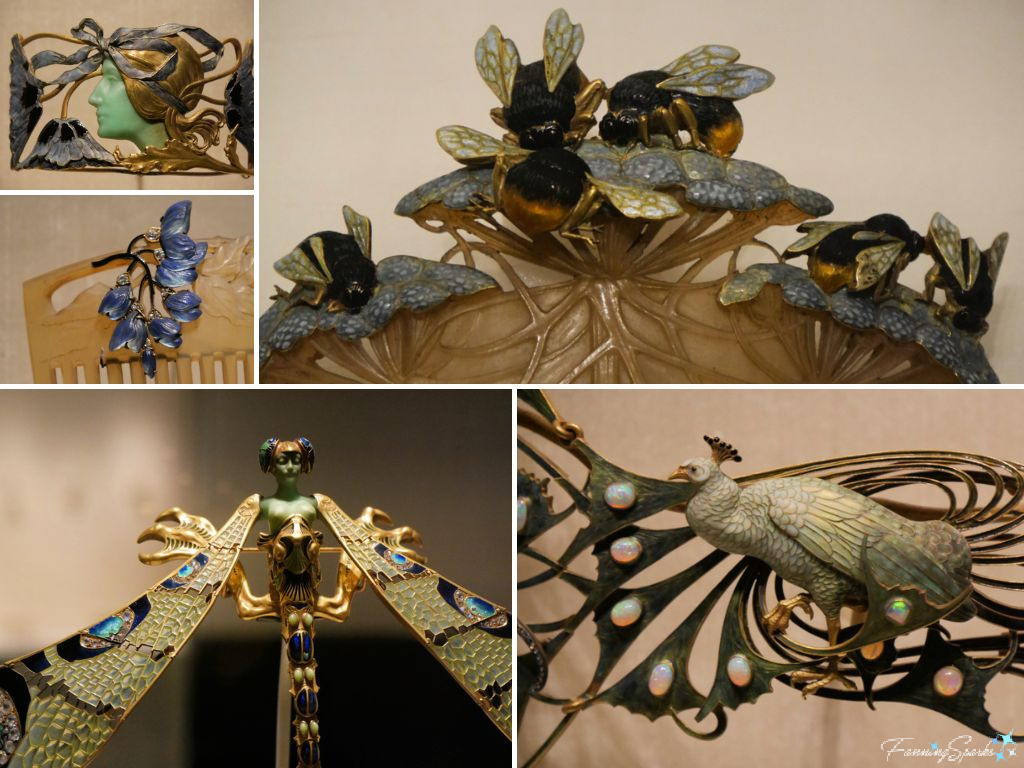
 Outstanding enameling is also beautifully incorporated into these works of art by René Lalique. Shown below are:
. “Female Figure” neck collar
. “Drone and Umbels” hair comb
. Wisteria hair comb
. “Dragonfly-Woman” brooch
. “Peacock” corsage ornament.
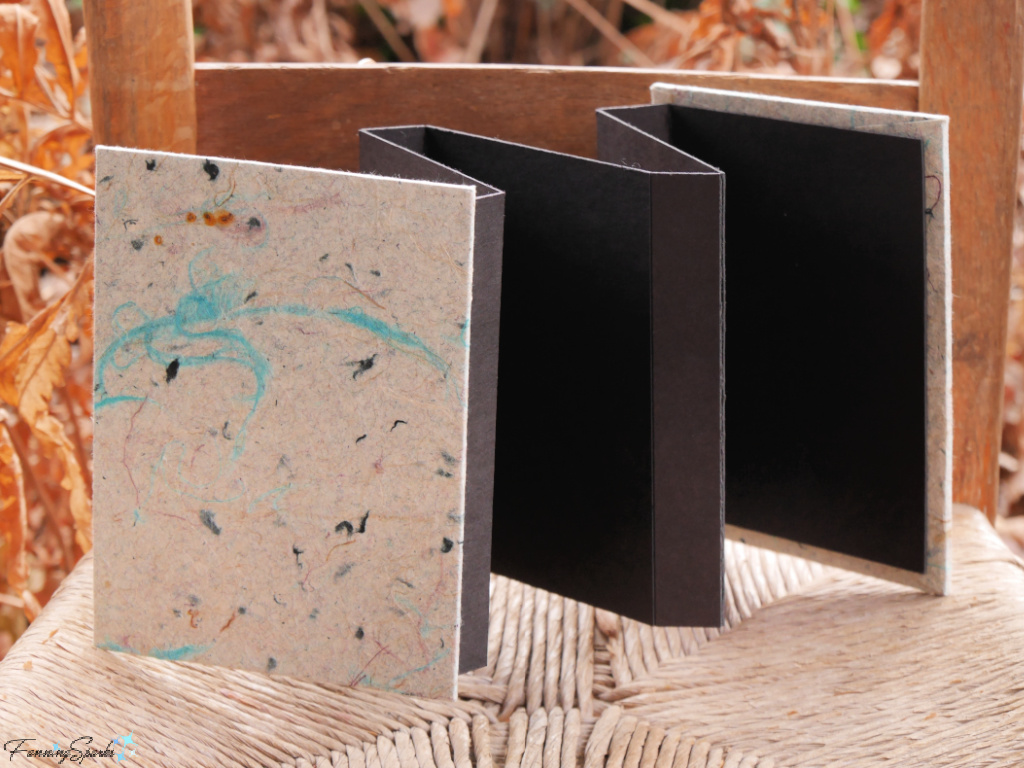
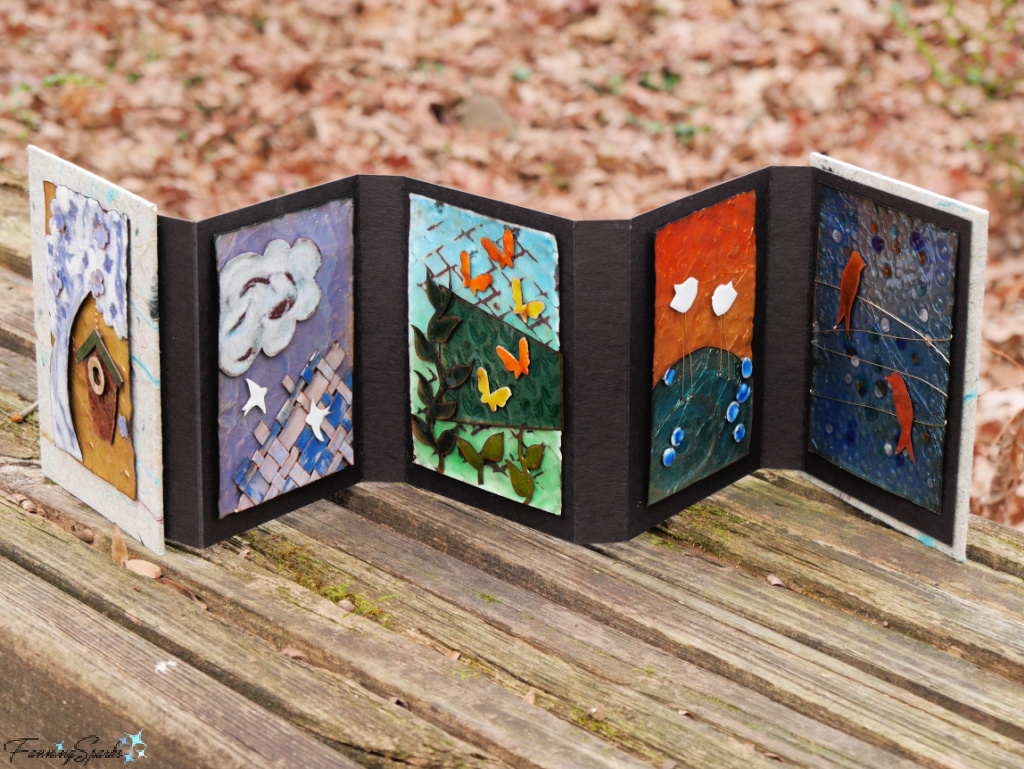
 We did not, of course, create such beautiful works of art in our introductory enameling class. We did, however, make the most of the opportunity to experiment with various textures, colors and techniques and created an array of copper enameled pieces. By the end of the week, we filled our albums with a collection of our own one-of-a-kind masterpieces.
Here’s a peek at my finished album followed by a few closeup views.
 Oh… and that box of old enameling supplies—they didn’t really work out so I’ll just donate them to another sale to inspire the next thrifty shopper!
More Info
The Cooking with Enamel class with instructor Steve Artz was a weeklong session held at John C Campbell Folk School.
“Steve has been enameling since 1978 when he discovered this luscious medium while attending San Diego State University as a studio artist. He has exhibited locally, nationally, and internationally and his work is in collections throughout the world. He has taught enameling to beginners as well as experts. … He is well known for his “play days” workshops and his instructional seminars in metal manipulation and torch firing techniques. … He strives to produce unique enamel art and promotes the art through a variety of exhibitions and conferences.”
Steve frequently instructs at the Folk School where he encourages his students to experiment and challenges them to think outside the box. He generously shares his knowledge and expertise and fosters a fun-loving, positive enthusiasm in the studio. You can learn more about Steve Artz on his website Enamel Artz.
Thank you Steve for a great week! Special thanks to fellow students, Laura and Janet, for making it a truly memorable experience.
The John C Campbell Folk School, as described in the class catalog, “fosters a non-competitive learning environment where adults of all ages, skills and backgrounds learn from one another”. See the John C Campbell Folk School website for more info.
I’m currently participating in a 6-week Work Study Program at the John C Campbell Folk School. This is my third visit to the Folk School where I’ve had the opportunity to take a variety of classes from leathercrafting to basketry to broom making to pottery to woodcarving. I’ve shared these experiences here on the blog—they are all listed on the FanningSparks’ About > Folk School category index.
The following books and articles were consulted in the writing of this blog post:
. The Art of Enameling: Learn Different Types & Techniques for Enameling article by Kristin Arzt
. Copper Enameling book by Louie Taylor which is available here on Internet Archives
. Basic Copper shopping website.
Please check the following websites for more information about the exhibits and museums mentioned in this blog post:
. George Walter Vincent Smith Art Museum in Springfield, Massachusetts, USA
. Bröhan-museum in Berlin, Germany
. Corning Museum of Glass in Corning, New York, USA
. Calouste Gulbenkian Museum in Lisbon, Portugal.
Today’s Takeaways
1. Freewheeling experimentation is a great way to learn a new medium.
2. “There are at least 200 different techniques to choose from when you start enameling.” Kristin Artz
3. Copper enameling offers a wide variety of methods and outcomes.

Comments are closed.