
Finding a gift that signals care and affection, while also being something the recipient appreciates, can be challenging. It can be even more challenging when the recipient has embraced minimalism and/or has decided to downsize. This is often the case with senior citizens but is also relevant to those living in small spaces like students and young adults. For folks in these situations, the joy of receiving a gift can be more about a pleasant surprise and the message of affection than the actual item. This is the thought process that led me to create the 25 Moments of Joy advent calendar for my Mom.
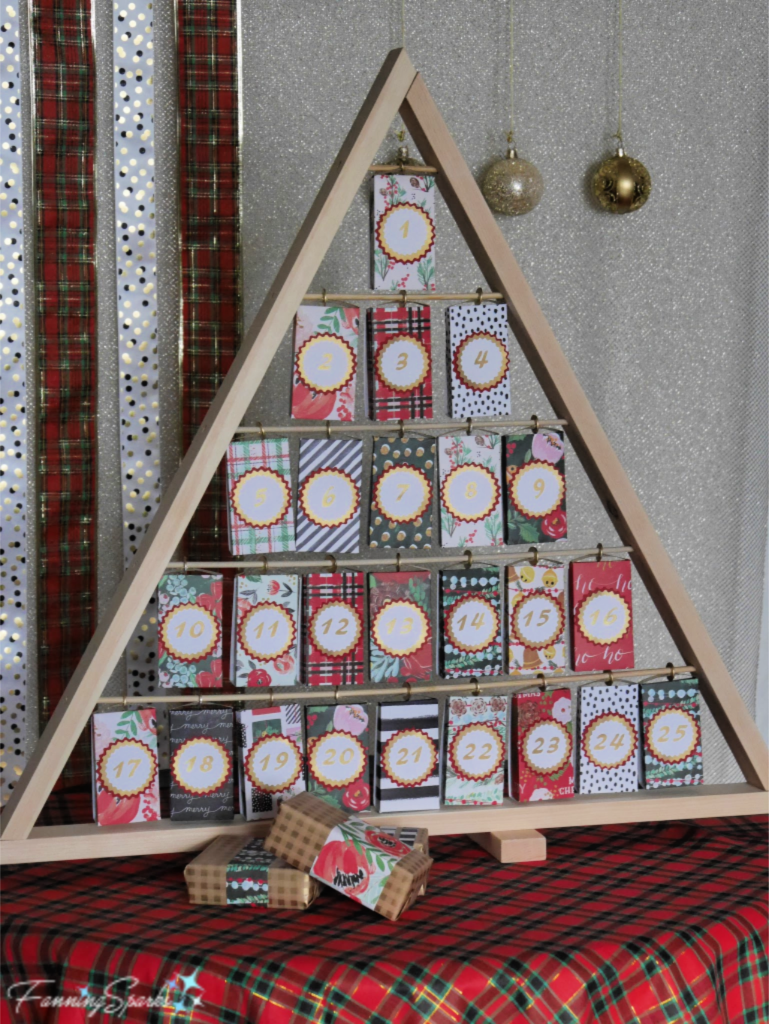
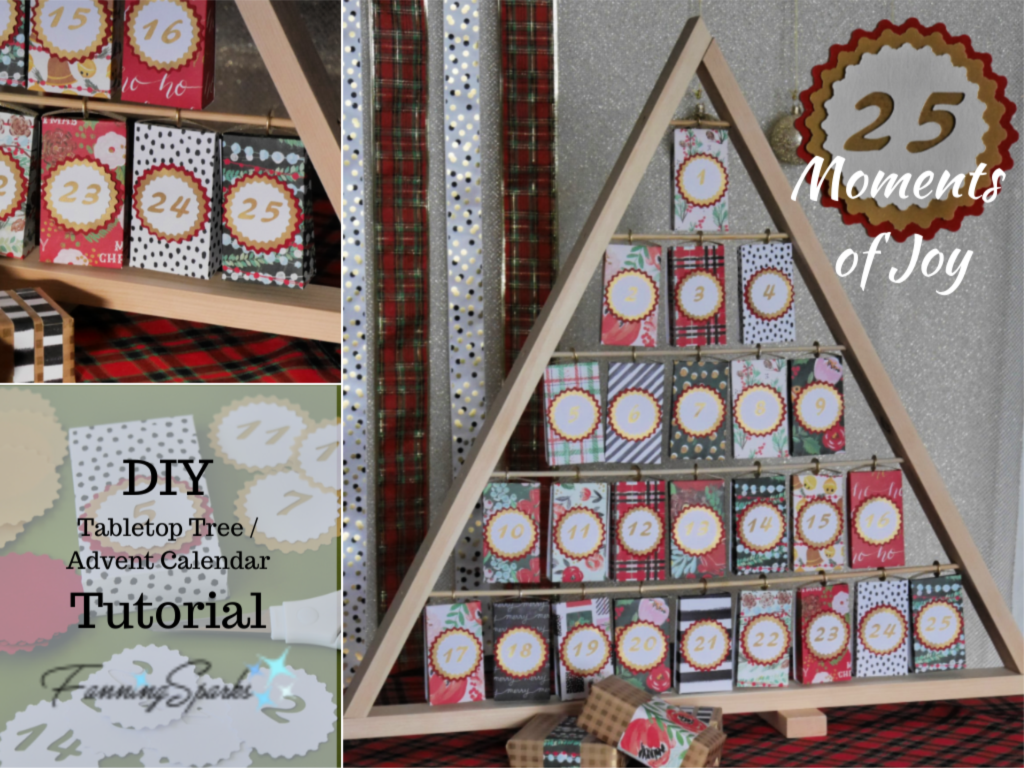
This advent calendar is designed to also serve as a small tabletop Christmas tree. It stands on its own and is quite compact. It is only 4” deep and stands about 2 feet high and 1½ feet wide. The tree can easily fit on the edge of a dresser, a desk or a small table. The gift packets, designed to hold 25 small gifts/surprises, are made of bright cheery paper and serve as decorations on the tabletop tree. The 25 Moments of Joy advent calendar is reusable and can easily be used year after year. It’s also quite versatile and would be a perfect way to display a few favorite ornaments.
Today’s post provides easy, step-by-step instructions to make your very own 25 Moments of Joy Tabletop Tree/Advent Calendar. There are two major components to this project 1) a wooden frame in the shape of a tree referred to as the Tree Frame and 2) a set of 25 paper gift packages referred to as the Gift Packets.
Supplies Needed – Tree Frame: The following supplies are needed to make the wooden tree-shaped frame:
Pine Board: 1 – 1” x 2” x 8’ pine board to build the triangular Tree Frame.
Scrap Board: 1 – 1” x 2” x 6-10” scrap wood to be used as a drilling guide.
Wood Dowels: 2 – 3/16” x 48” poplar dowels for hanging the Gift Packets inside the Tree Frame.
Screws: 4 – wood screws 1 ¼” length in size #8 to assemble the Tree Frame.
Wood Glue.
Supplies Needed – Gift Packets: The following supplies are needed to make the set of 25 paper Gift Packets:
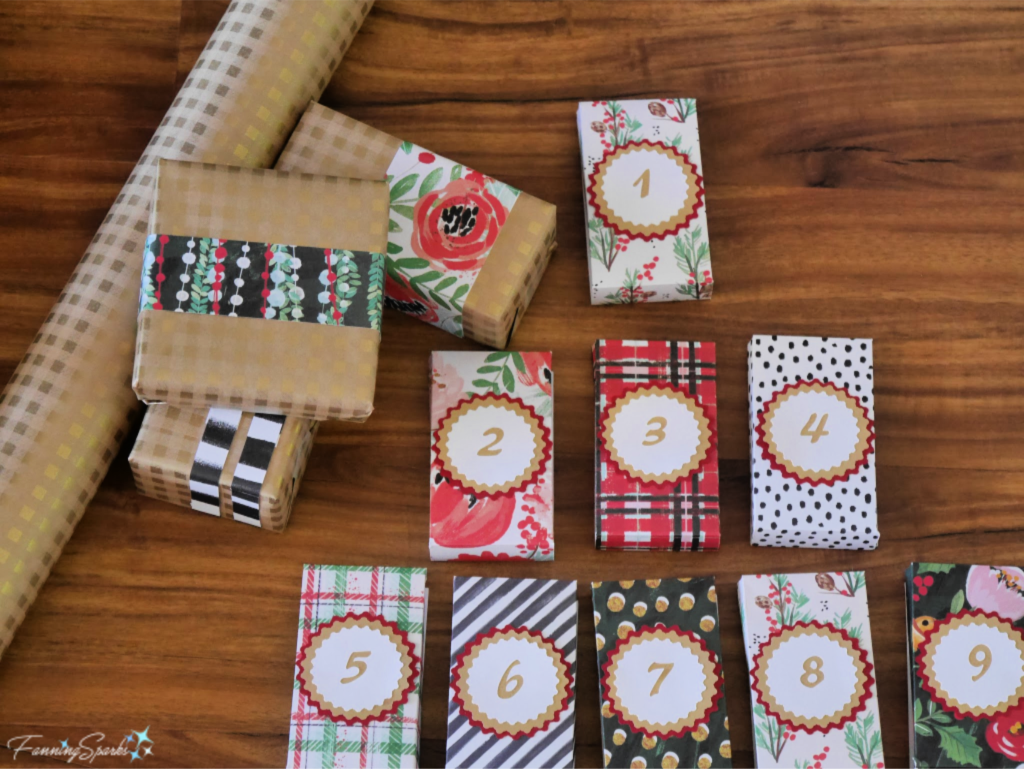
Cardstock: 25 – 8 ½” x 11″ sheets of cardstock in coordinating patterns. I used the Poppies & Pines collection from Paper Studio.
5 – 8 ½“ x 11” sheets of cardstock to make the Numbered Badges for the Gift Packets in the following colors:
… 1 sheet 8 ½“ x 11” white
… 2 sheets 8 ½“ x 11” gold
… 2 sheets 8 ½“ x 11” red
Ribbon: Ribbon ⅜” wide x 9’ long for the hangers at the top of Gift Packets. I used gold ribbon.
Glue: Glue dots or other paper glue for adhering paper. I used the Scotch Adhesive Dot Roller.
Tape: Removable decorative tape such as washi tape.
Washers: 25 – Flat zinc washers ¼” to hang the Gift Packets on the dowels.
Spray Paint: Spray paint to enhance the washers. I used Rust-oleum Specialty Metallic in gold.
Wrapping paper: Some gifts may not fit inside the Gift Packets. You may choose to wrap them separately and place at the foot of the tree.
Scrap Paper: A small strip of paper to be used as a guide.
Project Templates: Download this DIY 25 Moments of Joy Tabletop Tree Advent Calendar – Complimentary Download from FanningSparks – Nov 2019 to print the templates needed for the Gift Packets and Numbered Badges.
Tools Needed – Tree Frame: The following tools are needed to make the wooden tree-shaped frame:
Tape Measure
Jigsaw (or whatever type of saw you prefer)
Clamps: To hold pine board while cutting and drilling.
Drill with ¼” countersink drill bit.
Screwdriver
Sandpaper
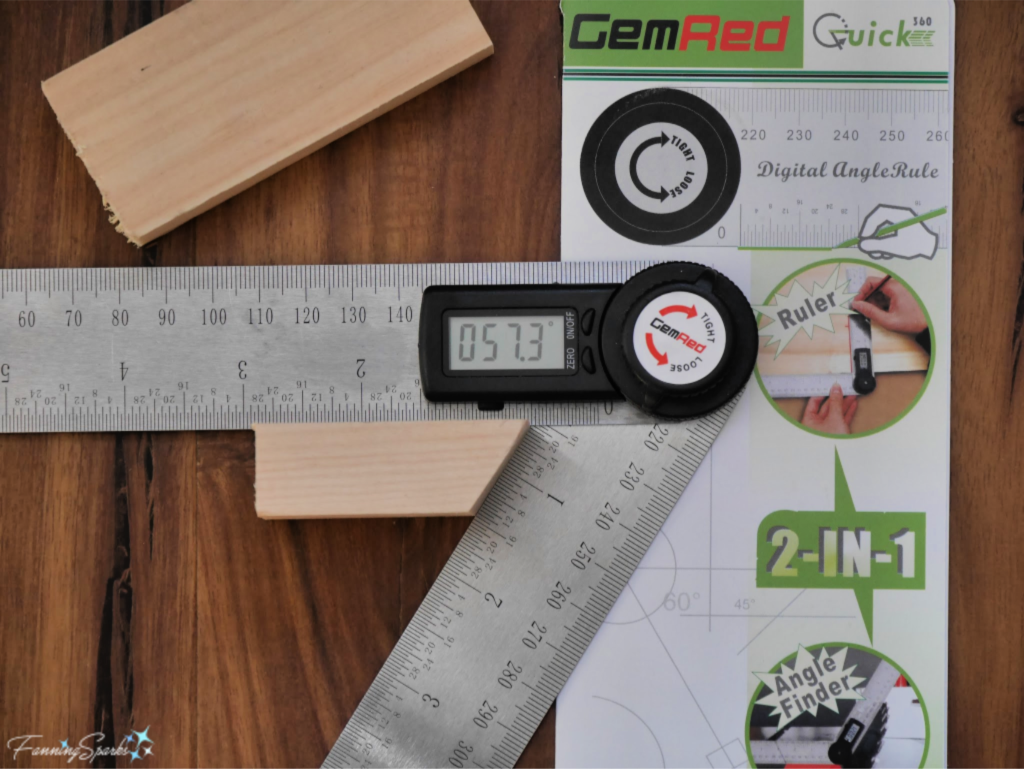
Angle Finder: To measure angles and set jigsaw blade accordingly.
TIP: A digital Angle-Rule, a 2-in-1 ruler and angle finder, like this one from GemRed is very helpful for finding and cutting the angles needed in this project.
Tools Needed – Gift Packets: The following tools are needed to make the set of 25 paper Gift Packets:
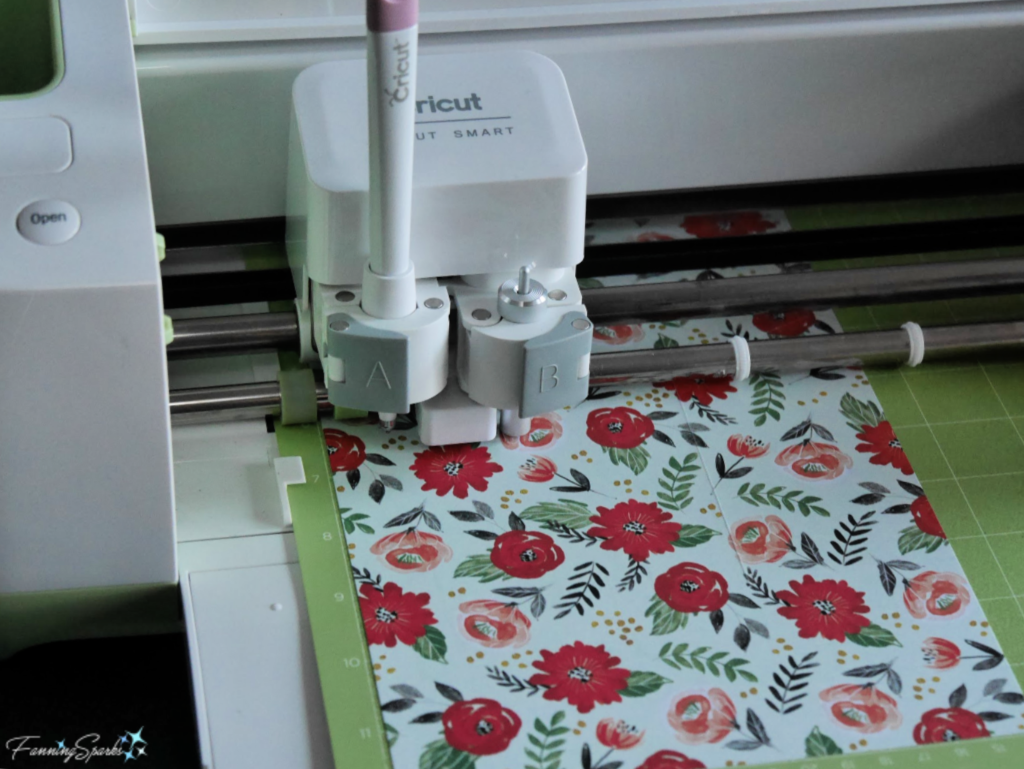
Scissors: To cut cardstock for the Gift Packets and Numbered Badges. Alternatively, use a Cricut® Explore or other cutting machine as I did.
Bone Folder (or other smooth hard edge) for scoring and folding the cardstock.
Ruler.
Instructions for Tree Frame
Preparations
Step 1 Cut the Board Parts Cut the 1” x 2” x 8’ pine board into the following parts:
. Bottom Piece Measure at 24 ¾” and cut with straight (90⁰) ends.
. Left Side Piece This is the longer of the two sides and will sit on top of the Right Side piece at the peak. Measure along the INSIDE edge and mark at 26 ¾” long. Cut top end with angle of 57⁰. Cut bottom end with angle of 62⁰
. Right Side Piece This is the shorter of the two sides and will sit underneath the Left Side piece at the peak. Measure along the INSIDE edge and mark at 26” long. Cut top end with angle of 57⁰. Cut bottom end with angle of 62⁰
. Bottom Braces Cut 2 Bottom Braces each 4” long with straight (90⁰) ends.
TIP: While jigsaw is set for 62⁰ angle cut, cut one end of the 6-10″ piece of 1” x 2” scrap wood with an angle of 62⁰. This will be used to guide the drill later.
Lightly sand all cut parts to ensure a smooth, unblemished finish.
Step 2 Dry Fit the Board Parts Lay the pine parts on a working surface. Check fit. Triangular wood parts should fit as shown below. Adjust as necessary.
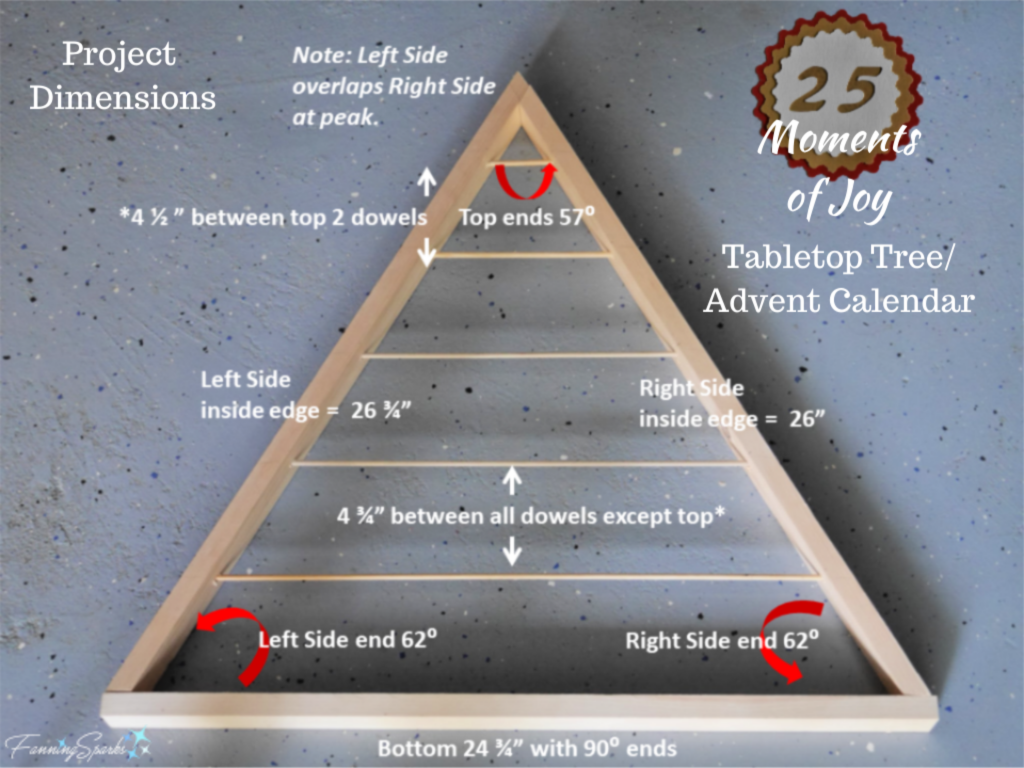
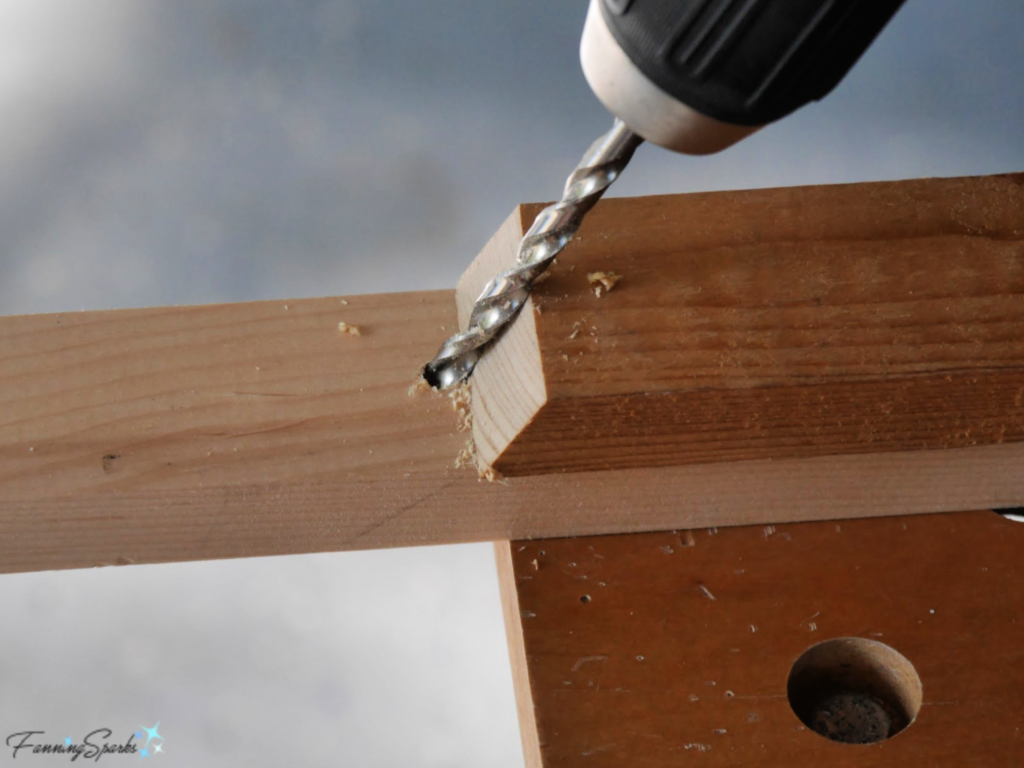
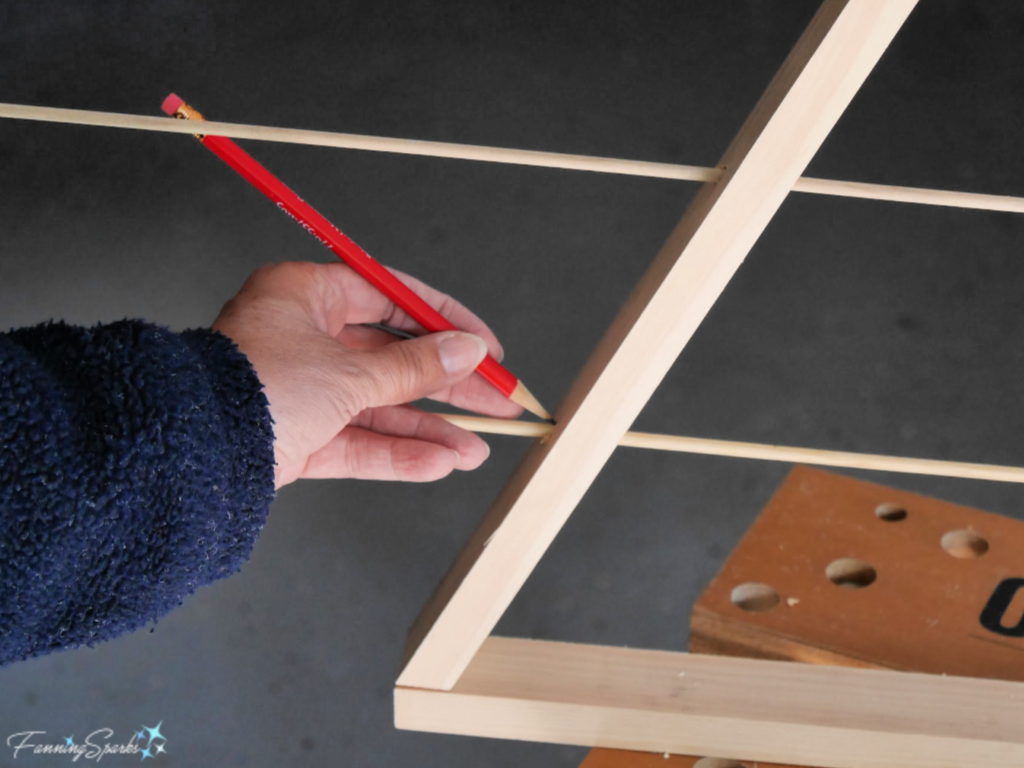
Step 3 Drill Holes for Dowels Mark the Left and Right Sides to indicate where holes will be drilled for the dowels. Measure along the INSIDE edge of the side parts starting at the bottom edge. Measure and mark at 4 ¾ “. Repeat 3 times resulting in 4 marks spaced 4 ¾ “ apart. Measure and mark one final mark at 4 ½ “. See above Project Dimensions photo to confirm spacing. Take note of the angle at which the dowel holes will need to be drilled; the angle is 62⁰ and matches the angle of the bottom edge of the side pieces. Mark lightly to avoid confusion.
Using the drilling guide created in Step 1, drill holes in the Left and Right Sides at marks. Holes must be drilled at 62⁰. This photo shows how the drilling guide helps drill angled holes.
 Assembly
Step 4 Assemble Tree Frame The Tree Frame is assembled with 2 screws in the Bottom Piece and wood glue at the peak. Clamp and/or tape the Bottom Piece, Right Side and Left Side together for the final check.
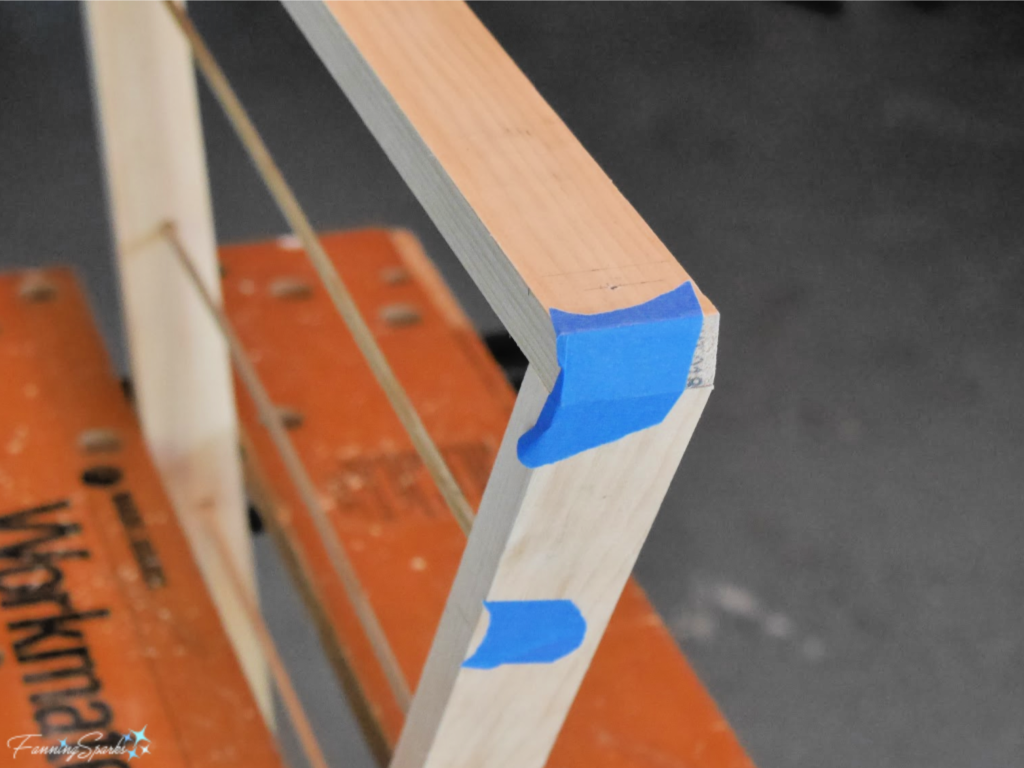
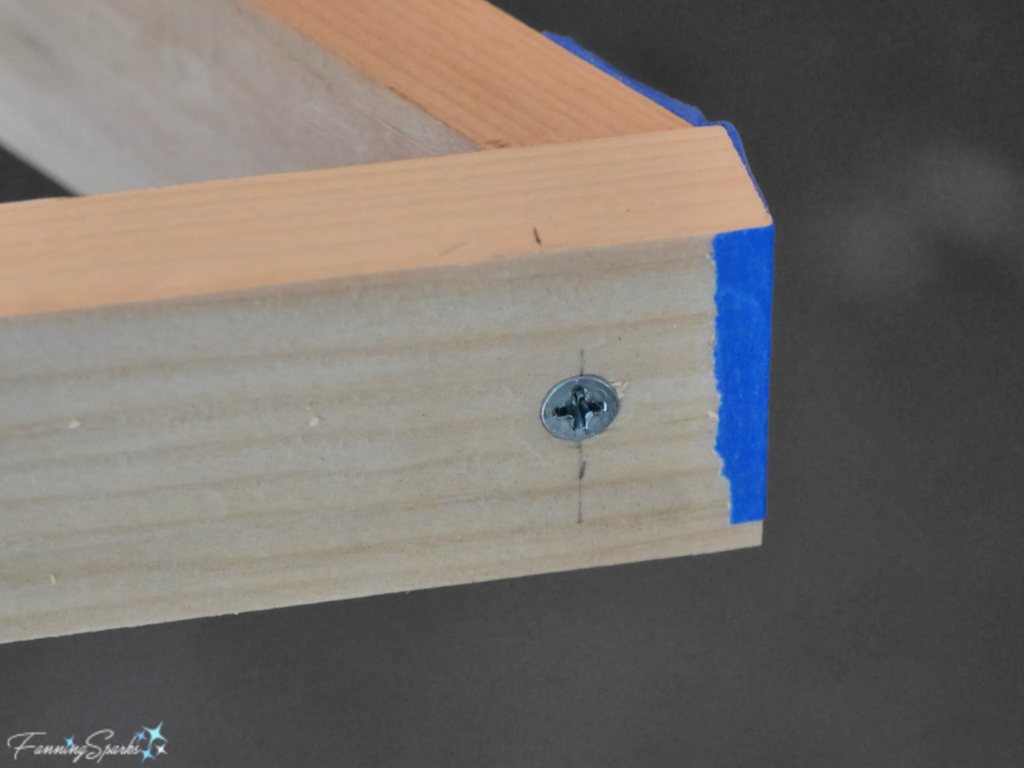
Mark placement for the screws on the Bottom Piece; take care to ensure screws are placed far enough towards the center to avoid popping through the angled sides (see photo below). Disassemble. Drill and countersink pilot holes in Bottom Piece. Reassemble Tree Frame. Use 2 wood screws 1 ¼” length in size #8 to attach Bottom Piece to Left and Right Sides. Glue Left and Right Sides at peak.
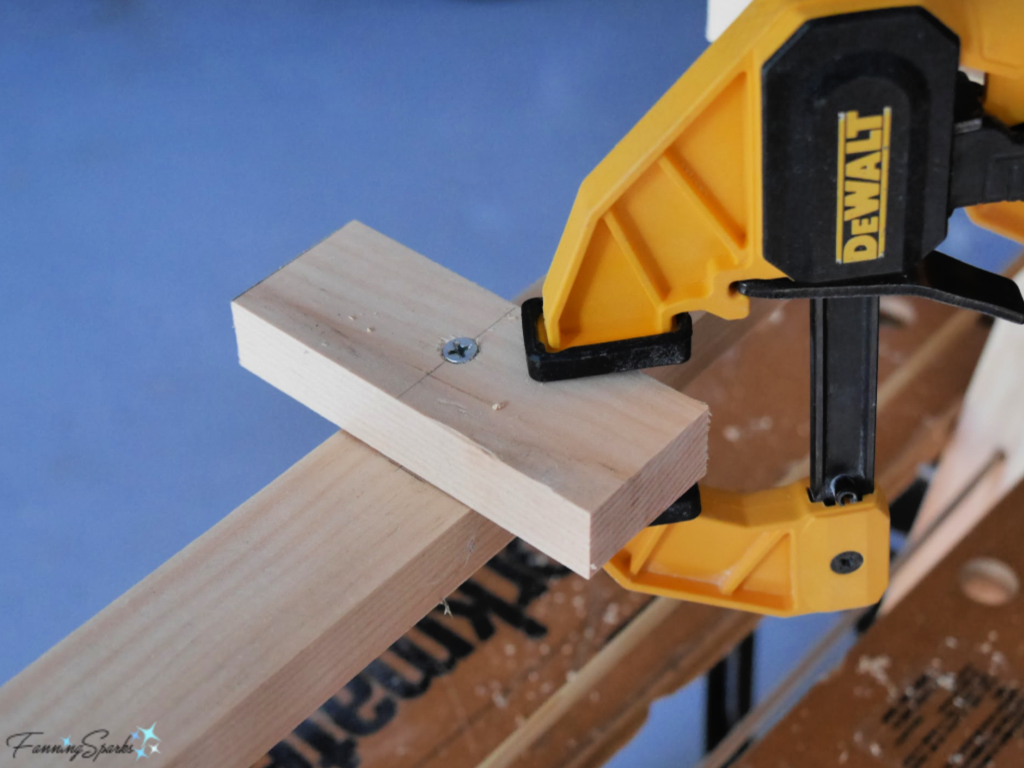
Step 5 Attach Bottom Braces Measure to find center of Bottom Piece. Measure and mark 3 ½” from center towards right and towards left. Find and mark center on each Bottom Brace. Drill and countersink pilot holes in Bottom Braces. Position and clamp the Bottom Braces onto the Bottom Piece aligning with marks. Use wood screws 1 ¼” length in size #8 to screw into place from the bottom.
Step 6 Insert Dowels Insert a piece of dowel into the bottom set of holes on the Right and Left Sides. Mark where dowel needs to be cut. Cut dowel. Sand ends. Insert dowel in place. Repeat for the 4 remaining dowels.
 Instructions for Gift Packets
Preparations
Step 7 Paint Washers Use spray paint to paint the washers the desired color. I used Rust-oleum Specialty Metallic in gold. Apply to dry.
Step 8 Prepare Templates Download the DIY 25 Moments of Joy Tabletop Tree Advent Calendar – Complimentary Download from FanningSparks – Nov 2019 to print the templates needed for the Gift Packets and Numbered Badges. Take care to ensure the scale is accurate on your printed version. See specifics in the download document.
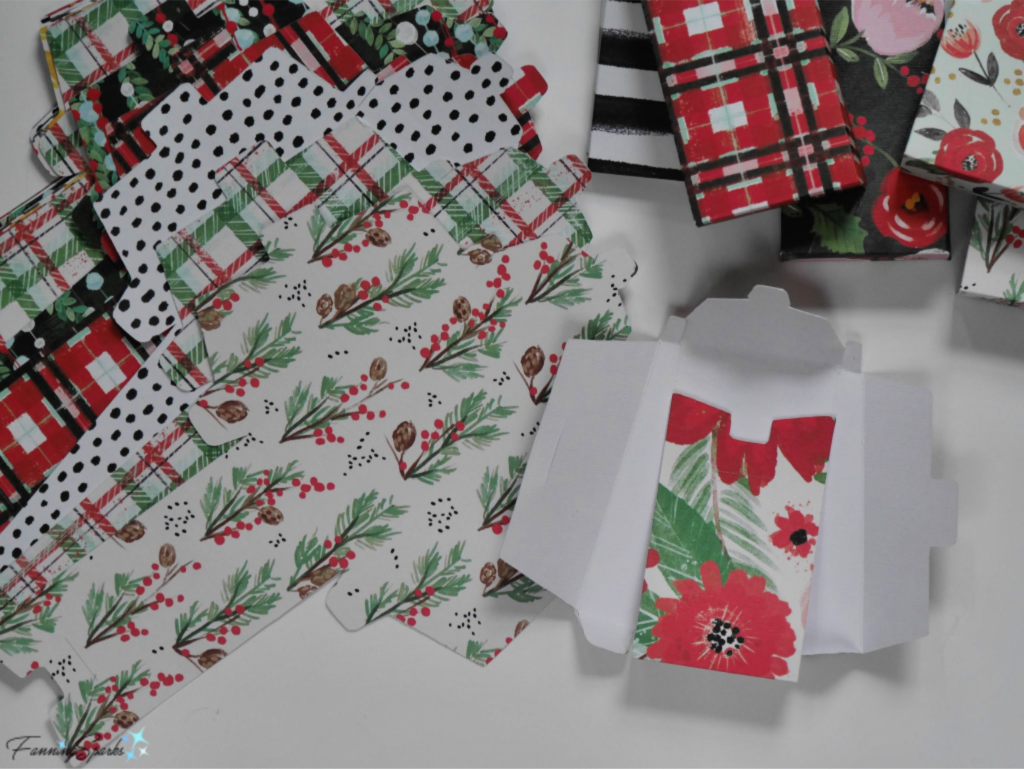
Step 9 Cut Paper Parts Use the downloaded template to cut 25 Gift Packets from cardstock. Cut on solid lines. Score dashed lines for folding. The packet numbers are made with 3 layers of colored paper. Use the downloaded templates to cut 3 sets of 25 badges from cardstock. This includes 25 small buttons in white cardstock numbered from 1 to 25; 25 medium buttons in gold cardstock; and 25 large buttons in red cardstock. The numbers, from 1 to 25, can be printed or cut out. I used a Cricut® Explore cutting machine for this step but you could simply cut the badges with scissors and print the numbers by hand.
Assembly
Step 10 – Assemble Gift Packets Fold in the sides first. Slip the side tab into the vertical slot. Fold up the bottom. Fold over the top flap. Prepare the top tab to slip into the horizontal slot.
Step 11 – Assemble Numbered Badges Use glue to adhere the 3 layers of cardstock for the Numbered Badges. I used white cardstock for the small numbered buttons, gold cardstock for the medium buttons and red cardstock for the large buttons. Do not attach to the Gift Packets yet.
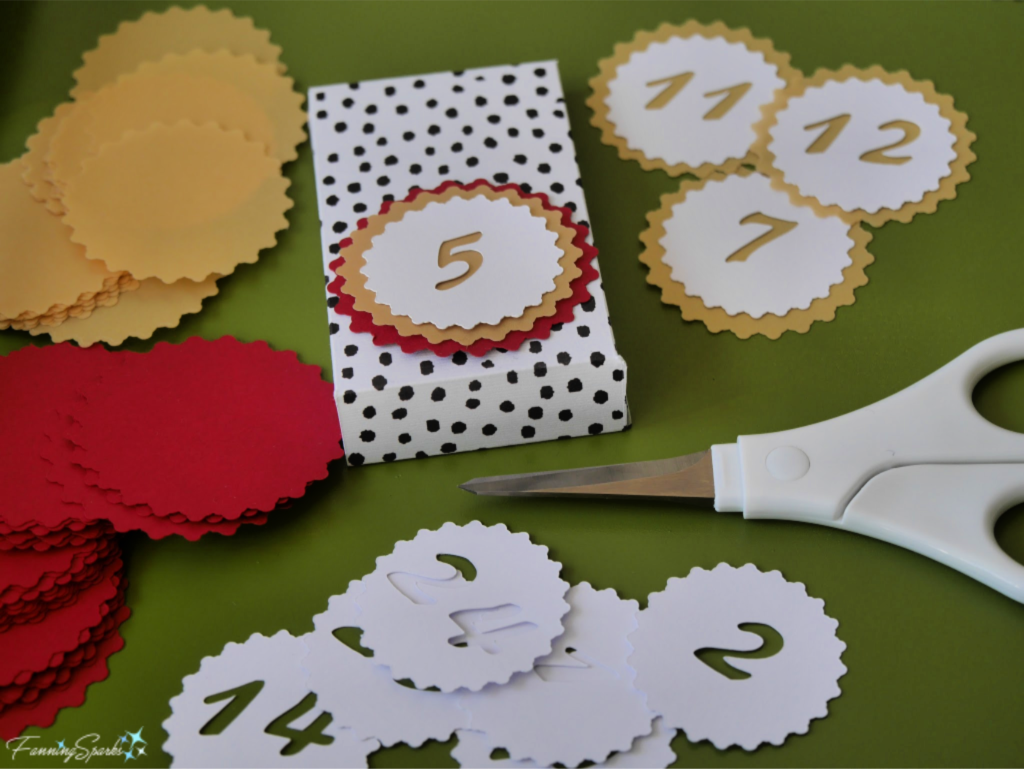
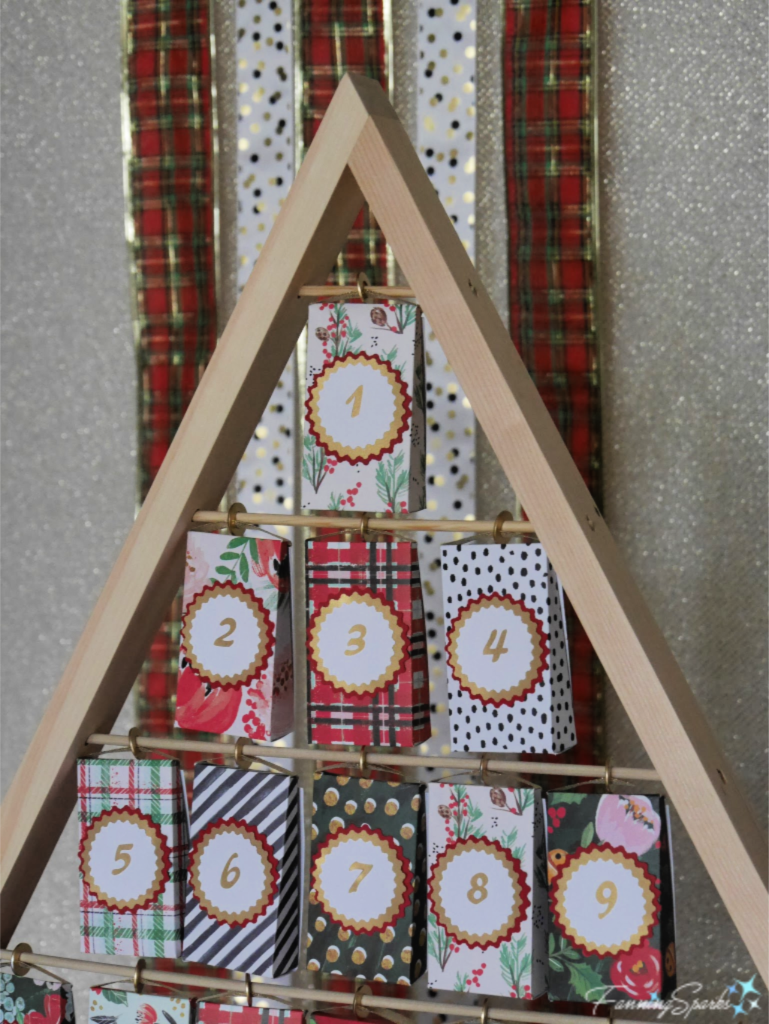
Step 12 – Determine Placement Lay out the partially constructed Gift Packets in a pyramid (1 in the first row, 3 in second row, 5 in third row, 7 in fourth row and 9 in the last row). Move around until you find a pleasing arrangement of the various colors and patterns. Assign the numbers according to your selected placement.
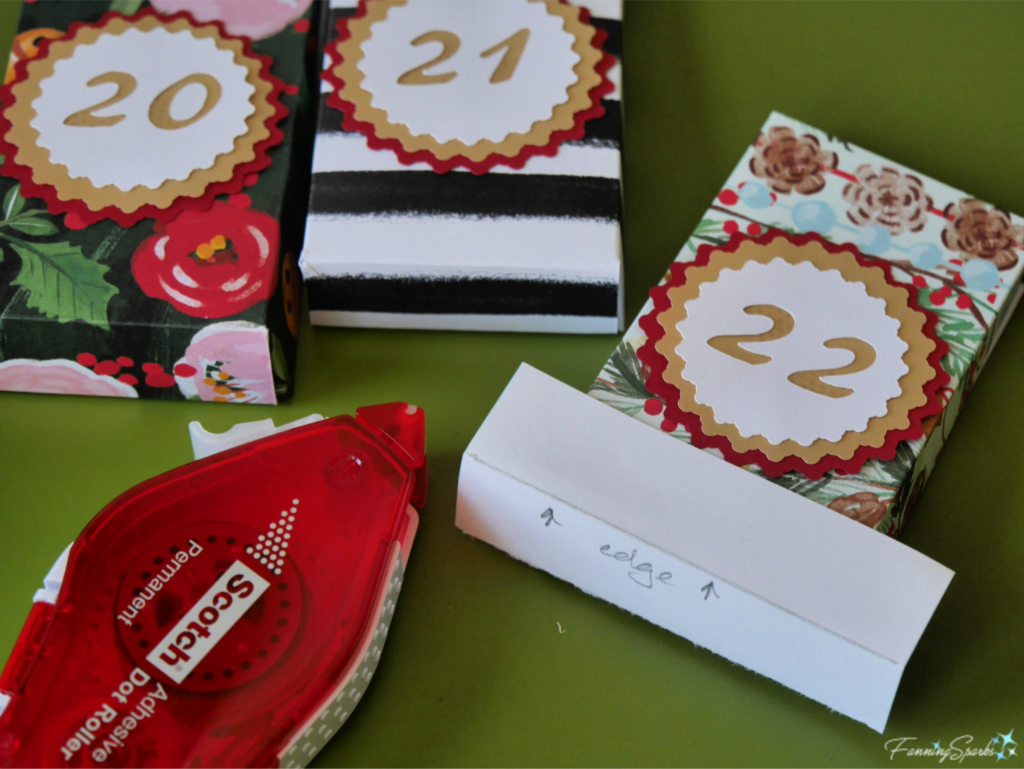
Step 13 – Adhere Numbered Badges Prepare to attach the Numbered Badges to the Gift Packets. Measure about ¾“ from the bottom edge of the packet. Center Numbered Badge and glue or tape in place. It’s helpful to unfold and flatten the Gift Packet at this stage so you can apply pressure to glued area. Leave Gift Packets flattened for next steps.
TIP: Use a piece of scrap paper folded at ¾” as a guide to ensure Numbered Badges are placed the same on all packets.
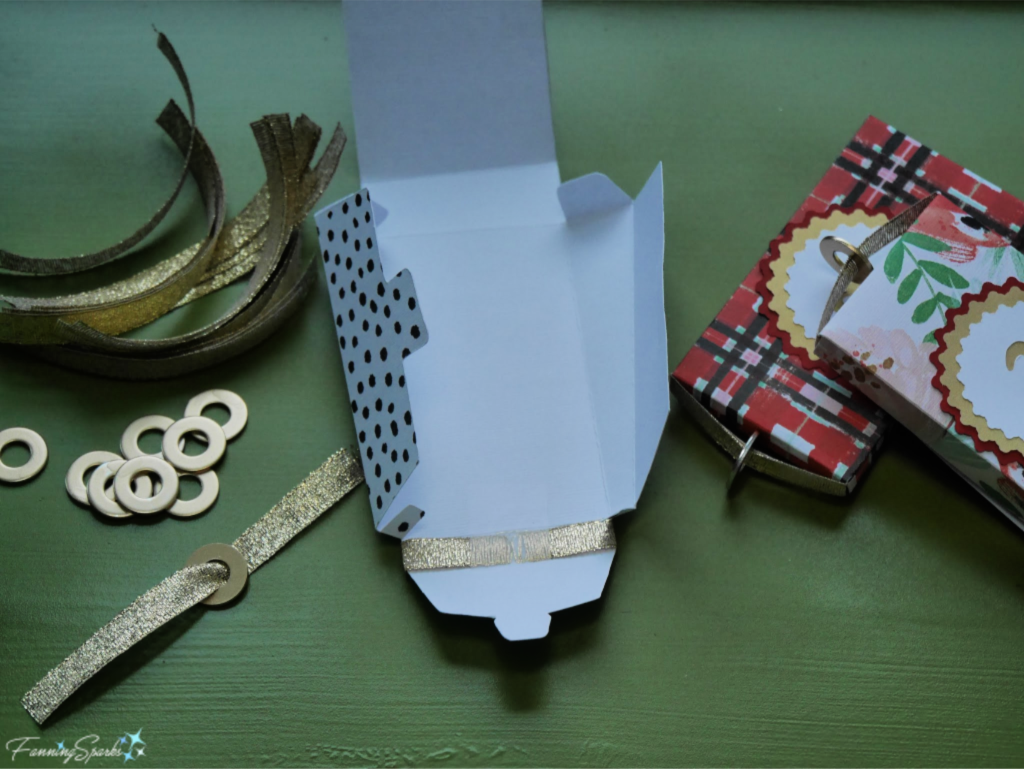
Step 14 – Attach Hangers A piece of ribbon threaded through a washer allows the Gift Packet to slip onto the dowels of the Tabletop Tree. Cut 25 pieces, each 4” long, from the ⅜” wide ribbon. Slip a washer onto the piece of ribbon and slide to center. Wrap ribbon around top of Gift Packet bringing ends together under top flap. Tape in place. Flip the washer up vertically. The ribbon should be snug. Leave Gift Packets flattened until next step.
Step 15 – Fill and Hang In this final step, insert a small gift or note into each Gift Packet. The Gift Packets only hold tiny items so you’ll need to plan accordingly. I wrapped a few small gifts separately and simply inserted a note in the Gift Packet inviting my Mom to choose a wrapped package.

Refold the Gift Packet, inserting tabs into slots (as described in Step 10). Use small pieces of removable tape to hold the back seam and the top flap in place. Then slip the Gift Packet onto the dowel. Take note of the badge numbers to hang them in sequence.
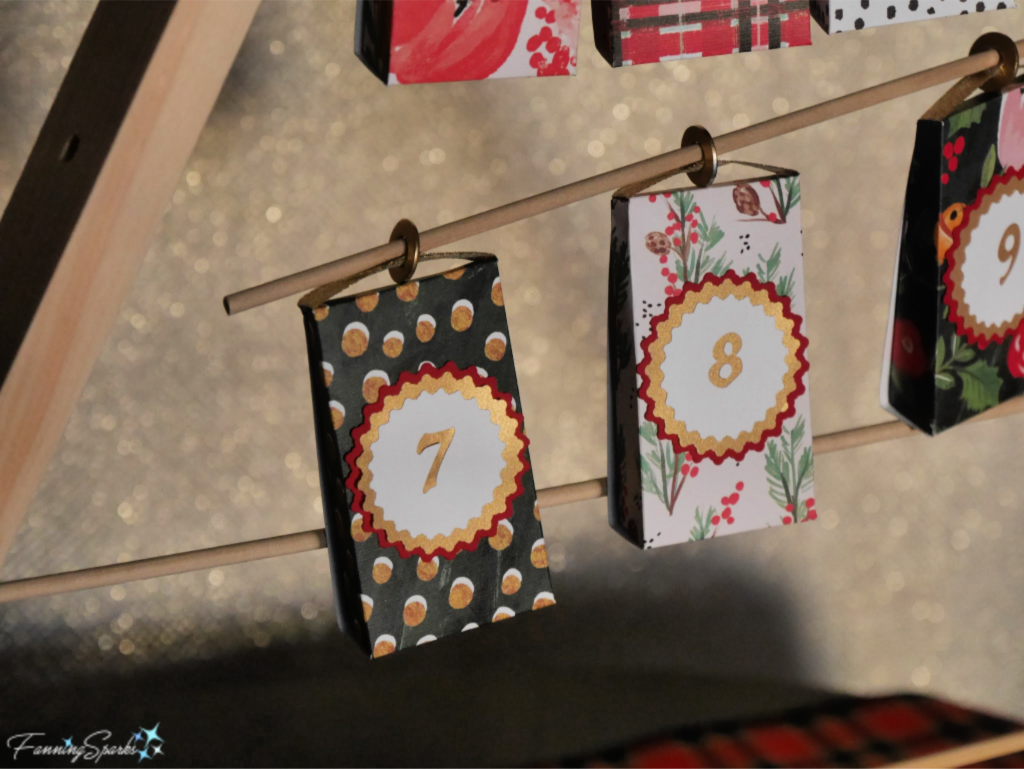
Step 16 – Give to the Lucky Recipient Arrange the Gift Packets evenly along the dowels. To remove the Gift Packets, the recipient would simply slip out the dowel and slide the gift packet off the dowel. Gather any separately wrapped gifts at the base of the tree. Put the Tabletop Tree/ Advent Calendar in place for December 1st and let the countdown begin. I wish you and your lucky recipient 25 Moments of Joy this holiday season!
You may want to pin the below photo for future reference.
More Info
Be sure to download this DIY 25 Moments of Joy Tabletop Tree Advent Calendar – Complimentary Download from FanningSparks – Nov 2019 to print the templates needed for this project.
You might also like these simple woodworking projects from previous posts:
. DIY Bluebird-Approved Birdhouse Tutorial

. DIY Pyramid Trellis Tutorial

Today’s Takeaways
1. The joy of receiving a gift can be more about a pleasant surprise and the message of affection than the actual item.
2. An advent calendar spreads out the joy and delivers 25 pleasant surprises and messages of affection.
3. Consider making the 25 Moments of Joy Tabletop Tree/ Advent Calendar for someone special this holiday season.


Comments are closed.